
Grow A Garden 2 Base Price List
What's the most valuable crop?![Evomon Best Starter [Leafbun, Blazpup, or Bubble?]](/wp-content/uploads/2026/06/evomon-best-starter.jpg "Evomon Best Starter [Leafbun, Blazpup, or Bubble?]")
Evomon Best Starter [Leafbun, Blazpup, or Bubble?]
Grass-type, Fire-type, or Water-type?![Evomon Tier List [META and BEST Evomon]](/wp-content/uploads/2026/06/evomon-tier-list.jpg "Evomon Tier List [META and BEST Evomon]")
Evomon Tier List [META and BEST Evomon]
The Evomon dream team.
![[Roblox] Evomon Shiny Hunting Guide – Including Prismatic and Pris Shinies!](/wp-content/uploads/2026/06/evomon-shiny-hunting-guide.jpg "[Roblox] Evomon Shiny Hunting Guide – Including Prismatic and Pris Shinies!")
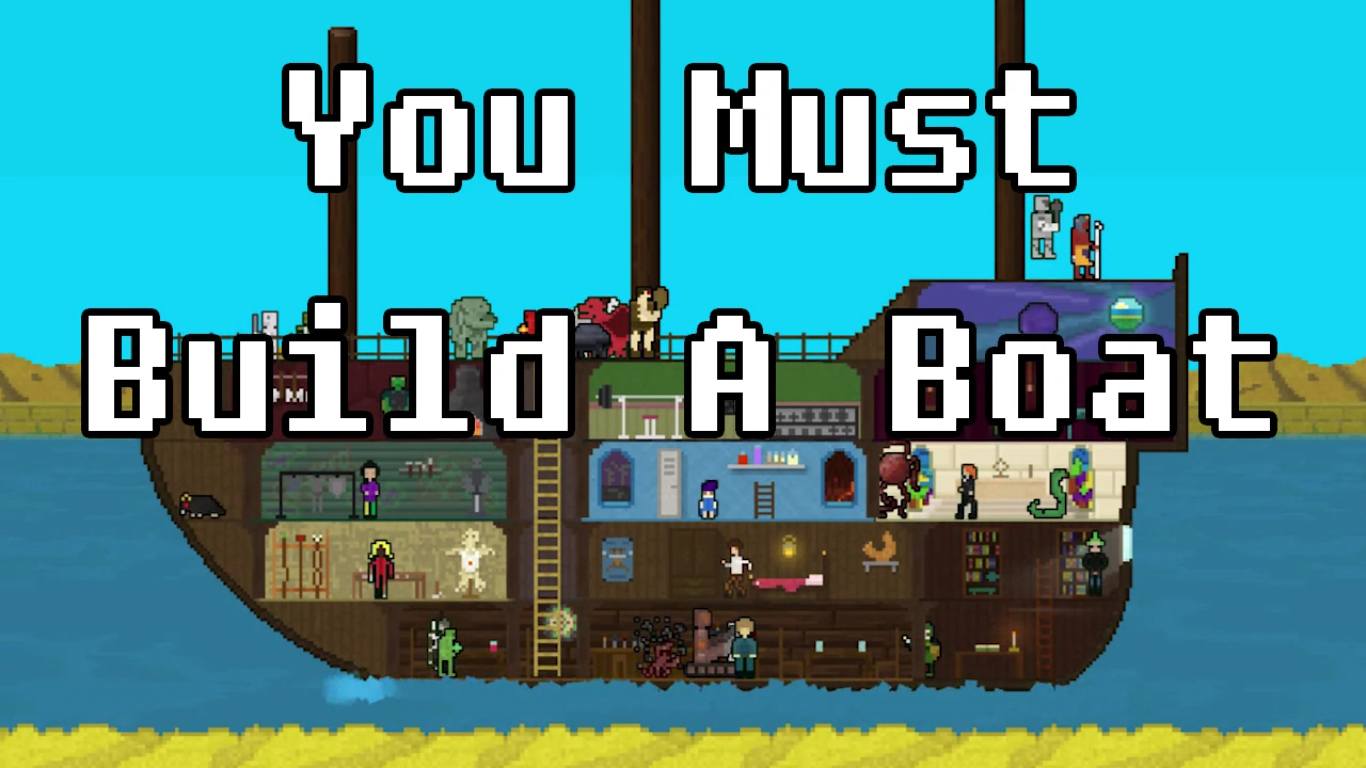
You Must Build A Boat Tips, Cheats and Strategies
You Must Build A Boat is an endless puzzle adventure from EightyEight Games. In this game, you’ll slay monsters and collect treasure through a series of match-3 dungeons, all in pursuit of attracting a ready crew to build and man …


- Prefer Gamezebo on Google

You Must Build A Boat is an endless puzzle adventure from EightyEight Games. In this game, you’ll slay monsters and collect treasure through a series of match-3 dungeons, all in pursuit of attracting a ready crew to build and man your ever-growing boat. Gamezebo’s You Must Build A Boat Tips, Cheats and Strategies will help you do exactly what the game’s title tells you to do.

- Stay apprised of dungeon types and monster weaknesses. Crew member Woodward joins your fledgling team early on, bringing with him an encyclopedia of knowledge about You Must Build A Boat (YMBAB). While the initial stages are fairly straightforward, you’ll soon run into dungeons with specific modifiers, like “Enchanted” or “Vulnerability,” as well as enemies with unique strengths and weaknesses, like an aversion to fire or a buff against magic. If you have come across a modifier or enemy at least once, info on it will be available in Woodward’s book.
- If you’re having trouble against a certain type of enemy or are unsure what a modifier means (especially if you take a break from playing for awhile and just forgot), check Woodward’s book for info. You can view a dungeon or quest’s modifiers from the quest start screen and then back out to check in with Woodward and adjust your strategy as needed. (More on that below.)
- Don’t waste attack tiles between enemies. There are times during a run that you’ll be moving between enemies or treasure chests: if you match an attack tile during this time, it’s simply wasted. You will only attack enemies once you’re standing next to them, or, in the case of long-range items like the bow or spells, when you are within a certain distance. The same is true for key tiles: if you match key tiles before you’re next to a treasure chest—even if the chest is visible on-screen—the match will not count towards unlocking the chest. You may intentionally make unused matches to free up space on the board, but if you have a really useful match available—like a x3 sword tile—try not to waste it when no enemy is nearby.

- The exception to this rule are trap tiles. If a trap is visible on-screen, making a match that will disarm the trap will successfully disarm it from any distance. You don’t have to wait for the trap to be on top of you.
- Use down time to match shield, power, and thought tiles. The time between enemies and treasure chests is usually short, but each time you reach a new segment of a dungeon–its Roman numeral increases, e.g. Sewer II, Sewer III, etc.–you’ll get a brief break without anything impeding your progress. You’ll have a period of free running before the level increase box pops up and randomly assigns a new dungeon modifier to your run. Use this free time to your advantage: continue matching and clear the board of any shield, thought, and power tiles to free up space for swords, staffs, and keys, or to basically refresh your tiles by matching as many as possible.

- Use items freely. Item tiles are acquired by matching crates: by breaking apart crate tiles, you will sometimes acquire spells, bows, bombs, or food. Spells and bows are used to damage or slow enemies, bombs break all crate tiles currently on the board, and food gives your adventurer a boost of energy so that he moves farther away from falling off the screen.
- Although items can be very useful, they can also start to clog up the board and make matches more difficult. You don’t want to save more than one or two items at a time, and even then, if you’re having trouble making a match you should use the item tile to free up space. Food should always be used immediately unless you’re at the far right side of the screen.
- A note on Spells vs. Staffs/Staves. The difference between these two is a little confusing at first. Staffs/staves are the red wand tiles you match on the game board. They deal Magic damage to enemies. (As opposed to the blue sword tiles, which deal Physical damage.) Staff/stave power is upgraded at Silver’s Staffery. Enemies that are vulnerable to Magic are hurt more when you match red staff tiles, and enemies resistant to Magic are hurt less by the same tiles. Spells are the usable items you sometimes find within crate tiles, like Fireball, Flash Freeze, etc. These items’ power can be upgraded at Leem’s Arcanery. These items do not do Magic damage: they do damage, or cause effects, specifically related to their element (fire, ice, etc.). An enemy immune to Fire will not be harmed by Fireball, but will be harmed by red staff tiles.

- Always be upgrading. The two most important aspects to progressing in YMBAB are 1) matching quickly and 2) upgrading your adventurer regularly. As you progress through the game, you’ll unlock more and more ways to upgrade: making attack and magic tiles stronger, increasing your defense and shield capacity, improving spell items’ abilities, increasing food recovery, etc. Every single upgrade is useful and you’ll almost certainly end up purchasing from every category. Thus, as soon as you can afford any upgrade, go ahead and buy it. This will start with a lot of sword and staff upgrades, but as these get more expensive, move on to other areas and build those up. There’s really no reason to save gold or other materials as every upgrade will benefit you in some way, and dedicated adventurers will eventually buy every upgrade available, anyway.
- But keep in mind that the most expensive upgrade =/= the best. Be sure to check the bonuses an upgrade you will give you at the top of the screen (green + sign) and try to select the greatest benefit. In the image above, the first upgrade is cheaper but will give us +2 to maximum damage, while the more expensive option only offers +1.

- Selecting “Run again” will maintain your current Priory bonus. One of the later additions to your boat-in-progress is Davies’ Priory, a temple where you can make an offering of gold, power, or thought and receive a random blessing (or curse) for your next run in the form of a dungeon modifier and quality boost. This modifier only lasts one run, unless you select “Run again” after dying, in which case it will carry over to your next run. If you keep selecting “Run again,” the Priory bonus will maintain indefinitely until you choose to end the run and return to the boat. Use this to your advantage in the (rare) instance that you get a good modifier from the Priory. Note: completing a quest will remove the “Run again” option as it is replaced with “Collect reward.”
- Stuck on a quest? Use your crew to your advantage. If you find yourself struggling with a quest or dungeon, double check to make sure you’ve upgraded/unlocked everything you can at that point.
- First, upgrade any skills or tiles you can afford at Stan’s Smithy, Silver’s Staffery, and Crittan’s Armory.
- Second, recruit any monsters you haven’t yet at The Beastiary (remember: once you “capture” a monster you still need to recruit it to get its bonus).
- Third, double check Woodward’s Library (or our list below) for hints on the monsters you’re facing and adjust your strategy accordingly. For example, if you’re up against a lot of magic-resistant monsters, you may want to increase your sword power or use a potion that increases the appearance of sword tiles.
- Finally, use the “Potion of Sacrifice” at Mudder’s Tavern to reduce the dungeon’s difficulty. You’ll earn 0 gold while using this potion, but enemies will be much easier to defeat and thus the dungeon will be easier to traverse. This potion is basically like moving the difficulty slider down.

- If you’re struggling with a very specific quest, such as “Freeze X number of enemies,” adjust your upgrades to match that. For that quest in particular, we’d recommend using the “Leem’s Bounty” potion at the Tavern instead, which awards you more spells from item crates, and upgrading your sword or staff tiles to potentially freeze enemies (if the option is available).
- Finally, the Priory is such a crapshoot that we don’t recommend messing with it unless you’re really in a jam, and then only with the understanding that you might still get a negative effect and waste your offering. We had an abundance of power and thought points by the final quest and kept visiting the Priory until getting “Easy Chests,” which made the dungeon much easier. But this took a lot of offerings and negative modifiers to get to that point.
- The Priory’s modifiers / blessings are unpredictable, and the result seems only influenced by what you give, not determined by it. For instance, we gave 300 of each currency and received a neutral modifier (Wanderers). On our next run, we offered 400 of each currency and received a negative modifier (Power Monsters). There is no magic number that will guarantee a good blessing from the Priory; it’s a gamble.

- You can move other tiles on the board while your current match is breaking. This is a bit confusing in writing, so bear with us: when you make a match, it takes a second or two for the tiles to actually break. First, they light up and shake, then they shatter and the tiles above them fall into their place. Between the lighting up and the shattering, you can continue making matches elsewhere on the board. (You can’t match tiles that are affected by the current match, as they won’t exist soon.) There are two major uses for this:
- One, it just helps you go faster. Since there’s no turn limit, YMBAB benefits from fast fingers and frequent matches. If you continue matching while other matches are breaking, you’re saving precious seconds of downtime.
- Two, you can actually catch cascading tiles within another match, creating a double (or triple, etc.) match. For example: you match some swords that causes some shields to fall together. These shields will break as a cascading match, but after the swords—by themselves. If you were to match some staffs while the shields are matching, you would earn a double match for shields + staffs. You can actually visualize this by making a match mid-cascade but holding it in place: don’t lift your finger. You’ll see the cascaded tiles lighted up as well as the match under your finger. That’s how you know you’ve turned it into a double match. In the image above, we’ve moved the key tiles to match after the sword tiles cascaded into place–holding our finger on the key tiles held both, letting go will result in a double match.

- Don’t get too hung up on what tile you “need” at the moment. To pass enemies, you need to match swords and staffs. To pass treasure chests, you need to match keys. To avoid traps, you need to match whatever tile the trap is displaying. However, if you get overly hung up on trying to find and match what is “needed” at the given moment, you may end up flustered and unable to find any match. Sometimes going fast and making “unhelpful” matches will actually be more beneficial in the long run, creating chains and cascades that open up the board and bring in new tiles.
- And if you are completely stuck, try dragging random rows or columns back and forth. YMBAB will never give you a “hint” for an available match: if you can’t find a match, you’re just going to be stuck staring at the screen until your adventurer dies. If you’re completely lost, first get rid of any usable items (spells, bows, food, etc.). Then put your finger on any row and drag it one direction. You can either do this a bit slowly, looking for any sign of tiles lighting up—when three like tiles touch, they will flash to indicate a match—or quickly, almost spinning the row with your finger and letting go immediately. If you “spin” a row and like tiles touch, they will often connect and break automatically. These are last-ditch options, however, and shouldn’t be used as standard play as they waste a lot of time.

- Yes, you have to complete quests. While progressing through the main game, you can’t start a dungeon run without assigning a quest to it. You’ll always be playing with a quest in mind, although there’s no punishment for “failing” a quest—you’ll just have to retry it on the next run and you’ll still earn any currency and items you picked up on that attempt. (Every quest in the game must be completed to finish the main story.) Once you beat the game, you’ll unlock an open-ended mode where you can play without any quests and replay any area / dungeon you choose.
- You can lose money at Hattan’s Investing. Hattan is one of the last crew unlocks, and he offers “investment” opportunities. These involve giving him gold which he’ll try to turn into more gold after you’ve run a certain distance. However, just like the Priory, there is no guarantee here: you can lose all of the gold you invest with no return, so don’t invest more than you can afford to lose.

- SPOILERS: There are secret crew unlocks. Most of the human and monster crew you acquire is earned automatically by progressing through the game / completing quests. However, there are a number of secret crew members that can only be unlocked by completing special tasks / goals. We are still tracking down all these secret crew members, but we’ll add their requirements to this list as we find them.
- Catapult: to unlock, you need to get about 70 entries in Woodward’s Library list. When you speak to Woodward after reaching the required number, Catapult will unlock.

- Black Dragon: to unlock, play a run in the final map area, Gallery. Tap on his picture in the action screen as it passes: his unlock screen will pop up immediately. The image above highlights his portrait you need to tap on (it will pass by multiple times in a single run.

Woodward’s Library
We find Woodward’s Library extremely useful, but it’s a bit of a chore to navigate—especially once you’ve acquired a lot of different modifiers and monsters. Below is the info you will find in the Library, written out for easier searching. We’ve split it into sections: monsters, dungeon modifiers, items, and traps. Note: as we are still completing our Library, some entries may be missing.
The entries appear word-for-word what you’ll find in the game, arranged like so: Library entry number | Library entry type | Entry name | Entry info
Monster Analyses
- 001 | Monster | Mummy | Vulnerable to Physical. Vulnerable to Fire.
- 002 | Monster | Asp | Ranged.
- 003 | Monster | Pharaoh | Vulnerable to Magic. Loves Gold.
- 004 | Monster | White Dragon | Resistant to Physical. Resistant to Magic.
- 016 | Monster | Imp | Extra fast.
- 018 | Monster | Swarm | Resistant to Physical damage. Vulnerable to Fire damage.
- 019 | Monster | Troll | Resistant to Physical. Resistant to Magic.
- 037 | Monster | Sapper | Ranged.
- 038 | Monster | Fallen Warrior | Resistant to Physical. Immune to Freeze.
- 039 | Monster | Robber | ???
- 040 | Monster | Giant | Resistant to Physical. Resistant to Magic.
- 044 | Monster | Doom Engine | Vulnerable to Fire.
- 045 | Monster | Slimethrower | Ranged.
- 046 | Monster | Golem | Resistant to Physical.
- 047 | Monster | Spheer | Resistant to Physical. Resistant to Magic.
- 052 | Monster | Akaname | Vulnerable to Physical damage.
- 053 | Monster | Muck Beetle | Very resistant to Physical.
- 054 | Monster | Ratter | Fast.
- 068 | Monster | Flamethrower | Immune to Fire.
- 069 | Monster | Demon | Vulnerable to Magic.
- 070 | Monster | Red Dragon | Resistant to Physical. Resistant to Magic. Immune to Fire.
- 071 | Monster | Bushido | Resistant to Physical.
- 072 | Monster | Ninja | ???
- 073 | Monster | Jewel Golem | Resistant to Physical. Resistant to Magic. Immune to Shock.
- 074 | Monster | Orc | Green.
- 075 | Monster | Goblin Cannon Crew | Vulnerable to Physical. Ranged. Bruiser. (Note: this is the second #75 in the Library.)
- 076 | Monster | Wraith | ??? (Note: this is the second #76 in the Library.)
- 077 | Monster | Treant | Resistant to Physical. Resistant to Magic. Vulnerable to Fire.
- 078 | Monster | Witch | Ignores shields.
- 079 | Monster | Mage | Fast.
- 080 | Monster | Geltower | ???
- 081 | Monster | Vampire | Vulnerable to Physical.
- 082 | Monster | Catapult | Bruiser.
- 084 | Monster | Bonesaur | Resistant to Physical. Resistant to Magic.
- 085 | Monster | Reaper | Immune to Freeze.
Woodwardopedia: Dungeon Modifiers
- 005 | Woodwardopedia | Rich Chests | Chests in a Rich Chests dungeon contain extra loot.
- 006 | Woodwardopedia | Easy Chests | Chests in an Easy Chests dungeon have one lock less.
- 007 | Woodwardopedia | Hard Chests | Chests in a Hard Chests dungeon have one lock extra.
- 008 | Woodwardopedia | Power Monsters | Monsters in a Power Monsters dungeon hit much harder.
- 010 | Woodwardopedia | Tough Monsters | Monsters in a Tough Monsters dungeon can take significantly more damage.
- 011 | Woodwardopedia | Fragile Monsters | Monsters in a Fragile Monsters dungeon take less damage to defeat.
- 012 | Woodwardopedia | More Monsters | Dungeons with More Monsters have significantly more monsters.
- 013 | Woodwardopedia | More Chests | More Chests greatly increases the chance of encountering chests.
- 015 | Woodwardopedia | Short | In a Short dungeon the distance between segments is reduced by 50%.
- 025 | Woodwardopedia | Life Enchanted | All enemies in a Life Enchanted dungeon have Life Enchant.
- 026 | Woodwardopedia | Power Enchanted | All enemies in a Power Enchanted dungeon have Power Enchant.
- 027 | Woodwardopedia | Enchanted | Enchanted dungeons have a higher chance of Enchanted monsters and Ultrachests.
- 028 | Woodwardopedia | More Items | Crates are more likely to contain items in a More Items dungeon.
- 030 | Woodwardopedia | Fast Monsters | Monsters in a Fast Monsters dungeon attack more frequently.
- 031 | Woodwardopedia | Bruisers | Monsters in a Bruisers dungeon are very slow, but hit very very hard.
- 032 | Woodwardopedia | Powerful Traps | Traps in a Powerful Traps dungeon are more effective.
- 033 | Woodwardopedia | Dark | Visibility is reduced in a Dark dungeon.
- 034 | Woodwardopedia | Misty | Chests and small monsters are effectively invisible in Misty dungeons.
- 035 | Woodwardopedia | Fast Traps | Traps trigger more quickly in a Fast Traps dungeon.
- 036 | Woodwardopedia | Antimagic | Spells do less damage in an Antimagic dungeon.
- 043 | Woodwardopedia | More Traps | Traps are more common in a More Traps dungeon.
- 048 | Woodwardopedia | Life Enchant | Monsters with Life Enchant regain health over time.
- 049 | Woodwardopedia | Power Enchant | Monsters with Power Enchant deal more physical damage.
- 055 | Woodwardopedia | Power Magic | Spells do more damage in a Power Magic dungeon.
- 056 | Woodwardopedia | Frozen | Creatures in Frozen dungeons are immune to Ice but vulnerable to Fire.
- 057 | Woodwardopedia | Firestorm | Creatures in a Firestorm dungeon are immune to Fire but vulnerable to Ice.
- 058 | Woodwardopedia | Grounded | Creatures in a Grounded dungeon cannot be Shocked.
- 059 | Woodwardopedia | Vulnerability | Your shield has no effect in a Vulnerability dungeon.
- 062 | Woodwardopedia | Gym | You gain twice as much Power from matching in a Gym dungeon.
- 063 | Woodwardopedia | School | You gain twice as much Thought from matching in a School dungeon.
- 064 | Woodwardopedia | Wanderers | Wanderers from other zones may visit this dungeon.
- 065 | Woodwardopedia | No Items | Dungeons with this modifier have No Items.
- 066 | Woodwardopedia | Martial | Swords deal extra damage in a Martial dungeon but staves deal less.
- 067 | Woodwardopedia | Wizardly | Staves deal extra damage in a Wizardly dungeon but swords deal less.
Crate Tile Items
- 020 | Item | Arrow | Deals Physical damage to targeted monster.
- 021 | Item | Tile Bomb | Breaks all tiles of the type displayed.
- 022 | Item | Food | Grants bonus energy.
- 023 | Spell | Flash Freeze | Freezes enemies.
- 024 | Spell | Fireball | Deals Fire damage to enemies.
- 060 | Spell | Shock | Enemies that are Shocked are more vulnerable to damage.
- 061 | Spell | Shell | Casting Shell instantly fills your shield to maximum.
Traps
- 041 | Trap | Ice Trap | Freezes you. Match tiles to break out.
- 042 | Trap | Sword Trap | Deals Physical damage to you.
- 075 | Trap | Shock Trap | Shocks you. Monsters will deal extra damage.
- 076 | Trap | Disarm Trap | Drains your shield.

More articles...
-
Grow A Garden 2 Base Price List
What's the most valuable crop? -
Evomon Best Starter [Leafbun, Blazpup, or Bubble?]
Grass-type, Fire-type, or Water-type? -
Evomon Tier List [META and BEST Evomon]
The Evomon dream team.