![Digimon UP Tier List [Supports, Buddies, and Partners]](/wp-content/uploads/2026/07/digimon-up-tier-list.jpg "Digimon UP Tier List [Supports, Buddies, and Partners]")
Digimon UP Tier List [Supports, Buddies, and Partners]
These Digimon will get you UP the leaderboard.


![Haze Seas Boss Drops [Chances, Locations, and How to Spawn]](/wp-content/uploads/2026/07/haze-seas-boss-drops.jpg "Haze Seas Boss Drops [Chances, Locations, and How to Spawn]")

Welcome to the Witches’ Legacy: The Charleston Curse walkthrough on Gamezebo. Witches’ Legacy: The Charleston Curse is a Hidden Object Game played on the PC created by EleFun Games. This walkthrough includes tips and tricks, helpful hints and a strategy guide on how to complete Witches’ Legacy: The Charleston Curse.
Welcome to the Witches’ Legacy: The Charleston Curse walkthrough on Gamezebo. Witches’ Legacy: The Charleston Curse is a Hidden Object Game played on the PC created by EleFun Games. This walkthrough includes tips and tricks, helpful hints and a strategy guide on how to complete Witches’ Legacy: The Charleston Curse.
This hidden object game requires visiting several locations and using inventory items to advance play.
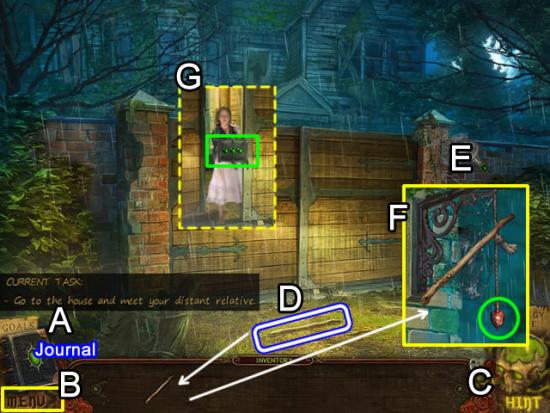
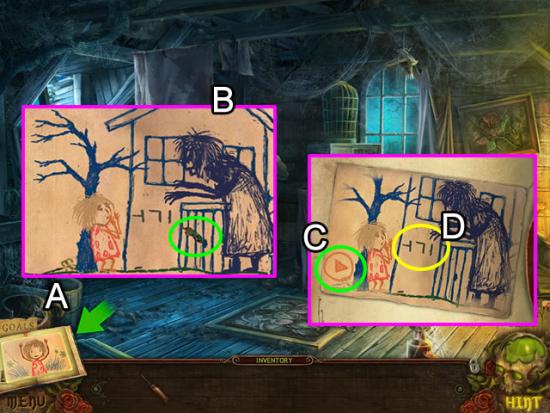
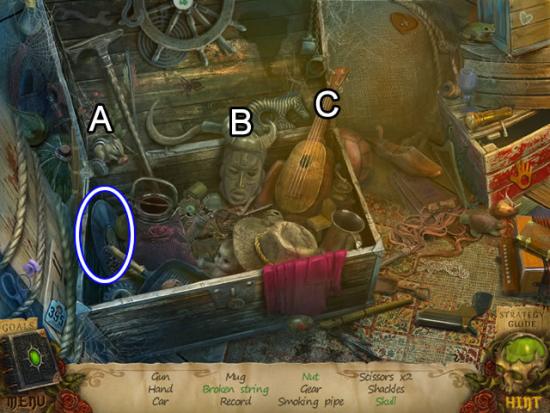
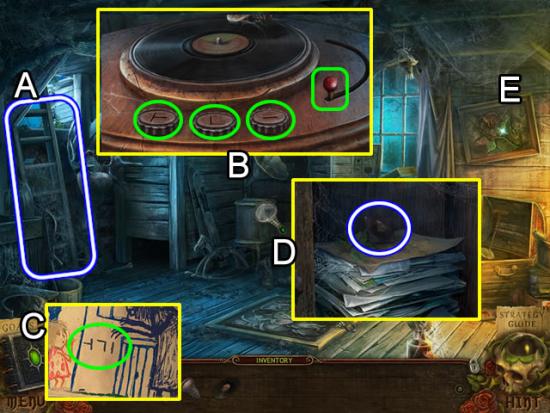
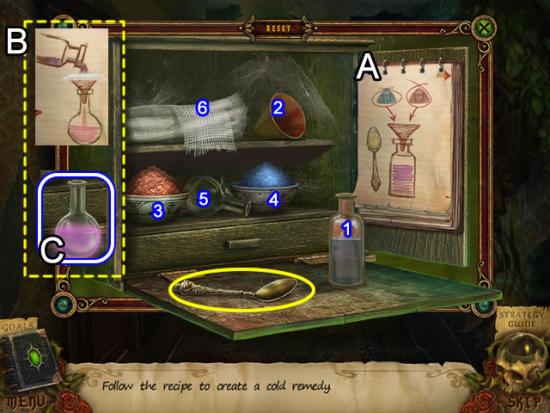
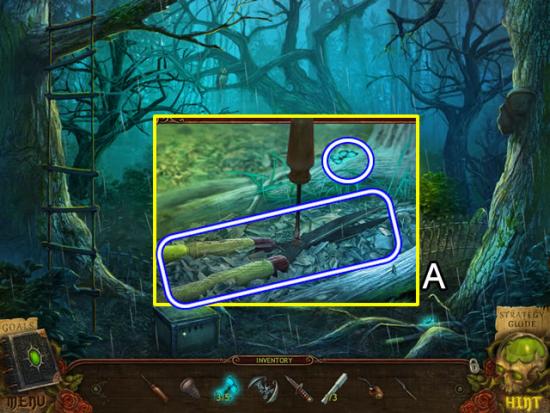
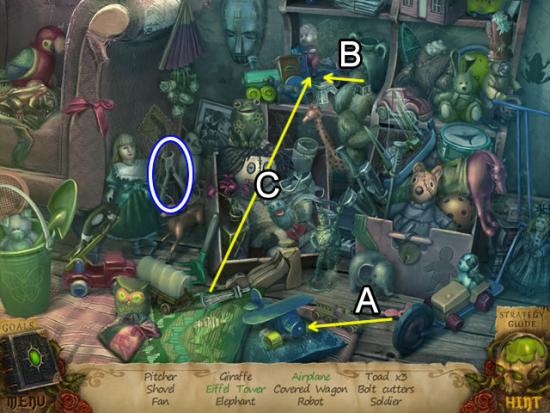
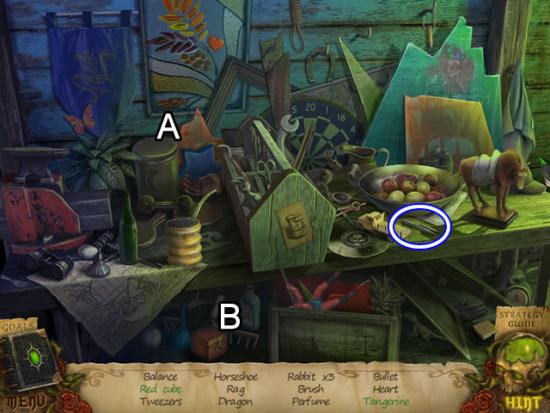
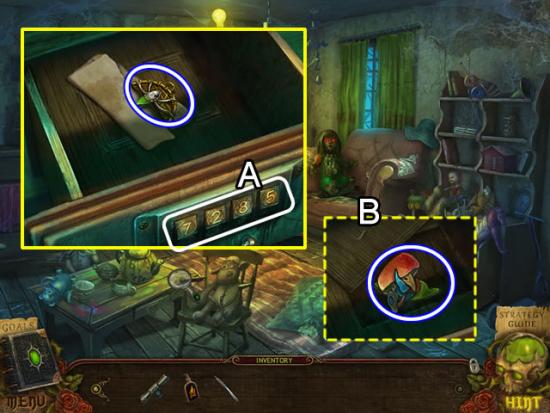
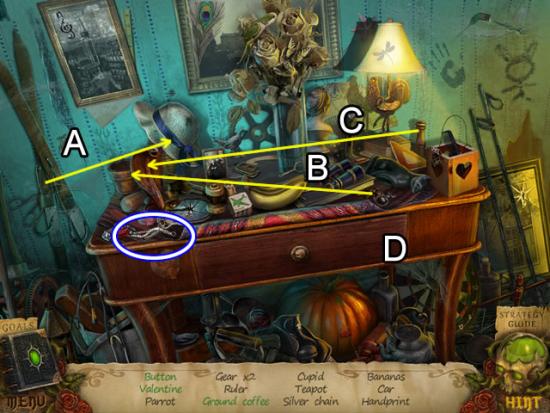
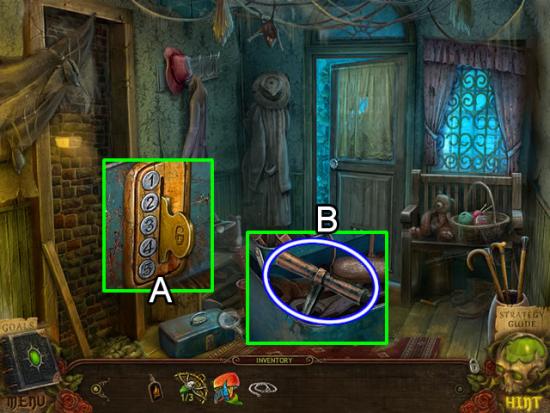
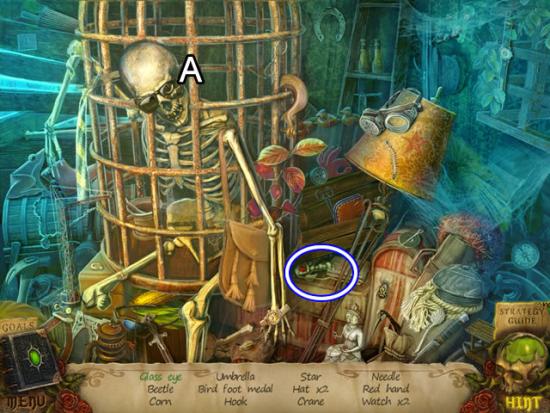
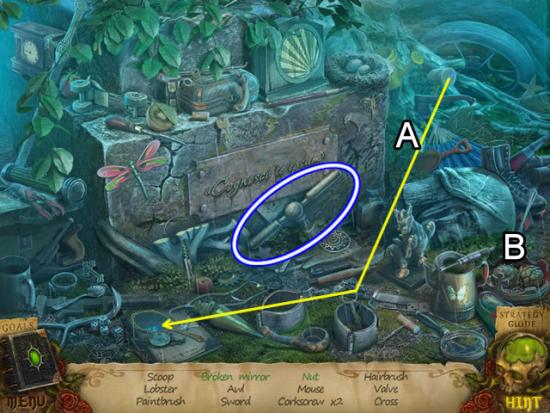
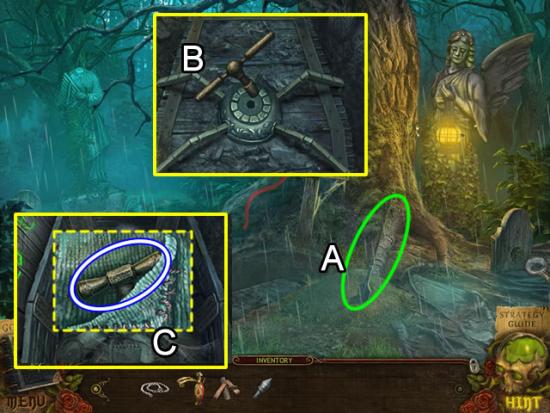
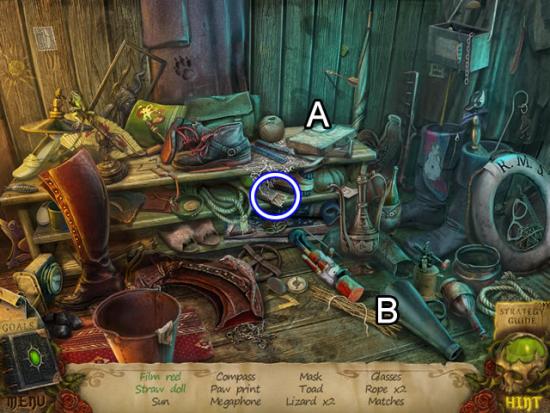
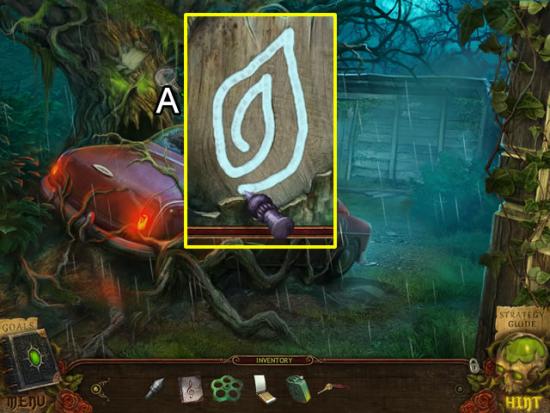
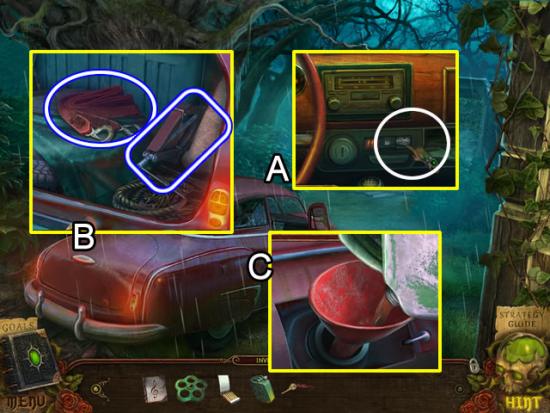
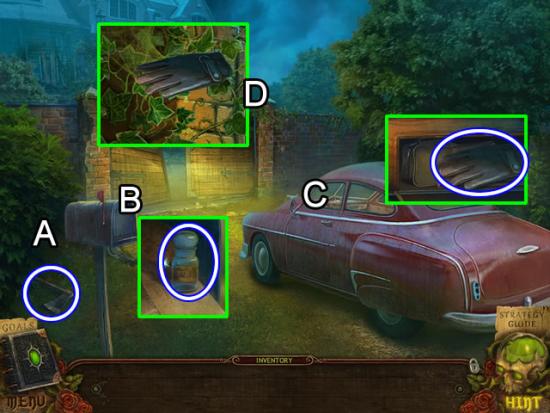
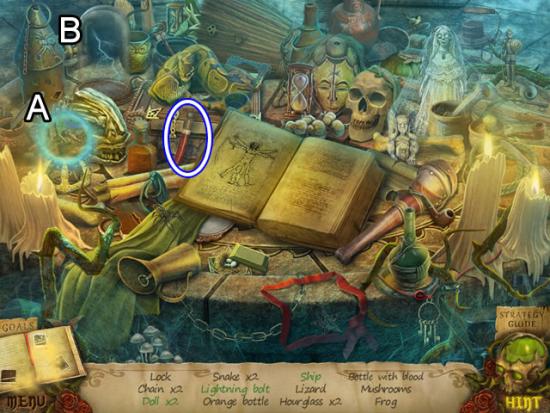
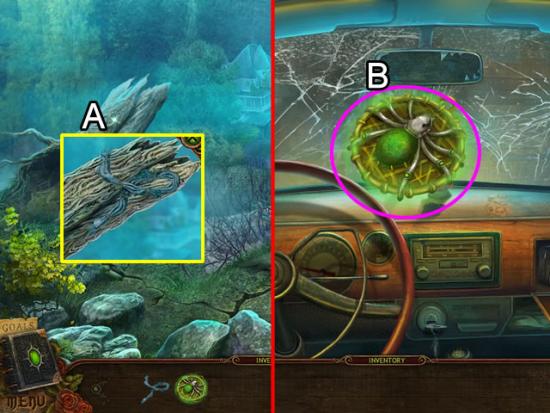
The Car

Screen Navigation
Game Play

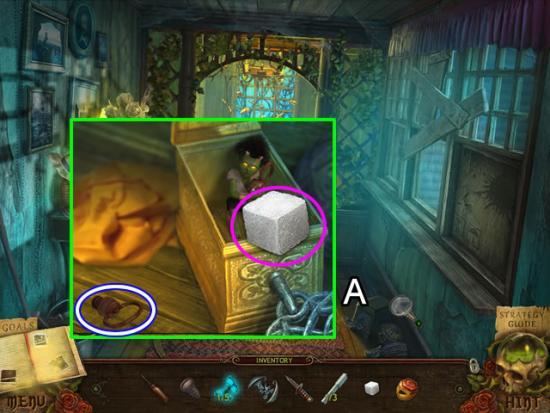
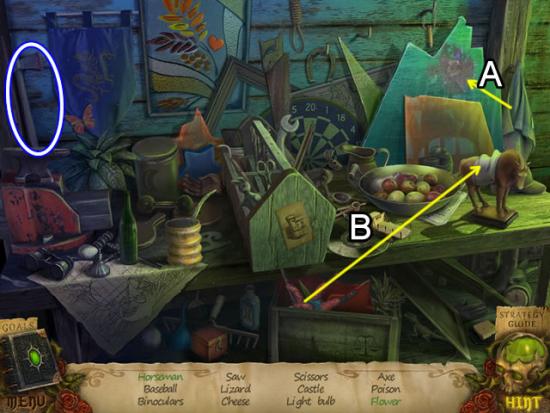
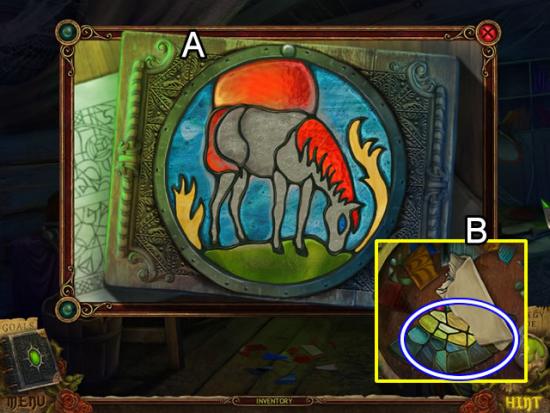
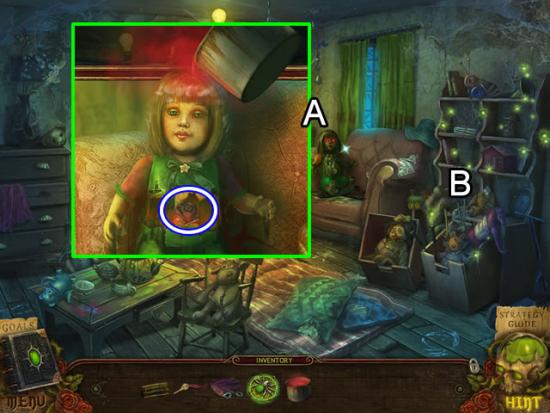
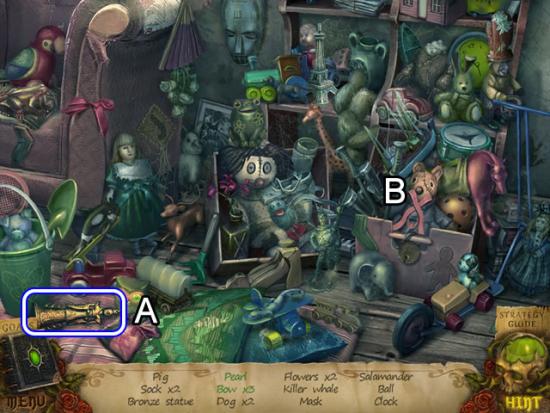
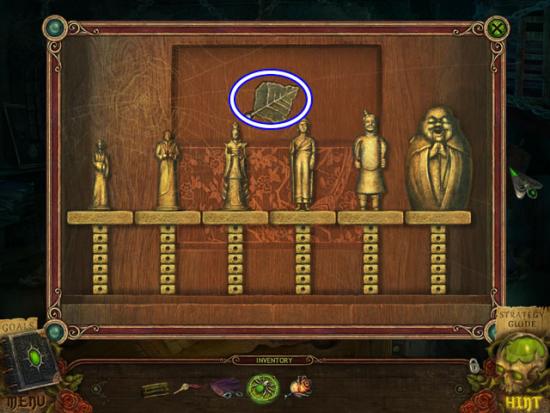
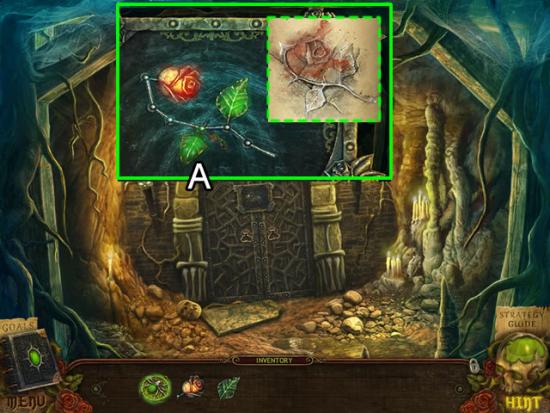
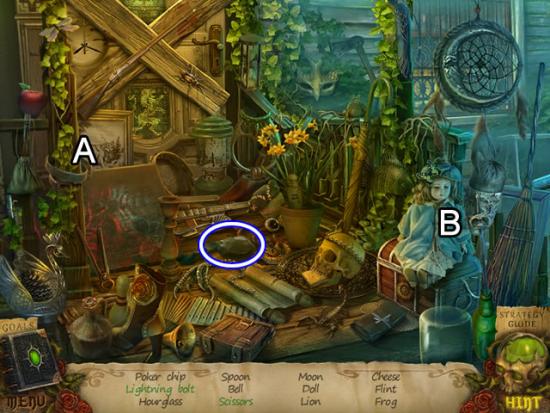
The Attic
Attic Hallway
Hallway
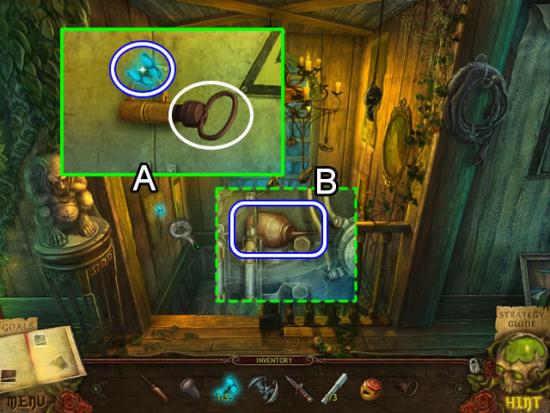
Right Hallway
Left Hallway
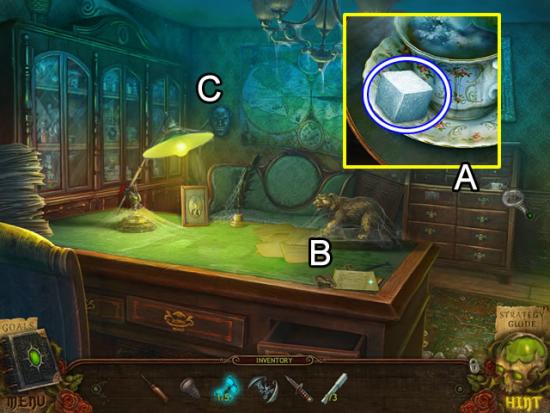
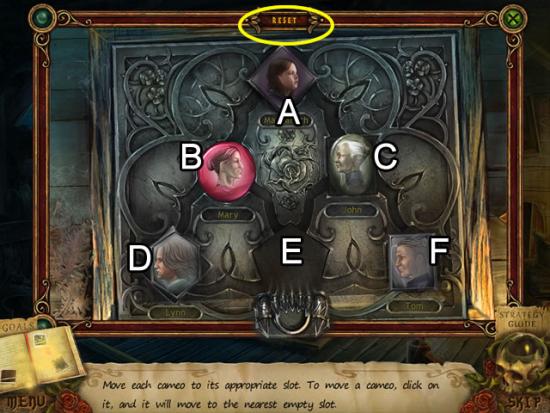
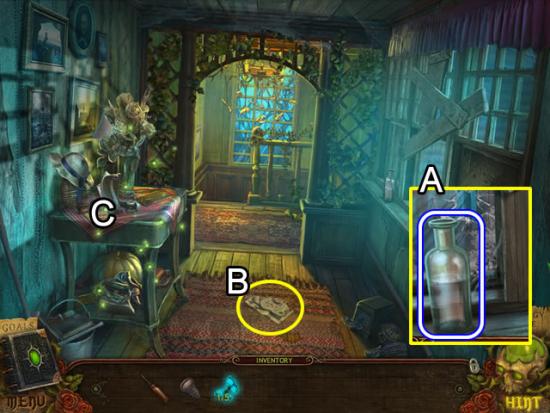
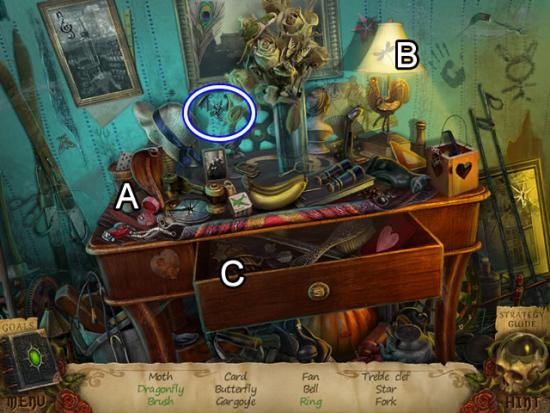
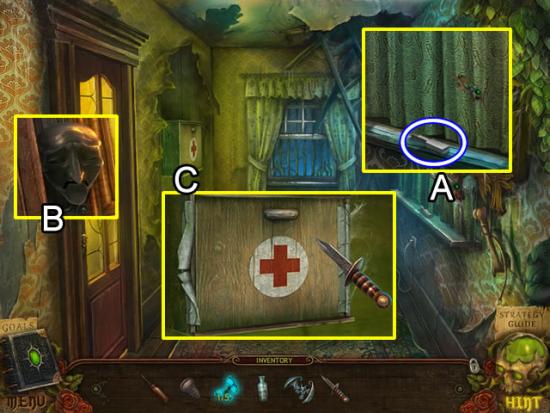
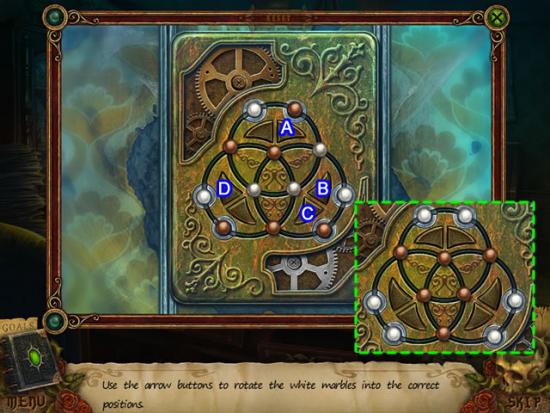
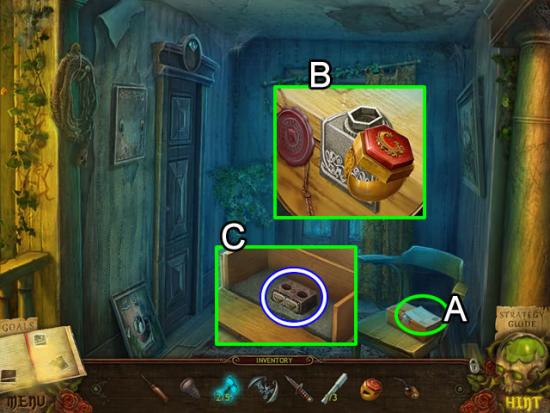
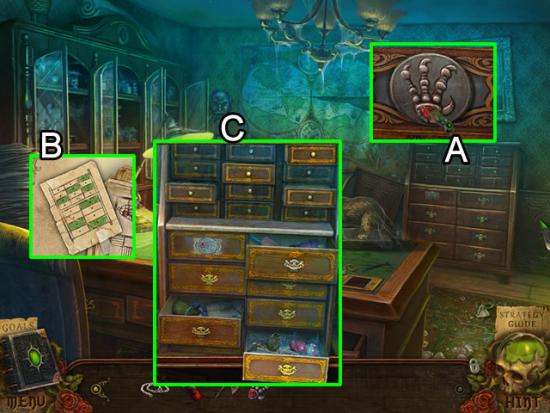
Office
Hallway
Top of Stairs
Right Hallway
Office

Left Hallway
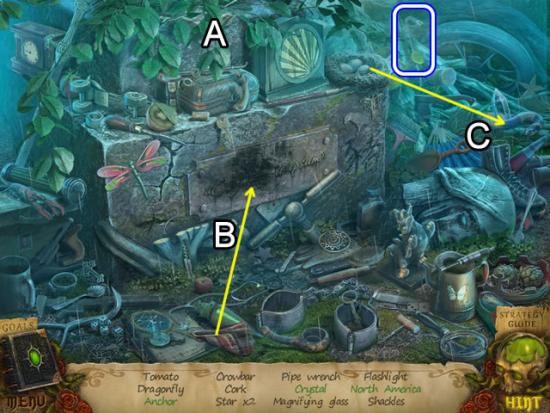
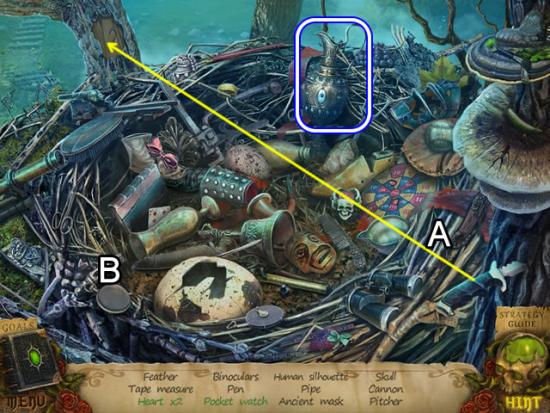
Tree House
Backyard
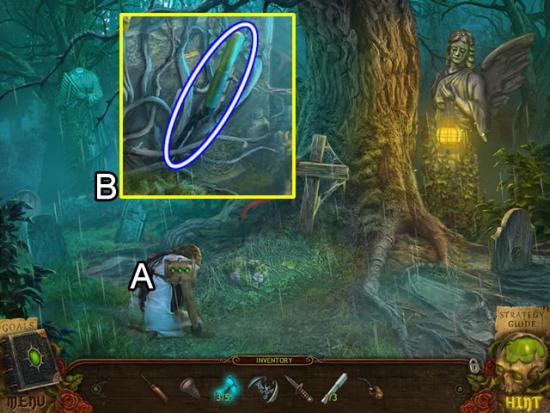
Graveyard
Backyard
Graveyard
Backyard
Tree House
Top of Stairs
Right Hallway
Top of Stairs
First Floor Landing
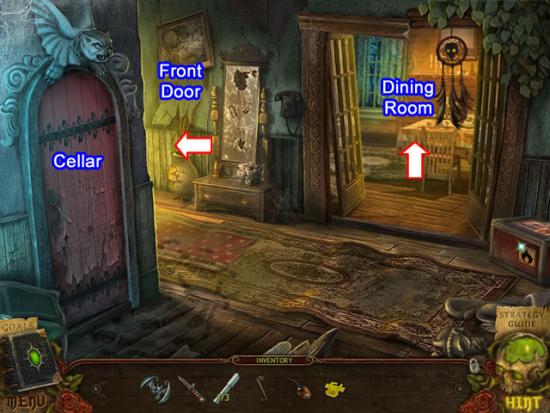
Front Door
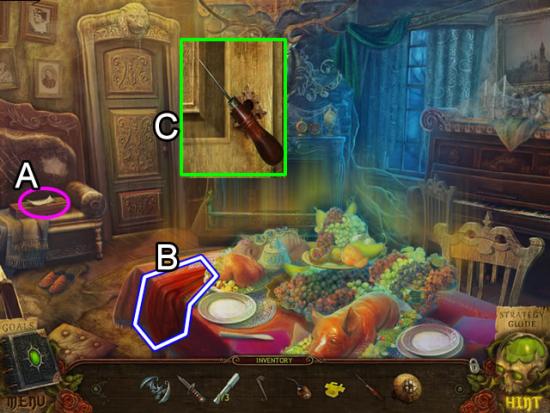
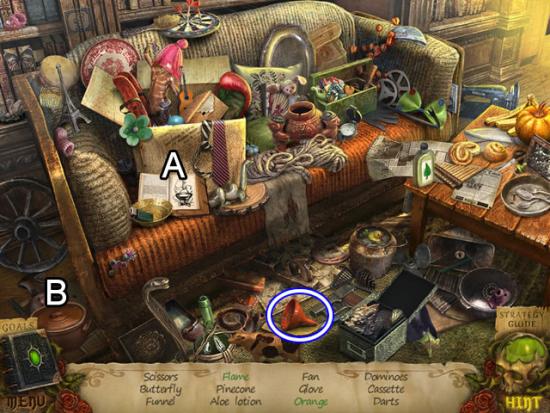
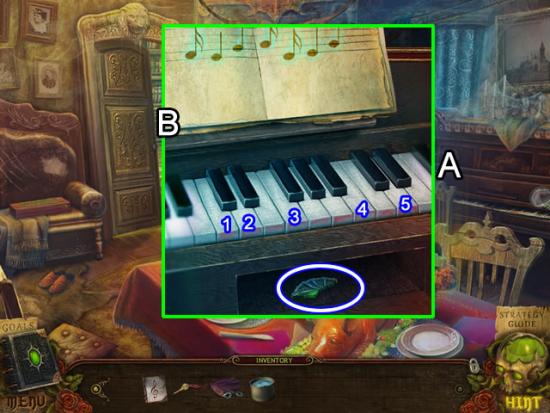
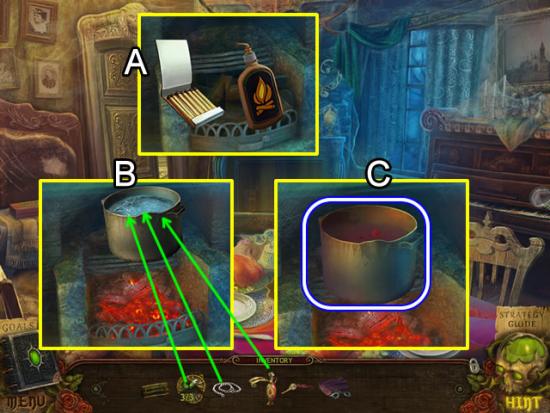
Dining Room
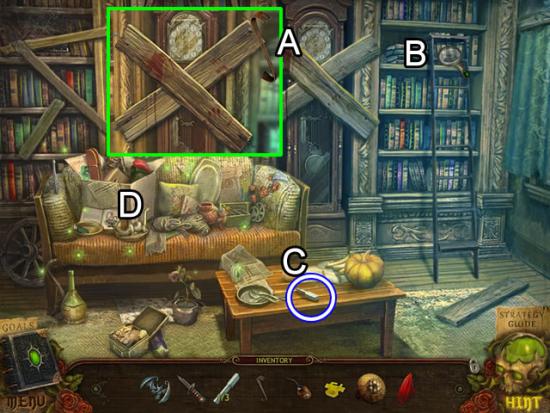
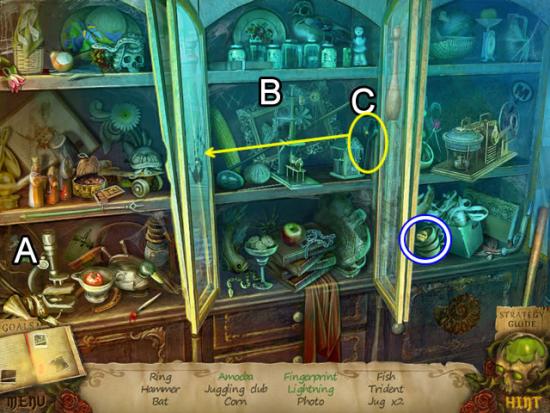
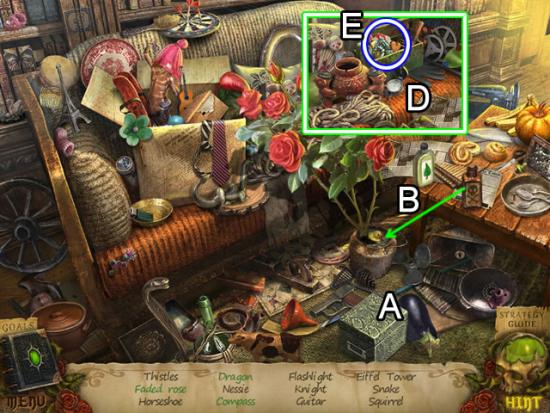
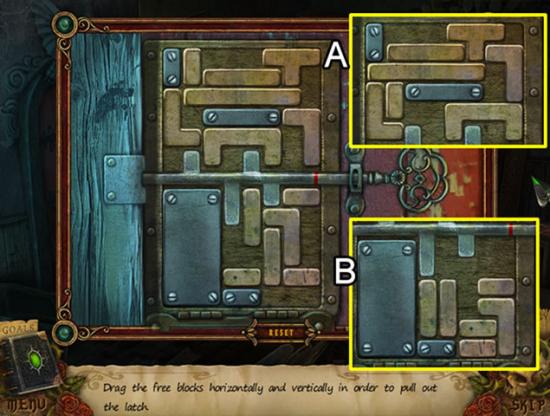
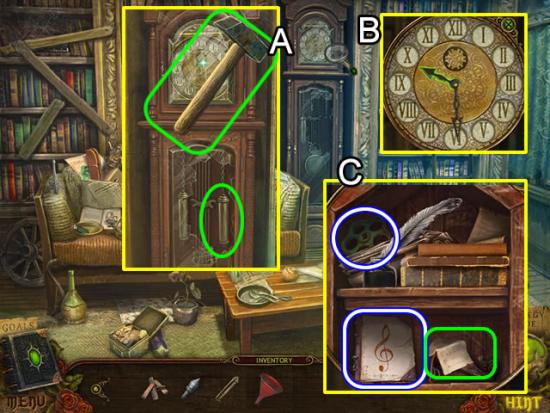
Library
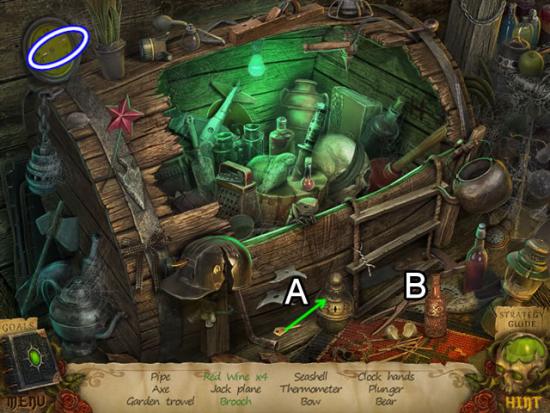
Cellar
Front Door
Barn Exterior
Side Window
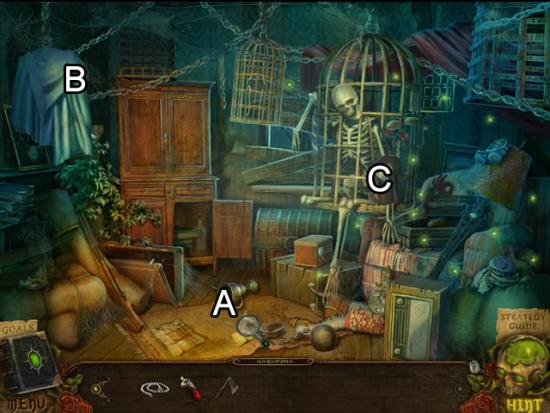
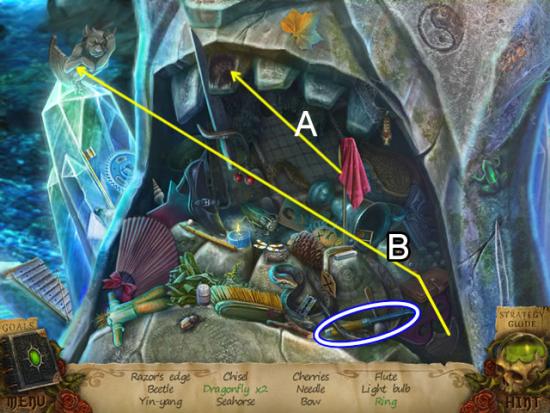
Bricked-up Room
Attic Hallway
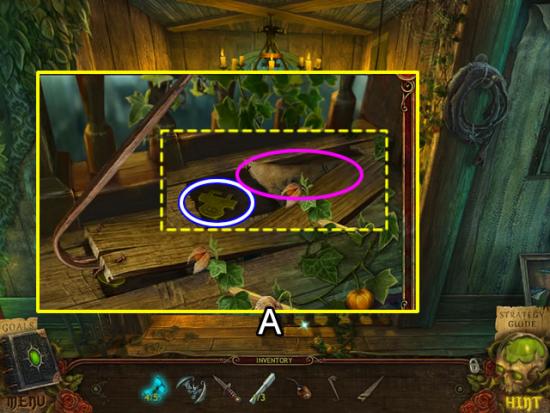
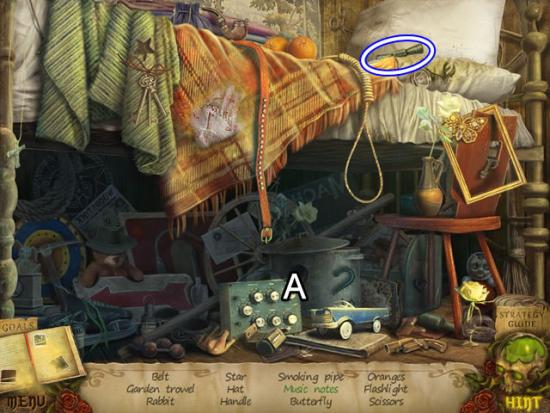
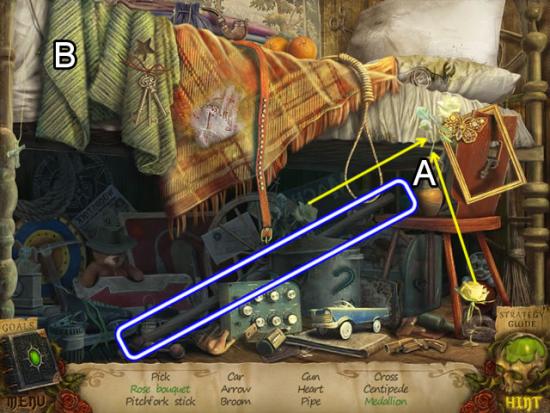
Lynn’s Room
Barn Interior
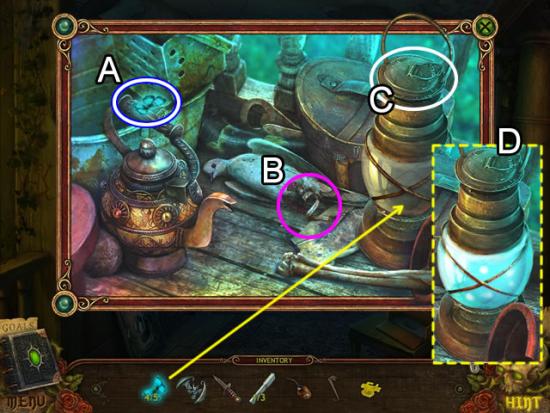
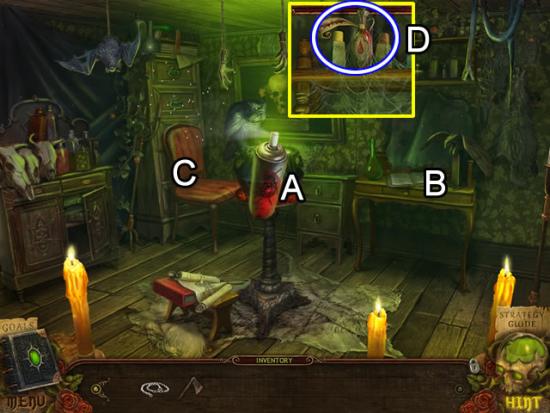
Studio
Lynn’s Room
Hallway
Front Door
First Floor Landing
Studio
Right Hallway
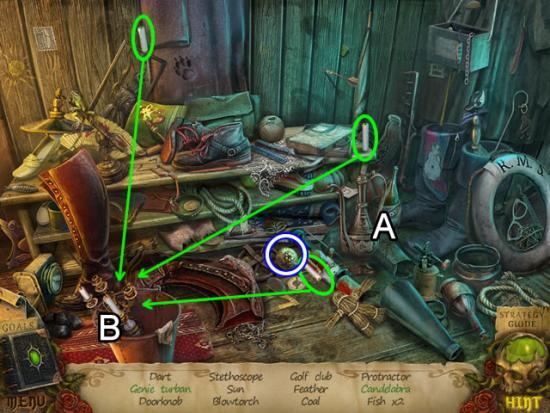
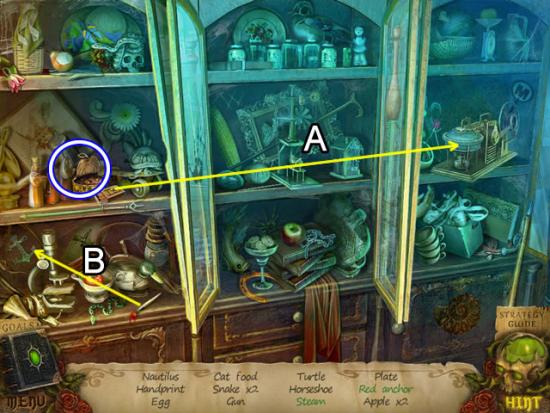
Storeroom
Office
Secret Room
Office

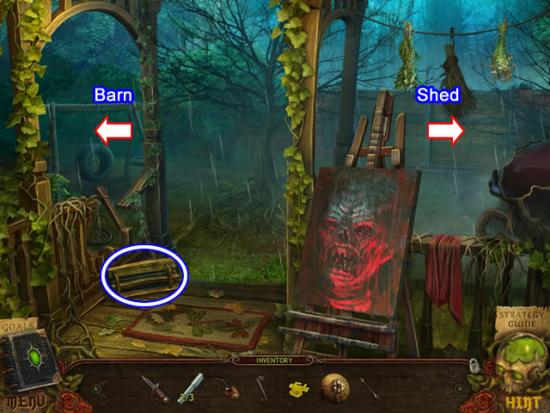
Barn Exterior

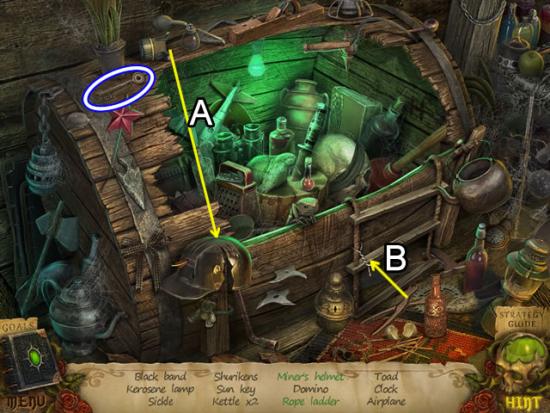
Barn
Graveyard

Right Hallway
Library
Front Door
Bricked-up Room
Cellar
Storeroom
Barn
Shed Exterior
Possessed Tree
The Car

Barn Exterior
Cellar
Bricked-up Room
Dining Room
Lynn’s Room
Storeroom
Car
Shed Interior
Bridge
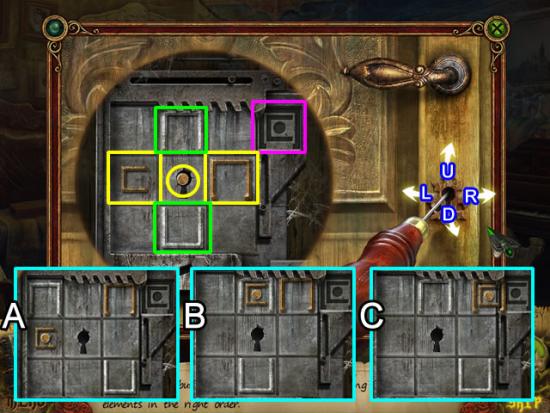
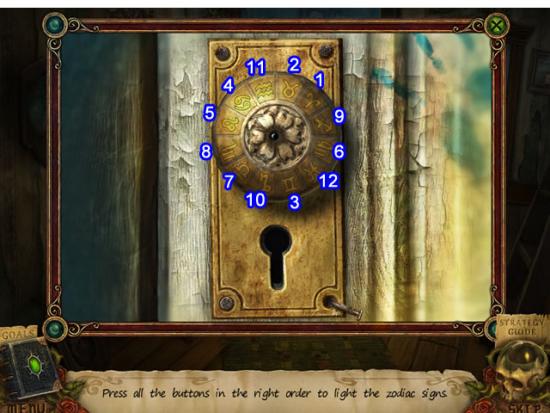
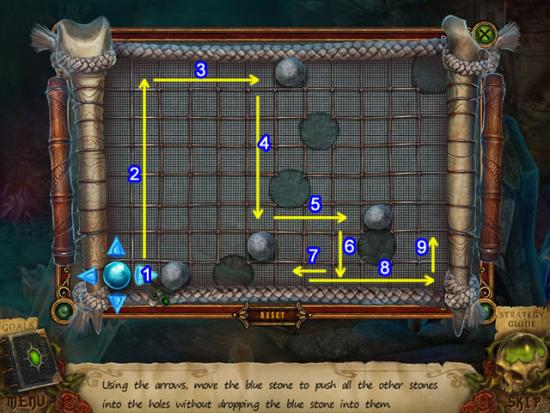
Dungeon Door
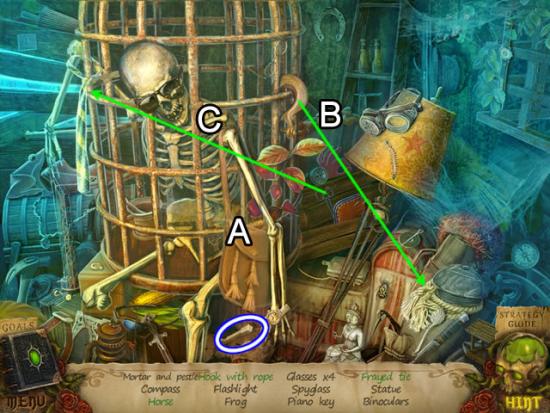
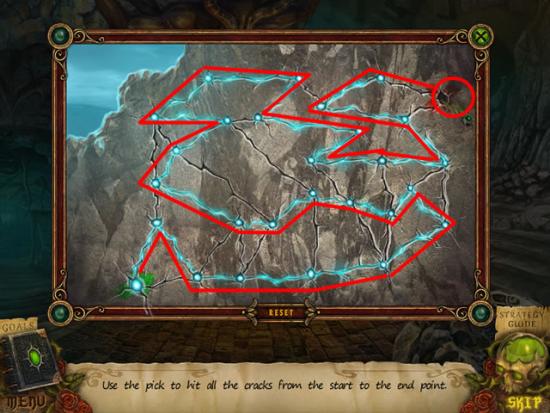
Dungeon
Congratulations! You have finished playing Witches’ Legacy: The Charleston Curse Collector’s Edition. Additional material and bonus game play is now available from the Extras tab on the main menu.
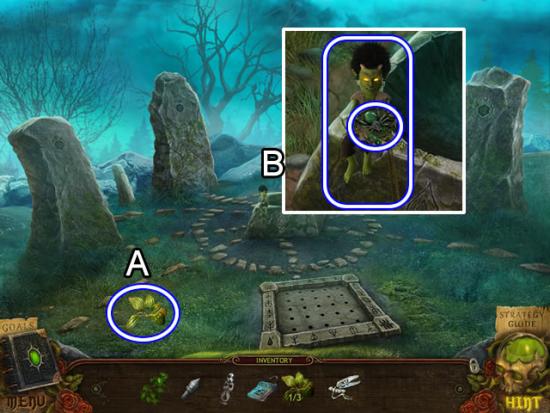
Outside the Manor
Front Yard
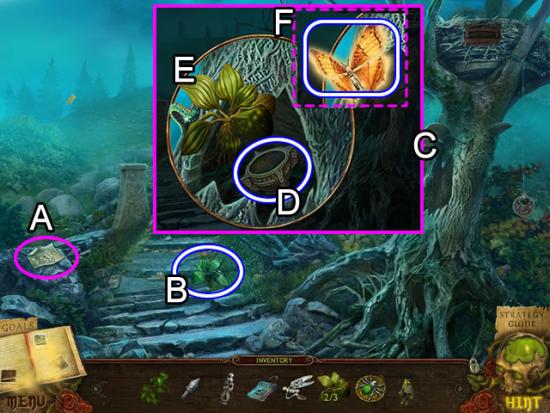
Shed Exterior
Front Yard
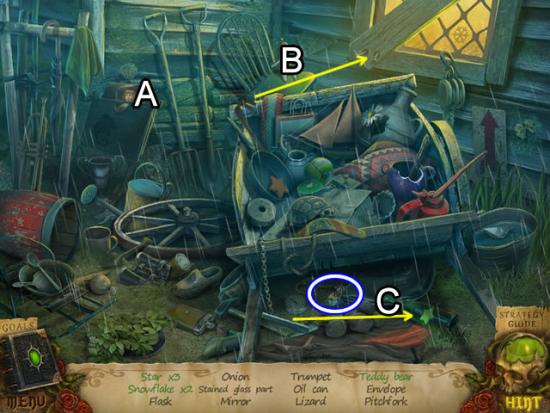
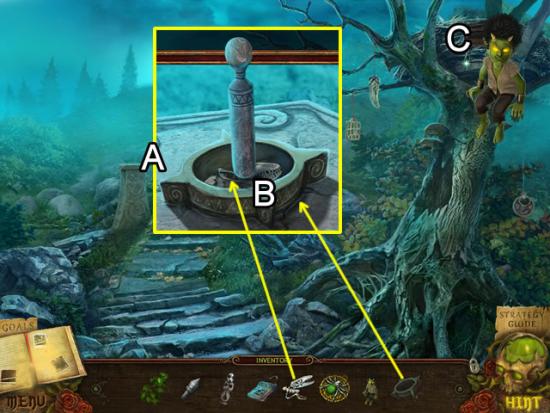
Shed
Catacombs
Front yard
Catacombs
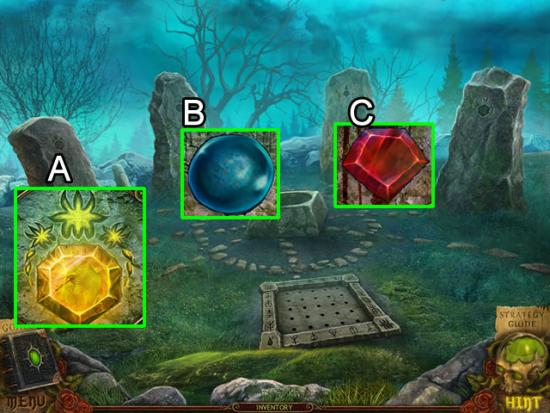
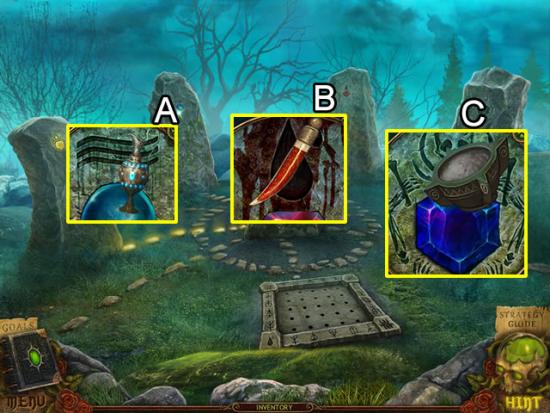
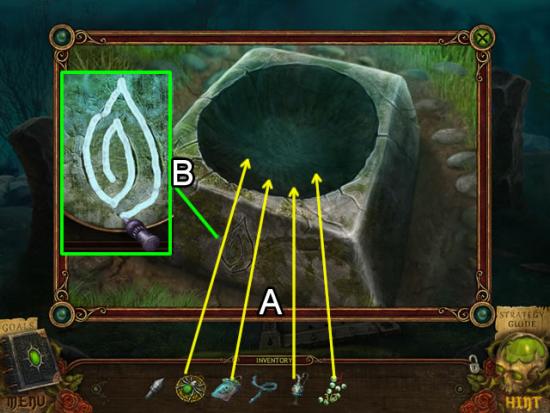
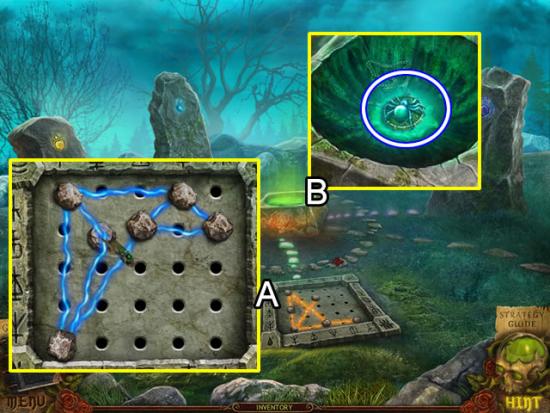
Cave Altar


Crossroads
Pool
Crossroads
Overlook
Sanctuary Ruins Entrance
Sanctuary Ruins
Sanctuary Ruins Entrance
Overlook
Crossroads
Front Yard

Bottom of the Well
Pool

Sanctuary Ruins
Sanctuary Ruins Entrance
Pool
Cave Altar
Sanctuary Entrance
Overlook
Outside the Manor
Congratulations! You have completed the bonus play for Witches’ Legacy: The Charleston Curse Collector’s Edition.
