![Digimon UP Tier List [Supports, Buddies, and Partners]](/wp-content/uploads/2026/07/digimon-up-tier-list.jpg "Digimon UP Tier List [Supports, Buddies, and Partners]")
Digimon UP Tier List [Supports, Buddies, and Partners]
These Digimon will get you UP the leaderboard.


![Haze Seas Boss Drops [Chances, Locations, and How to Spawn]](/wp-content/uploads/2026/07/haze-seas-boss-drops.jpg "Haze Seas Boss Drops [Chances, Locations, and How to Spawn]")

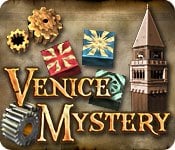
Check out our Tips and Tricks for Venice Mystery, the mah jong game with several puzzles to unluck and more than 70 levels. Find the clues that will help find the hidden machine plans that are inside 13 secret paintings in Venice. GENERAL TIPS You start the game with 3 lives and you can earn an extra life for every 250,000 points you earn while playing. If you're playing the mahjong tiles section and you think you're about to lose a life because you cannot finish on time, i…
a:1:i:0;a:2:s:13:”section_title”;s:32:”Venice Mystery Tips & Tricks”;s:12:”section_body”;s:19836:”
Check out our Tips and Tricks for Venice Mystery, the mah jong game with several puzzles to unluck and more than 70 levels. Find the clues that will help find the hidden machine plans that are inside 13 secret paintings in Venice.
GENERAL TIPS
POWER-UPS
1-Transform: Transforms all the playable tiles of a special color and pattern into a tile from your dock. Use this power-up when you are running out of time and you need to get to that last key and you do not have the proper tile on your dock to remove that tile that is blocking the key. Click on the transform power-up first, then click on a tile from the bottom dock that you would like to place on the playing field. The tile that you choose to place on the playing field will be replaced automatically so that you will be able to use the piece from your dock.
2-Sixth Sense: This power-up will really come in handy when you are running short on time and you need to know which pile has the keys, Key Stones and power-ups hidden underneath it.
3-Shuffle: Activate it to shuffle all the tiles in the bottom dock and create new dock tiles. This will only shuffle the tiles from the dock and not the playing field.
4-Ankh: To activate the ankh, click on a tile on the playfield, all the playable tiles of this pattern and color will be destroyed.
5-Fire Golem: Use the Fire Golem to destroy a group of tiles by shooting at them with fireballs. The key to using the Fire Golem is to actually shoot the fire balls on specific tiles, if you shoot towards the direction of something else it will not destroy anything. Shoot as fast as you can so that you can destroy as many tiles as possible. This can come in handy when you are trying to destroy a thick pile of tiles at one time.
6-Swap: Click on 2 tiles to exchange their position.
MAH JONG HINTS
CLOCK TOWER HINTS
SPOILER ALERT!!
If you get stuck on a level with either the paintings or the scrolls, we have all the answers below. They are numbered in the order of the circles below from left to right. In one occasion I remember the circles had switched places so it’s possible for them not to always be in the correct order, but the majority should be, and these notes will at least give you a good idea where to look for things. The Clock Tower numbers did not change as far as I could see. Don’t forget to click on the symbol that’s on the scroll once you’ve finished inputting the numbers.
Painting #1 Level 4
1-left side, between the first tree trunk and the second
2-in the middle of the third tree
3-last tree on the right, towards the bottom
Clock Tower #1
I, III, VIII, XIX, XVII, XIII, XXII, XXIII
Then click on the sun symbol that is on the left hand corner of the screen
Painting #2 Level 8
1-left side, small opening, between both buildings
2-top left, close to the building
3-middle of the screen, towards the bottom by the third building on the right
4-center of the screen, closer to the right, by last building
Clock Tower #2
IIII, VI, III, XII, XVIII, XXIIII, XX, XV
Then click on the symbol that looks like a circle with lines going through it
Painting #3 Level 13
1-top left, closer to the middle
2-top of the tree
3-middle left side, bottom of the tree
4-bottom right corner
5-middle of the screen, closer to the right, close to the dark edge
Clock Tower #3
II, V, VII, XI, XII, XXI, XIX, XVI
Then click on the symbol that looks like an open curtain
Painting #4
1-first building, at the bottom right side of the building
2-first building on the left, on the left of the top 2 windows
3-second building on the right, next to the top of the first window
4-second building on left corner, by the first window on the bottom row
5-second building, middle set of windows, by the last one
Clock Tower #4
I, III, XVIII, XX, XXIII, XIII, X, VII
Click on the symbol that looks like a ring, first symbol on the right side
Painting #5
1-first tree on left, towards the middle
2-the grass between the first and second tree
3-on the ground, close to the base of the second tree
4-leaves of the third tree
5-end of the road
Clock Tower #5
VIII, IIII, XIX, XXI, XXIIII, XV, XII, XII, XV, XII, X
Then click on the symbol that looks like the letter V with a ring at the bottom
Painting #6 Level 27
1-top left corner of main building
2-left corner of main building
3-in the sky, left side, highest part of the building
4-underneath highest part of the building
5-bottom right corner, last opening( door…window?) of the first building
6-right side of the main building, last window, on top row
Clock Tower #6
I, VI, IX, XIIII, XVI, XXII, XX, XVII
Then click on the half-moon symbol
Painting #7 Level 32
1-left side of bowl, where the blue rim ends
2-left side of the bowl
3-at the bottom, where the green fruit is, close to the frame
4-in the middle of the yellow fruit, that is in the bowl (the lightest yellow)
5-right side of the bowl, close to the blue rim
6-top right hand corner, on the wooden table
Clock Tower #7
II, VIII, XVI, XV, XXIIII, XXI, XX, III
Then click on the symbol that looks like a ring
Painting #8 Level 36
1-in the middle of the first building
2-first building, last window
3-second building, next to middle window
4-in the middle of the second building
5-above second building, in the sky
6-middle of the third building
Clock Tower #8
III, V, VII, XVIII, XXI, XV, VI, X
Then click on the symbol that looks like an open curtain
Painting #9 Level 43
1-top left
2-left bottom, on blue plants, close to the building
3-middle of the picture
4-on the part of the ground closest to the right side of the screen
5-top right side of the screen
6-bottom right side of the screen, close to the white part
7-by the last column on the right side
Clock Tower #9
V, X, XVII, XVI, XXIIII, XXIII, XIX, XI
Then click on the symbol that looks like a circle with stripes going across it
Painting # 10
1-between the second and third opening, on the left side
2-right below where clue # 1 is
3-on the left of the highest peak of the bridge (peach skyline)
4-inside the small tower (highest peak of the bridge)
5- under the top of the bridge, towards the middle
6-on the left side of the first yellow and pink pole
7-top right hand corner, between the last 2 openings
Clock Tower 10
VII, VIII, IIII, XIII, XI, XVIII, XX, XXII
Then click on the sun symbol
Painting #11 Level 56
1-top left of the first building
2-left side of the bridge, towards the top
3-middle of the bridge, between the 2 buildings
4-under the bridge, almost below the center point of bridge, on the ground
5-under the bridge, on the right corner
6-bottom right side of the screen, towards middle of the building
7-top right corner of the building, on the right side
Clock Tower Scroll #10
XIIII, XIX, XXIIII, XVIII, X, IIII, VII, I
Then click on the half-moon symbol
Painting # 12 level 62
1- center of the screen, closest to the left side
2-second highest part of the building, between first and second largest pole
3-in the middle of the largest arch
4-slightly above where # 5 is
5-top arch of the tallest building (which is the building in the middle)
6-bottom right corner of the building, towards the bottom of the tallest building
7-right side of the tallest point of the building (peach sky) between the second and third longest pole
8-middle of the screen, closer to the right side, next to the third tall pole
Clock Tower #12
V, II, IIII, XV, XX, XXIII, XXII, XII
Then click on the symbol that looks like a V with a ring at the bottom
Painting #13 Level 70
1-left side of the building, on the edge of the building by the first peak that you see.
2-above the arch, on the building itself (center of the screen)
3-left side of the buildings dome, close to the sky
4-by the arch of the building (right side of the arch)
5-next to the arch, it looks like a window and there’s a small column next to it
6-right side of the dome, closer to the middle edge
7-top of the first lamppost that is on the right corner of the screen (or third post if you’re counting left to right)
8-above the last lamppost, to the right of the building
9-right corner, at the very bottom, by the last lamppost
Clock Tower #13
III, V, VIII, XI, XXII, XXI, XVII, XVIII
Then click on the half-moon symbol
Assembling the machine, final chapter
Just pick up the parts at the bottom and place them in their appropriate location on the machine. If you look closely at the details it’s not hard to do. The part cannot be placed unless it’s in the correct location. The answers to these puzzles are numbered 1 through 13, for the purposes of this walkthrough. You will not see numbers for the parts in the game. The pieces are in order from left to right.
1-right side, below the biggest green gear
2-bottom left corner
3-top, second gear, starting on the left side
4-last one on the top right corner
5-all the way at the bottom, towards the center of the screen
6-towards the middle of the screen, left side of the big green gear
7-top of the screen, above the big green gear
8-bottom right side of the metal pole
9-first gear on the top
10-third gear from the top
11-right corner
12-below number 11, right corner
13-below the big green gear
“;
