
Best Horror Games On Itch.io – July 2026
Across a bounty of subgenres.
Grow A Garden 2 Base Price List
What's the most valuable crop?![Evomon Best Starter [Leafbun, Blazpup, or Bubble?]](/wp-content/uploads/2026/06/evomon-best-starter.jpg "Evomon Best Starter [Leafbun, Blazpup, or Bubble?]")
Evomon Best Starter [Leafbun, Blazpup, or Bubble?]
Grass-type, Fire-type, or Water-type?
![[Roblox] Evomon Shiny Hunting Guide – Including Prismatic and Pris Shinies!](/wp-content/uploads/2026/06/evomon-shiny-hunting-guide.jpg "[Roblox] Evomon Shiny Hunting Guide – Including Prismatic and Pris Shinies!")
Vampire Saga: Pandora’s Box Walkthrough
Welcome to Gamezebo's walkthrough for Vampire Saga: Pandora's Box.OverviewPart 1- Grandfather's HousePart 2- The Ship Part 3- Restoring the Music Box (Grandfather's House) Part 4- The Ship's Monster Part 5- Vampire in the Bedroom Part 6- Pandora's Fate Part 7- Grandfather's Fate GENERAL TIPSRandomized Objects- Hidden objects are randomized, and may be in a different order or different objects entirely whenever you encounter a hidden object level. Key Items- Impo…


- Prefer Gamezebo on Google

a:1:i:0;a:2:s:13:”section_title”;s:39:”Vampire Saga: Pandora’s Box Walkthrough”;s:12:”section_body”;s:93910:”
Welcome to Gamezebo’s walkthrough for Vampire Saga: Pandora’s Box.
Part 1- Grandfather’s House
Part 2- The Ship
Part 3- Restoring the Music Box (Grandfather’s House)
Part 4- The Ship’s Monster
Part 5- Vampire in the Bedroom
Part 6- Pandora’s Fate
Part 7- Grandfather’s Fate
GENERAL TIPS
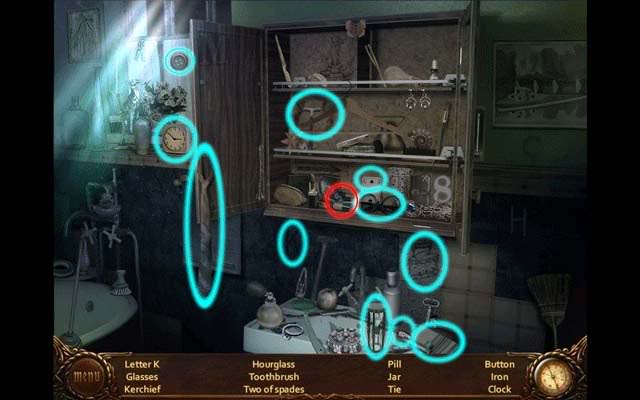
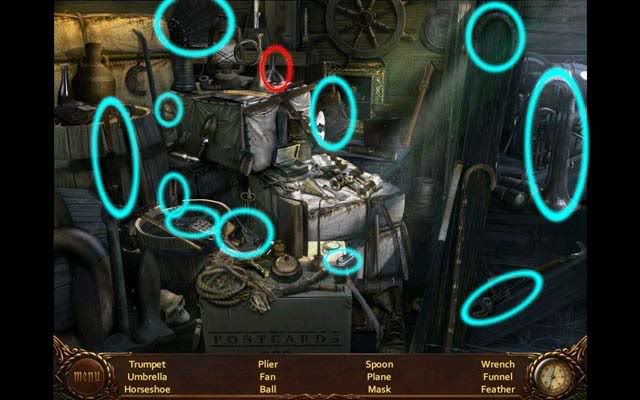
- Randomized Objects- Hidden objects are randomized, and may be in a different order or different objects entirely whenever you encounter a hidden object level.
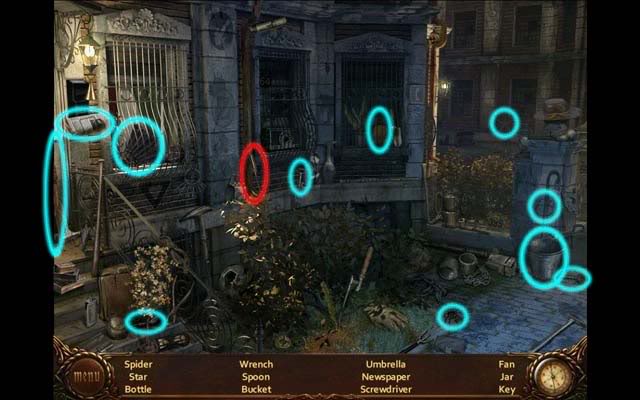
- Key Items- Important or key objects you need to find, which will be added to your inventory upon completion, are circled in red. Note not all levels will have you find a key item you need in the actual hidden object area, but you’ll earn it at the end still.
- Hints- There are two kinds of hints in this game. First, if there’s something you should do in an area, oftentimes something will sparkle or flash to catch your eye. The other kind of hint is accessible via the hint button. You can use hints inside and outside of hidden object levels. If there’s nothing to do in an area, your hint will not be wasted. Hints replenish after a short amount of time for you to use again.
- Auto Save- There is no save button for your game, but don’t worry: the game will automatically resume in the last room you were in whenever you restart.
- Skipping Cutscenes- It’s possible to skip cutscenes by tapping the "ESC" button, however you cannot speed a cutscene up.
- Options- Options are accessible from the options menu. You can alter cursor, window, sound and music here.
- Colorful Fog- All colorful fog areas are hidden object levels. It’s suggested you do these before exploring an area further. Every single hidden object level will reveal a key and useful item you’ll need.
- Shooting the Gun- You’ll only do this once in the game. Automatically you shouldn’t be able to miss. Relax as there’s no time limit. Move the mouse cursor and wait until the target is over the monster before clicking to shoot.
WALKTHROUGH
Our story begins with a mysterious phone call. The grandfather of our main character, Ty, has called in a panic claiming to have killed. Frazzled, Ty proceeds to his grandfather’s house to investigate…
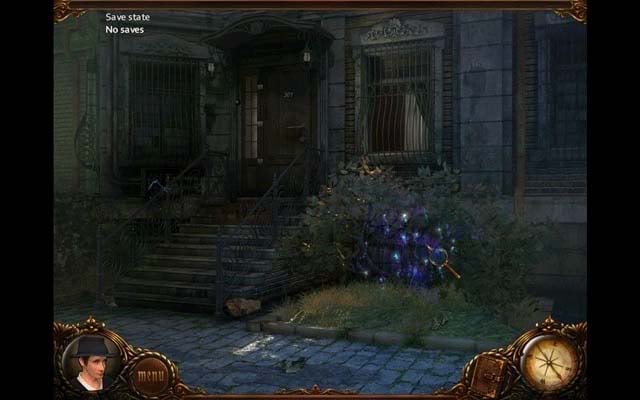
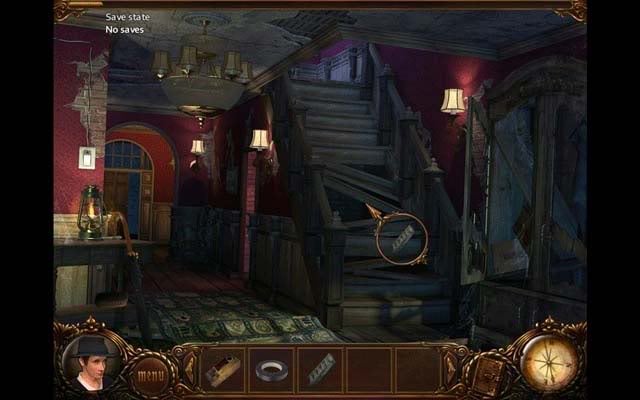
The Porch
- Upon reaching the first area, the Porch, you’ll immediately notice a dark and colorful fog. Click on it to enter your first hidden object challenge.

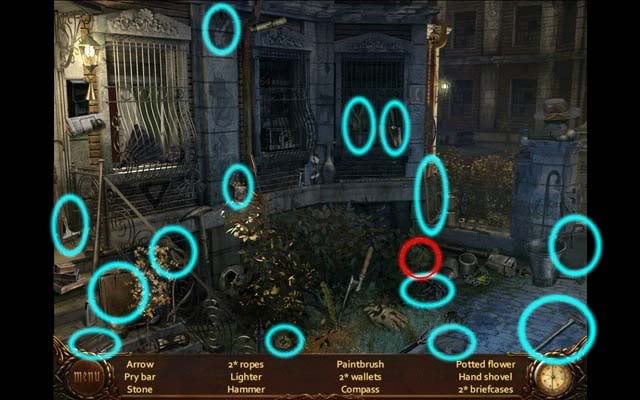
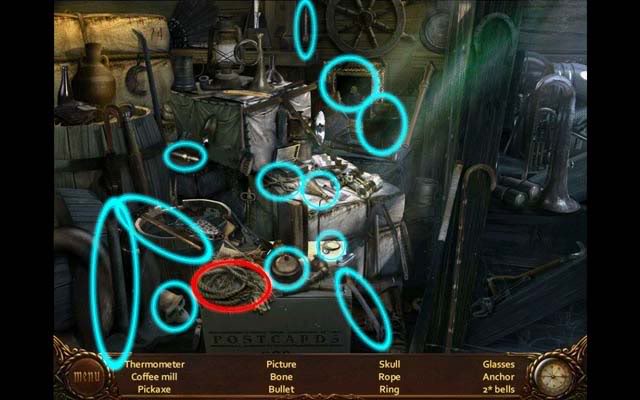
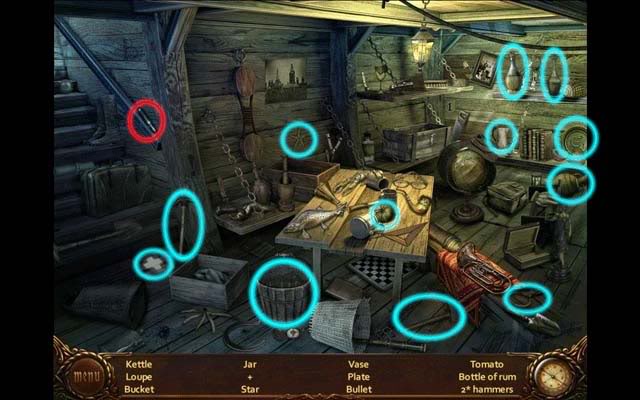
Hidden Object Area- The Porch (Part 1)
- Find the objects listed at the bottom of the screen. Once you’ve found all the objects listed, the Stone will be added to your inventory.
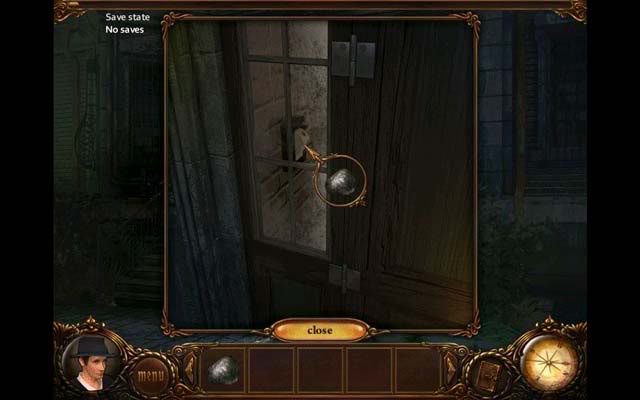
The Porch
- Back in the main Porch area, click on the window next to the door. Use the Stone on the window to break it.
- Click on the switch to turn on the porch lights.
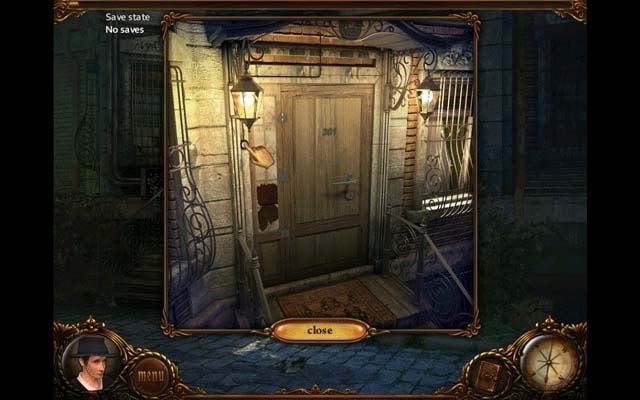
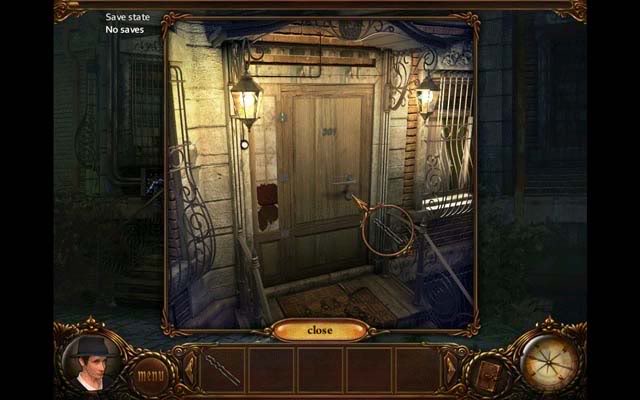
- Exit the window screen, and in the main porch area, click on the door to enter another close-up screen.
- Click on the doorbell: there’s no answer, and the door is locked. Click on the doormat for yet another close-up. Click on the top right corner to overturn it and find a Hairpin. Click on it to add it to your inventory.
- Back in the door close-up screen, select the Hairpin and use it by clicking on the lock under the door handle. A mini-game will ensue.
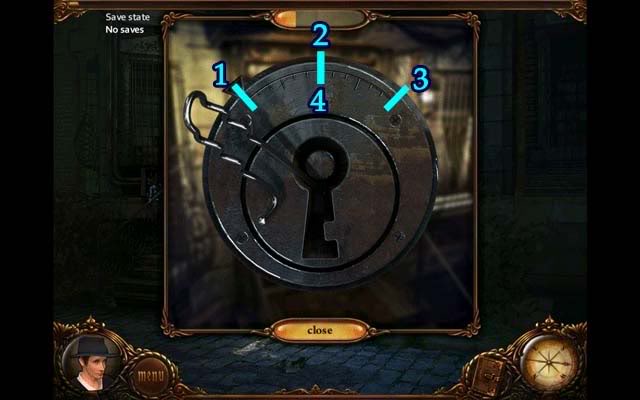
Mini-game: Unlock the Door
- The goal of this game is to unlock the door using the hairpin. By moving the mouse, you can rotate the position of the pin and click to test the lock. You must find and click four spots in the correct order to open the door. The sequence is as follows: align the pin with the far left notch and click. Next, click on the middle notch. Then, align with the far right notch and click. Align once more with the middle to successfully open the door. Below the solution is marked on the lock:
The Porch
- The door is unlocked, but chained from the inside. Exit the close-up back to the main porch area, where you’ll notice another dark and colorful fog has appeared. Click on it to ensue in another hidden object level.
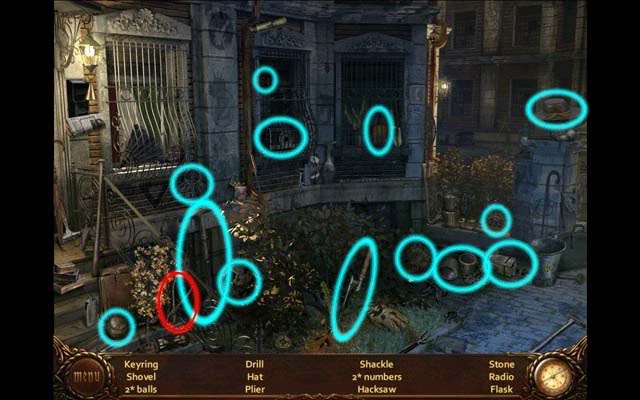
Hidden Object Area- The Porch (Part 2)
- Find all the objects listed at the bottom of the screen. Once you’ve found everything, the Pliers will be added to your inventory.
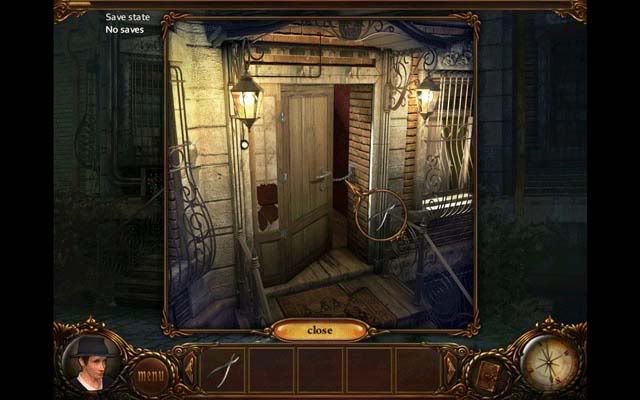
The Porch
- Click on the door for a close-up. Use the Pliers on the chain to unlock the door and enter into the house’s hallway.
Hallway
- Once inside the hallway, you can either enter the Bathroom or go back to the Porch. The stairs are broken, denying access to the Living Room above.
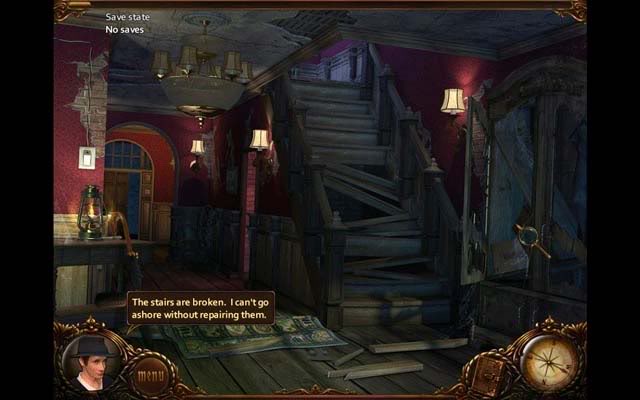
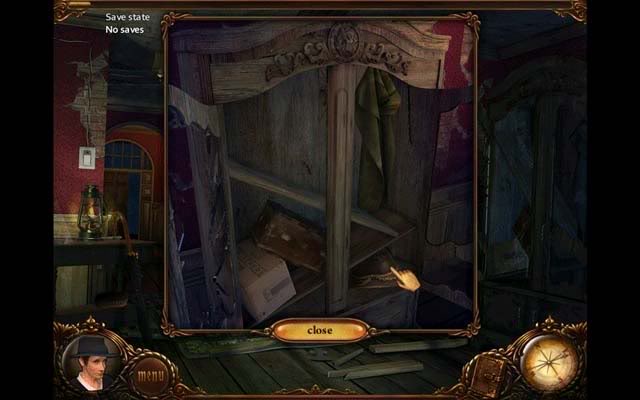
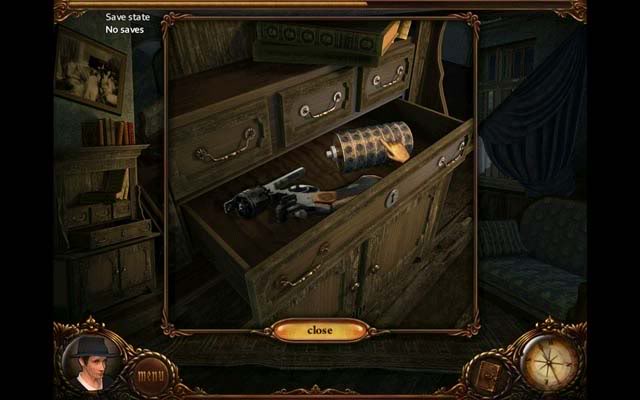
- Click on the cabinet on the right: in the close-up, click on the hat on the bottom right and then click on the box it reveals. It’s Ammo. Click on it to add it to your inventory and proceed to the Bathroom.
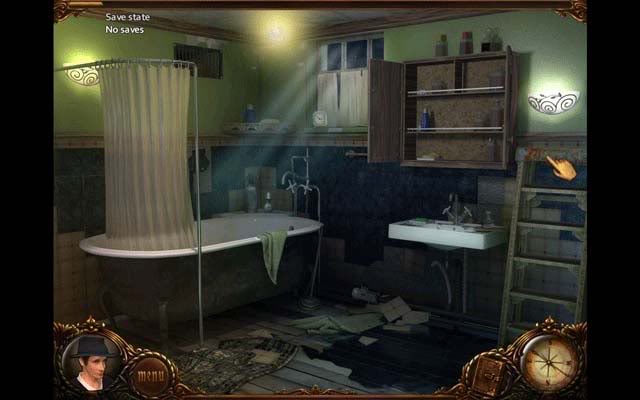
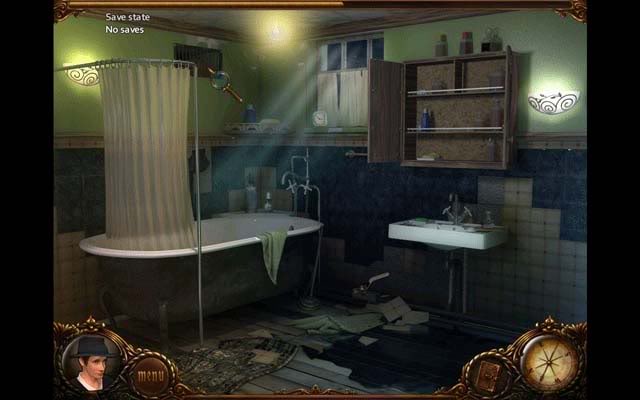
Bathroom
- The water pipes are broken here. Click on the cabinet above the sink to open it. Inside is a familiar dark and colorful fog. Click on it to enter the next hidden object level.
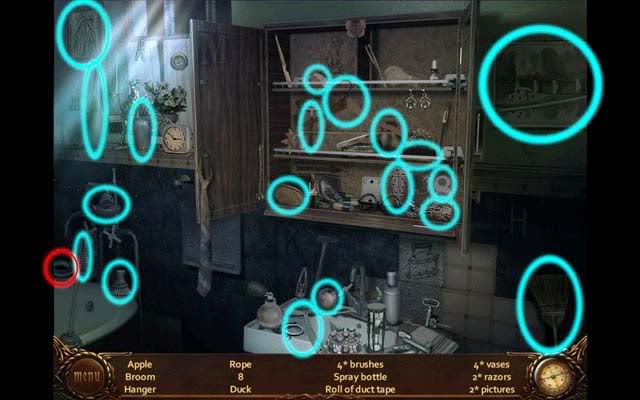
Hidden Object Area- The Bathroom (Part 1)
- Find all the objects listed at the bottom of the screen. Once you’ve found everything, the Duct Tape will be added to your inventory.
Bathroom
- Click on the Ladder on the right side of the room to add it to your inventory and exit back into the Hallway.
Hallway
- Use the Ladder on the broken stairs to gain access to the Living Room.
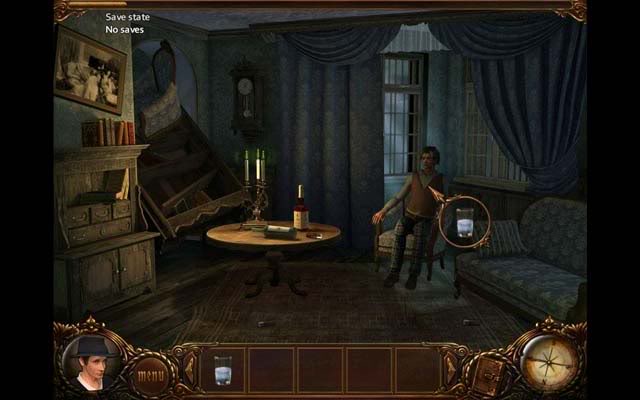
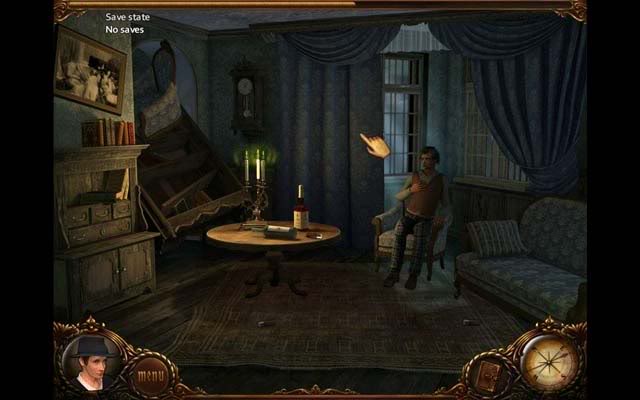
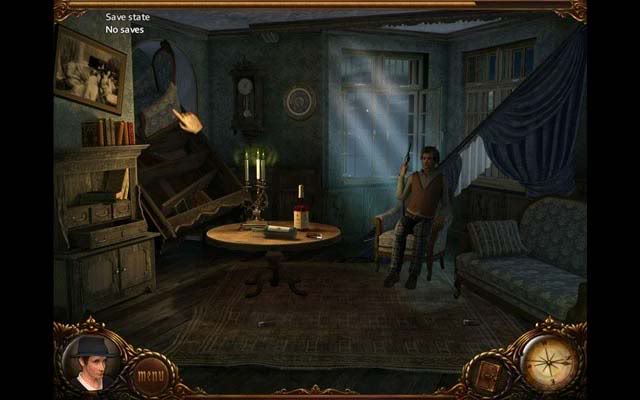
Living Room
- Ty’s Grandfather lies breathless in a chair, likely suffering from a heart attack. He’ll need aspirin and water in order to recover.
- Pick up the Glass sitting on the table in the middle of the room.
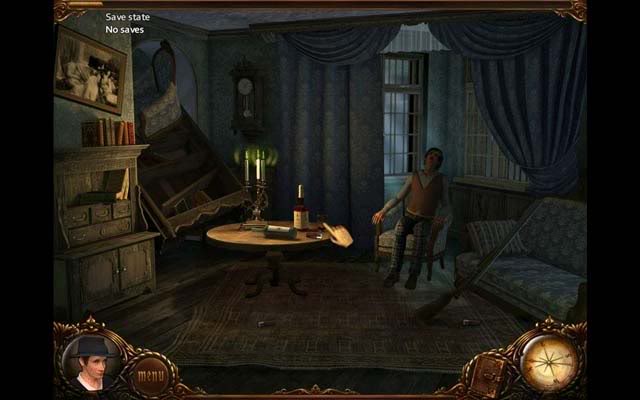
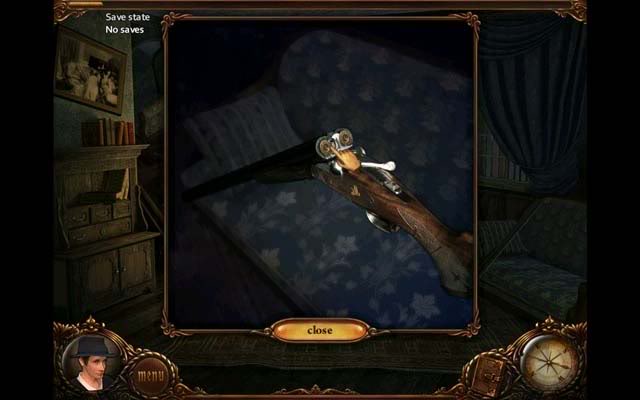
- Click on the Shotgun lying against the couch. In the close-up screen, click on both shells/casings in the barrel to remove them. Next, use the Ammo from your inventory and click on the gun barrel to load it. Once you’ve finished, click on the Shotgun again to add it to your inventory.
Hallway
- Proceed back to the Porch
The Porch
- Once back outside, you’ll notice the colorful fog. Click on it to enter another hidden object level.
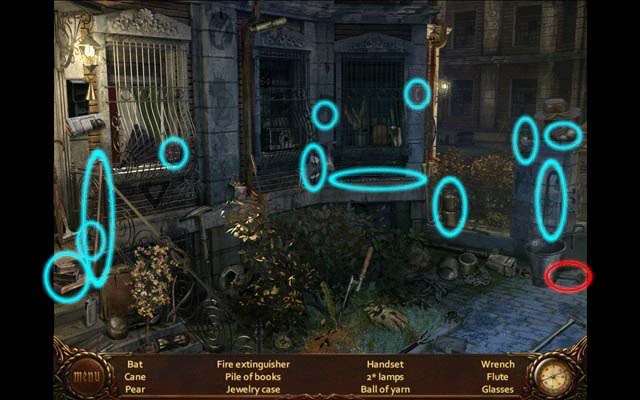
Hidden Object Area- The Porch (Part 3)
- Find all the objects listed at the bottom of the screen. Once you’ve found everything, the Wrench will be added to your inventory.
The Porch
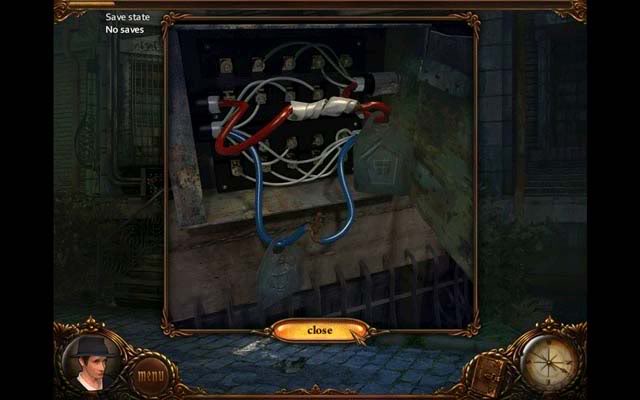
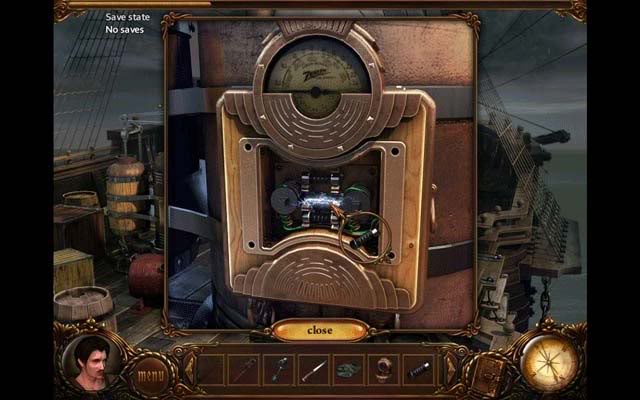
- Click on the electrical box (you’ll notice the blue electric sparks).
- In the close-up, use the Duct Tape to mend the broken wires and exit.
- Proceed into the house.
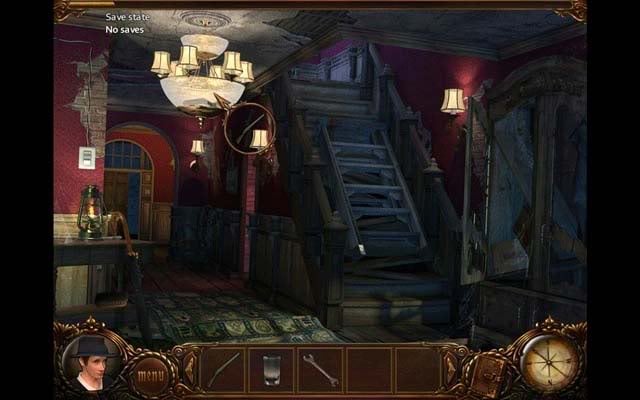
Hallway
- Now that the electricity is restored, click on the light switch on the left side of the screen to turn on the electricity in the chandelier: you’ll notice a silhouette inside the bowl.
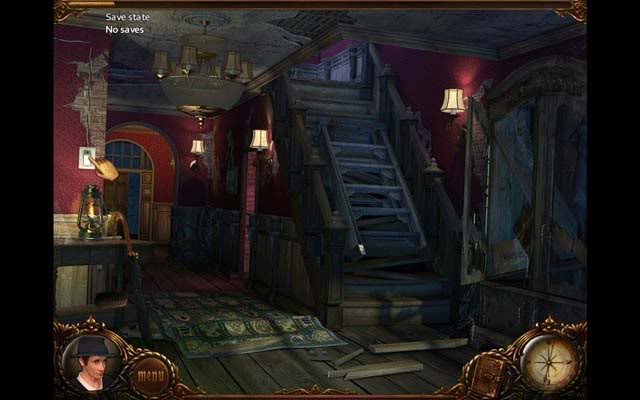
- Use the Shotgun on the chandelier bowl to break it. Pick up the Handle that falls to the floor and proceed to the Bathroom.
Bathroom
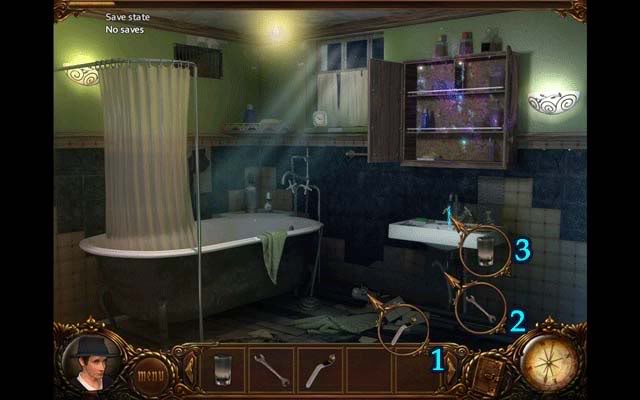
- Connect the Handle to the pipe valve to the left of under the sink. Click/Turn it to shut the water off.
- Use the Wrench on the damaged pipe under the sink to fix it.
- Click on the Handle to restore water flow.
- Click on the sink to make water flow, and use the Glass on the water to fill it.
- Once you’ve acquired the Glass of Water, click on the colorful fog in the cabinet to enter another hidden object level.
Hidden Object Area- The Bathroom (Part 2)
- Find all the objects listed at the bottom of the screen. Once you’ve found everything, the Aspirin will be added to your inventory. Exit the bathroom
Hallway
- Proceed up the stairs to the living room.
Living Room
- Use the Aspirin on Ty’s Grandfather, then use the Glass of Water on him. He will be revived, and a cutscene will ensue.
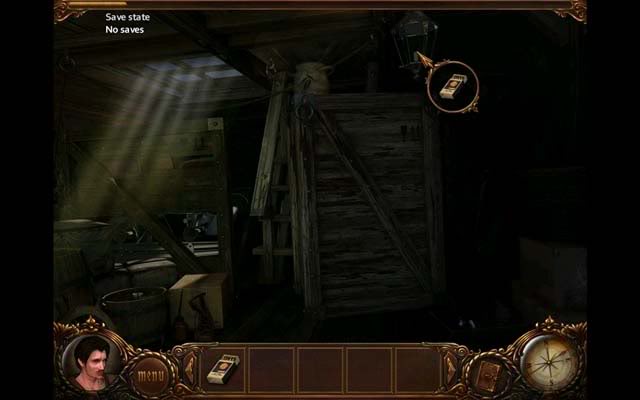
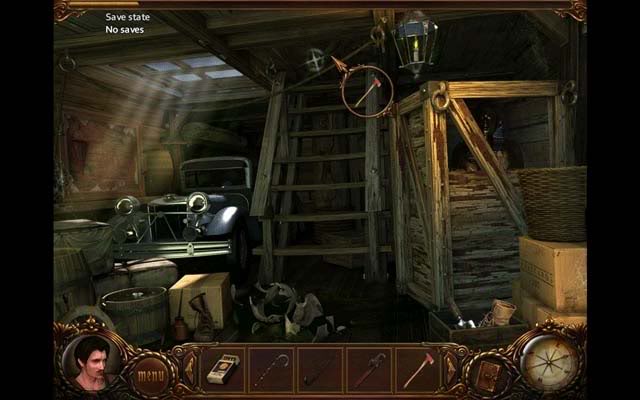
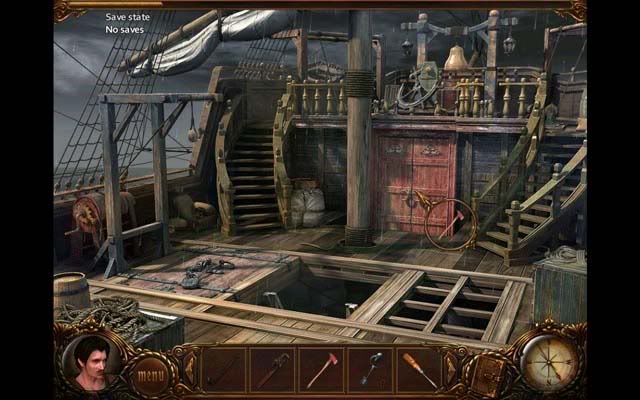
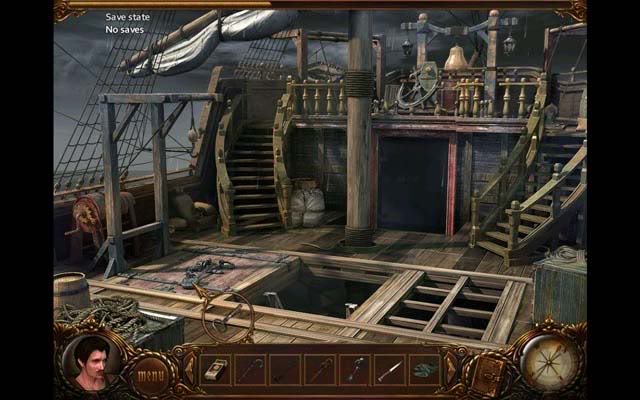
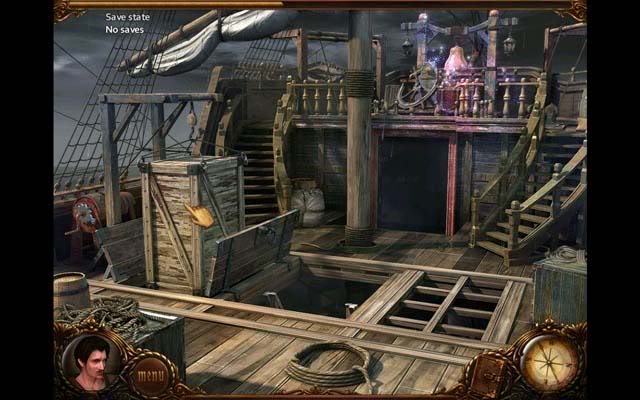
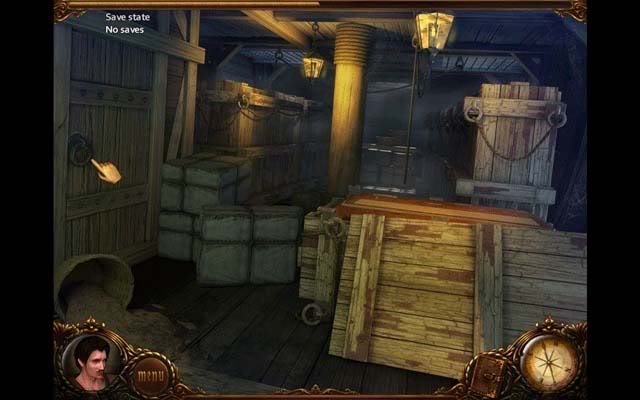
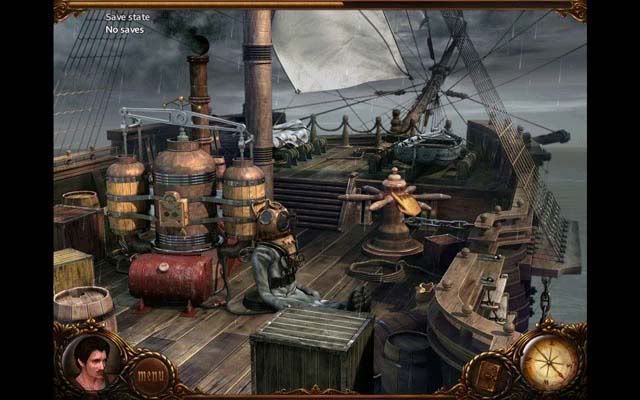
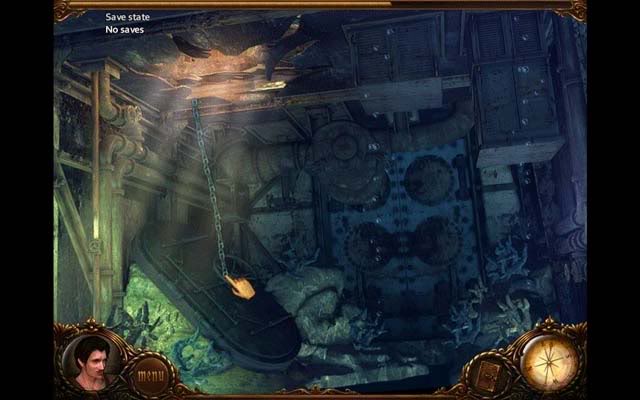
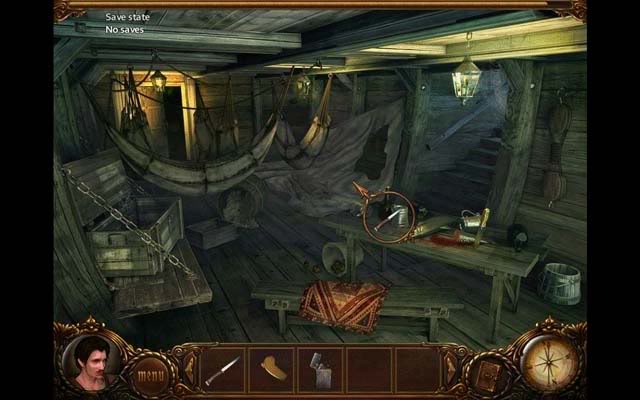
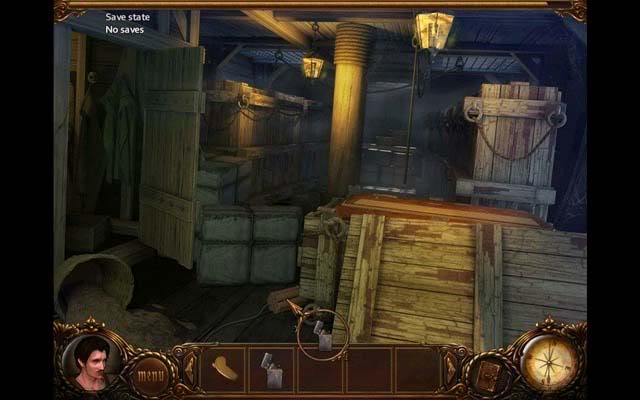
Cargo Hold
- Pick up the Matches on the left, sitting on top of the crates
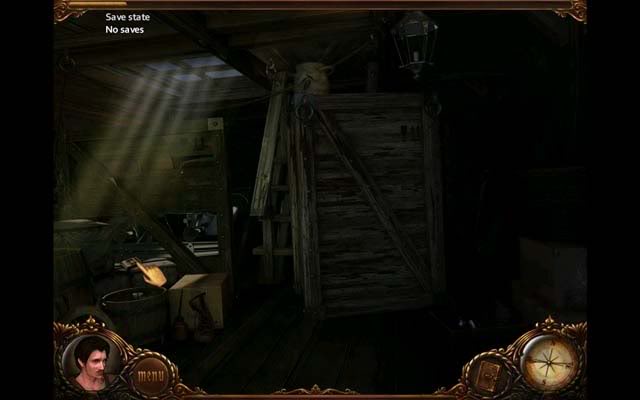
- Use the Matches on the unlit lantern near the top of the screen. This will light the candle and enable you to see.
- A colorful fog will appear. Click on it to enter a hidden object area.
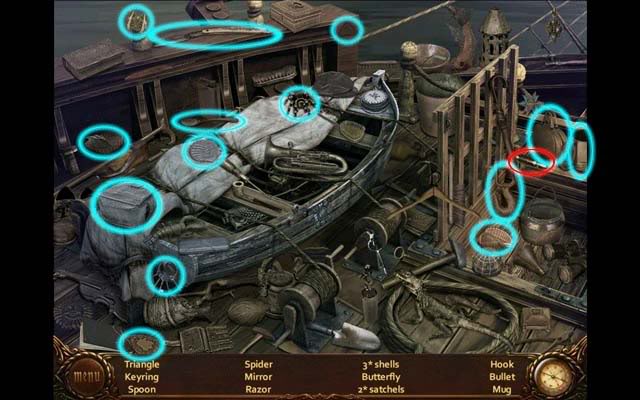
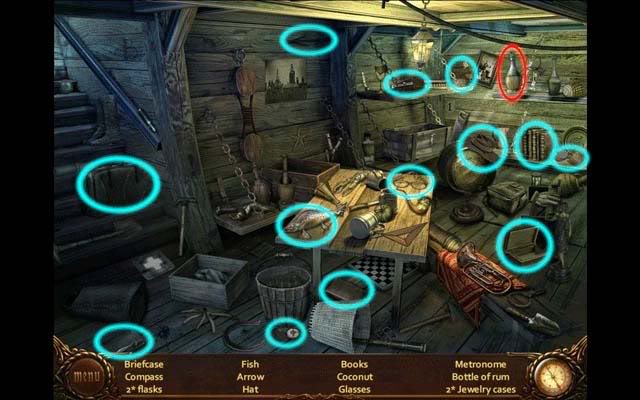
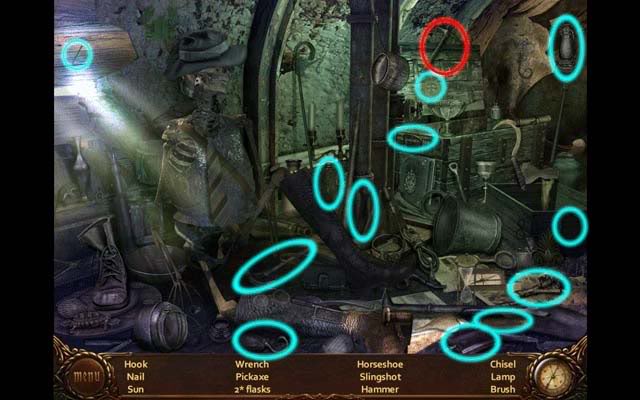
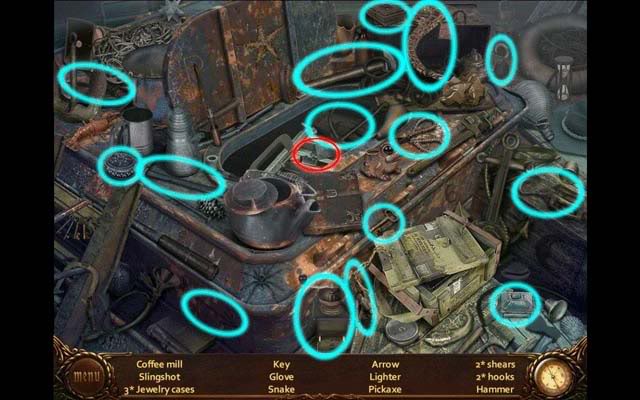
Hidden Object Area- Cargo Hold (Part 1)
- Find all the objects listed at the bottom of the screen. Once you’ve found everything, the Cane will be added to your inventory.
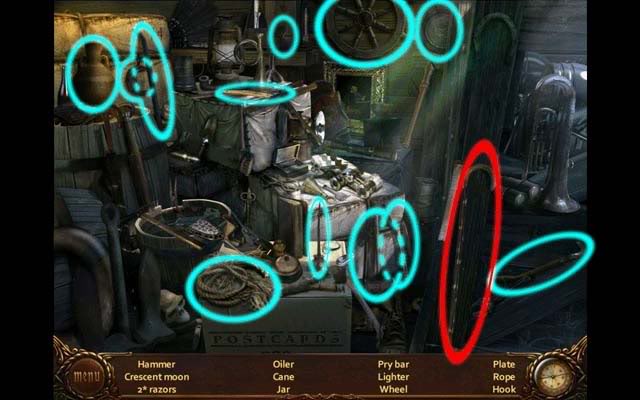
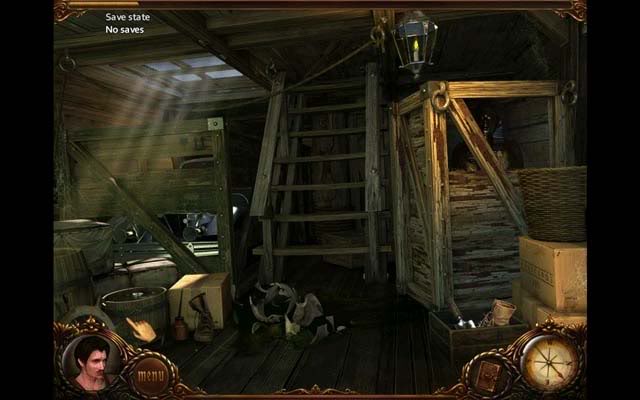
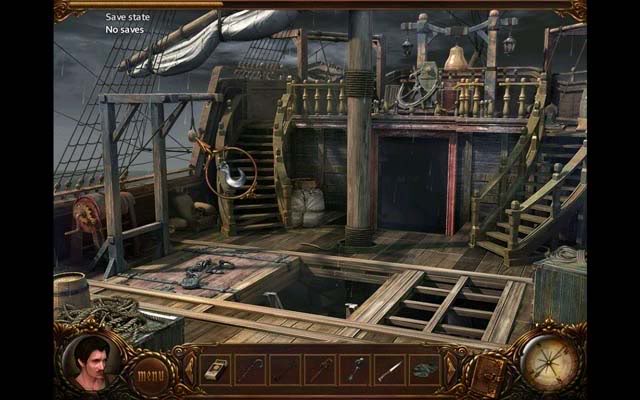
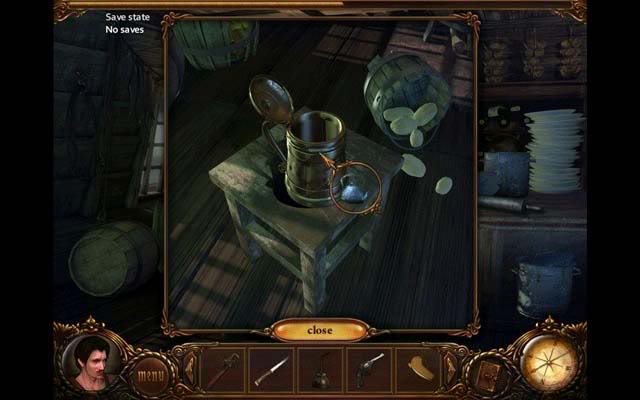
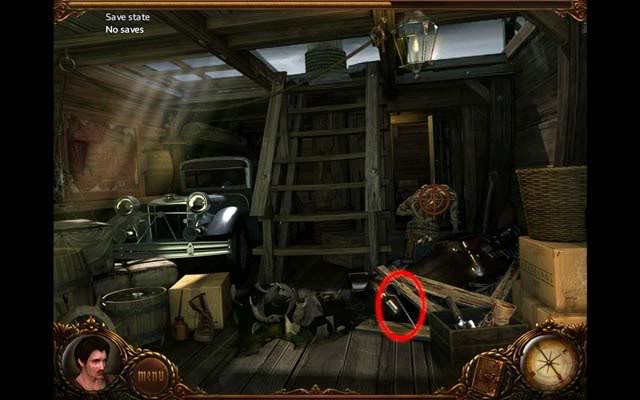
Cargo Hold
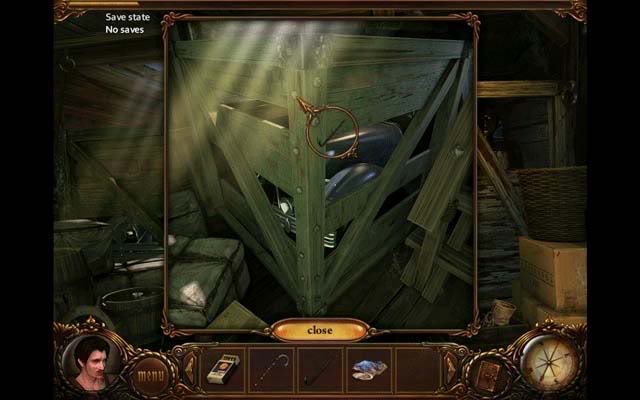
- Back in the main cargo hold area, use the Cane on the jar of oil sitting on top of the large crate to knock it down.
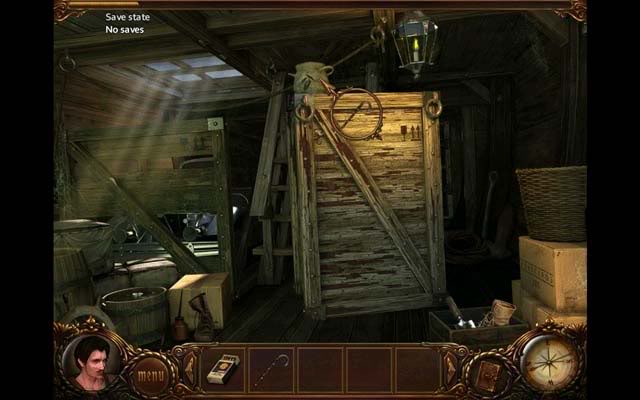
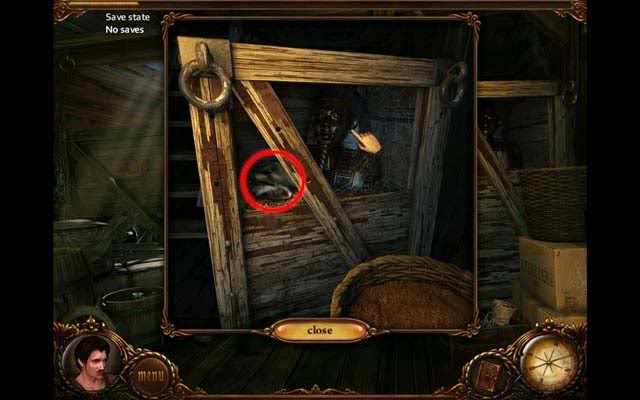
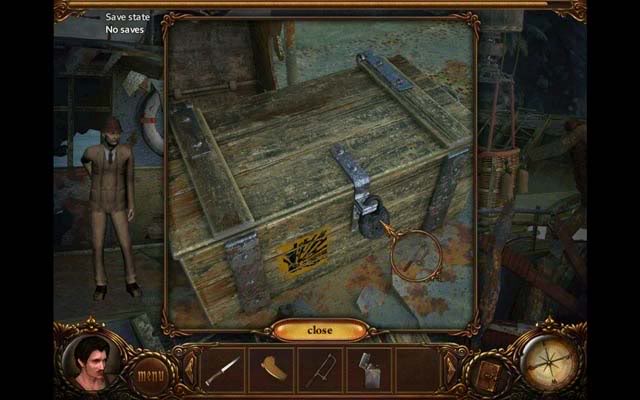
- Click on the large crate to move it out of the way
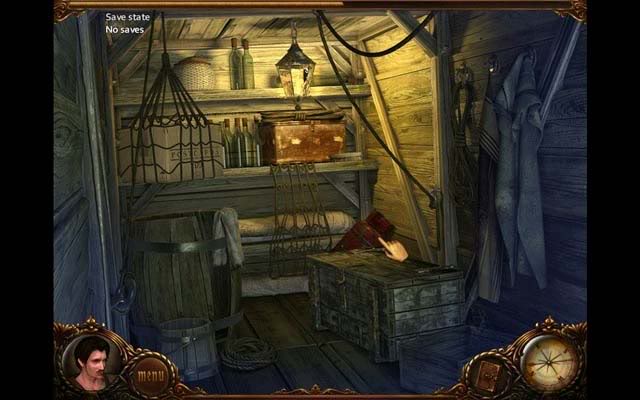
- Pick up the Crow Bar lying against the stair rails.

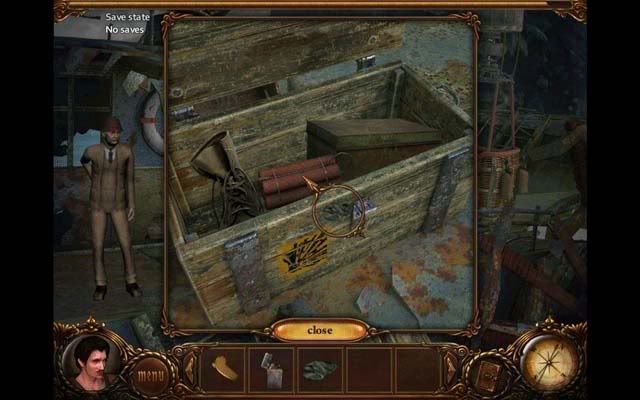
- Click on the large crate for a close-up view. Use the Crow Bar on the crate to open it and discover a Sarcophagus inside. Pick up the Rag inside the crate (on the left side).
- Use the Rag on the bucket filled with water on the floor to get the Wet Rag
 3
3
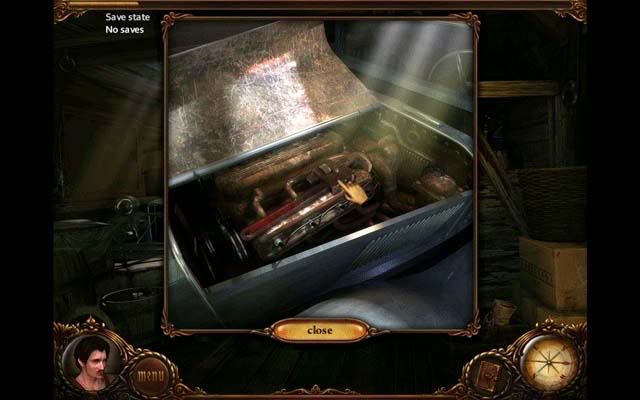
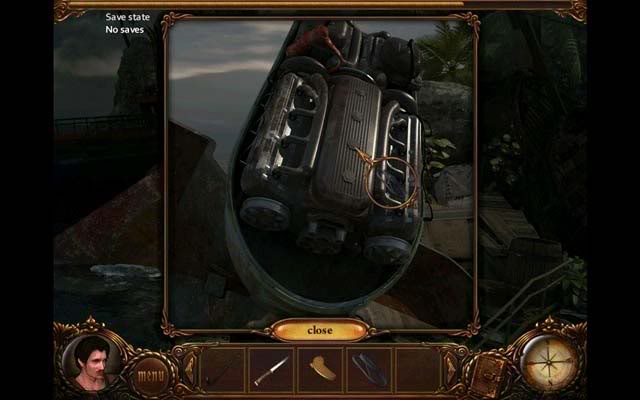
- Click on the large crate on the left. In the close-up, use the Crow Bar to open the box (by clicking multiple times) to reveal a car.
- Click on the car to enter another close-up. Click on the hood to reveal a Wrench. Pick it up and add it to your inventory.
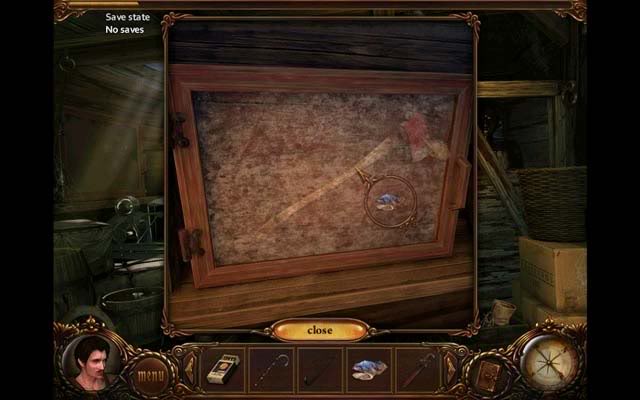
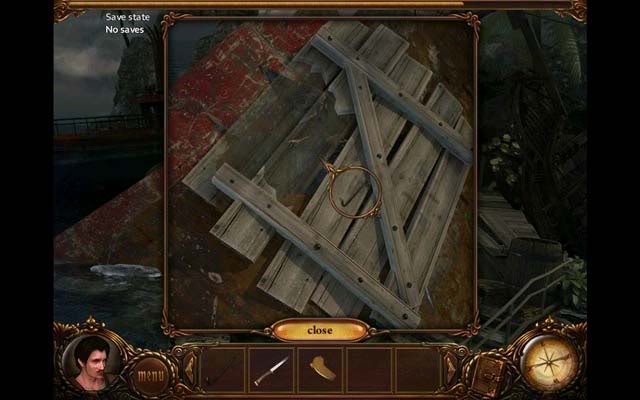
- After exiting the close-up, click on the box/case on the left. In the close-up, use the Wet Rag on the dusty class to reveal an axe inside. Use the Crow Bar (multiple times) to break the glass. Once it’s all gone, pick up the Axe and add it to your inventory. Exit the close-up.
- Use the Axe on the door hatch at the top of the stairs to open it. Once it’s open, exit to the deck.
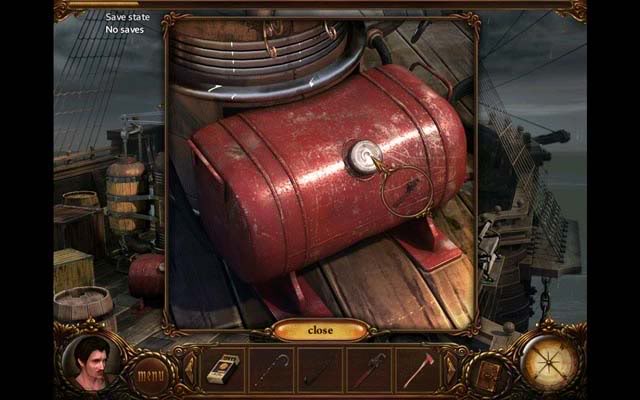
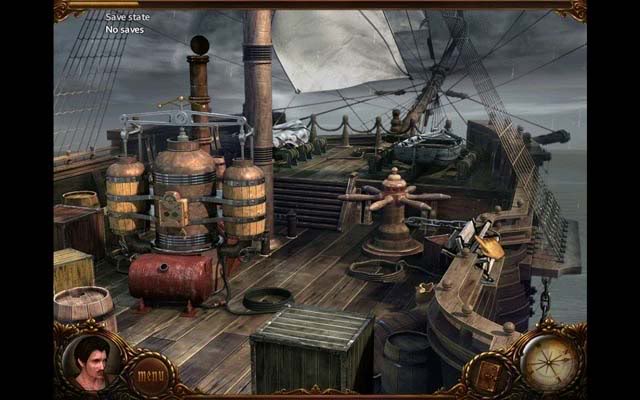
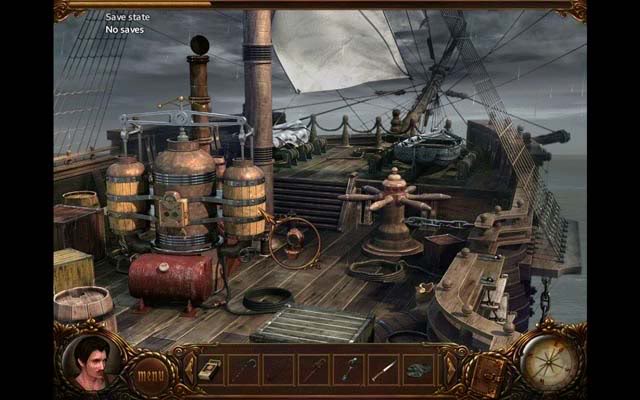
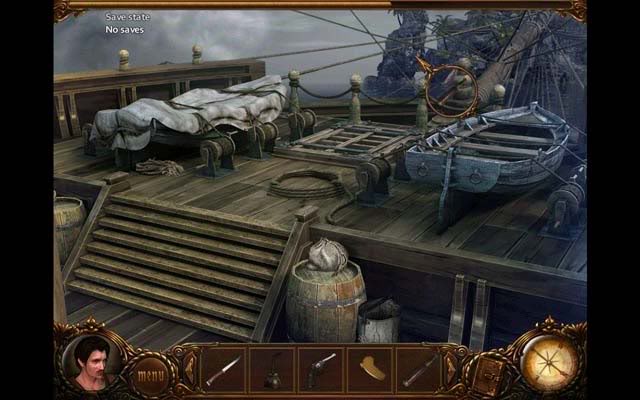
Deck
- Out on the deck, check the red propane tank on the left. Use the Wrench to unscrew the cap and exit for now.
- Click on the anchor wheel to discover the anchor is caught on something. Click on the wooden rope steps on the right to lower them and gain access to the area "Side of the Ship", but leave it alone for now and proceed to the bow.
Bow
- You’ll notice a colorful fog to the upper left on the bow. Click on it to enter another hidden object level.
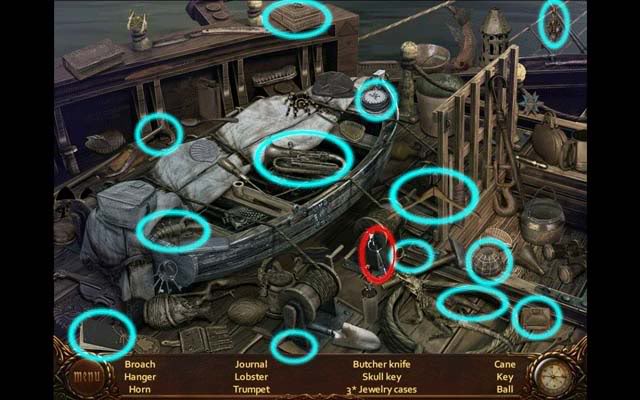
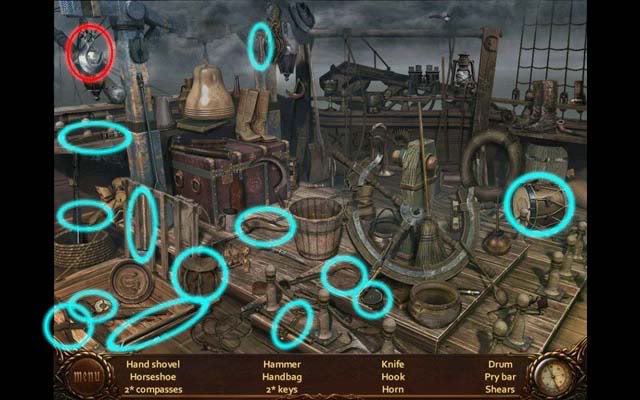
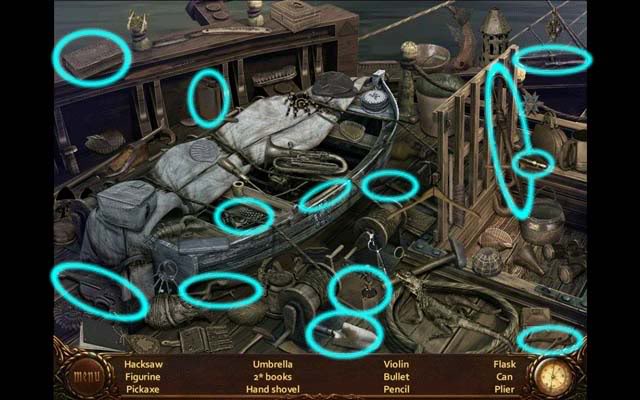
Hidden Object Area- Bow (Part 1)
- Find all the objects listed at the bottom of the screen. Once you’ve found everything, the Skull Key will be added to your inventory.
Bow
- Exit to the deck.
Deck
- Proceed to stern
Stern
- Upon accessing the stern, you’ll notice a colorful fog near the top of the screen. Click on it to enter another hidden object level.
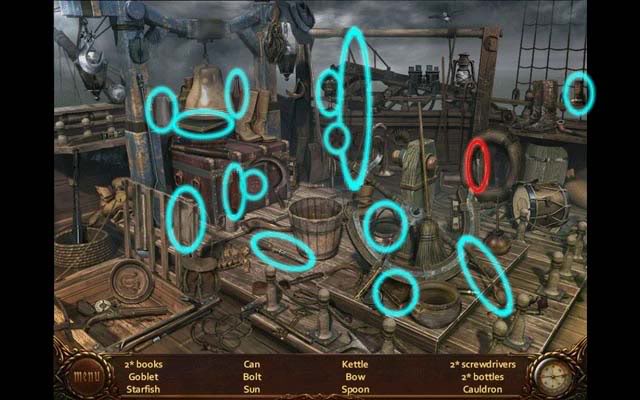
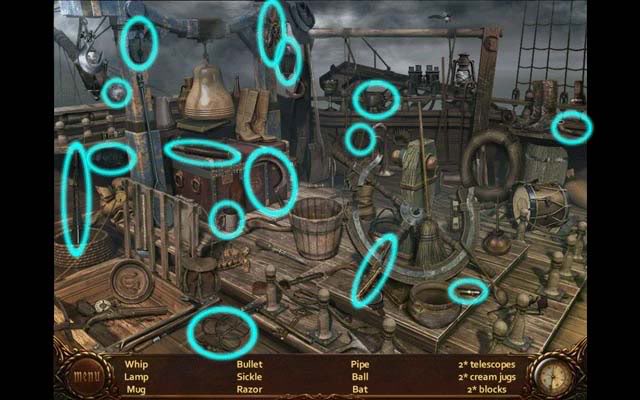
Hidden Object Area- Stern (Part 1)
- Find all the objects listed at the bottom of the screen. Once you’ve found everything, the Screwdriver will be added to your inventory.
Stern
- Use the Axe on the red doors to access the corridor.
Corridor
- Click on the door at the far end of the hall to gain access to the main cabin area.
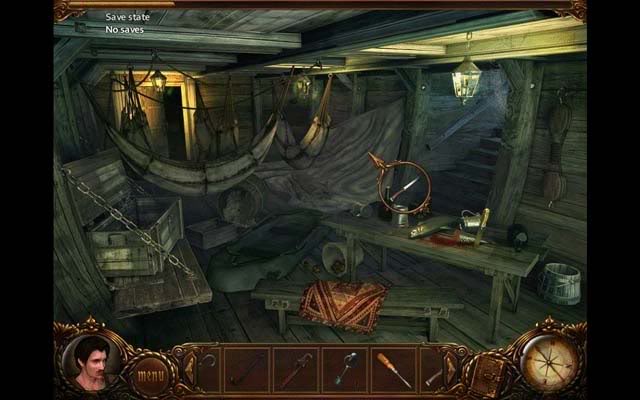
Main Cabin
- Down in the main cabin, click on the table with the colorful fog to enter another hidden object level.
Hidden Object Area- Main Cabin (Part 1)
- Find all the objects listed at the bottom of the screen. Once you’ve found everything, the Knife will be added to your inventory.

Main Cabin
- Use the Knife on the tarp canvas to cut a piece off and add Canvas to your inventory. Proceed back to the corridor.
Corridor
- Click on the ornate door on the left to open it and enter the captain’s cabin.
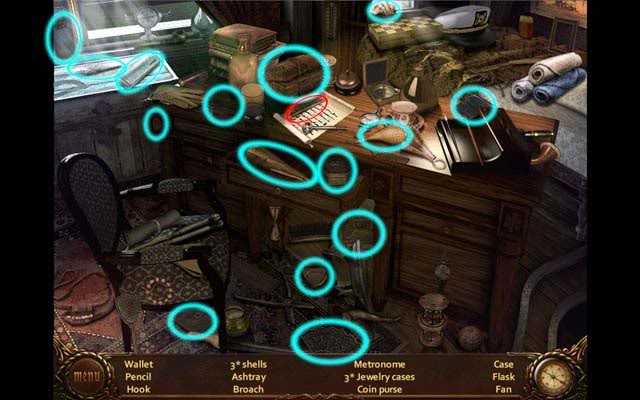
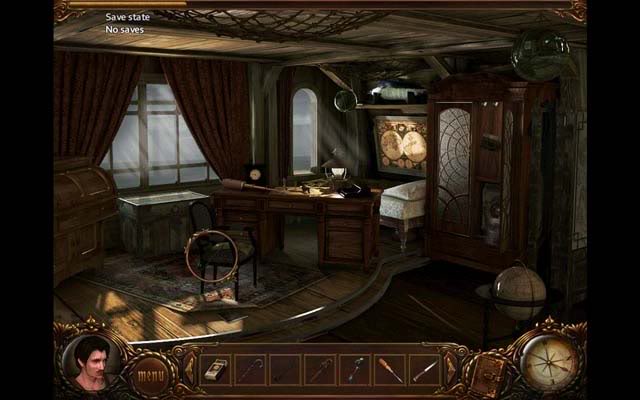
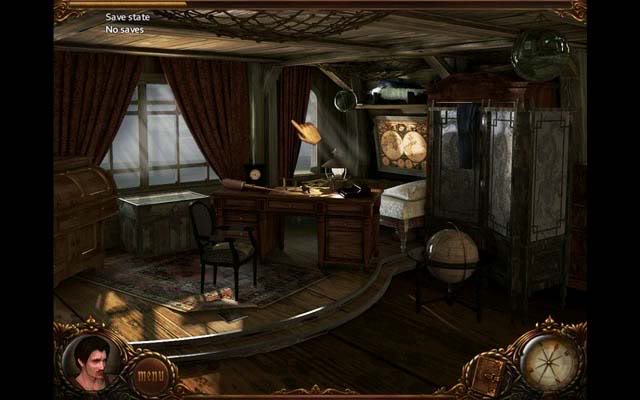
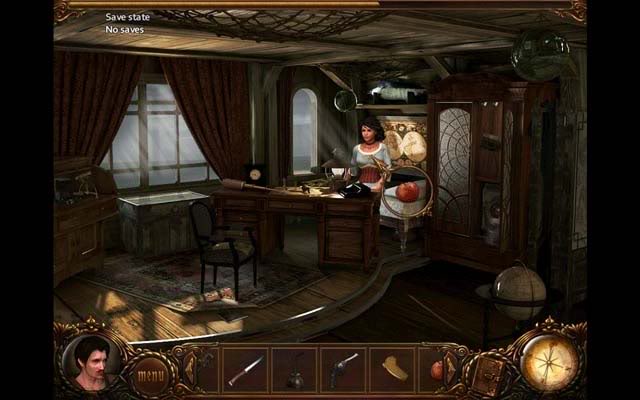
Captain’s Cabin
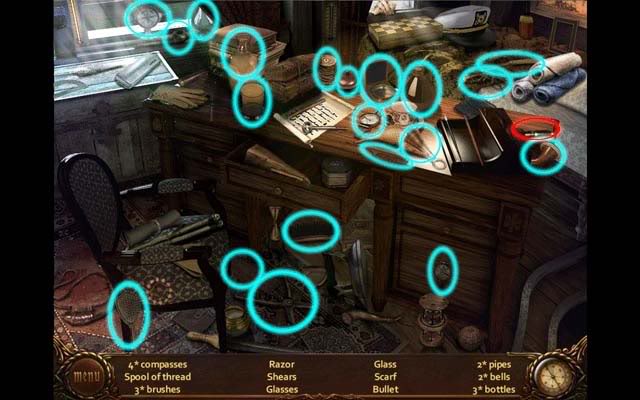
- After a brief hallucination, click on the colorful fog on the desk to enter another hidden object level.
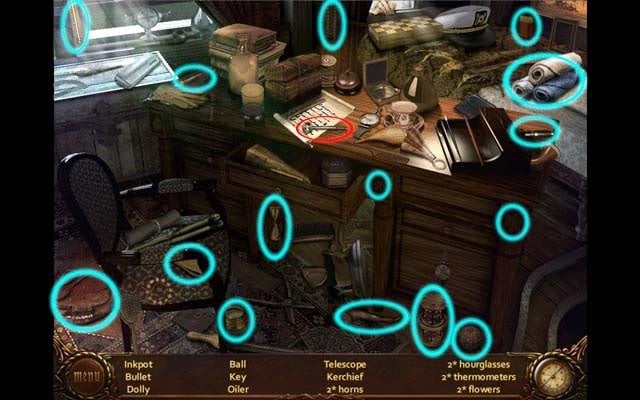
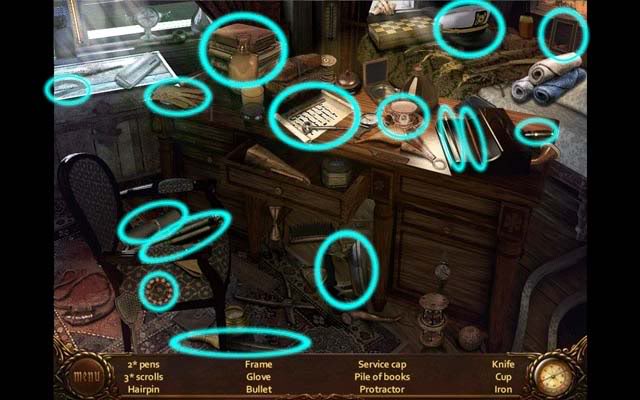
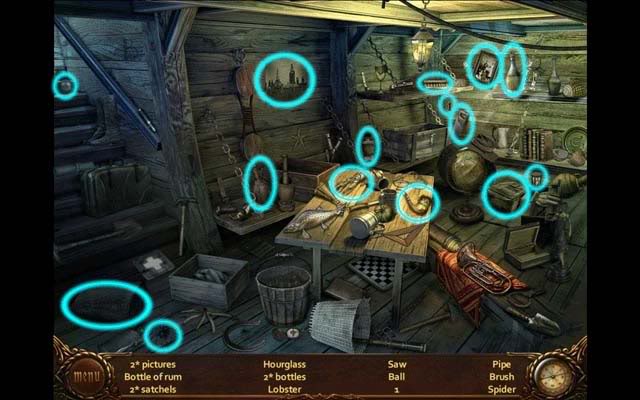
Hidden Object Area- Captain’s Cabin (Part 1)
- Find all the objects listed at the bottom of the screen. Once you’ve found everything, the Pencil will be added to your inventory.
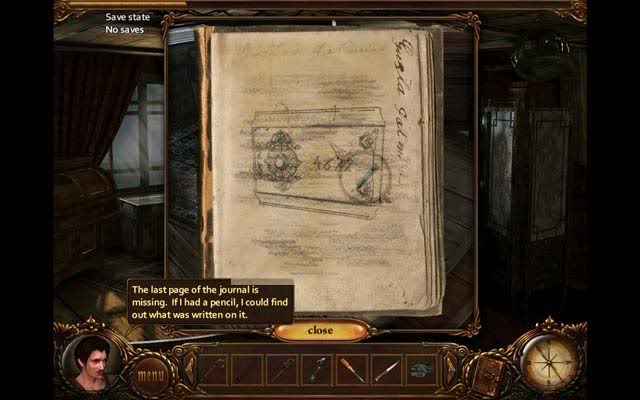
Captain’s Cabin
- Click on the corner of the rug closest to the bottom of the screen: this will open a close-up window.

- In the close-up, click on the corner of the rug again to overturn it, revealing a journal. Click on it to enter another close-up of the journal page.
- Use the Pencil on the journal page to reveal a safe combination: 4-6-7-9. Exit the close-up.
- Click on the globe on the right, and then on the soji screen to reveal a bureau. Click on it to open it and click once again to enter a close-up inside.

- Click on the Diving Suit to add it to your inventory.
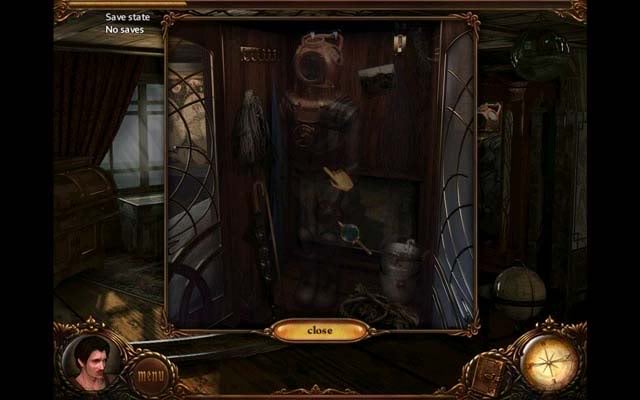
- Behind the diving suit is a safe: click on it until you enter a close-up where you can enter the combination. Enter the combination 4-6-7-9 to open the safe.
- Inside the safe, there’s a gun with empty chambers. Don’t worry about this now: we’ll come back to the gun later. Click on the letter under the gun to find that there’s a conspiracy afoot. Exit the letter and pick up the Protector at the top right corner (the metallic fuse) to add it to your inventory, and exit the safe/bureau.
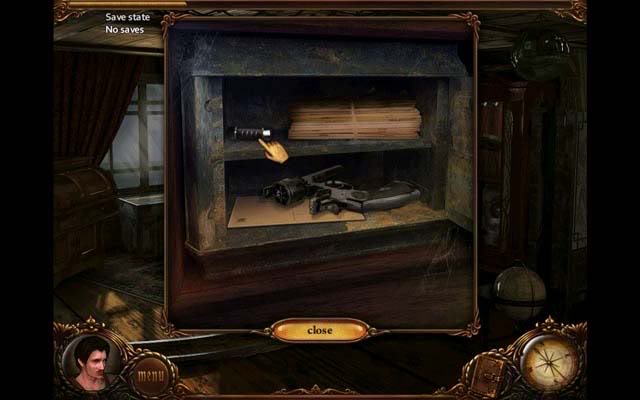
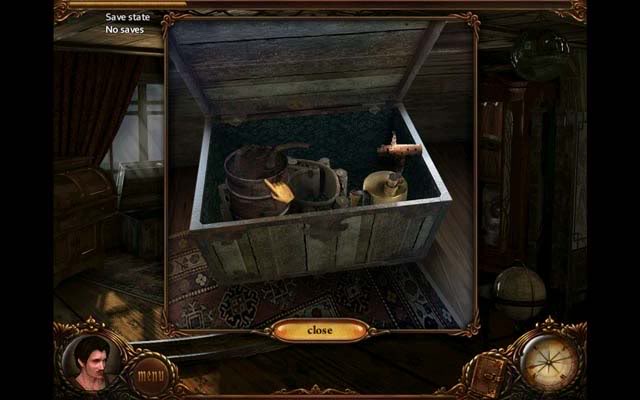
- Back in the main area, use the Crow Bar on the wooden chest under the window to open it. Click on it to look inside. Pick up the Fuel Can inside on the left to add it to your inventory.
- Exit the captain’s cabin to the corridor. Continue down into the main cabin and enter the galley.
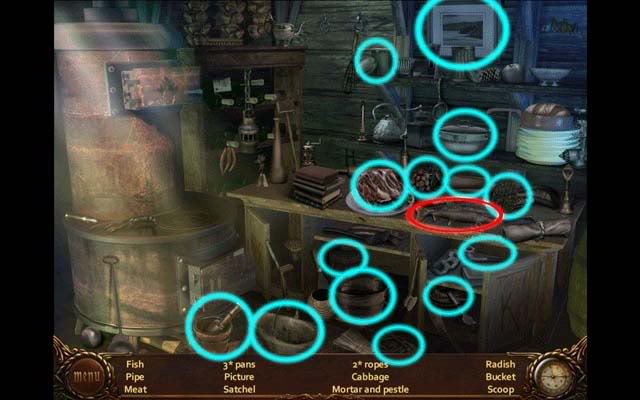
Galley
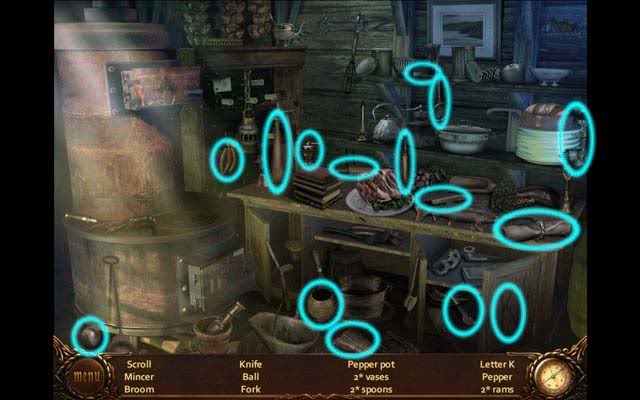
- You’ll notice a colorful fog on the right. Click on it to enter another hidden object level.
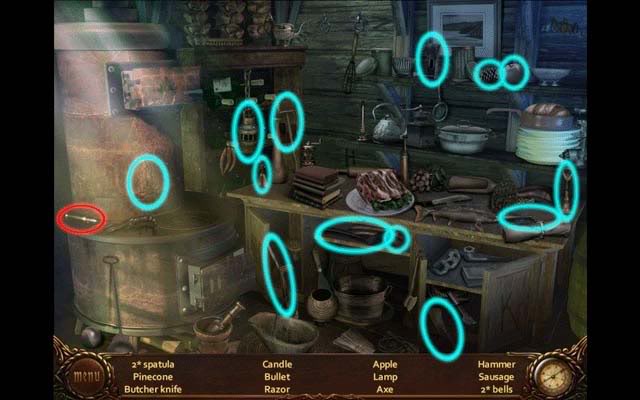
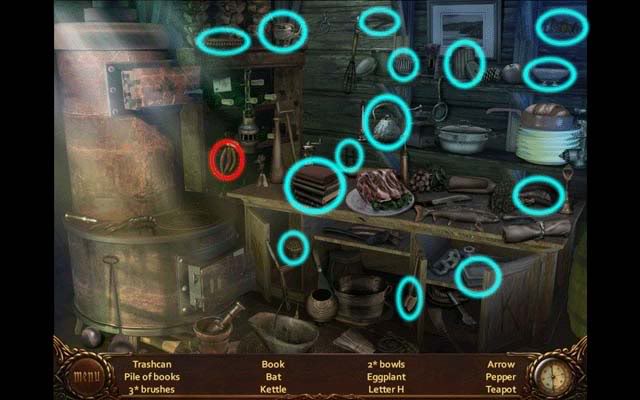
Hidden Object Area- Galley (Part 1)
- Find all the objects listed at the bottom of the screen. Once you’ve found everything, the Fish will be added to your inventory.
- Upon completing the level, exit the galley into the main cabin, enter the corridor and proceed back into the captain’s cabin.
Captain’s Cabin
- Click on the draped curtain at the far corner of the room to reveal another open window. Proceed.
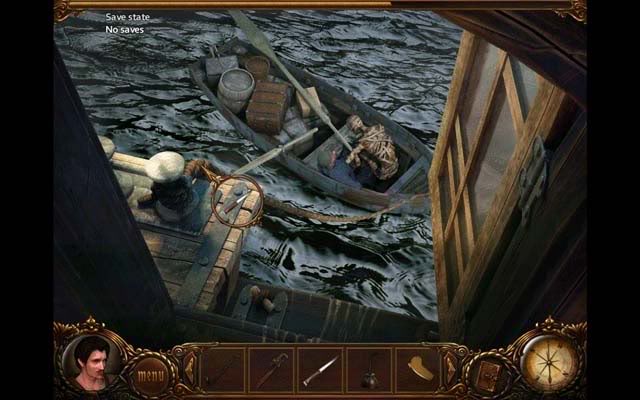
Window
- There’s a boat with a dead sailor down below, but an angry gull prevents you from getting to it. Use the Fish on the gull to make it move and continue down to the boat.
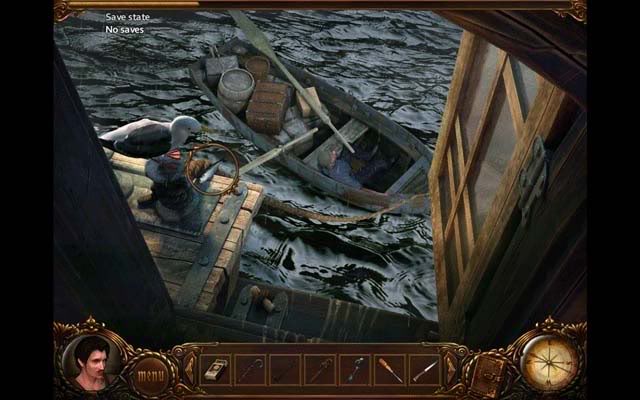
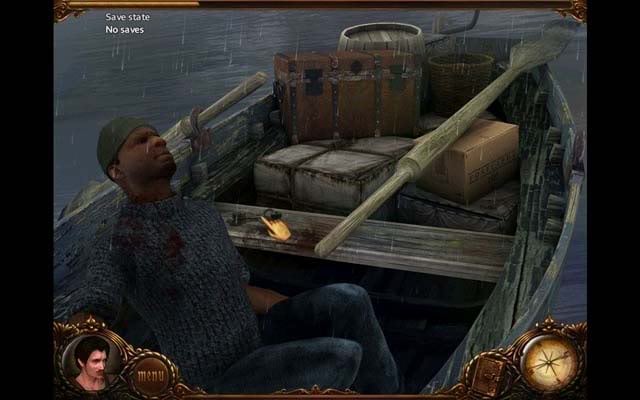
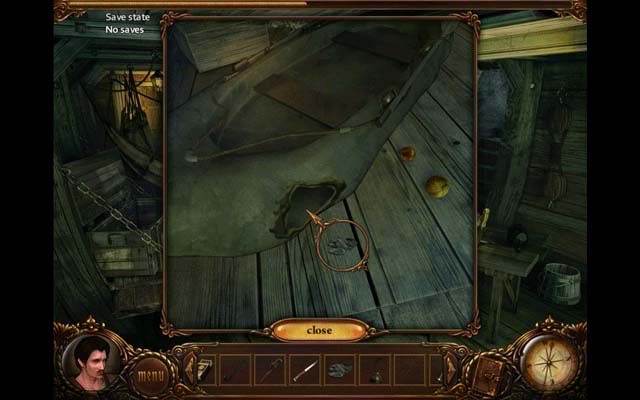
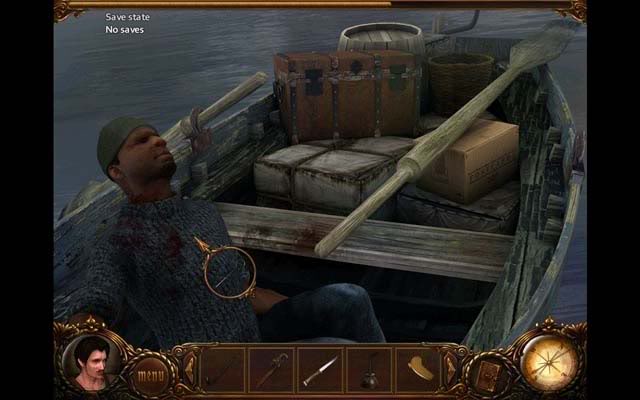
Boat
- You’ll have another hallucination in the boat of the sailor being killed. Pick up the Skull Key sitting to the sailor’s left and exit the boat.
- Proceed from the boat to the window, out of the captain’s cabin into the corridor, and out onto the stern. Continue down into the cargo hold.
Cargo Hold
- The colorful fog has returned. Click on it to enter another hidden object level.
Hidden Object Area- Cargo Hold (Part 2)
- Find all the objects listed at the bottom of the screen. Once you’ve found everything, the Funnel will be added to your inventory.
- Exit the cargo hold onto the deck.
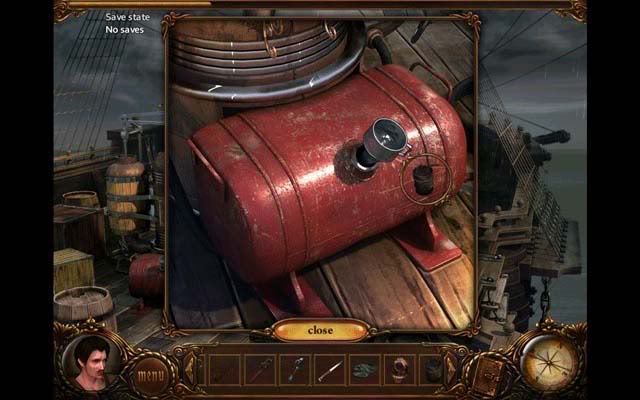
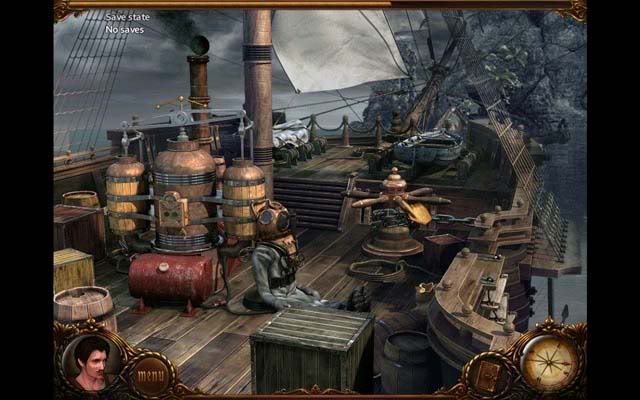
Deck
- On the deck, use the Diving Suit on the compressor (by clicking on the rightmost barrel).
- Click on the red fuel tank where we were before: use the Funnel on the open hole (where you previously used the Wrench). Next, use the Fuel Can on the Funnel to successfully add fuel to the previously empty tank. Exit the close-up.
- Click on the compressor controls: they’re not working. Use the Screwdriver to undo each of the screws and open the control panel. Use the Protector on the bare electricity. Finally, click on the green button to turn it on. You can now dive!
- Move from the deck to the side of the ship.
Side of the Ship
- Proceed underwater.
Underwater
- Proceed to the bottom
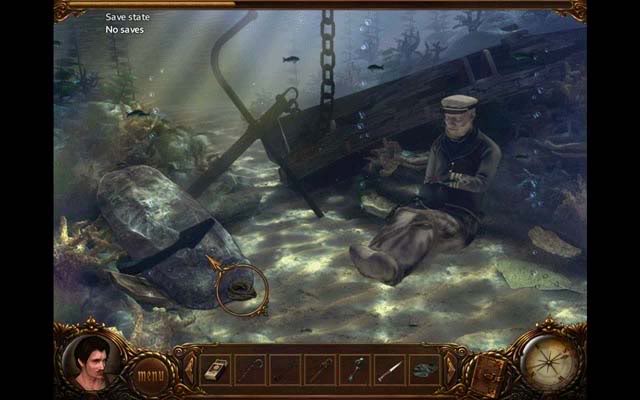
The Bottom
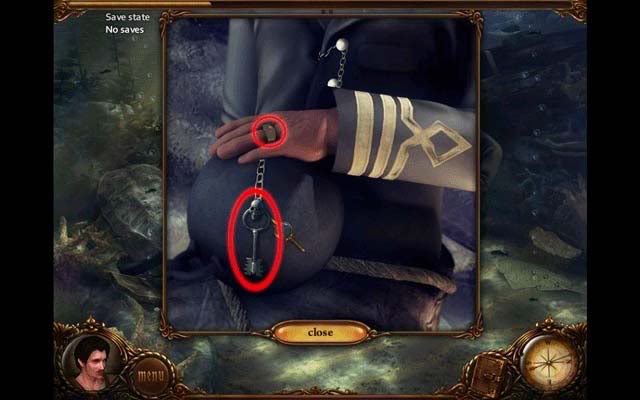
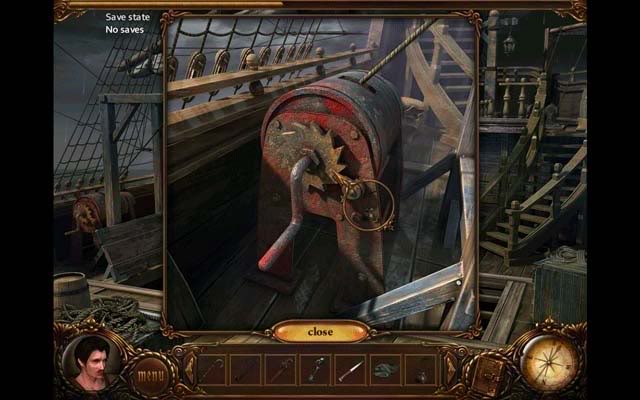
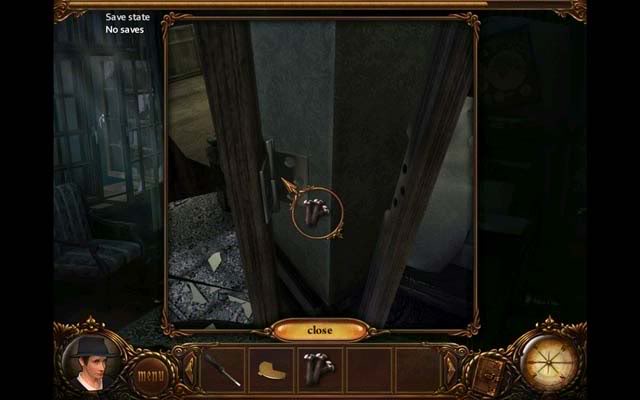
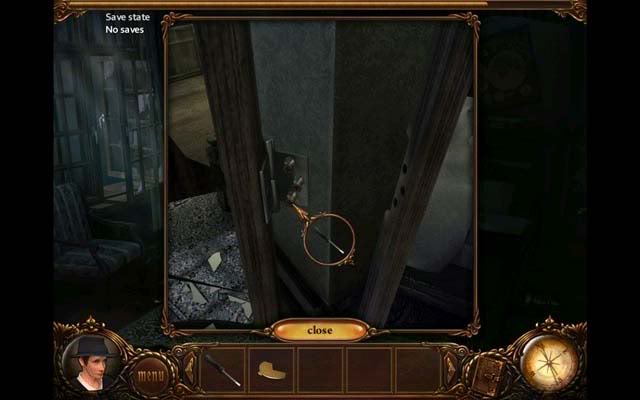
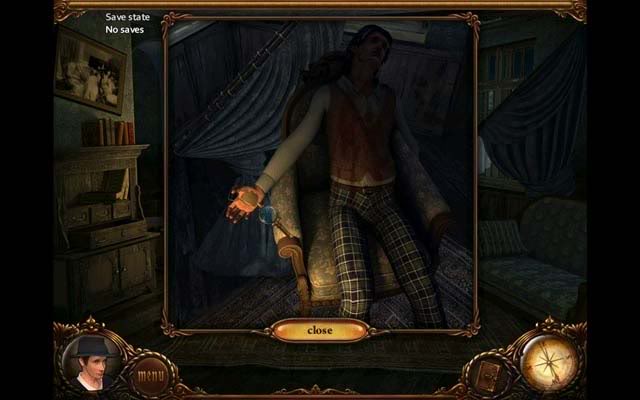
- The bottom will greet you with a disturbing sight: the captain has drowned. Click on him to enter a close-up of his hand.
- In the close-up, click on and add to your inventory both the Skull Key and the captain’s Ring. Exit the close-up and proceed all the way back up to the deck.
Deck
- Proceed to the stern
Stern
- Upon reaching the stern, you’ll notice the colorful fog has returned. Click on it to enter another hidden object level.
Hidden Object Area- Stern (Part 2)
- Find all the objects listed at the bottom of the screen. Once you’ve found everything, the Hook will be added to your inventory.
Stern
- Upon completing the hidden object area, use the Hook on the pulley: you’ll find it on the gallow-like structure with the rope on the left.
- Proceed down to the cargo hold.
Cargo Hold
- Back in the cargo hold, the colorful fog has appeared. Click on it to enter another hidden object level.
Hidden Object Area- Cargo Hold (Part 3)
- Find all the objects listed at the bottom of the screen. Once you’ve found everything, the Rope will be added to your inventory.
- Exit the cargo hold and proceed back to the deck.
Deck
- Go to the side of the ship to underwater, and proceed to the bottom
The Bottom
- Use the Rope on the rock pinning the anchor and return to the deck.
Deck
- Return to the stern and proceed to the cargo hold.
Cargo Hold
- The colorful fog has appeared once again. Click on it to enter another hidden object area.
Hidden Object Area- Cargo Hold (Part 4)
- Find all the objects listed at the bottom of the screen. Once you’ve found everything, the Bullet will be added to your inventory.

- Exit the cargo hold to the stern, enter the corridor and proceed to the captain’s cabin.
Captain’s Cabin
- There’s a colorful fog on the desk. Click on it to enter another hidden object level.
Hidden Object Area- Captain’s Cabin (Part 2)
- Find all the objects listed at the bottom of the screen. Once you’ve found everything, the Key will be added to your inventory.
- Exit the captain’s cabin into the corridor, down into the main cabin, and into the galley.
Galley
- Click on the colorful fog in the right hand corner of the screen to enter another hidden object area.
Hidden Object Area- Galley (Part 2)
- Find all the objects listed at the bottom of the screen. Once you’ve found everything, the Bullet will be added to your inventory.
- Exit the galley and return to the deck.
Deck
- Use the Key on the lock to the left of the entrance to the cargo hold.
- Proceed to the cargo hold.
Cargo Hold
- Click on the large crate with the sarcophagus inside to move it under the open cargo hatch. Use the Cane to help the hook latch onto the crate and exit.
- Proceed to the captain’s cabin.
Captain’s Cabin
- A familiar colorful fog is covering the desk. Click on it to enter another hidden object area.
Hidden Object Area- Captain’s Cabin (Part 3)
- Find all the objects listed at the bottom of the screen. Once you’ve found everything, the Bullet will be added to your inventory.
Captain’s Cabin
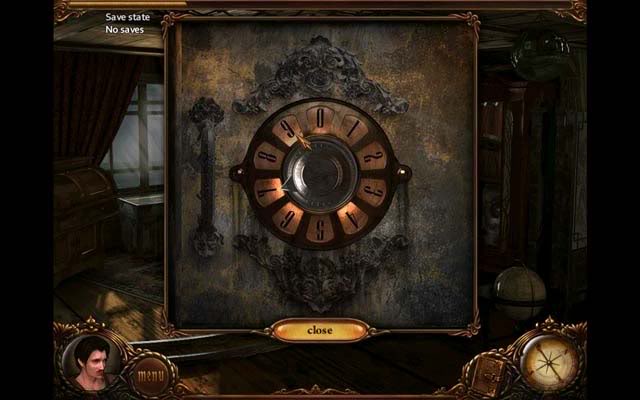
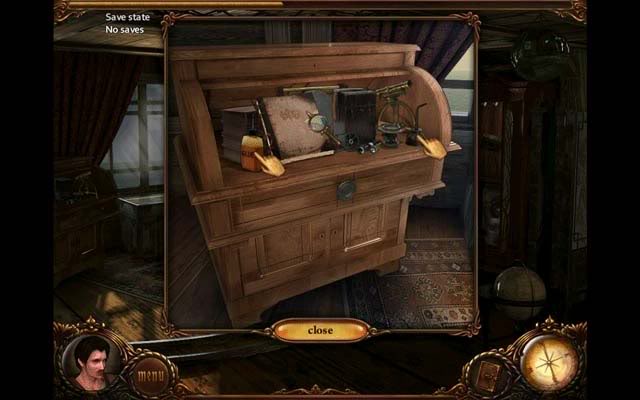
- After completing the hidden object area, click on the roll-top desk on the far left side of the screen to enter a close-up.
- In the close-up, use the Ring on the lock to open the desk.

- The lock combination is as follows: top right, bottom left, bottom right, top left. See the picture below:
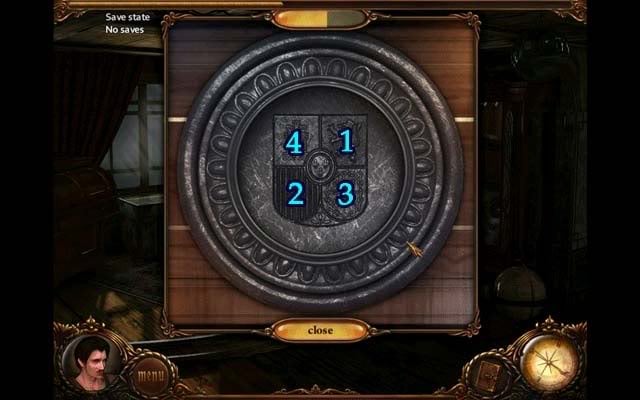
- On the desk, pick up the Oil and the Glue, both on either far side of the desk. After doing this, click on the journal to find a haunting entry: the captain committed suicide.
- Return to the stern.
Stern
- Click on the crank controlling the rope and pulley on the far left side of the screen (red in color) to enter a close-up.
- Use the Oil on the rig until it works again. Exit the close-up.
- Click the crank to pull the large crate up from the cargo hold.
- There’s a colorful fog that’s reappeared in this area as well. Click on it to enter another hidden object area.
Hidden Object Area- Stern (Part 3)
- Find all the objects listed at the bottom of the screen. Once you’ve found everything, the Bullet will be added to your inventory.

- Proceed back to the bow.
Bow
- Click on the colorful fog to enter another hidden object level.
Hidden Object Area- Bow (Part 2)
- Find all the objects listed at the bottom of the screen. Once you’ve found everything, the Bullet will be added to your inventory.
- Proceed down to the main cabin.
Main Cabin
- Down in the main cabin, click on the life raft on the floor to enter a close-up.
- Use the Glue on the hole in the raft.
- Use the Piece of Tarp on the hole to repair the raft. Click on it a couple times to add Raft to your inventory.
- Backtrack to the deck, down the side off the boat to the bottom (underwater).
The Bottom
- Use the Raft on the rock you tied the rope on earlier.

- There’s nothing more to do here at the moment, so go back to the main cabin.
Main Cabin
- A colorful fog has appeared down here again. Click on it to enter a hidden object level.
Hidden Object Area- Main Cabin (Part 2)
- Find all the objects listed at the bottom of the screen. Once you’ve found everything, the Bullet will be added to your inventory.
- Time to return to the captain’s cabin.
Captain’s Cabin
- Click on the bureau to access the safe again. Once inside the safe, click on the gun.
- Use all six Bullets on the gun. Once it’s fully loaded, click it again until Gun is added to your inventory.
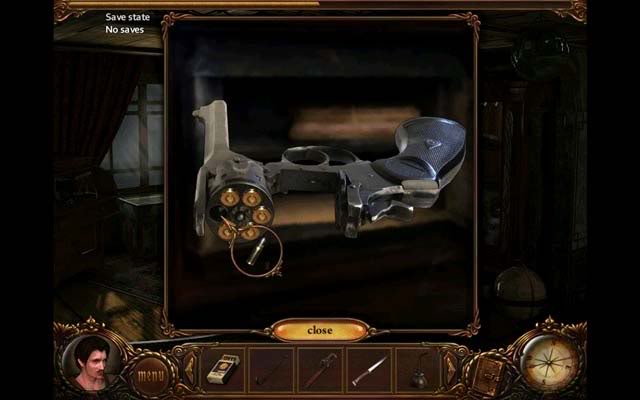
- Upon adding the Gun to your inventory, the last Skull Key will appear. Pick it up and add it to your inventory as well.
- Proceed to the cargo hold.
Cargo Hold
- Proceed into the passage to the second cargo hold
Passage to the Second Cargo Hold
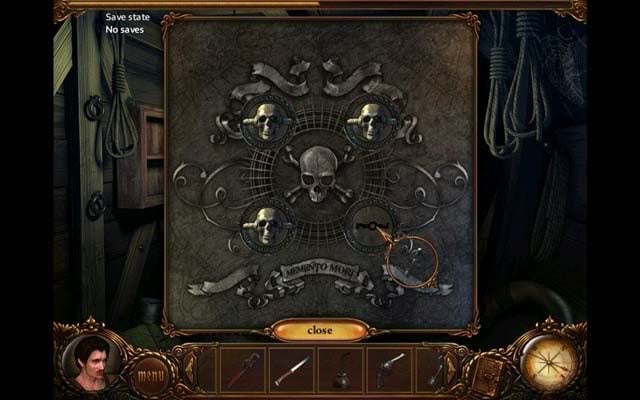
- Click on the square metal area of the door
- Use all four Skull Keys on the various holes to activate the puzzle. Your goal is to complete and reassemble the puzzle/insignia to open the door. Clicking on a skull key will rotate four pieces in their respective corners. The puzzle is quite difficult as it’s easy to get pieces mixed up. However, luckily you can skip the puzzle by clicking the "Skip" puzzle at the top after a period of time. This is probably the best solution to get into the next area seeing the complexity and random nature of the puzzle.
Second Cargo Hold
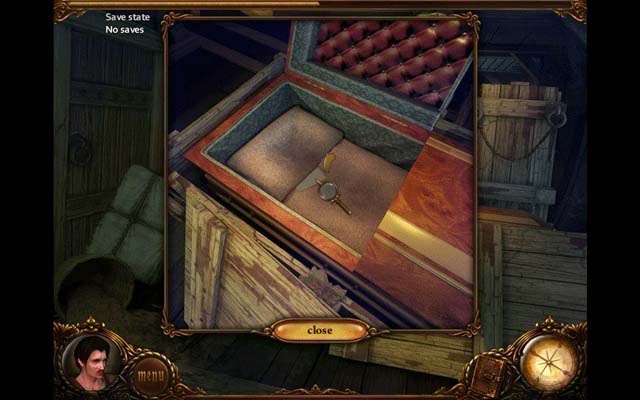
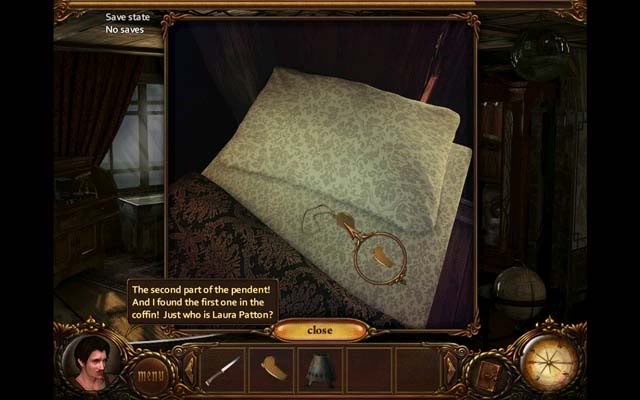
- Once inside, examine the inside of the closest crate. The close-up reveals what seems to be a coffin. Click on it to open it.

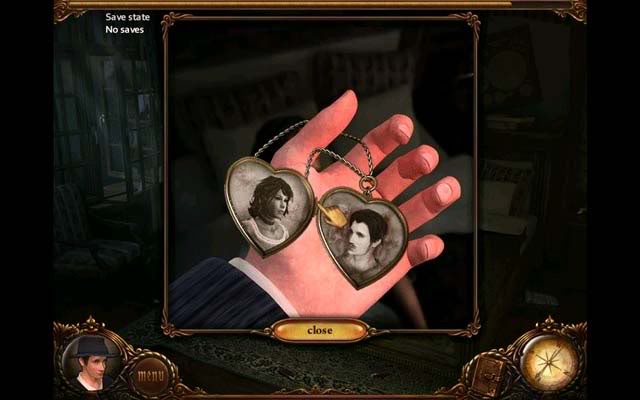
- Inside, click on the objects slightly protruding from the bottom of the pillow. Click on the piece of paper to reveal a slightly disturbing love note. Click on the gold object to add Pendant Fragment to your inventory. Exit the close-up.
- Click on the bound packages on the left to clear the doorway and enter the closet.
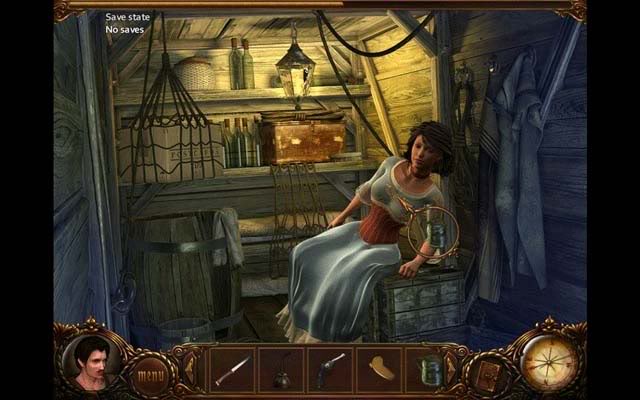
Closet
- Inside the closet is an unconscious girl- so you’re not alone on this ship after all! She needs to be revived. Exit the closet and backtrack to the main cabin.
Main Cabin
- Click on the colorful fog to enter a hidden object level.
Hidden Object Area- Main Cabin (Part 3)
- Find all the objects listed at the bottom of the screen. Once you’ve found everything, the Rum will be added to your inventory.
- Upon completing the level and acquiring the Rum, continue to the galley.
Galley
- Click on the colorful fog to enter another hidden object level.
Hidden Object Area- Galley (Part 3)
- Find all the objects listed at the bottom of the screen. Once you’ve found everything, the Peppers will be added to your inventory.
Galley
- Back in the main galley area, click on the Wood underneath the oven/stove to add it to your inventory.
- Click on the Kettle on the right side of the screen on the counter to add it to your inventory.
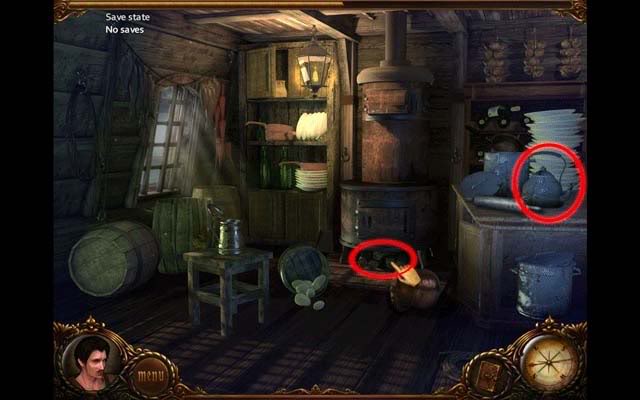
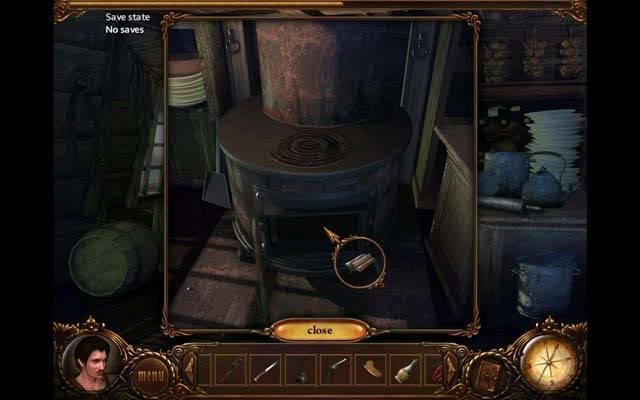
- Click on the stove/oven to open a close-up window. Click on the oven door to open it.
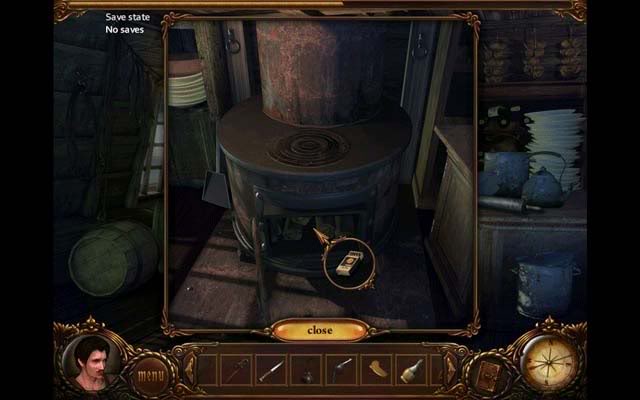
- Use the Wood on the inside of the oven, then use the Matches on the wood.
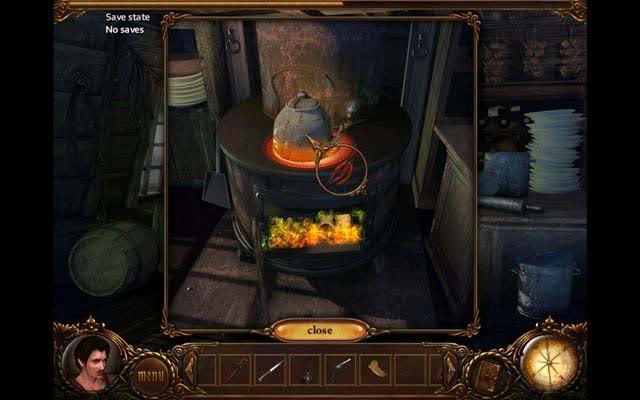
- Use the Kettle on the heated area on the stove.
- Use the Rum and the Peppers on the Kettle to finish your brew. Click on the Kettle to pick it up and add it to your inventory.

- Select the mug sitting on the small table to the left of the oven. Click on it for a close-up, and use the Kettle on it to acquire Drink.
- Return to the closet down in the second cargo hold.
Closet
- Use the Drink on the woman to revive her.
Captain’s Cabin
- Once the woman, Laura, is revived, backtrack to the closet where you found her.
Closet
- Back in the closet, pick up the red Air Canister partially hidden behind the box on which she was sitting: now we can inflate the raft!
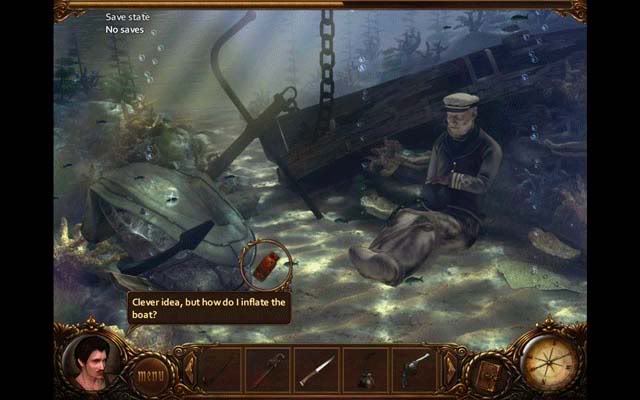
- Proceed to the bottom underwater.
The Bottom
- Use the Air Canister on the raft tied to the rock to inflate it: you can now move the anchor.
- Crawl back up to the deck.
Deck
- Click on the anchor wheel to bring the anchor back up from the water.
- After doing this, a cutscene will ensue and you’ll be transported back to Grandfather’s house.
Part 3- Restoring the Music Box (Grandfather’s House)
After a cutscene, Grandfather will ask for you to find a certain music box. He would also like a loaded gun. Proceed from the living room to the bathroom.
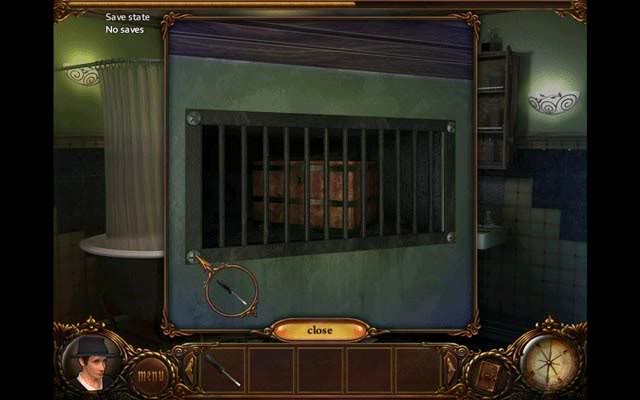
Bathroom
- Click on the grate/air duct above the bathtub. Inside is the music box, but there’s no way to open it. Proceed to the porch.
The Porch
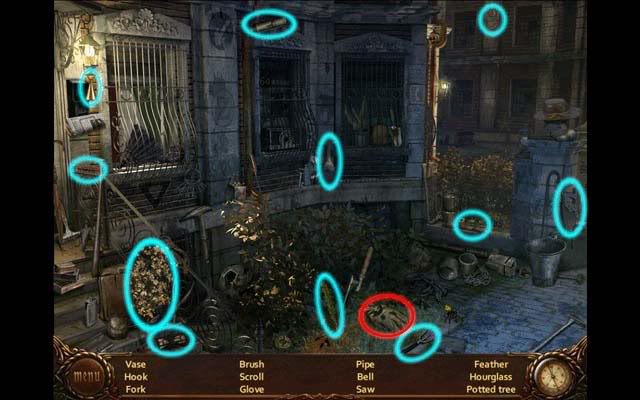
- Click on the colorful fog that’s reappeared in front of the house to enter a hidden object level.
Hidden Object Area- The Porch (Part 1)
- Find all the objects listed at the bottom of the screen. Once you’ve found everything, the Screwdriver will be added to your inventory.
- Proceed back to the bathroom.
Bathroom
- Click on the grate above the bathtub to enter the close-up. Use the Screwdriver to remove the screws from the grate. Once done, click on the grate to remove it.
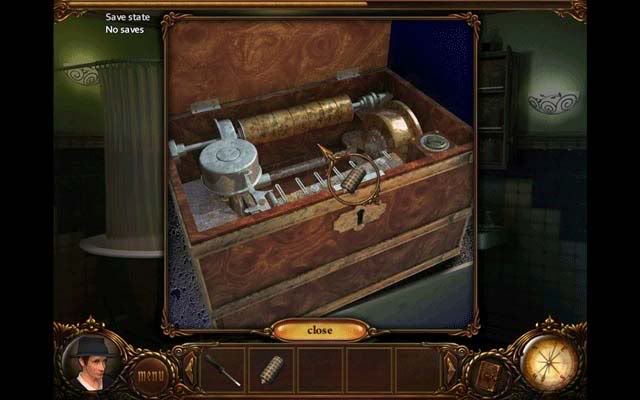
- Click on the music box to enter another close-up. Click on the box to open it.
- Inside, click to notice that a roller is missing from the music box. Return to the living room to ask Grandpa about it.
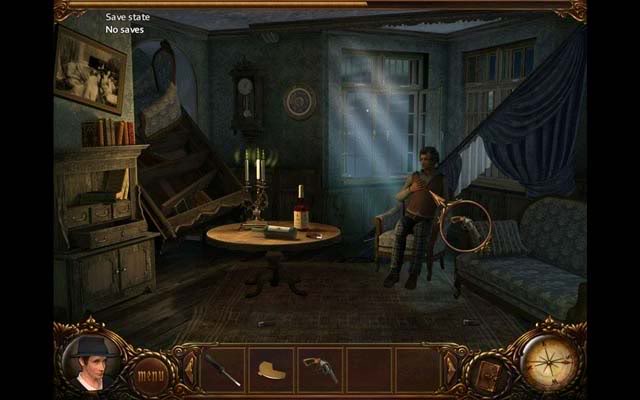
Living Room
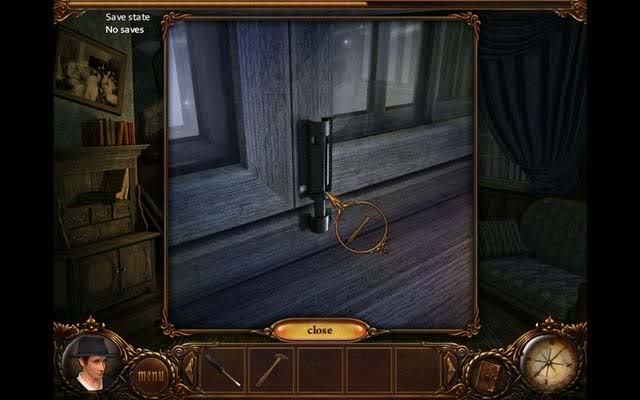
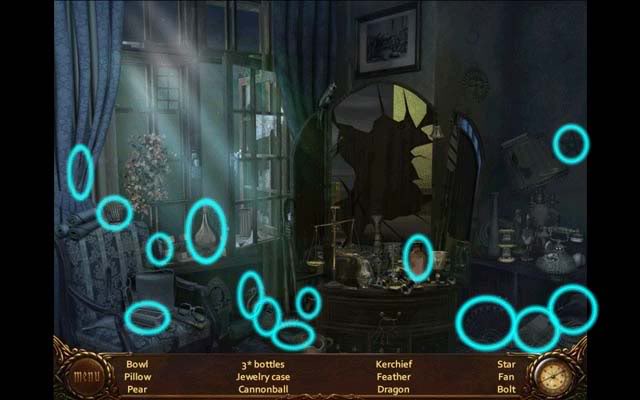
- Click on Grandpa to ask him about the roller, but he doesn’t know where it is. He’d like you to open the window, though.
- Click on the curtain to the left of Grandpa to move it aside and click on the window for a close-up.
- Click on the window lock to discover it’s stuck: you’ll need something to dislodge it. Exit the close-up and return to the bathroom.
Bathroom
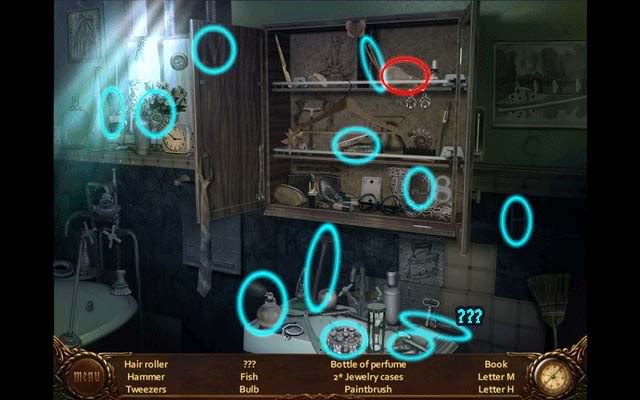
- In the bathroom, you’ll notice a colorful fog. Click on it to enter another hidden object area.
Hidden Object Area- Bathroom (Part 1)
- Find all the objects listed at the bottom of the screen. Once you’ve found everything, the Hammer will be added to your inventory.

- Return to the living room.
Living Room
- Click on the window again to enter the close-up. Use the Hammer on the latch to knock it lose and exit the close-up.
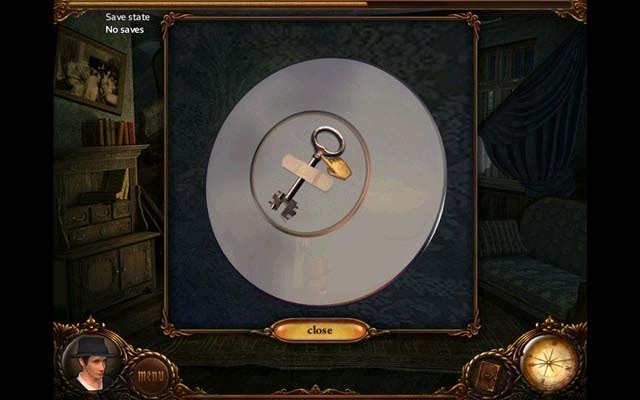
- Back in the main living room area, click on the window to open it. Upon opening the window, the curtain rod will collapse, revealing a plate on the wall. Click on the plate.

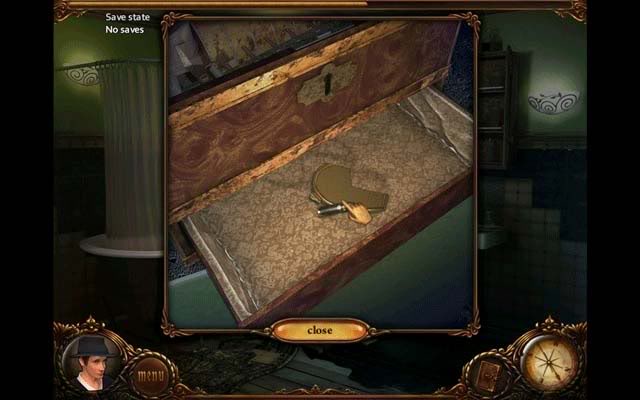
- In the close-up, click on the plate again to turn it over. There’s a Key taped to the back. Click on it to add it to your inventory and exit the close-up.
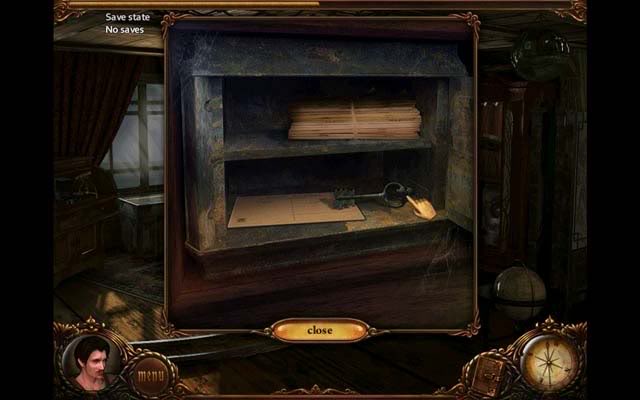
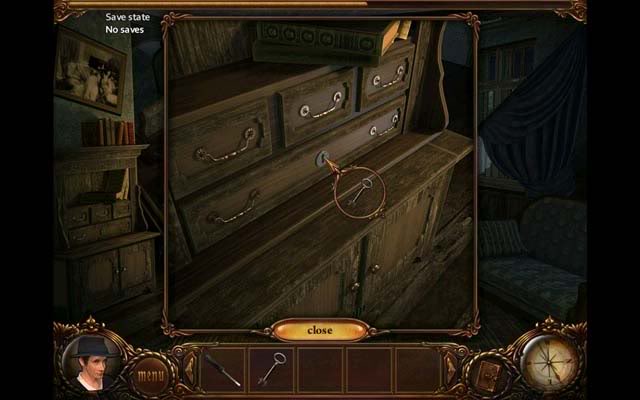
- Back in the main area, click on the desk on the far left.
- Use the Key on the desk lock to unlock and open it. Inside the desk is a gun and the Roller. Leave the gun alone for now and click on the Roller to add it to your inventory.
- Return to the bathroom
Bathroom
- Click on the music box again until you’re in the close-up with the box open. Use the Roller on the inside of the music box to repair it. Click on the left side when the magnifying glass appears. This will open a mini-game.
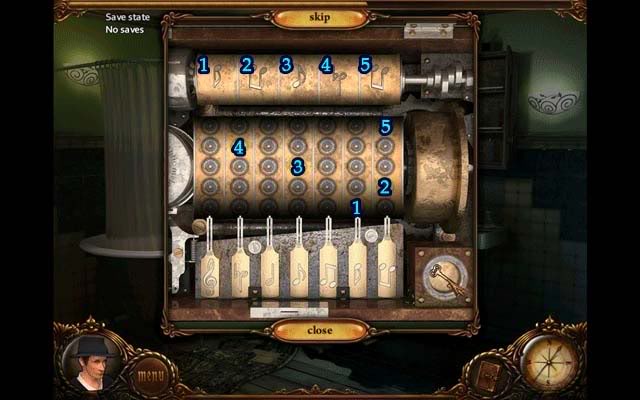
- The goal of the mini-game is to select the notes in the sequence shown at the top of the music box on the reel. The first note to be played is at the bottom. There are three separate solutions, and when you’ve completed your musical sequence, press the button to have it played. You can also skip the mini-game after a certain amount of time. Here are the sequence solutions:
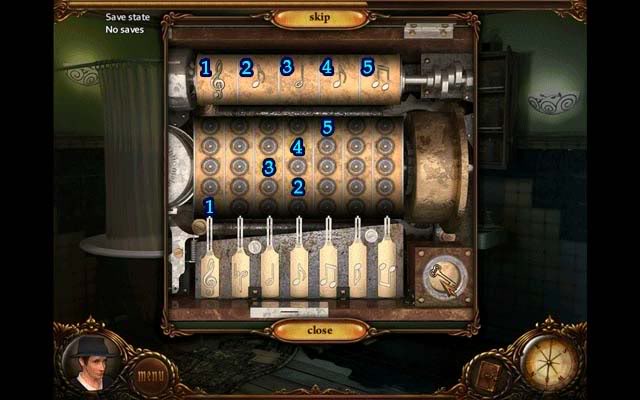
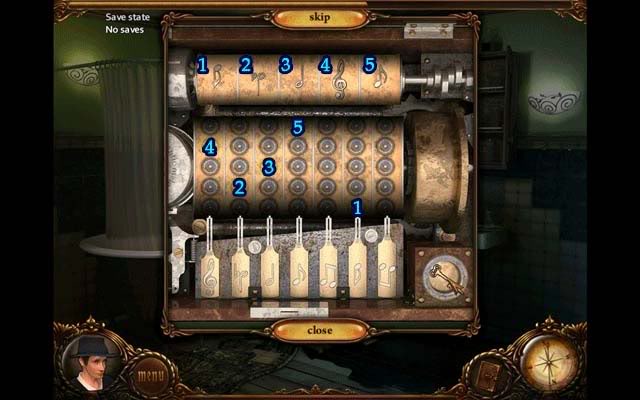
- Upon completing the mini-game, a secret compartment of the music box will open, revealing a Bullet and a Pendant Fragment. Pick up both and add them to your inventory.
- Return to the living room
Living Room
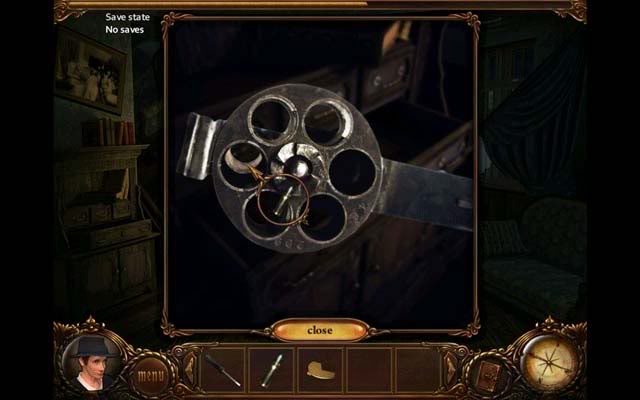
- Click on the desk on the left to access the drawer containing the gun. Click on the gun to enter the close-up of the chambers.
- Use the Bullet on the gun to load it. Once the gun is loaded, click on it to add "Gun" to your inventory.
- In the main area again, take the Gun and use it/give it to Grandpa. This will trigger a cutscene that takes you back to the ship.
Captain’s Cabin
- Click on Laura to talk to her: she’d like an apple
- Proceed down to the galley
Galley
- Click on the colorful fog you encounter in the galley to enter another hidden object level.
Hidden Object Area- Galley
- Find all the objects listed at the bottom of the screen. Once you’ve found everything, the Apple will be added to your inventory.
- Return to the captain’s cabin
Captain’s Cabin
- Use the Apple on Laura.
- A colorful fog will appear. Click on it to enter another hidden object area.
Hidden Object Area- Captain’s Cabin
- Find all the objects listed at the bottom of the screen. Once you’ve found everything, the Telescope will be added to your inventory.
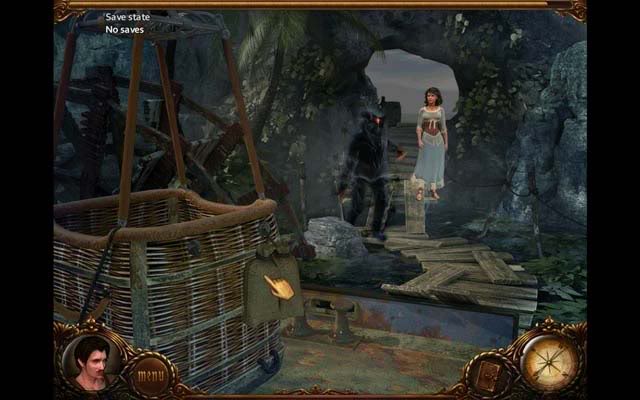
- Proceed to the bow
Bow
- Use the Telescope on the island that’s appeared to survey the area. Look thoroughly before it will automatically close the new window.
- The large crate has fallen from the boat running aground. Proceed down to the cargo hold to check on it.
Cargo Hold
- Down in the cargo hold, a mummy-like monster is distracted. Use the Gun on the monster. With each shot, it will come closer. Keeping shooting it, taking care not to miss. It will eventually run away.
- Once the mummy is gone, pick up the Sceptre left in the coffin wreckage and add it to your inventory.
- Proceed to the captain’s cabin to check on Laura.
Captain’s Cabin
- Click on Laura: she’s OK. Continue to the window and outside to the boat.
Boat
- Use the Sceptre on the dead sailor and leave the boat back to the captain’s cabin.
Captain’s Cabin
- Move back to the window.
Window
- The monster is now in the boat. Use the Knife on the rope to cut to loose and get rid of the monster.
- Return to the deck
Deck
- Click on the anchor wheel to let down the anchor and secure the ship.
- Dive down into the water and continue to boat’s cargo hold
Boat’s Cargo Hold
- Click on the chain and drag it to the wheel on the door. Click to secure it.
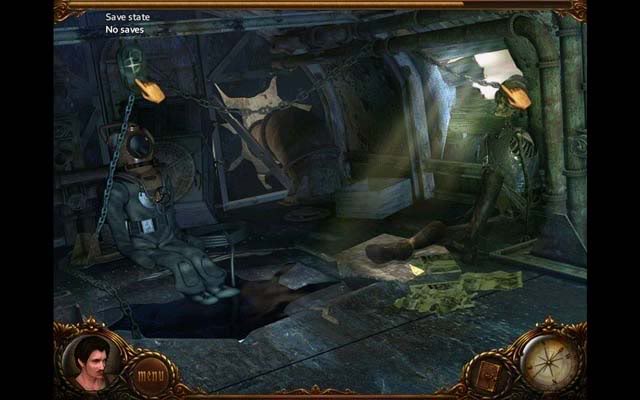
- Continue up to skeleton
Skeleton
- Click on the papers on the floor to discover the fate of the skeleton.
- Click on the colorful fog on the skeleton to enter another hidden object level.
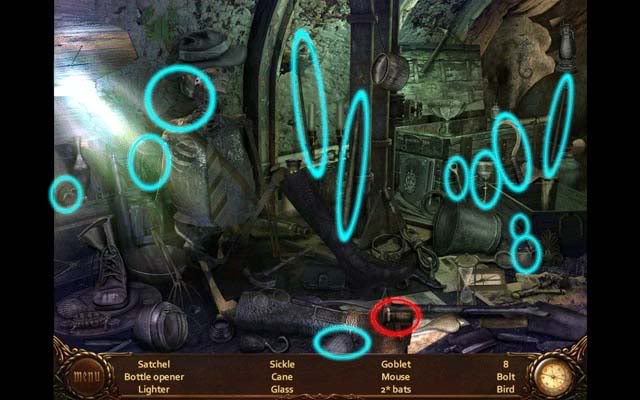
Hidden Object Area- Skeleton
- Find all the objects listed at the bottom of the screen. Once you’ve found everything, the Pickaxe will be added to your inventory.
- Proceed back to the underwater.
Underwater
- Back in the main underwater area, use the Crowbar on the piece of stairs buried in the ocean floor in the middle of the screen. Click on it to add it to your inventory.
- Use the Stairs in your inventory on the missing section on the staircase on the right
- Close inspection of the new section of stairway reveals that the steps need to be secured. Return to Pandora for bolts.
Bow
- Click on the colorful fog that’s appeared to enter another hidden object area.
Hidden Object Area- Bow
- Find all the objects listed at the bottom of the screen. Once you’ve found everything, the Bolt will be added to your inventory.
- Upon finishing the area, continue to the stern.
Stern
- Click on the colorful fog that’s appeared to enter another hidden object area.
Hidden Object Area- Stern
- Find all the objects listed at the bottom of the screen. Once you’ve found everything, the Bolt will be added to your inventory.
- Upon finishing the area, continue to the main cabin
Main Cabin
- Click on the colorful fog to enter another hidden object level.
Hidden Object Area- Main Cabin
- Find all the objects listed at the bottom of the screen. Once you’ve found everything, the Bolt will be added to your inventory.
- Upon finishing the level, return back underwater and to the skeleton.
Skeleton
- Click on the colorful fog over the skeleton to enter another hidden object level.
Hidden Object Area- Skeleton
- Find all the objects listed at the bottom of the screen. Once you’ve found everything, the Bolt will be added to your inventory.
- Return to the underwater
Underwater
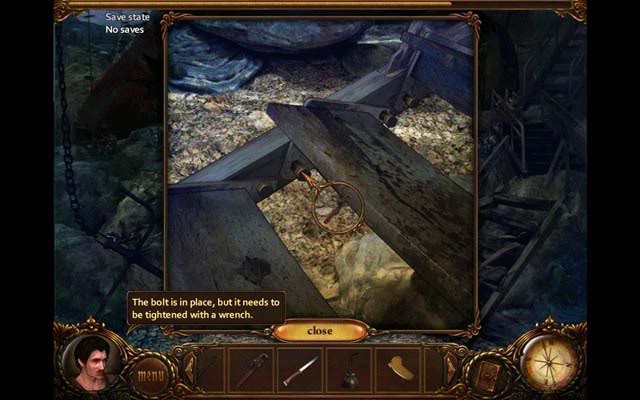
- Back in the main underwater area, click on the section of staircase you repaired earlier to enter a close-up screen.
- Use all four Bolts from your inventory on the holes around the steps.
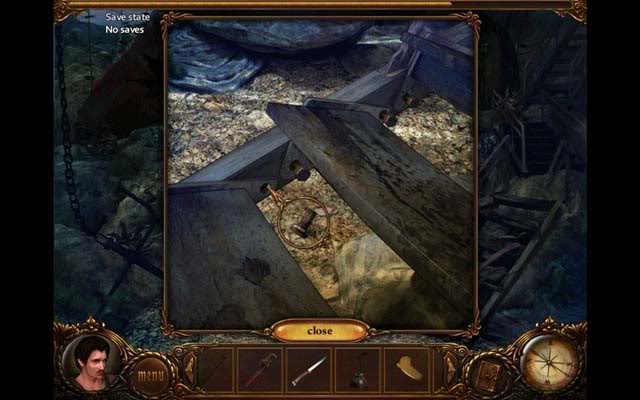
- Use the Wrench to secure the Bolts once they are in place.
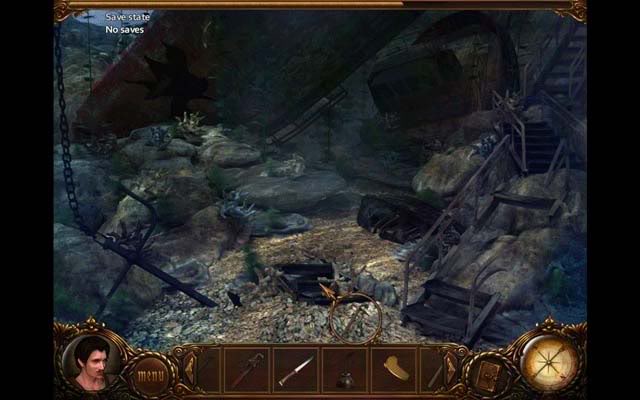
- Once everything’s secured, continue up to the shipwreck
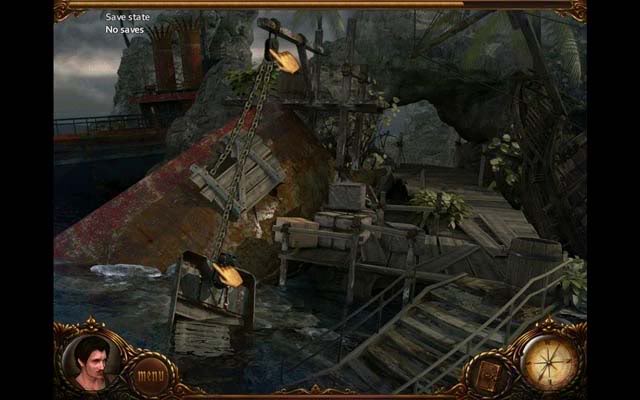
Shipwreck
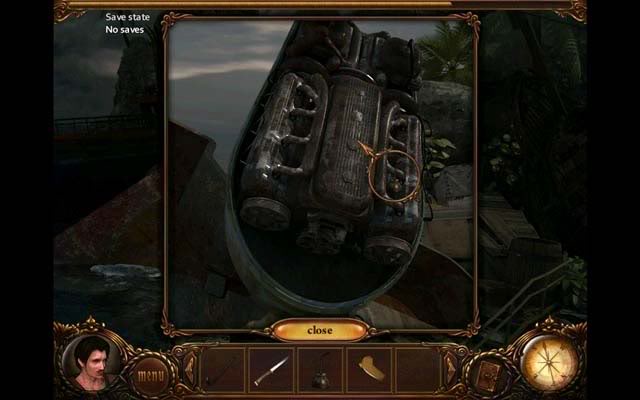
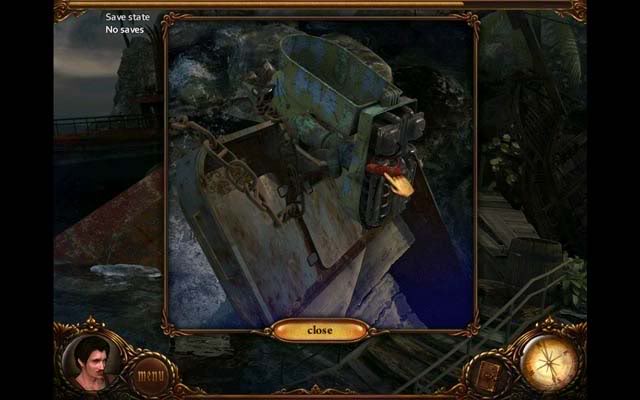
- Click on the motorboat to enter a close-up screen of the engine. Click on the engine again to enter a secondary close-up.
- Use the Oiler on the engine until it’s completely oiled, and exit for now.
- Continue through the passage and onto the steamboat
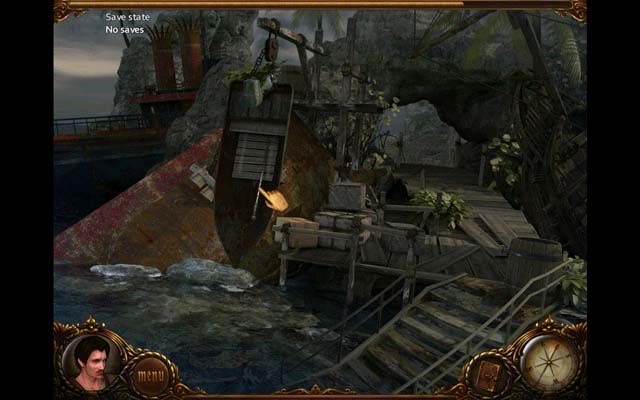
Steamboat
- In the distance, a survivor is floating on some wreckage, but can’t be reached without a hook. You can also overlook the locked chest for now.
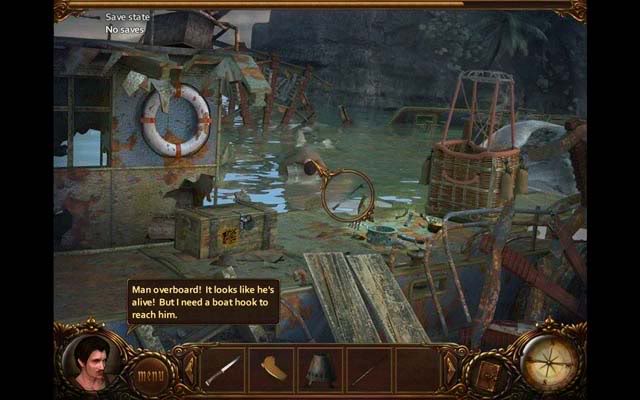
- Click on the colorful fog to enter a hidden object level.
Hidden Object Area- Steamboat
- Find all the objects listed at the bottom of the screen. Once you’ve found everything, the Belt will be added to your inventory.
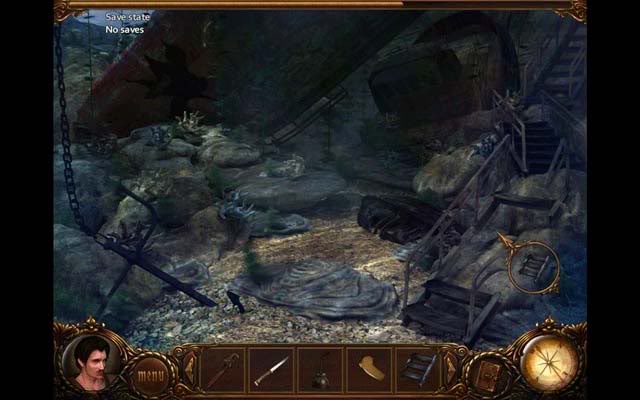
- Return to the shipwreck
Shipwreck
- Click on the motorboat again, returning to the close-up where you used the oiler.
- Use the Belt on the engine and exit the close-up.
- In the main area again, click on the wooden planks covering the side of the ship. In the close-up, use the Crowbar on the wood to reveal a skeleton underneath and exit.
- Return to the underwater and back up to the skeleton.
Skeleton
- Click on the chain to the left of the diving suit and drag it to the pulley up above. Click on it to secure it.
- Click on the chain from the pulley and drag it to the opening next to the skeleton.
- Return to the site of the shipwreck
Shipwreck
- Click the chain from the boarded area and drag it to the pulley above and click to secure it.
- Click the chain from the pulley and drag it to the back/propeller of the motorboat and click to secure it.
- Click on the motorboat for a close-up screen. Click on the red engine chord to start the boat and therefore pull the chain.
- Return to the boat’s cargo hold
Boat’s Cargo Hold
- Click on the Burner underneath/behind the heavy metal door. It’ll fall back down once you pick it up to add it to your inventory.

- Return to the site of the shipwreck
Shipwreck
- Pick up the Hook inside the hoisted boat to add it to your inventory.
- Continue to the steamboat
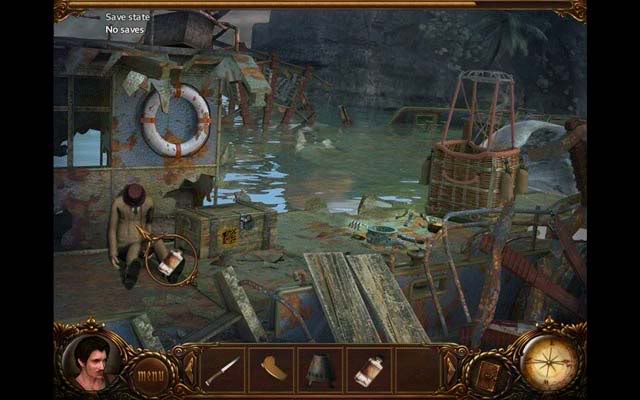
Steamboat
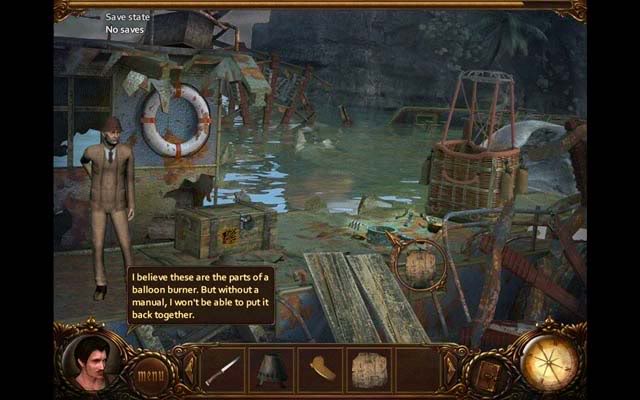
- Use the Hook on the survivor to drag him to shore. He’s unconscious and will need smelling salts to be revived.
- Return to Pandora and continue to the main cabin
Main Cabin
- Click on the colorful fog to enter another hidden object level.
Hidden Object Level- Main Cabin
- Find all the objects listed at the bottom of the screen. Once you’ve found everything, the Smelling Salts will be added to your inventory.

- Return to the steamboat
Steamboat
- Use the Smelling Salts on the survivor. He introduces himself and things become clear. After a dramatic cutscene, return to Pandora, to the captain’s cabin to check on Laura.
Captain’s Cabin
- Laura is nowhere to be found. Click on the bed where she was resting.
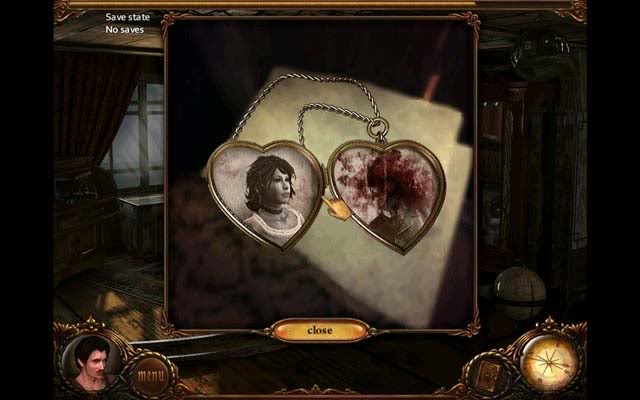
- In the close-up, use the Pendant Fragment on the pendant necklace left behind. Click on the whole pendant to examine it further. A locket is revealed, and Laura appears and knocks you out.
Part 5- Vampire in the Bedroom
Living Room
- Back in the living room, Grandpa encourages Ty to have a look in the bedroom himself to see if he’s telling the truth or not.
- Click on the chair at the top left of the screen, then on the shelf below to clear passage to the bedroom.
Bedroom
- Click on the colorful fog on the chair to enter another hidden object level.
Hidden Object Area- Bedroom
- Find all the objects listed at the bottom of the screen. Once you’ve found everything, the Screws will be added to your inventory.
Bedroom
- Click on the right mirror panel when the magnifying lens appears for a close-up.
- Use the Screws on the hinge
- Use the Screwdriver on the Screws to repair the mirror hinge and exit the close-up. The mirror reveals the girl on the bed has no reflection.
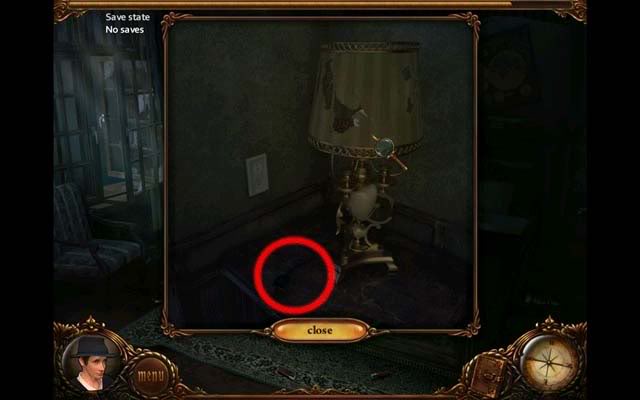
- You can click on the lamp during this point in time, but you’ll need something to change the bulb. Come back to this area later.
- Backtrack to the bathroom
Bathroom
- Click on the colorful fog to enter another hidden object level
Hidden Object Area- Bathroom
- Find all the objects listed at the bottom of the screen. Once you’ve found everything, the Light bulb will be added to your inventory.
- Exit to the porch
The Porch
- Click on the colorful fog to enter another hidden object level
Hidden Object Area- The Porch
- Find all the objects listed at the bottom of the screen. Once you’ve found everything, the Glove will be added to your inventory.
- Time to return to the bedroom
Bedroom
- Click on the lamp to enter the close-up again. Click on the cord in the wall to unplug the lamp’s electricity.
- Click on the lamp for another close-up screen
- Use the Glove on the broken bulb to remove it.
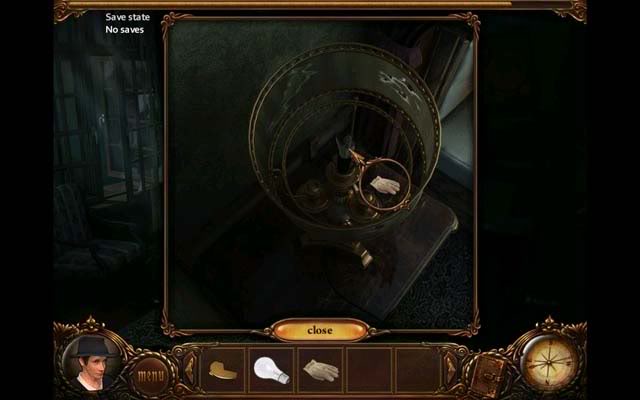
- Use the Light bulb on the empty socket to replace it. Exit the close-up.
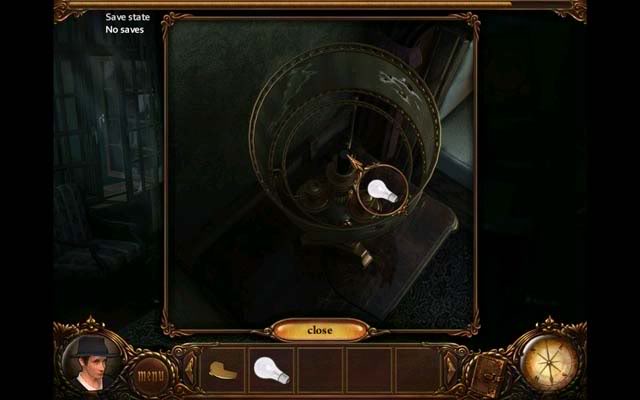
- Click on the cord and plug the lamp back into the wall to restore light and exit the close-up.
- Click on the girl on the bed for a close-up.
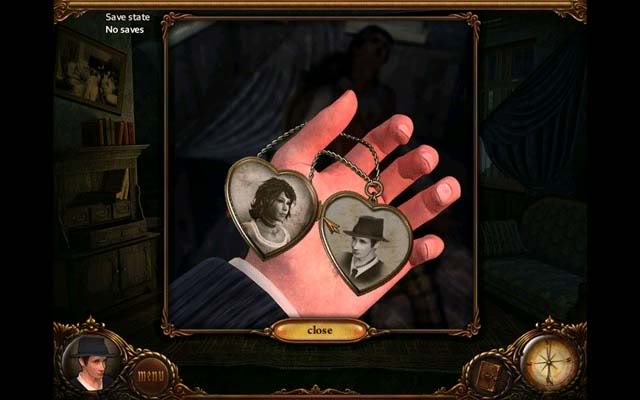
- Use the Pendant Fragment on her necklace to restore the locket.
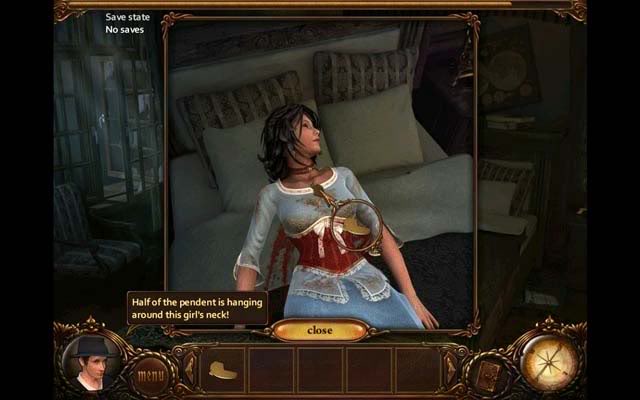
- Click on the locket for a closer look. Open it to reveal a picture of Laura and Grandpa.
- Return to the living room to talk to Grandpa
Living Room
- Click on Grandpa to talk to him and enter another cutscene. You’ll end up back at the ship for the rest of his story.
Captain’s Cabin
- You’ll wake back up in the captain’s cabin. Proceed to the steamboat
Steamboat
- Click on the colorful fog to enter another hidden object level.
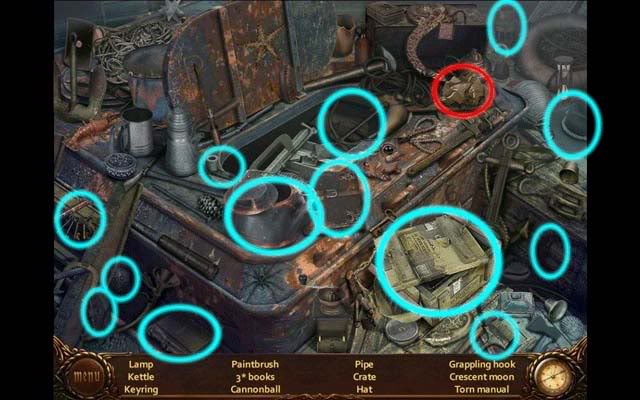
Hidden Object Area- Steamboat
- Find all the objects listed at the bottom of the screen. Once you’ve found everything, the Torn Manual will be added to your inventory.
Steamboat
- Upon acquiring the Torn Manual, you’ll enter another close-up screen, this time to assemble the manual pieces. You can skip the puzzle after a certain period of time. The solution looks like this:
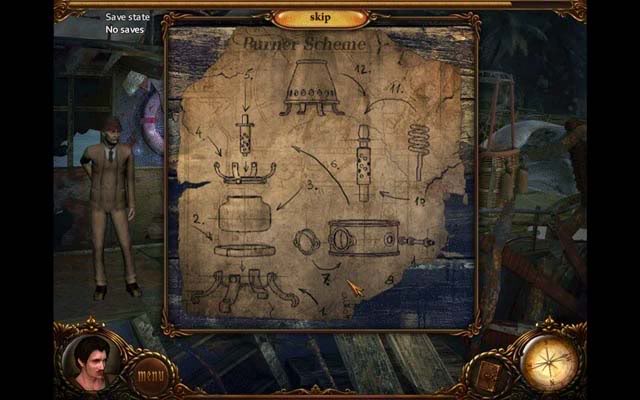
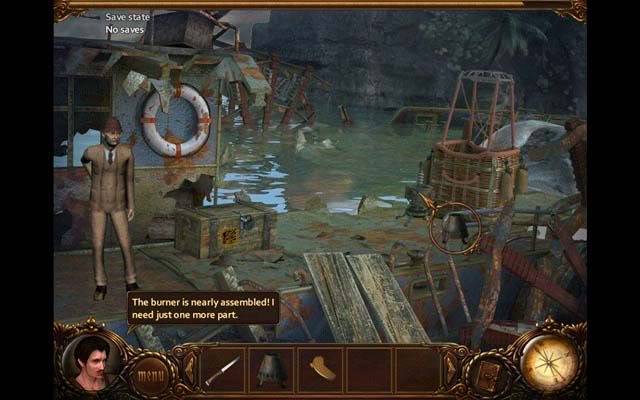
- Back in the main steamboat area, use the Manual on the balloon burner parts.
- You’ll enter another mini-game. Assemble the burner parts according to the manual on the wall. The pieces are numbered below according to what needs to be assembled in what order:
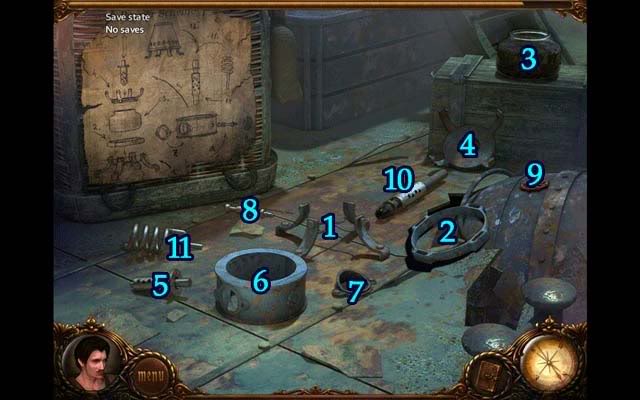
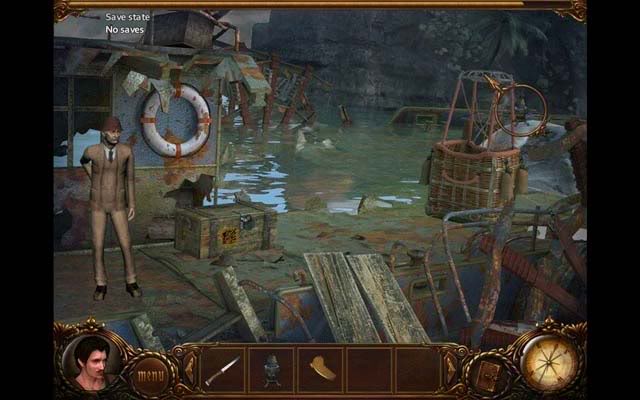
- Once the parts are assembled, use the Burner on the assembled burner parts and click on it to add it to your inventory.
- Use the Assembled Burner on the top of the hot air balloon basket.
- However, Pandora still needs to be destroyed. Return to the skeleton in the boat’s cargo hold.
Skeleton
- Click on the colorful fog to enter another hidden object level.
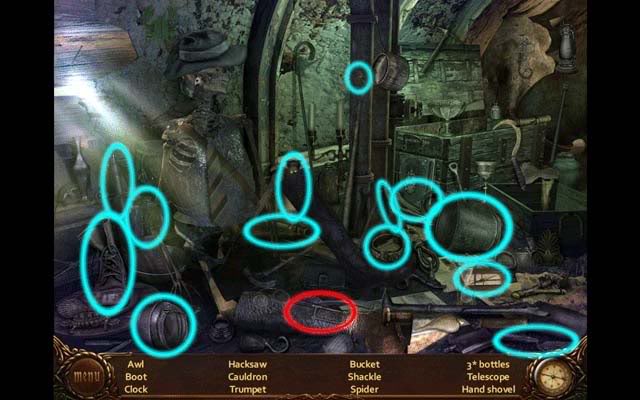
Hidden Object Area- Skeleton
- Find all the objects listed at the bottom of the screen. Once you’ve found everything, the Hacksaw will be added to your inventory.
- Return to the steamboat
Steamboat
- Click on the colorful fog to enter another hidden object level
Hidden Object Area- Steamboat
- Find all the objects listed at the bottom of the screen. Once you’ve found everything, the Lighter will be added to your inventory.
Steamboat
- Click on the wooden chest to (your) right of Elias Patton.
- Use the Hacksaw on the lock and open the chest. You need to pick up the dynamite, but you’ll need tarp canvas to do it. Return to Pandora.
Main Cabin
- Use the Knife on the tarp to add Piece of Tarp to your inventory.
- Return to the steamboat
Steamboat
- Click on the wooden chest. Use the Piece of Tarp on the Dynamite to pick it up and add it to your inventory.
- Time to return to Pandora one last time.
Second Cargo Hold
- Place the Dynamite at the foot of the crate with the coffin.
- Use the Lighter on the Dynamite and get off Pandora and back onto the island. A cutscene reveals Pandora’s end. Return to the steamboat.
Steamboat
- Upon returning to the steamboat, Laura is waiting for you after having killed Elias Patton. After a brief cutscene, enter the balloon.
Balloon
- Click on the sandbags hanging from the side of the balloon. With each, a familiar phantom will appear.
- Drop the last bag and enter the balloon to fly away from Laura and the island, hopefully leaving the nightmare behind for good.
Living Room
- Grandpa tells you to pour holy water on Laura and end the nightmare once and for all. Return to the bedroom.
Bedroom
- Click on the colorful fog to enter another hidden object level.
Hidden Object Area- Bedroom
- Find all the objects listed at the bottom of the screen. Once you’ve found everything, the Holy Water will be added to your inventory.
Bedroom
- Click on Laura for a close-up view. Use the Holy Water on her.
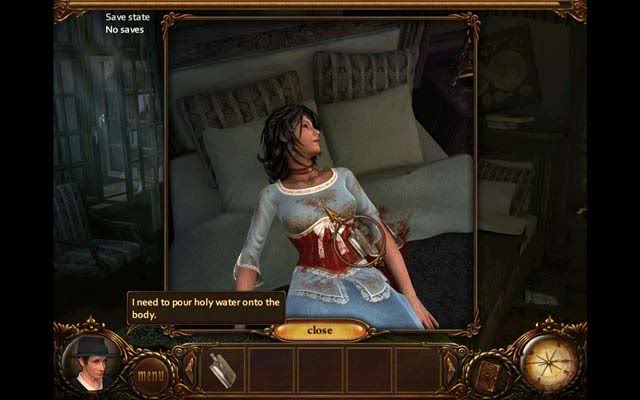
She’ll wake up and knock Ty unconscious, killing Grandpa in a cutscene.
Living Room
- Upon waking up, return to the living room to find Grandpa dead. Click on him for a close-up, then click on the locket in his hand.
- Upon closer inspection and opening the locket, the picture of Grandpa morphs into one of Ty, and the true horror is revealed.
Congratulations, you’ve finished the game!
“;

More articles...
-
Best Horror Games On Itch.io – July 2026
Across a bounty of subgenres. -
Grow A Garden 2 Base Price List
What's the most valuable crop? -
Evomon Best Starter [Leafbun, Blazpup, or Bubble?]
Grass-type, Fire-type, or Water-type?