![Digimon UP Tier List [Supports, Buddies, and Partners]](/wp-content/uploads/2026/07/digimon-up-tier-list.jpg "Digimon UP Tier List [Supports, Buddies, and Partners]")
Digimon UP Tier List [Supports, Buddies, and Partners]
These Digimon will get you UP the leaderboard.

![Haze Seas Boss Drops [Chances, Locations, and How to Spawn]](/wp-content/uploads/2026/07/haze-seas-boss-drops.jpg "Haze Seas Boss Drops [Chances, Locations, and How to Spawn]")

Treetopia is a Facebook game developed by Playdom that lets players become a village chief to take care and grow their own virtual tribe. Players manage it by gathering resources, build housing, fulfill quests with warriors and healers, grow the village tree and protect villagers from deadly plants. This quick start guide will provide you with tips to get started playing Treetopia.
Treetopia is a Facebook game developed by Playdom that lets players become a village chief to take care and grow their own virtual tribe. Players manage it by gathering resources, build housing, fulfill quests with warriors and healers, grow the village tree and protect villagers from deadly plants. This quick start guide will provide you with tips to get started playing Treetopia.
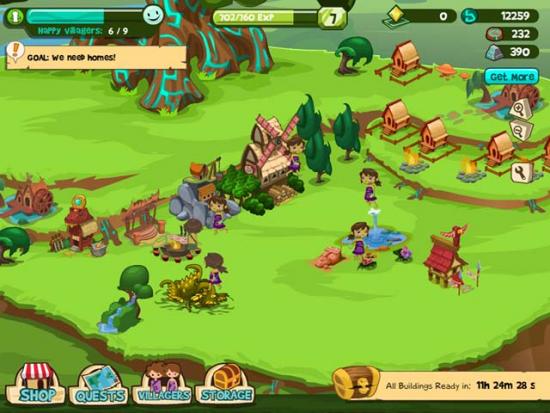
Getting to know and learning how to manage your village is key to keeping your Treetopian tribe happy and loyal. As a chieftain, you’ll need your tools to do so. Here is a rundown of the interface and menus that you will use throughout the game. You can use the screenshot below as reference.

Progress bars
Your progress bars are found on top. The aqua bar is your village population. Keep an eye on this bar to check your villager’s happiness level. The green bar shows your progress in terms of experience points.
The wealth bars indicate the number of gems (yellow diamond), beads, wood and limestone you currently have. Beads are used to purchase most of the items within your shop. Wood and limestone are used for quests and can also be used to buy special items.
Just below your village population, the list of goals will appear to serves as a guide on what to do for the next milestone.
Main Menu
Here are the following icons found on your main bar:
The chest you see at the bottom right is your countdown to let you know when to come back to collect the resources from all of your buildings.
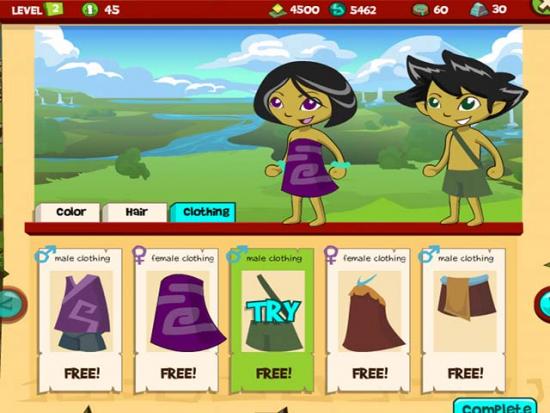
Stand out and create a unique look for your tribe. From hair color, skin tone and clothing, all of the items are free for now. If you feel like creating a tribe “Avatar style” or even let them look like the “Smurfs”, you can do so here. It’s expected that these items will be updated with new styles for a fee.
Grow your tribe by adding more houses to bring in more villagers. Go to the store and choose from two houses, the Fir hut that houses 1 person and the Apple Farm that brings in 2 people.
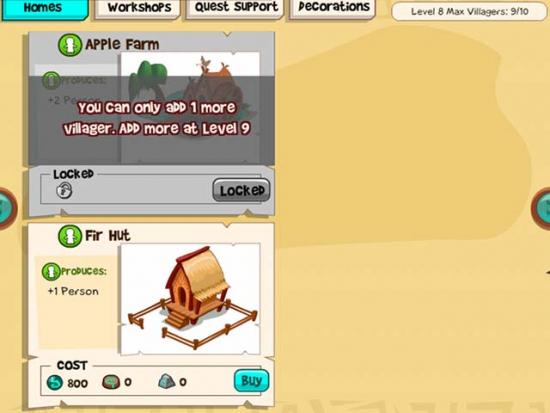
Each level will only provide you a limited number of villagers. The goal here is to level up in order to accept more people in your tribe. Take note that the Apple Farm will only be available for construction when you have two vacant slots. As seen in the screenshot above, since I already have 9 villagers and the maximum is 10, you can only build the Fir Hut. You can opt to build only Fir huts in your village but the recommendation is to wait until the next level to build the Apple Farm. As you progress, you will run out of space especially when your tree grows. Building the Apple Farms will save you space and add more villagers at the same time.
To support your villagers, you need resources to construct buildings and go on quests. There are 3 basic resources that you need to collect. Beads, wood and limestone. Most resource buildings called workshops produce beads so you have quite a few to choose from but at earlier levels, having 3-4 gum tree fire pits is a good start. The Wood Works workshop produces wood and the Limestone Quarry gives you limestone. As you level up, more buildings will be unlocked.
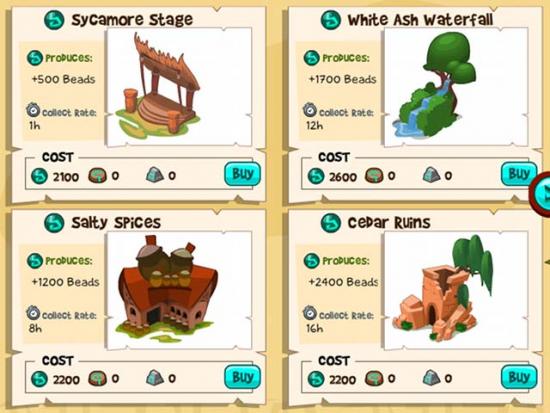
Each workshop takes time to produce its resource. Pointing your mouse on the building will show how many have been produced and the time left to collect it. When it is ready a chest will appear on the building to signal you to collect. Remember the building stops producing once it has reached its maximum.
Take note that these buildings produce extra resources apart from what it being collected on its own. This happens when a villager is happy and working on the building. While you are playing, you can click on them as they appear to add to your stash.
Constructing some of these buildings will prompt you to grow your village tree.
There is one thing that makes your villagers unhappy. The attack of the deadly plant monsters. Every few minutes, these plants will invade your village and take a tribe member prisoner. Free them from its deadly clasp by cutting them down. Click on each plant and your villager will then go back to work.
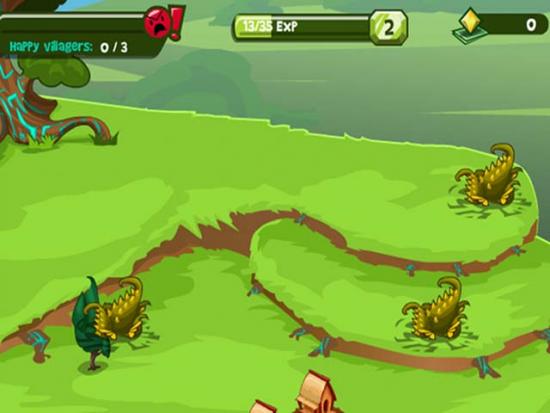
If you don’t free them, your workshops will stop from producing extra resource items.
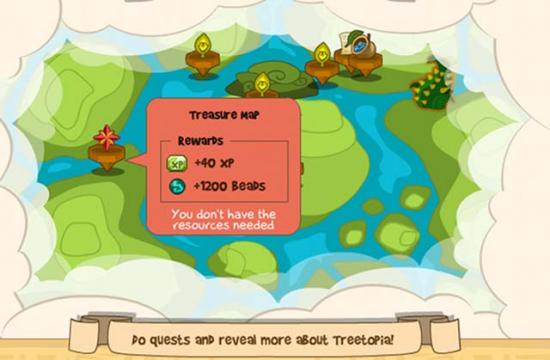
Your village needs a bit of excitement in their lives. Having them fulfill quests will quench their thirst for adventure. Click on the quests icon on the main bar to open a map. Pointing to one will indicate the name of the quest, rewards and whether you have the resources to start it.
Be sure to click on “set an alert” on the top of this page to be notified of any updates, reviews, posts, tips, and cheats for Treetopia. We’ll be updating our guides all the time.
