![All VV Ultimatum Titles [How to Get]](/wp-content/uploads/2026/06/vv-ultimatum-titles.jpg "All VV Ultimatum Titles [How to Get]")
All VV Ultimatum Titles [How to Get]
Do titles provide buffs?


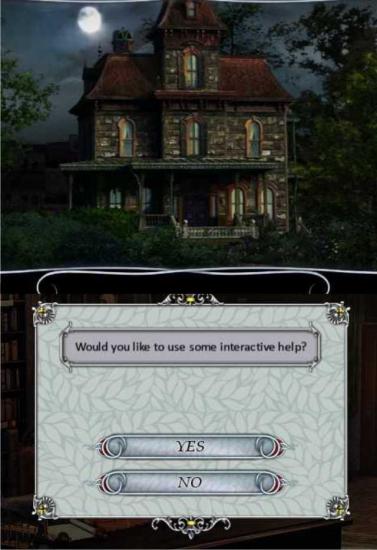
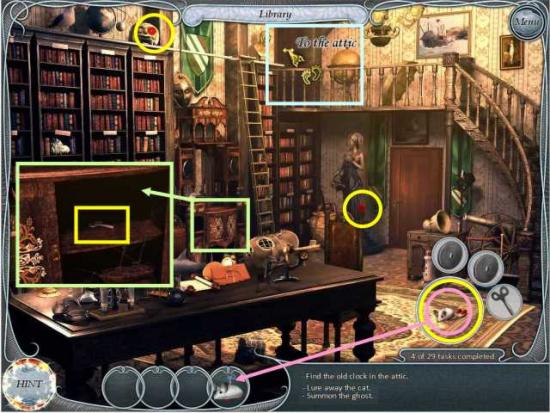
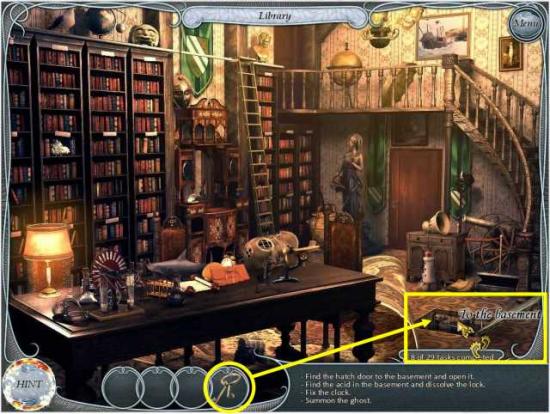
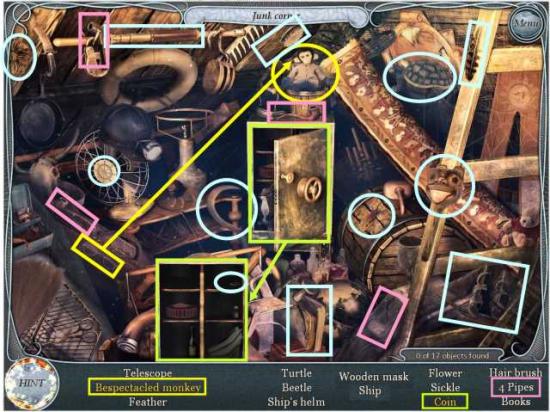
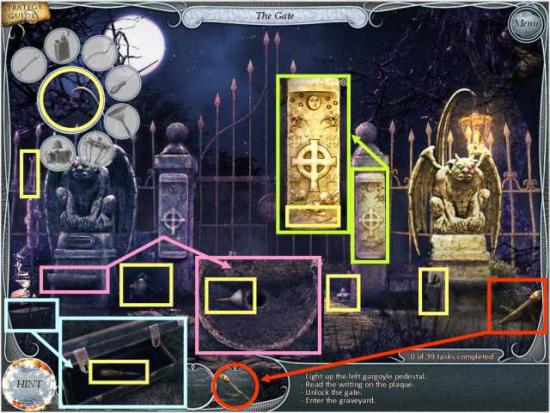
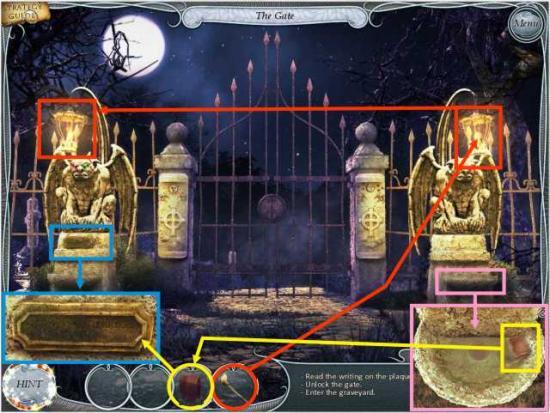
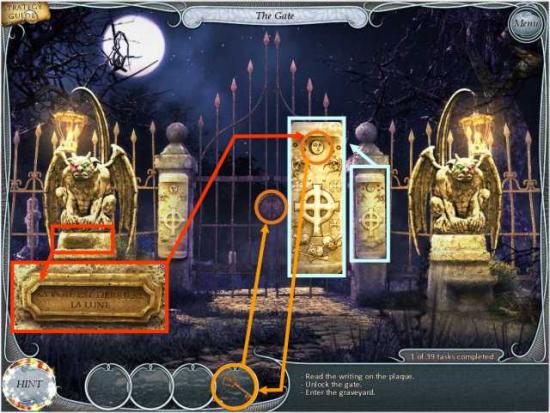
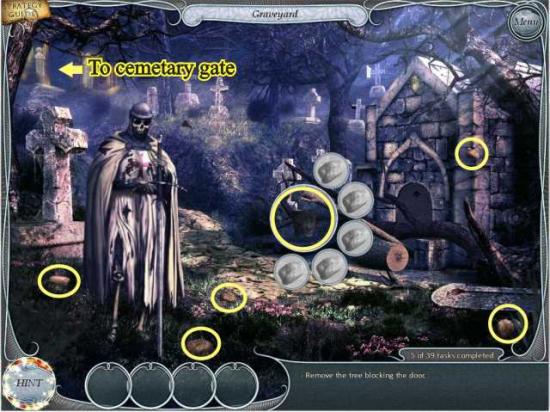
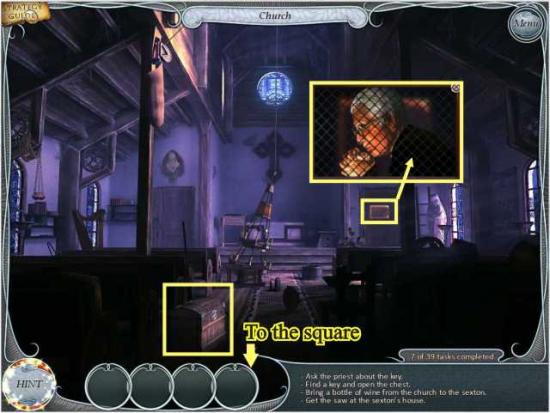
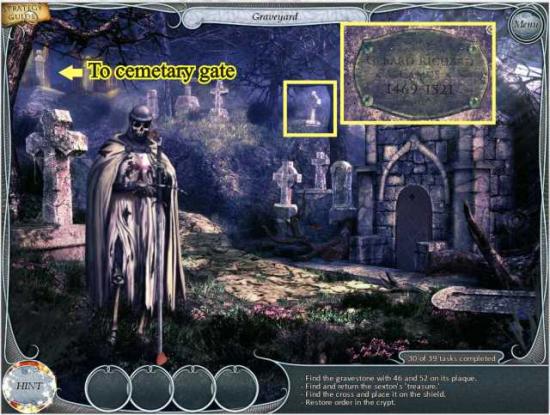
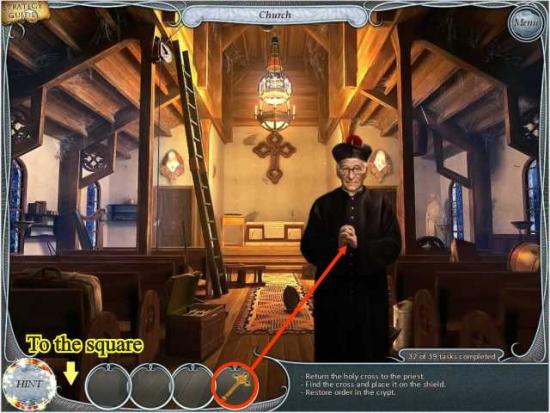
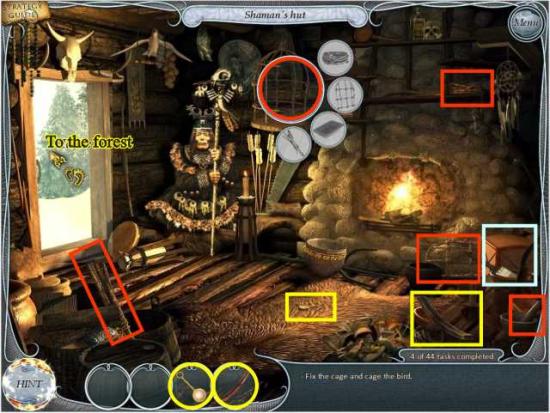
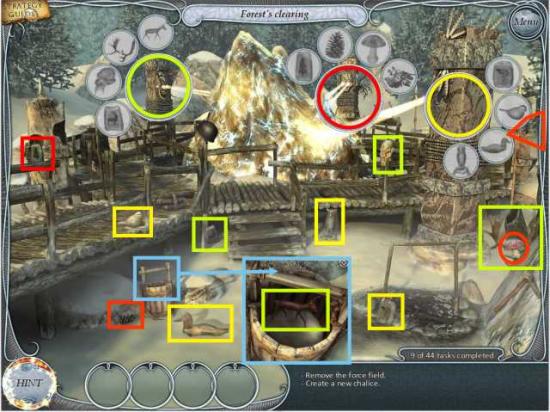
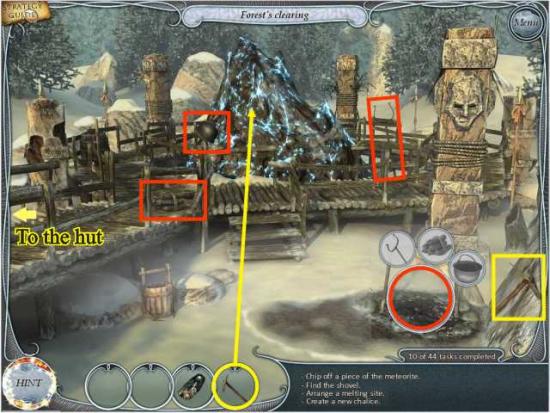
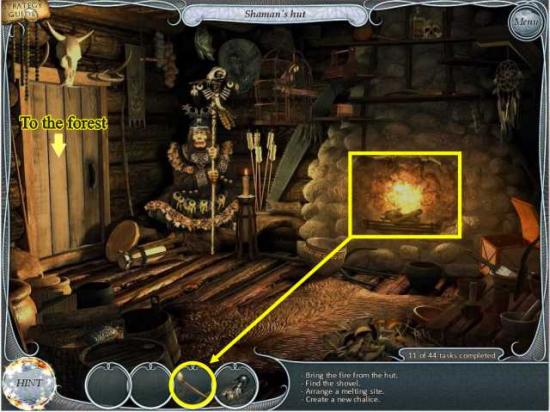
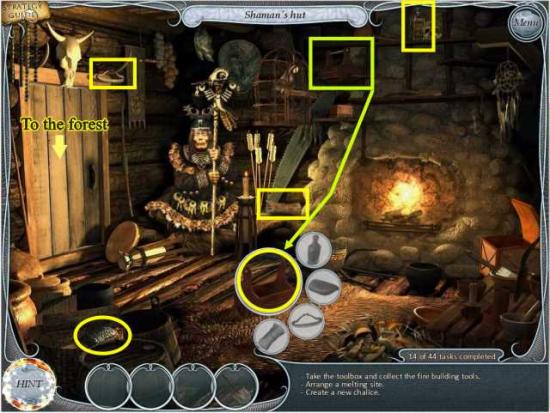
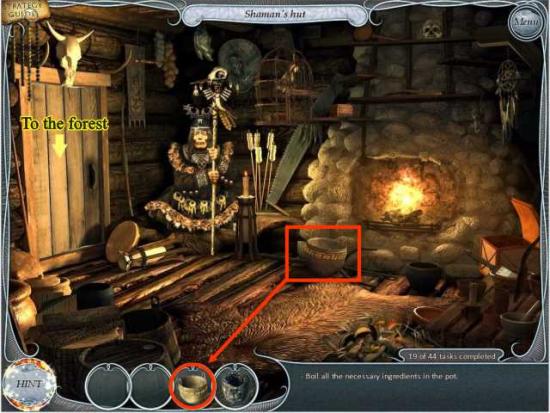
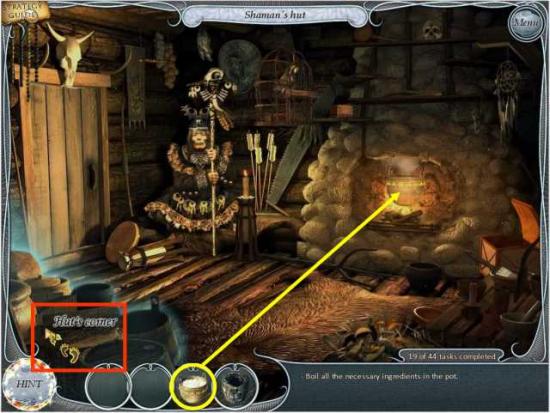
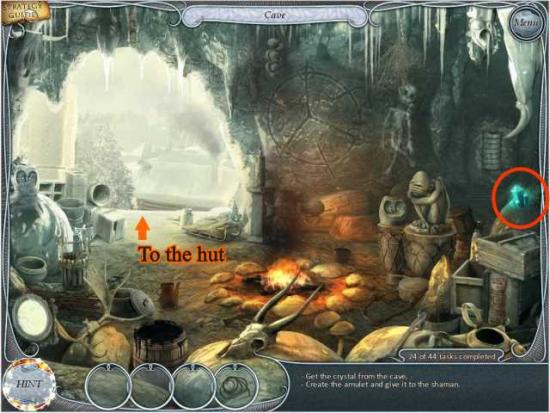
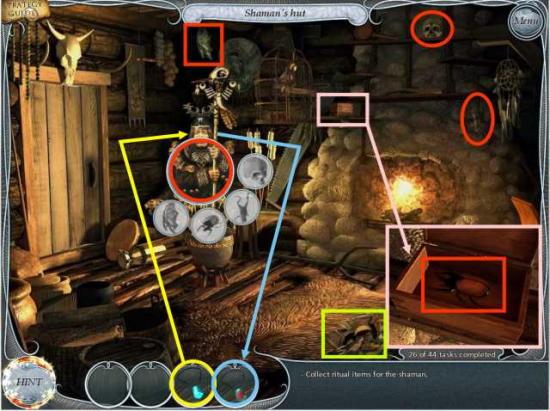
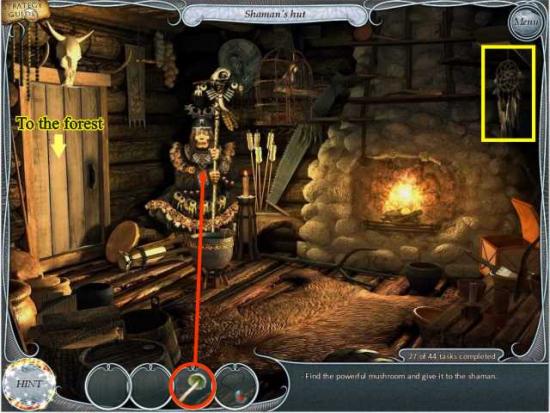
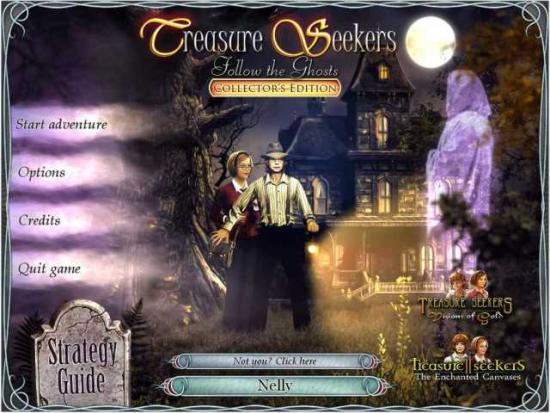
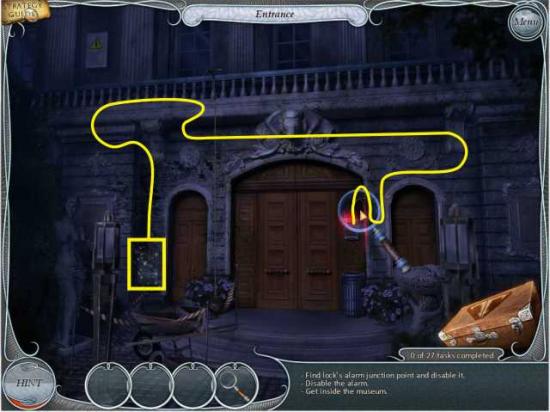
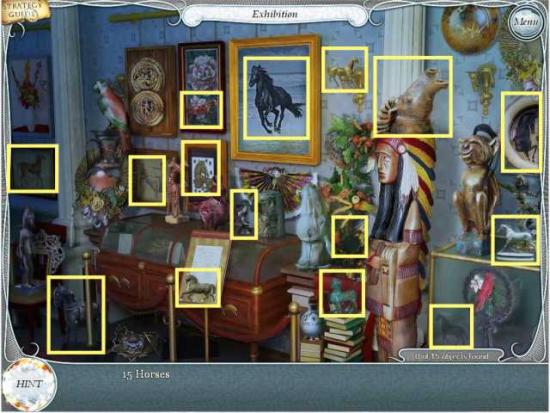
Welcome to the Treasure Seekers: Follow the Ghosts walkthrough on Gamezebo. Treasure Seekers: Follow the Ghosts is a hidden object adventure game created by Artogon Games. This walkthrough includes tips and tricks, helpful hints, and a strategy guide to how to complete Treasure Seekers: Follow the Ghosts.
Welcome to the Treasure Seekers: Follow the Ghosts walkthrough on Gamezebo. Treasure Seekers: Follow the Ghosts is a hidden object adventure game created by Artogon Games. This walkthrough includes tips and tricks, helpful hints, and a strategy guide to how to complete Treasure Seekers: Follow the Ghosts.
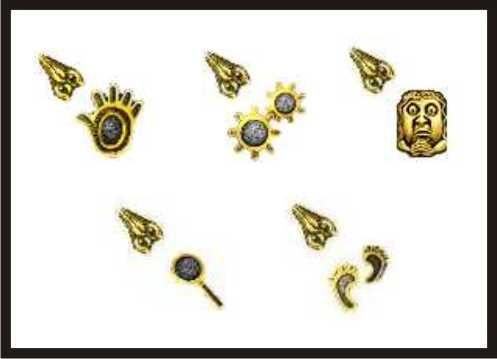
CURSOR ATTACHMENTS

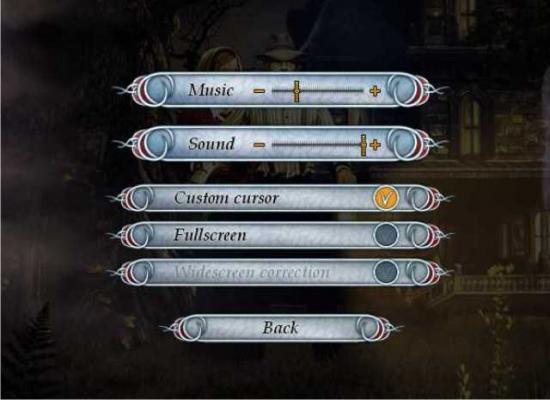
OPTIONS
MINI GAMES
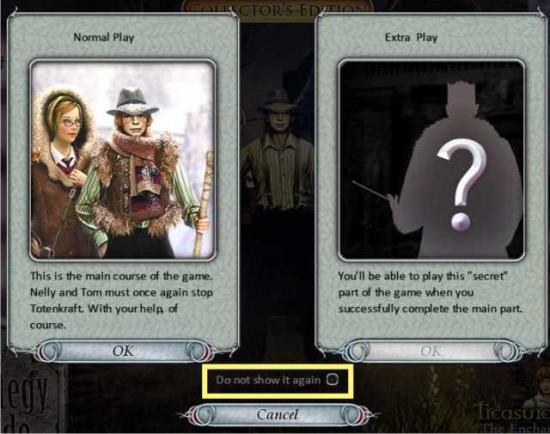
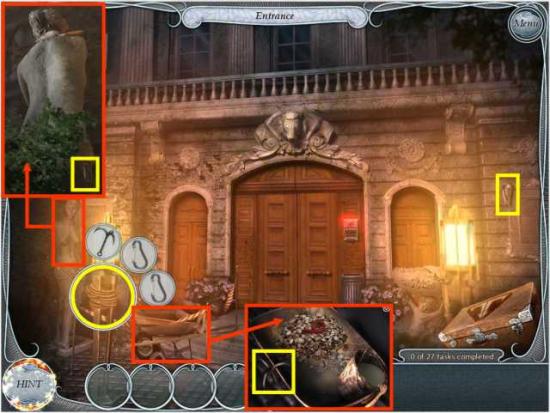
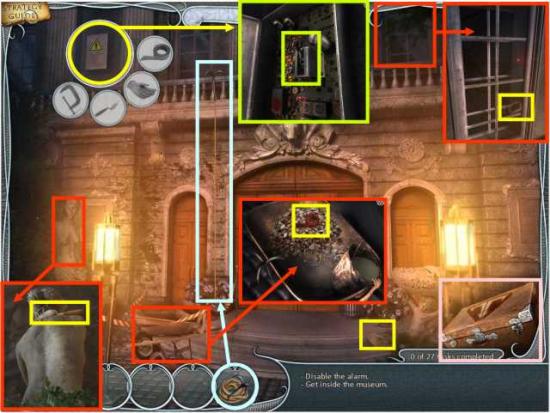
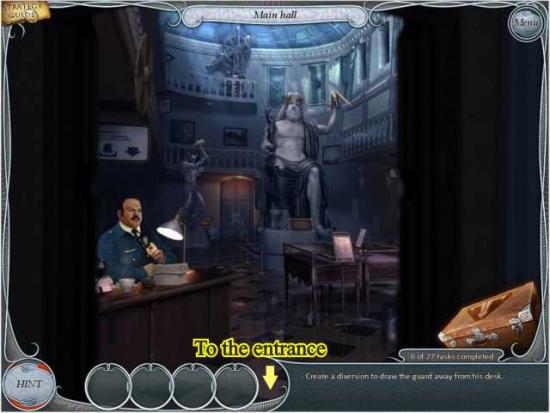
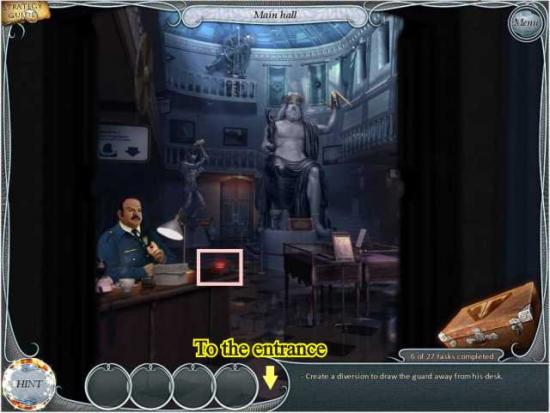
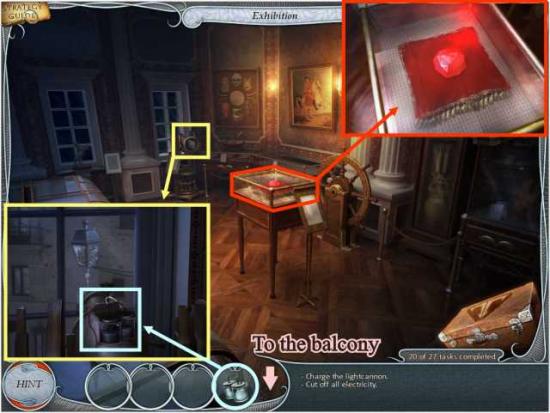
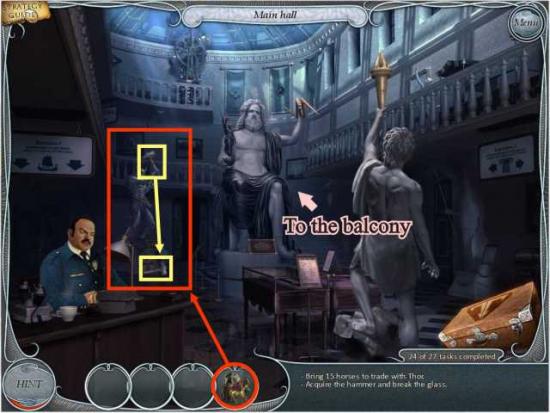
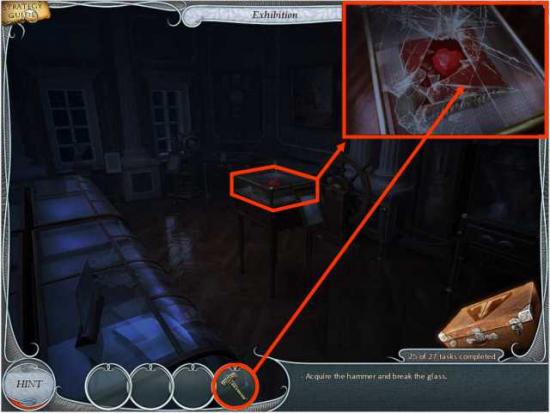
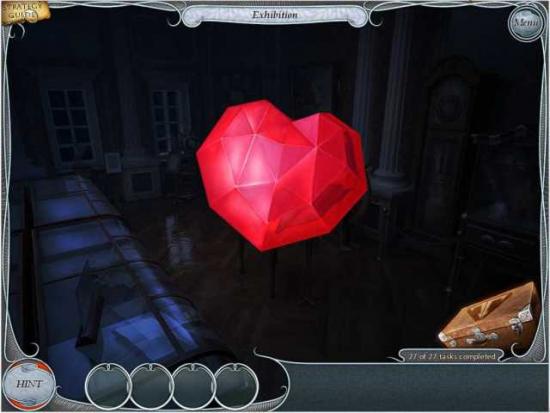
The adventure begins in 1931 England and with the mysterious disappearance of the Ruby Heart diamond from the Bristol Museum.
Tom is fascinated with the crime because the theft coincided with the appearance of a ghost at the Caldwold Manor so he and Nelly are off to investigate.
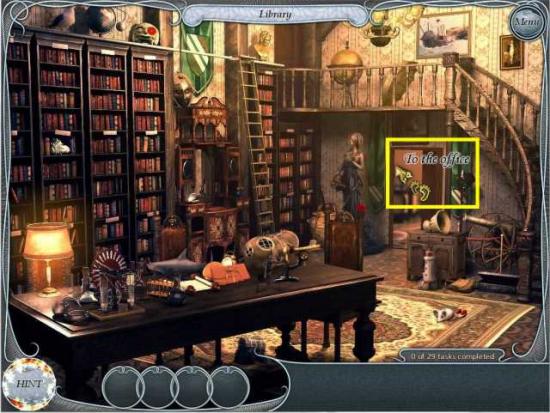
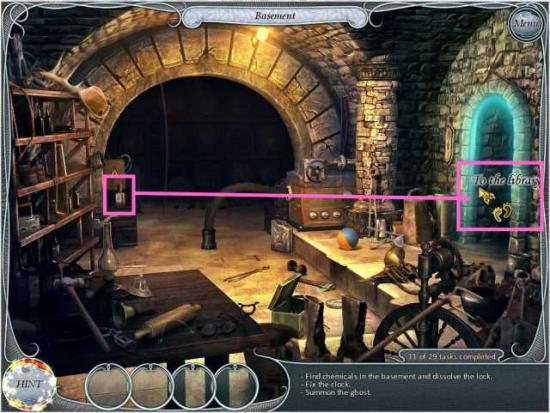
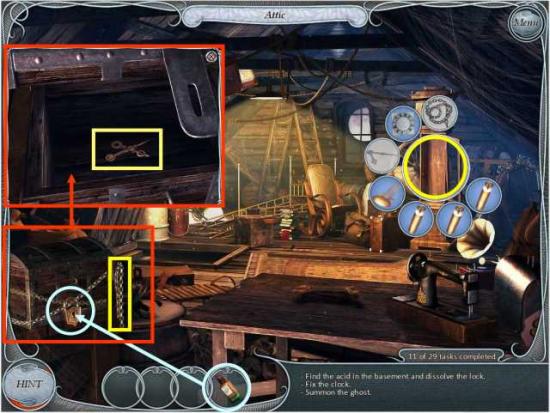
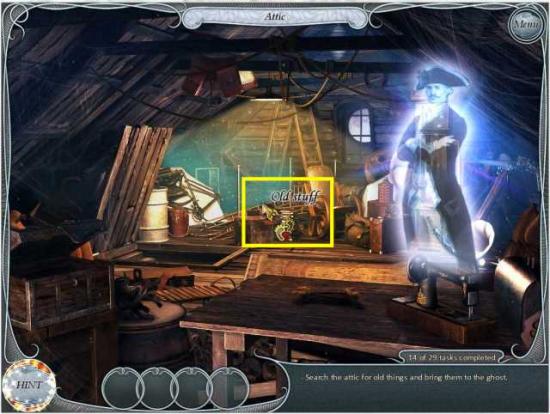
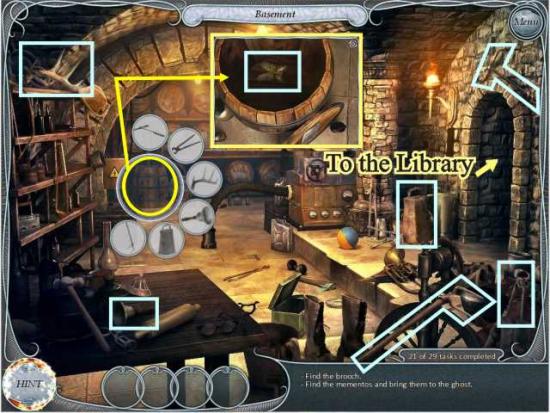
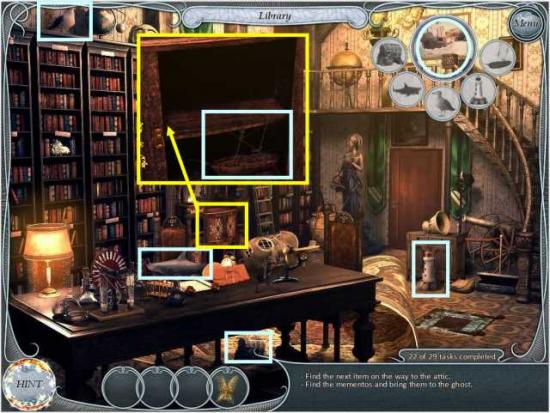
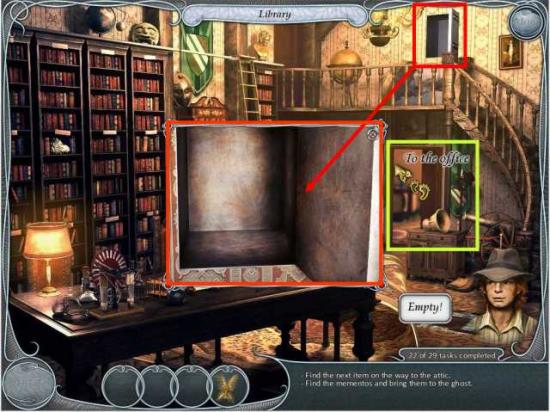
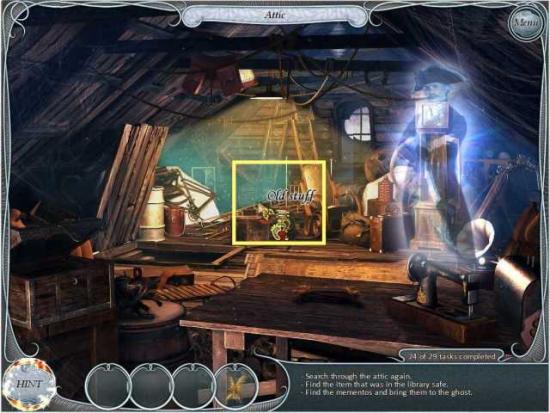
CALDWOLD MANOR
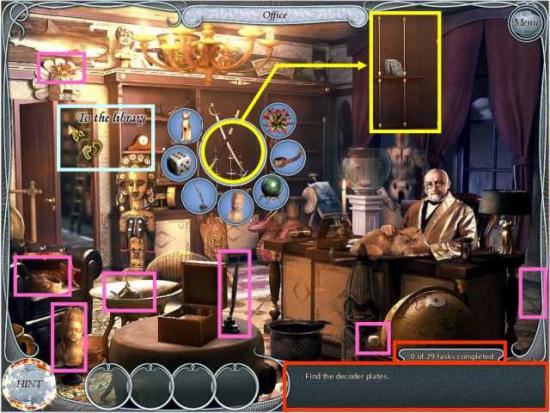
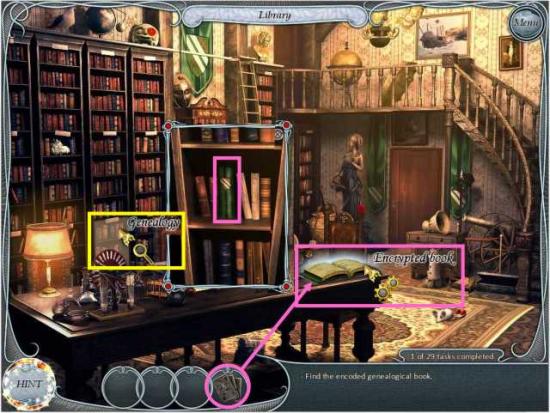
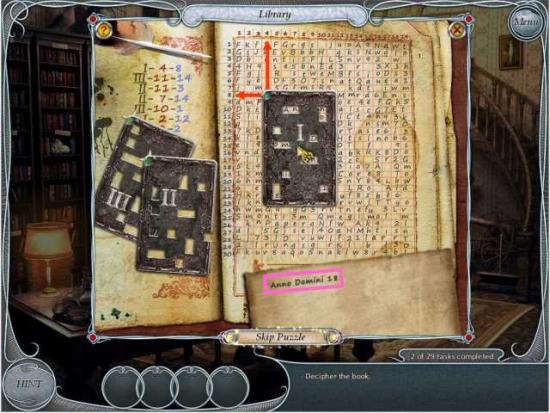
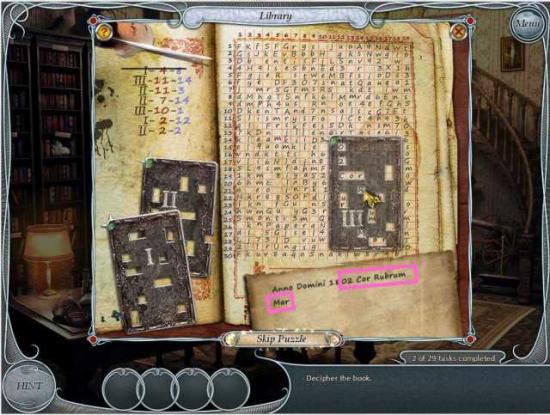
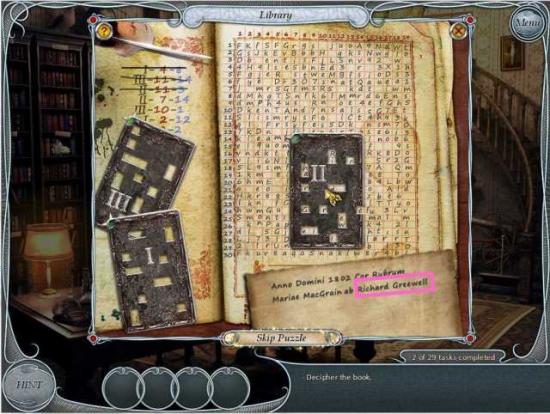
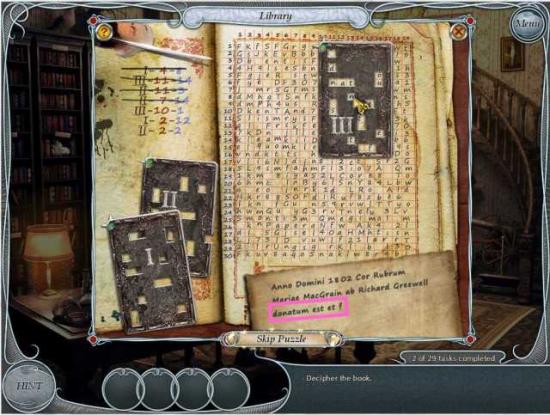
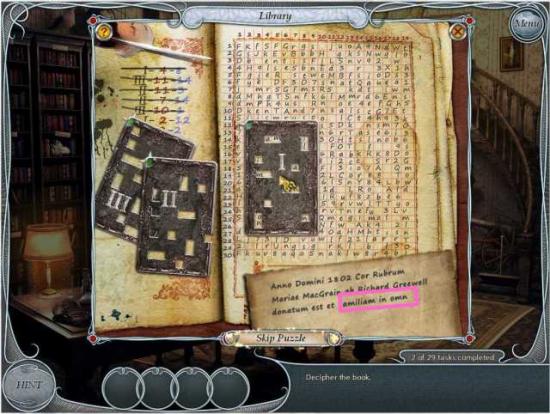
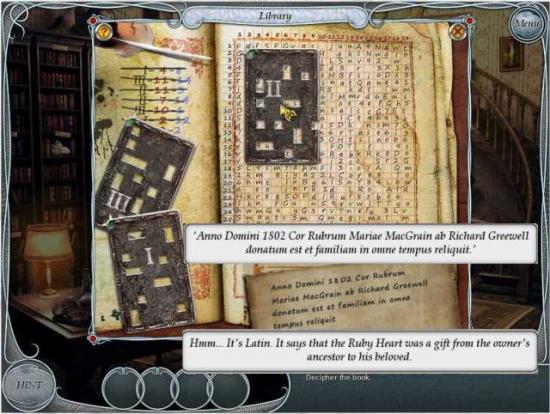
MINI GAME TO DECIPHER THE BOOK

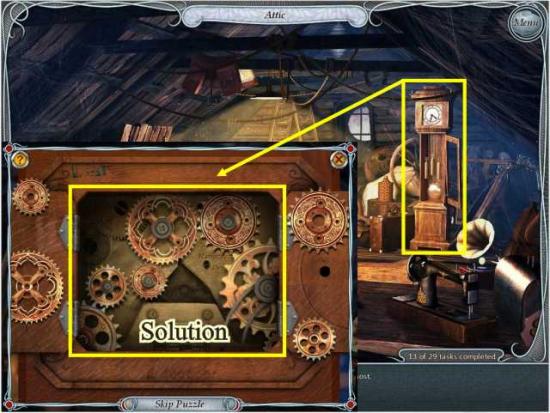
MINI GAME TO SET THE CLOCK TO MIDNIGHT
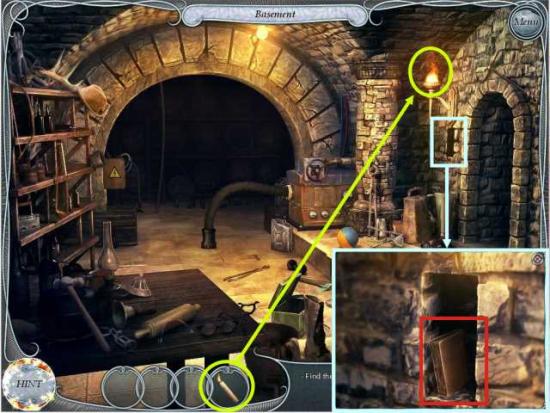
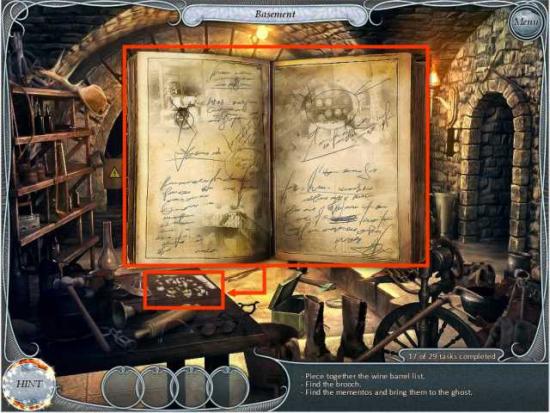
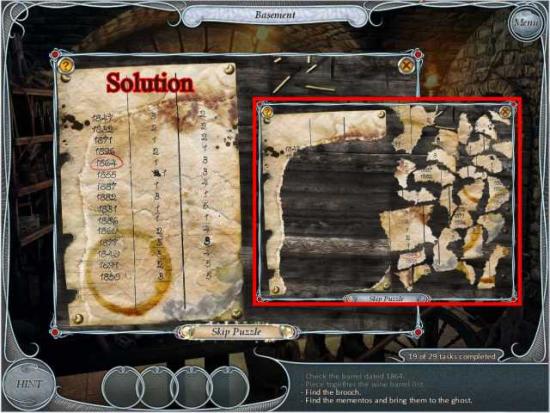
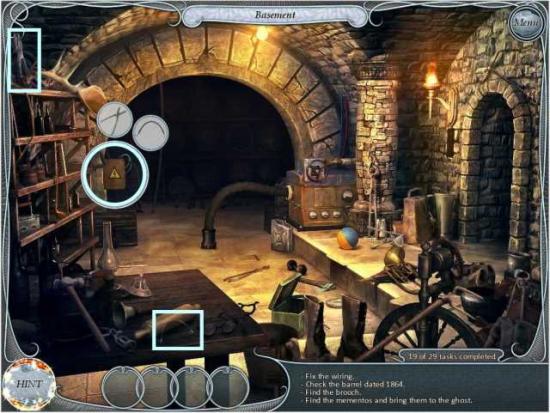
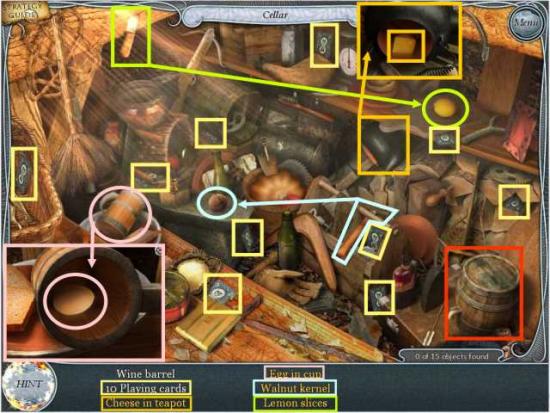
MINI GAME TO PIECE TOGETHER THE WINE BARREL LIST
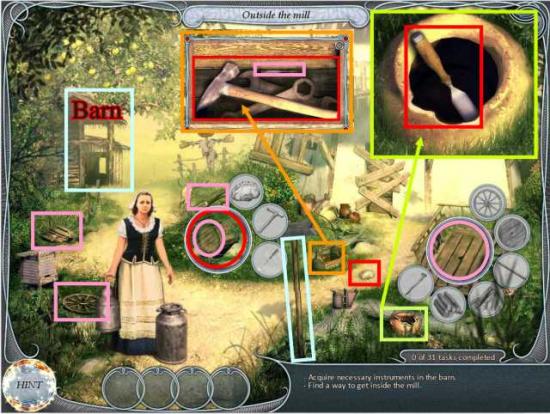
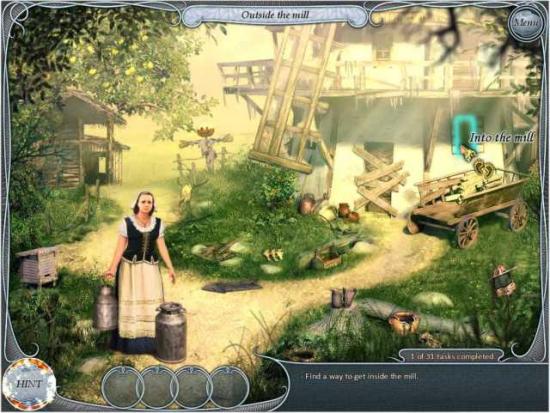
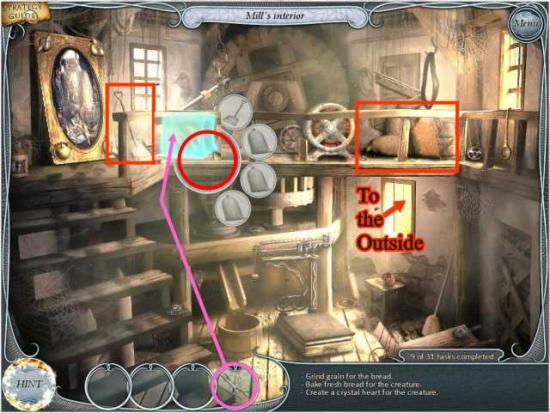
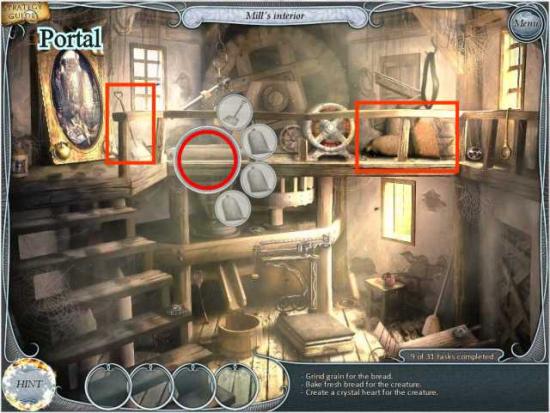
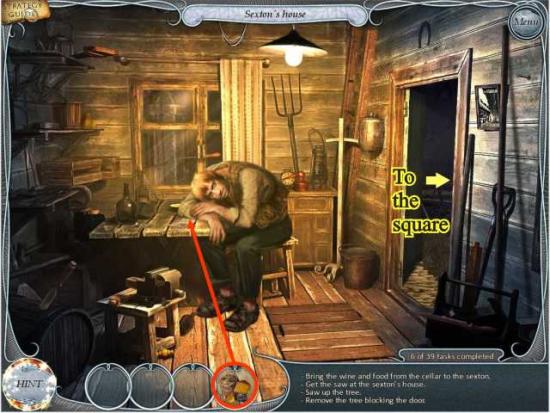
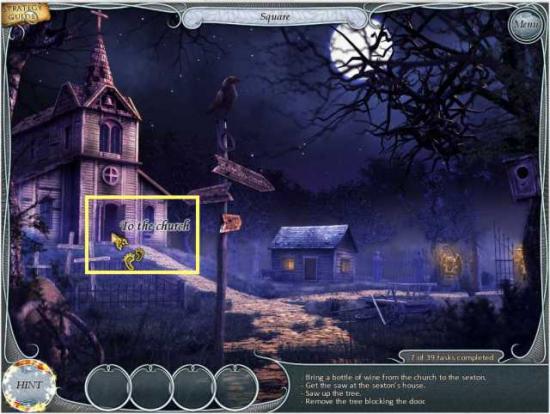
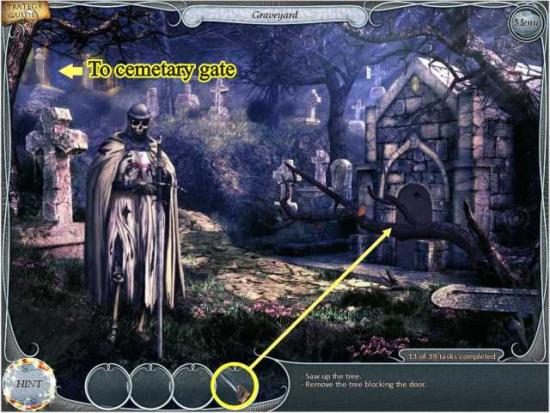
OUTSIDE THE MILL
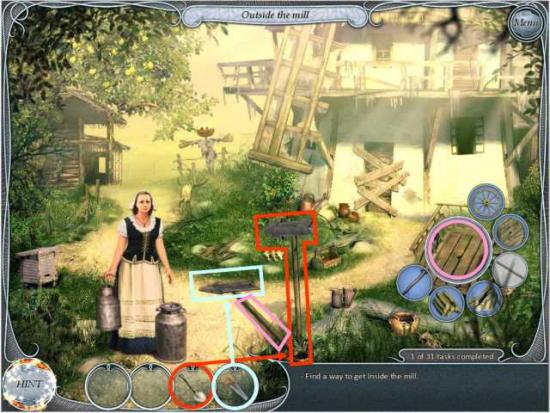
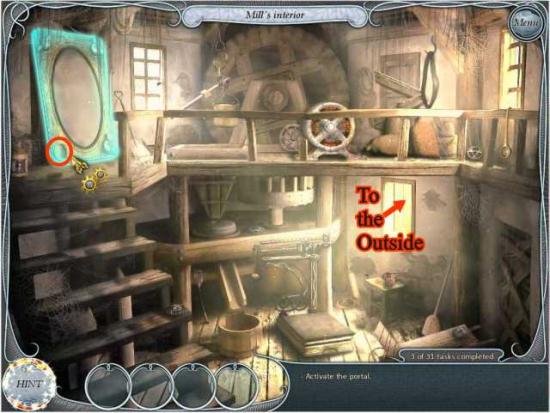
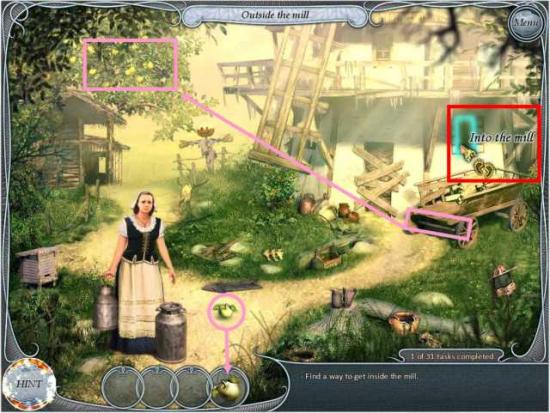
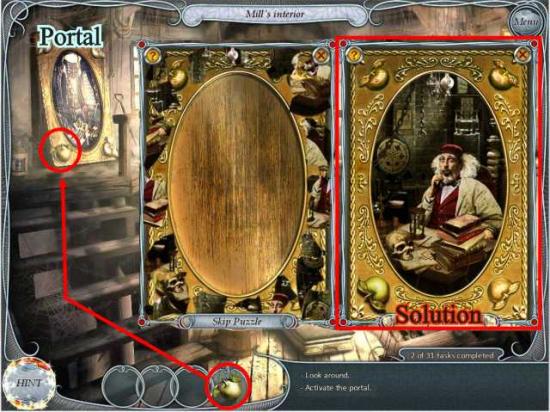
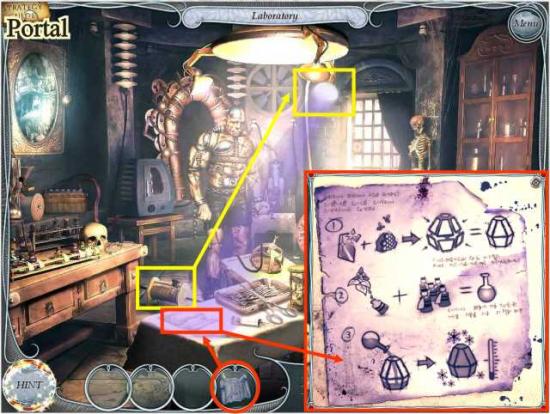
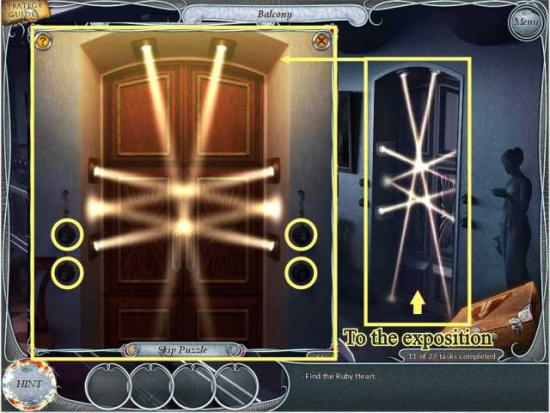
JIGSAW PUZZLE MINI GAME TO ACTIVATE THE PORTAL
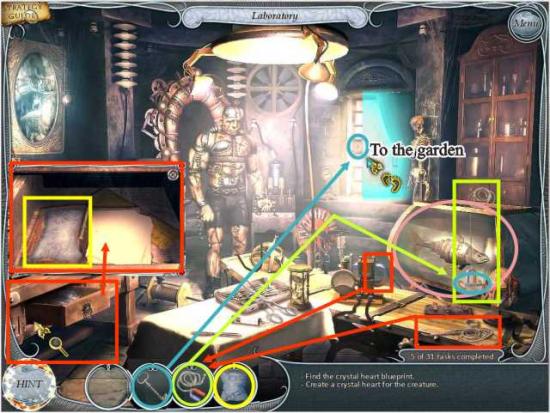
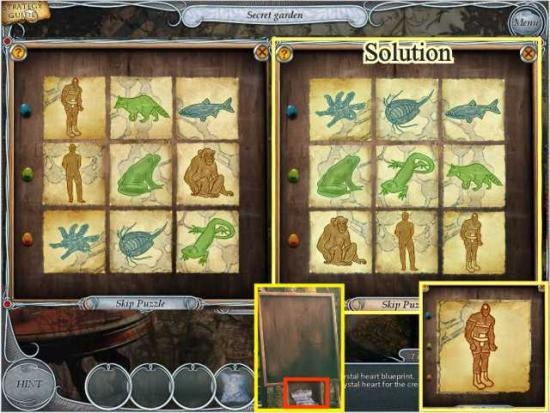
EVOLUTION MINI GAME
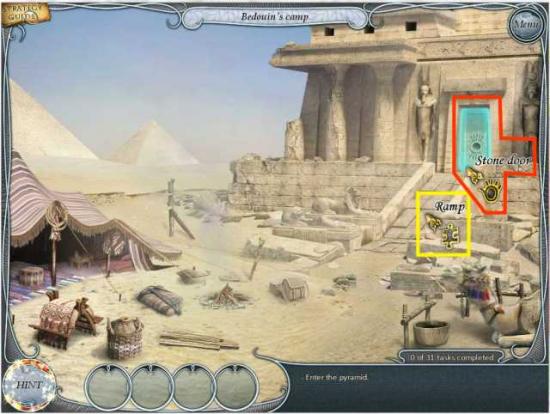
RAMP MINI GAME

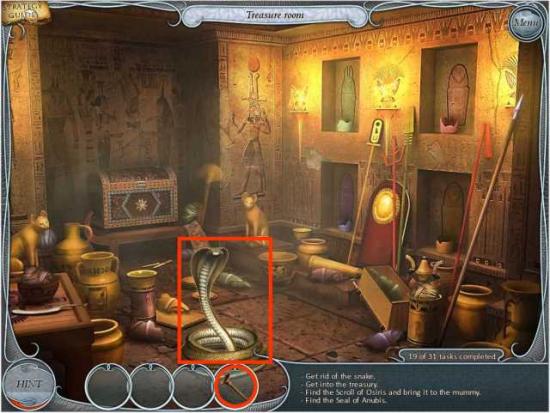
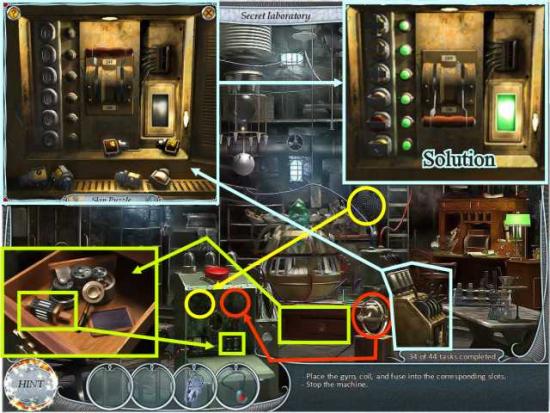
FTG93

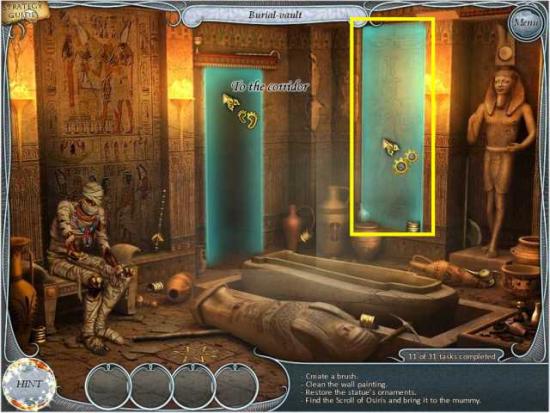

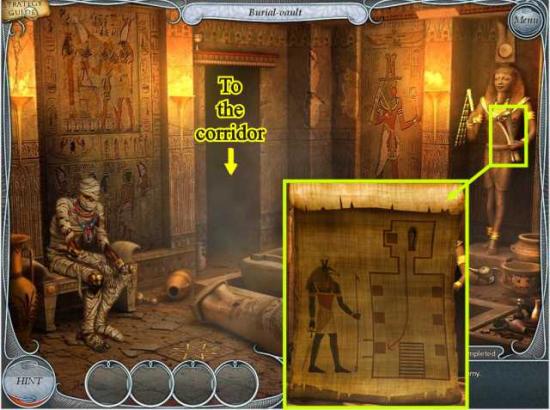
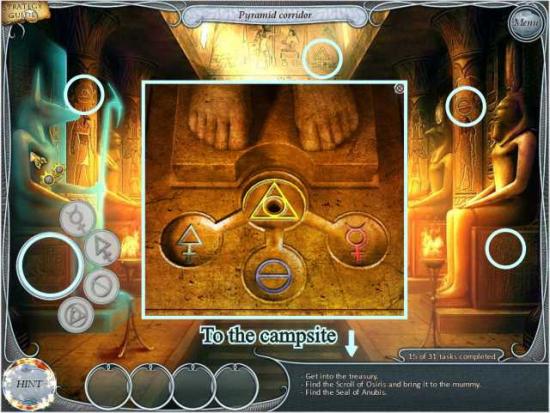
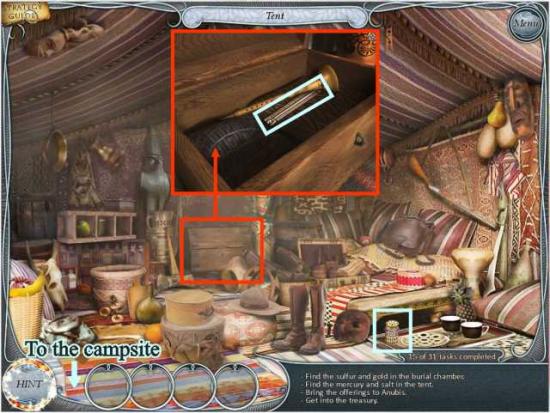

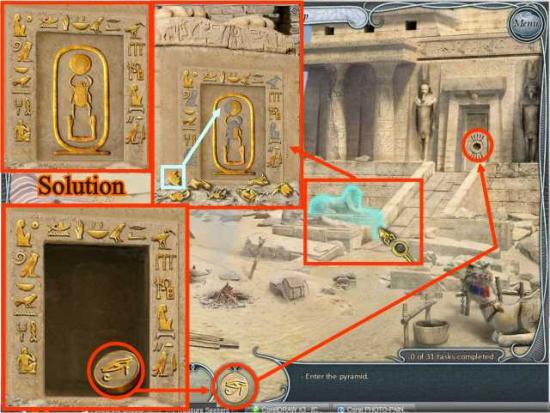
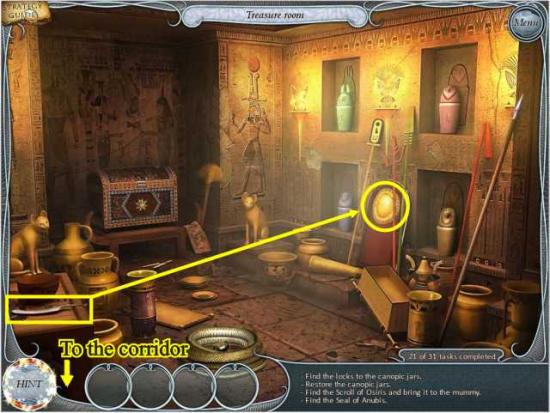
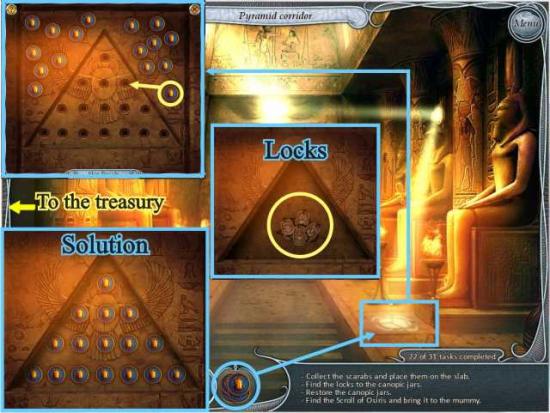
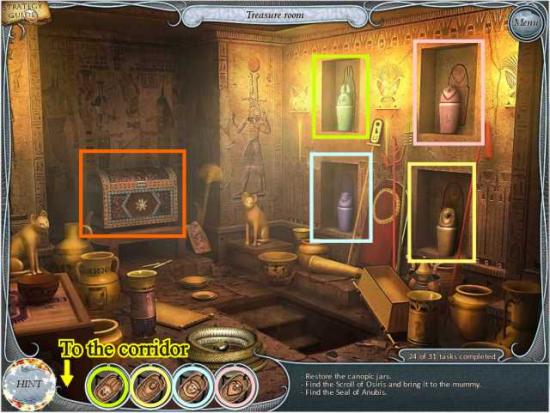
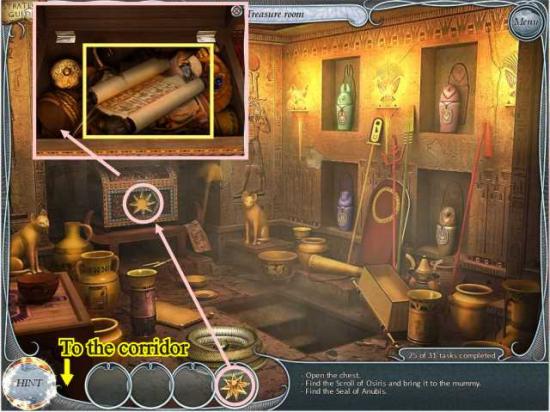
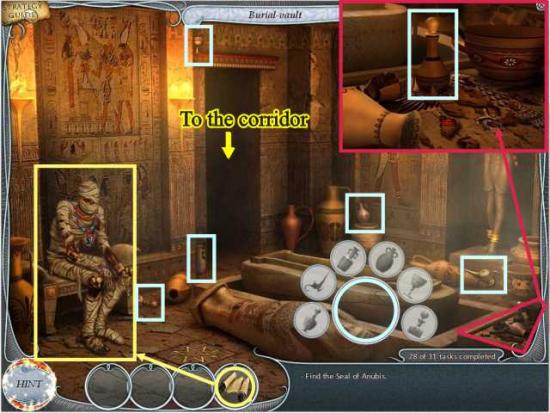
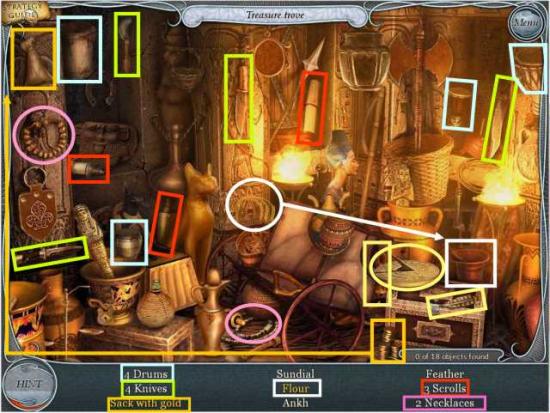
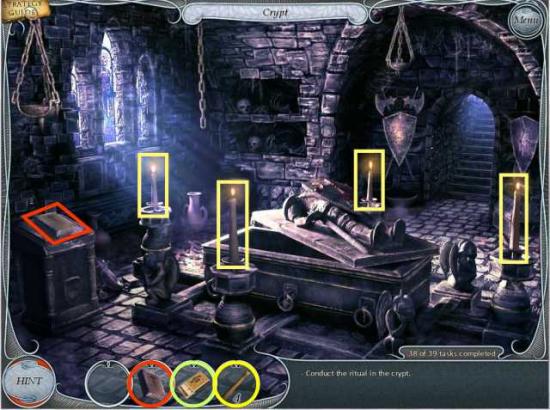
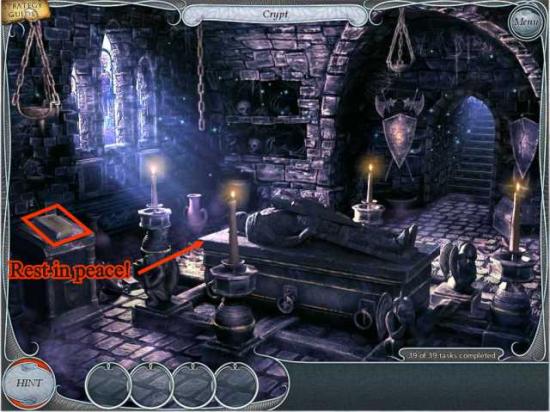
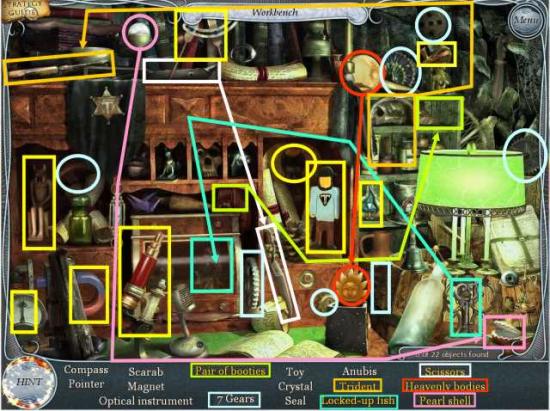
OFFERING TO ANUBIS MINI GAME
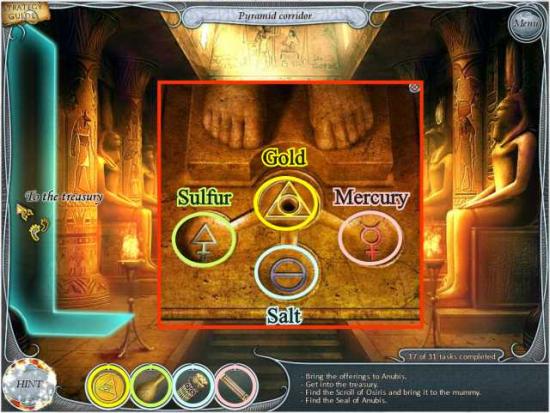
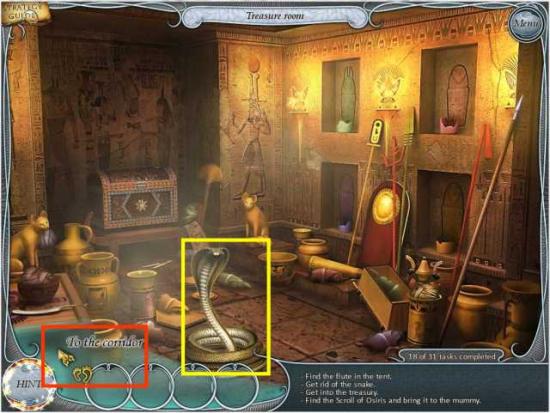
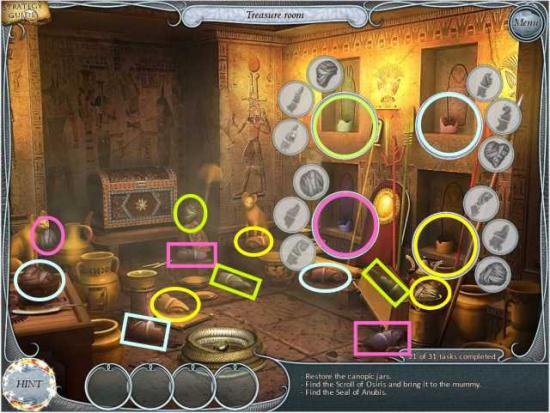
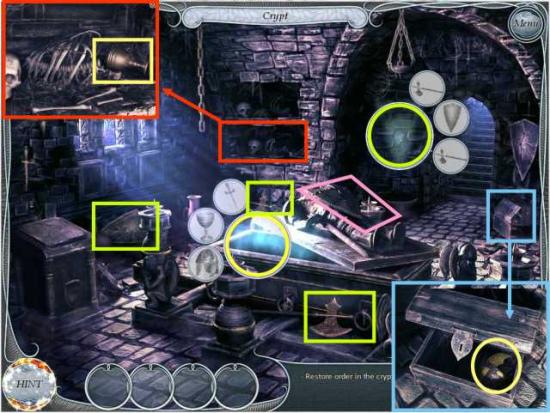
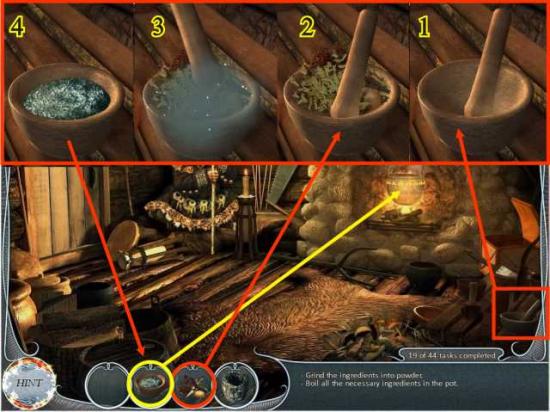
Click on the 4 niches to bring up 4 circlets – collect the color coded pieces of the jars and place them in the circlets.
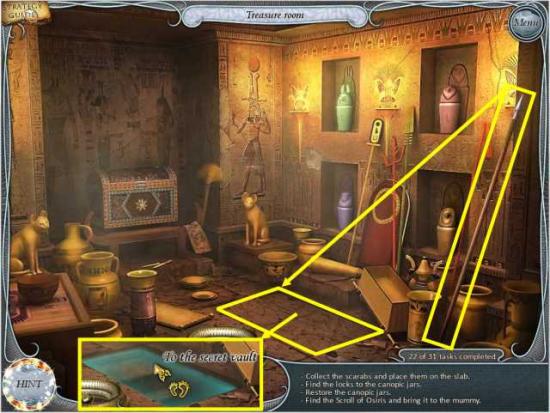
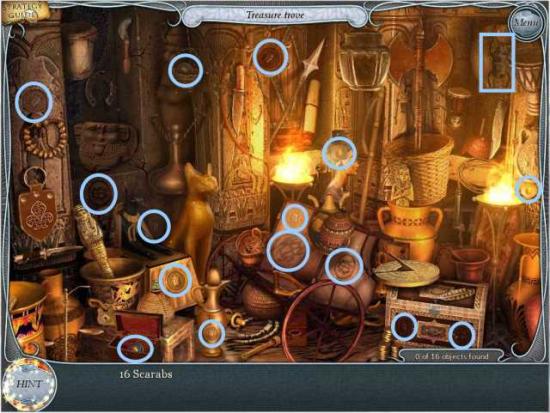
SCARAB MINI GAME


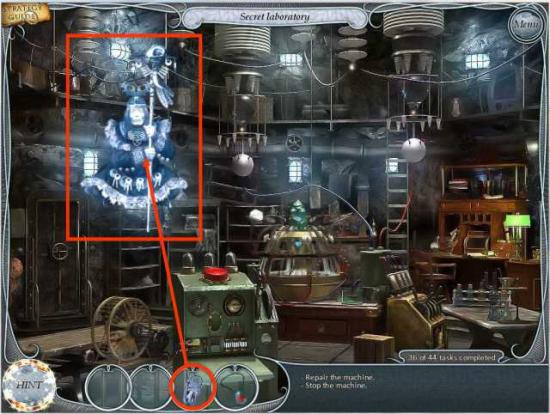
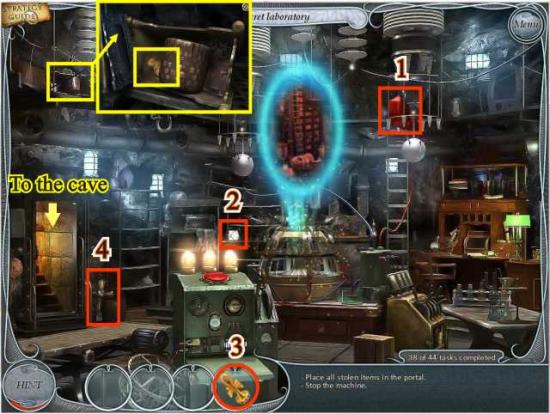
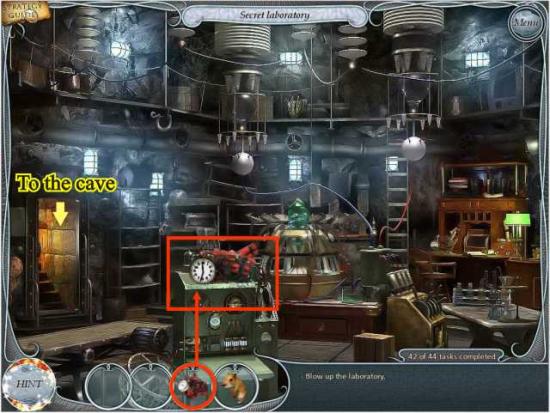
MINI GAME TO DISCOVER THE ROBBER


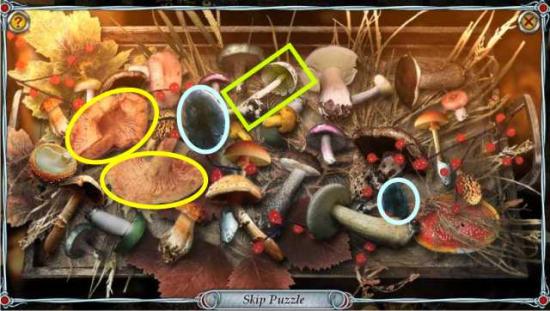
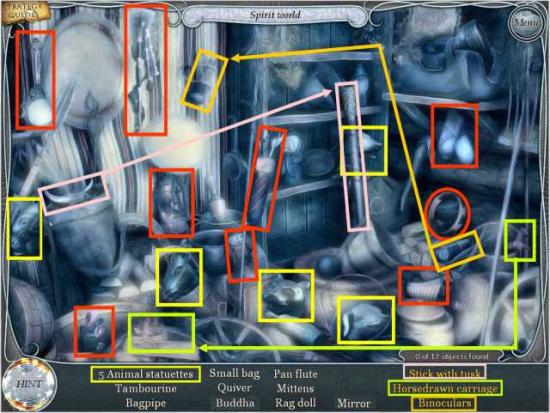
MUSHROOM MINI GAME


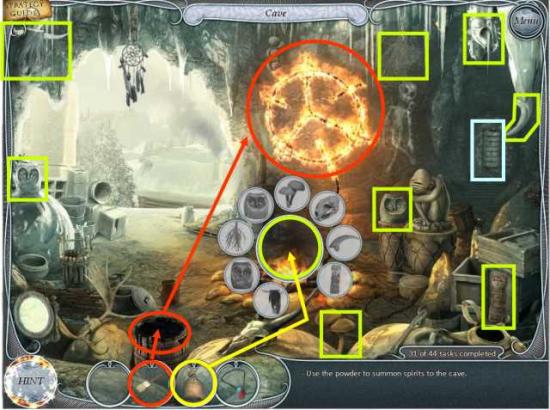
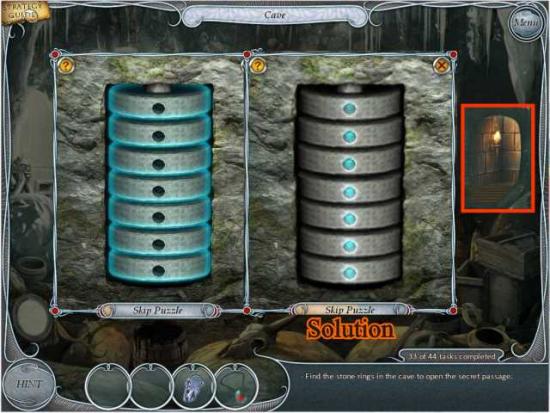
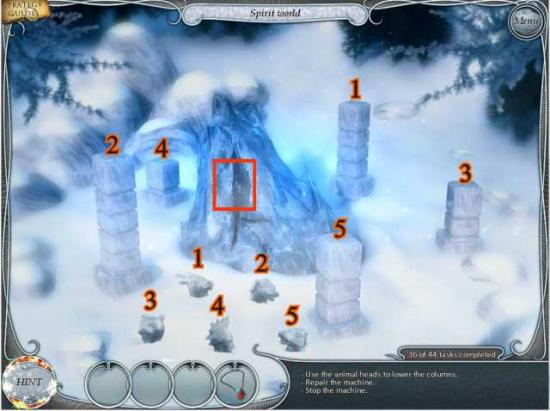
STONES MINI GAME
ANIMAL HEAD MINI GAME


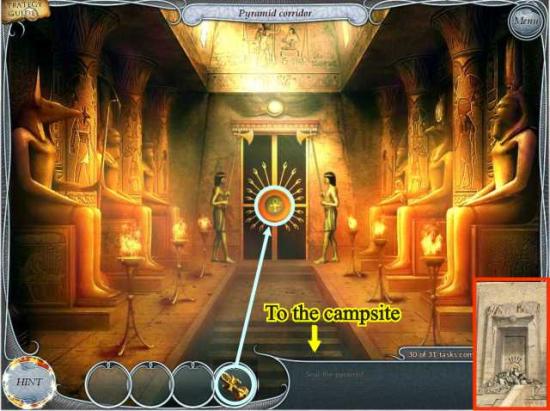
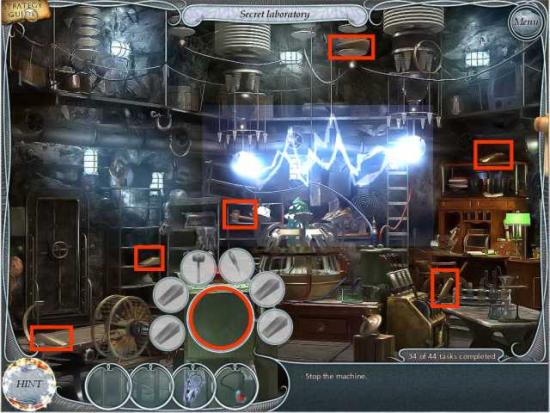
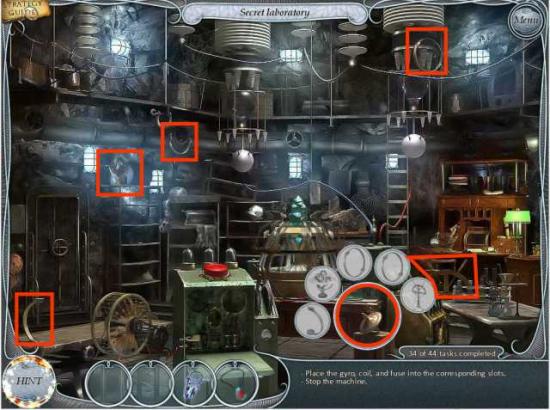
CONGRATULATIONS YOU HAVE COMPLETED YOUR ASSIGNMENTS AND REMOVED ALL THE ANOMALIES.
* * * * * * * * * * * * * * * * * *


CONGRATULATIONS!
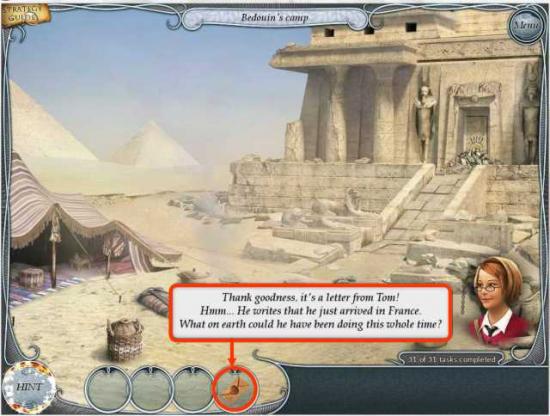
YOU HAVE COMPLETED THE SECRET BONUS SECTION OF TREASURE SEEKERS 3 AND ARE NOW READY TO FOLLOW THE GHOSTS……………..
