![All VV Ultimatum Titles [How to Get]](/wp-content/uploads/2026/06/vv-ultimatum-titles.jpg "All VV Ultimatum Titles [How to Get]")
All VV Ultimatum Titles [How to Get]
Do titles provide buffs?


Welcome to the Top Secret Finders walkthrough on Gamezebo. Top Secret Finders is a hidden object adventure game played on the PC created by Vendel Games. This walkthrough includes tips and tricks, helpful hints, and a strategy guide on how to complete Top Secret Finders.
Welcome to the Top Secret Finders walkthrough on Gamezebo. Top Secret Finders is a hidden object adventure game played on the PC created by Vendel Games. This walkthrough includes tips and tricks, helpful hints, and a strategy guide on how to complete Top Secret Finders.
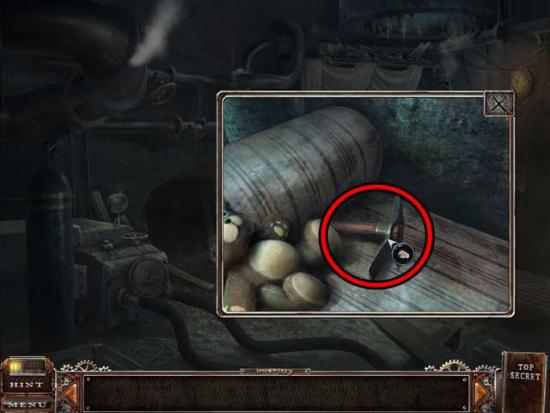
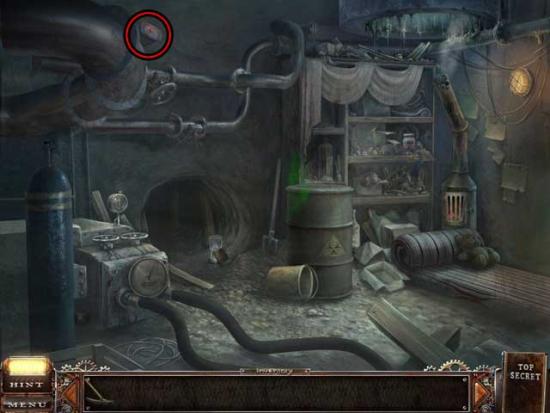
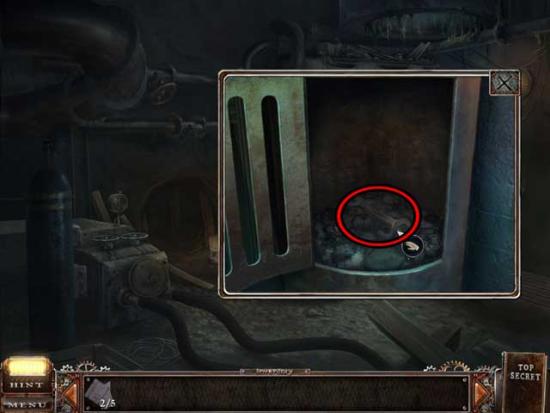
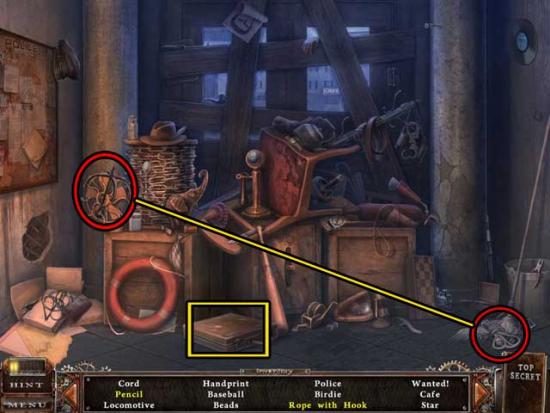
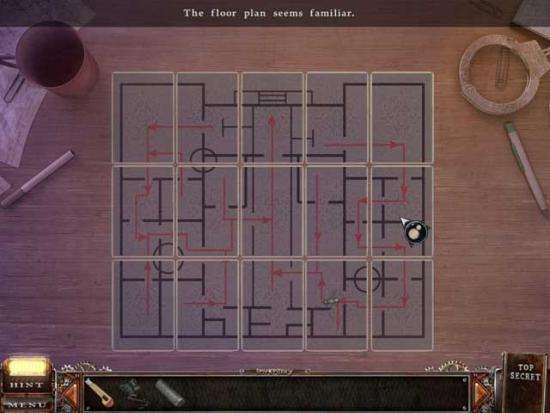
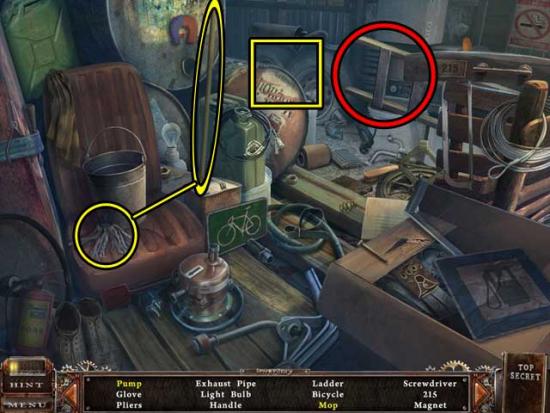
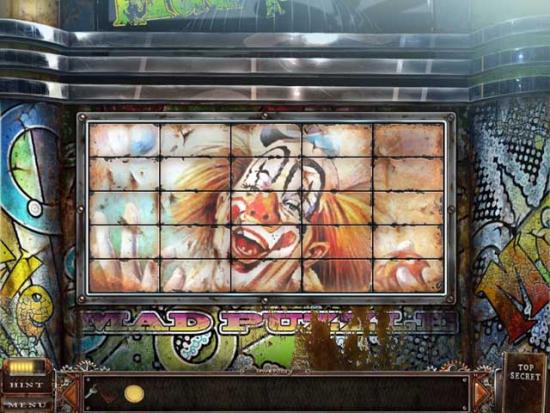
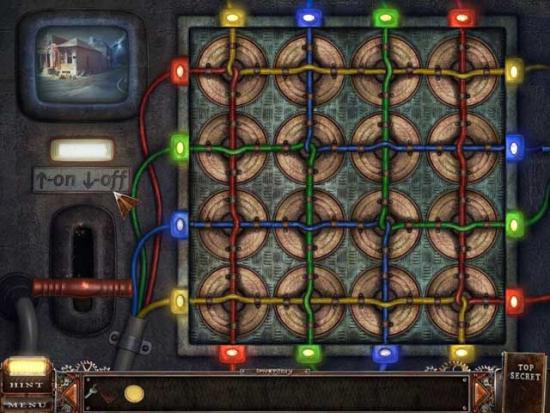
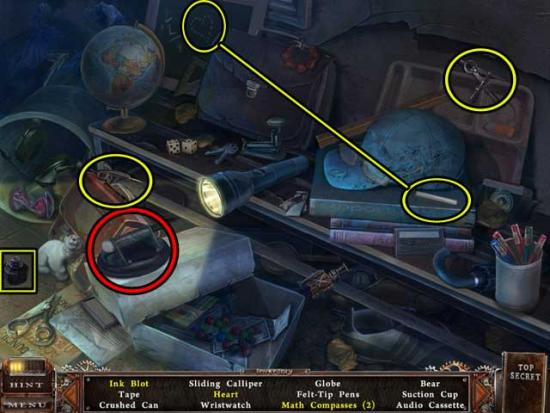
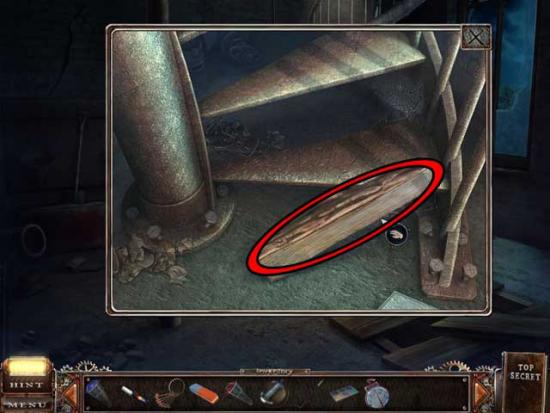
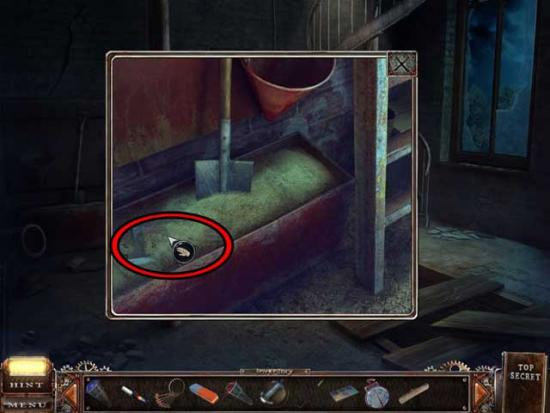
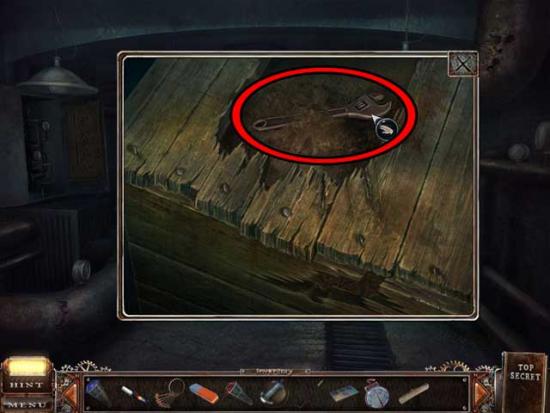
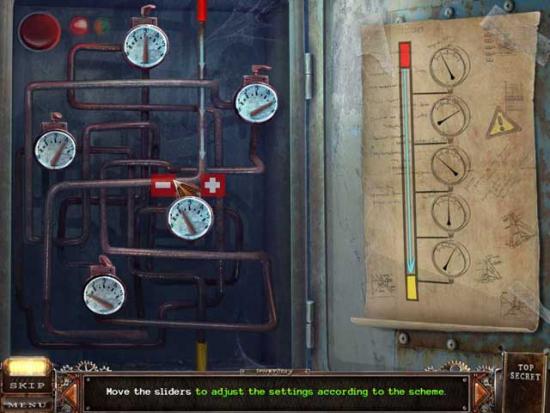
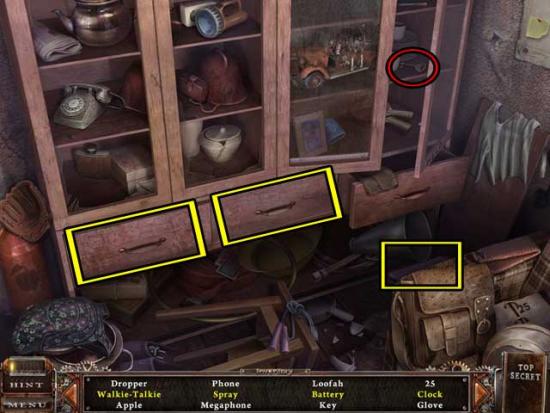
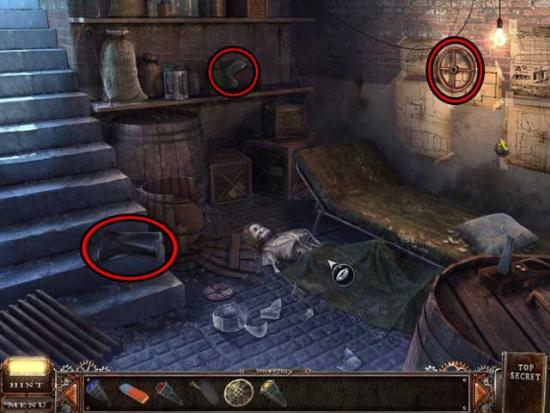
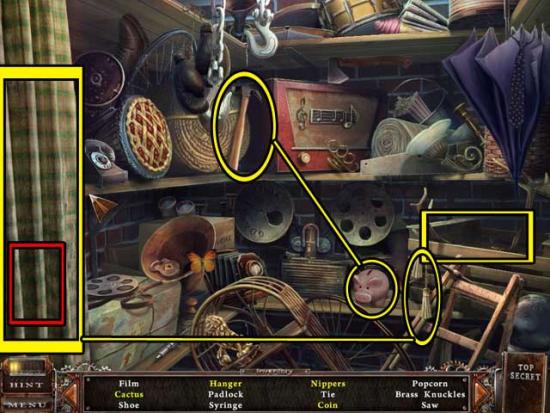
Boiler Room


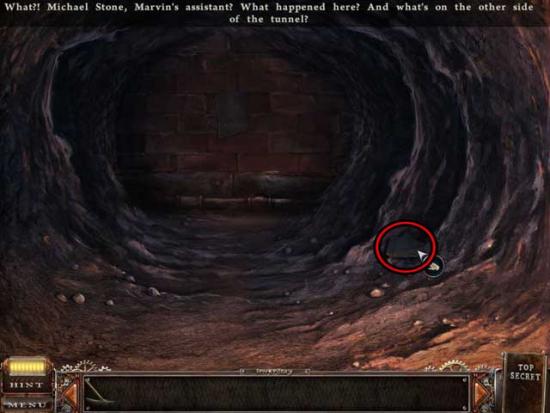
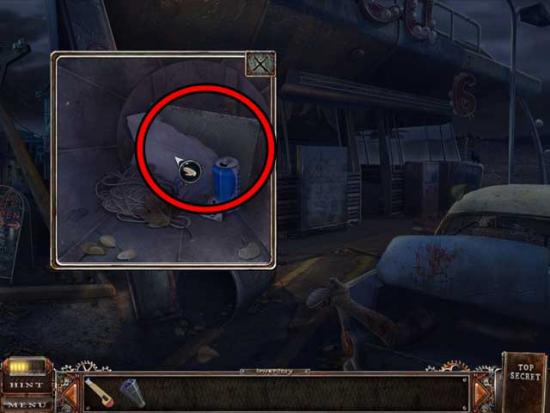
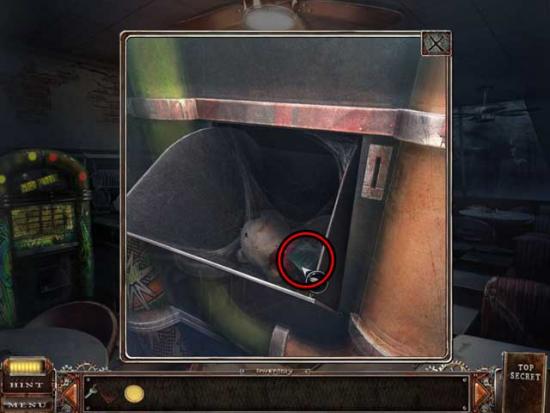
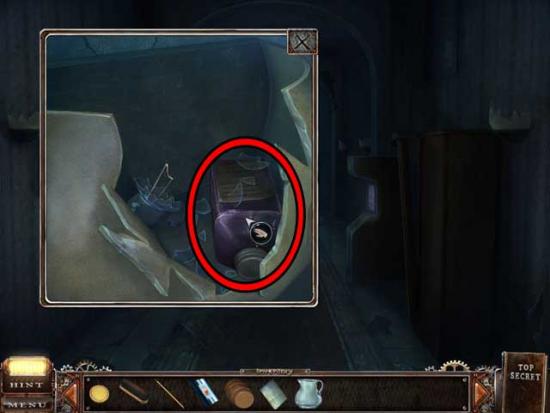
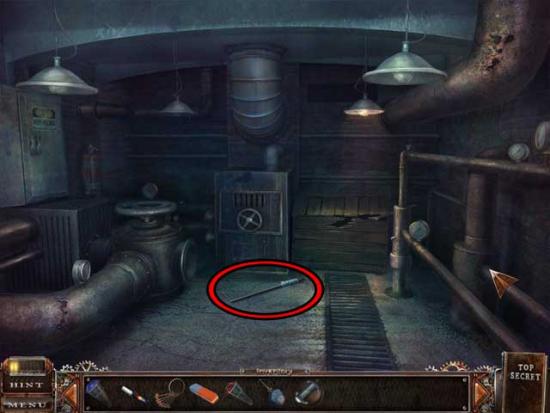
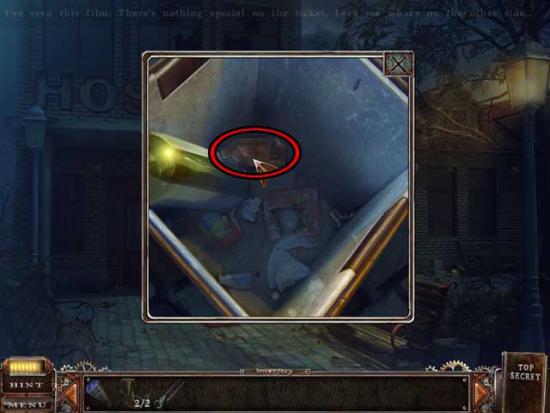
Tunnel
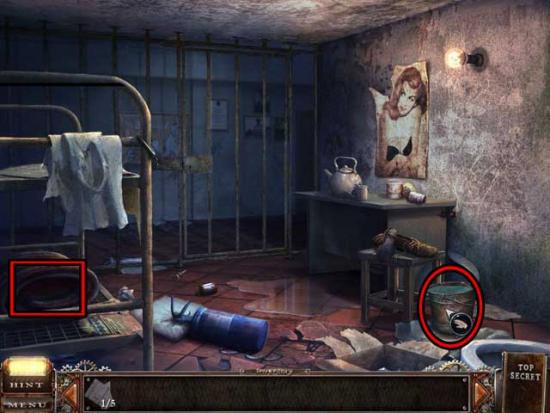
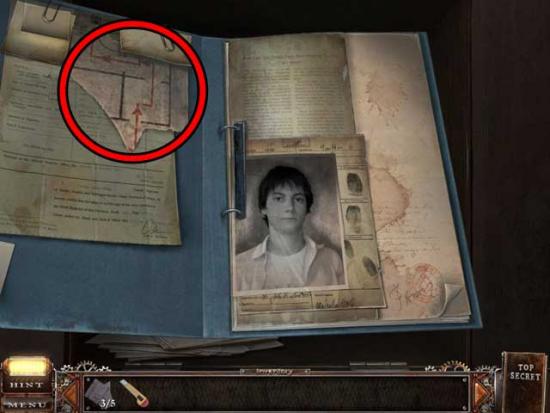
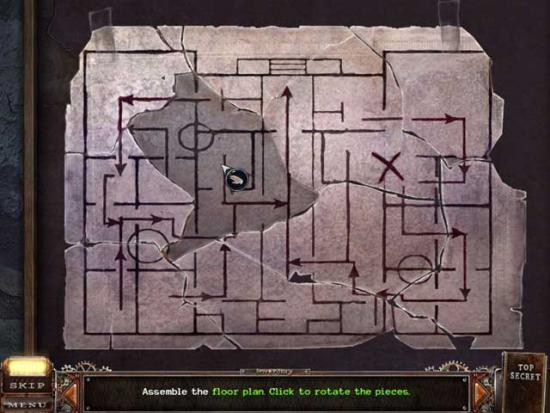
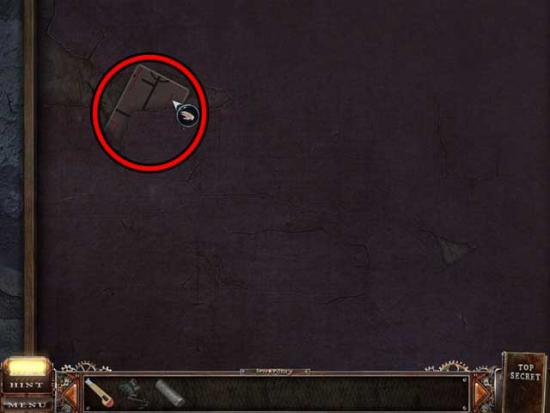
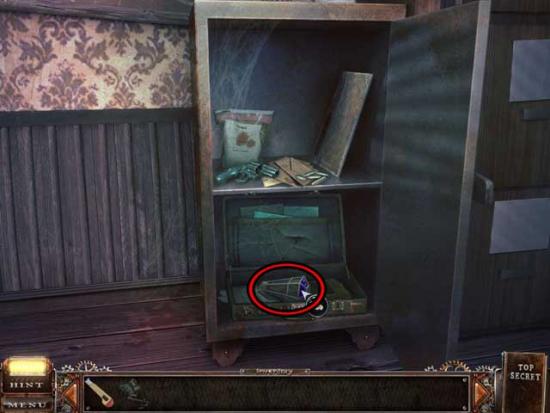
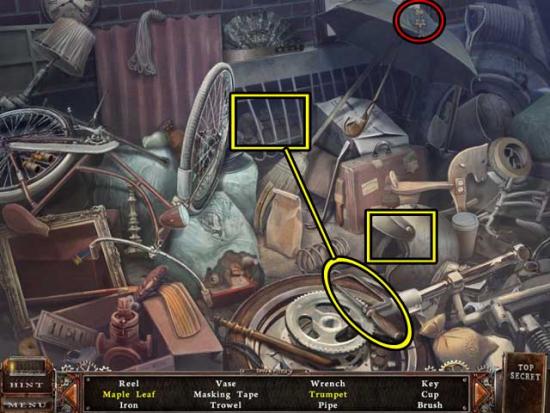
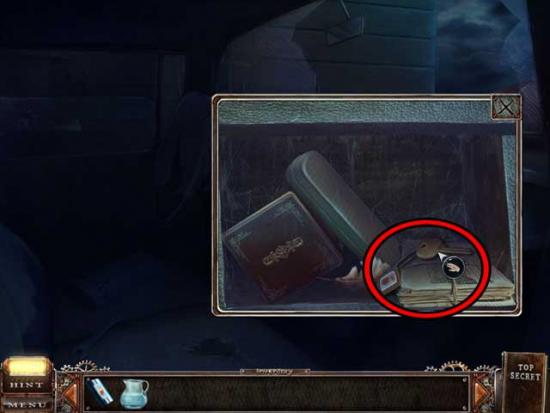
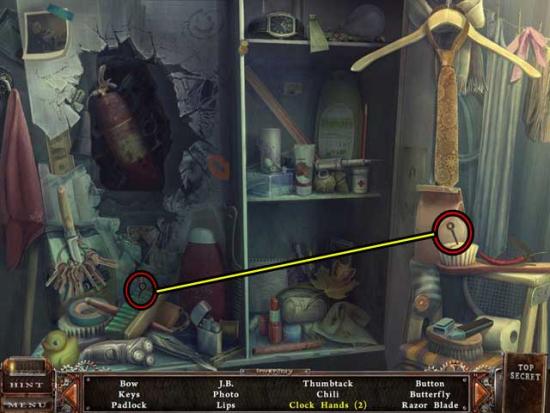
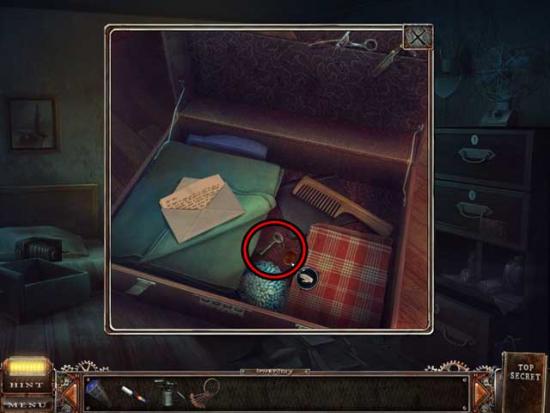
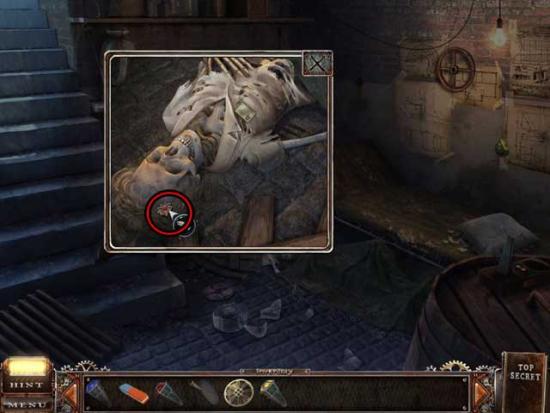
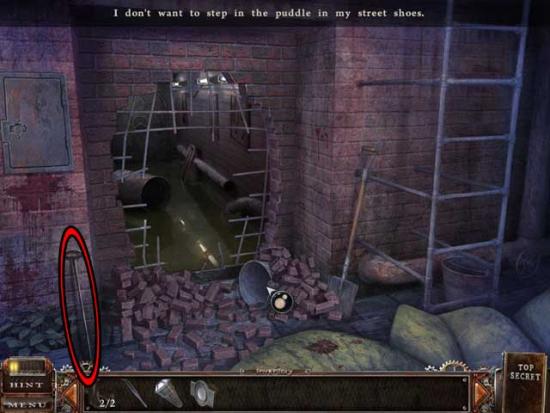
Cell
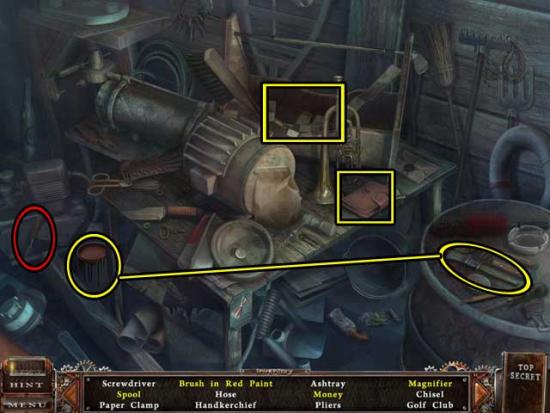
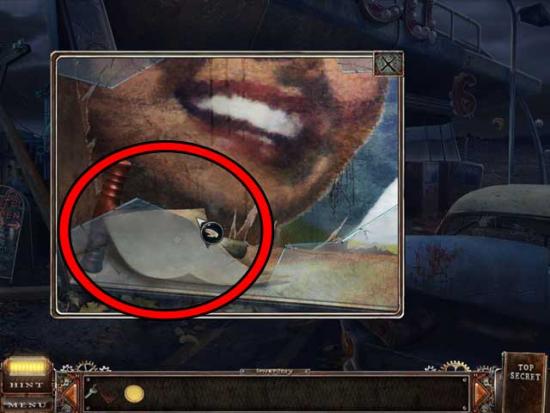
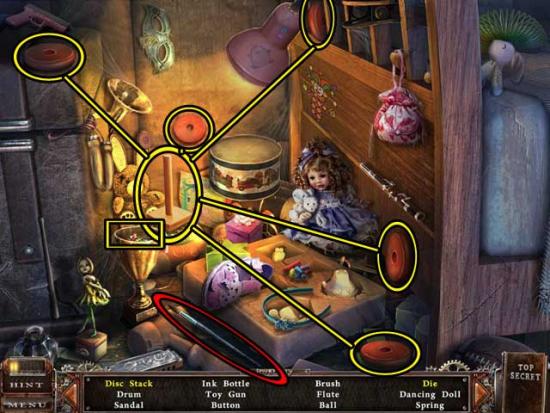
Boiler Room
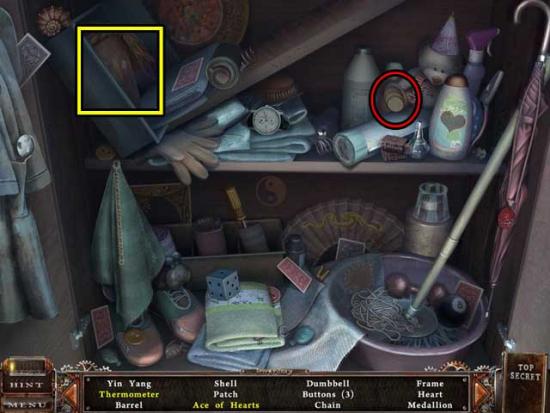
Cell
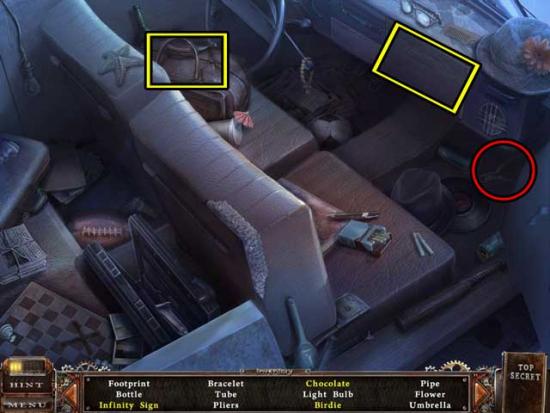
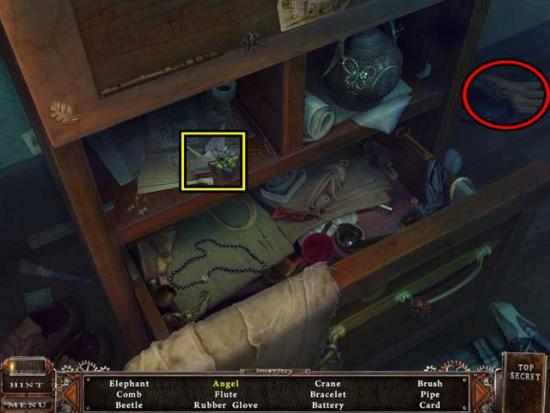
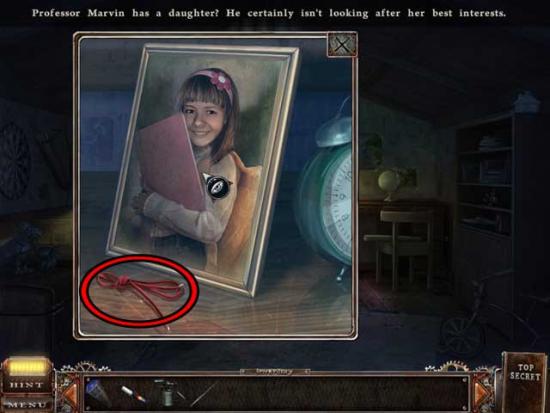
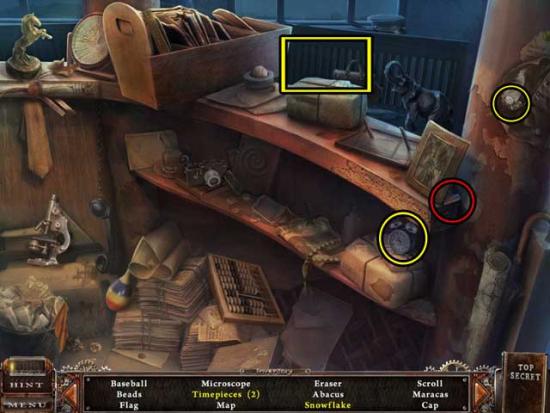
Hall

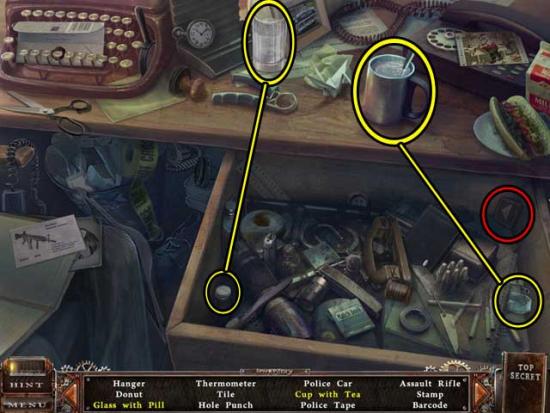
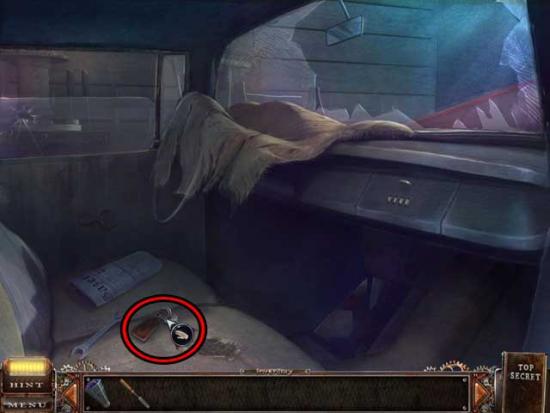
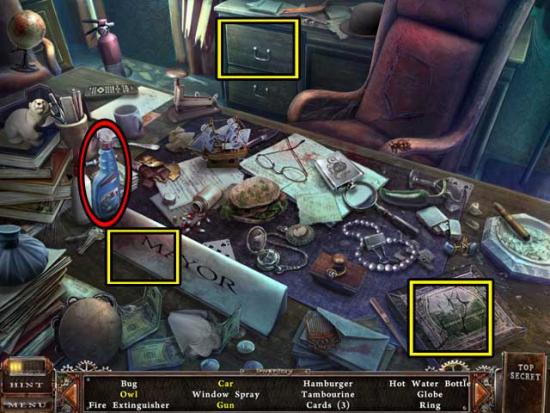
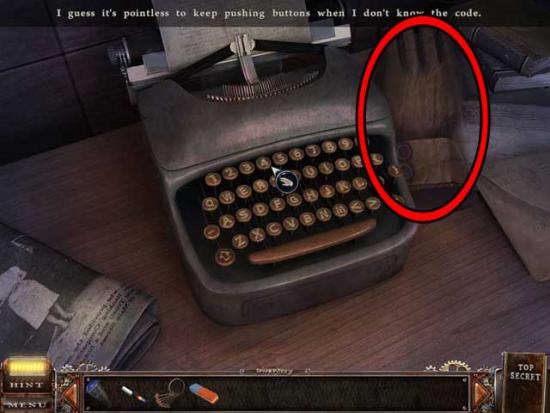
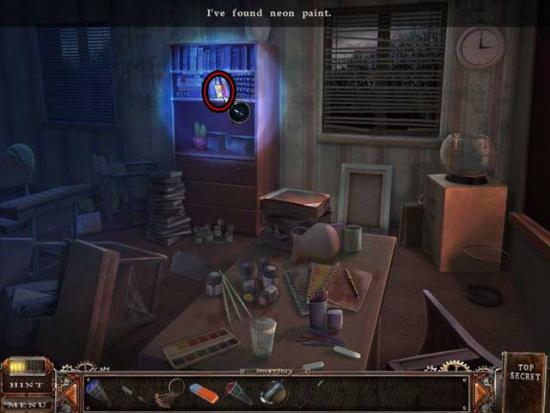
Office


Hall
Office
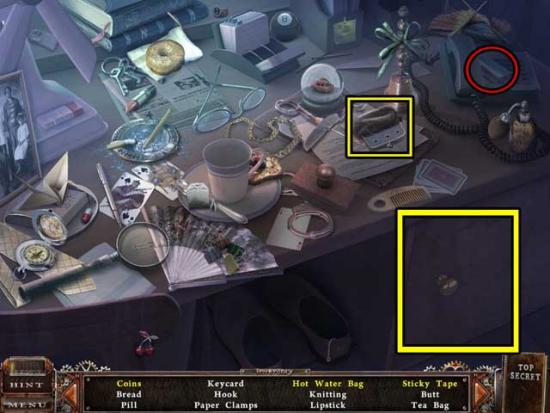
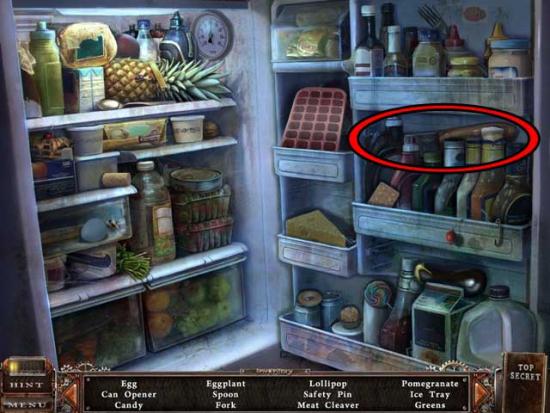
Boiler Room
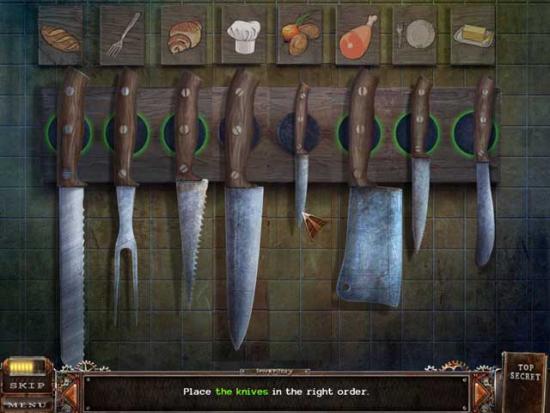
Border
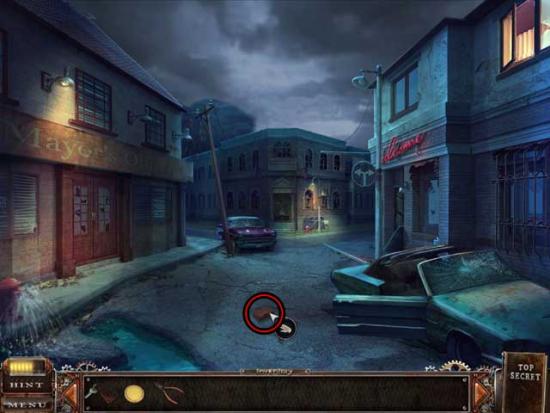
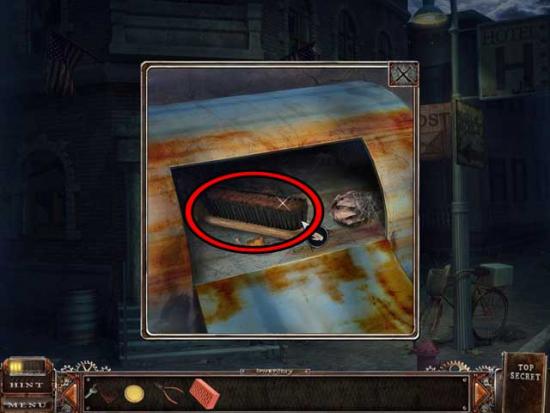
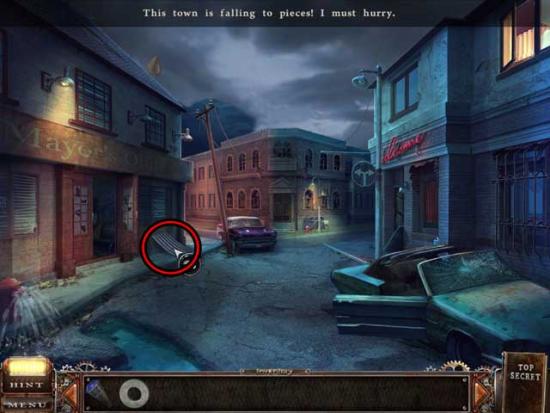
Street
Cafe Entrance
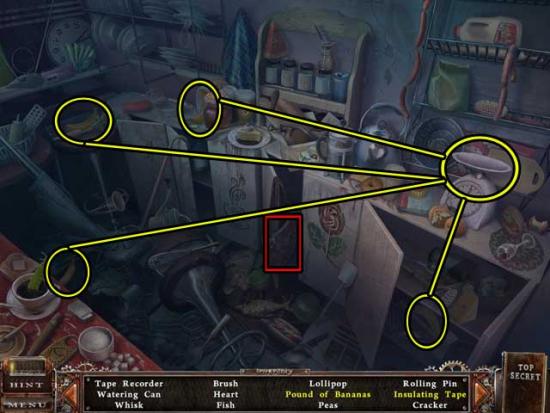
Cafe
Street
Gas Station
Garage
Gas Station

Cafe
Street
Hall
Cafe Entrance
Gas Station
Street
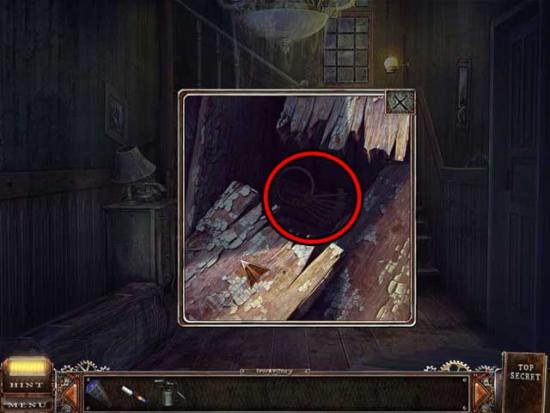
Side Street
Post Office Entrance
Fallen Tree
Post Office Entrance
Chasm
Side Street
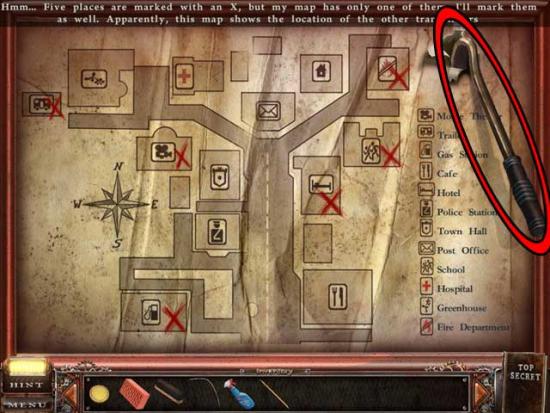
Town Hall
Lobby
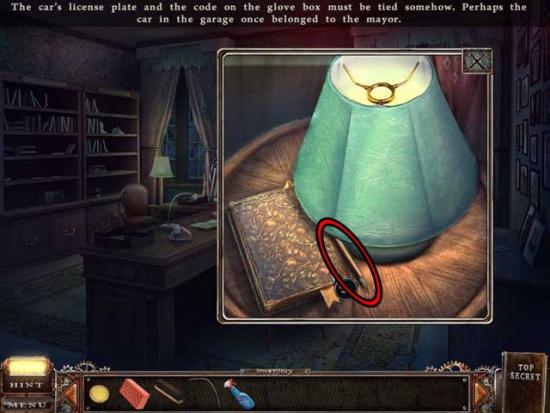
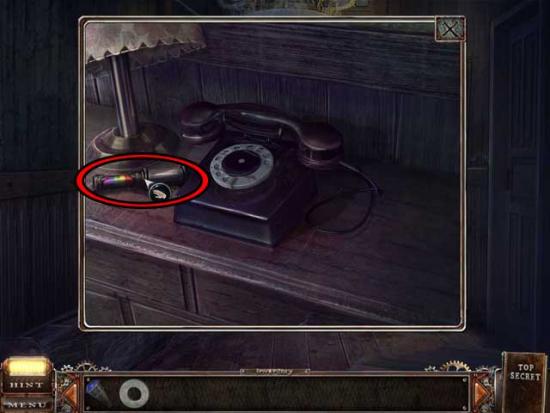
Mayor’s Office
Lobby
Town Hall
Side Street
Hotel Entrance
Hotel Lobby
Upstairs Hall
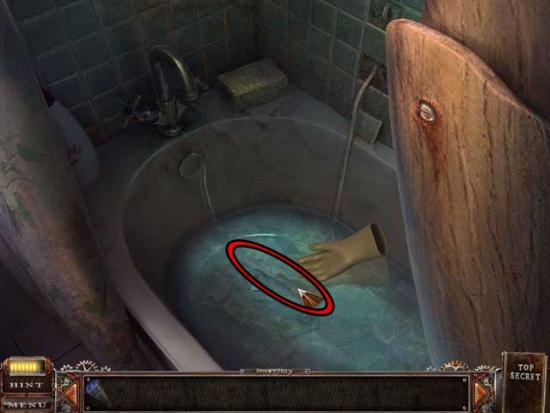
Hotel Room
Bathroom
Upstairs Hall
Hotel Lobby
Upstairs Hall
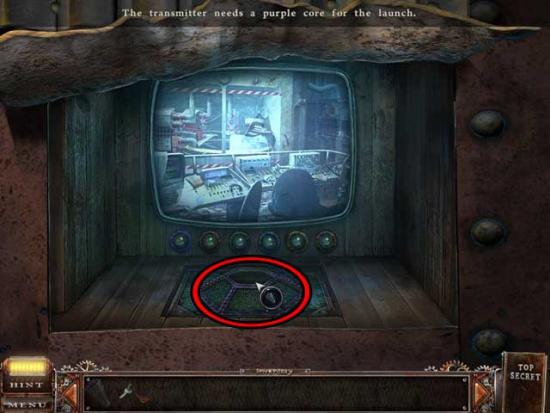
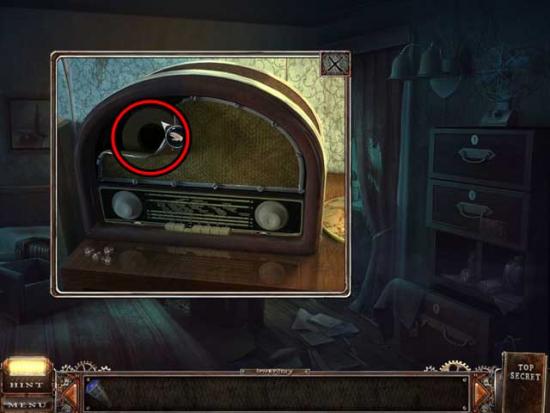
Hotel Transmitter Room
Side Street
Garage
Lobby
Major’s Office
Hotel Transmitter Room
Bathroom
Hotel Transmitter Room
Bathroom
Hotel Transmitter Room
Side Street
Chasm
Front Yard
Foyer
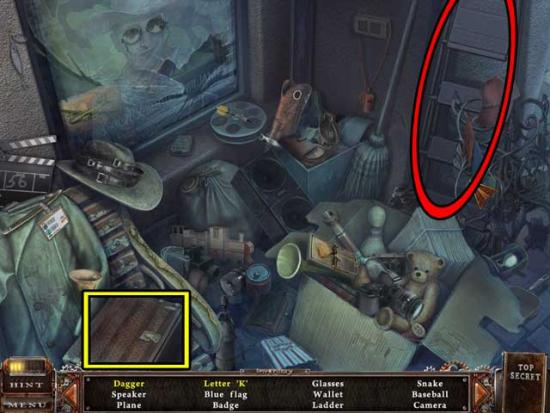
Child’s Room
Foyer
Hotel Transmitter Room
Post Office Entrance
Post Office


Chasm
School Yard
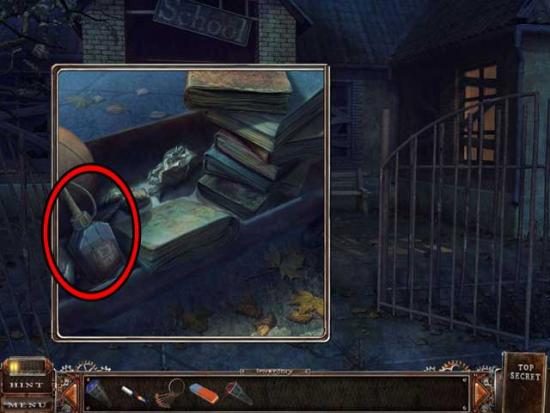
School
School Boiler Room
School
Classroom
Chasm
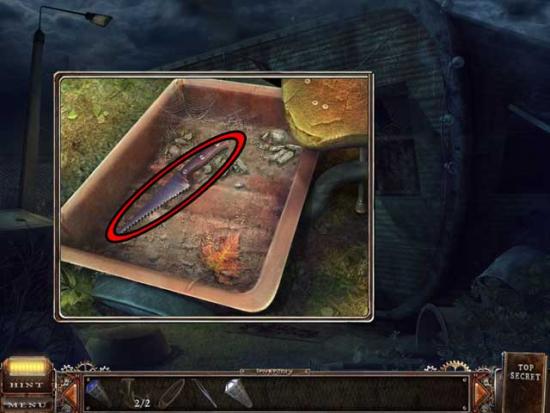
Fire Station Garage
Fire Station
School Boiler Room
School
Fire Station
Break Room
Fire Station
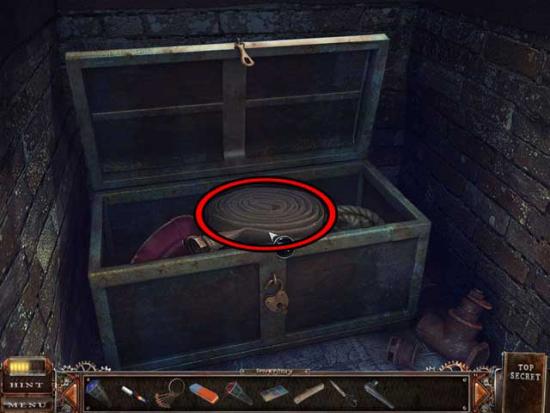
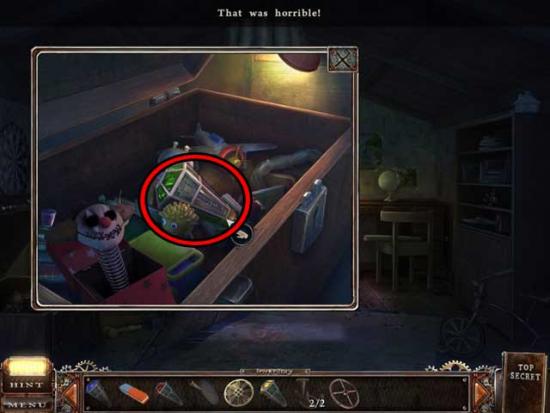
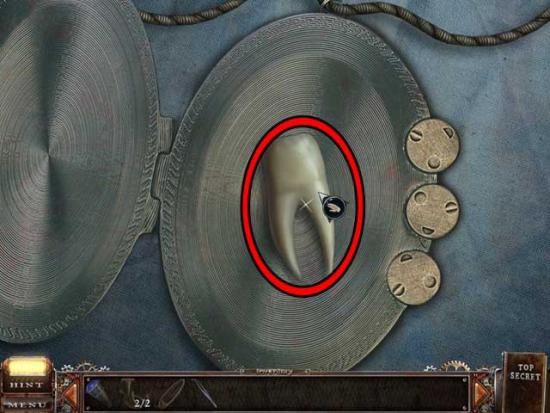
Storage Chest
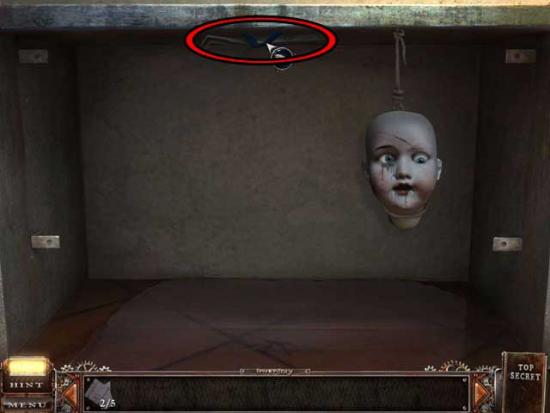
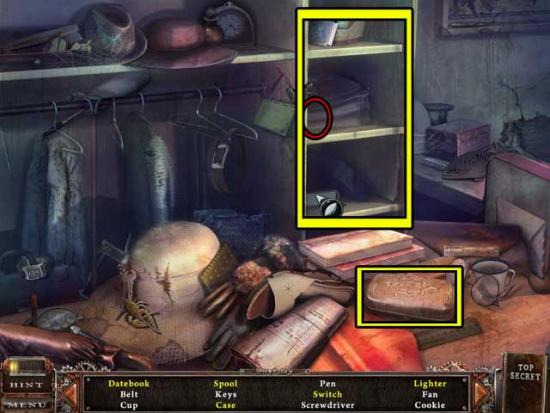
Child’s Room

Foyer
Living Room

Back Yard
Basement
Child’s Room
School
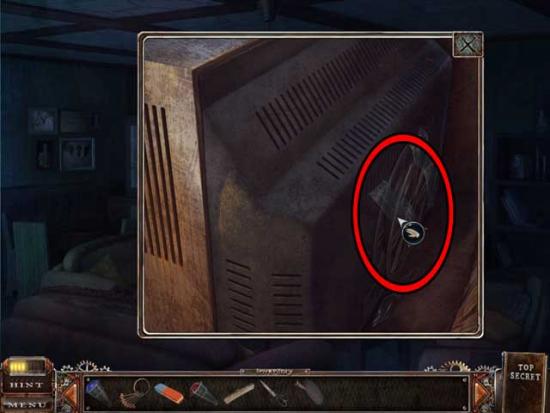
Hotel Transmitter Room
Fallen Tree
Cinema Entrance
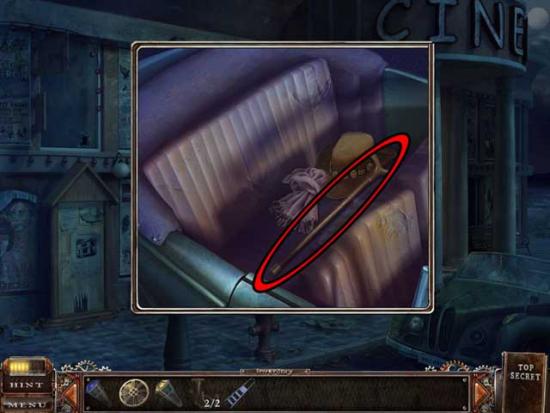
Cinema Lobby
Theater
Cinema Lobby
Projector Booth
Theater

Fallen Tree
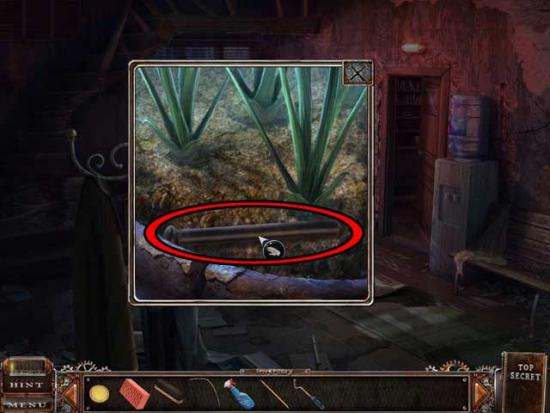
Greenhouse Entrance
Fallen Tree
Hospital Entrance
Hospital

Hospital Hallway
Dentist
Hospital Hallway
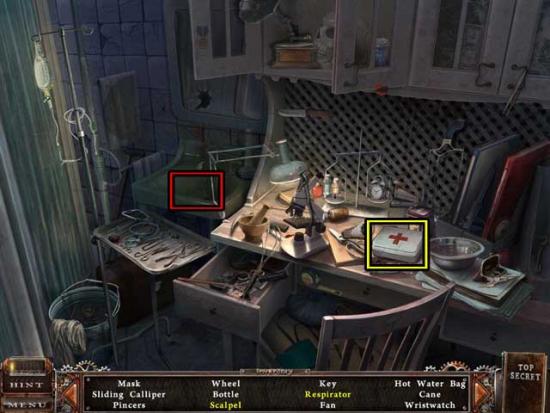
Operating Room
Dentist
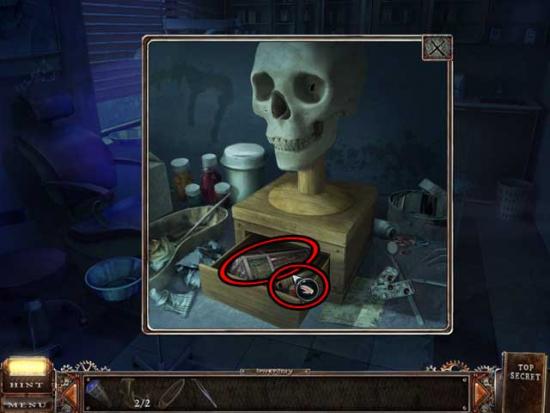
Operating Room
Greenhouse Entrance
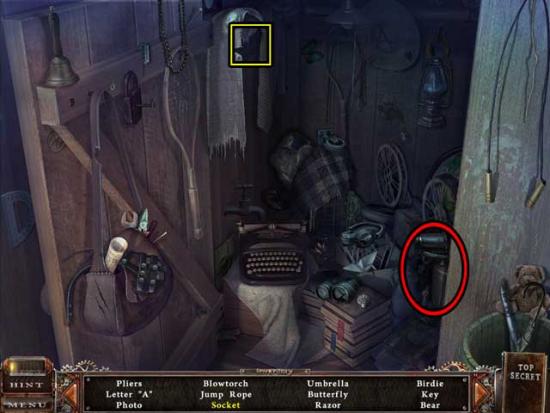
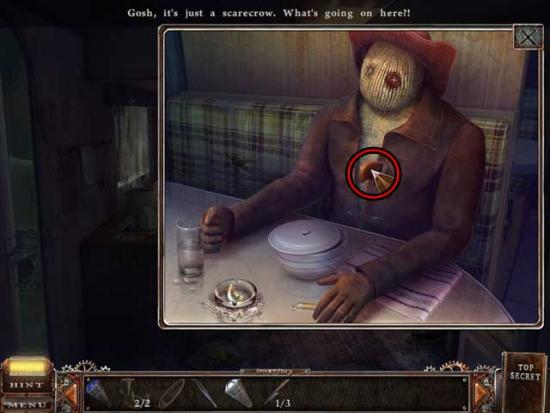
Trailer
Trailer Interior
Greenhouse Entrance
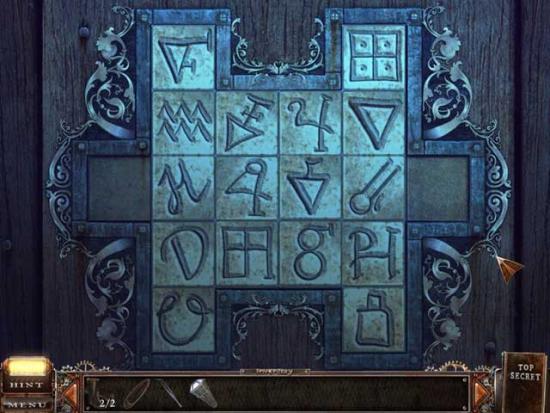
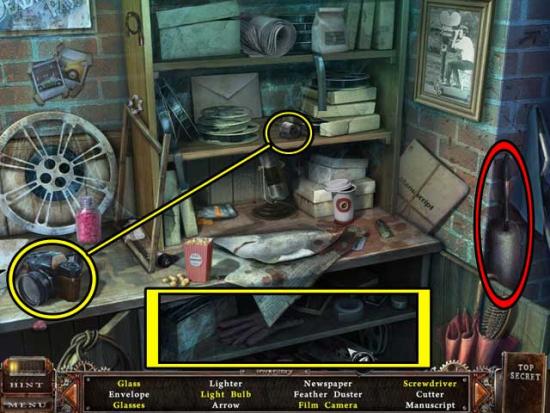
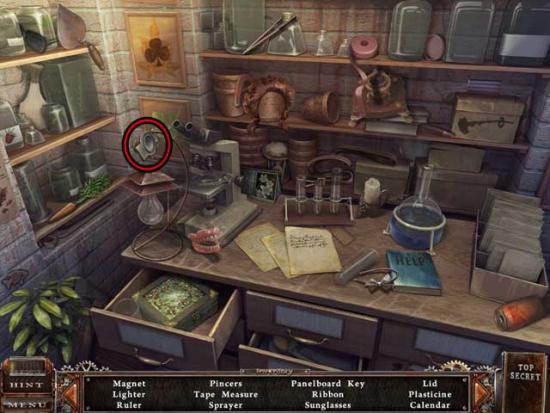
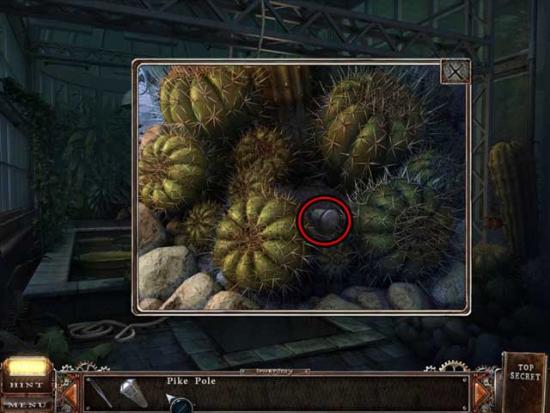
Greenhouse
Lab
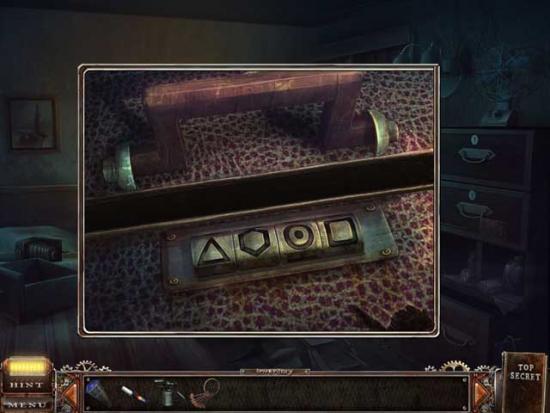
Secret Entrance
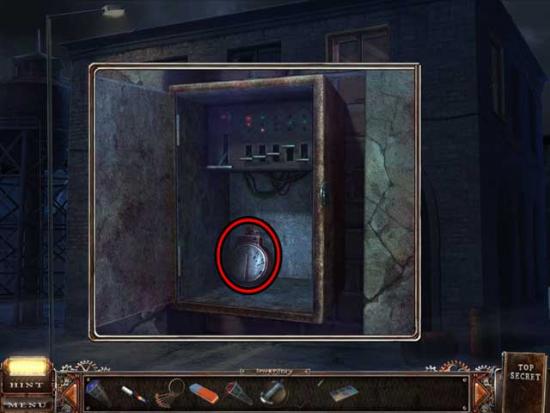
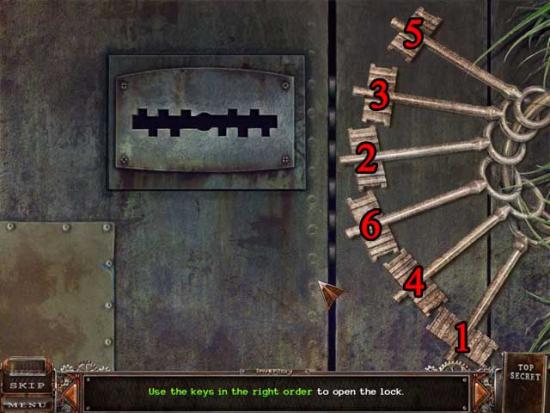
Metal Door
Greenhouse
Secret Entrance
Metal Door
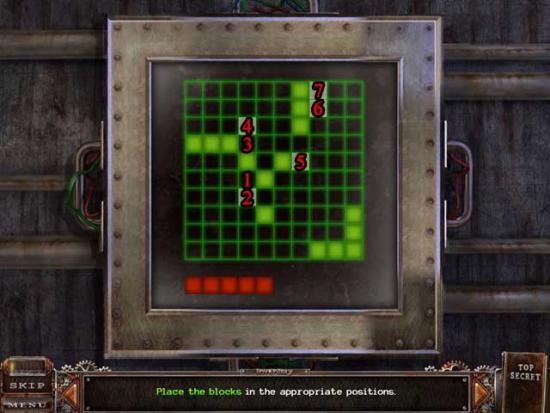
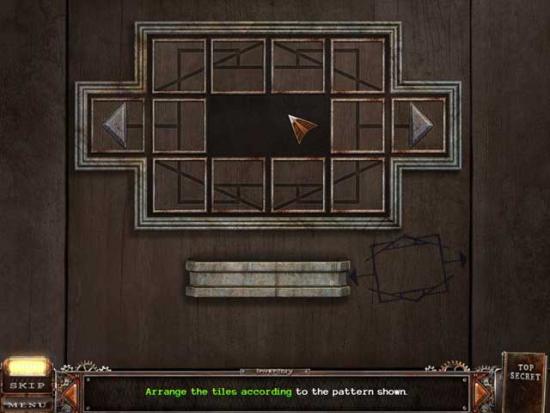
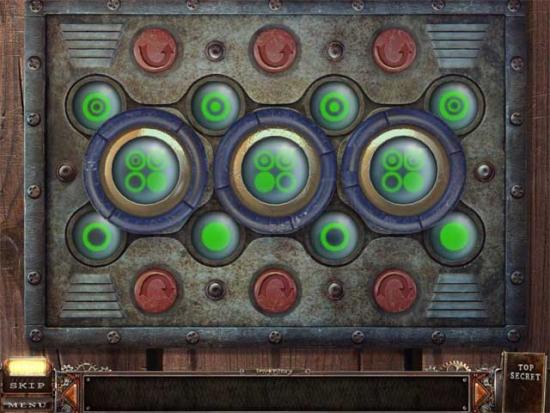
1)Slide a block into the “1” position from the bottom.
2)Slide a block into the “2” position from the bottom, then click on the block in the “1” position to remove it.
3)Slide a block into the “3” position from above.
4)Slide a block into the “4” position from above. Click on the block in the “3” position to remove it.
5)Slide a block into the “5” position from the right.
6)Slide a block into the “6” position from the right.
7)Slide a clock into the “7” position from above.
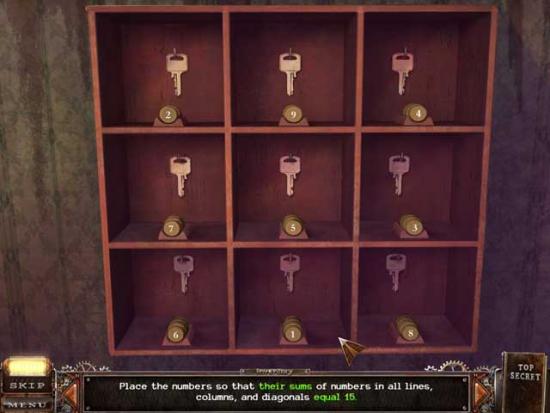
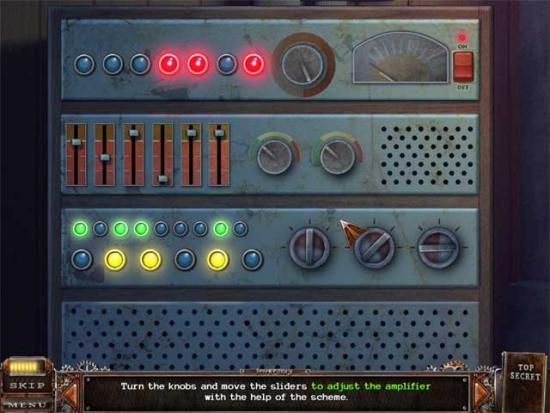
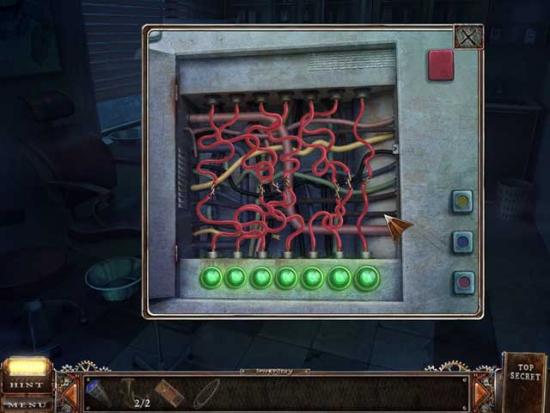
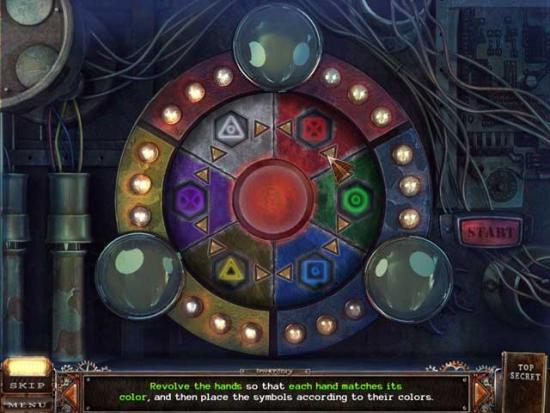
Machine
Bathroom
Break Room
Machine
Congratulations! You’ve completed Top Secret Finders!
