![Digimon UP Tier List [Supports, Buddies, and Partners]](/wp-content/uploads/2026/07/digimon-up-tier-list.jpg "Digimon UP Tier List [Supports, Buddies, and Partners]")
Digimon UP Tier List [Supports, Buddies, and Partners]
These Digimon will get you UP the leaderboard.


![Haze Seas Boss Drops [Chances, Locations, and How to Spawn]](/wp-content/uploads/2026/07/haze-seas-boss-drops.jpg "Haze Seas Boss Drops [Chances, Locations, and How to Spawn]")

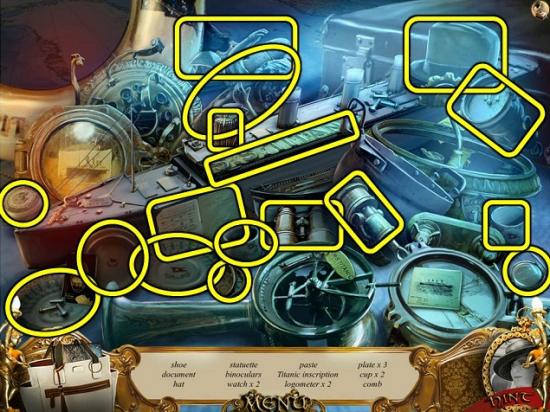
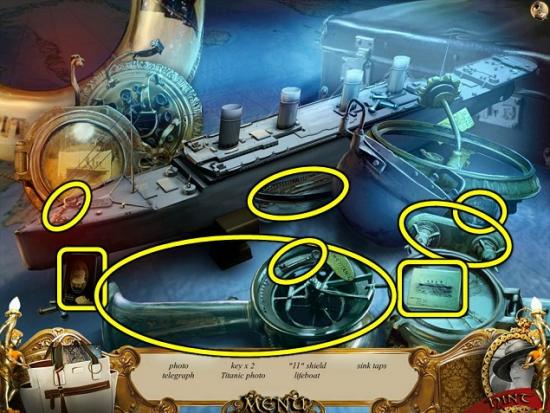
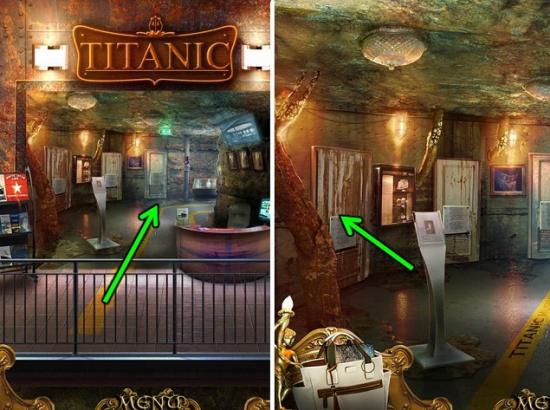
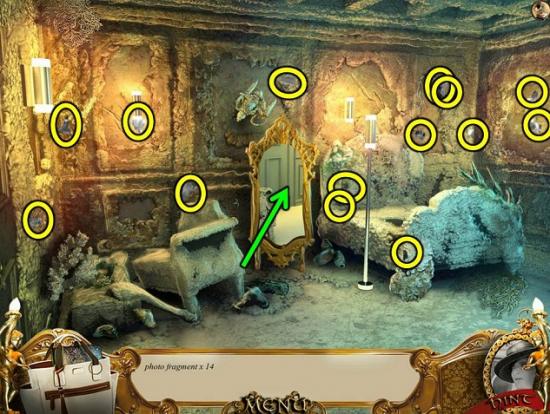
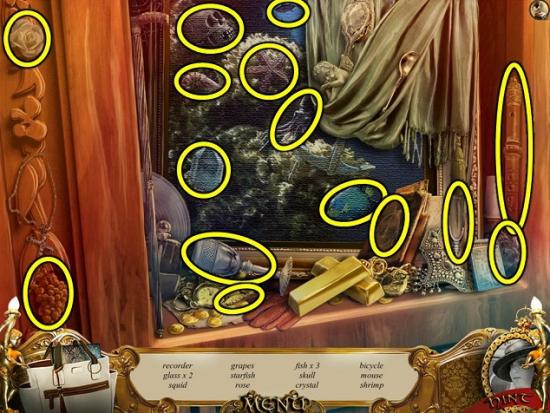
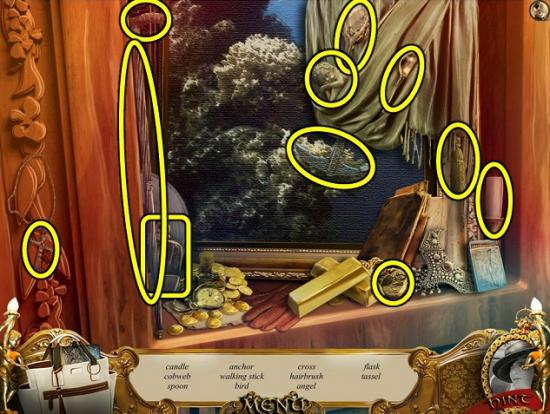
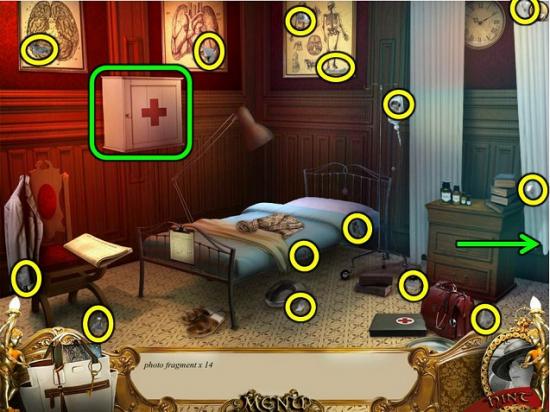
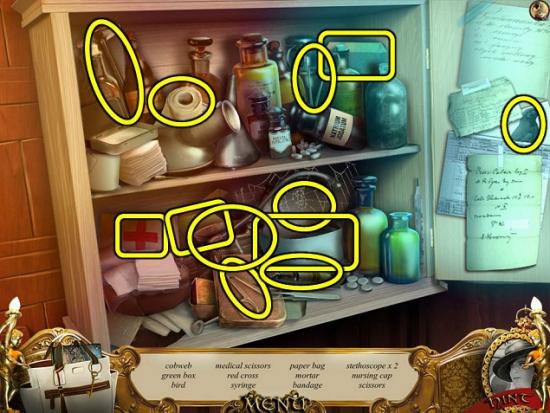
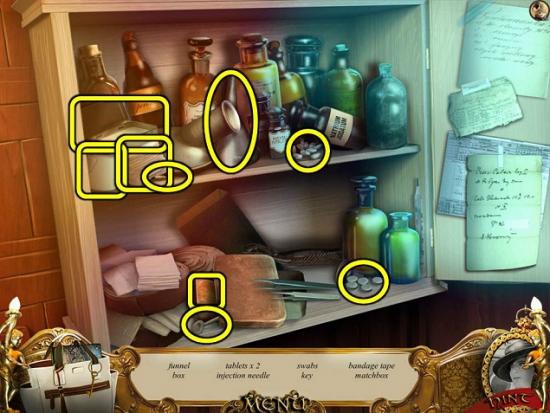
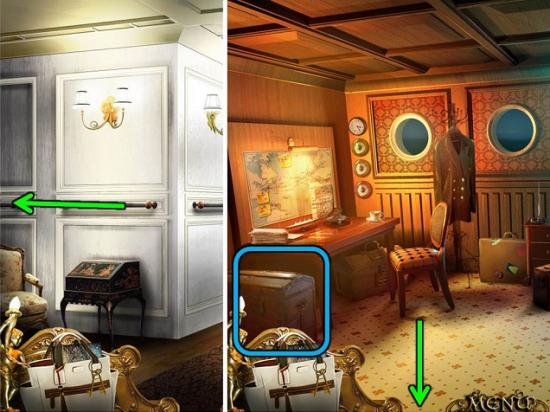
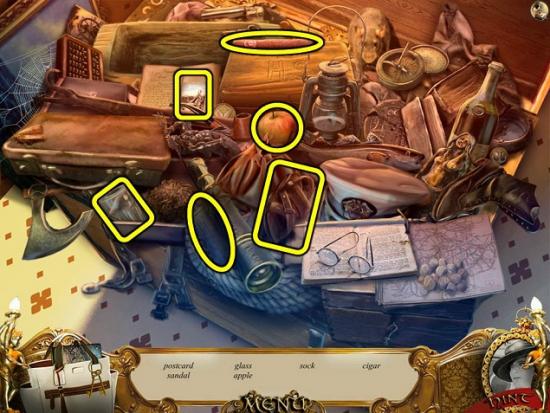
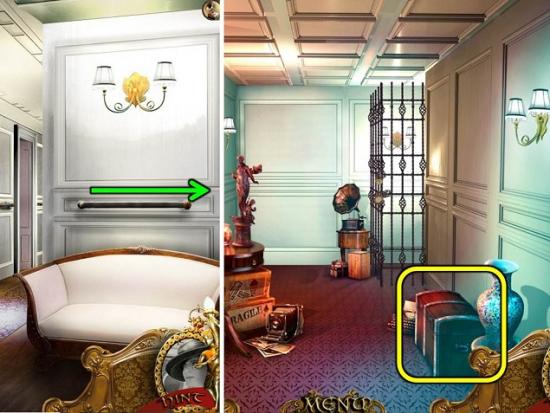
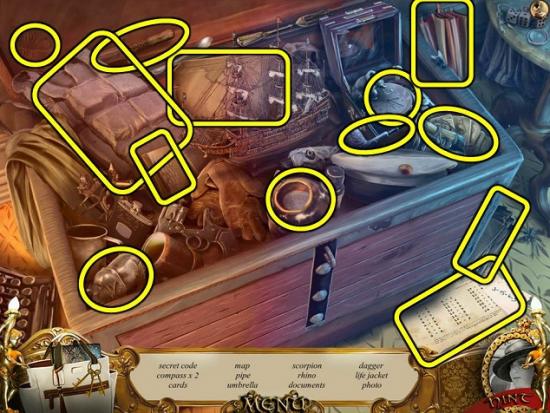
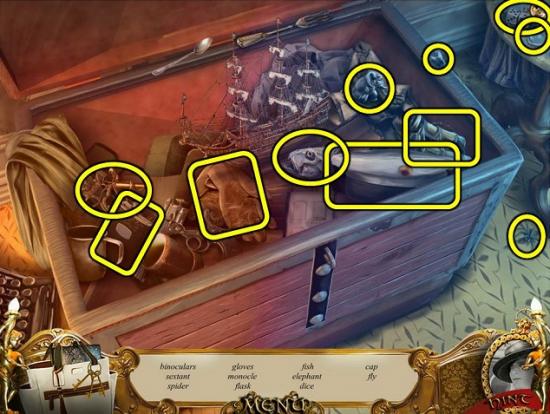
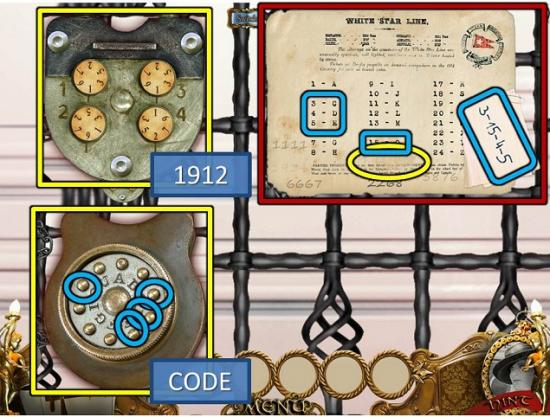
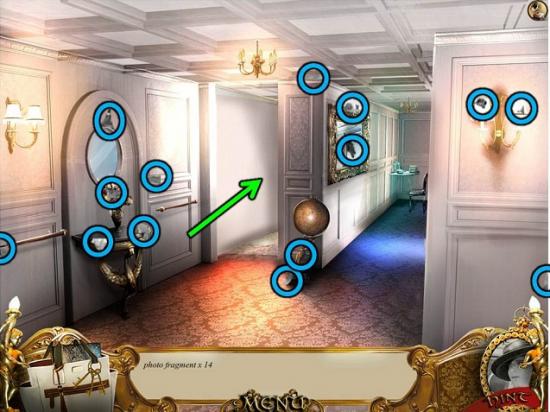
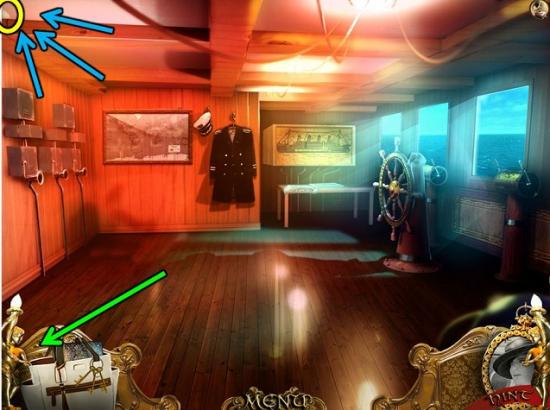
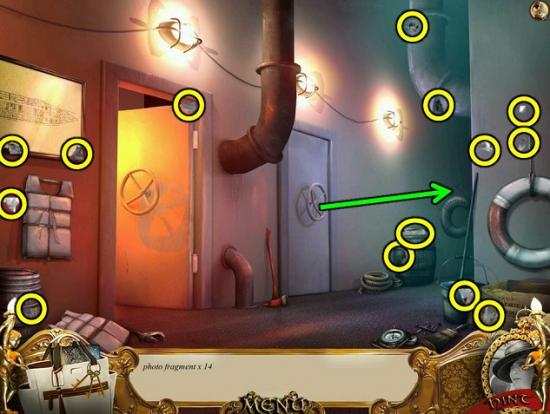
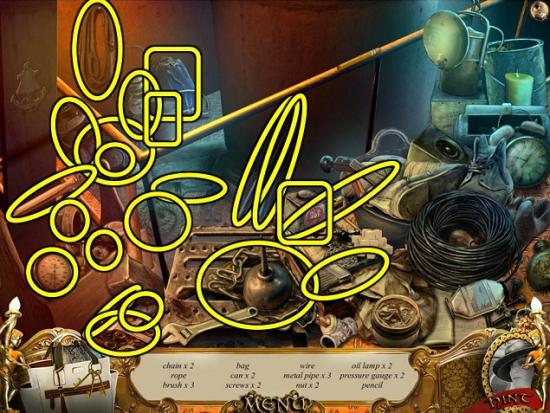
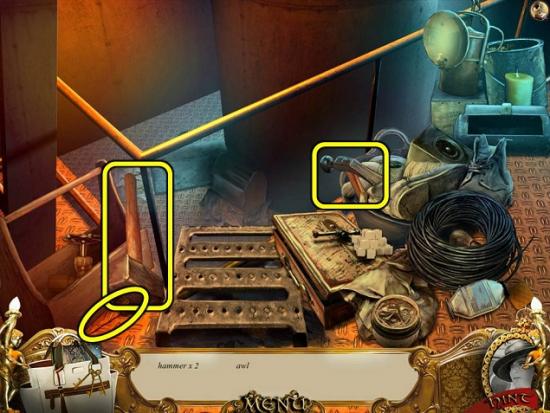
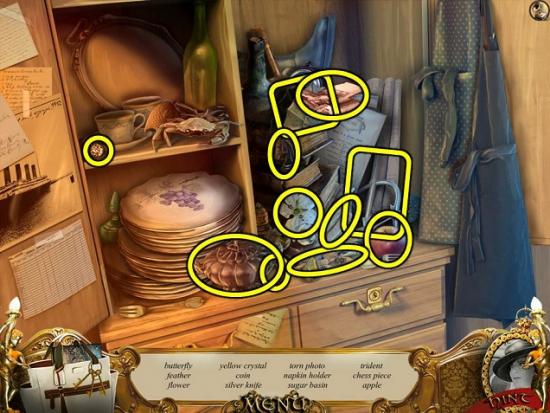
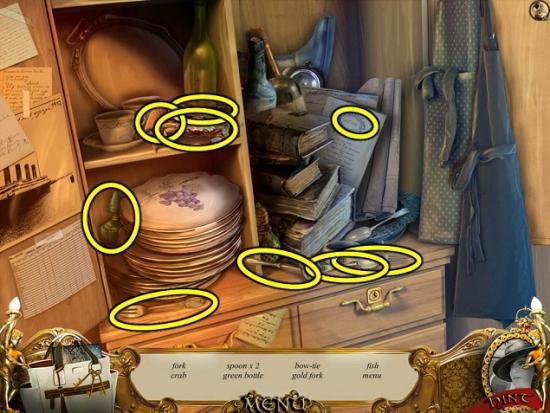
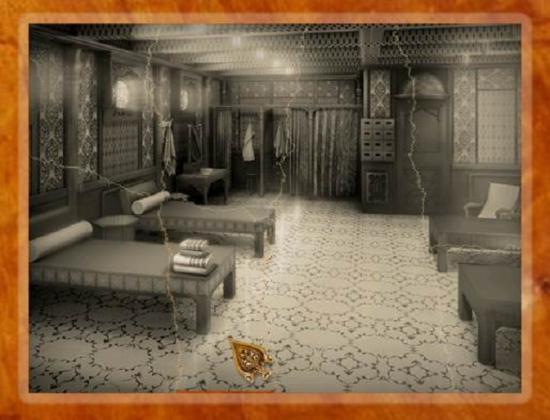
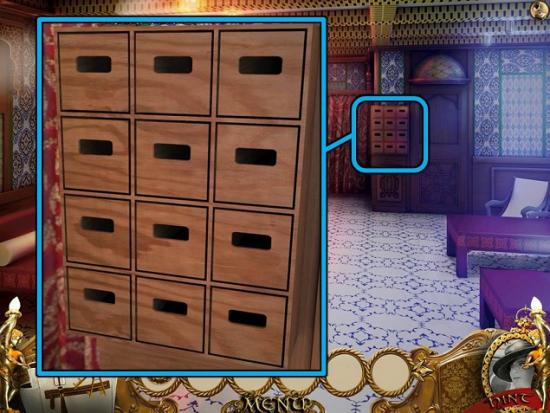
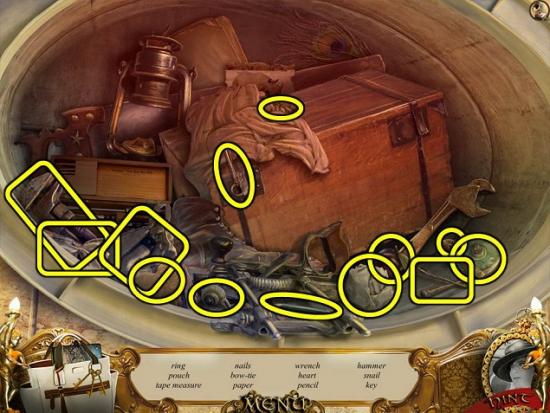
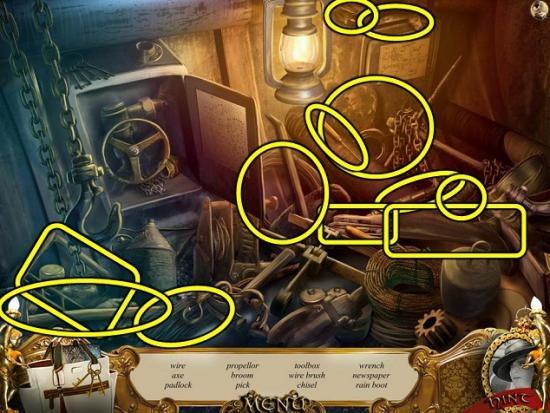
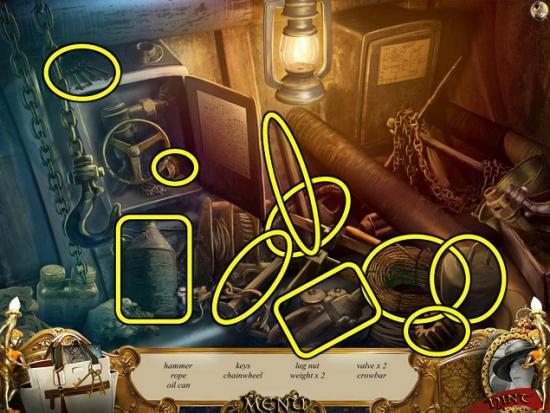
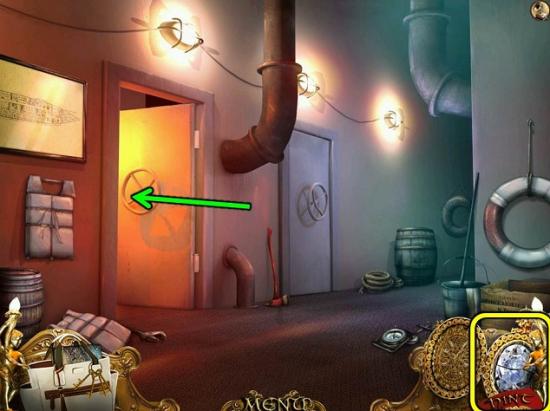
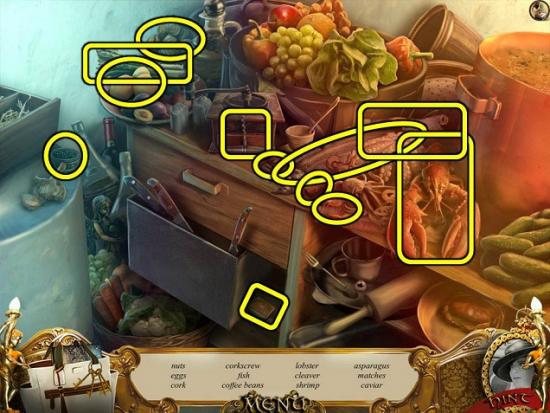
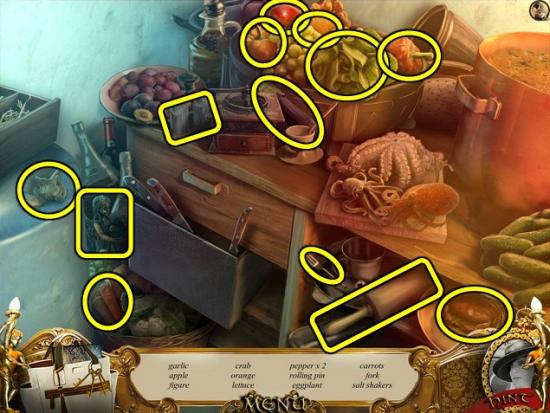
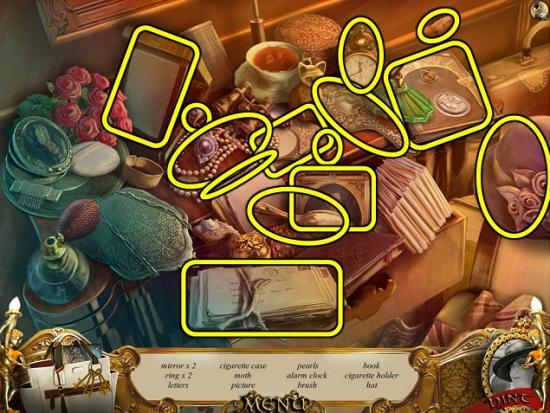
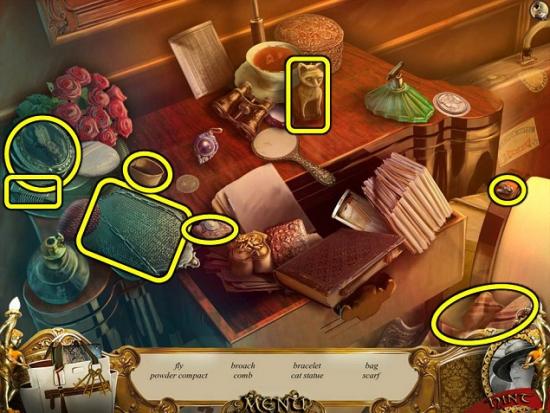
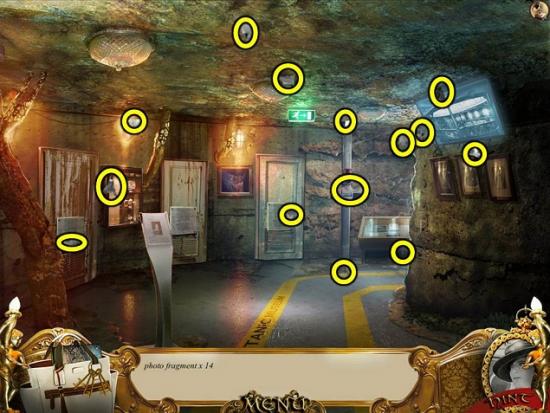
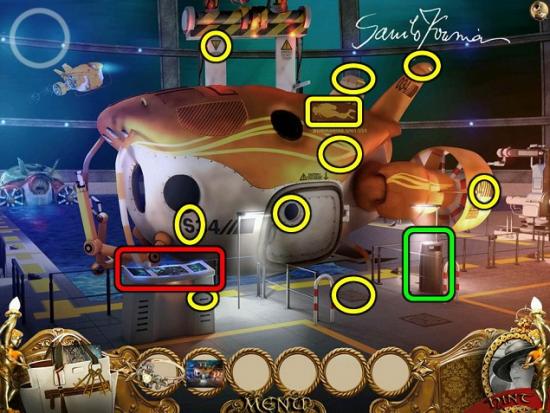
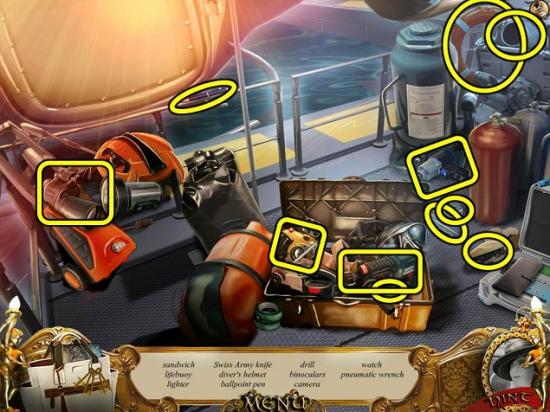
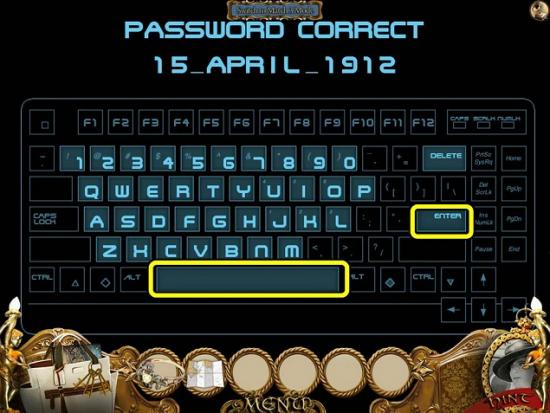
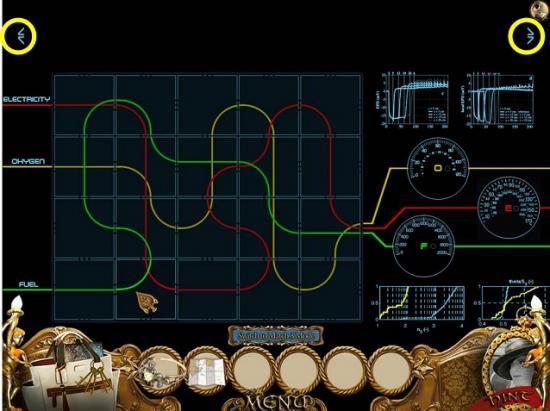
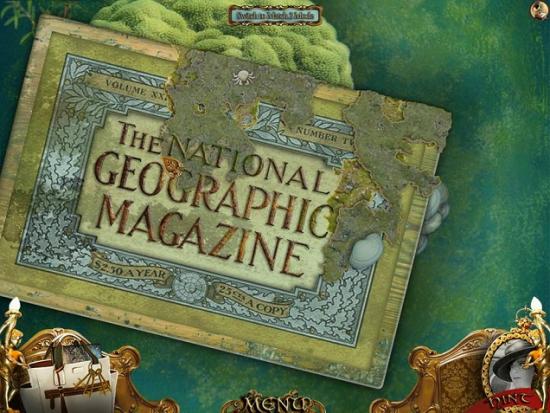
Welcome to the Titanic’s Keys to the Past walkthrough on Gamezebo. Titanic’s Keys to the Past is a hidden object game created by National Geographic and Play Way. Travel back in time to the Titanic’s maiden voyage to solve a mystery and save your grandmother. Gamezebo’s quick start strategy guide will provide you with detailed images, tips, information, and hints on how to play your best game.
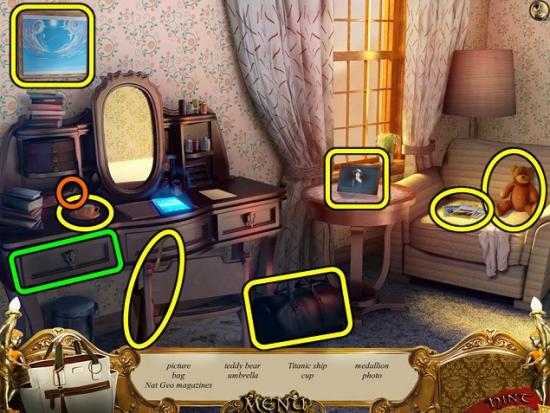
Welcome to the Titanic’s Keys to the Past walkthrough on Gamezebo. Titanic’s Keys to the Past is a hidden object game created by National Geographic and Play Way. Travel back in time to the Titanic’s maiden voyage to solve a mystery and save your grandmother. Gamezebo’s quick start strategy guide will provide you with detailed images, tips, information, and hints on how to play your best game.
Difficulty Modes
General


Congratulations!
You have completed Gamezebo’s walkthrough for Titanic’s Keys to the Past. Be sure to check back often for game updates, staff and user reviews, user tips, forums comments and much more here at Gamezebo!
