![Hololive Dreams Tier List [Best Cards]](/wp-content/uploads/2026/07/hololive-dreams-tier-list.jpg "Hololive Dreams Tier List [Best Cards]")
Hololive Dreams Tier List [Best Cards]
The best cards for the best performances.


![Iron Soul Dungeon Weapon Tier List [Best Weapons]](/wp-content/uploads/2026/07/iron-soul-dungeon-weapon-tier-list.jpg "Iron Soul Dungeon Weapon Tier List [Best Weapons]")

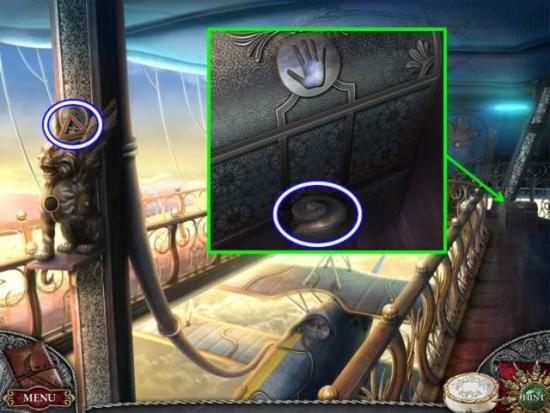
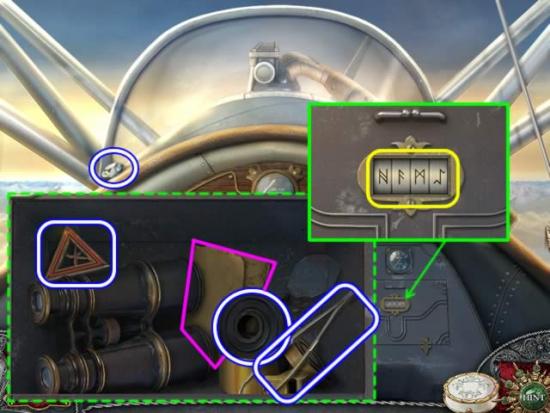
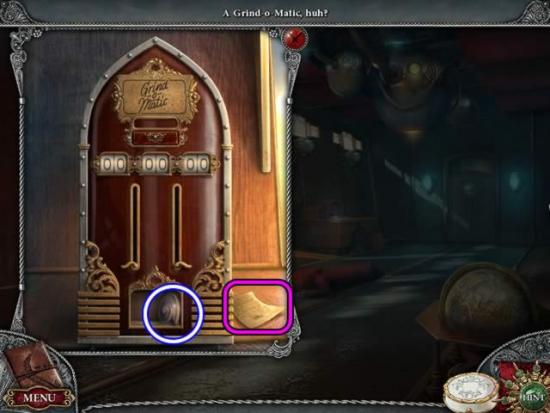
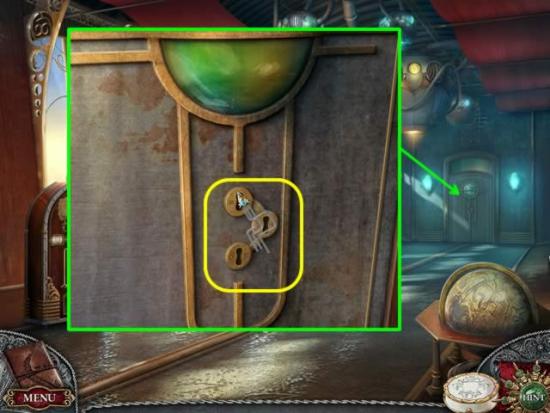
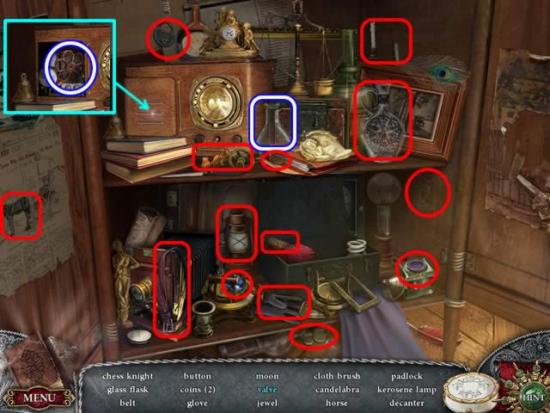
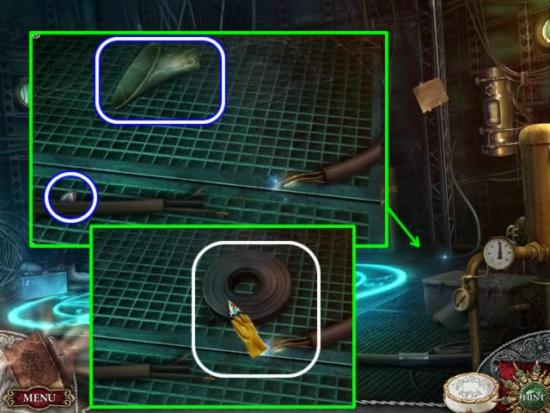
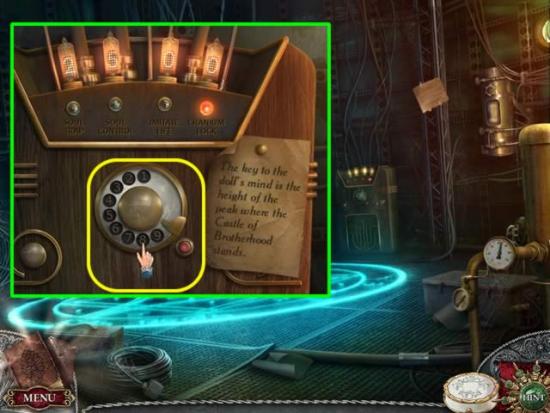
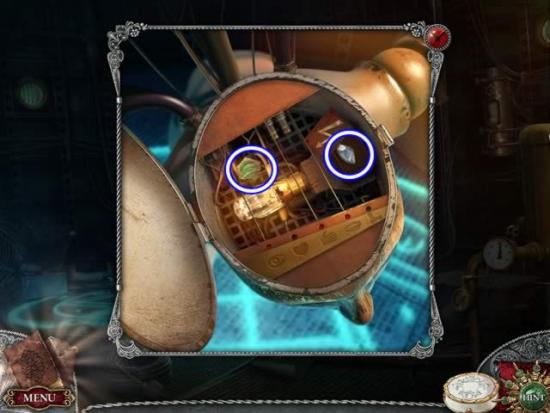
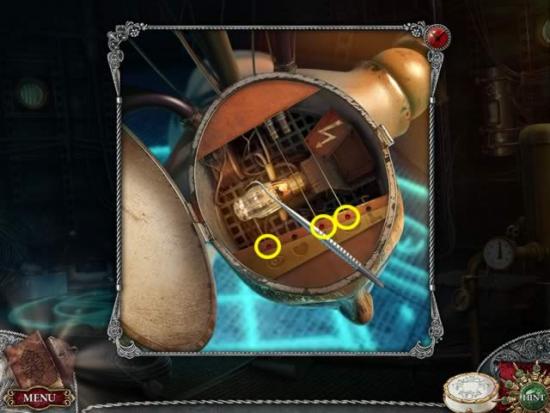
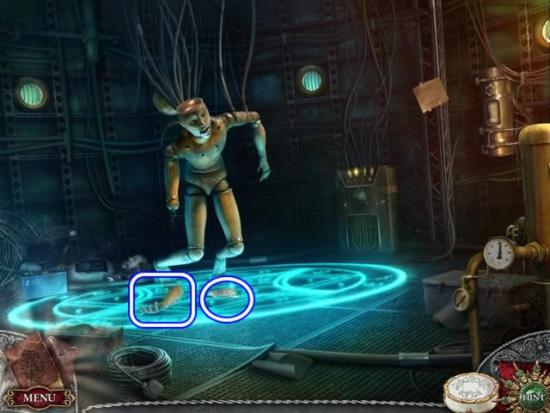
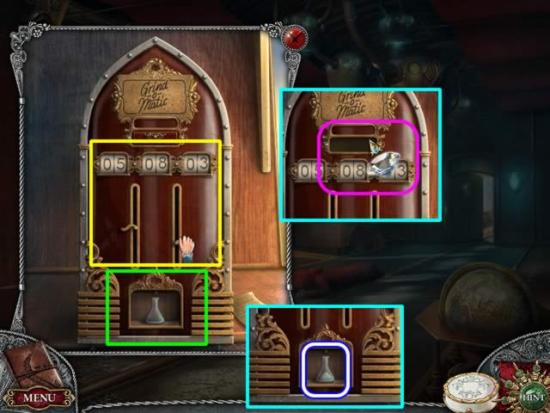
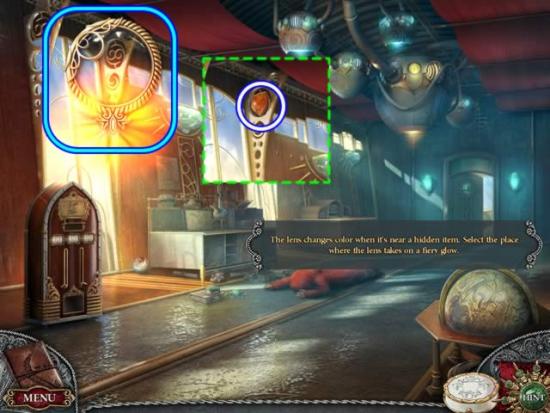
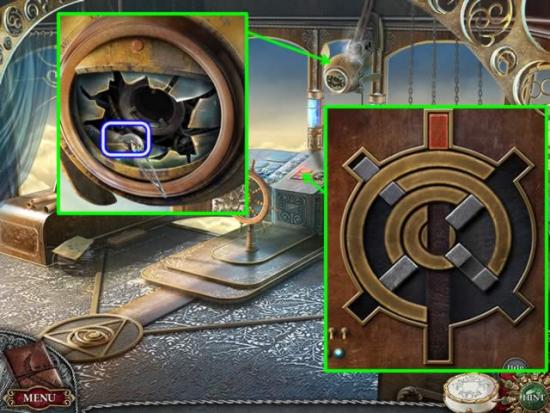
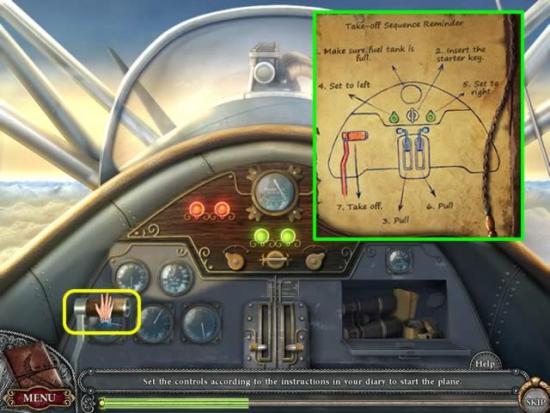
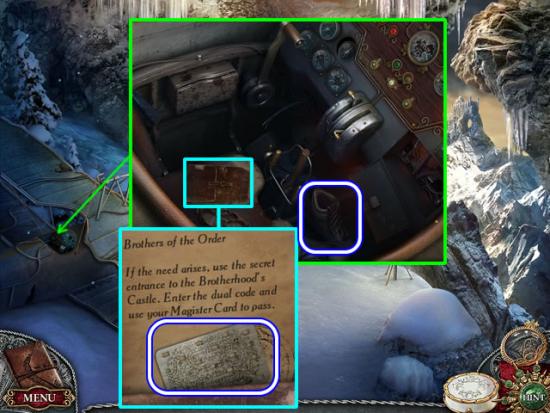
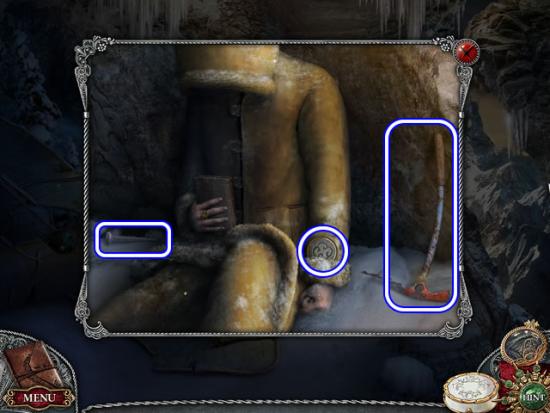
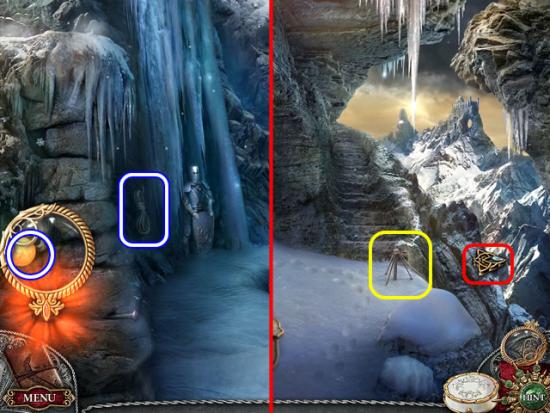
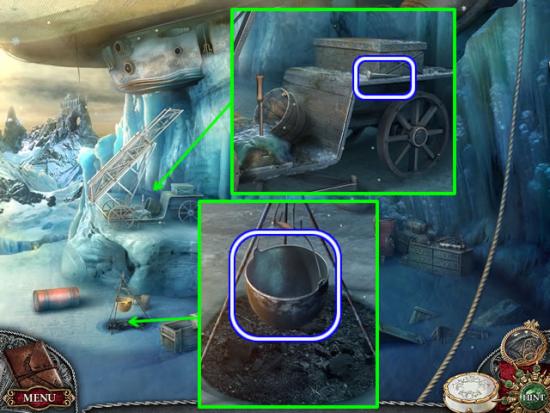
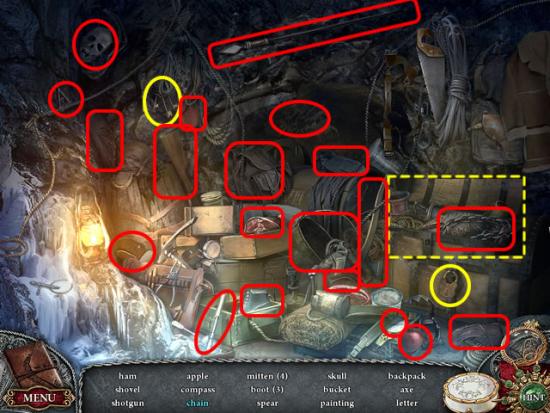
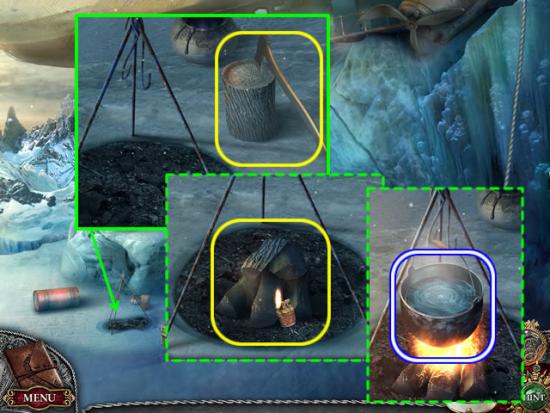
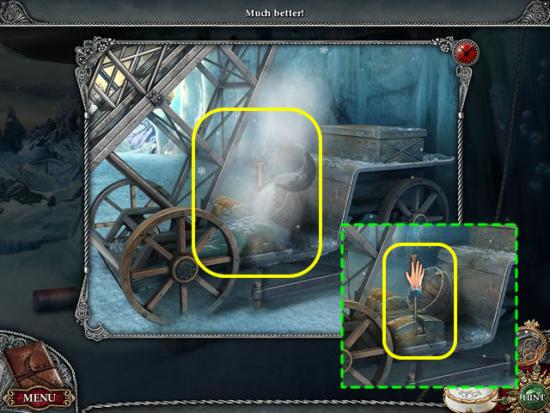
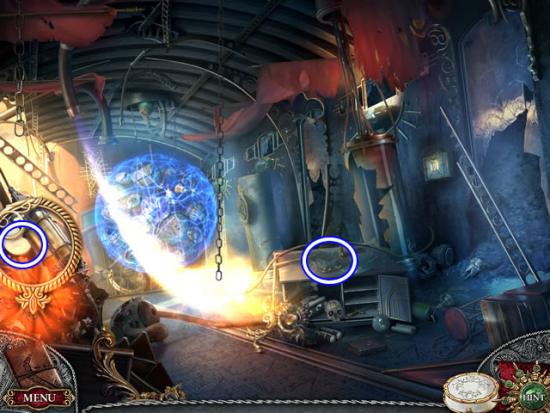
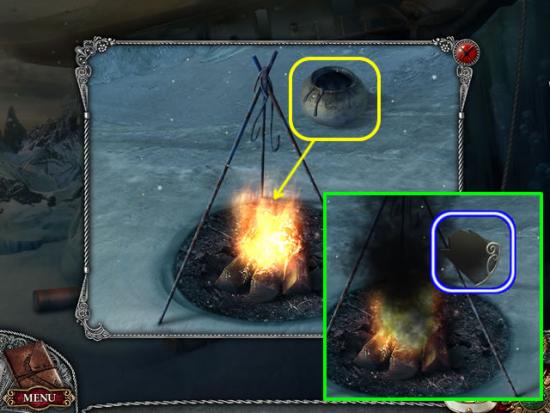
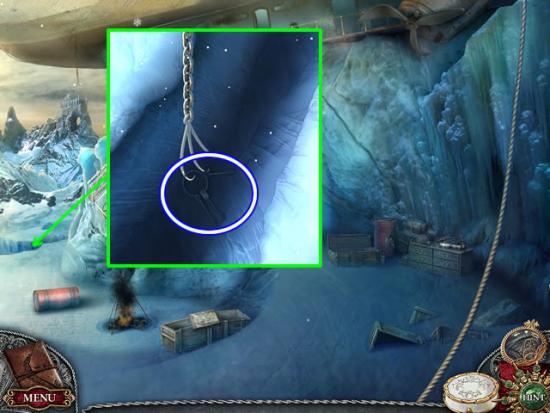
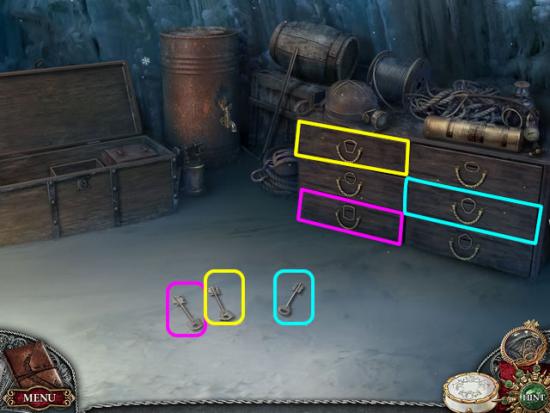
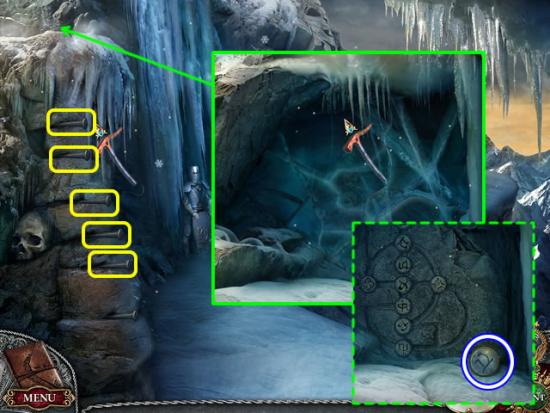
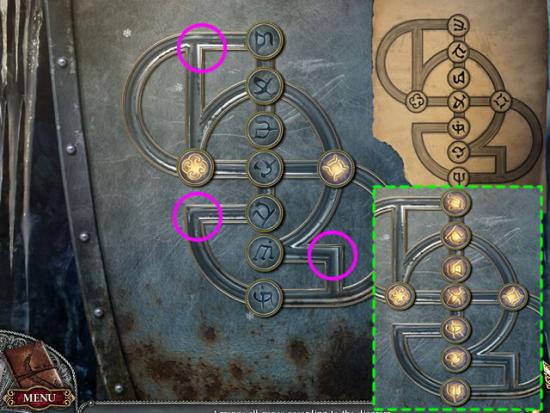
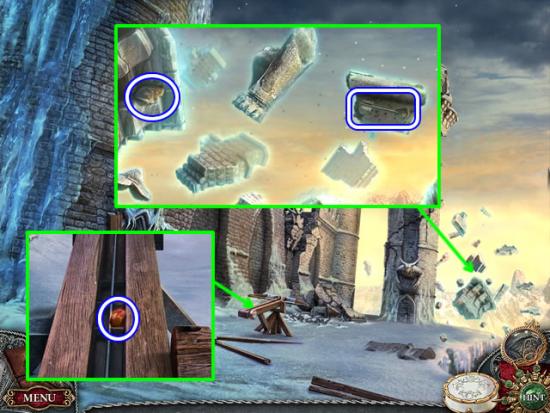
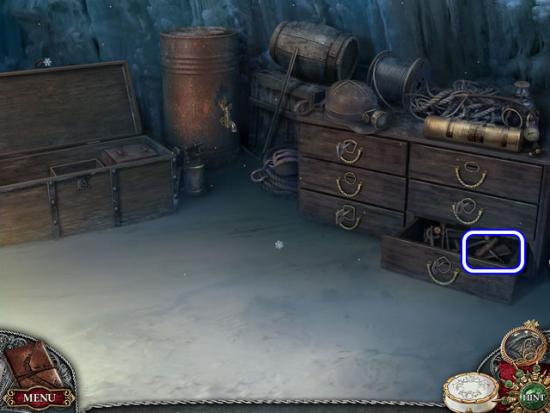
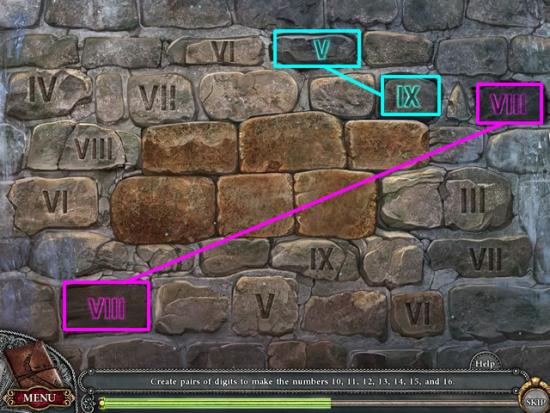
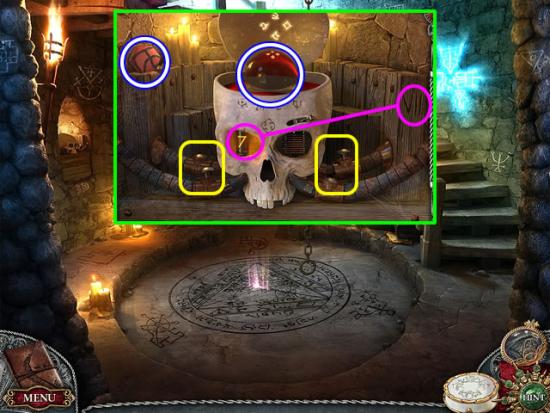
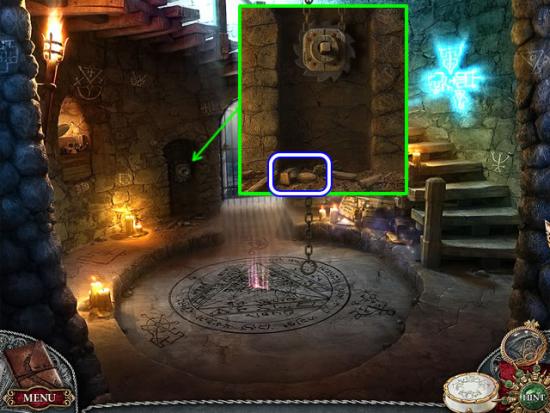
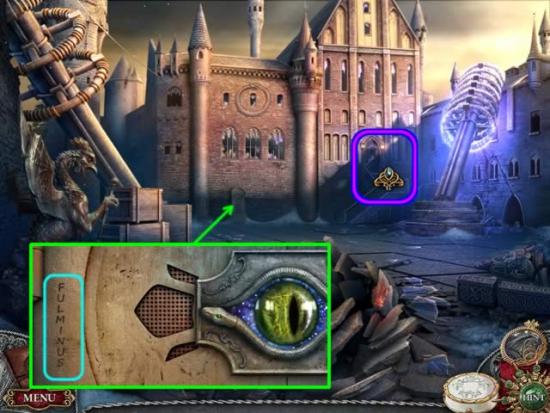
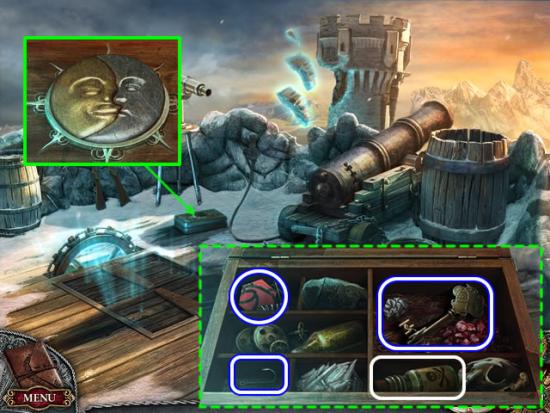
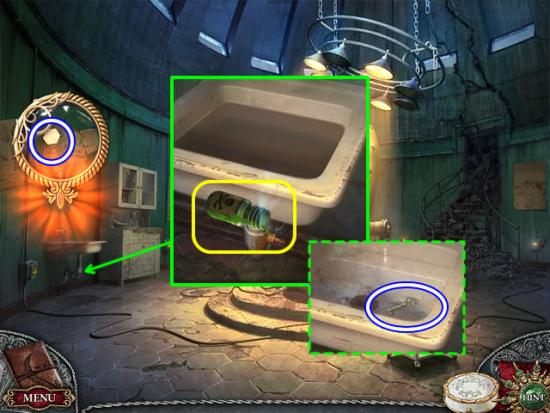
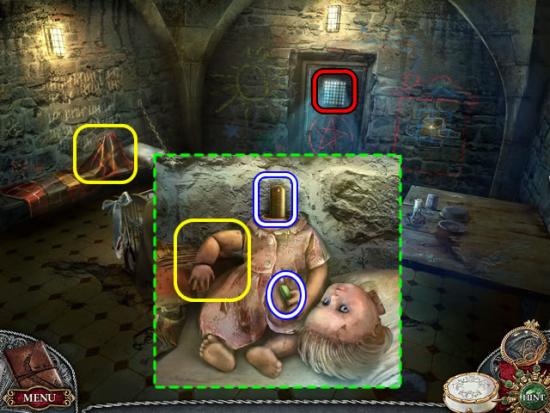
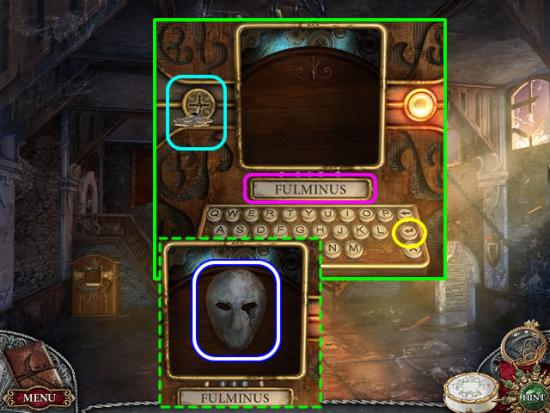
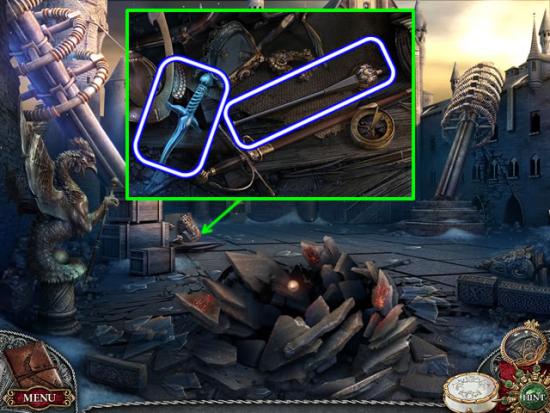
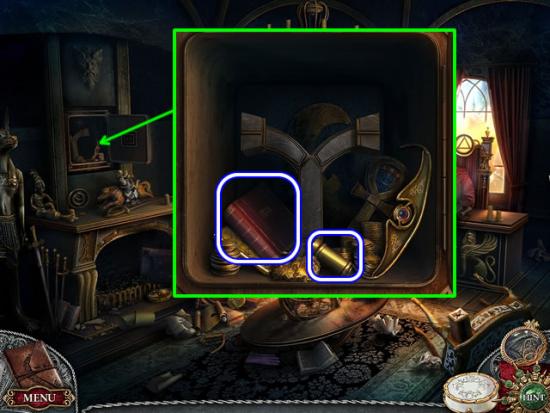
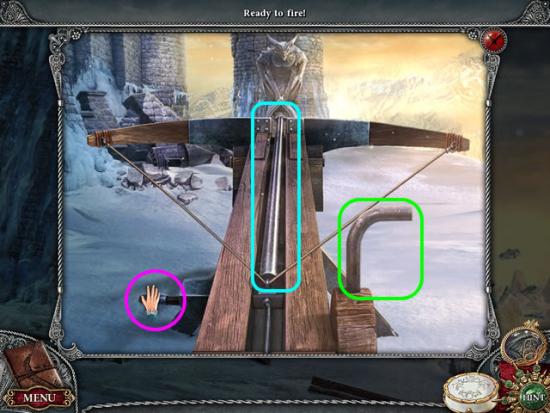
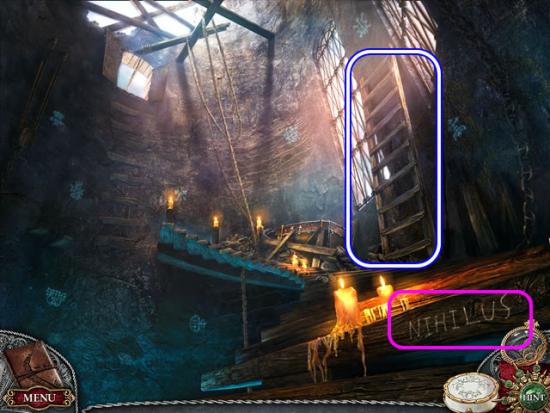
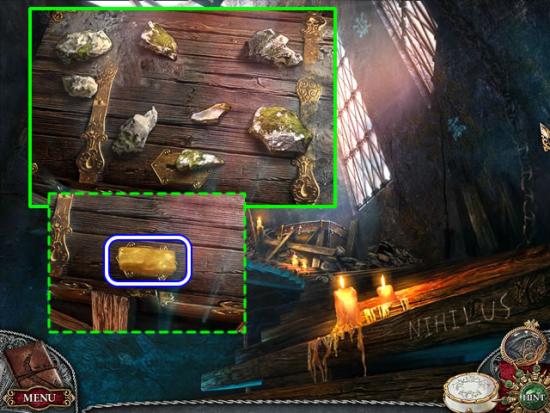
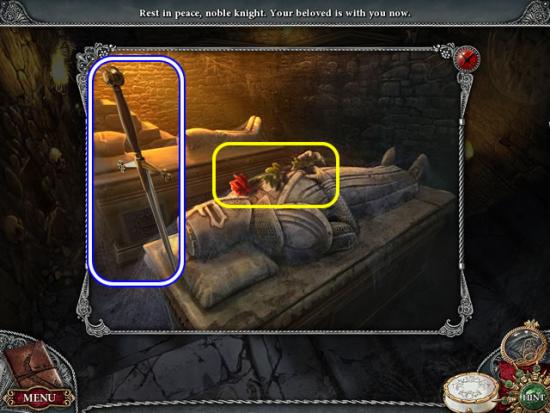
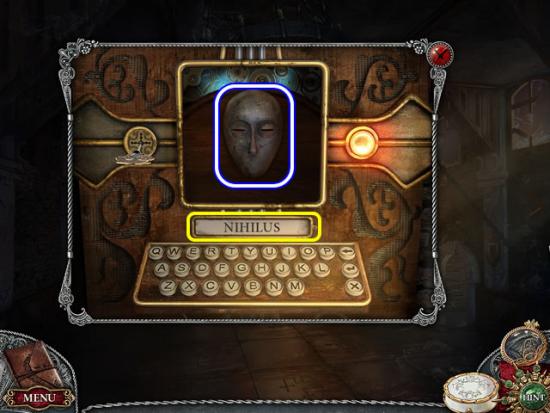
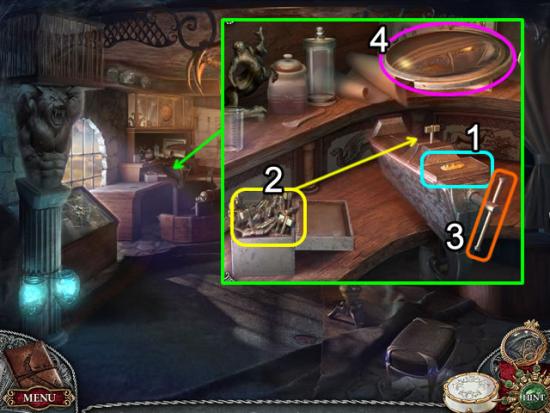
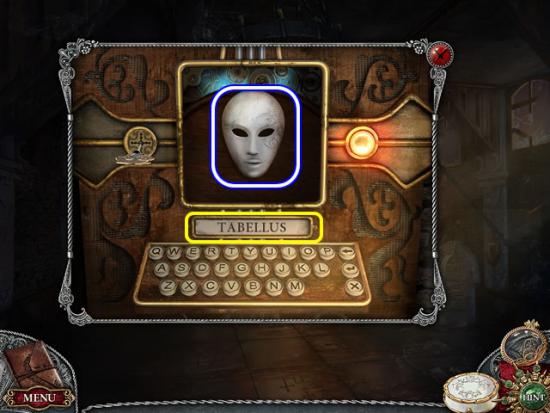
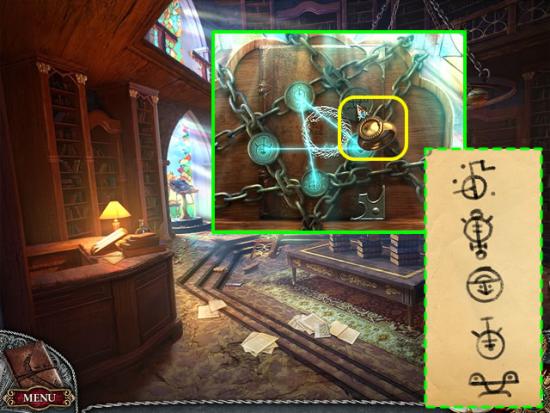
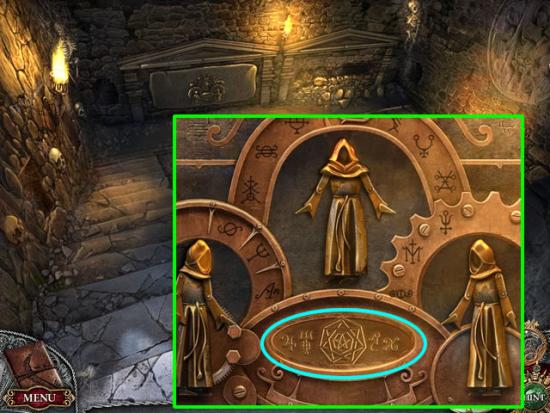
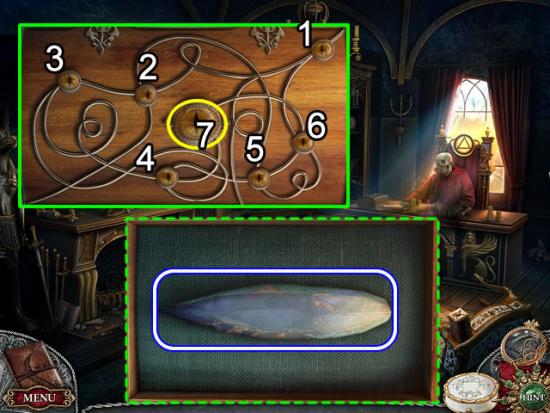
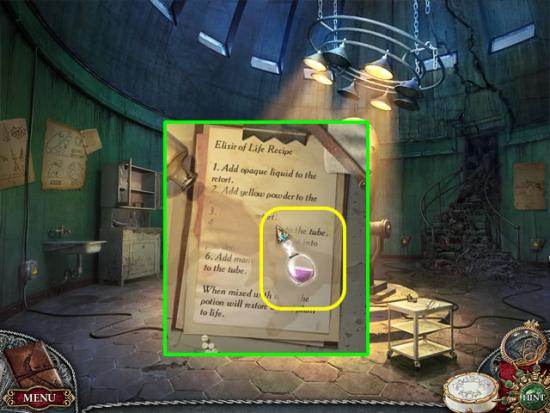
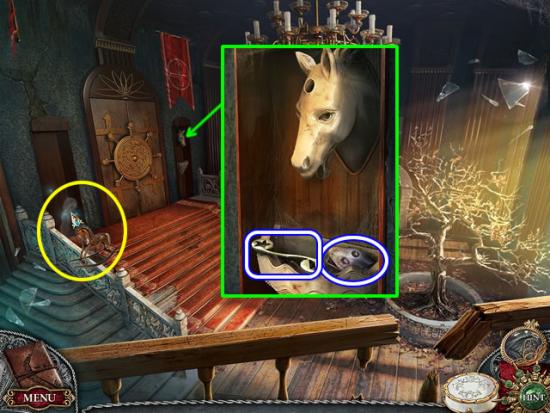
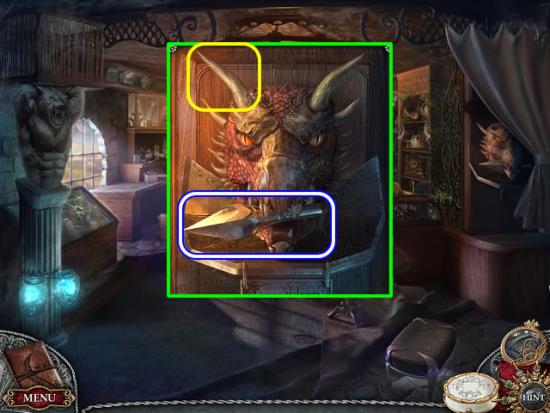
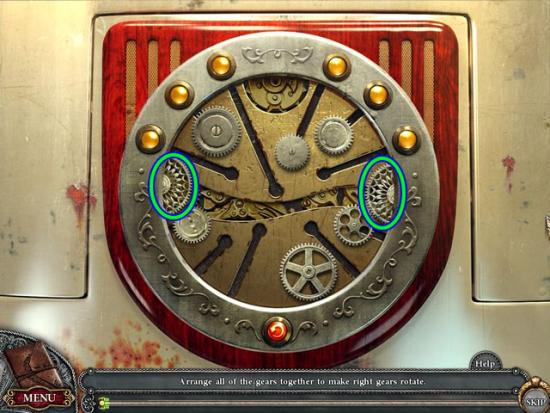
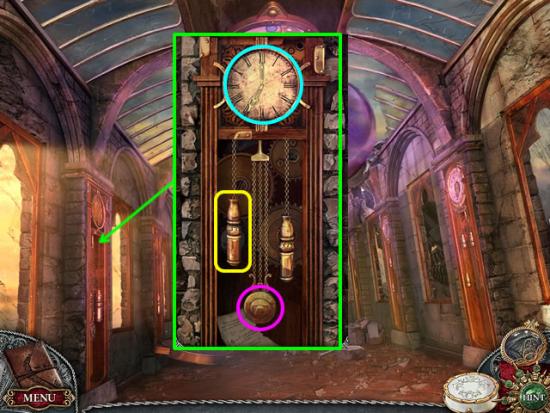
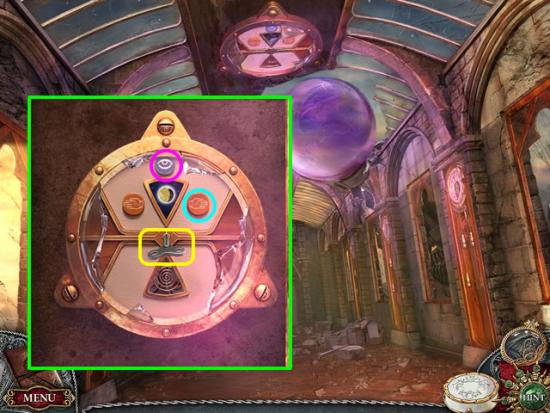
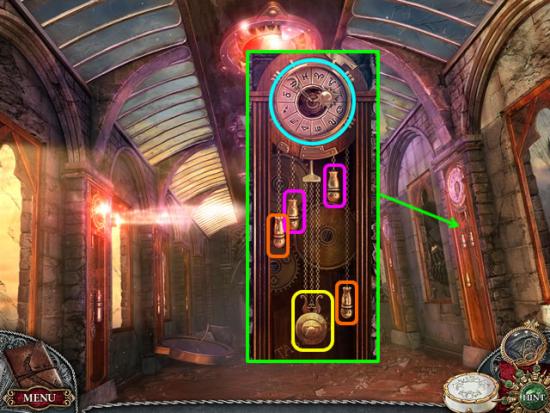
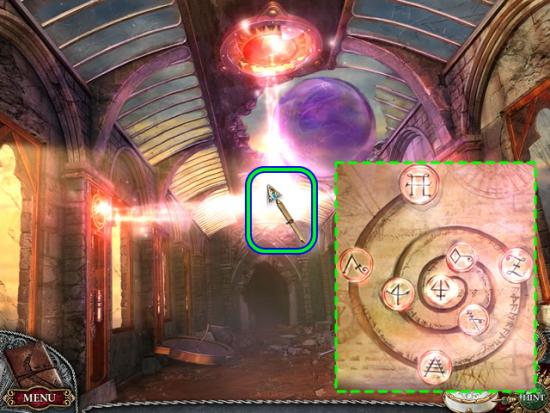
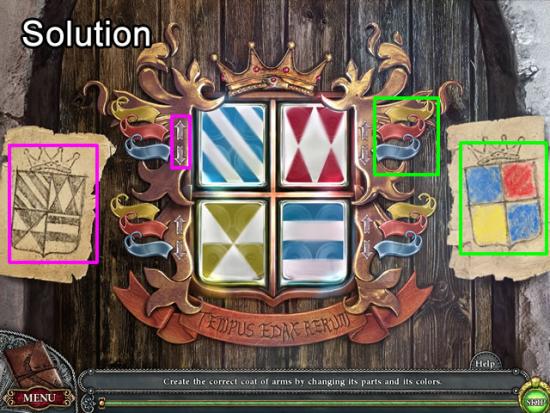
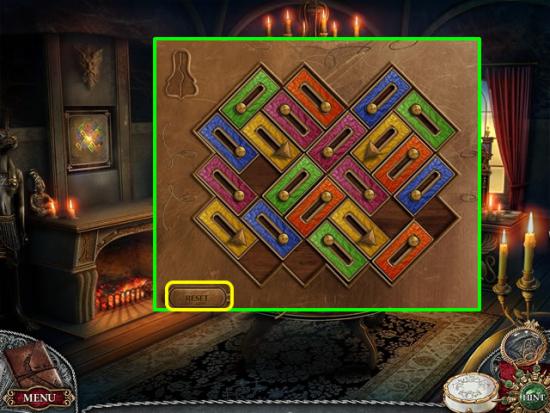
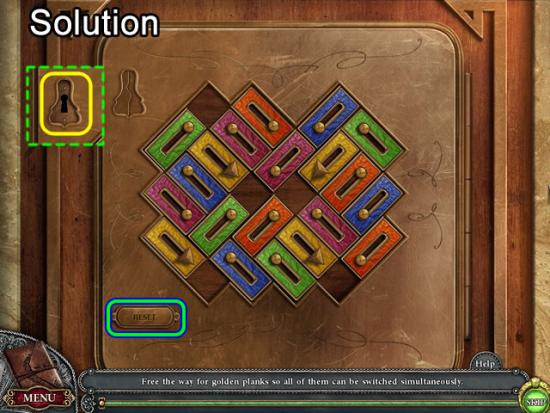
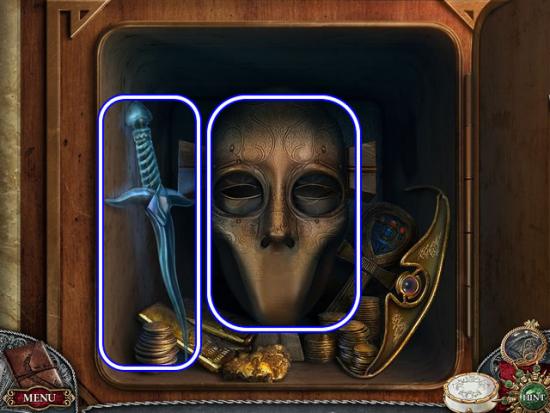
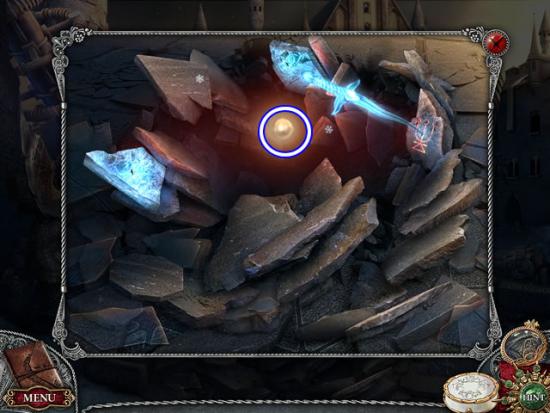
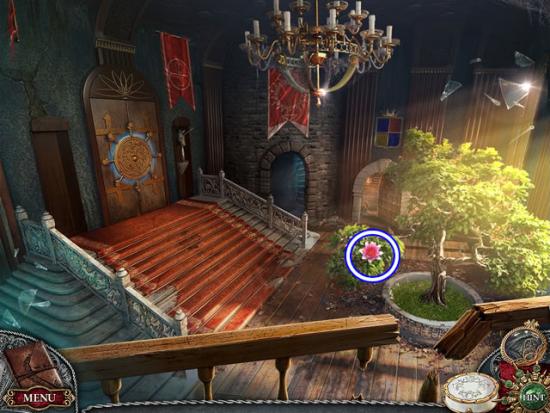
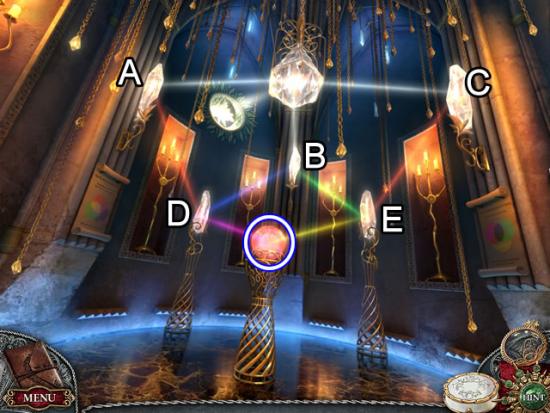
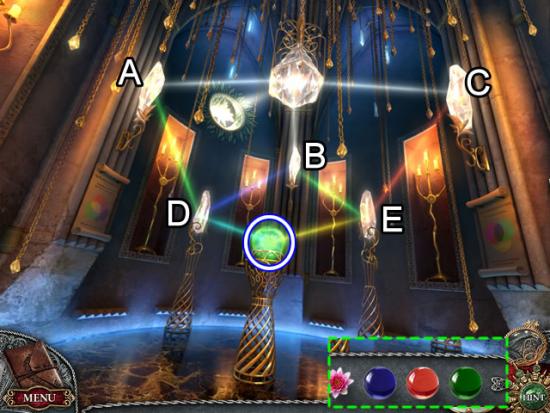
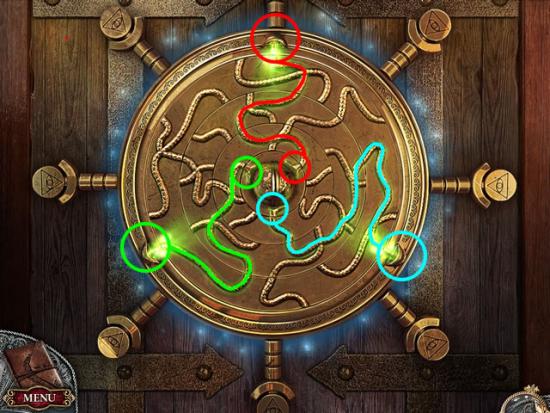
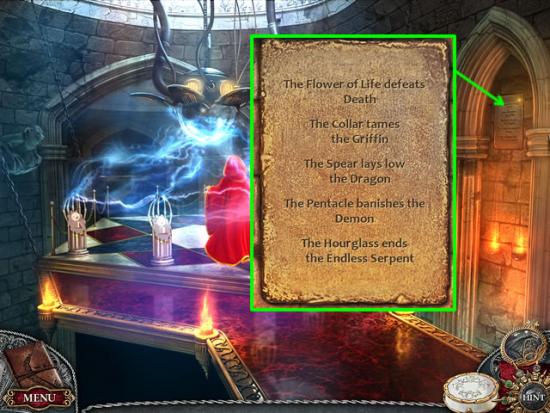
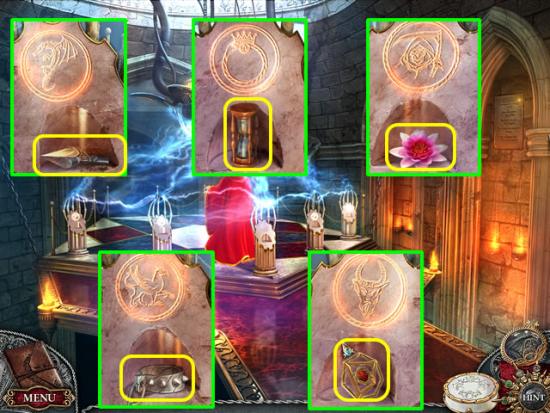
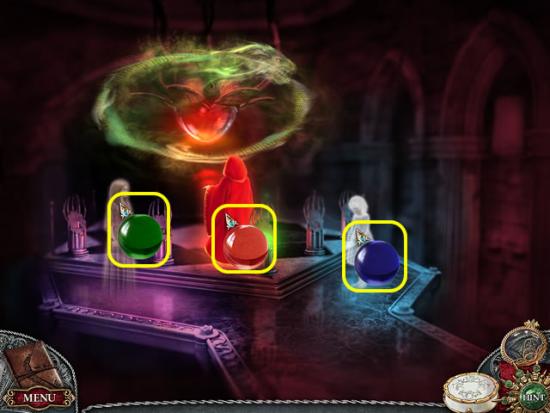
Welcome to the Timeless: The Lost Castle walkthrough on Gamezebo. Timeless: The Lost Castle is a hidden object adventure created by Boolat Games. This walkthrough includes tips and tricks, helpful hints and a strategy guide on how to complete Timeless: The Lost Castle.
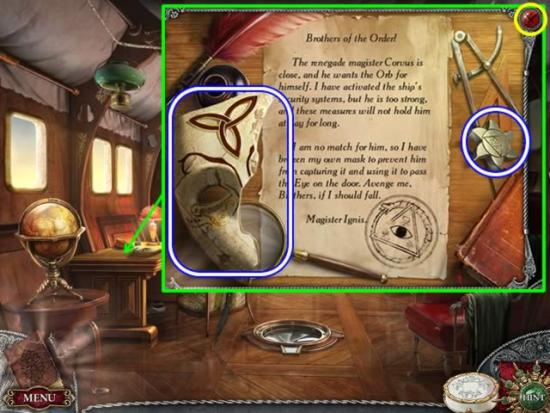
Welcome to the Timeless: The Lost Castle walkthrough on Gamezebo. Timeless: The Lost Castle is a hidden object adventure created by Boolat Games. This walkthrough includes tips and tricks, helpful hints and a strategy guide on how to complete Timeless: The Lost Castle.
Difficulty Modes
Cursors
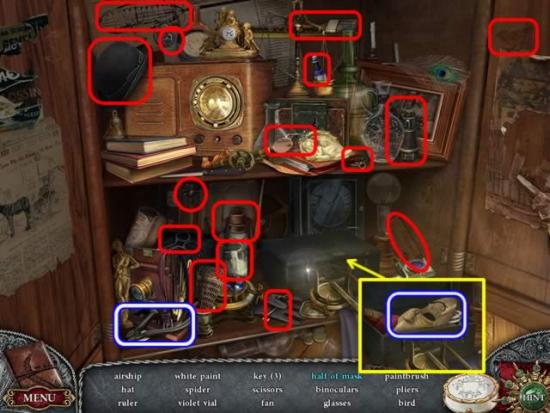
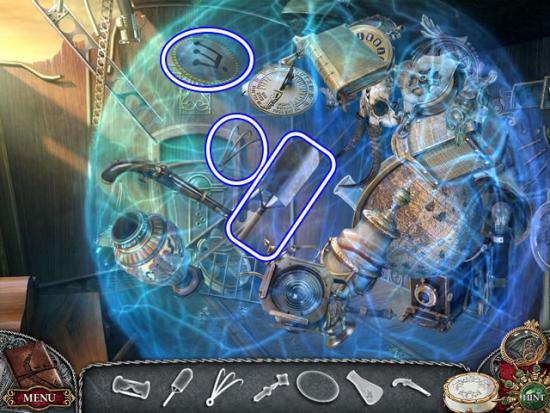
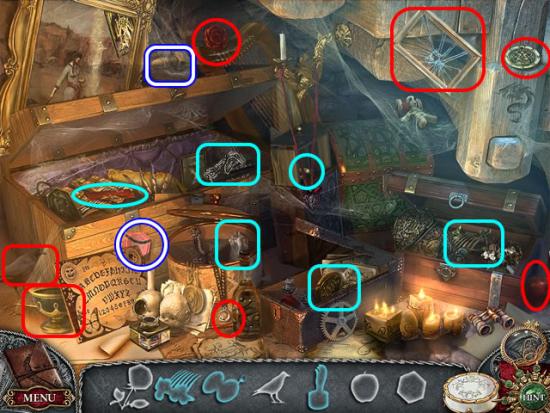
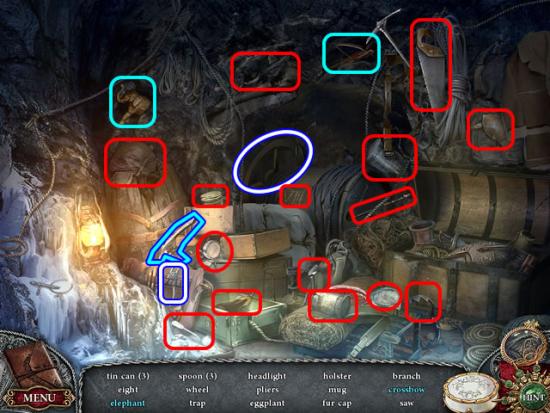
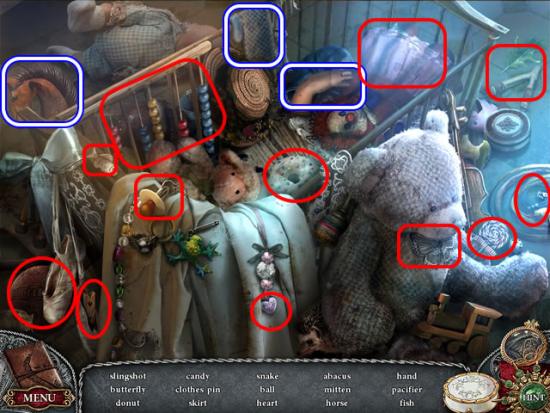
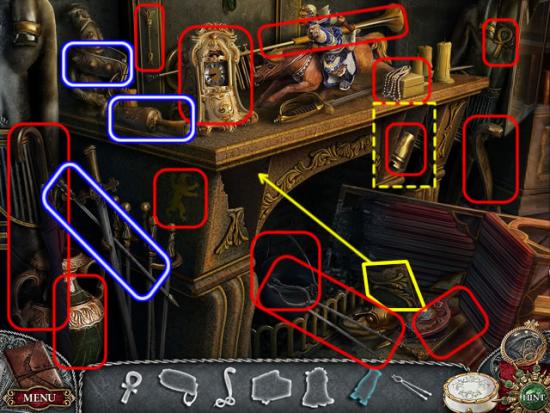
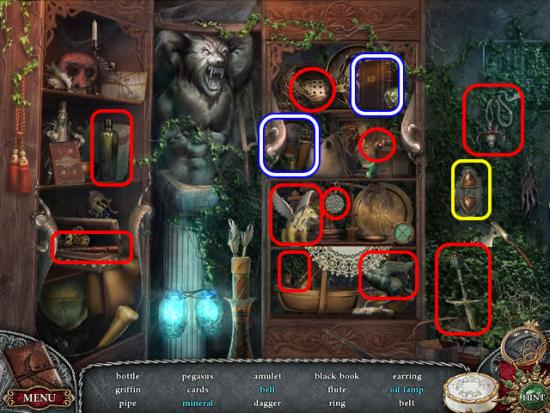
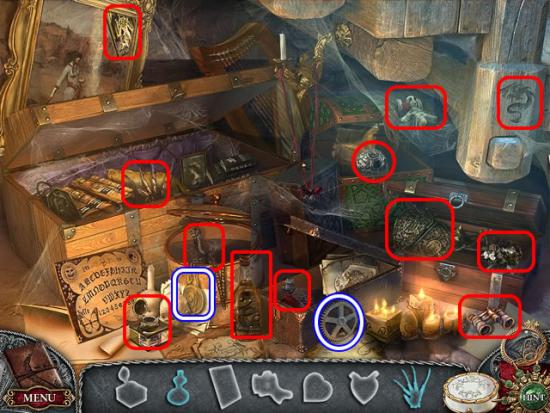
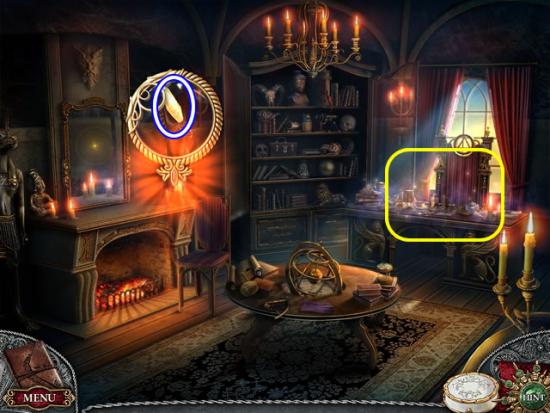
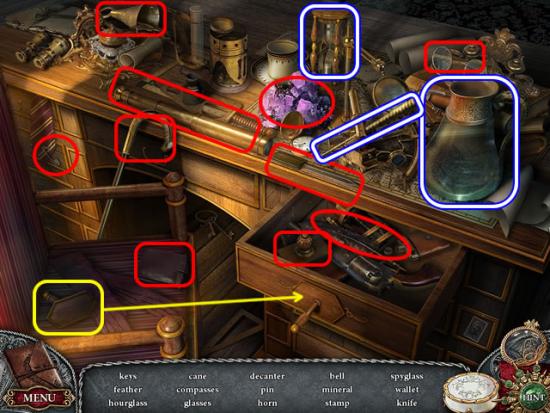
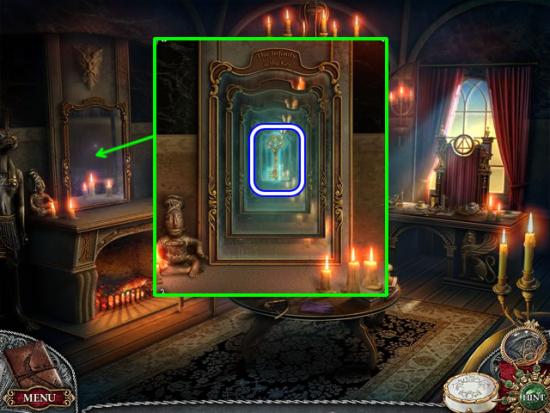
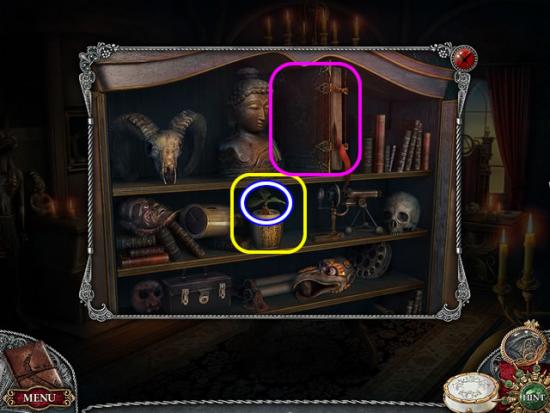
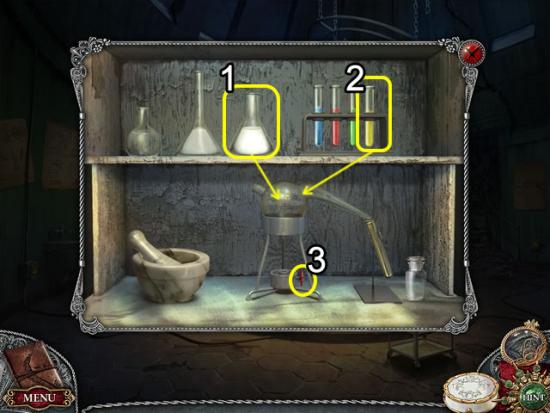
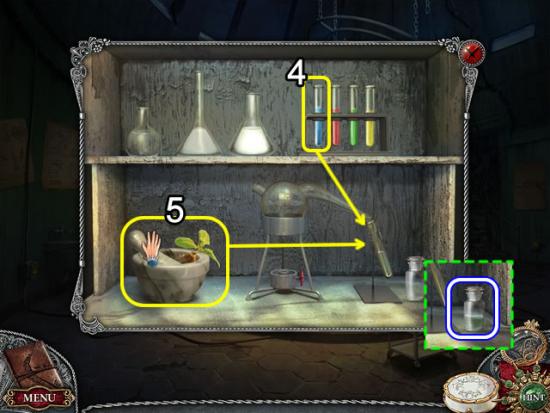
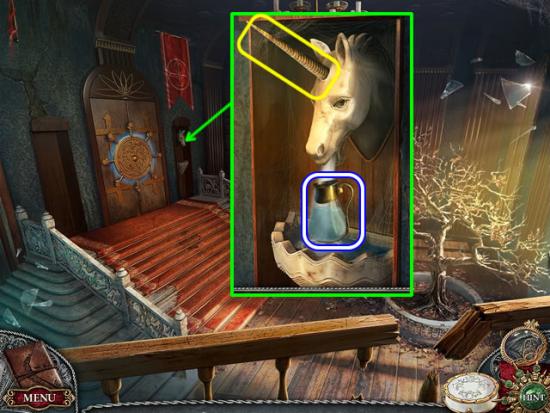
Hidden Object Scenes
Hint and Skip Buttons


Congratulations! You have completed playing Timeless: The Lost Castle.
