![Digimon UP Tier List [Supports, Buddies, and Partners]](/wp-content/uploads/2026/07/digimon-up-tier-list.jpg "Digimon UP Tier List [Supports, Buddies, and Partners]")
Digimon UP Tier List [Supports, Buddies, and Partners]
These Digimon will get you UP the leaderboard.


![Haze Seas Boss Drops [Chances, Locations, and How to Spawn]](/wp-content/uploads/2026/07/haze-seas-boss-drops.jpg "Haze Seas Boss Drops [Chances, Locations, and How to Spawn]")

Welcome to the Time Mysteries: The Ancient Spectres Collector’s Edition walkthrough on Gamezebo. Time Mysteries: The Ancient Spectres Collector’s Edition is a Hidden Object Game played on the PC created by Artifex Mundi. This walkthrough includes tips and tricks, helpful hints and a strategy guide on how to complete Time Mysteries: The Ancient Spectres Collector’s Edition.
Welcome to the Time Mysteries: The Ancient Spectres Collector’s Edition walkthrough on Gamezebo. Time Mysteries: The Ancient Spectres Collector’s Edition is a Hidden Object Game played on the PC created by Artifex Mundi. This walkthrough includes tips and tricks, helpful hints and a strategy guide on how to complete Time Mysteries: The Ancient Spectres Collector’s Edition.
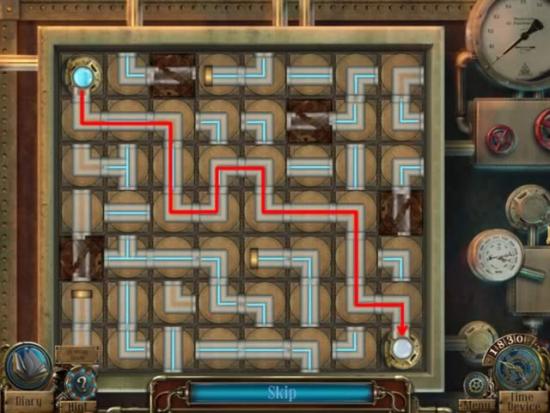
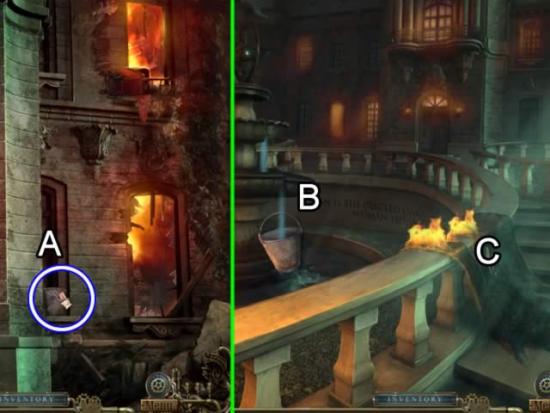
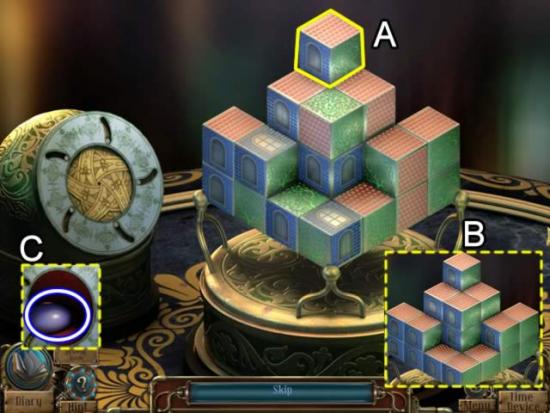
This hidden object game requires visiting several locations and using inventory items to advance play.
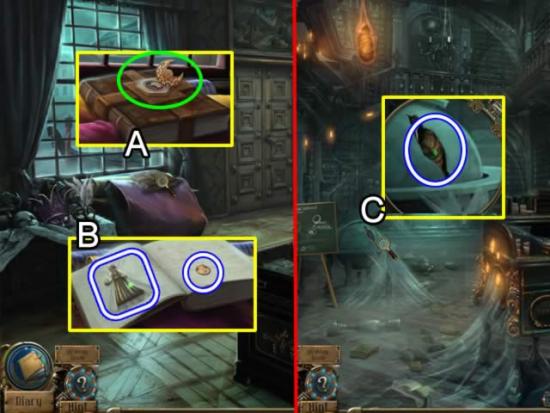
Main Menu:
Screen Navigation:
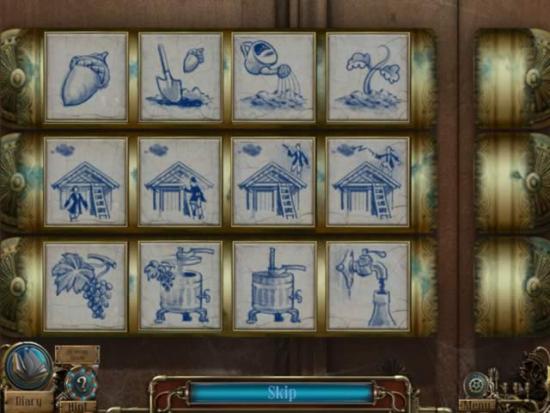
Symbol Meanings:
A short clip explains the background and introduces the story line for play.
If you are not familiar with hidden object games, click “Yes” when asked if you would like a tutorial. This will show you how to interact with objects and characters.
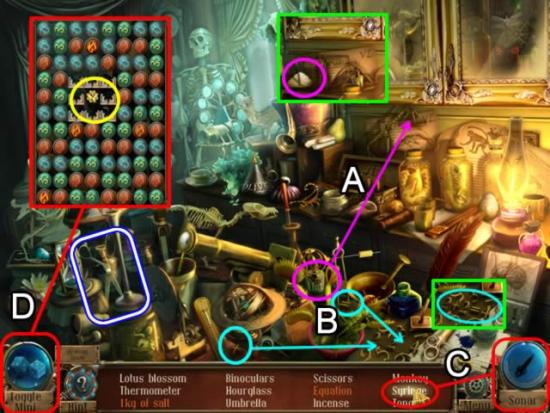
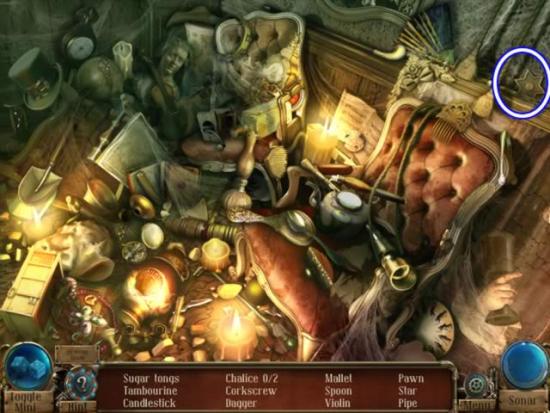
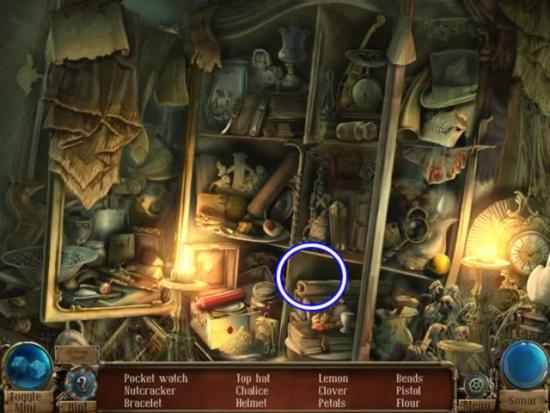
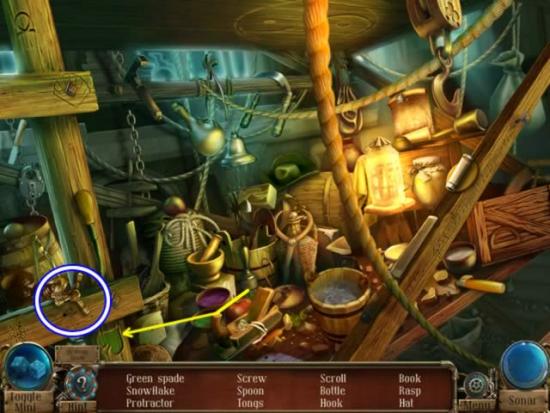
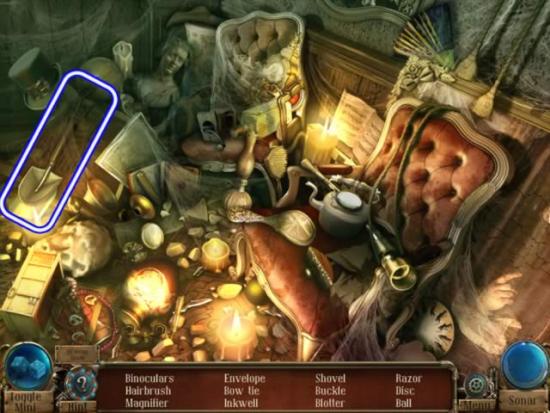
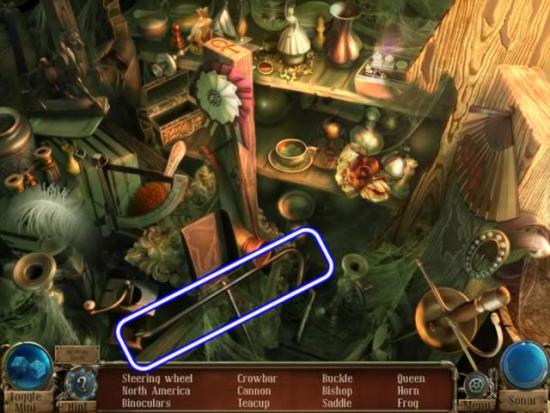
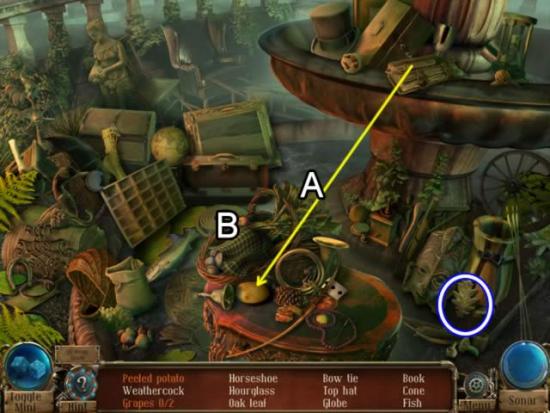
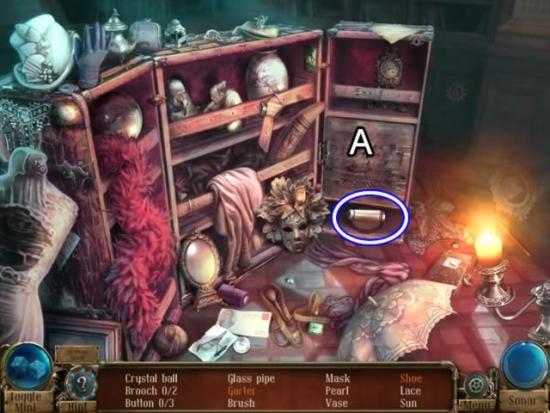
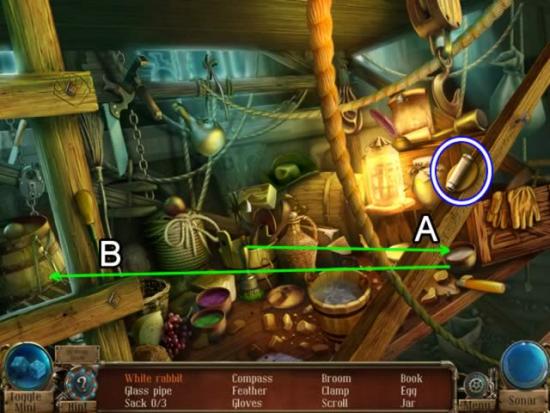
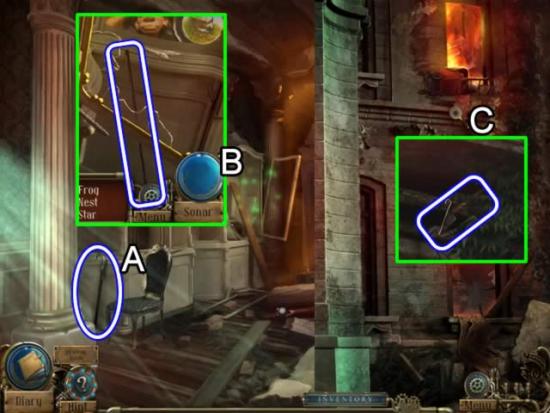
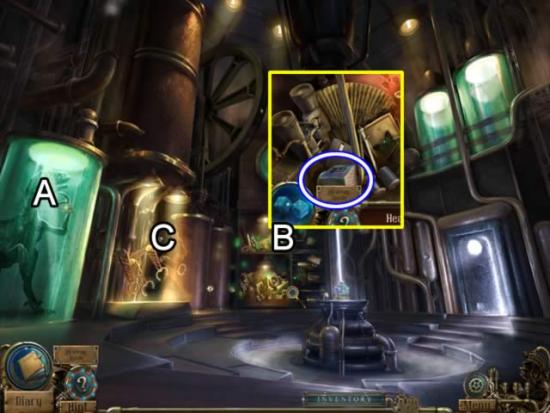
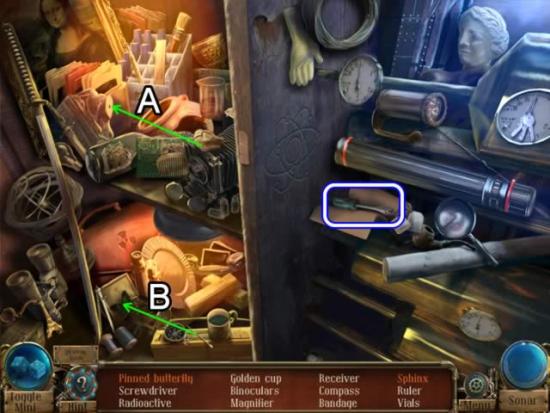
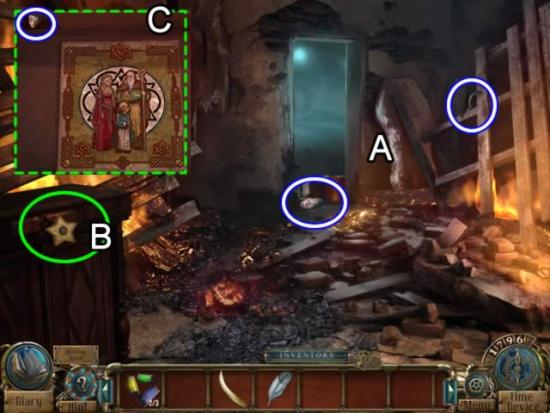
Only inventory items are circled in hidden object scenes. They are highlighted in white with a blue border. Objects listed in orange lettering indicate an additional step is needed to get an item. Move your cursor around until it turns into a gear, magnifying glass or hand to help locate the needed item or interactive area. Note: These objects, just as the rest of the items in a list, are randomly generated. Your scene may not have the same interactive items as the screen shot. Hold down the “Ctrl” and “F” keys simultaneously to open a box to search this walkthrough for a specific item.
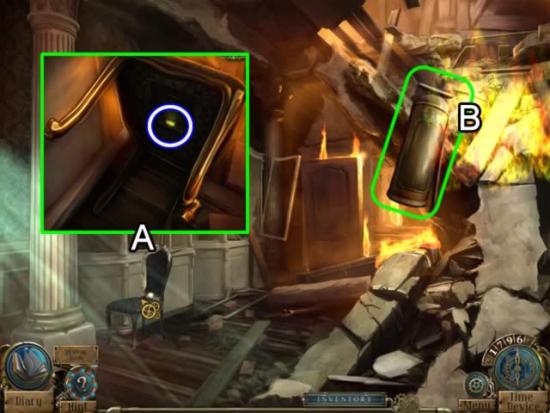
With the exception of a hidden object area, most inventory items are not collected from a scene until they are needed.

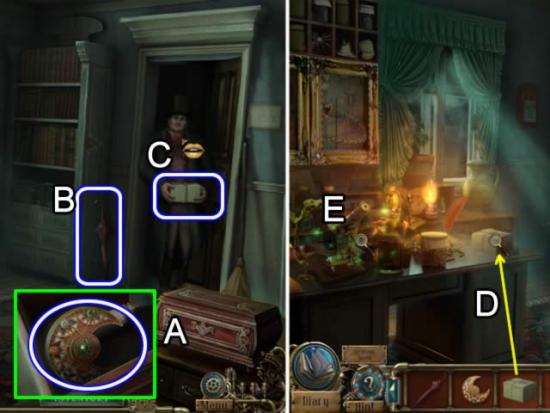
Home

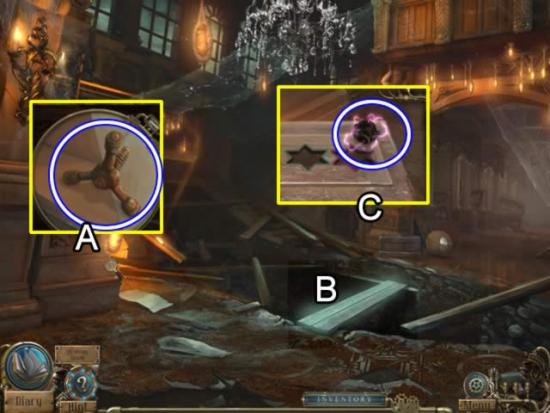
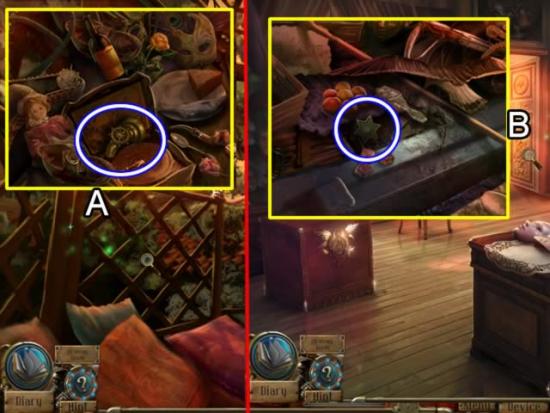
Mansion Grounds
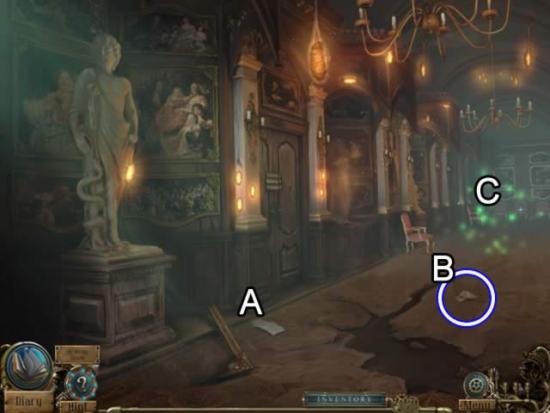
Dining Hall
Study/Balcony
Garden

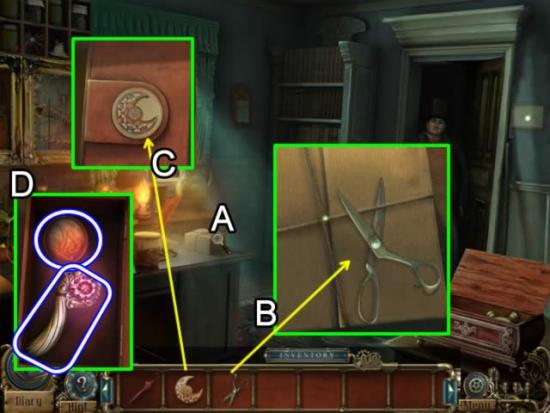
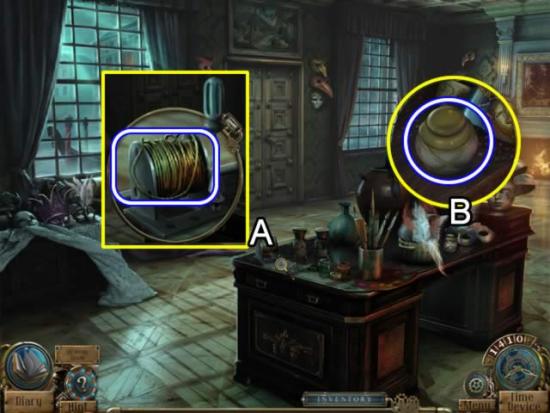
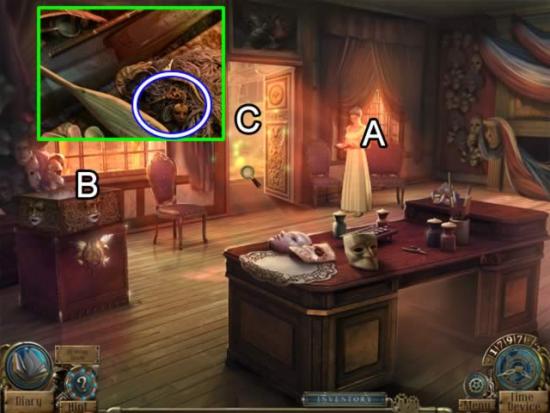
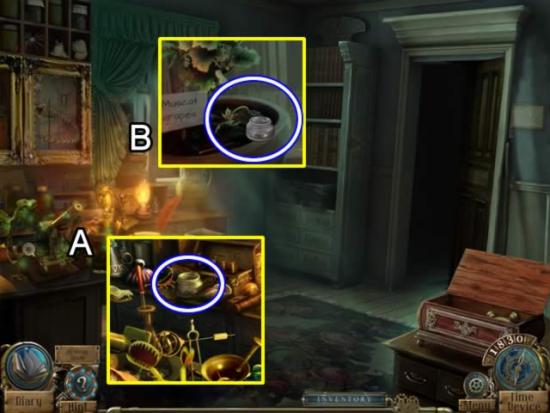
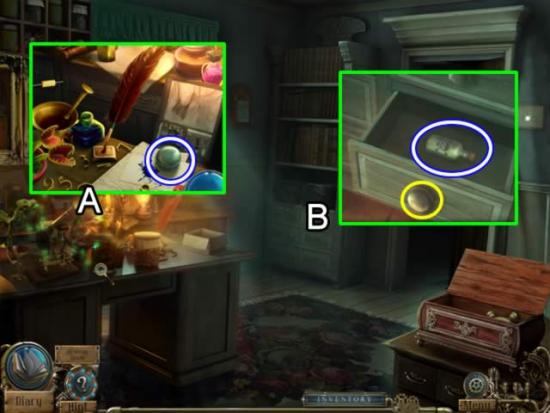
Study
Main Hall
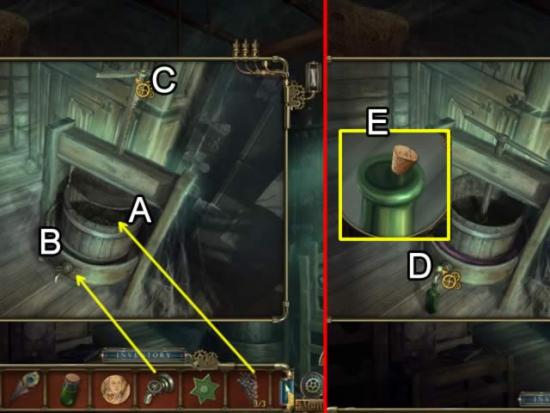
Corridor
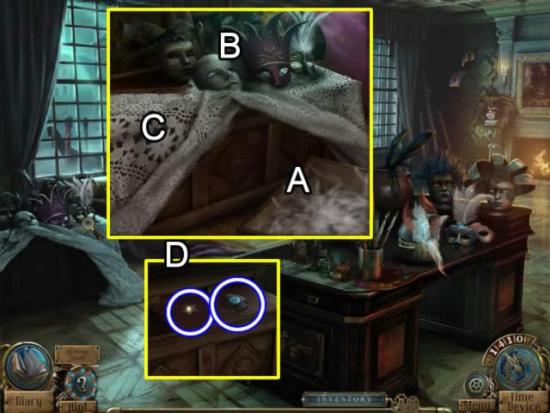
Study
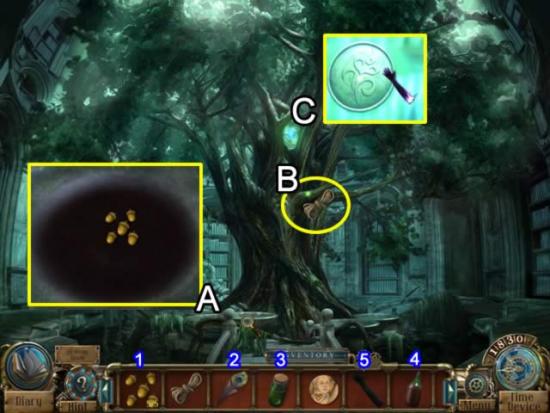
Dining Room
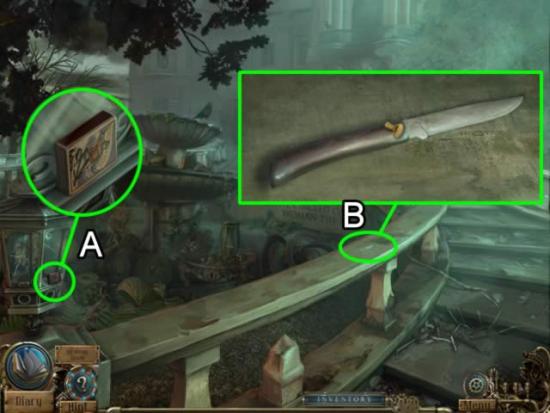
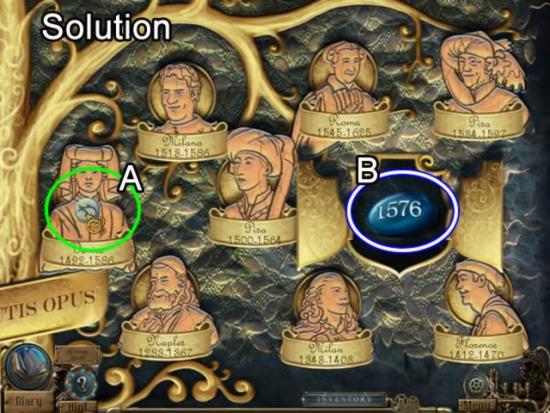
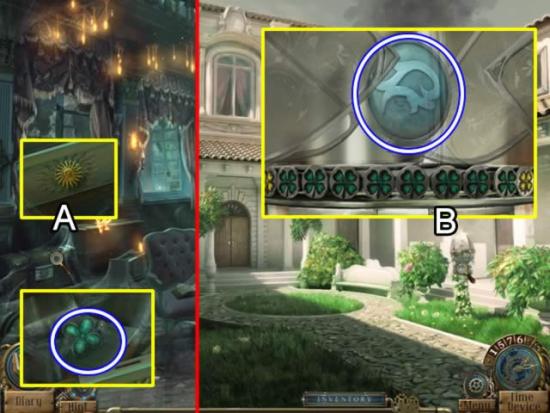
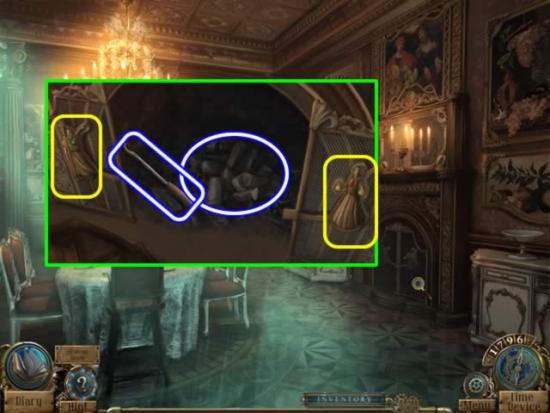
Garden, 1576
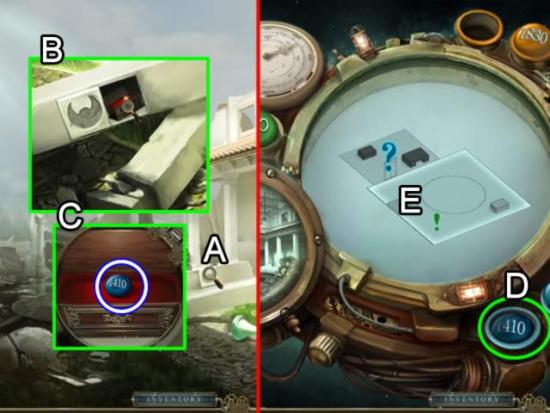
Garden, 1410
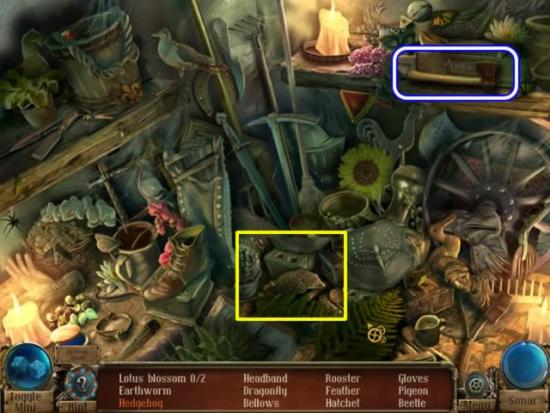
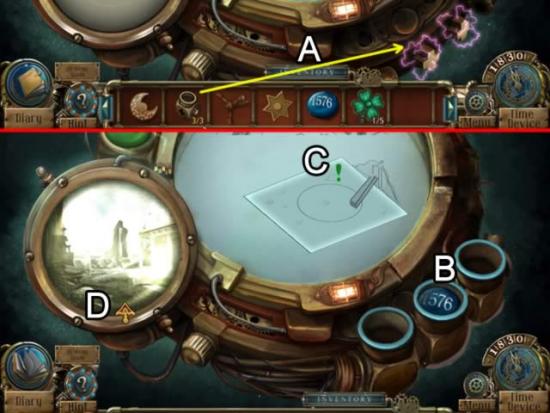
Garden, 1576
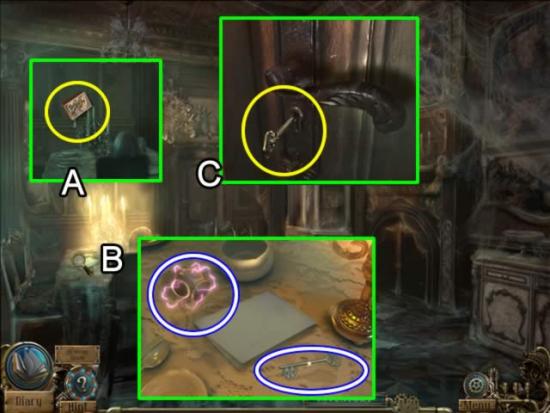
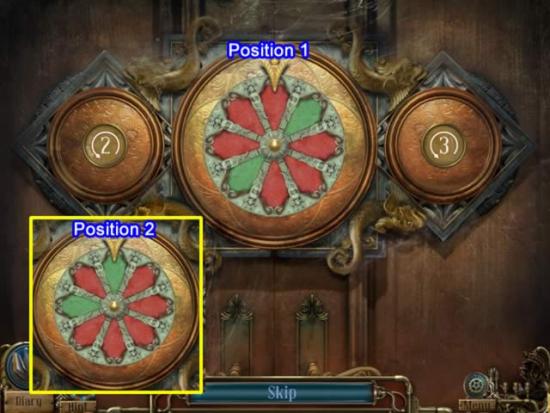
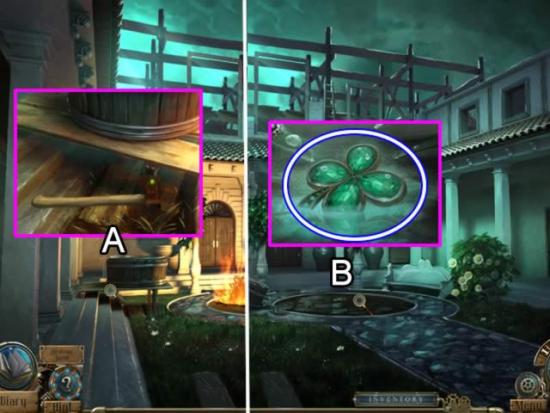
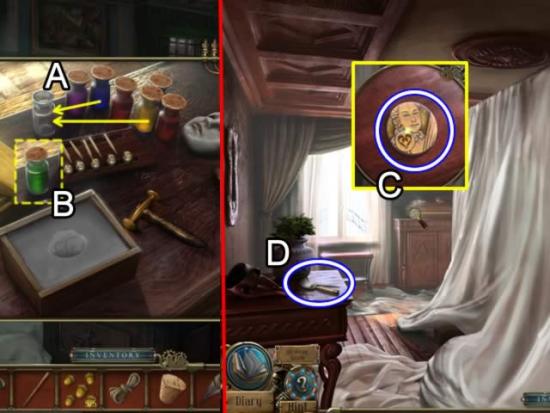
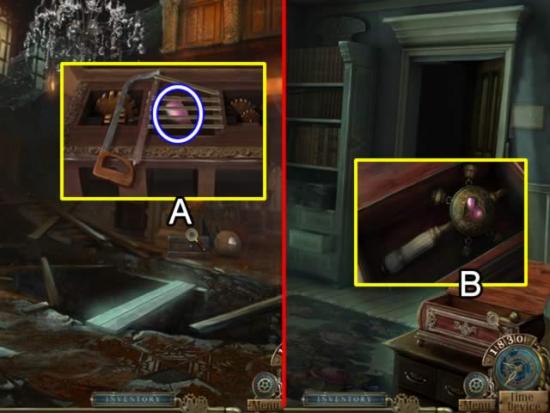
Study, 1830
Garden, 1576
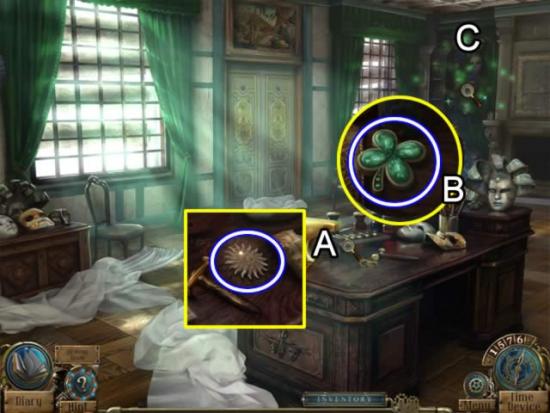
Garden, 1830
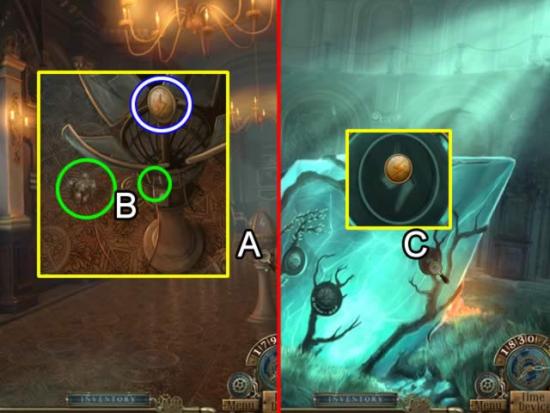
Fountain, 1830
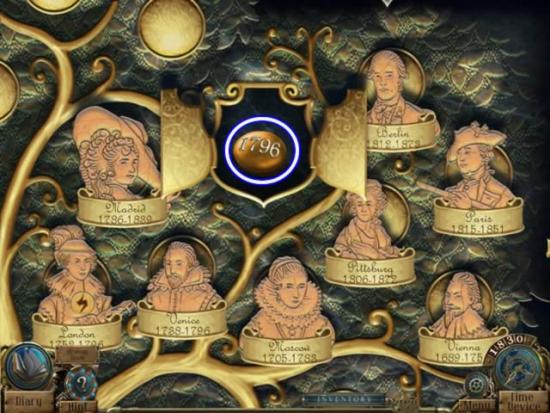
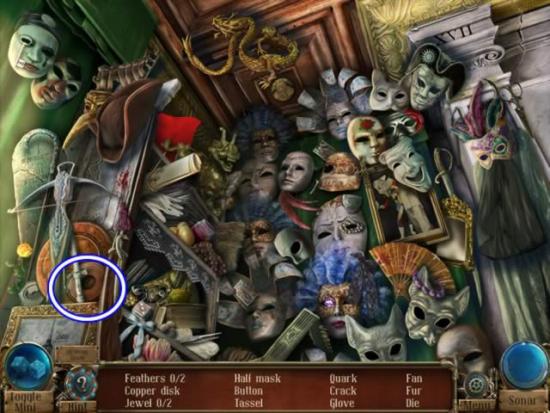
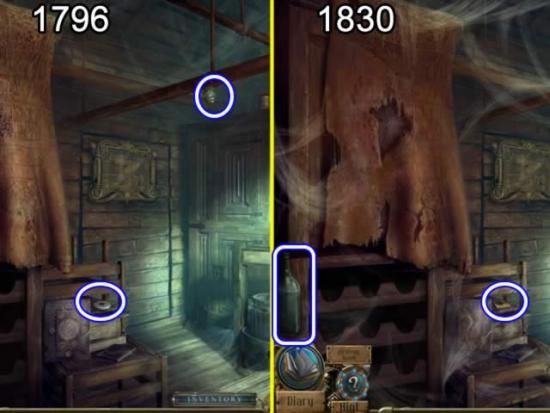
Fountain, 1796
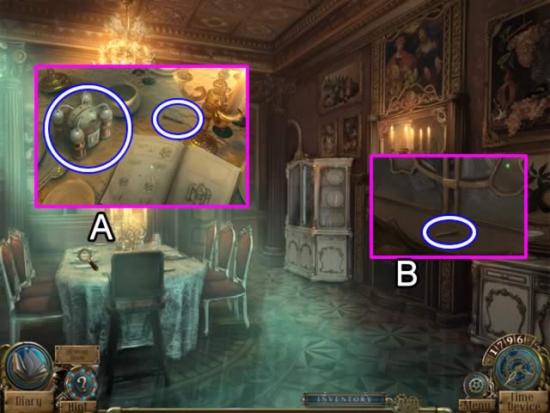
Dining Hall, 1796
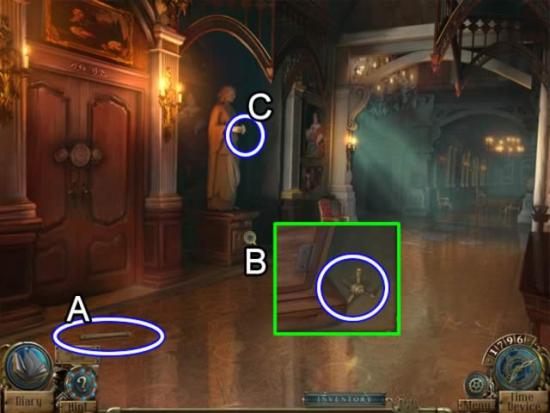
Dining Hall Corridor, 1796
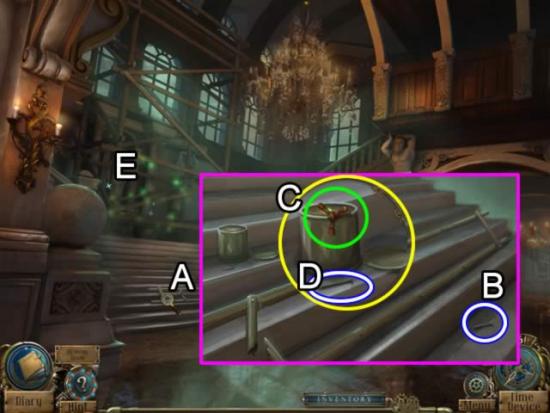
Main Hall, 1796
Study Corridor, 1796
Dining Hall, 1830
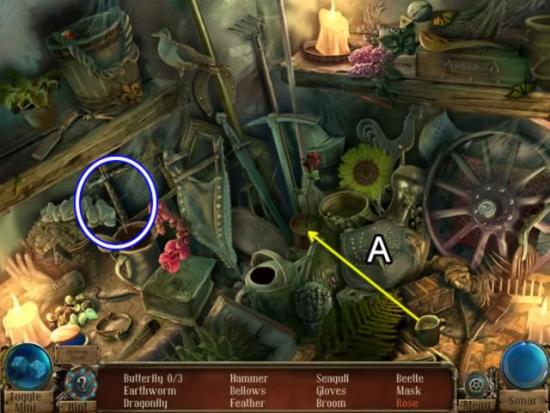
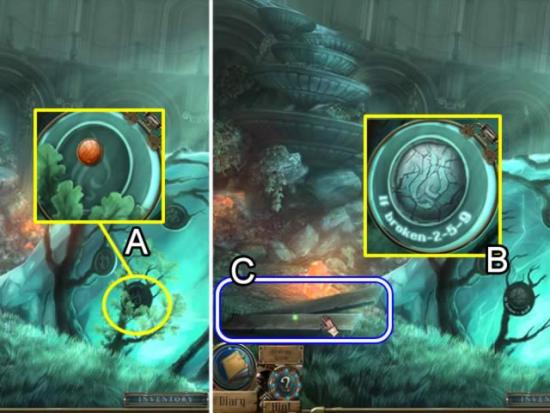
Garden, 1410
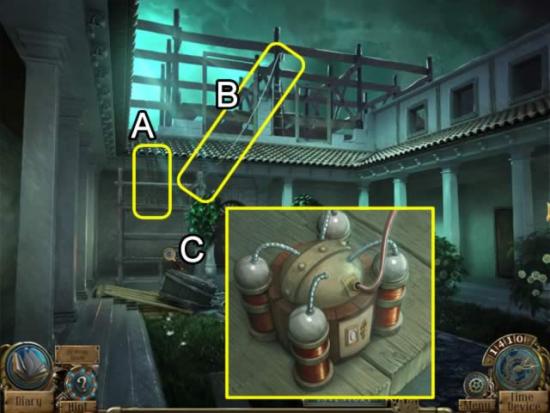
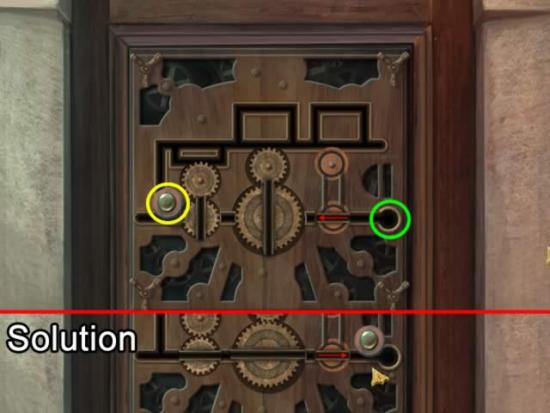
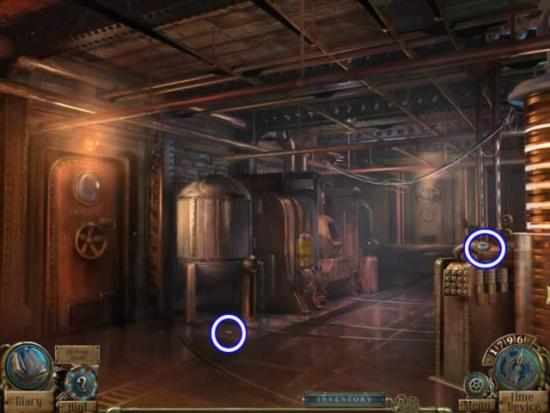
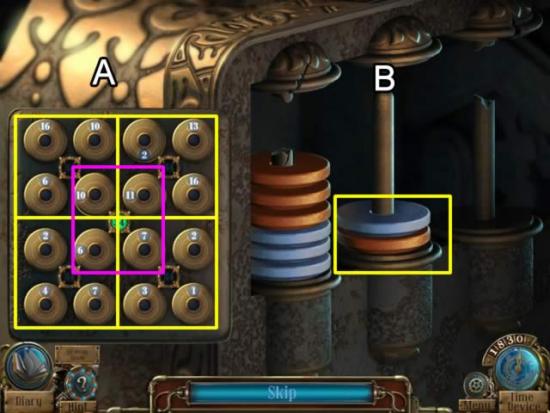
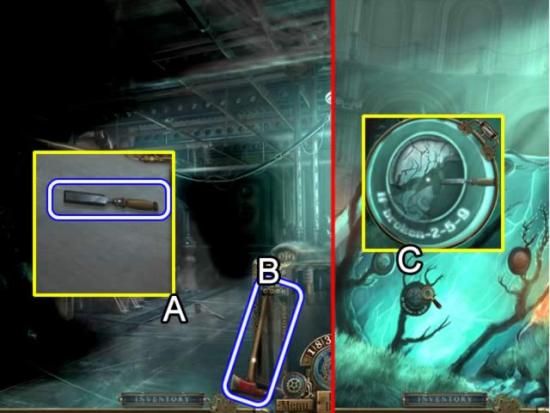
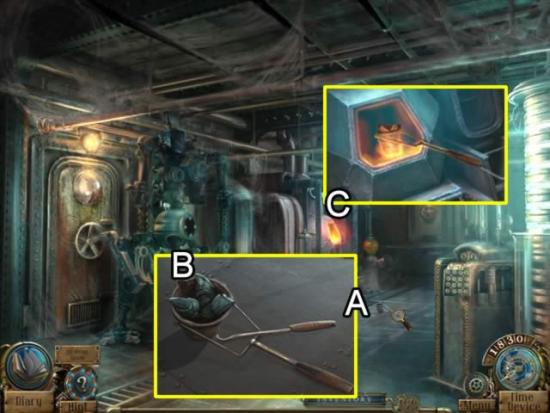
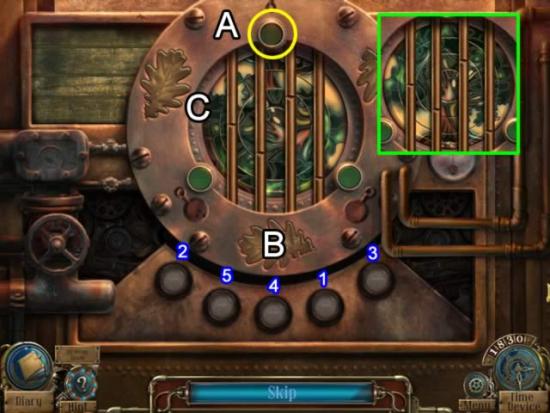
Workshop, 1410
Main Hall, 1796
Garden, 1410
Study Corridor, 1796
Garden, 1830
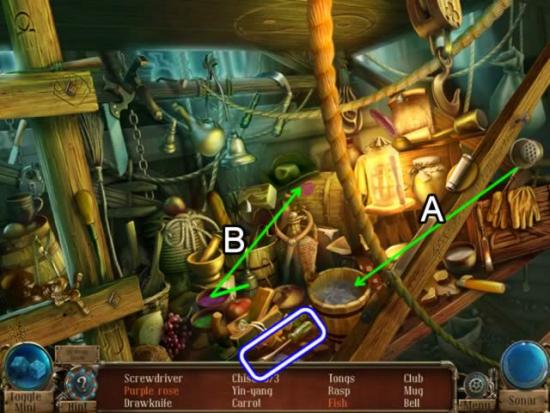
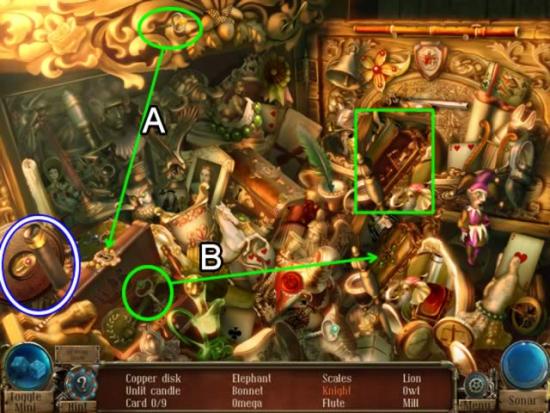
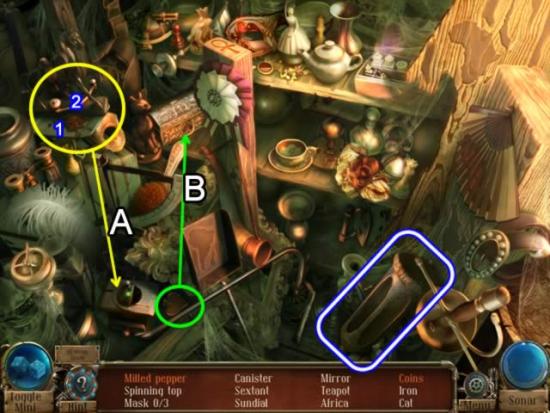
Workshop, 1576
Workshop, 1410
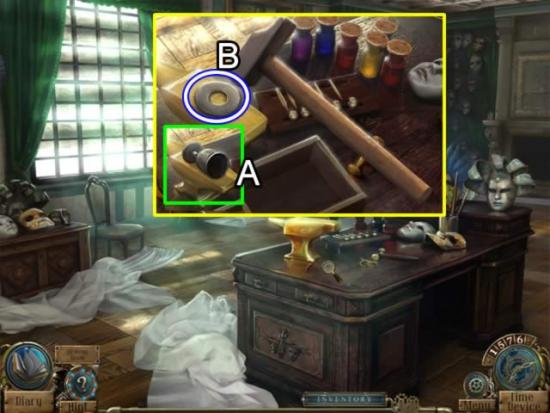
Study, 1830
Main Hall, 1796
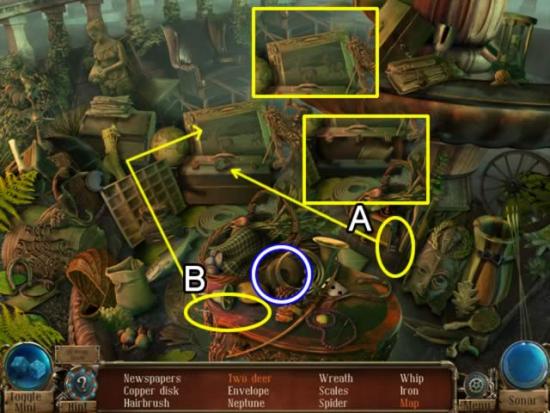
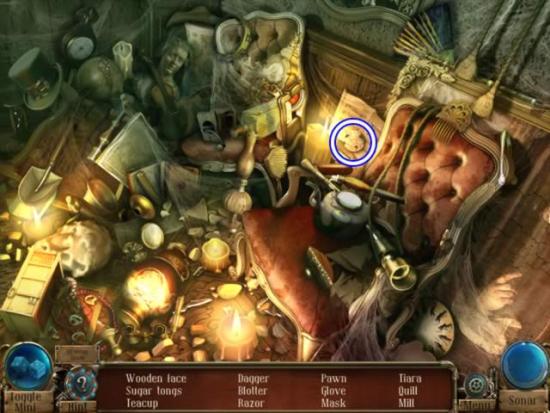
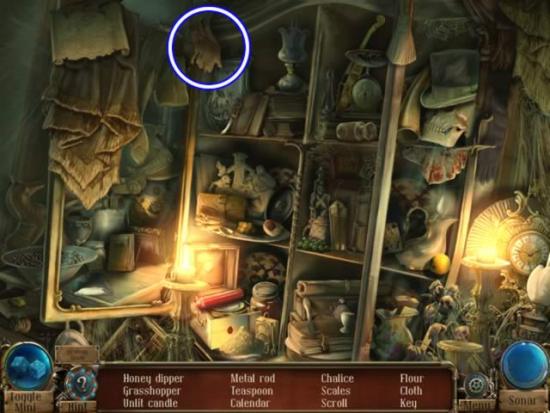
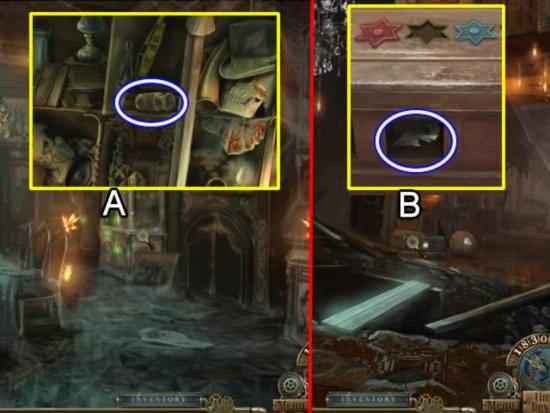
Storeroom, 1796
Storeroom, 1830
Study Corridor, 1796
Study, 1796
Storeroom, 1796
Basement, 1796
Dining Hall, 1796
Dining Hall Corridor, 1796
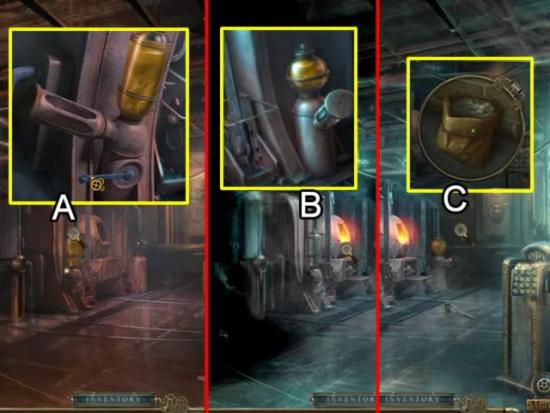
Workshop, 1576
Storeroom, 1830
Basement, 1830
Garden, 1830
Storeroom, 1830
Basement, 1830
Storeroom, 1830
Basement, 1796
Basement, 1830
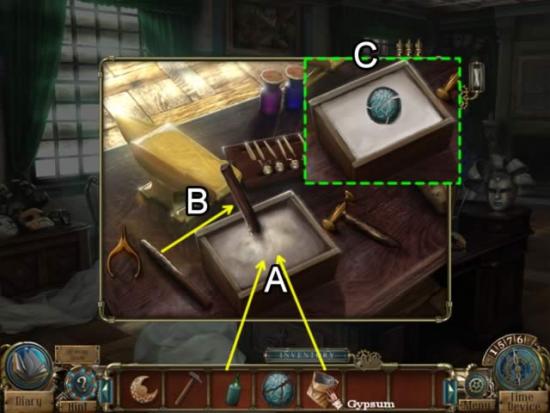
Workshop, 1576
Basement, 1830
Workshop, 1576
Garden, 1830
Study Corridor, 1830
Garden, 1410
Workshop, 1576
Study Corridor, 1796
Study, 1796
Garden, 1797
Workshop, 1797
Garden, 1420
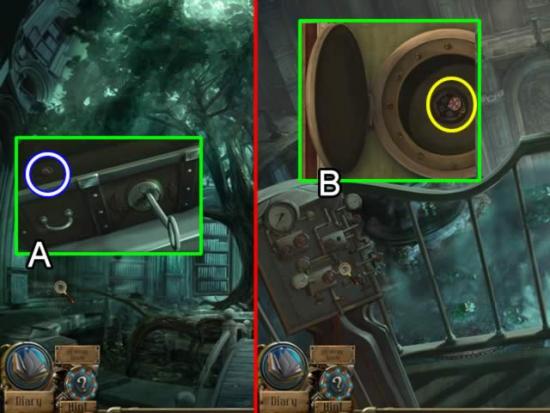
Workshop, 1410
Basement, 1830
Storeroom, 1830
Main Entrance, 1830
Garden, 1576

Garden, 1797
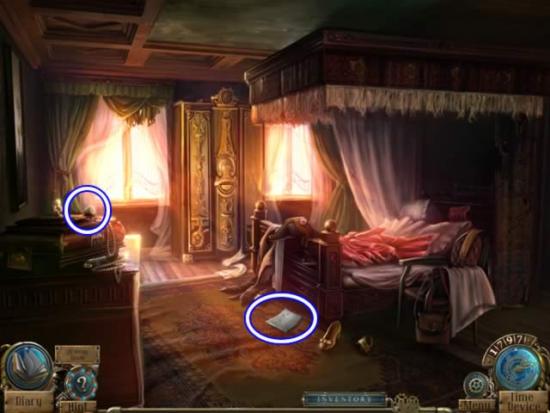
Bedroom, 1797
Study, 1796
Dining Hall, 1830
Main Hall, 1830
Workshop, 1576
Bedroom, 1576
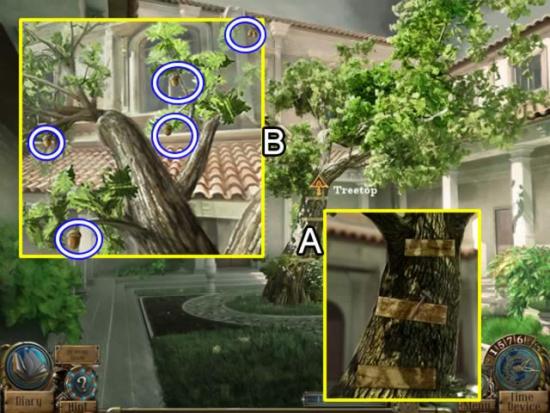
Tree House, 1797
Workshop, 1797
Home, 1830
Garden, 1576
Garden, 1797
Storeroom, 1796
Main Hall, 1830
Storeroom, 1830
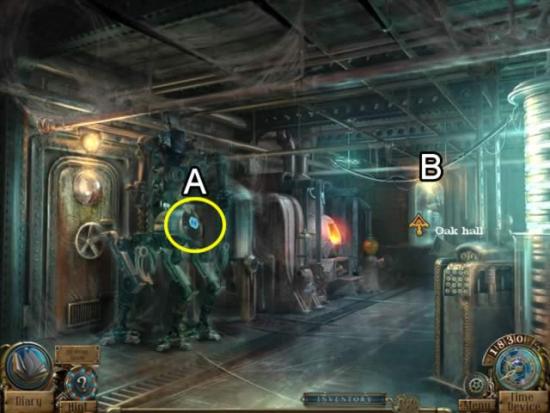
Oak Hall, 1830
Garden, 1830
Fountain, 1830
Study, 1796

Dining Hall Corridor, 1796
Workshop, 1797
Tree House, 1797
Dining Hall Corridor, 1796
Study, 1796
Mansion Gate, 1830
Home, 1830
Mansion Gate, 1830
Main Hall, 1830
Home, 1830
Garden, 1830
Basement, 1830
Main Hall, 1796
Basement, 1796
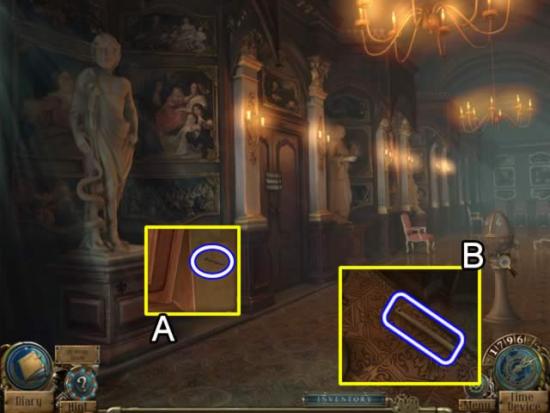
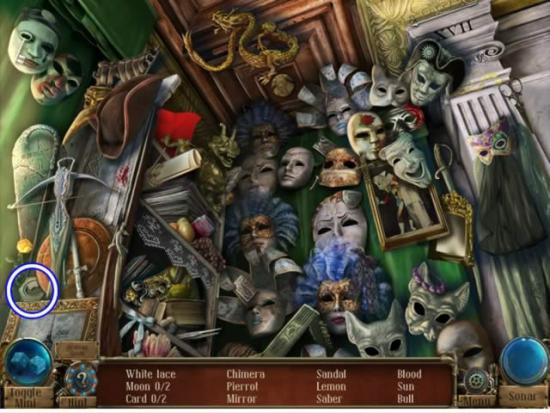
Oak Hall, 1796
Balcony, 1796
Study, 1796
Dining Hall Corridor, 1796
Main Hall, 1796
Balcony, 1796
Congratulations! You have completed playing Time Mysteries: Ancient Spectres Collector’s Edition. The bonus chapter is now available from the “Extras” tab on the main menu.
Laboratory
Chamber
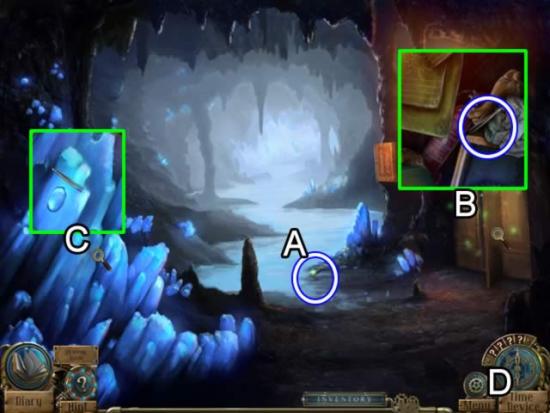
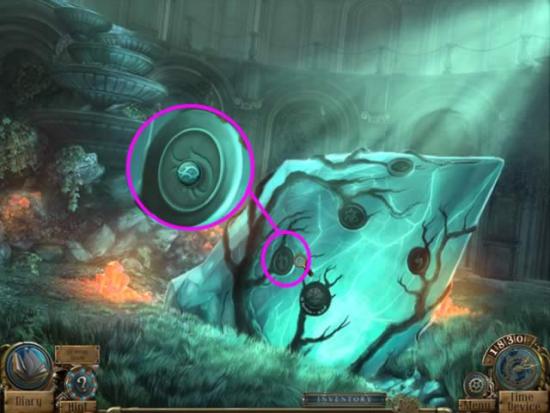
Crystal Cave
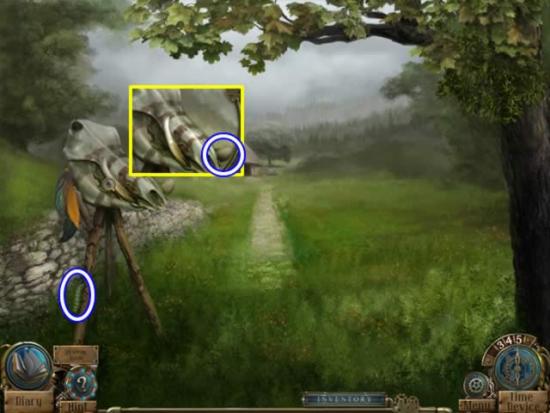
Meadow
Cottage Exterior
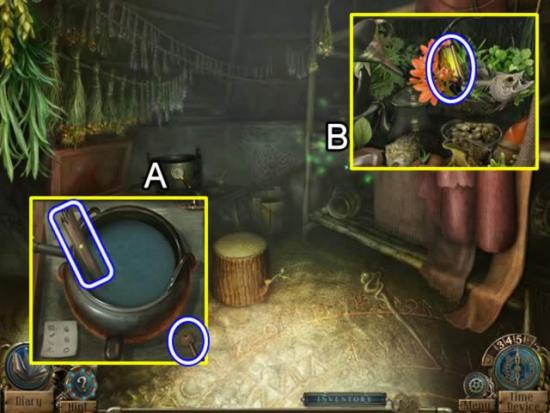
Cottage Interior
Cottage Exterior
Meadow
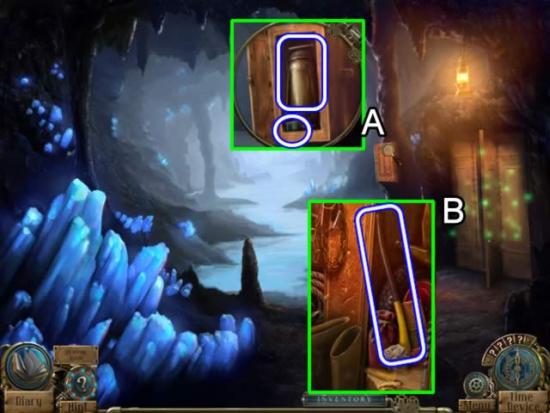
Crystal Cave
Laboratory
Mansion – First Floor
Mansion – Second Floor
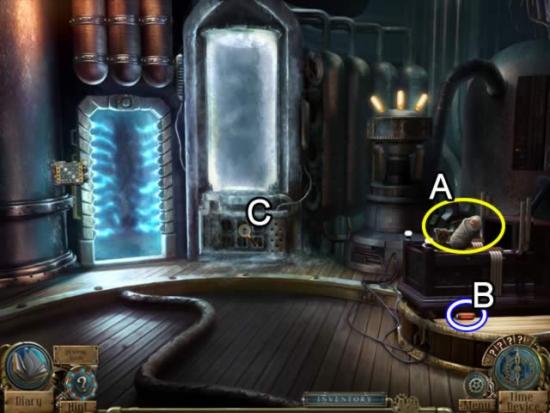
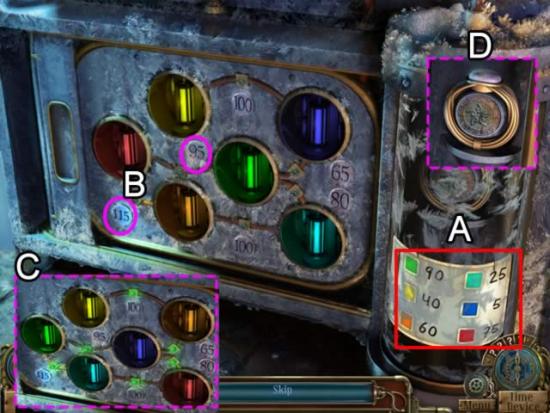
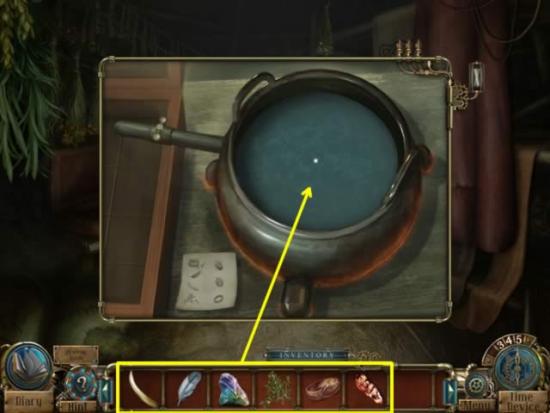
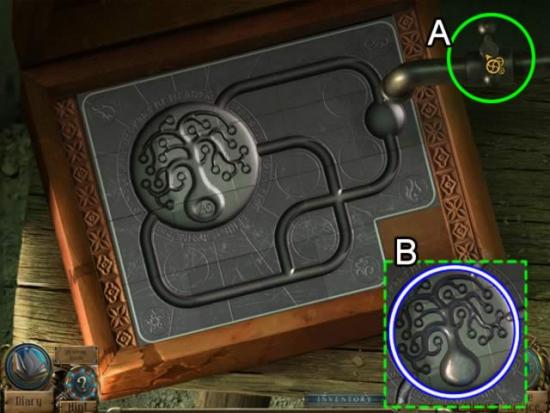
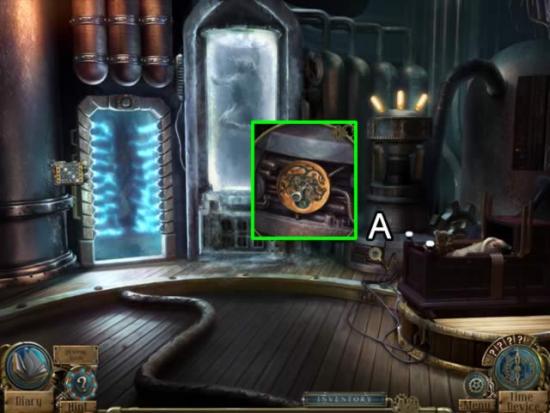
Laboratory
Mansion – First Floor
Meadow
Cottage
Mansion – Second Floor
Cottage
Laboratory
Congratulations! You have finished the bonus chapter of Time mysteries: Ancient Spectres Collector’s Edition. Additional bonus features are now available under the “Extras” tab on the main page.
