![All VV Ultimatum Titles [How to Get]](/wp-content/uploads/2026/06/vv-ultimatum-titles.jpg "All VV Ultimatum Titles [How to Get]")
All VV Ultimatum Titles [How to Get]
Do titles provide buffs?


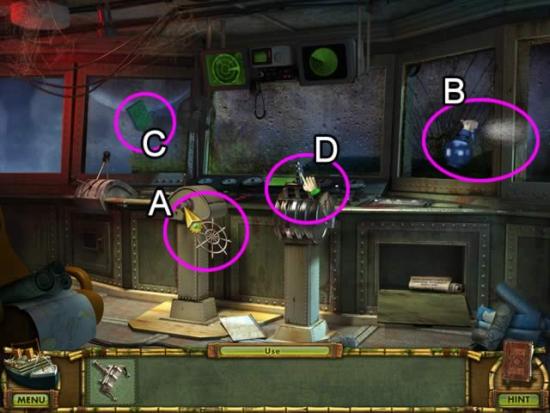
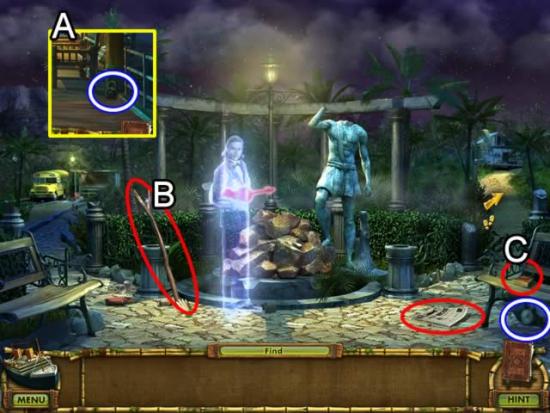
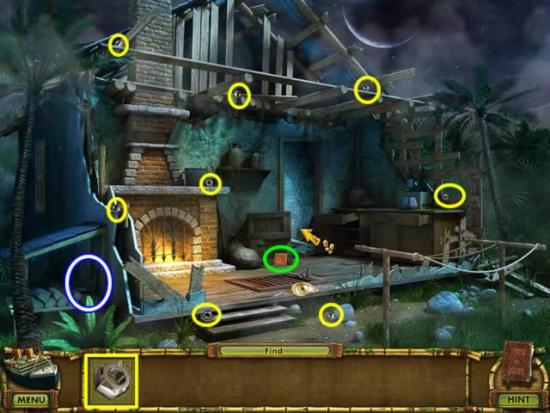
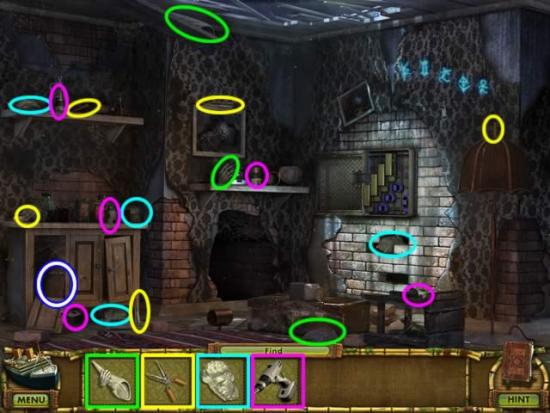
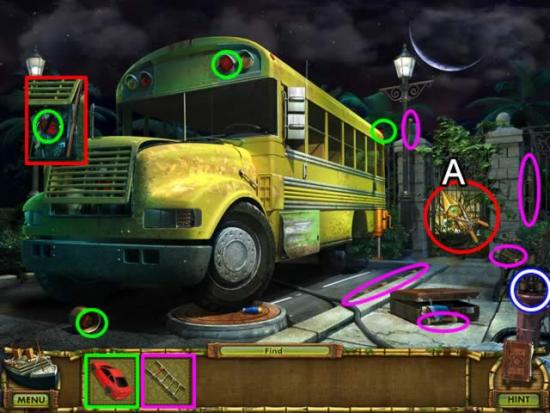
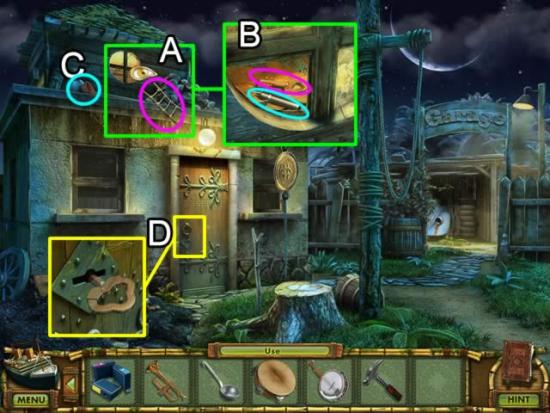
Welcome to the Treasures of Mystery Island: Ghost Ship walkthrough on Gamezebo. Treasures of Mystery Island: Ghost Ship is a Hidden Object Game played on the PC created by Alawar Five-BN for Alawar Games. This walkthrough includes tips and tricks, helpful hints and a strategy guide on how to complete Treasures of Mystery Island: Ghost Ship.
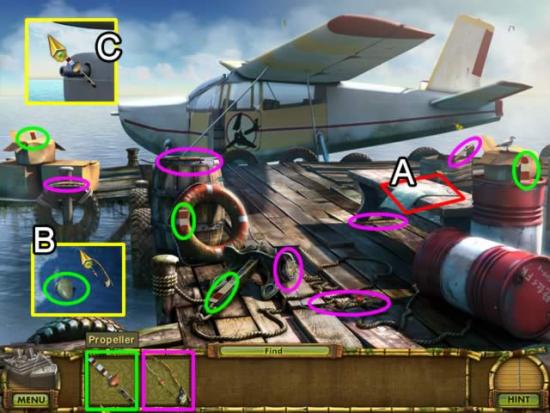
Welcome to the Treasures of Mystery Island: Ghost Ship walkthrough on Gamezebo. Treasures of Mystery Island: Ghost Ship is a Hidden Object Game played on the PC created by Alawar Five-BN for Alawar Games. This walkthrough includes tips and tricks, helpful hints and a strategy guide on how to complete Treasures of Mystery Island: Ghost Ship.
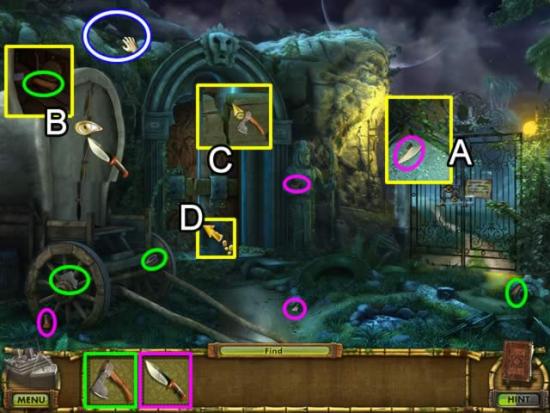
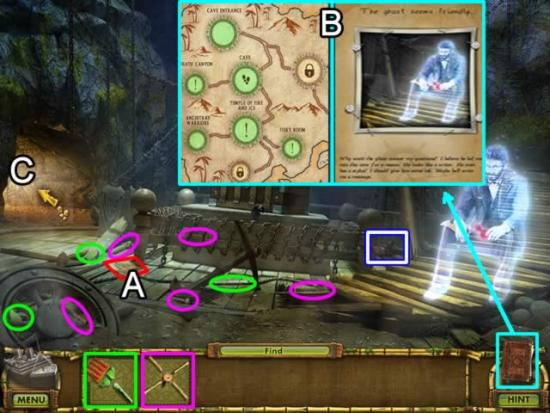
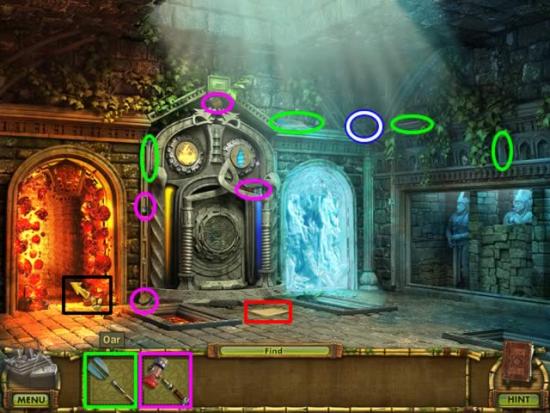
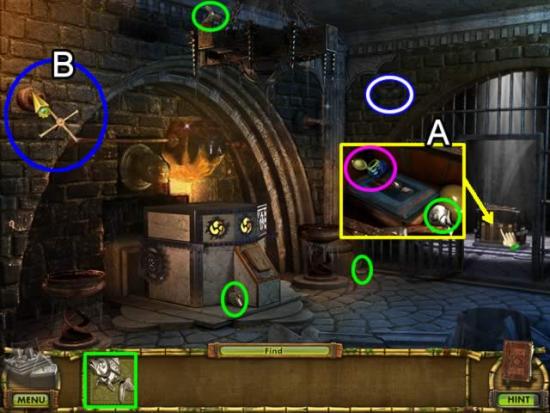
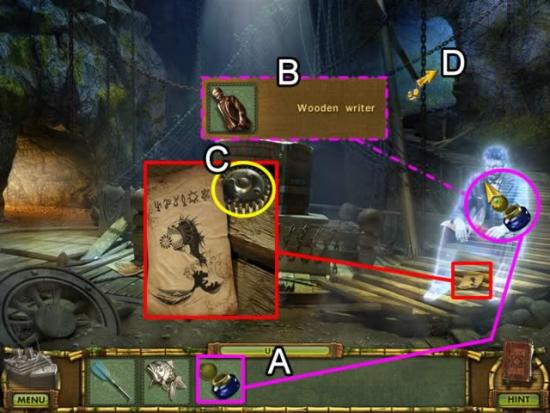
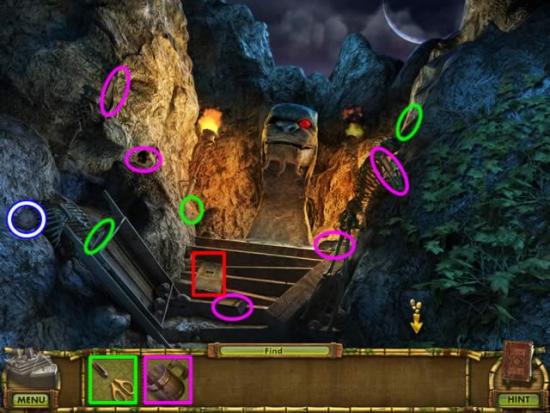
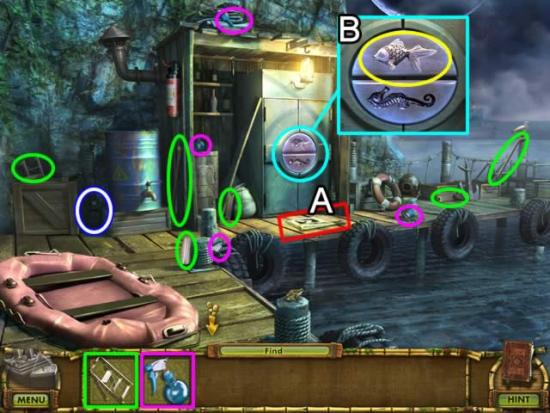
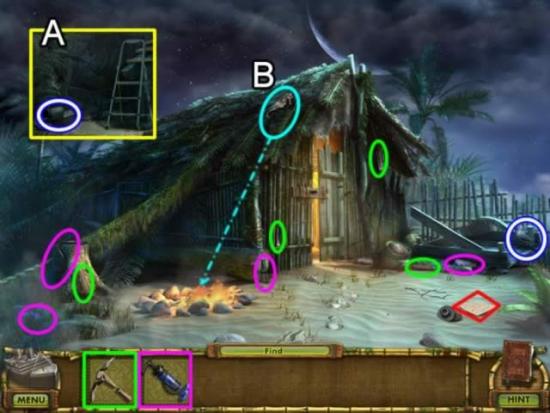
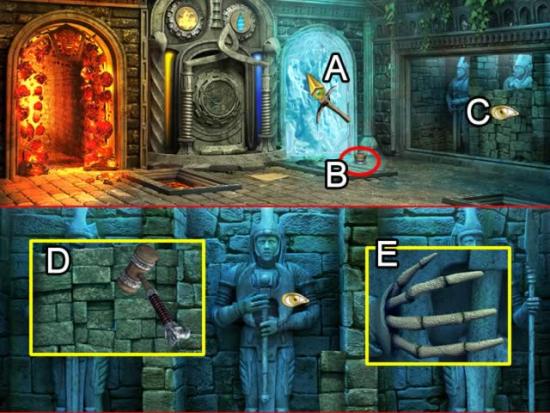
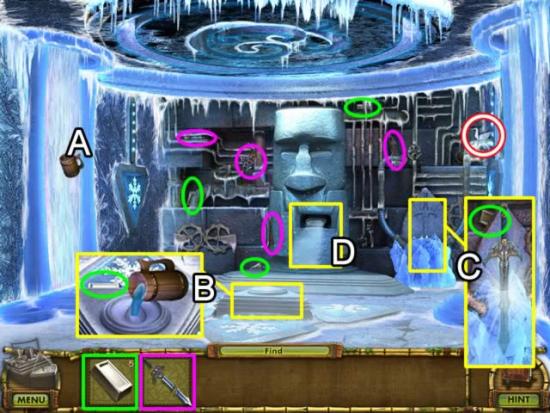
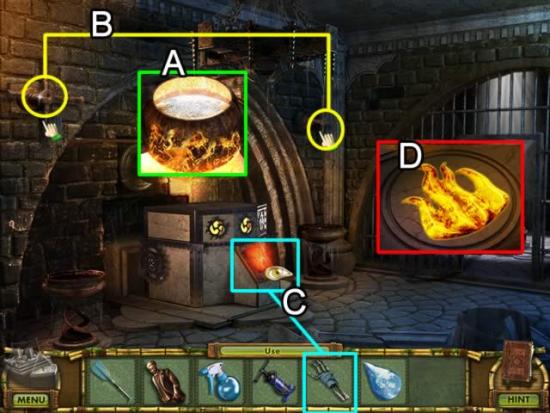
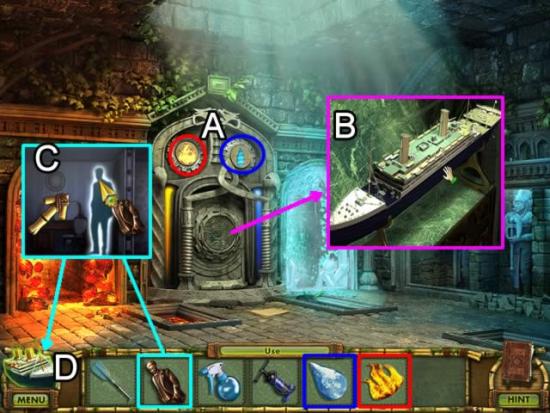
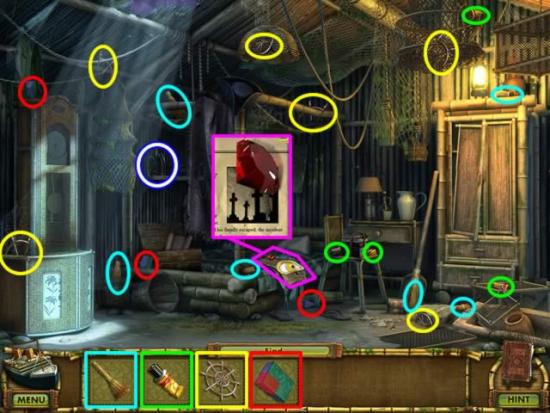
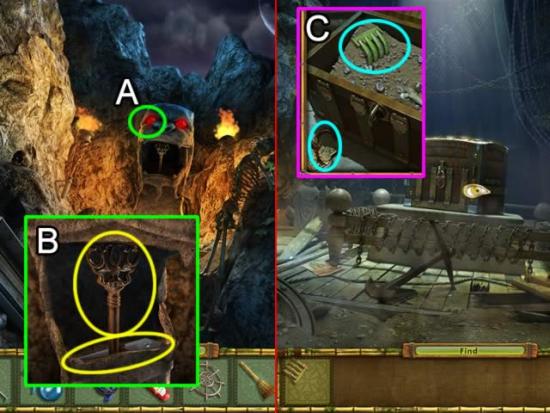
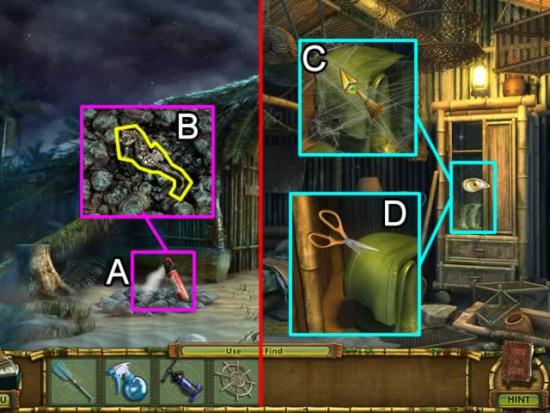
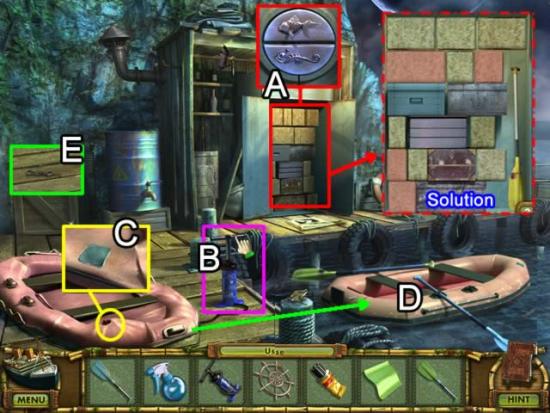
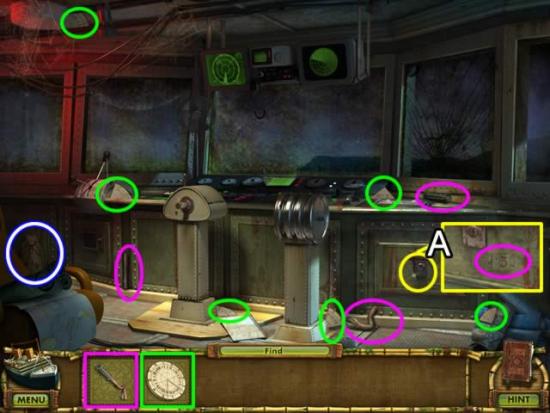
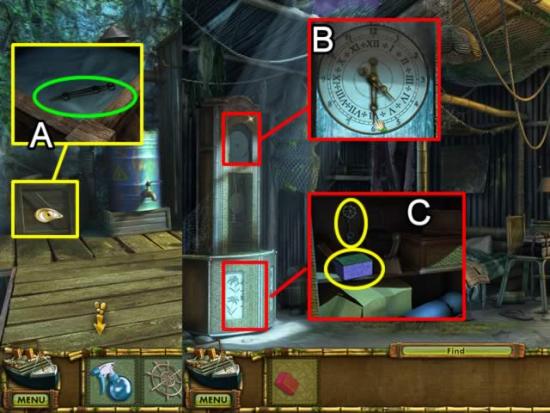
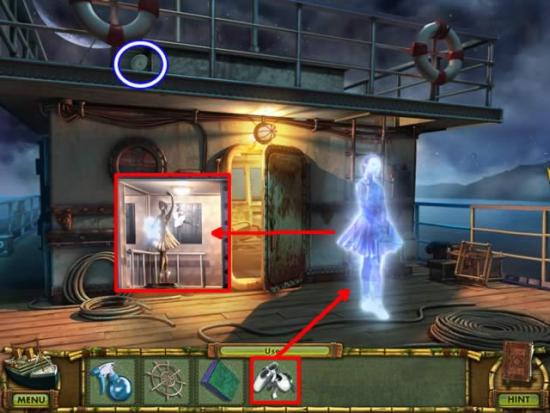
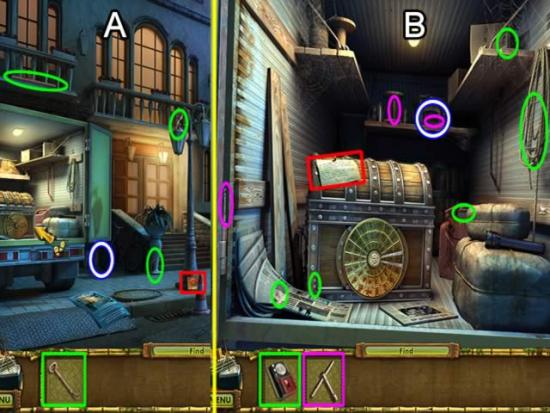
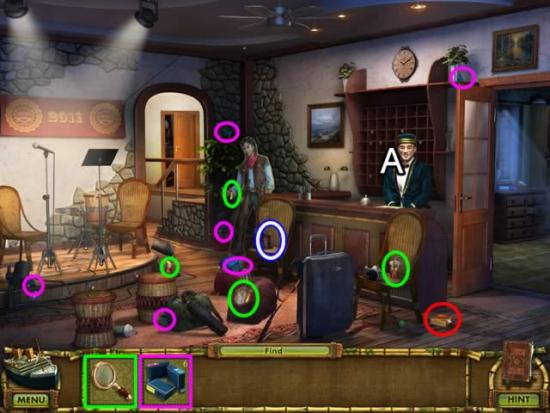
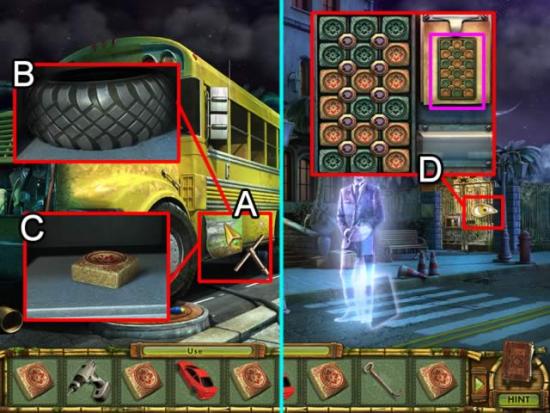
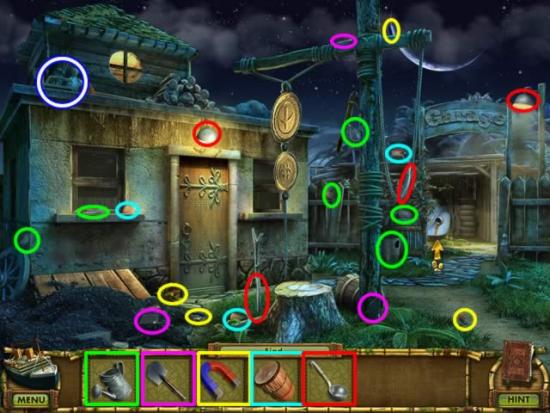
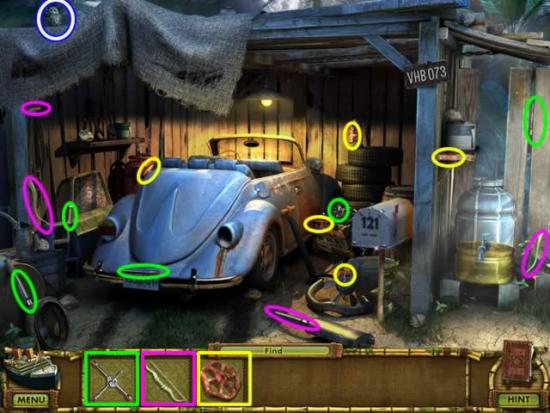
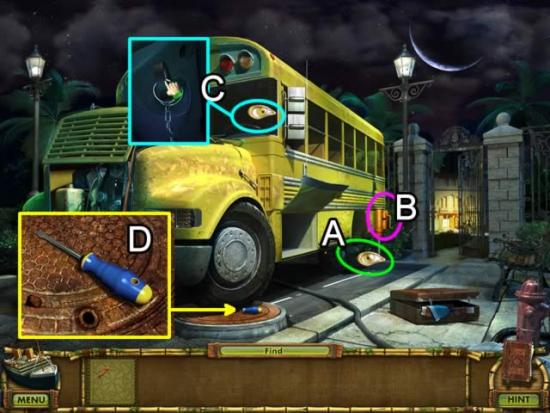
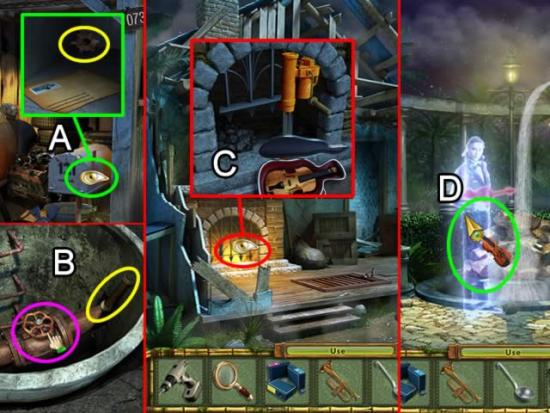
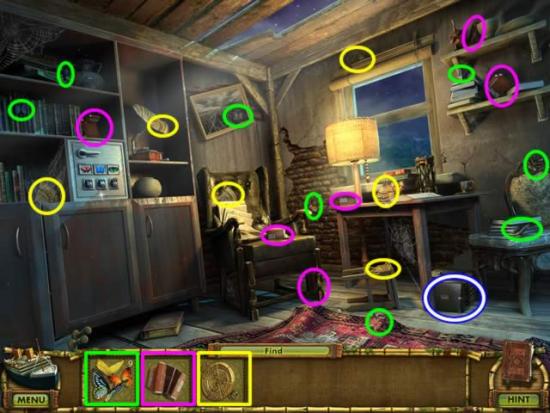
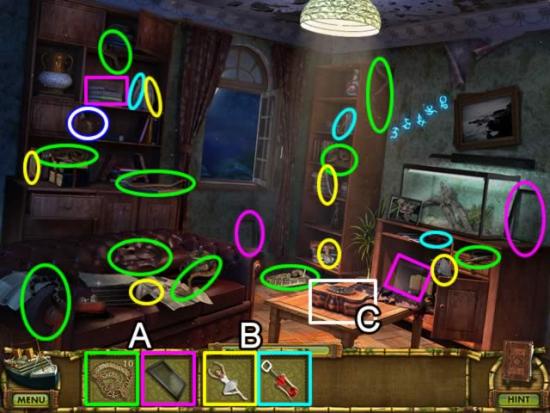
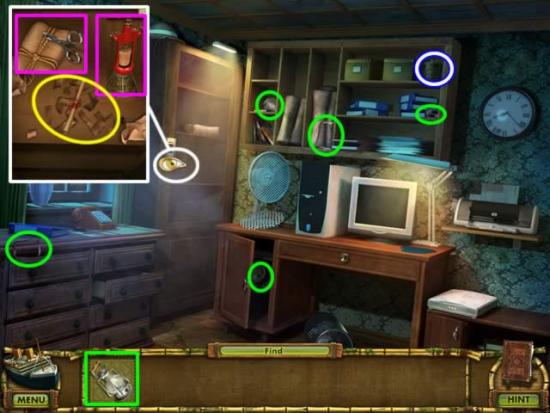
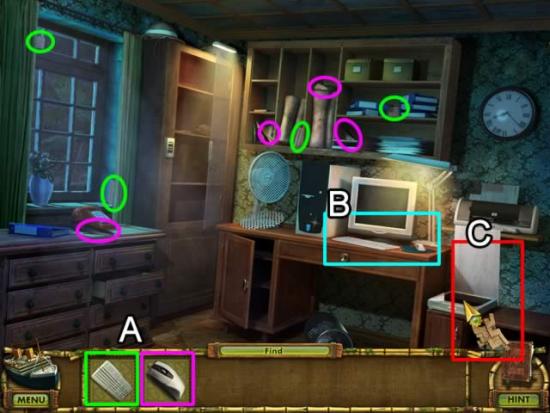
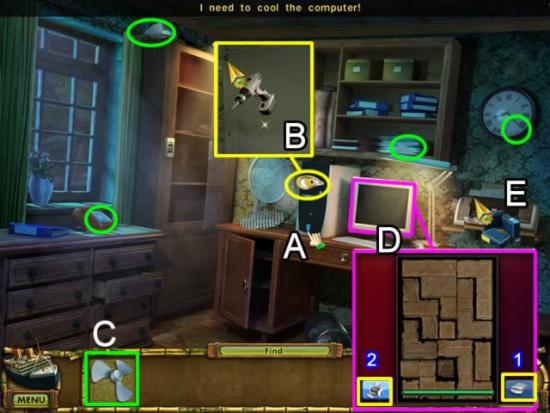
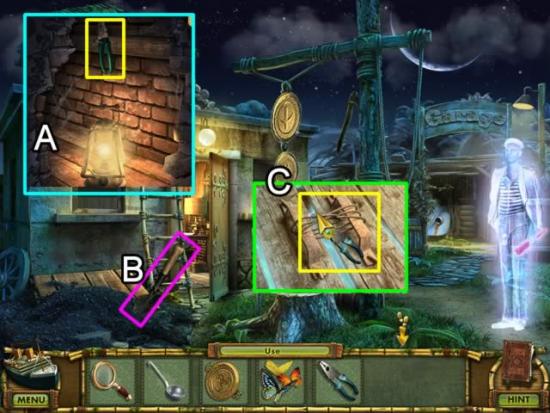
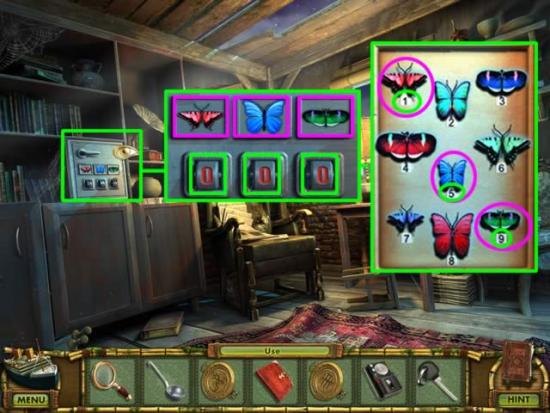
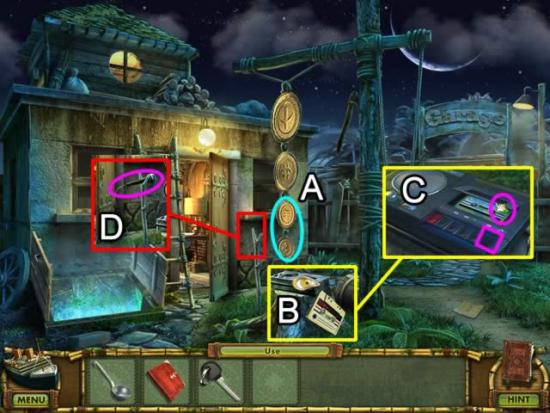
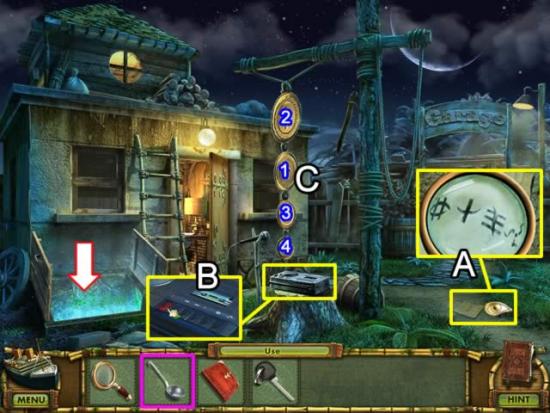
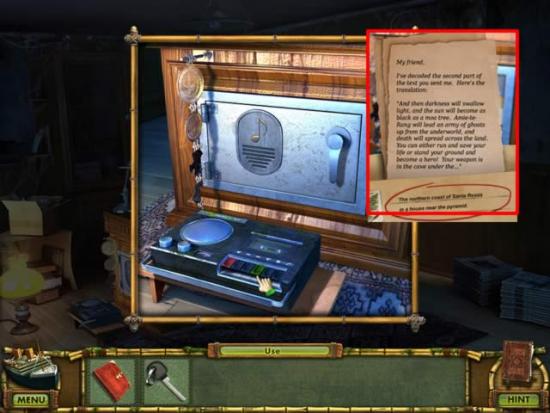
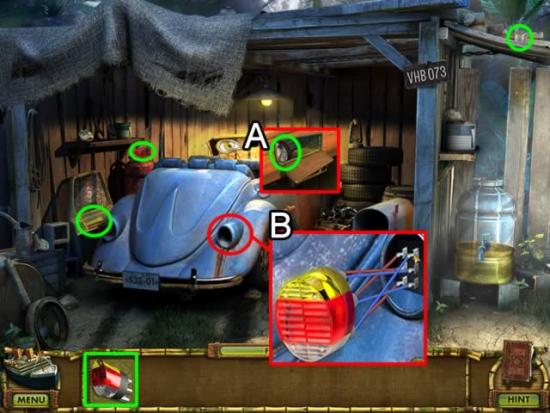
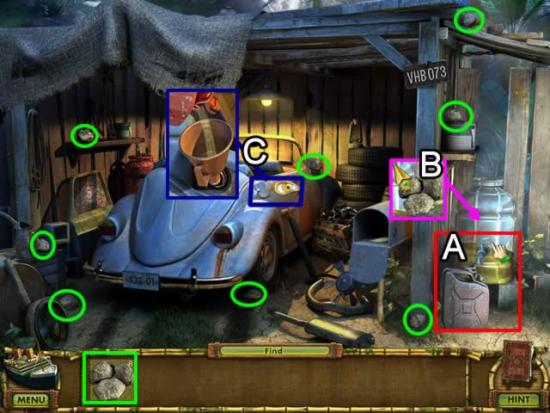
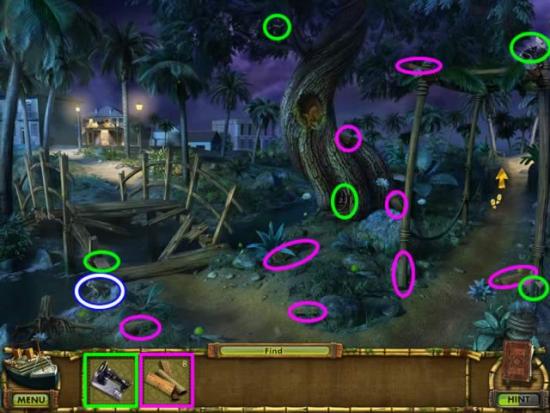
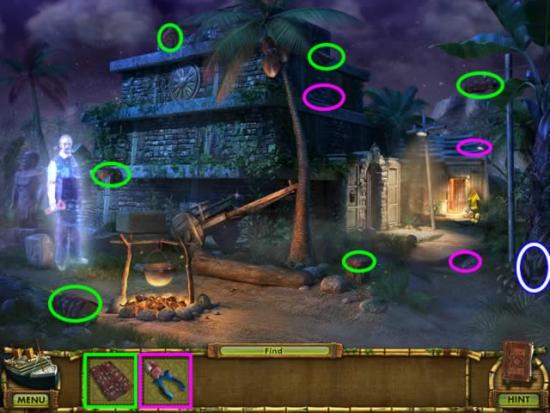
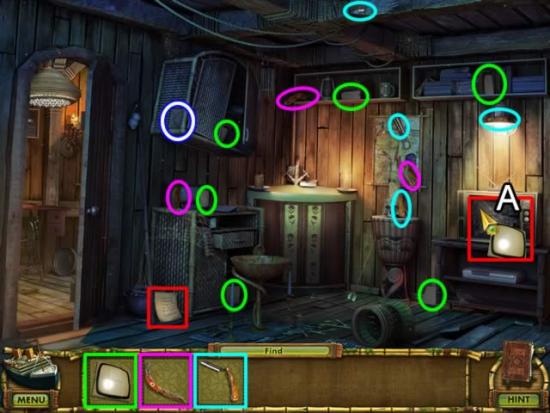
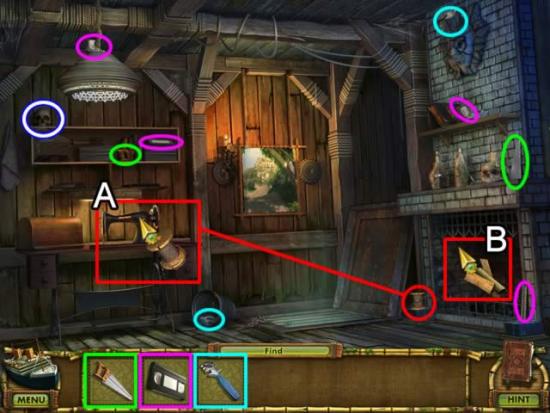
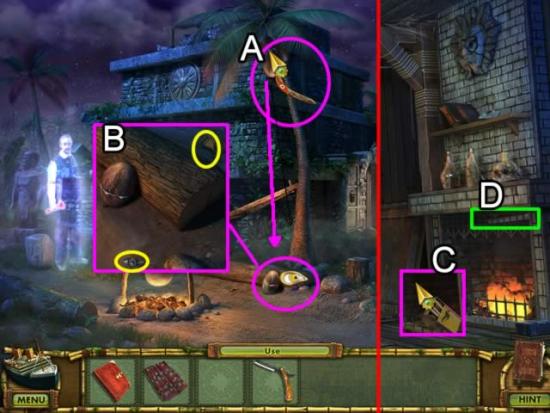
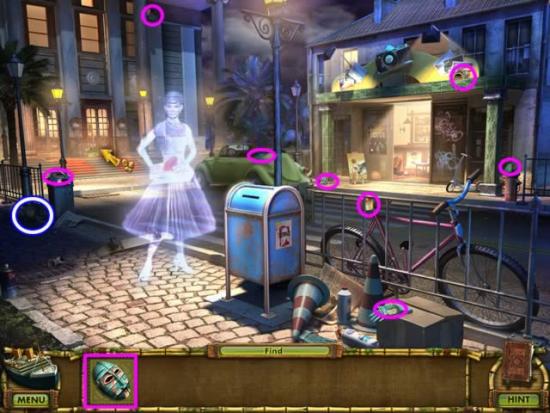
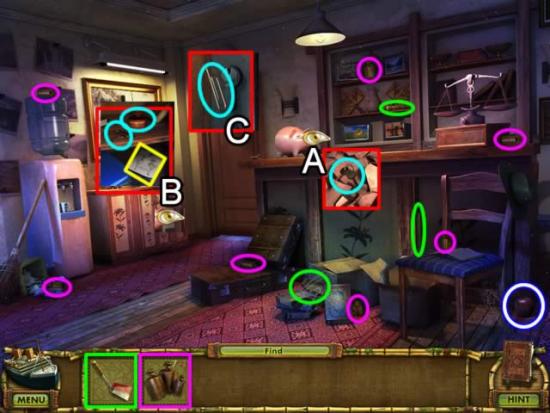
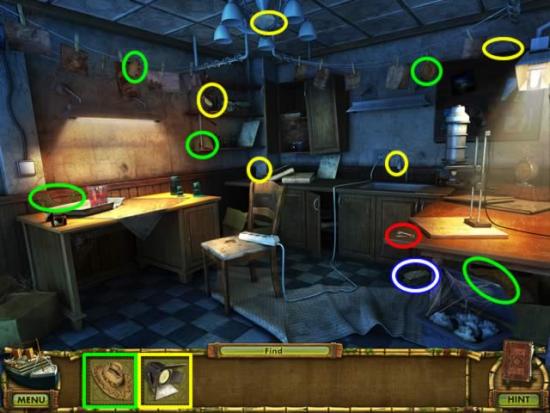
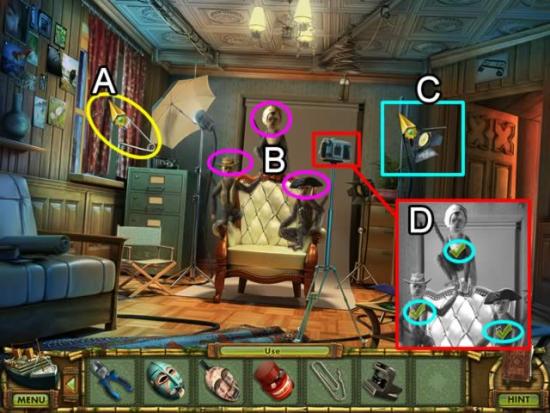
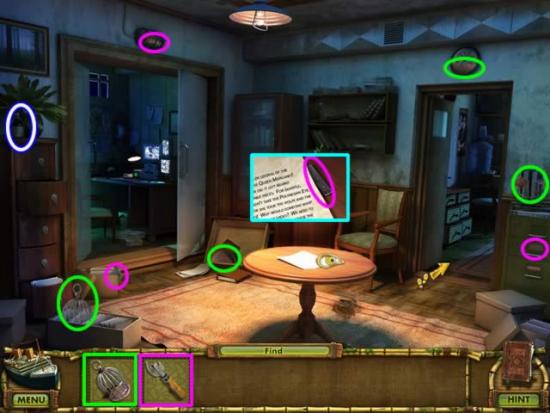
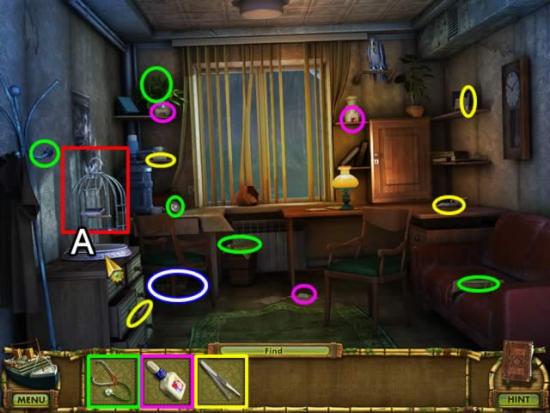
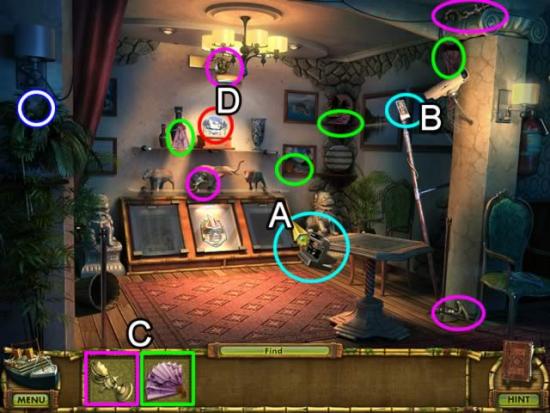
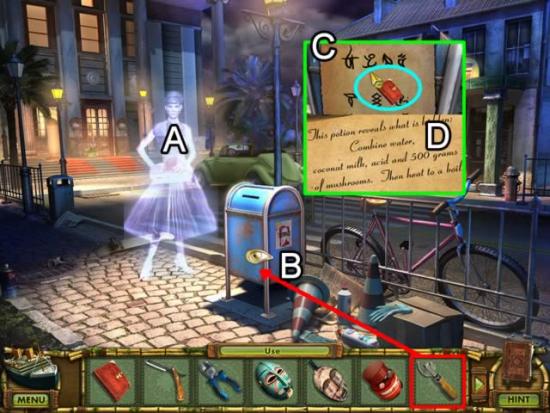
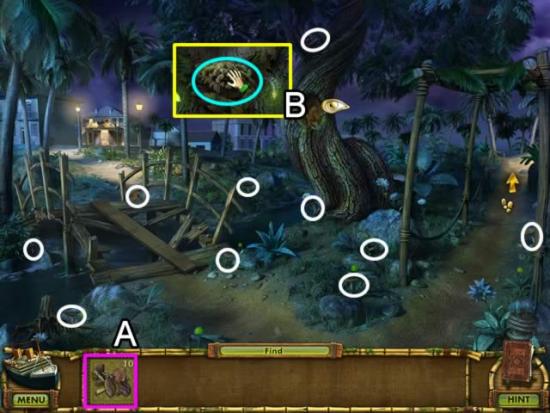
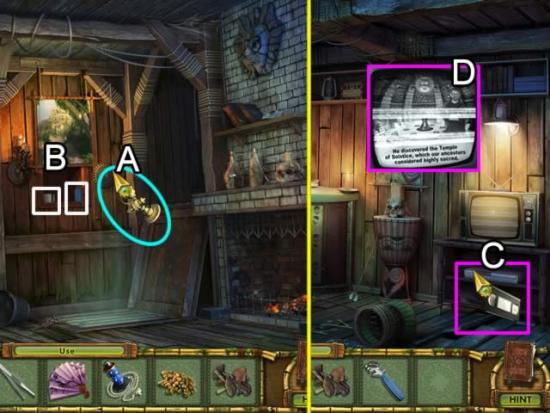
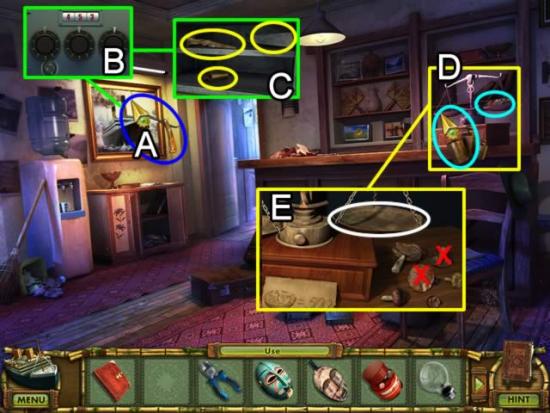
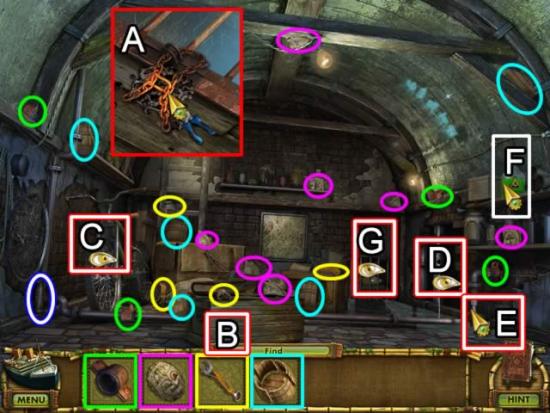
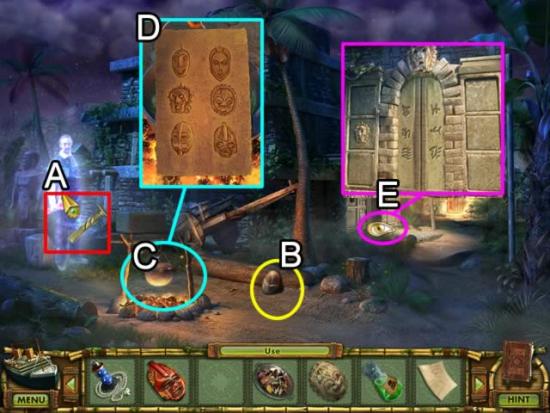
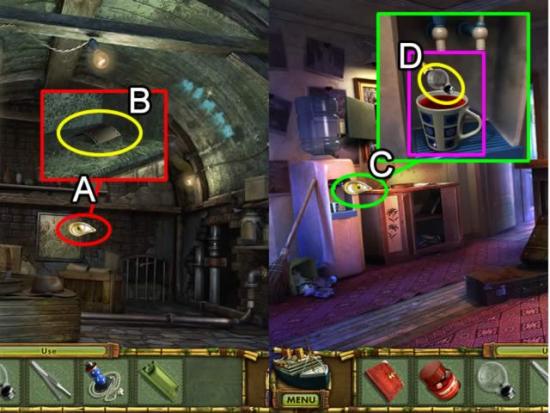
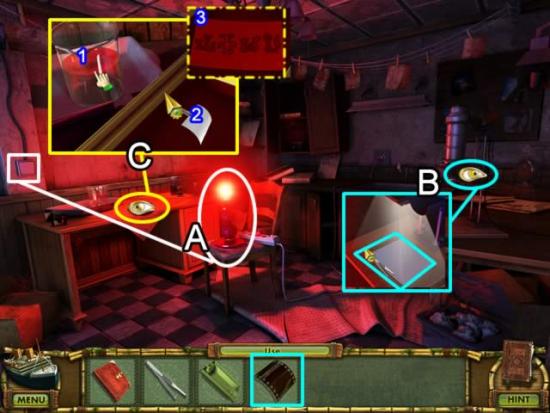
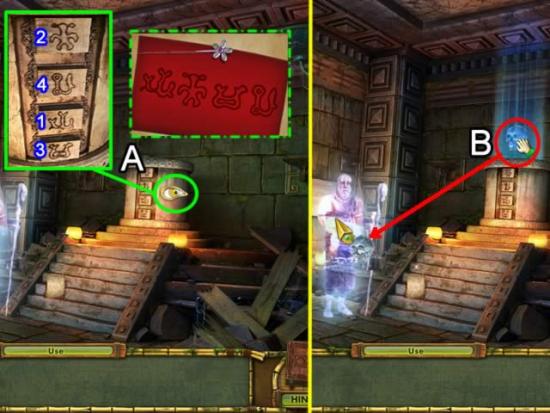
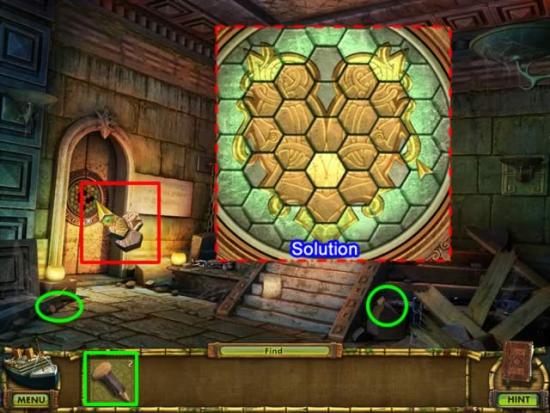
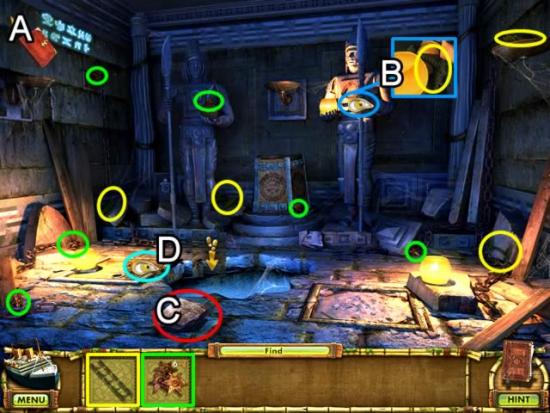
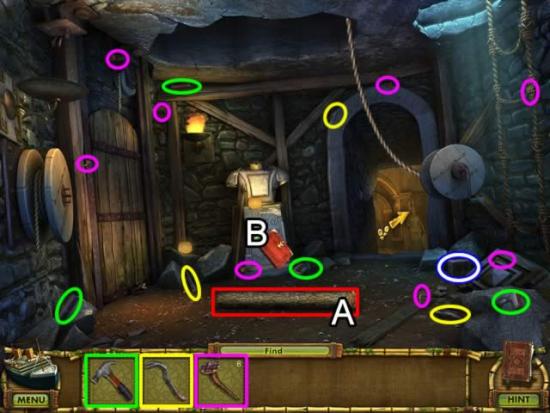
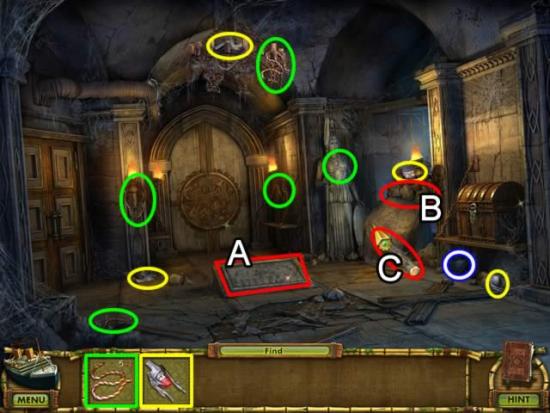
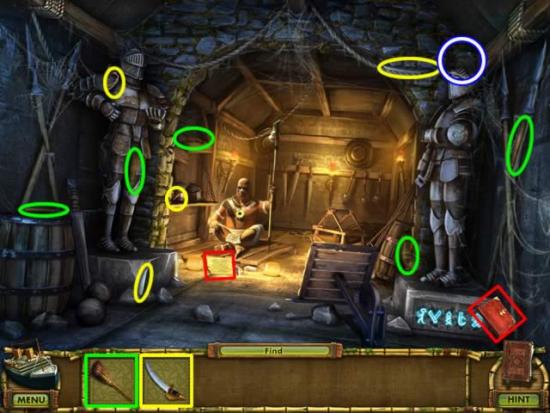
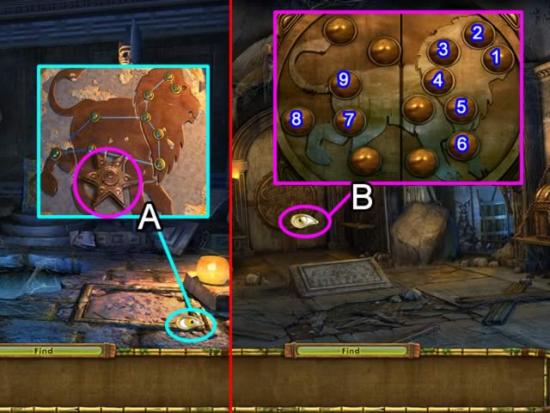
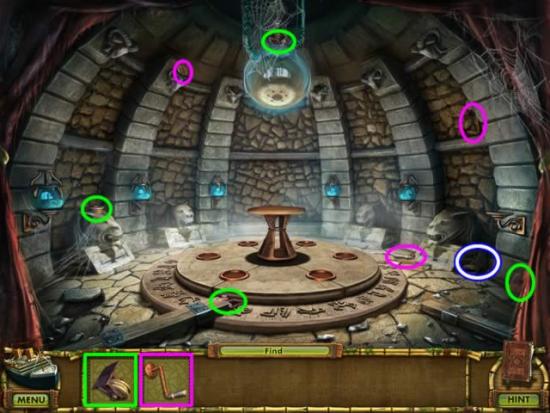
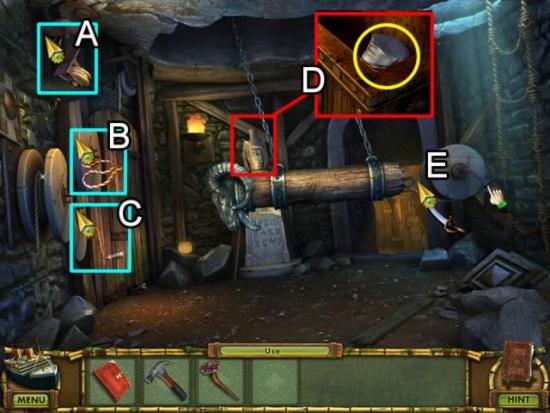
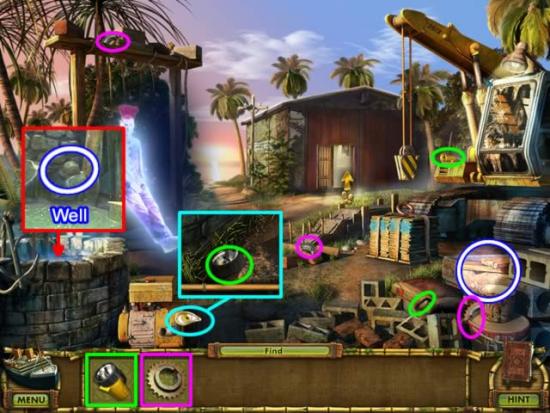
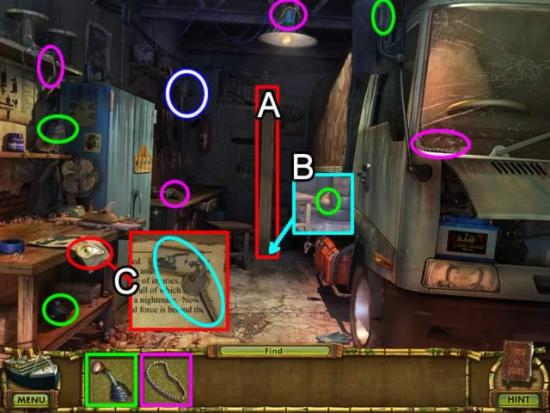
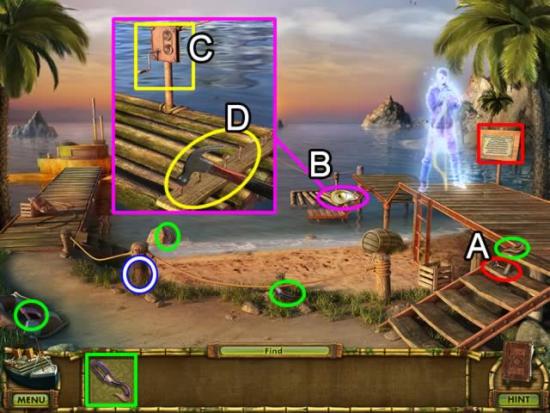
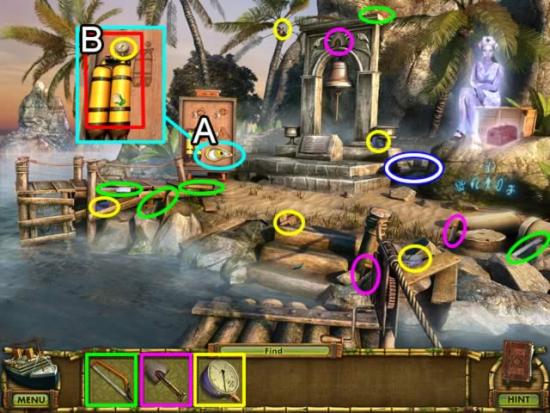
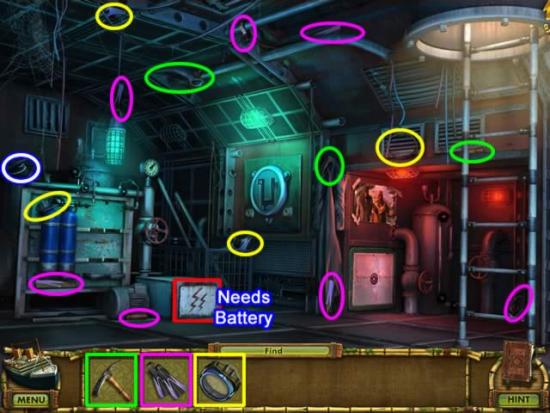
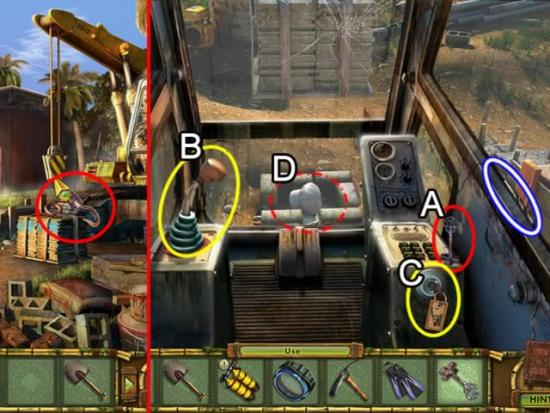
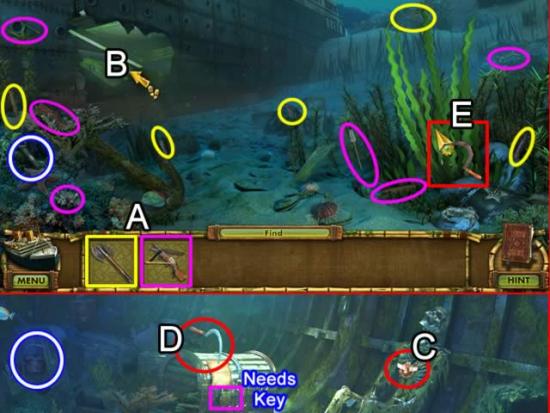
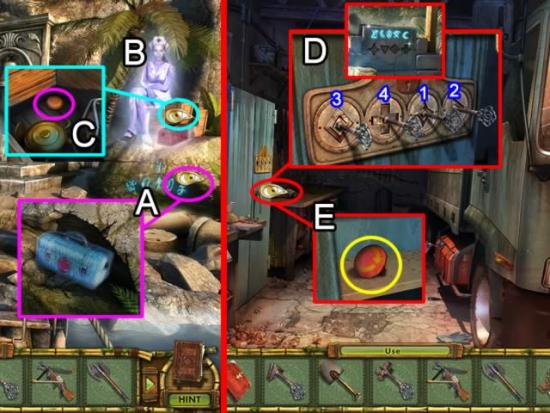
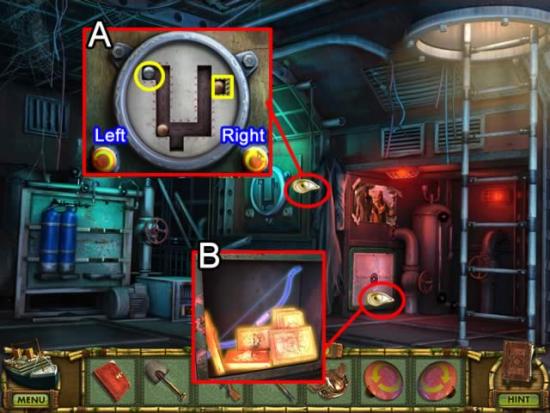
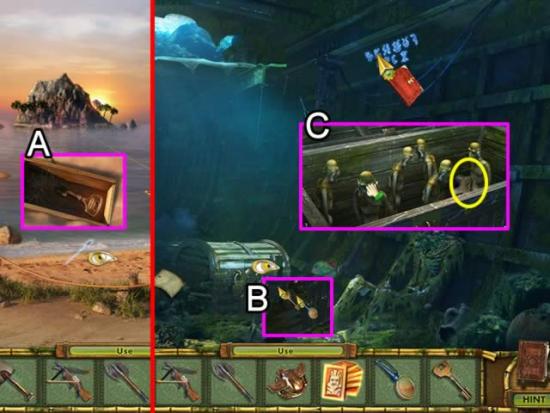
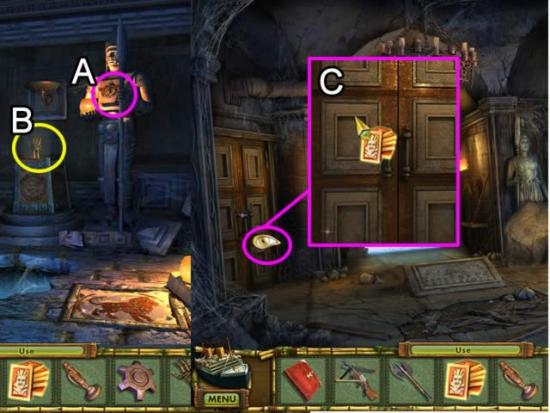
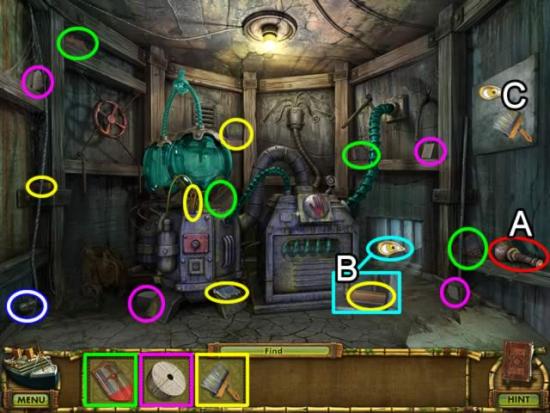
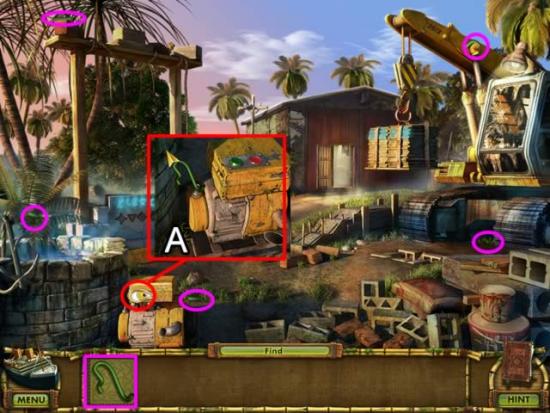
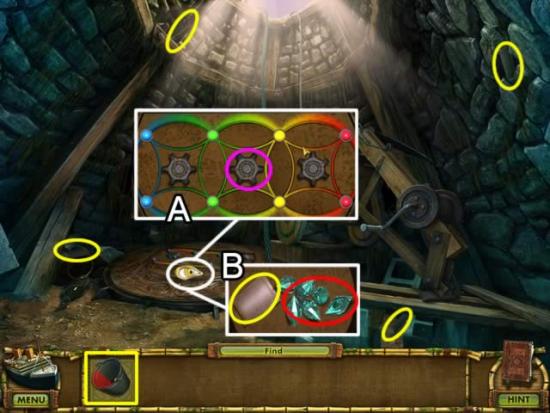
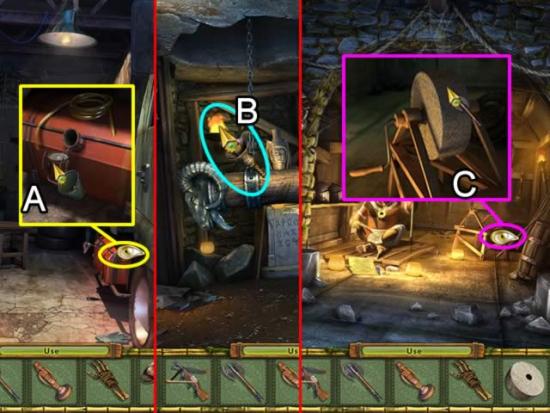
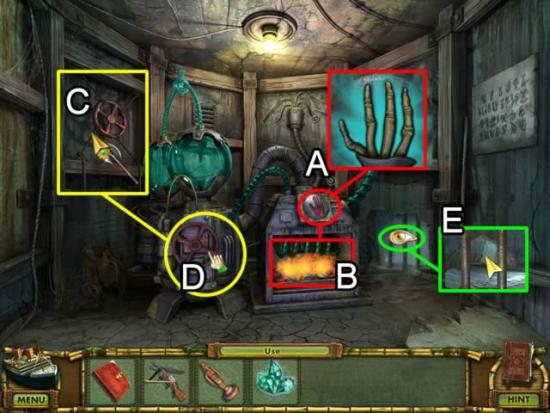
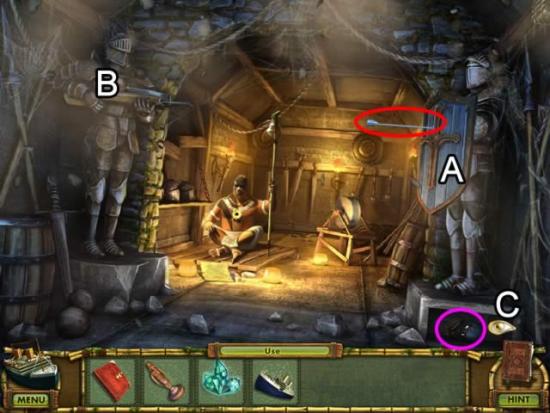
This fragmented hidden object game requires visiting several locations and using inventory items to advance play.
Beginning Play:
Navigation:
Symbol Meanings:
A short clip explains the background and introduces the story line for play.
Keys to this guide:
It’s a good idea to play the optional tutorial to learn how to interact with objects and characters.


Congratulations! You have finished playing The Treasures of Mystery Island: Ghost Ship.
