- Wondering how to get Monopoly GO! free rolls? Well, you’ve come to the right place. In this guide, we provide you with a bunch of tips and tricks to get some free rolls for the hit new mobile game. We’ll …
Best Roblox Horror Games to Play Right Now – Updated Weekly
By Adele Wilson
Our Best Roblox Horror Games guide features the scariest and most creative experiences to play right now on the platform!The BEST Roblox Games of The Week – Games You Need To Play!
By Sho Roberts
Our feature shares our pick for the Best Roblox Games of the week! With our feature, we guarantee you'll find something new to play!All Grades in Type Soul – Each Race Explained
By Adele Wilson
Our All Grades in Type Soul guide lists every grade in the game for all races, including how to increase your grade quickly!
The Tales of Bingwood: To Save a Princess Tips Walkthrough
Welcome to Gamezebo's walkthrough for The Tales of Bingwood – Chapter 1: To Save a Princess. I strongly recommend using this walkthrough sparingly, and only when you're really, really "pulling your hair out" stuck. Before you consult this guide, ask yourself these questions: Have you talked to absolutely everyone in the town and exhausted all dialogue options? Sometimes talking to people again will open up new things to talk about. Have you examined every interesting l…
a:1:i:0;a:2:s:13:”section_title”;s:46:”The Tales of Bingwood: To Save a Princess Tips”;s:12:”section_body”;s:32306:”
Welcome to Gamezebo’s walkthrough for The Tales of Bingwood – Chapter 1: To Save a Princess. I strongly recommend using this walkthrough sparingly, and only when you’re really, really "pulling your hair out" stuck.
Before you consult this guide, ask yourself these questions:
- Have you talked to absolutely everyone in the town and exhausted all dialogue options? Sometimes talking to people again will open up new things to talk about.
- Have you examined every interesting looking object in a scene? Sometimes simply looking at something will give you a clue about what to do next, or who to talk to.
- Have you tried using all of the items from your inventory on a puzzle? Sometimes the item you need to use is a bit unorthodox, but it makes sense if you think about it.
- Have you tried combining certain items in your inventory to make something new?
You can jump to any word in the walkthrough by pressing the "Ctrl" and "F" keys at the same time and typing in the word you want to search for. For example, if you’re wondering what you need to do with the shovel, type Ctrl+F, then "shovel" to search the document for that word.
Colors: Items that you can pick up and use from your inventory are highlighted in green. Items that you need to click on or interact with in the environment are highlighted in red. Places are underlined.
WALKTHROUGH
Tutorial
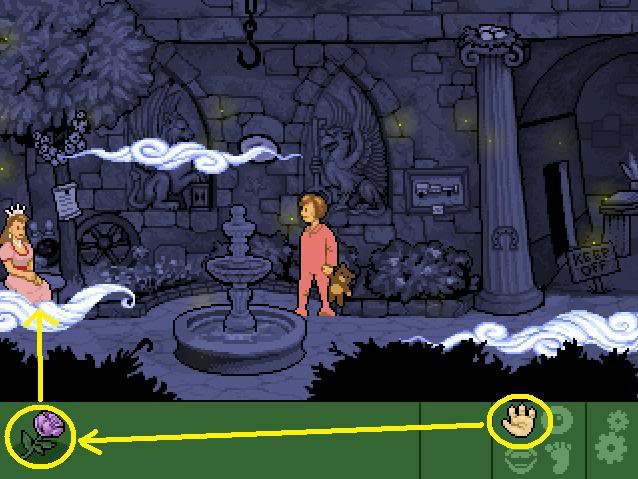
- Follow the instructions to learn about the Mouth, Hand and Eye commands. When your Future Me leaves, feel free to use the eye and hand icons to examine objects in the room. When ready, make your way to the left until you see Princess Liliana.
- Select the hand icon, take the flowers from your inventory, and give them to the Princess.

- Select a conversation topic… it doesn’t matter which one you’ll pick, as you’ll soon fine out…
House
There’s nothing to do here except walk outside – click on the open doorway to do so.
Shop
Exits: To Farm, To Mill, To Bridge
Watch the cutscene. When it ends, you’ll see a large black bird and a key sitting in the road. Try to take the key; when you do, the bird will grab it and fly away.
Read the proclamation nailed to the shed, then use the "hand" icon to take it.
Exploring the Island
- In the first part of the walkthrough I’m going to help you explore the entire town of Bingwood so that you can add every location to your map. Once this is done, you’ll be able to fast-travel to anywhere in the town by opening your map and clicking on the location you want to travel to.
- From the Shop where you begin the game, there are three exits. Start by walking north, towards the crossroads.
Crossroads
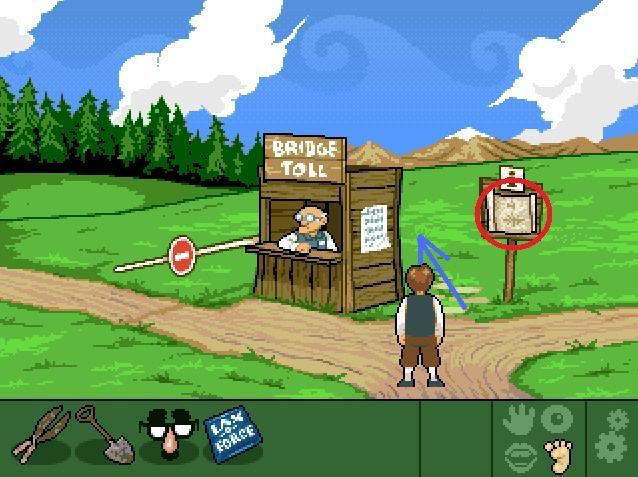
Exits: To the castle; To the Rift
- Take the Map of Bingwood attached to the information sign. Look at the map. Locations you’ve visited will appear as colored circles. You can click on any of the colored circles to fast-travel to that location.
- Talk to the Toll Booth Guy – you’ll need 10 Silver Crowns before he’ll let you cross the gate.
- Click on the top of the cobblestones to the right of the tollbooth until the words "Sneak Behind Booth" appears. Take this exit, which allows you to travel to the Rift.
To the Rift
- Talk to the maintenance men. You can’t do anything without a hard hat, it seems.
- Head back to the Crossroads and walk right and approach the Castle.
Castle
- There’s not much you can do here for now, except talk to the guards. If you select the dialogue option that you’re here on business, and to take fish to the castle, the guard promises to let you through if you can show him some fish. At least the castle has been added to your map. Head south to the Mill.
Mill
- Talk to the miller and learn about his broken millstone. Head south to the Shop where you started.
Shop
- The Boutique owner will come out and mention that he’s lost his inventory key. You can now enter the boutique.
- Enter the boutique.
Boutique
- Talk to the shopkeeper about "free stuff," and he’ll give you the Lax-o-Force.
- Leave the boutique, and take the left path to the farm.
Farm
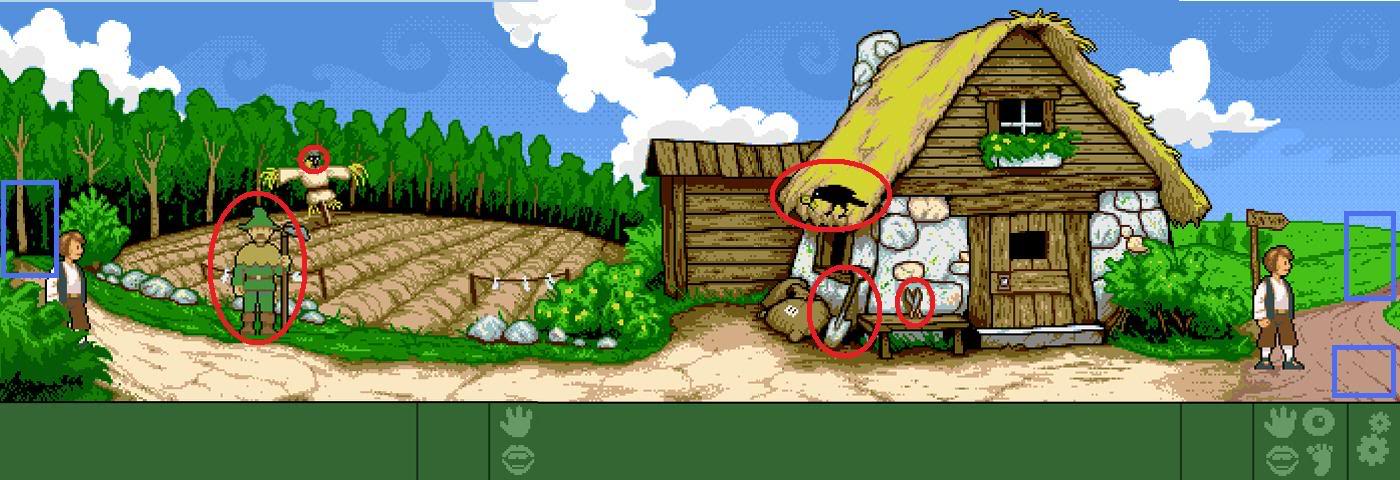
(Click on the screenshot above to enlarge it.)
Exits: To Shop, To Crossroads, To Cliff Path
- Take shovel and hedge clippers leaning up against the farmhouse.
- The crow is perched on the farm roof. Try to grab the key a second time, and the crow flies away again.
- Next, walk a little further to the left and examine the scarecrow, paying particular attention to the head. Click on the face to take the novelty glasses.
- Talk to the farmer thoroughly, then head to the left to the cliff path.
Cliff Path
Exits: To Cliff, To Farm
- Watch the crow fly off into the distance around the other side of the cliff.
- Examine the shrubbery that seems to be moving.
- Continue up to the Cliff.
Shack
Exits: To Cliff Path
Talk to the hermit thoroughly.
- Click on the rocky part of the cliff to examine the Cliffside. The screen will pan downward so you can see the crow and the key in its nest. If only you had a rope…
- But you don’t! So use the map to fast-travel back to the Shop that you started from, and this time take the right path.
Inn
- Talk to the Innkeeper and learn that the pirates are causing her a bit of trouble. Select the dialog option where you offer to help her get rid of the pirates, and she’ll give you a treasure map.
- If you like, talk to all the pirates for some funny stories and jokes.
- Go right one more screen to the Smithy.
Out front of the Smithy
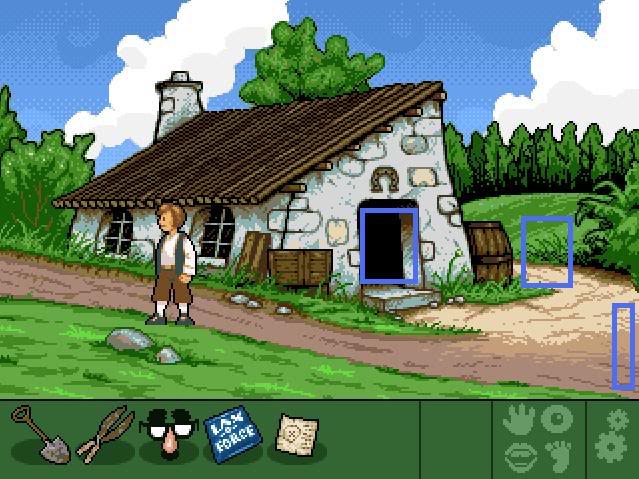
Exits: Into the Smithy, To Meadow, To Home
- Go into the Smithy.
Smithy
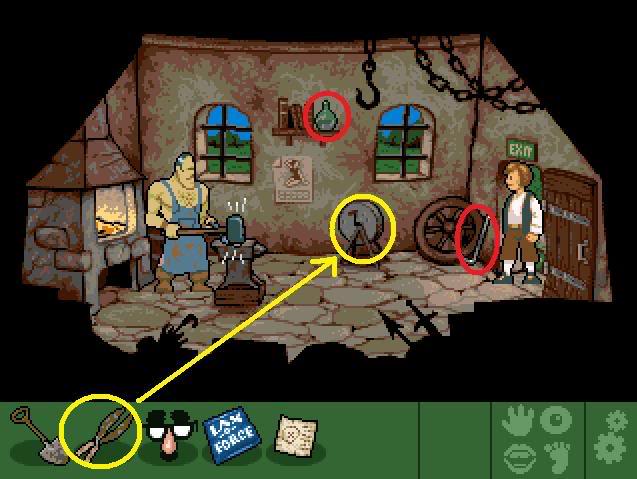
- Take the rusty hedge clippers from your inventory and click them onto the sharpening wheel to sharpen them.
- If you try to take the crowbar or the flask, the blacksmith will yell at you. Wait until his turns around to place the horseshoe into the forge, and quickly grab the crowbar and flask from the shelf while his back is turned. If you don’t get them both in time, don’t worry; just wait for him to turn around again.
- Leave the Smithy, and take the right path to your Home
Home – Out Front
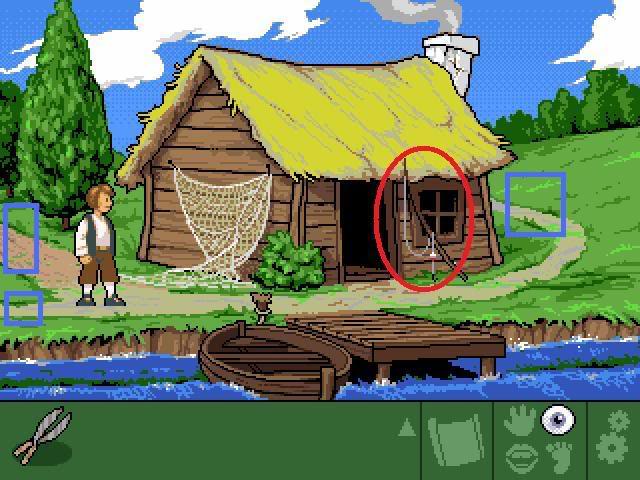
Exits: To Beach, To the Smithy, To the Meadow
- Take the fishing rod leaning against the house, and go inside.
Home – Inside
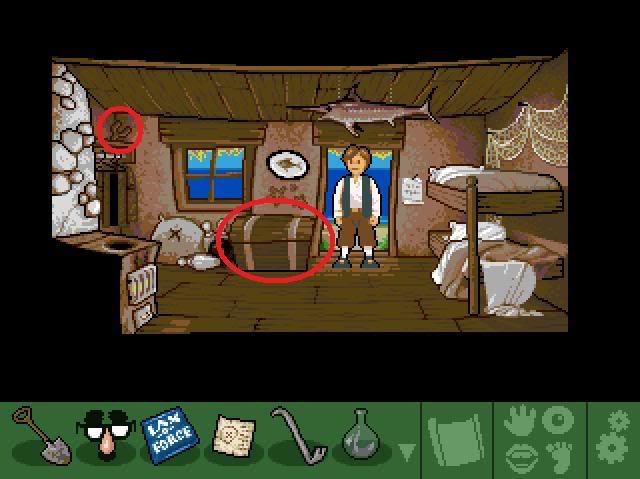
- Click on the old chest until you take the cuckoo clock.
- Also grab the broken slingshot sitting on the shelf on the left – it’s missing a rubber band.
- Leave the home, and head left to the beach.
Beach
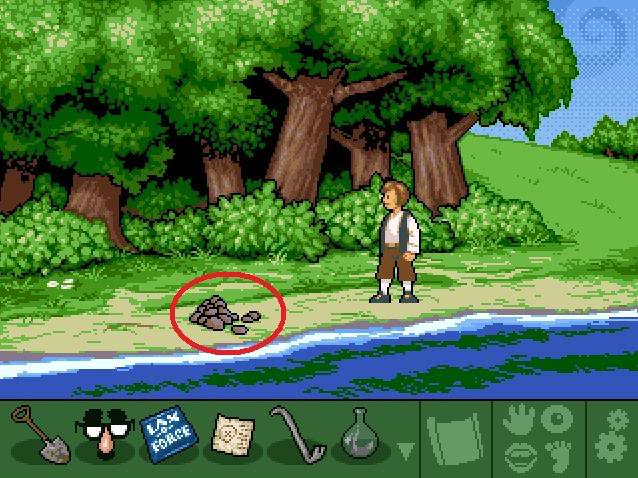
- Take three rocks from the rock pile on the beach. (Click on the rock pile three times.)
Meadow
Exits: Smithy, Mill, To Home, Forest
- There’s nothing to do here yet, but you’ve added the location to your map. Walk north to the forest to add the Sage’s Hut to your map as well.
Ok, now that you’ve added all of the locations to the map and have some items in your inventory, it’s time to start completing some quests:
The Innkeeper’s Treasure
- Make sure you have the treasure map from the Innkeeper, and the shovel in your inventory. (If you don’t have either one of them yet, read through the first part of the walkthrough to learn how to get them.)
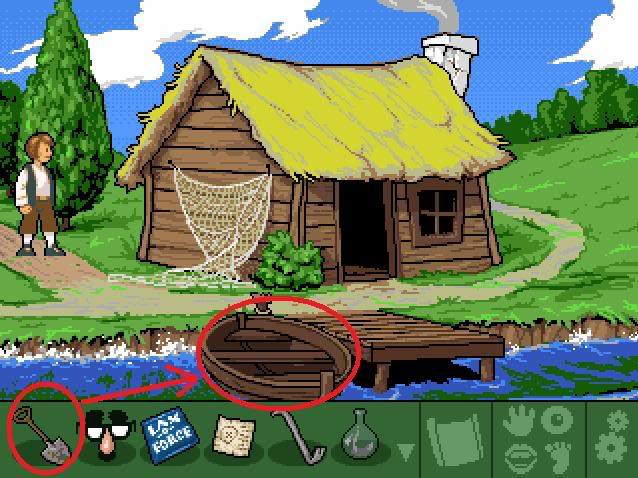
- Fast-travel to "Fisher" (your home), and use the shovel from your inventory on the boat by the dock to sail to the island.
- On the island (which has now been added to your map as a fast-travel location), take the shell from the beach.
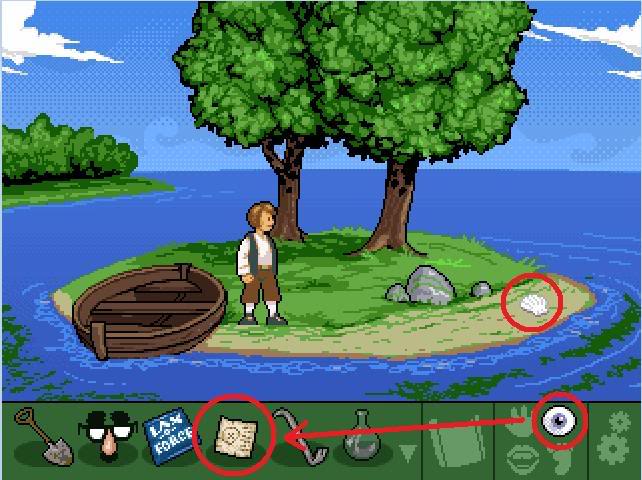
- Look at the treasure map in your inventory to read the map. Uh oh…
- Select the shovel and click on "Possible location of buried treasure" – basically, click anywhere on the island.
- Fast-track to the Inn, and watch the cutscene.
- Enter the inn and talk to the Innkeeper again to receive the free lunch vouchers and the empty chest.
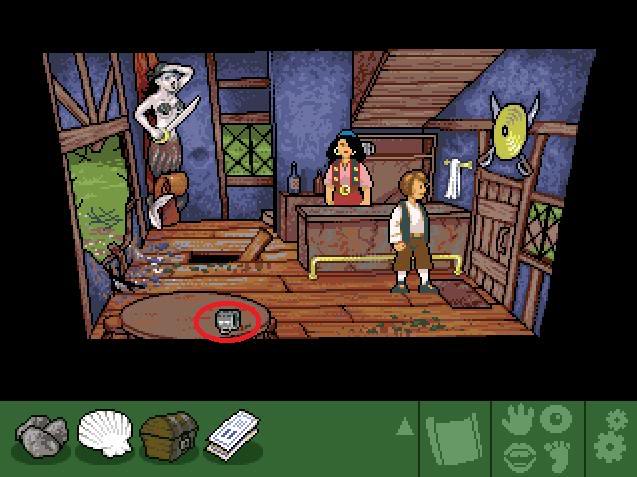
- Take the mug on the table.
The Hermit – Crossing the Rift
- If you ask the Miller about the hermit, he’ll suggest that you ask about him at the Castle.
- Go to the Castle and ask the second guard about the hermit to learn more about him. Go back to the Shack and talk to the hermit to confirm what the guard said. He admits to being an engineer. Ask him about helping you cross the chasm to the Rift. He’ll give you the Hermit’s Sketch.
- Fast-travel to the Sage’s Hut and talk to the Sage about your tree-related problem. He’ll ask you to retrieve some ingredients from him that are listed in a book inside his hut. You can now travel to the Sage’s Hut.
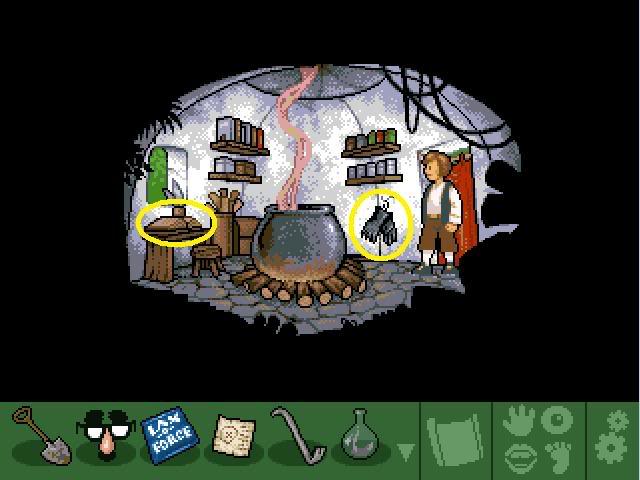
- Inside the Sage’s Hut, take the gloves that are hanging on the wall near the door.
- Click on the open book underneath the window to acquire the recipe for Perpendicular Produce.
- Go back out of the hut and talk to the Sage again. Ask him about each of the ingredients and he’ll give you hints about where to start looking for them.
Filling the Perpendicular Produce Recipe
The Perpendicular Produce Recipe is:
- Blossom of a Purple Rose
- Granulated Seashell
- Follicular Moss
- Wriggling Earthworms
- Mature Faerie Agarie
- Leaf of a Rubber Tree
- Medium-sized Trout
Wriggling Earthworms
- Make sure you have the mug in your inventory (if you don’t, go back and complete the "Innkeeper’s Treasure" quest.)
- Fast-travel to the Farm.
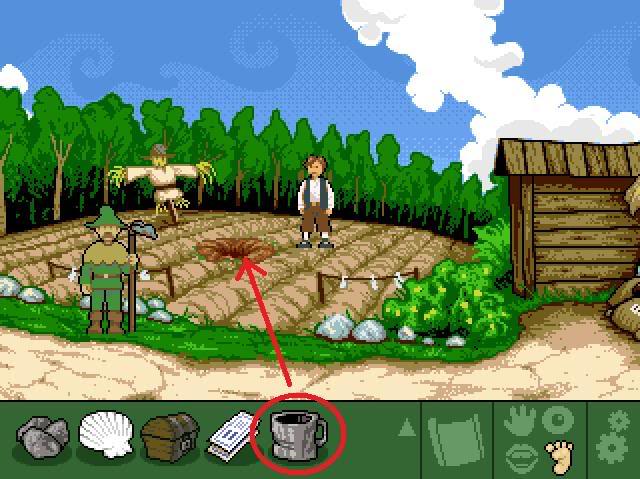
- Take your shovel and click on the plowed dirt near the scarecrow to dig a hole.
- Use the mug from your inventory on the hole to pick up the squiggly wormies.
Medium-sized Trout
- Make sure you have the fishing rod, squiggly wormies, and gloves in your inventory.
- Fast-travel to the Island.
- Select the squiggly wormies from your inventory and click on your fishing rod to bait the rod.
- Take your fishing rod and bait and click on the water anywhere in the lower half of the screen, where you see the word "Sea."
- Watch the cutscene as Tom catches a fish.
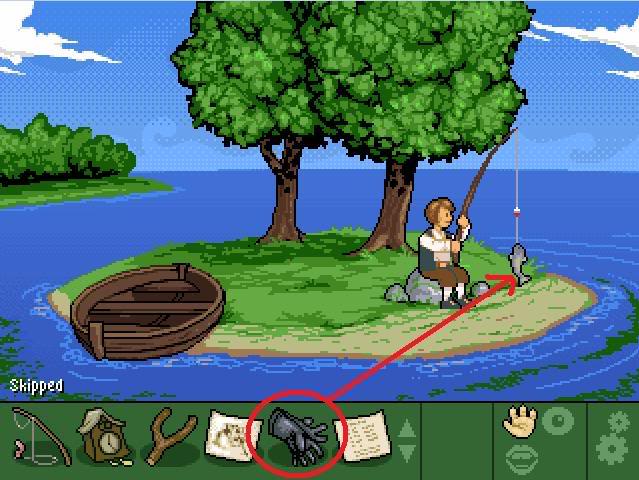
- While the fish is on the line, use the gloves from your inventory on the fish to pick it up. If you aren’t fast enough, the fish wriggles back into the water and you’ll have to try again.
- Catch another fish, so you have a total of two in your inventory.
Follicular Moss
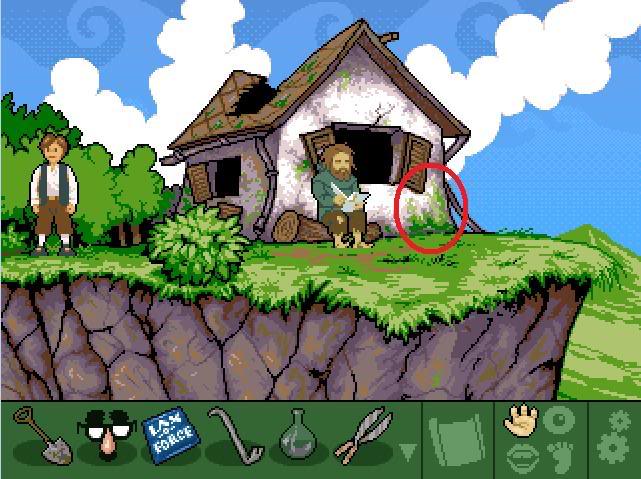
- Fast-travel to the Cliff and take the sphagnum moss on the side of the shack.
Mature Faerie Agarie / Blossom of Purple Rose / Leaf of a Rubber Tree / Granulated Seashell
- These four quests are interconnected, so here are instructions about how to complete all of them:
- Make sure you have the following items in your inventory: antique clock, the empty chest from the Innkeeper’s Treasure quest, the seashell from the island, and the trout from the Medium-sized Trout quest.
- First, fast-travel to the Smithy and talk to Arnold about Hobgoblins. He agrees to help you if you find him a bellows.
- Then, go to the Mill and talk to the miller about his broken millstone.
- Go to the Shop, enter the boutique, and ask the shopkeeper about the bellows. He agrees to give them to you if you run an errand for him at the castle.
- Examine the bag of quick-drying cement in front of the counter, then ask the shopkeeper about that as well.
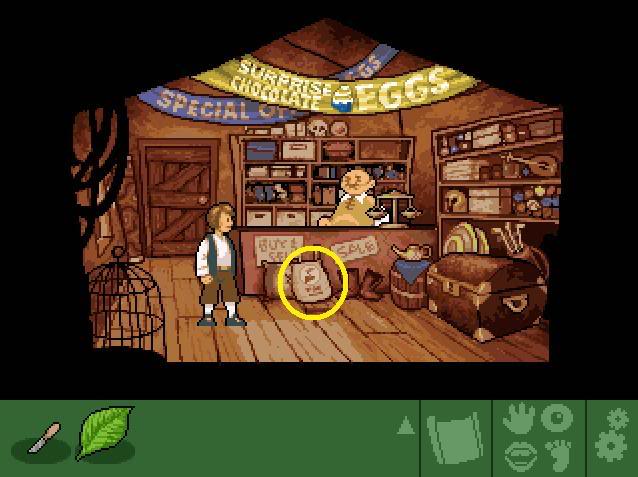
- Trade him the antique cuckoo clock for it. You’ll receive the bag of cement and the chocolate egg.
- Eat the chocolate egg to receive a gold ring and half a chocolate egg.
- If you haven’t done so already, ask the shopkeeper about free stuff and to receive the Lax-O-Force laxative.
- Fast-travel to the beach and use the old chest on the sand to receive a chest full of sand.
- Fast-travel to the Castle and talk to the second guard. Tell him you’re on business to deliver fish, and when he asks for proof, click on the trout from your inventory and then on the guard to show him.
- Enter the castle through the gate.
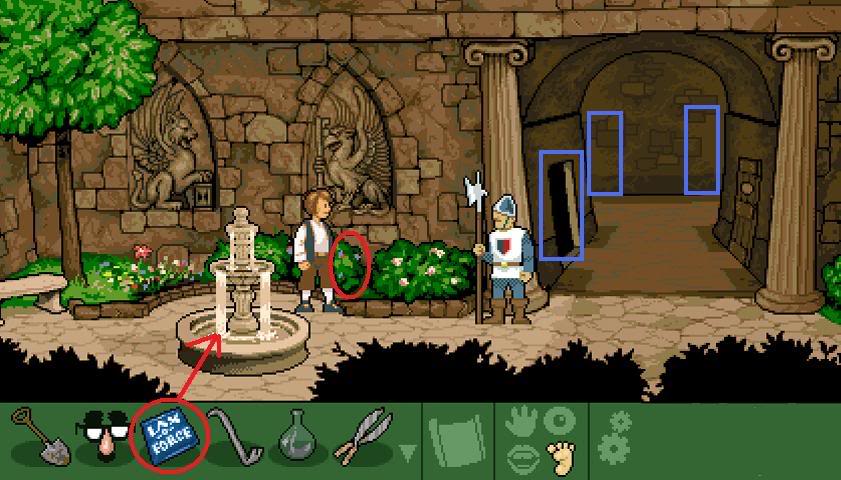
- There’s a purple rose bush in the flower bed to the left, but the guard won’t let you pick any flowers.
- Use the Lax-O-Force on the fountain. The next time the guard takes a drink, he’ll run off to use the WC. When he’s gone, pick a purple rose.
- Use the quick-drying cement on the fountain, then add the sand. Use the crowbar on the ruined fountain to take the mill wheel.
- Next, enter the kitchen and talk to the Cook.
- Use the Novelty Glasses on Tom ("Me") and talk to the Cook again to receive the Bag o’ Money.
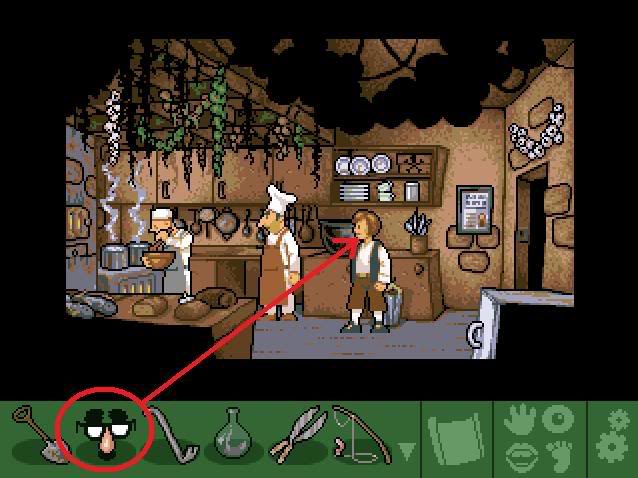
- Watch the cutscene. Eek! You automatically retrieve the broken cleaver from the WC door and add it to your inventory.
- Fast-travel to the Mill and give the millstone to the miller. Next, give him the seashell to receive the Seashell Powder.
- Fast-travel to the Shop and enter the Boutique.
- Return the Bag o’ Money to the shopkeeper; he gives you the bellows in return.
- Fast-travel to the Smithy and give the bellows to Arnold. He gives you an iron talisman.
- While you’re here, use the broken cleaver on the sharpening stone to turn it into a sharp blade.
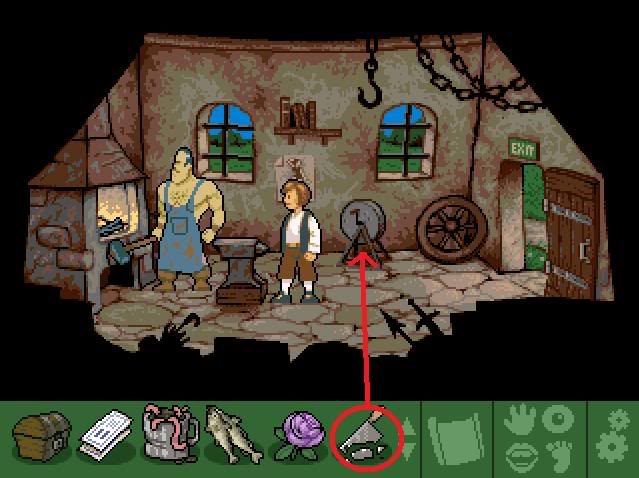
- Fast-travel to the Inn, and click on the vine underneath the "unreachable window" on the right window to climb it.
- Next, use the sharp blade on the window to open the latch and enter the bedroom.
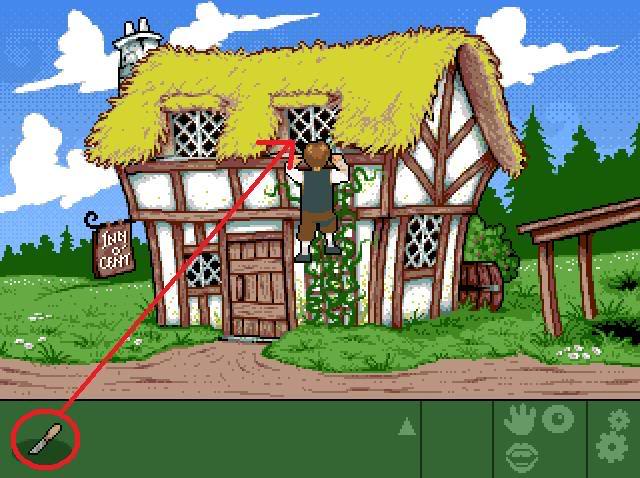
- Take a leaf from the potted plant near the window – it’s the Leaf from the Rubber Tree. If you like, you can also use the sharp knife on the tree to get a rubber strip. Climb back out of the room.
- Fast-travel to the Beach, and a new pathway will open up near the "tingly area" that leads into the forest. Enter the forest.
- In the forest clearing, place a trout on the large rock.
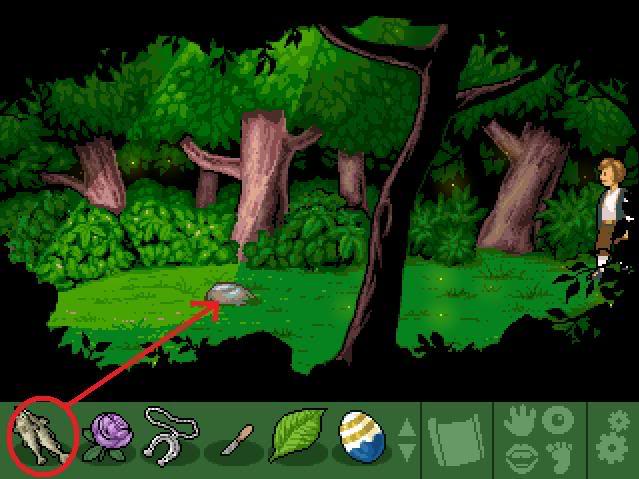
- A Hobgoblin appears sitting on a Faerie Agaric mushroom. Ask him for a piece of the mushroom. He asks if you have anything to trade. If you’ve already eaten the chocolate egg, then you have the golden ring and will continue talking to the goblin. If you haven’t, he’ll transport you to the Island. If this happens, simply eat the egg now to get the ring, then fast-travel back to the Beach, re-enter the forest, and talk to the Hobgoblin again.
- The Hobgoblin asks you three riddles. No matter what you answer, it will be "wrong" so just have some fun with it and see if you can get the geeky references.
- After the Hobgoblin takes the ring and gloats at you, use the smith’s iron talisman on him and automatically grab a piece of the Faerie Agaric.
Mixing the Potion
- Now that you have all the ingredients, fast-travel to the Sage’s Hut.
- Drop the Piece o’ Mushroom, Leaf, Purple Rose Blossom, Trout, Seashell Powder, Squiggly Wormies and Sphagnum Moss into the cauldron.
- Use the glass flask that you got at the Smithy on the cauldron to fill it with Perpendicular Produce.
Getting the Acorn
- Make sure you have the broken slingshot and sharp knife. If you don’t have the sharp knife yet, look through the section about completing the Perpendicular Potion which tells you how to get it.
- If you haven’t done so already, fast-travel to the Inn, climb the vine underneath the window, and use the sharp knife on the window to force it open. Inside the bedroom, use the sharp knife on the potted plant to take a rubber strip.
- In your inventory, use the rubber strip on the broken slingshot to repair it.
- If you haven’t done so already, fast-travel to the beach and pick up three rocks from the rock pile.
- Fast-travel to the meadow.
- Click on a rock in your inventory, then on your slingshot to load it. Use the loaded slingshot on the ram in the field.
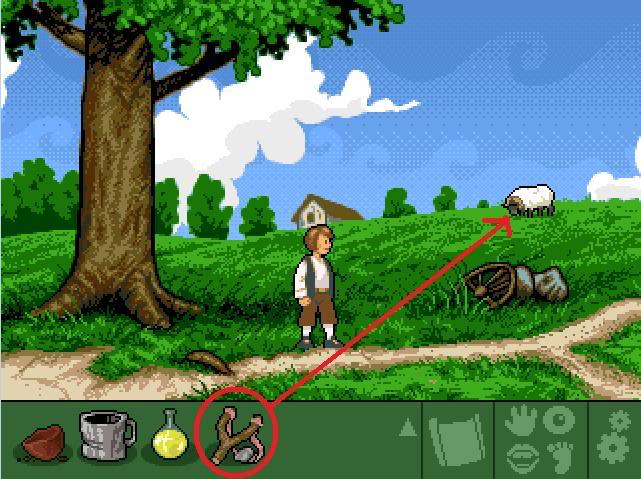
- Fire at the ram three times until you run out of rocks. The ram will run into the tree, causing an acorn to fall. Pick up the acorn.
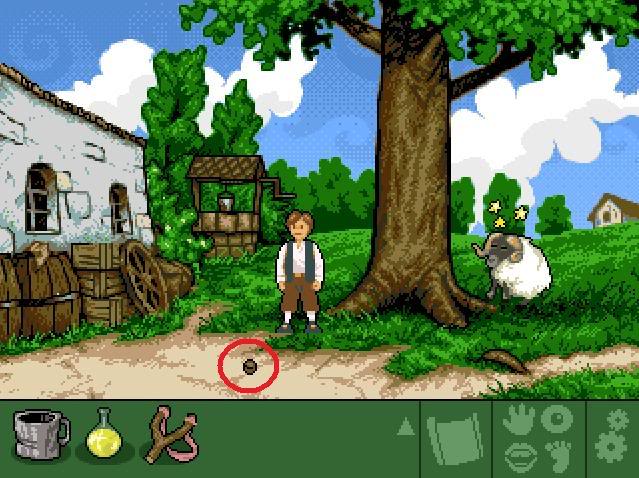
Exploring the Cavern / Getting the Rope
- If you haven’t done so, go back to the shop and talk to the shopkeeper about buying a rope. He offers to give you one for free if you manage to get his key back.
- Fast-travel to the Cliff Path.
- Select the sharpened hedge cutters from your inventory and click on the moving shrub to cut it down and reveal a hole leaving into an Odd Cavern. Go through the hole to find that you can’t go any further until you find some light.
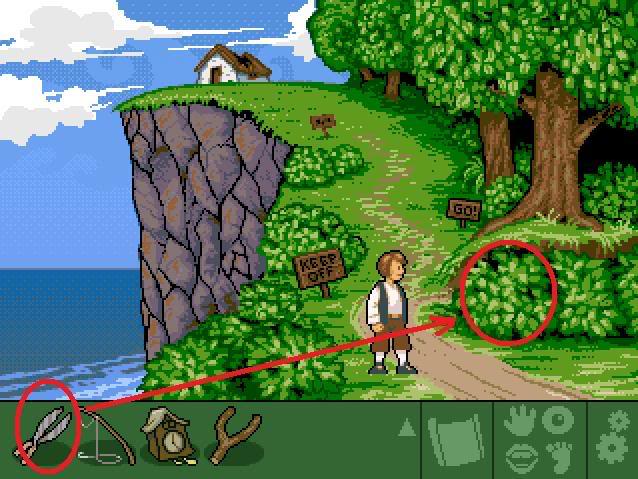
- Fast-travel to the Castle, go into the kitchen, and take the cracked glass jar from the shelf.
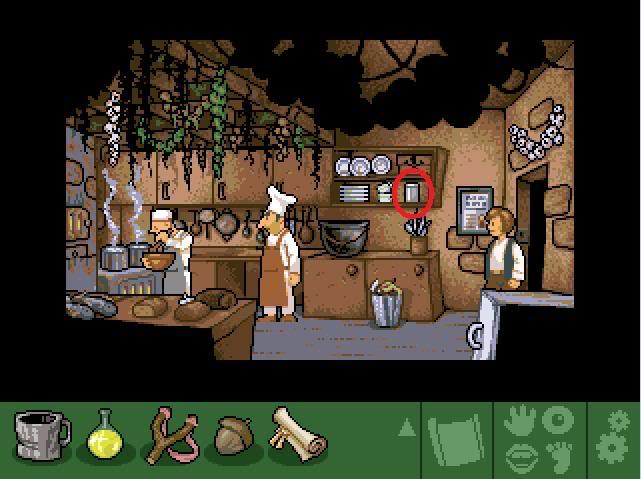
- While you’re in the Castle, you can go to the Throneroom and complete the Get the Sword quest below.
- Fast-travel to the Beach and take another rock from the pile since you used all of the ones you had getting the acorn.
- Go back into the Forest where you saw the Hobgoblin.
- In your inventory, use the piece of leftover chocolate on the cracked glass jar.
- Use the chocolate in a jar on Tom (Me), and the fireflies will fly into it. You receive fireflies in a jar.
- Fast-travel back to the Cliff Path and enter the Odd Cavern. You now have enough light to see.
- Walk to the left, and take a look at the primitive cave paintings on the wall – adventure game fans will recognize the homage to Sierra’s King’s Quest!
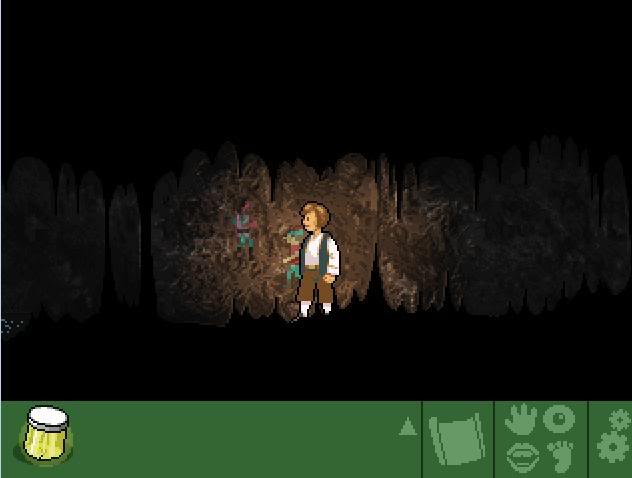
- Walk left as far as you can, and head out to the ledge.
- You arrive at the ledge with the crow’s nest and key. Load your slingshot with a rock once again, select the loaded slingshot, and click on the crow to scare it again. You’ll automatically take the key.
- Fast-travel to the Shop, enter the Boutique, and give the key to the shopkeeper. In exchange, he’ll give you the rope.
Getting the Sword
- Fast-travel to the Castle and enter the throneroom.
- Show the royal proclamation you took from the shed to the town crier to get an audience with the King and Queen. Watch a funny cutscene to learn how and why the Evil Wizard took the princess. The King and Queen give you a sword.
Building the Catapult
- Fast-travel to the Rift. You won’t be able to do anything here until the maintenance men leave.
- Give the free lunch vouchers you got from the Innkeeper to the first maintenance man and both of them will leave.
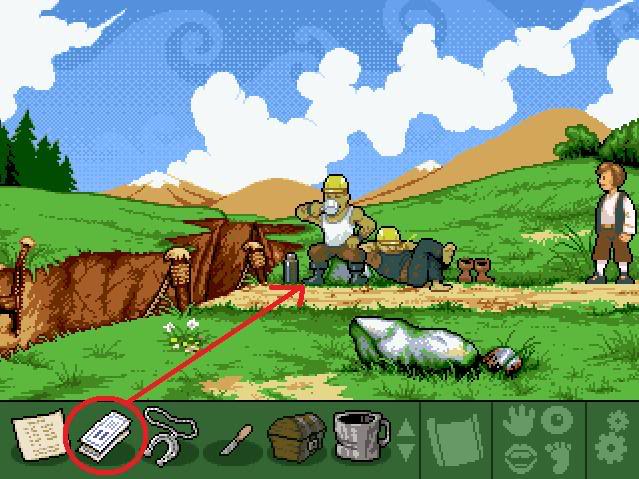
- Use the shovel on the patch of fertile soil.
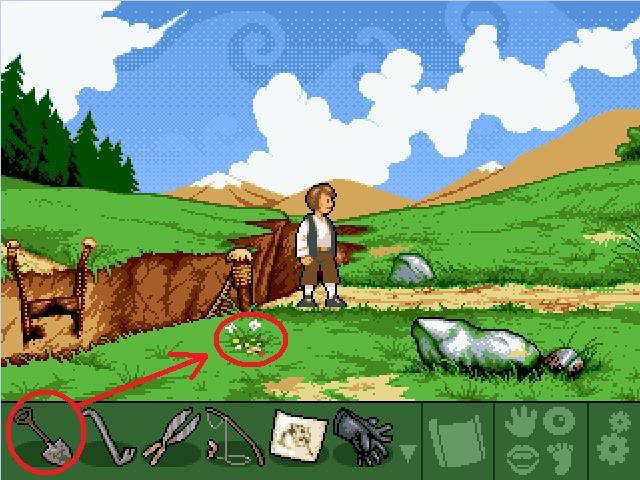
- Next, put the acorn in the hole, and pour the Perpendicular Produce over it.
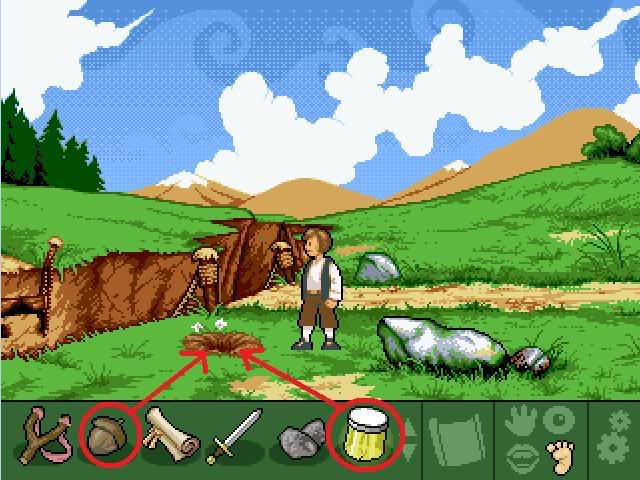
- Use the crowbar on the large boulder to the right of the tree. Use the rope on the upright boulder.
- Use the "hand" icon on the upright boulder to push it back down. Use the "hand icon" again on the tree to climb into it.
- Finally, use the sword on the rope to cut it.
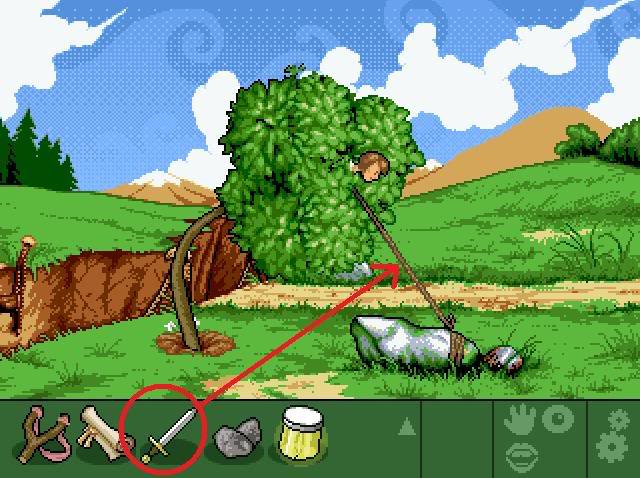
Congratulations! You’ve just finished Chapter 1.
“;
More articles...
Monopoly GO! Free Rolls – Links For Free Dice
By Glen Fox
Wondering how to get Monopoly GO! free rolls? Well, you’ve come to the right place. In this guide, we provide you with a bunch of tips and tricks to get some free rolls for the hit new mobile game. We’ll …Best Roblox Horror Games to Play Right Now – Updated Weekly
By Adele Wilson
Our Best Roblox Horror Games guide features the scariest and most creative experiences to play right now on the platform!The BEST Roblox Games of The Week – Games You Need To Play!
By Sho Roberts
Our feature shares our pick for the Best Roblox Games of the week! With our feature, we guarantee you'll find something new to play!All Grades in Type Soul – Each Race Explained
By Adele Wilson
Our All Grades in Type Soul guide lists every grade in the game for all races, including how to increase your grade quickly!


