- Wondering how to get Monopoly GO! free rolls? Well, you’ve come to the right place. In this guide, we provide you with a bunch of tips and tricks to get some free rolls for the hit new mobile game. We’ll …
Best Roblox Horror Games to Play Right Now – Updated Weekly
By Adele Wilson
Our Best Roblox Horror Games guide features the scariest and most creative experiences to play right now on the platform!The BEST Roblox Games of The Week – Games You Need To Play!
By Sho Roberts
Our feature shares our pick for the Best Roblox Games of the week! With our feature, we guarantee you'll find something new to play!All Grades in Type Soul – Each Race Explained
By Adele Wilson
Our All Grades in Type Soul guide lists every grade in the game for all races, including how to increase your grade quickly!
The Sushi Spinnery Walkthrough
Welcome to the quick start guide for Kairosoft’s newest sim game, The Sushi Spinnery. Create your own sushi restaurant, develop new and unusual dishes, and attract a wide variety of customers in an effort to make your restaurant the best. This guide will help you familiarize yourself with the game world.
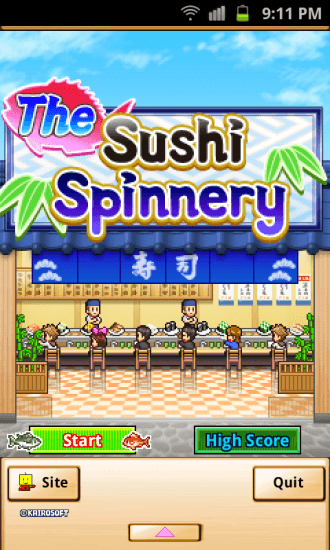
Game Introduction – The Sushi Spinnery
Welcome to the quick start guide for Kairosoft’s newest sim game, The Sushi Spinnery. Create your own sushi restaurant, develop new and unusual dishes, and attract a wide variety of customers in an effort to make your restaurant the best. This guide will help you familiarize yourself with the game world.
Quick Start Guide
Getting Started

- To begin The Sushi Spinnery, tap the start button.
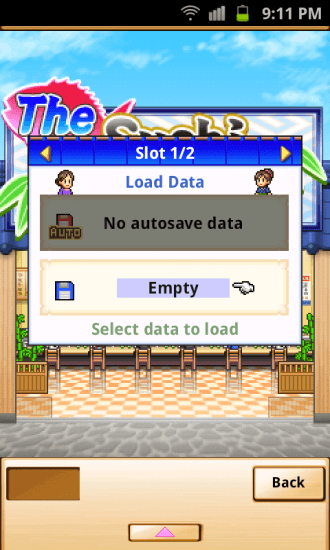
- Select an empty slot to create a new game.
- Name your restaurant and tap okay to begin the game.
- At the top of the screen you will find the current game year and month along with the current in game time. You will also find your funds as well as your balance of sushi coins (these actually won’t show up until you’ve completed the first several months of the game).
- At the bottom of the screen you will find the save button and the menu button.
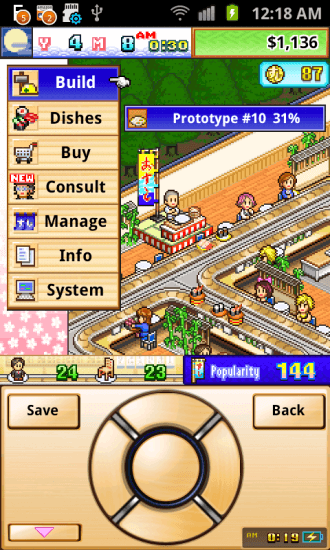
- Tapping the menu button will open the game menu. Under the menu you will find the following subcategories (not all will be available immediately):
- Build: Here you will be able to access the build menu. You can purchase store items, amenities, and décor items.
- Dishes: Here you can view the dishes you currently have available. You can see their current price and taste rating. If you tap on a dish you can also view the prep time for it.
- Buy: Tapping the buy button opens the Tsukiji Market. Here you can purchase boosts for dishes, amenities, seats, and counters.
- Consult: Here you can access your consultant. They can help you find new chefs, new ingredients, advertise to various locations, and unlock expansions to your restaurant.
- Manage: Here you can change your current specials, enter contests, and check up on your staff.
- Info: Under info you can view customer information, ingredient information, and restaurant information.
- System: Here you can save your game, access the game options, read the in game tutorial, view your high scores, and return to the title screen.
Building Your Restaurant
- When you first begin The Sushi Spinnery you will have one chef and a small conveyor belt with seating.
- The first thing you will want to do is add to your seating/conveyor belt.
- Tap the menu button and select build from the drop down menu.
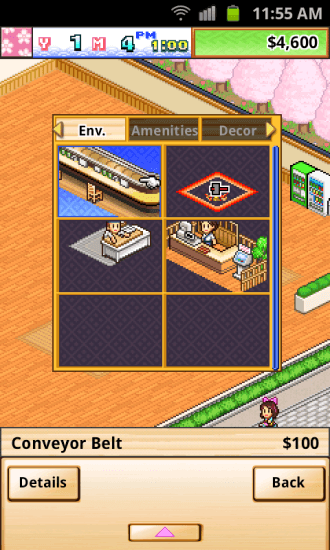
- This will open the build menu. The first screen that opens says Env. at the top. These are the items you will be purchasing for your store.
- Select the conveyor belt and tap on it a second time to select it. You will be returned to your main screen.
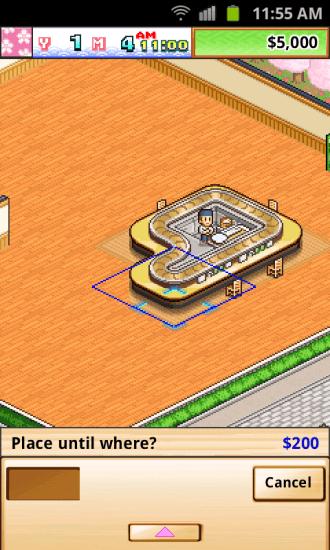
- Tap and drag to place the conveyor belt. Make sure it is connected to the already existing belt or food will not be able to reach it.
- Once you are satisfied with the placement of the conveyor belt, tap on it again to confirm the purchase.
- Seating is automatically added around the belt.
- Now it’s time to wait for some customers to come and eat at your restaurant.
- After a while you will begin to notice customers leaving without eating, this means it’s time to add a second prep station.
- Return to the build menu and select the prep station.
- Place it so that is facing the conveyor belt. If it isn’t facing the conveyor belt, your chefs won’t be able to place food on the belt.
- To rotate the prep station, tap the rotate button at the bottom left of the screen.
- At this point in the game, if you place an item incorrectly the only way to remove it is by selecting the remove tool in the build menu. Later on, once you’ve won your first contest, you will unlock the ability to move items around your store.
- Now that your restaurant is well under way, it’s time to add some amenities to your restaurant.
Amenities & Boosts
- Amenities can be found in the build menu, under the amenities tab.
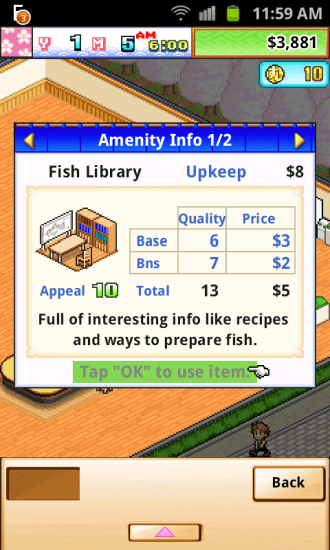
- As you progress through the game you will unlock various amenities that you can place in your restaurant, including vending machines, a fish library, and a toy store.
- In addition to bringing in extra income for your restaurant, amenities can also earn you sushi coins and increase the appeal of nearby seats.
- Once you have purchased an amenity you can increase its appeal by using boosts.
- Boosts can be purchased by accessing the main menu and selecting buy.
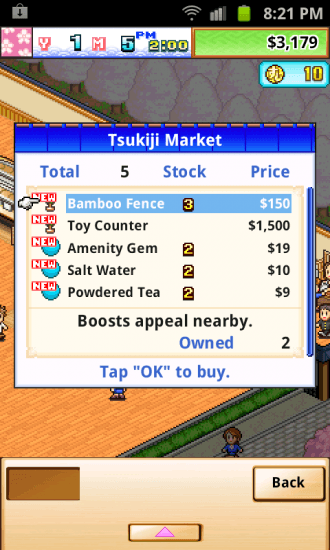
- This will take you to the Tsukiji Market.
- Tap on a boost to see what it does.
- Certain boosts, such as the amenity gem, will power up amenities, while others, such as the gourmet oil, will power up ingredients (to see more on these boosts, please see the section on dishes).
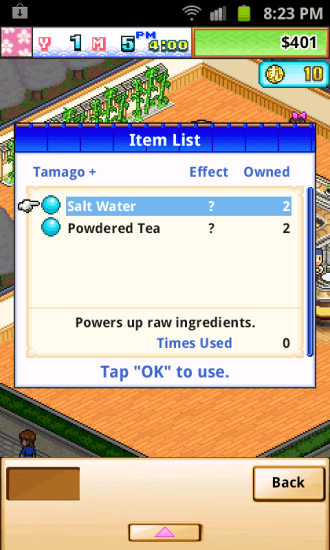
- To purchase a boost, select the boost you wish to purchase, and tap ok to buy it.
- To use a boost, tap on the amenity you wish to power up.
- This will open the amenities menu where you can view its stats. At the bottom of the menu you can tap ok to use an item.
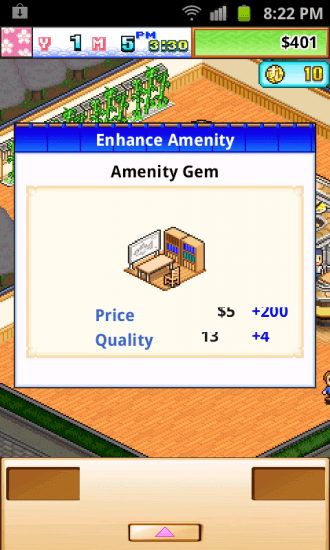
- This opens a window where you can view all the boosts you have purchased.
- Be careful not to use boosts that are incompatible. At best they will do nothing and at worst they will decrease the amenities stats.
- You can also boost the stats of amenities and seats by placing décor items nearby.
- Décor items can also be purchased in the Tsukiji market.
Expanding Your Restaurant
- Eventually you are going to begin running out of room in your restaurant.
- However, before you can expand, you will need to complete several steps.
- First, you will need to unlock the consultant (this will happen after playing through several in game months).
- Then you will need to wait for someone to suggest that you expand your restaurant.
- This will unlock the proposal for the hammer.
- To begin an expansion, open the menu and tap on consult. Select special from the drop down menu.
- From here you will be able to purchase the hammer using sushi coins.
- If you do not have enough sushi coins to make the purchase you will need to wait until you have earned enough. Sushi coins can be earned from seats with high appeal, and by competing in contests.
- Once you have enough sushi coins to purchase the hammer, it’s time to make the purchase.
- Once purchased, return to the main menu and select build.
- From the first screen select the remove option.
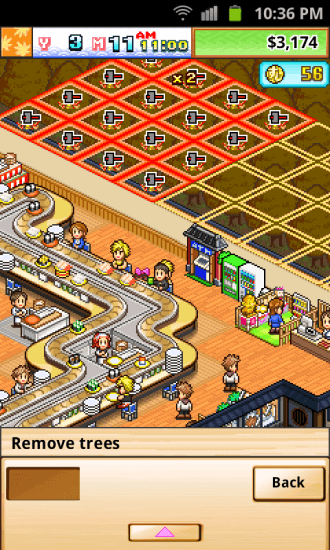
- Tap on the trees surrounding the restaurant. You will see grids showing you how large your expansion will be.
- Once you’ve selected the area you wish to expand into, tap it again to finalize the purchase.
- Congratulations! Your restaurant is now slightly larger!
- As you progress in the game you will unlock additional expansions items, such as extra entrances and break rooms for your employees.
Creating New Dishes
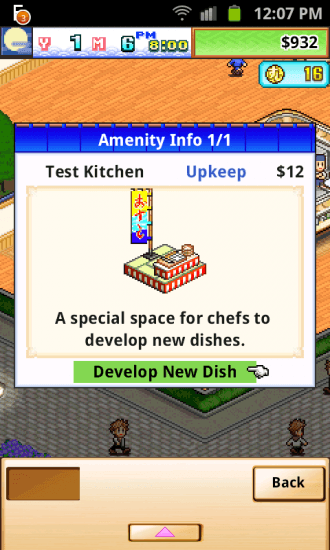
- Once you’ve progressed in the game a bit, you will be alerted that you can now build a test kitchen.
- The test kitchen will allow you to create new and unique dishes using the ingredients you have unlocked so far.
- To unlock new ingredients, visit your consultant and select food from the drop down menu.
- From here you can send your consultant to find new ingredients.
- Before you can create a new dish you will need to build your test kitchen.
- Once it is built, tap on it to begin creating a new dish.
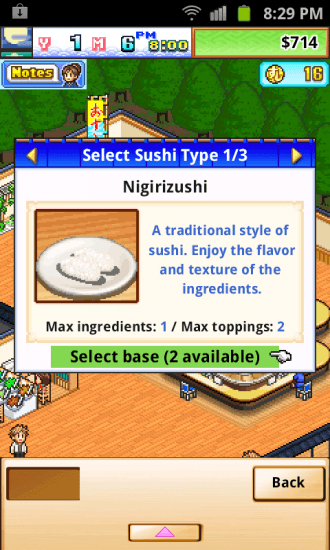
- First you will need to select the type of sushi you wish to create. You will have three options: Nigirizushi, Gunkan-maki, and Makizushi.
- Scroll through your options to see descriptions for each option. You can also view the max number of ingredients for each type as well as the max number of toppings.
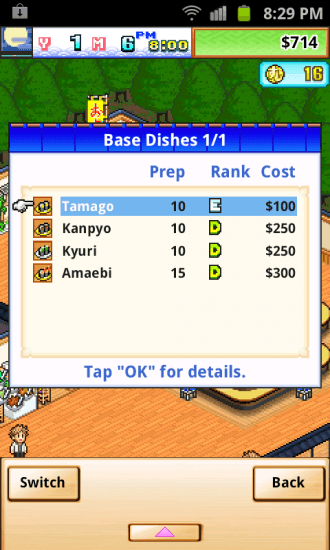
- Once you have selected the type of sushi, it’s time to select your base ingredient. The ingredients available vary by sushi type in addition to what ingredients you have unlocked.
- You will be able to view each ingredients stats to see their prep rate, rank, and cost. Also, if you notice a fish icon next to an ingredient, this means that item is in season and demand is higher.
- Once you have select your base you will get a chance to review your choices. This is also the point where you can change the chef who will be creating the dish.
- At the bottom of the window you can tap on the chef to change them out.
- You can view all your current chefs and view their stats for prep and discernment. Prep allows you to add more ingredients to your dish and discernment will allow the chef to find better quality ingredients to use.
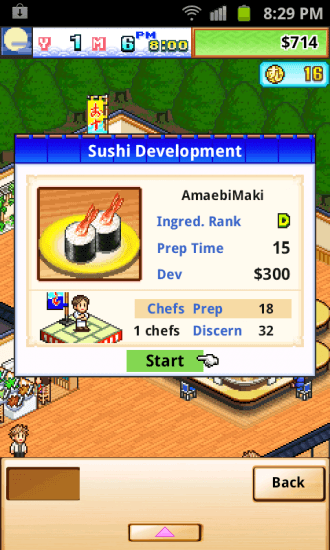
- Once you are happy with your selections, tap the start button to begin prepping the new dish.
- You will need to wait while your chef works. You can watch their progress at the bottom of the screen.
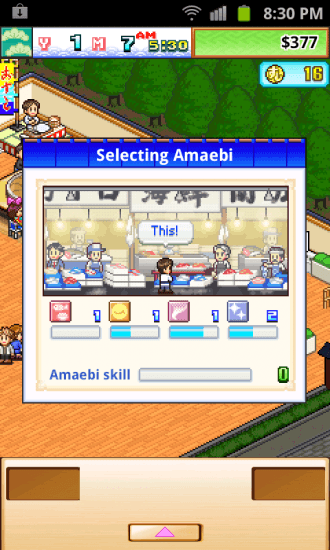
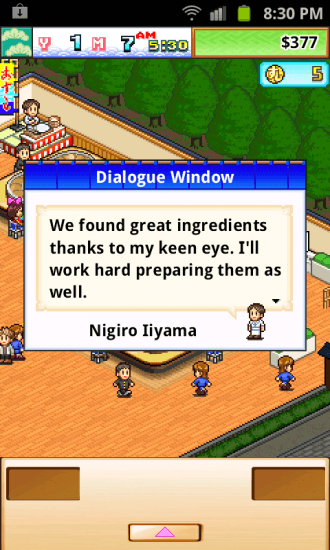
- Once they have reached a certain point, they will need to go and find ingredients. You can increase the chances of them finding unique ingredients by using a chef with high discernment. Otherwise, you can increase their chances by spending sushi coins.
- Once they have completed their trip you will receive points that will increase the rating of the dish. If you are extremely successful you may also level up the ingredient, raising the stats of all dishes using that ingredient.
- Once your chef returns you will be able to add additional ingredients and/or toppings to your dish.
- This is where the prep stat comes into play. You need the dishes prep to be under the prep rating of the chef.
- Also, when scrolling through your ingredient options, pay attention to the icons at the bottom of window. Each one will raise a specific stat for the dish.
- Once you are happy with your selections, continue development.
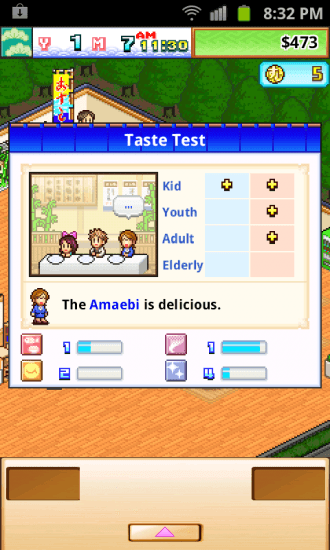
- You will need to wait for prep to be completed and then it’s time for the dish to be taste tested.
- If the dish is well made you can receive significant upgrades to the dish at this time.
- You will then receive the dish’s taste ranking as well as its price.
- You can increase the stats of your dishes by using boosts purchased in the Tsukiji Market.
- To use a boost on a dish, select dishes from the main menu.
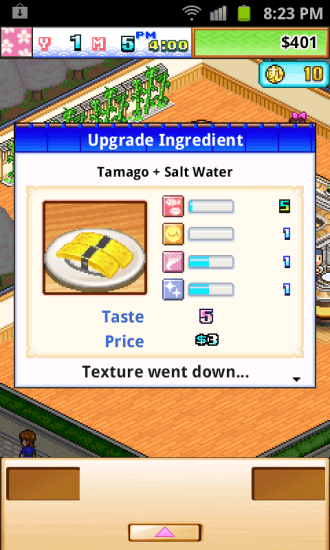
- Tap on the dish you want to boost and then tap ok to use an item.
- Select the boost you want to use from your inventory, but be careful. If you use a boost that isn’t compatible you could end up decreasing the stats instead of boosting them.
- Also, it seems that using the same boost repeatedly will yield diminished results.
Contests
- One benefit of creating unique dishes is being able to enter them in contests.
- To enter a contest, go to the main menu and select manage. From the drop down menu, select contests.
- This will open the contest window. Here you can scroll through all the currently available contests.
- You will notice that each contest has four categories and each categories importance is rated by hearts. The category with three hearts is the one you want to focus on.
- Also, pay attention to who is sponsoring the contest (children, adults, etc).
- Once you’ve selected the contest you want to enter, tap the enter button.
- Now it’s time to select the dish you wish to enter in the contest.
- Remember, you want to make your choice based on the category with three hearts.
- Tap on the dish that best meets the requirements for the contest. This will open a secondary window where you can see how the dish rates with different demographics.
- This is where the knowledge of who is judging the contest comes in handy. Sometimes a dish that matches the heart rating best won’t be compatible with the demographic of the judges. Play around with your choices to find a dish that best meets both requirements.
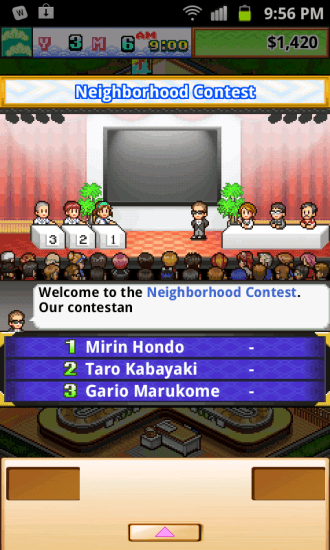
- Once you are happy with your choice it’s time to enter the contest. The contest will begin the following month.
- You will be competing against two NPC’s. There are three judges and each will rank you dish on a scale of one to ten. The competitor with the highest score wins.
- If you do not win the contest, you will be able to reenter it at a later date.
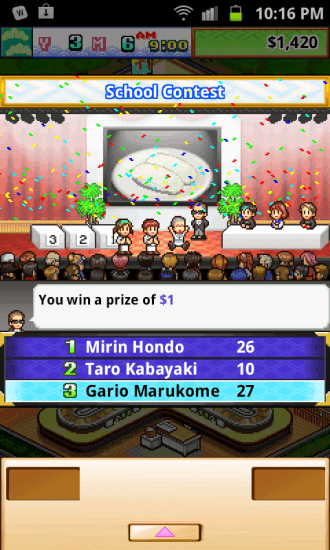
- Competing in contests is an excellent way to earn extra sushi coins.
Advertising & Customers
- In addition to raising the appeal of your seats and amenities, you can also bring in new customers by advertising to various locations.
- To advertise, open the main menu and select the consultant. From the drop down menu select PR.
- Here you will be able to view all the advertising opportunities available to you.
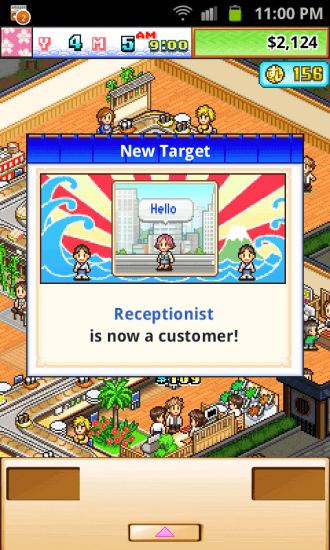
- Each one will bring a different customer type to your restaurant.
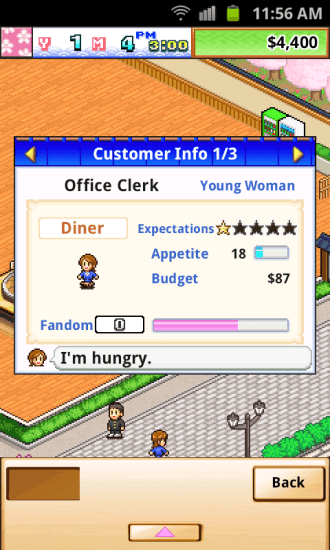
- Each customer has their own preferences and dislikes. You can tap on a customer twice to view their stats.
- Customers have several stats you will want to pay attention to. These are expectations, appetite, budget, and fandom.
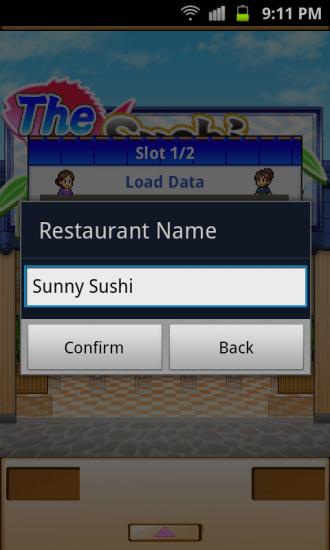
- If you scroll to the next page you can view their history with your restaurant.
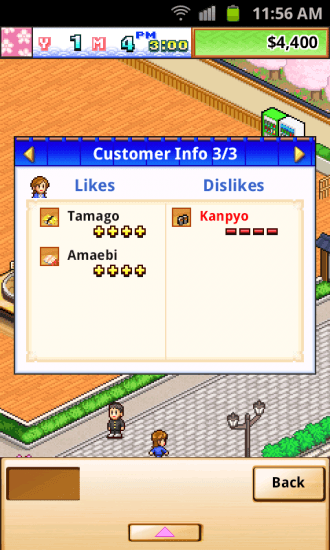
- On the third page you can see what ingredients a customer likes and which ones they dislike.
- With this information you can customize your menu to cater to all the various customers who will visit your restaurant.
Employees & Training
- When you begin the game you will be able to hire up to five chefs.
- You can also hire a part-time chef to man a prep station at any time. This is helpful when a chef is busy in the test kitchen or away training.
- Part-time chefs do not work as fast as your trained chefs, but they are still faster than having no one manning a prep station.
- To hire a new chef, visit the consultant and select HR from the drop down menu.
- You can either place a help wanted sign in your window, or you can run an ad.
- After a short time you will be given a list of potential hires.
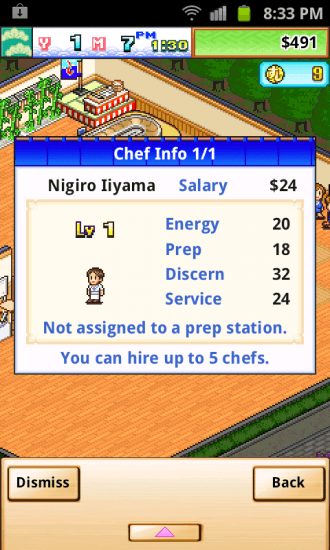
- Pay attention to their stats as well as their salary and select the one(s) who best fit what you need.
- Once a chef is hired you will want to assign them to a prep station.
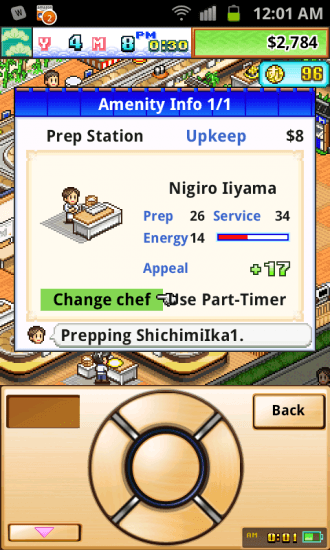
- Tap on a prep station that is manned by a part-time chef to open the info window.
- Tap on change chef to select a new chef for the station.
- Now that you’ve hired a new chef, it’s time to increase their skills.
- Return to the consultant and select HR from the drop down menu.
- This time, select the training trip and select the chef you wish to send.
- As your chefs level up, the trips will require more sushi coins to complete.
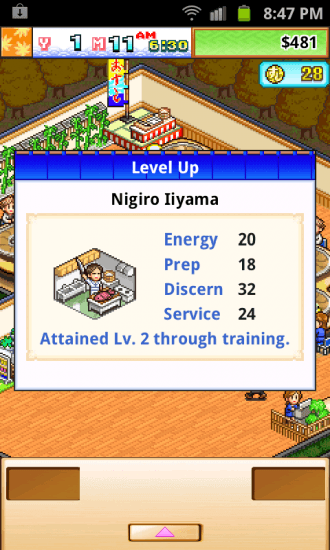
- When the chef returns from the trip they will level up and their stats will increase significantly.
- If you had replaced them with a part-time worker while they were gone, don’t forget to send them back to their station.
Rankings
- Every six months you will be ranked on four categories: Cuisine, Service, Amenities, and Seats.
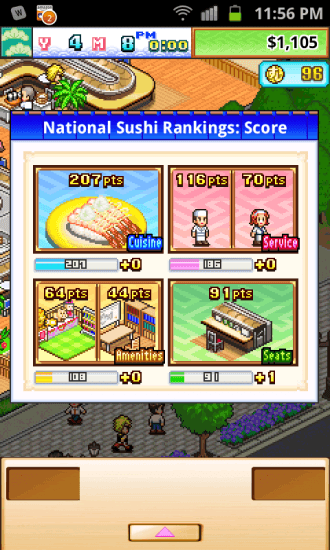
- You will be able to see if you’ve increased in any of these areas.
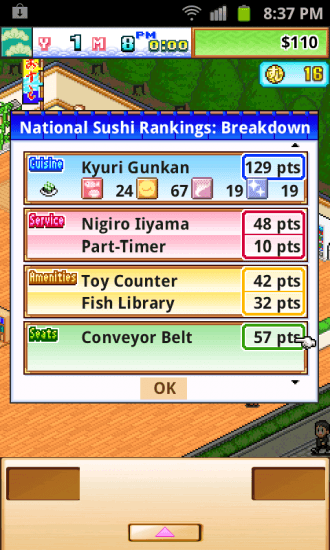
- The next screen will give you a breakdown of your ranking. Here you will be able to see which items were used for ranking and what scores they received.
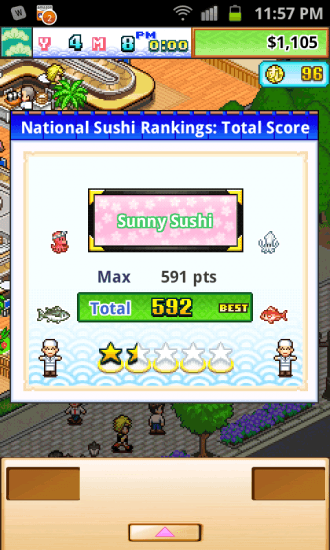
- Finally, you will be able to see your final score along with your restaurants current star level.
- You will be awarded additional income as a reward and it will increase as you increase your restaurants ranking.
Congratulations! You have completed the quick start guide for The Sushi Spinnery by Kairosoft. Be sure to check back often for game updates, staff and user reviews, user tips, forum comments, and much more here at Gamezebo.
More articles...
Monopoly GO! Free Rolls – Links For Free Dice
By Glen Fox
Wondering how to get Monopoly GO! free rolls? Well, you’ve come to the right place. In this guide, we provide you with a bunch of tips and tricks to get some free rolls for the hit new mobile game. We’ll …Best Roblox Horror Games to Play Right Now – Updated Weekly
By Adele Wilson
Our Best Roblox Horror Games guide features the scariest and most creative experiences to play right now on the platform!The BEST Roblox Games of The Week – Games You Need To Play!
By Sho Roberts
Our feature shares our pick for the Best Roblox Games of the week! With our feature, we guarantee you'll find something new to play!All Grades in Type Soul – Each Race Explained
By Adele Wilson
Our All Grades in Type Soul guide lists every grade in the game for all races, including how to increase your grade quickly!


