![Digimon UP Tier List [Supports, Buddies, and Partners]](/wp-content/uploads/2026/07/digimon-up-tier-list.jpg "Digimon UP Tier List [Supports, Buddies, and Partners]")
Digimon UP Tier List [Supports, Buddies, and Partners]
These Digimon will get you UP the leaderboard.


![Haze Seas Boss Drops [Chances, Locations, and How to Spawn]](/wp-content/uploads/2026/07/haze-seas-boss-drops.jpg "Haze Seas Boss Drops [Chances, Locations, and How to Spawn]")

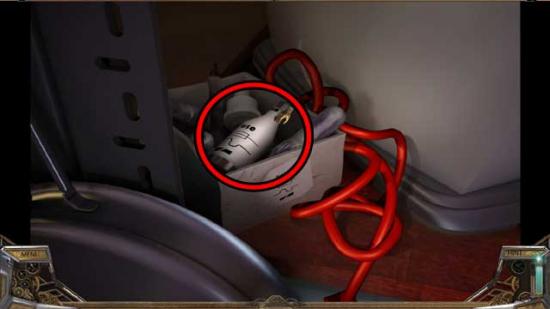
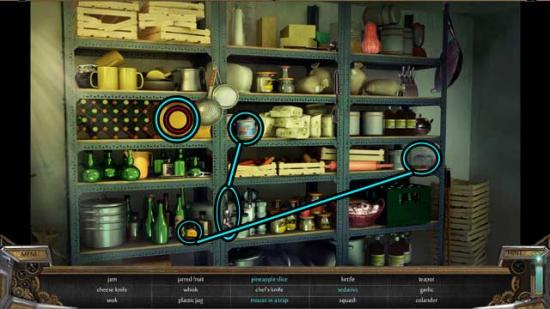
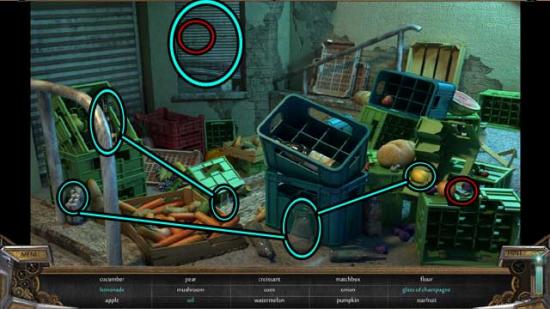
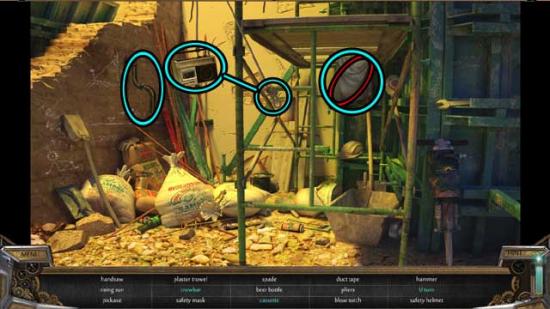
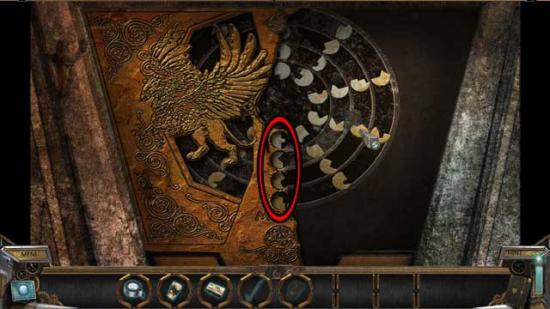
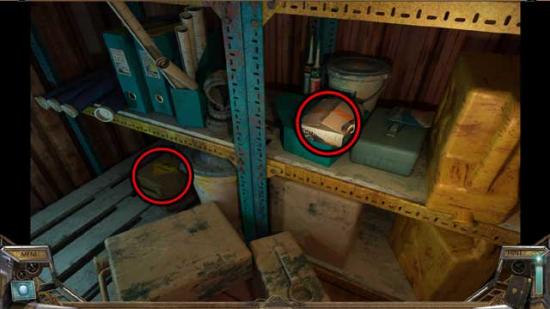
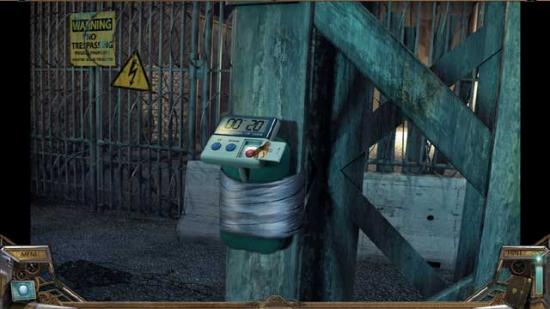
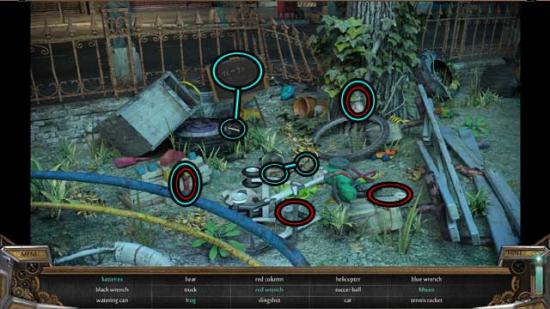
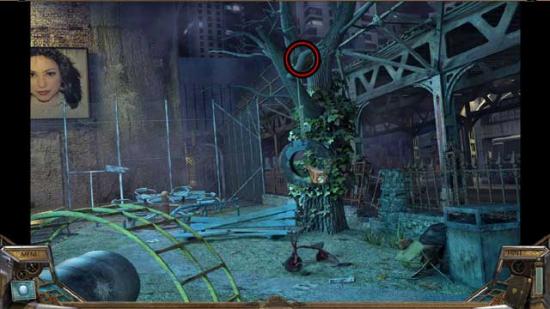
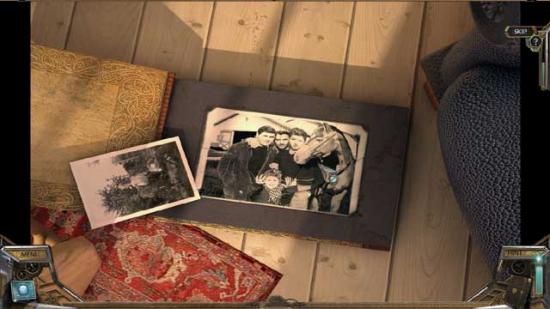
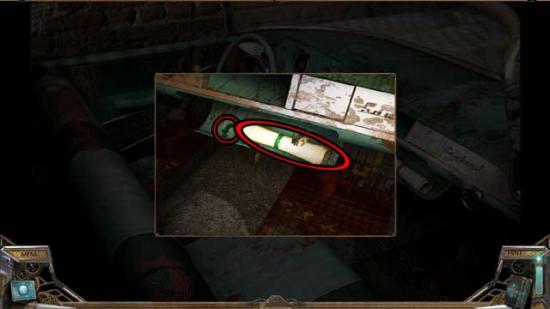
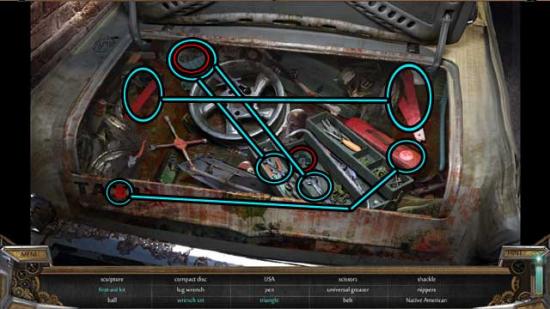
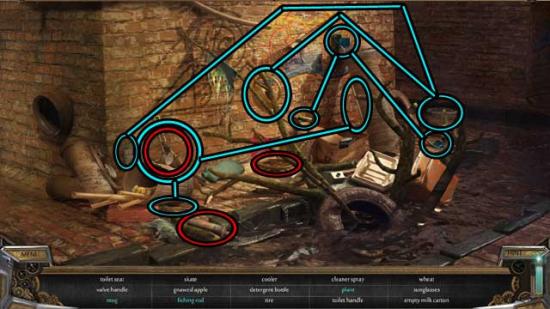
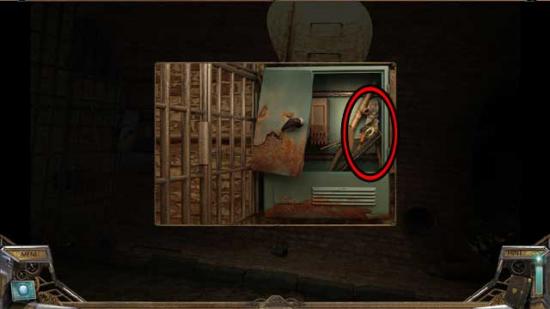
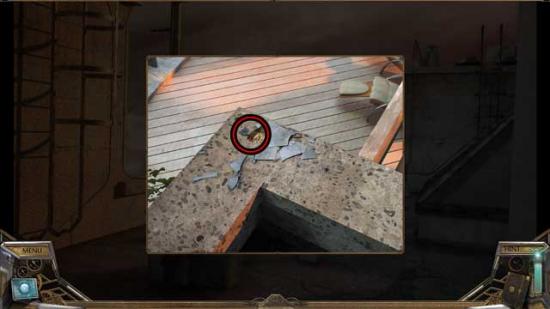
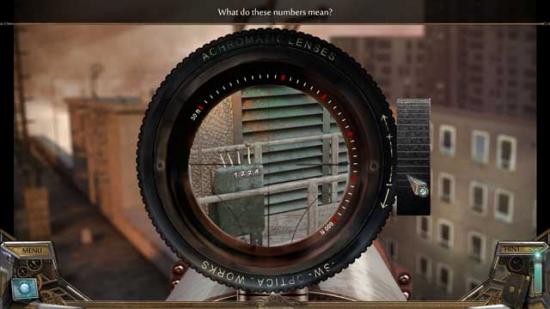
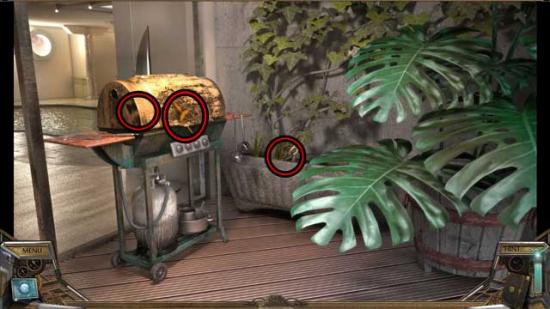
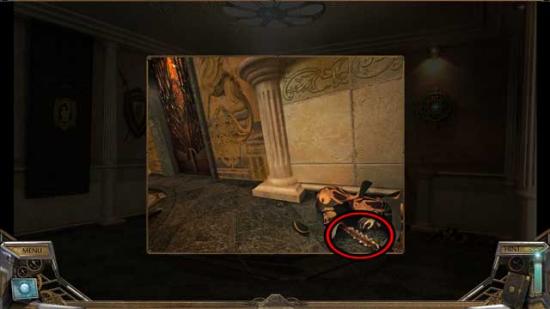
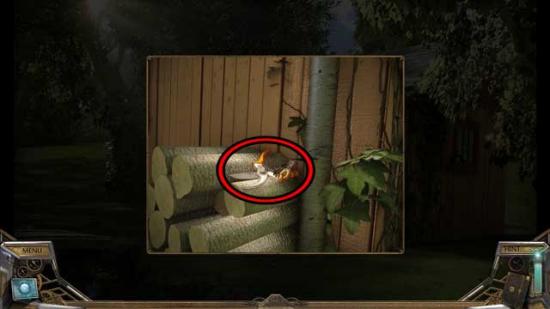
Welcome to The Secret Order: New Horizon walkthrough on Gamezebo. The Secret Order: New Horizon is a hidden object adventure game played on the PC created by Sunward Games. This walkthrough includes tips and tricks, helpful hints, and a strategy guide for how to complete The Secret Order: New Horizon.
Welcome to The Secret Order: New Horizon walkthrough on Gamezebo. The Secret Order: New Horizon is a hidden object adventure game played on the PC created by Sunward Games. This walkthrough includes tips and tricks, helpful hints, and a strategy guide for how to complete The Secret Order: New Horizon.
Outside Restaurant

Restaurant
Kitchen
Storeroom
Kitchen
Restaurant
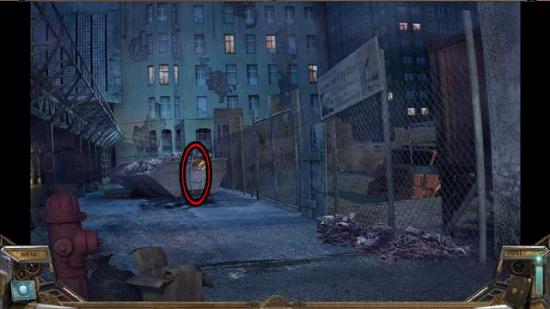
Street
Crossroads
Restaurant
Kitchen
Storeroom
Kitchen
Restaurant
Restaurant Terrace
Left of the Restaurant
Construction Site Entrance
Left of the Restaurant
Bus
Bus Door
Inside the Bus
Construction Site Entrance
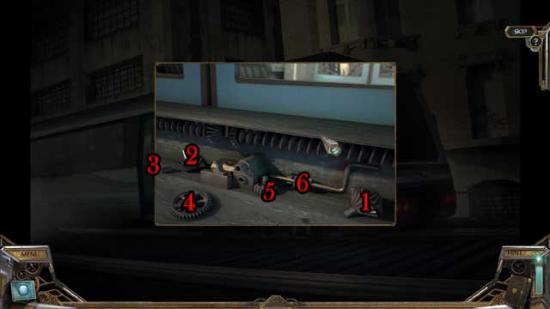
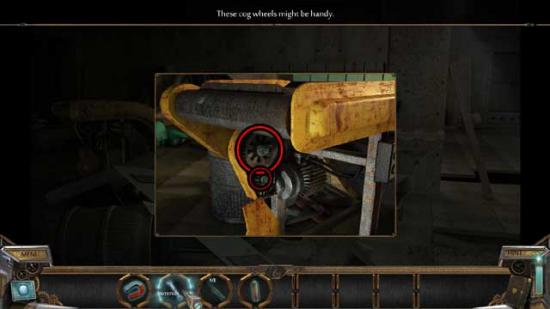
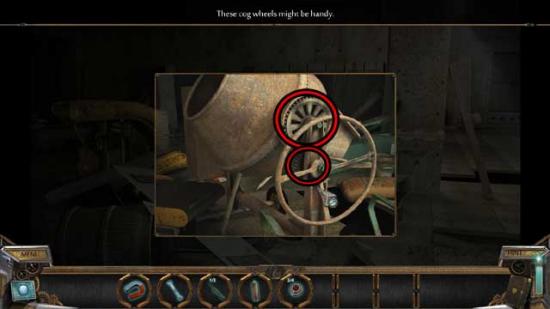
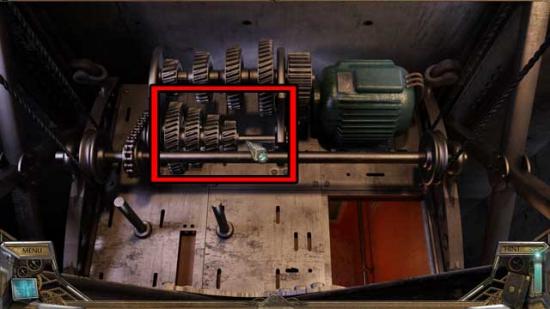
Heavy Machines
Trailer
Heavy Machines
Excavator
Sewer

Sewer
Trailer
Inside Trailer
Restaurant Terrace
Left of the Restaurant
Playground Entrance
Basketball Court
Restaurant Terrace
Right of the Restaurant
Metro Station
Metro Rail
Right of the Restaurant
Metro Station

Subway Car
Inside Subway Car
Damaged Lamppost
Alleyway
Top of the Ladder

Window
Room
Top of the Ladder
Alleyway
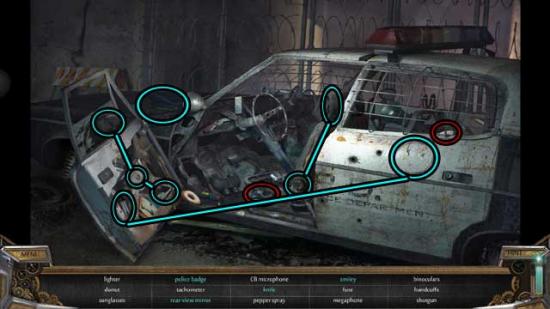
Car Wreck
Car Interior
Car Interior
Car Wreck
Alleyway
Sewer
Alleyway
Garage Door
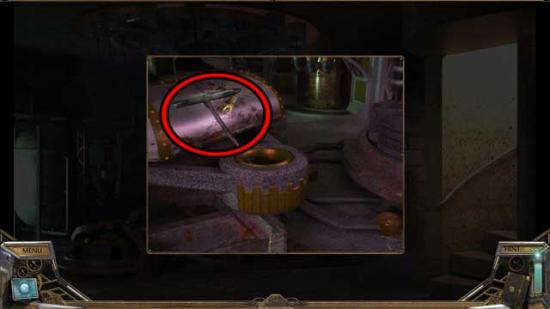
Construction Machines
Chasm in the Floor
Next to Elevator
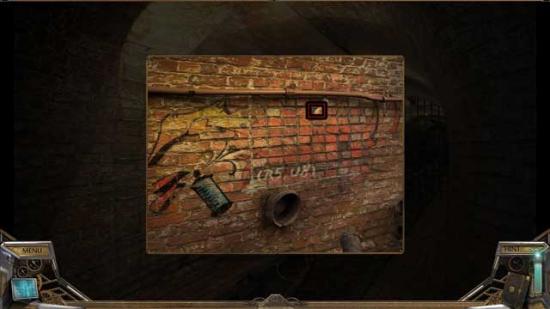
Graffiti in the Sewer
Sound Lock Door
Next to Elevator
Inside the Elevator
Next to Elevator
Inside the Elevator
Top of Elevator
Chasm in the Floor
Totem Pole
Totem Pole

Chasm in the Floor
Top of Elevator
Inside the Elevator
Stairway
Inside the Elevator
Roof Entrance
Roof
Ladder

Roof (2)
Roof Back View
Roof
Lift
Inside the Lift
Loft Terrace

Terrace Entrance
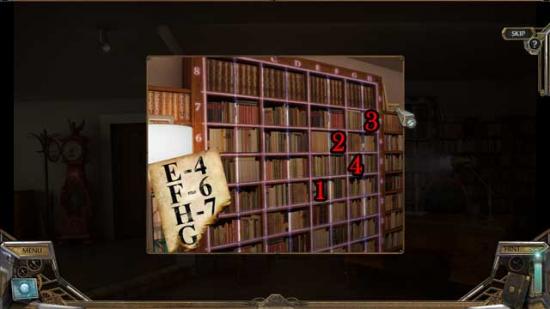
Bookshelf
Terrace Entrance
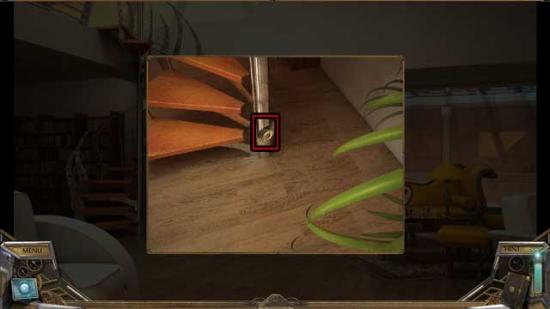
Spiral Staircase
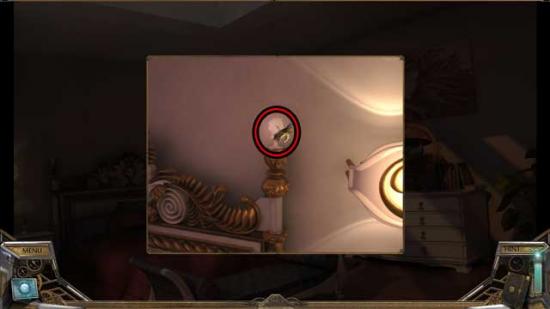
Bedroom
Bookshelf
Spiral Staircase
Bedroom
Spiral Staircase
Spiral Staircase
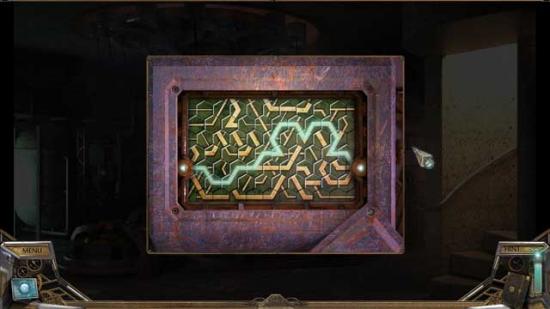
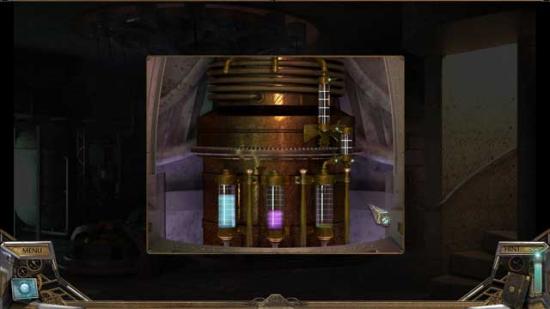
Power Source Room
Spiral Staircase
Pool
Power Source Room
Pool
Secret Room
Shed

Garden
House
House-Terrace
House Entrance
Basement

House Entrance
Basement
Congratulations! You’ve completed The Secret Order: New Horizon!
