![Digimon UP Tier List [Supports, Buddies, and Partners]](/wp-content/uploads/2026/07/digimon-up-tier-list.jpg "Digimon UP Tier List [Supports, Buddies, and Partners]")
Digimon UP Tier List [Supports, Buddies, and Partners]
These Digimon will get you UP the leaderboard.


![Haze Seas Boss Drops [Chances, Locations, and How to Spawn]](/wp-content/uploads/2026/07/haze-seas-boss-drops.jpg "Haze Seas Boss Drops [Chances, Locations, and How to Spawn]")

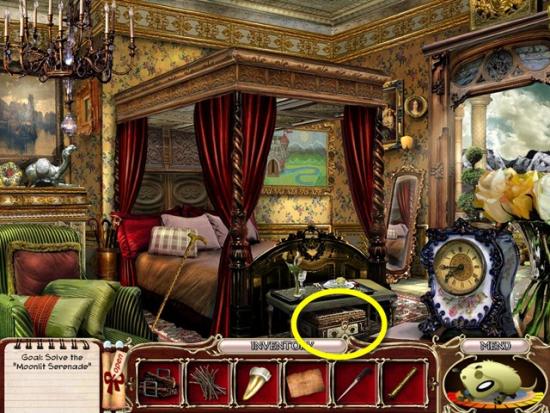
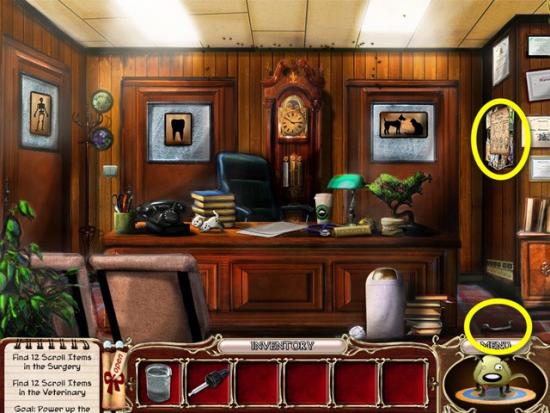
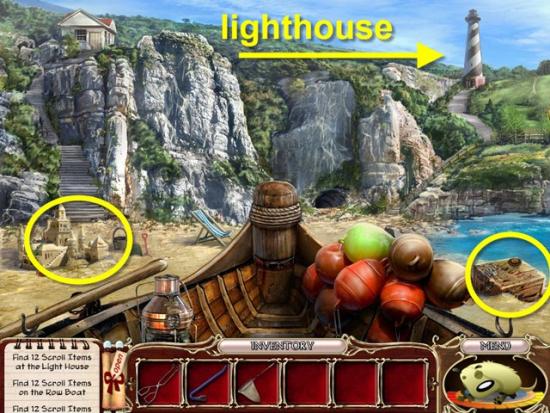
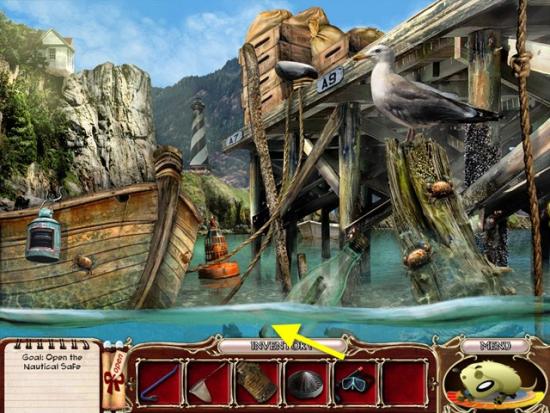
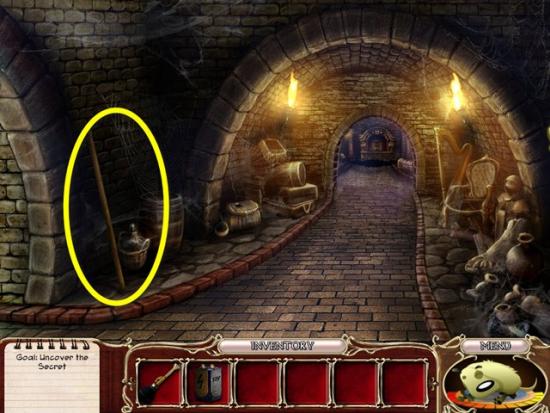
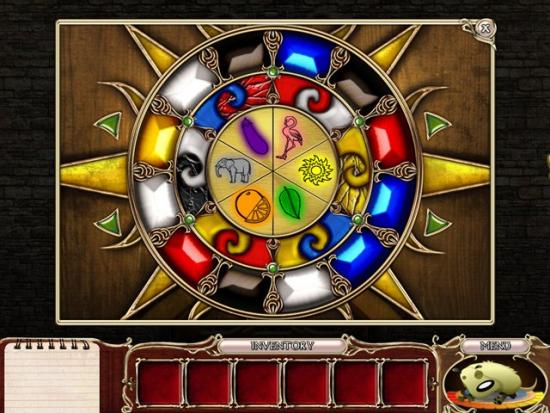
Welcome to the The Scruffs: Return of the Duke walkthrough on Gamezebo. The Scruffs: Return of the Duke is a hidden object/adventure game played on the PC created by Sweet Tooth Games. This walkthrough includes tips and tricks, helpful hints, and a strategy guide on how to complete the game.
Welcome to the The Scruffs: Return of the Duke walkthrough on Gamezebo. The Scruffs: Return of the Duke is a hidden object/adventure game played on the PC created by Sweet Tooth Games. This walkthrough includes tips and tricks, helpful hints, and a strategy guide on how to complete the game.
This walkthrough is meant to be used as a guide to assist in solving mini-puzzles and acquiring all items in order to complete the game. You may explore locations in the order you wish, this walkthrough is written to take the most direct route to the game’s finish.
Inventory objects will be written in bold. The walkthrough will state, “Use the inventory item on the blah blah,” because it assumes you have the item. If you don’t have the item, on your keyboard, press CTRL+F (at the same time). In the text box, type the name of the item you are looking for and press ENTER. This will scan this page for the appearance of that word.
This is a hidden object adventure game. You will move from location to location solving hidden object hunts, mini-puzzles and picking up items to use in order to proceed in the game.
Help on the main screen explains gameplay.
This game has two levels of difficulty.
Casual mode offers more in-game help and the hint timer charges quickly.
Expert mode offers less in-game help and the hint timer takes longer to charge.
Move your cursor over every aspect of a scene and watch for it to change; it’s the only way to find everything.
The Menu button at the bottom right of the screen will bring you back to the main screen.
Items collected throughout the game go into your inventory, located at the bottom of your screen.
The notepad at the bottom left of your screen shows you the tasks you need to complete.
Closing a window – To close the zoom-in windows, click anywhere outside of the window.
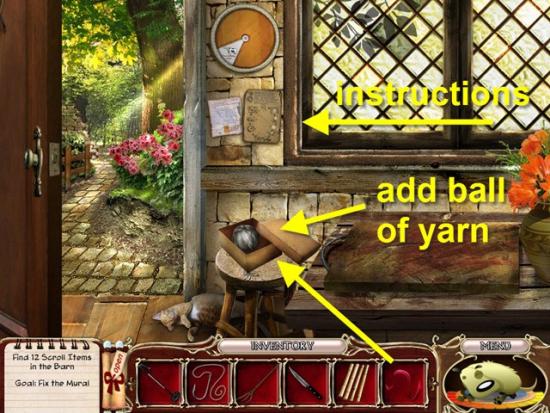
Mini-puzzles can be skipped once the Skip button fills. Click on the question mark at the left of the scene to get instructions on how to solve the puzzle.
Hint system – Hints are available in the bottom right of the screen.
Using a hint will wake up Scruffy the dog. He will get excited and jump up and down or give a thumbs up when your cursor gets close to an item you need to find, an inventory item to pick up or an active area you need to investigate. He’ll tell you to check elsewhere if there’s nothing to do in that room.
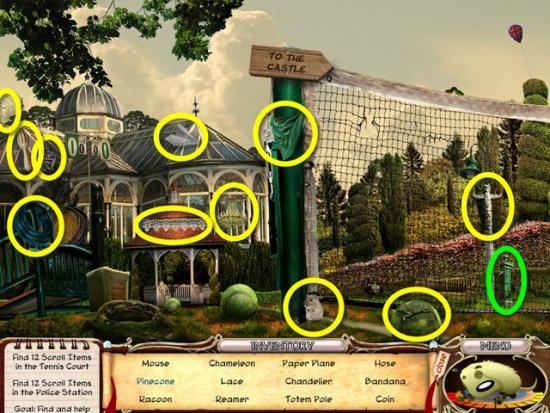
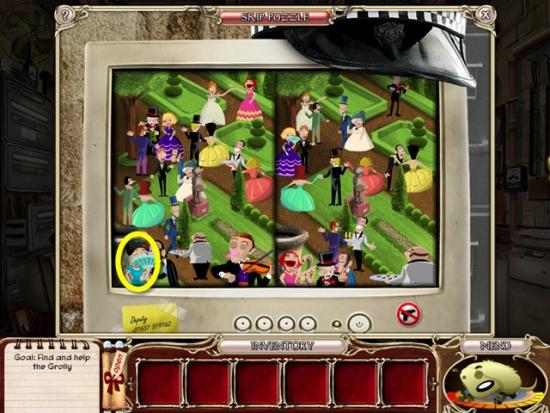
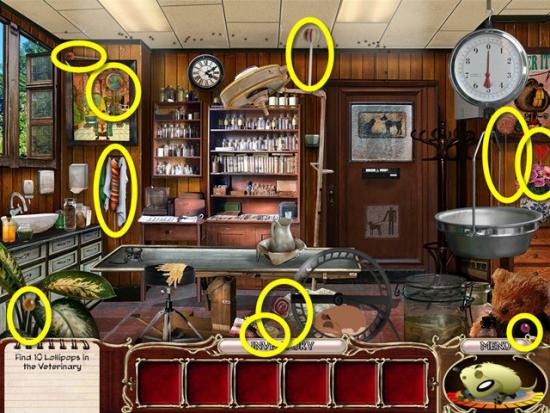
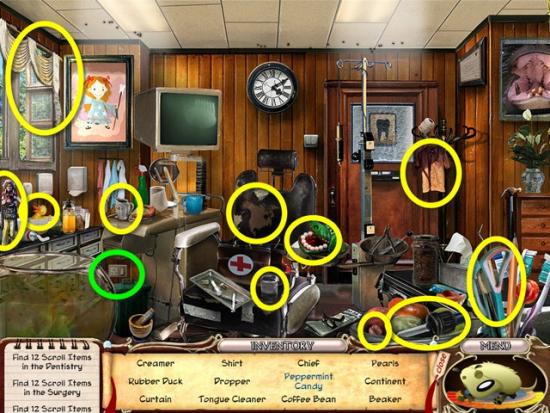
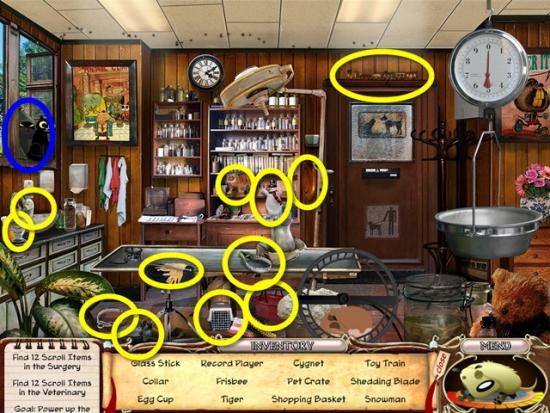
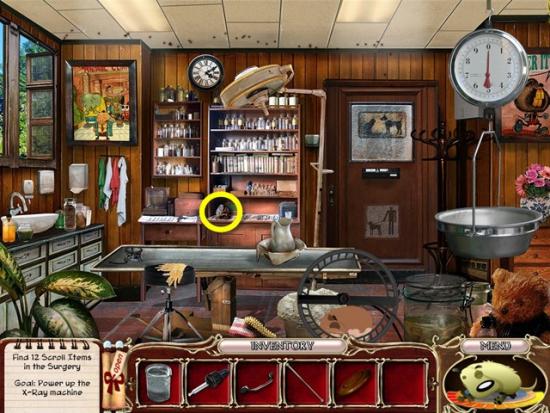
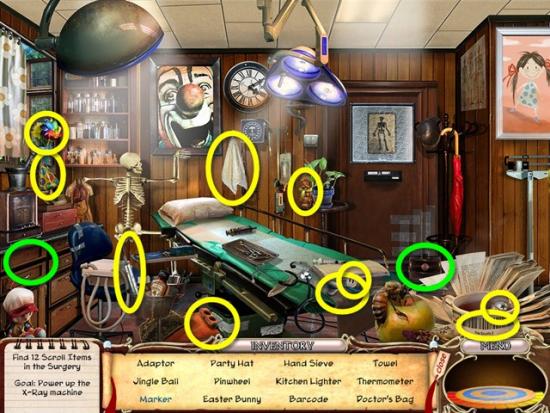
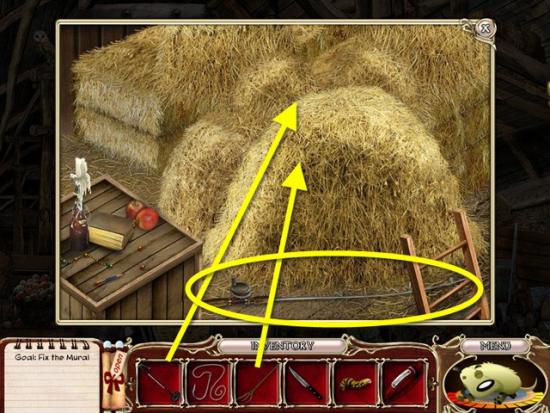
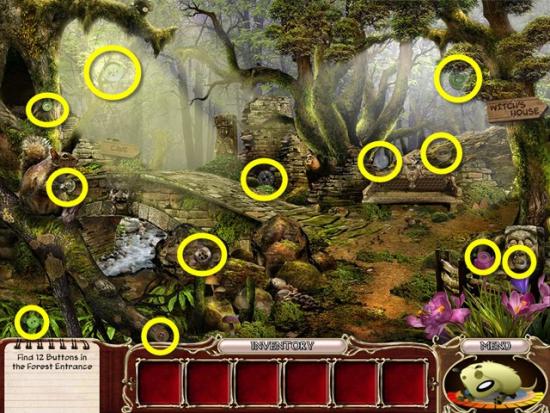
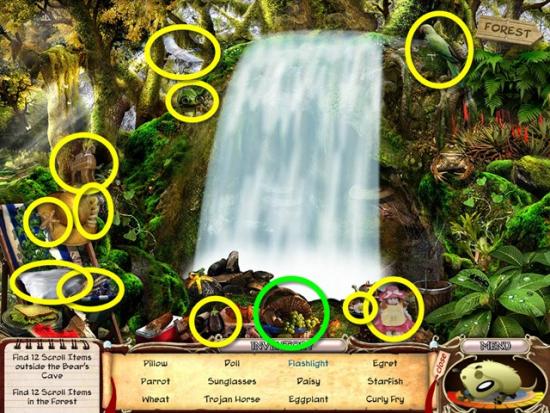
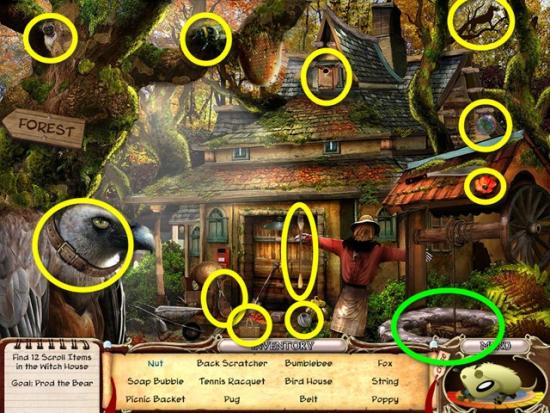
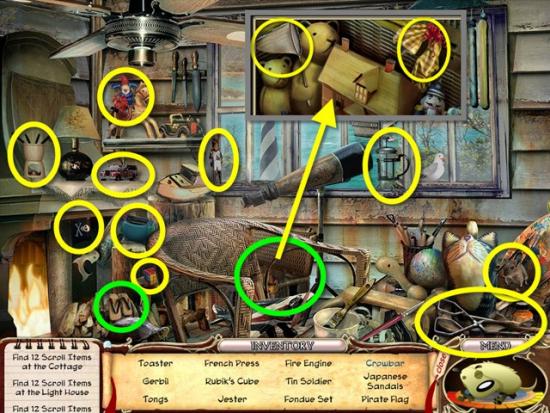
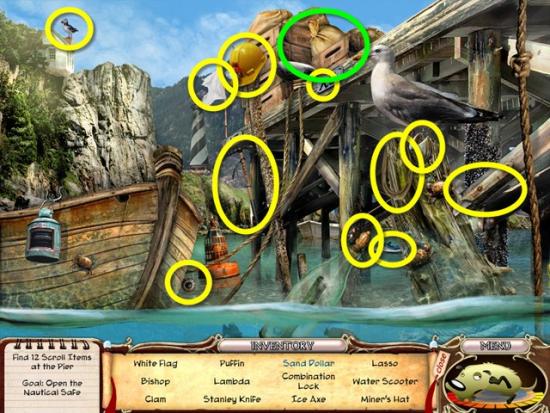
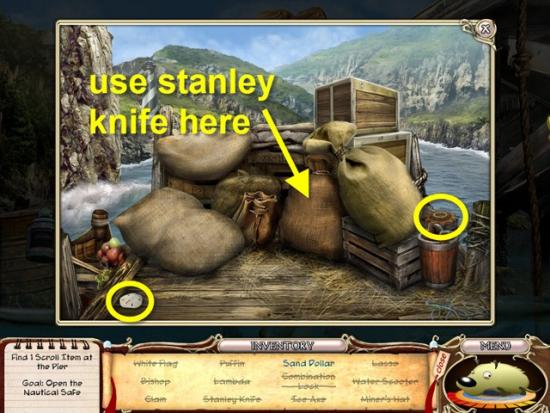
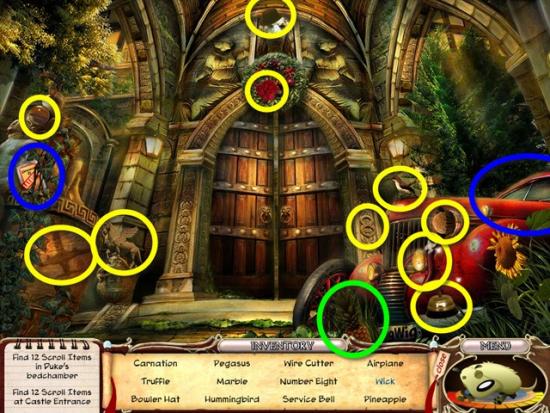
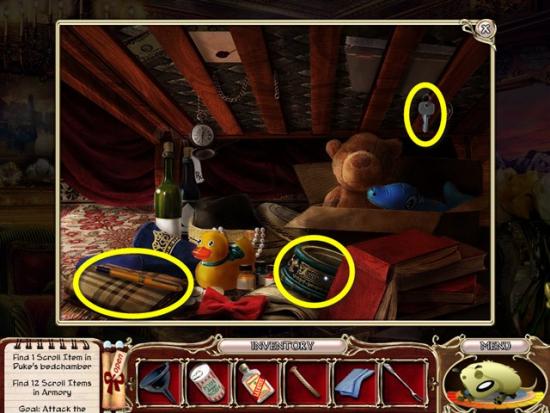
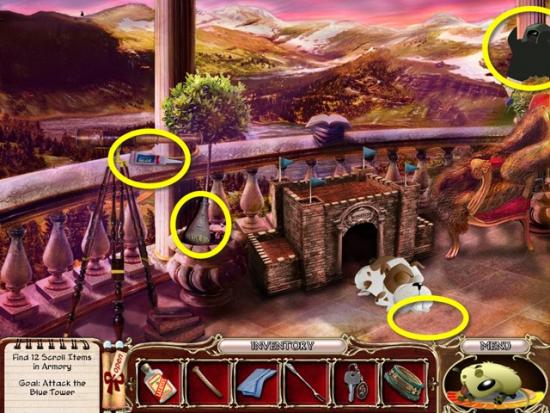
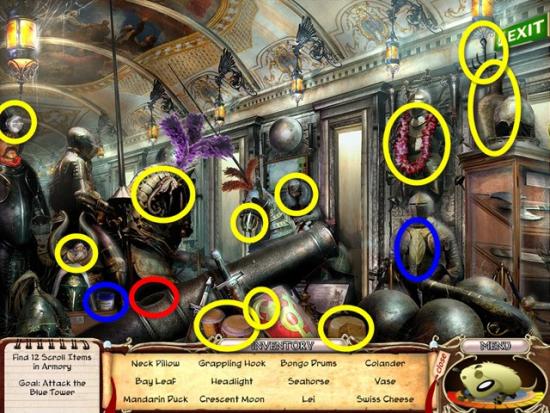
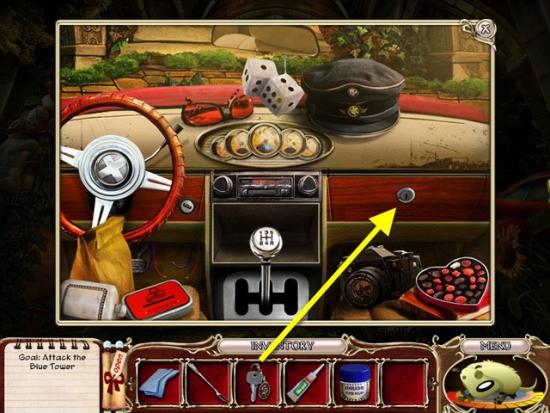
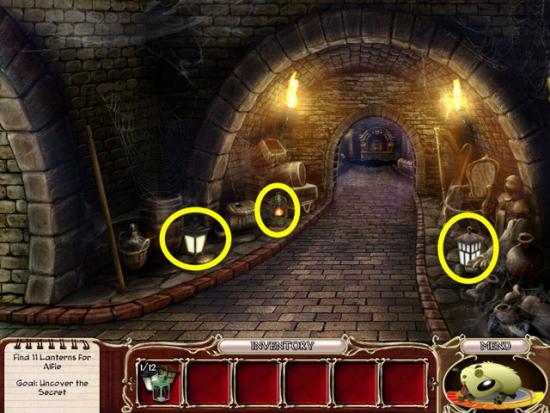
Hidden object hunts provide a list of items to find. Click on items in the scene to cross them off the list. Once you have found all the hidden objects, an item is added to your inventory. Items written in green mean you need to perform an action in order to find them. In the screenshots, yellow highlights will show the items you need to find, green highlights will show the items that require an action.
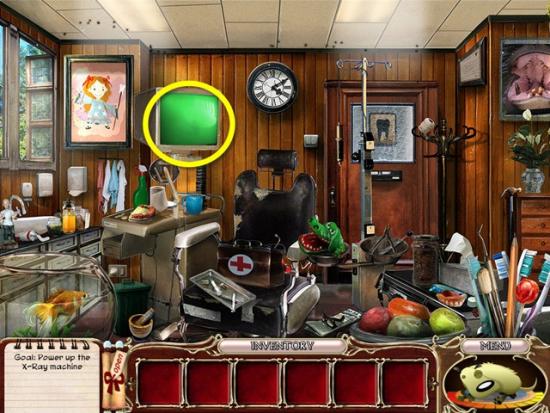
After clicking Play from the main screen, watch the cutscene. Choose your difficulty setting, then watch another cutscene.
When offered interactive help, click Yes.

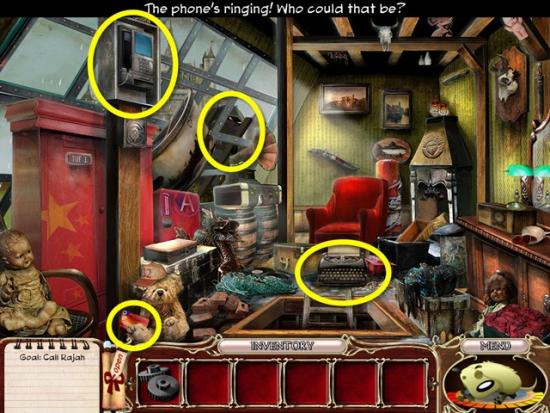
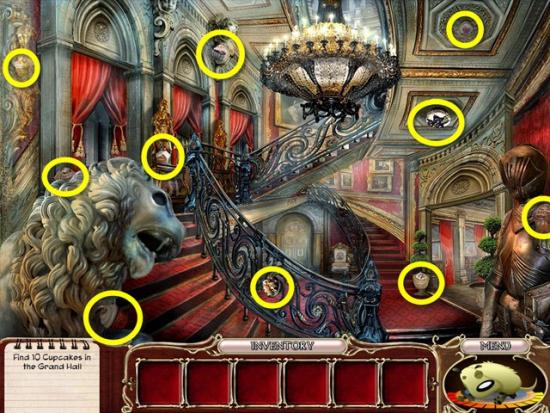
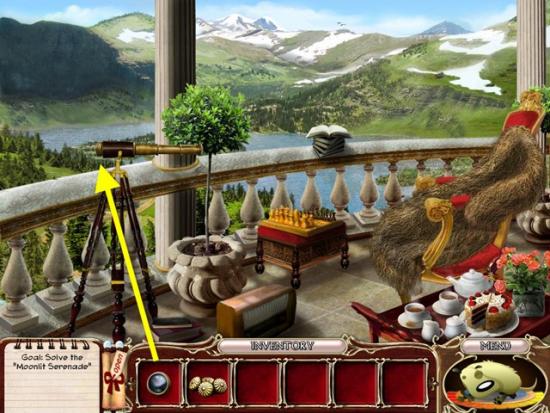
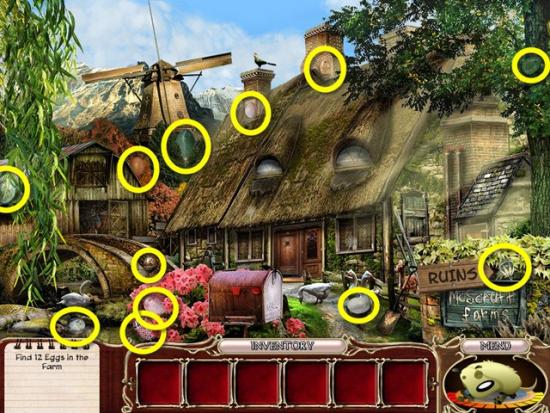
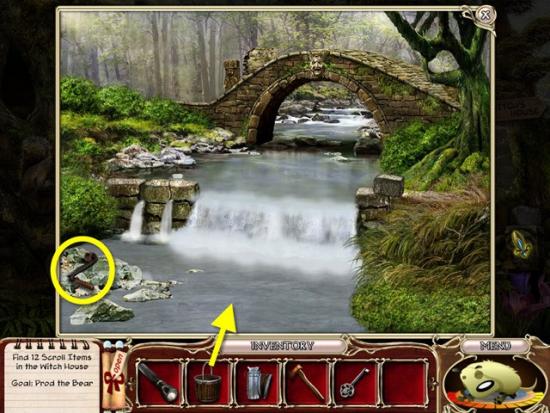
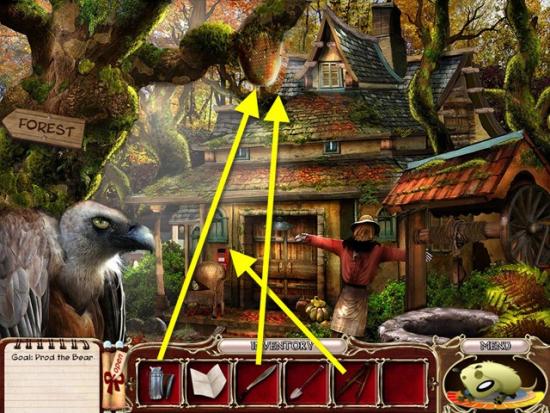
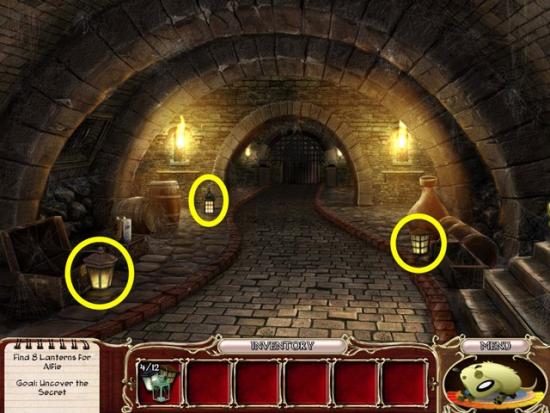
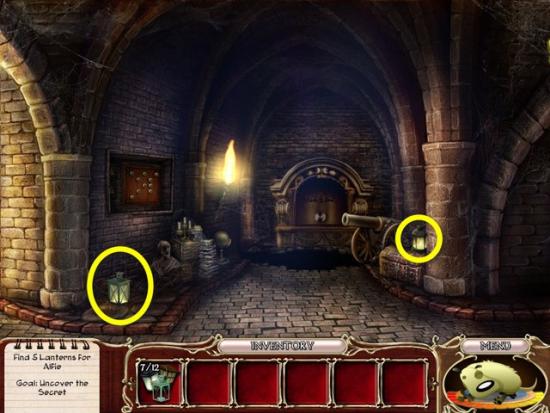
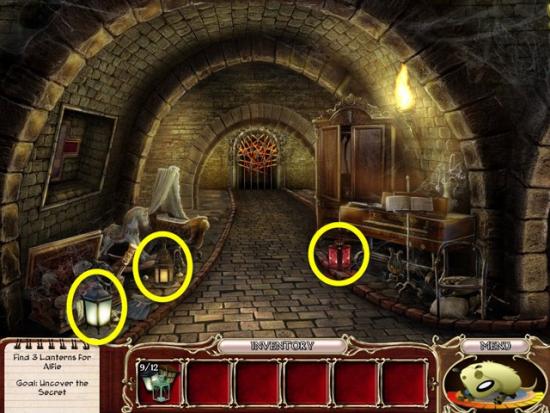
Find eight feathers.
Go up the stairs to the attic.
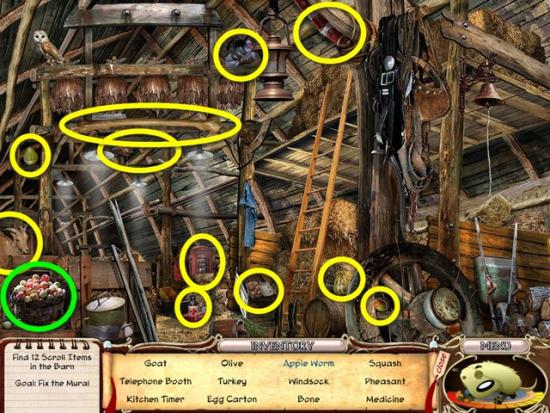
Give the feathers to the Rajah. Take the scroll. A hidden object hunt starts.
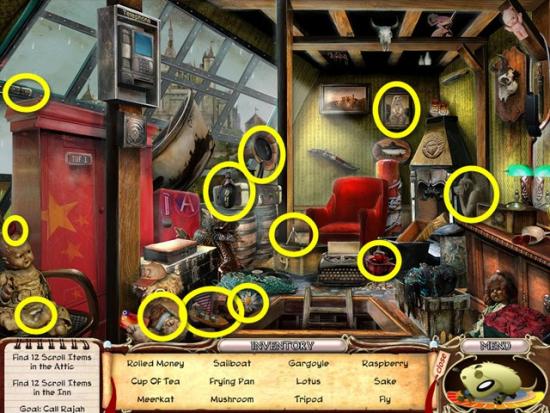
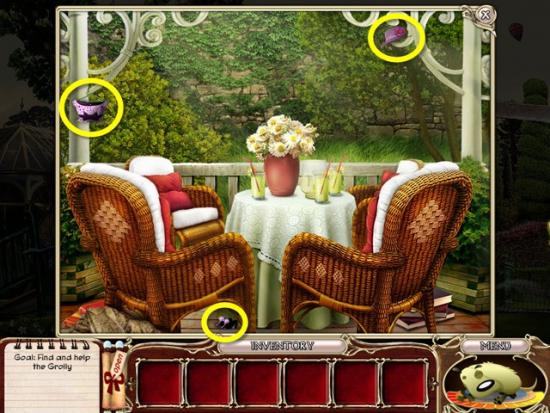
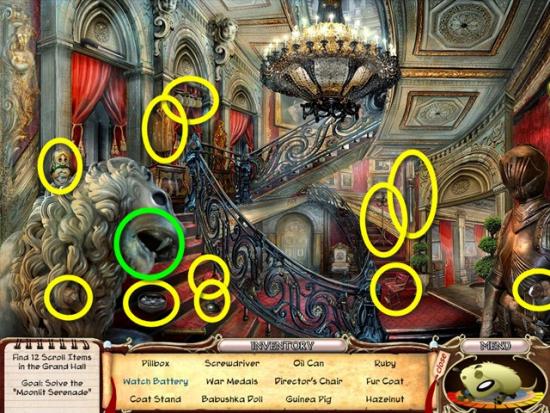
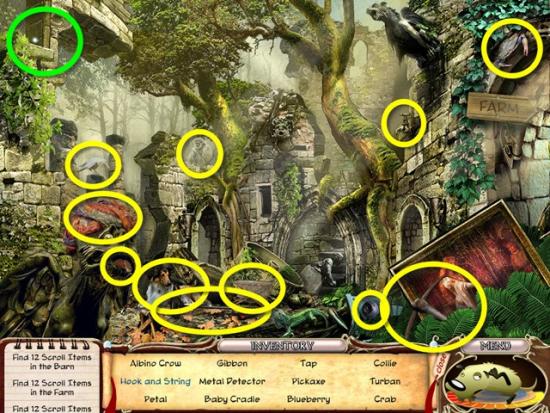
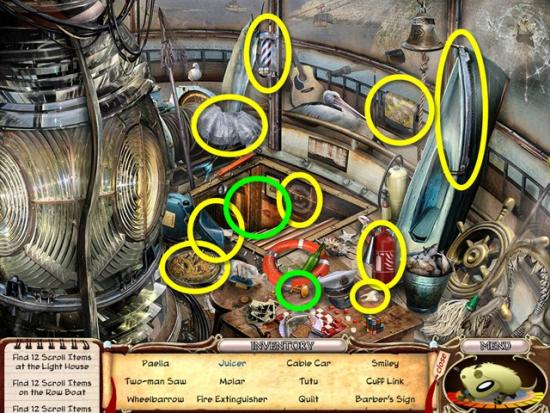
Find all the objects.
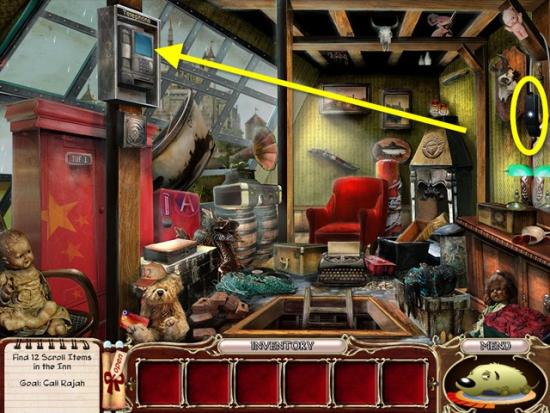
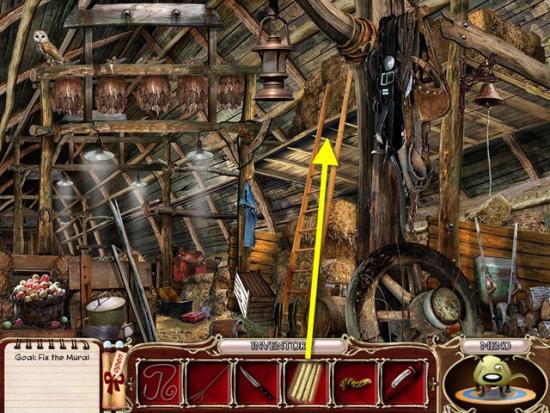
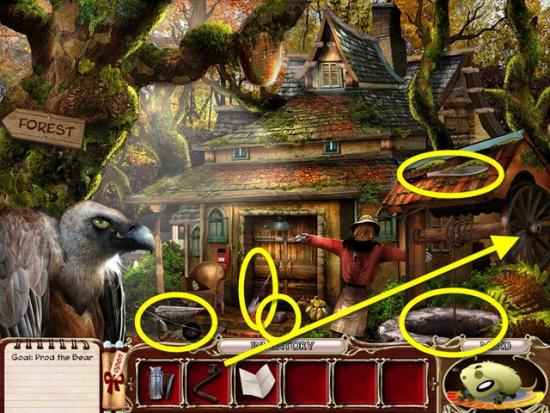
Take the telephone handset. Click on the telephone. Click anywhere outside the window to close it.
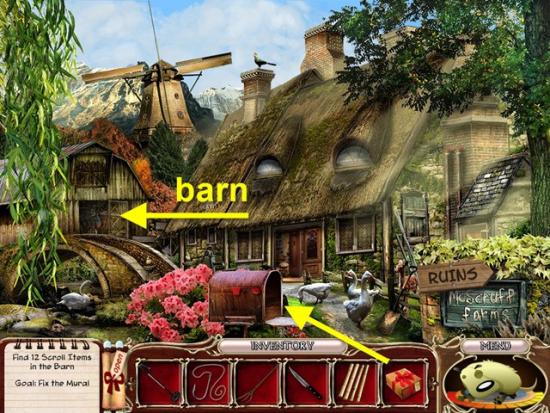
Go down to the inn.
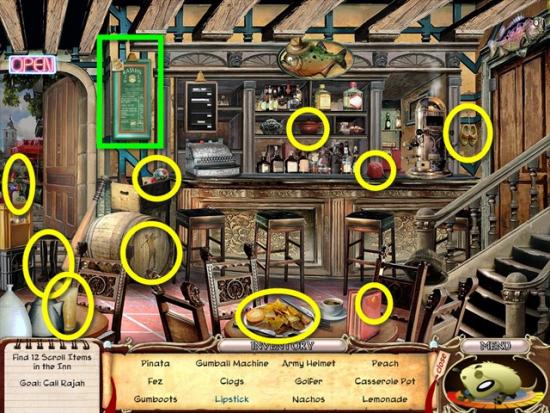
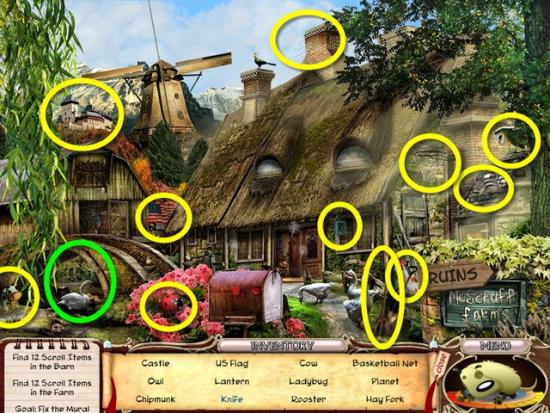
Find all the objects. Click on the menu board. Move the sign and take the lipstick.
Click on the shelves behind the bar. Move the small “Rajah’s secret delights” sign and take the typewriter knobs.
Go up to the attic.
Click on the telephone. When it stops ringing, click anywhere outside the window to close it.
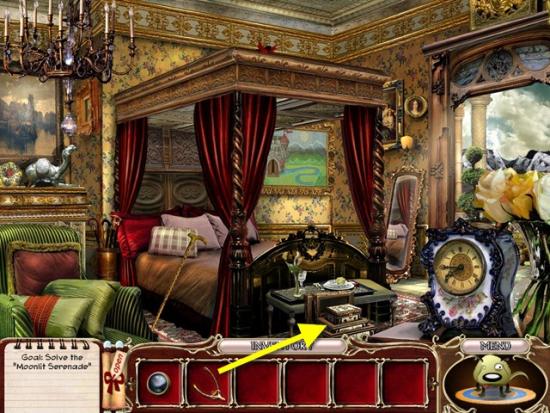
Take the credit card. Click on the character looking in the window.
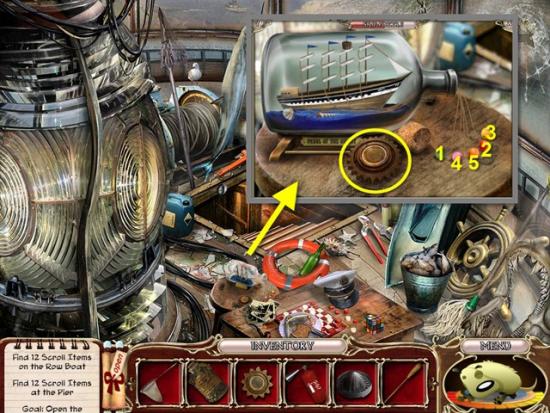
Click on the typewriter. Add the typewriter knobs. Turn the knobs three times and take the pin code. Click anywhere outside the window to close it.
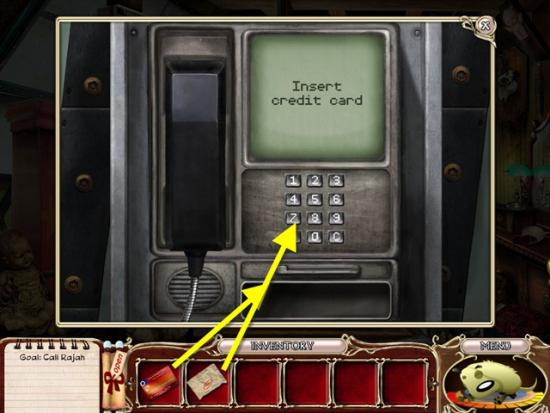
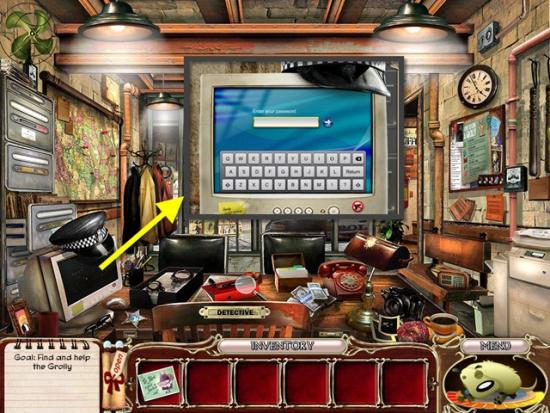
Click on the telephone. Insert the credit card and enter the pin code (if you don’t remember the number, click on it, memorize the number, then close it and enter the code).
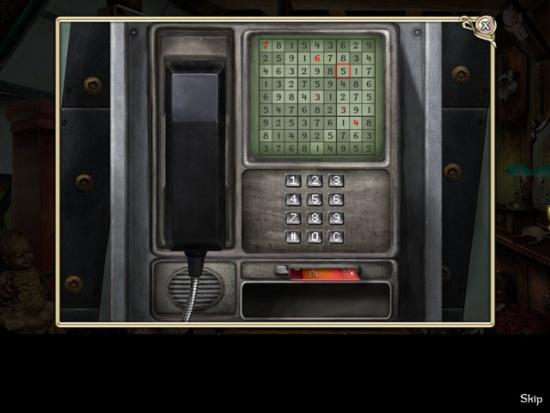
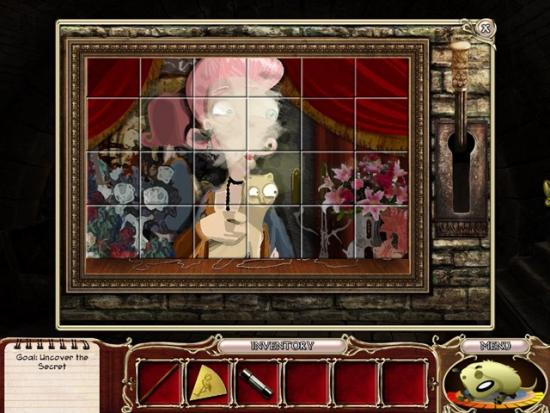
A mini-puzzle starts. Complete the sudoku puzzle. The board is broken up into nine areas with nine boxes in each. Enter numbers into the tiles however numbers cannot be repeated in any row, column or nine box area. Diagonal doesn’t count.
Solution:
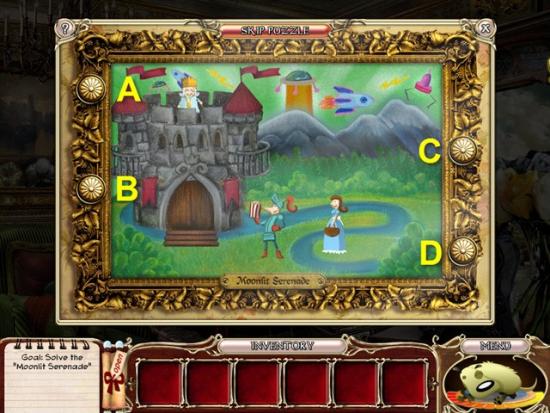
Take the Tapestry of the Knights of Scrufford.
Watch the cutscene.
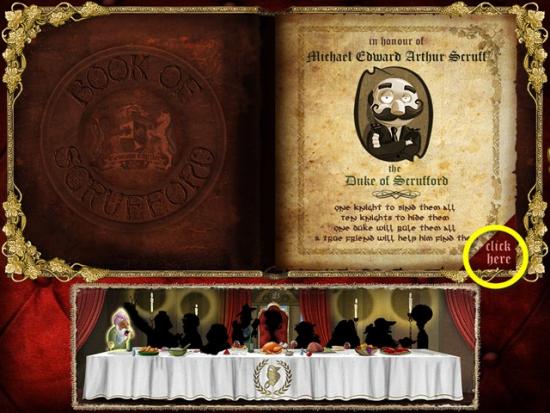
On the Book of Scrufford, click on the area that reads “click here.” Read the entry, then click Continue.
Watch the cutscene.
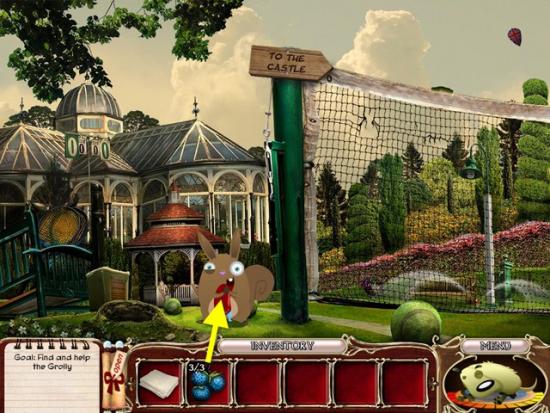
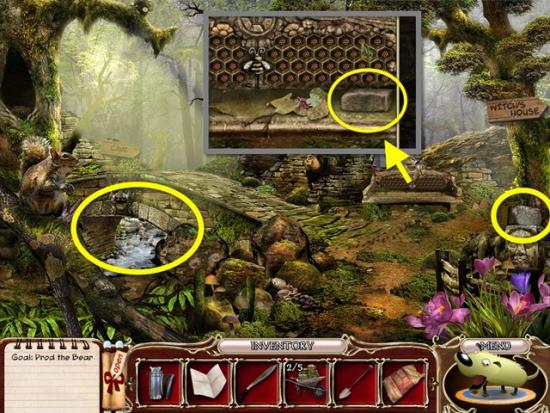
Find eight types of pasta. When you are finished, click on the sign for the park, then from the next scene, click on the sign for the station.
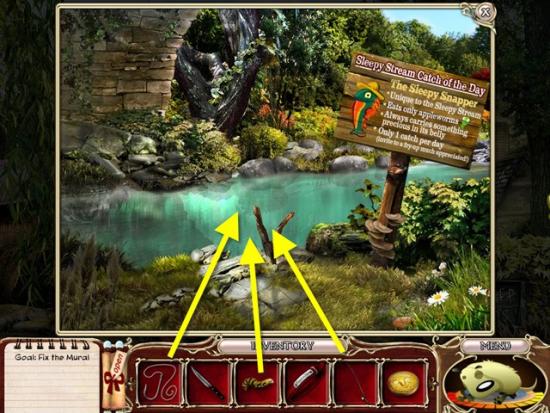
At the station, give the pasta to Michelangelo. Take the scroll to trigger a hidden object hunt.
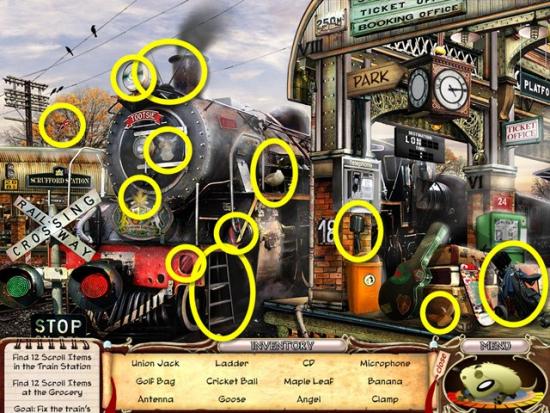
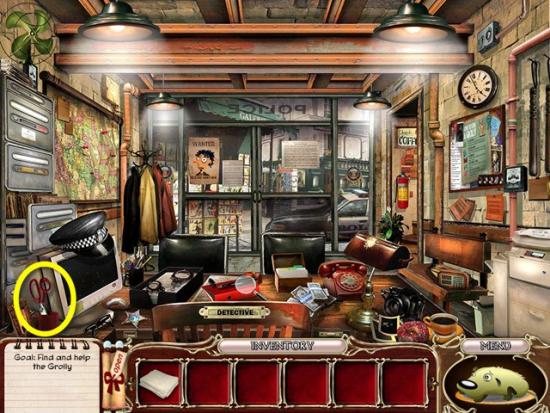
Find all the objects. A clamp is added to your inventory.
Return to the grocery (click on the park sign, then the grocery sign).

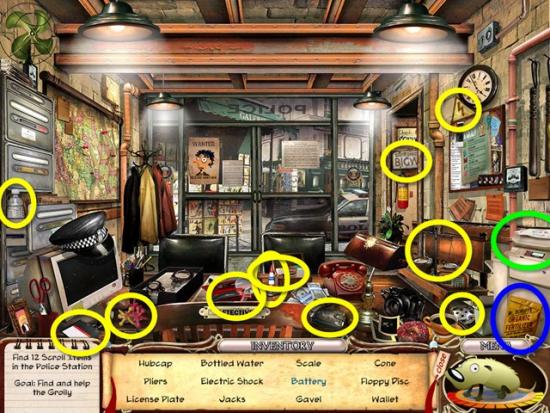
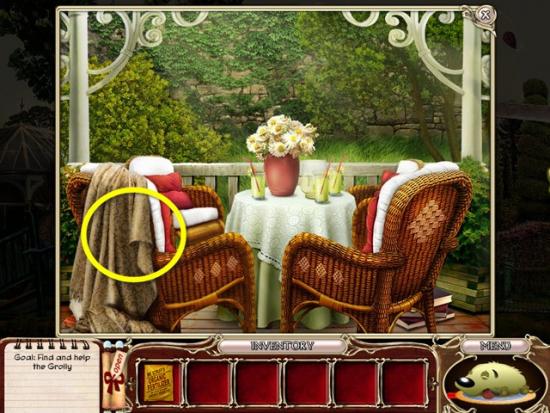
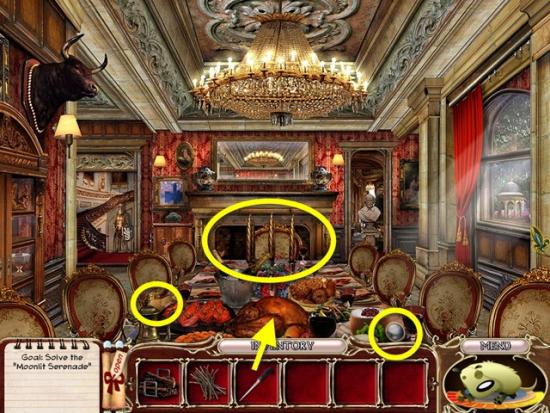
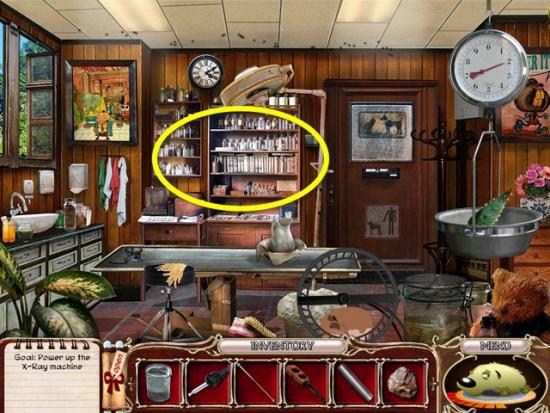
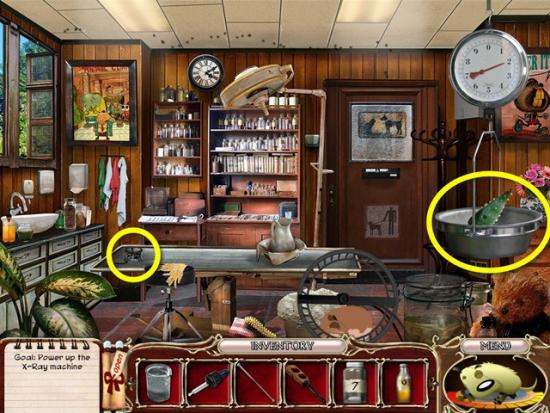
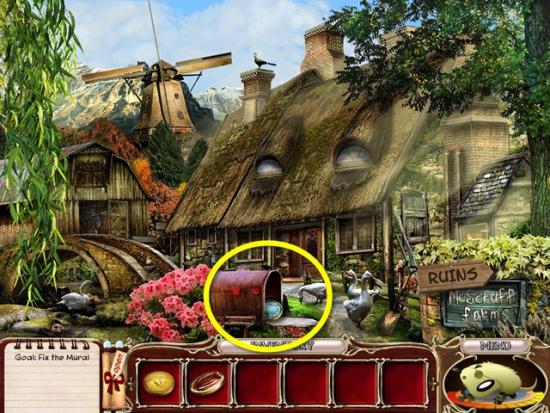
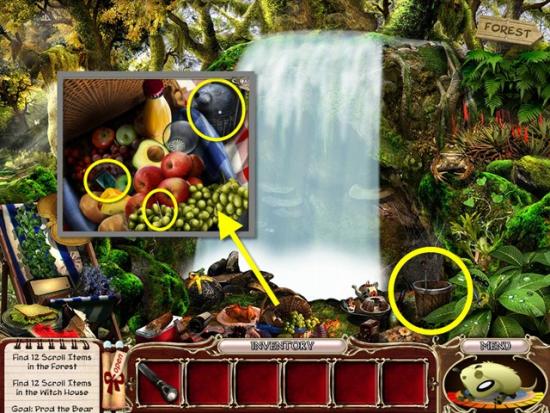
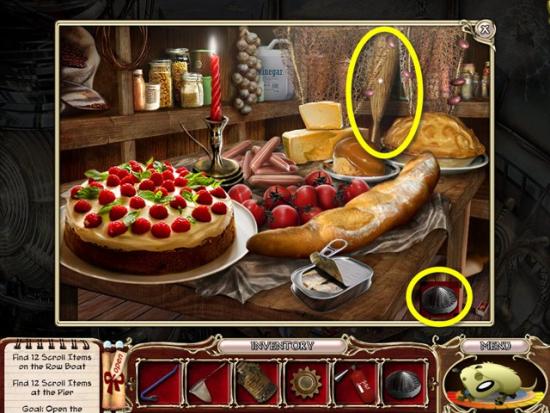
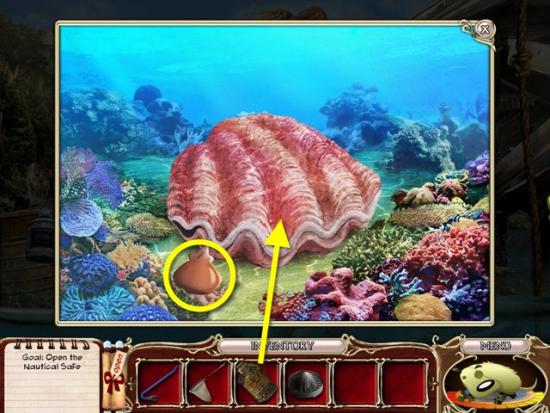
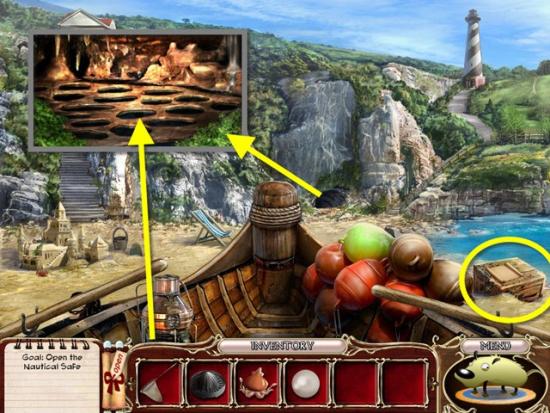
Find all the objects. Click on the fruit on the stand and take the asparagus. Move the weight and take the lime. Click anywhere outside the window to close it.
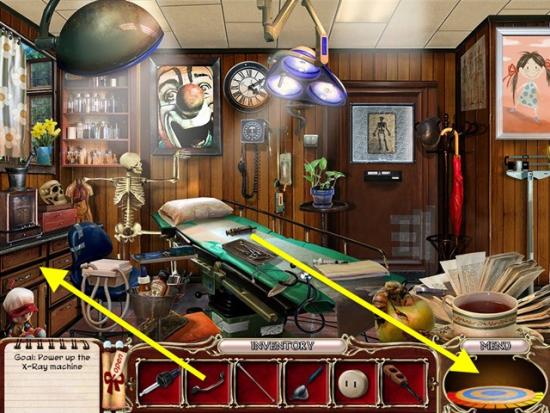
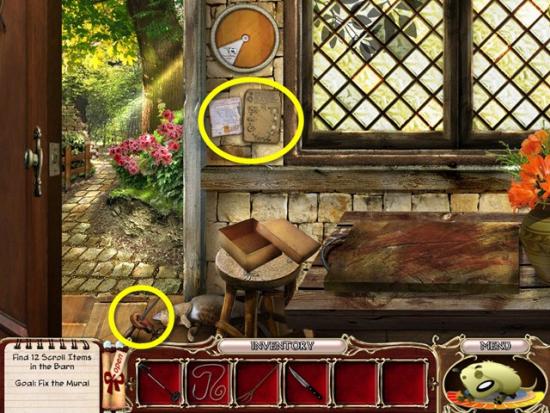
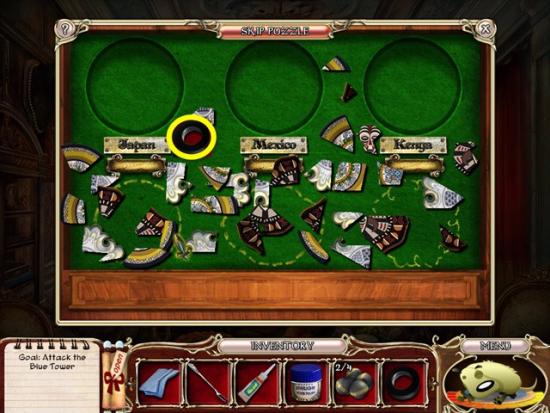
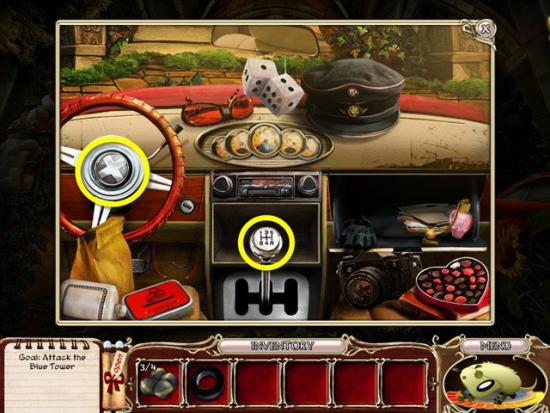
Click on the display in the store (white circle in screenshot above). Move the small sign and take the corkscrew. Click anywhere outside the window to close it.
Click on the sign for the park.
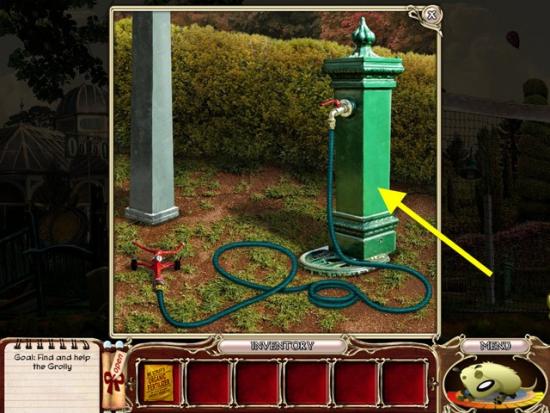
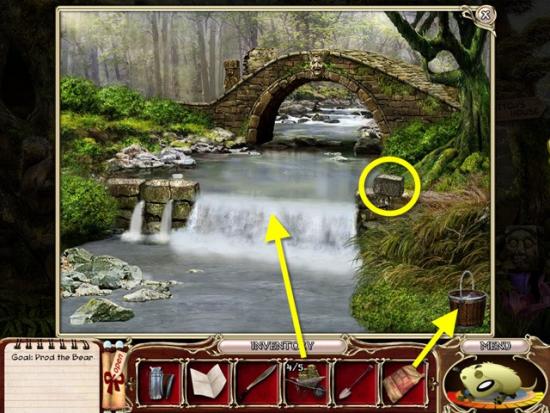
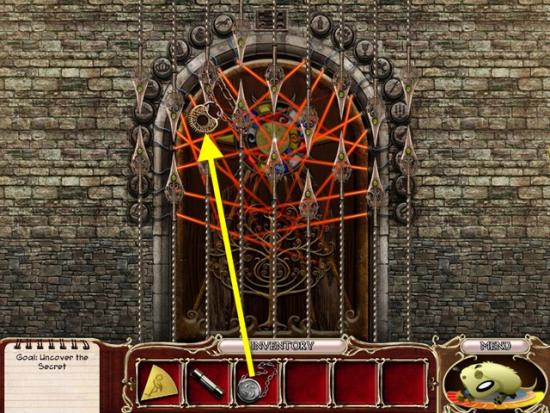
Click on the fountain.
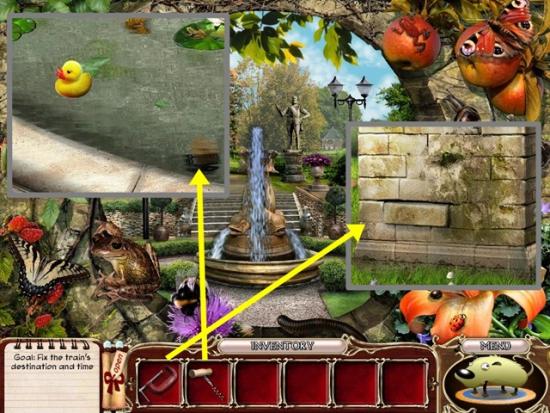
Use the corkscrew on the cork in the fountain. Take the coin. Click anywhere outside the window to close it.
Click on the statue. Add the clamp to the loose brick, then pull out the brick. Take the coin.
Click on the station sign.

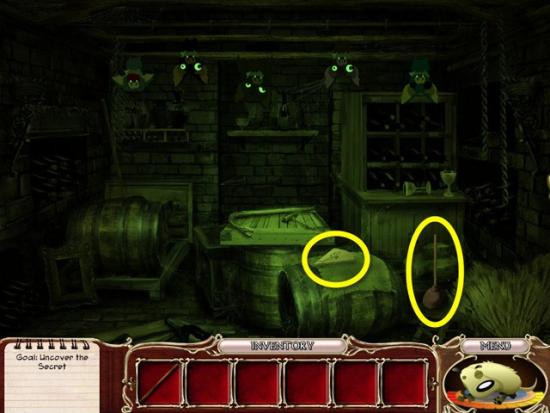
Take the two letter rolls.
Click on the newspaper box. Add the two coins and take the train timetable. Click anywhere outside the window to close it.
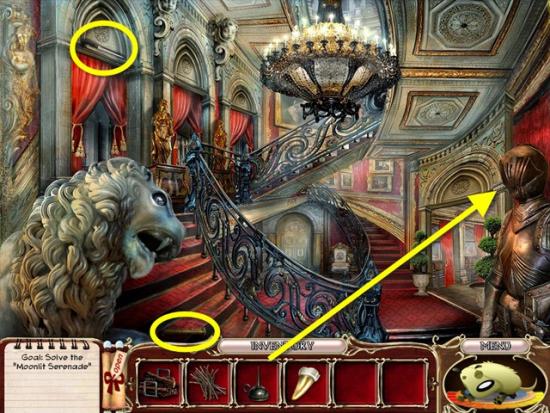
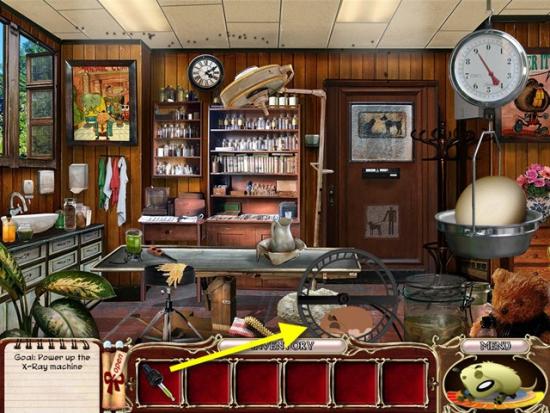
From your inventory, click on the train timetable and take note of the circled time (13:20 out of Scrufford).
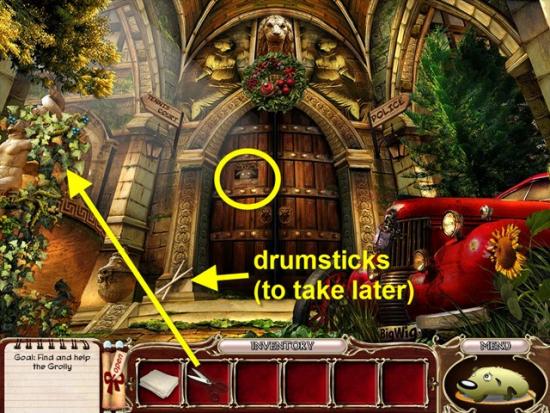
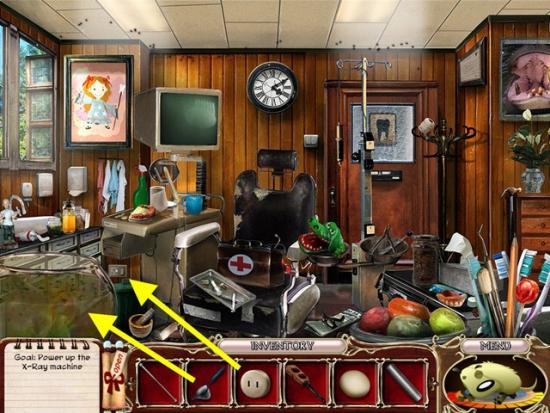
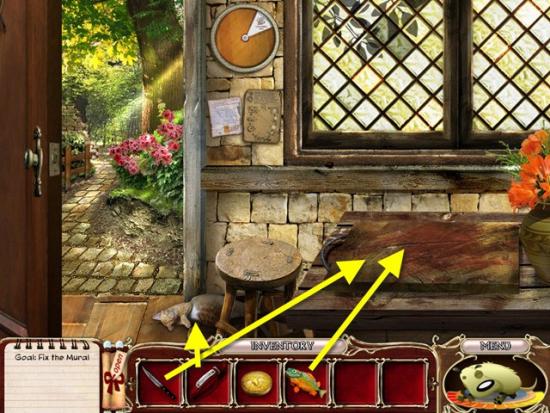
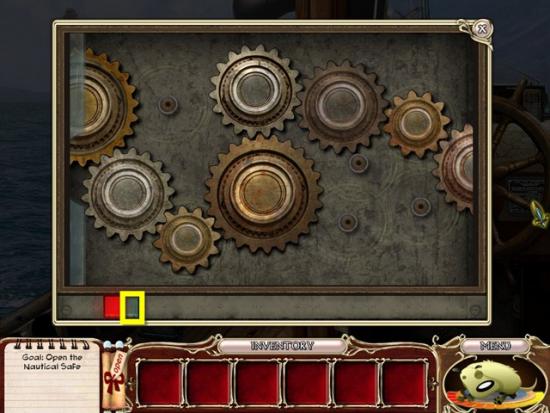
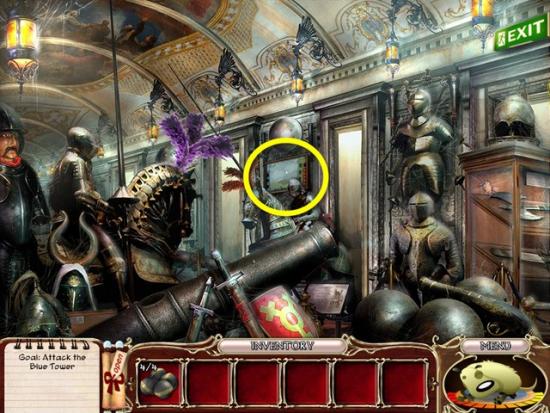
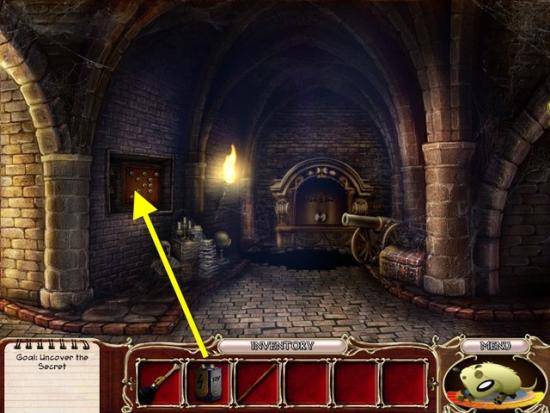
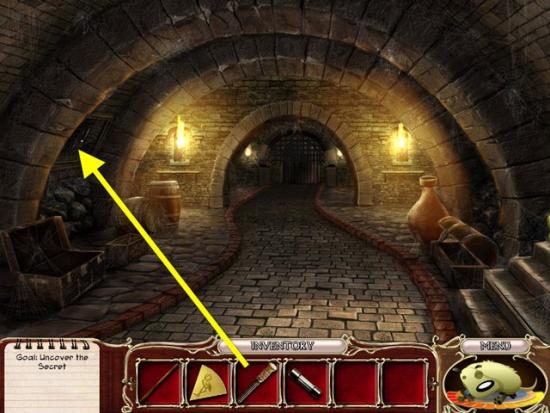
Click on the ticket office sign (yellow rectangle in the screenshot above).
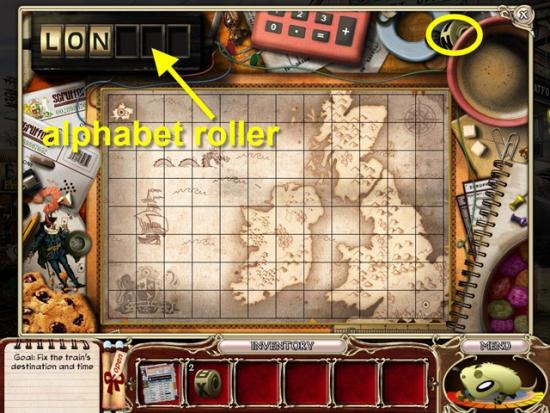
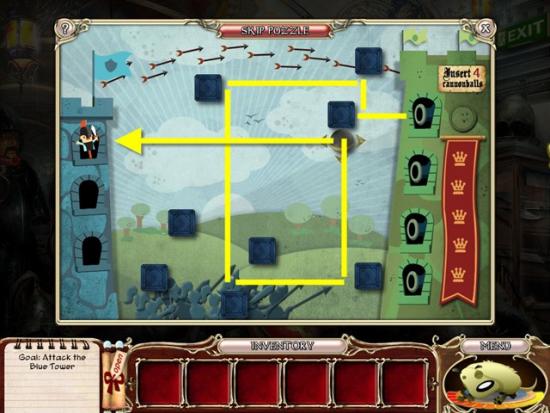
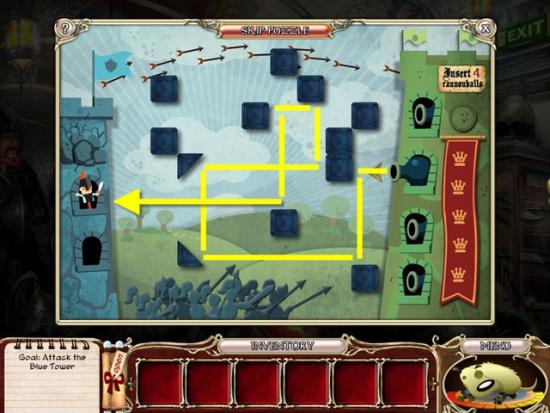
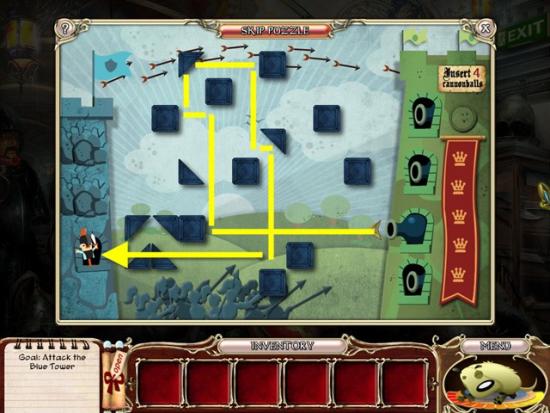
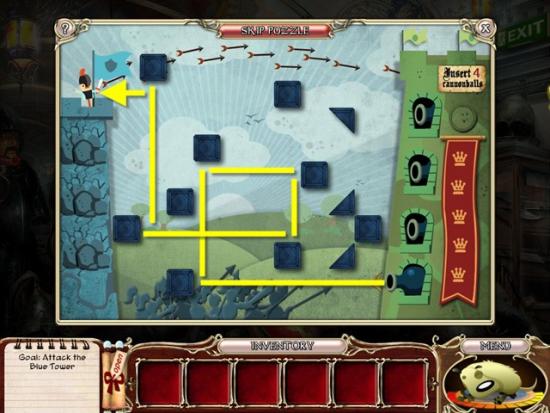
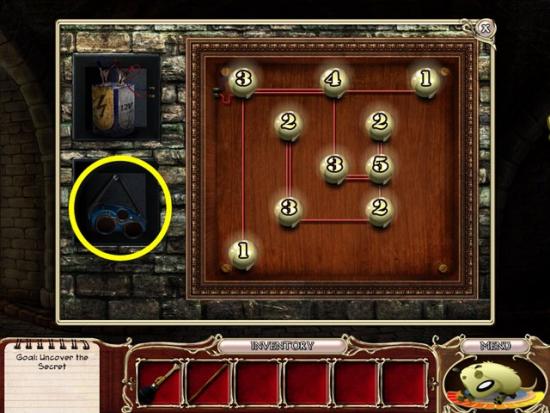
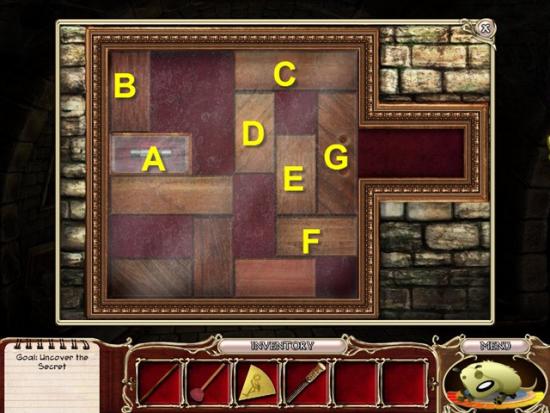
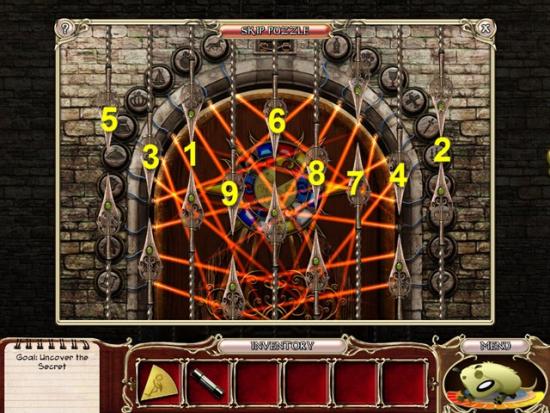
Take the third letter roll. Add the three letter rolls to the alphabet roller. A mini-puzzle starts. Rearrange all the train tracks to create a continuous circuit. Click on a track to rotate it clockwise.
Solution:
Click on the clock. You are missing items. Click anywhere outside the window to close it.
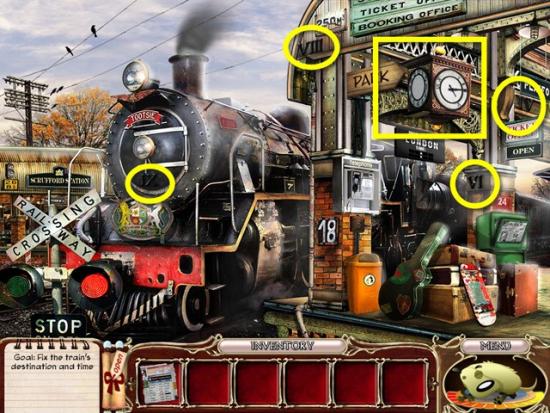
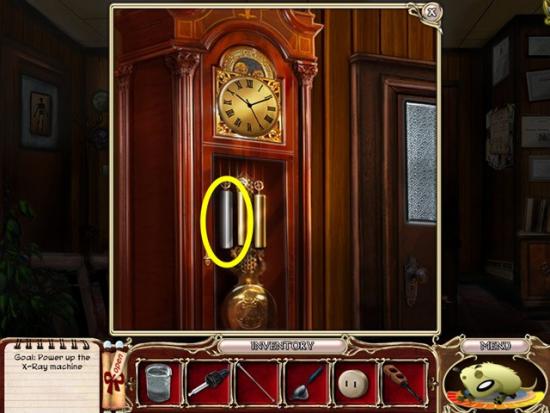
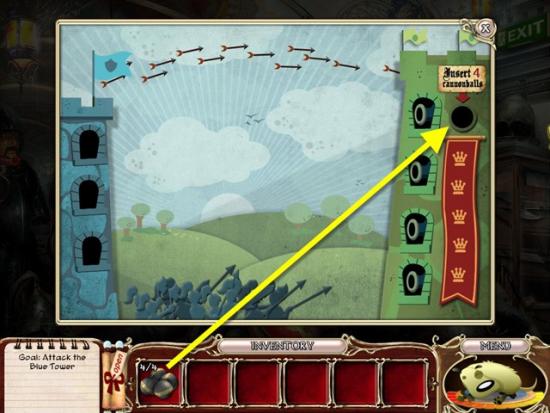
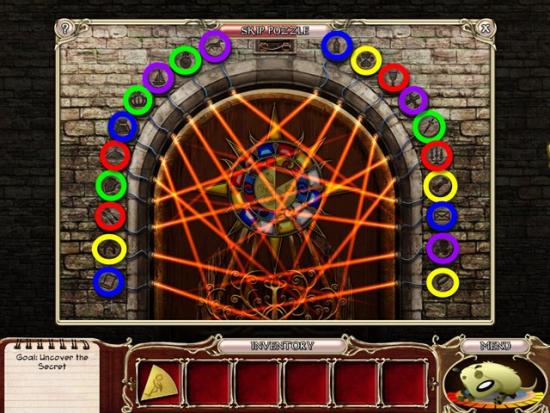
Take the four roman numerals. Click on the clock (yellow square).
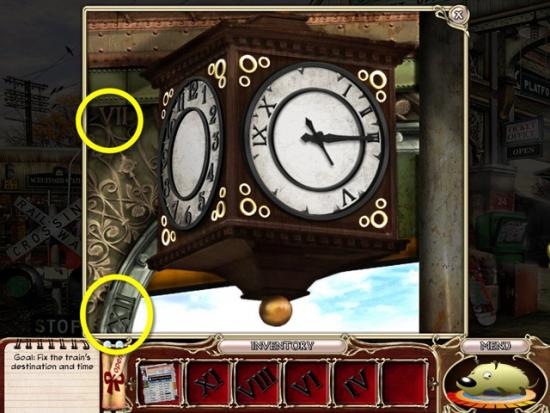
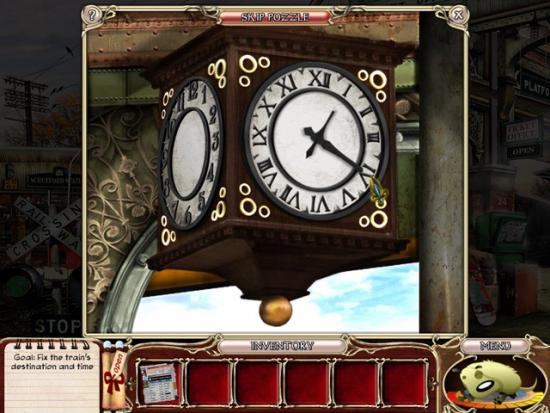
Take the two roman numerals. Add the six roman numerals to the clock. Set the time to the circled departure time on the train timetable (13:20).
Solution:


The end!
