![Hololive Dreams Tier List [Best Cards]](/wp-content/uploads/2026/07/hololive-dreams-tier-list.jpg "Hololive Dreams Tier List [Best Cards]")
Hololive Dreams Tier List [Best Cards]
The best cards for the best performances.


![Iron Soul Dungeon Weapon Tier List [Best Weapons]](/wp-content/uploads/2026/07/iron-soul-dungeon-weapon-tier-list.jpg "Iron Soul Dungeon Weapon Tier List [Best Weapons]")

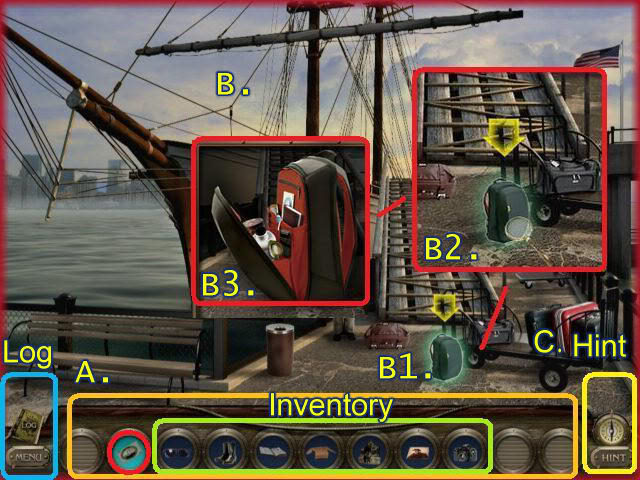
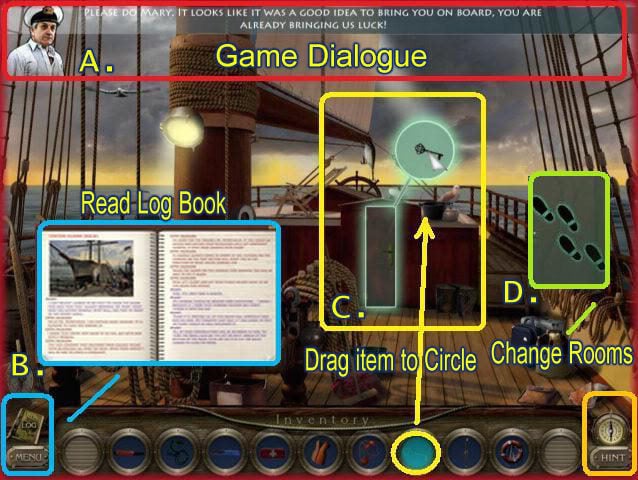
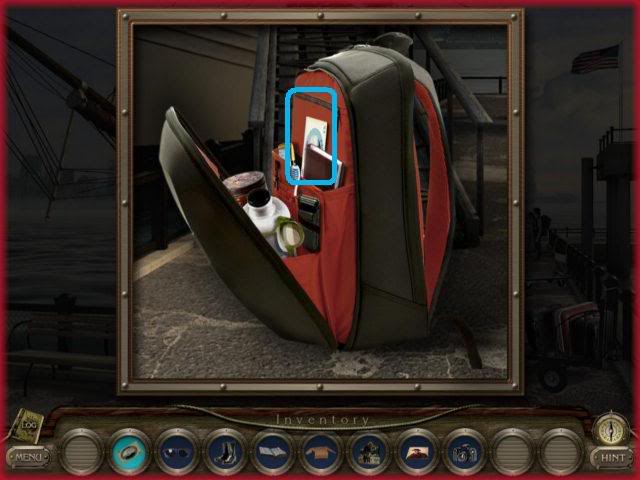
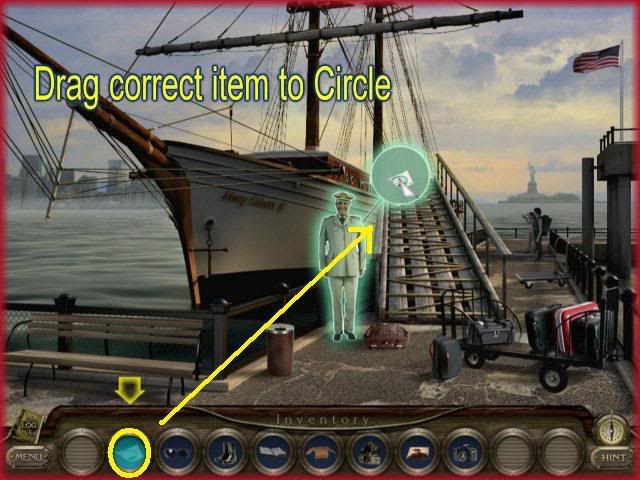
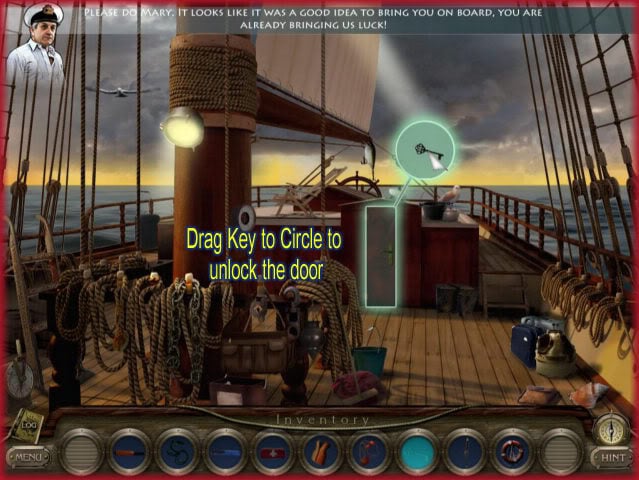
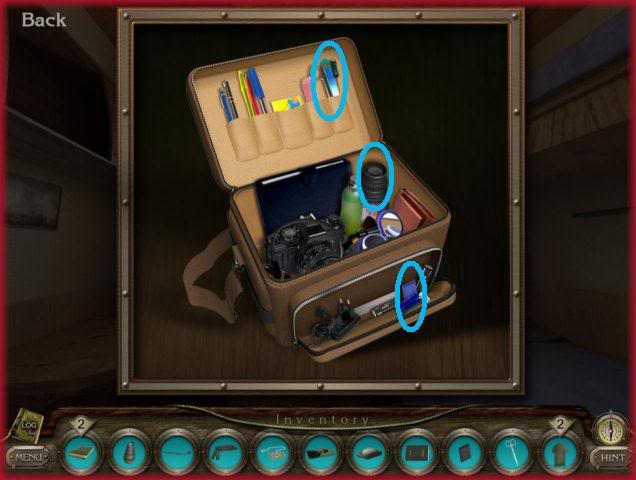
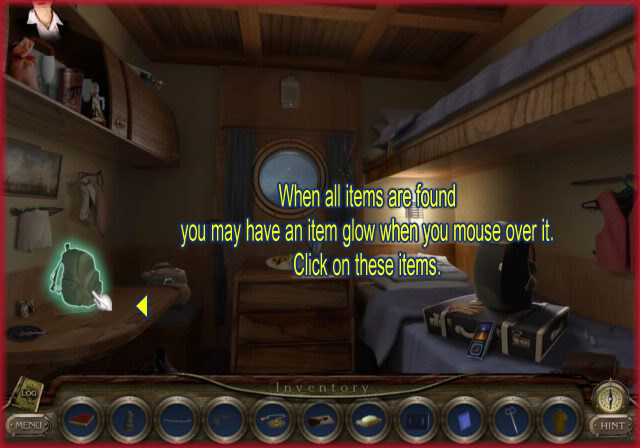
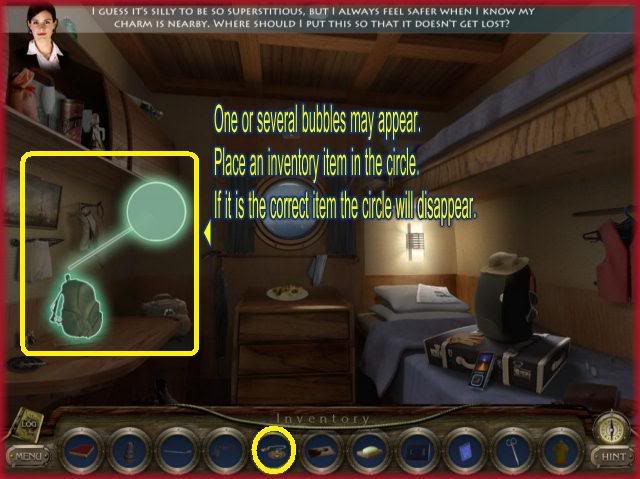
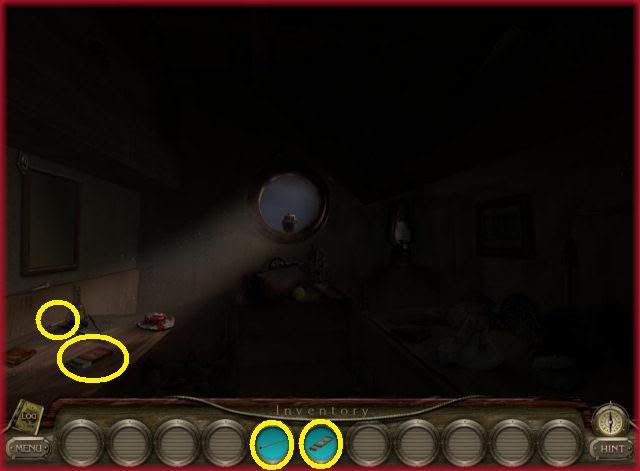
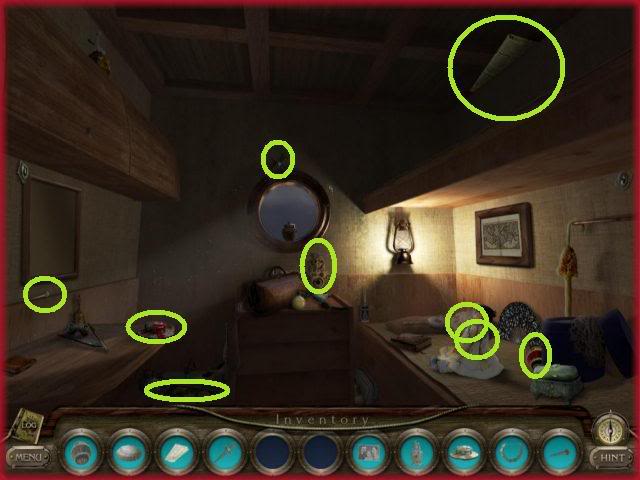
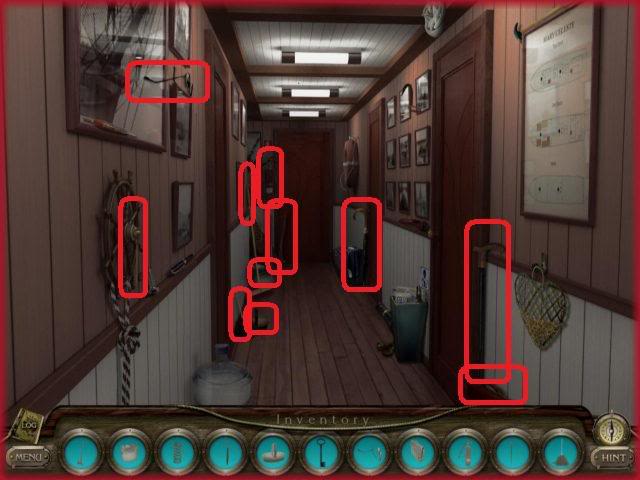
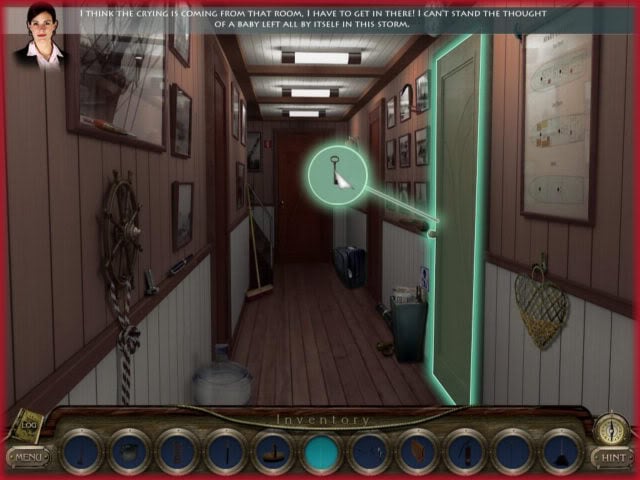
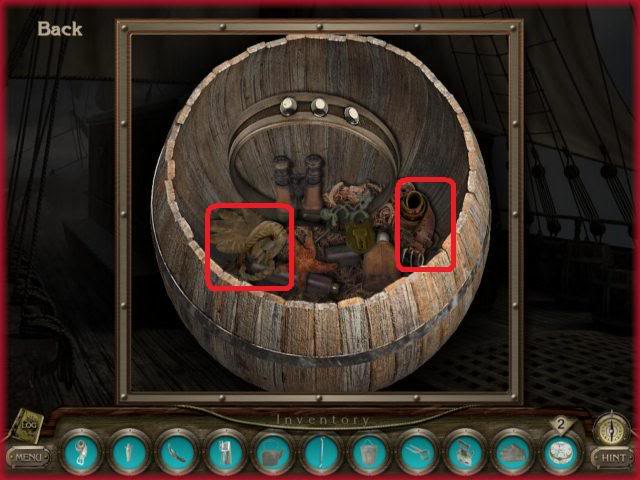
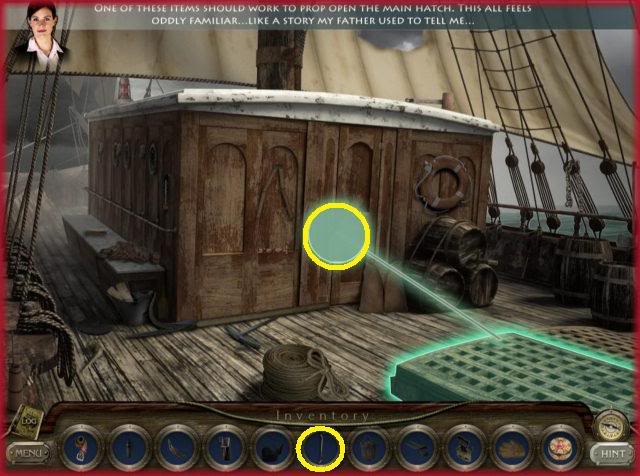
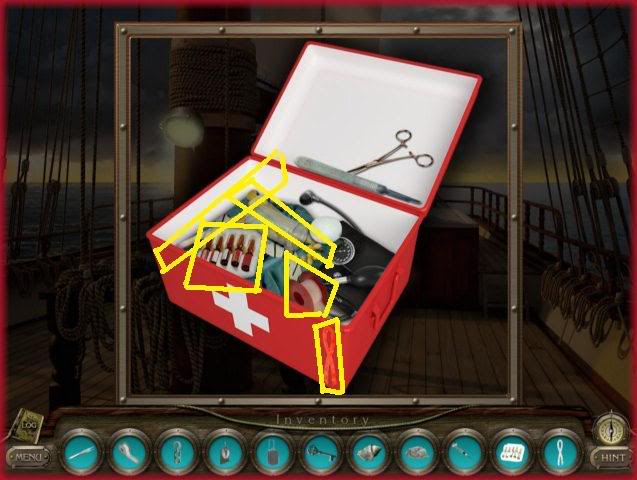
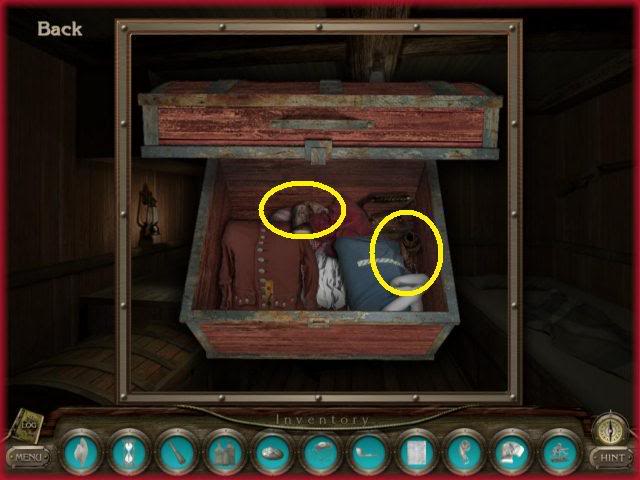
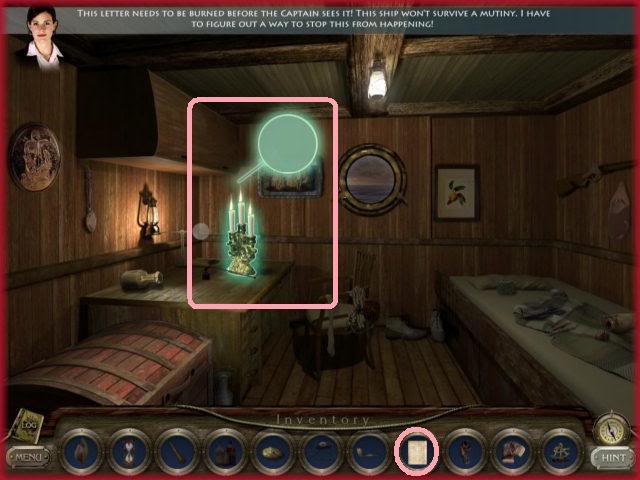
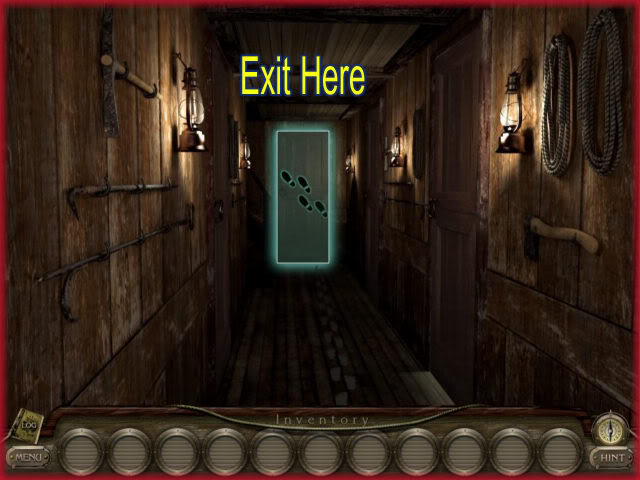
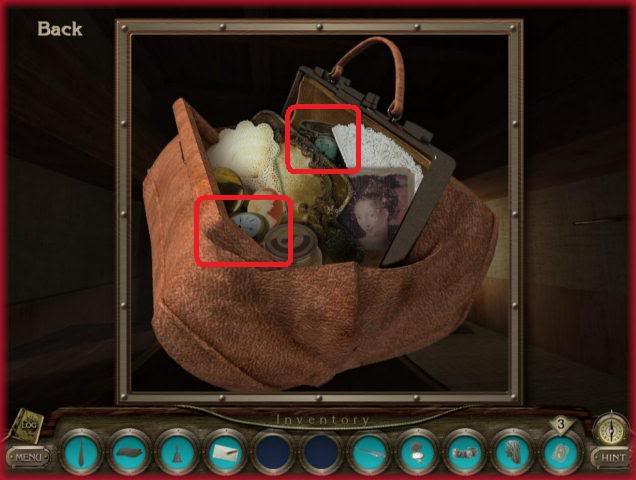
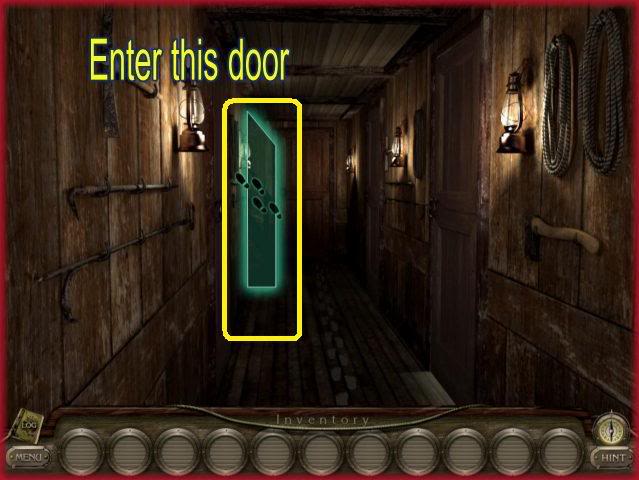
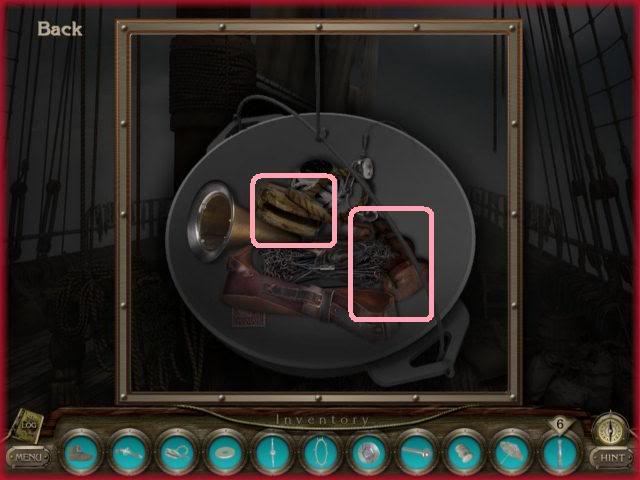
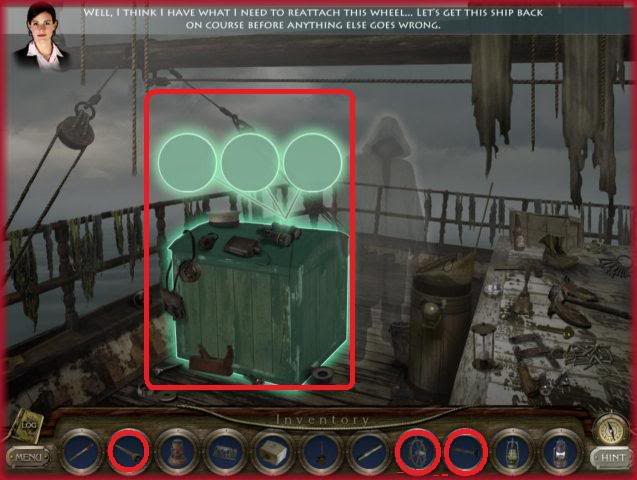
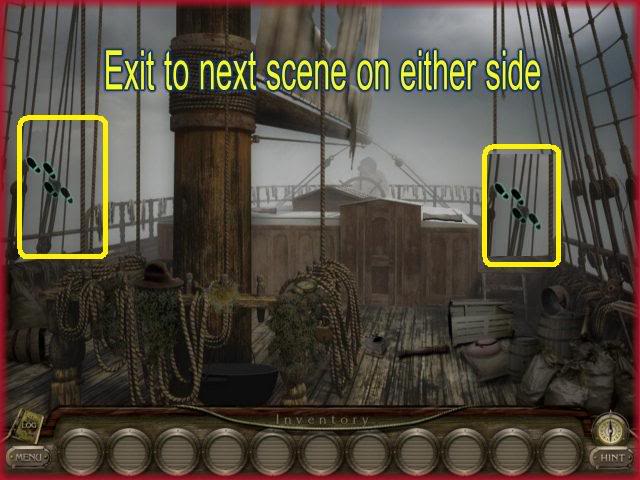
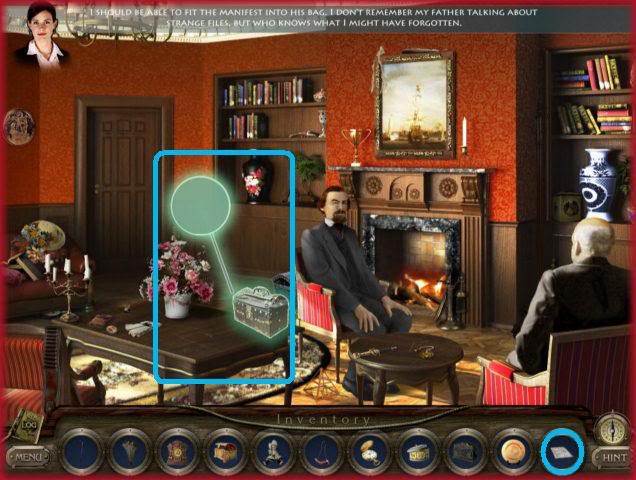
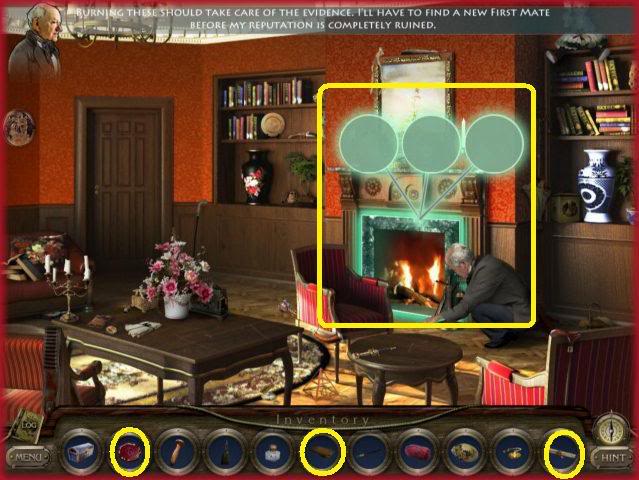
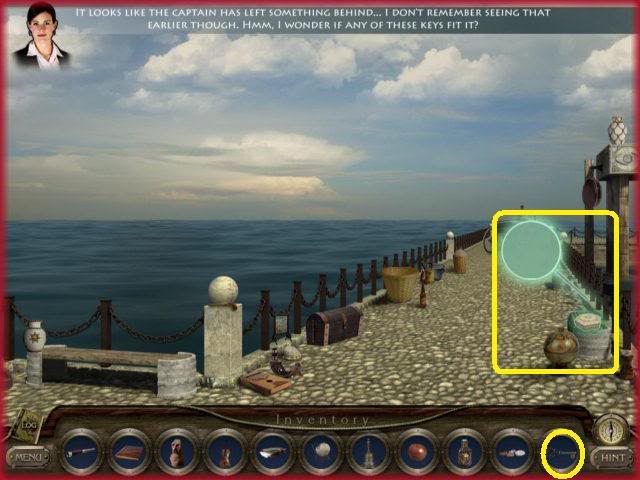
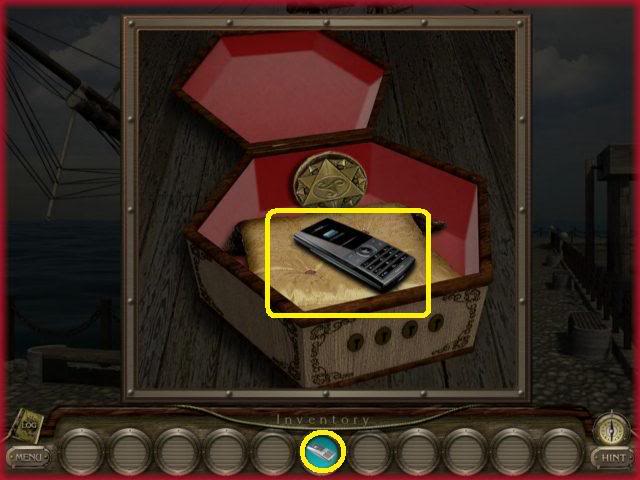
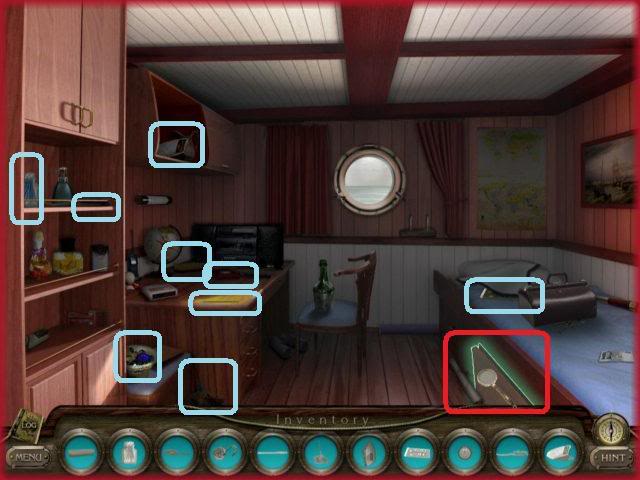
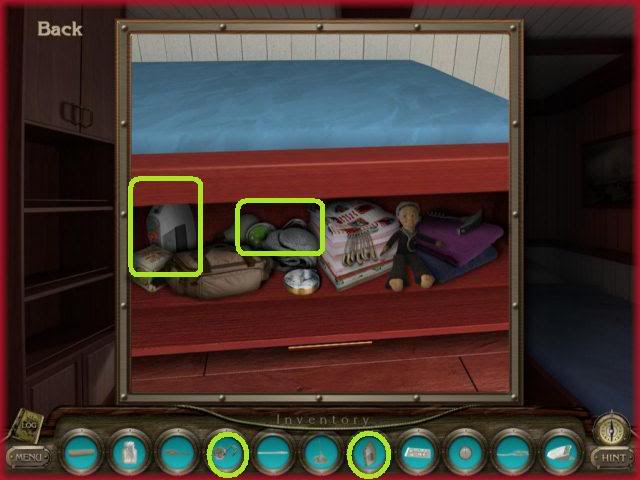
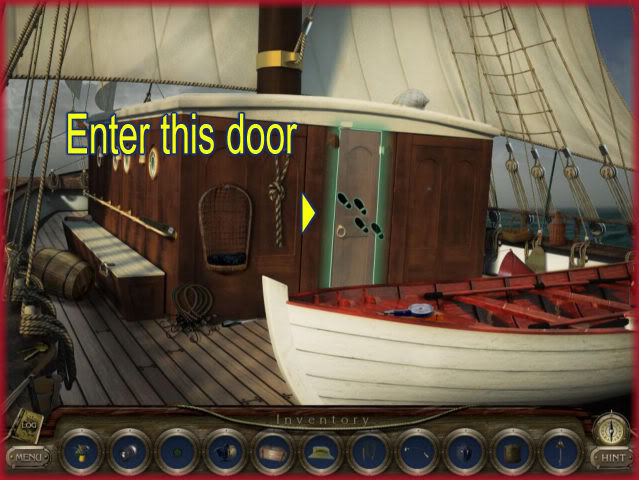
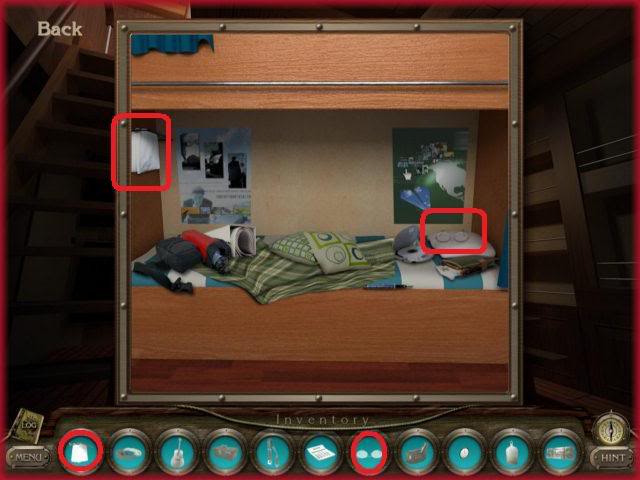
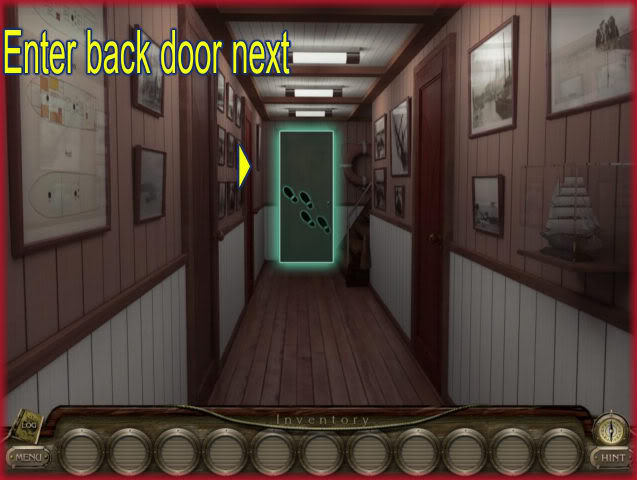
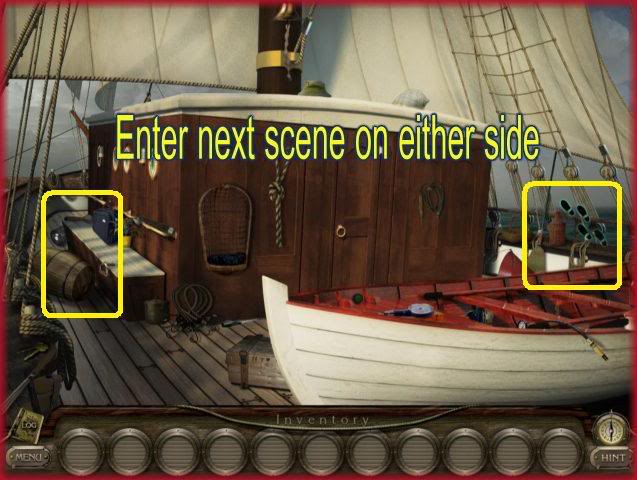
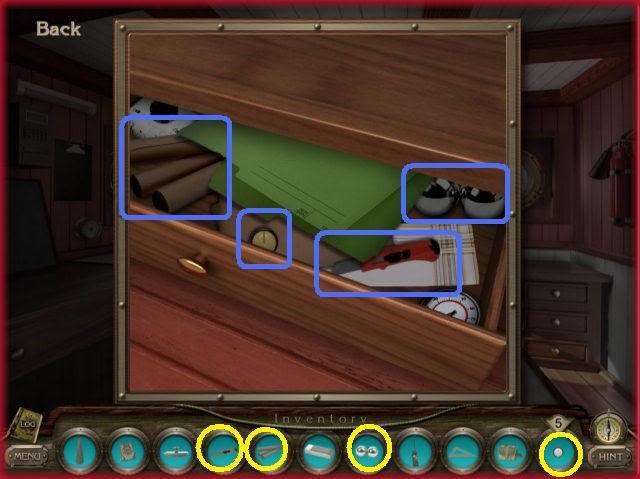
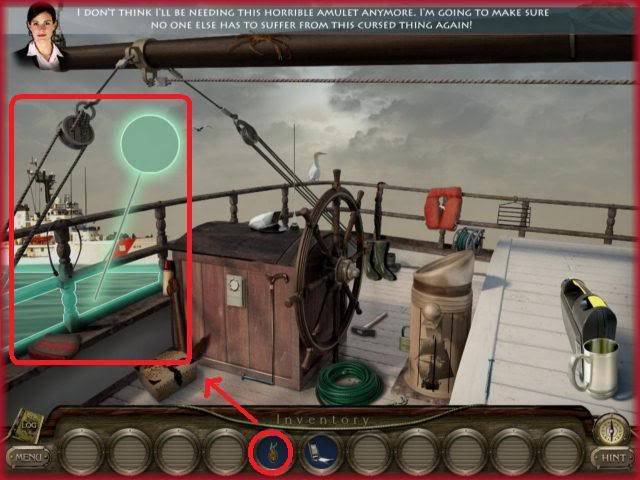
Welcome to Gamezebo's walkthrough for The Mystery of the Mary Celeste.GAME DETAILSThe game has 8 chapters and 7 mini games. The game has only one mode which is a non-timed mode so you can play at a leisurely pace. There are no points awarded in the game and no final score. It is played for story completion only. All items in this game are hidden in the same area every time you play the game.There are no penalties for random clicks. The hidden objects are shown at the bottom of the screen an…
a:1:i:0;a:2:s:13:”section_title”;s:43:”The Mystery of the Mary Celeste Walkthrough”;s:12:”section_body”;s:82397:”Welcome to Gamezebo’s walkthrough for The Mystery of the Mary Celeste.

GAME DETAILS
GENERAL TIPS
GAME ELEMENTS
WALKTHROUGH
Game Prologue
Staten Island "The Docks"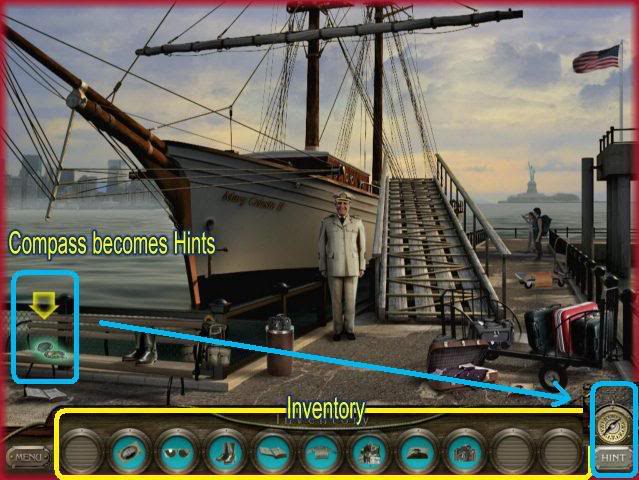

Chapter 1
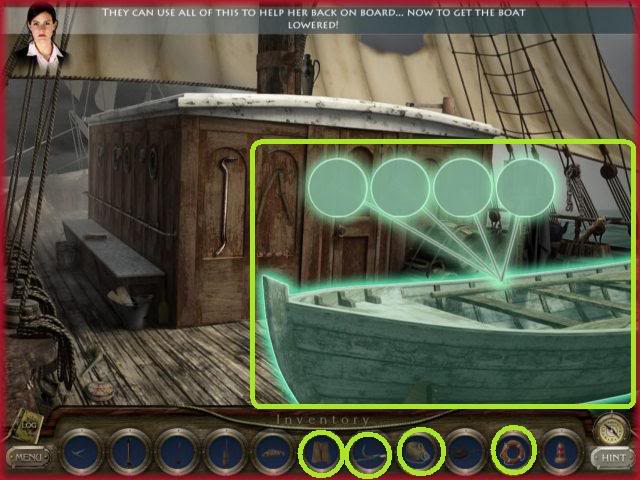
Boat Deck


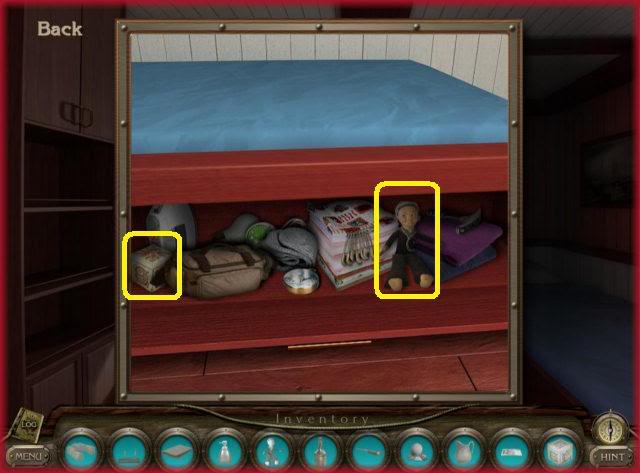
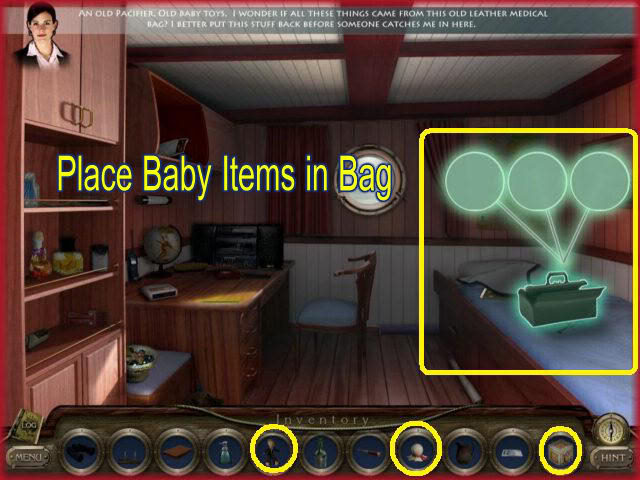
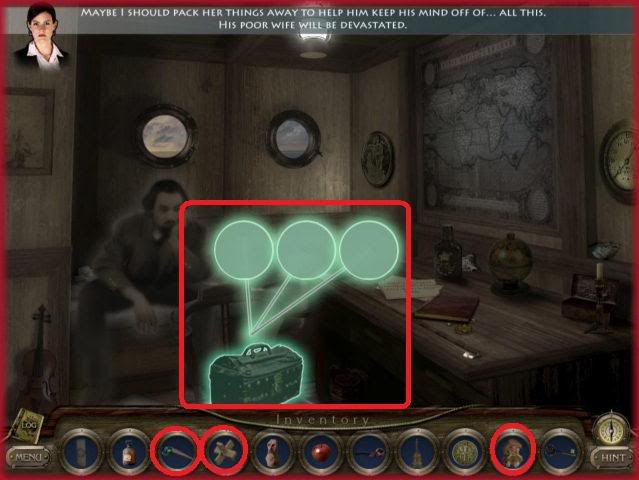
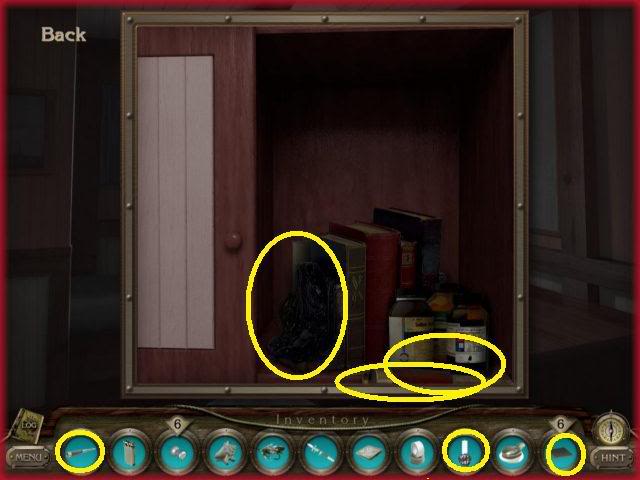
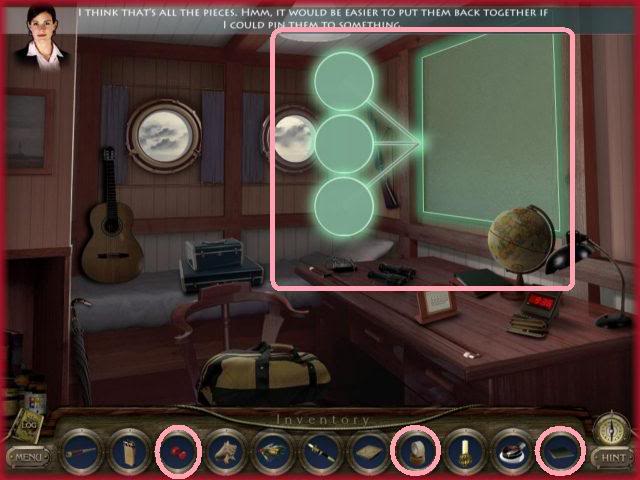
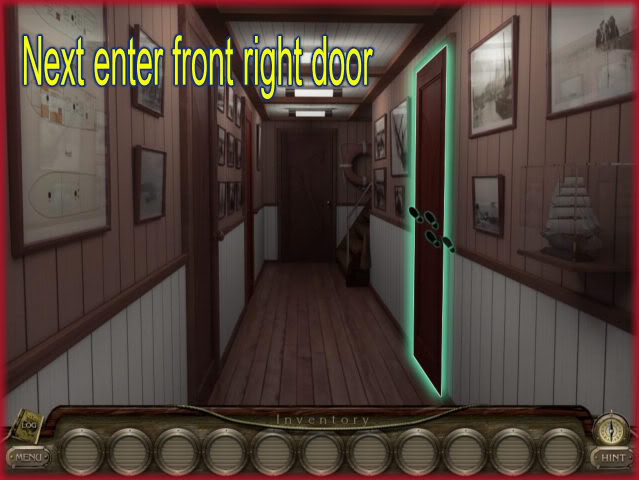
Mary’s Room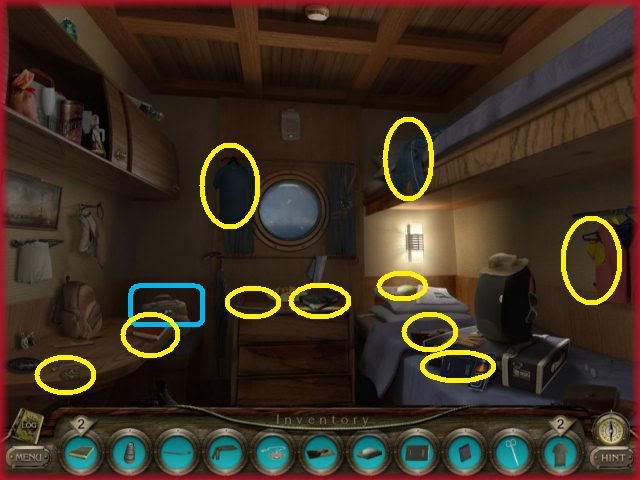

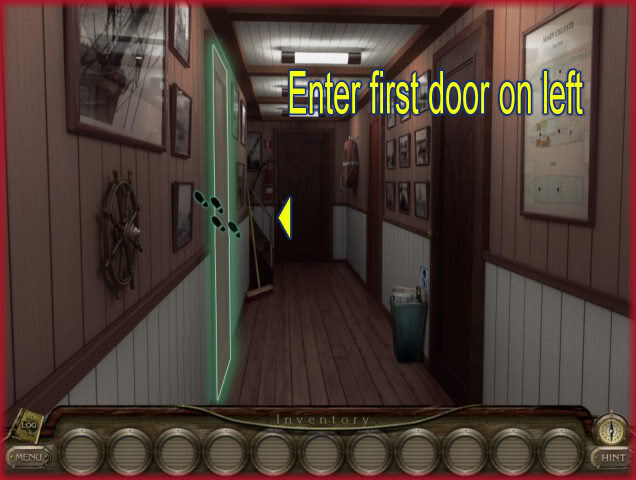
First Mate’s Quarters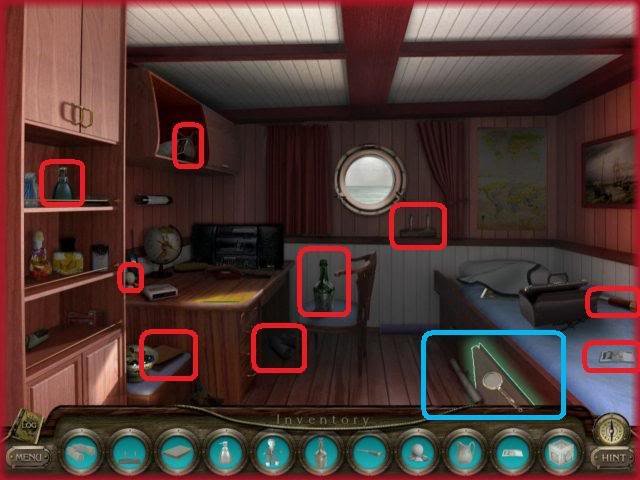
Chapter 2
Front Deck of Mary Celeste II
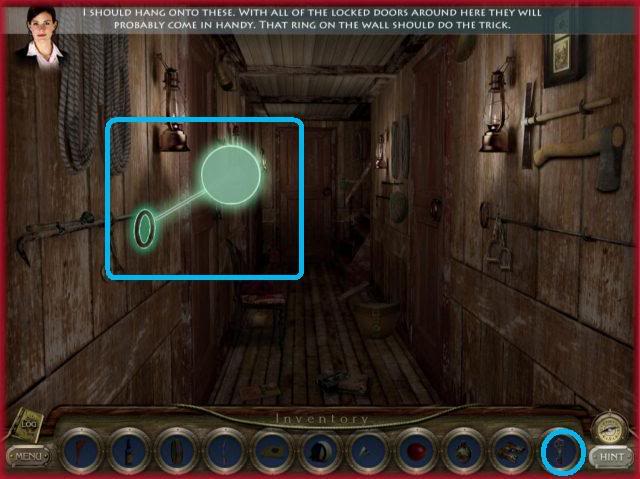
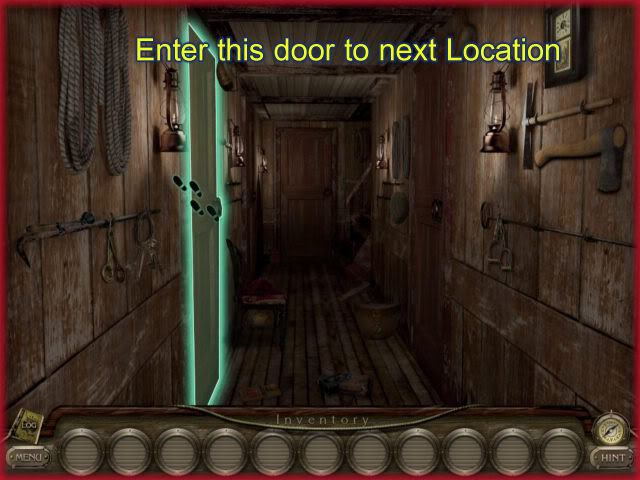
Front Hall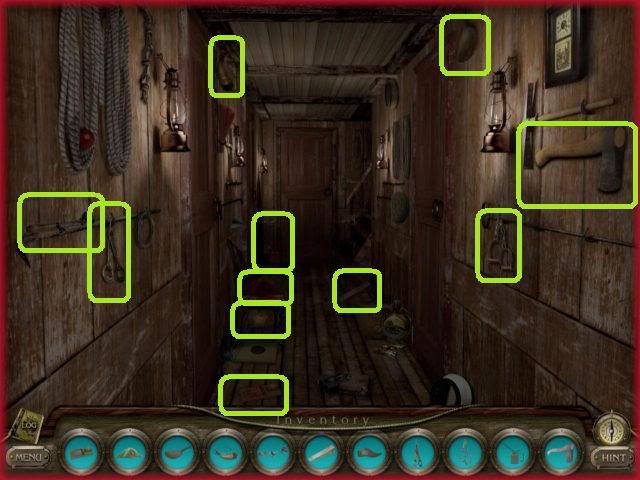
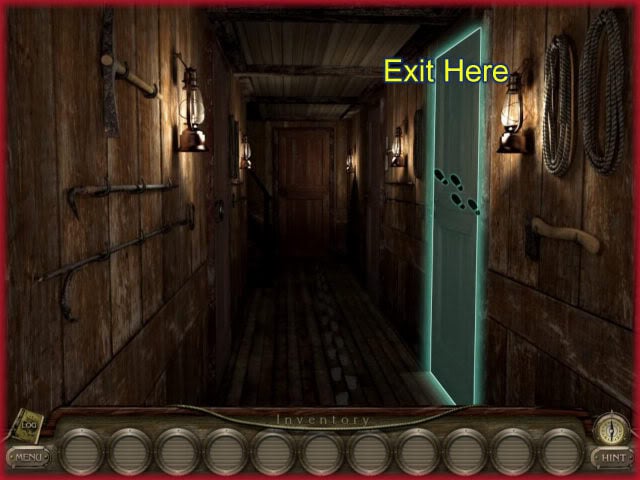
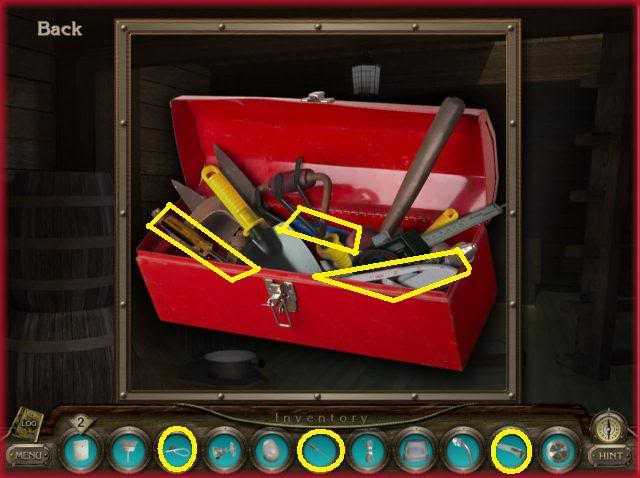
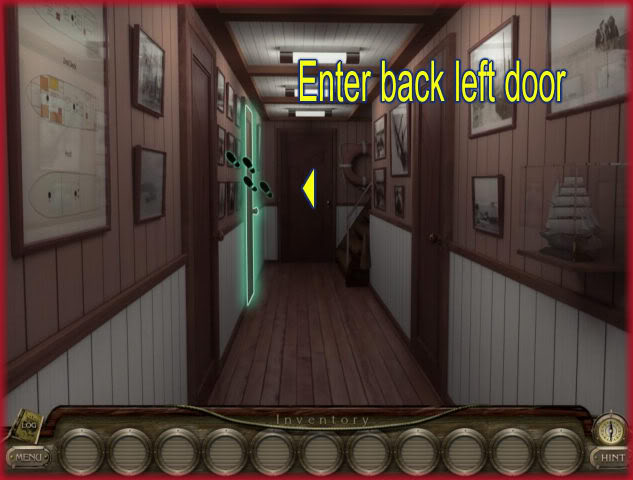
Storage Hold
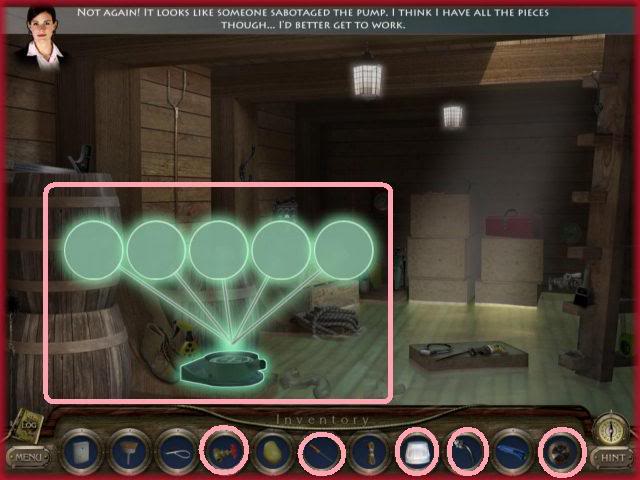
Mini Game 1 – Pipe Assembly
Chapter 3
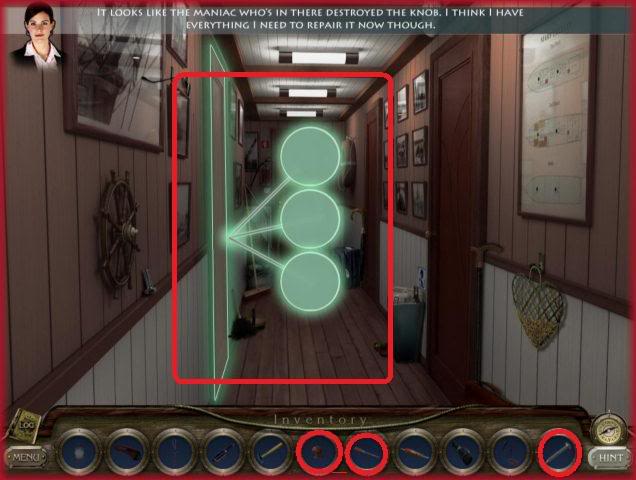
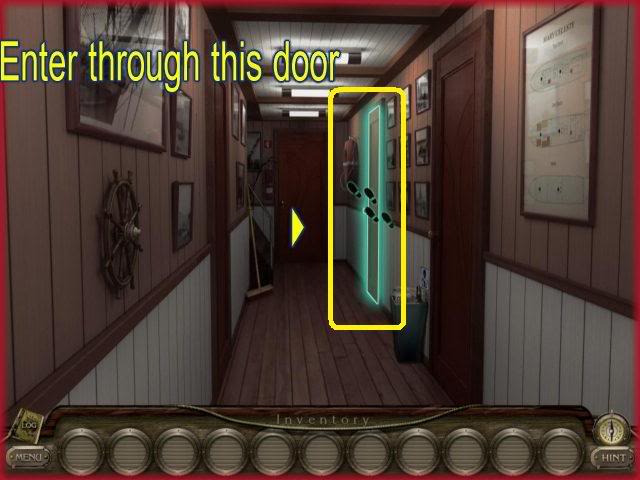
Front Hallway

Front Deck

Mini Game 2 – Pulley Puzzle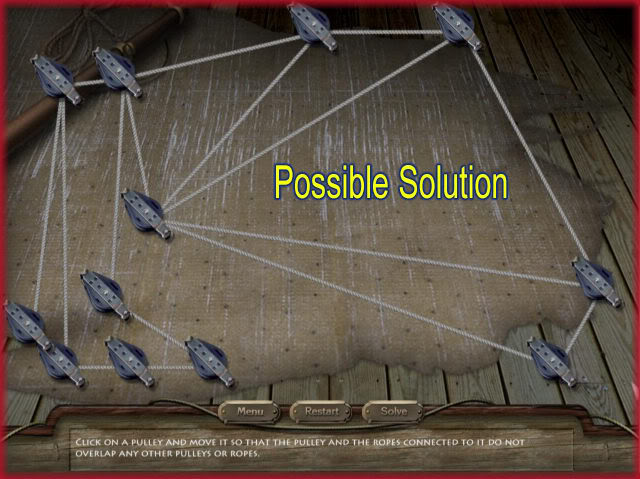
Back Deck of Boat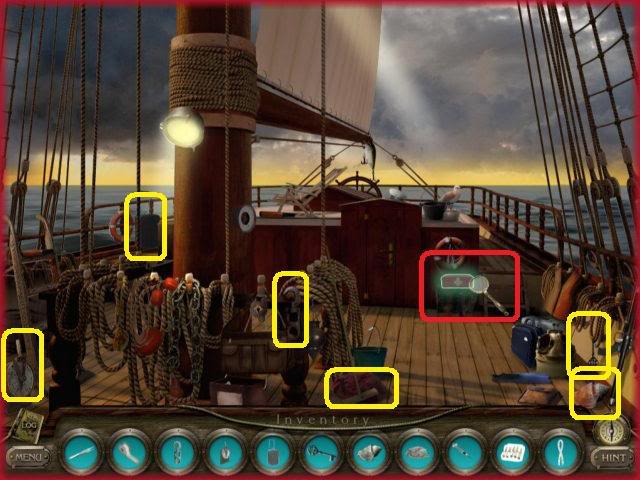

Back Hall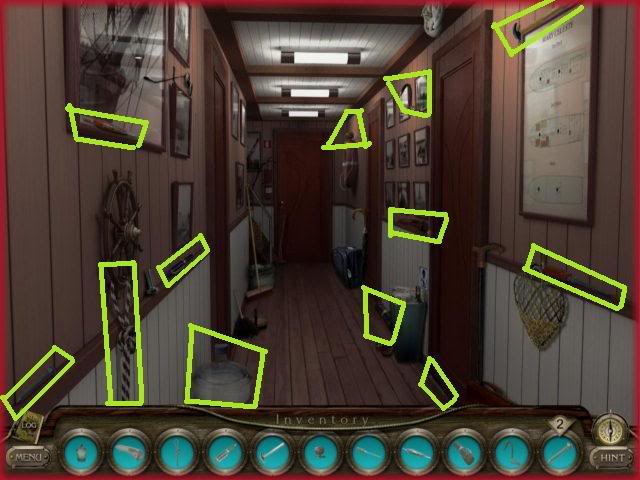
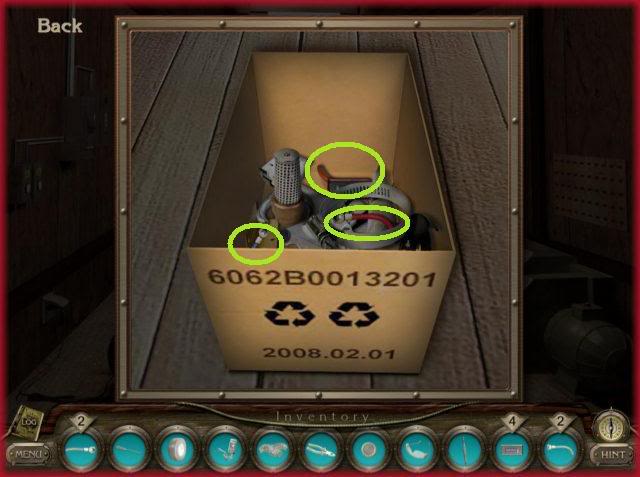
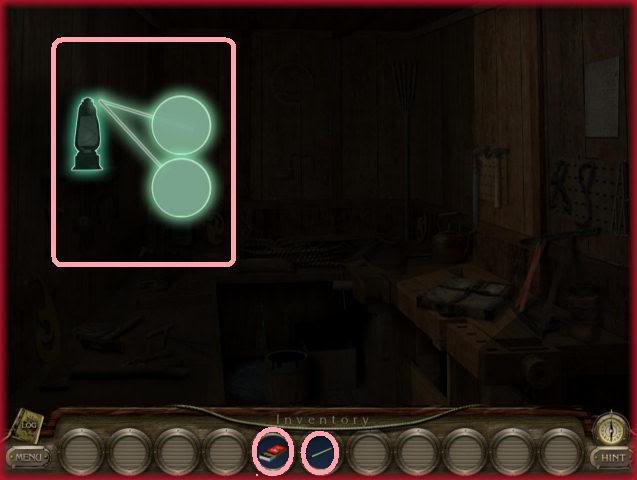
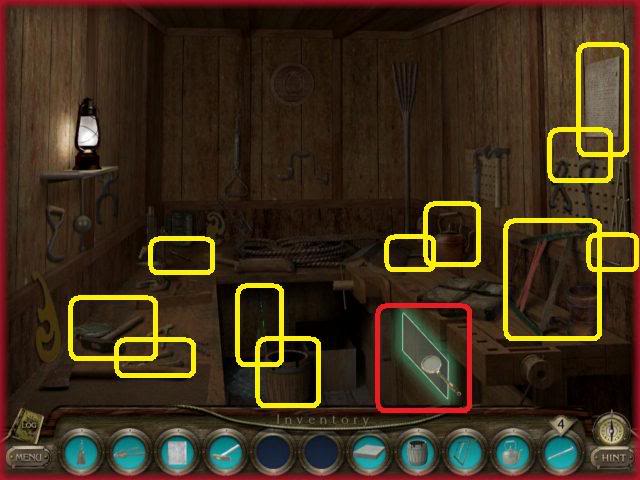
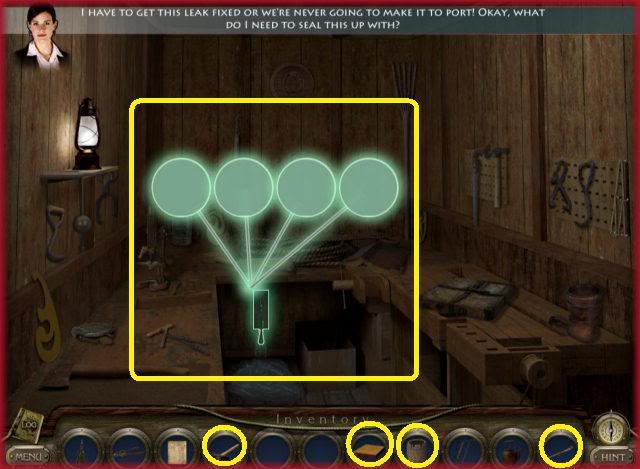
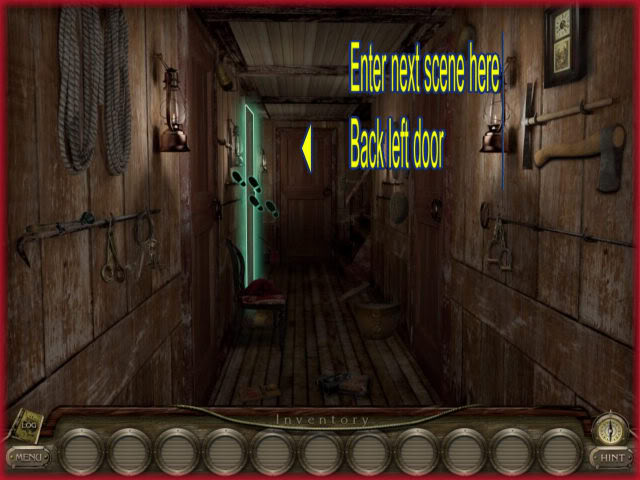
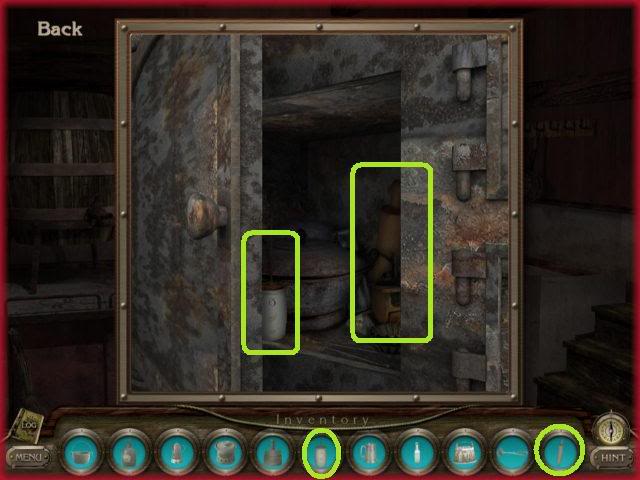
Tool Room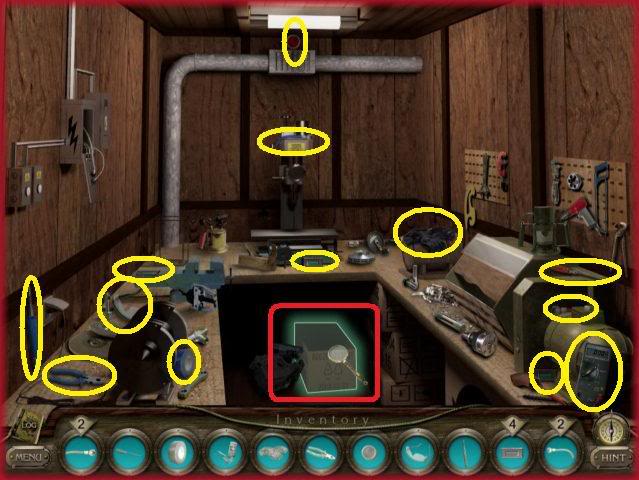
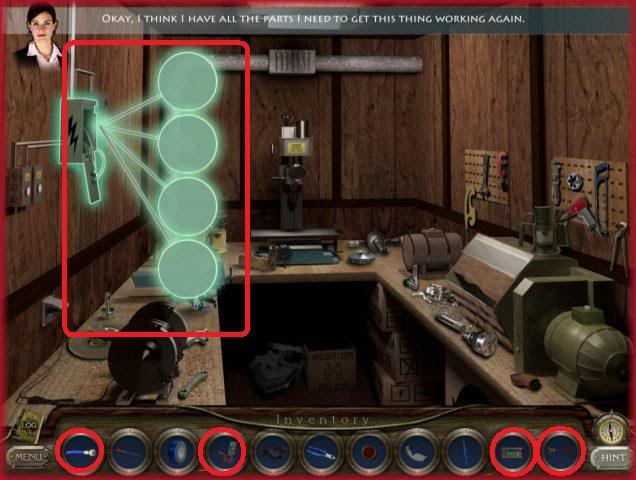
Mini Game 3 – Circuit Puzzle
Chapter 4
Tool Room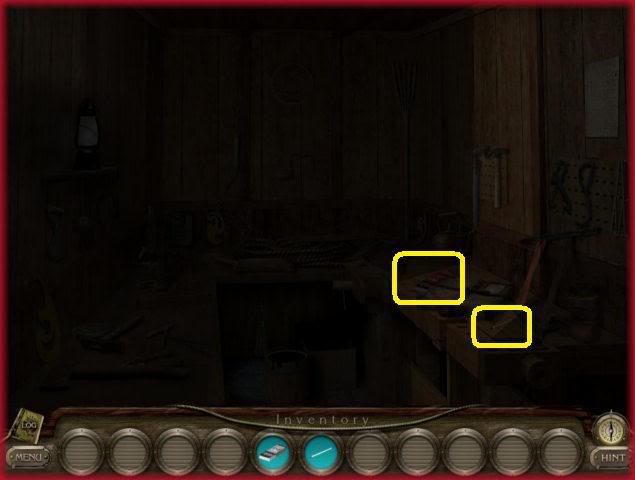
First Mate’s Quarters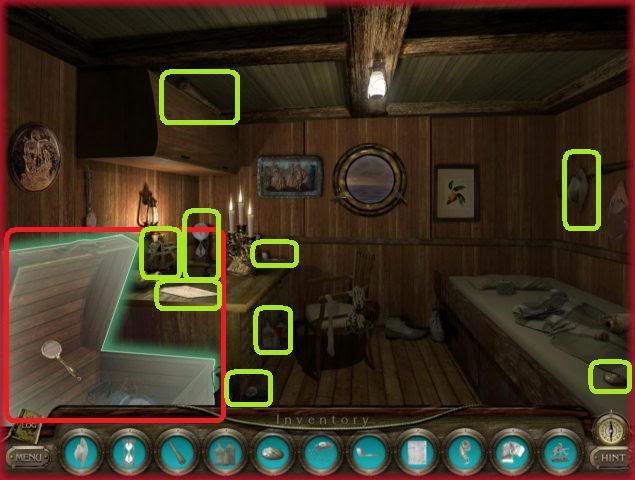
Mary’s Room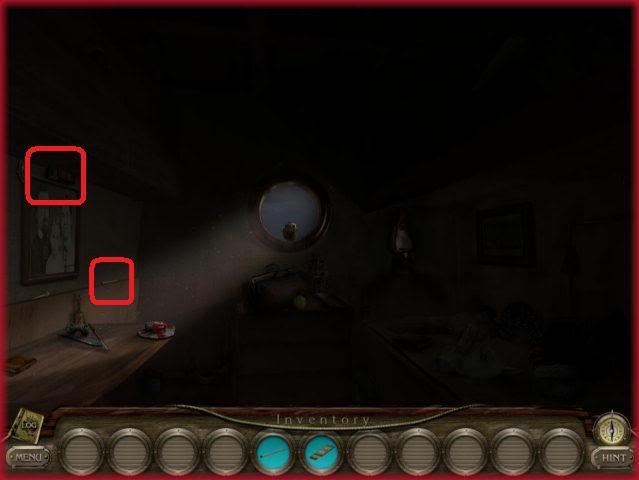

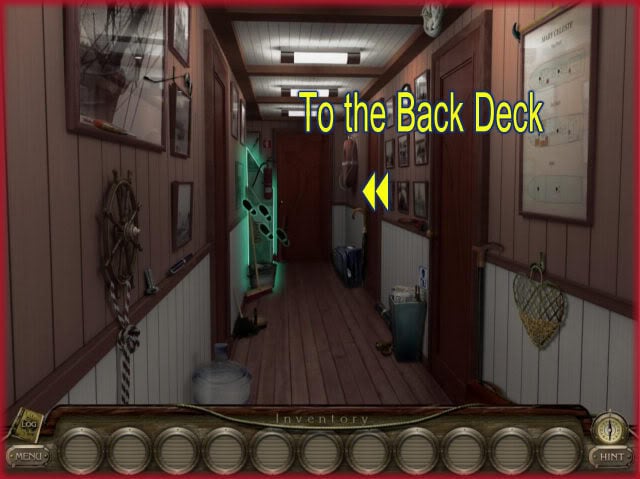
Back Deck of Mary Celeste II
Boat Helm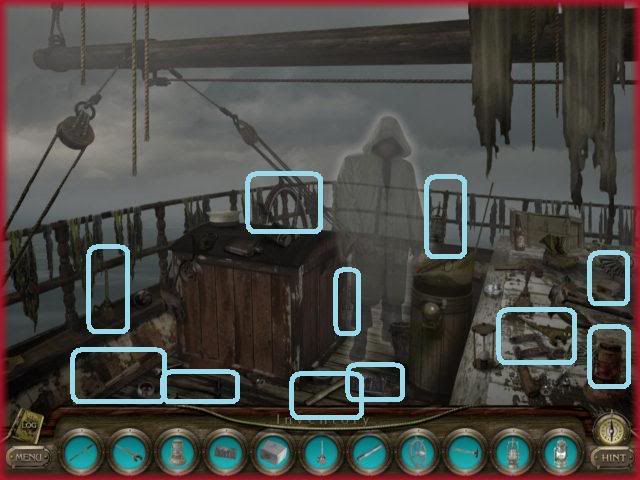
Front Deck of Boat
Mini Game 4 – Pulley Puzzle 2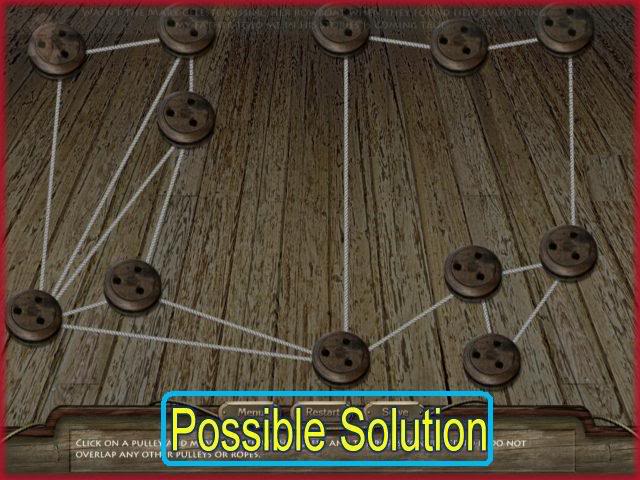
Chapter 5
Morehouse Manor – Study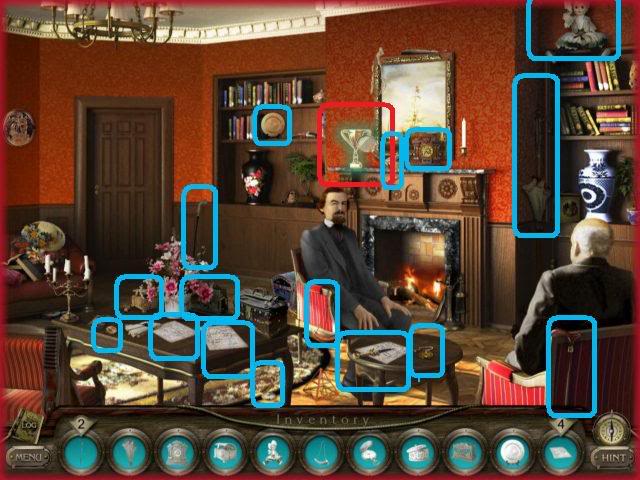
Captain’s Room
Front Hallway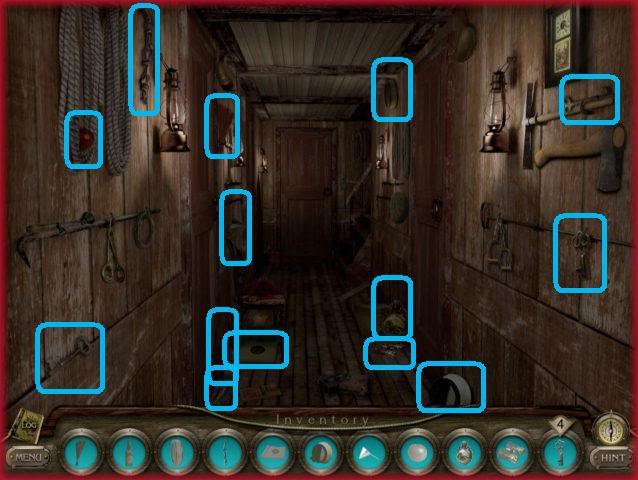
Crew’s Quarters – Den
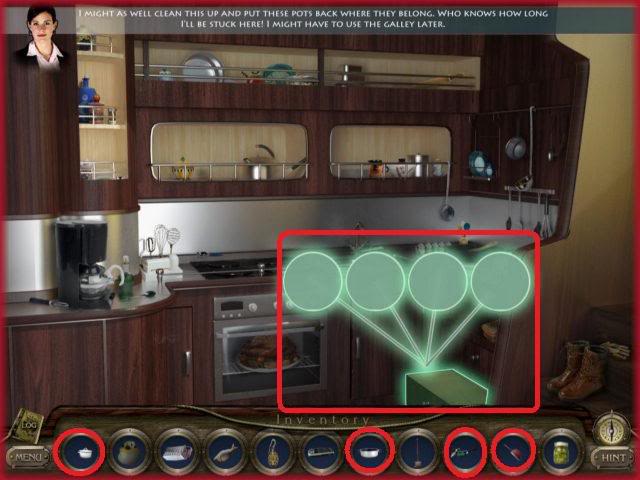
Boat Galley – Kitchen area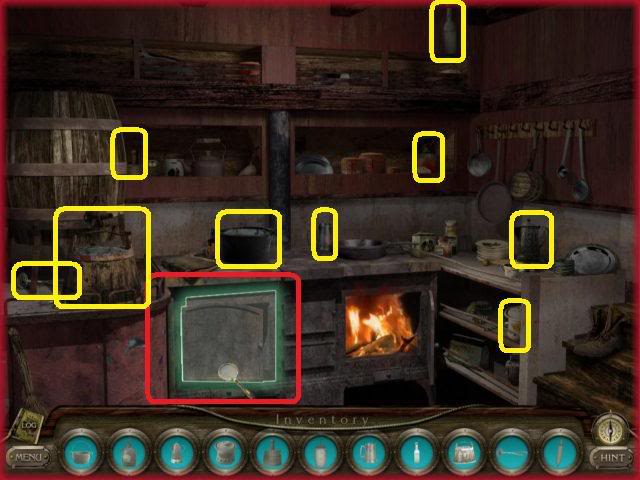
Chapter 6
Captain’s Quarters
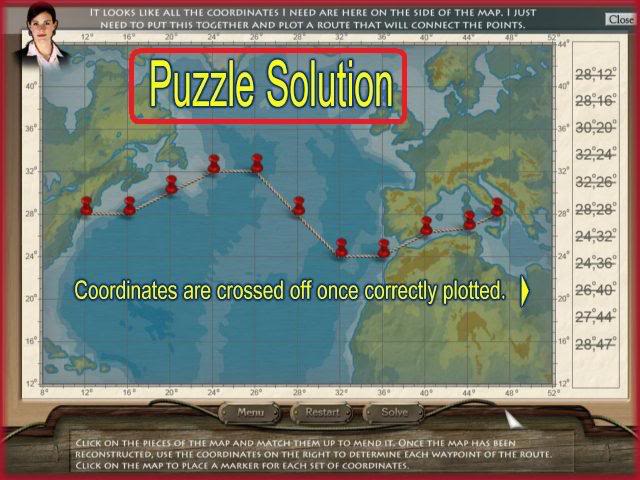
Mini Game 5 – Map Plotting
Storage Area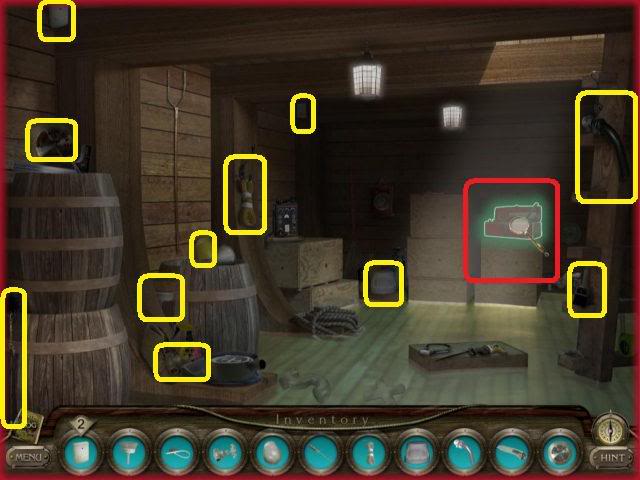
Mini Game 6 – Connect the Pipes
Galley – Kitchen area

Front Deck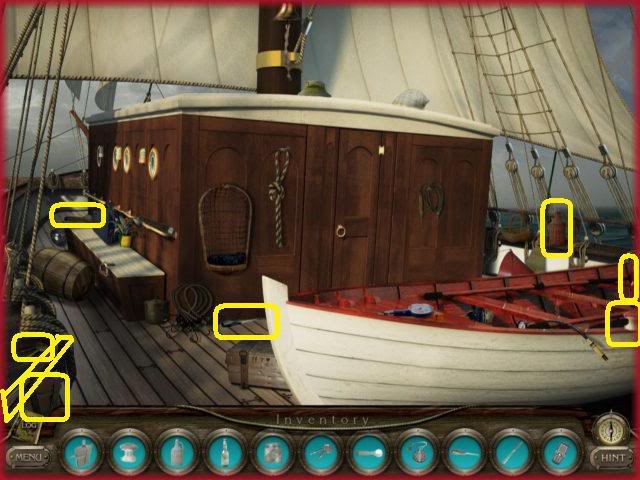
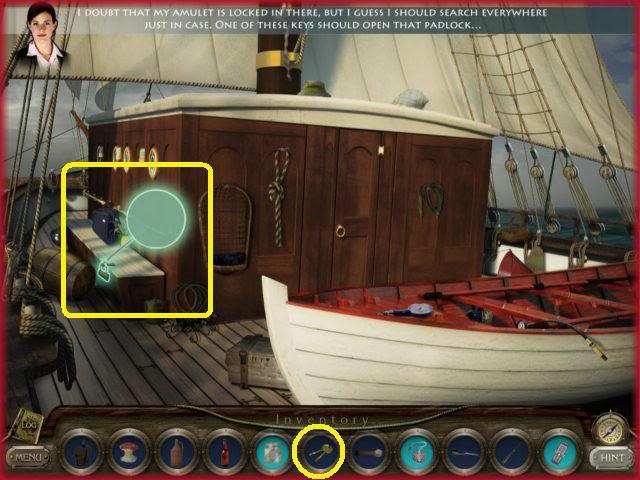
Deck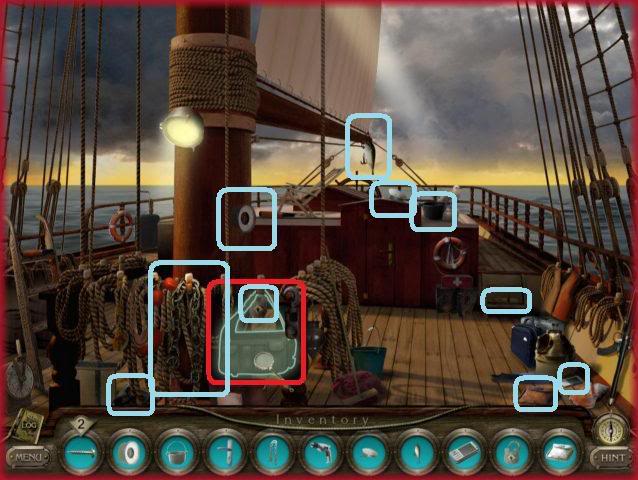
Helm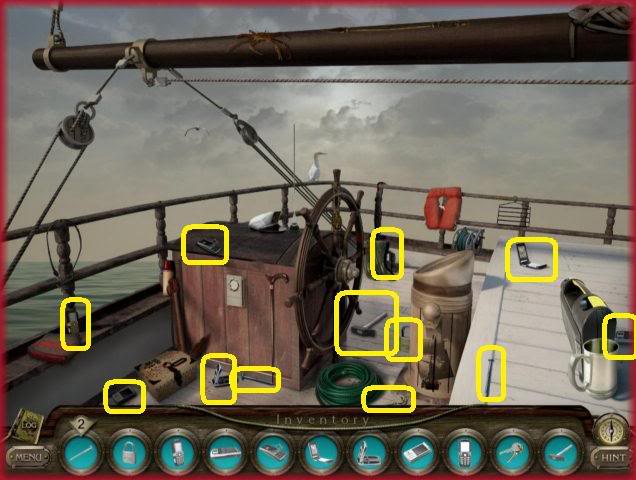
Chapter 7
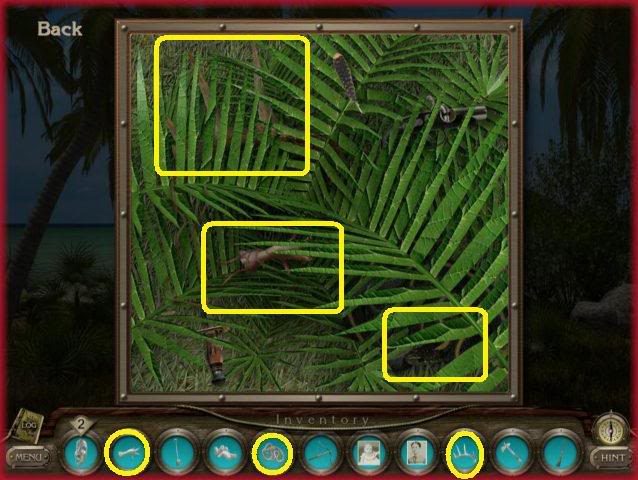
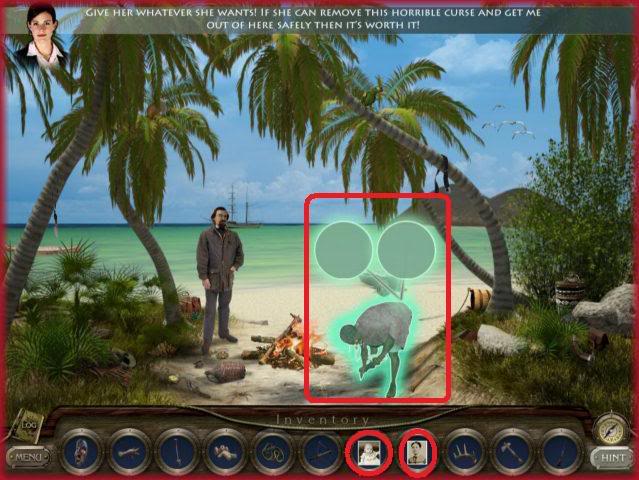
Island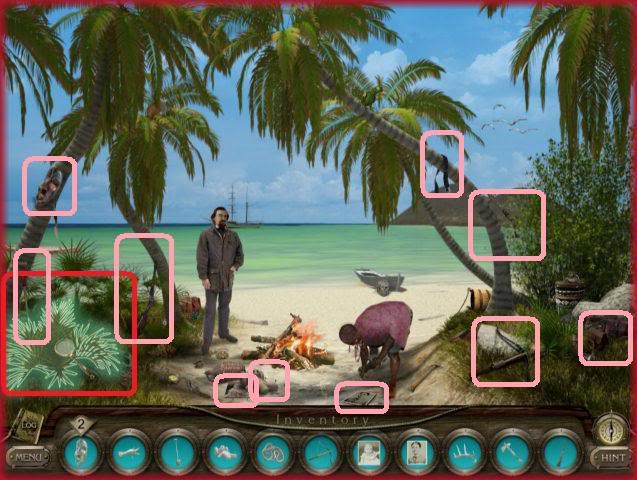
Morehouse Manor
Staten Island Dock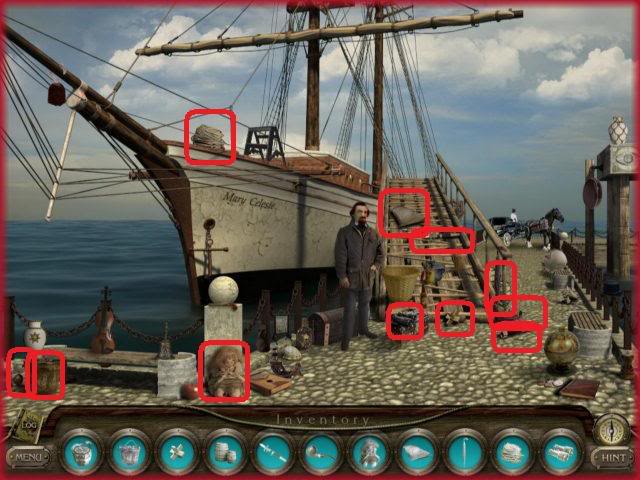
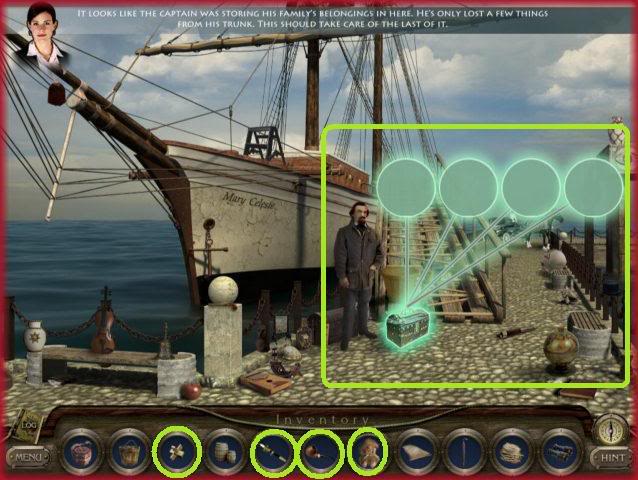
Side Pier View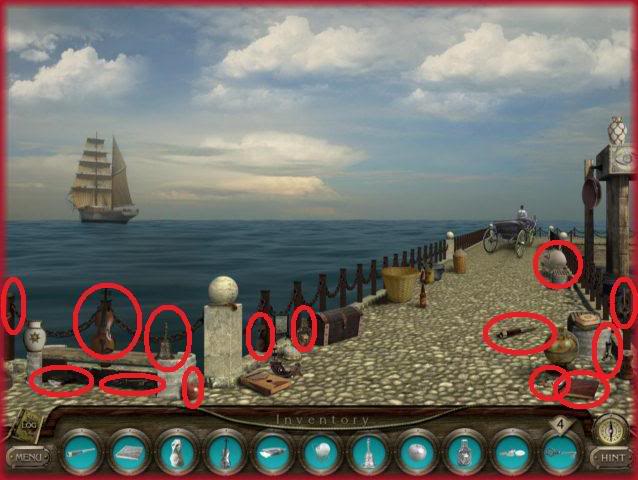
Chapter 8
Boat Helm – Control Room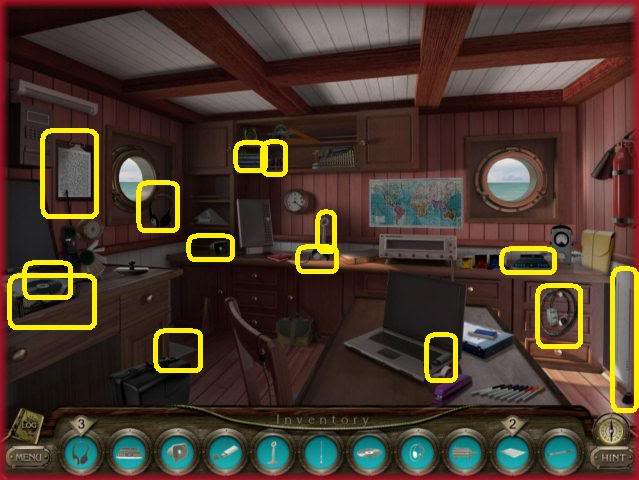
Hallway
First Mate’s Quarters
Mary’s Room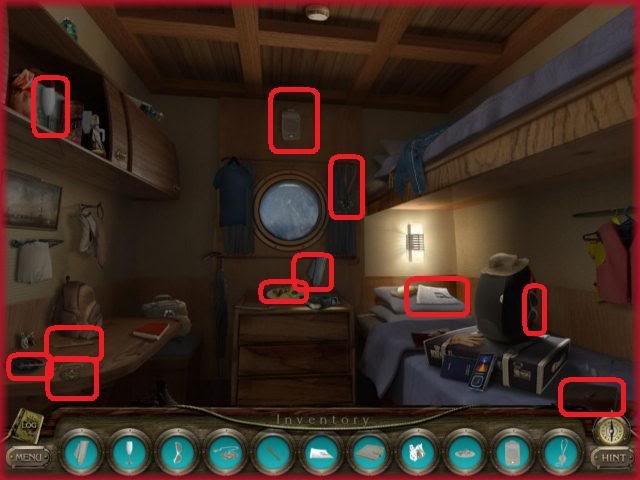
Tool Room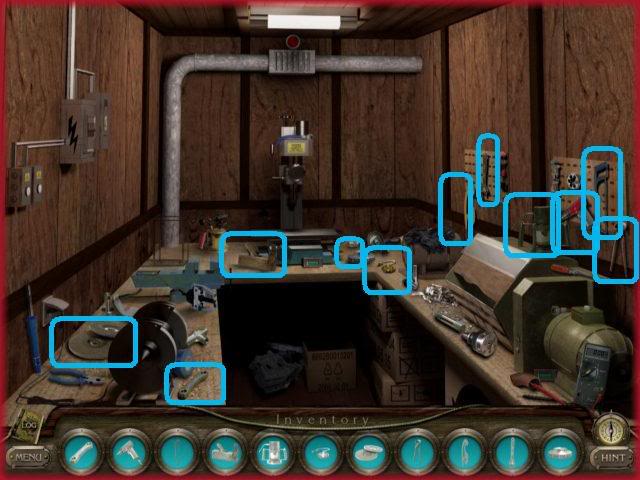
Deck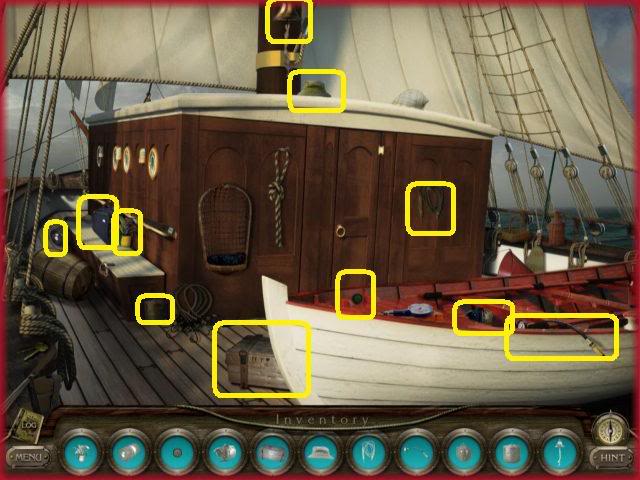
Crew’s Quarters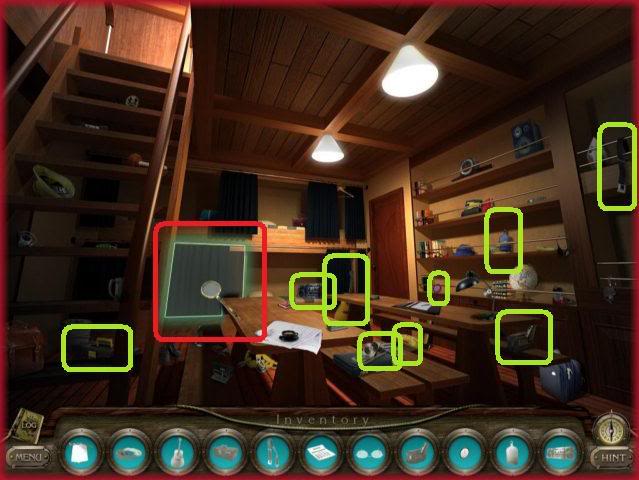
Captain’s Quarters
Storage Area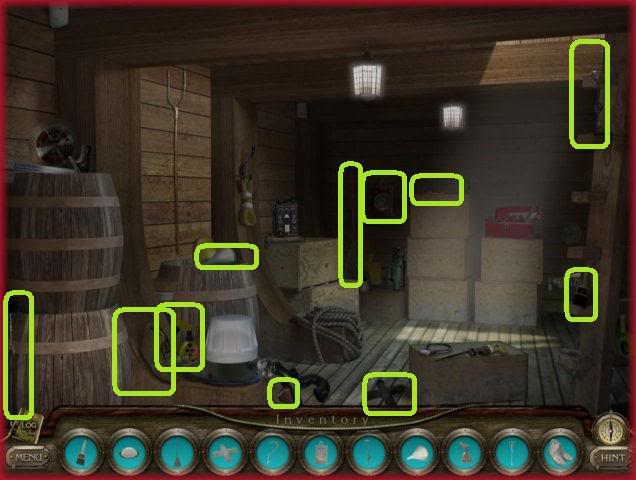
Galley – Kitchen Area
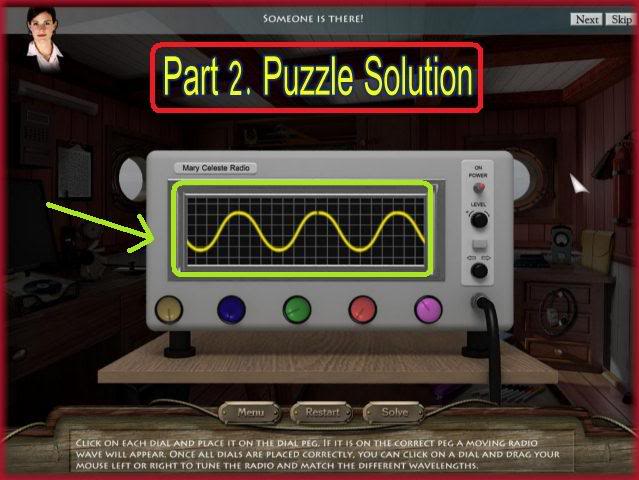
Radio Control Room
Mini Game 7 – Radio Control
Boat Helm
Congratulations you have finished the game!
“;
