- Wondering how to get Monopoly GO! free rolls? Well, you’ve come to the right place. In this guide, we provide you with a bunch of tips and tricks to get some free rolls for the hit new mobile game. We’ll …
Best Roblox Horror Games to Play Right Now – Updated Weekly
By Adele Wilson
Our Best Roblox Horror Games guide features the scariest and most creative experiences to play right now on the platform!The BEST Roblox Games of The Week – Games You Need To Play!
By Sho Roberts
Our feature shares our pick for the Best Roblox Games of the week! With our feature, we guarantee you'll find something new to play!All Grades in Type Soul – Each Race Explained
By Adele Wilson
Our All Grades in Type Soul guide lists every grade in the game for all races, including how to increase your grade quickly!
The Hardy Boys: The Hidden Theft Walkthrough
Welcome to Gamezebo's strategy guide for The Hardy Boys: The Hidden Theft.This game is the first computer game based on the Hardy Boys' series of mysteries and adventures. Unlike the Nancy Drew series of games, this one is a traditional point-and-click adventure game with the third person view. Featuring the voices of Jesse McCartney and Cody Linley as Frank and Joe Hardy, this game sets the boys in the middle of a criminal investigation after it was discovered that the vault in the Spe…
a:1:i:0;a:2:s:13:”section_title”;s:44:”The Hardy Boys: The Hidden Theft Walkthrough”;s:12:”section_body”;s:52100:”Welcome to Gamezebo’s strategy guide for The Hardy Boys: The Hidden Theft.
This game is the first computer game based on the Hardy Boys’ series of mysteries and adventures. Unlike the Nancy Drew series of games, this one is a traditional point-and-click adventure game with the third person view.
Featuring the voices of Jesse McCartney and Cody Linley as Frank and Joe Hardy, this game sets the boys in the middle of a criminal investigation after it was discovered that the vault in the Spencer Mansion was robbed. The Bayport Police need the Hardys’ assistance to tie up some loose ends but it’s not long before the boys find themselves embroiled in a drama of sinister proportions and they begin to suspect the theft is linked to something in their past. How will this mystery ever be unraveled? Let’s start a new game and find out!
Chapter 1: Business as Usual
As the game opens, you’ll be treated to a TV-style "Previously on" comic strip depicting the conclusion of the case the Hardys were working on prior to the start of the game. After they arrive home, it turns out that their mother Laura and their Aunt Trudy are there waiting for them to scold them for all the laws they’ve broken after a police officer stopped by their house to inform them of what happened.
After Laura and Trudy have left the boys’ bedroom, the police officer comes in to pay them a visit. He introduces himself as Eric Piedmont, and it’s revealed that he’s not a police officer at all but rather an agent of a group calling themselves the "American Teens Against Crime", or ATAC for short. Eric has stopped by to hand the boys’ their latest assignment.
After Eric has left the room, the first thing to do would be to check out the details of the assignment. The inventory can be accessed by right-clicking anywhere on the screen and you’ll see that the manila envelope that Eric had given them is there. Double click on the envelope to remove a video disc from it and you can pop it into the faux Xbox 360 situated next to the television to watch it. It turns out that the vault inside the Spencer Mansion was robbed and the 200 million dollars’ worth of Rothschild bearer bonds was stolen from a virtually impregnable Mosler safe. The voice goes on to comment that because the safe can’t be blown up, it insinuates that the thief knew the combination to the safe.
After the assignment has been spelled out for the boys, the disc will automatically reformat into a music CD to keep the details from leaking out to anyone who wasn’t supposed to see the disc. After Frank and Joe finish discussing the case, they decide that they need to call their father Fenton so that they can be ungrounded and be allowed to use their motorcycles again. However, the problem is that both of the boys left their cellphones inside the bikes’ compartments. This means that the next step will have to be to find a way to get the cellphones back and escape their mother’s notice at the same time.
Leave the room and attempt to head downstairs. Laura will meet them at the foot of the steps and send them back up to their room. I guess we’ll have to find another way to get outside. At the end of the hallway, you’ll see that the window is open and there’s a tree nearby, providing us with an alternative method of leaving the house. Joe tells Frank that he’s the better climber of the two; therefore he’ll be the one to climb down the tree.
The game will begin to explain the task of switching between Frank and Joe. You’ll primarily control Frank, but once situations like these arise where you need to switch to Joe, you can accomplish this by moving the mouse cursor to the upper right corner of the screen causing a taskbar to appear. Click on the icon featuring the boys’ faces to activate the switch mode and then click on Joe’s face to switch control to Joe.
As Joe, climb down the tree but as he does so, a branch snaps off the tree which causes Aunt Trudy to come out to investigate. Frank will hightail it back into his room to hide and after Trudy returns to her room, position Frank near the stairs. Switch to Joe and use him to ring the bell near the front door. As Laura goes to answer the door, use Frank to head downstairs and grab the motorcycle keys from the bowl near the bottom of the screen. Once Frank has the keys, quickly head back up the stairs and return to the bedroom.
Look out the window to see Joe waving up at him. Toss the keys down to Joe and then grab the boys’ pet parrot, Playback from his perch and send him down to Joe as well. As Joe, walk into the garage and use the keys to unlock the compartment under the driver’s seat. Retrieve the cellphone and then go into the inventory to combine the cellphone with Playback.
Return to the house and click on the window of the bedroom to get Frank to appear. Send Playback up to him with the cellphone and once Frank checks the status of the phone; you’ll see that it needs to be recharged. Walk over to the television and click on the power strip near the right side of the TV stand. Plug the cellphone into one of the cords and Frank will call Fenton to explain their predicament. Fenton will agree to call Laura to get them out of their mess so that they can begin to investigate the hidden theft.
Chapter 2: Brother Against Brother
As the Hardys walk up to the front door of the Spencer manor, they will see Officer Riley scoping out the grounds. As he confronts the Hardys, he’s soon joined by Samuel Spencer. He initially thinks they’re hoodlums until Officer Riley introduces them to him. Sam is well aware of who their father is, and after the conversation, Officer Riley leaves with Sam to search the grounds some more.
Enter the manor and walk across the room to meet Lily Spencer. Question her about everything to learn that she remembers seeing a six foot tall repairman possibly in his 50s with short dark hair hanging out by the utility shed. She figured he was lost, but after that she never saw him again.
Lily’s father will walk into the room after you’re done talking with Lily, so feel free to question him as well. He claims that when the theft occurred, he was working in the yard when Sam came running up to him yelling. The police were called and they detained Thomas in his home because Sam said that Thomas was the only one who knew the combination, primarily because Sam tells it to him every night and makes him write it down as well. Even though Thomas knows the combination, he says he would never steal anything from him, despite being strapped for cash.
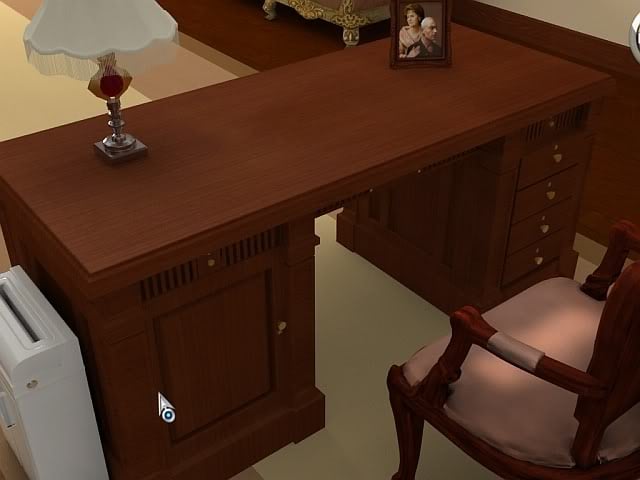
After you’ve finished interrogating the father, let’s explore the mansion to see if we can dig up some clues as to what really happened. Walk over and look at the face of the grandfather clock to see that it’s stopped at 3 o’clock and the glass covering is locked. Enter the study next to it and examine the desk to see that all of its drawers are currently locked.
There is a small paper shredder situated next to the desk, but you have to be in the close-up view of the desk in order to get to the shredder.

Open the front of the shredder and pick up the remains of a shredded piece of paper to realize that it was a blank piece of paper. Why would anyone want to shred a blank piece of paper? Afterwards, let’s take a look at the broken window near the front of the room. Carefully pick up a shard of glass from the floor before leaving the interior of the mansion altogether.
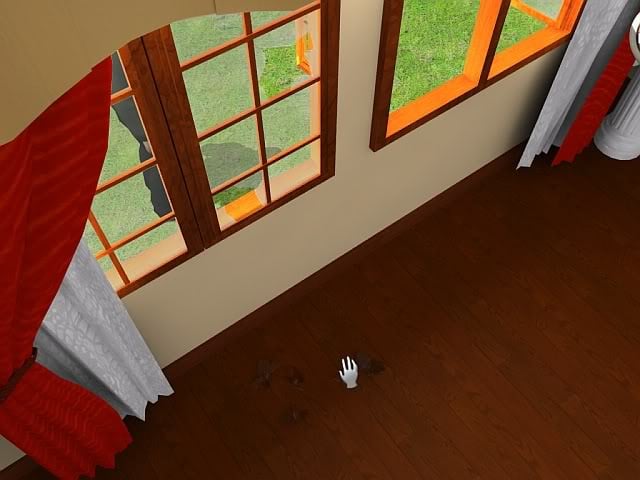
Once outside, walk over to the open window to see Mr. Spencer standing nearby. Behind where Frank is situated, you’ll find a blank piece of paper resting near the planter. Take it and then talk to Mr. Spencer in order to learn about his typical day to learn that he noticed the broken window at about 6:30 am that morning and that the window was left open during the day. He was interrupted by a salesman that had come the day before and after he wrote down his safe combination, he left it on the desk before shredding it later on.
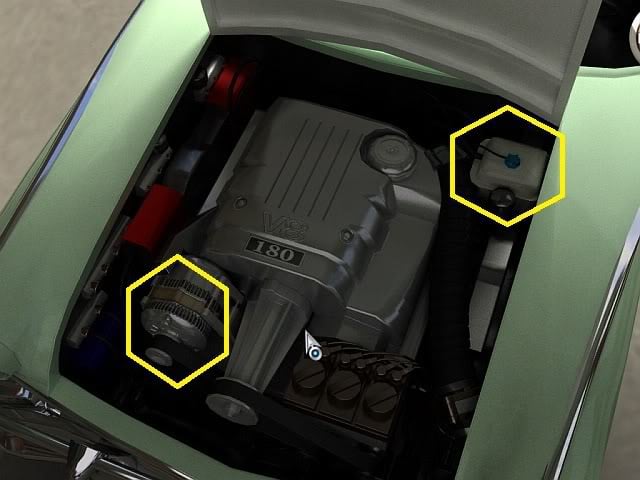
Have Frank use his cellphone to call Fenton and ask if he can do some further digging on Sam. You may have to call Fenton twice if you hadn’t previously called him. Even though there isn’t really need to do so right now, you can check out Sam’s car that is currently parked in the driveway. When you open the hood, you’ll notice you can interact with the coolant reservoir as well as the fan belt, but you can’t do anything with them right now.
You can also check out the side view of the car, but you’ll quickly realize that the driver side door is locked.

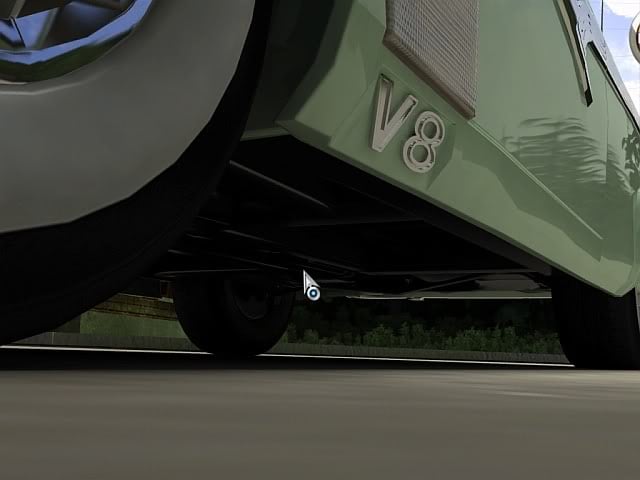
You could also check the underside of the car, but there isn’t anything of interest to be found there right now.
Regardless of whether or not you examined the car, walk around behind it and attempt to speak with Officer Riley. I think a bug may be encountered here as even though the icon changing to a mouth like I could speak with him, no matter how many times I clicked the mouse nothing would happen. It’s nothing to worry about, but it can be aggravating when you can’t do something that you obviously can.
Either way, return to the study and piece the blank piece of paper on the desk. Leave the room, but grab the doorstop seated on the floor next to the door and use it to prop the door open.
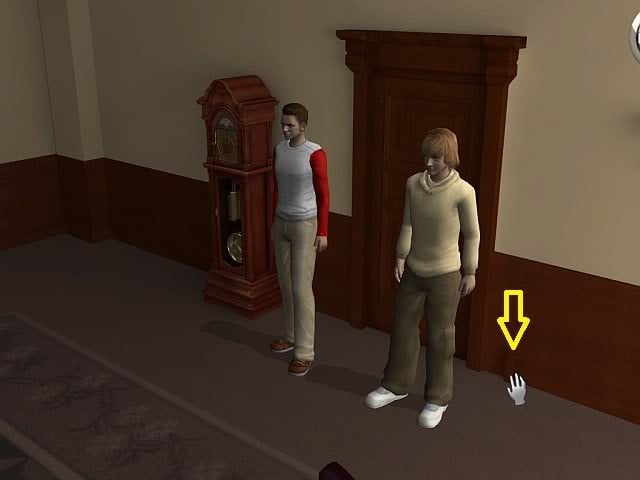
Leave the mansion through the front door and watch what happens. The wind will come blowing through the door, into the study, and blow the paper off the desk and out the window. Speak with Officer Riley again and explain to him as to what could have happened that would have resulted in the break-in. Officer Riley will agree to let Thomas roam the grounds again, provided he doesn’t leave in case further questioning is needed.
Now that Thomas has been relatively cleared of suspicion, we can check out the rest of the mansion grounds to glean more clues as to what went on here. Head left past the front door and walk down the driveway. Follow the side path that leads to the top of the screen and then follow the dirt path that forks off to the left to come across the utility shed.
As you walk up to the shed, you’ll notice a set of footprints leading to it. Examine them further and pick up a sample of mud before entering the shed itself. As you look around, you’ll find a toolbox that has been sealed shut.
Leave the shed and return to the driveway. Continue to follow the path to the left to find a cottage. Before entering, take the hubcap from the stack of tires.
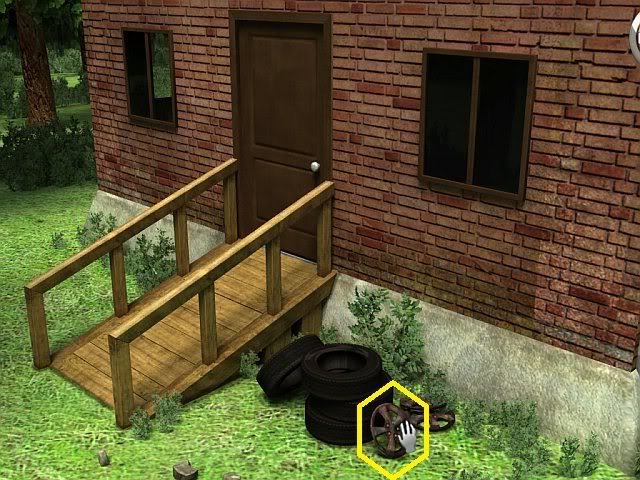
Knock on the door and as soon as you enter, you’ll find Thomas here sitting with his wife, who suffers from polyneuropathy and is wheelchair bound. Talk to Thomas some more in order to learn what he and Sam were like as kids and then talk to his wife, Mary to learn her feelings towards Sam.
Once you’re done talking to the couple, access the game’s taskbar and utilize the map to travel to the Bayport High School. As you walk onto the grounds, check out the computer lab to see Phil standing around inside. Talk to him to learn that the AC is on the fritz, which isn’t good for the computers, particularly the one called the Nexus. The Nexus is a dedicated terminal that is connected to an online global database and it shut itself off because the temperature exceeded 75 degrees and it won’t be able to turn on until the temperature is lowered.
Leave the computer lab and head into the next room, which happens to be the utility room and when you talk to Mark the repairman, you’ll learn that the reason why the AC isn’t working is because it ran out of coolant. While you’re here, rummage through his toolbox and grab the screwdriver and wrench and as you head out the door, grab the lid off the garbage can. With those in hand, use the map to travel to the Spencer Mansion.
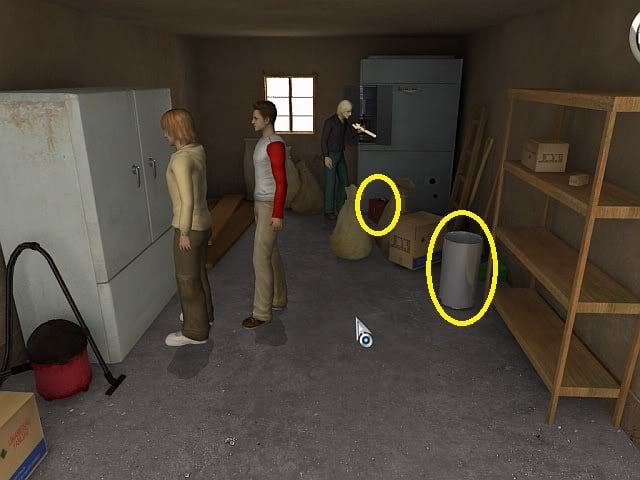
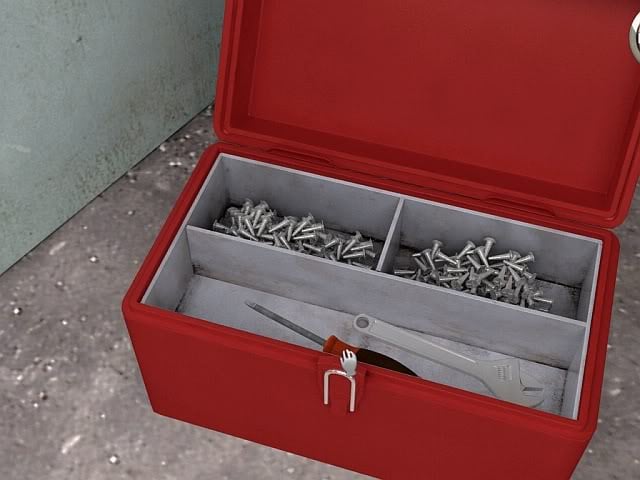
When you have returned to the mansion, walk over to Sam’s car and pop open the hood. Cut a hole in the coolant tank using the shard of glass and then you can either place the hubcap or garbage lid under the car to collect some of the dripping coolant. Now that you have the coolant, you can use it to power up the AC back at the school, so let’s use the map and head back there now.
Follow the path past the computer lab and utility room until you reach an open door leading into the science lab. Walk towards the back of the room and grab a beaker from the counter and then return to the utility room. Open the large cabinet situated along the left wall and remove the cap from the antifreeze tank. Pour the coolant from Sam’s car into the beaker and then into the tank to get the AC working again.
Talk to Mark before leaving and once you’re outside, walk out into the center of the area where you’ll find Iola sitting on a bench looking rather dejected about something. When you talk to her, she’ll tell the guys that her science teacher wrote a note saying to make an aspirin if anyone wants extra credit. She’s not too sure about what to do now, but maybe there’s something that Frank and Joe can do to help her out.
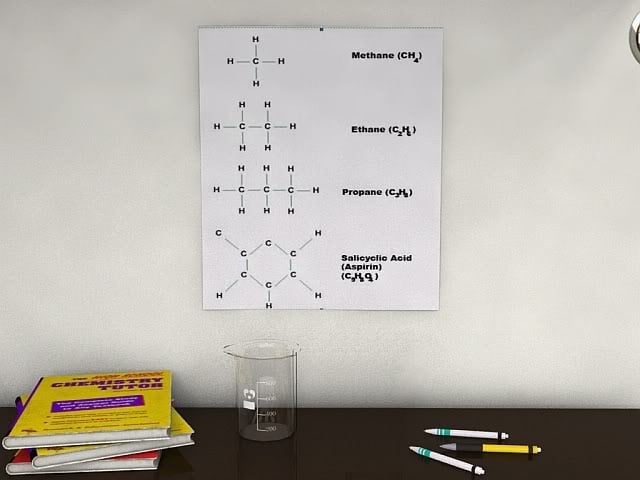
Return to the science lab and walk over to where you obtained the beaker to see a poster of atomic structures on the back wall. Study the one for salicylic acid, or aspirin and then walk over to the teacher’s desk to see an atomic structure model.
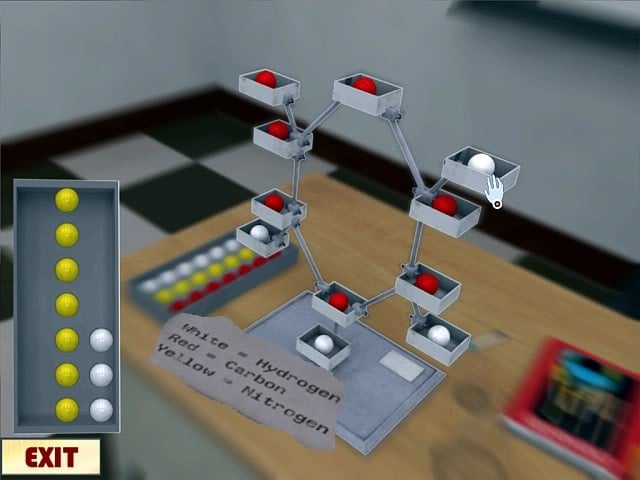
You’ll have to recreate the structure for aspirin and if you look at the key on the base, you’ll see that each of the colored balls corresponds to a specific element.
White = Hydrogen
Red = Carbon
Yellow = Nitrogen
Put the red balls into each of the center boxes as well as the upper left box, and then put the white ones in the rest to complete the molecule.
Speak with Iola and show her the completed molecule and she’ll thank the boys for all they’ve done for her. I guess she’ll be getting that A+ after all! We’re finished at the school for now, so use the map to travel to the police station so that we can get back into solving the case of the hidden theft.
Walk up the stairs and enter the police station. Turn right and follow the hall around the desk and enter the first door you come to in order to find the chief’s office. Discuss the case with him and you’ll learn that because the locks were changed recently, Officer Riley is the only one who has access to the crime lab right now and he’s still at the mansion.
Return to the mansion and speak with Officer Riley only have him brush the boys off as he still needs to look for evidence. Follow the driveway behind the car to come across an old nurses’ station. You’ll spot a makeshift grave near the entrance, but other than that there isn’t anything else interesting on the outside, so let’s go inside and take a look.
Enter the first room on the left and you’ll realize that someone has been living here. Look at the bed and move the pillow to find a rag and a wig. When you go into your inventory and double-click on the wig, you’ll find a strand of black hair attached to it.
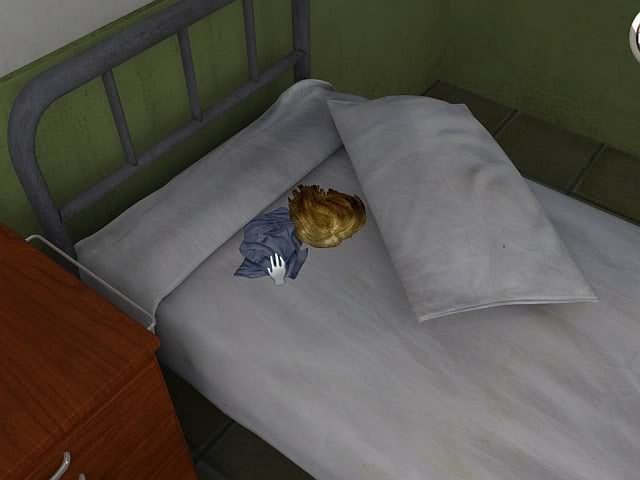
When you move the mattress away from the wall, you’ll find a vent that’s being held in place by some Phillips head screws. It would be far too simple to remove the screws using the flathead screwdriver, so instead we’ll have to find a Phillips screwdriver somewhere. As you look out the window, you’ll see a shadow run away from the scene so quickly that it’s almost eerie.
Leave the room and head into the one directly across from it. Open the first set of lockers and take the rubber gloves, the old roll of gauze, as well as a bottle of hydrogen peroxide. Walk over to the large gas tanks resting against the wall and use the wrench on the second one from the left to open it. While the gas is leaking out, use the rubber gloves in order to fill them with propane and then use the wrench on the tank again to close the valve.
Return to the mansion and talk to Officer Riley about what you’ve discovered and he’ll follow the boys over to the nurses’ station. You can talk to him again here if you want, otherwise use the map to head over to the utility shed.
Inside the shed, use the flathead screwdriver to open the sealed toolbox to discover the Phillips screwdriver we need to open the vent. I love Frank’s comment at this point: "Did I just use a screwdriver to get another screwdriver?" You just have to love the clichéd conventions of point-and-click adventure games.
Head back to the nurses’ station and use the newfound screwdriver on the vent in the bedroom to find a pair of muddy boots hidden behind it. Use the boots on the path leading to the shed to see that they match the footprints. Talk to Officer Riley who is currently stationed outside the abandoned nurses’ station about the crime lab. He’ll refuse to leave since the crime scene isn’t cordoned off by tape. Use the old gauze on the trees near the door to cordon it off and then Con will agree to meet the boys back at the station.
Once you’ve returned to the police station, head past the chief’s office and enter the door near the back of the building to find the crime lab. When you talk to Con, he still won’t allow the boys the use of the lab equipment, but he’ll agree to do the search for them provided they can give him the physical characteristics of the perpetrator. I think Iola may be able to help these two analyze the evidence they’ve dug up so far, so let’s speak with her inside the school’s science lab.
Iola is hiding near where you picked up the beaker earlier. Have her analyze any evidence you’ve scrounged up, although she doesn’t know how to do a blood test since she’s never been taught how to perform one. Walk over to the computer lab and talk to Phil to learn that the Nexus is working again. Access the computer next to him and type "blood test" into the search box and read the procedure to performing a blood test.
Take the information back to Iola and she’ll give you some blood test evidence. Before leaving, have her compare the glass shard you picked up from the Spencer mansion with the one she found in the rag. When you ask her about the hair, you’ll learn that it has cut recently, leading the boys to decide to check out the nearest barber shop.
Return to the police station and deliver the evidence to Con. He’ll use the lab to print out a picture of someone calling himself "John Johnson". Now that we have an idea of who to look for, use the map to travel to Bayport Street.
Walk into Get Snippy, the town’s barber shop and talk to Gus the barber who is currently cutting Chet’s hair. When the Hardys show him the suspect’s picture, he says that he cut his hair yesterday and that he left only one business card in the fishbowl as he left the place. Check out the fishbowl and play the matching game that ensues.
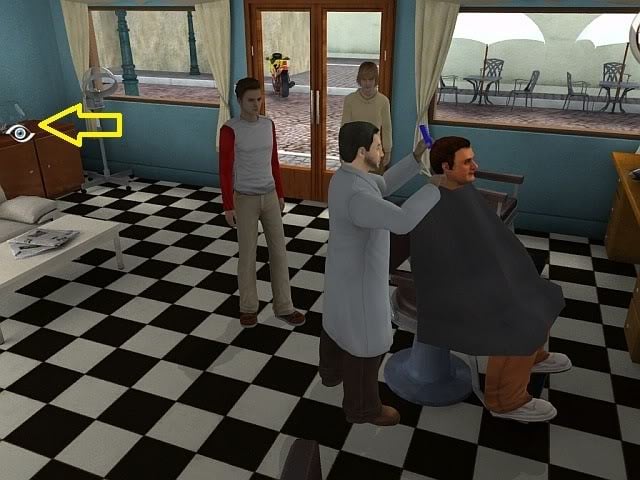
The puzzle is pretty easy and once everything’s all said and done, you’ll be left with a business card for a place located in Manhattan called "Dougal Siepp’s Masquerade Emporium". Talk to Gus once more and the boys will soon set out for the Emporium.
Chapter 3: It’s in the Blood
Before entering the establishment, the boys work on their cover identities to avoid causing the guy from becoming defensive. As they walk in, they’re greeted by Val, who helps to run the place. Before he’ll agree to let them see Dougal Siepp, he enlists their help by having them fix up all the mannequins that some vandals messed up and putting their accessories back to where they belong.
Walk behind the counter to find a catalog of costumes resting on the coffee table. You can use this catalog to get some hints as to where the accessories belong. After you’re done thumbing through it, take the witch’s hat sitting next to it and turn right and forward to find the mannequins. Examine each mannequin and take the accessories that don’t belong to it.
Mannequin
Accessories to Remove
Accessories to Add
Werewolf
Saber and broadsword
Ripped shirt and boots
Skeleton
Brooch
Thigh and jawbone
Devil
Broom and knight’s helm
Mustache and pitchfork
Witch
Eye patch and ripped shirt
Broom and witch’s hat
Knight
Magic wand and thigh bone
Knight’s helm and broadsword
Pirate
Mustache and tiara
Saber and eye patch
Vampire
Pitchfork and jawbone
Wig and brooch
Fairy
Wig and boots
Tiara and magic wand
Once the accessories are back where they belong, talk to Val and he’ll set forth one more task before he’ll take the boys to see Dougal Siepp. The gondolas situated in front of the mannequins are out of order and because Val and Dougal both have OCD, they have to be arranged so that each gondola is showing the proper jewelry for each mannequin.
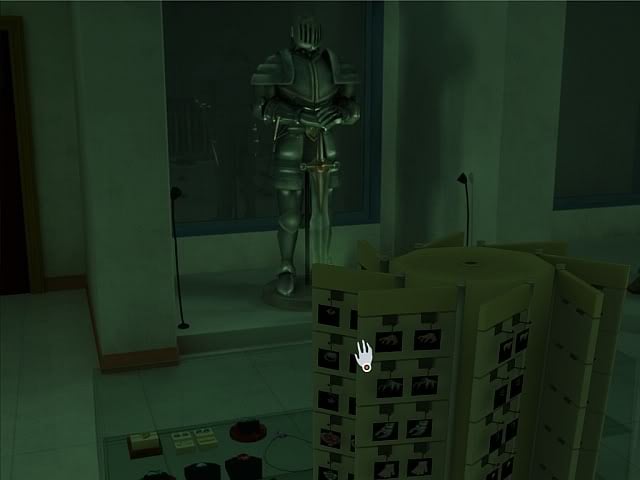
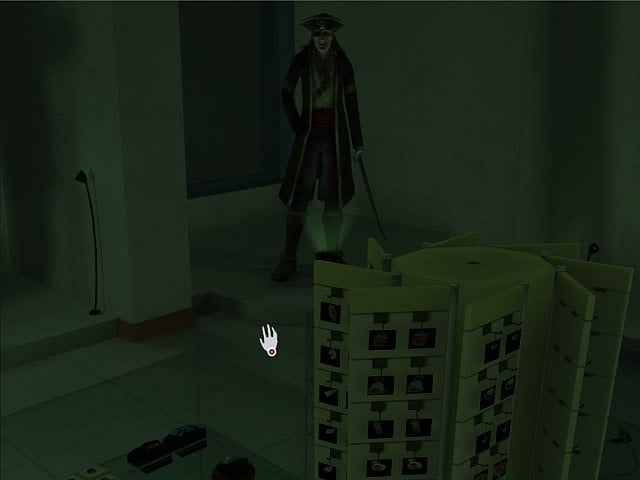
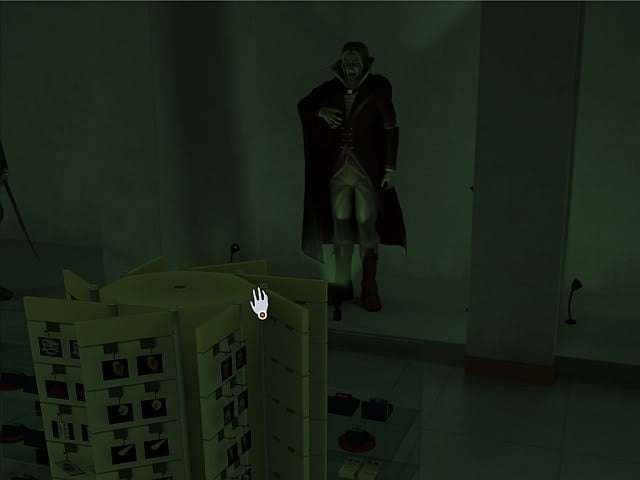
You’ll be presented with an overhead view of the store, and when you click on a mannequin, you’ll see a gondola in front of it. Turn the gondola so that the appropriate jewelry is facing you, using the catalog (or the following screenshots) for clues.
Mannequin
Jewelry Type
Screenshot(click iamgeto enlarge)
Werewolf
Noses
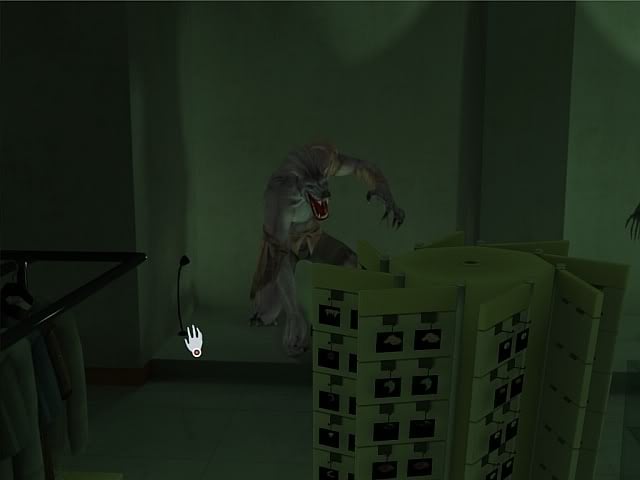
Skeleton
Teeth
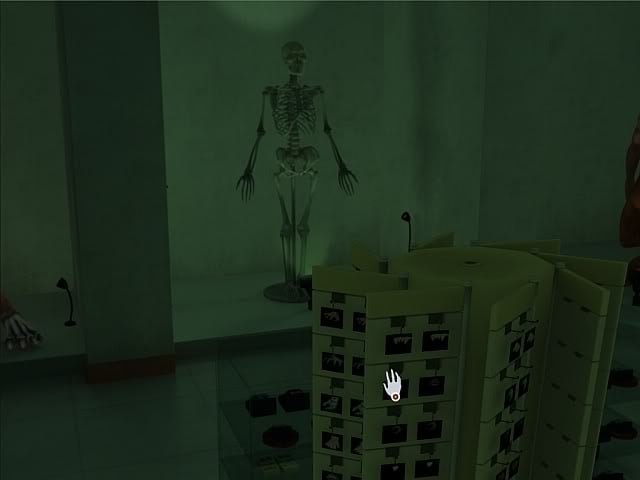
Devil
Sigils
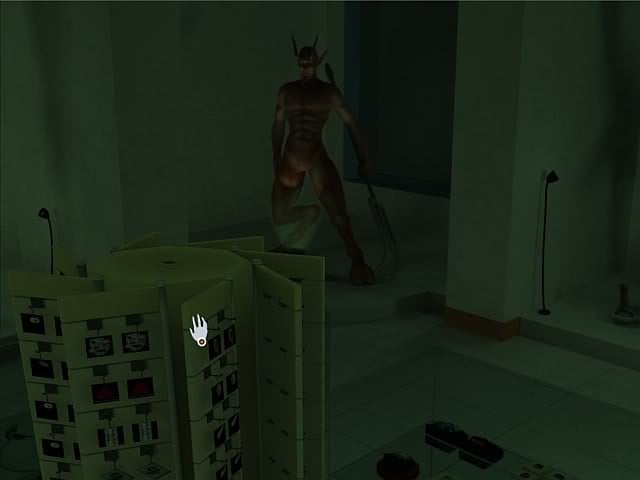
Witch
Eyes
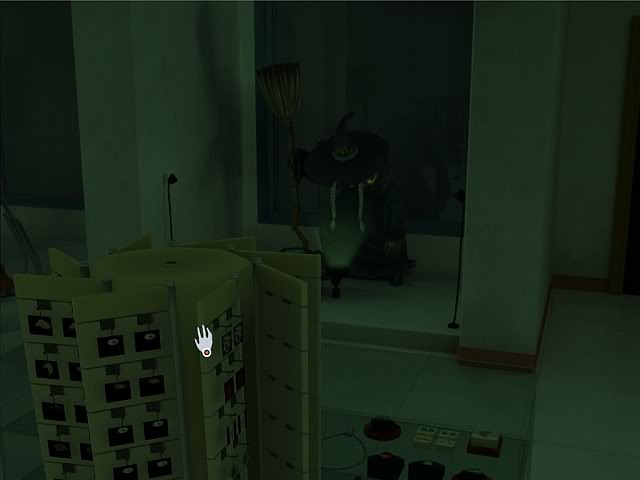
Knight
Feet
Pirate
Potions
Vampire
Ears
I wasn’t able to snap the picture for the Fairy’s jewelry in time because as soon as you complete the puzzle, a message comes up saying "Bingo! You Did It!" The Fairy’s jewelry will be the one featuring the different brooches.
Once the gondolas have been successfully rearranged, talk to Val again and he’ll agree to take the boys to see Dougal once he’s set the alarm. He tells the boys to wait in the backroom to avoid setting off any motion sensors. The backroom is the door to the left of the coffee table.
Once the alarm has been set, you’ll realize that Val hasn’t returned. Leave the backroom and check the front door to find out that Val has locked them in. Return to the backroom and inspect the area. You’ll see packing paper littered all over the floor, a bishop’s miter, and a set of stairs blocked off by iron bars. When you look at the door in front of the stairs, you can open the lock’s cover to see that it needs a chess piece in order to unlock it.
Pick up the packing paper from the floor and then lift up the bishop’s miter to find a black bishop chess piece. It’s not the one needed for the lock, but if you head out and look at the knight mannequin, you’ll see that it has an indentation in its gauntlet where a certain chess piece should go. Do you think the bishop will work? Try it and see!
The gauntlet will open to reveal the white king piece. Return to the backroom and use the white king chess piece to unlock the door. Head upstairs to the second floor to find a rather peculiar looking room. It has three curtains, a skylight, and not much else. When you pull back one curtain, you’ll find a curious looking machine. The second one will reveal a blank wall with a frame while the other will reveal a plaque with four expressions:
The scuttling scourge of Hercules: Cancer
The Queen of Vanity: Cassiopeia
Orion’s poison nemesis: Scorpio
A Sacrifice to Sea: Andromeda
Make a mental note of those expressions as they will be needed momentarily. Walk into the foreground to find a bookshelf. Pick up the greasepaint crayon from the bottom shelf and then look at the book of constellations resting on the middle shelf. Afterwards, turn on Frank’s cellphone and read the journal entry regarding Tetrabiblos. As you flip through the pages of the book of constellations, use the packing paper on each constellation and use the crayon to trace an outline of it. Once you have all four tracings, walk over to the curious looking machine.
The machine is actually used to control the star balls on the ceiling and when you light up the correct constellations, a hidden door will open. To connect one star ball to the next, click on the starting point and then connect it to the next point and work your way over until the constellation is completed. The following screenshots will provide you with the correct solutions:
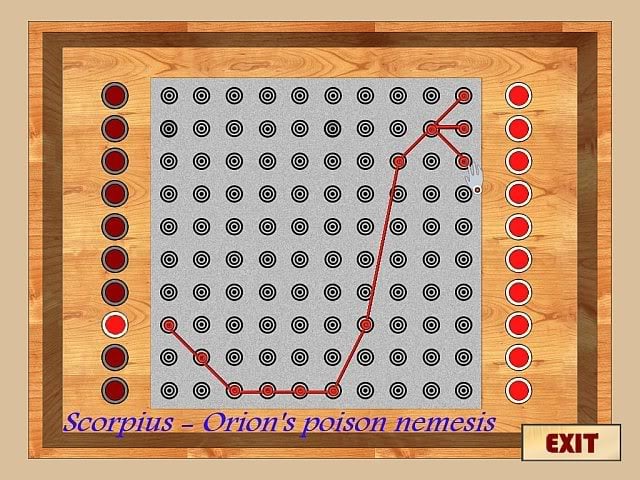
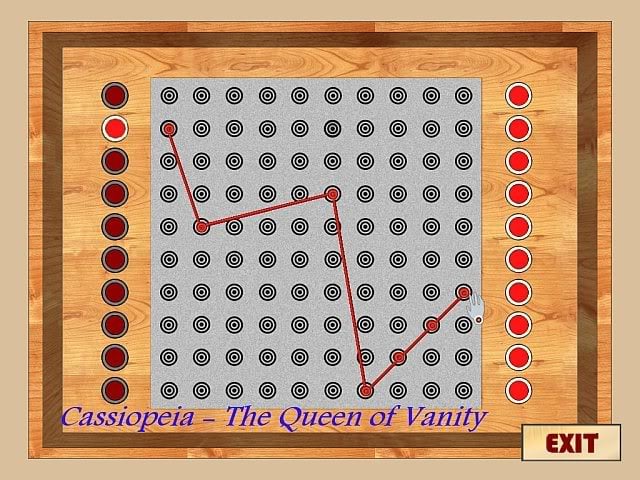
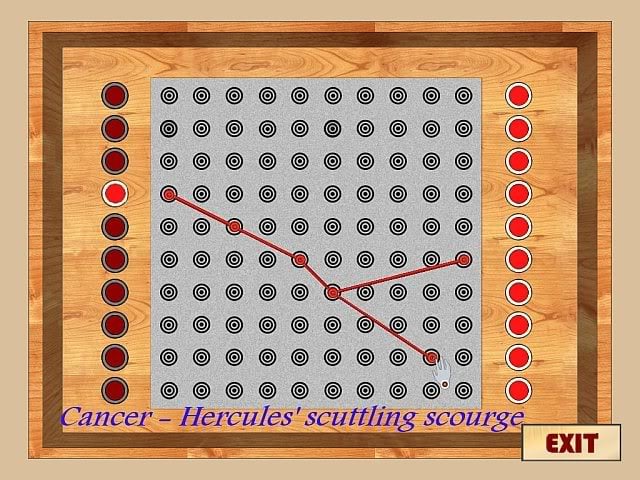
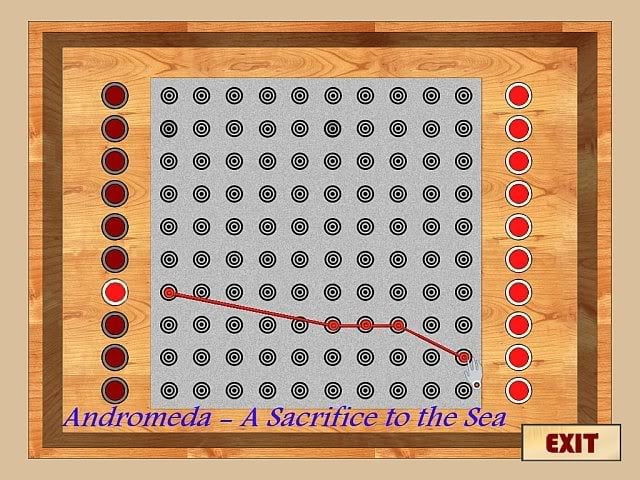
Once the constellations have all lit up on the ceiling, the door hidden by the second curtain will open. Walk through it to find Dougal Siepp standing in the middle of the room with some shocking news. It turns out that Dougal Siepp isn’t the man responsible for the theft, but he’ll help the best he can while protecting his interests at the same time. Make sure to talk to him about everything and before the boys set out once again, he’ll give them a puzzle box and the clue "It’s about time".
He lets them know that they should be checking out a man named Richard Llewellyn, someone who has questionable tattoos and a rather nasty chip on his shoulder. He’s currently staying at the Crescent Theater, so use the Manhattan map to travel there and let’s check it out.
Upon entering the theater, walk into the lobby and then into the ticket booth using the door to the right. Look at the peg board on the wall to find a couple of keys and take the one on the bottom to learn that it unlocks the gallery. Leave the booth and then proceed into the auditorium. Walk down the aisle and head to the left of the stage to find a door that leads backstage.
Head down into the hallway and knock on the door near the fire hose. You’ll be introduced to Howard Morley, an actor who refuses to come out until his cue, which means we’ll have to figure out how to set the conditions on the stage for his cue. After you’re done talking to him, head north up the hallway and pass by the stairs leading up into the gallery and enter the first door you come to in order to find a dressing room.
In the foreground, you’ll see a large script entitled "Hamlet’s Twin Brother". Pick it up and then read it using the journal function of the cellphone to learn what it’ll take to set the cue for Howard, which begins on page 6.
1) Turn on the breaker for the backstage lighting
2) Load the ‘Spooky’ music roll in the player piano
3) Turn the player piano on
4) Set the backdrop to castle battlement
5) Get the gallery key from the box office
6) Get the script from the dressing room
7) Unlock the padlock and extend the gallery stairs
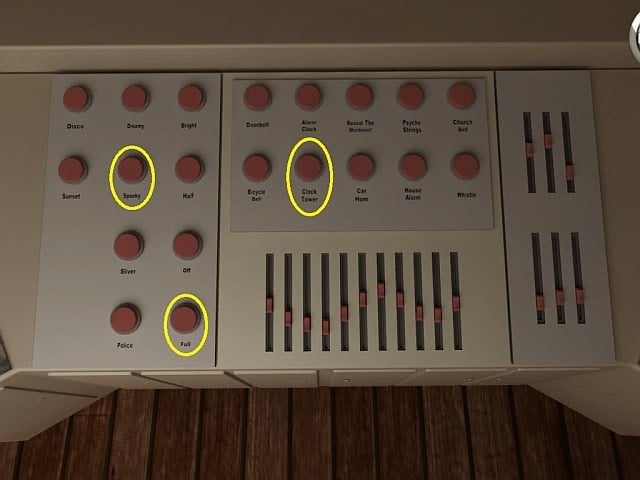
8) Set lights to ‘spooky’ using console in gallery
9) Set moon to full at console in gallery
10) Ring clock tower bell three times on the bell board
Make a note that because of your previous actions, steps 5 through 7 are already completed. Leave the dressing room and walk down the hallway across from you and then go right to wind up on stage. Grab the music rolls that are on top of the player piano and load the "Spooky" music roll into the player piano to complete steps 2 & 3. When you walk out onto the stage, you’ll see that the backdrop has already been set for you in order to complete step 4.
In order to complete step 1, return to the gallery stairs and you may spot a small fuse box near the exit door. Open it and flip the top right switch down to turn the backstage lighting back on.
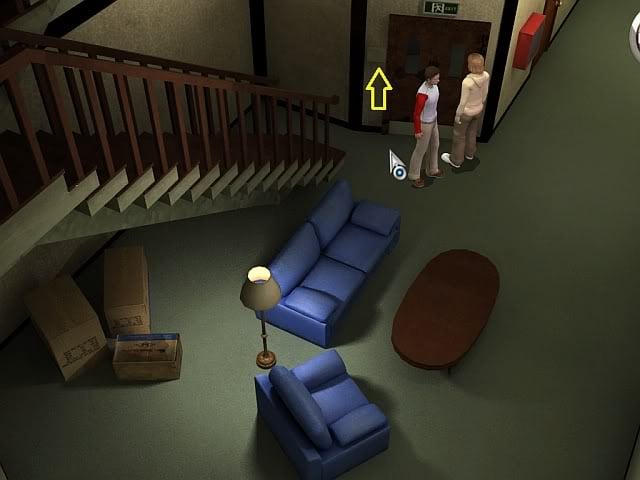
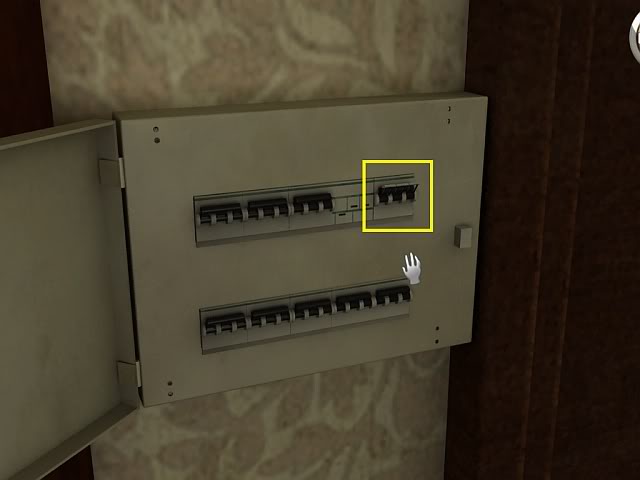
Afterwards, walk up the stairs to the door leading to the gallery and use the gallery key to unlock it. Follow the balcony around until you reach the console. Press the spooky light button and then right click to pull back to the console. Repeat the process after you’ve pressed the full button as well as the clock tower button.
Once you’re finished, Howard will come out of his room and head out onto the stage to recite his line. As he’s returning to his room, head back downstairs and meet him halfway. As you talk to him, you will learn that Richard Llewellyn is actually the son of Dougal Siepp and that while he was in Manhattan he was hit by a car and wound up in the St. Ambrose Hospital, which will be our next destination.
Enter the hospital and speak with the guard standing just inside the door. It’s cold outside and he doesn’t want to stay out there when he hasn’t had a hot drink, but the cocoa machine isn’t working at the moment.
Walk down from there to find the receptionist sitting at her desk. She doesn’t have the time to talk right now as she’s engrossed with a puzzle she’s working on, to which the solution is easily available in this screenshot.
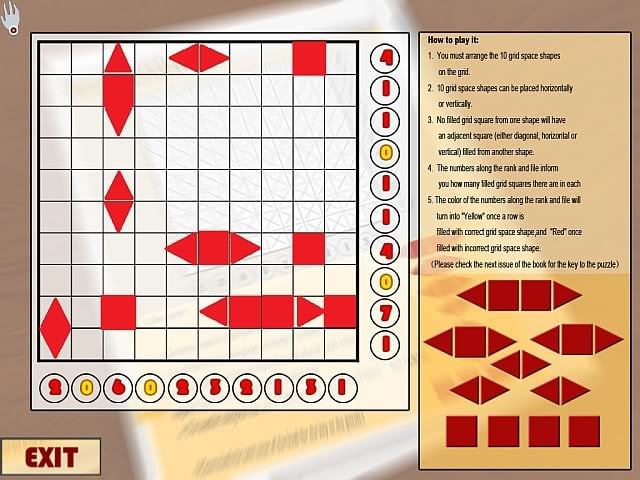
In order to rotate the pieces, simply right-click the mouse and when you’ve solved it, the receptionist will decide to take a break and watch some TV. When you talk to her, she’ll let slip that Richard is currently staying in the ICU and isn’t able to receive any visitors. Walk past her desk and attempt to use the elevator when you’ll be stopped by the receptionist.
Since that path is a no-go, enter the utility room located on the other side of the receptionist’s desk. Grab the doctor’s coats from the wall near the door as well as the folded sheet from the gurney. Head outside and walk over to the garbage bin to see a satellite dish protruding from the wall behind it. Cover it with the sheet and it’ll cause the TV inside to lose its signal. This will get the receptionist out of the way as she walks over to try to fix the TV.
In order to get rid of the guard, head back into the hospital and walk over to the vending machine to the left of the guard. Get some hot water from the water cooler and then get a chocolate bar out of the vending machine. Stick the chocolate bar into the hot water and you’ll make some hot cocoa to give to the guard.
Once the guard is satisfied, he’ll return to his post outside and leave the elevator completely unguarded. Ride the elevator up to the ICU floor and now you’ll be tasked with figuring out where Richard’s room is located.
As you walk towards the upper hallway, you’ll find a guard situated in front of room 305. When you talk to him, you’ll learn that Dr. Casper is in charge of that particular room and once you’re done talking to him; Dr. Casper will appear and head into the room to check on his patient.
Return to the elevator and walk down into the lower hallway. Enter the room on the left side of the hall that isn’t marked by a number to find the doctor’s lounge. When you check the lockers, you’ll find that the only one that is locked is the one belonging to Dr. Casper.
Walk over to the desk and access the computer to see that it prompts you for a username and password. The password is the name of Dr. Casper’s son, which is written on the back of the photo. Once you’ve accessed the computer, use the keyboard provided to you in order to enter "edwardcasper" as the login name and then "bobby" as the password.
Now that you’ve gotten into Dr. Casper’s files, read the one about the different call codes as well as Richard’s accident report. In order to get rid of the guard in front of Richard’s room, leave the lounge and walk up to room 310. Grab the cones surrounding the water puddle and then use the phone behind the boys to dial 116310. An alarm will sound and prompt the guard to head over to room 310, where he slips on the water puddle. The doctor will chase after him to make sure he’s doing alright, leaving room 305 available for the boys to check out.
Talk to Richard inside his room and he’ll explain everything in detail before he codes and passes away. As the boys leave the hospital, they’ll run into Dougal, who’s going in to see his son as the chapter concludes.
Chapter 4: What Goes Around, Comes Around
The boys will be back at the house. Walk into the den to see Fenton sitting on the couch. Talk to him to learn the truth about Samuel Spencer. It turns out that Sam is a habitual liar and that he wasn’t born in Oakwood, but rather the Ingram Sanitarium which is now known as the Spencer Mansion.
Before you can end the conversation, Fenton tells the boys that while he did what he could to smooth things over with their mother, he wants them to cook her favorite breakfast to make up for the trouble they got themselves into before the game started.
Walk into the kitchen and look for a paper posted to the side of the refrigerator that has the recipe for Laura’s favorite French toast written on it. You can read it in the journal on your cellphone as well, but either way open the refrigerator and take the eggs, milk, and orange juice from inside.
Head over to the counter where the mixing bowl is situated and take the vanilla extract as well as the pocket knife. Crack the eggs into the bowl and then mix in the milk, orange juice, and vanilla extract. Use the whisk to automatically mix the batter together and then soak a slice of bread into it.
Next you’ll need to cook it. Walk over to the oven and turn the temperature dial so that it’s in between the minimum and maximum temperatures. Put the bread inside the oven and then turn it on to cook the French toast. Once it’s been made, talk to Fenton and Laura will eventually walk into the room as the boys apologize to her for what they did and afterwards, talk to Fenton one last time before setting out for the Spencer Mansion.
When you talk to Sam inside the mansion, he will mention that his car was vandalized. When you ask him about where he was born, he’ll lie and say he was born in Virginia. Leave the mansion to inspect the damage that was done to the car to see that it has a dent in it and there’s a rag hanging off the bumper.
Take the cloth from the bumper and then pop open the hood. Use the knife to cut out the timing belt and then use the map to jump over to the caretaker’s residence. When you enter the house, you’ll realize that Thomas is the only one in the room at the moment, meaning that Mary is off somewhere on the grounds. Talk to Thomas to learn that Sam and Tom were both born at the Sanitarium and that their father was the superintendent as well as the fact that Lily is currently hanging out at Mug Shots on Bayport Street.
Jump over to the nurses’ station once you’ve finished talking with Thomas to find Mary hovering over the unmarked grave. She will leave a white lily, which the boys will pick up once she’s gone. Return to the caretaker’s residence and confront Mary with what you’ve just witnessed. She has Thomas leave the room while she explains the boys that she is the mother of Richard Llewellyn. Her parents worked in the Sanitarium where she was also born and eventually became known as "Scary Mary". Dougal Siepp became one of her best friends and that he is Richard’s father.
It also turns out that Sam caused the fire that eventually killed Mary’s parents and Richard never forgave him for it. After she mentions his anger, she’ll hand over his confession for the boys to read in the journal.
Once you’ve heard all of these revelations, you’ll probably want to jump over to the high school to see if Iola will analyze the rag you removed from Sam’s car. When you enter the science lab, you’ll see that she’s no longer there. With not much else to do, let’s go find Lily at the Mug Shots coffee shop on Bayport Street.
As you walk into the shop, you’ll see Chet hanging out here as well as Lily. Talk to Chet and the boys will ask if he could have Iola meet them at the high school. He’ll agree to do so and leave the shop. Talk to Lily and the boys will ask to see her locket. Upon further examination, you’ll see that you’ll need to solve a puzzle in order to open it. Read Richard’s confession once again to figure out how to open the locket, or else follow this solution:

Push on the left petal, the right petal, the left petal again, and then the top petal. Push the button on the side and the locket will pop open to reveal a small key. When the boys ask Lily about any alternate entrances into the mansion, she’ll mention that there is another one on the west side of the mansion. Before we investigate it, however, let’s return to the high school to see if Iola is there.
Walk into the science lab to find Iola in her usual spot. Have her examine the cloth from the car to learn that the blood on it is of the same blood type as Dougal and Richard and you’ll be presented with some hit and run evidence. Leave the room and walk into the computer lab to see Phil fidgeting with his socks. He’s removing the elastic to make them more comfortable for him to wear and he’ll hand over a piece of the elastic. After you’re finished, use the map to travel to the West Wing of the Spencer Mansion.
Proceed through the doorway leading into the West Wing and you’ll spot a pamphlet lying on the floor. You can read it in the journal to learn more about the place. Enter the nearby door to find yourself inside the pharmacy. Take a look at the window as well as the door lock and then look at the open window above it to have Joe climb onto Frank’s shoulders.
Use the timing belt on the bar just inside the window and then have Joe climb back down. Look through the window once more to see the timing belt dangling just within your reach. Pull on it to open the window and then climb through it to see what’s waiting for you on the other side of the door.
Inside the patients’ quarters, go through the door and check the peg board with the keys on it. You may have noticed that while you can’t take any of the keys hanging on the wall, there is a hole in the floor with a key lying at the bottom just out of reach. Go into the inventory and combine the refrigerator magnet with the sock elastic and use it to grab the key at the bottom of the hole.
Walk over to the right side of the hallway and at the end; use the key to unlock the door to room 6. Enter the newly unlocked room and you’ll see that part of the wall has been burned and that there’s a plank nailed to the wall that looks a bit out of place.
Move the bed away from the wall and then hit the burned section of the wall to have it break away. Walk into the adjoining room and grab the misplaced plank and Joe will walk over and hold it down. As Frank, walk back into the previous room and click on the misplaced plank and it’ll break to reveal a lock box. Use the tiny key you took from Lily’s locket and use it to unlock the lock box. Open it to find a confession written by Sam and Tom’s father, Orin Ingram Spencer. Read Dougal’s diary afterwards and soon all the pieces of the puzzle should come together to explain why the theft happened in the first place.
Reunite the boys by moving one close to the other and clicking the center icon while in select mode. Head back to the mansion and walk over to Sam’s car and cut out the timing belt that replaced the one that you had cut out previously and then head inside the mansion.
You can finally open Dougal’s puzzle box while using "It is time" as the clue. Go into your inventory and double click on the puzzle box to bring up the close-up view. As you move your cursor around the sides of the box, you’ll see a couple of arrows appear that suggest that the panel can be moved up and down. In order to open the box, follow this solution:
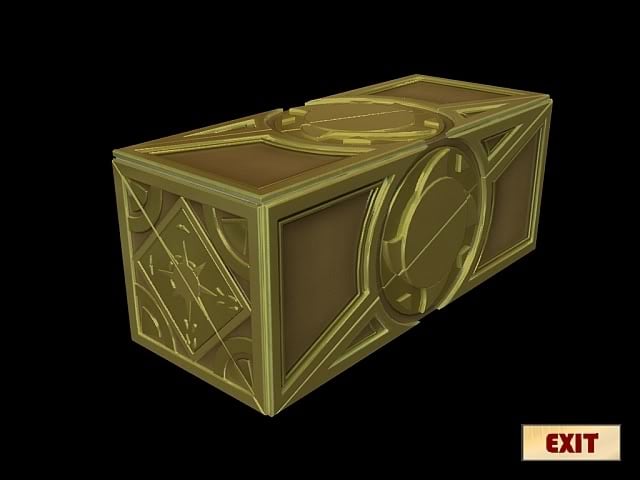
1) Starting with the end of the box, move the top half up and then the bottom half down.
2) Move the bottom half of the long side of the box down
3) Move the top half of the end of the box back to its original position by moving it down and then follow it up by moving the bottom half back to its original position.
4) Move the top half of the long side of the box down
5) Move the top half of the end of the box down and then the bottom half up.
6) Move the bottom half of the long side of the box down
7) Move both halves of the end of the box to their original position.
8) Finally, move the top half of the long side of the box down to solve the puzzle.
Once the box has been opened, it’ll reveal a push rod for the grandfather clock next to the door leading into the study. Walk over to the clock and use the rod to unlock the glass covering the clock face. This puzzle will involve arranging the various sized gears so that all of them begin to move. You may reference the following screenshot for the solution:

Once all the gears are in place, a small drawer below them will open to reveal a desk key. Take it and then walk into the study. Walk over to Sam’s desk and use the key to unlock the top right drawer. Inside the drawer you will find Sam’s car keys as well as some correspondence written between Sam and his lawyers. It turns out that Sam is trying to commit insurance fraud by collecting the insurance on the bearer bonds that were actually burned up in the fire.
Return outside and use the car keys to unlock the driver side door of the car. On the driver’s seat you will find a ticket stub that shows that Sam was in New York yesterday, which means that he was responsible for Richard’s hit and run accident.
You’ve gone through this entire game accumulating all the evidence needed to solve the case of the hidden theft and now that you have the ticket stub, you have all the evidence you need. From here, go to the police station and talk to the chief to show him all the evidence that was turned up. Once you’re finished, you’ll get to see a comic strip featuring the conclusion of this game.
“;
More articles...
Monopoly GO! Free Rolls – Links For Free Dice
By Glen Fox
Wondering how to get Monopoly GO! free rolls? Well, you’ve come to the right place. In this guide, we provide you with a bunch of tips and tricks to get some free rolls for the hit new mobile game. We’ll …Best Roblox Horror Games to Play Right Now – Updated Weekly
By Adele Wilson
Our Best Roblox Horror Games guide features the scariest and most creative experiences to play right now on the platform!The BEST Roblox Games of The Week – Games You Need To Play!
By Sho Roberts
Our feature shares our pick for the Best Roblox Games of the week! With our feature, we guarantee you'll find something new to play!All Grades in Type Soul – Each Race Explained
By Adele Wilson
Our All Grades in Type Soul guide lists every grade in the game for all races, including how to increase your grade quickly!


