- Wondering how to get Monopoly GO! free rolls? Well, you’ve come to the right place. In this guide, we provide you with a bunch of tips and tricks to get some free rolls for the hit new mobile game. We’ll …
Best Roblox Horror Games to Play Right Now – Updated Weekly
By Adele Wilson
Our Best Roblox Horror Games guide features the scariest and most creative experiences to play right now on the platform!The BEST Roblox Games of The Week – Games You Need To Play!
By Sho Roberts
Our feature shares our pick for the Best Roblox Games of the week! With our feature, we guarantee you'll find something new to play!Type Soul Clan Rarity Guide – All Legendary And Common Clans Listed!
By Nathan Ball
Wondering what your odds of rolling a particular Clan are? Wonder no more, with my handy Type Soul Clan Rarity guide.
The Crop Circles Mystery Walkthrough
Welcome to The Crop Circles Mystery walkthrough on Gamezebo. The Crop Circles Mystery is a Hidden Object/Adventure game played on PC created by RTS Casuals and available at Big Fish Games. This walkthrough includes tips and tricks, helpful hints, and a strategy guide for how to complete The Crop Circles Mystery.
The Crop Circles Mystery
Welcome to The Crop Circles Mystery walkthrough on Gamezebo. The Crop Circles Mystery is a Hidden Object/Adventure game played on PC created by RTS Casuals and available at Big Fish Games. This walkthrough includes tips and tricks, helpful hints, and a strategy guide for how to complete The Crop Circles Mystery.
General Information
- Click on Options to adjust the Sound and Music volumes and to turn Full Screen and Custom Cursor on and off.
- Click on “If you are not JANE click here” to enter your own name. The default name is Jane, who is the protagonist in the game.
- When you start a new game you’re given the option of choosing either Relaxed or Timed Modes. The walkthrough was created in Relaxed Mode, however the Timed Mode is very generous and you shouldn’t have any problems completing the Item Lists or the Farmer’s Market Minigames. Note: the Puzzles and other Minigames are NOT timed.
- Click on Adventure to start the game.
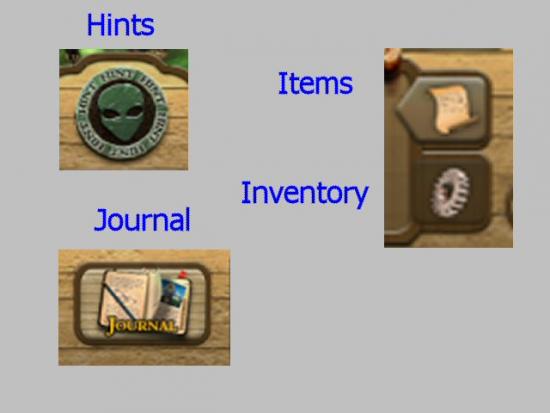
- Your Journal keeps track of the story. This is located at the bottom left of the screen
- Hints recharge in about 45 seconds. The Hint button is round and looks like a little, green alien; it’s located at the bottom right of your screen. Click on the name of the item you want to find (it will change from white to yellow) to get the location for that item, otherwise you’ll get the location for a random item in the list. When you click on the item you want a Hint for, a white silhouette of the item will appear in the box at the left side of the Item List.
- Access the Menu by clicking on the button just below the Hint button.
- The Item and Inventory buttons are located just to the left of Hint and Menu buttons. The Item List button is on top and the Inventory button is just below it.

- When you first start the game, you’ll be given an opportunity to use a Tutorial. You can choose not to use it, if you wish.
- Items that are “greyed” out, in the Item List, require some other action/items that you can’t perform/haven’t collected yet. They will become available once you perform certain tasks/collect certain items.
- There are several Tasks and Minigames, throughout and you may skip some of them, if you like. The Skip button charges in about 45 seconds after you begin and is located at the bottom of that game’s screen. You will be given instructions on how to complete the game but if you wish to repeat them, you can click on the Help button also located in that game’s screen. Note: The Farmer’s Market Minigames cannot be skipped.
Game Map
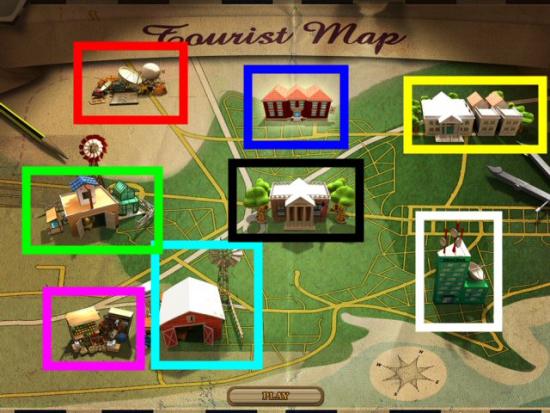
Use the Map to travel to the various locations: Jane and Joe’s Farm (cyan), The Farmer’s Market (magenta), Eliza’s Farm (green), The Library (black), The University (yellow), Area S1 (red), Paranormal TV (white) and The Police Station (blue).
Walkthrough – Chapter 1 – Jane and Joe’s Farm
The opening movie shows some mighty strange happenings on Jane and Joe’s farm, during a severe thunderstorm. They wake to find quite a bit of damage and work on repairing everything before they start worrying about those weird Crop Circles.
Jane and Joe’s Field
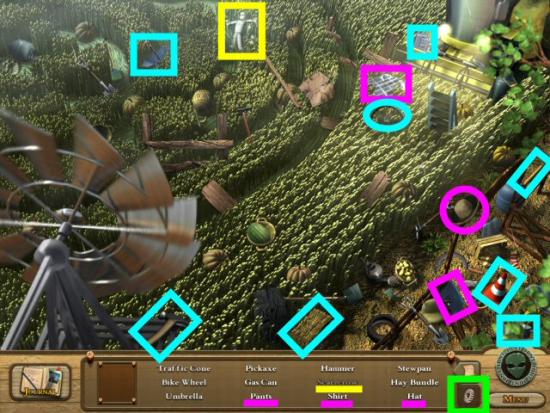
Collect all the objects (cyan) and the Shirt, Pants and Hat (magenta), in the Item List. Click on the Inventory button (green) and use the Hat, Shirt and Pants on the Scarecrow (yellow); you may use them in any order you like. Once you’ve finished with the Scarecrow, click on it to finish the Item List. Note: except for the Scarecrow and Hat, Shirt and Pants, your Item List will probably be different.
Jane and Joe’s Yard
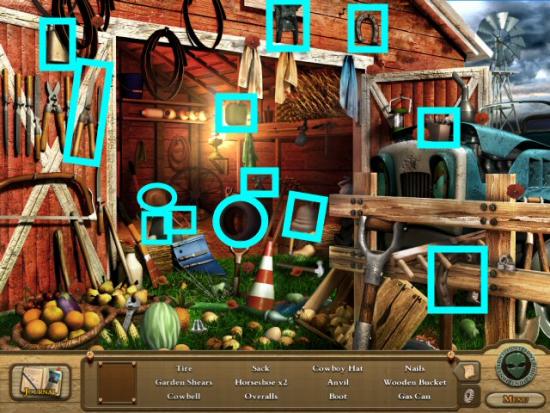
Collect all the objects (cyan) in the list. Note: your Item List will probably be different.
Even though you’ve gotten the Field and Barn cleaned up, you’re still left with quite a bit of damage to the rest of the Farm, and you’ve still got to investigate those mysterious Crop Circles.
Jane and Joe’s Farm
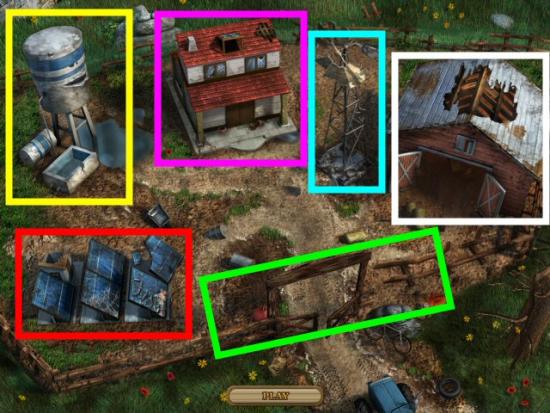
You can’t afford to repair everything, yet. So choose one thing to do now. Move your mouse cursor over the Water Tower (yellow), House (magenta), Wind Mill (cyan), Shed (white), Fence (green) or Solar Panels (red) and click on it to repair it. Click on the Play button, at the bottom of the screen to continue.
Jane and Joe’s Field
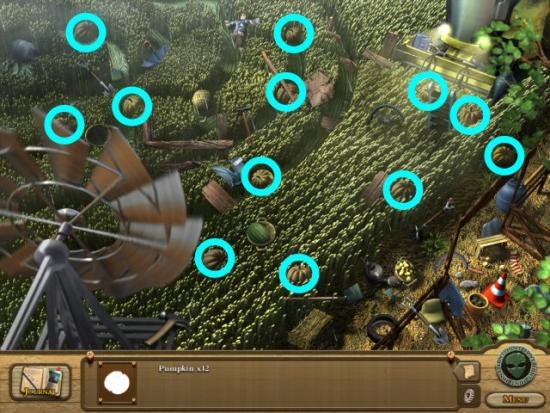
In order to make enough money to repair everything else, you’re going to have to gather items to sell at the Farmer’s Market. First thing, collect all 12 pumpkins (cyan).
Jane and Joe’s Yard
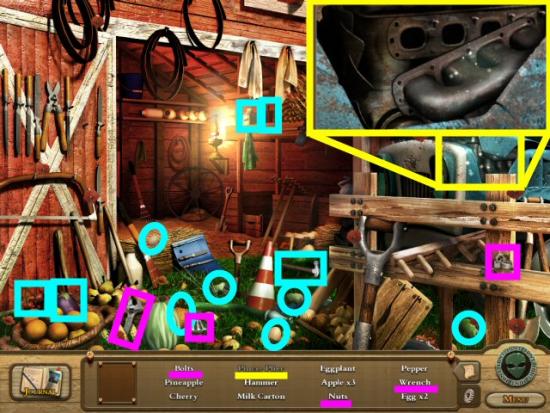
That’s not nearly enough to make some decent money, so let’s see what we have in the Barn that we can sell. Collect all the objects (cyan) and Bolts, Nuts and Wrench (magenta), in the Item List. Click on the sparkling area on the Tractor (yellow), click on the Inventory button and use the items on the Tractor: Bolts, Nuts and Wrench, in that order. Once you’ve finished with the Tractor, click on the Pincer Plier that will be sitting on top of the Tractor hood (bonnet), to finish the Item List. Note: except for the Pincer Plier and Bolts, Nuts and Wrench, your Item List will probably be different.
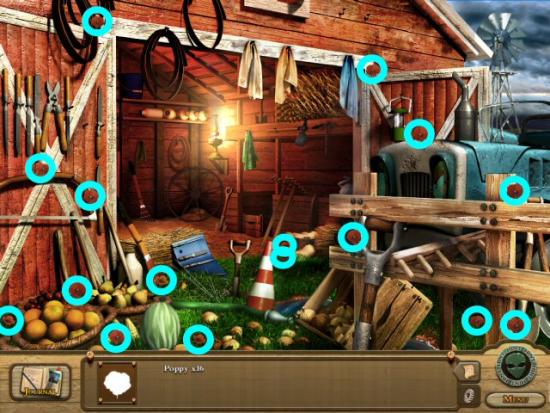
Next, those Poppies will probably sell really well at the Farmer’s Market. Collect all 16 Poppies (cyan). Note: your Poppies may be in different locations than the ones shown.
Farmer’s Market Minigame 1
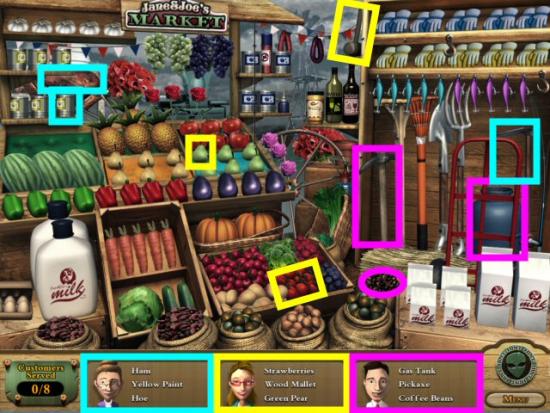
Well, it looks like we have enough items to go sell them at the Farmer’s Market. This starts your first minigame. The object is to find 3 items in the scene, for each customer. You need to serve a total of 8 customers. As you finish one customer, another will “arrive.” You don’t need to find everything for a particular customer because additional customers will “arrive” until you’ve served 8 of them. You can use a Hint, but I didn’t bother and just found the items for the next customer. See the next screenshot for an example. Note: this minigame can’t be skipped.
Jane and Joe’s Farm
Choose one of the remaining 5 locations to repair, with the money you and Joe earned at the Farmer’s Market. I chose to do the most logical first: Fence, so the critters don’t escape; Solar Panels for environmentally friendly, free electricity; Water Tower so we can all have clean drinking water; Wind Mill so we can get the water flowing; Shed so the tools stay dry; House, because the Shed doesn’t have cable. You can choose to do them in whichever order you like.
Jane and Joe’s Yard
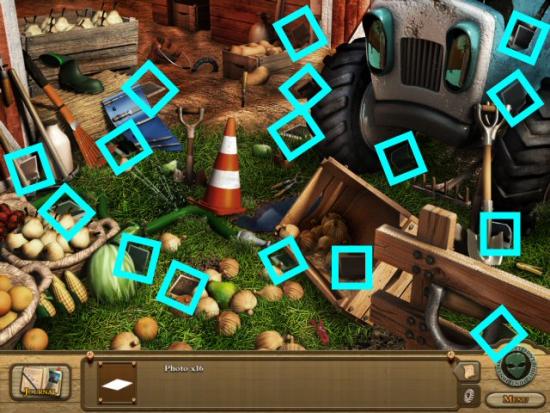
A neighbor lad comes running up with Photos he took during last night’s ferocious storm, but trips and scatters them. Let’s find all 16 Photos (cyan) and see if he got any pictures of what caused those Crop Circles.
Jane and Joe’s Shed
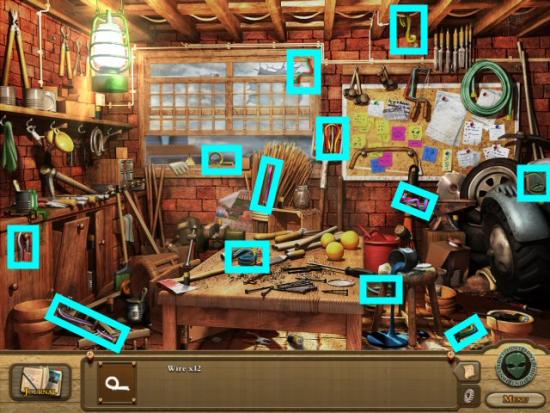
You take a look at the Photos, and it looks like there’s a flying saucer in one. Just then, a news crew arrives, babbles something about other incidents then drives off. Maybe we should research this on the internet, but the storm shorted out the wires in the fuse box. Luckily there are some in the Shed; find all 12 Wires (cyan). Note: your Wires may be in different locations than the ones shown.
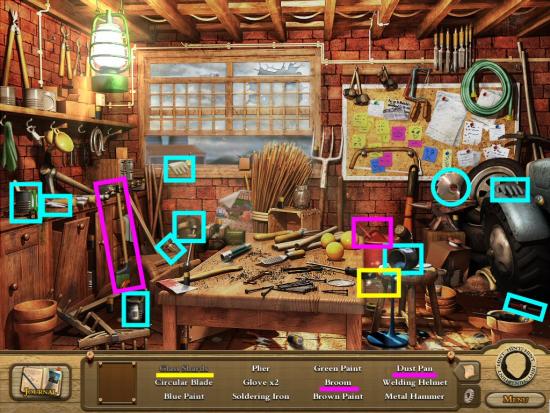
Now, we’ll need some tools. Collect all the objects (cyan) and key items (magenta), in the Item List. Click on the Inventory button and use the Broom and Dustpan on the Glass Shards (yellow) in the sparkling area. Once you’ve finished, click on the Glass Shards to finish the Item List.
Fuse Box Minigame
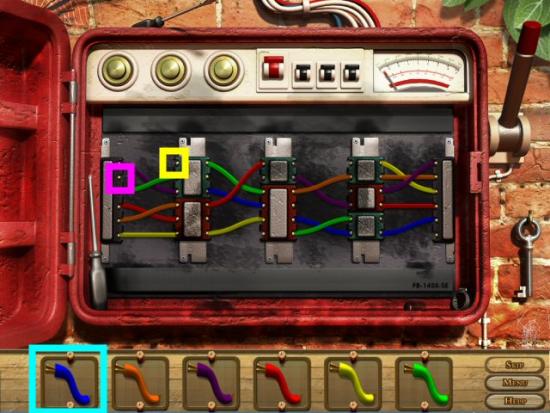
Now we need to replace the shorted Wires with the ones we found in the Shed. Click on a Wire (cyan) then click on an empty terminal (magenta) to place it. Next, click on the next empty terminal (yellow), across from it, to connect it. Repeat with the remaining Wires until all are connected. Note: you can’t place a Wire in the section where that same-colored Wire is already connected. If you like, you can skip this minigame after the Skip button charges.
Chapter 2 – Library
Once you get the power running, you hop onto the internet to see what information you can find about Crop Circles. Unfortunately, there’s not a lot of information, so you head off to the Library. Time to do some more research. Click on the Map to go to the Library.
Library Reading Area
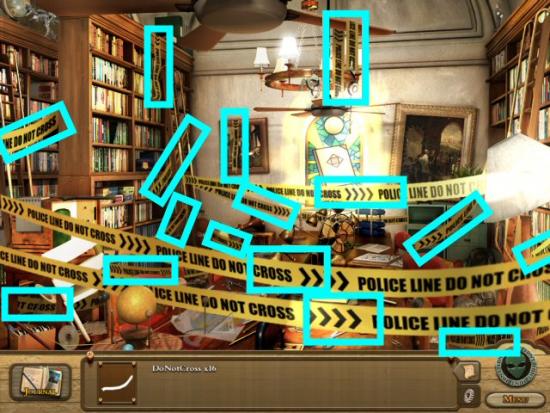
Apparently, the Library was broken into. Help the Librarian with the clean up. Collect all 16 pieces of Do Not Cross tape (cyan). Note: your Do Not Cross tape may be in different locations than the ones shown.
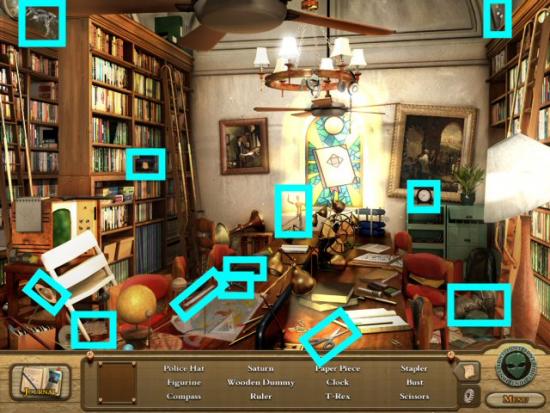
Collect all the objects (cyan) in the Item List. Note: your Item List will probably be different.
Library Shelves
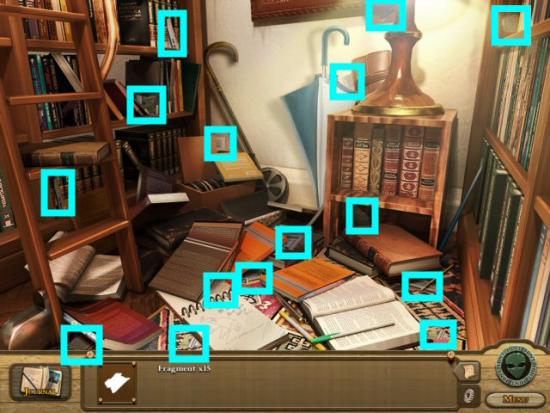
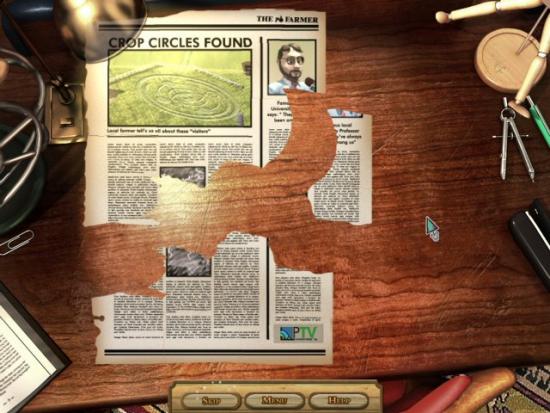
One of the items you found is a torn Paper Fragment from a Newspaper. Collect the 15 Paper Fragments (cyan). Note: your Paper Fragments may be in different locations than the ones shown.
Reassemble Newspaper Minigame
Click on a piece to rotate it; click and drag a piece to move it into place. I suggest beginning with the border pieces first (I started with a top piece as it was more distinctive) then rotating and moving the center pieces into place. Note: you can connect 2 or more pieces then move the whole into place. I began with rotating and moving my pieces, and arranging them in sections before bringing them all together.
Library Reading Area
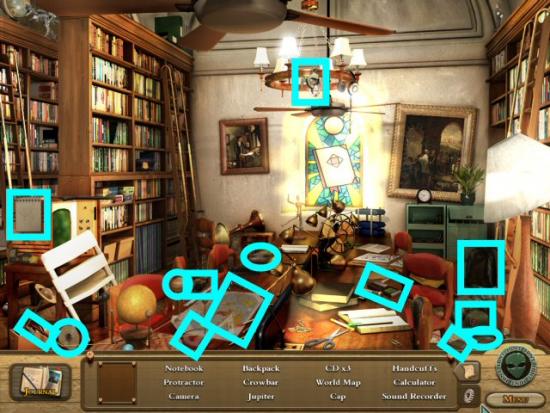
Apparently, a Professor investigated a similar occurrence at another farm. First, let’s see what else we can find. Collect all the objects (cyan) in the Item List. Note: your Item List will probably be different.
Farmer’s Market Minigame 2
Before we head off to Eliza’s farm, let’s help Joe sell some more items at the Farmer’s Market. Click on the Map to go to the Farmer’s Market.
The instructions are the same as the first Farmer’s Market Minigame. The object is to find 3 items in the scene, for each customer. You need to serve a total of 8 customers. Note: this minigame cannot be skipped.
Choose one of the remaining 4 locations to repair, with the money you and Joe earned at the Farmer’s Market.
Chapter 3 – Eliza’s Farm
Time to head over to Eliza’s Farm and see if we can get more information about the Crop Circles phenomenon. Click on the Map to go to Eliza’s Farm.
Eliza’s Yard
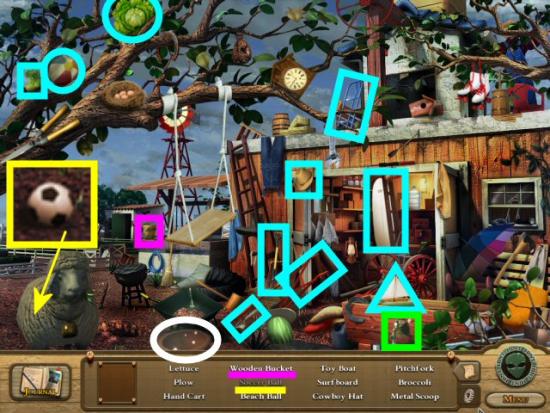
Eliza’s farm was also hit hard by the storm. Time to do the neighborly thing and help her clean up a bit. Collect all the objects (cyan) and the Wooden Bucket (magenta), in the Item List. Click on the Inventory button and use the Wooden Bucket on the Faucet (green) in the sparkling area. Next, use the Full Bucket on the Bowl (white) in the other sparkling area. Once you’ve finished, click on the Soccer Ball (yellow), hidden behind the Sheep, to finish the Item List.
Eliza’s Tool Shed
After the sheep moved, Jane notices a strange object buried in the ground. There are probably tools in Eliza’s Tool Shed that can help her. Collect all the objects (cyan) in the Item List. Note: your Item List will probably be different, except for the Shovel and Pickaxe.
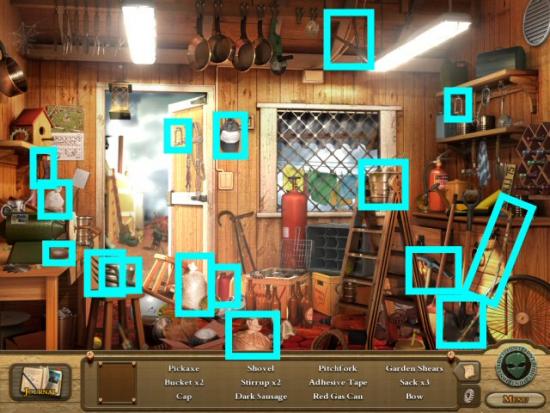
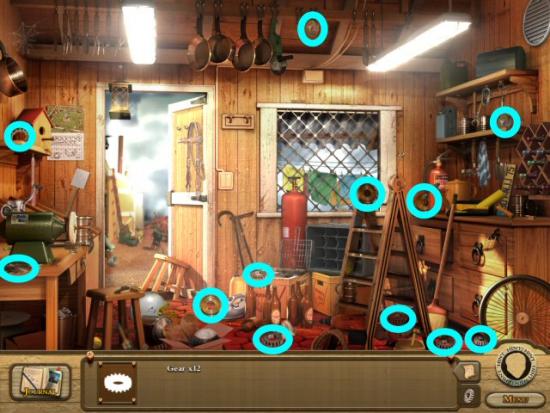
Next, find all 12 Gears (cyan). Note: your Gears may be in different locations than the ones shown.
Eliza’s Yard
We’re almost there. Collect all the objects (cyan), in the Item List. Click on the Inventory button and use the Pick and the Shovel, in that order on the Metal Ring (yellow) in the sparkling area. Once you’ve finished, click on the Metal Ring to finish the Item List.
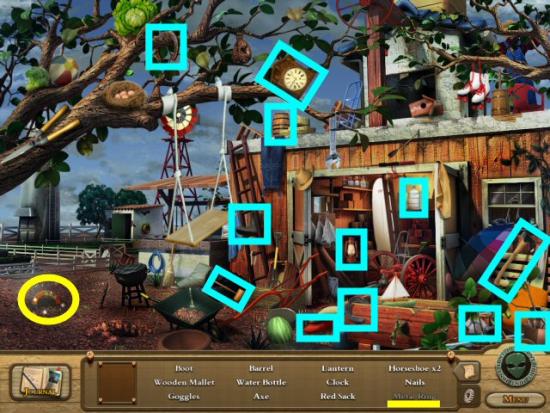
Eliza seems to think the Metal Ring is just a prank. Jane’s not so sure and decides to get her Metal Detector and see if she can locate more Metal Rings.
Chapter 3 – Jane and Joe’s Farm 2
Click on the Map to go to Jane and Joe’s Farm.
Jane and Joe’s Shed
Collect all the objects (cyan) and the Metal Detector Parts (magenta), in the Item List.
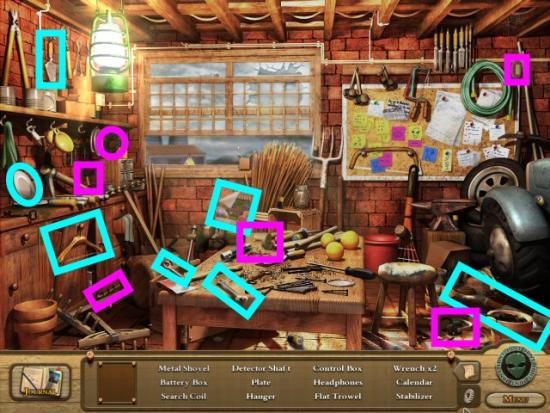
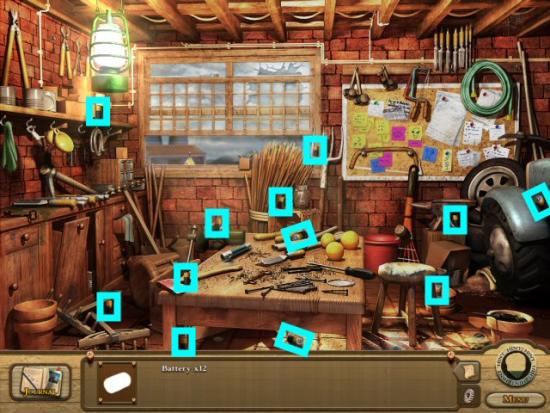
Next, Collect 12 Batteries (cyan).
Assembling the Metal Detector Minigame
To make it easier, move the Control Box and Search Coil (green) off of the Metal Detector Schematic (magenta), so you can see how to put it together.
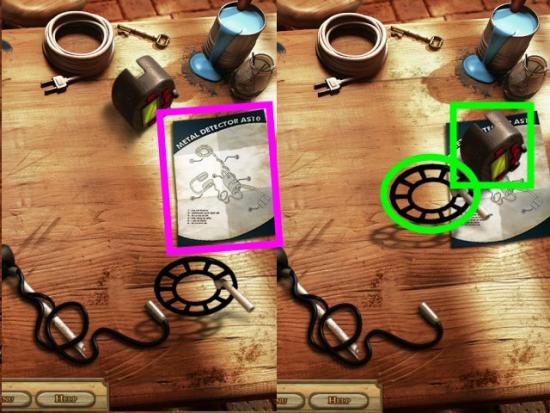
Drag and drop each piece into its correct position. When it’s in the right place, the piece will get somewhat transparent. When you release your mouse button it will connect to the correct piece. Note: you can begin anywhere on the table, with any 2 pieces that will connect. The following screenshot shows the pieces in approximate order, with the Battery Box already connected to the Detector Shaft (green), according to the Metal Detector Schematic.
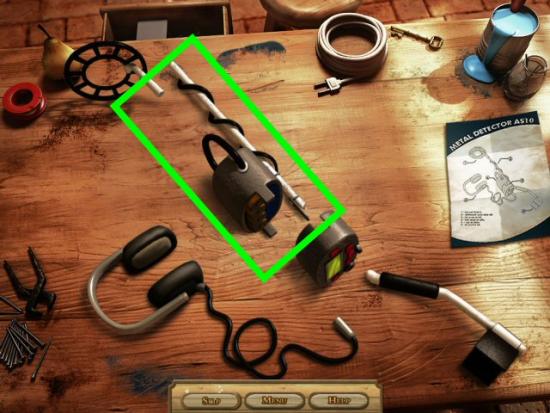
Chapter 4 – Eliza’s Farm 2
Click on the Map to go to Eliza’s Farm.
Eliza’s Tool Shed
Eliza didn’t really know what the Professor’s findings were, but she’s sure his Card is in the Tool Shed. Collect all the objects (cyan) and the Key (magenta), in the Item List. Click on the Inventory button and use the Key on the Lock (yellow) in the sparkling area. Click on the drawer and collect the Card (green) to finish the Item List.
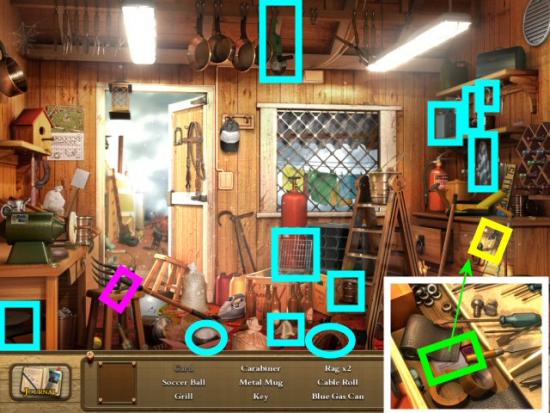
Jane now has the Professor’s name, Charles Fort. But, before calling him, she’s going to try and see if she can find any more of those Metal Rings.
Metal Rings Minigame
Move your cursor over the scene until it stops flashing and beeping and remains a solid green with a steady tone. The closer you are, the faster it flashes and beeps. Click on that spot to collect the Metal Ring. Find all 11 Metal Rings (cyan). Note: your Metal Rings may be in different locations than the ones shown.
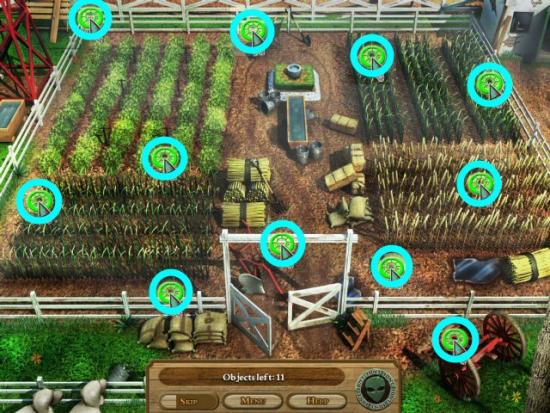
Farmer’s Market Minigame 3
Time to earn some more money to continue with the repairs to the farm. The instructions are the same as the first Farmer’s Market Minigame. The object is to find 3 items in the scene, for each customer. This time, you need to serve a total of 10 customers. Note: this minigame cannot be skipped.
Choose one of the remaining 3 locations to repair, with the money you earned at the Farmer’s Market.
Chapter 4 – University
Time to talk to Professor Fort. Click on the Map to go to the University.
Charles Fort’s Office
It seems Charles Fort isn’t in his office and no one’s seen him, lately. Let’s check out his Office and see what we can find. Collect all 15 Sticky Notes (cyan). Note: your Sticky Notes may be in different locations than the ones shown.
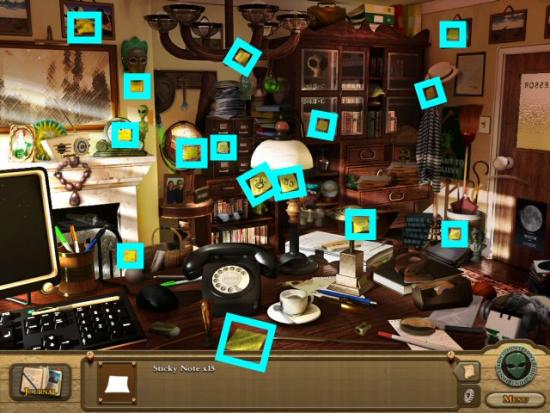
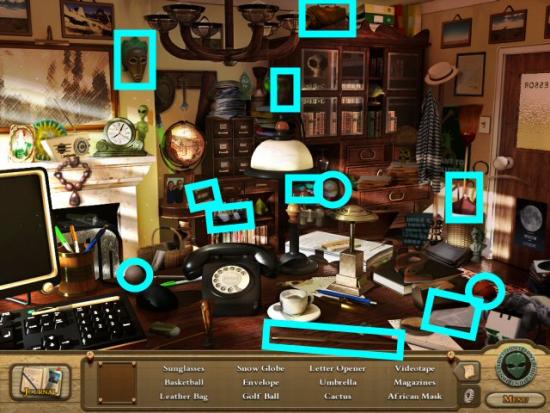
Those Sticky Notes all have symbols that resemble the ones on the Metal Rings. Better look around some more and see what else we can find. Collect all the objects (cyan) in the Item List. Note: your Item List will probably be different.
Decode Symbols Minigame
For this minigame, you need to decode the message. Some of the symbols have a letter below them, but the others are missing. Using the letters already decoded, drag and drop them to the correct positions, under the symbols that are missing letters. Here is the solution
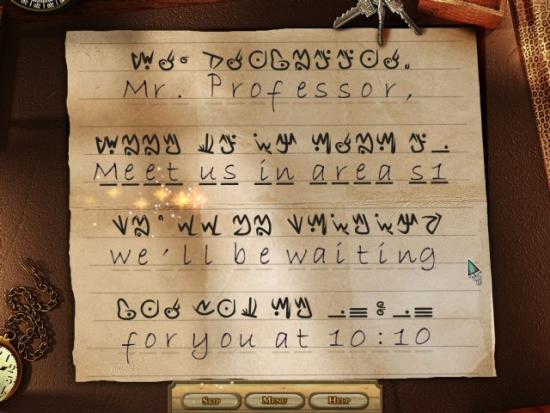
Mr. Professor, Meet us in area s1 we’ll be waiting for you at 10:10. Hmmm. I wonder where Area S1 is located. Let’s look some more and see if we can find any more information.
Professor Fort’s Desk
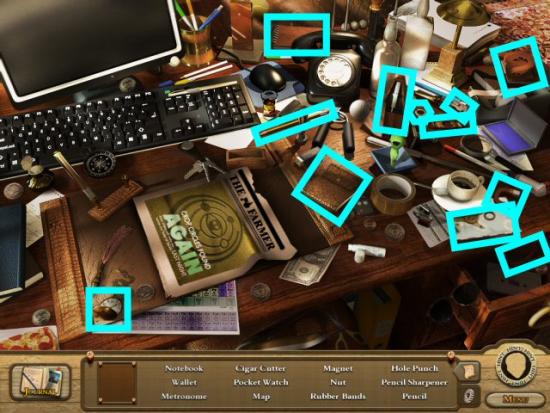
Collect all 12 Paper Clips (cyan). Note: your Paper Clips may be in different locations than the ones shown (Sigh. I know; paper clips. That’s okay; we can link them together and make a bracelet).
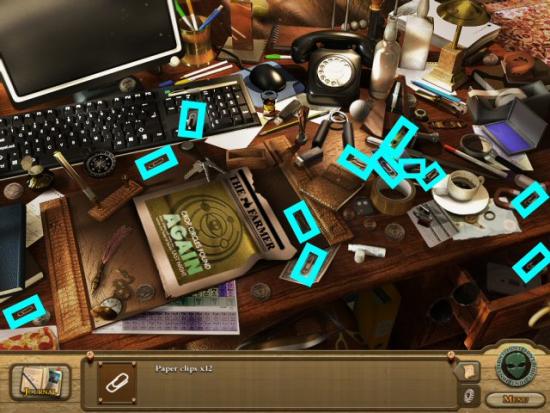
Collect all the objects (cyan) in the Item List. Note: your Item List will probably be different.
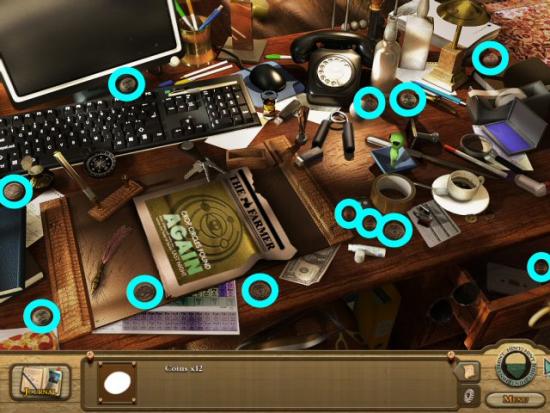
Collect all 12 Coins (cyan). Note: your Coins may be in different locations than the ones shown.

at map we found seems to indicate the location of Area S1. Time for another road trip…but, before we go investigating, let’s head back to the Farmer’s Market and help Joe earn some more money for repairs. The instructions are the same as the first Farmer’s Market Minigame. The object is to find 3 items in the scene, for each customer. This time, you need to serve a total of 10 customers. Note: this minigame cannot be skipped.
Choose one of the remaining 2 locations to repair, with the money you earned at the Farmer’s Market.
Chapter 5 – Area S1
Road to Marswell City
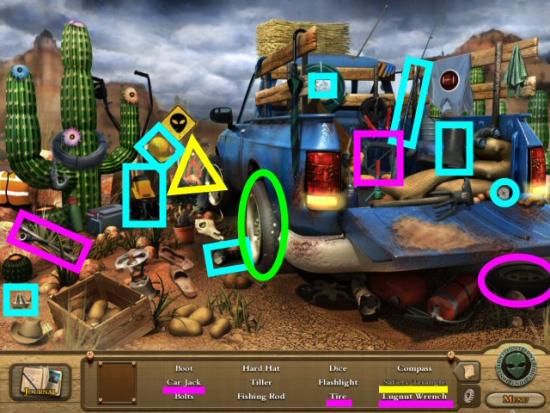
We head out towards Marswell City, in search of Area S1, only to get a flat tire on the truck. Looks like we’re going to have to put the spare tire on if we want to get there before nightfall. Collect all the objects (cyan) and Tire, Lug Wrench and Jack (magenta), in the Item List. Click on the Inventory button and use the Lug Wrench, Jack, Tire, Lug Nuts and Lug Wrench, in that order, on the Flat Tire (green). Once you’ve finished with the Tire, click on the Safety Triangle (yellow) to finish the Item List.
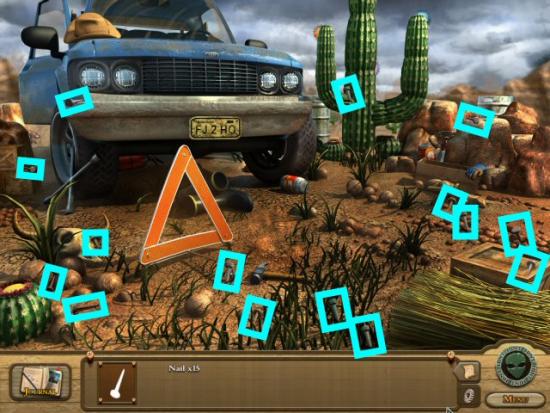
Before we take off, let’s clean up all these nails. It’s probably how we got the flat tire. Collect all 15 Nails (cyan). Note: your Nails may be in different locations than the ones shown.
The road’s clear so we can get moving. Click on the Map to go to Area S1.
Generator
There’s a Generator hooked up to some sort of contraption that has a lock with those same symbols we found on the Metal Rings. The Generator isn’t working, so let’s collect what we need to get it going. Collect all the objects (cyan) and the Fuel Cap, Funnel and Gas Can (magenta) in the Item List. Note: your Item List will probably be different, except for the Fuel Cap, Funnel and Gas Can.
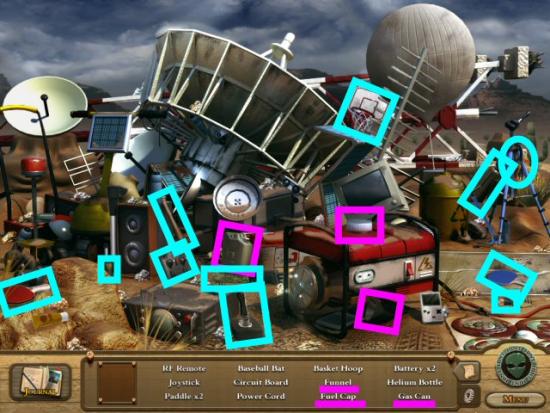
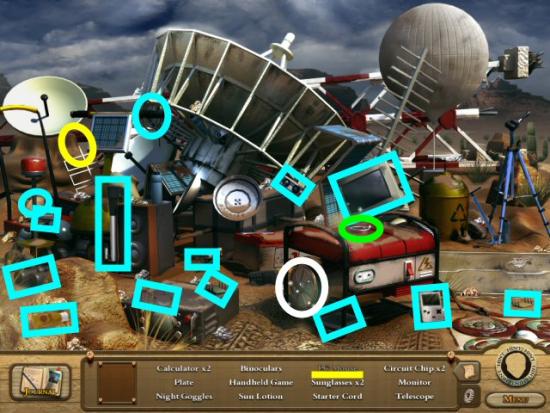
Seems we still need some more things. Collect all the objects (cyan) in the Item List. Note: your Item List will probably be different, except for the PC Mouse. Click on the Inventory button and use the Funnel, Gas Can and Fuel Cap, in that order, on the top of the Generator (green). Use the Starter Cord on the front of the Generator (white). Once you get the Generator running, collect the PC Mouse (yellow) that appears on the right.
Circular Rings Minigame
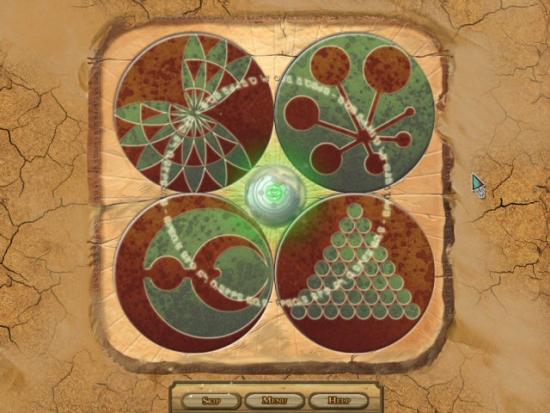
Now that the Generator is running, you can try and figure out the Lock to the X. Click on the Rings to rotate them clockwise, right click to rotate them counter-clockwise, until the symbols line up. Also, notice that all 4 Rings have an arc of small circles that must line up through all 4 Rings, too. Here is the solution.
Underground Bunker
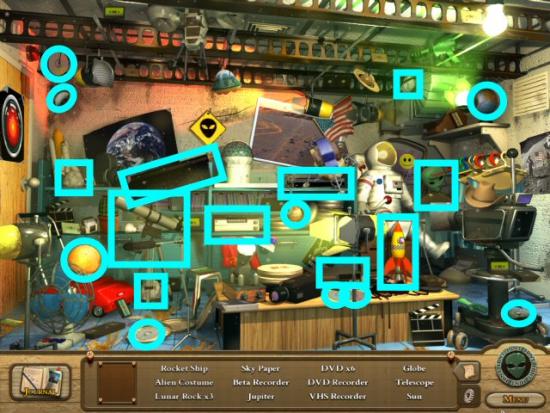
As soon as the last Ring slipped into place, a trap door opened, leading to an Underground Bunker…that looked an awful lot like a film studio. Collect all the objects (cyan) in the Item List. Note: your Item List will probably be different.
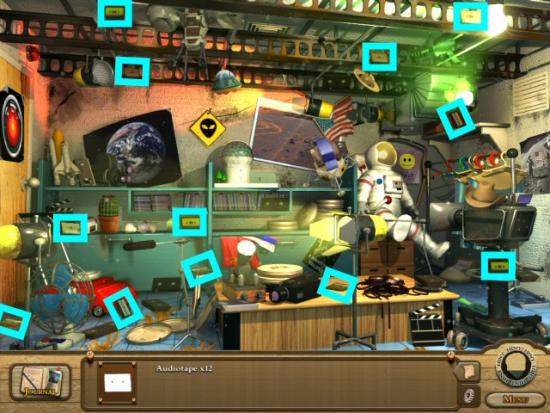
Collect all 12 Cassette Tapes (cyan). Note: your Cassette Tapes may be in different locations than the ones shown.
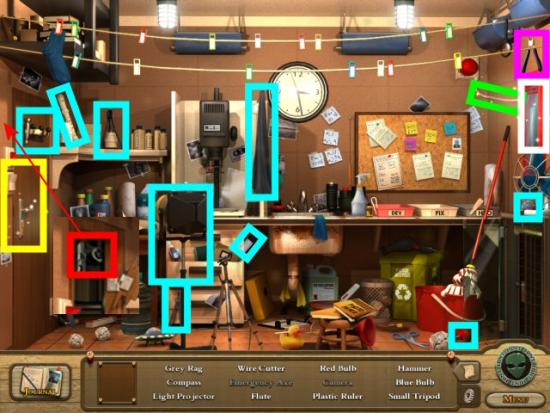
Darkroom
There seems to be someone locked inside the closet in the Darkroom. Collect all the objects (cyan) and Wire Cutters and Hammer (magenta), in the Item List. Click on the Inventory button and use the Wire Cutters on the alarm wiring (green), then use the Hammer on the Emergency Axe (white). Click on the Emergency Axe to add it to Inventory. Use the Emergency Axe on the Door (yellow). You open the door to find Professor Ford bound and gagged, in the closet. After you release him, collect the Camera (red) to finish the Item List.
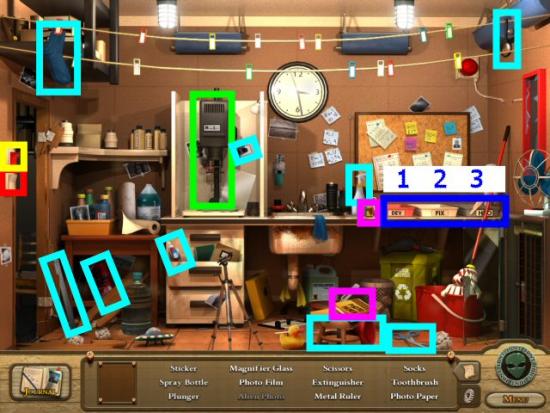
There’s still more evidence to gather. Collect all the objects (cyan) and the Photo Paper and Film (magenta), in the Item List. Click on the Inventory button and use the Film Negatives on the Photo Machine (green). Turn off the White Light (red), turn on the Red Light (yellow) to begin developing and use the Photo Paper on the Photo Machine. Place the exposed Photo into the Developer, Fixer and Water (blue) in the order shown. Click on the finished Alien Photo to complete the Item List. Turn on the Light (red).
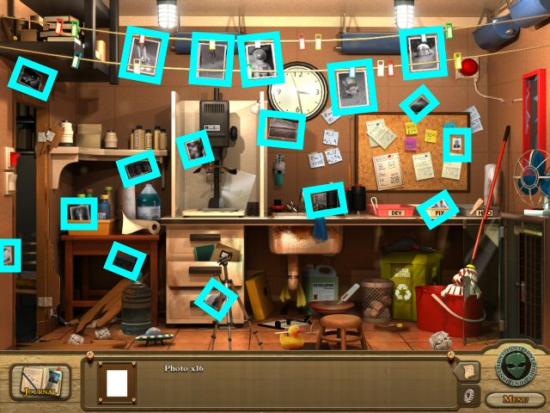
Collect all 16 Photos (cyan). Note: your Photos may be in different locations than the ones shown.
Trapdoor Lock Minigame
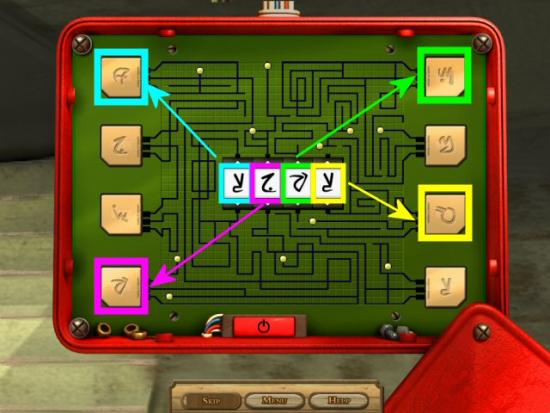
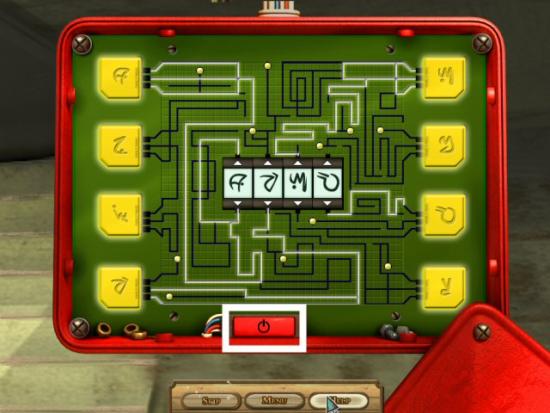
Each symbol in the center is connected to a switch on either the left or the right side. Click on the arrow above or below the center symbols to change it so it matches the symbol on the correct switch on the left or right side. Click the Red Power Button (white) when you’re finished. Note: your symbols will probably be different, but the solution will be the same.
Generator
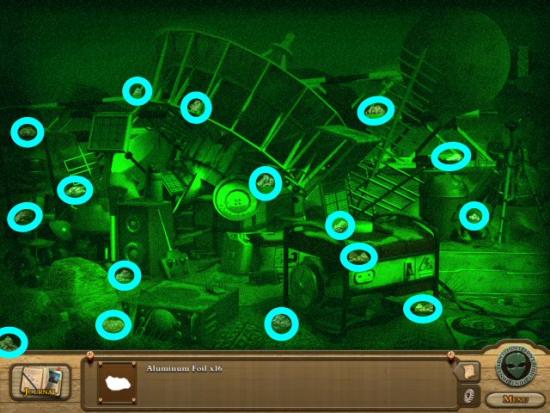
Professor Ford seems to think the pieces of Aluminum Foil may have some strange properties. Collect all 16 pieces of Aluminum Foil (cyan). Note: your pieces of Aluminum Foil may be in different locations than the ones shown.
Time to earn some more money to continue with the repairs to the farm. The instructions are the same as the first Farmer’s Market Minigame. The object is to find 3 items in the scene, for each customer. This time, you need to serve a total of 12 customers. Note: this minigame cannot be skipped.
Click on the remaining location to repair it, with the money you and Joe earned at the Farmer’s Market. Congratulations! The farm is back to the way it was before that terrible storm.
The photos you and Jane found in the Underground Bunker, at Area S1, keep showing the same man. It’s the same man that showed up at the farm, right after that big storm. Jane’s pretty sure Paranormal TV is behind the Crop Circles, just so they can get media coverage for the fake phenomena. Click on the Map to go to Paranormal TV.
Chapter 6 – Paranormal TV
Broadcast Control Room
Collect all the objects (cyan) and key items (magenta), in the Item List. Click on the Inventory button and use the key item on the [insert object name here] (yellow) in the sparkling area. Once you’ve finished, click on the [insert object name here] to finish the Item List. Note: your Item List will probably be different except for the
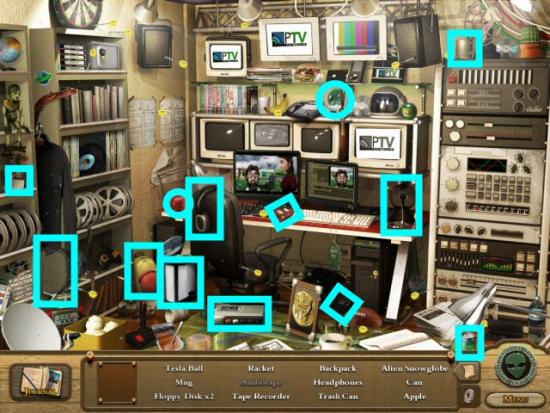
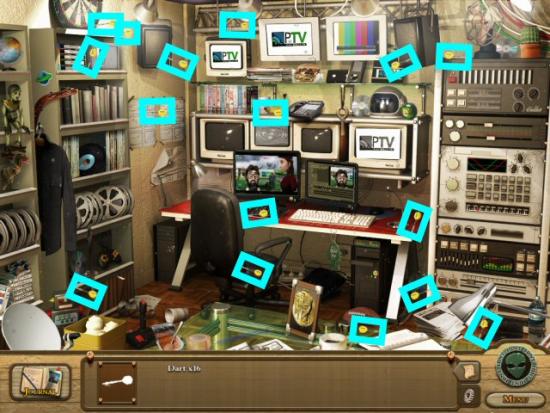
Collect all 16 Darts (cyan). Note: your Darts may be in different locations than the ones shown. Jane and the Professor head off to see if they can catch the Paranormal TV broadcaster admitting to creating the Crop Circles and faking the Alien story.
Security Camera Minigames 1, 2 & 3
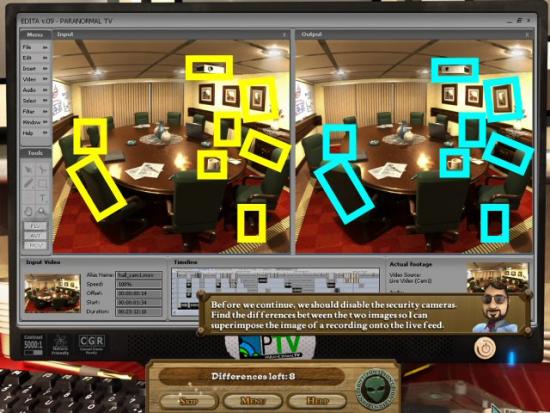
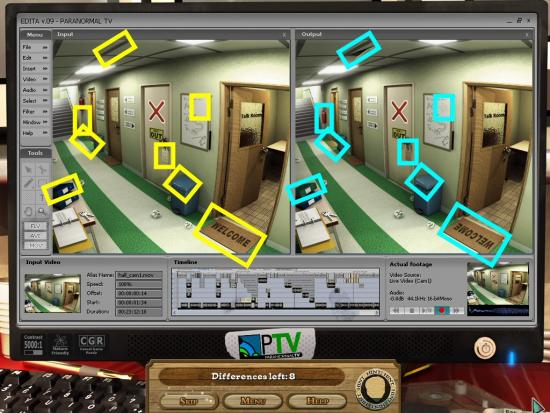
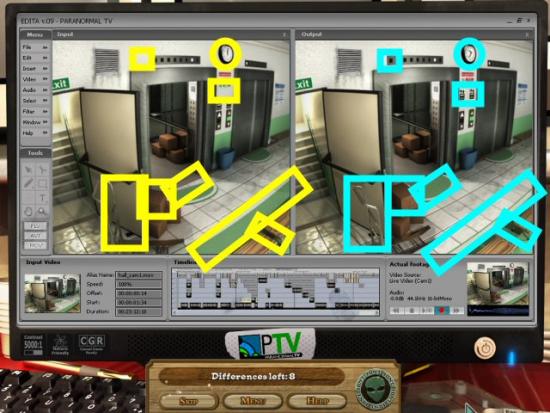
We need to disable the security cameras by switching photos. Find the 8 differences between the photos, in both locations. The Hint button is available or you can Skip it, if you like. Note: your solutions may be different than the ones shown.
CEO’s Office
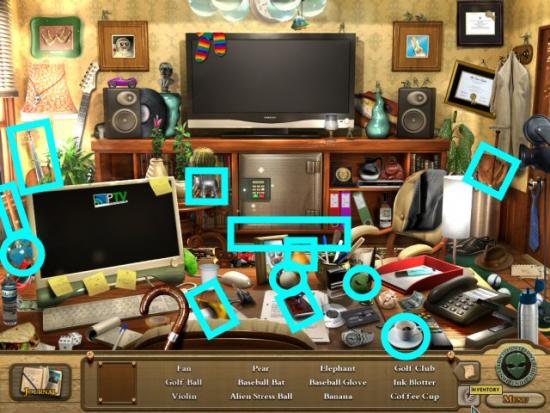
Jane and the Professor make their way to the CEO’s Office. Collect all the objects (cyan) in the Item List. Note: your Item List will probably be different.
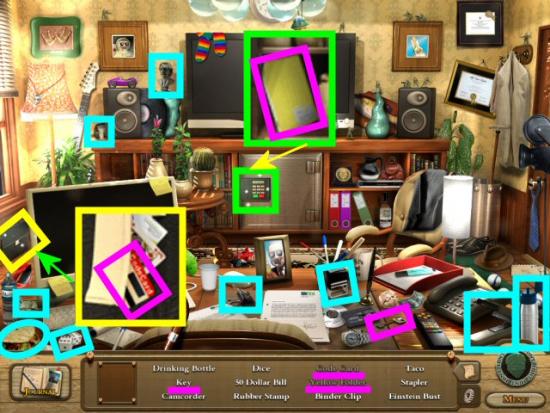
We need to find a way to unlock the Briefcase, and get into the Safe. Collect all the objects (cyan) and the Key (magenta), in the Item List. Click on the Inventory button and use the Key on the Briefcase (yellow) in the sparkling area on the left. Click on the Briefcase and take the Code Card (magenta). Use the Code Card on the Safe (green) and take the Yellow Folder (magenta).
You’re interrupted by the CEO and that Reporter and it seems all hope is lost. But wait! It’s Joe and the Police, to the rescue. Those miscreants are hauled off to the hoosegow. Click on the Map to go to the Police Station.
Epilogue – The Police Station
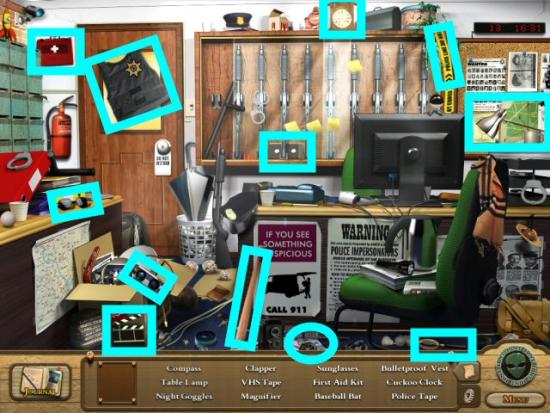
There seem to be quite a few things related to the hoaxes Paranormal TV perpetrated. Collect all the objects (cyan) in the Item List. Note: your Item List will probably be different.
Well I guess all’s well that ends well…or does it. Congratulations! You’ve completed The Crop Circles Mystery. Watch the ending movie.
More articles...
Monopoly GO! Free Rolls – Links For Free Dice
By Glen Fox
Wondering how to get Monopoly GO! free rolls? Well, you’ve come to the right place. In this guide, we provide you with a bunch of tips and tricks to get some free rolls for the hit new mobile game. We’ll …Best Roblox Horror Games to Play Right Now – Updated Weekly
By Adele Wilson
Our Best Roblox Horror Games guide features the scariest and most creative experiences to play right now on the platform!The BEST Roblox Games of The Week – Games You Need To Play!
By Sho Roberts
Our feature shares our pick for the Best Roblox Games of the week! With our feature, we guarantee you'll find something new to play!Type Soul Clan Rarity Guide – All Legendary And Common Clans Listed!
By Nathan Ball
Wondering what your odds of rolling a particular Clan are? Wonder no more, with my handy Type Soul Clan Rarity guide.


