![Digimon UP Tier List [Supports, Buddies, and Partners]](/wp-content/uploads/2026/07/digimon-up-tier-list.jpg "Digimon UP Tier List [Supports, Buddies, and Partners]")
Digimon UP Tier List [Supports, Buddies, and Partners]
These Digimon will get you UP the leaderboard.


![Haze Seas Boss Drops [Chances, Locations, and How to Spawn]](/wp-content/uploads/2026/07/haze-seas-boss-drops.jpg "Haze Seas Boss Drops [Chances, Locations, and How to Spawn]")

Welcome to The Agency of Anomalies: Cinderstone Orphanage walkthrough on Gamezebo. The Agency of Anomalies: Cinderstone Orphanage is a Hidden Object/Adventure Game played on the PC created by Orneon. This walkthrough includes tips and tricks, helpful hints and a strategy guide on how to complete The Agency of Anomalies: Cinderstone Orphanage.
Welcome to The Agency of Anomalies: Cinderstone Orphanage walkthrough on Gamezebo. The Agency of Anomalies: Cinderstone Orphanage is a Hidden Object/Adventure Game played on the PC created by Orneon. This walkthrough includes tips and tricks, helpful hints and a strategy guide on how to complete The Agency of Anomalies: Cinderstone Orphanage.
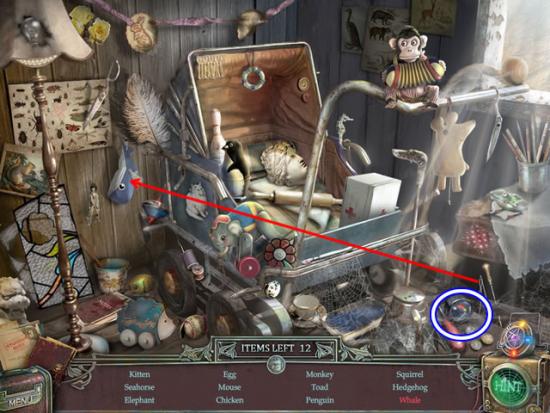
This hidden object game requires visiting several locations and using inventory items to advance play.

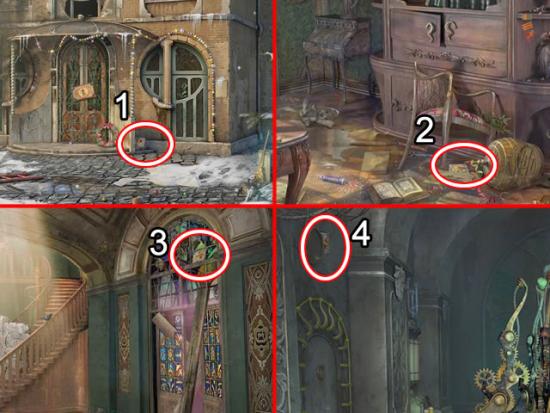
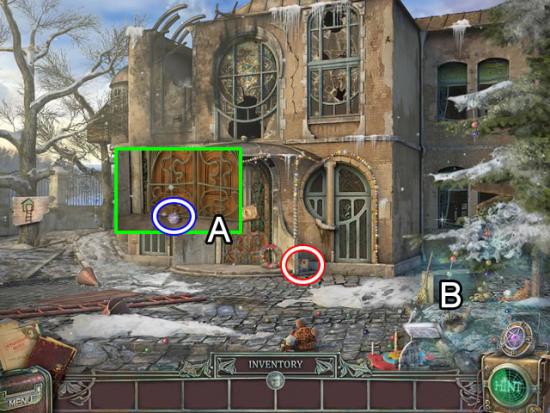
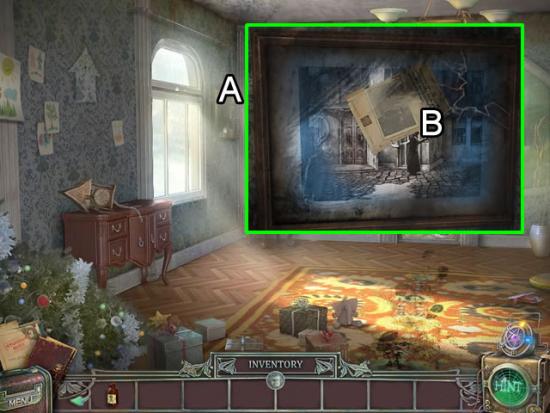
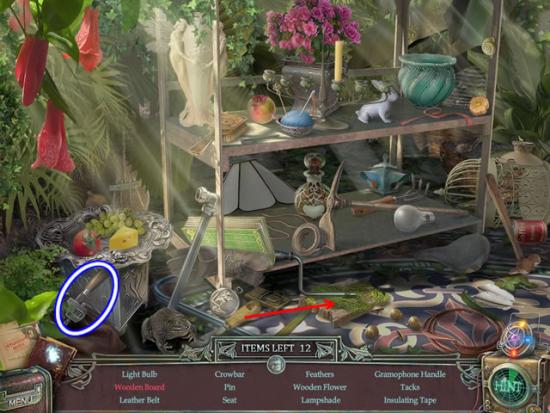
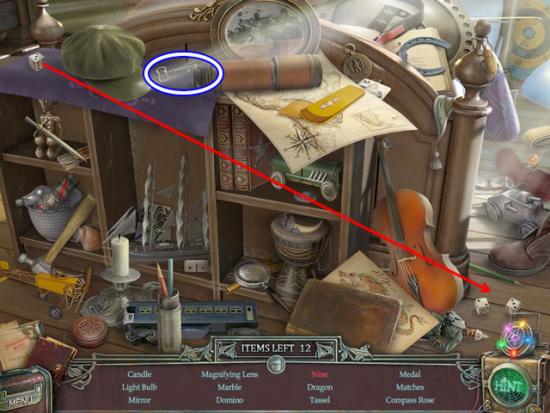
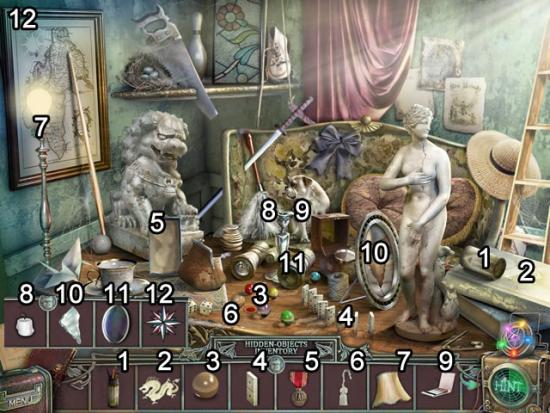
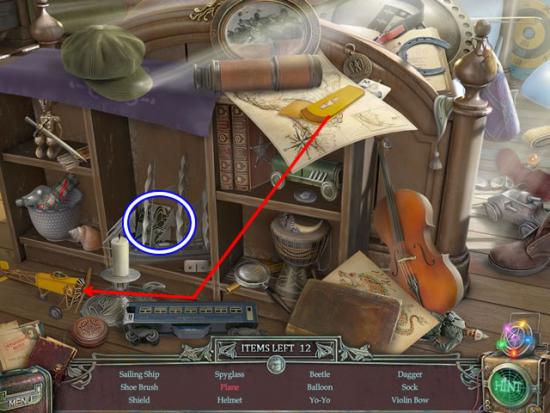
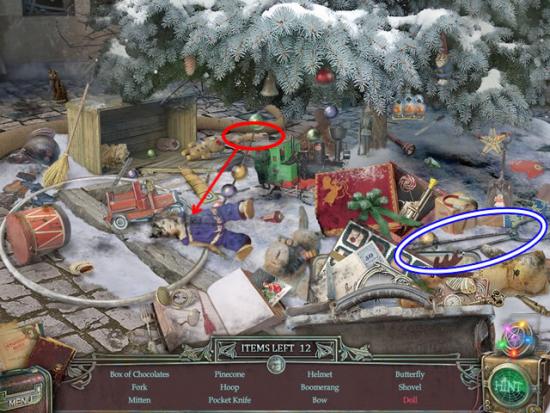
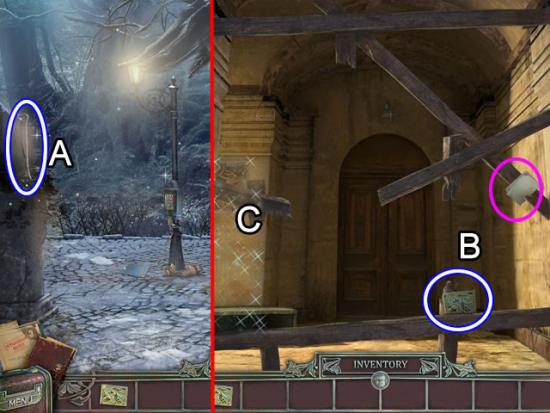
Orphanage Exterior
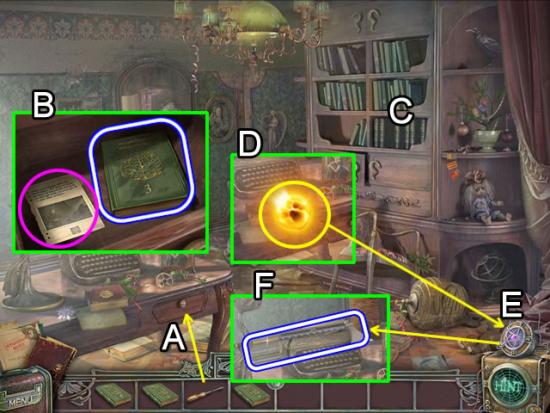
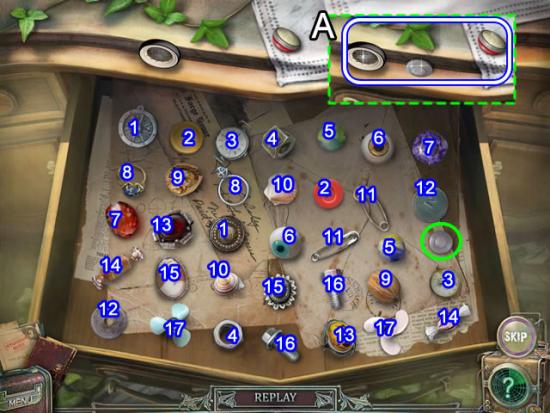
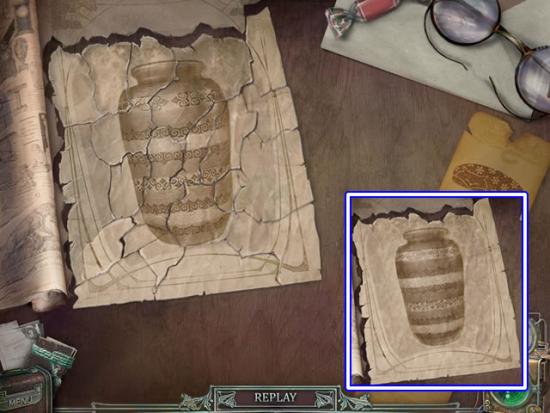
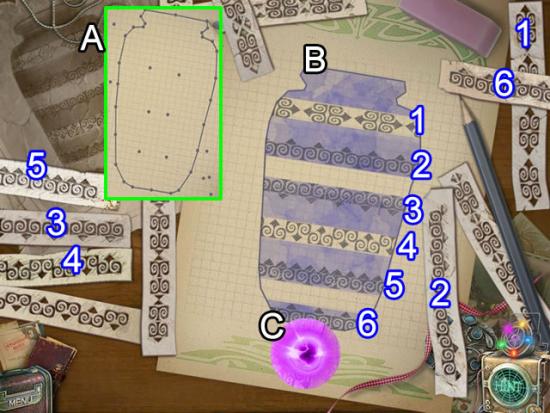
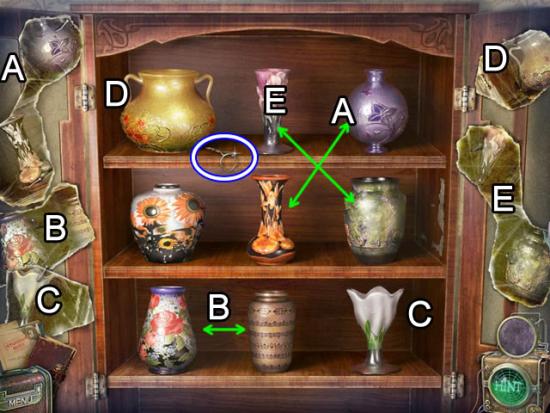
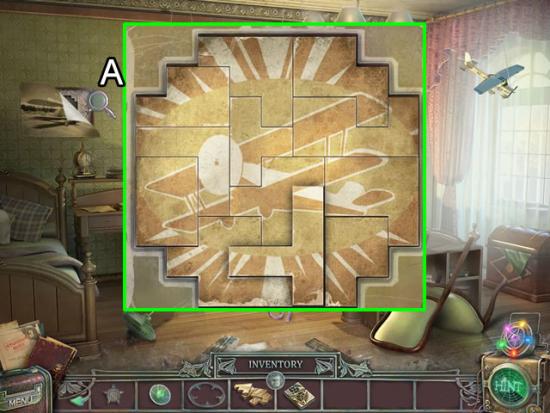
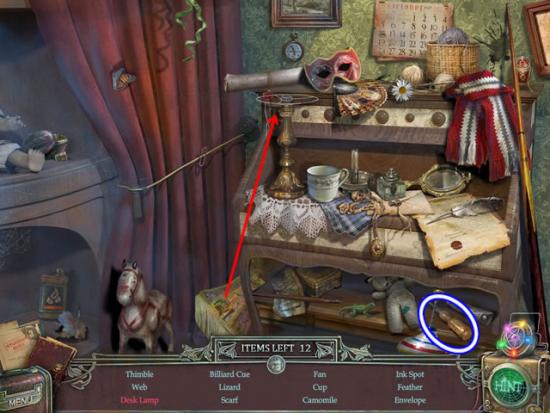
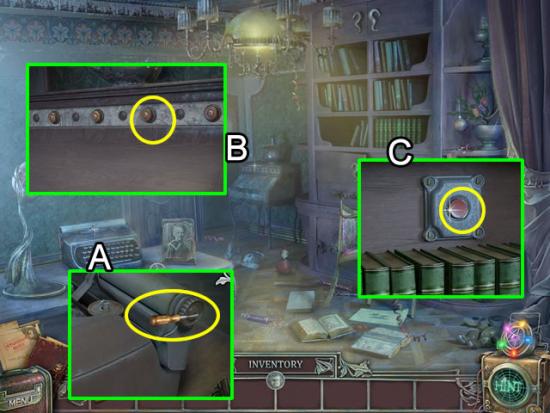
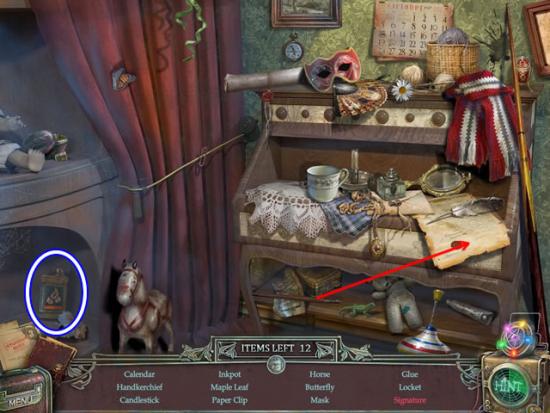
Preceptress’ Office
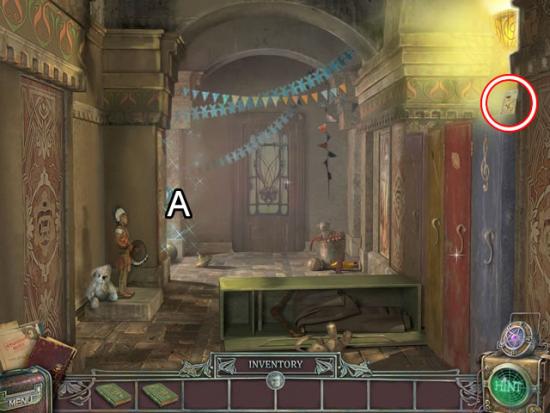
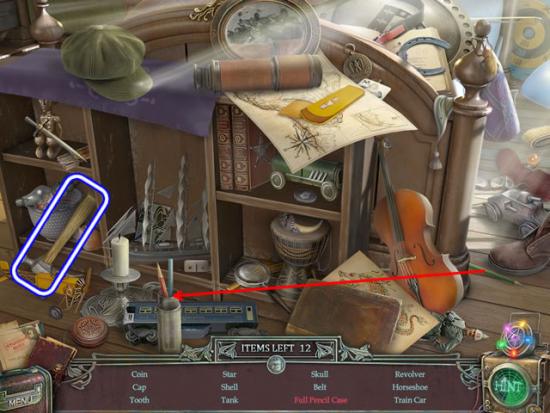
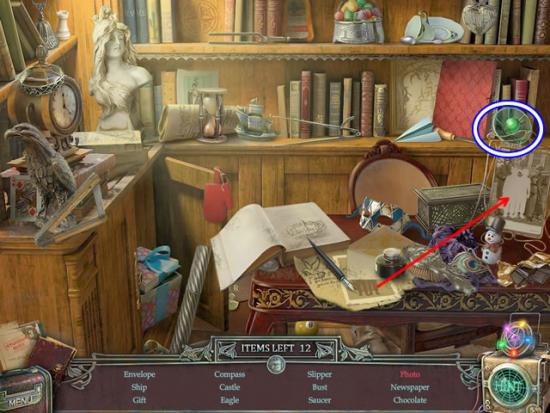
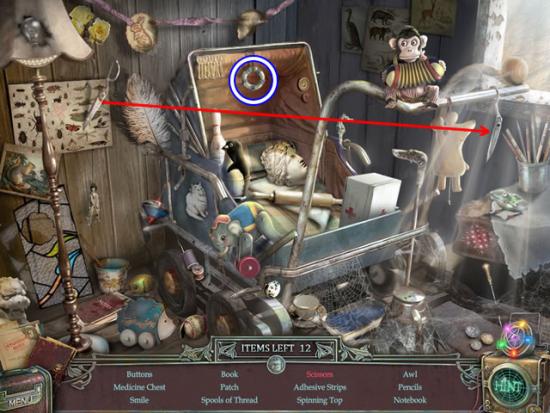
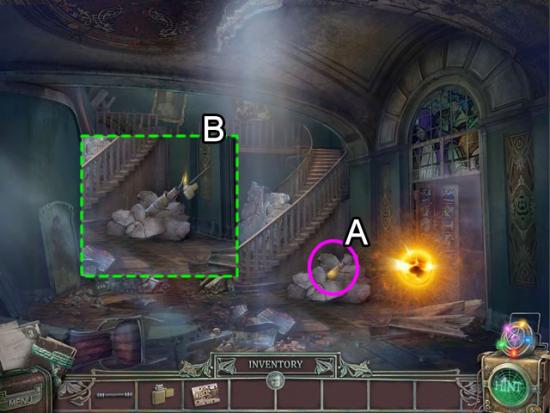
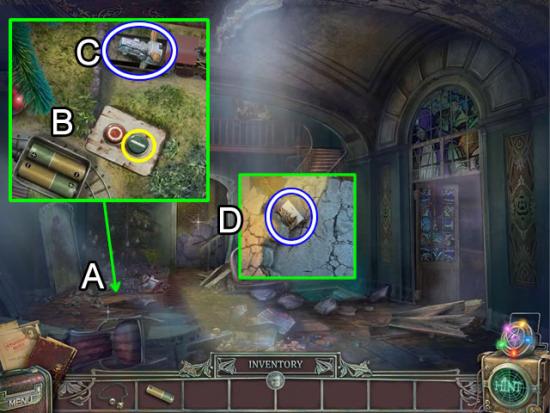
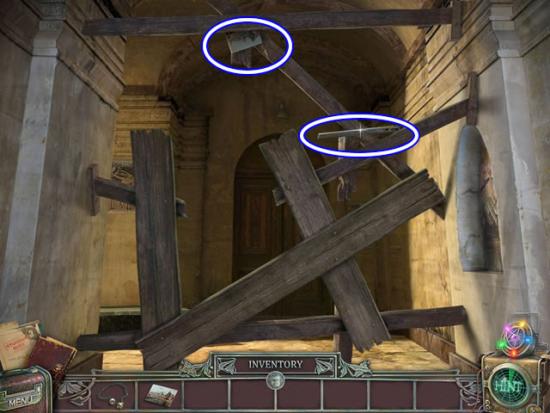
Entryway
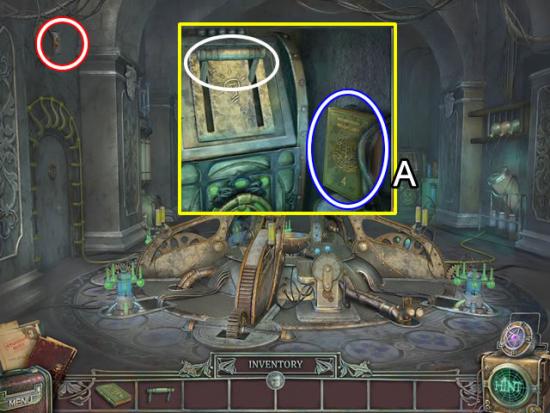
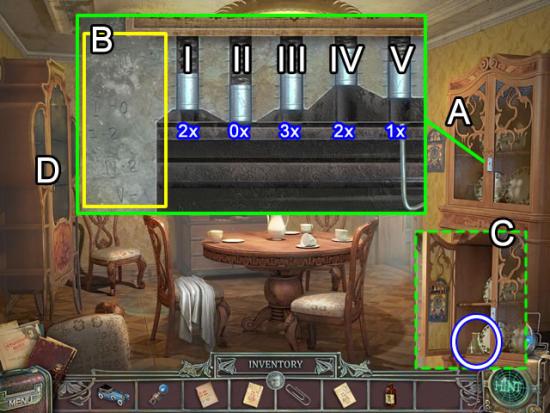
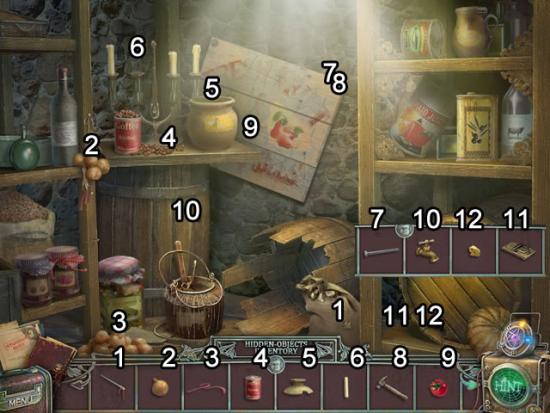
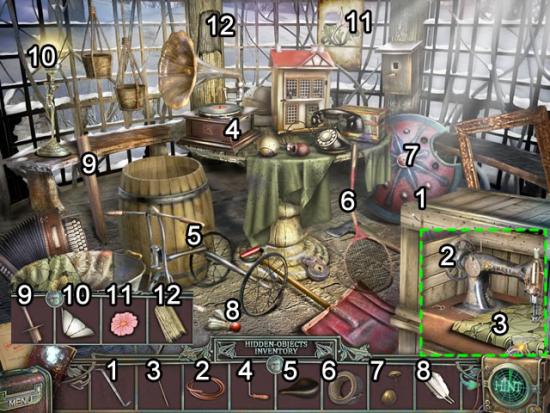
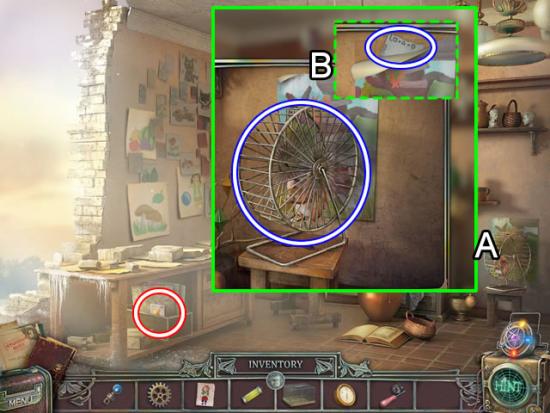
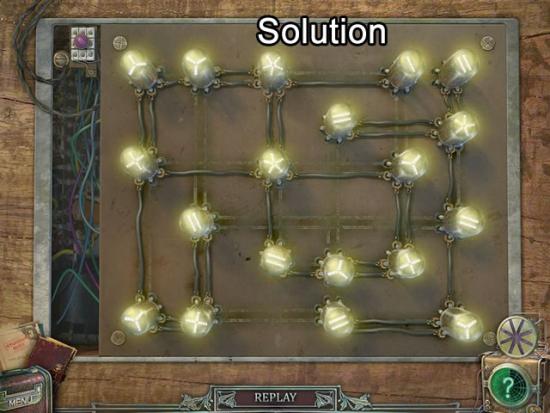
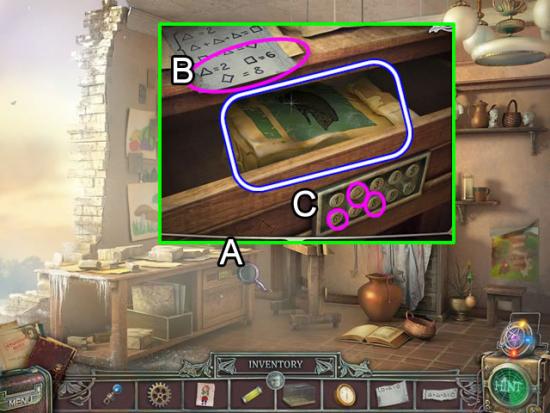
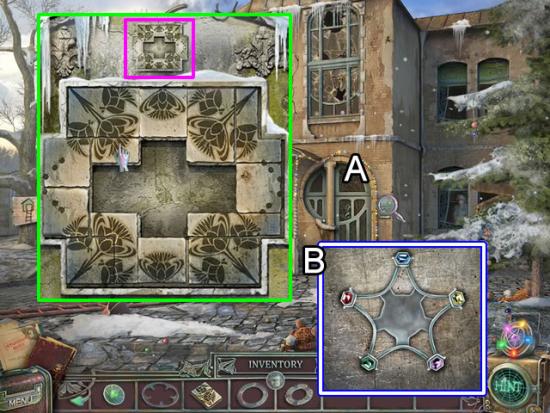
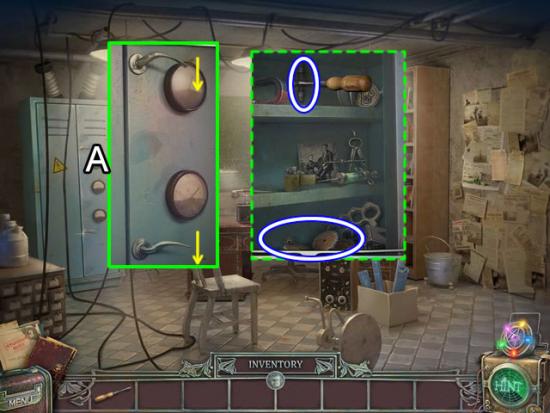
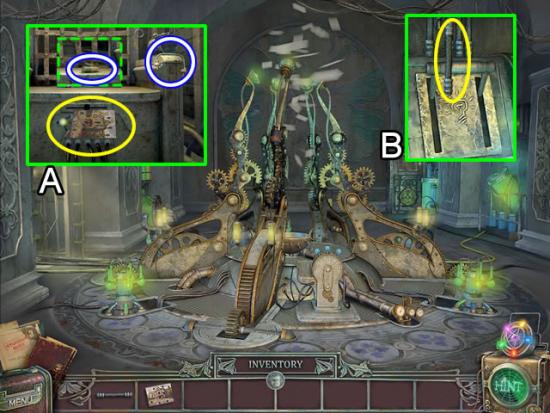
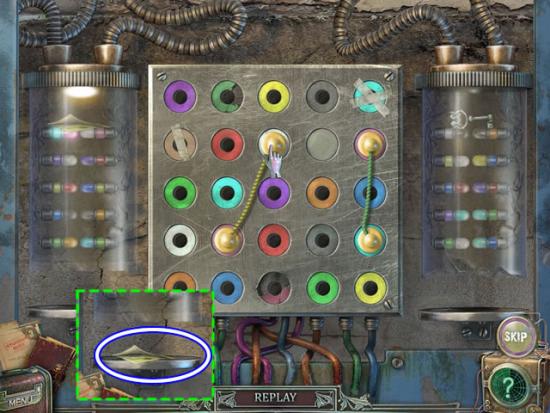
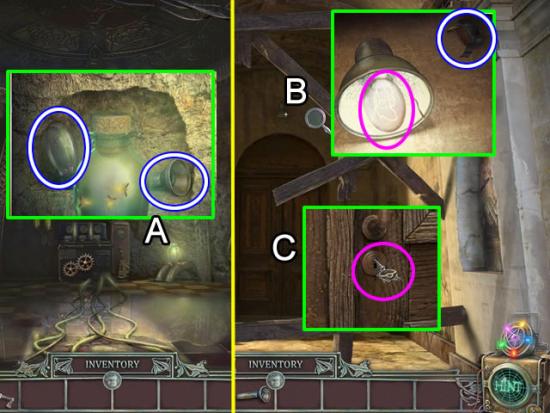
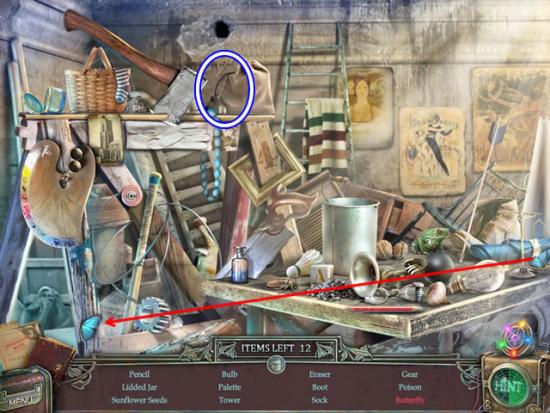
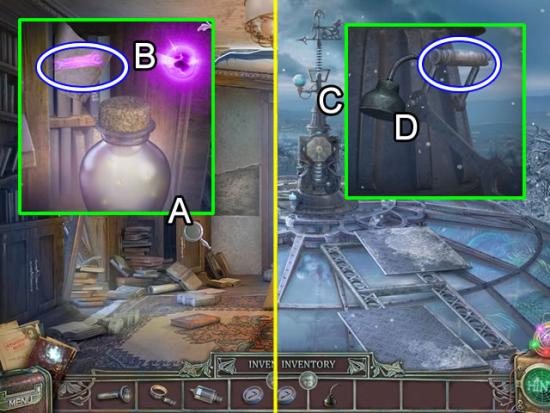
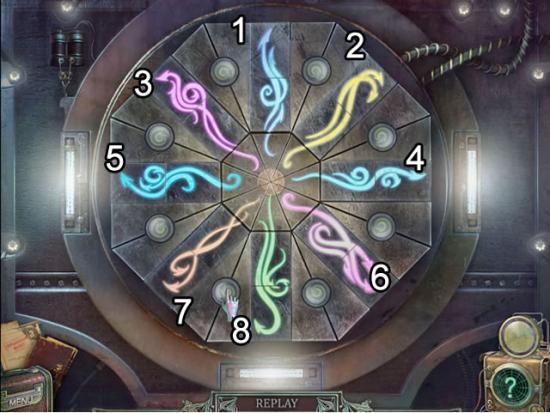
Basement – Machine Room
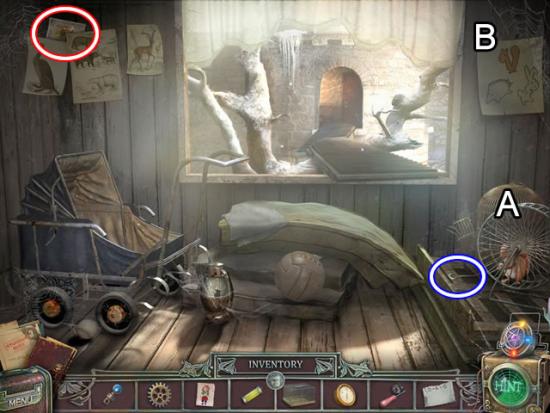
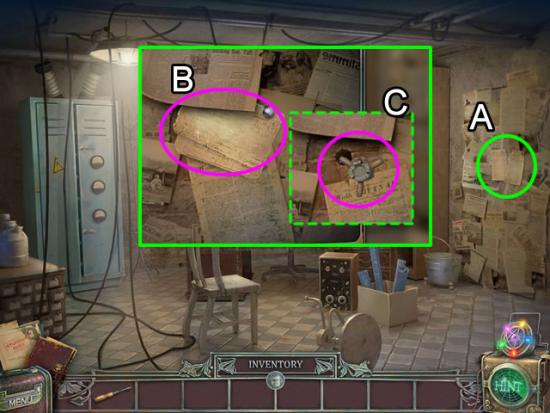
Locker Hallway
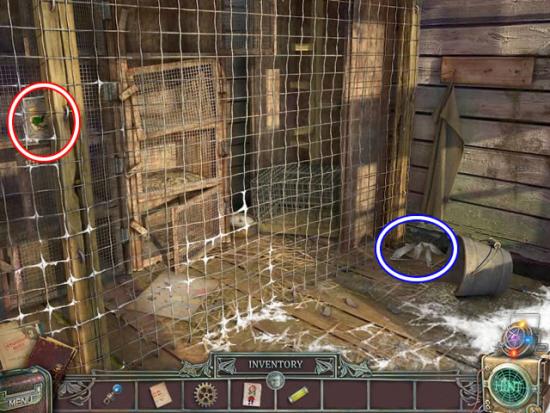
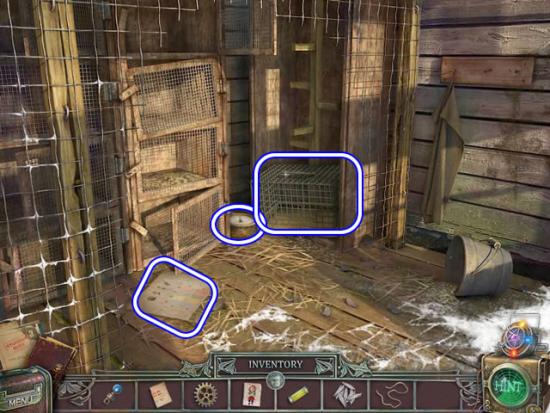
Side yard
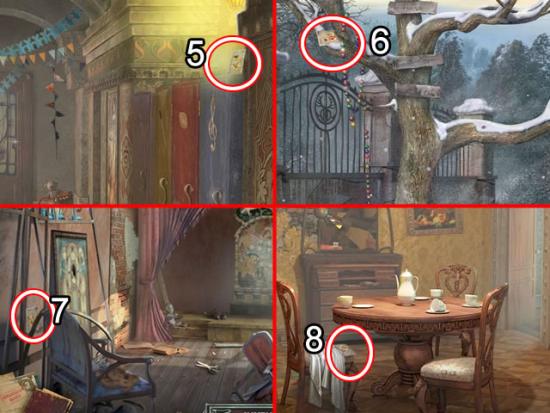
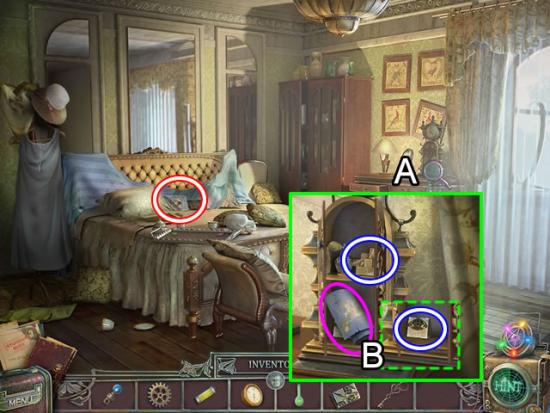
Preceptress’ Office
Entryway

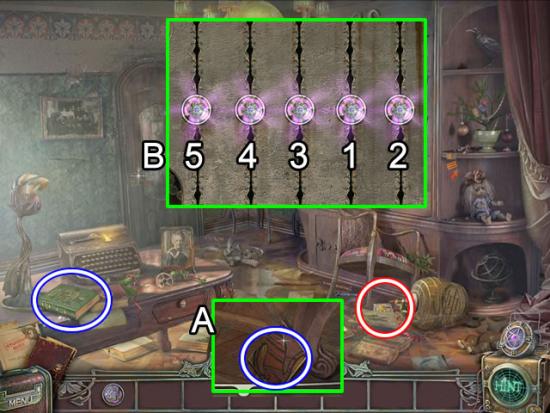
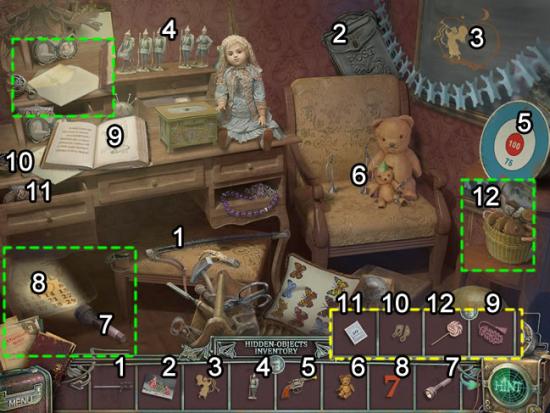
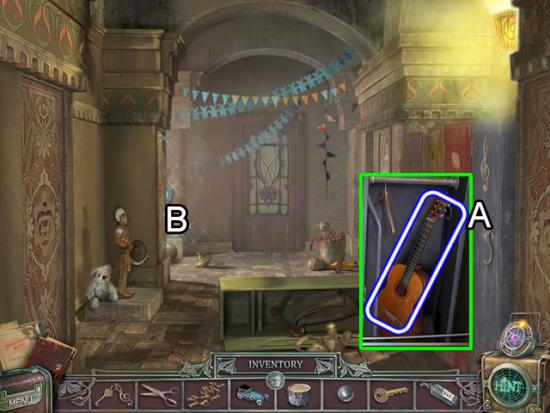
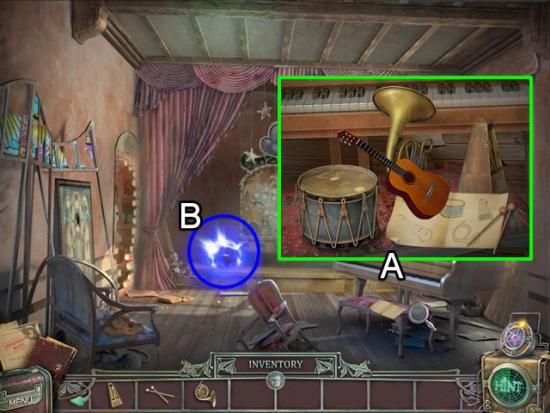
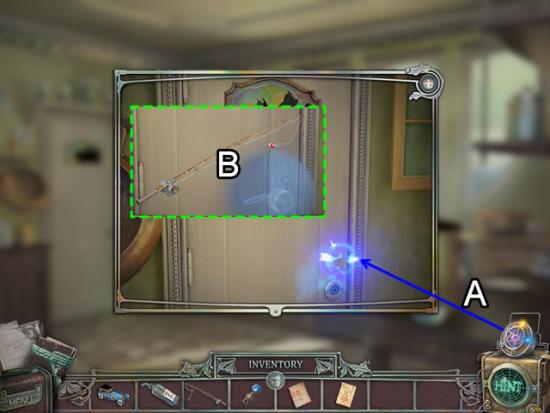
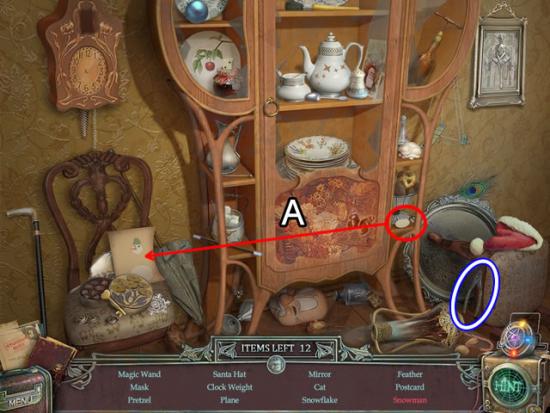
Music Room
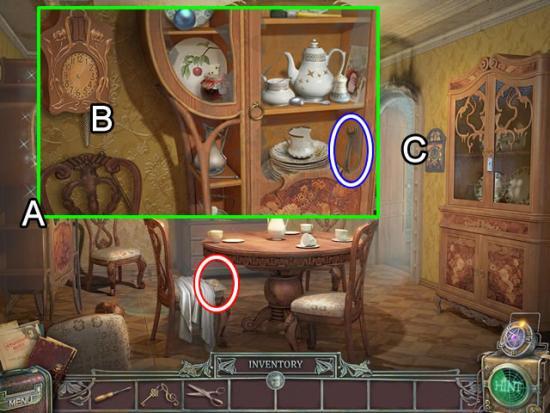
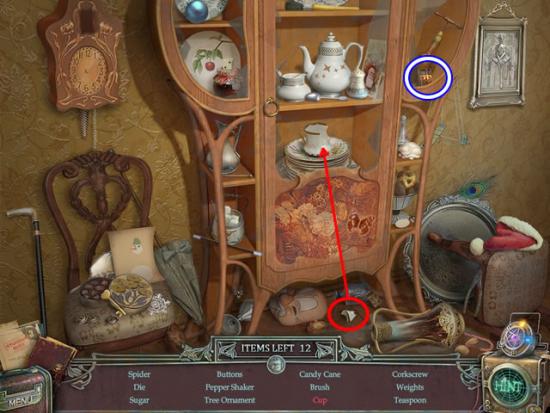
Dining Room
Family Room – Left Side

Family Room – Right Side
Family Room – Left Side
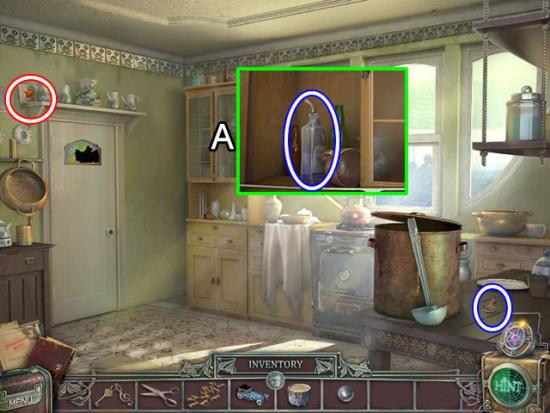
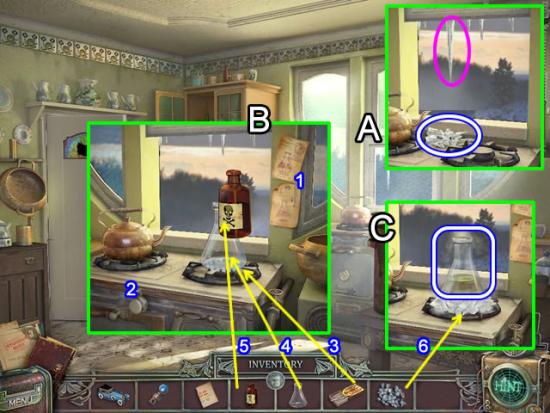
Kitchen
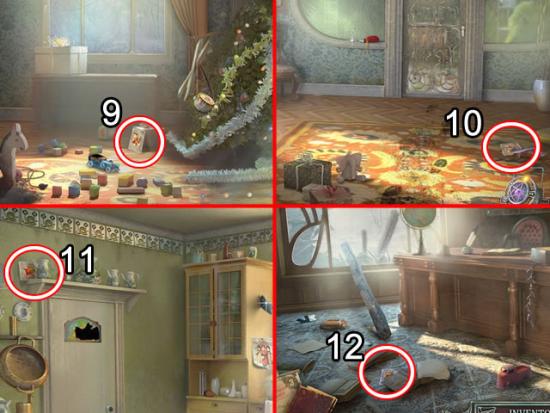
Locker Hallway
Office
Dining Room
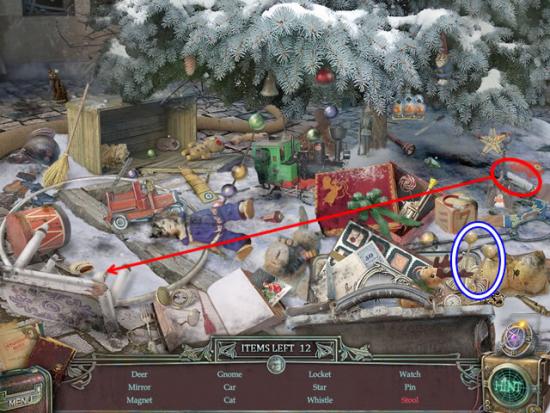
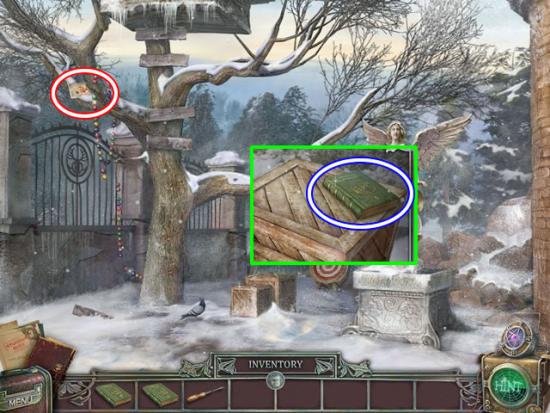
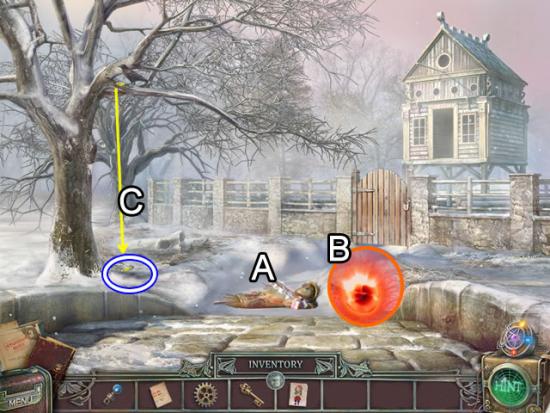
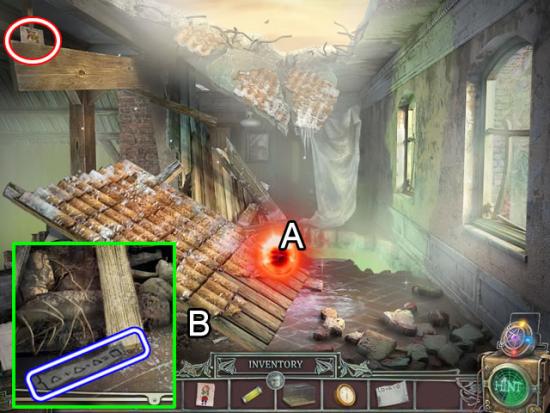
Orphanage Exterior
Side Yard
Music Room
Kitchen

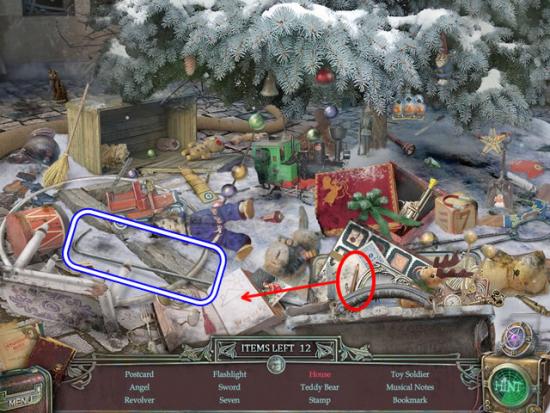
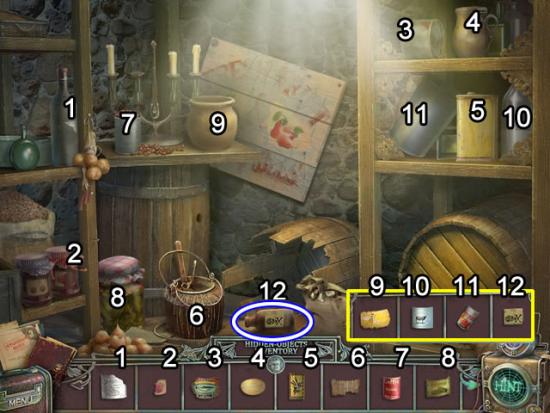
Pantry
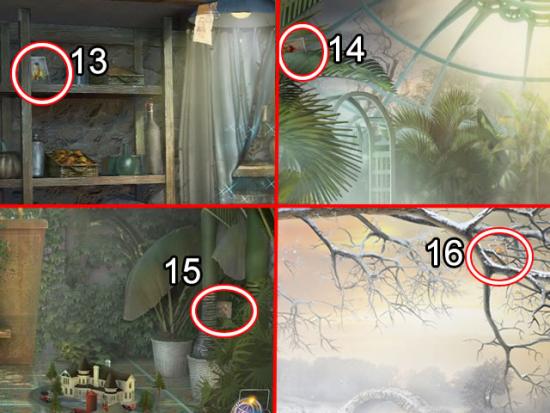
Family Room – Right
Dining Room
Kitchen
Family Room – Right

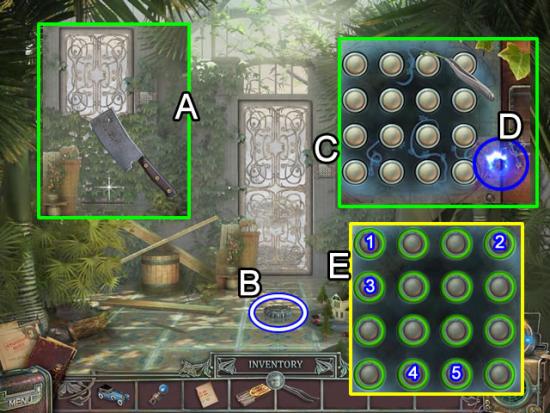
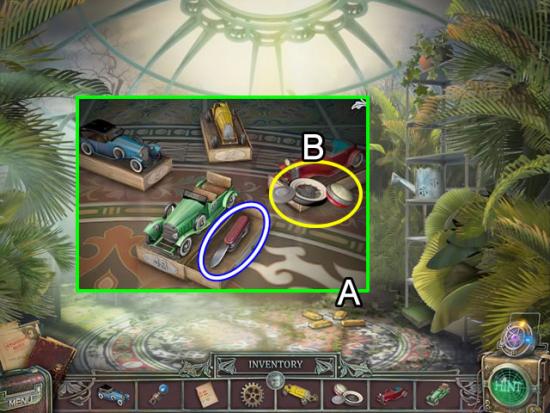
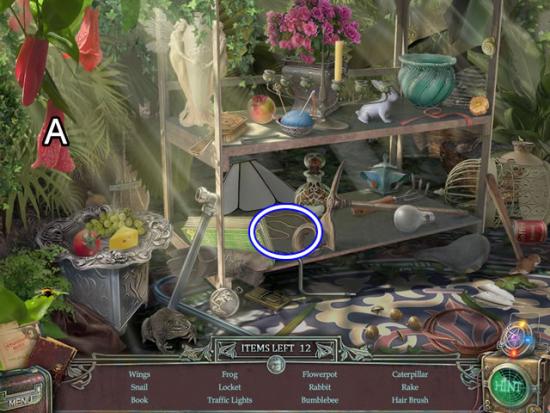
Greenhouse
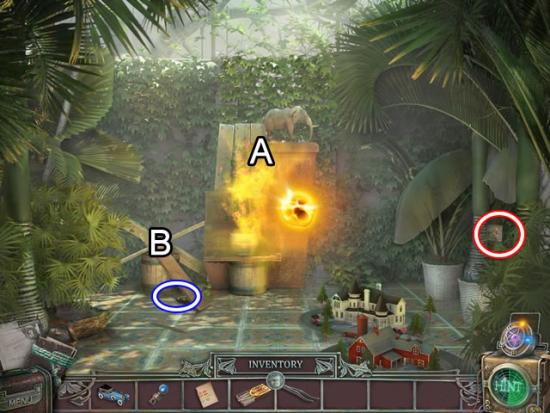
Greenhouse Patio
Kitchen
Greenhouse Patio
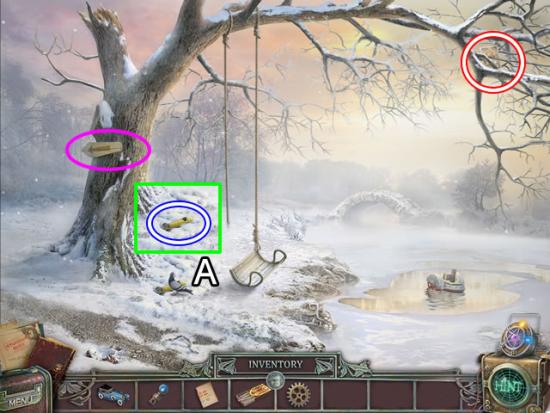
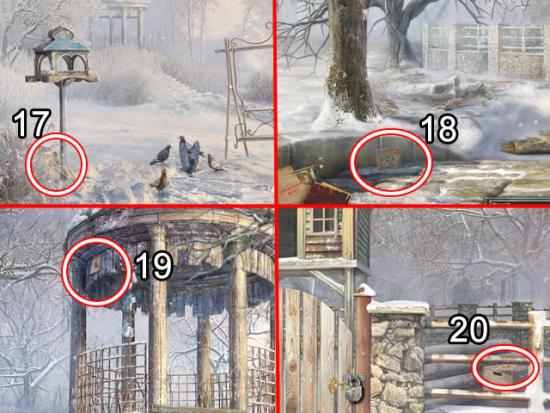
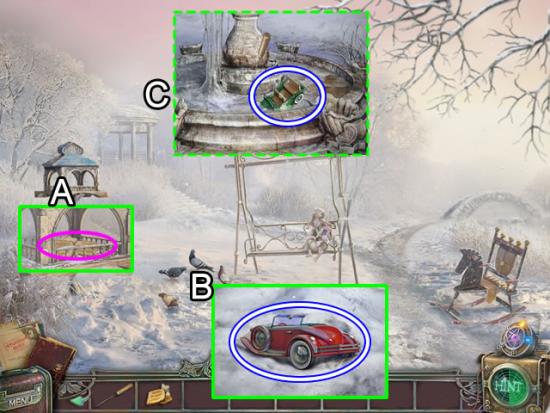
Tree Swing
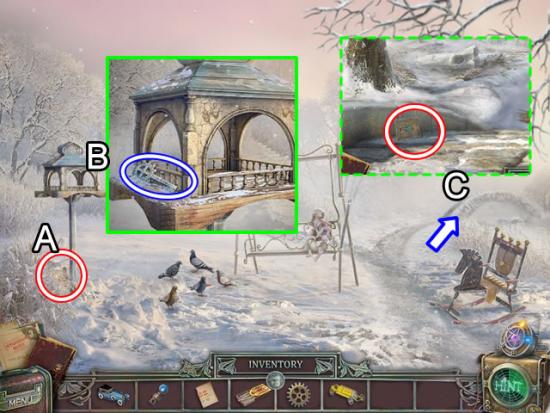
Bird Feeder
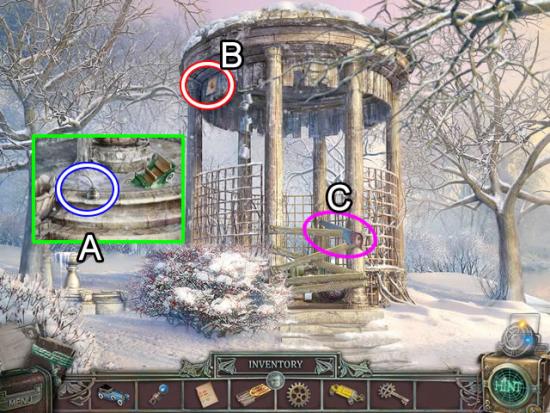
Gazebo
Greenhouse
Pantry
Bird Feeder
Kitchen
Greenhouse
Tree Swing
Bird Feeder
Gazebo
Tree Swing
Dovecote Entry
Greenhouse
Dining Room
Dovecote
Music Room

Side Yard
Tree House
Observatory
Hallway
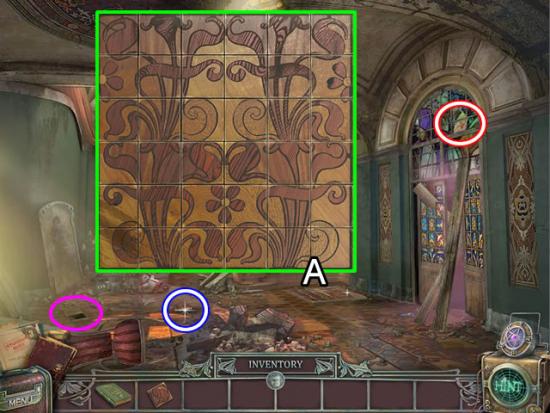
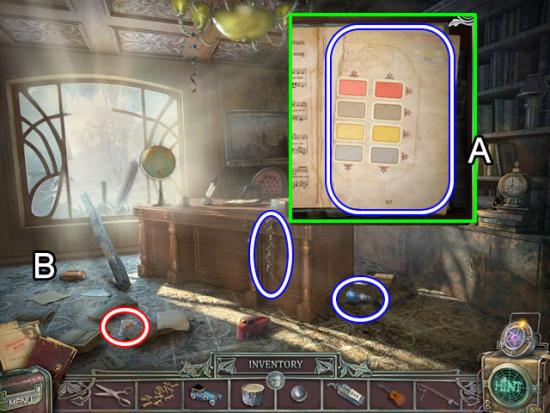
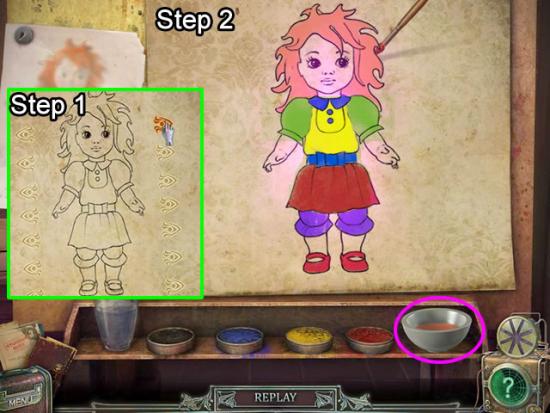
Studio
Tree House

Observatory
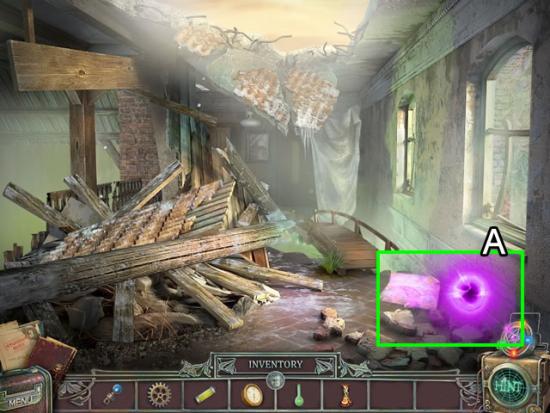
Destroyed Room
Studio
Destroyed Room
Tree House
Hallway
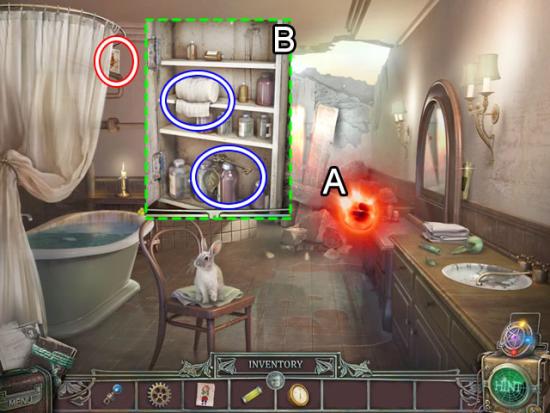
Bathroom
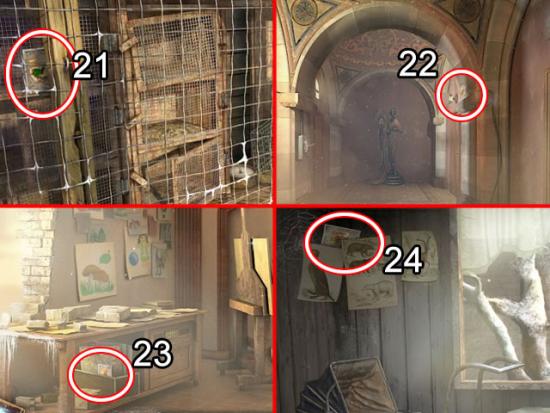
Locker Hallway
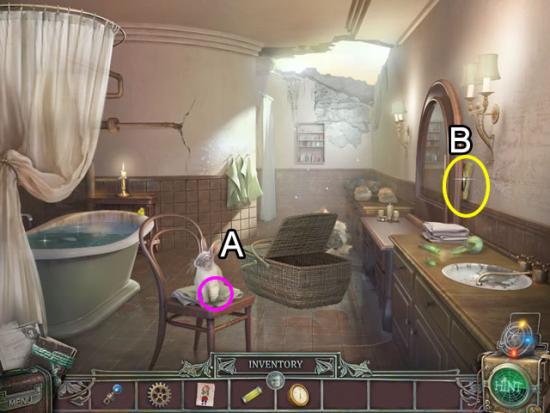
Bathroom

Tree House
Hallway

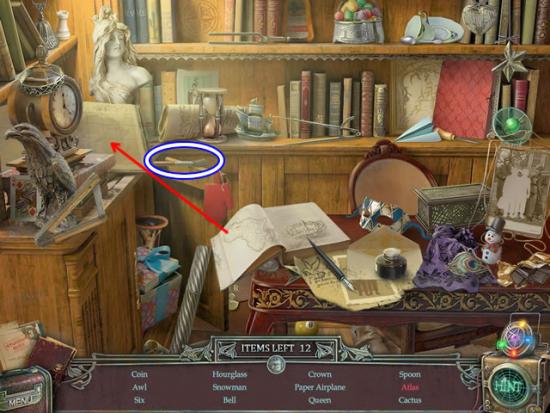
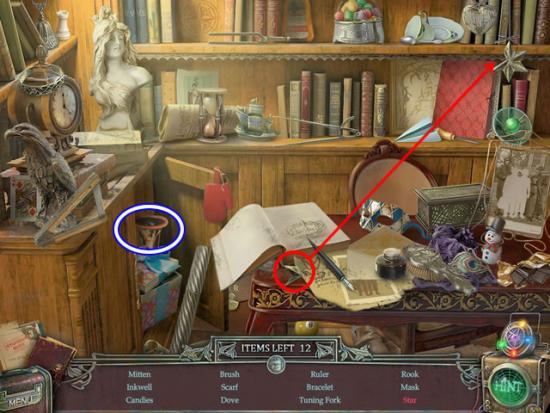
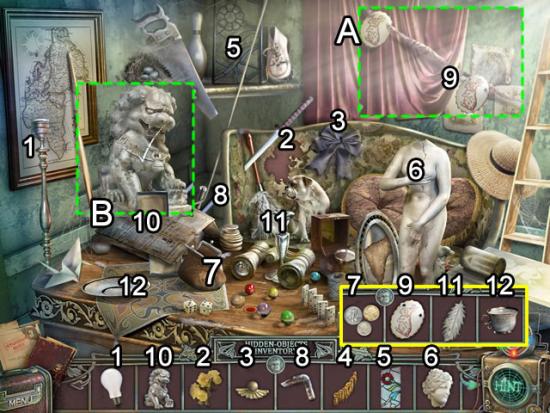
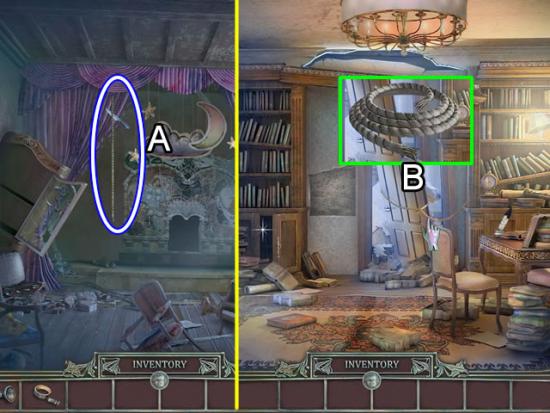
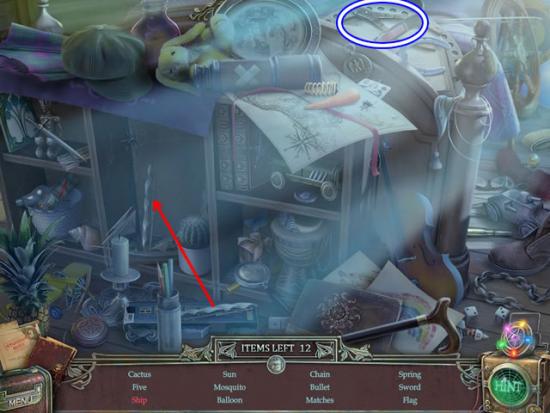
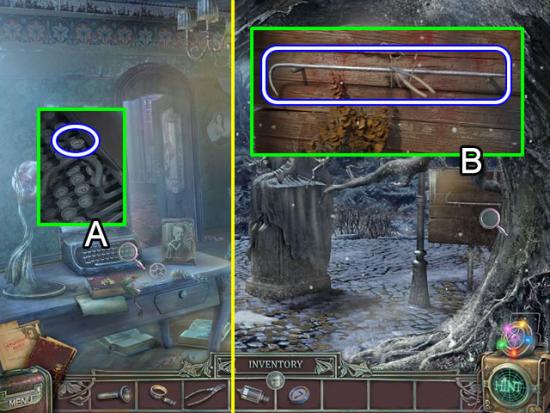
Library
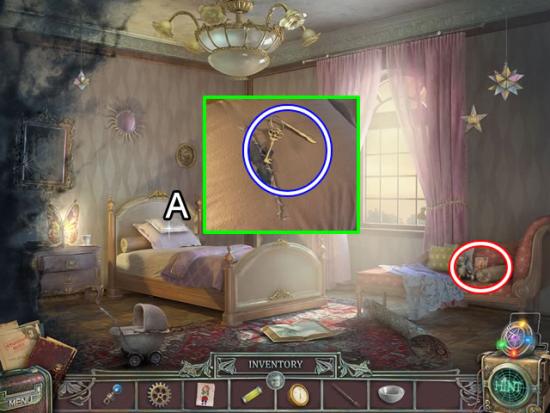
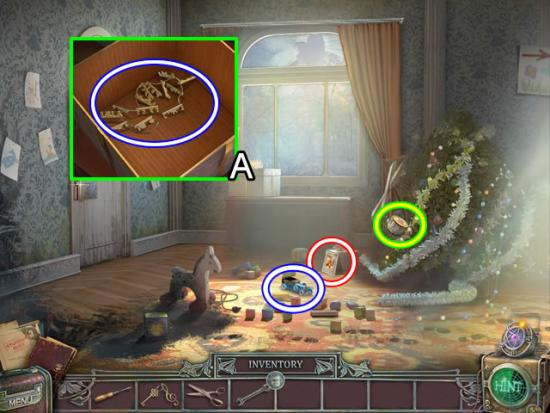
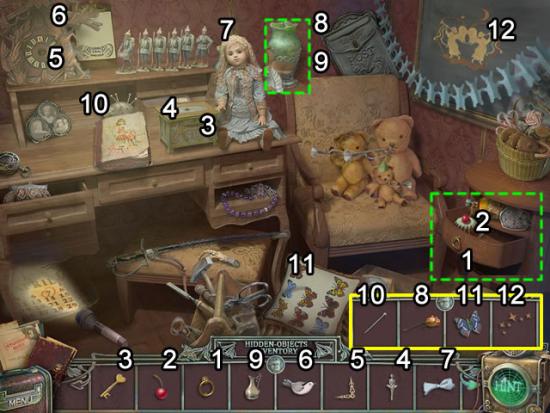
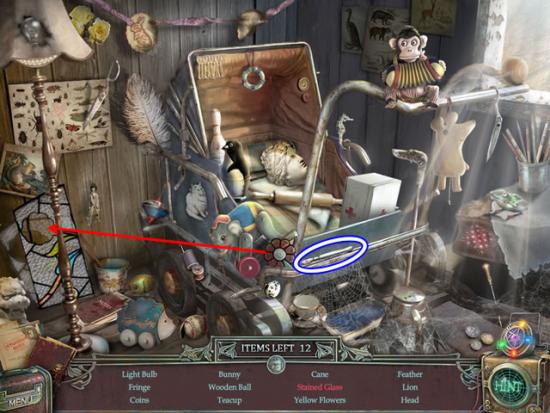
Girl’s Bedroom
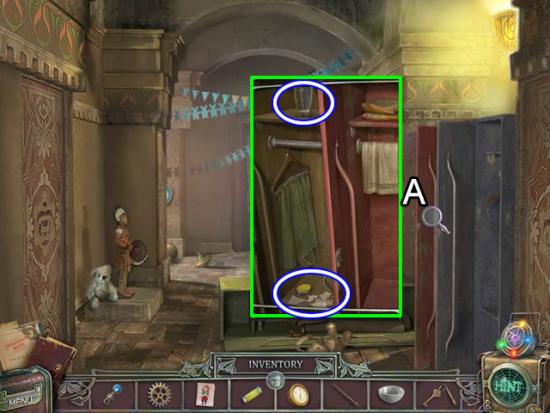
Locker Hallway
Tree House
Library
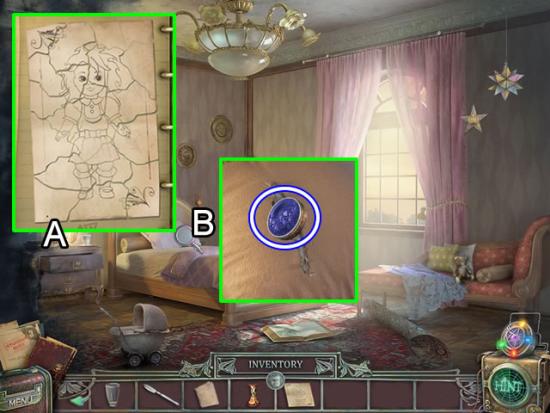
Girl’s Bedroom
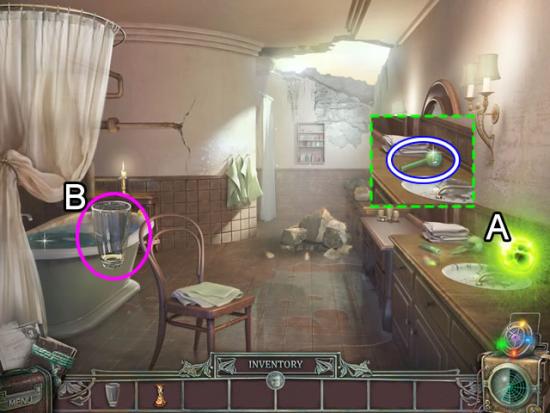
Bathroom
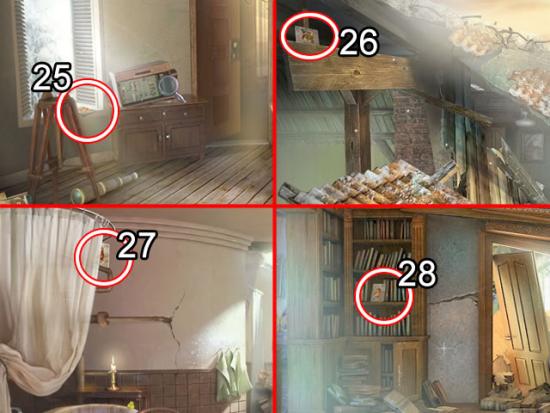
Studio
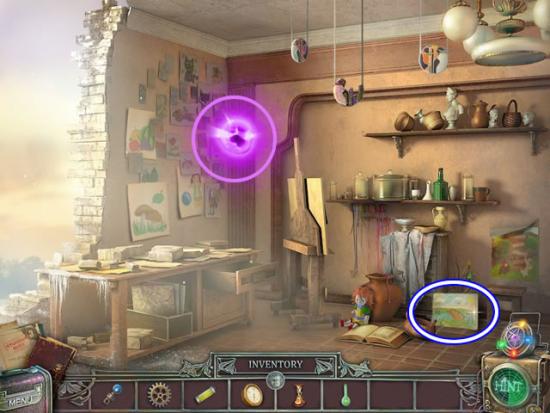
Destroyed Room
Reception Area
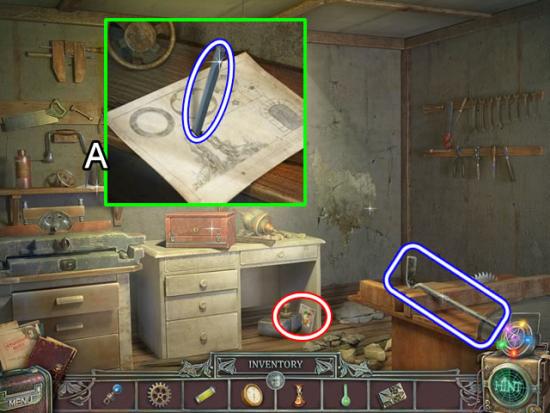
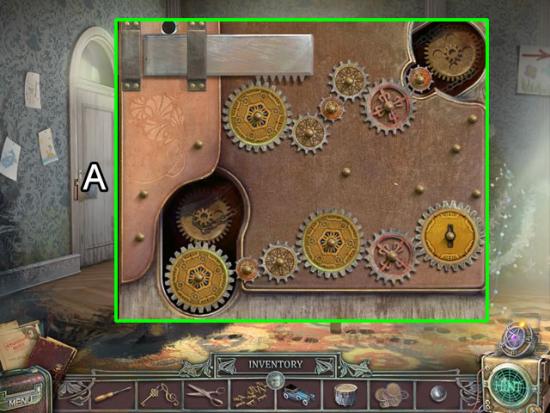
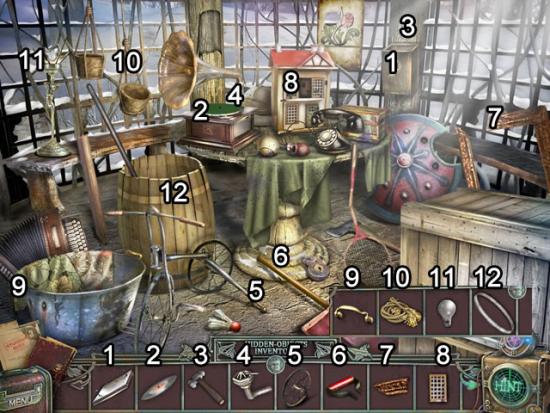
Workshop
Master Bedroom
Workshop
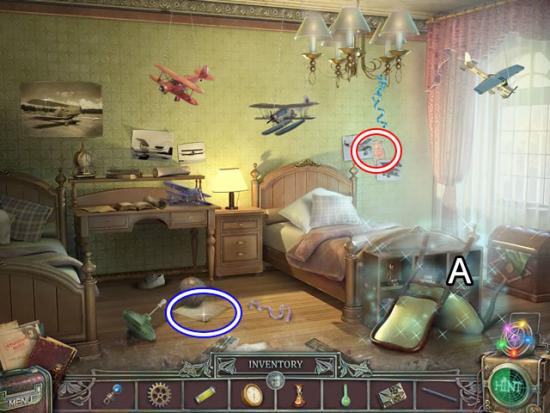
Boy’s Bedroom
Workshop
Reception Area
Master Bedroom
Reception Area
Boy’s Bedroom
Library
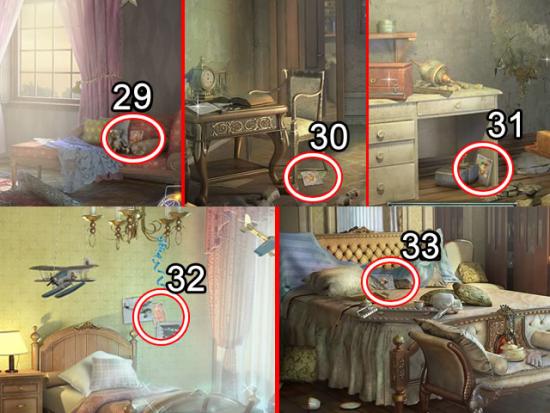
Girl’s Bedroom
Boy’s Bedroom
Tree House
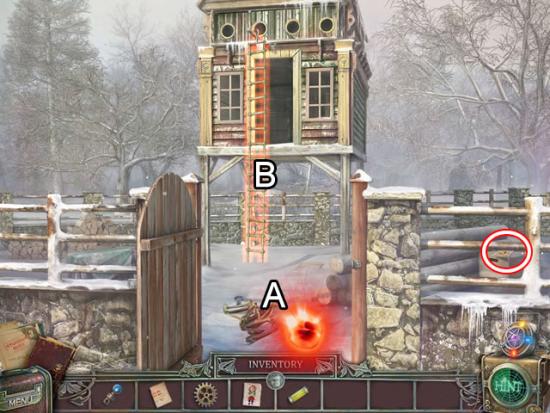
Orphanage Exterior
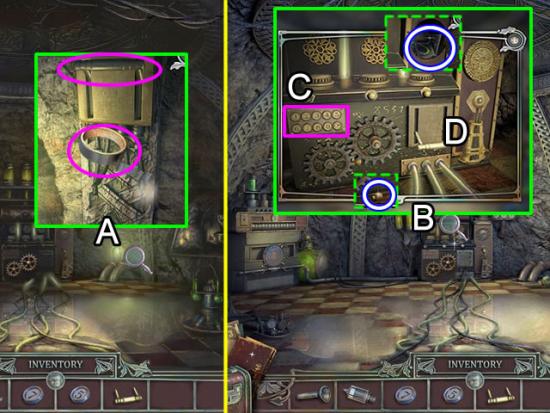
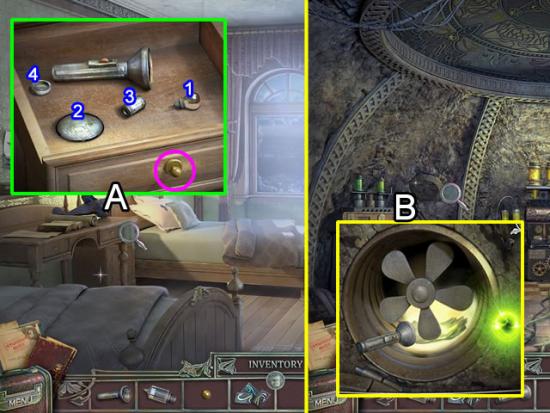
Basement – Machine Room
Basement – Chamber
Orphanage Exterior

Basement – Machine Room
Congratulations! You have completed playing The Agency of Anomalies: Cinderstone Orphanage.
Click the Extras tab on the main menu to replay the puzzles and play an additional chapter.
Preceptress’ Office
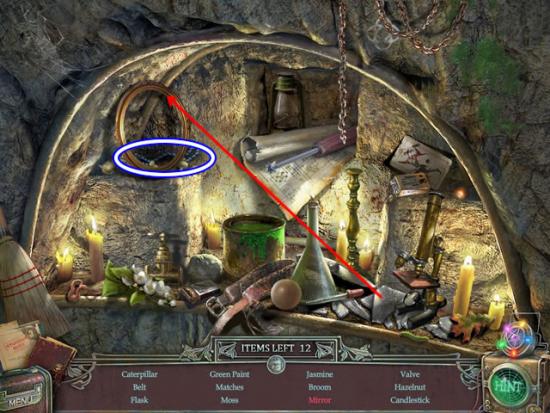
Secret Lab
Preceptress’ Office
Entryway
Music Room
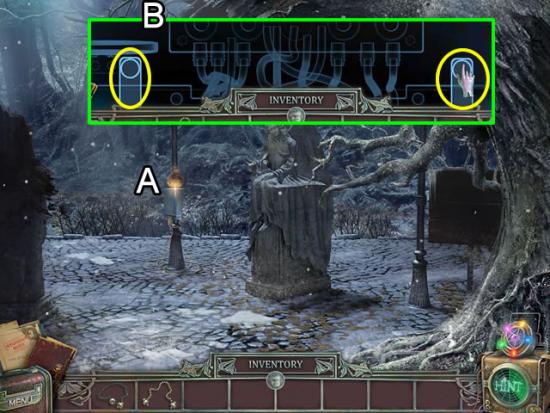
Courtyard
Preceptress’ Office
Secret Lab
Entryway
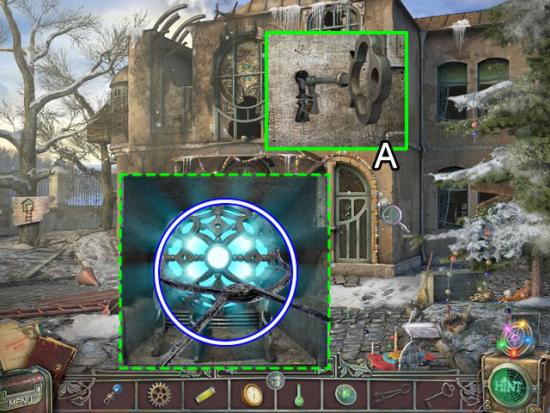
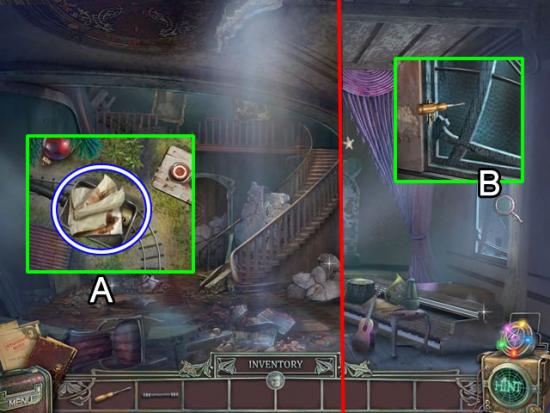
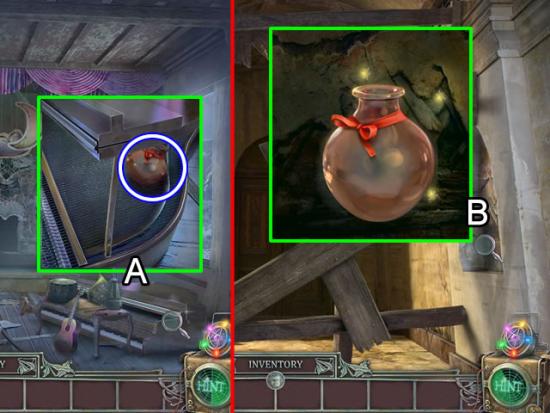
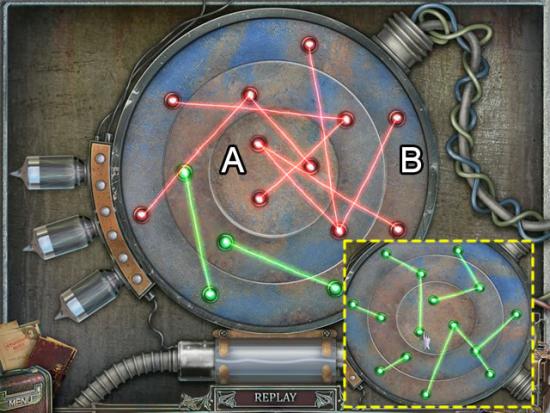
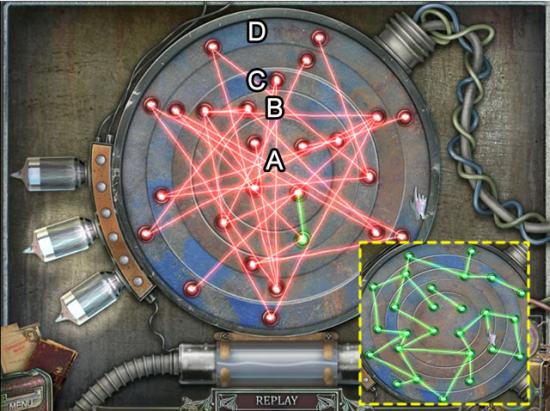
Basement – Machine Room
Entryway
Secret Lab
Passageway
Secret Lab
Basement – Machine Room
Music Room
Passageway
Courtyard
Passageway

Secret Lab
Basement – Machine Room
Basement – Secret Room
Passageway
Courtyard
Basement – Secret Room
Passageway
Library
Music Room
Library
Boy’s Bedroom
Preceptress’ Office
Courtyard
Secret Lab

Boy’s Bedroom
Roof
Library

Passageway
Library
Roof
Basement – Secret Room
Boy’s Bedroom
Basement – Secret Room
Roof

Basement – Secret Room
Roof
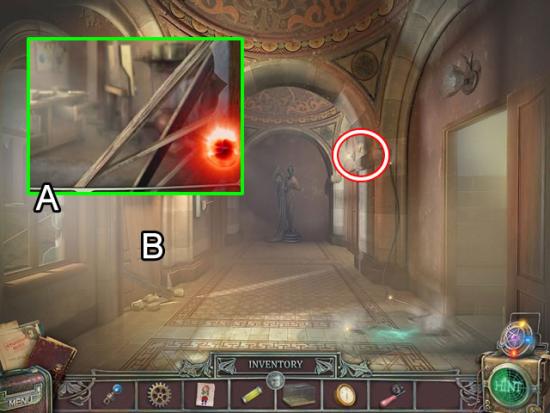
Basement – Secret Room
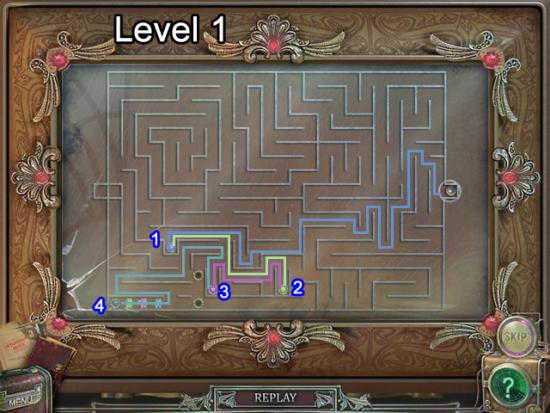
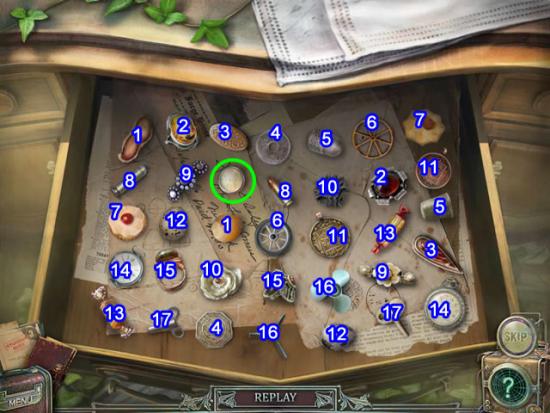
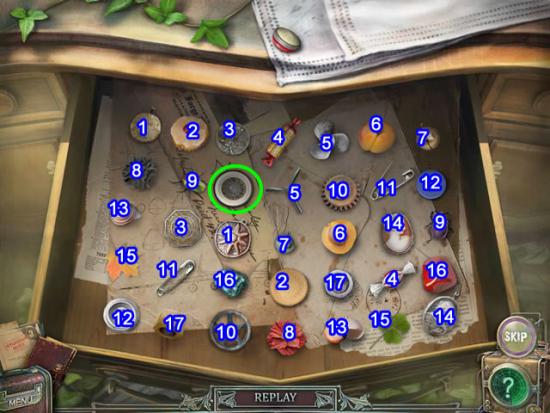
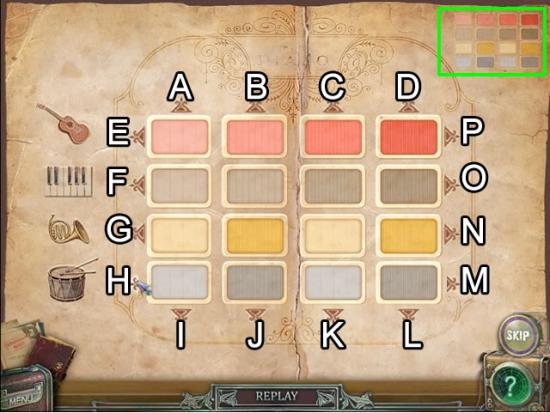
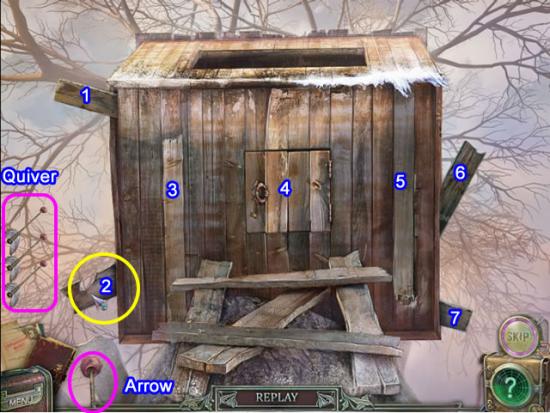
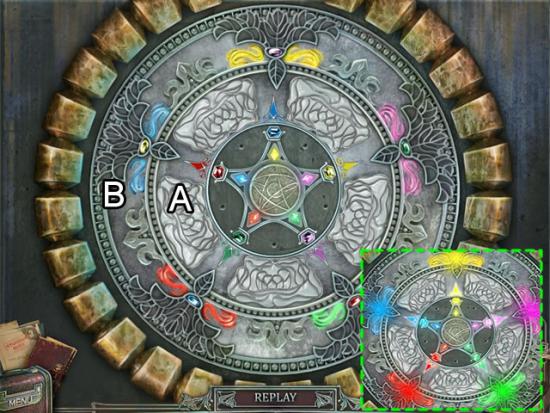
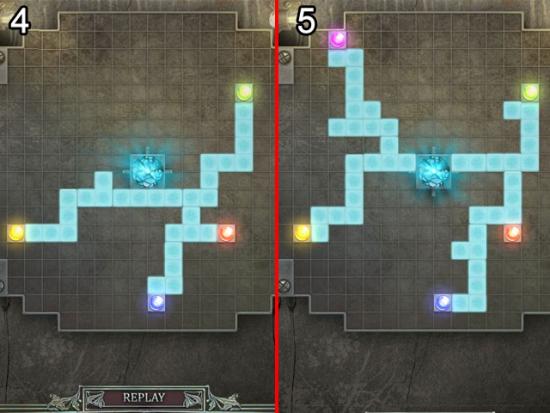
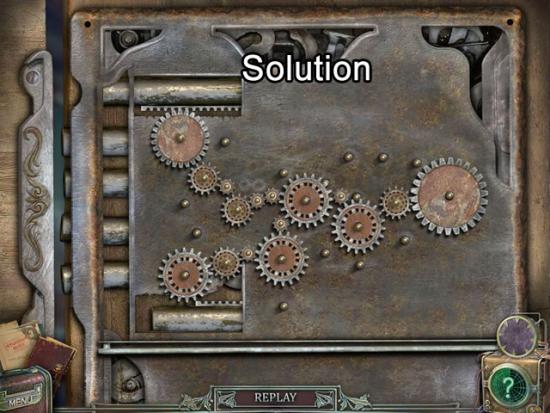
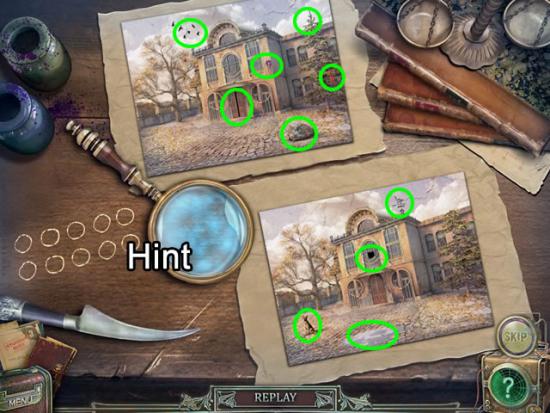
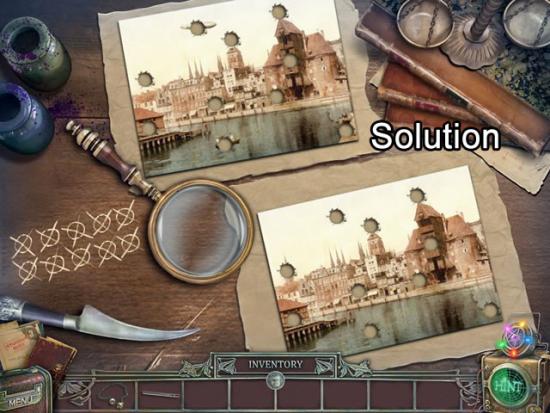
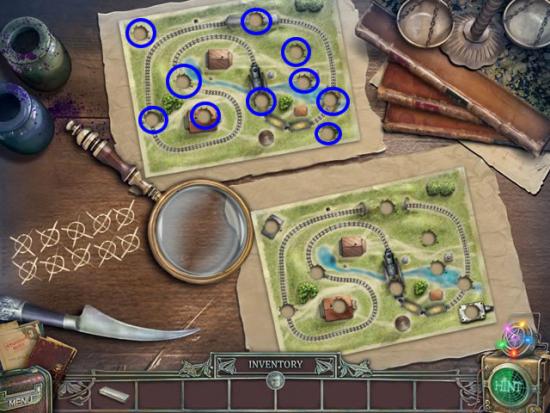
Puzzle 1
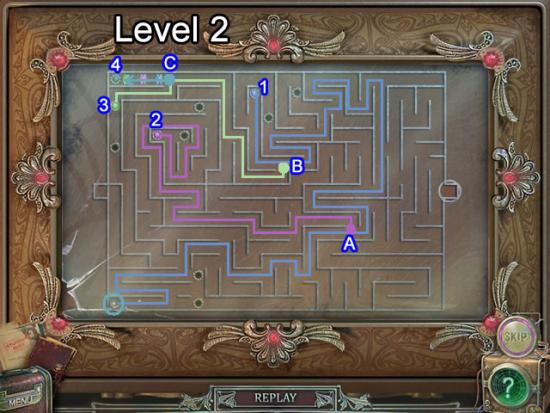
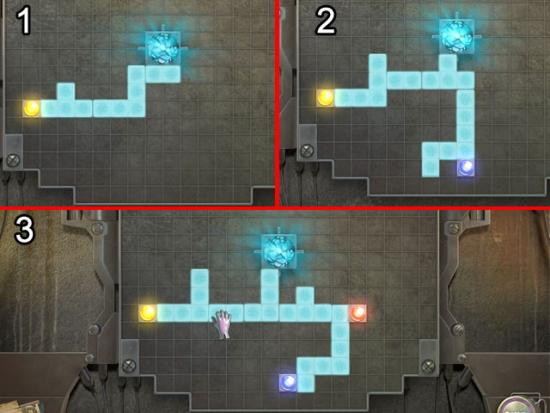
Puzzle 2
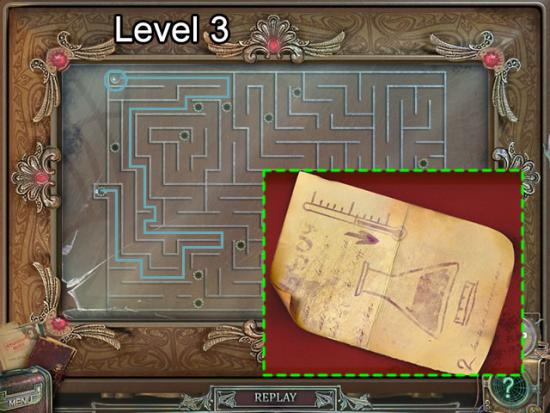
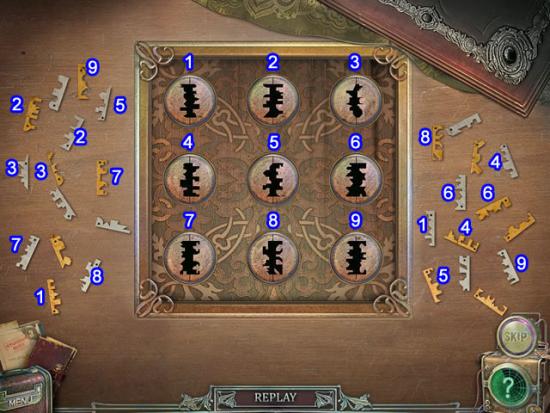
Puzzle 3
Congratulations! You have completed the bonus adventure of The Agency of Anomalies: Cinderstone Orphanage Collector’s Edition.
These are shown in the order they were encountered in this walkthough.