![Hololive Dreams Tier List [Best Cards]](/wp-content/uploads/2026/07/hololive-dreams-tier-list.jpg "Hololive Dreams Tier List [Best Cards]")
Hololive Dreams Tier List [Best Cards]
The best cards for the best performances.


![Iron Soul Dungeon Weapon Tier List [Best Weapons]](/wp-content/uploads/2026/07/iron-soul-dungeon-weapon-tier-list.jpg "Iron Soul Dungeon Weapon Tier List [Best Weapons]")

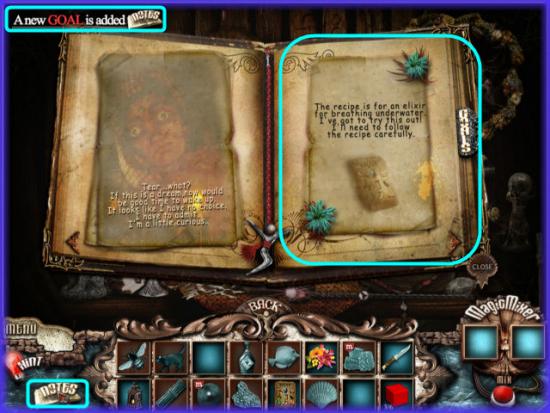
Welcome to the Tearstone walkthrough on Gamezebo. Tearstone is an adventure game played on the PC created by DragonsEye Studio. This walkthrough includes tips and tricks, helpful hints and a strategy guide on how to complete Tearstone.
Welcome to the Tearstone walkthrough on Gamezebo. Tearstone is an adventure game played on the PC created by DragonsEye Studio. This walkthrough includes tips and tricks, helpful hints and a strategy guide on how to complete Tearstone.
Game Tips
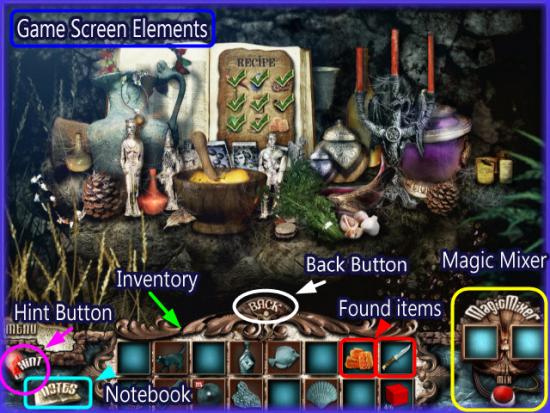
Game Elements

Inventory
Cursors
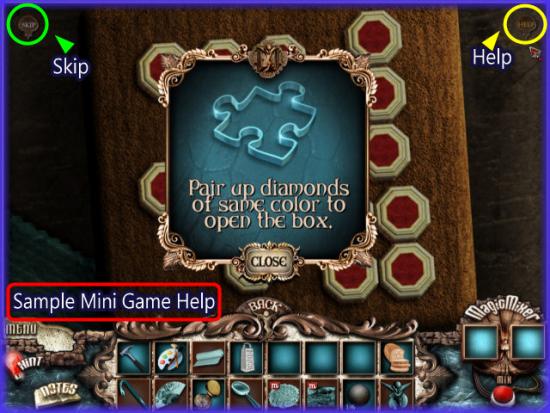
Mini Games
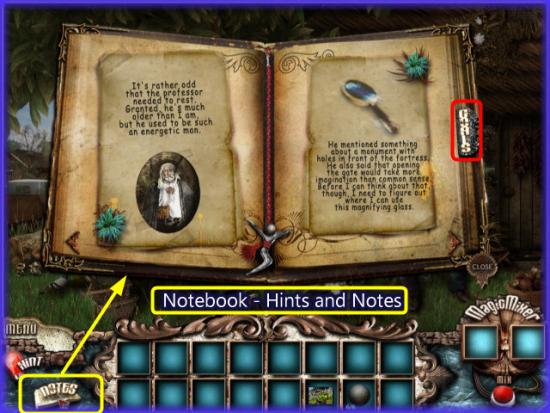
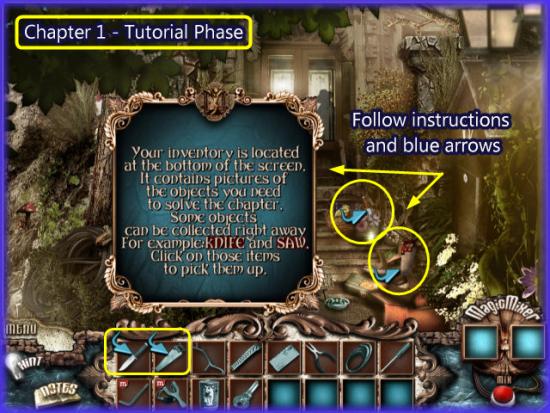
Notebook/Goals
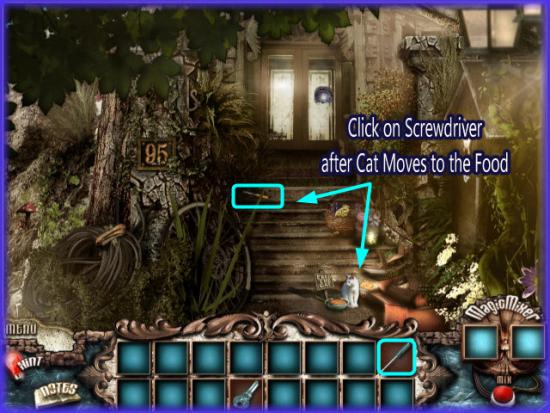
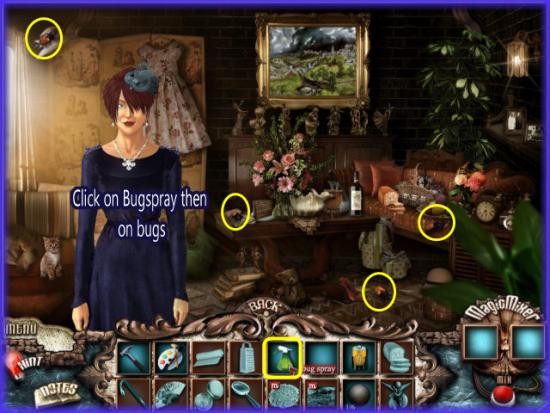
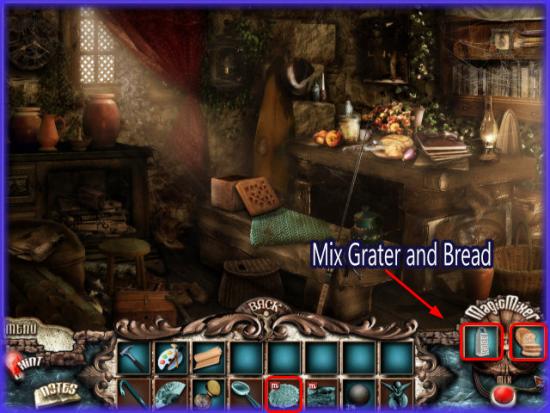
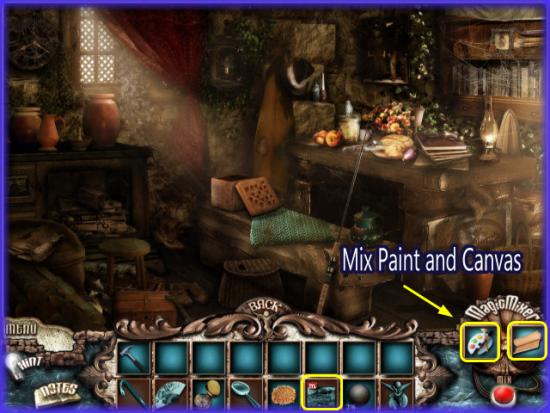
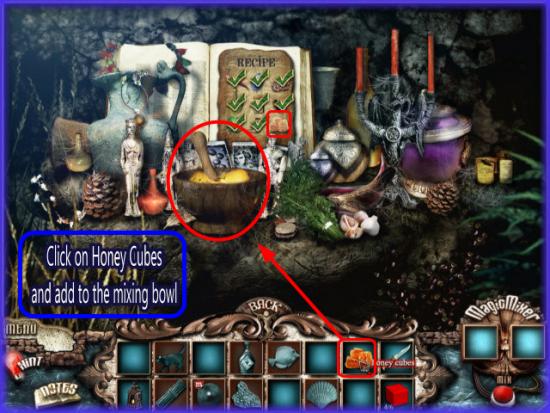
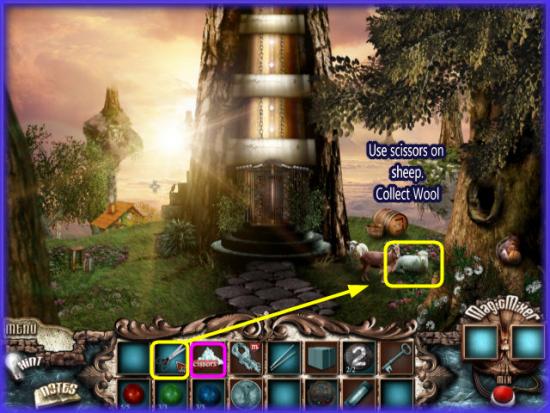
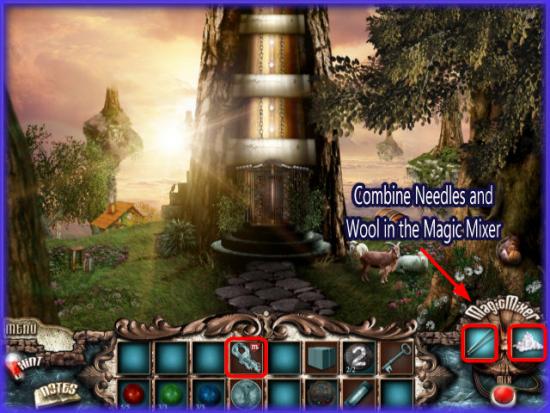
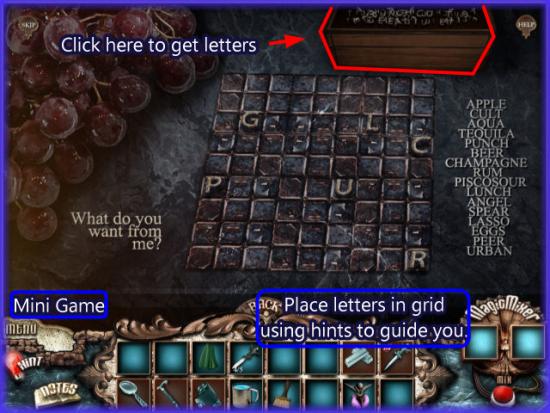
The “Magic Mixer”

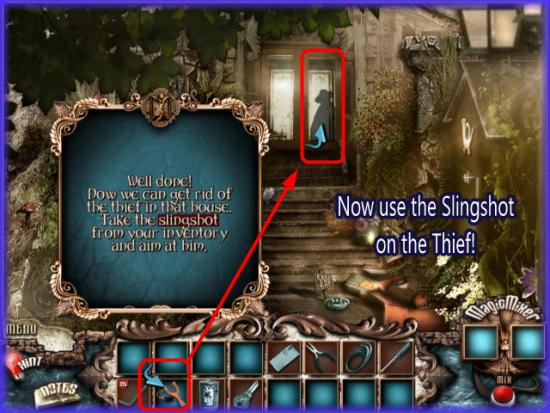
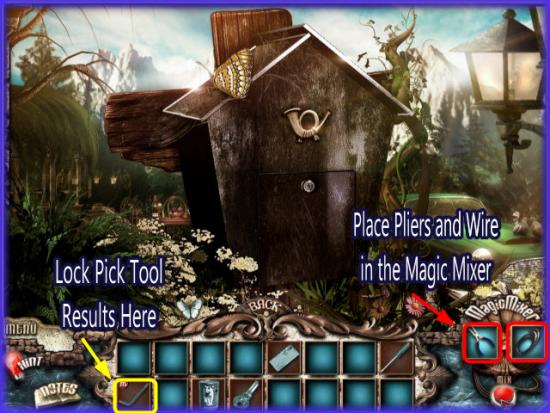
Using the “Magic Mixer” for the first time
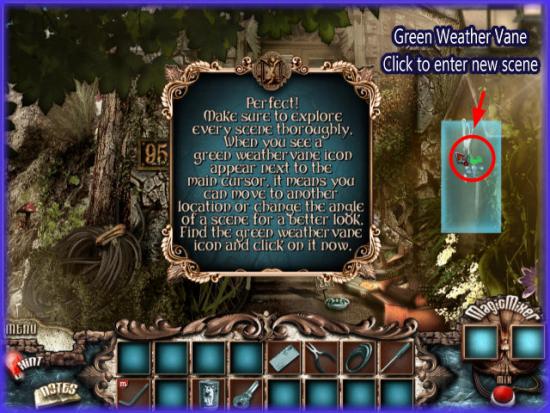
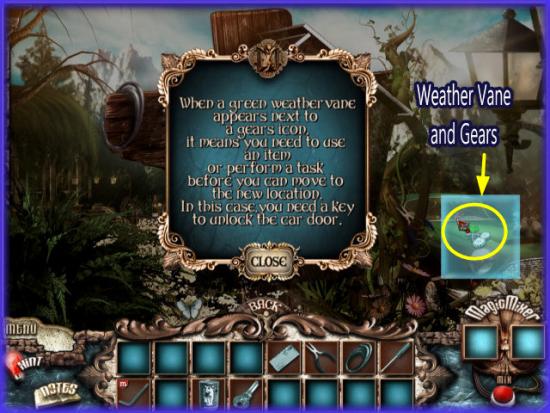
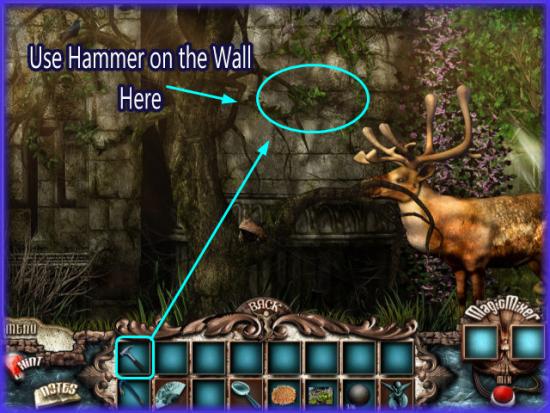
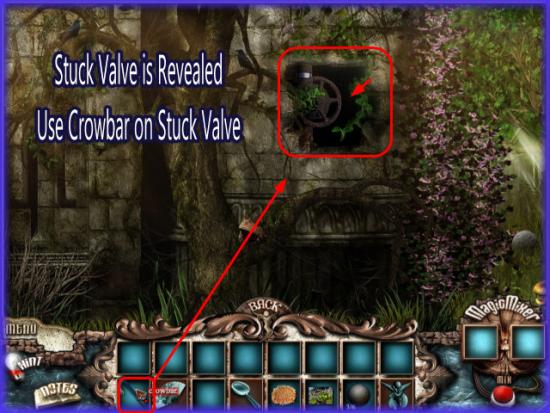
Using the Weather Vane and Weather Vane with Gears
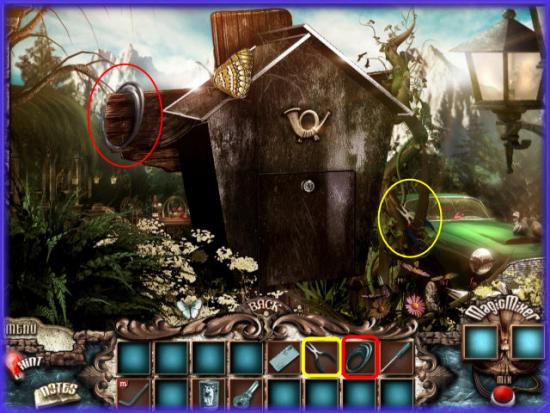
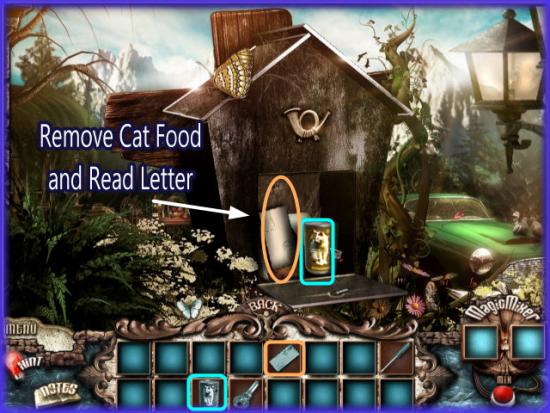
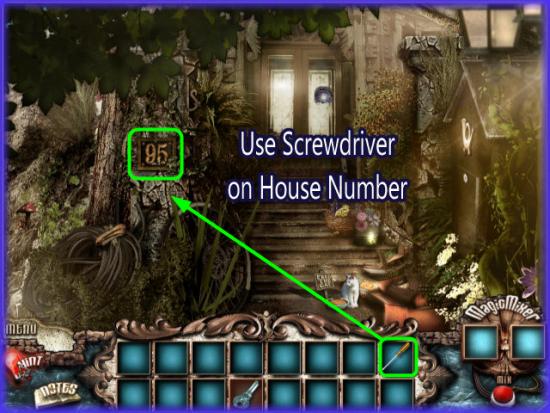
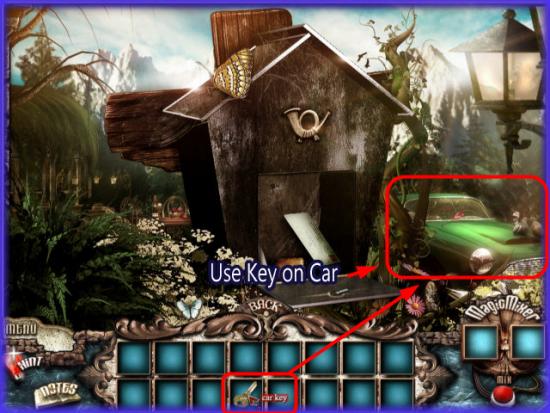
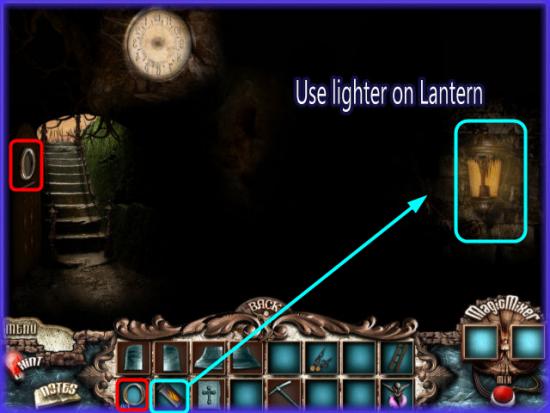
Open the Mailbox
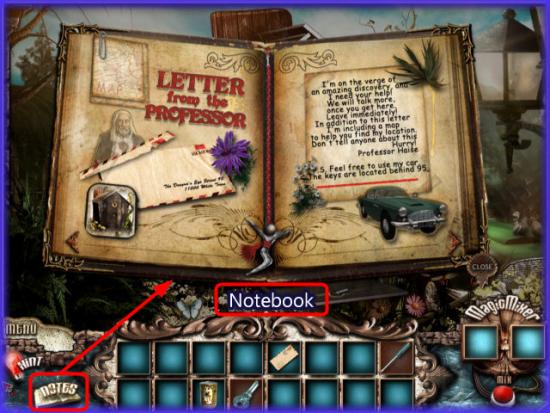
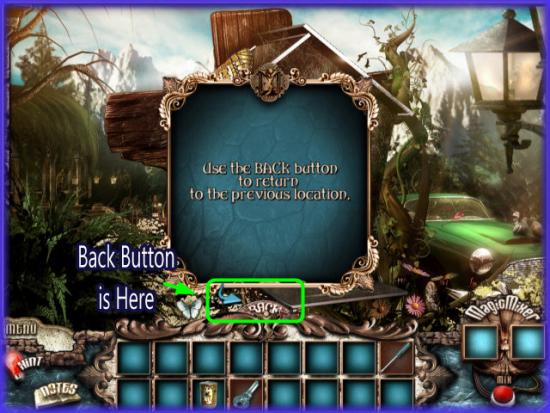
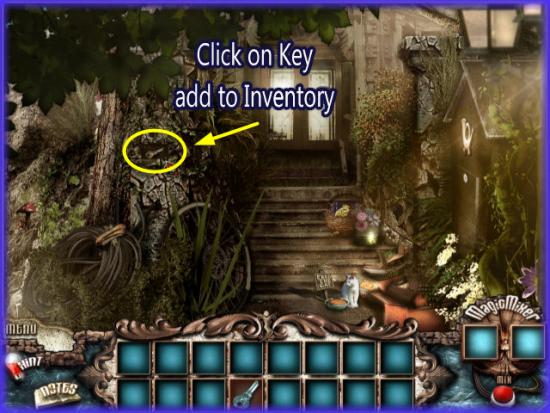
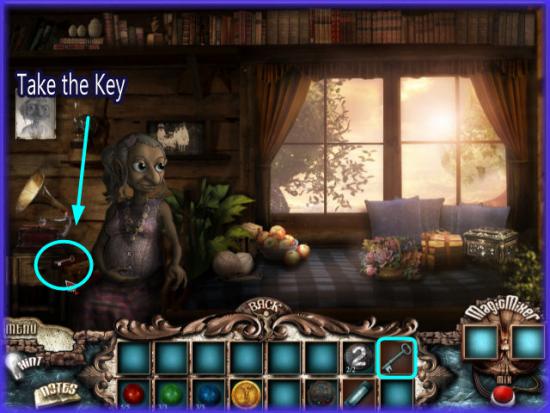
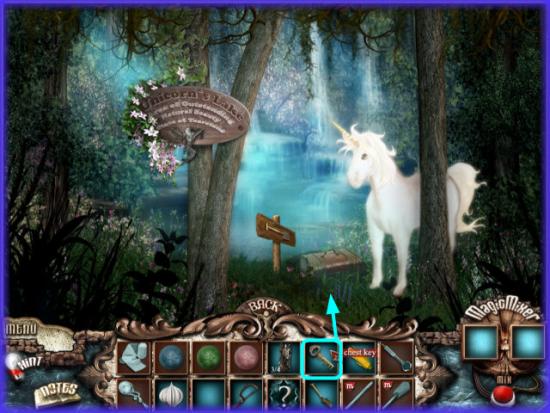
Obtain the Key


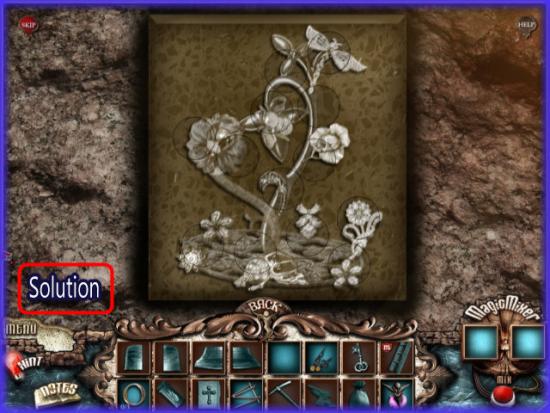
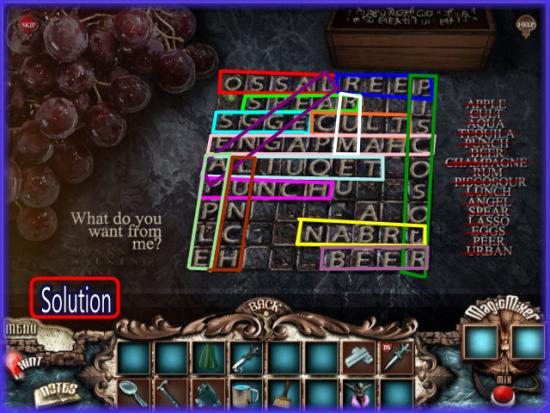
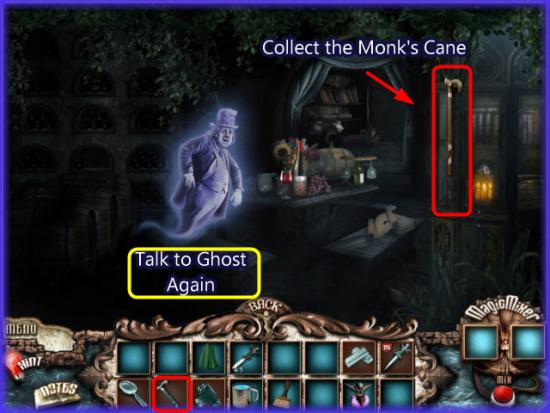
Mini Game

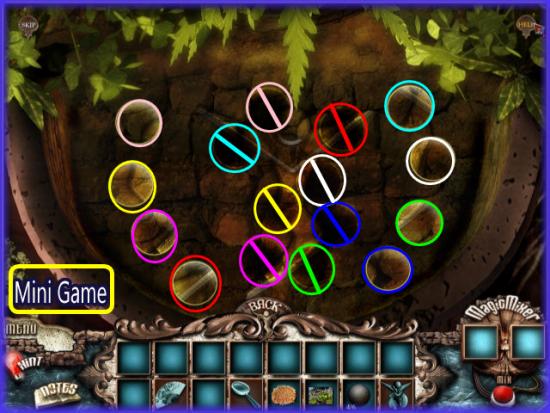
Mini Game
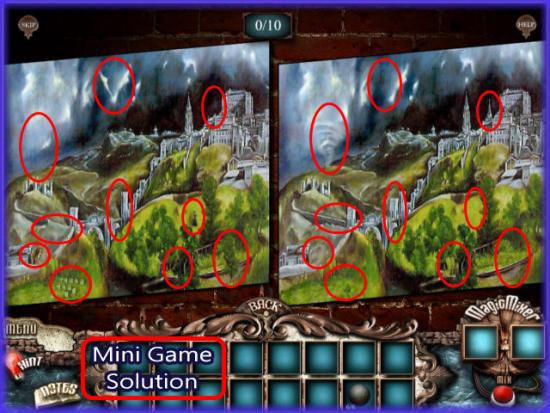
Mini Game


Mini Game


Mini Game
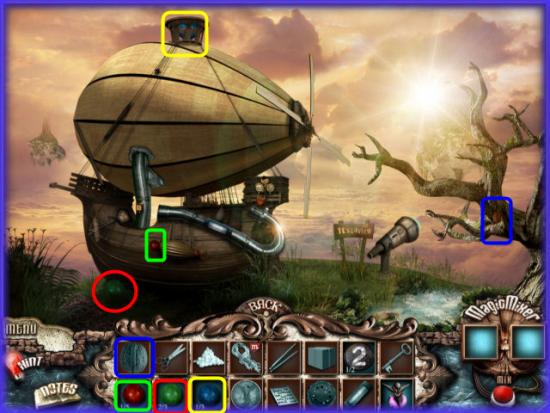
? Chapter three begins with your introduction to “Tommy” and he tells you that you need to start the alarm system to fool the guard into walking away from his post so you can get on the elevator that will take you to a vehicle that can get you to Tearstone Island.
? There are two areas you will need to get to that the guard will be standing in front of. If you can distract him with alarms and phone calls you should be able to get to these scenes
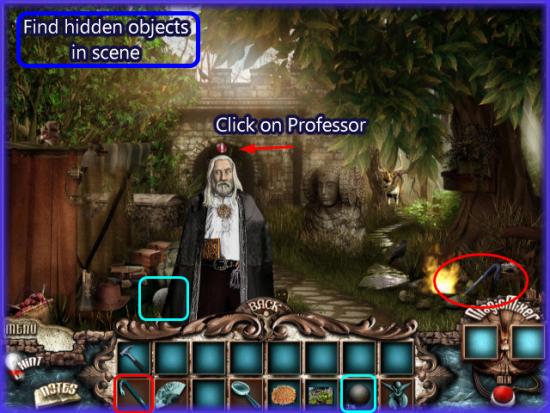
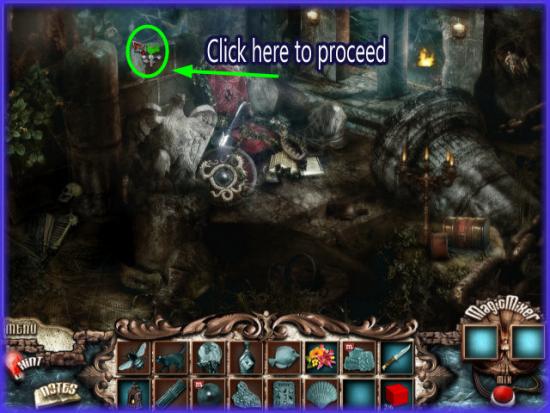
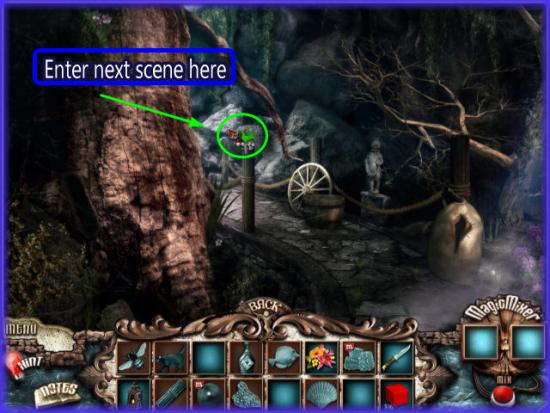
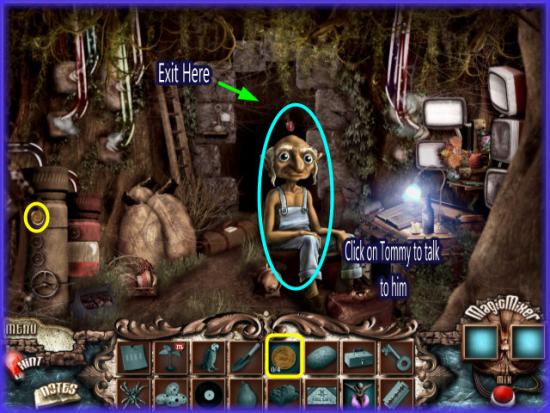
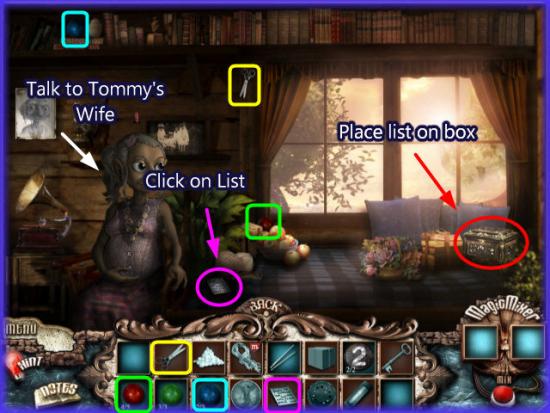
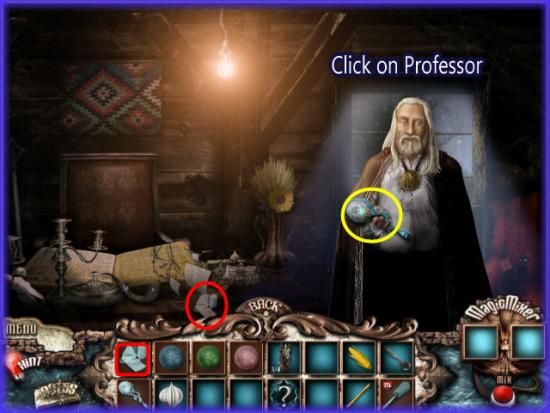
? Find the hidden objects in the first room and click on Tommy to talk to him. He asks you for a favor which is to find his toolbox. If you do so he will help you out.
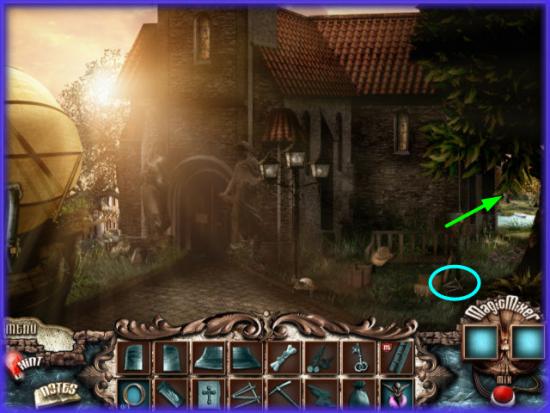
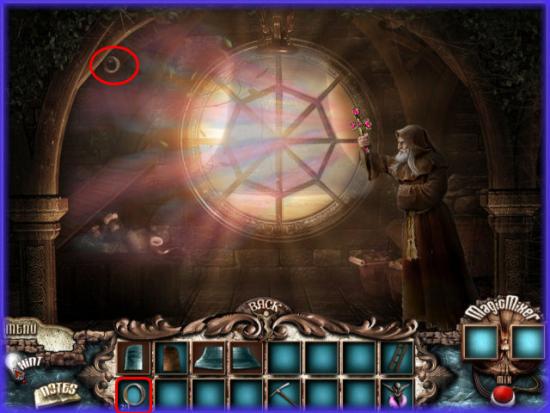
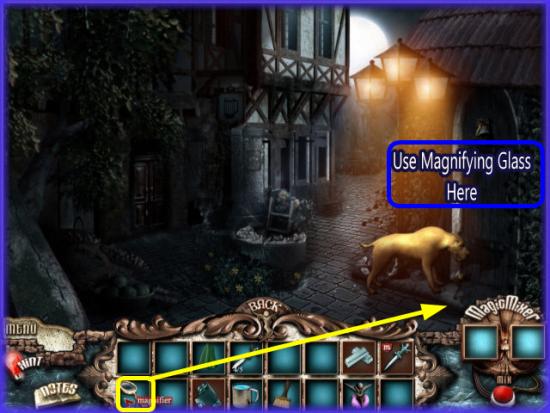
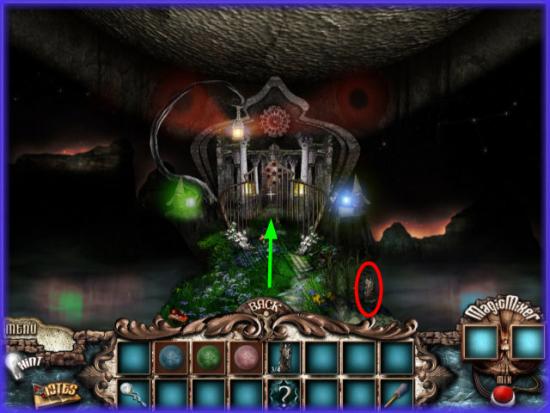
? Click on the coin which is shown circled in the image above.
? Next, click on the passageway behind Tommy.
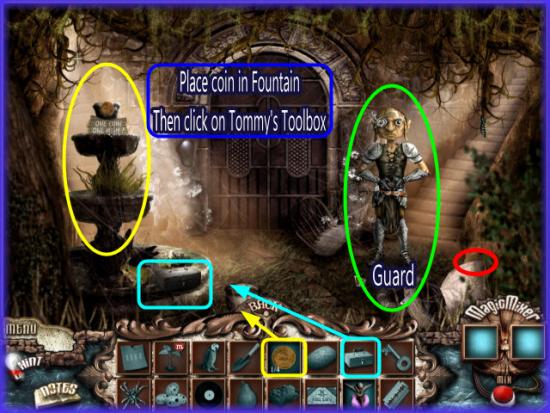
? Here you will see the elevator and the guard in front of it. When you click on the guard he says, “Access Denied”
? You will have to get Tommy to fix the cameras for you in order to start the alarm and distract the guard away from his post.
? There is another coin located at the right side near the guard circled in red above. Click on it to add it to your inventory. Coins can be used as soon as you get them or you can wait until you have all four. It is probably best to use them as you get them as they bring items into your inventory.
? Here are the items the coins will purchase for you. Please note that the fourth coin is much harder to get and may take a while.
? Coin 1 – Tommy’s Toolbox
? Coin 2 – Spider
? Coin 3 – Eggs
? Coin 4 – Record
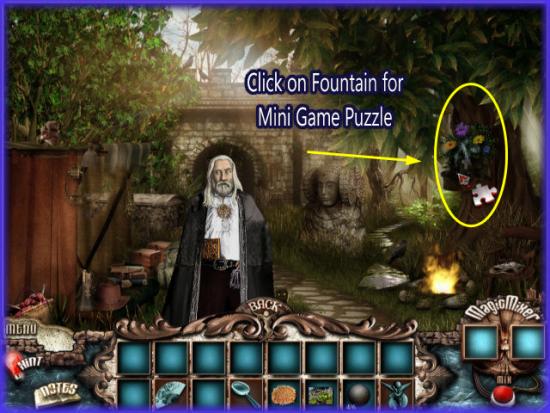
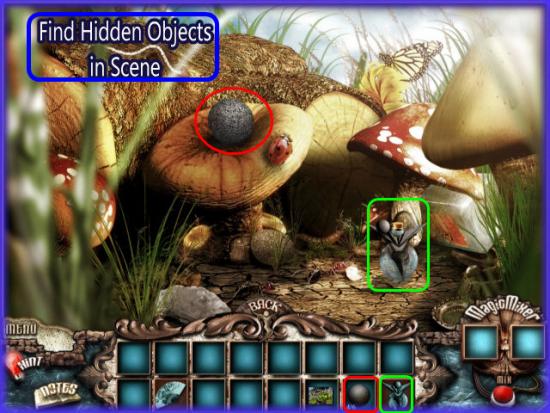
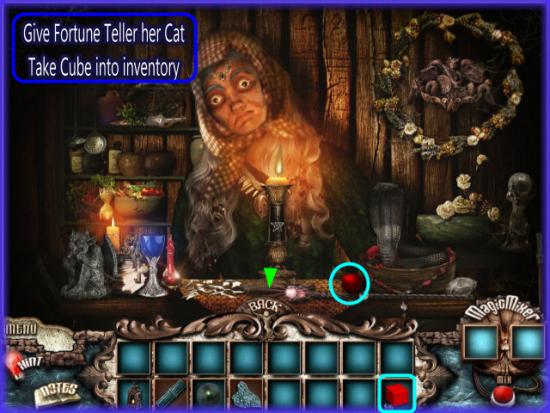
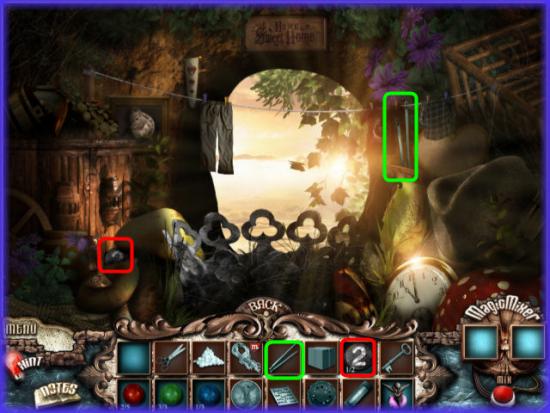
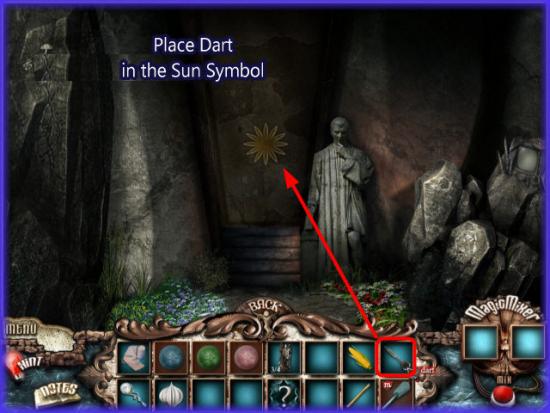
? Take the coin out of your inventory and place it at the center of the fountain.
? Tommy’s toolbox should appear in the fountain. Click on it to take it into inventory and then click on “Back” so you can give it to Tommy.
? Use the second coin and the spider will appear right at the center of the fountain. Click on him and add him to inventory.
? Click on the toolbox and give it to Tommy.
? Read the new dialogue and Tommy will tell you he can now fix the surveillance cameras to help you out with fooling the guard.
? New notes and goals have been added to your notebook.
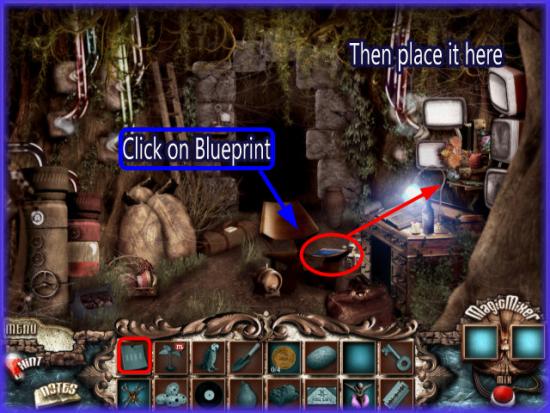
? Tommy will disappear and when he does click on the blueprint under his chair.
? Click on the blueprint in inventory and place it along the right side of the scene where the computers are located.
? This will take you to a new scene.
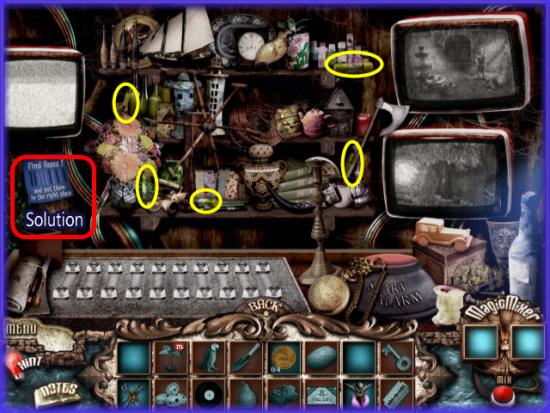
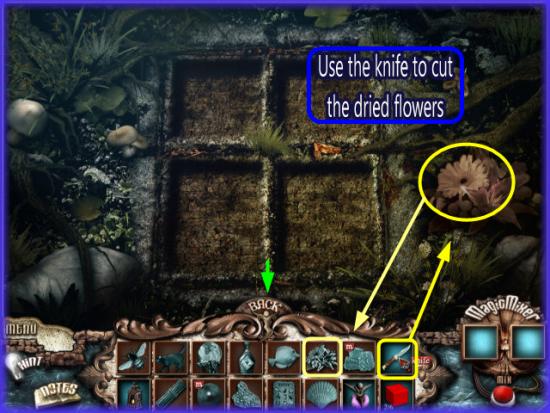
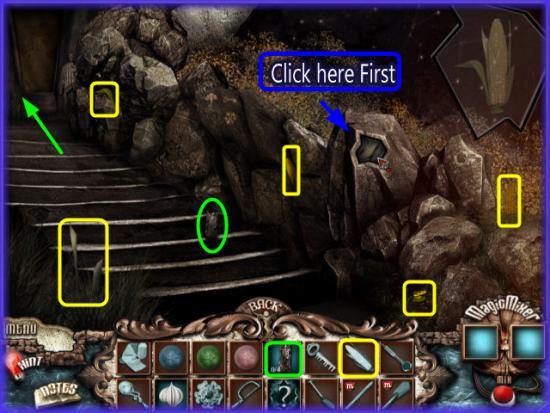
? This scene is where you learn to fool the guard away from the right side of the elevator. A little later you will learn how to fool him away from the left side of the elevator and fountain.
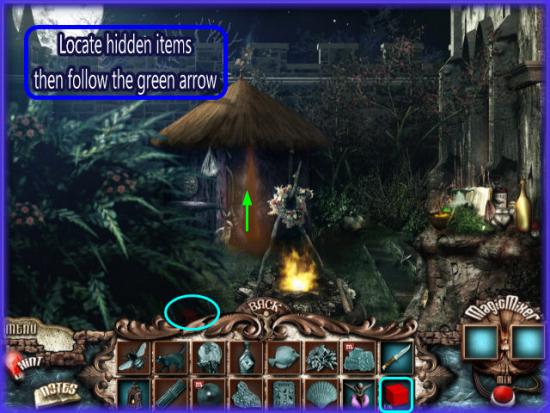
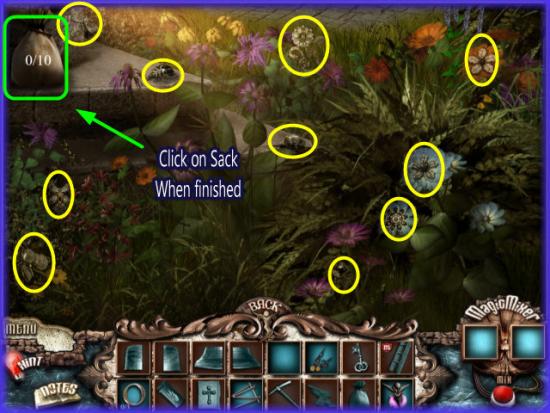
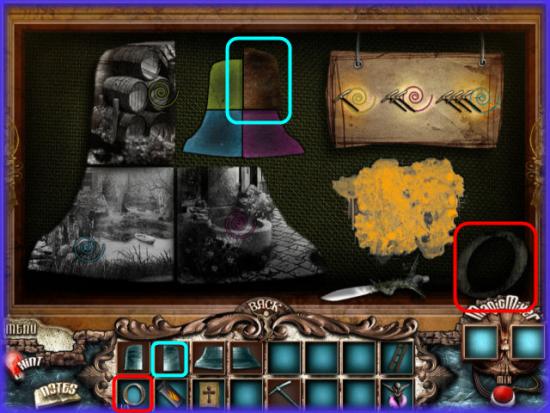
? Look for the little green fuses that are hidden in the scene.
? When you click on a fuse it sticks to your cursor until you place it in the fuse tray at the bottom left.
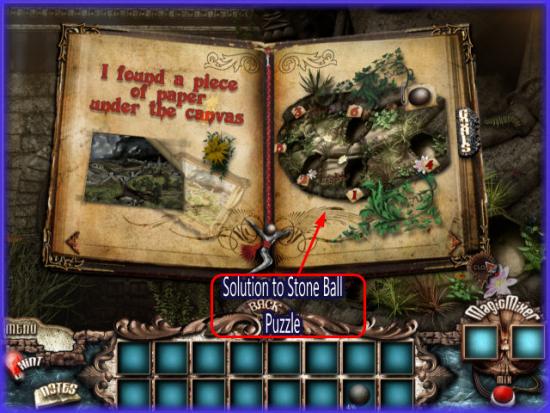
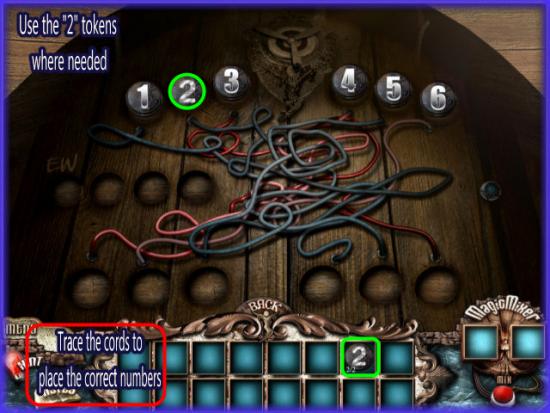
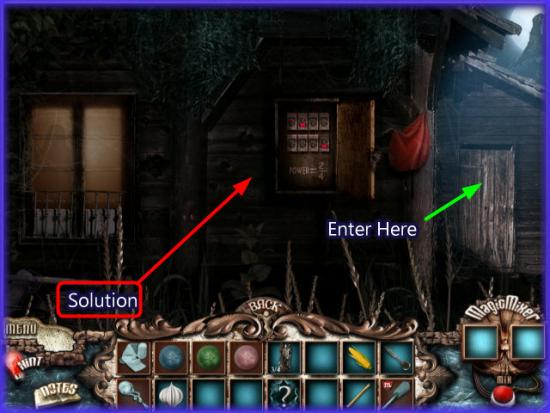
? Note the blue piece of paper hanging up under the monitor. This is actually the answer to the puzzle.
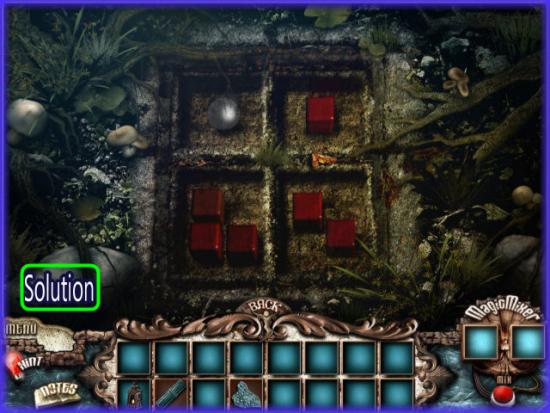
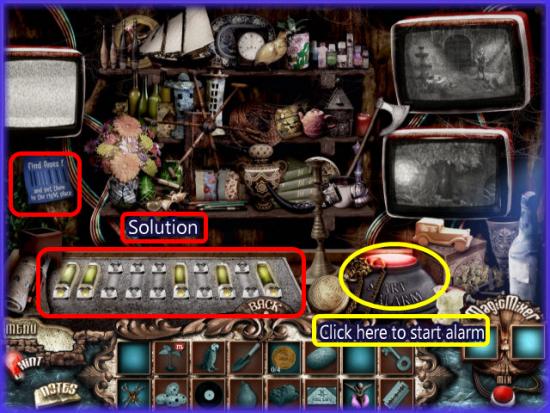
? Place a fuse in the tray everywhere you see a black line in the drawing. This would also translate to from left to right positions one and two will have a fuse, three through five will be empty, six, eight and ten will have a fuse and spots seven and nine will be empty.
? See the second image above for the answer.
? The fuse will lock in place when placed but can be removed if needed.
? Once the fuses are placed you will need to click on the start alarm button to the right of the fuses.
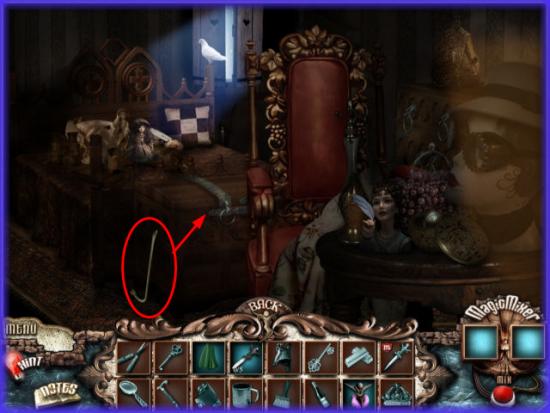
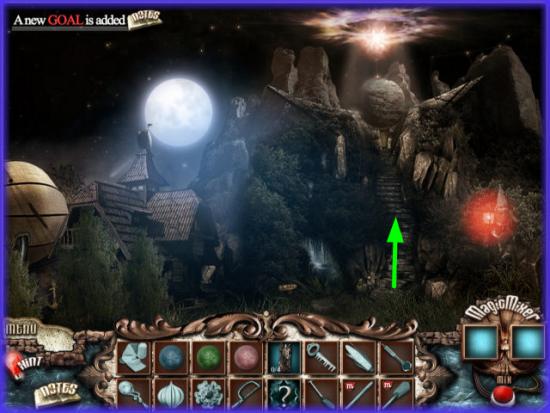
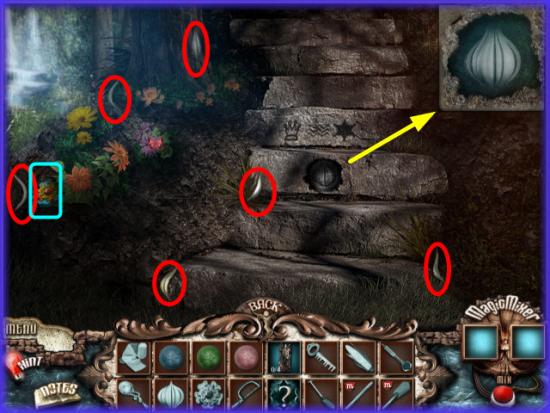
? Once this is done you can go back to the elevator and go up the large stairway to the right of it to explore what is there.
? Hit the back button once and go through the door way and up the large staircase to the right. The guard should be gone now. If he is not gone go back and check that you followed all the steps correctly in turning on the alarm.
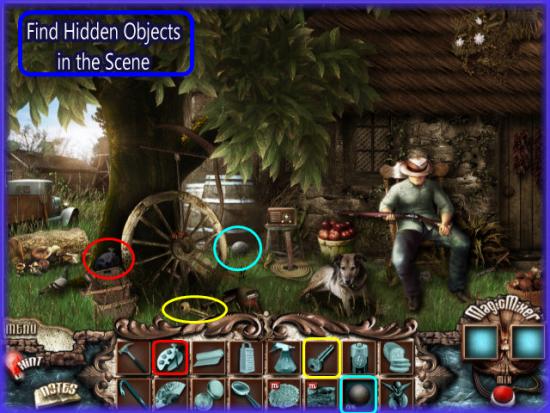
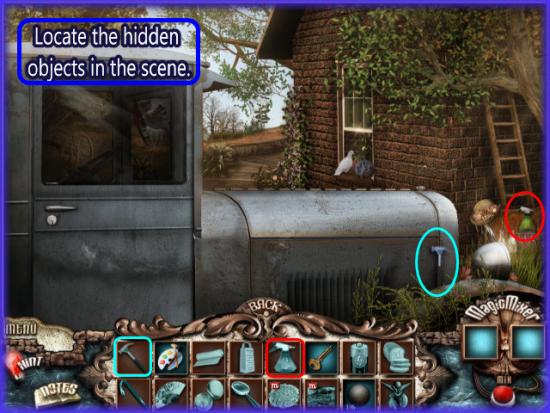
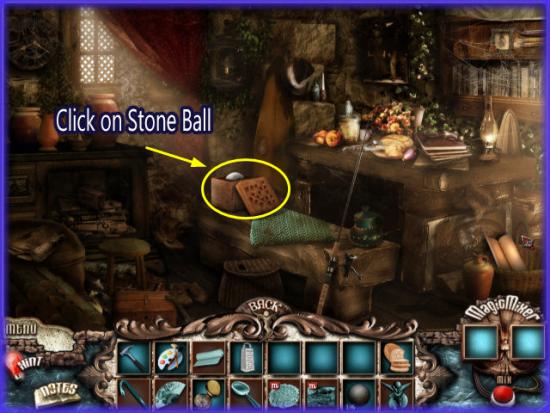
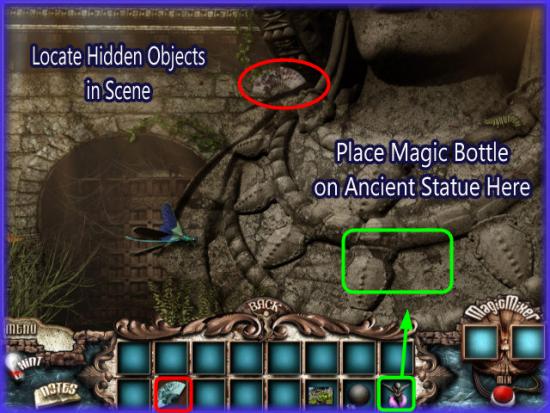
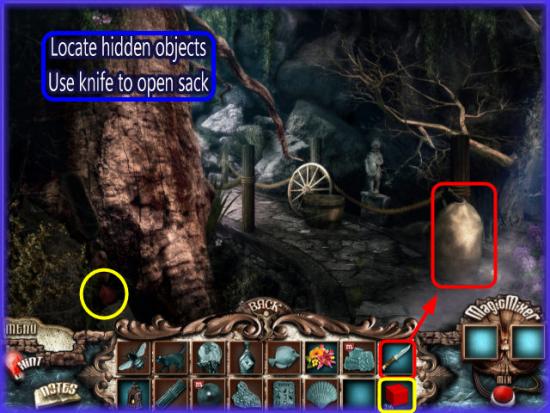
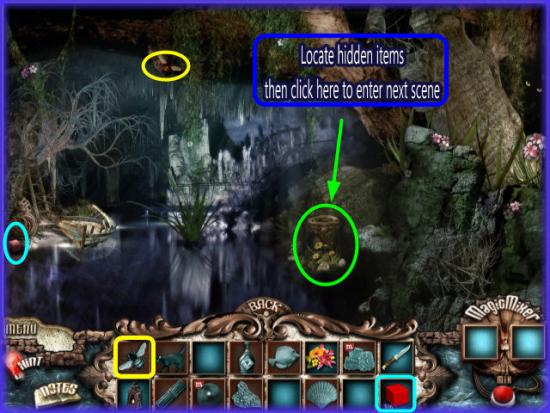
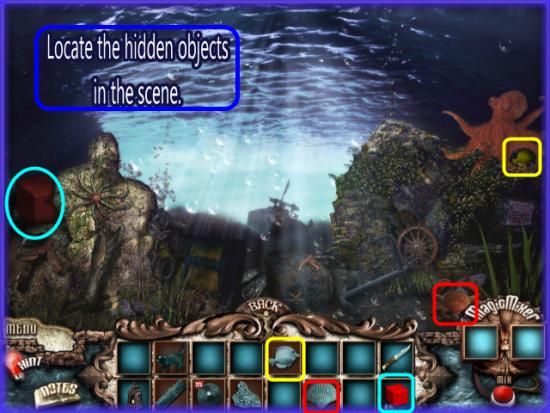
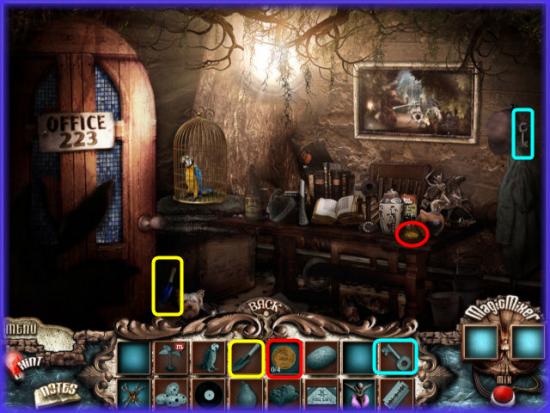
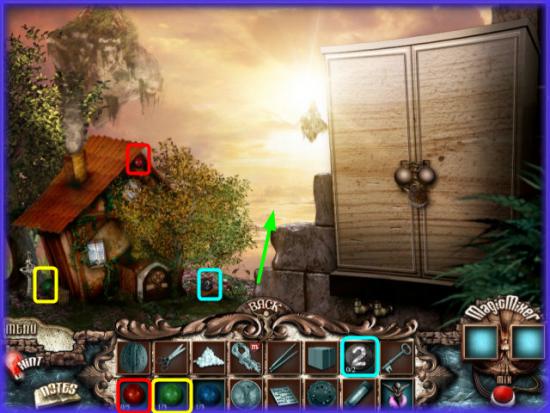
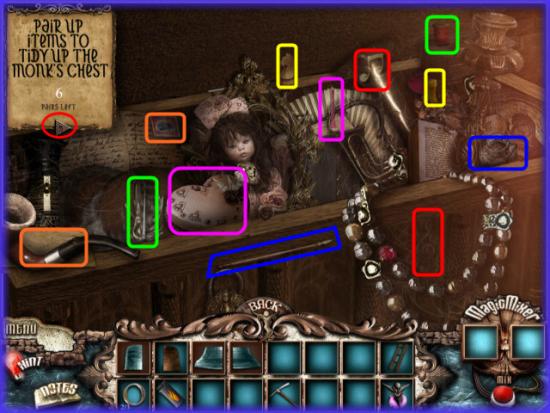
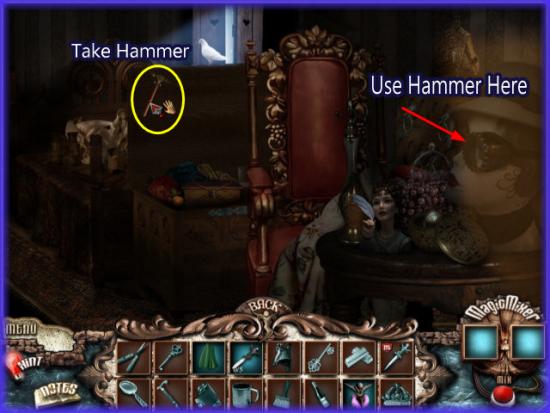
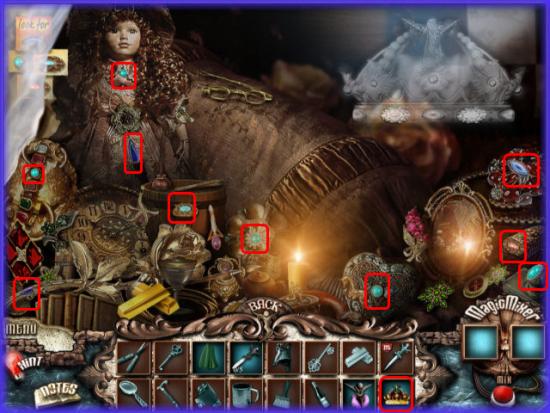
? Once in this room click on the hidden objects in the scene which are shown circled and color coded.
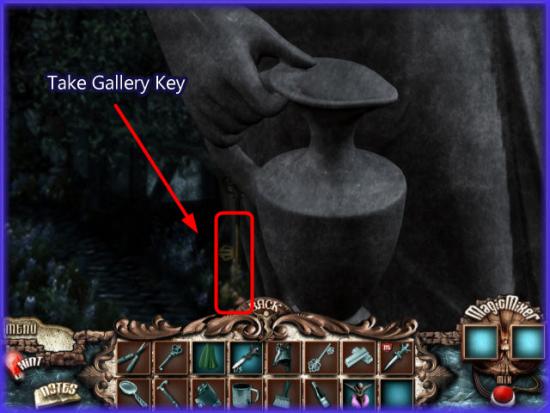
? Take the coin, spade, and cage key into your inventory.
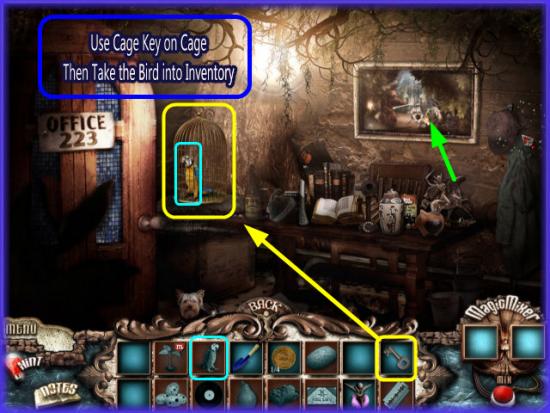
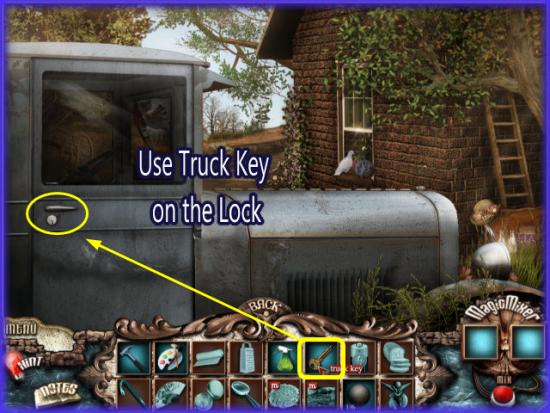
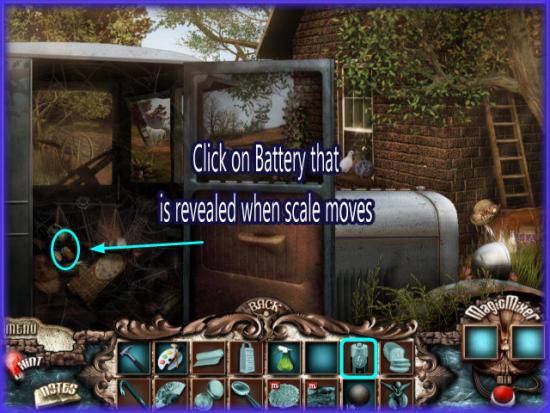
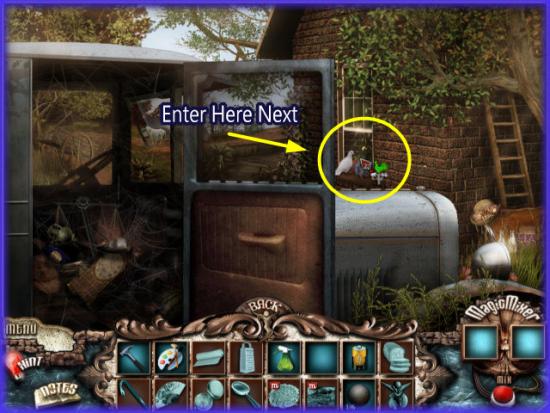
? Next take the cage key from your inventory and use it on the cage. It will lift open and now you can click on the bird and he will move into your inventory.
? Go back to the first room by hitting the back key one time and stop at the fountain to spend your third coin. You will get the colored eggs this time. Be sure to put them into inventory. They will be at the bottom tier of the fountain near where the toolbox was.
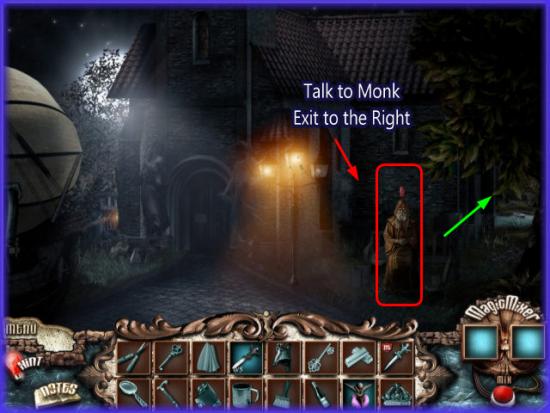
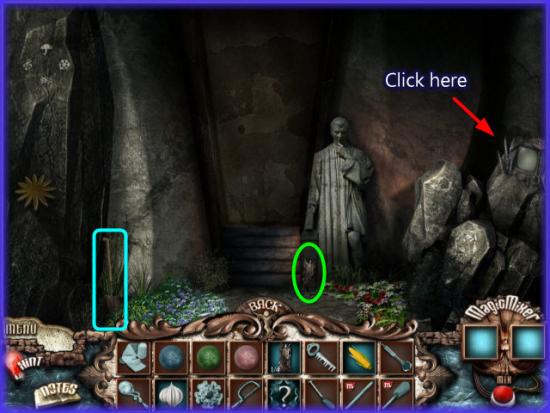
? Next go back into the first scene of the chapter where you met Tommy.
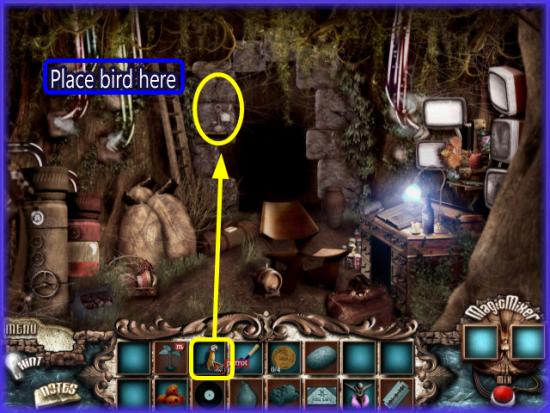
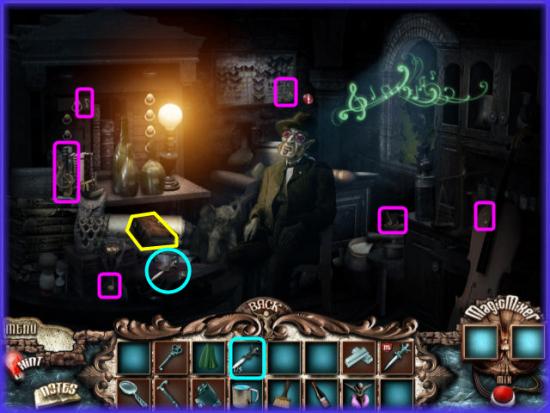
? Note the telephone sitting to the left of the doorway. You will need to click on the Parrot and place him on this telephone. If you click here beforehand you will see a message saying you need someone “Chatty”
? Once you place the bird you will be taken to a new scene.
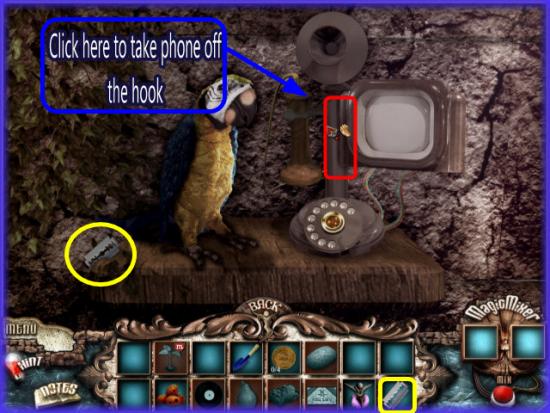
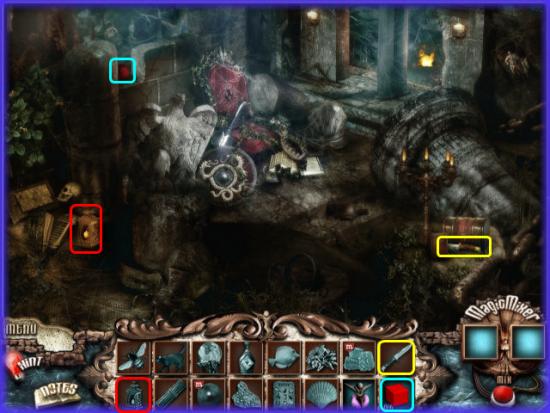
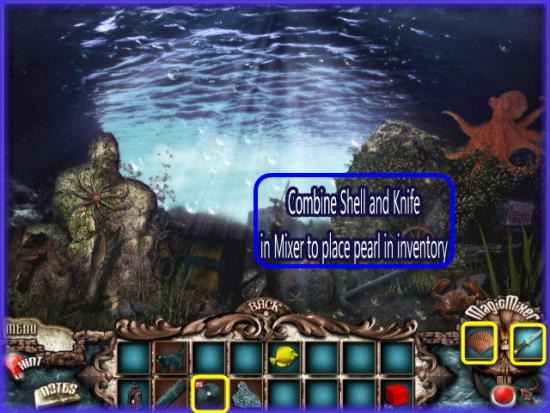
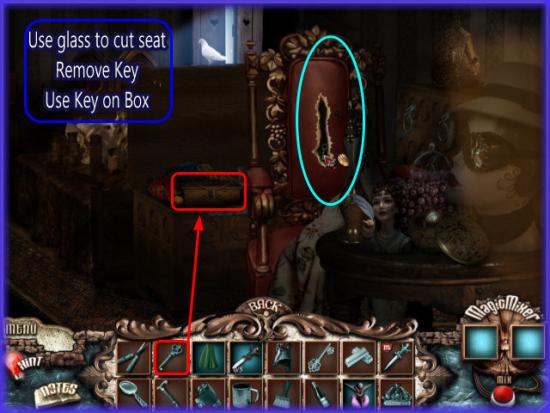
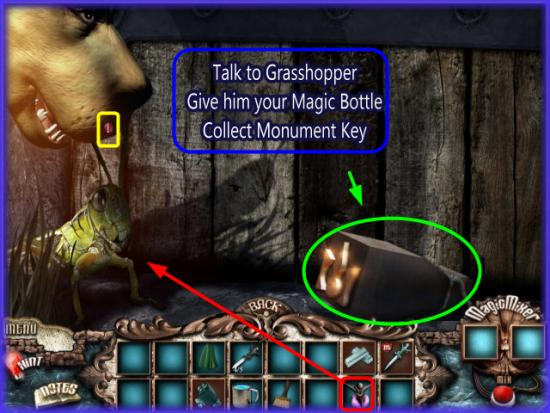
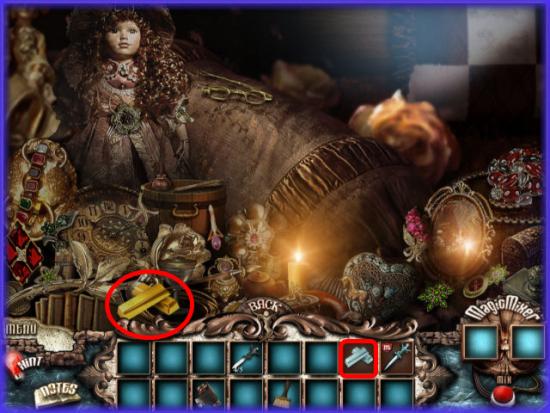
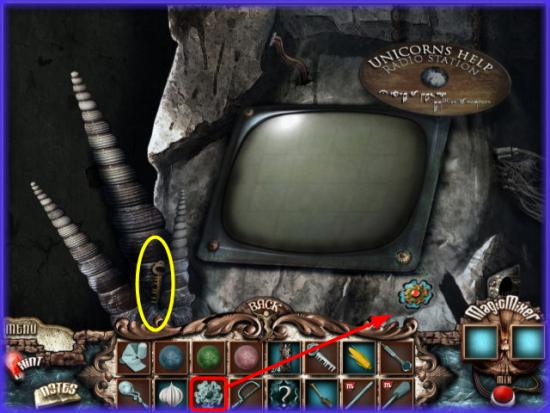
? In the first image you will see the parrot next to an old fashioned rotary phone. Be sure to click on the razor blade circled in yellow at the bottom left of the scene. This will move into your inventory.
? The phone is currently on the hook. Click on the handle as shown to take it off the hook.
? Now you can dial a number that will cause a phone to ring in another part of the building and this will distract the guard away from the left side of the elevator.
? You may have to go back and forth starting the alarm and calling on the phone until you find all the items you need.
? After much trial and error it appears that the three digit number is “2-2-3” You must click on each number and wait a second in between. If you hear a busy tone you have guessed incorrectly and will have to try again.
? It is not known if everyone will have the same phone number or if trial and error is the only way to learn this number.
? Once you have entered the correct three digit extension the guard will leave his post and move away from the left side of the elevator. Now you are free to go back and explore this site.
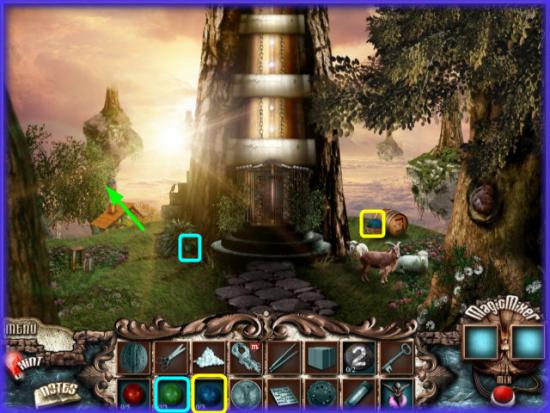
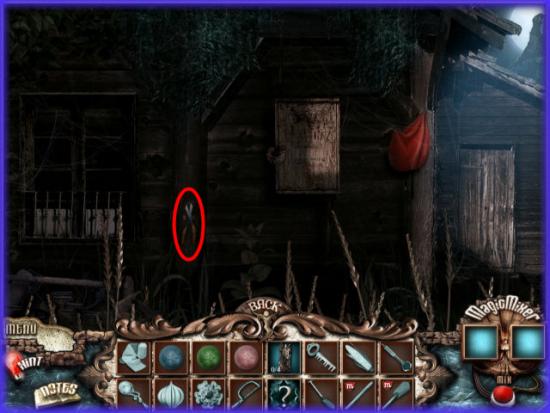
? Go back once, out the doorway and click on the area to the left of the fountain.
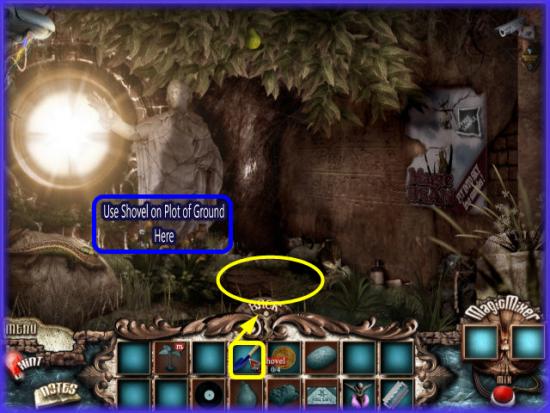
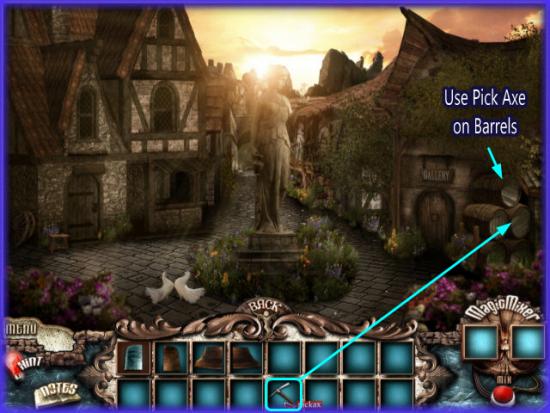
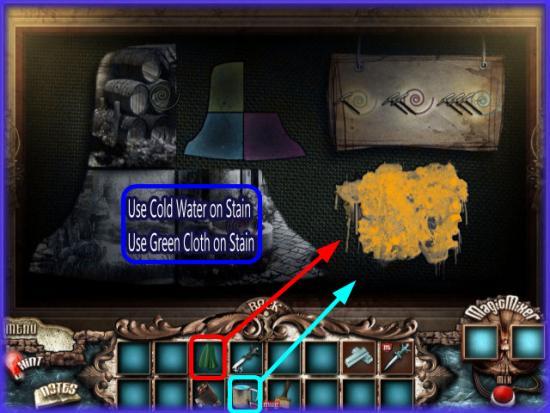
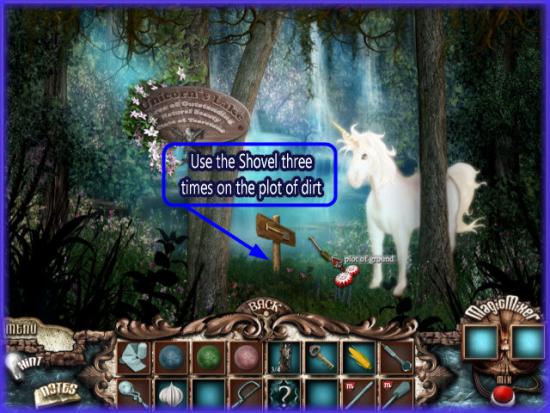
? Take the shovel and use it on the plot of ground at the center of scene.
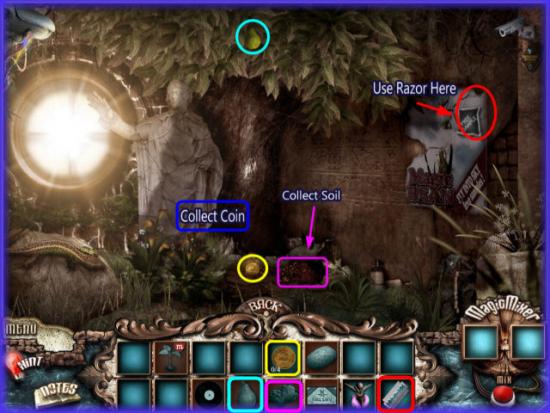
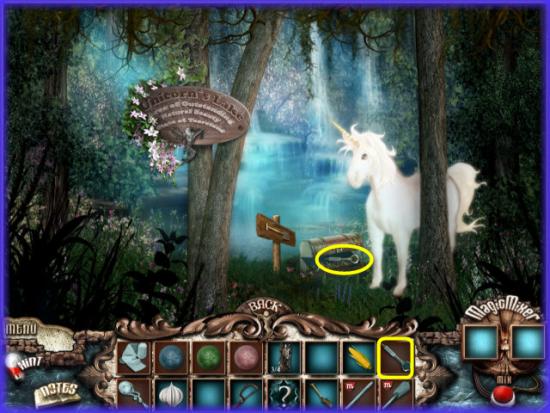
? When the coin is revealed click on it to add it to inventory.
? Click on the pear at the top of the scene and ad it to your inventory.
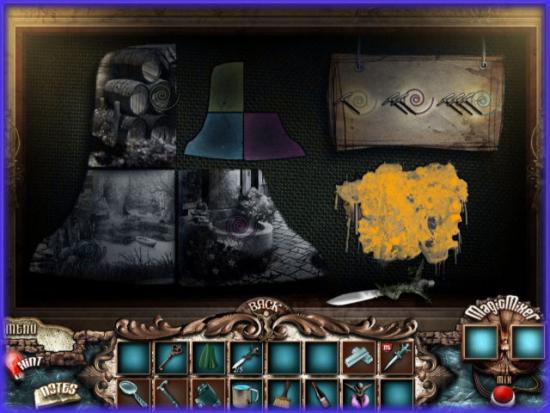
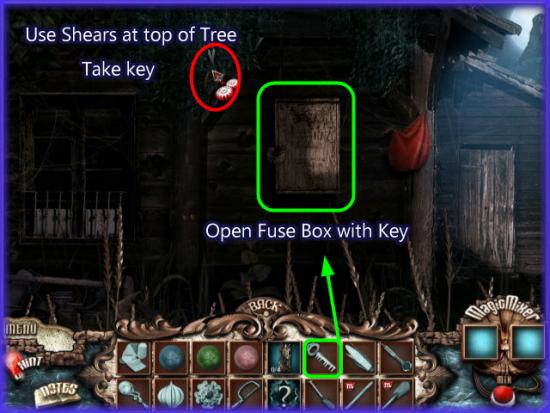
? Use your razor blade at the top right side of the poster marked with red in image above. You will find a seed behind the poster which you must click on to add to your inventory.
? Important – Now you will need to go back up the staircase to the right of the elevator. Before you can do so you will need to go back into the room with fuses in it and click on the “Start Alarm” button to turn it on and distract the guard from that side of the elevator.
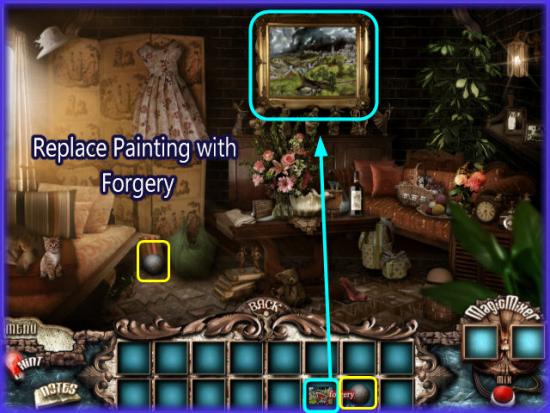
? Once you do this go up to the room at the top of the stairs and click on the picture on the wall which will take you to a new scene.
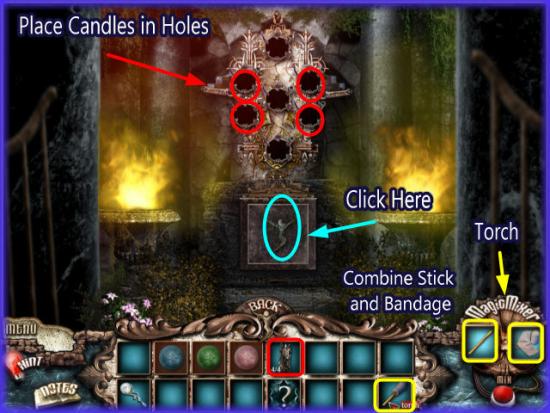
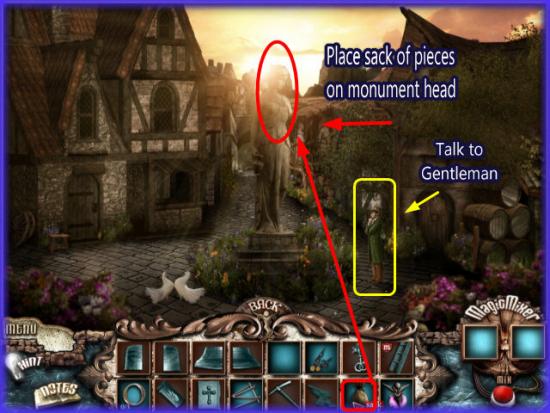
? You will need to put all the required items into this room in order to obtain the passkey to open the elevator with.
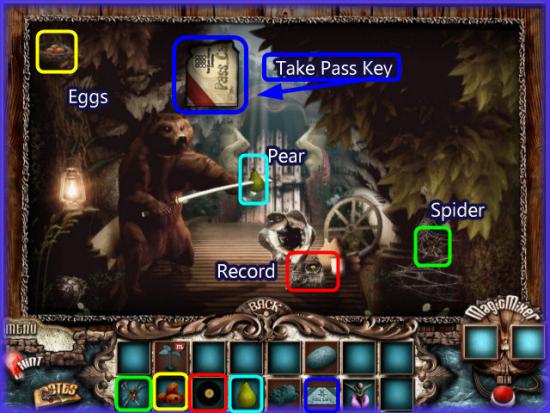
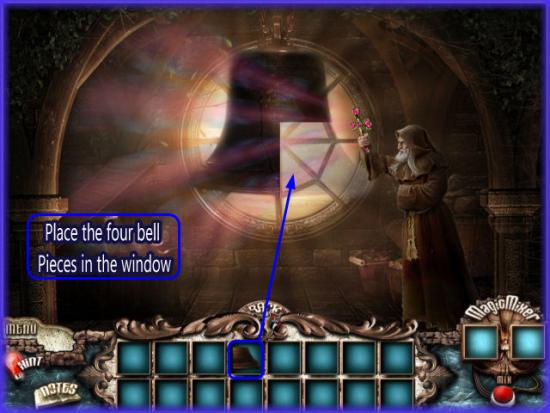
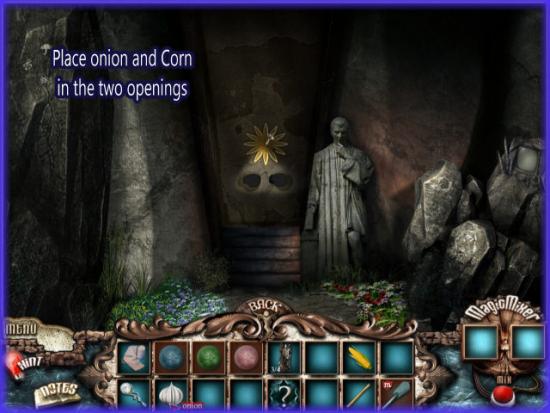
? Place the following items
? Pear – On the Bear’s sword.
? Eggs – In the nest at the top left corner.
? Spider – On the web at the bottom right corner.
? Record – On the phonograph player at the center of the scene.
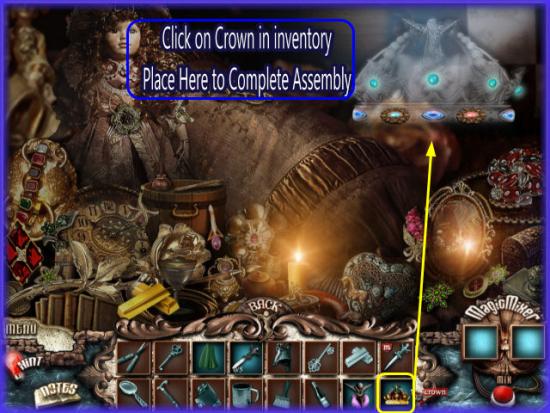
? When all these items are placed the pass key will be shown to you.
? Click on it to add it to your inventory.
? Back out of the scene twice to end up by the elevator.
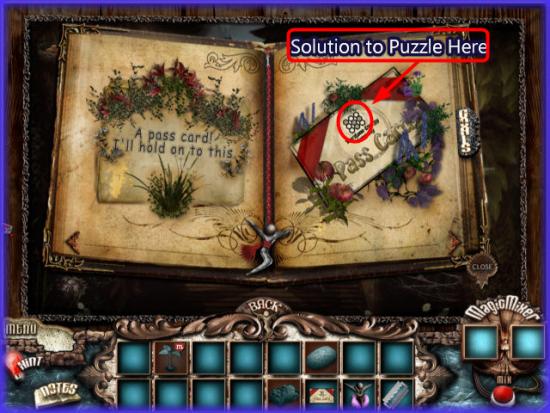
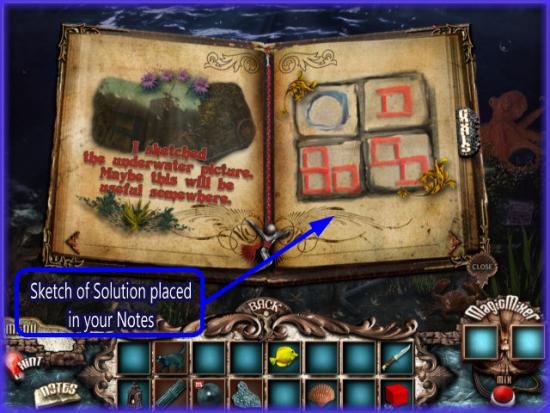
? Once you are given the pass card the information will go into your notebook.
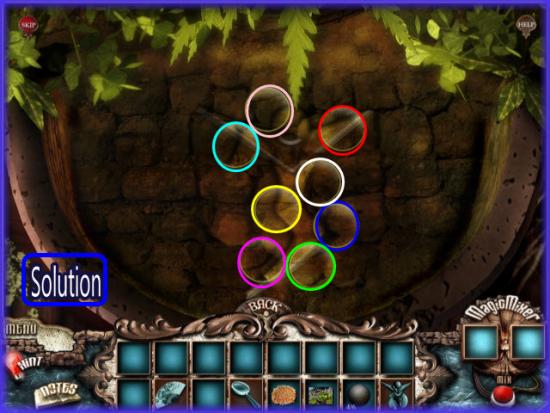
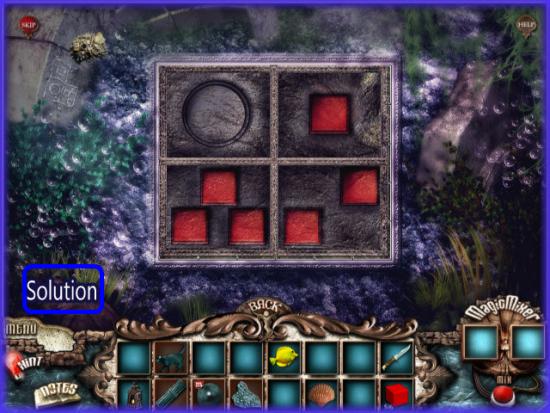
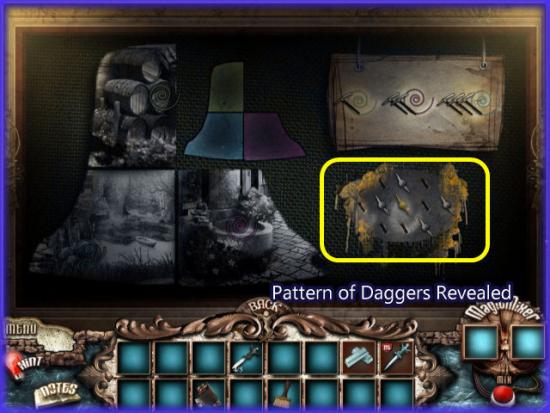
? This is very important because if you look closely at the pass card there is a pattern on it and later on you will see this is a solution to a puzzle.
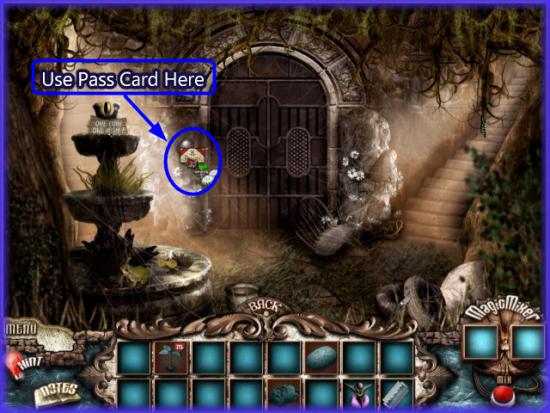
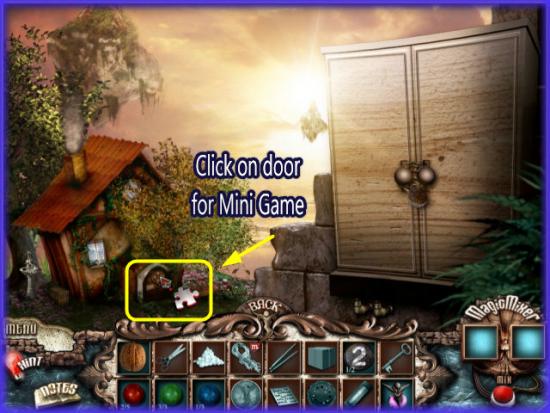
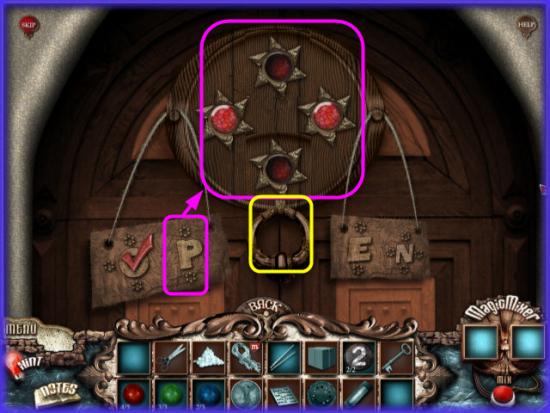
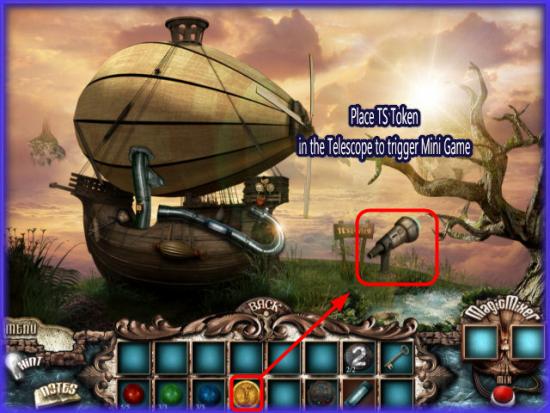
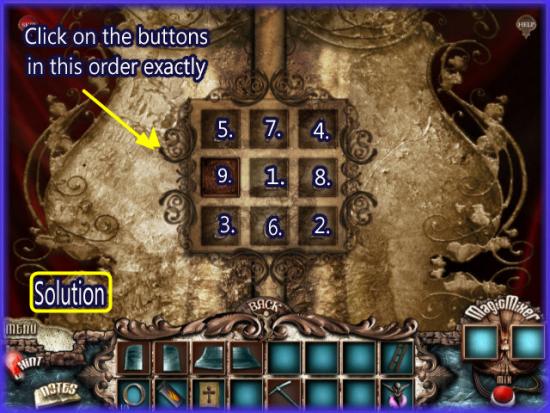
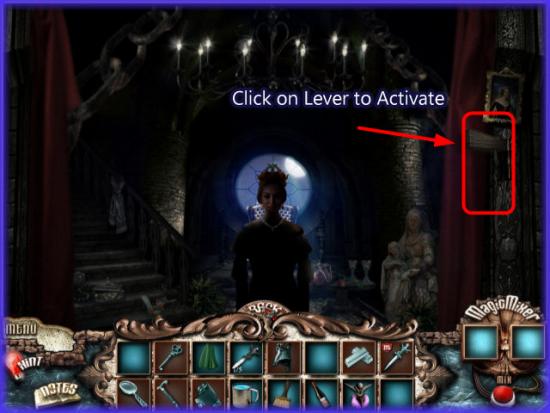
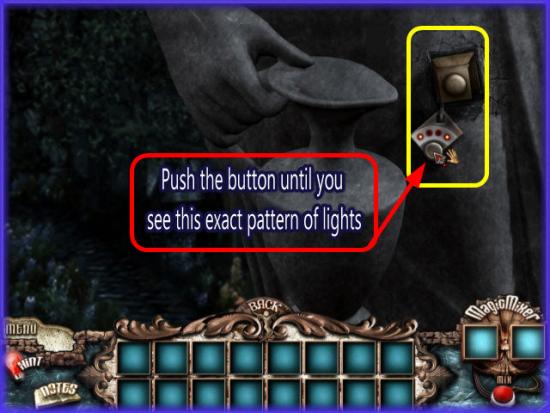
? Take the pass card and put it on the domed glass area to the left of the elevator. Once you do this you will be taken to a puzzle.
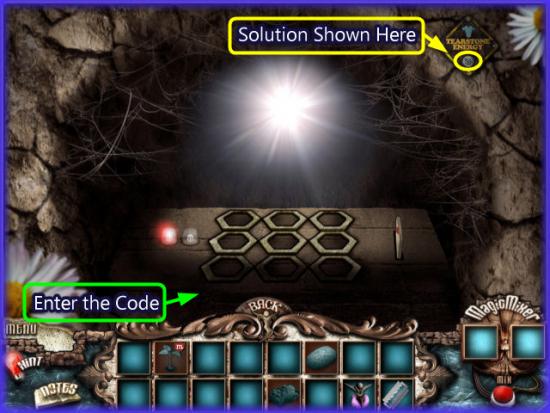
? Enter the correct code to open the elevator.
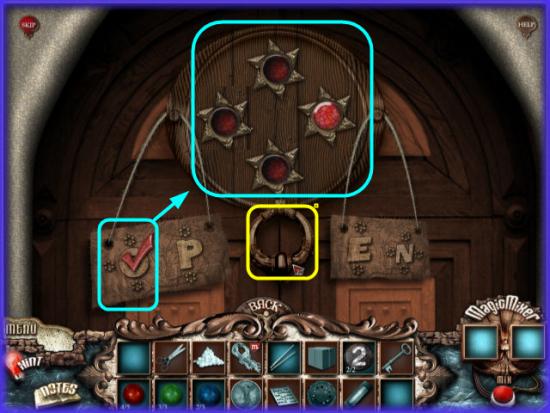
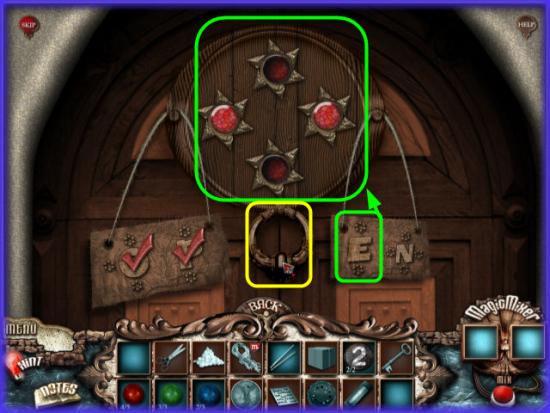
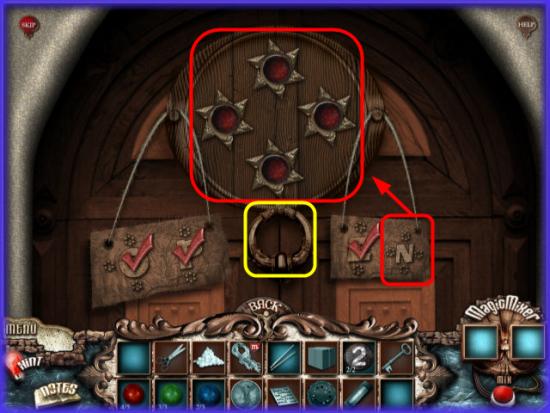
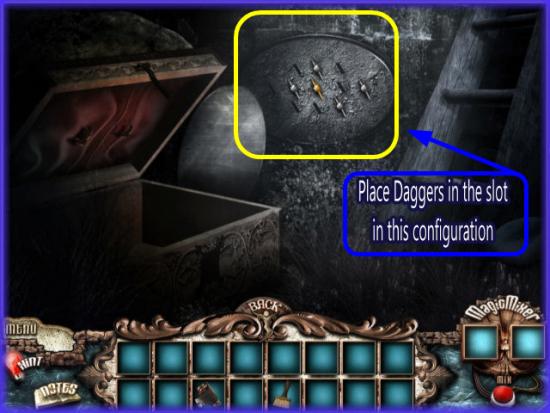
? As stated on the pass card and shown in image above you should consider the shaded areas in the 3 x 3 grid of hexagons.
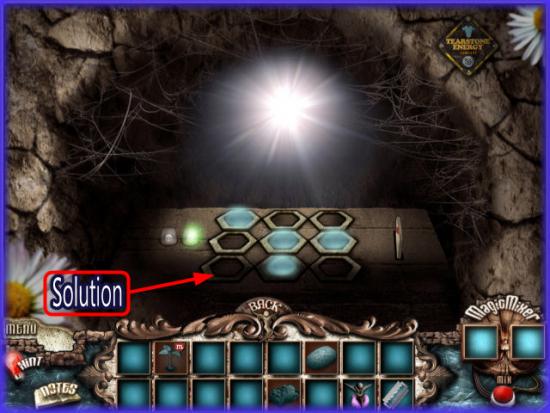
? Click on the top hexagon only in column one
? Click on the second and third hexagon in column two
? Click on only the second hexagon in column three.
? If you are successful the elevator door will open for you.
? Click on the door to enter the elevator.
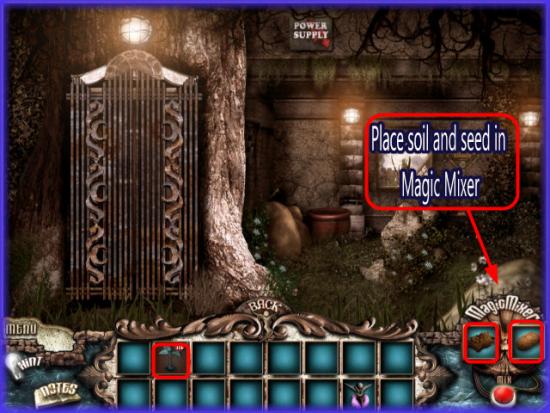
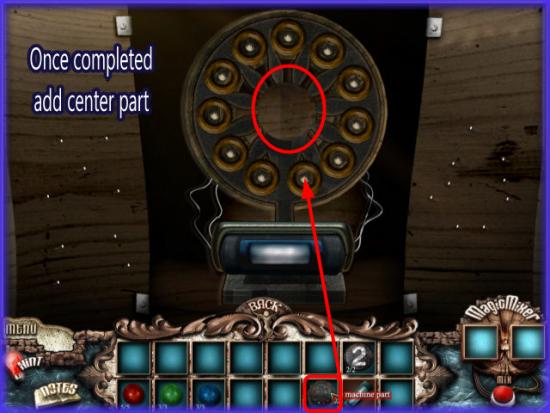
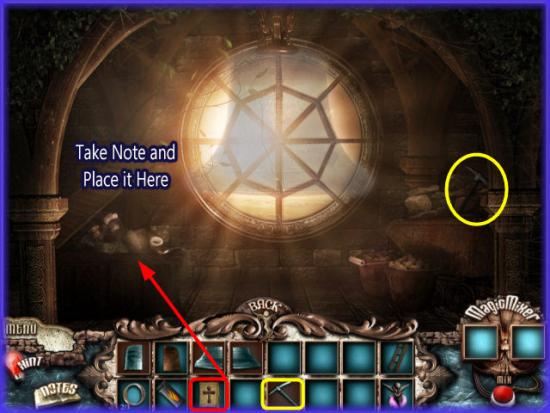
? Now you are in the power supply room.
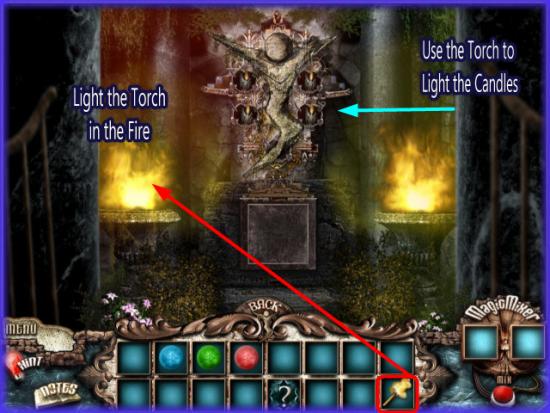
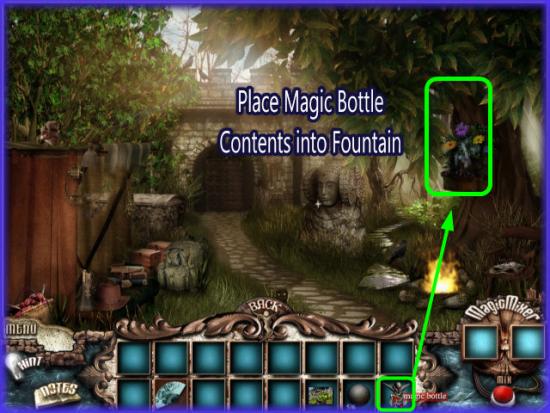
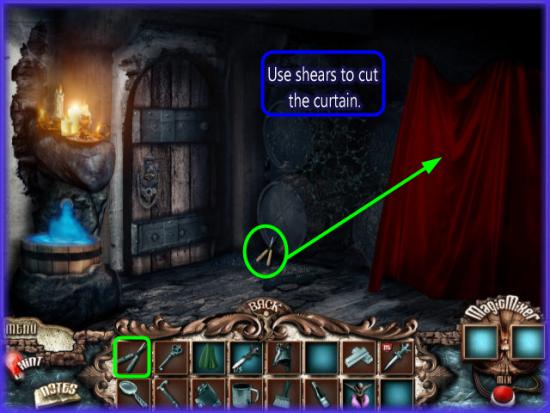
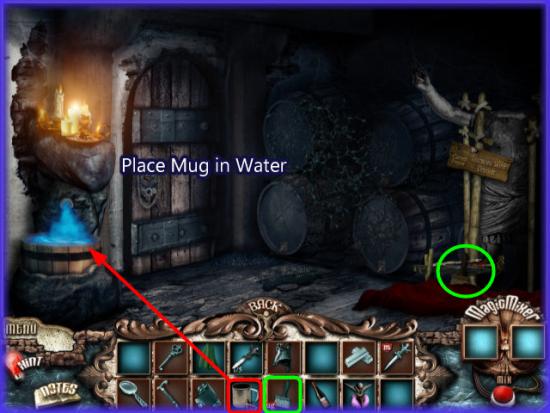
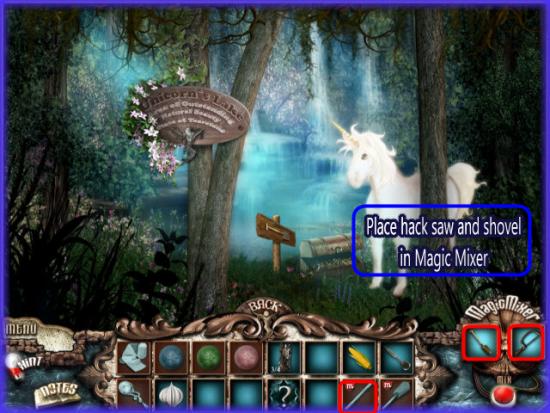
? Place the soil and the seed in the magic mixer and you will have a plant seedling in your inventory.
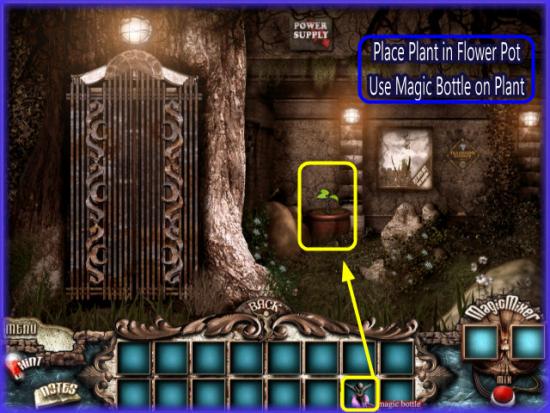
? Place the seedling in the flower pot in the center of the scene.
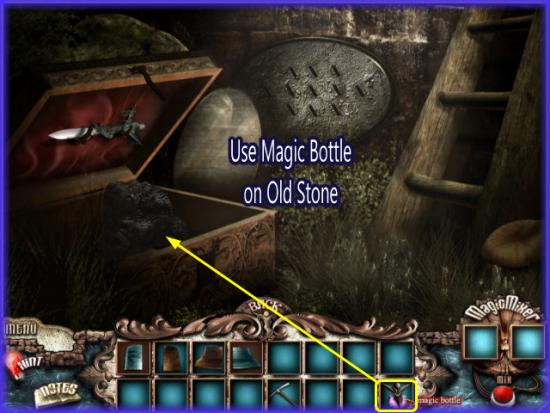
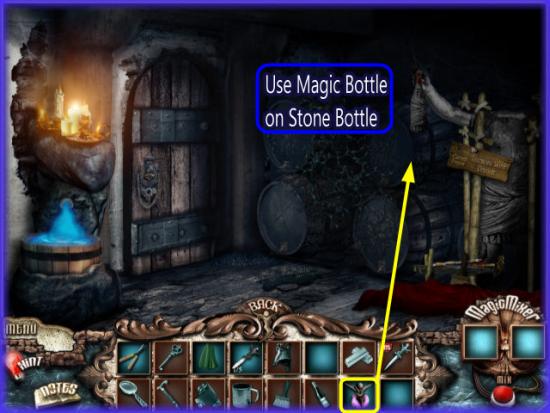
? Next take the magic bottle and add its contents to the flower pot.
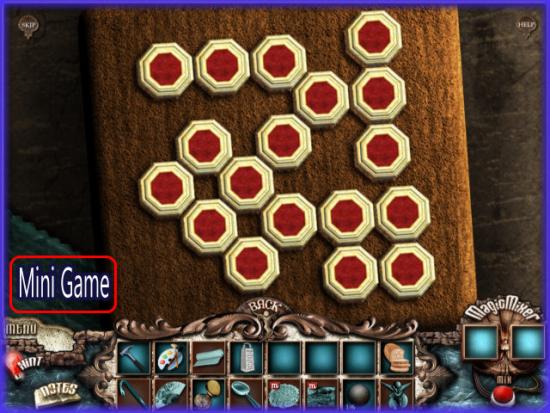
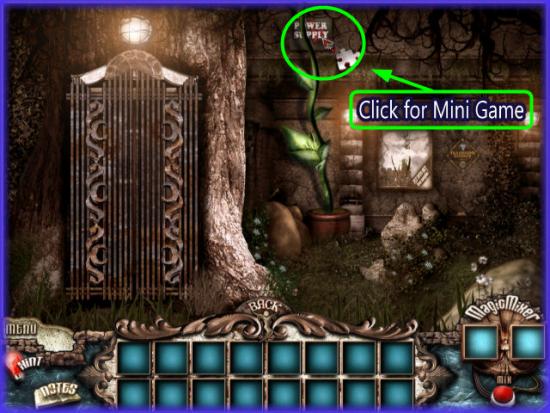
? In a moment there will be a full grown plant reaching to the power supply box. Now you can click on it to start a mini game.
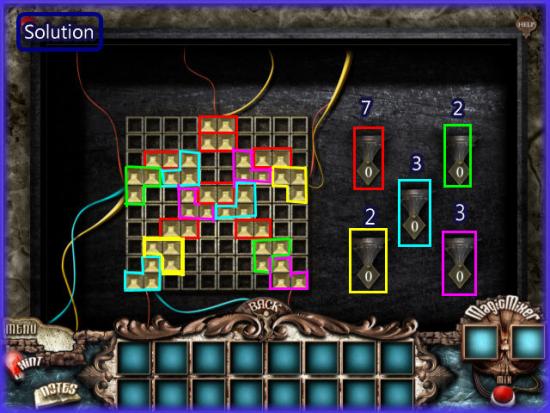
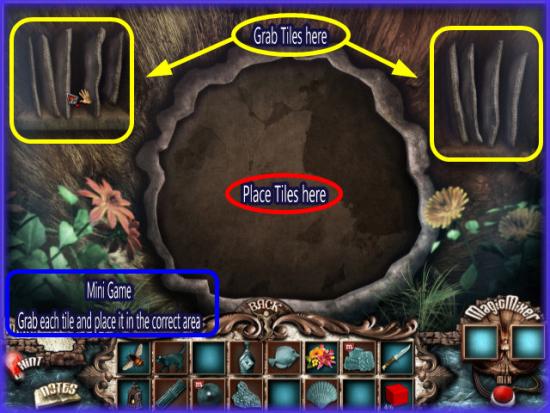
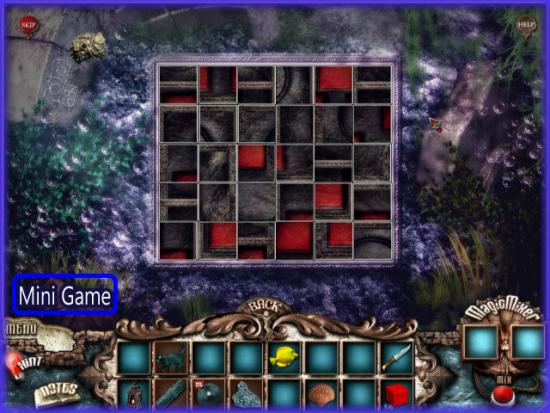
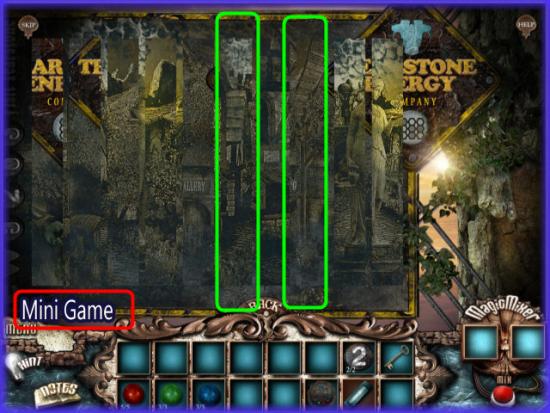
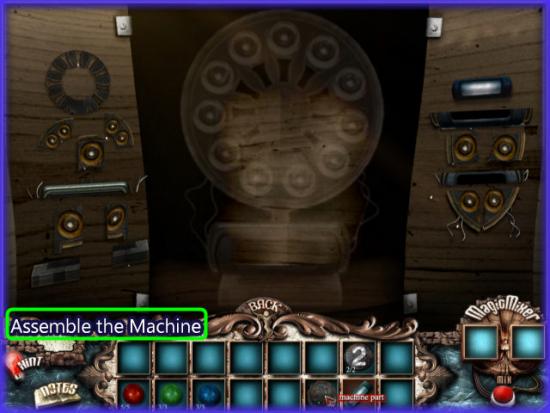
Mini Game
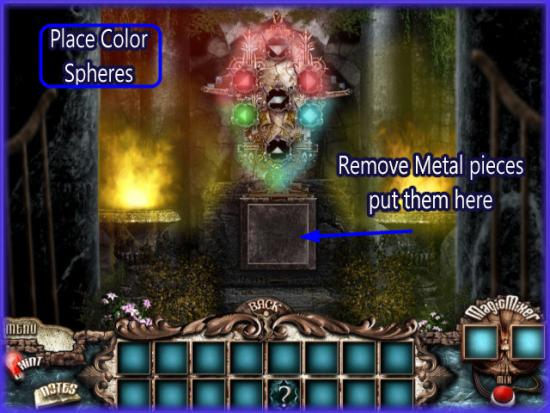
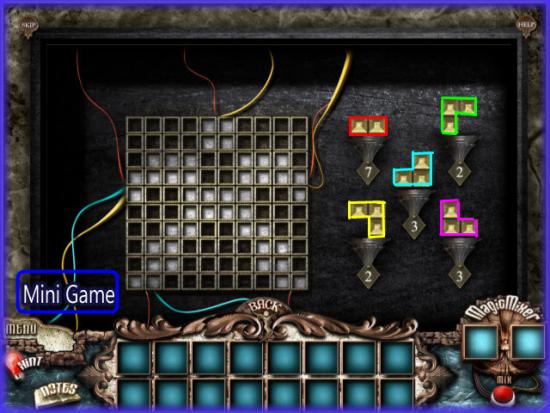
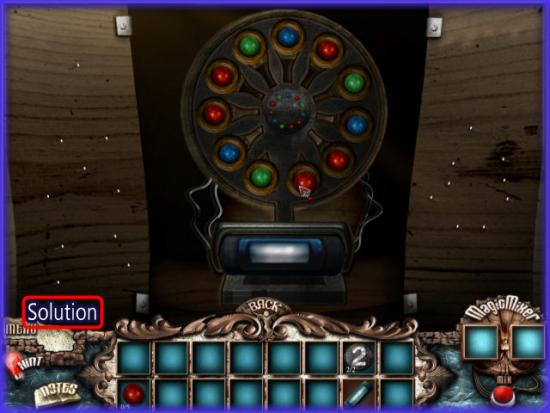
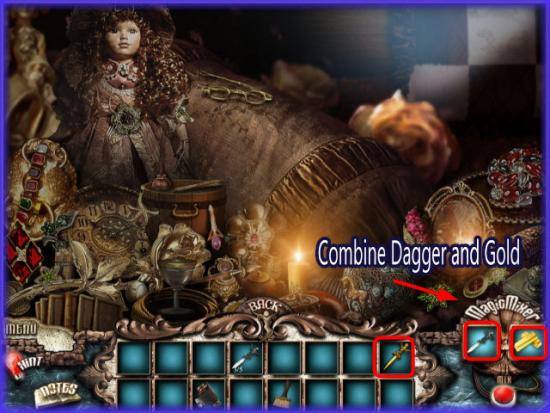
? In this mini game you need to match the components to the light grey areas of the background.
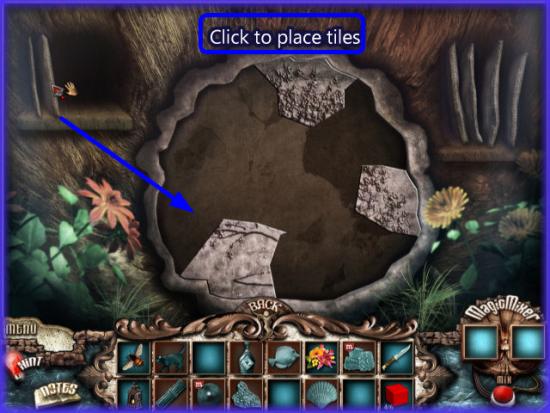
? The gold tiles will fit over the grey areas when you click on them and lock them into place.
? You can not rotate the pieces and you only get so many of each kind which is listed next to it.
? You must fit every single piece on the board without any left over or empty spaces.
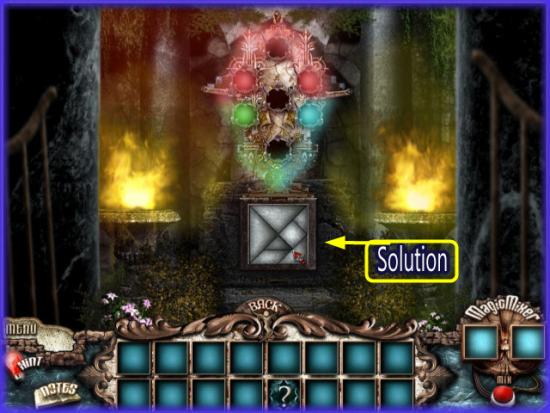
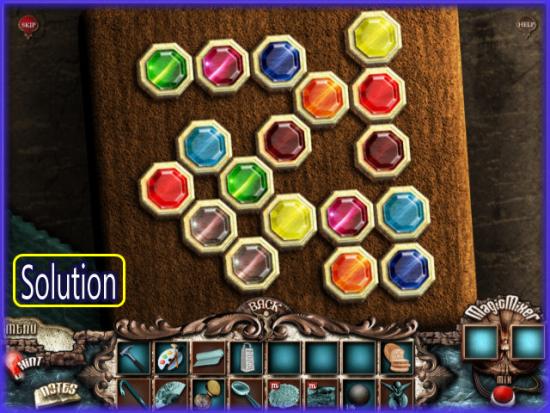
? I have color coded each piece so that you can see how the solution works.
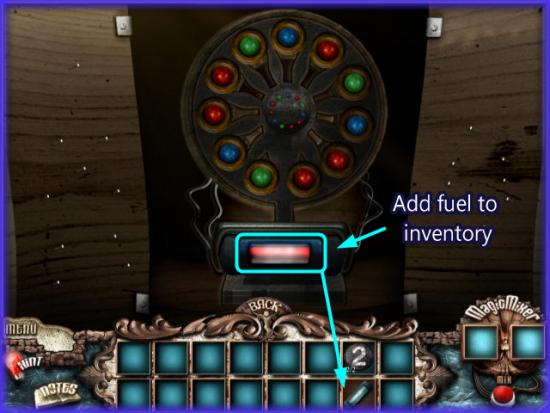
? Once you complete this puzzle you will have completed chapter three.
? A brief video snippet will now play to segue the storyline into the next chapter.
Mini Game
Mini Game


Mini Game


Mini Game


Mini Game


 ok
ok