![Hololive Dreams Tier List [Best Cards]](/wp-content/uploads/2026/07/hololive-dreams-tier-list.jpg "Hololive Dreams Tier List [Best Cards]")
Hololive Dreams Tier List [Best Cards]
The best cards for the best performances.


![Iron Soul Dungeon Weapon Tier List [Best Weapons]](/wp-content/uploads/2026/07/iron-soul-dungeon-weapon-tier-list.jpg "Iron Soul Dungeon Weapon Tier List [Best Weapons]")

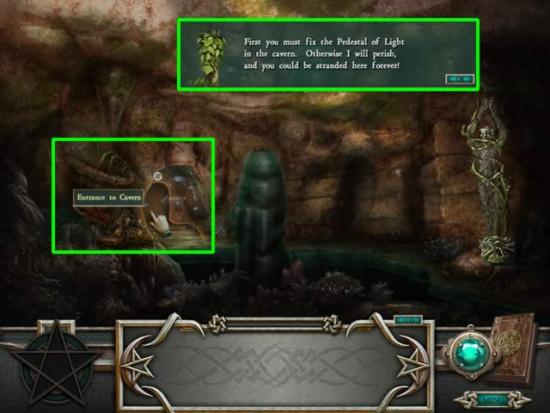
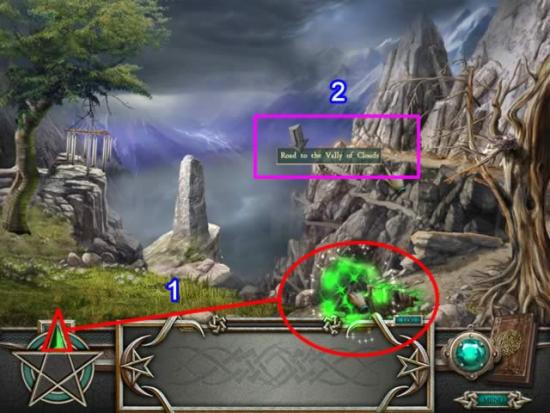
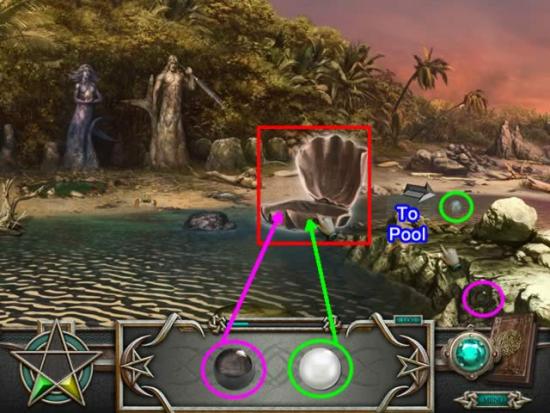
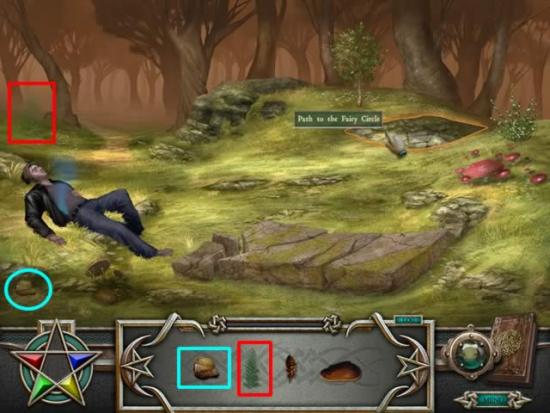
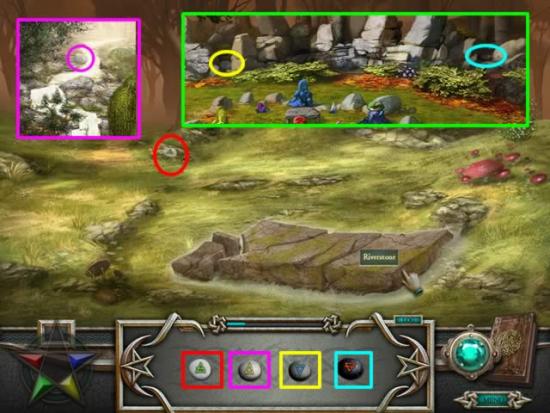
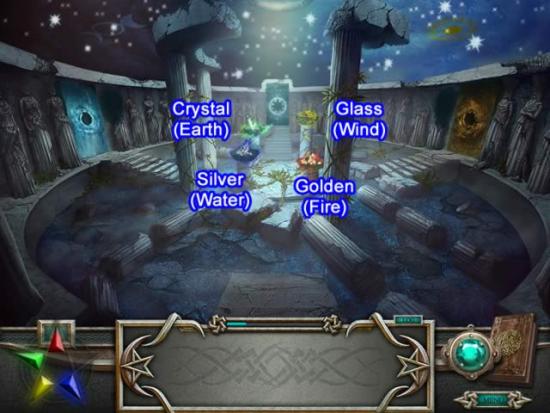
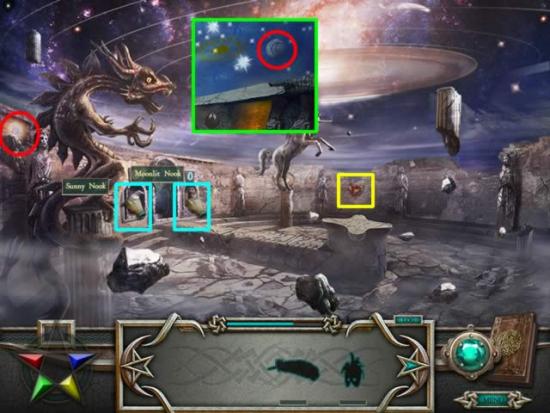
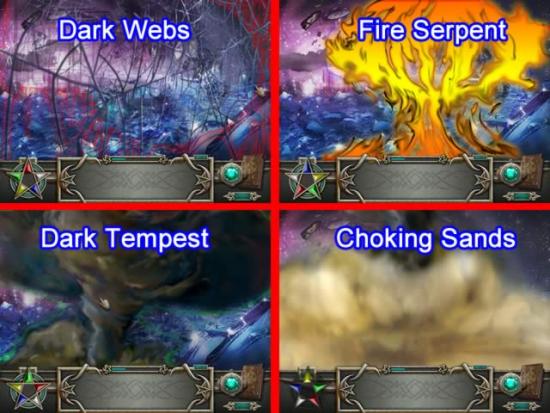
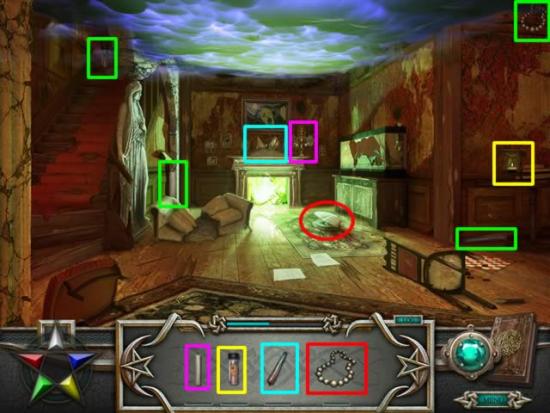
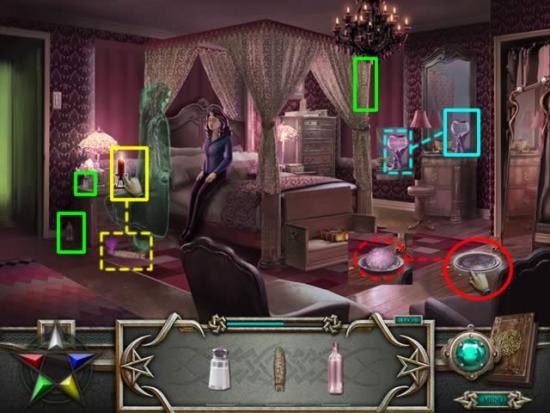
Welcome to the Tamara the 13th walkthrough on Gamezebo. Tamara the 13th is a Hidden Object Game played on the PC created by PoBros and PlayFirst. This walkthrough includes tips and tricks, helpful hints, and a strategy guide on how to complete Tamara the 13th.
Welcome to the Tamara the 13th walkthrough on Gamezebo. Tamara the 13th is a Hidden Object Game played on the PC created by PoBros and PlayFirst. This walkthrough includes tips and tricks, helpful hints, and a strategy guide on how to complete Tamara the 13th.
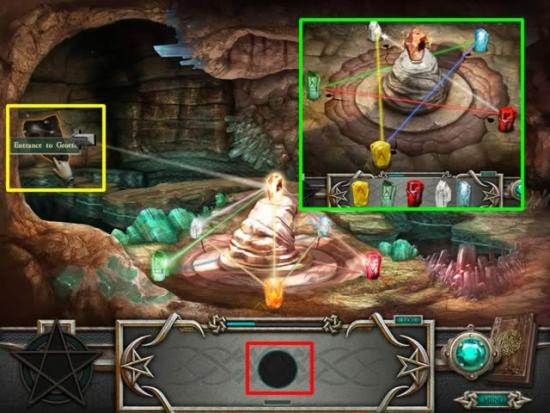
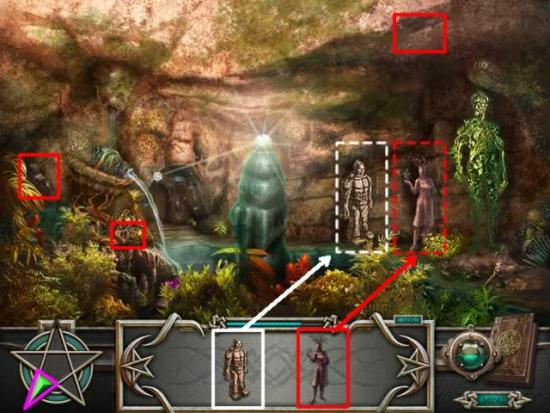
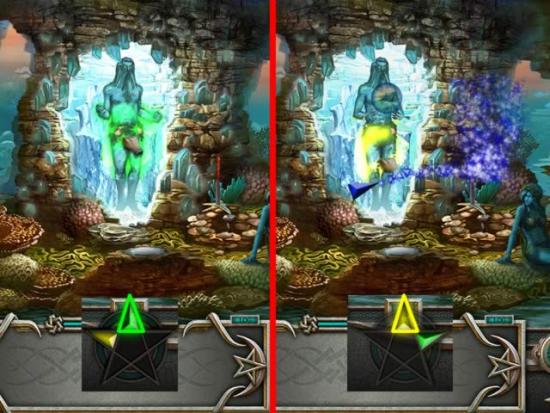
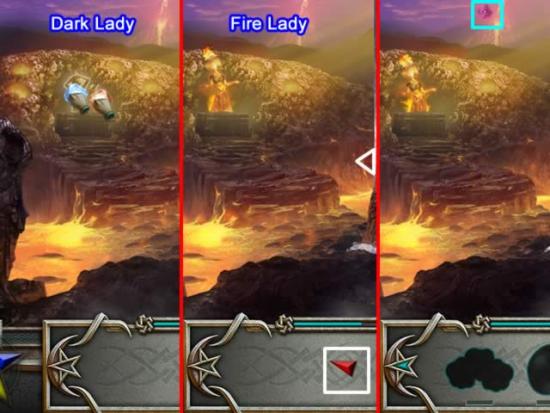
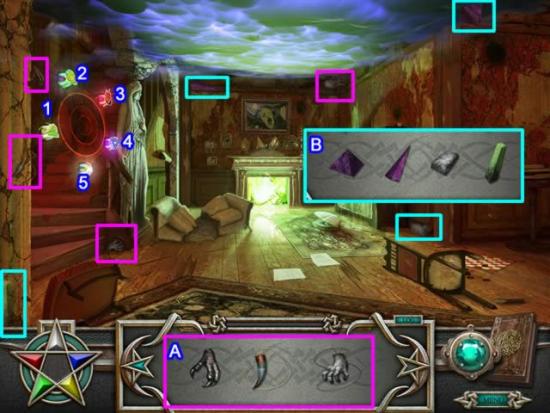
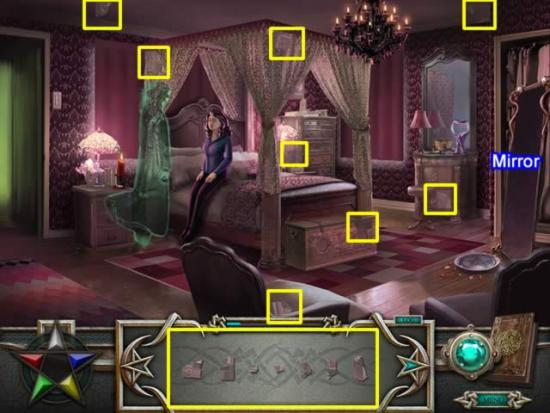
This game uses silhouettes for hidden objects. Most minigames are repeat-the-pattern or connect-the-pipes.
There is no timer and no score.
Play Options:
Navigation:

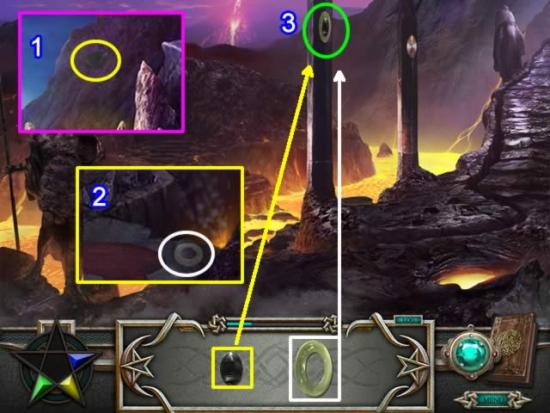
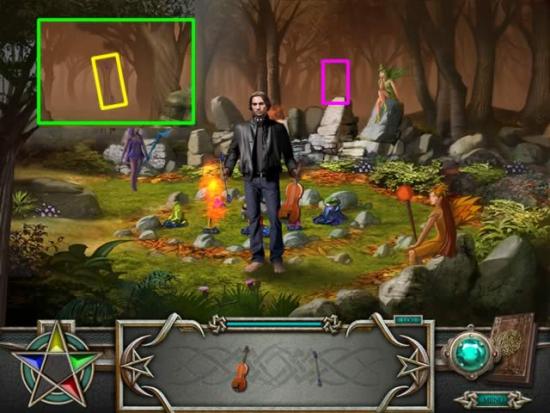
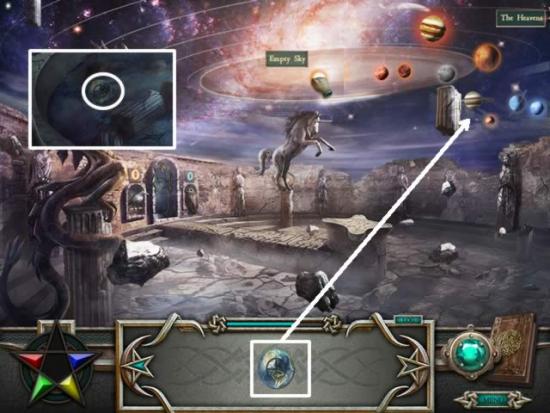
A short clip introduces the characters and sets the story line for play. An interactive tutorial is available for the first scene.
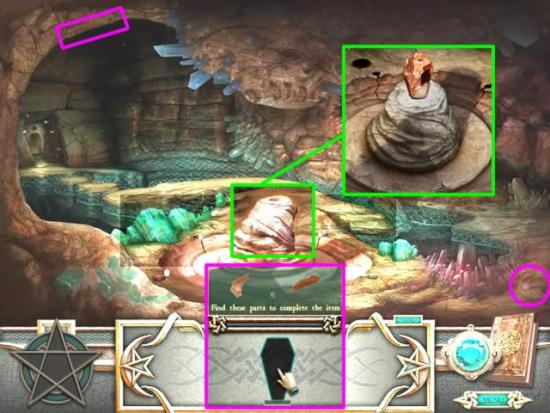
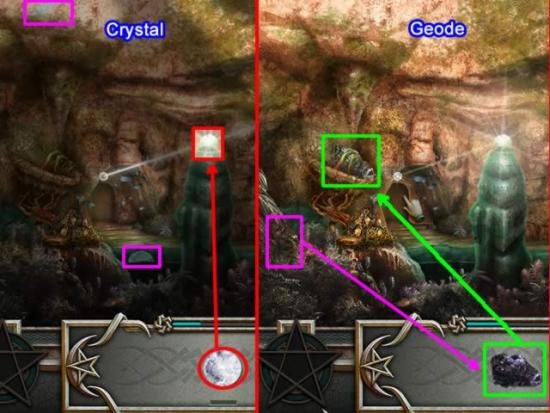
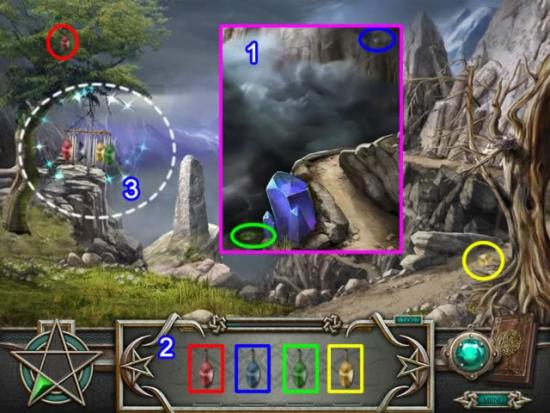
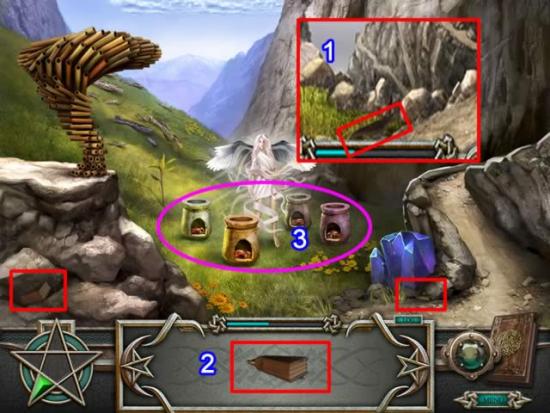
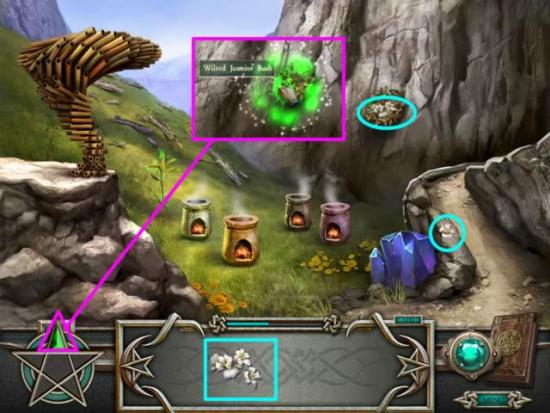
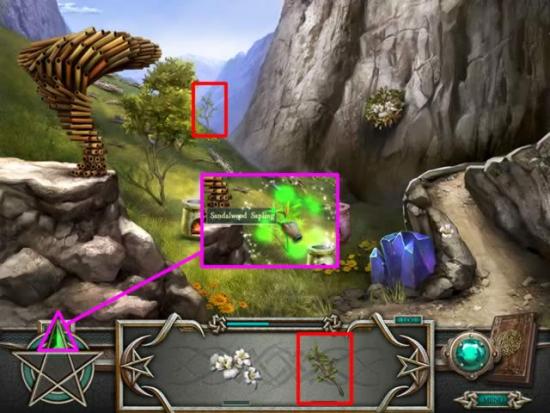
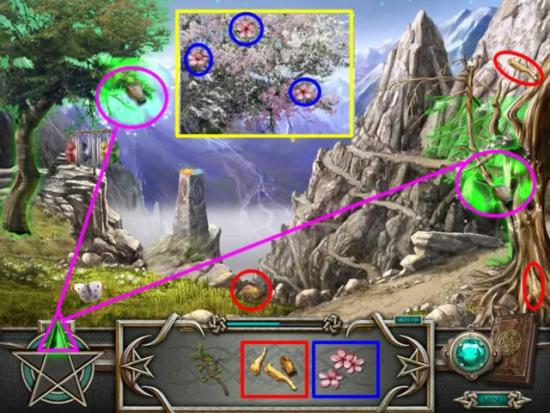
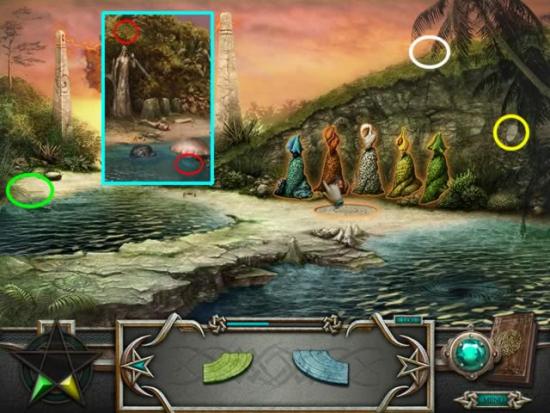
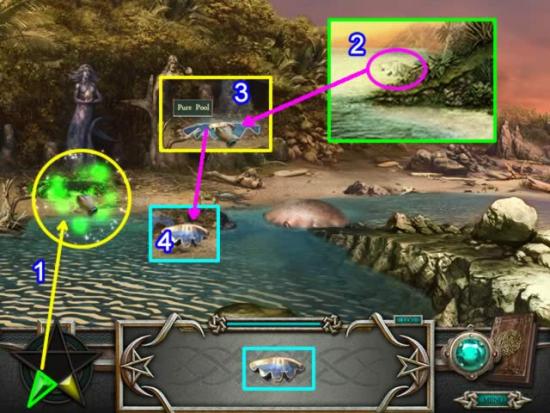
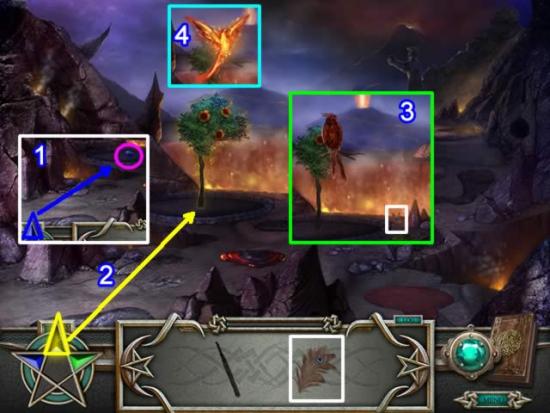
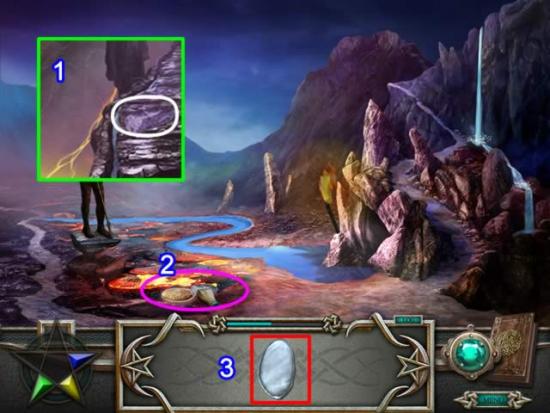
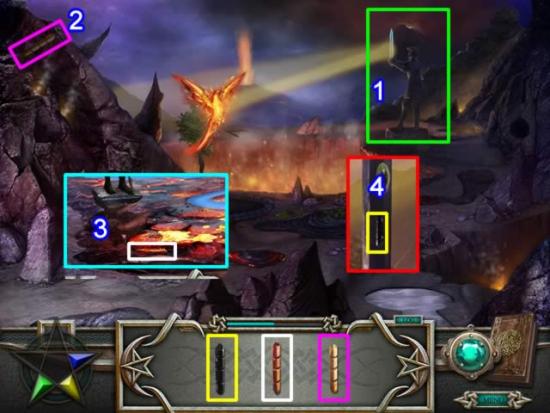
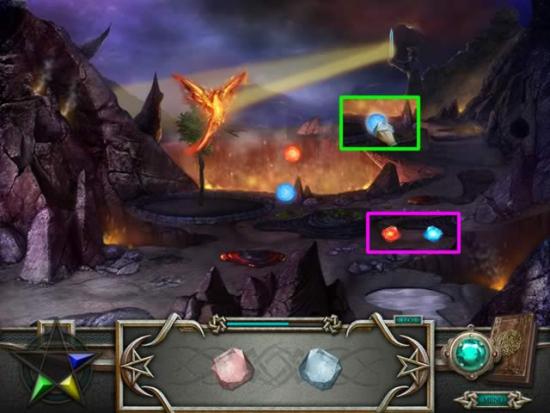
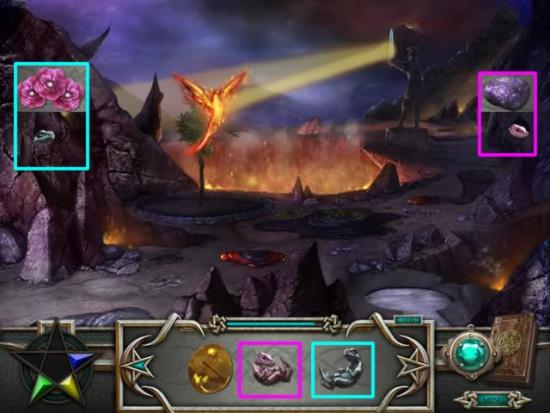
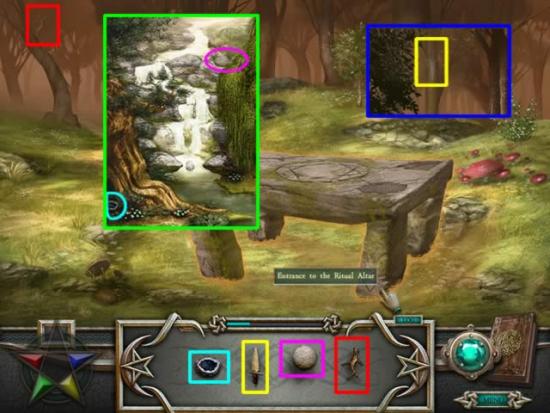
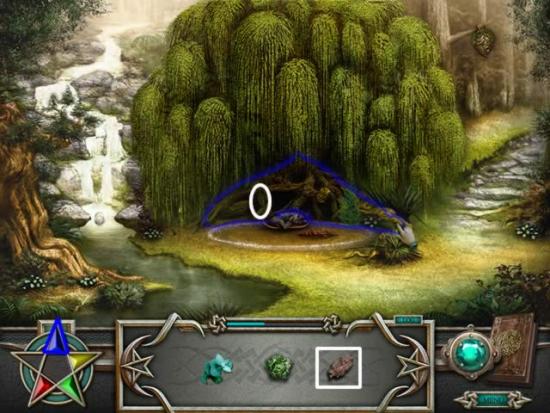
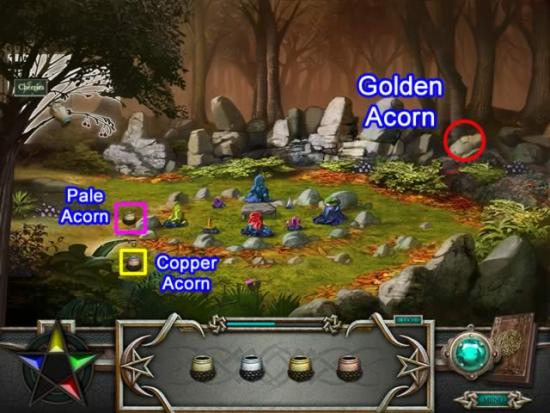
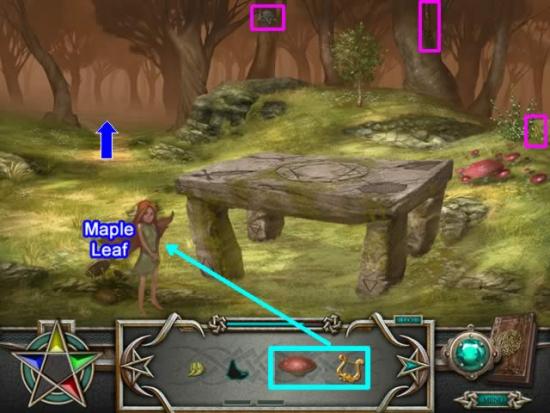
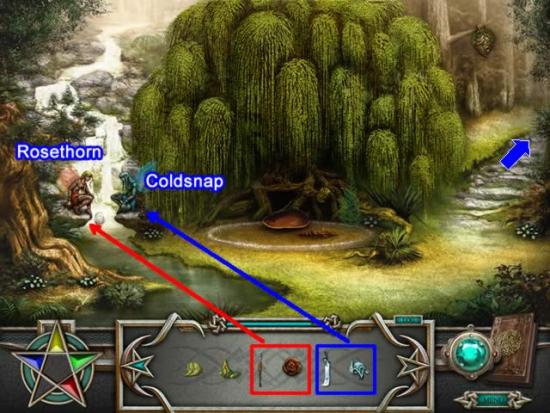
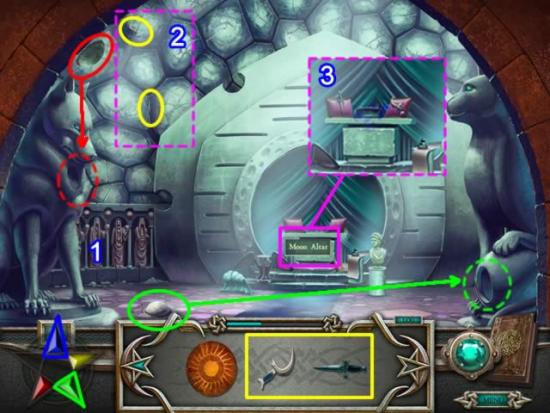
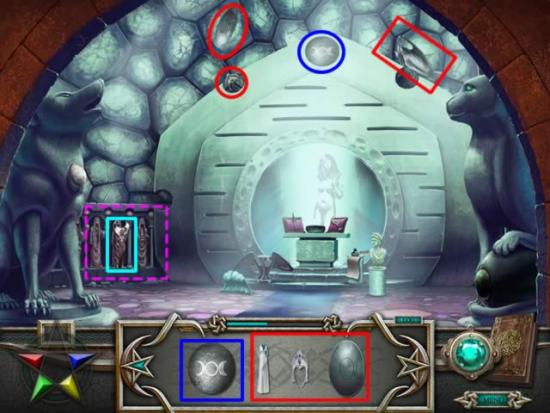
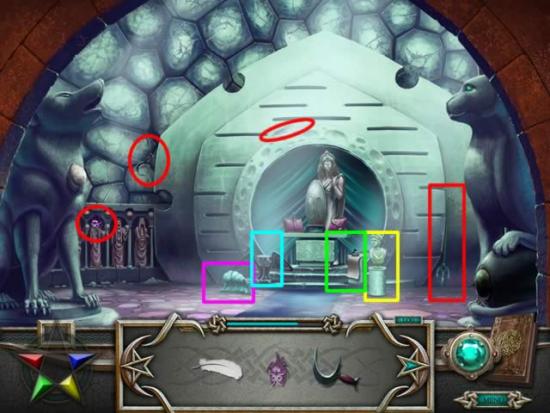
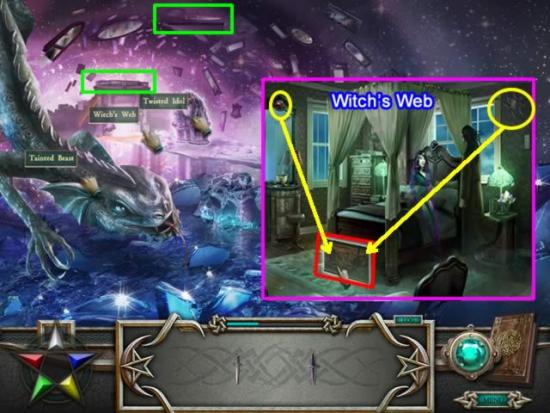
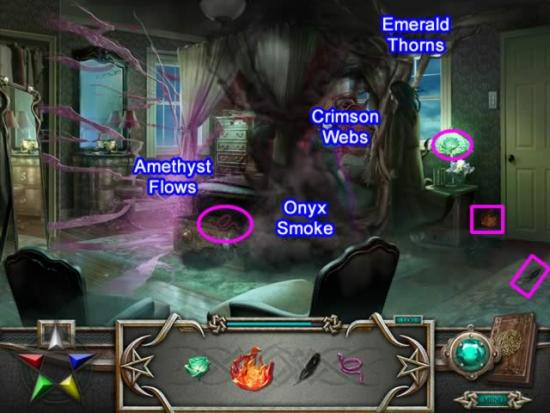
Collect both pieces of the REFRACTING CRYSTAL (highlighted in pink).
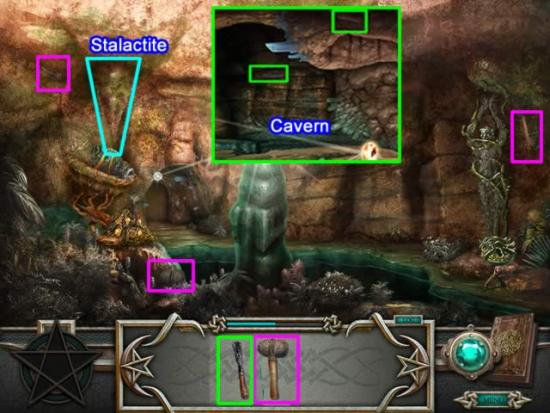
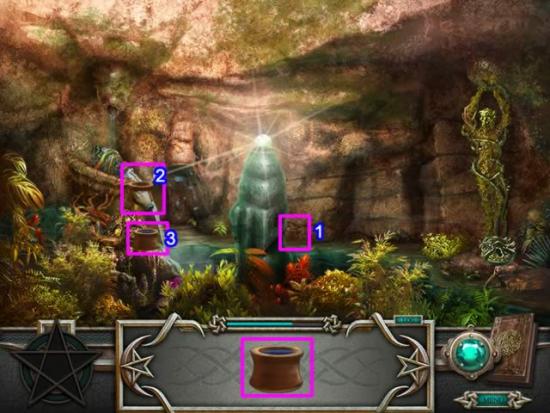
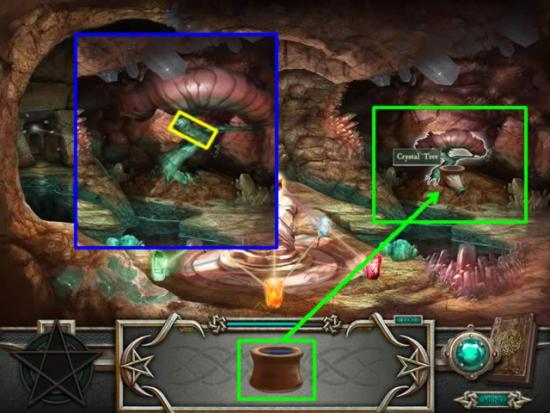
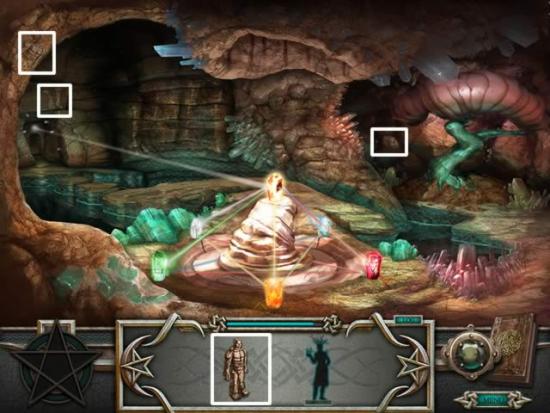
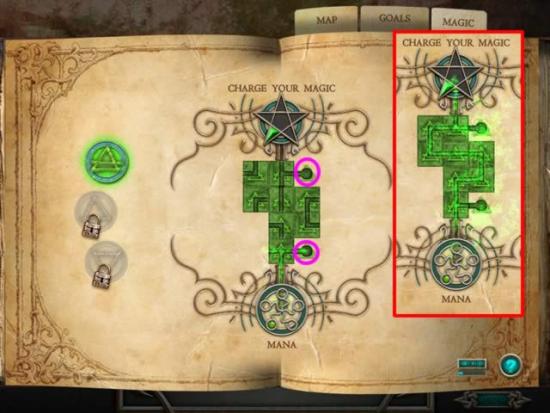
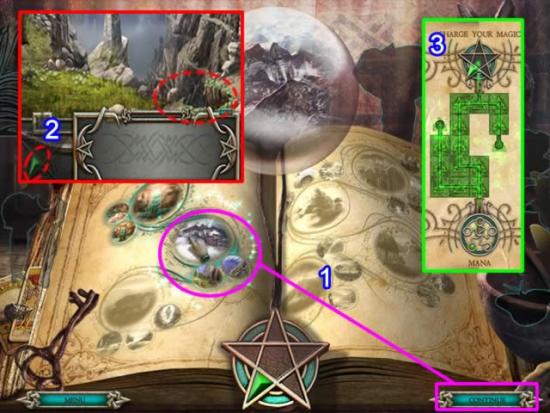

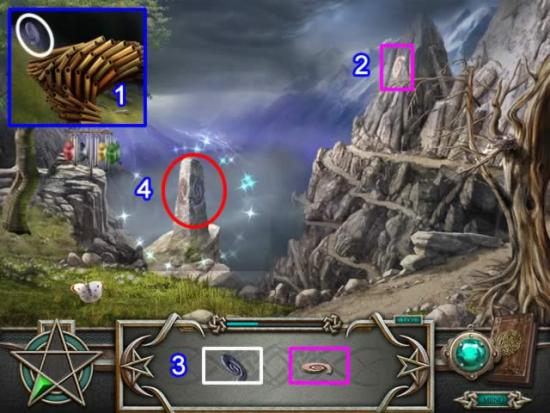
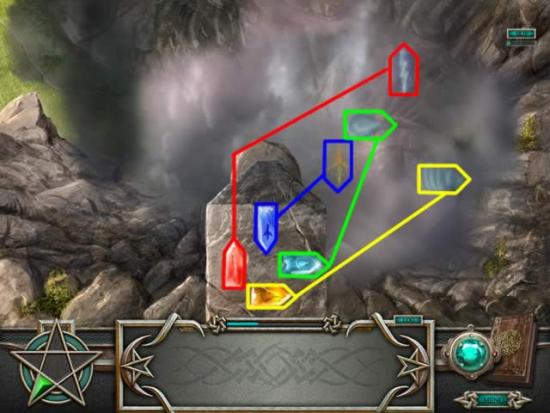

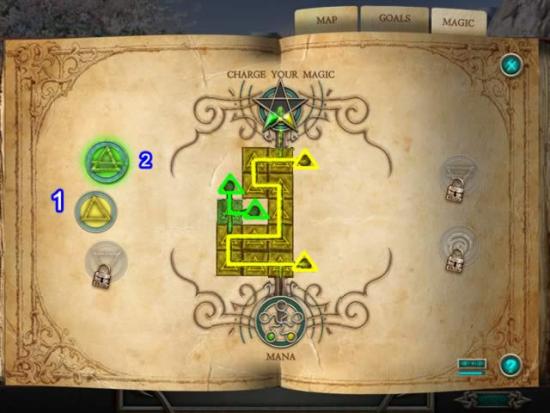
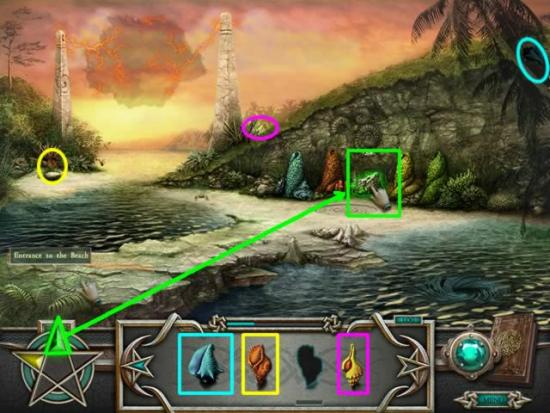
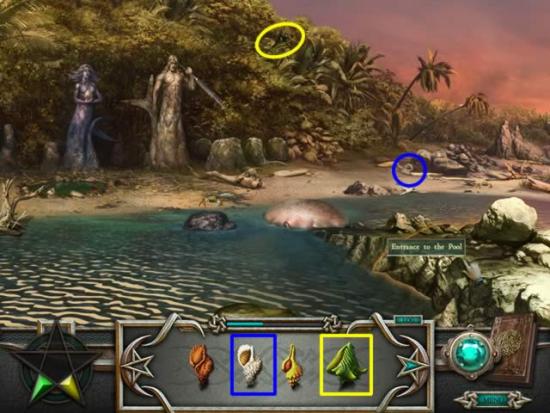
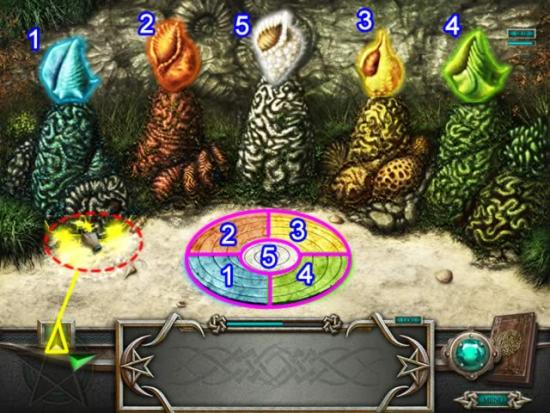

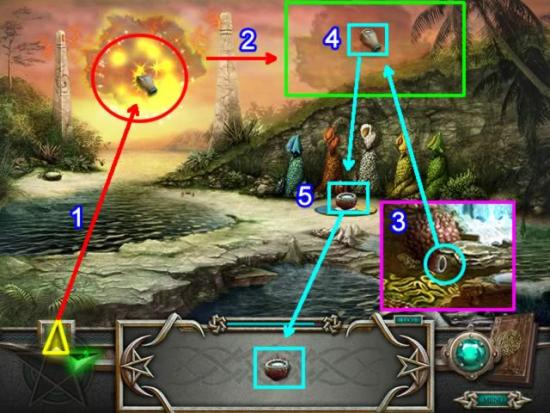
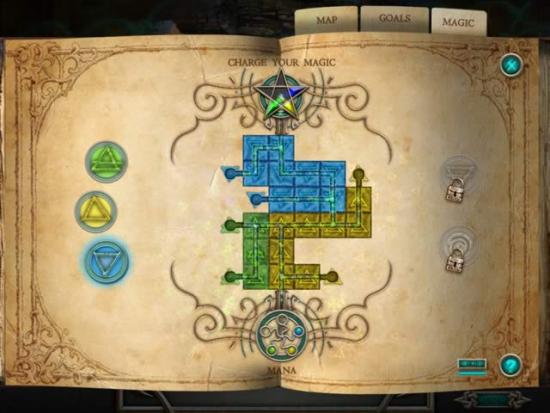
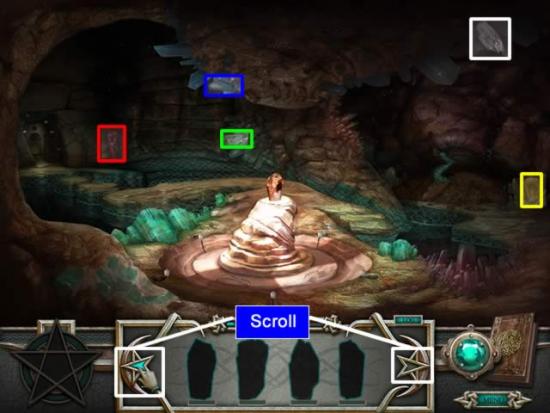
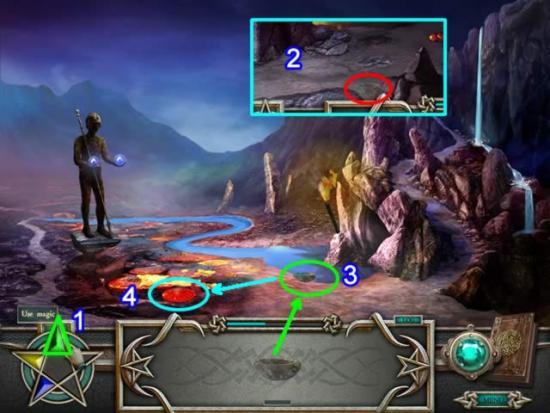
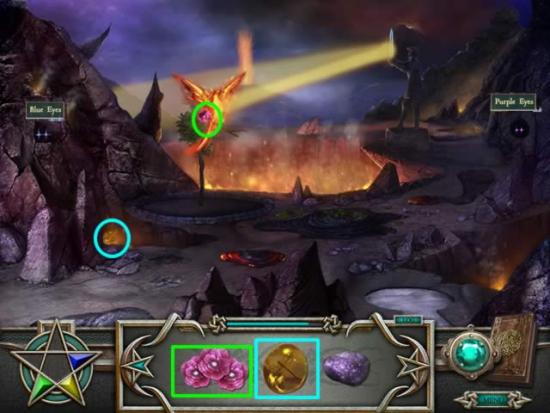
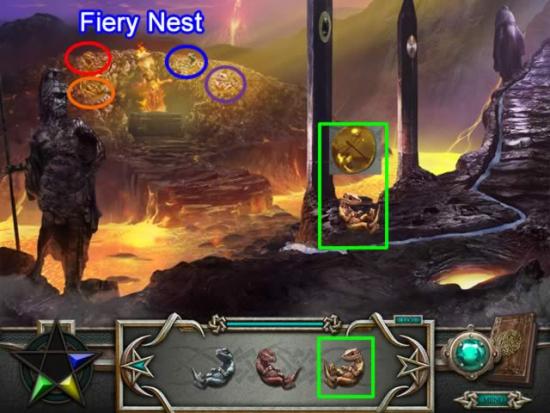
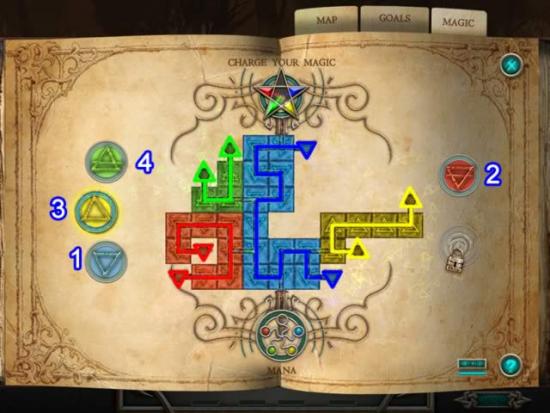
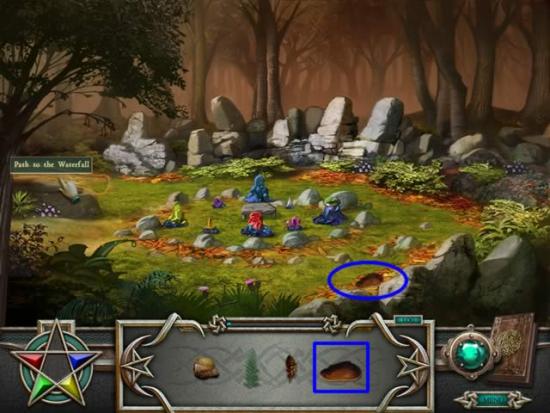
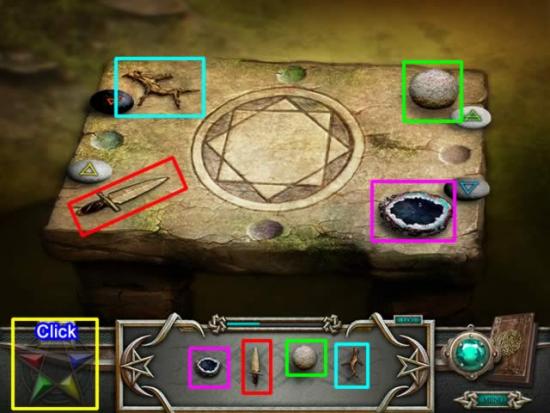
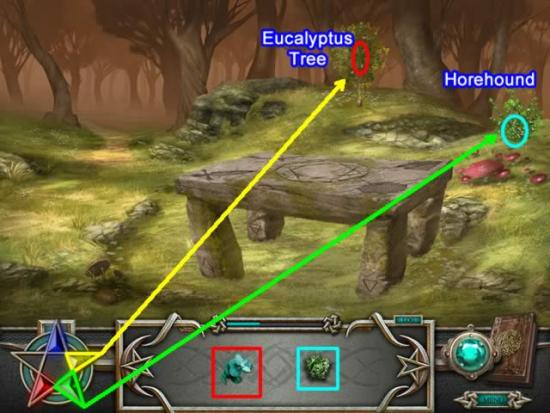
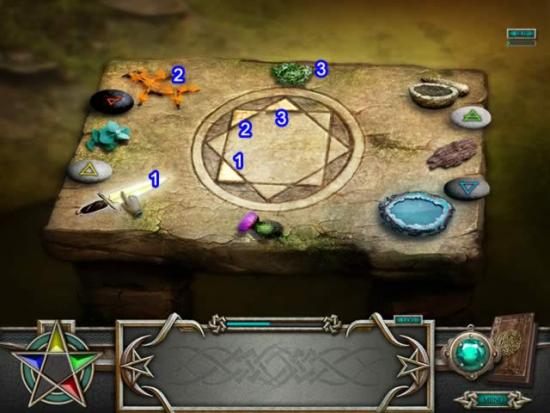
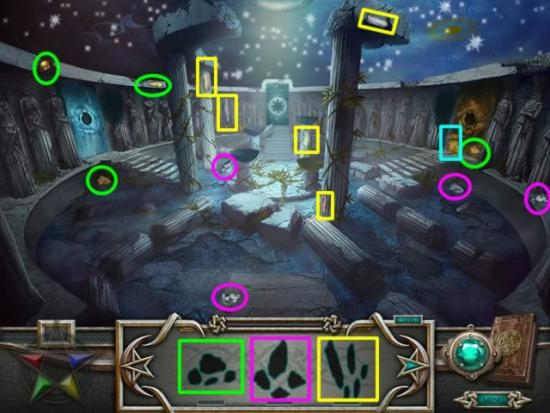
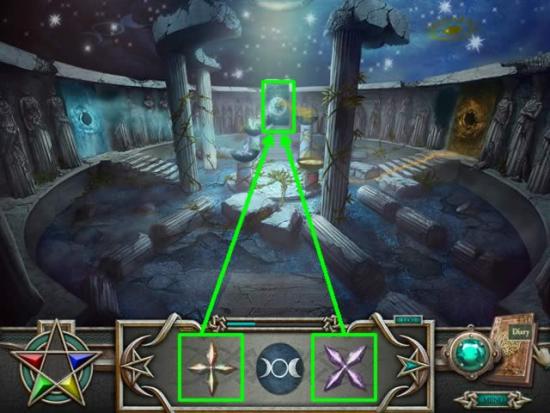
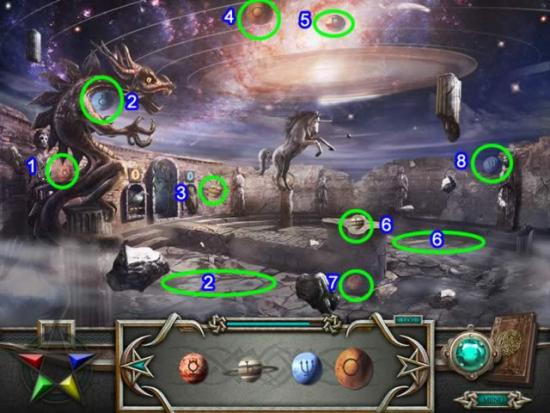
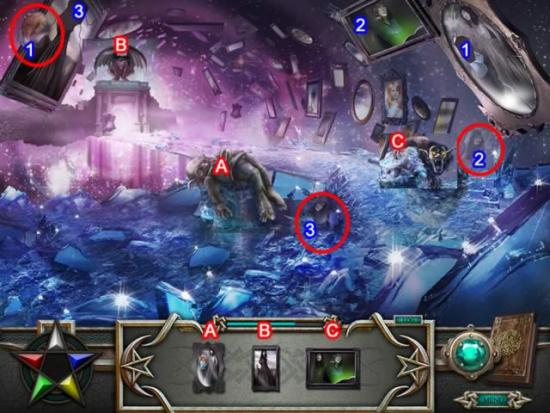
Goal: Charge three stones.


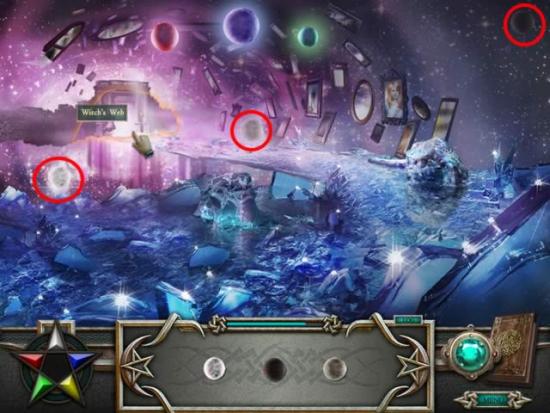
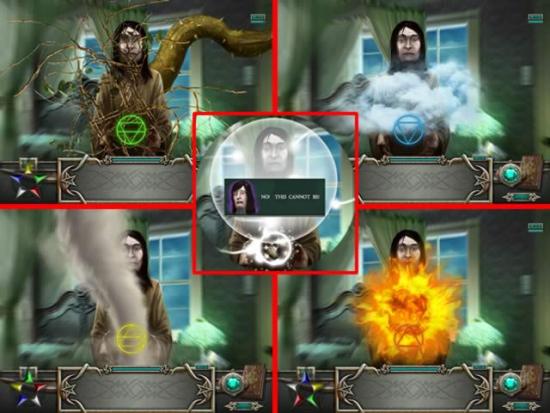
Congratulations! You have finished Tamara the 13th!
