![Digimon UP Tier List [Supports, Buddies, and Partners]](/wp-content/uploads/2026/07/digimon-up-tier-list.jpg "Digimon UP Tier List [Supports, Buddies, and Partners]")
Digimon UP Tier List [Supports, Buddies, and Partners]
These Digimon will get you UP the leaderboard.


![Haze Seas Boss Drops [Chances, Locations, and How to Spawn]](/wp-content/uploads/2026/07/haze-seas-boss-drops.jpg "Haze Seas Boss Drops [Chances, Locations, and How to Spawn]")

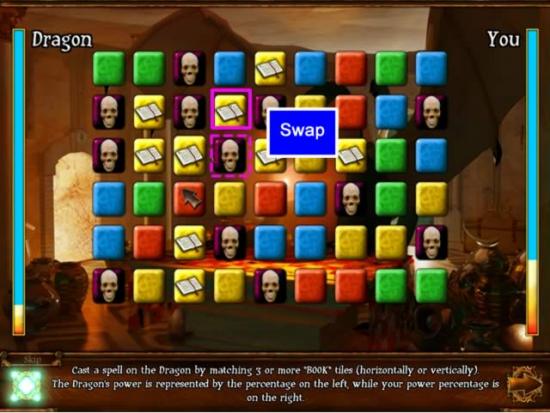
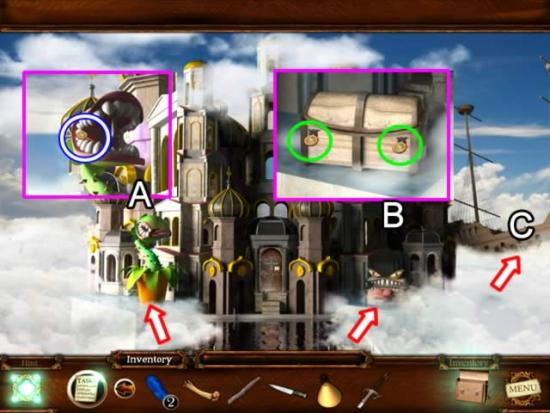
Welcome to the Tales from the Dragon Mountain: The Strix walkthrough on Gamezebo. Tales from the Dragon Mountain: The Strix is a Hidden Object Game played on the PC created by Cateia Games. This walkthrough includes tips and tricks, helpful hints and a strategy guide on how to complete Tales from the Dragon Mountain: The Strix.

Welcome to the Tales from the Dragon Mountain: The Strix walkthrough on Gamezebo. Tales from the Dragon Mountain: The Strix is a Hidden Object Game played on the PC created by Cateia Games. This walkthrough includes tips and tricks, helpful hints and a strategy guide on how to complete Tales
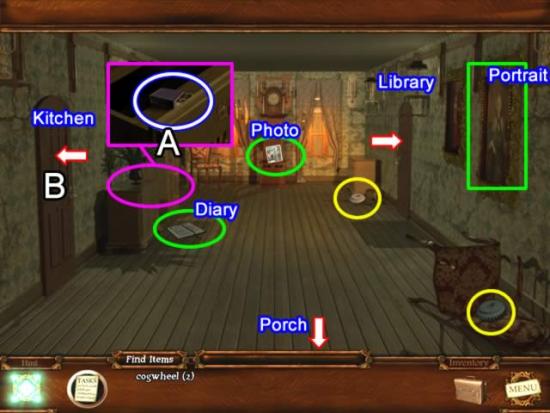
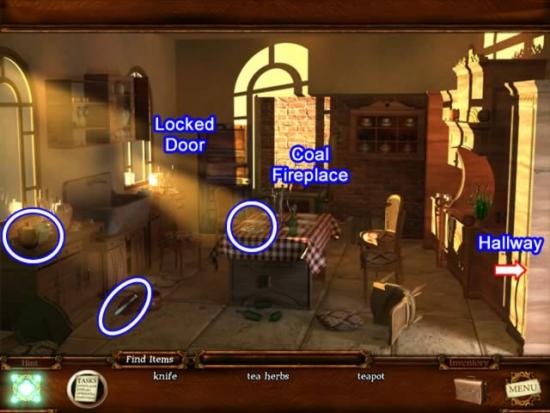
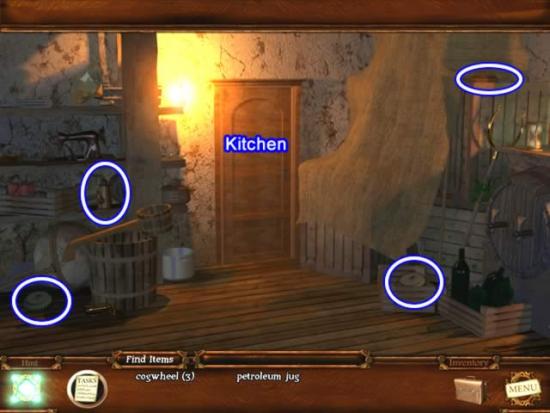
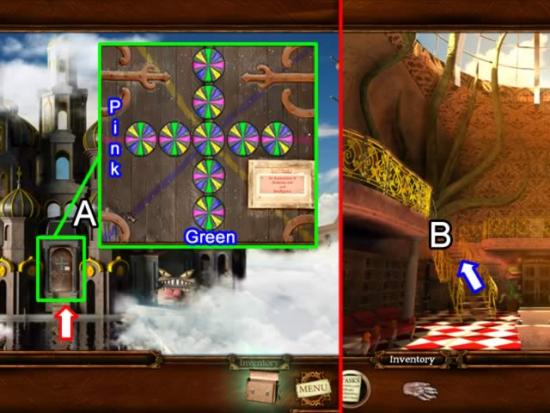
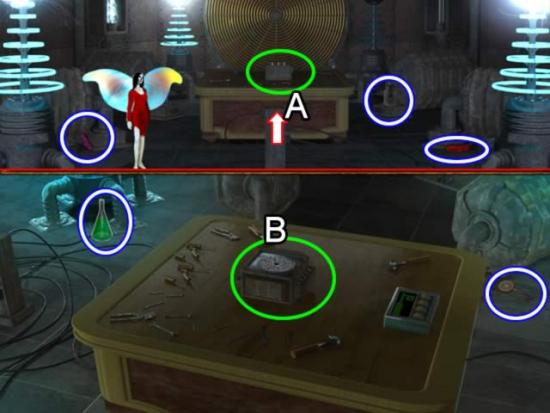
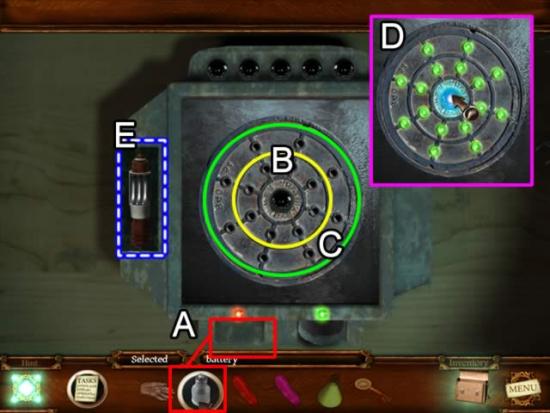
This hidden object game requires visiting several locations and using inventory items to advance play.
Main Menu:
Screen Navigation:
Symbol Meanings:
A clip explains the background and introduces the story line for play.
If you are not familiar with hidden object games, click “Yes” when asked if you would like a tutorial. This will show you how to interact with objects and characters.

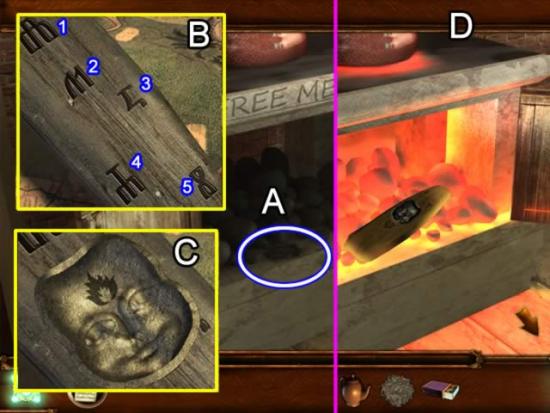
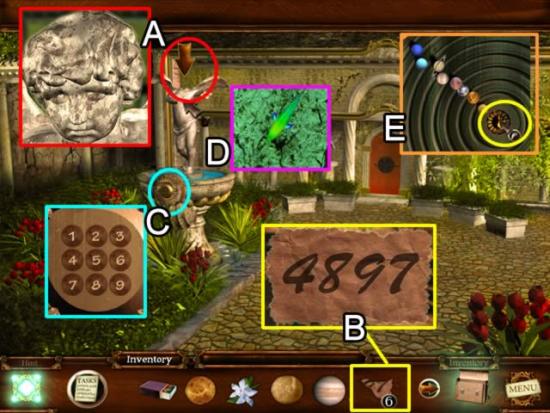
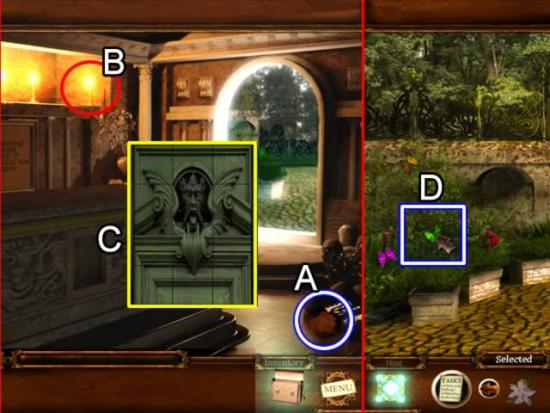
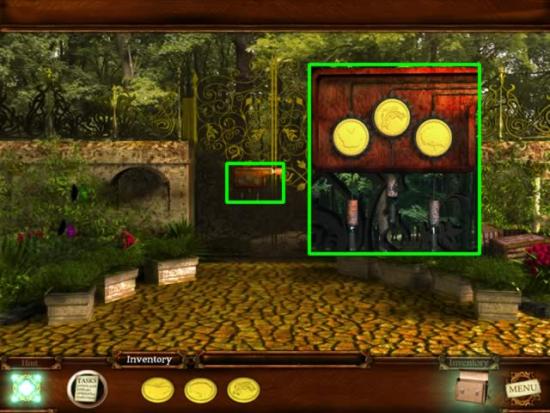
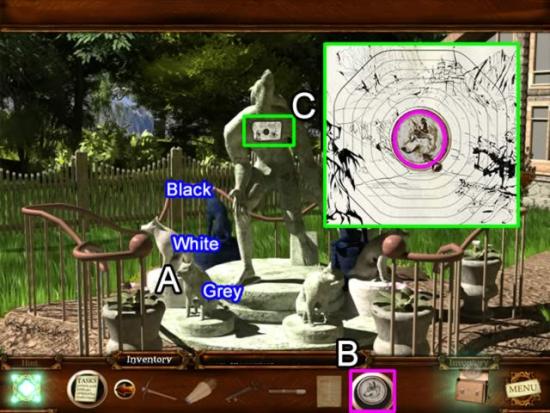
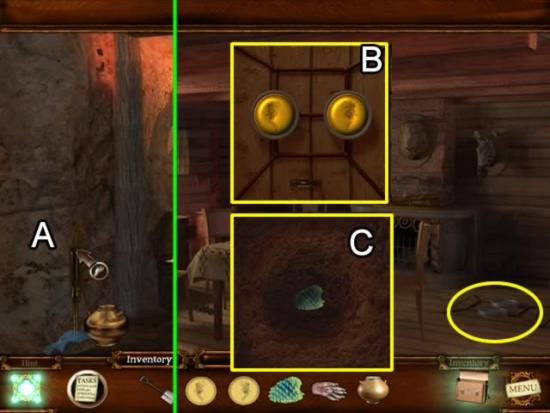
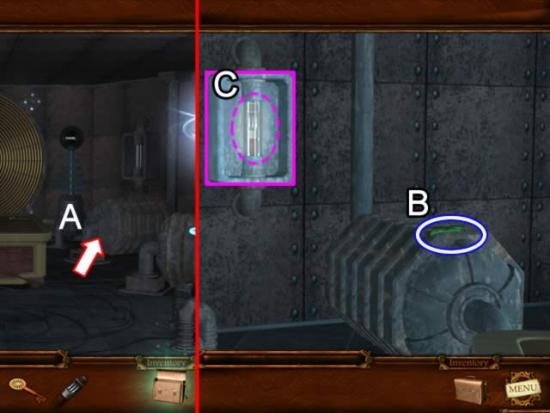
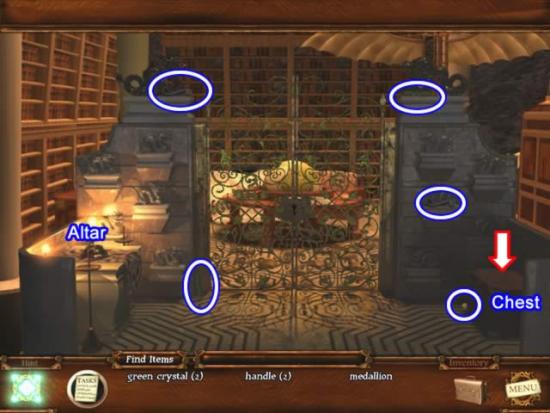
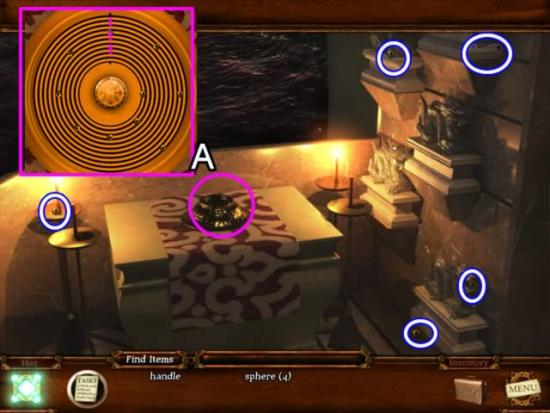
Place the three WOLF statues on the pedestals as shown (A). Receive a WOLF MEDALLION (B).
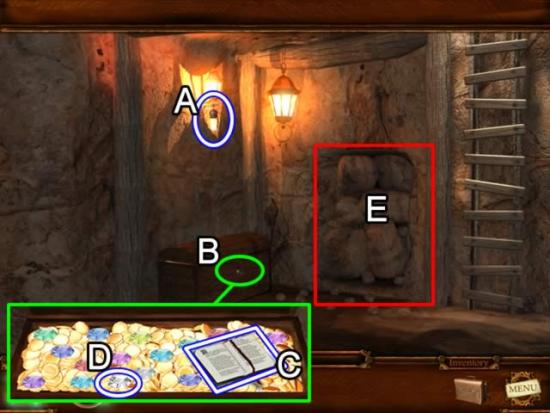
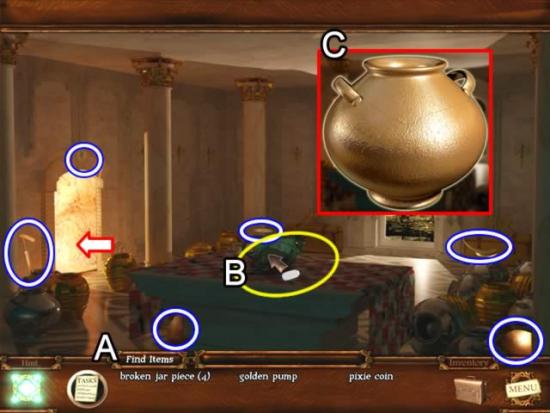
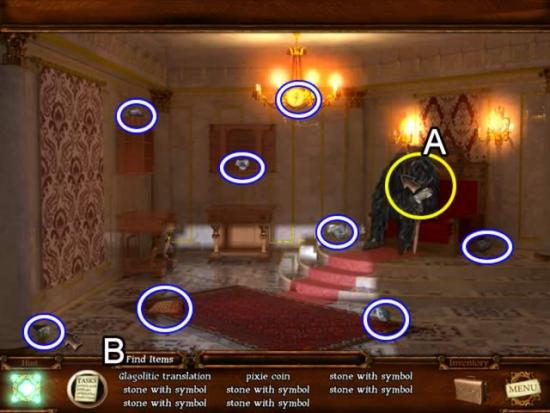
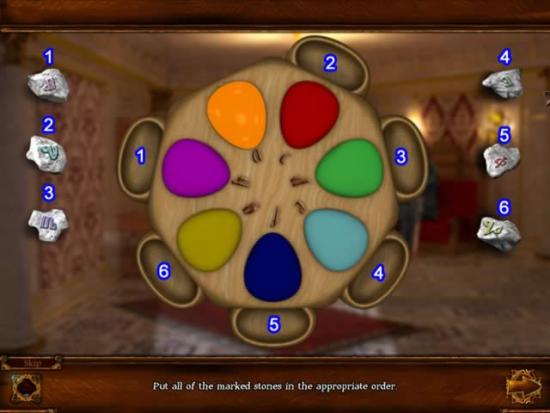
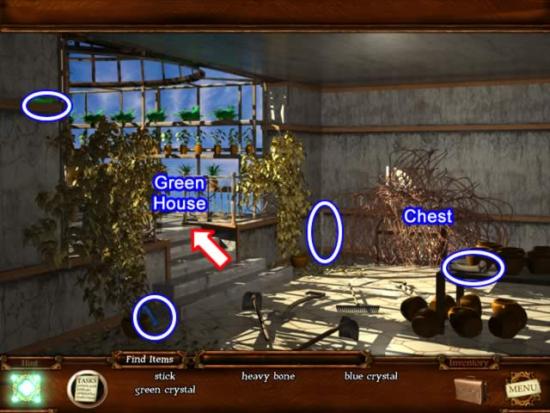

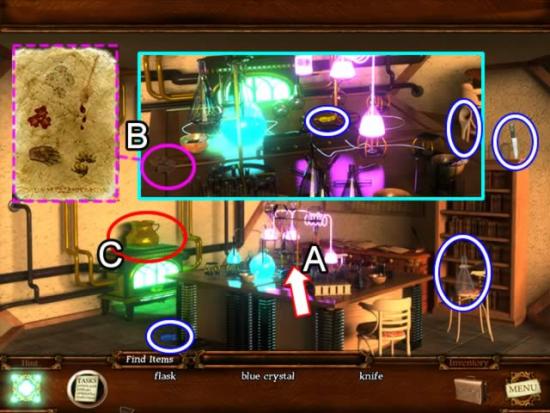
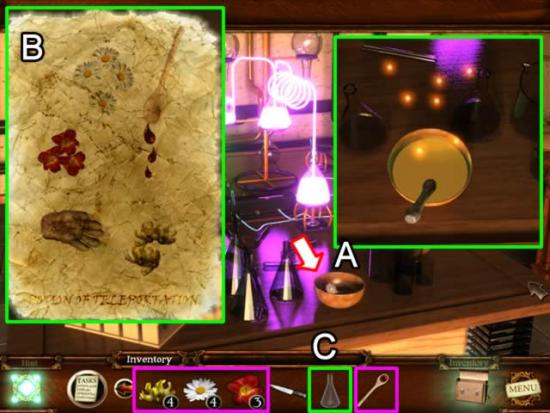

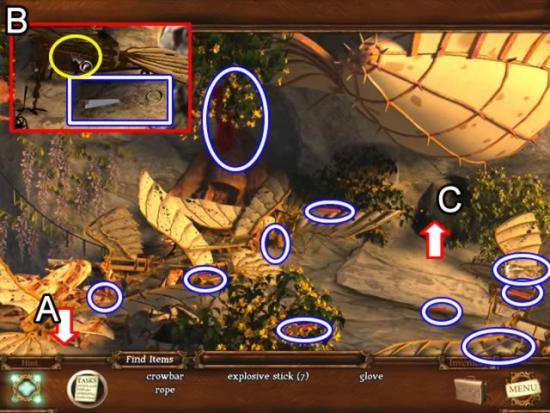
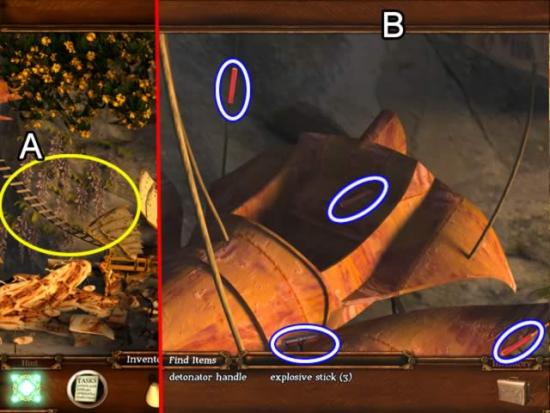
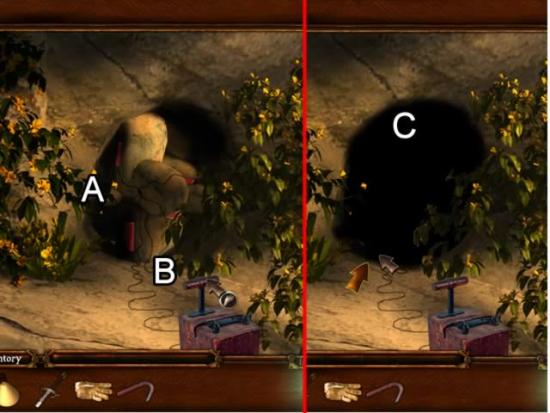

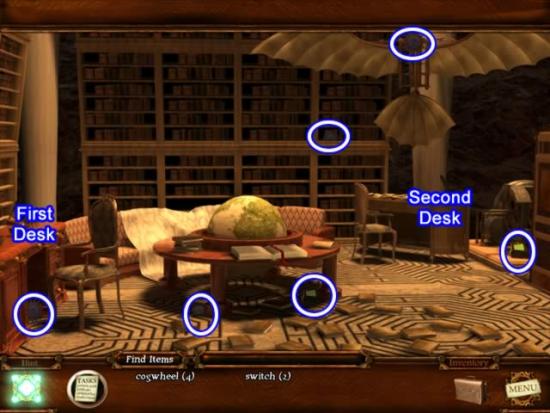
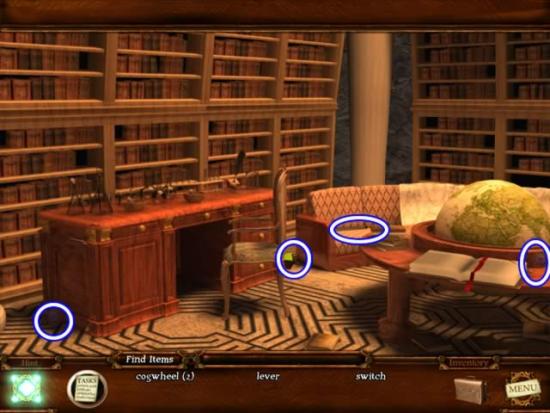
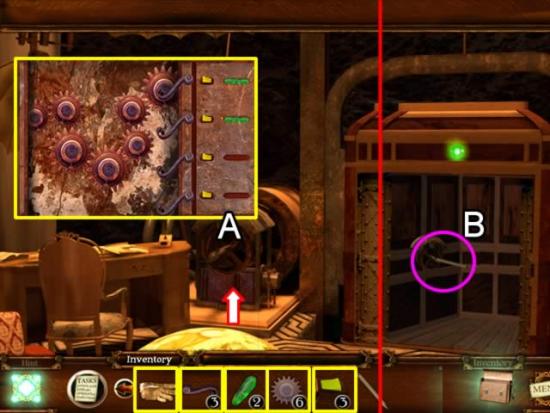
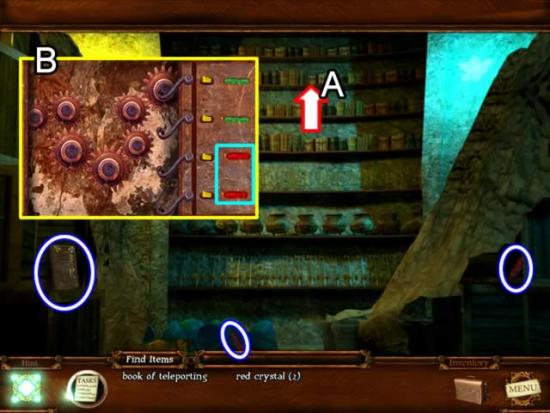
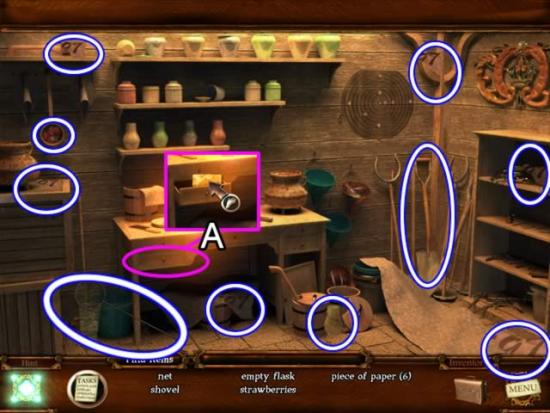
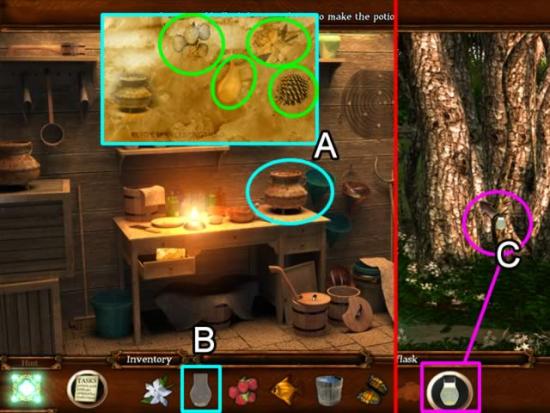
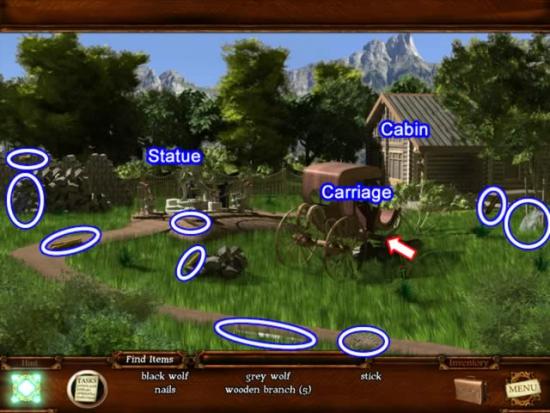
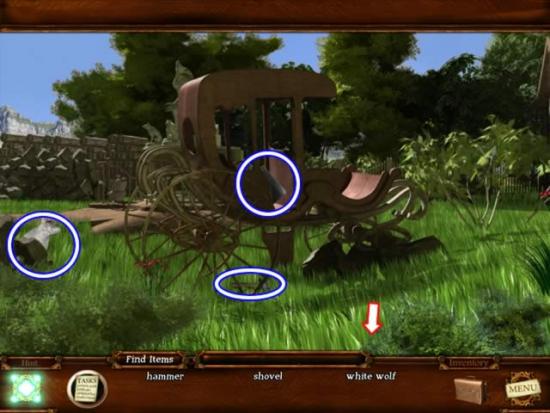
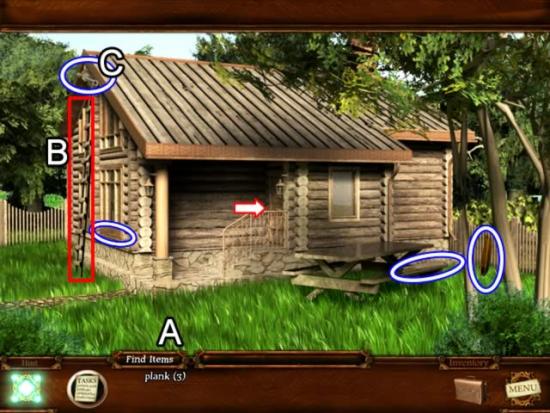
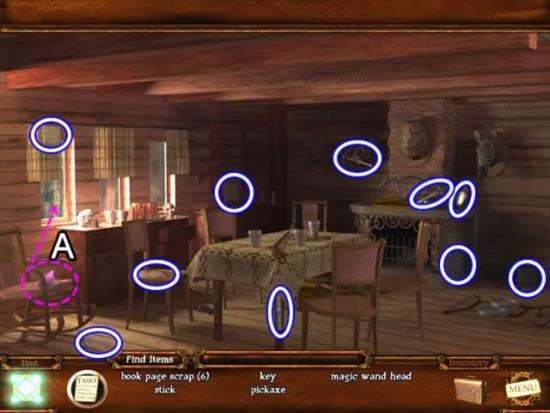
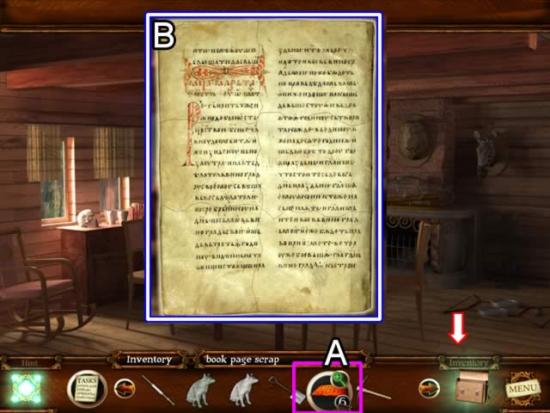
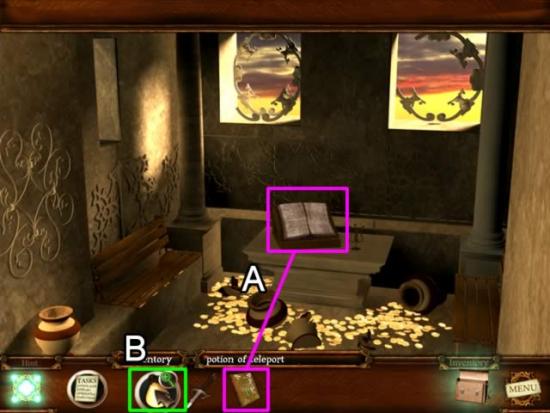
Pick up the inventory items.

Congratulations! You have finished playing Tales from Dragon Mountain: The Strix.
