![Digimon UP Tier List [Supports, Buddies, and Partners]](/wp-content/uploads/2026/07/digimon-up-tier-list.jpg "Digimon UP Tier List [Supports, Buddies, and Partners]")
Digimon UP Tier List [Supports, Buddies, and Partners]
These Digimon will get you UP the leaderboard.


![Haze Seas Boss Drops [Chances, Locations, and How to Spawn]](/wp-content/uploads/2026/07/haze-seas-boss-drops.jpg "Haze Seas Boss Drops [Chances, Locations, and How to Spawn]")

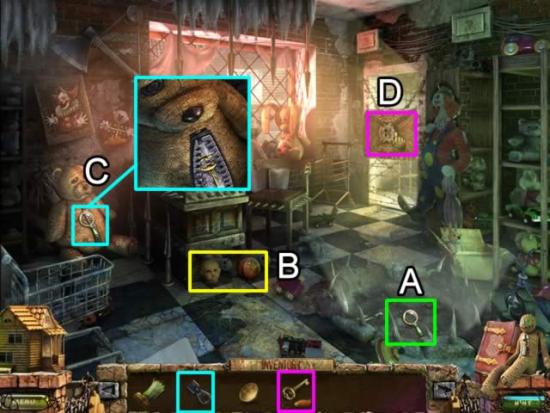
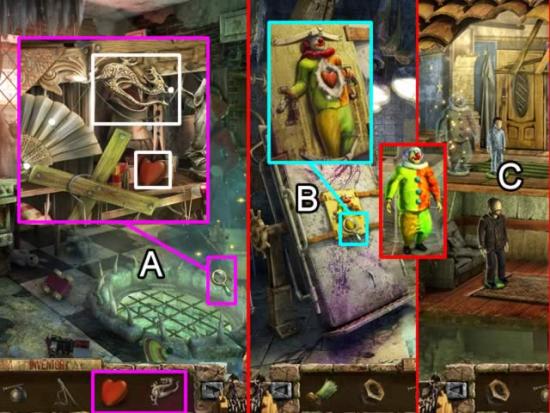
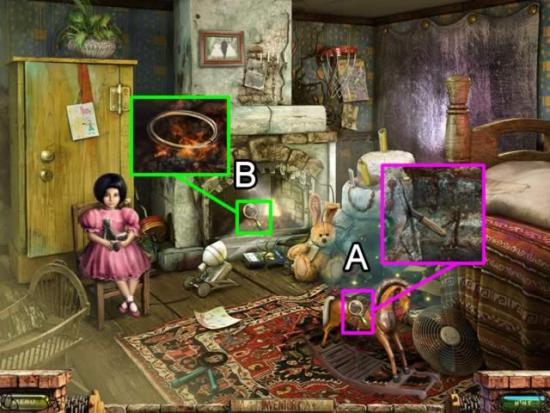
Welcome to the Stray Souls: Dollhouse Story Collector’s Edition walkthrough on Gamezebo. Stray Souls: Dollhouse Story Collector’s Edition is a Hidden Object Game played on the PC created by Alawar Friday’s Games. This walkthrough includes tips and tricks, helpful hints, and a strategy guide on how to complete Stray Souls: Dollhouse Story Collector’s Edition.
Welcome to the Stray Souls: Dollhouse Story Collector’s Edition walkthrough on Gamezebo. Stray Souls: Dollhouse Story Collector’s Edition is a Hidden Object Game played on the PC created by Alawar Friday’s Games. This walkthrough includes tips and tricks, helpful hints, and a strategy guide on how to complete Stray Souls: Dollhouse Story Collector’s Edition.
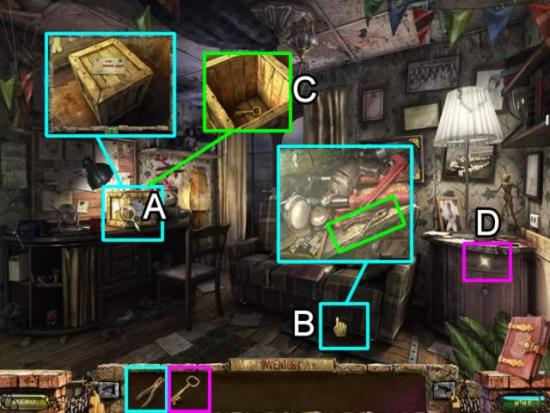
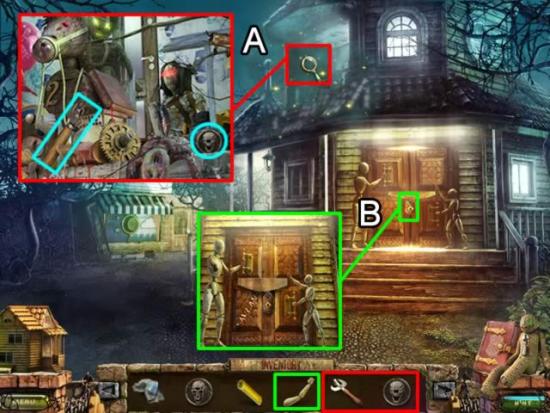
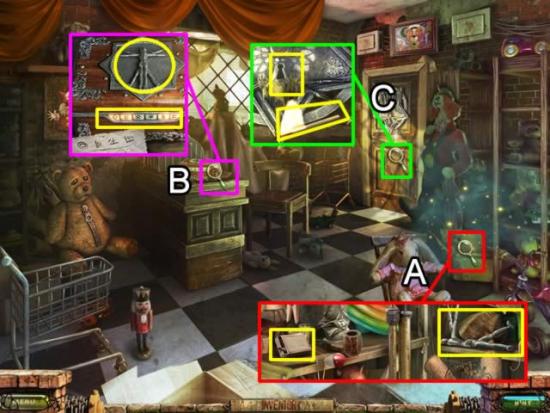
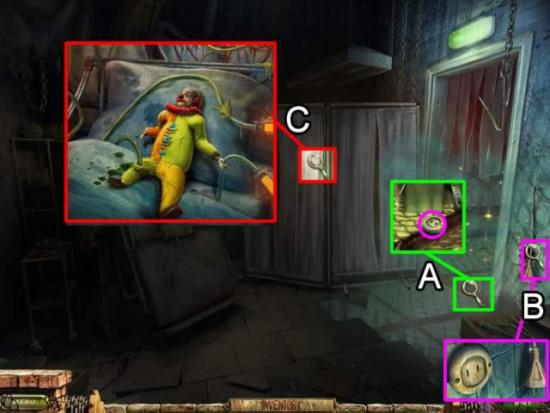
This hidden object game requires visiting several locations and using inventory items to advance play.
Beginning Play:
Navigation:
Symbol Meanings:
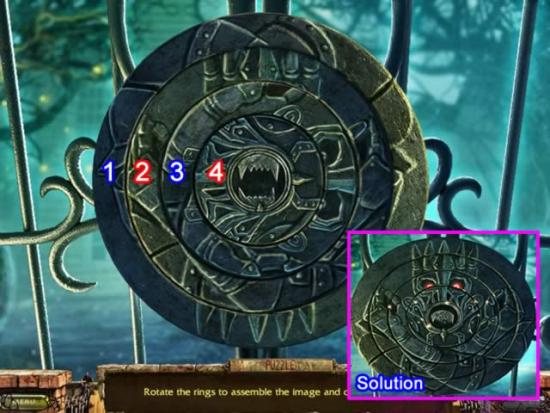
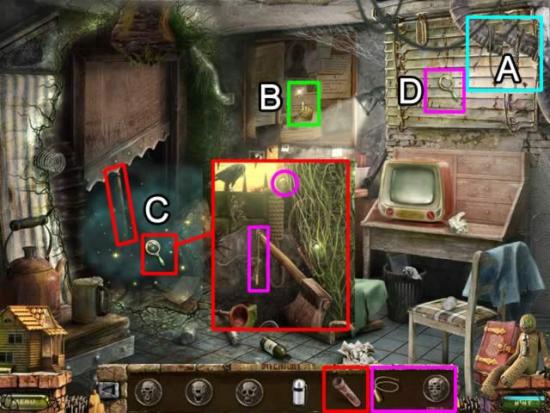
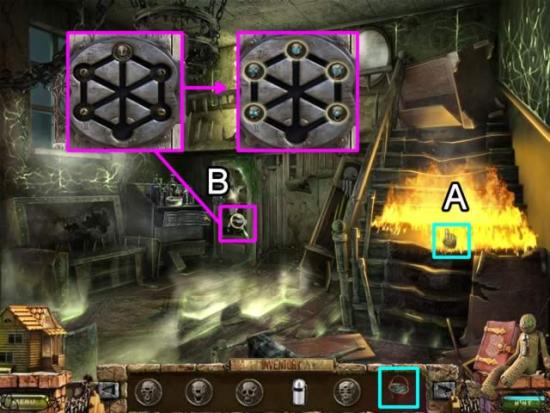
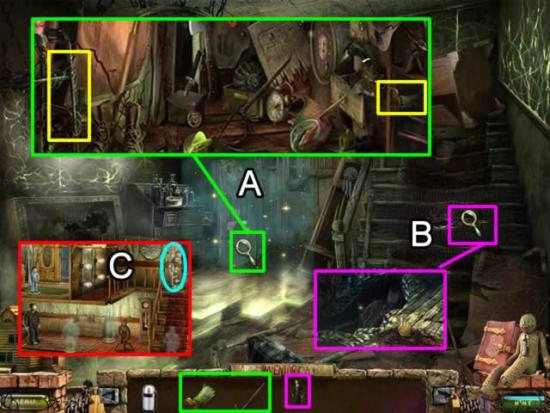
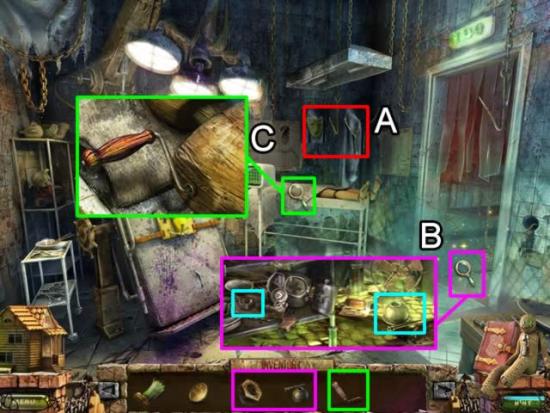
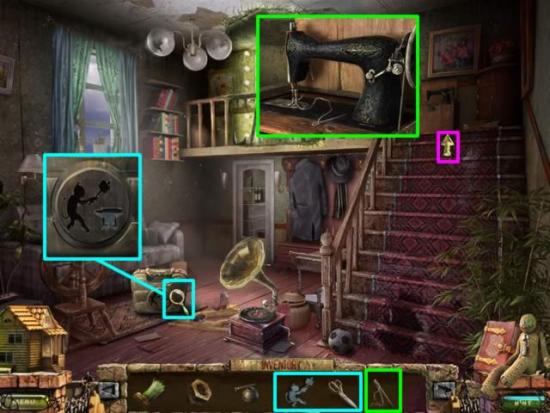
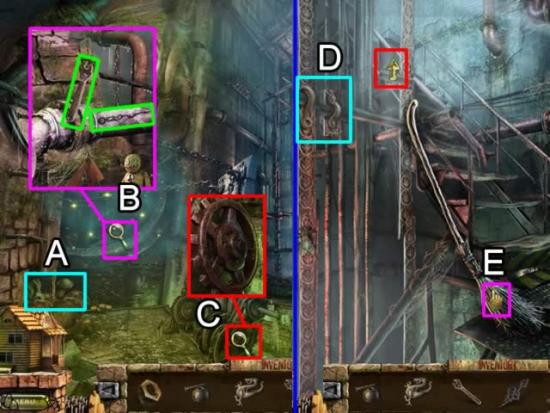
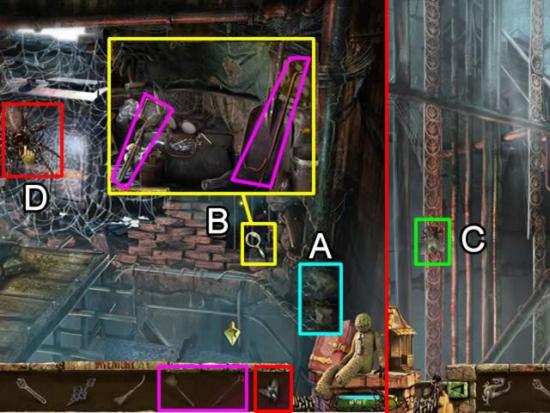
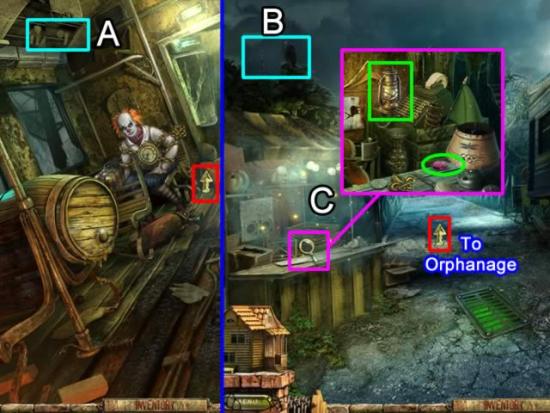
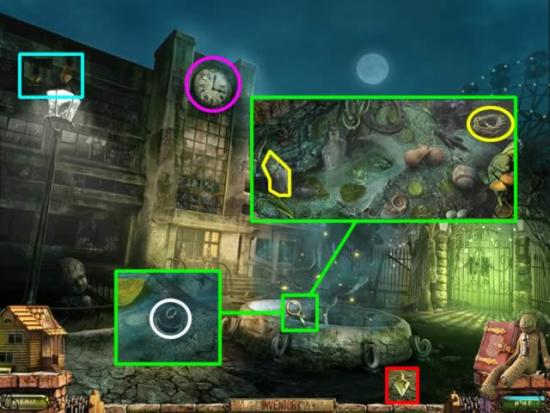
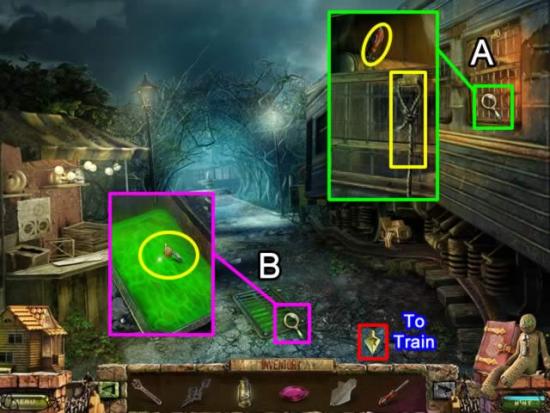
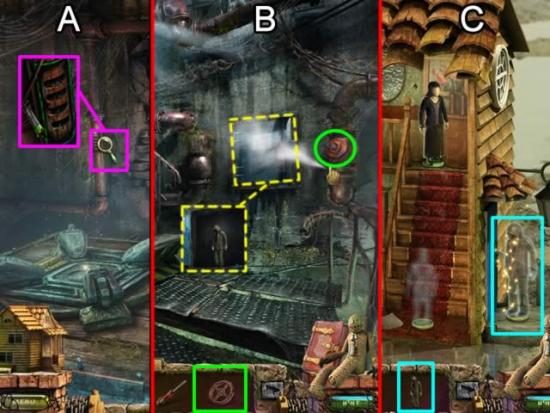
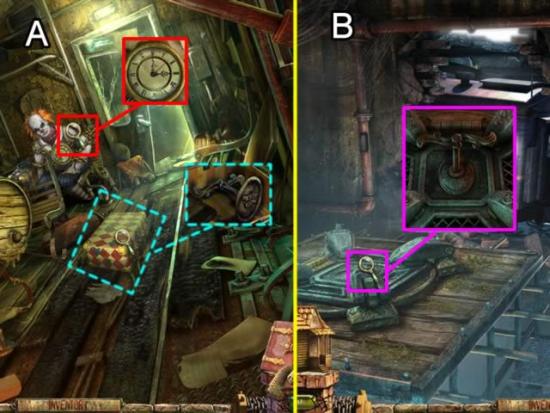
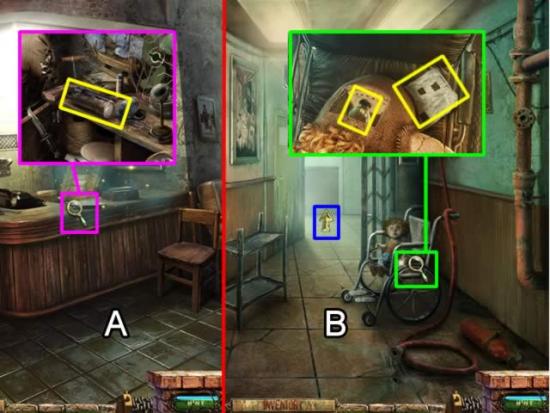
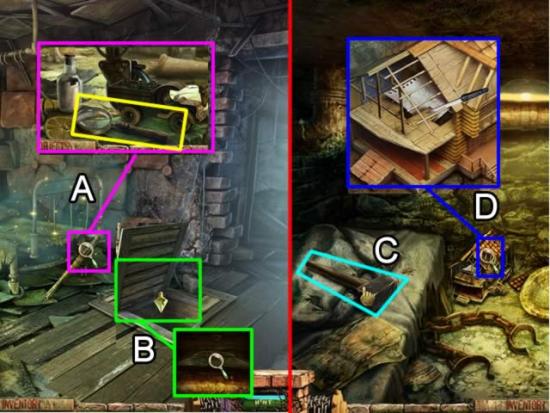
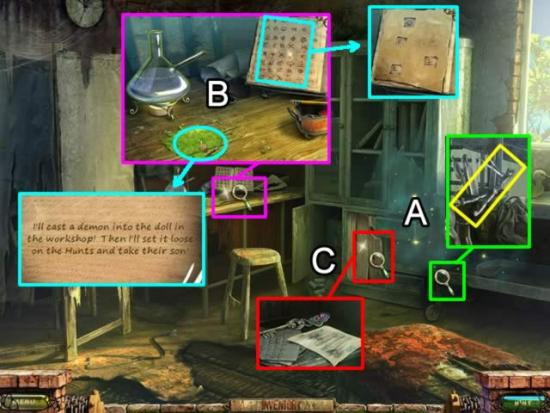
Your list for hidden objects may vary from this guide. For this reason, screenshots only show inventory and Beyond object locations. The word “Beyond” is always in bold print to draw your attention to its existence in the screenshot.
A short clip explains the background and introduces the story line for play.
Play the optional tutorial to learn how to interact with objects and characters.

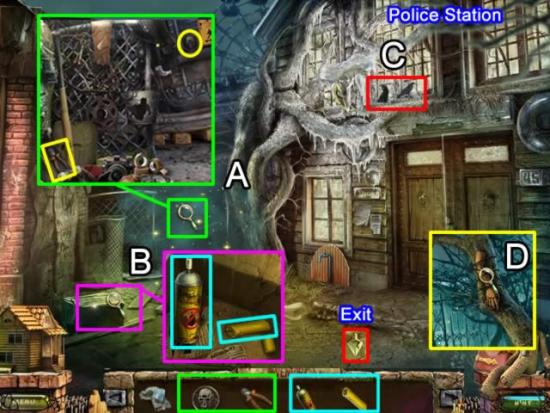
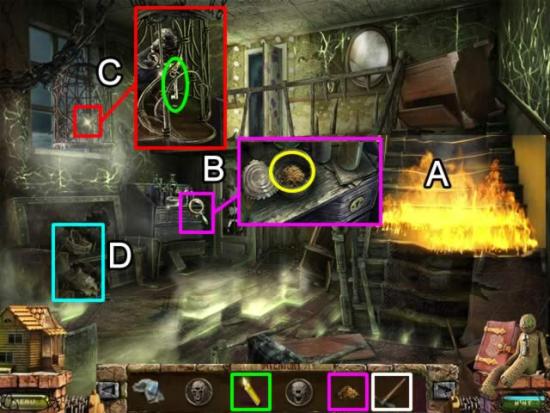
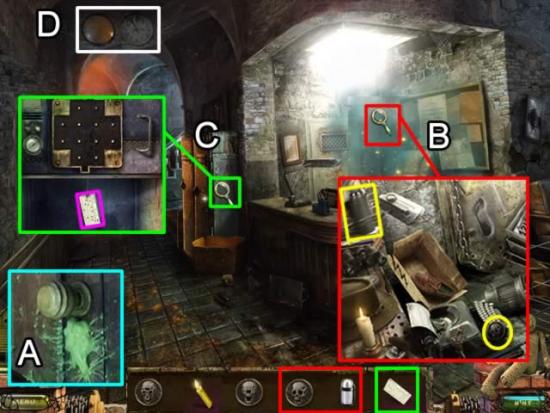
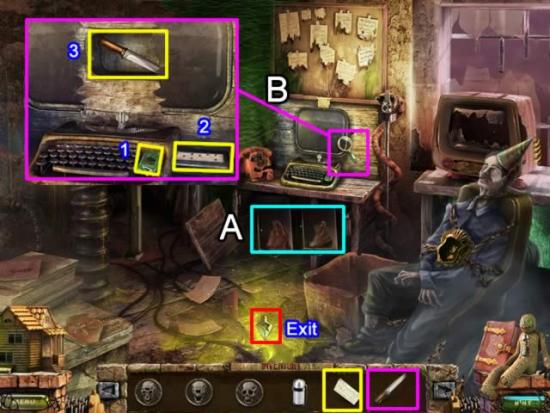
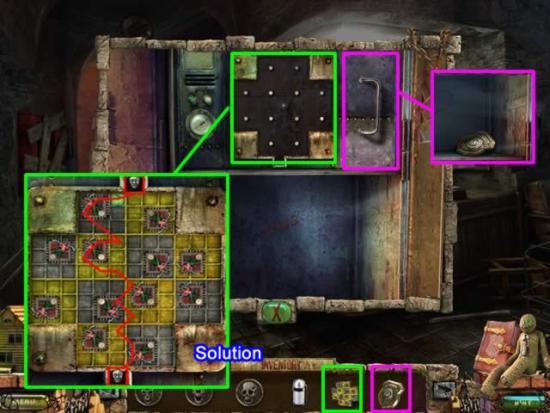
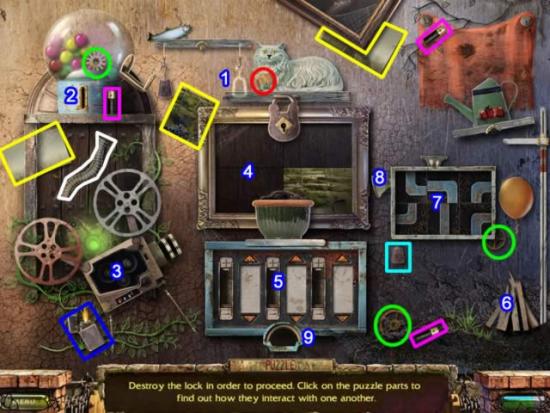
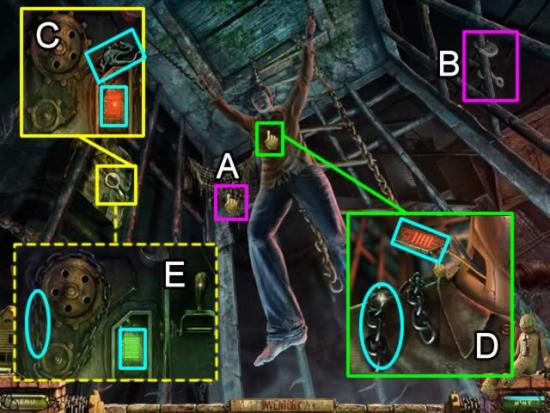
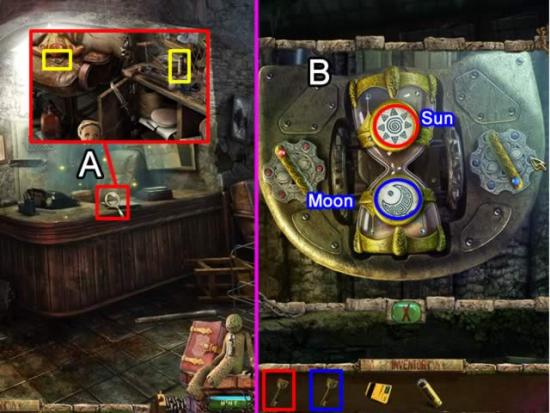
Put the objects together in such a way that a plant will eat the lock. Here is one way (the following numbers correspond with the numbers in the screenshot):
Or watch the video:


Congratulations! You have completed playing Stray Souls: Dollhouse Story Collector’s Edition.
Here is a quick reference to the location of all Beyond objects and their chapter location in this guide. Not all morphing objects were identifiable and some are best guesses.
Number | Location | Objects | Chapter |
1 | Toy Store – Tree | Hat/Nest | 2 |
2 | House – Porch | Lantern/Lantern | 2 |
3 | Police Station – Tree | Crow/Cat | 3 |
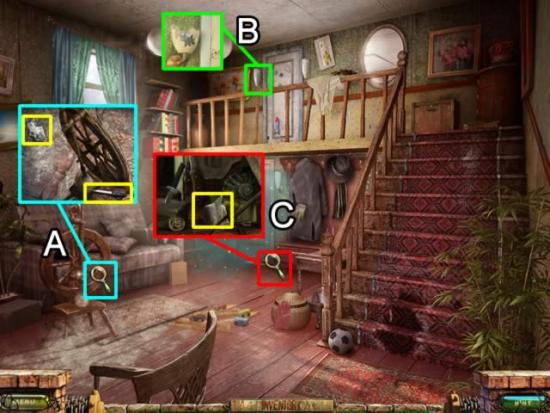
4 | House – Couch | Basket/? | 3 |
5 | Police Station – 1st Floor | Picture/Picture | 3 |
6 | Police Station – 2nd Floor | Picture/Picture | 3 |
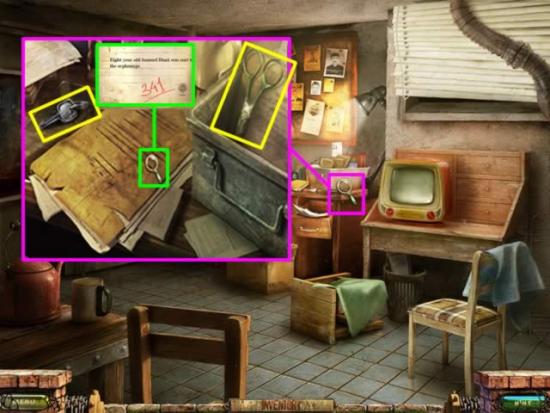
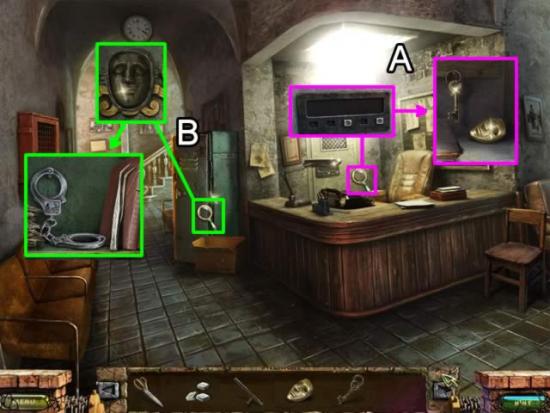
7 | Police Station – Chief’s Office (before) | Bag/Boot | 3 |
8 | Police Station – Chief’s Office (after) | Chain/Wire | 3 |
9 | House – Living Room (after) | Picture/Picture | 4 |
10 | House – 2nd Floor Landing | Apple/8 Ball | 4 |
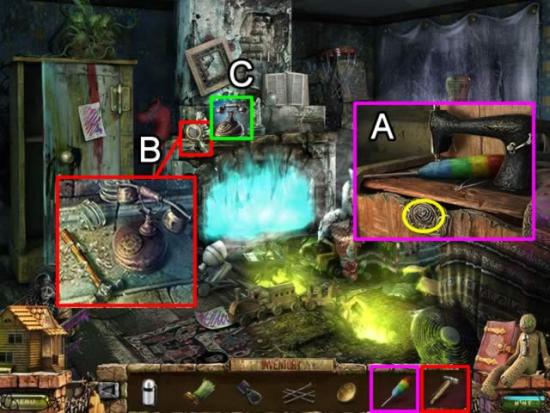
11 | House – Play Room | Stocking/Rat | 4 |
12 | Toy Store | Doll Head/Ball | 4 |
13 | Toy Store – Back Room | Mask/Stethoscope | 4 |
14 | Tunnel | Mushroom/Mushroom | 5 |
15 | Tunnel – Stairs | Handle/Handle | 5 |
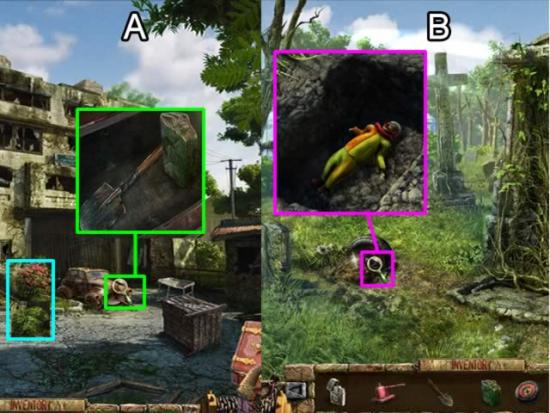
16 | Tunnel – Spider Room | Frog/Rock | 5 |
17 | Train | Doll/Doll | 5 |
18 | Concession Stand | Cross/Bird | 5 |
19 | Orphanage – Lamp | Bird/? | 5 |
20 | Cage | Lock/Hook | 6 |
21 | Amusement Park – Clown Gate | Design/Design | 6 |
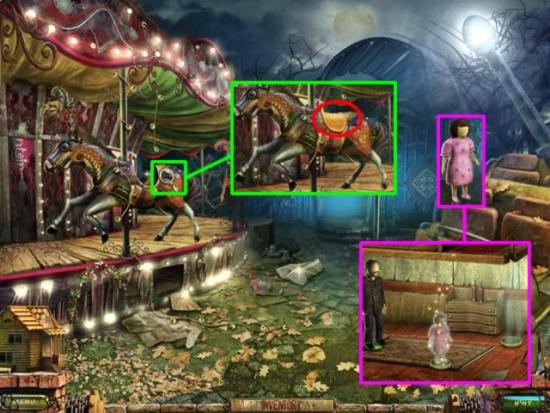
22 | Amusement Park – Carnival Wagon | Flower/Flower | 6 |
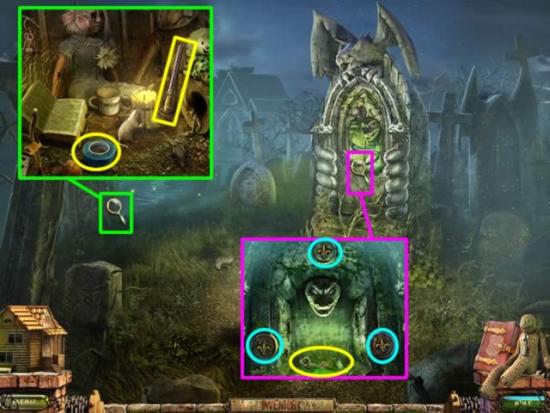
23 | Amusement Park – Graveyard | Wreath/Wreath | 6 |
24 | Amusement Park – Carnival Wagon | Bottle/Trophy | 6 |
25 | Orphanage Entrance | Address/Light | 7 |
26 | Orphanage Lobby | Glass/Stein | 7 |
27 | Orphanage Stairs | Sign Arrows | 7 |
28 | Orphanage Hallway | Mushroom/Mushroom | 7 |
29 | Orphanage – Hand Room | Mushrooms/? | 7 |
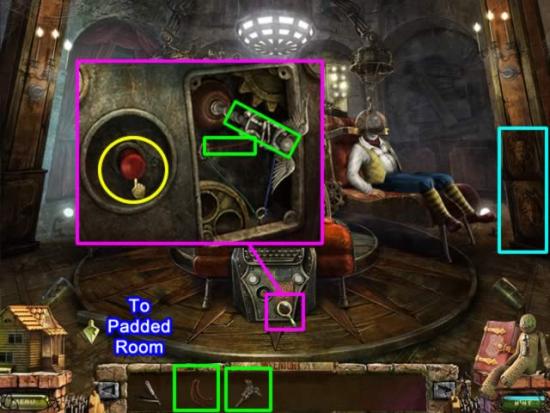
30 | Orphanage – Machine Room | Face/Face | 7 |
31 | Orphanage – Padded Room | Rat/Rat | 8 |
32 | Orphanage – Outside Directors Office | Picture/Picture | 8 |
33 | Outside Orphanage | Bush/Bush | 8 |
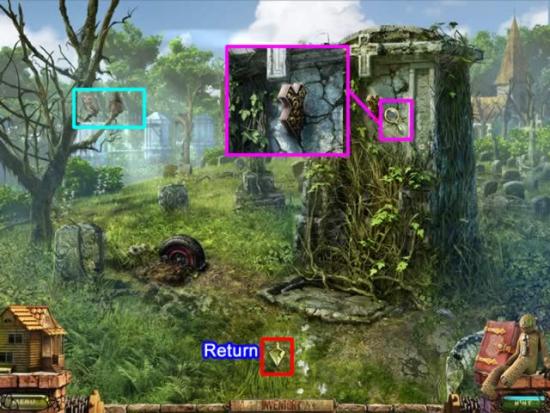
34 | Cemetery | Owl/Squirrel | 8 |
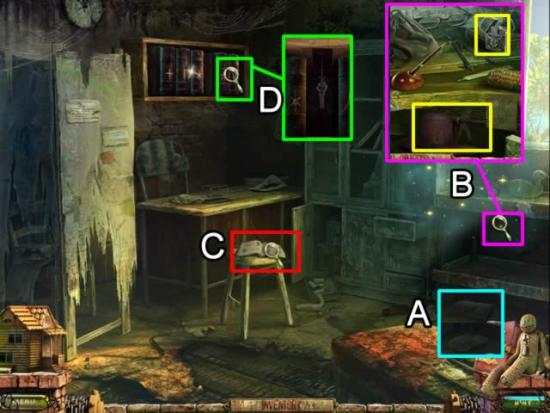
35 | Orphanage – Director’s Office | Book/? | 8 |
36 | Kim’s Car | Bird/Pigeon | 8 |
Once you have completed the game, the PLAY selection on the main menu changes to PLAY BONUS CHAPTER.
This is a pre-quill to the story, set 25 years earlier. There are NO Beyond objects!
Congratulations! You have finished the bonus chapter of Stray Souls: Dollhouse Story Collector’s Edition.
Click the Extra Content door on the main menu to access Storyline, Deleted Scenes, Wallpaper, Media and Concept art.
