![Digimon UP Tier List [Supports, Buddies, and Partners]](/wp-content/uploads/2026/07/digimon-up-tier-list.jpg "Digimon UP Tier List [Supports, Buddies, and Partners]")
Digimon UP Tier List [Supports, Buddies, and Partners]
These Digimon will get you UP the leaderboard.


![Haze Seas Boss Drops [Chances, Locations, and How to Spawn]](/wp-content/uploads/2026/07/haze-seas-boss-drops.jpg "Haze Seas Boss Drops [Chances, Locations, and How to Spawn]")

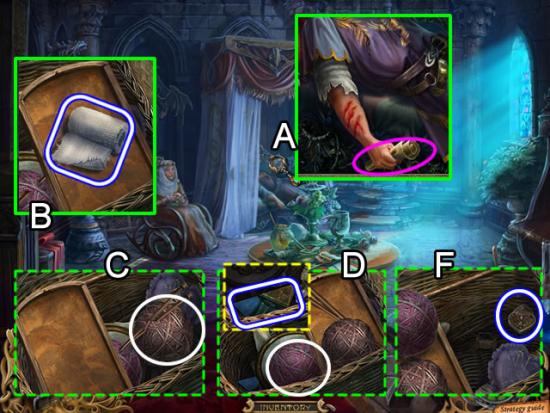
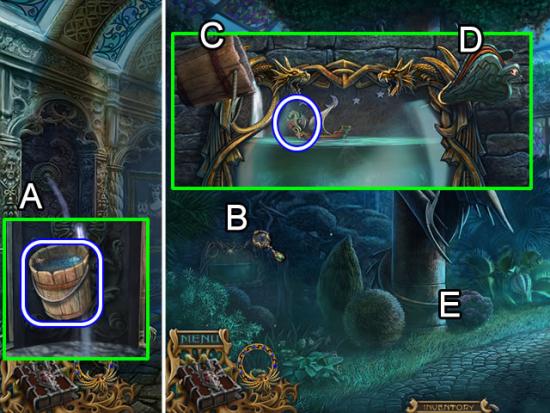
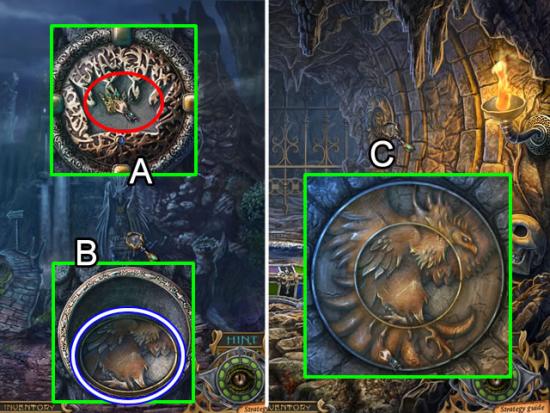
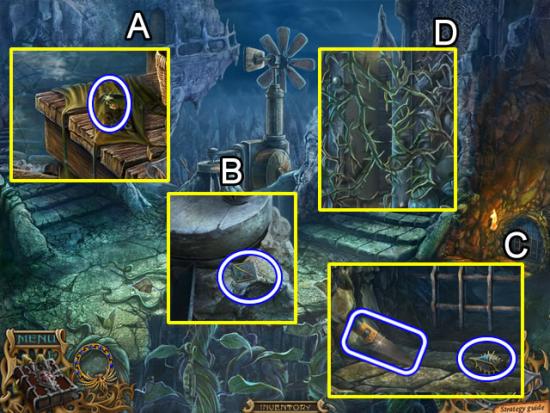
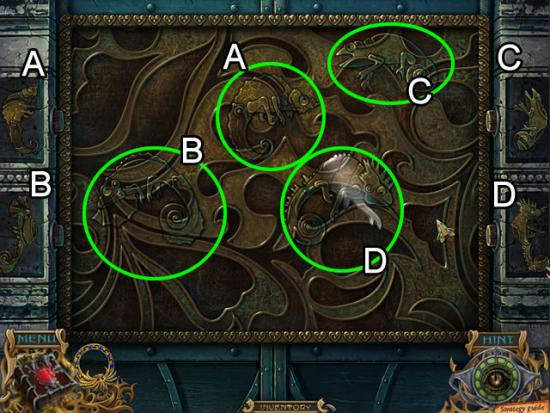
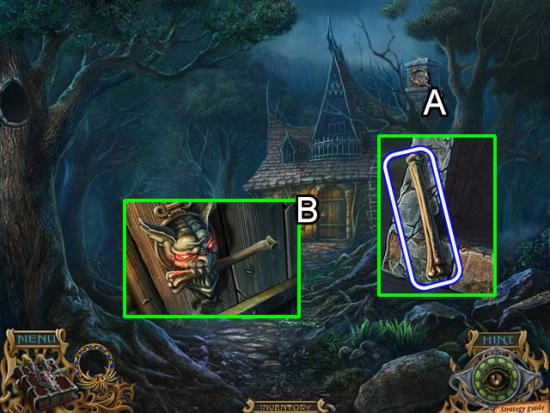
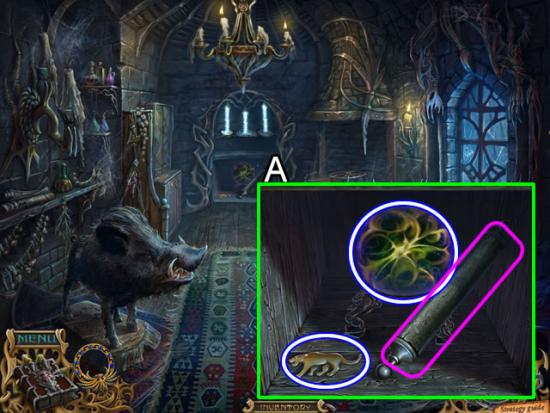
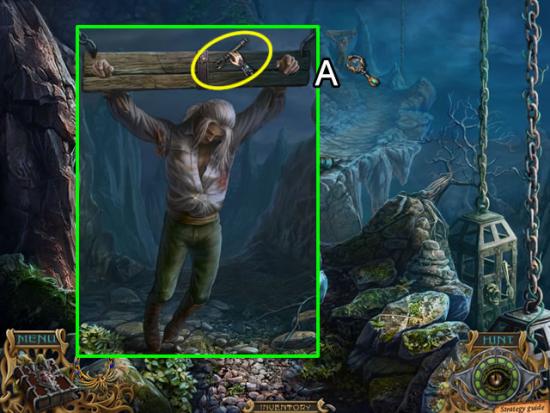
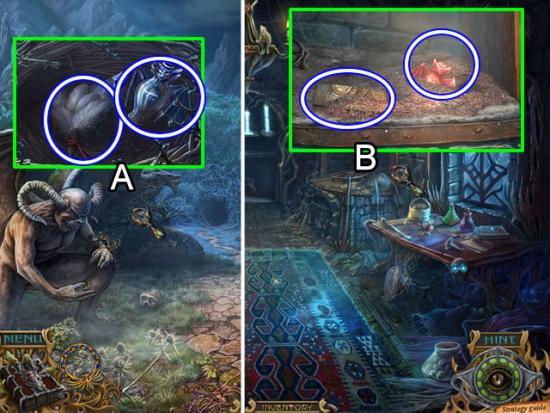
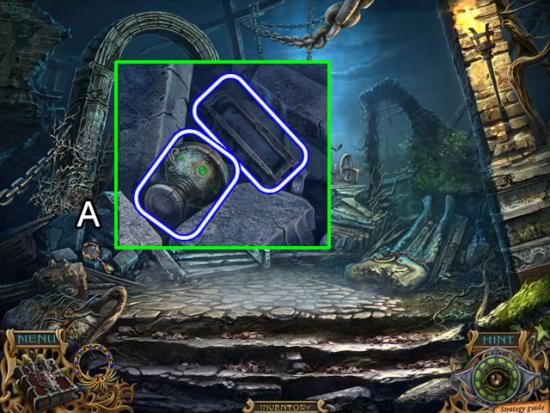
Welcome to the Spirits of Mystery: Song of the Phoenix walkthrough on Gamezebo. Spirits of Mystery: Song of the Phoenix is a Hidden Object Game created by ERS Game Studios. This walkthrough includes tips and tricks, helpful hints and a strategy guide on how to complete Spirits of Mystery: Song of the Phoenix.
Welcome to the Spirits of Mystery: Song of the Phoenix walkthrough on Gamezebo. Spirits of Mystery: Song of the Phoenix is a Hidden Object Game created by ERS Game Studios. This walkthrough includes tips and tricks, helpful hints and a strategy guide on how to complete Spirits of Mystery: Song of the Phoenix.
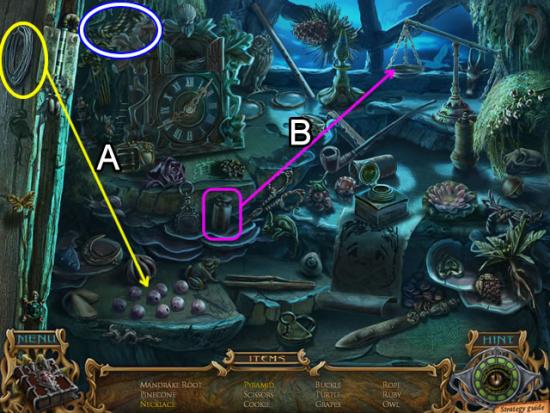
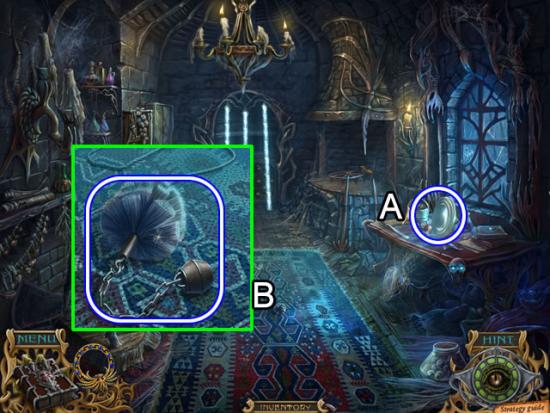
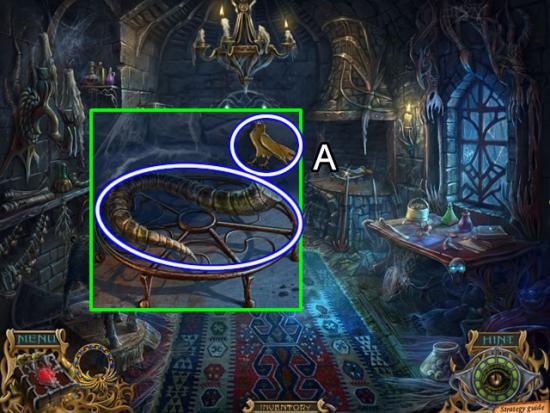
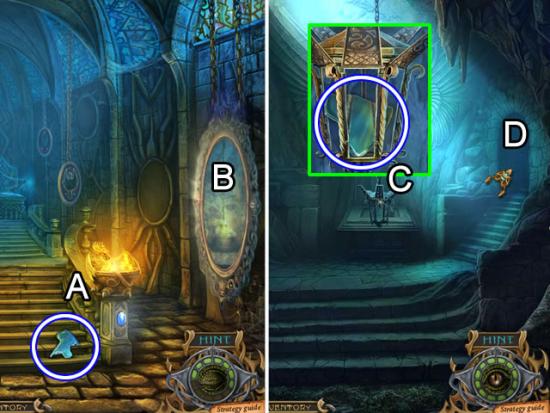
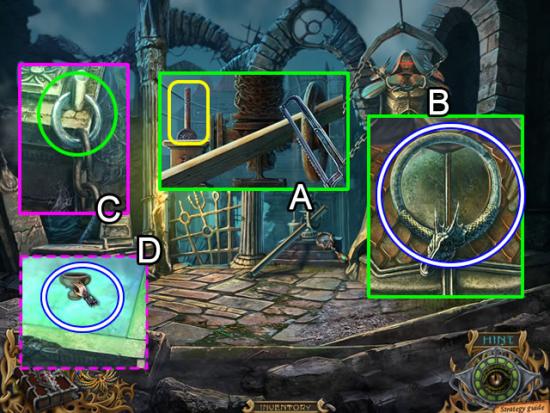
This hidden object game requires visiting several locations and using inventory items to advance play.
An optional interactive tutorial is available.
Watch the initial cutscenes.

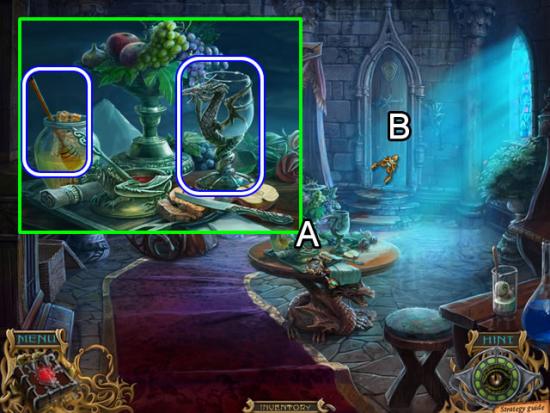
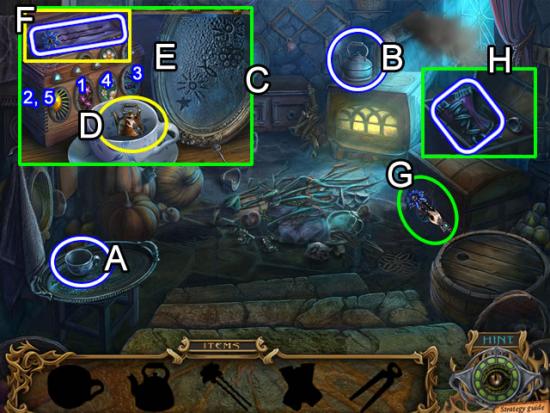
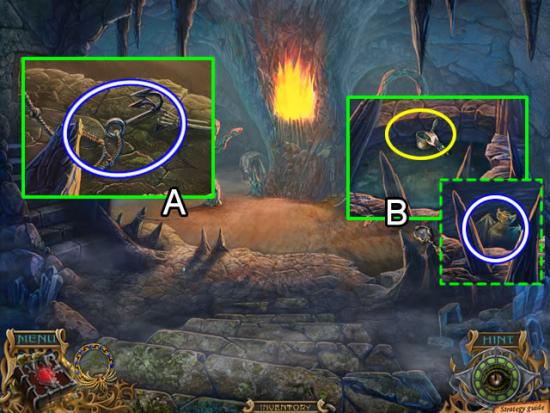
Sitting Room
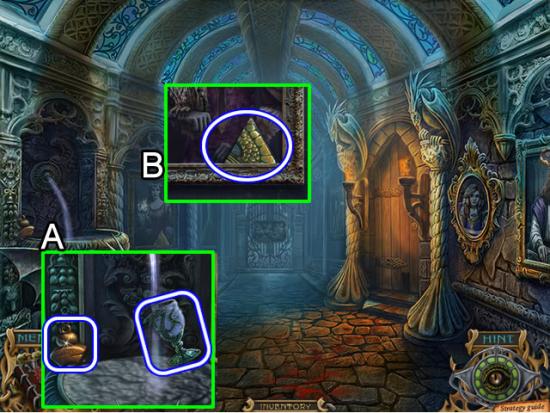
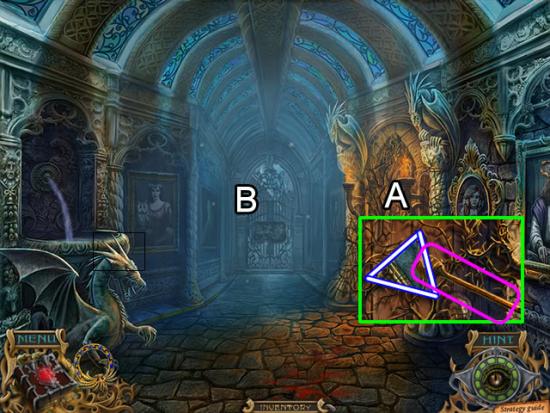
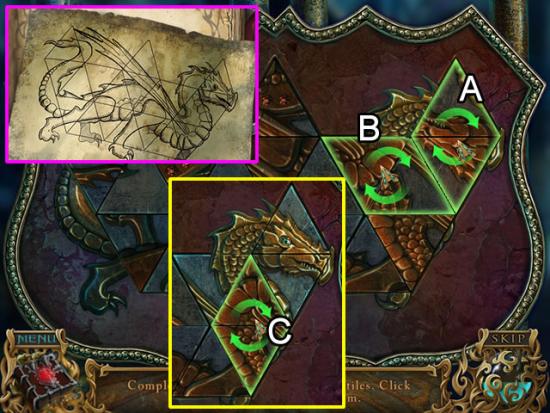
Hallway

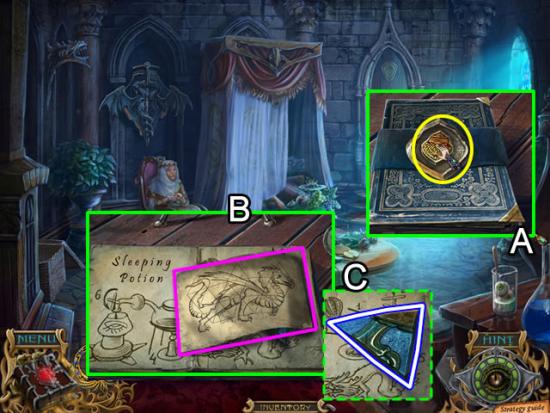
Sitting Room
Hallway

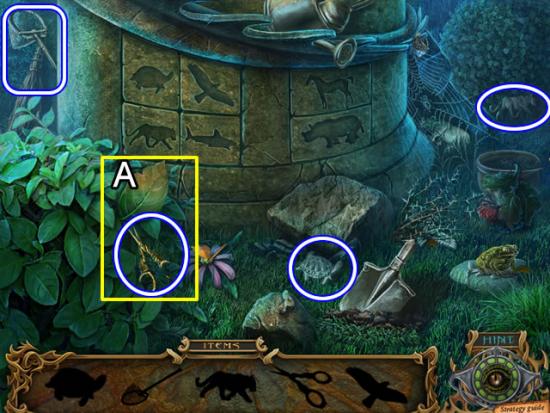
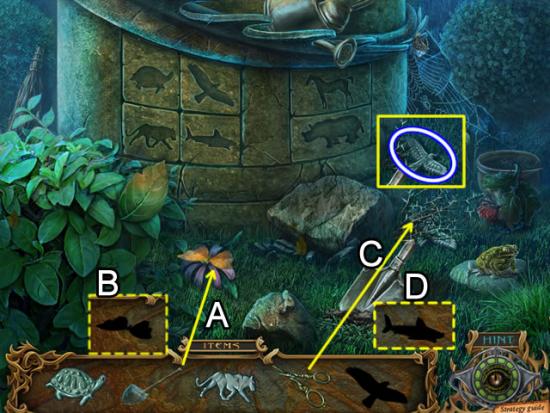
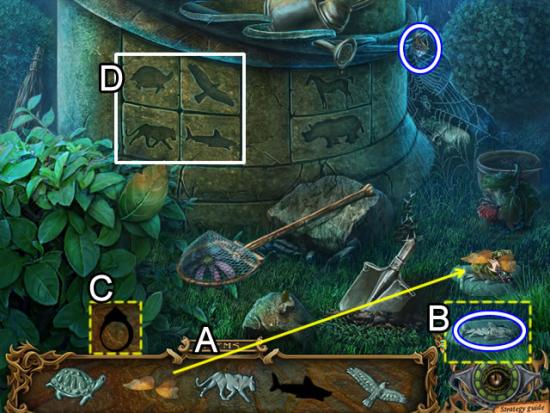
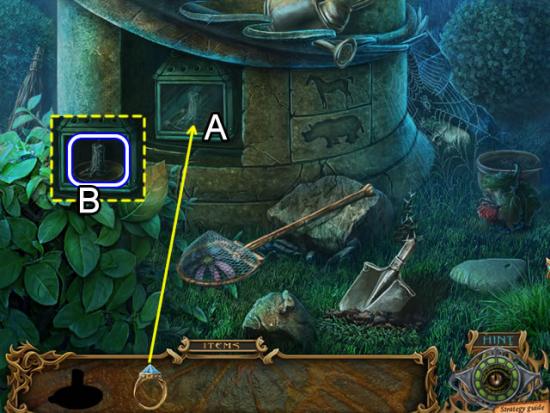
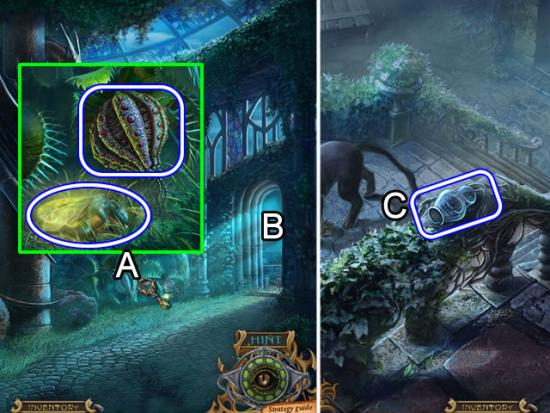
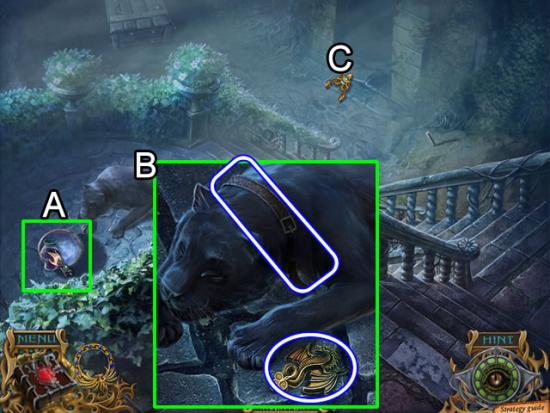
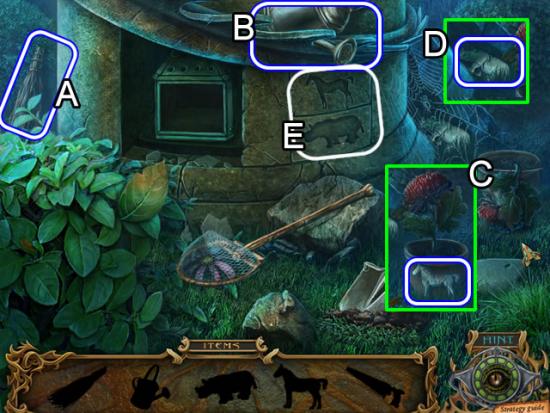
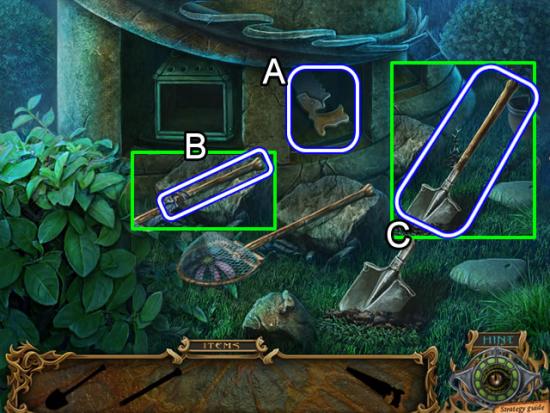
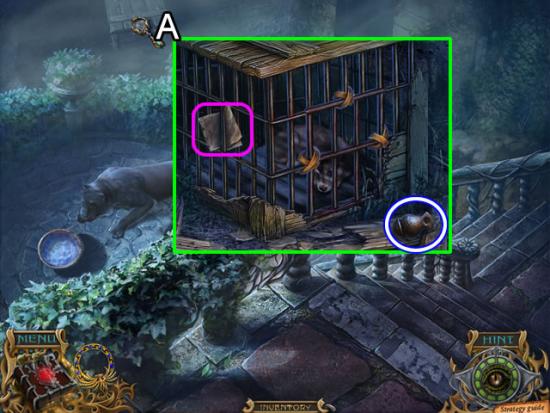
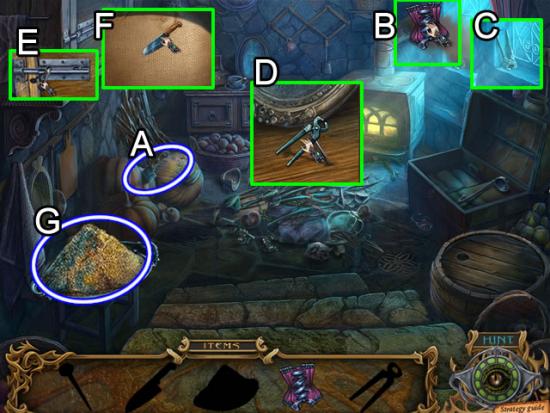
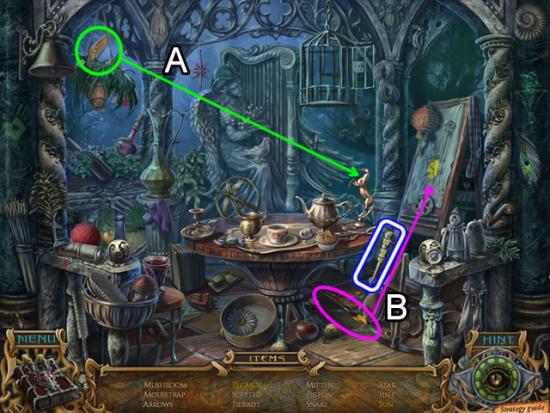
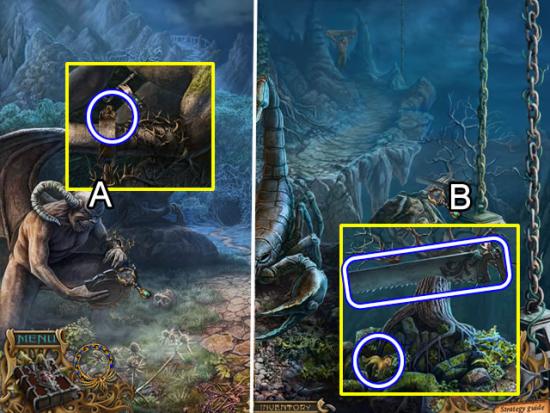
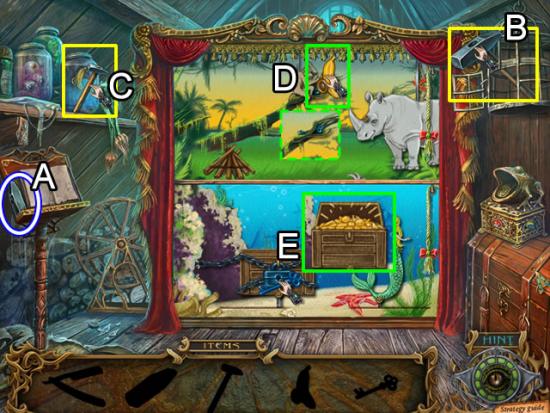
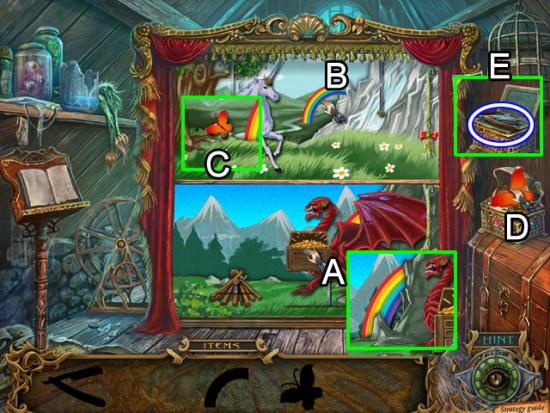
Garden
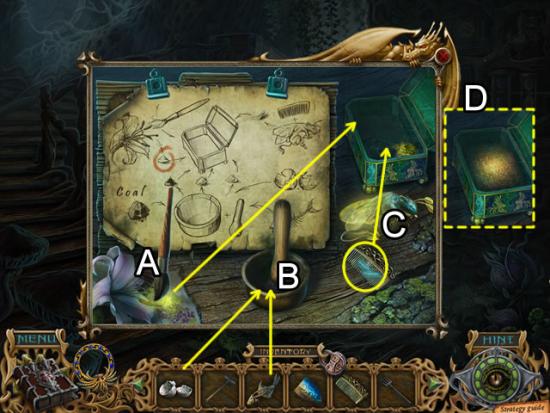
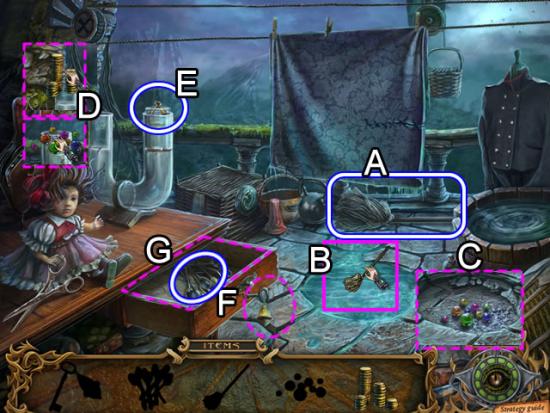
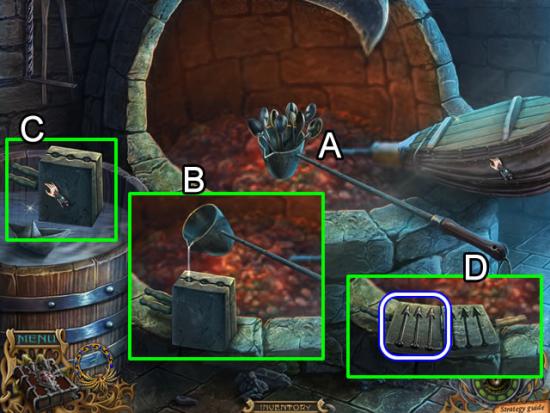
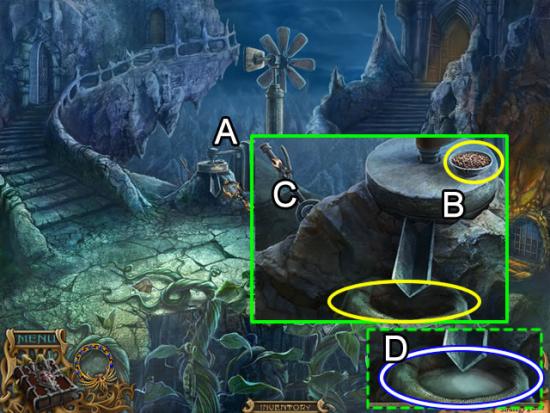
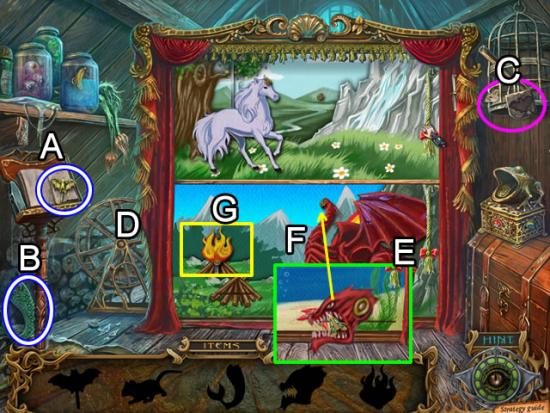
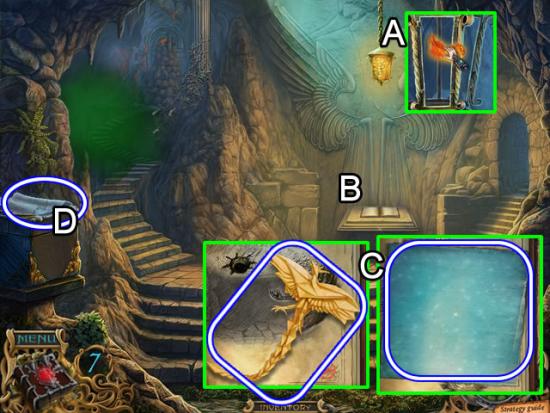
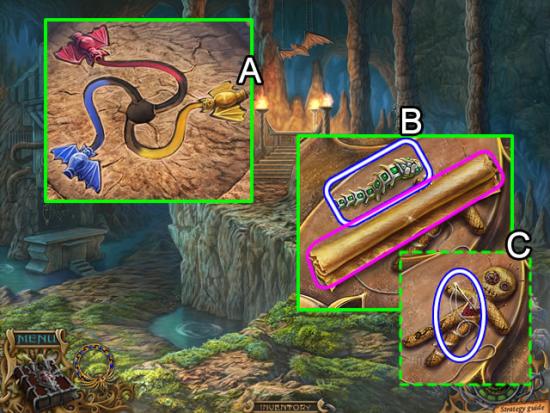
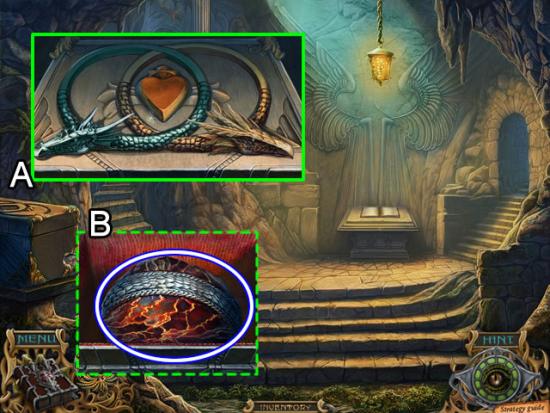
1. Put the DREAM BERRY in the crusher.
2. Press the crusher handle.
3. Put dream berry powder in the beaker.
4. Place the CANDLESTICK under the beaker.
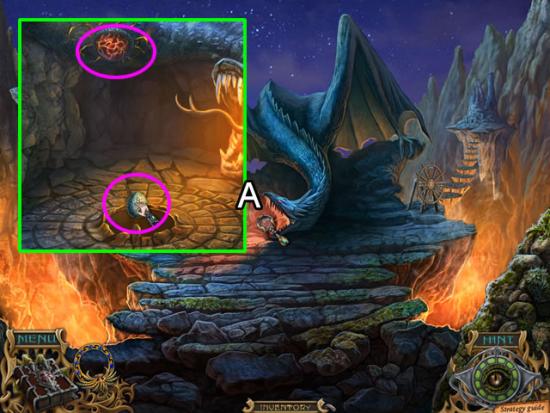
5. Pull the dragon’s tail to light the candle.
6. Put the POTION VESSEL under the spigot. Turn to fill the vessel with SLEEPING POTION.
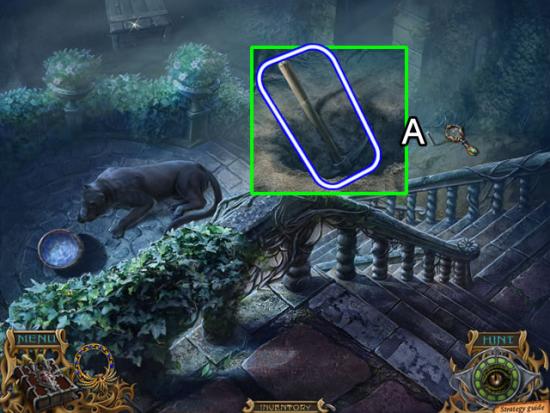
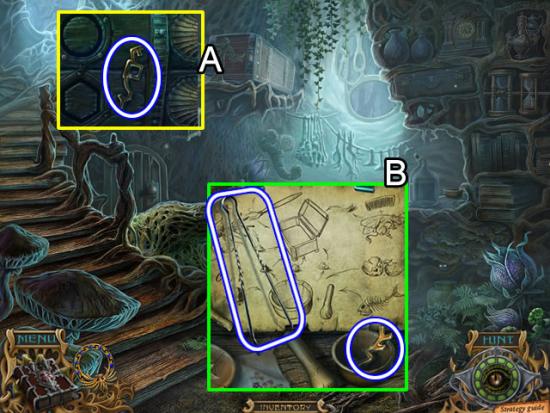
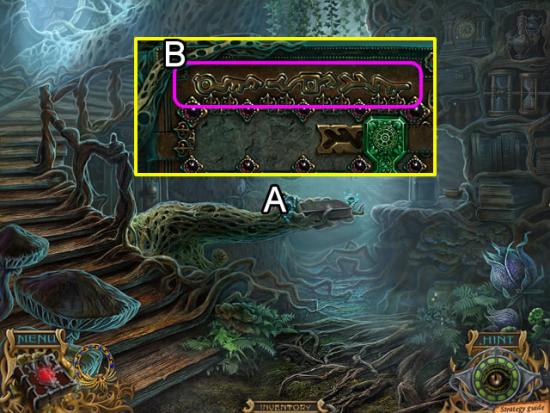
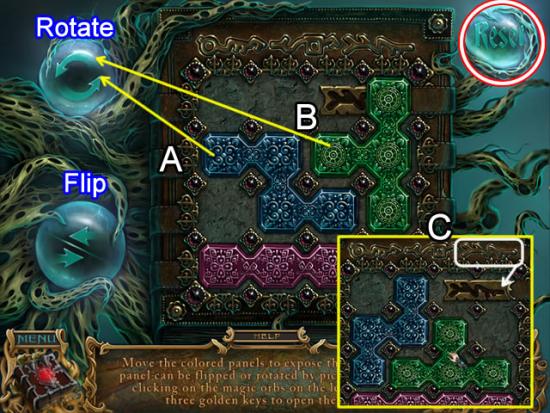
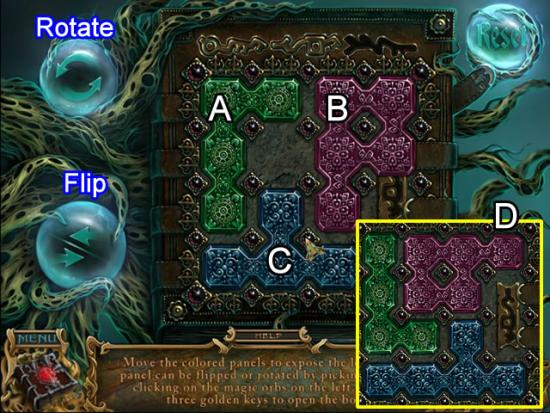
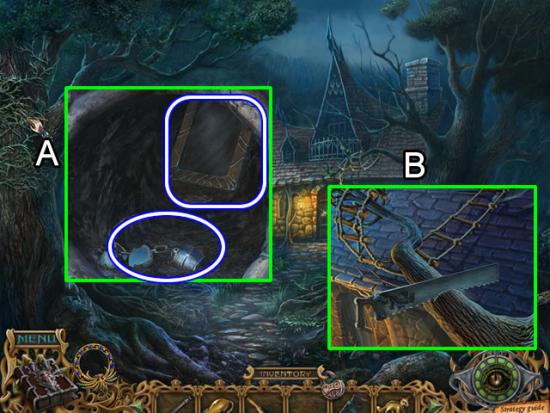
Back Steps
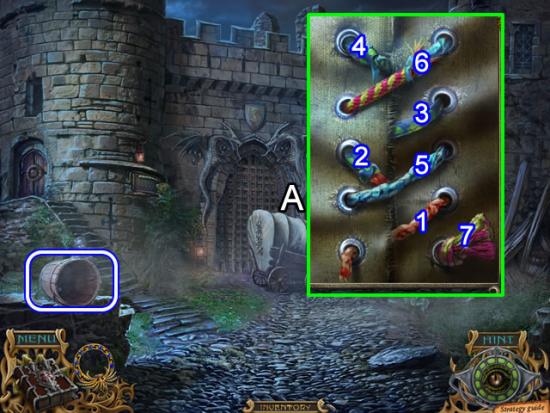
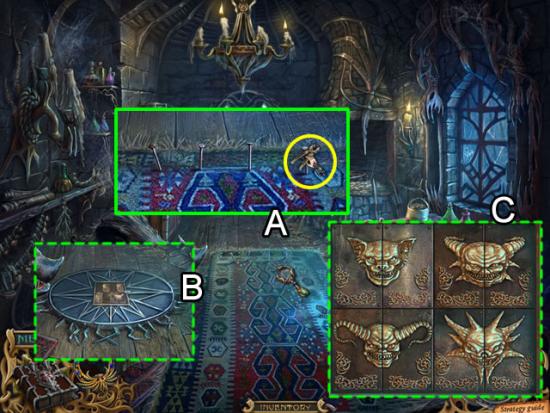
Castle Close
Hallway
Garden
Back Steps
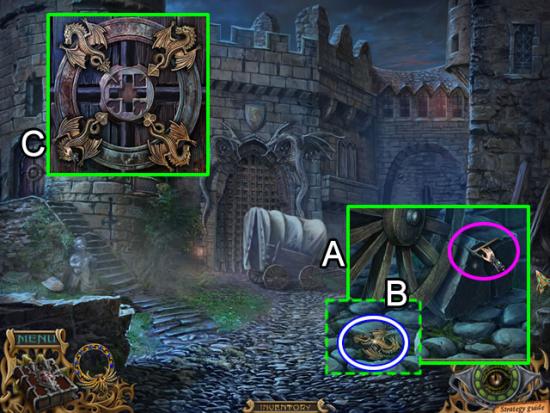
Castle Close
Gatehouse
Back Stairs
Castle Close

Crossroads
Gatehouse
Back Steps
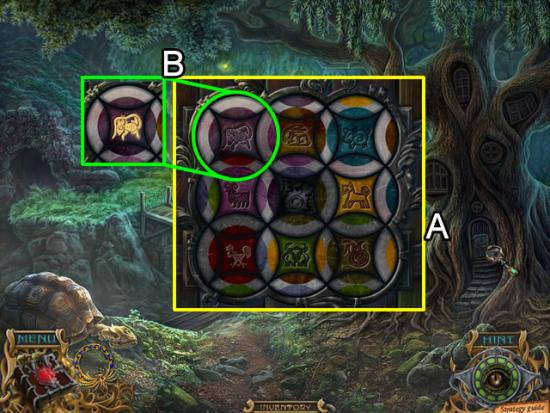
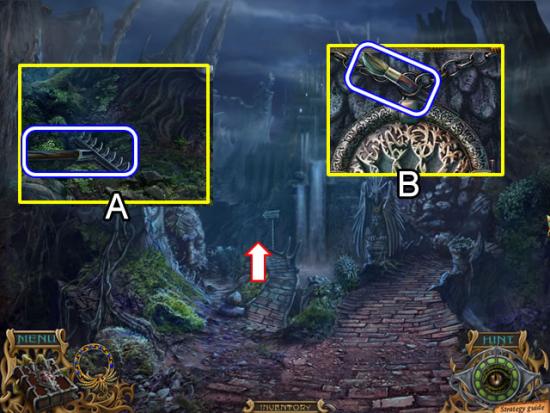
Enchanted Forest Clearing
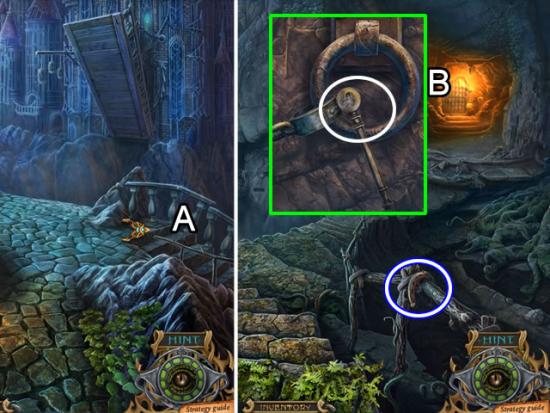
Destroyed Bridge
Enchanted Forest Clearing
Tree House
Enchanted Forest Clearing
Tree House
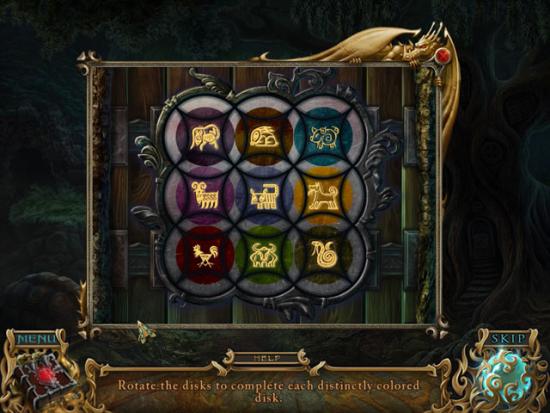
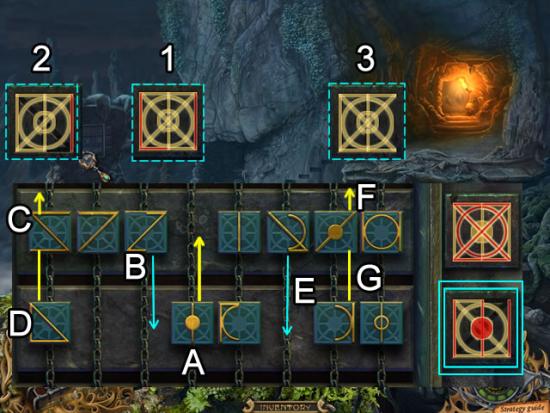
Round One
Round Two
Round Three
Crossroads
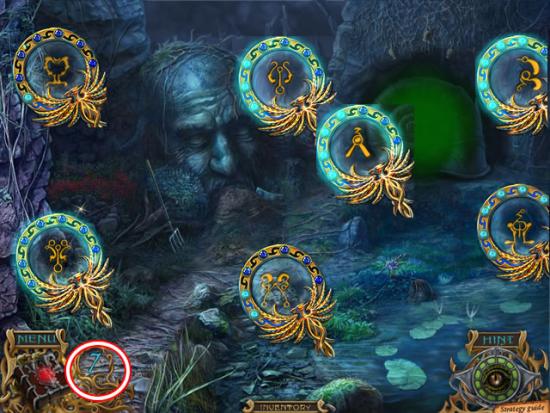
Destroyed Bridge
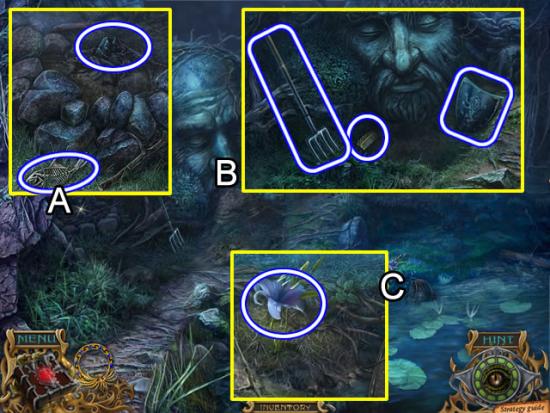
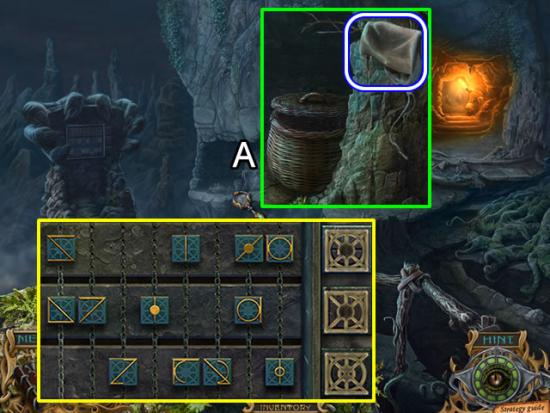
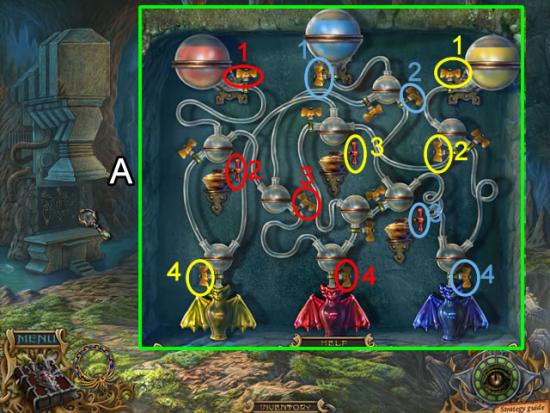
Cave
Tree House
Cave
Enchanted Forest Clearing
Forest Bridge
Castle Path
Cave Entrance
Tree House

Castle Path
Cave Entrance

Cave
Castle Path
Cave
Cavern
Cave Entrance
Castle Path
Cavern
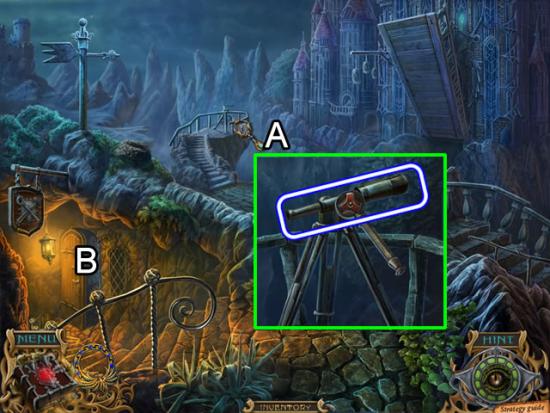
Cliff Top
Castle Approach
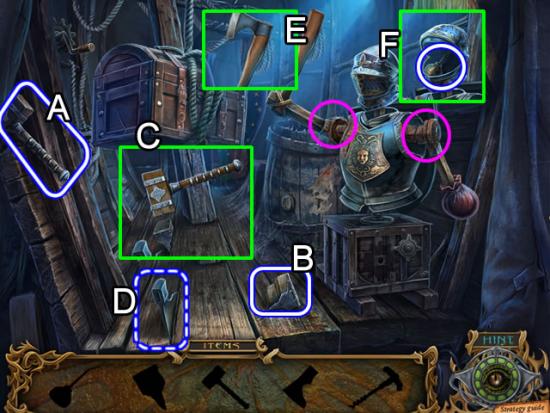
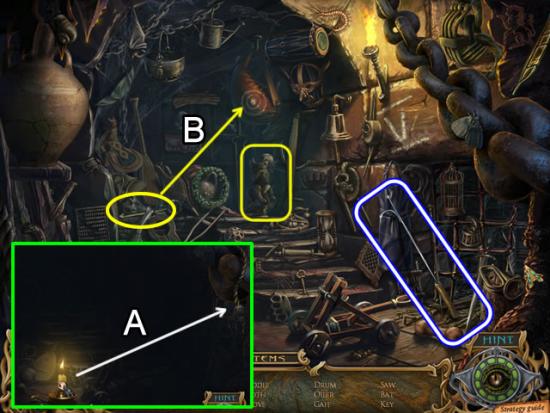
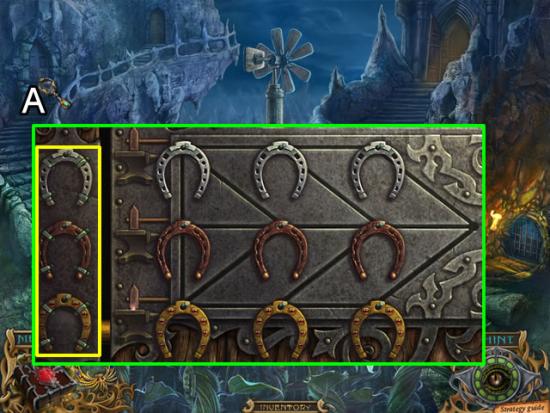
Workshop
Castle Approach
Cliff Cell
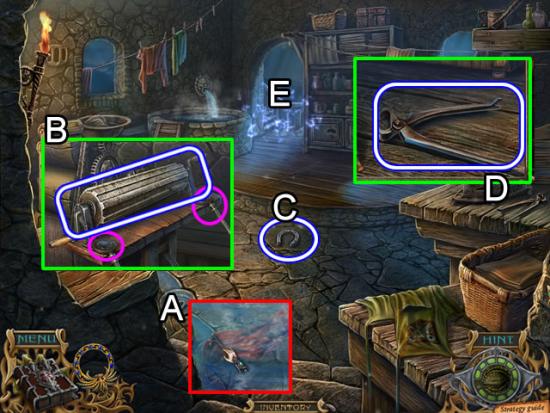
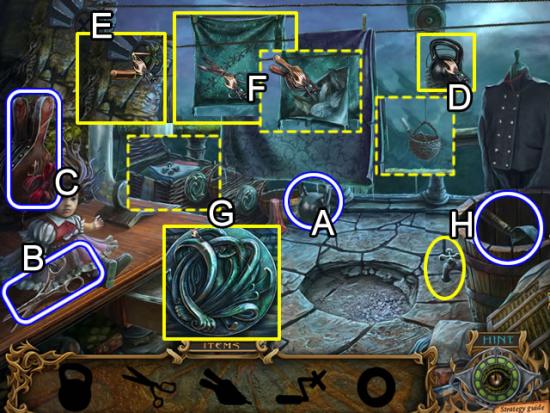
Laundry

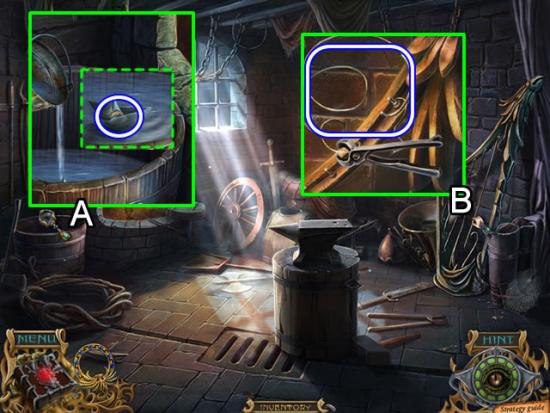
Blacksmith’s Shop
Castle Approach
Workshop
Blacksmith’s Shop

Castle Approach
Throne Room
Castle Grounds
Kitchen
Cliff Cave
Cliff Top
Castle Grounds
Estate Grounds
Entry Hall

Office
Entry Hall
Kitchen
Laundry
Blacksmith’s Shop
Laundry
Office
Entry Hall
Office
Cliff Cell
Castle Grounds
Garden

The Guardians
Garden
Estate Grounds
Entry Hall
The Guardians
Temple
Garden
Throne Room
Garden
Temple
Temple of Phoenix
Throne Room
Temple of Phoenix
Forest Cabin
Duel Site
The Abyss
Duel Site
The Abyss
Forest Cabin
Cabin Interior
Forest Cabin
Cabin Interior
Duel Site
Forest Cabin
Cabin Interior
Duel Site
The Abyss
Congratulations! You have completed the main game of Spirits of Mystery: Song of the Phoenix. If you are playing the Collector’s Edition, additional gameplay is now available from the “Extras” tab on the main menu.
Temple of Phoenix
Cave Entry
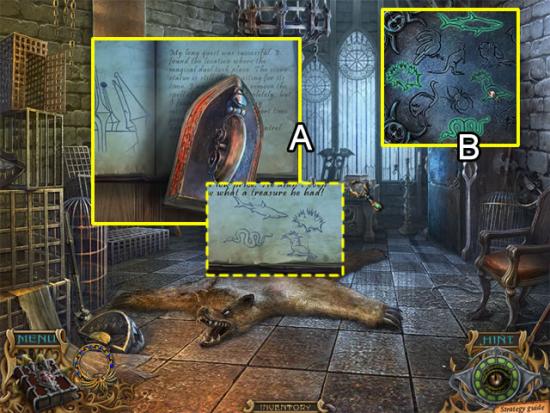
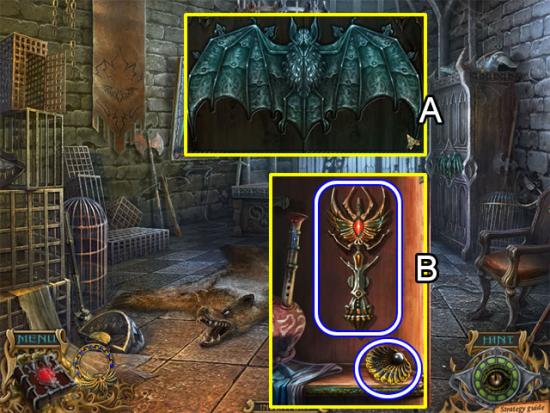
Library
Cave Entry
Library
Temple of Phoenix
Cave Entry
Dragon Rocks
Temple of Phoenix
Forest Cabin
Cabin Interior
Forest Cabin
Duel Site
The Abyss
Forest Cabin
Cabin Interior
Duel Site
Cabin Interior
The Abyss
Bat Cave
Library
Cabin Interior
Snake Cave
Bat Cave
The Abyss
Duel Site
Forest Cabin
Dragon Rocks
Snake Cave
Library
Dragon Rocks
Cave Entrance
Dragon Rocks
Congratulations! You have completed the bonus chapter of Spirits of Mystery: Song of the Phoenix. Bonus content is now available from the “Extras” tab on the main menu.
