![Digimon UP Tier List [Supports, Buddies, and Partners]](/wp-content/uploads/2026/07/digimon-up-tier-list.jpg "Digimon UP Tier List [Supports, Buddies, and Partners]")
Digimon UP Tier List [Supports, Buddies, and Partners]
These Digimon will get you UP the leaderboard.

![Haze Seas Boss Drops [Chances, Locations, and How to Spawn]](/wp-content/uploads/2026/07/haze-seas-boss-drops.jpg "Haze Seas Boss Drops [Chances, Locations, and How to Spawn]")

Welcome to the Spirit Seasons: Little Ghost Story walkthrough on Gamezebo. Spirit Seasons: Little Ghost Story is a hidden object adventure game played on the PC. This walkthrough includes tips and tricks, helpful hints, and a strategy guide for how to complete Spirit Seasons: Little Ghost Story.
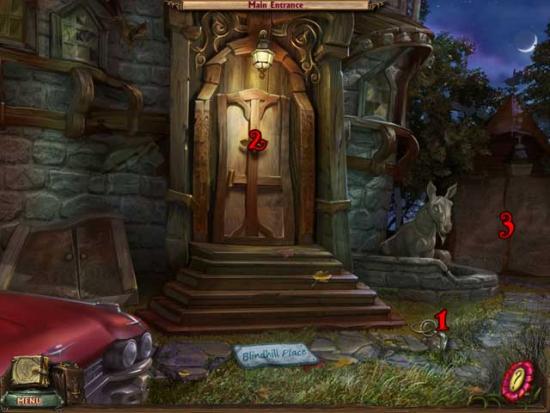
Welcome to the Spirit Seasons: Little Ghost Story walkthrough on Gamezebo. Spirit Seasons: Little Ghost Story is a hidden object adventure game played on the PC. This walkthrough includes tips and tricks, helpful hints, and a strategy guide for how to complete Spirit Seasons: Little Ghost Story.
Main Entrance

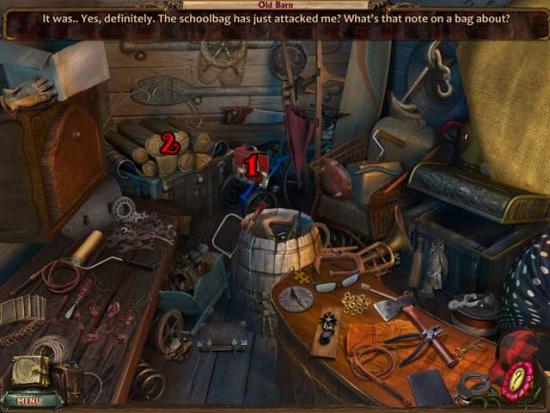
Old Barn
Main Entrance
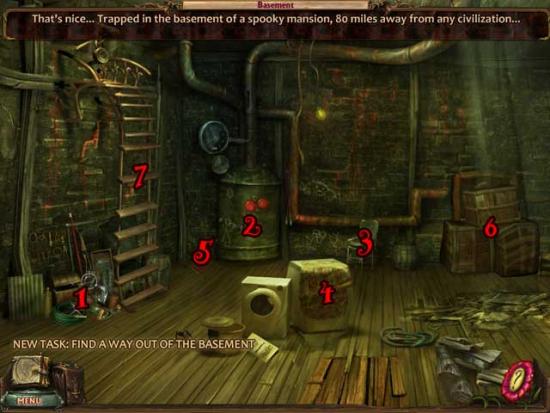
Basement
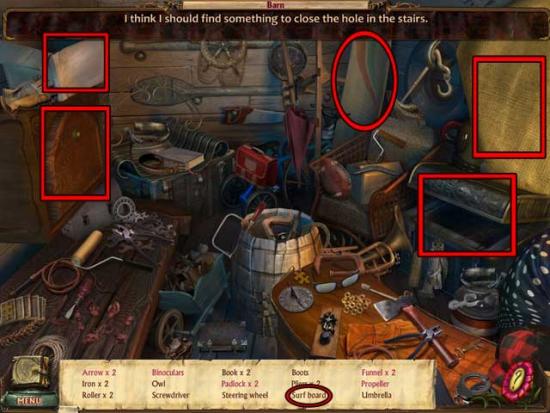
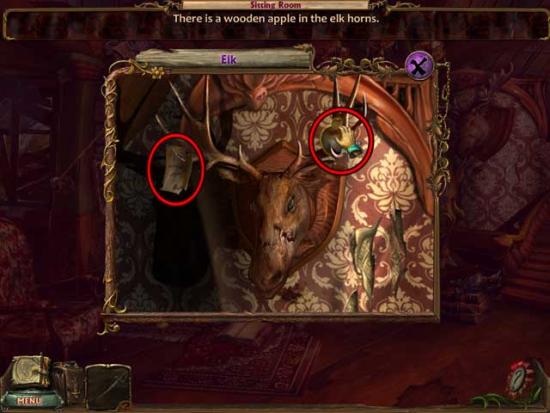
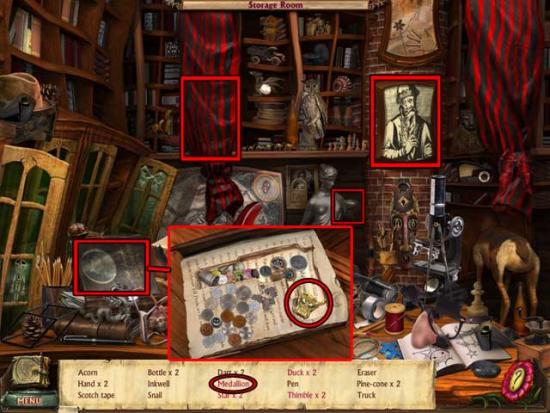
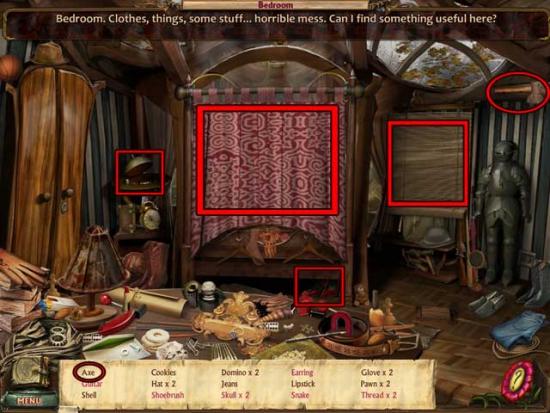
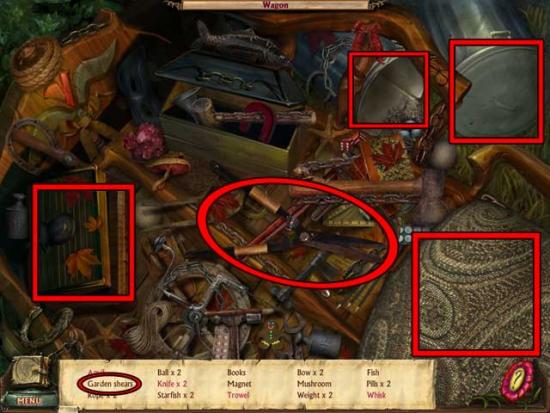
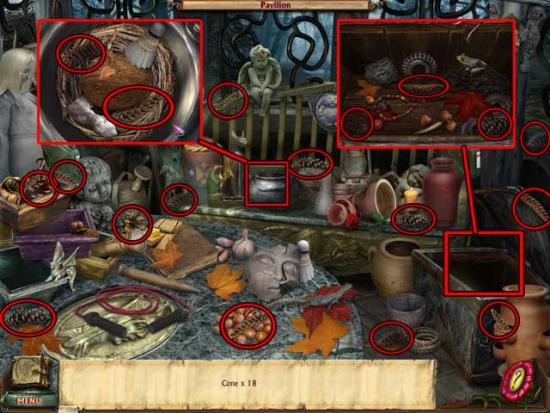
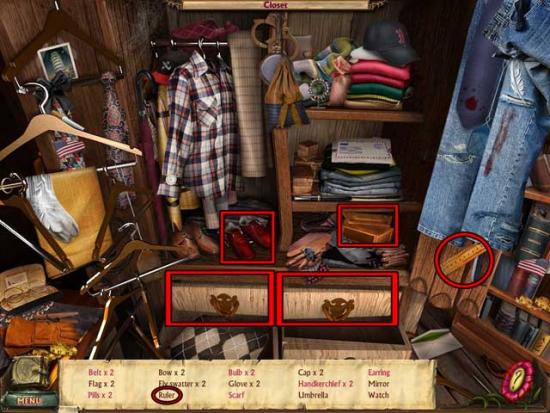
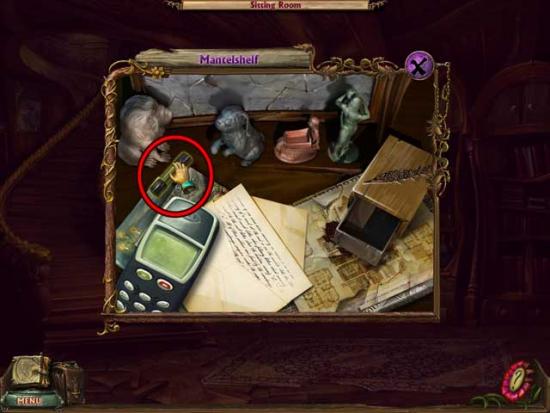
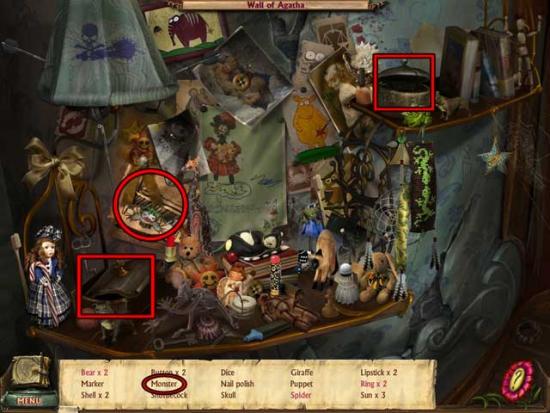
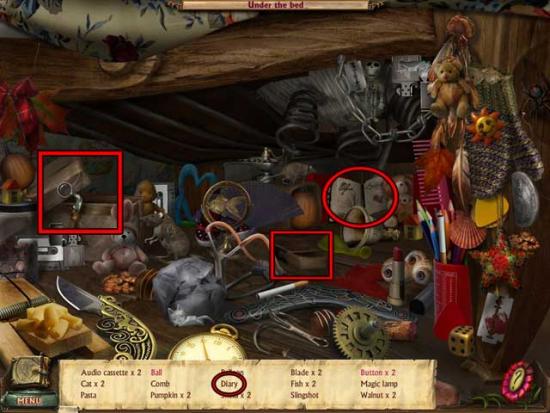
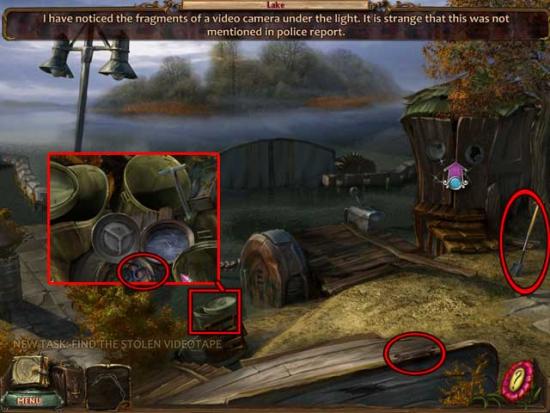
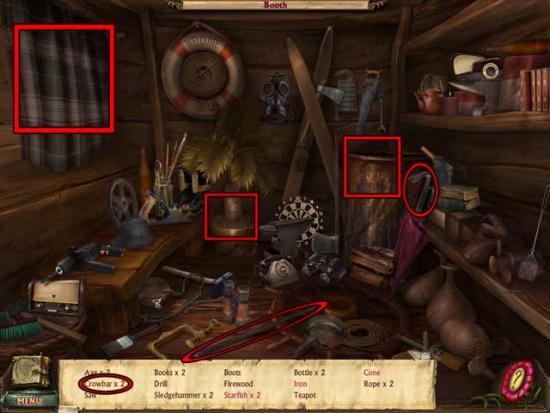
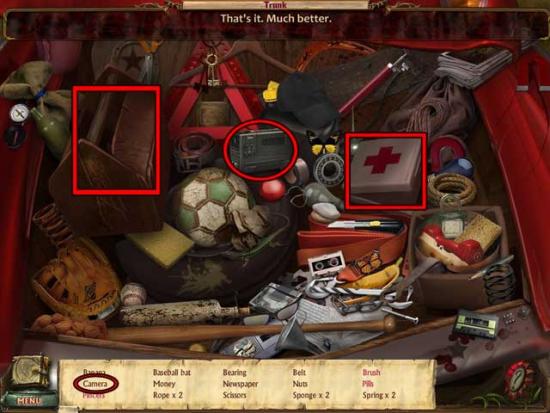
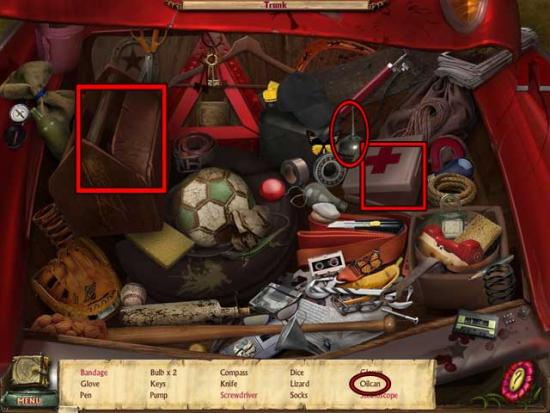
? Find the objects listed at the bottom of the screen: objects are randomized. The key item has been circled for you, while hidden locations are squared.
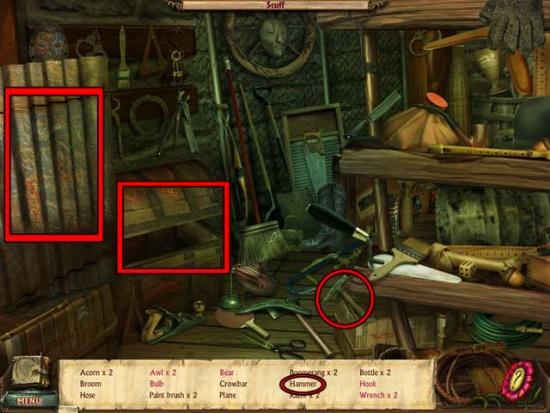
? Upon completing the area, the HAMMER will be added to your inventory.
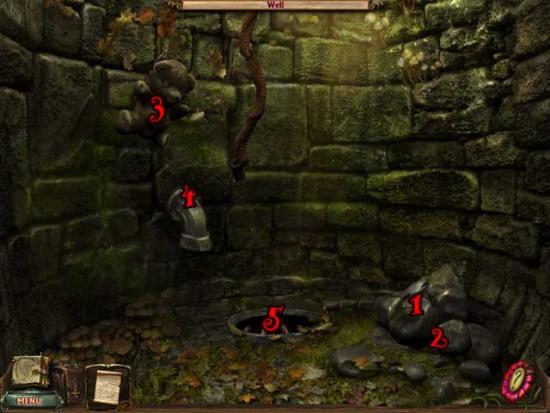
? Click on the grate to open it, then collect the NAILS inside to add them to your inventory.
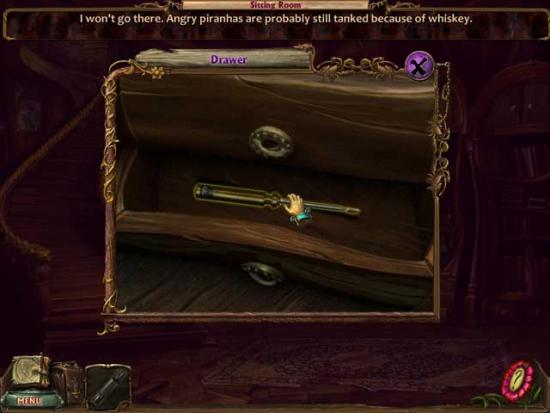
? Pick up the WRENCH lying on the tray to add it to your inventory.
? Use the WRENCH on the broken glass to remove it and add the HAMSTER to your inventory.
? Pick up the FIRE HOOK to add it to your inventory.
? Use the HAMSTER on the door grate to gain access into the next room’s hidden object area.
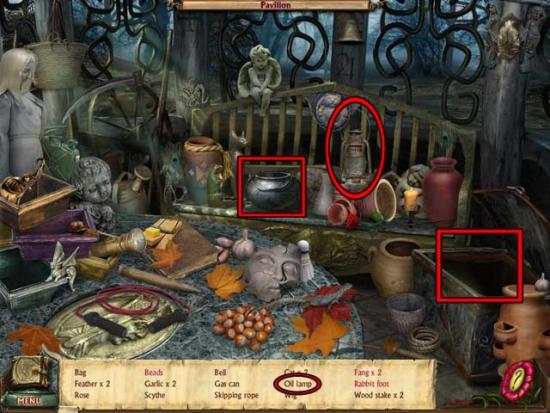
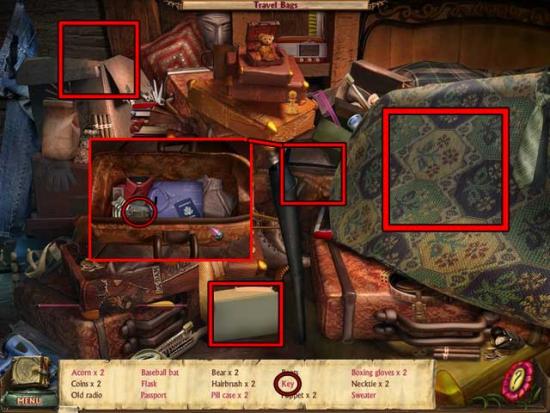
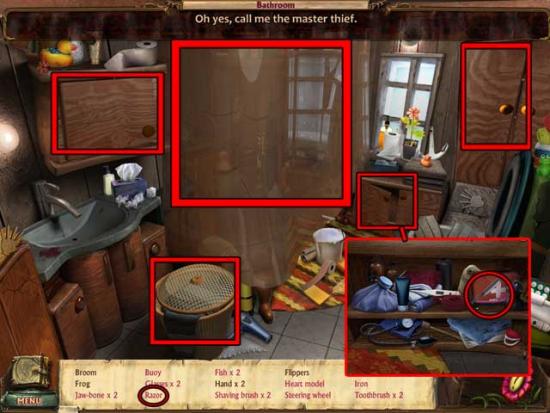
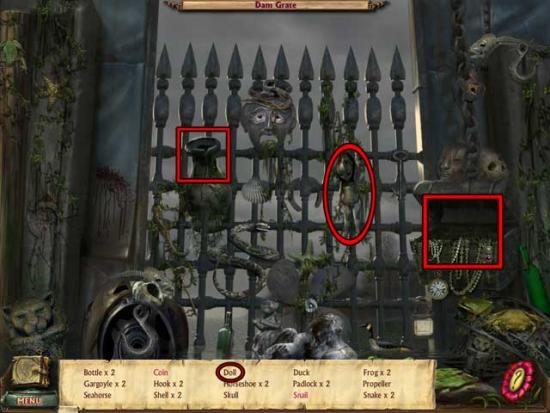
? Find the objects listed at the bottom of the screen: objects are randomized. The key item has been circled for you, while hidden locations are squared.
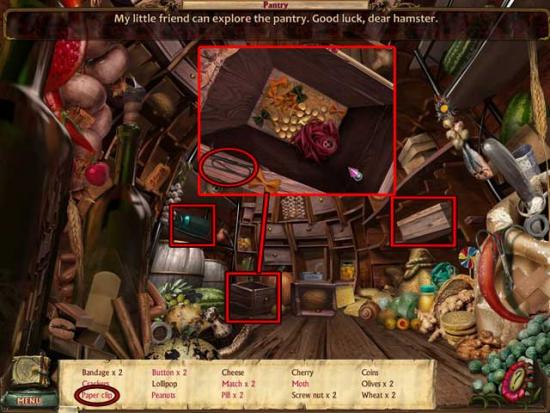
? Upon completing the area, the PAPER CLIP will be able to be added to your inventory.
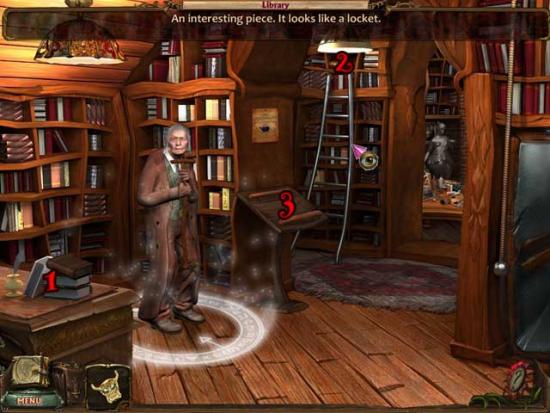
? Pick up the LADDER BOARD lying on the floor to add it to your inventory, then take a closer look at the gap in the ladder.
? Place the LADDER BOARD back in its proper location, then use the NAILS on it. Use the HAMMER to secure them and successfully repair the step.
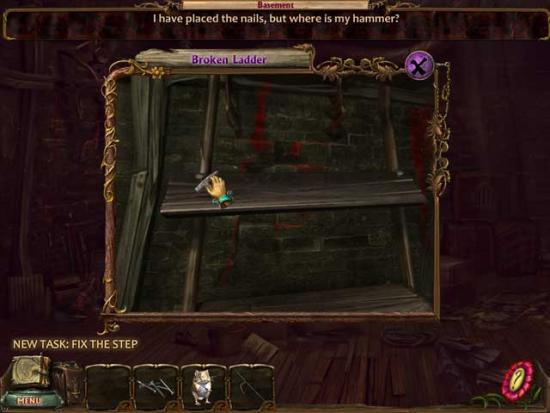
? Climb up the ladder.
Main Entrance
Old Barn
Main Entrance
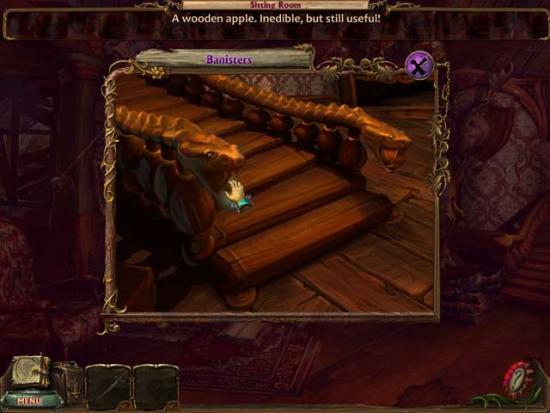
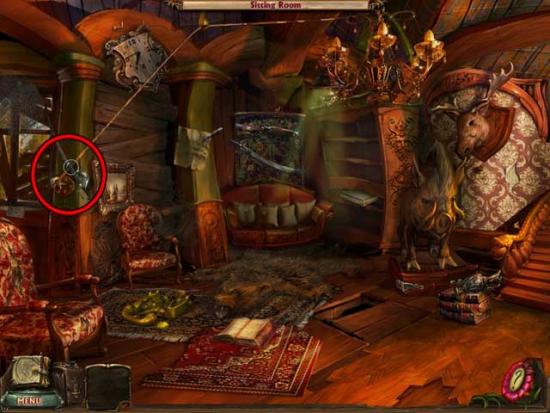
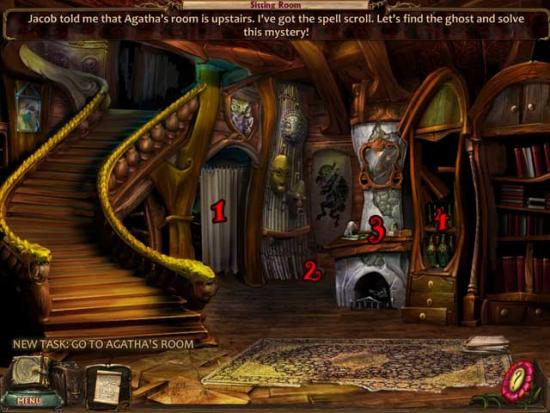
Sitting Room
Main Entrance
Sitting Room
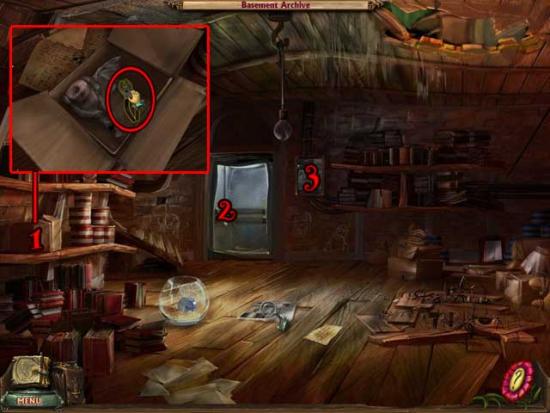
Basement Archive
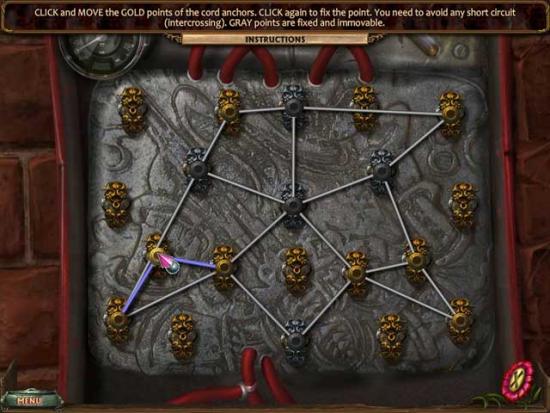
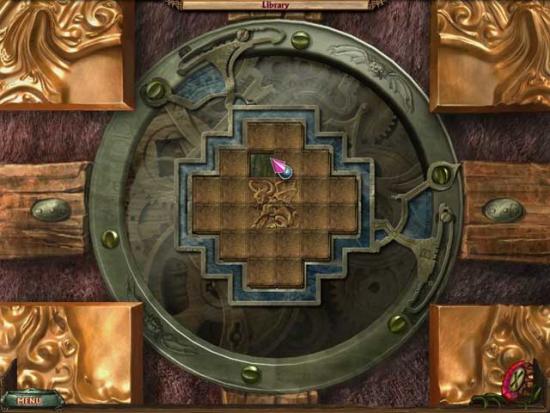
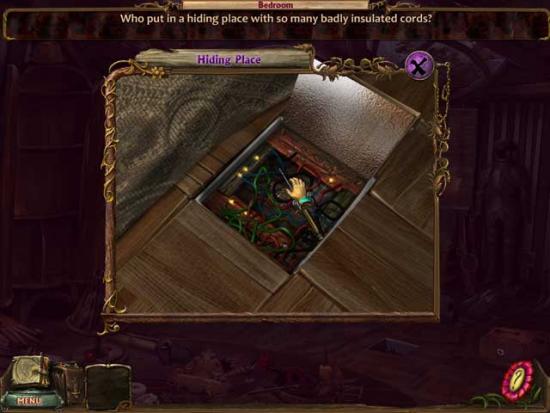
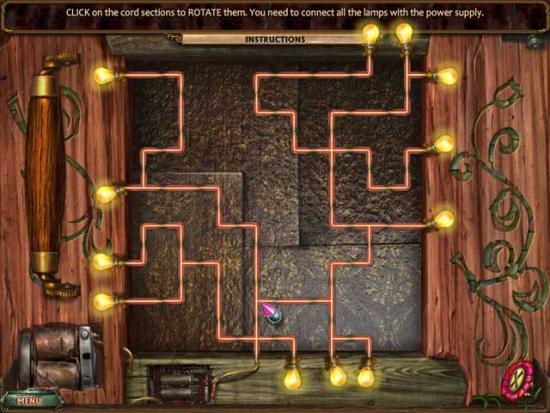
? Click and move the gold points of the chord anchors until none of the wires intersect: silver anchors cannot be moved. There are many different possible solutions. A possible solution is shown below:
Library
Sitting Room
Corridor
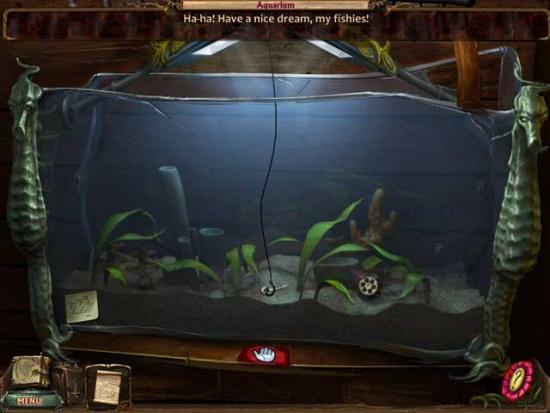
Aquarium
Corridor
Agatha’s Room
Alley
Graveyard
Alley
Well
Graveyard
Crypt
Servant’s Room
Bathroom
Servant’s Room
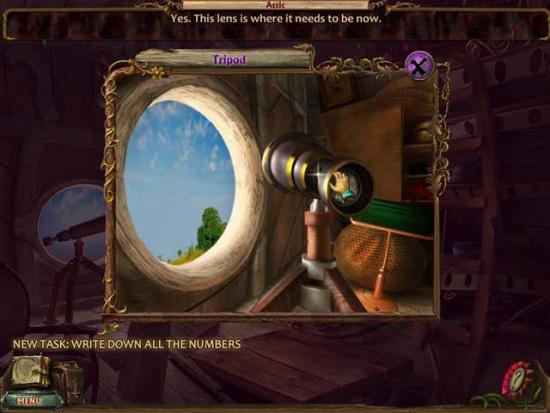
Attic
SS28.jpg

Servant’s Room
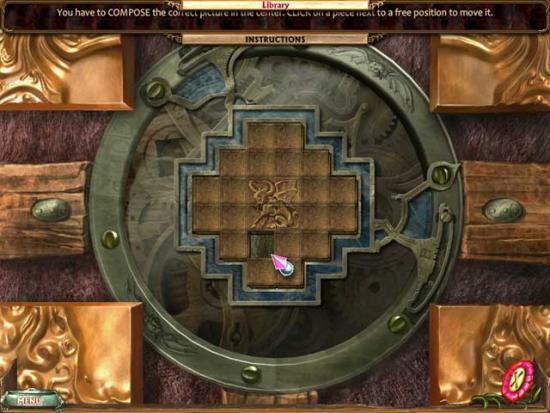
(Note: if you’re playing expert mode, the solution is Right 7, Left 12, Right 4, Left 15, Right 1, Left 16)
Library
Sitting Room
Corridor
Bedroom
Agatha’s Room
Main Entrance
Alley

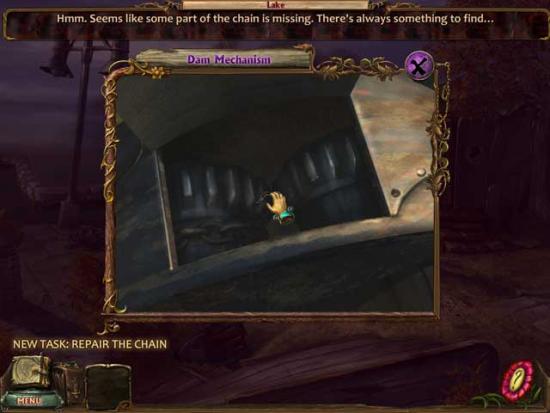
Lake
Alley
Main Entrance
Lake
Main Entrance
Lake
The Final Choice
Congratulations! You’ve completed Spirit Seasons: Little Ghost Story!
