Sphera: The Inner Journey Walkthrough

Welcome to the Sphera: The Inner Journey walkthrough on Gamezebo. Sphera: The Inner Journey is a hidden object/adventure game played on the PC created by Sandlot Games. This walkthrough includes tips and tricks, helpful hints, and a strategy guide to how to complete Sphera: The Inner Journey.

By
Share this
  • Share this on Facebook
  • Share this on Twitter

Sphera: The Inner Journey – Game Introduction

Welcome to the Sphera: The Inner Journey walkthrough on Gamezebo. Sphera: The Inner Journey is a hidden object/adventure game played on the PC created by Sandlot Games. This walkthrough includes tips and tricks, helpful hints, and a strategy guide to how to complete Sphera: The Inner Journey.

How to Use this Walkthrough (Please read)

  • This walkthrough is meant to be used as a guide to assist in solving mini-puzzles and acquiring all items in order to complete the game. You may explore locations in the order you wish, this walkthrough is written to take the most direct route to the game’s finish.
  • Play the tutorial!!!! This walkthrough will assume you have and won’t explain anything explained in the tutorial.
  • Inventory objects will be written in bold. The walkthrough will state, “Use the inventory item on the blah blah,” because it assumes you have the item. If you don’t have the item, on your keyboard, press CTRL+F (at the same time). In the text box, type the name of the item you are looking for and press ENTER. This will scan this page for the appearance of that word.

Gameplay and Tips

  • This is a hidden object adventure game. You will move from location to location solving hidden object hunts, mini-puzzles and picking up items to use in order to proceed in the game.
  • When you begin the game, you have to choose a difficulty level.
  • Casual mode has a cursor that changes when it’s over an active area, hints recharge faster, you can skip puzzles and there is no penalty for misclicking during hidden object scenes.
  • Expert mode does not have a changing cursor, you cannot skip penalties, hints take longer to recharge and there is a penalty for misclicking in hidden object scenes.
  • Tip:
  • The Main Menu button at the bottom left of the screen will bring you back to the main screen.
  • Closing a window – To close the zoom-in windows, click the Close button or anywhere outside of the window.
  • Mini-puzzles can be skipped in Casual mode only. Hint system – Hints are available in the bottom right-hand of the screen. Using a hint in the adventure part of the game will guide you as to where to go next.
  • You will sometimes have to assemble items you’ve collected. The pieces are numbered so you can often use that as a guide for what piece to place when.
  • There is no timer or point system.
  • Hidden object hunts provide a list of items to find. Click on items in the scene to cross them off the list. Once you have found all the hidden objects, an item is added to your inventory.
  • Hidden objects screenshots will only highlight the items (yellow circles).

Navigation

  • There is no map in this game. The name of each room appears when you hover your cursor over the entryway to the next scene. This walkthrough will use that naming convention and will state, “return to the blah blah” and will not explain the route to take.

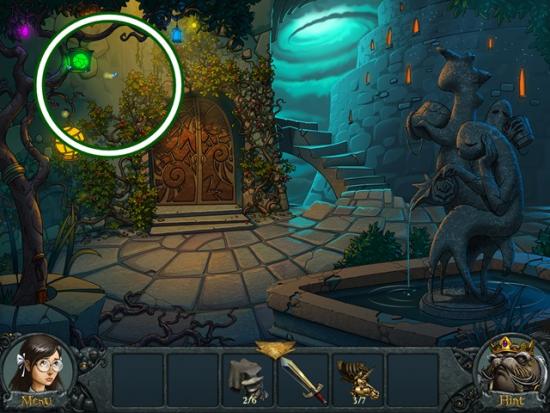
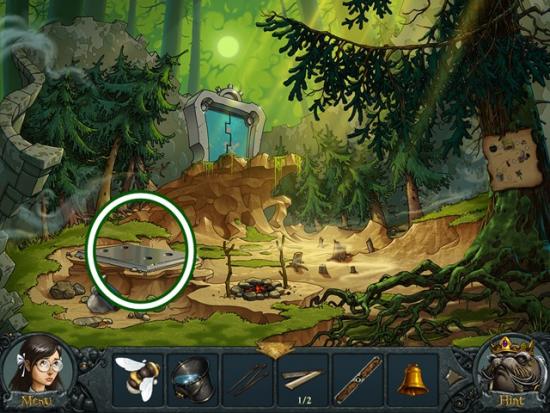
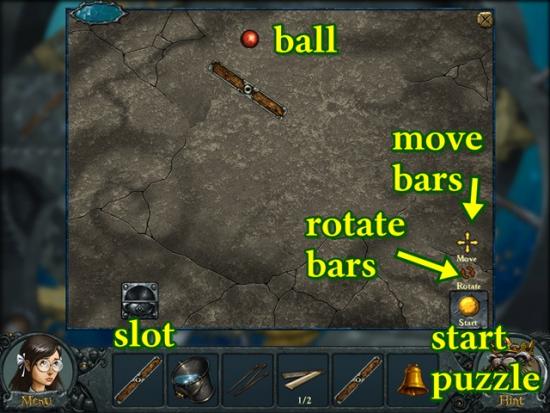
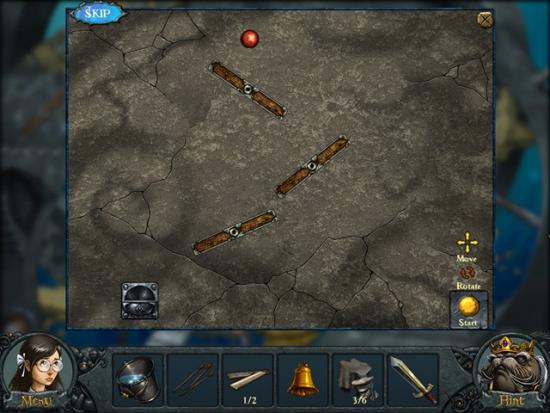
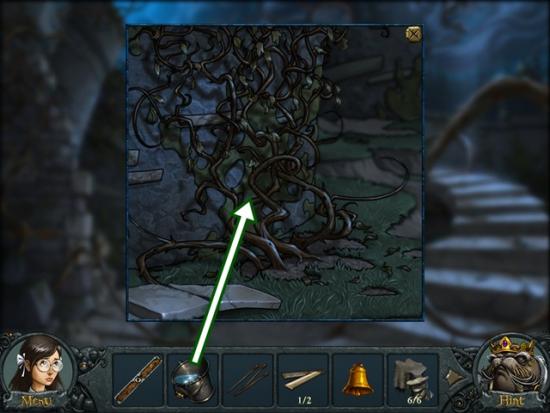
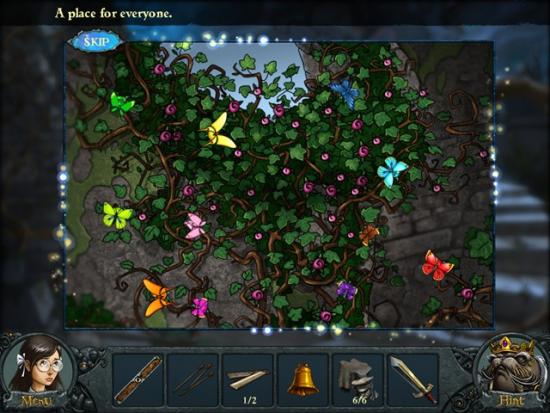
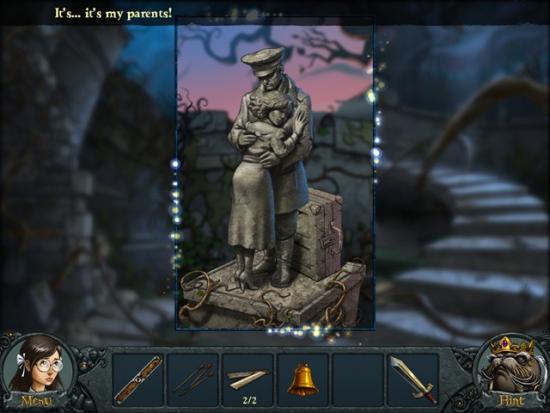
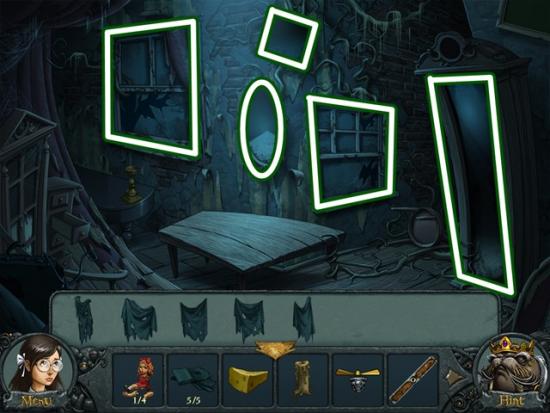
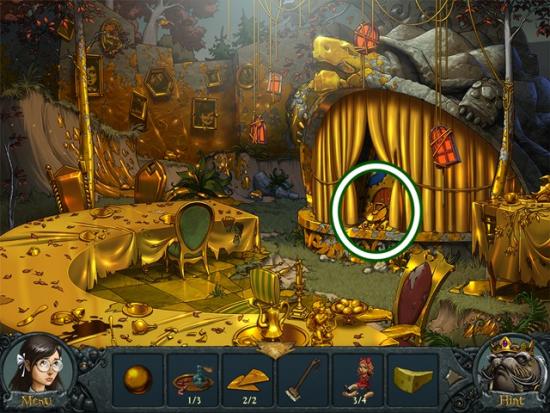
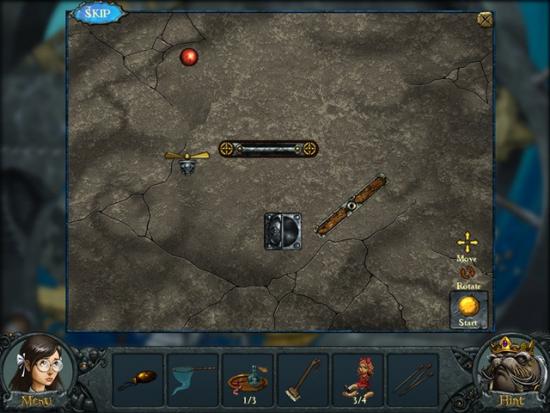
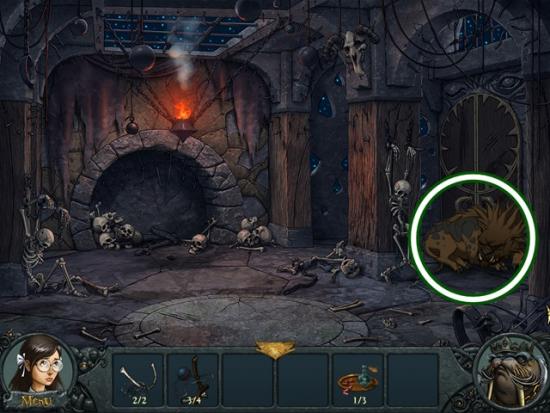
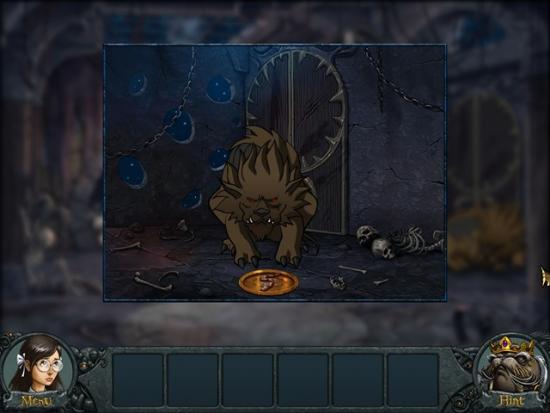
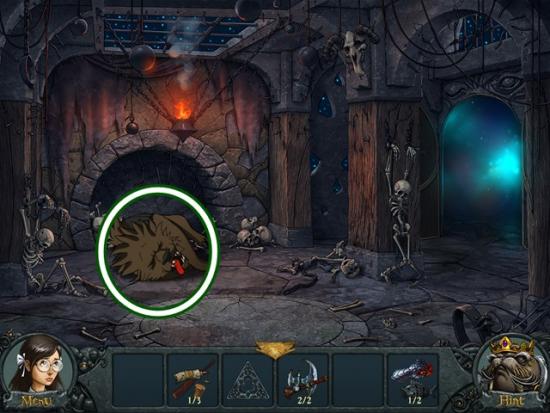
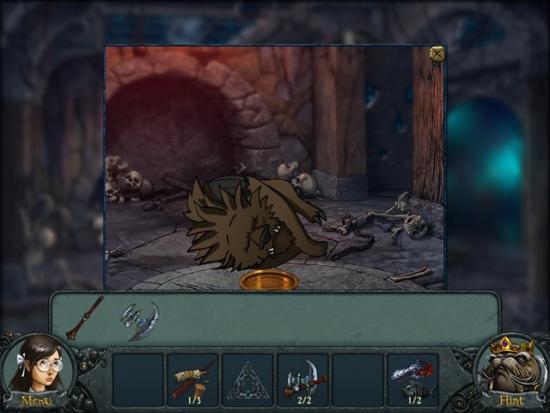
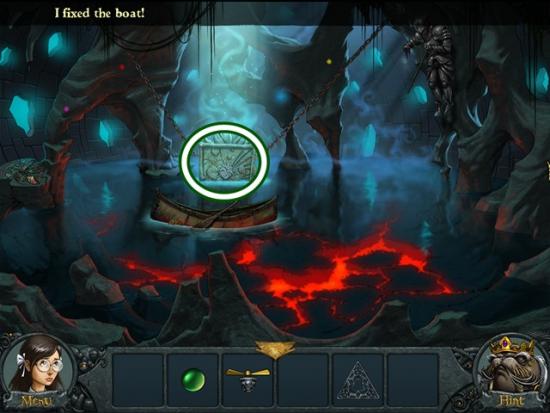
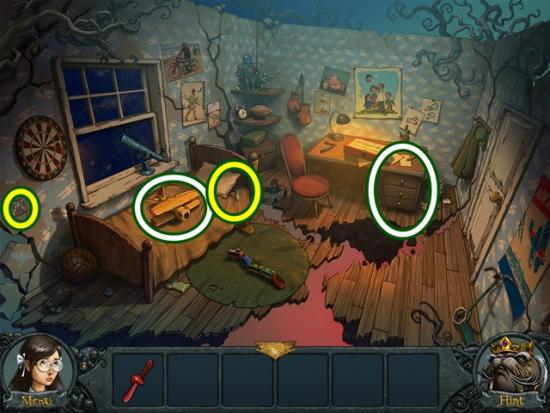
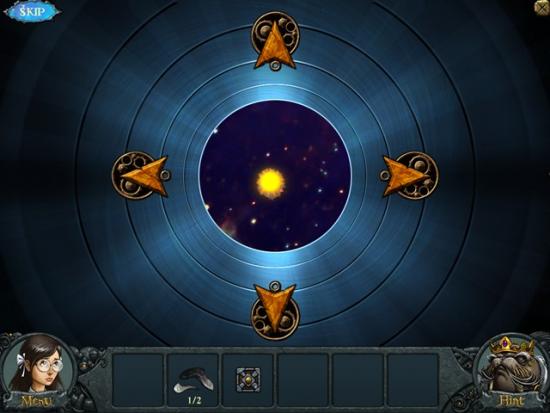
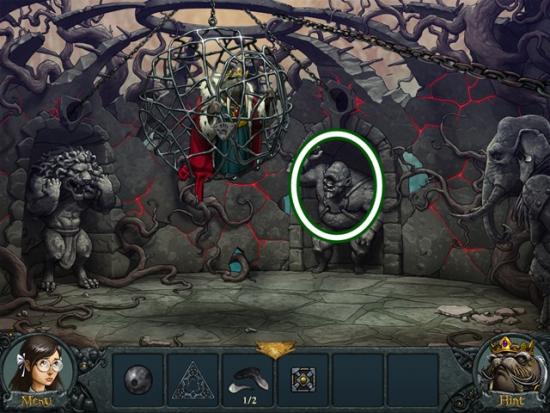
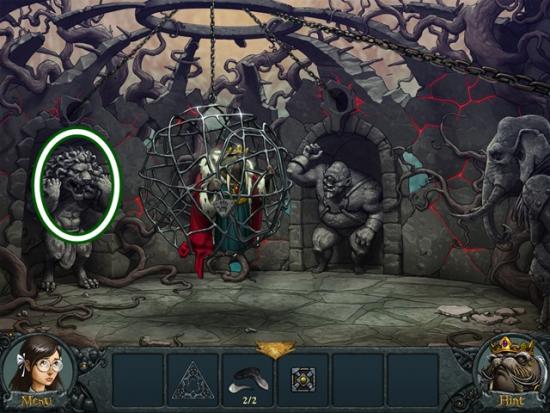
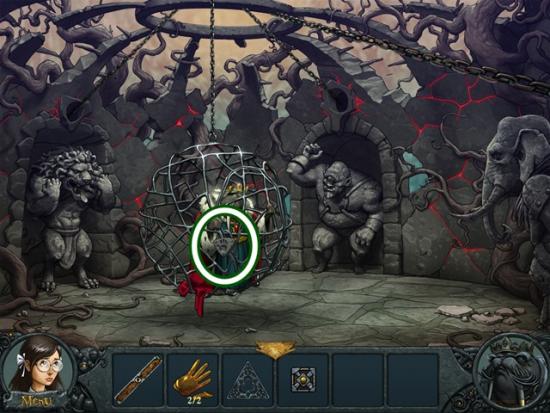
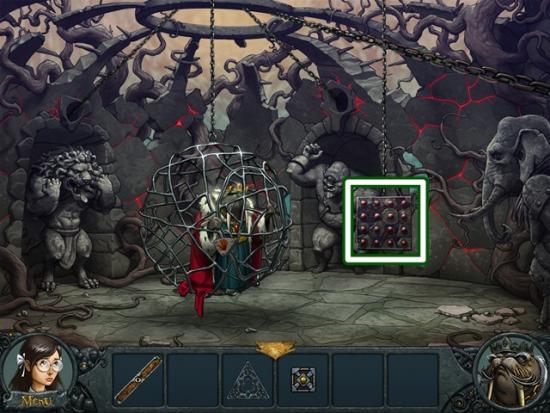
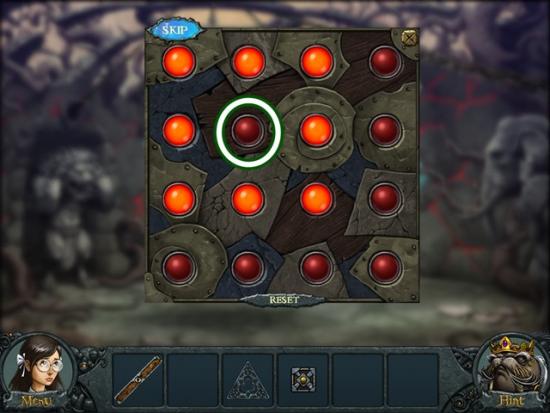
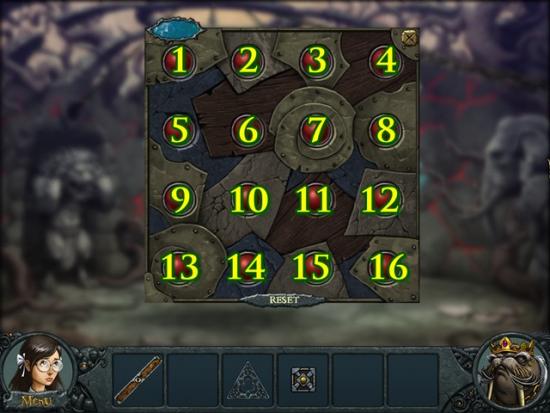
· This is a hidden object adventure game. You will move from location to location solving hidden object hunts, mini-puzzles and picking up items to use in order to proceed in the game.

· When you begin the game, you have to choose a difficulty level.

· Casual mode has a cursor that changes when it’s over an active area, hints recharge faster, you can skip puzzles and there is no penalty for misclicking during hidden object scenes.

· Expert mode does not have a changing cursor, you cannot skip penalties, hints take longer to recharge and there is a penalty for misclicking in hidden object scenes.

· Tip:

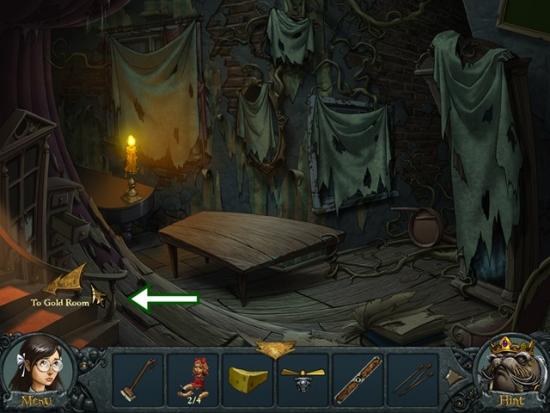
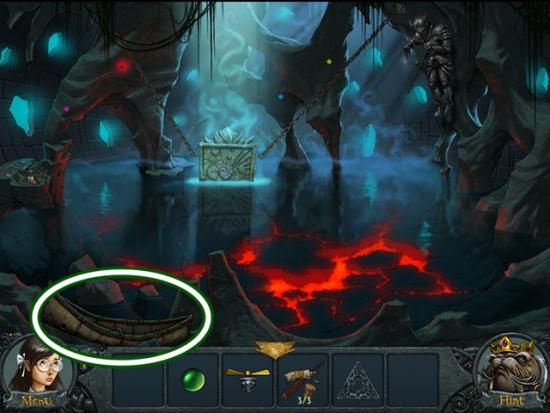
· The Main Menu button at the bottom left of the screen will bring you back to the main screen.

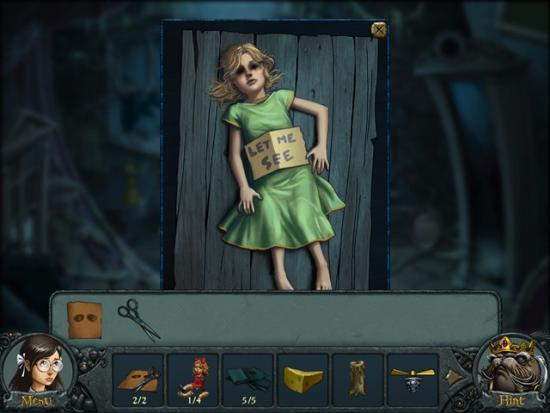
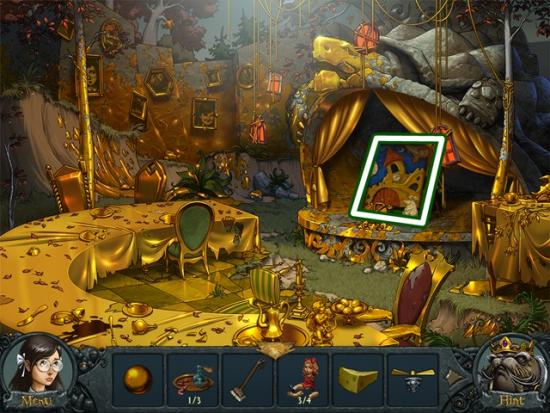
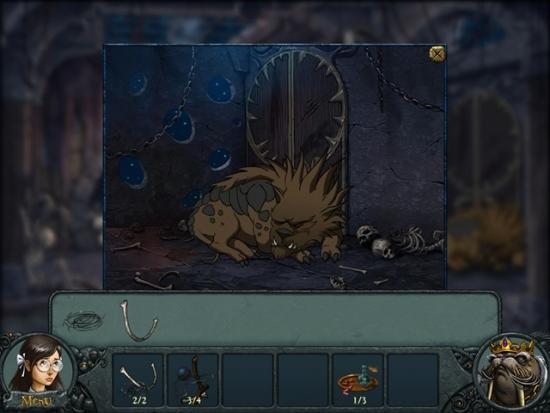
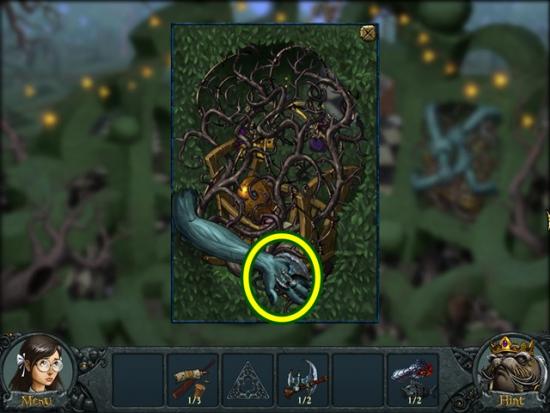
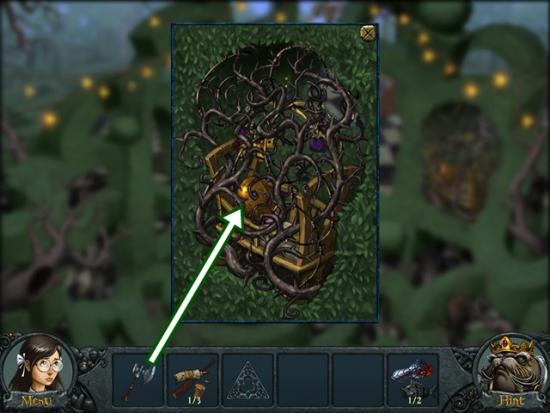
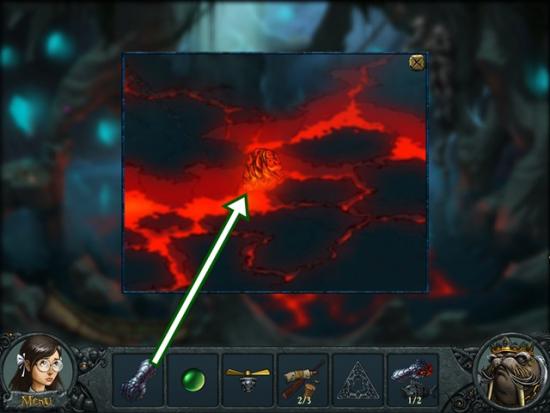
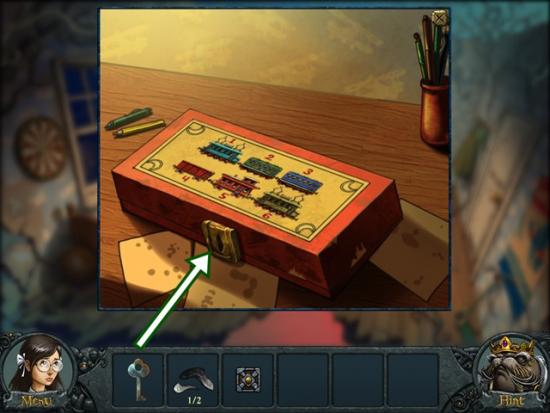
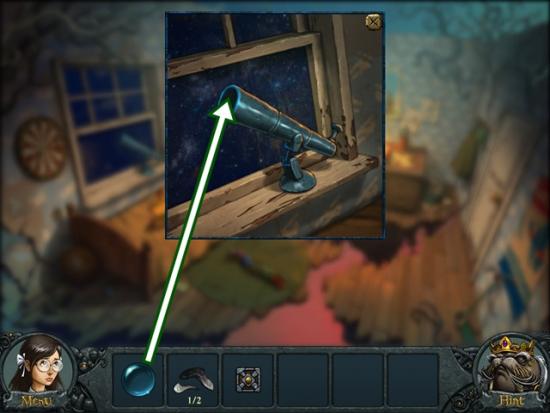
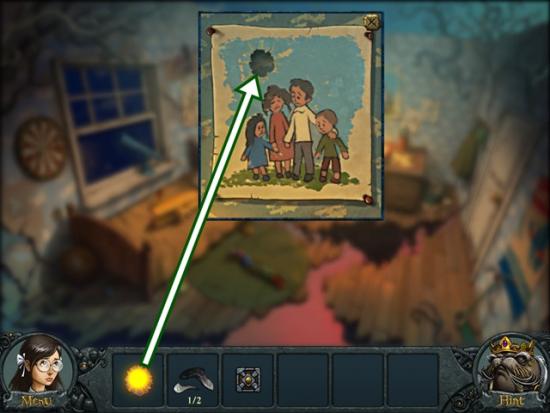
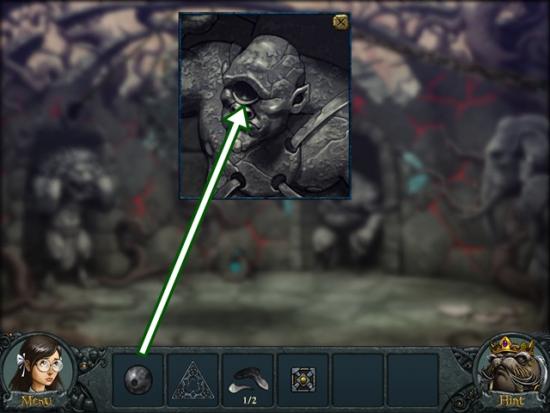
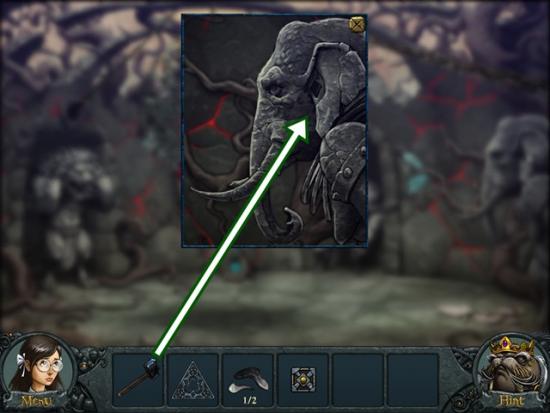
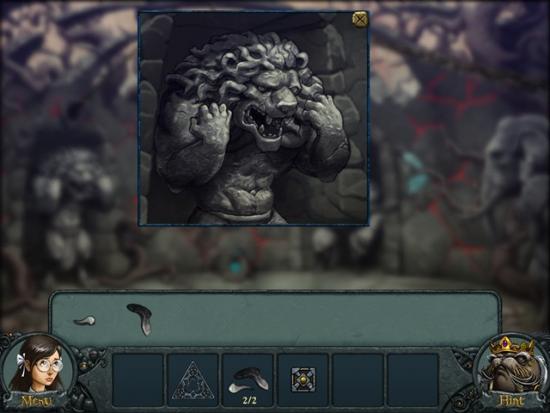
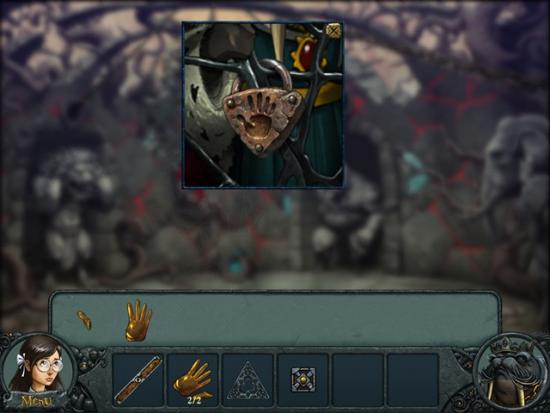
· Closing a window – To close the zoom-in windows, click the Close button or anywhere outside of the window.

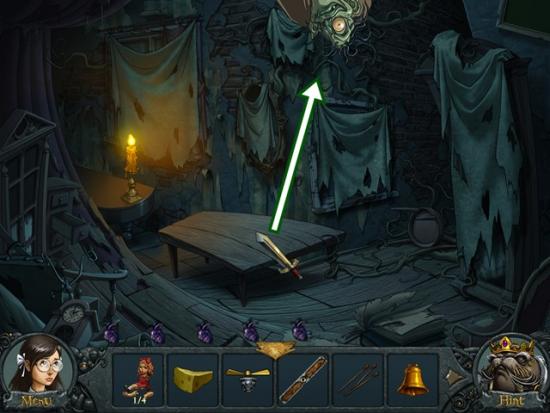
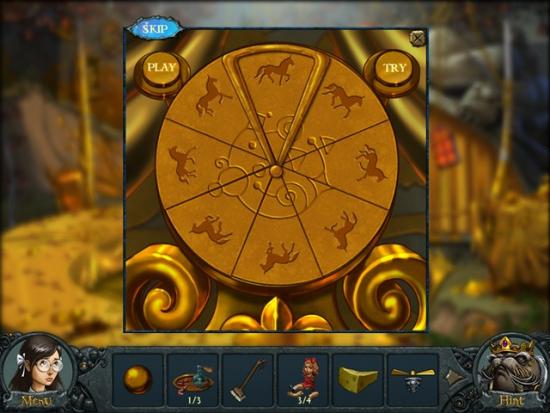
· Mini-puzzles can be skipped in Casual mode only. Hint system – Hints are available in the bottom right-hand of the screen. Using a hint in the adventure part of the game will guide you as to where to go next.

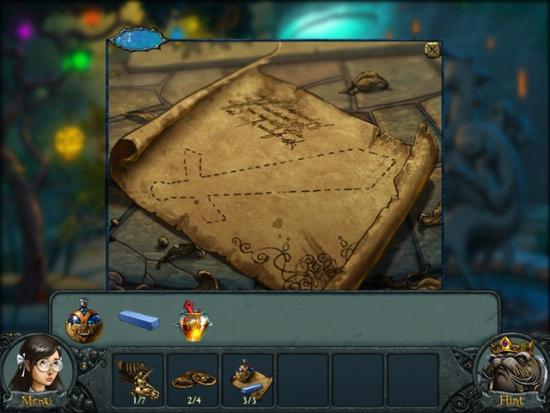
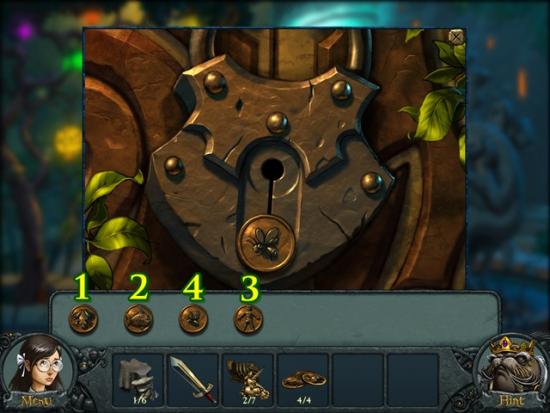
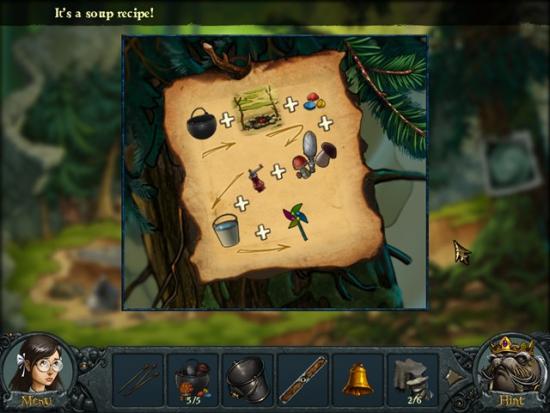
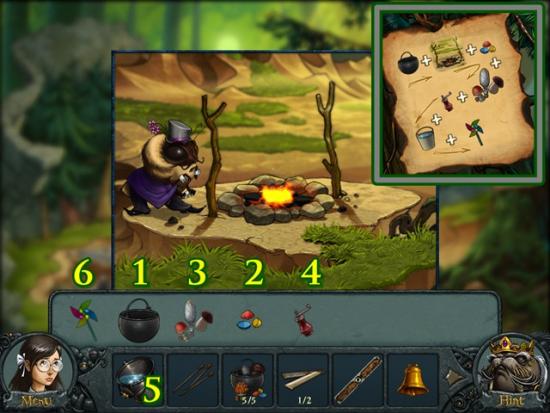
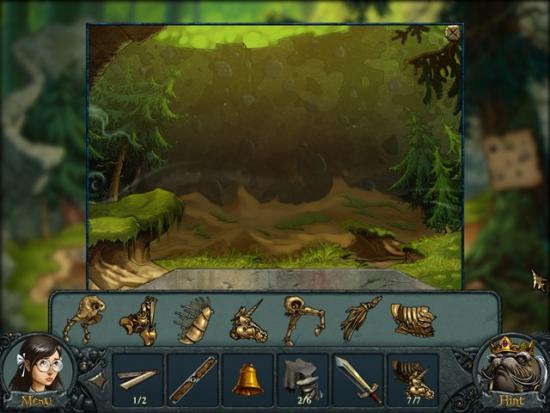
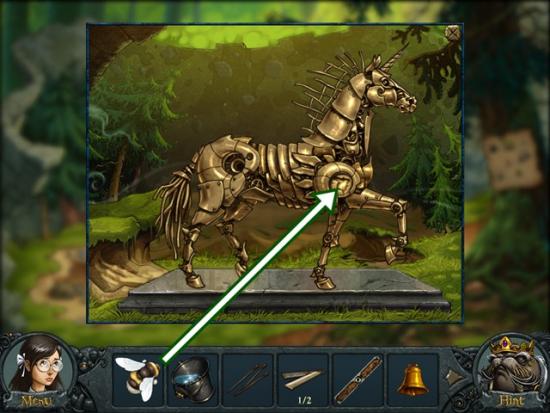
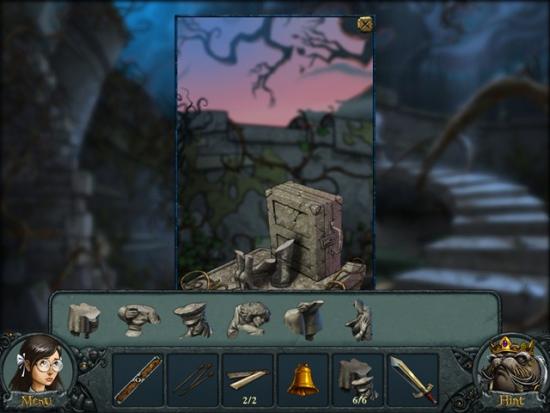
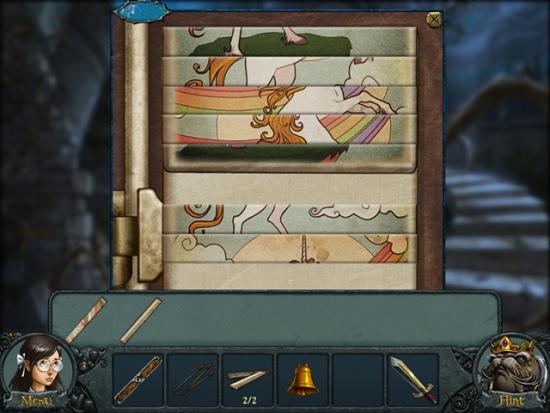
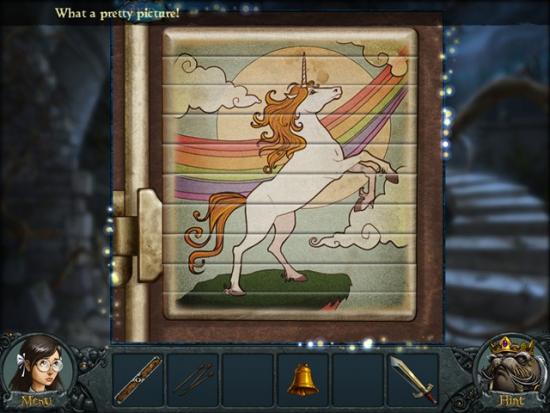
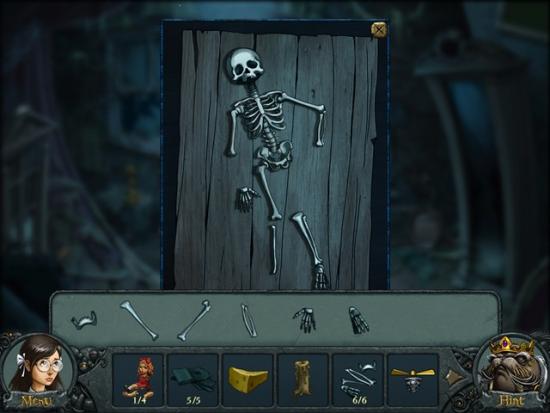
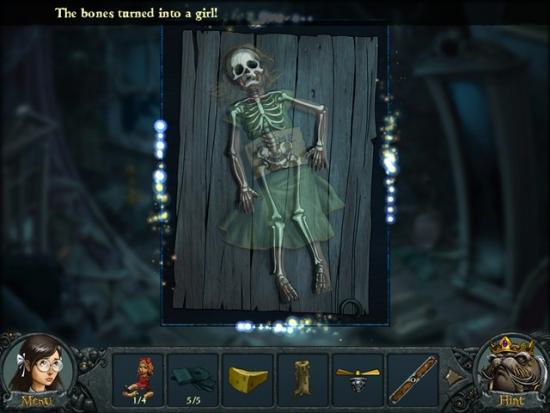
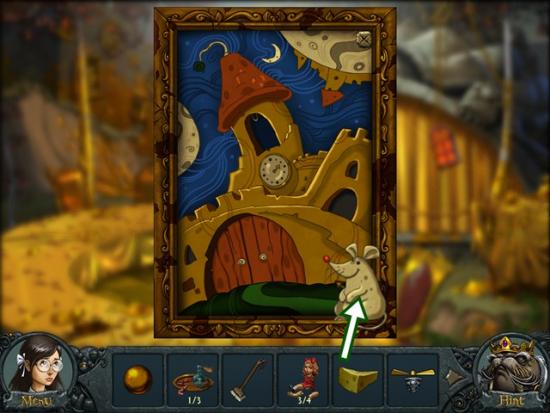
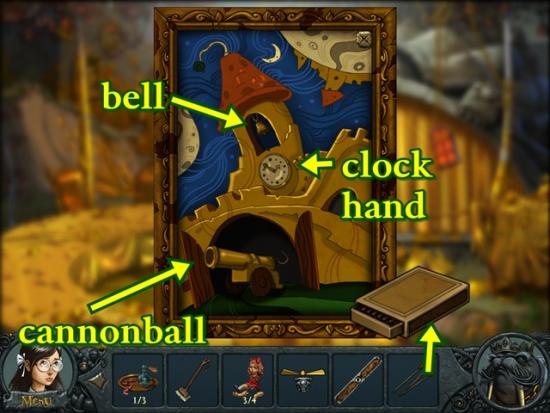
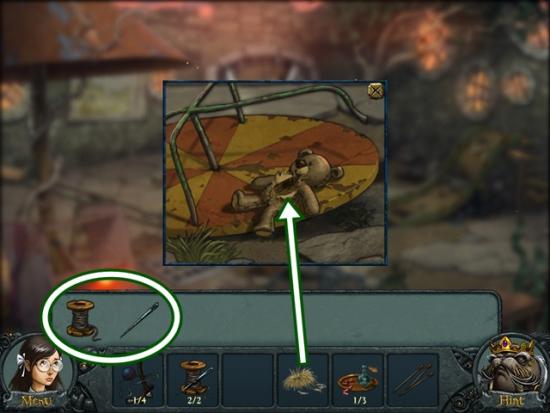
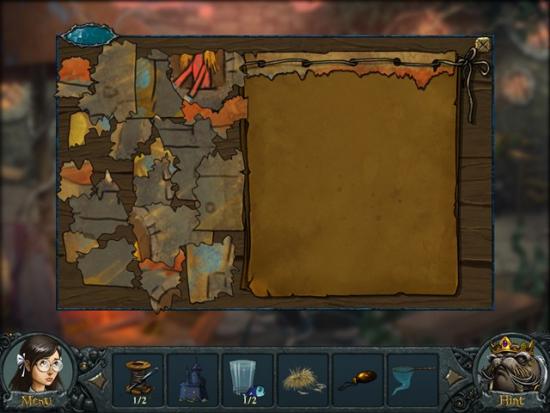
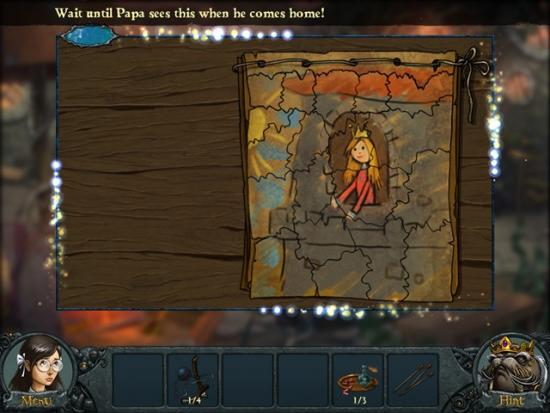
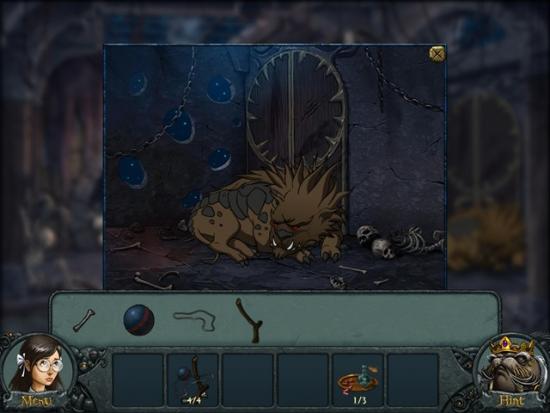
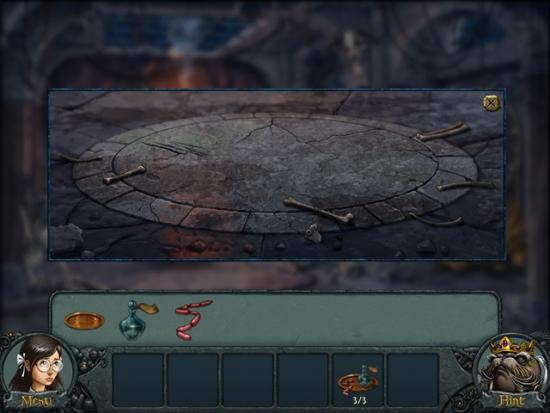
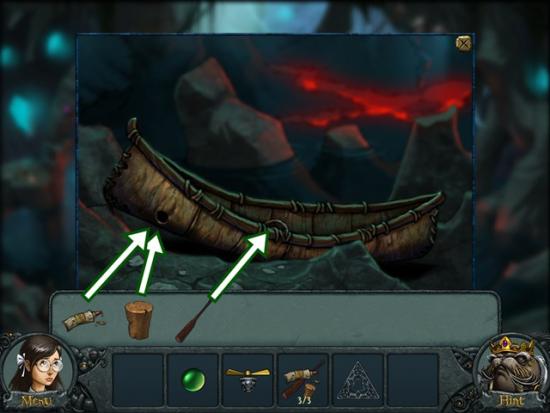
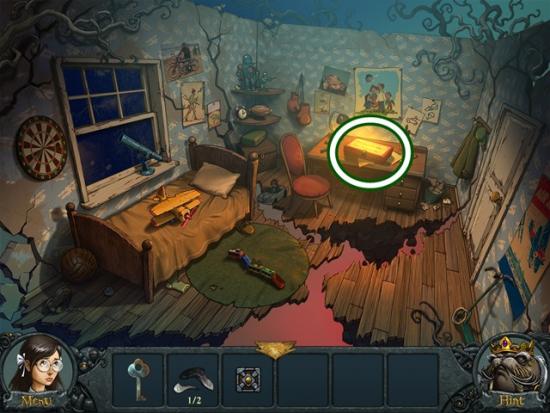
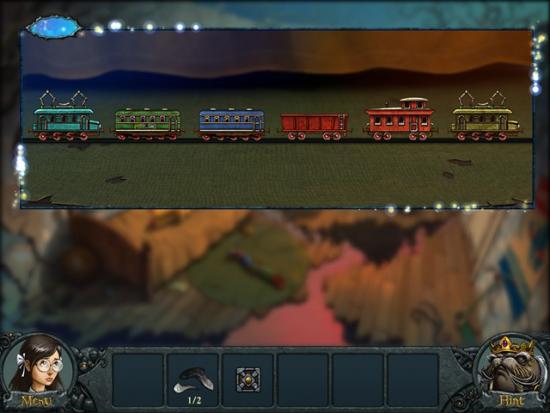
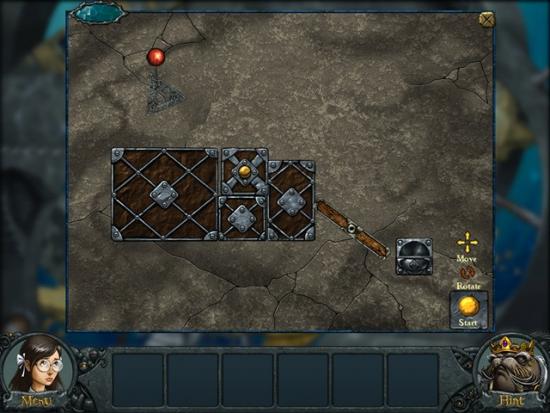
· You will sometimes have to assemble items you’ve collected. The pieces are numbered so you can often use that as a guide for what piece to place when.

· There is no timer or point system.

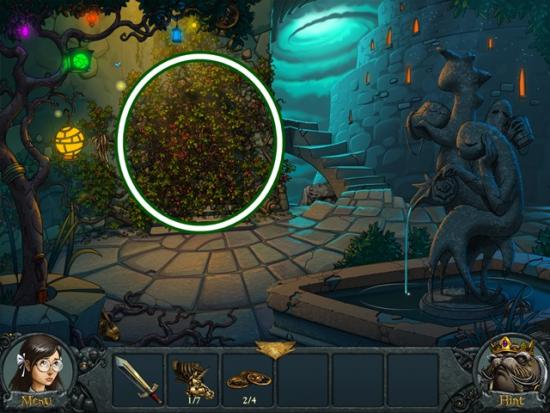
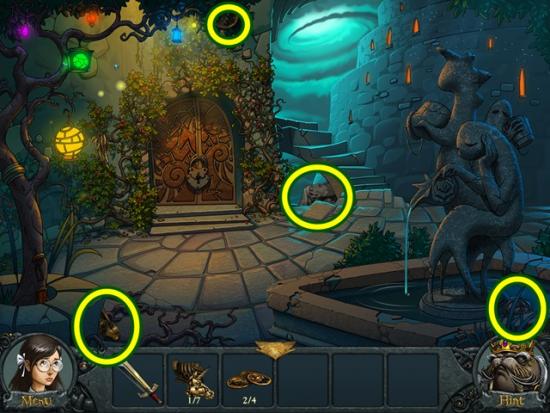
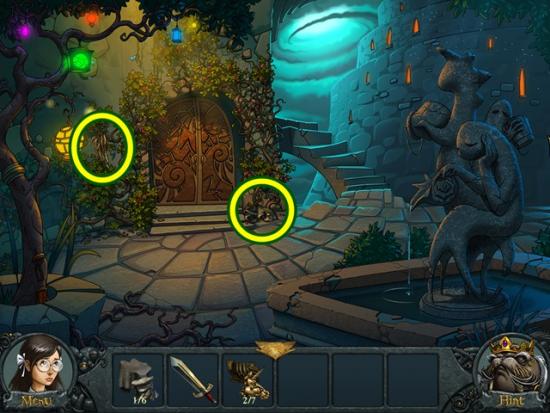
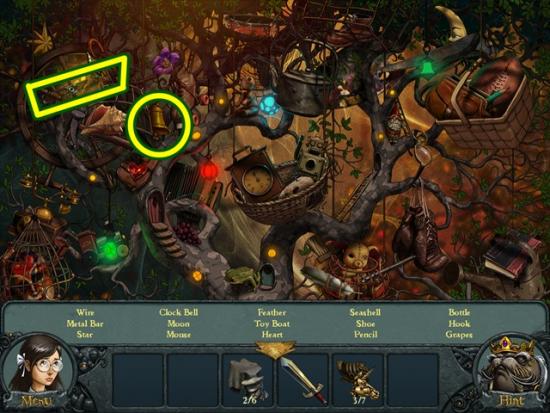
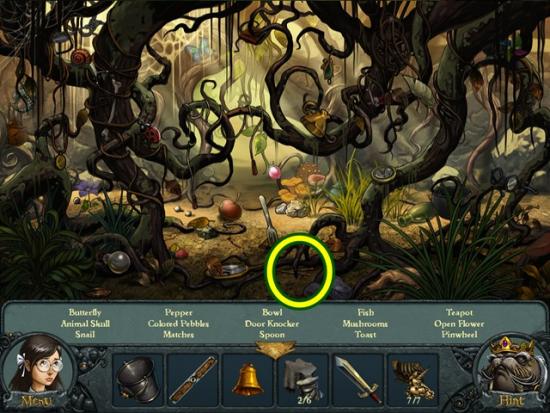
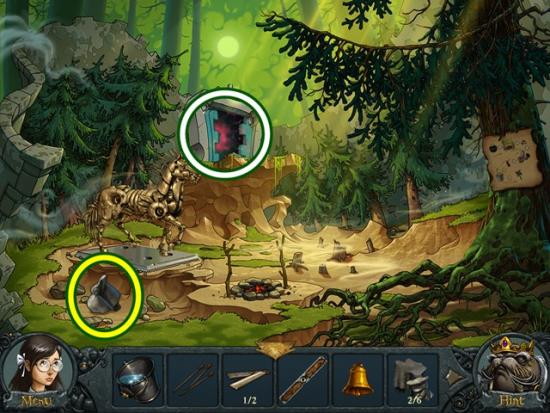
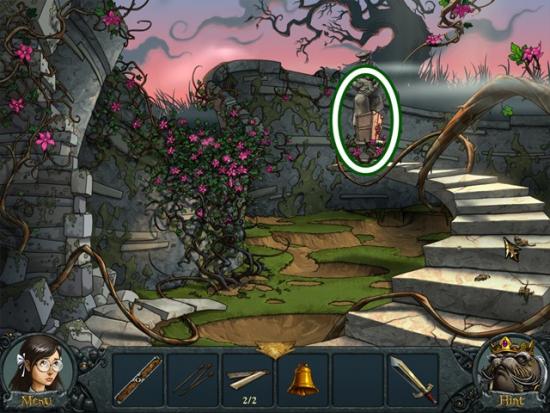
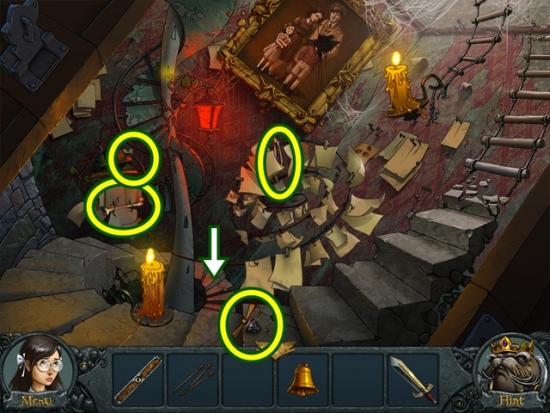
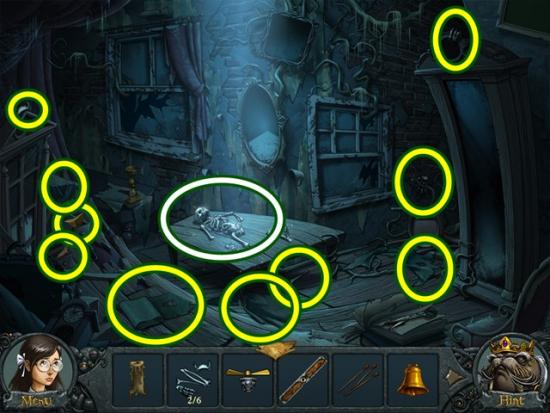
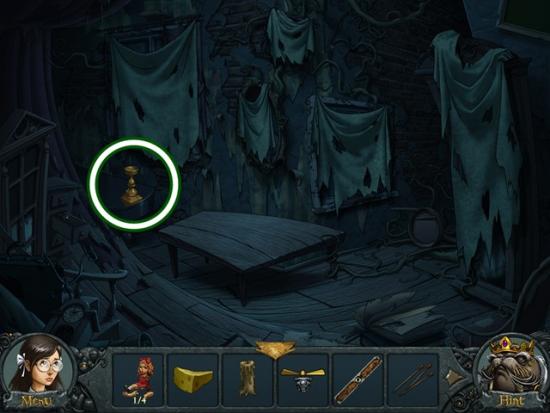
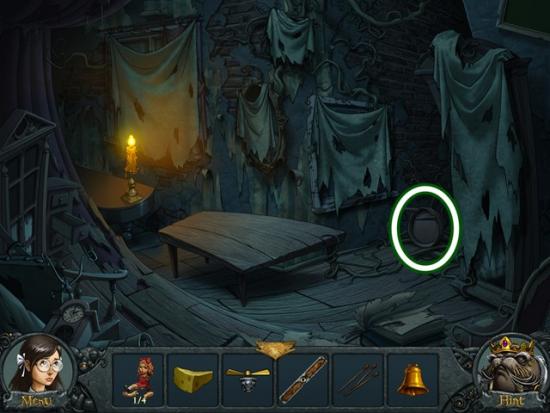
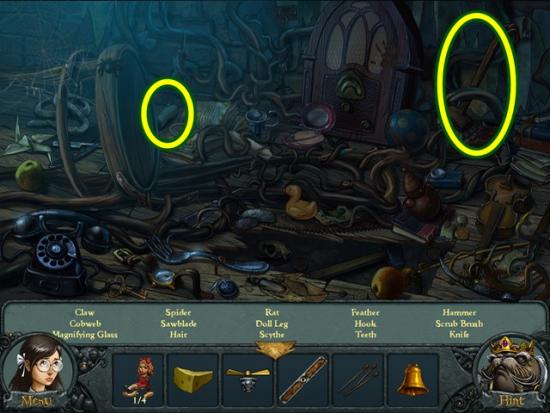
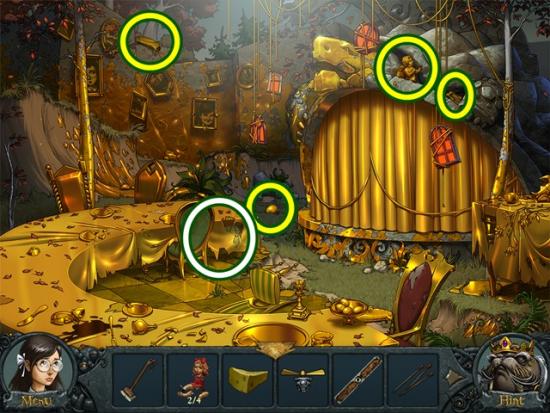
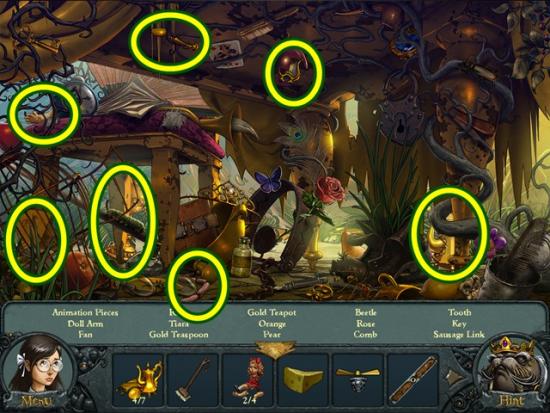
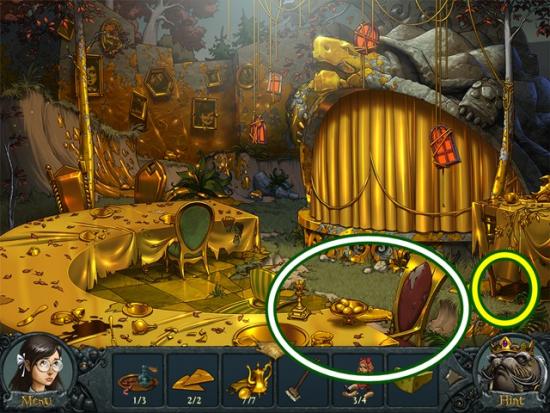
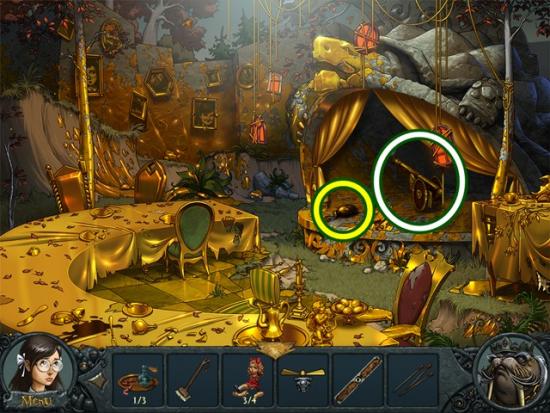
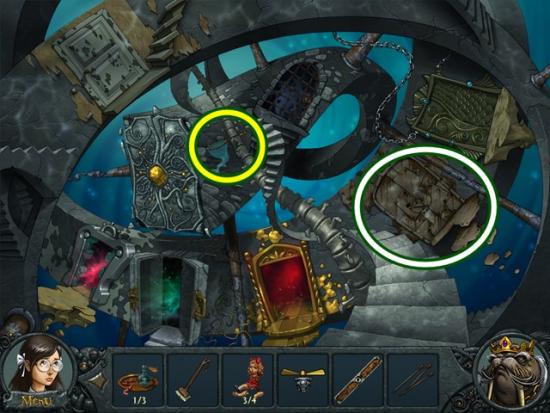
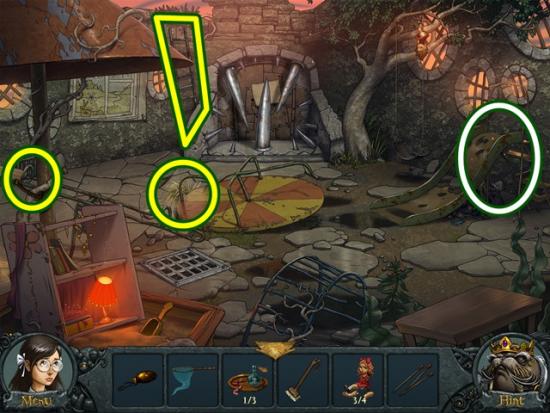
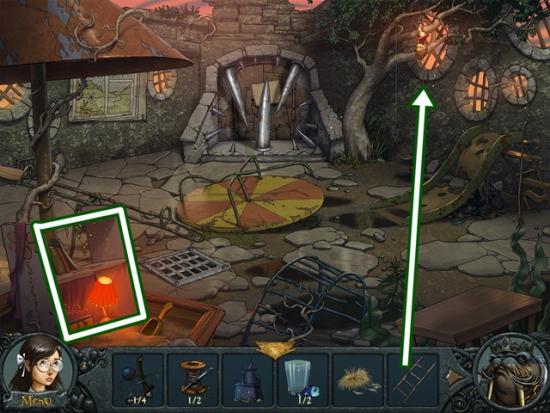
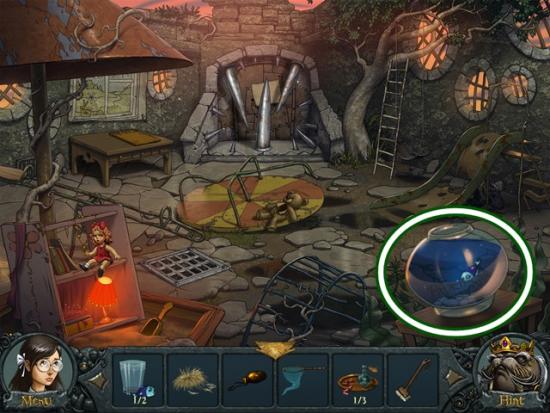
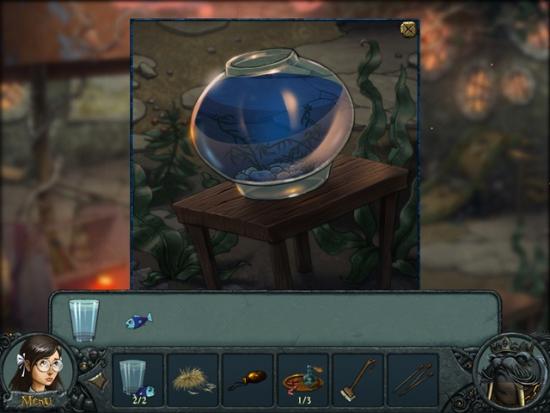
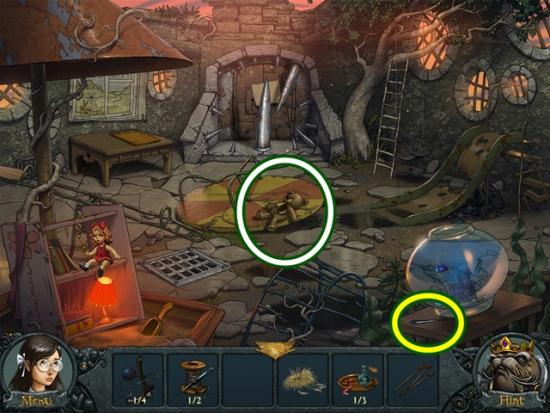
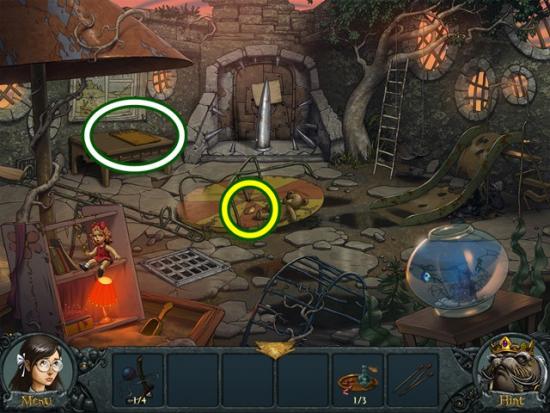
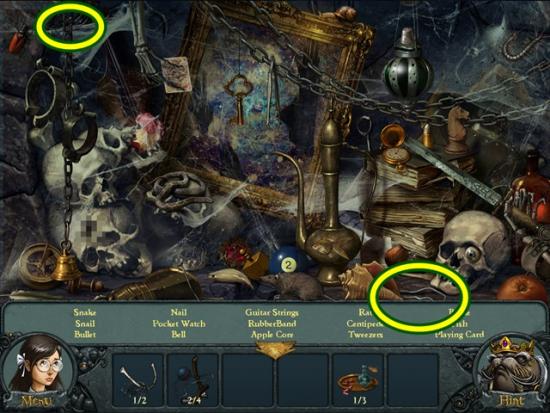
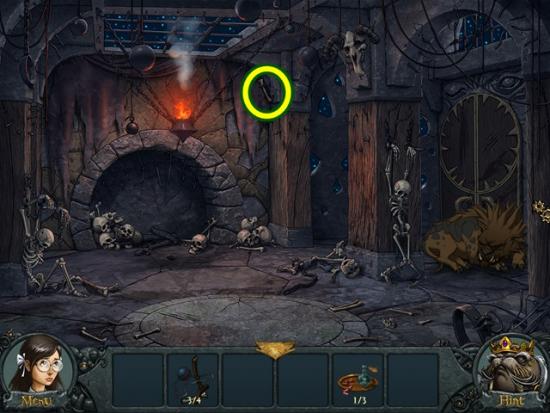
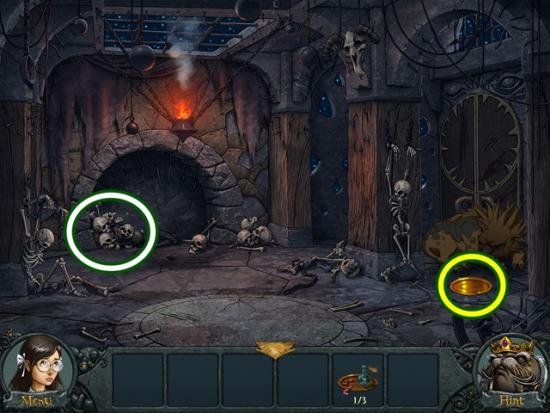
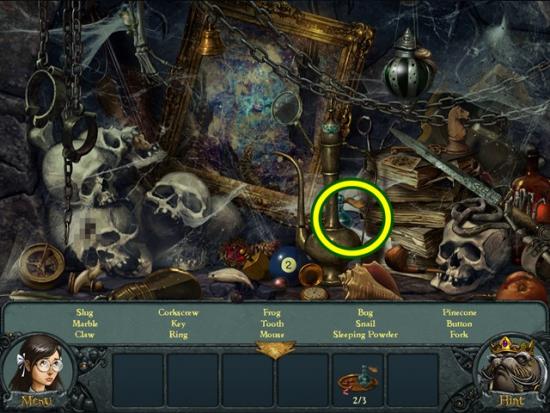
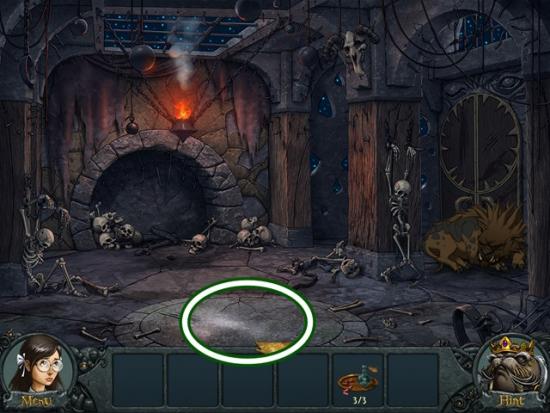
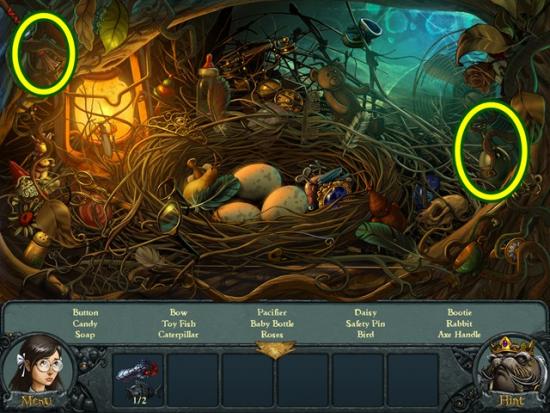
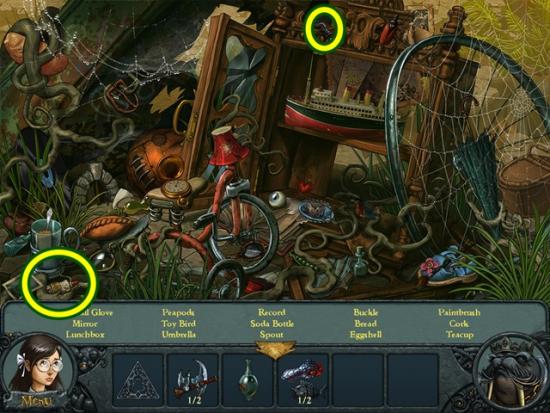
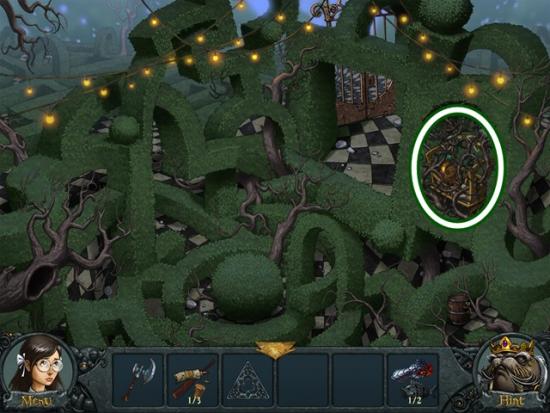
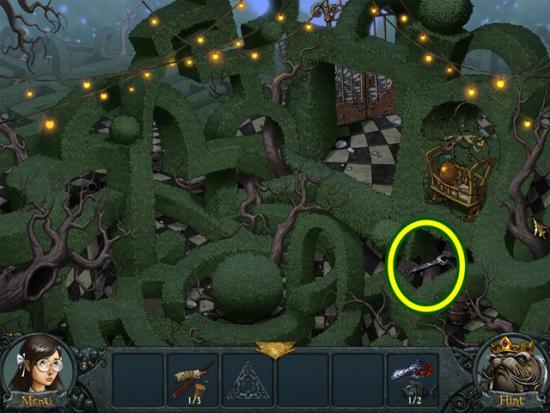
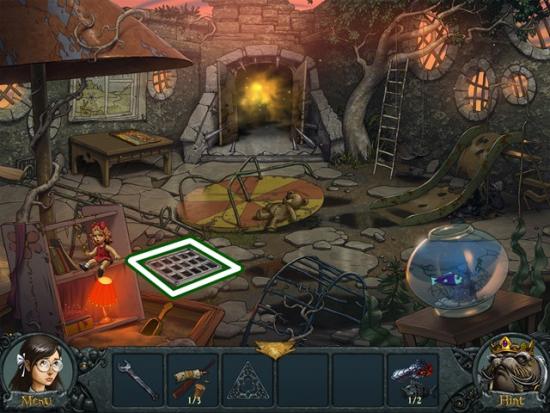
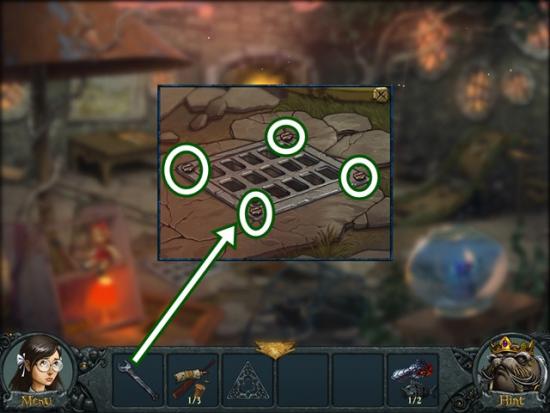
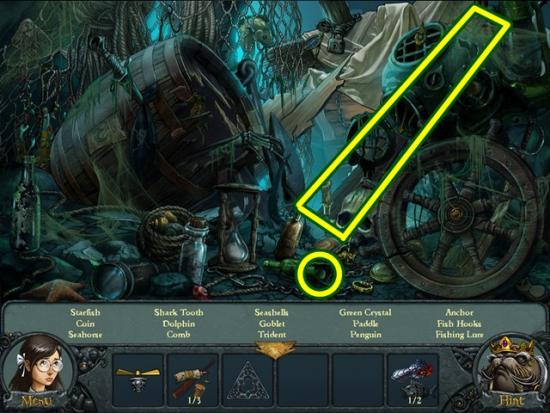
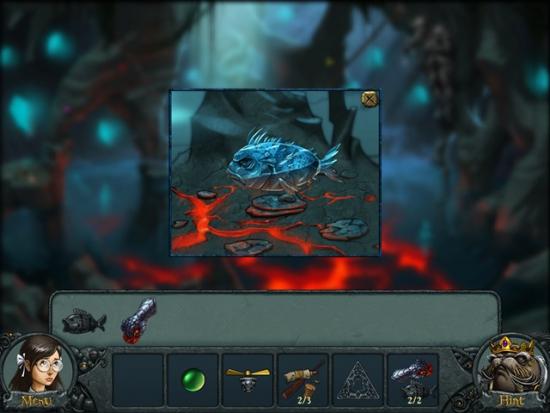
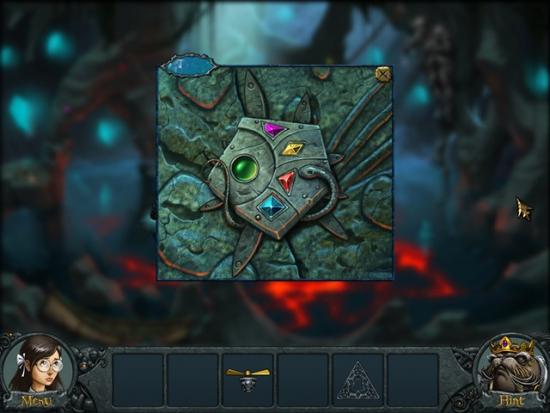
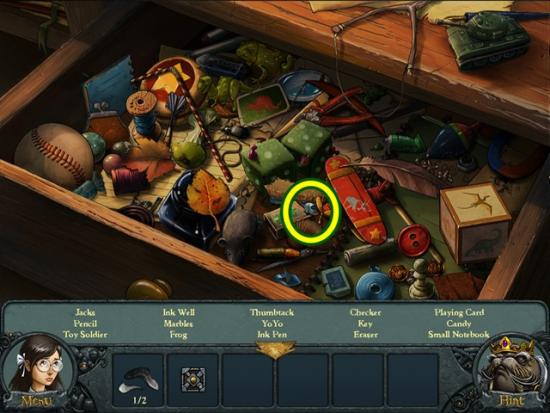
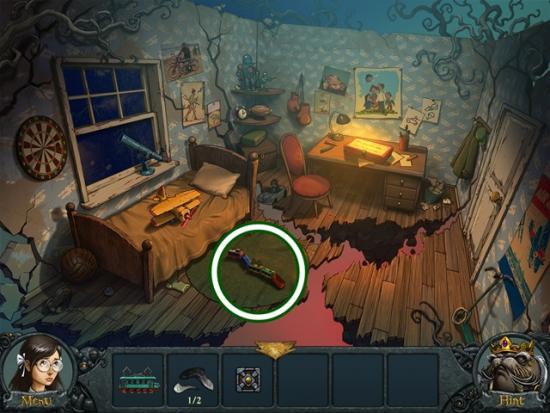
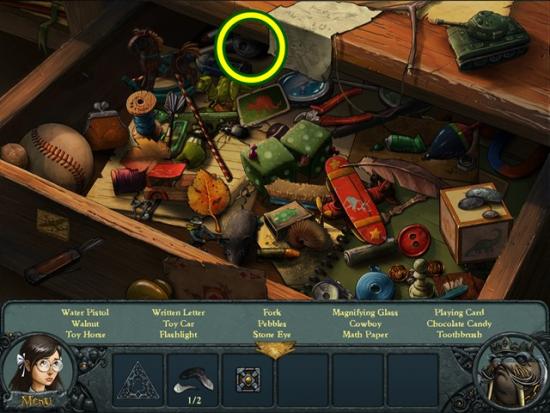
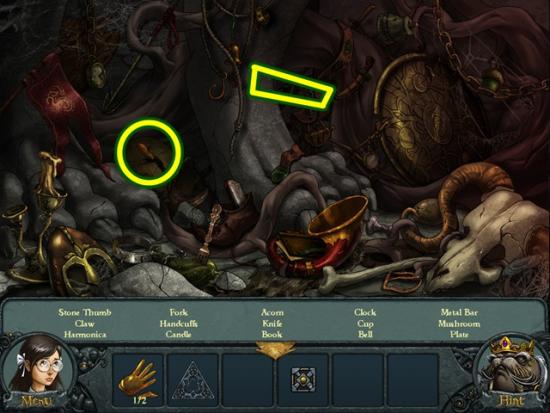
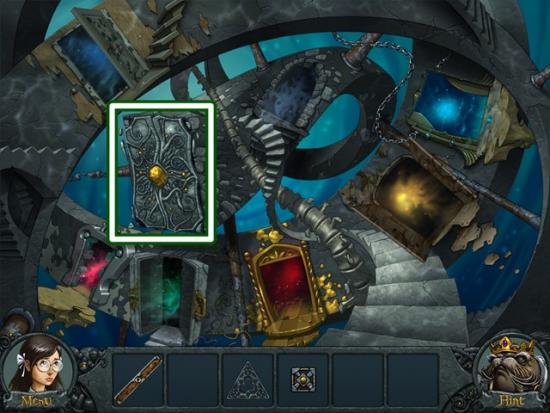
· Hidden object hunts provide a list of items to find. Click on items in the scene to cross them off the list. Once you have found all the hidden objects, an item is added to your inventory.

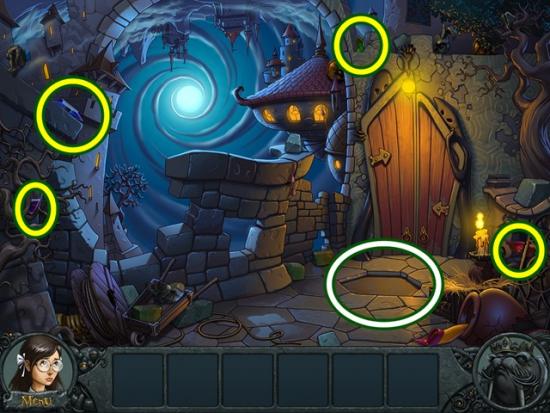
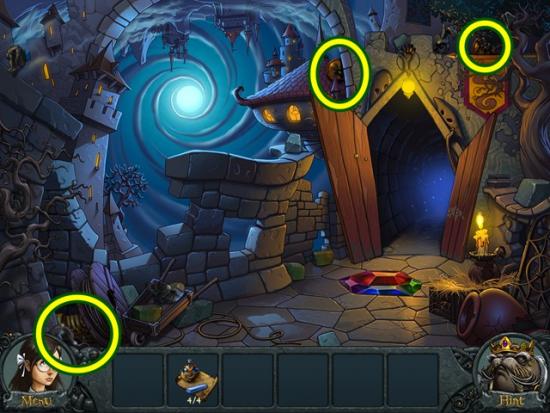
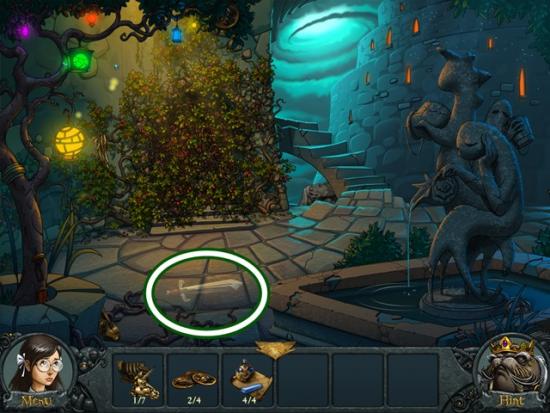
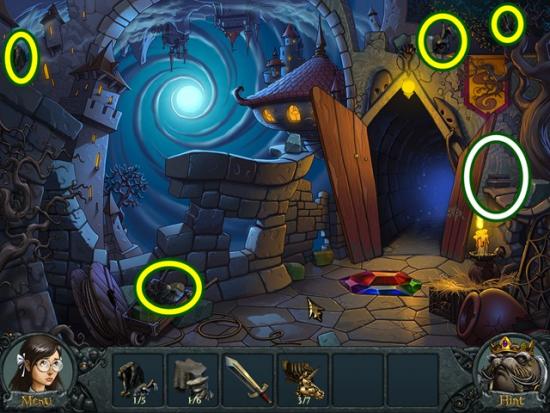
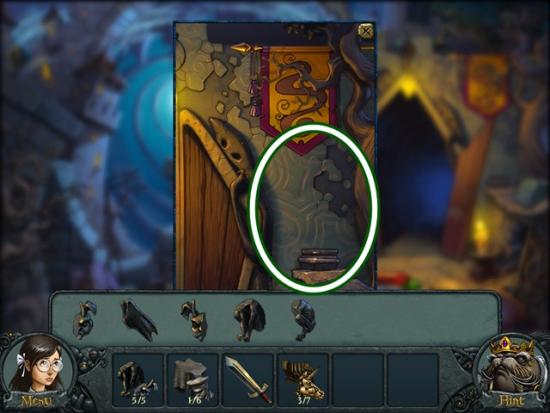
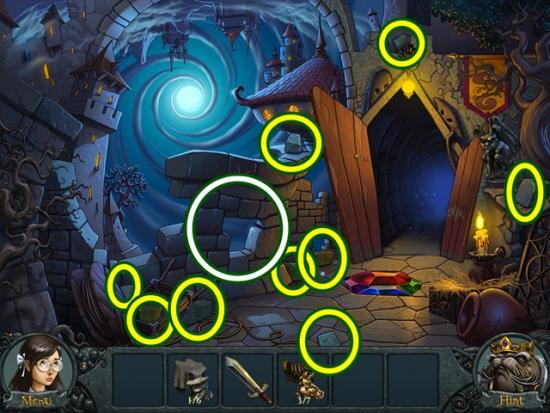
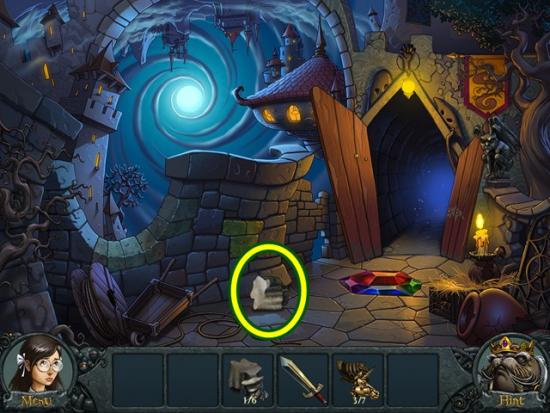
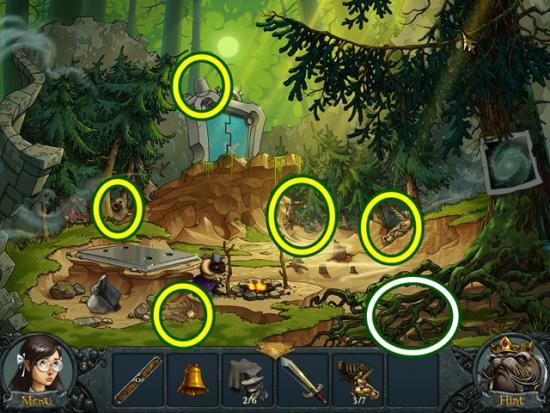
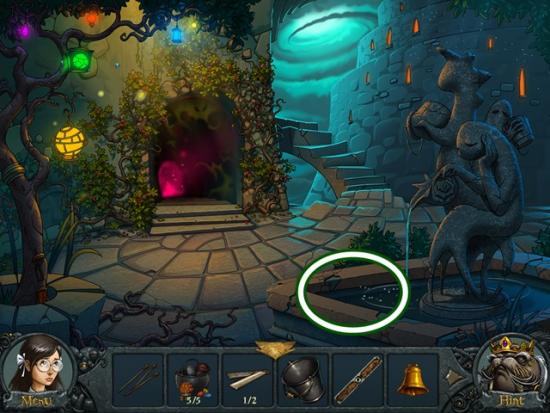
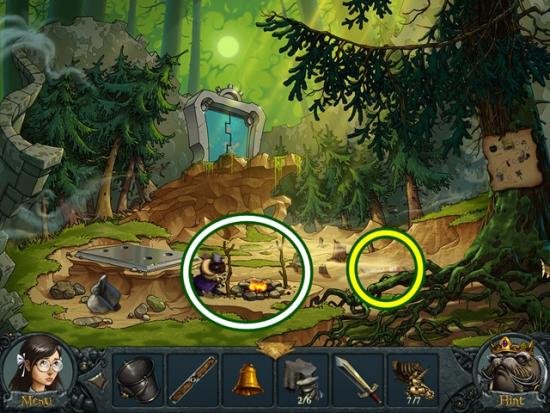
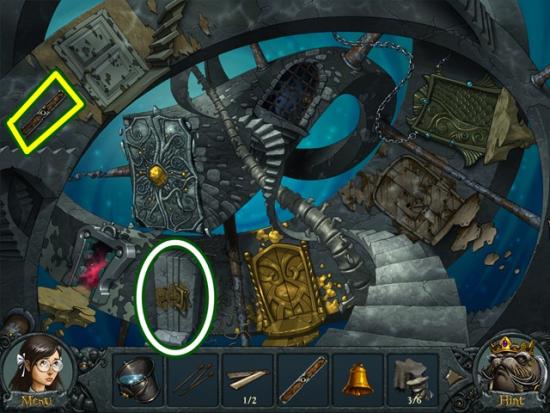
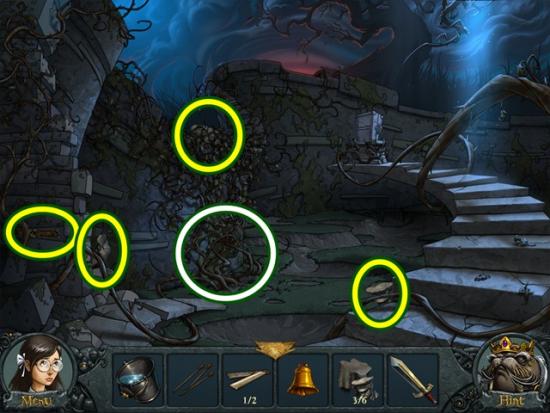
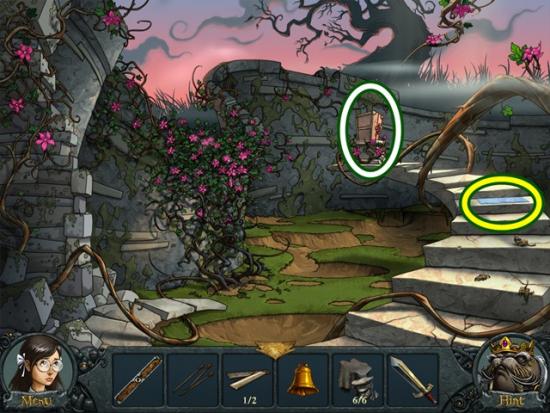
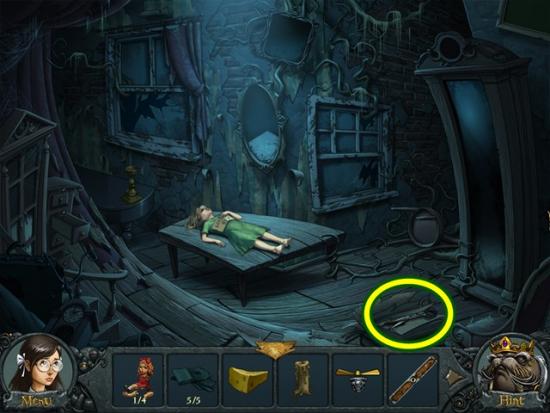
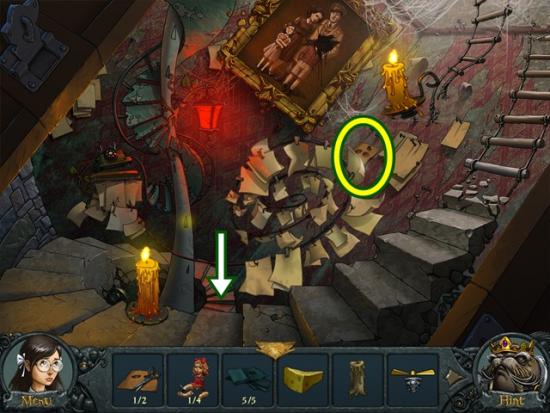
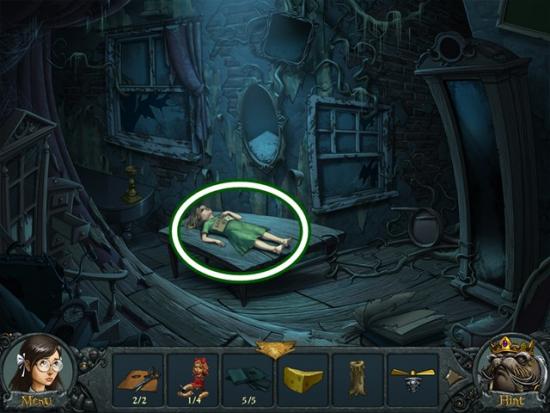
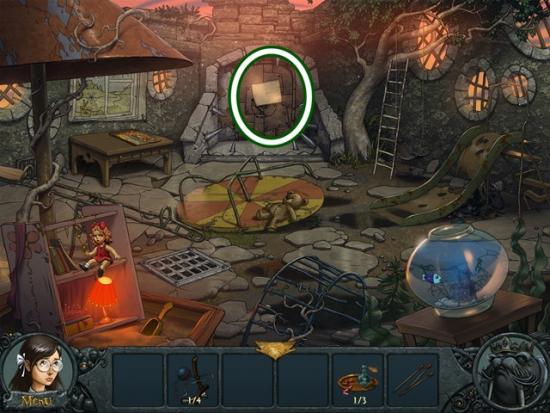
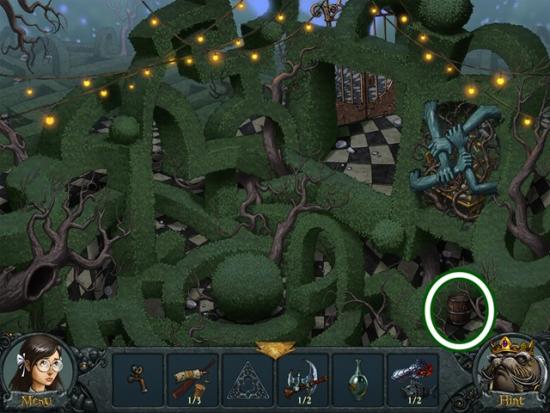
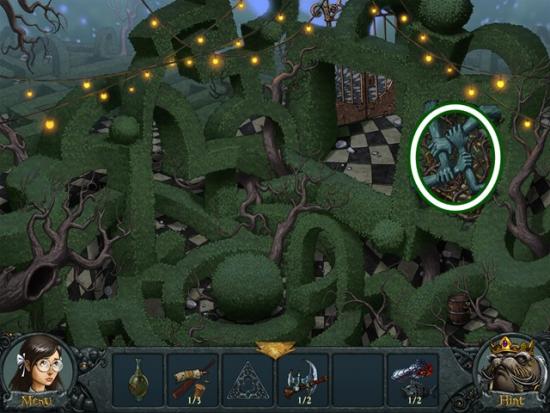
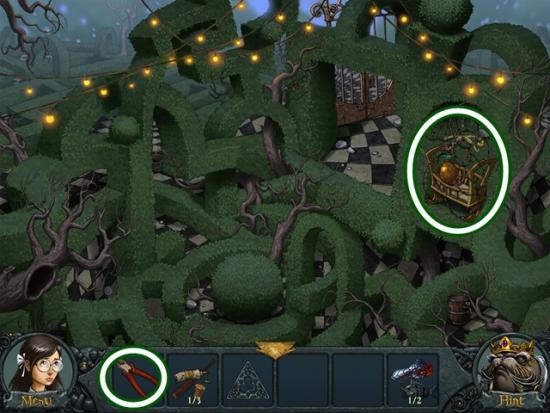
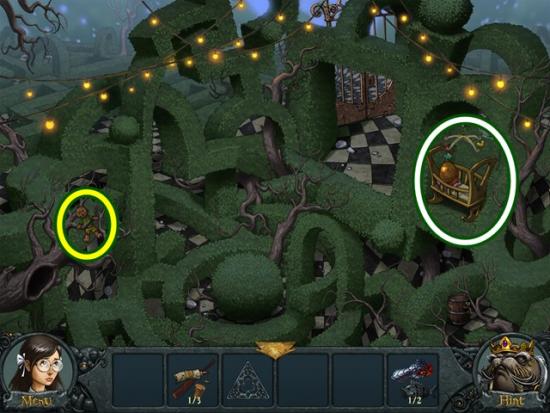
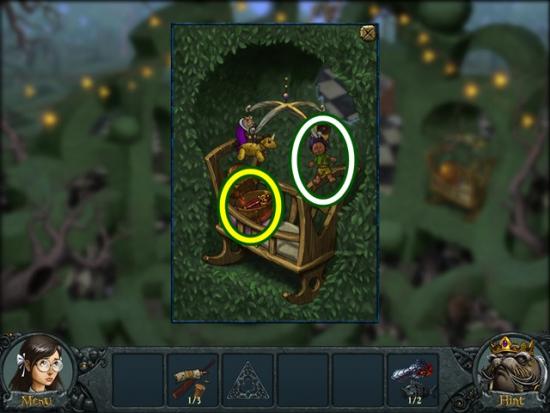
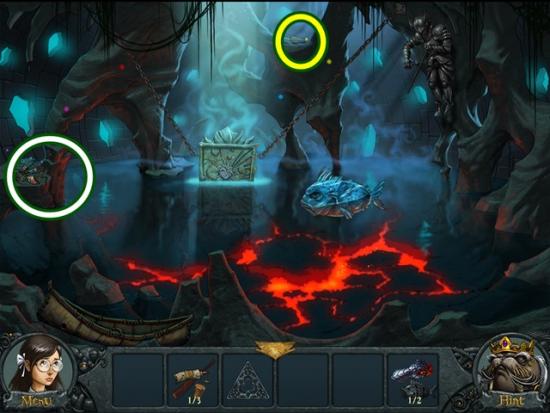
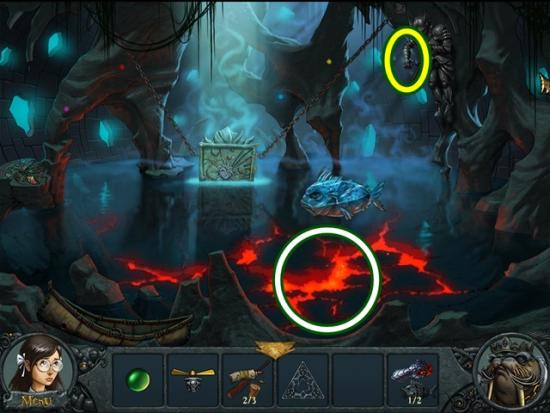
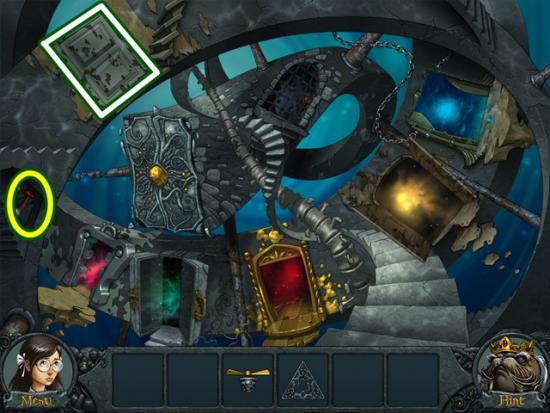
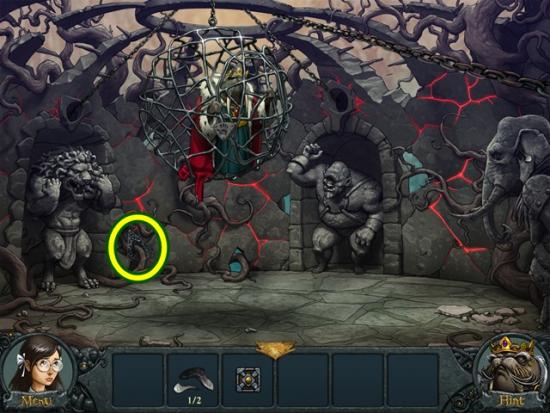
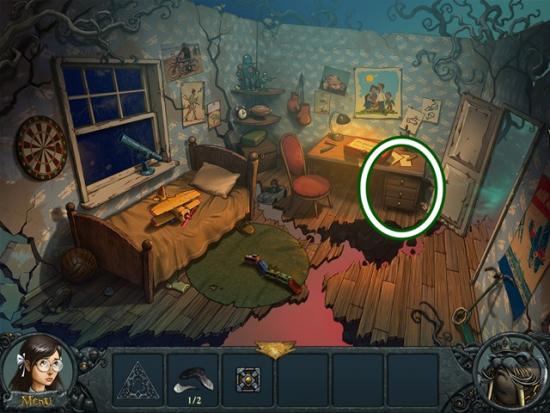
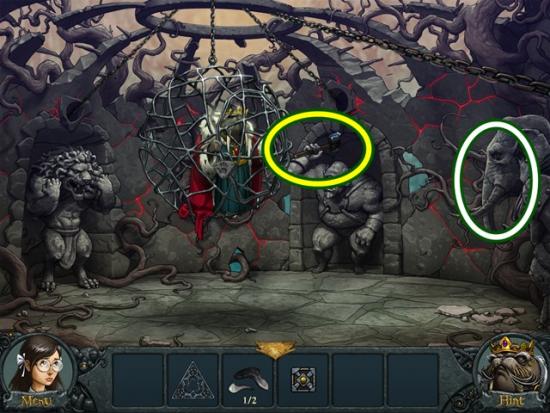
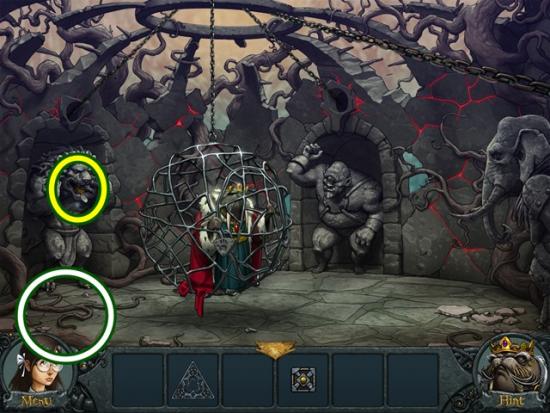
· Hidden objects screenshots will only highlight the items (yellow circles).

H2Navigation

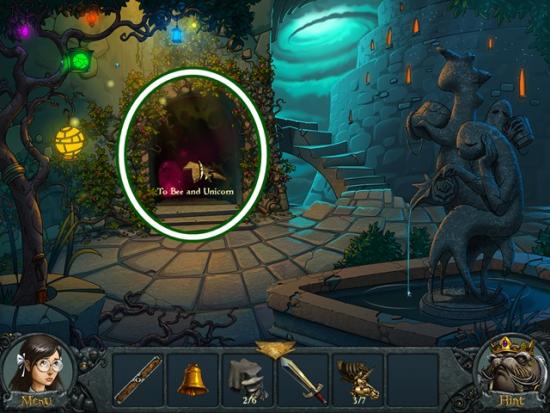
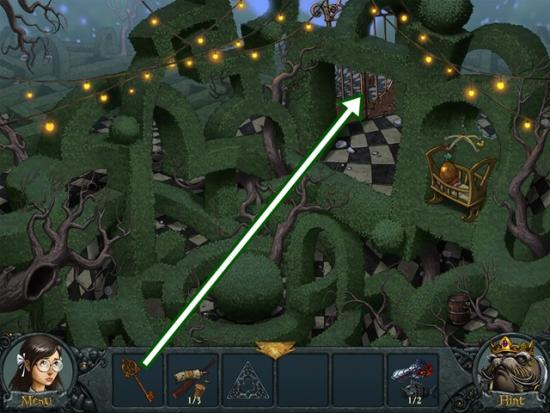
· There is no map in this game. The name of each room appears when you hover your cursor over the entryway to the next scene. This walkthrough will use that naming convention and will state, “return to the blah blah” and will not explain the route to take.

Walkthrough – Level 1

  • When you start to play the game, the tutorial will automatically begin. Even if you play a lot of these types of games, play the tutorial!!! If there is anything out of the ordinary in this game, it will be explained via the tutorial.
  • Note: If you play on Expert mode, the cursor does not change when hovering over areas of interest. The tutorial does not make the adjustment so is likely written for Casual mode.
 The Inner Journey
  • Take the four gems, then click on the indent on the ground. Place the four gems in the indent.
 The Inner Journey
  • Take the pieces of the flag. The tutorial then explains assembling items. Assemble the flag. When you are done, click on the area to the right of the door. Add the flag.
 The Inner Journey
  • Take the two coins and unicorn piece. Enter the courtyard.
 The Inner Journey
  • Click on the ground where you see the outline of a sword.
 The Inner Journey
  • Click on the sword items. First lay down the paper. Use the chalk to draw an outline of the sword. To draw, click and hold. You don’t have to be perfect, just for a continuous line. Once it’s done correctly, the chalk will disappear from your hand. Then use the honey to coat the chalk outline. Again, you don’t have to be perfect. Once the honey disappears from your hand, cover the sword with the glitter. Once you are done, take the sword.
 The Inner Journey
  • Click on the brambles (vine-covered door). Use the sword to remove the brambles. Click and the sword will remove an area, click on another area to remove the brambles there, and so on. This will take about six clicks. Once you are finished and the window closes, put your sword back in your inventory.
 The Inner Journey
  • Take the two coins, unicorn piece and statue piece. Click on the door.
 The Inner Journey
  • Use the coins to open the lock. In the following order, place the coins as: frog, fish, human, bee.
  • Watch the cutscene.
 The Inner Journey
  • Take the gargoyle piece and unicorn piece. Go south to the castle exterior.
 The Inner Journey
  • Take the five gargoyle pieces, then click on the post to the right of the door.
 The Inner Journey
  • Place the gargoyle pieces on the post. The pieces are numbered so place them in order from 1 to 5.
 The Inner Journey
  • Take all the archway pieces and the stones. Once you’ve taken all of them, click on the broken wall. Add the archway pieces to the broken archway (left) and the stones to the right side of the wall. Each piece fits in a specific area; keep trying until the piece is placed.
 The Inner Journey
  • Take the statue piece. Enter the courtyard.
 The Inner Journey
  • Click on the tree branches to start a hidden object hunt.
 The Inner Journey
  • Find all the objects. A metal bar and a bell are added to your inventory.
 The Inner Journey
  • Go through the door to the area to the bee and unicorn.
 The Inner Journey
  • Talk to the bee.
 The Inner Journey
  • Take the bucket and unicorn pieces. Click on the tree roots to start a hidden object hunt.
 The Inner Journey
  • Find all the objects. Soup ingredients and matches are added to your inventory.
 The Inner Journey
  • Click on the poster on the tree.
 The Inner Journey
  • Light the matches. To do so, click and drag the match over the lighting strip, then set the poster on fire to reveal the soup recipe.
 The Inner Journey
  • Close the window. Return to the courtyard.
 The Inner Journey
  • Click on the fountain. Use the bucket to gather water to get the bucket with water. Go through the door to the area to the bee and unicorn.
 The Inner Journey
  • Take the puzzle slat. Click on the bee.
 The Inner Journey
  • Click on the soup ingredients and follow the soup recipe. First add the pot, then the coloured pebbles, mushrooms, pepper, and bucket with water. Note the bar that appears below the window. Take the pinwheel and click and hold to fill the bar. Once you are done, the pinwheel disappears from your hand. Take the mushroom soup and give it to the bee. Watch the cutscene. Once it is done, the bee is added to your inventory.
 The Inner Journey
  • Click the statue base.
 The Inner Journey
  • Add the unicorn pieces to the base. To make it easier, add them in the order the pieces are numbered.
 The Inner Journey
  • Once the unicorn has been reassembled, add the bee.
 The Inner Journey
  • Take the statue piece. Go out the door to the hub.

Level 2

 The Inner Journey
  • Take the metal bar. Click on the bottom door, second from the left.
 The Inner Journey
  • Mini-puzzle: To open the door, the ball must go in the slot. Place the metal bars on the board to guide the ball to the slot. To move them, click the move button and click and drag the bar. To rotate a bar’s position, click the rotate button, then click on an end of the bar and click and rotate. Click start to start the puzzle. The ball will drop and gravity will pull the ball downwards. Position the bars so the ball will roll and bounce down into the slot.
  • One possible solution:
 The Inner Journey
  • Enter the door to father.
 The Inner Journey
  • Take the statue pieces and metal bar. Click on the vines.
 The Inner Journey
  • Water the vines with the bucket of water. The window will close. Click again on the vines.
 The Inner Journey
  • A mini-puzzle starts. Place each butterfly on its matching flower. Catch a butterfly by clicking on it, then release it by clicking on its matching flower (i.e., light blue butterfly goes on light blue flower, orange butterfly goes on orange flower, etc.). Place all the butterflies.
  • Solution:
 The Inner Journey
  • Take the puzzle slat. Click on the statue base.
 The Inner Journey
  • Add the statue pieces to the base. To make it easier, add them in the order the pieces are numbered.
  • Solution:
 The Inner Journey
 The Inner Journey
  • Click on the statue.
 The Inner Journey
  • Add the puzzle slats. A mini-puzzle starts. Rearrange the slats to complete the image. Click on two slats to swap their positions.
  • Solution:
 The Inner Journey
  • Go through the base to the stairway.
 The Inner Journey
  • Take the propeller, candle and two bones. Go down the stairs to the likho.
 The Inner Journey
  • Take the black cloth pieces, doll parts, cheese and bones. Click the skeleton on the table.
 The Inner Journey
  • Add the bones to the skeleton. The pieces are not numbered however you can only place a bone in its correct position. For example, there’s one piece that looks like a hand or foot. You cannot place it as a hand but you can as a foot therefore that is its correct position.
  • Solution:
 The Inner Journey
 The Inner Journey
  • Take the eyes and scissors. Return to the stairway.
 The Inner Journey
  • Take the eyes and scissors. Return to the likho.
 The Inner Journey
  • Click on the doll on the table.
 The Inner Journey
  • Click on the eyes and scissors. Use the scissors on the eyes to get the cut eyes. Place the cut eyes on the doll. Watch the cutscene.
 The Inner Journey
  • Click on the black cloth in your inventory. Click on each mirror and window in your inventory and add a piece of black cloth. If a cloth piece does not fit, right-click to deselect and select another piece. Continue until the piece stays in place.
 The Inner Journey
  • Click on the candlestick. Put the candle in the candlestick and use the matches to light it. Click and drag the match along the light strip to light the match. Watch the cutscene.
 The Inner Journey
  • A mini-puzzle starts. The sword is automatically placed in your hand. Use it to fight the woman. She will disappear and reappear. When you see her, use the sword on her. Do this five times.
  • Once you’ve hit her five times, watch the cutscene.
 The Inner Journey
  • Click on the overturned stool to start a hidden object hunt.
 The Inner Journey
  • Find all the objects. A scrub brush and a doll part are added to your inventory.
 The Inner Journey
  • Take the stairs to the gold room.
  • Watch the cutscene.
 The Inner Journey
  • Take the golden items. Click on the chair to start a hidden object hunt.
 The Inner Journey
  • Find all the objects. Gold items, animation pieces, food items and a doll part are added to your inventory.
 The Inner Journey
  • Take the cannonball (under the right table). Click on the end of the long, u-shaped table.
 The Inner Journey
  • Set the table with the gold items. Combine the harp with the cherub before placing it.
 The Inner Journey
  • Click on the newly opened stage.
 The Inner Journey
  • Add the animation pieces. A mini-puzzle starts. Rearrange the pieces so when you press Play, the horse will run.
  • The trick to this puzzle is to recreate the symbol in the middle. Once you’re finished, click the Start button. If you’ve successfully arranged the pieces, the horse will run. If not, keep rearranging the pieces.
  • Solution:
 The Inner Journey
 The Inner Journey
  • Click the painting on the stage.
 The Inner Journey
  • Give the cheese to the mouse.
 The Inner Journey
  • Take the clock hand. Add the clock hand to the clock and put the bell on the hook. When the door opens, add the cannonball to the cannon. Light a match and ignite the cannon.
 The Inner Journey
  • Take the bottle of water. Click on the cannon.
  • Put the cannonball in the cannon and light a match. After the cannon fires, go through the doorway to the hub.
 The Inner Journey
  • Take the small fishnet. Click on the door beside the stairs.

Level 3

  • A mini-puzzle starts. To get the ball into the slot, you must use the propeller and the metal rod. Use the start button to reset the puzzle, if necessary.
  • Solution:
 The Inner Journey
  • Enter the playground.
 The Inner Journey
  • Take the straw, toy pieces and ladder. Click on the slide to start a hidden object hunt.
  • Find all the objects. A toy castle, needle and thread and fish and glass are added to your inventory.
 The Inner Journey
  • Click on the doll hanging from the tree. Place the ladder against the tree and take the doll piece. Click on the shelf with the lamp.
  • Click on the doll pieces. Reassemble the doll. Add the reassembled doll to the shelf.
 The Inner Journey
  • Click on the fishbowl.
 The Inner Journey
  • Scoop out the fish with the small fishnet. Click on the fish and glass pieces. Combine them to add the fish in glass to your inventory. Clean the fishbowl with the scrub brush. Add the toy castle. Fill the empty bowl with the bottle of water. Add the fish in glass.
 The Inner Journey
  • Take the needle. Click on the teddy bear.
 The Inner Journey
  • Put the straw inside the teddy bear, then click on the needle and thread and combine them. Use the needle and thread to sew up the teddy bear.
 The Inner Journey
  • Take the piece of art. Click on the table.
 The Inner Journey
  • Reassemble the pieces. Once a piece is in its correct position, it is locked and cannot be moved. Start with the edges and work inwards. Once you have only one piece left, add the piece of art.
  • Solution:
 The Inner Journey
 The Inner Journey
  • Click on the door. Light a match and set the note on fire. Go through the door to Leucrotta.
 The Inner Journey
  • Take the toy piece and harp piece. Click on the pile of skulls to start a hidden object hunt.
 The Inner Journey
  • Find all the objects. A toy piece and harp piece are added to your inventory.
 The Inner Journey
  • Click on the sleeping beast.
 The Inner Journey
  • Click on the harp pieces. Assemble it. Use the assembled harp on the beast.
 The Inner Journey
  • Take the toy piece. Click on the sleeping beast again.
 The Inner Journey
  • Click on the toy pieces. Assemble the slingshot (put the bone on the handle, the elastic/rubber band on the handle, then add the ball). Use it on the sleeping beast.
 The Inner Journey
  • Take the plate (make food). Click on the pile of skulls to start a hidden object hunt.
 The Inner Journey
  • Find all the objects. A fork (make food) is added to your inventory.
 The Inner Journey
  • Click on the ground.
 The Inner Journey
  • Click on the make food items. Add the plate, then the sausage links then the sleeping potion. Take the food plate. Click on the sleeping beast.
 The Inner Journey
  • Give it the food plate. When it falls asleep and moves from the door, go through it to the crib.
 The Inner Journey
  • Take the triangle and lava and toy fish pieces. Click on circular bush to start a hidden object hunt.
 The Inner Journey
  • Find all the objects. A dull axe and handle piece and an empty jar are added to your inventory. Return to the playground.
 The Inner Journey
  • Click on the slide to start a hidden object hunt.
 The Inner Journey
  • Find all the objects. A spout and boat repair kit piece are added to your inventory. Return to the crib.
 The Inner Journey
  • Click on the barrel.
 The Inner Journey
  • Add the spout to the barrel. Fill the empty jar to get a jar with olive oil. Put the jar directly on the spout. If you can’t get it to fill, keep clicking (with the empty jar in your hand) on the barrel until it fills.
 The Inner Journey
  • Click on the clasped hands.
 The Inner Journey
  • Pour the jar with olive oil on the clasped hands. Take the dull axe and handle piece. Return to Leucrotta.
 The Inner Journey
  • Click on the sleeping beast.
 The Inner Journey
  • Click on the dull axe and handle piece. Assemble the dull axe. Sharpen the dull axe on the beast’s teeth to get the sharp axe. Return to the crib.
 The Inner Journey
  • Click on the brambles blocking the crib.
 The Inner Journey
  • Use the sharp axe to cut away the brambles.
 The Inner Journey
  • Take the wrench. Return to the playground.
 The Inner Journey
  • Click on the sewer grate.
 The Inner Journey
  • Remove the four bolts with the wrench. Take the wire cutters. Return to the crib.
 The Inner Journey
  • Click on the wires blocking the crib. Cut the wire with the wire cutters.
 The Inner Journey
  • Take the small boy. Click on the crib.
 The Inner Journey
  • Add the small boy to the mobile. Take the key from the egg.
 The Inner Journey
  • Click on the gate. Unlock it with the key. Go through the gate to the water.
 The Inner Journey
  • Take the propeller. Click on the ledge at the left to start a hidden object hunt.
 The Inner Journey
  • Find all the objects. A green gem and boat repair piece are added to your inventory.
 The Inner Journey
  • Take the gauntlet. Click on the lava.
 The Inner Journey
  • Use the gauntlet to take the lava and toy fish piece.
 The Inner Journey
  • Click on the fish.
 The Inner Journey
  • Click on the lava and toy fish pieces. Assemble the toy fish with lava. Give the toy fish with lava to the fish.
 The Inner Journey
  • Take the cork (boat repair piece). Click on the boat.
 The Inner Journey
  • Click on the boat repair pieces. Put the cork in the hole and seal it with glue, then add the paddle.
 The Inner Journey
  • Click on the large lock.
 The Inner Journey
  • Add the green gem. A mini-puzzle starts. You have to press the coloured gems in a specific order. This is solved by trial and error. Also note you can click a gem more than once. To begin, click each gem until one lights up. This is your starting point. Click on another gem. If the first gem goes dark, you must start again. Click the first gem so it lights up and click another gem. When the second gem stays lit up, this is the second gem. Continue in this fashion until the lock opens.
  • Go through the door to the hub.

Level 4

 The Inner Journey
  • Take the plane propeller. Click on the door at the top left.
  • Use the triangle and the propeller to get the ball in the slot. Don’t forget to rotate the propeller and triangle. Use the start button to reset the puzzle.
  • Solution:
 The Inner Journey
  • Go through the door to the brother.
 The Inner Journey
  • Watch the cutscene. Take the heavy block and tongue pieces from under the pillow. Position your cursor carefully to get them as it’s very close to the airplane active area.
  • Click on the toy airplane. Add the plane propeller. Click on the desk drawers to start a hidden object hunt.
 The Inner Journey
  • Find all the objects. A key is added to your inventory.
 The Inner Journey
  • Click on the box on the desk.
 The Inner Journey
  • Open the box with the key and take the engine. Take note of the pattern on the box. Close the window.
 The Inner Journey
  • Click on the train on the floor.
  • Add the engine. Arrange the train cars in the same order as seen on the box on the desk. Click two cars to swap their position.
  • Solution:
 The Inner Journey
 The Inner Journey
  • Take the lens. Click on the telescope.
 The Inner Journey
  • Add the lens to the end of the telescope. If you are having a hard time adding the lens, just keep clicking on the end of telescope (with the lens in your hand) until it takes.
  • Look out the telescope.
  • A mini-puzzle starts. Use the arrows to move the view around so you can find the brightest star (the sun).
 The Inner Journey
  • The view will look like this (screenshot above). Take the sun.
 The Inner Journey
  • Click on the drawing on the wall.
 The Inner Journey
  • Add the sun. Go through the open door to the nightmare.
 The Inner Journey
  • Watch the cutscene. Take the triangle. Go back to the brother’s room.
 The Inner Journey
  • Click on the desk drawers to start a hidden object hunt.
 The Inner Journey
  • Find all the objects. A stone eye is added to your inventory. Go back to the nightmare.
 The Inner Journey
  • Click on the stone ogre.
 The Inner Journey
  • Put the stone eye in the missing slot.
 The Inner Journey
  • Take the hammer. Click on the stone elephant.
 The Inner Journey
  • Use the hammer to chop off the elephant’s ear adding the second tongue piece to your inventory.
 The Inner Journey
  • Click on the stone lion.
 The Inner Journey
  • Click on the tongue pieces. Assemble the pieces to create the stone tongue. Put the stone tongue in the lion’s mouth.
 The Inner Journey
  • Take the hand piece from the lion’s mouth. Click on the roots at the lion’s feet to start a hidden object hunt.
 The Inner Journey
  • Find all the objects. A stone thumb and a metal bar are added to your inventory.
 The Inner Journey
  • Click on the padlock.
 The Inner Journey
  • Click on the hand pieces. Assemble them to form a stone hand. Put the stone hand in the padlock.
 The Inner Journey
  • Click on the panel that lowered. A mini-puzzle starts. The goal is to have all the buttons lit up. Click a button to light up the buttons surrounding it. When you click another button, it will light up all the buttons surrounding it that are off and it will turn off all its surrounding buttons that are lit.
 The Inner Journey
  • The screenshot above shows what happens if you click the circled button.
 The Inner Journey
  • Looking at the screenshot above and assuming the buttons are numbered in that fashion, to solve the puzzle, press numbers: 12, 9, 1, 4, 6, 7.
  • Watch the cutscene then go through the portal to the hub.

Level 5

 The Inner Journey
  • Click on the large, central door.
  • A mini-puzzle starts. Use the metal bar, heavy block and triangle to get the ball in the slot.
  • Solution:
 The Inner Journey
  • Go through the door to the end location.
 The Inner Journey
  • Here you will perform a bunch of hidden object hunts where the objects circle around the screen and items keep getting added. This will happen three times.

The end!