- Wondering how to get Monopoly GO! free rolls? Well, you’ve come to the right place. In this guide, we provide you with a bunch of tips and tricks to get some free rolls for the hit new mobile game. We’ll …
Best Roblox Horror Games to Play Right Now – Updated Weekly
By Adele Wilson
Our Best Roblox Horror Games guide features the scariest and most creative experiences to play right now on the platform!The BEST Roblox Games of The Week – Games You Need To Play!
By Sho Roberts
Our feature shares our pick for the Best Roblox Games of the week! With our feature, we guarantee you'll find something new to play!All Grades in Type Soul – Each Race Explained
By Adele Wilson
Our All Grades in Type Soul guide lists every grade in the game for all races, including how to increase your grade quickly!
Snark Busters: High Society Walkthrough
Welcome to the Snark Busters: High Society walkthrough on Gamezebo. Snark Busters: High Society is a hidden object adventure game created by Alawar Entertainment. This walkthrough includes tips and tricks, helpful hints, and a strategy guide to how to complete Snark Busters: High Society.
Game Introduction – Snark Busters: High Society
Welcome to the Snark Busters: High Society walkthrough on Gamezebo. Snark Busters: High Society is a hidden object adventure game created by Alawar Entertainment. This walkthrough includes tips and tricks, helpful hints, and a strategy guide to how to complete Snark Busters: High Society.
General Tips
- Upon starting the game, you can choose between two game modes: Regular mode or Expert Mode. Regular mode features the Hint button recharging quickly and interactive zones being highlighted. Expert mode features the Hint button recharging slowly, and interactive zones aren’t highlighted.
- In the upper left corner of the screen is the Menu button. Use this to pause the game and access the menu at any time.
- Located in the lower left corner are two circular slots. These are your Inventory slots. Items that you can stow in your inventory are circled in red in the guide below and identified with CAPS.
- The lower right corner of the screen has the light bulb. The light bulb will act as your Hint button. Once it’s lit, click on it to use a Hint.
Chapter 1: The City of Nodnol
Apartment
- Click on the drawer beneath the TV. Find the objects required: their locations are circled below. Upon finding them all, the drawer will open.

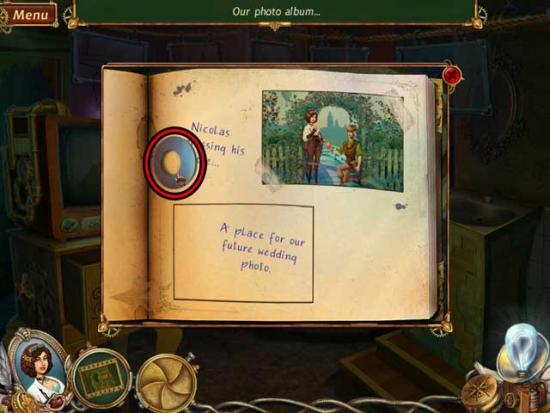
- Take a closer look inside the drawer. Click on the FILM NEGATIVE to add it to your inventory, then click on the photo album to open it. Click on the WASHER to add it to your inventory.
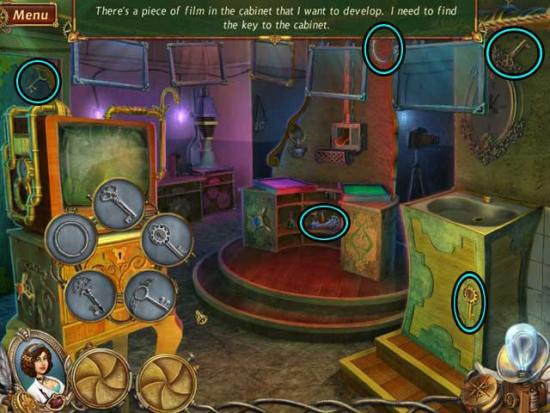
- Click on the sink on the right. Find the objects required: their locations are circled below. Upon finding them all, the sink will fill up.
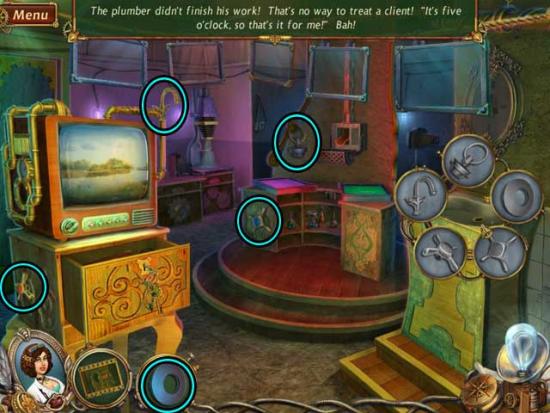
- Examine the machine at the back of the room, near the purple lights. Use the FILM NEGATIVE on the slot in the upper right corner to trigger a puzzle.
- The image is blurry. You need to focus it and resize it to fit the frame. Once the image is ready, you need to press the red button to print the image. The button sequence is random, but the goal shot (when you press the red button) is shown below.
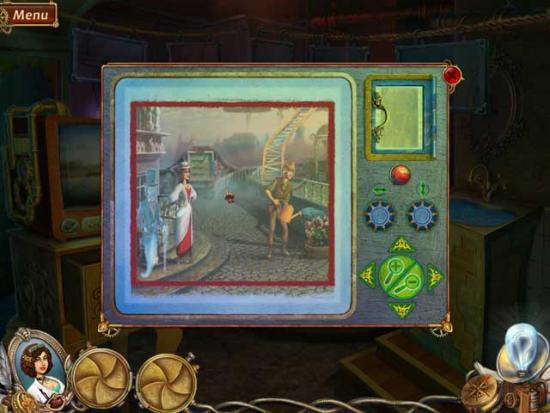
- Upon completing the puzzle, click on the UNDEVELOPED PHOTO to add it to your inventory.
- Use the UNDEVELOPED PHOTO on the green and purple fluid-filled trays to obtain the DEVELOPED PHOTO. Next, use the DEVELOPED PHOTO on the sink on the right to obtain the WASHED PHOTO, then place it in the hanging frame on the upper left to dry it.
- After a brief cutscene, you will be taken to the Square.
Square
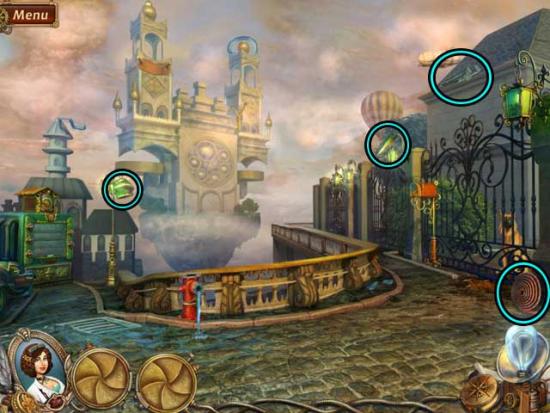
- Click on the fire hydrant. Find the objects required: their locations are circled below. There will be one missing still, but leave it for now.
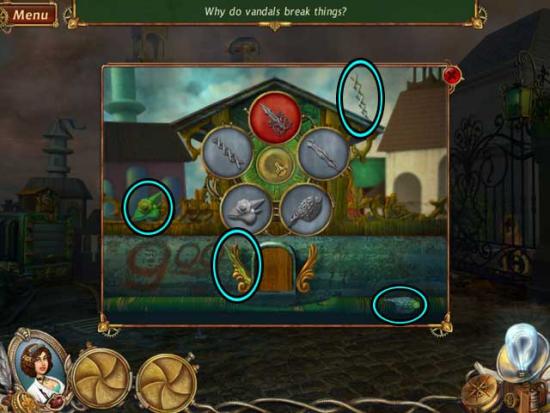
- Take a closer look at the green machine on the left. Click on the clock at the top for a closer view.
- Find the objects required: their locations are circled below. One will still be missing, but leave it for now.
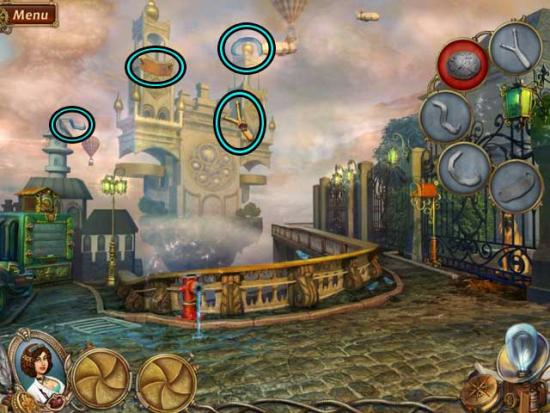
- Return to the main area view.
- Click on the lamp on the far right. Find the objects required: their locations are circled below. One will still be missing, but leave it for now.
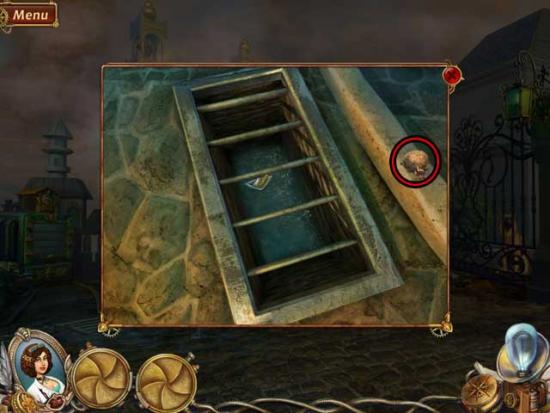
- Examine the sewer grate towards the lower left for a closer view. Click on the STONE to add it to your inventory.
- Use the STONE on the lamp on the right to complete it, triggering a sequence in which you will break the lamp. Click on the MAILBOX HANDLE to add it to your inventory.
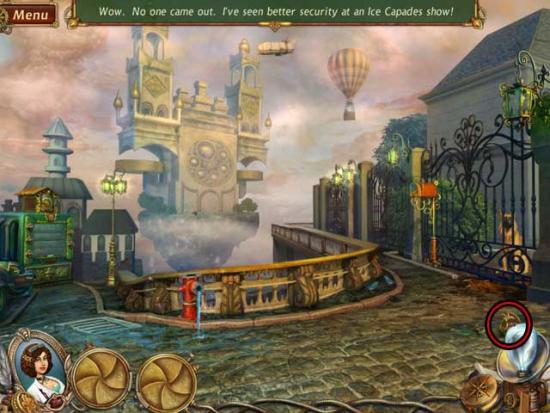
- Take a closer look at the mailbox on the right. Use the MAILBOX HANDLE on the mailbox to open it, then click on the FIRE HYDRANT CAP inside to add it to your inventory.
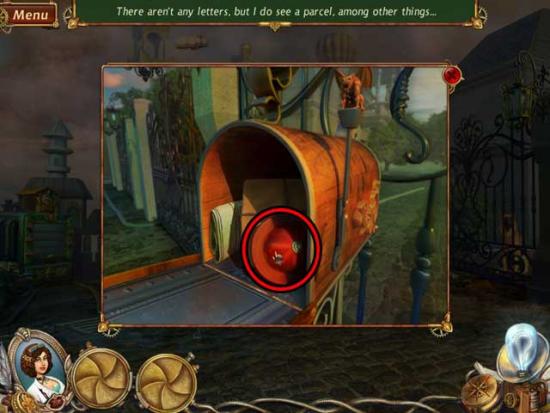
- Back in the main view, use the FIRE HYDRANT CAP on the hydrant to restore it, then examine the grate on the lower left. Click on the HOUR HAND to add it to your inventory.
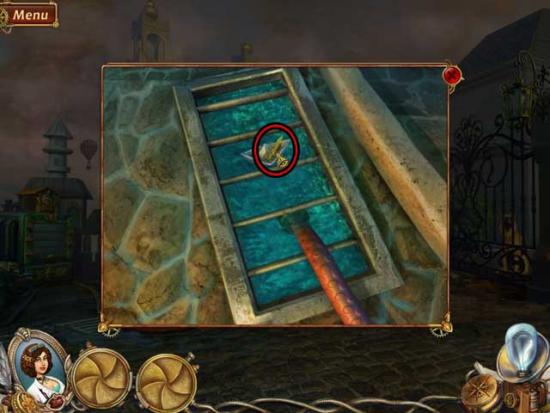
- Take a closer look at the green machine on the left again. Use the HOUR HAND on the clock to restore it, then set the time to 9:00. This will trigger a puzzle.
- To obtain the sausages and feed the dog, assemble the picture of the sausages. The solution is shown below.
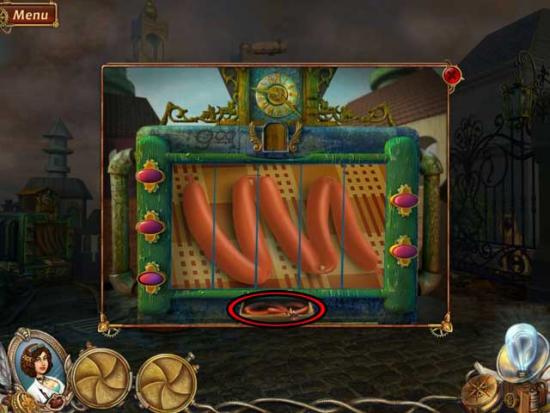
- Upon completing the puzzle, click on the SAUSAGES to add them to your inventory.
- Give the SAUSAGES to the dog on the other side of the fence on the right, resulting in a bigger hole being dug underneath. Click on the hole to proceed to the other side.
Mansion
- Click on the statue on the right. Find the objects required: their locations are circled below.
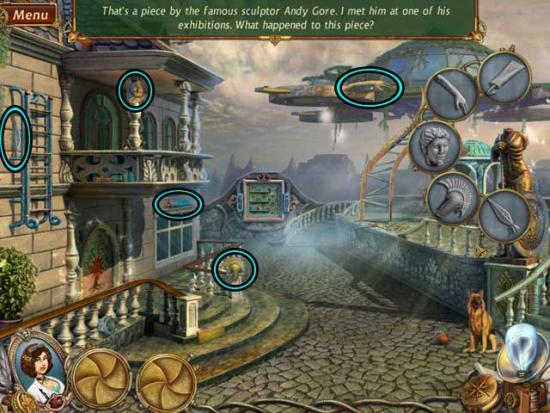
- Upon completing the statue, examine the ladder leading up to the floating garden. Find the objects required: their locations are circled below.
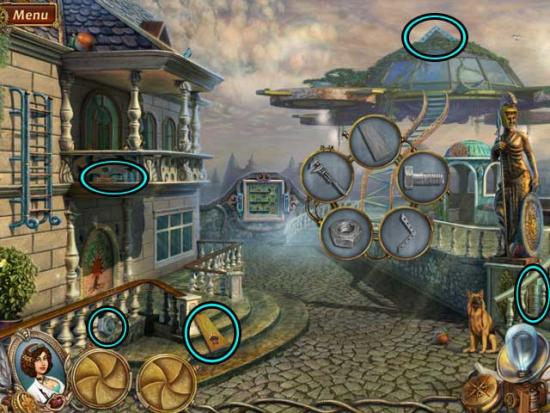
- Upon completing the steps, proceed up to the Floating Garden.
Floating Garden
- After speaking with the ghost, click on the device in front of him, on the left. Find the objects required: their locations are circled below.
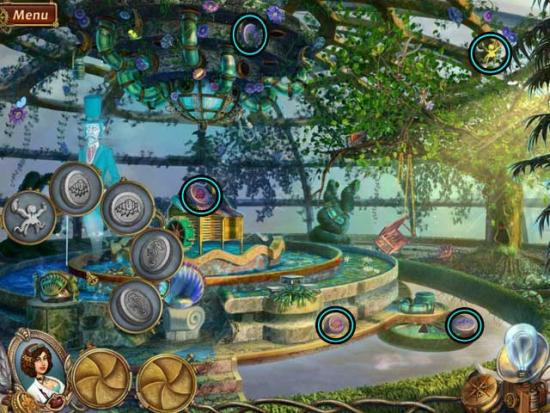
- Upon completing the device, a puzzle will be triggered. Use the octopus to move the red tiles to the bottom row and the blue tiles to the top row. Use the left and right arrows to move the octopus, then click on the up/down arrow to grab/place tiles. The octopus will grab whichever two are between his tentacles and place them in an empty space on the other side. The trick is to group the tiles so that two blues are next to each other/two reds are next to each other, etc, so the octopus can take those two and keep them together. Switch as necessary, but to get to the final solution, you will need to have at least two of the same color grouped together to most easily move tiles from one side to the other. The solution, with one final step, is shown below.
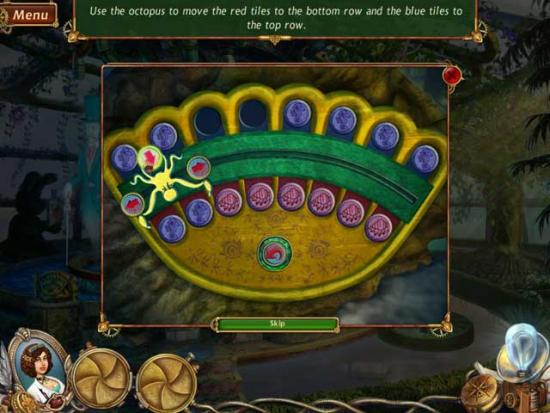
- Upon completing the puzzle, click on the FAIRY to add it to your inventory.
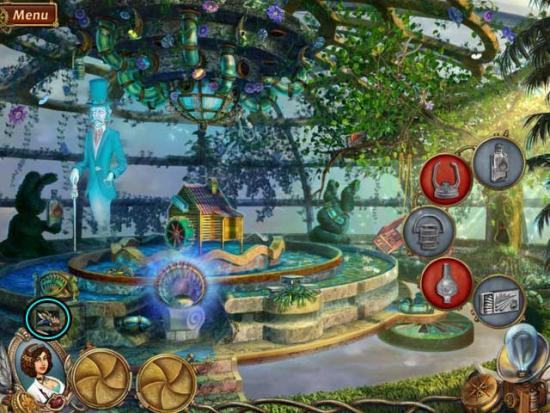
- Click on the pedestal in front of the fountain towards the right. Find the objects required: their locations are circled below. Leave the last item for now until it’s found.
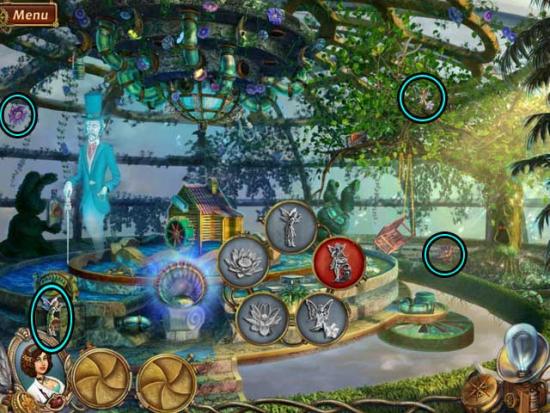
- Click on the portal in front of the small house and next to the ghost.
Frozen Garden
- Click on the cannon on the left, to the right of the Christmas tree. Find the objects required: their locations are circled below.
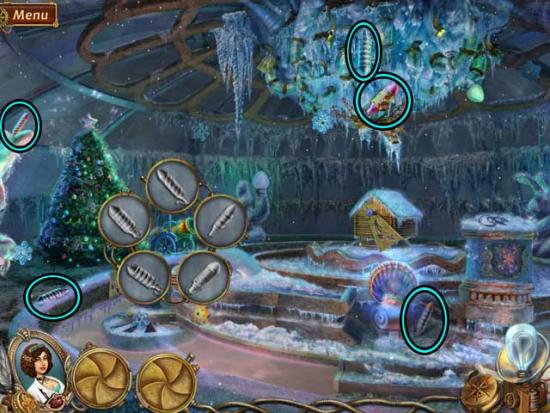
- Click on the small house/windmill towards the right. Find the objects required: their locations are circled below.
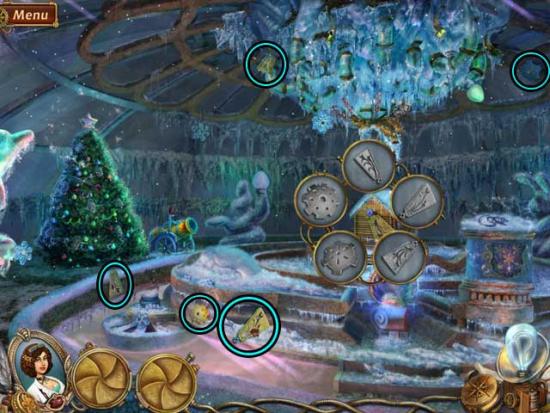
- Once you’ve restored the windmill, click on the GARDEN FAIRY to add it to your inventory.
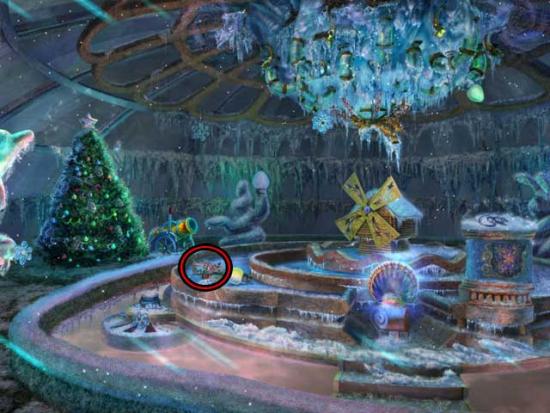
- Click on the pedestal on the far right. Find the objects required: their locations are circled below. Ignore the final item for now.
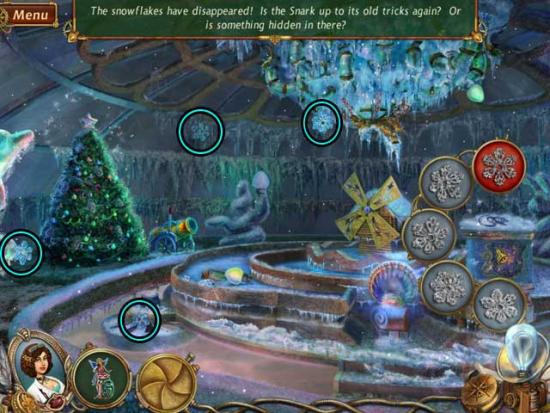
- Click on the top of the Christmas tree on the left. Find the objects required: their locations are circled below. Ignore the final item for now.
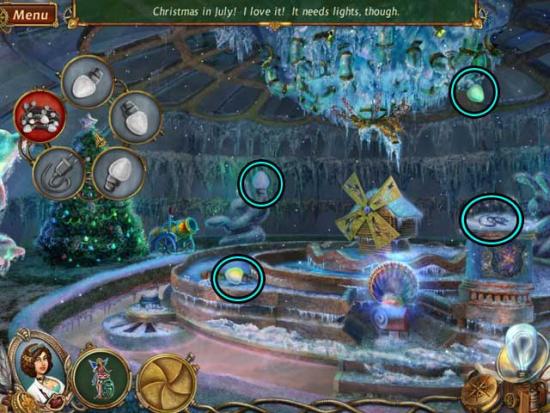
- Click on the portal to return to the Floating Garden.
Floating Garden
- Examine the pedestal to the right of the portal. Use the GARDEN FAIRY as the final item.
- Next, click on the device hanging from the ceiling. Find the objects required: their locations are circled below.
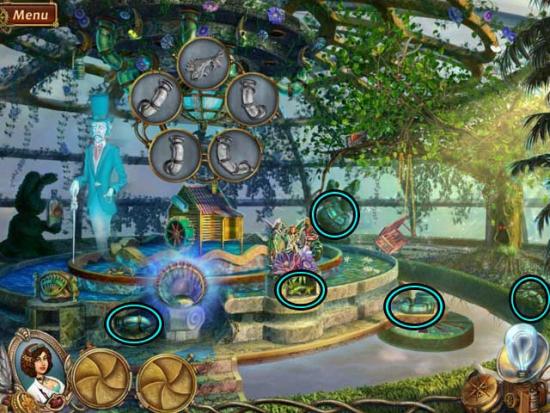
- Click on the broken swing on the right. Find the objects required: their locations are circled below.
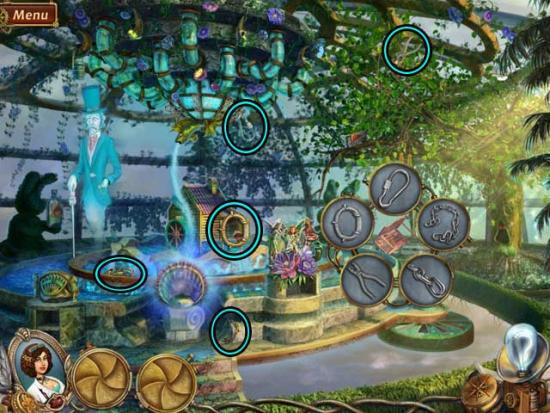
- Click on the CHRISTMAS LIGHTS and the BUCKET to add them to your inventory.
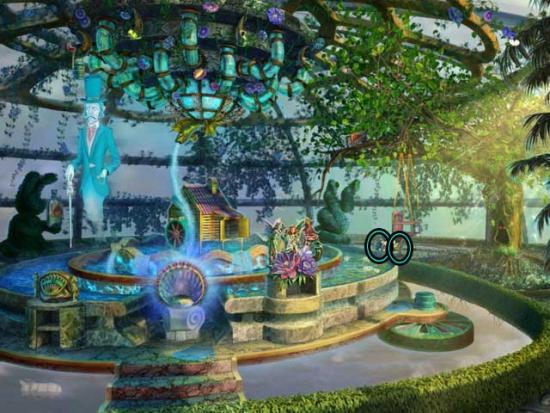
- Return through the portal.
Frozen Garden
- Use the CHRISTMAS LIGHTS on the Christmas tree, then click on the pedestal on the right. Place the final snowflake into the slot to open a secret compartment in the pedestal.
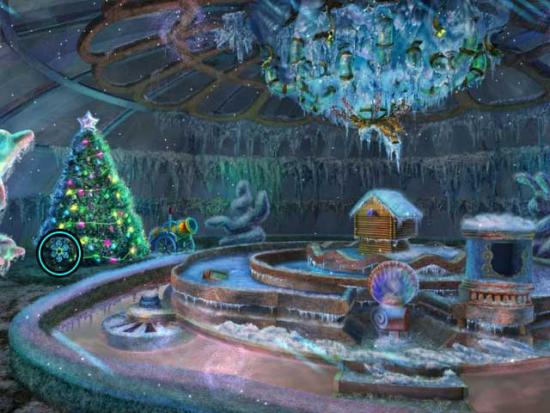
- Examine the inside of the pedestal on the right. Click on the clock. Find the objects required: their locations are circled below.
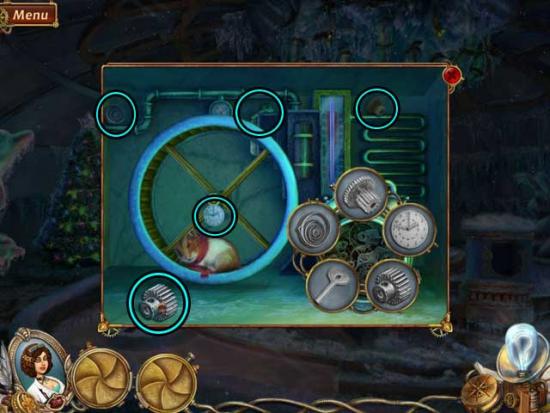
- Upon completing the puzzle, ice on the water in the main area will melt. Click on the OIL LAMP BASE to add it to your inventory.
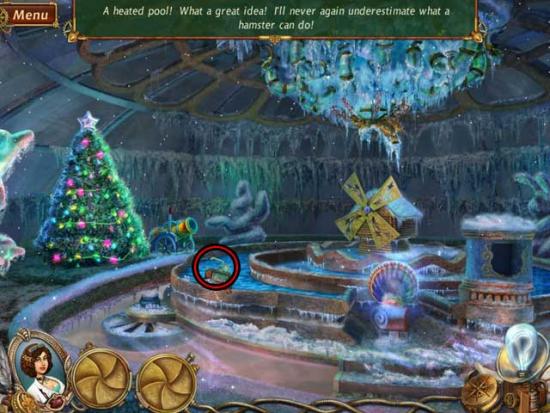
- Return to the Floating Garden.
Floating Garden
- Examine the hole in the tree on the right. Find the objects required: their locations are circled below. Use the OIL LAMP BASE to fill in the 4th object, and leave the 5th for now.
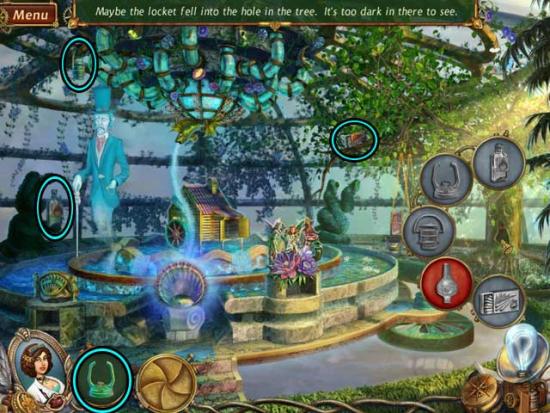
- Before leaving the area, use the BUCKET on the water near the ghost to obtain the BUCKET OF WATER.
- Return to the Mansion.
Mansion
- Take a closer look at the tree design on the wall on the left. Find the objects required: their locations are circled below. Ignore the final object for now.
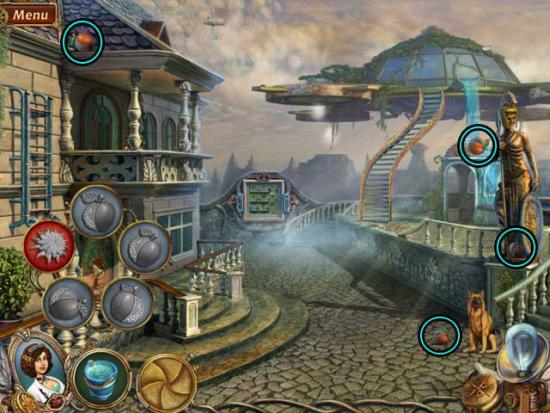
- Examine the machine ahead in the distance. Use the BUCKET OF WATER on the hook on the left to weigh it down and trigger a puzzle.
- Swap the tiles to assemble the image. Click on any two tiles to swap them. The solution is shown below.
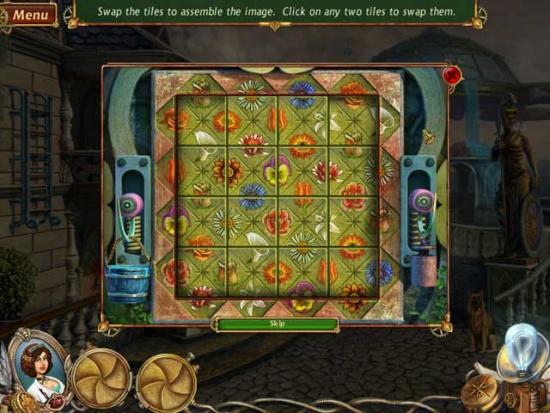
- Upon completing the puzzle, click on the SUN to add it to your inventory.
- Use the SUN to complete the set of items affiliated with the tree on the left. An alcove will be revealed: click on it for a closer view. Click on the LAMP COVER inside to add it to your inventory.
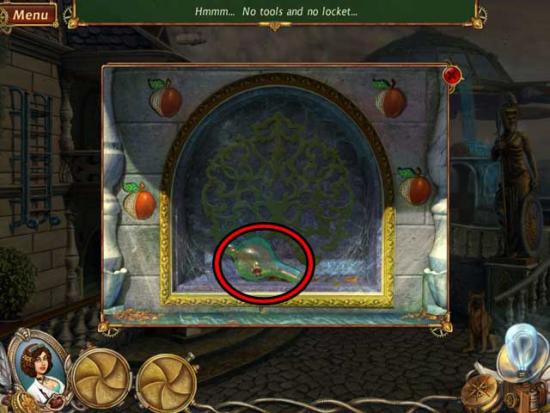
- Return to the Floating Garden.
Floating Garden
- Take a closer look at the hole in the tree on the right again. Use the LAMP COVER to complete the set of items, then examine the hole for a closer view. Click on the CANE to add it to your inventory.
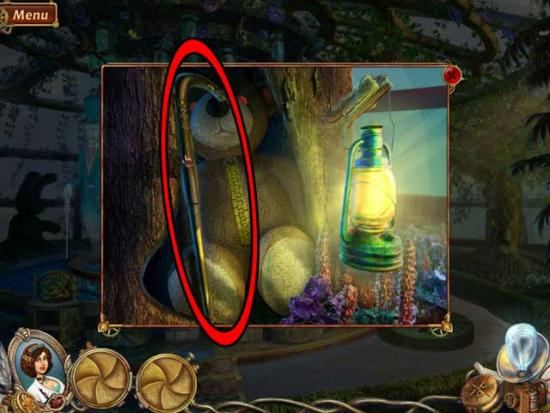
- Go back to the Mansion.
Mansion
- Use the CANE to pull down the ladder attached to the wall on the left, then take a closer view at the balcony. Read the scrap of paper on the table, then click on the RAZOR and the ZIPPER SLIDER inside the purse to add them to your inventory.
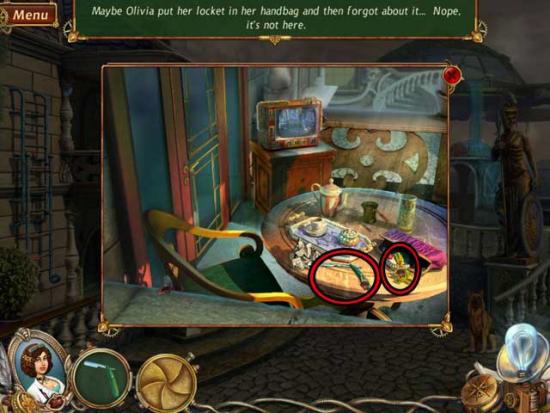
- Make your way back to the Floating Garden.
Floating Garden
- Examine the hole in the tree again. Use the ZIPPER SLIDER on the zipper on the bear to open it, then click on the PUZZLE PIECE inside to add it to your inventory.
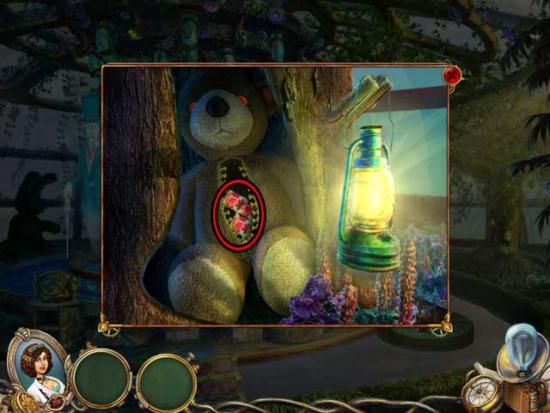
- Backtrack to the Square.
Square
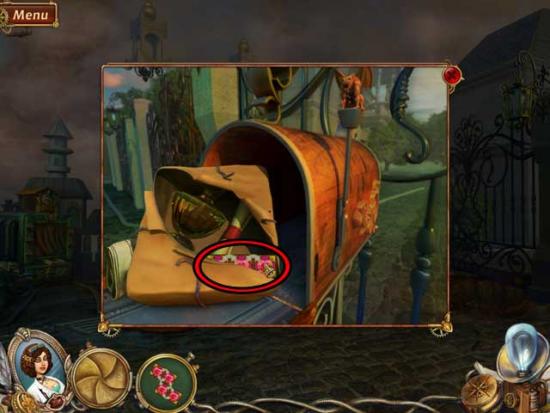
- Take a closer look at the mailbox on the right. Use the RAZOR to cut open the package inside, then click on the PUZZLE PIECE (2) inside to add it to your inventory.
- Make your way back to the Frozen Garden.
Frozen Garden
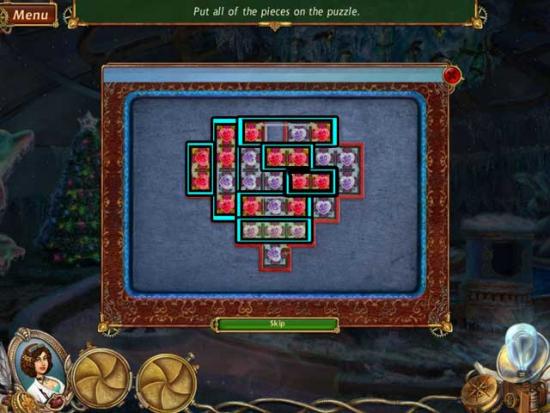
- Examine the small box sitting on the left edge of the fountain. Use the PUZZLE PIECES (x2) on the box to trigger a puzzle.
- Put all of the pieces on the puzzle. The solution is shown below.
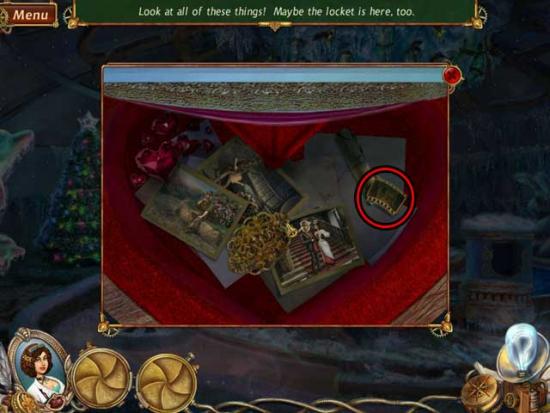
- Upon completing the puzzle, click on the FILM NEGATIVE to add it to your inventory.
Chapter 2: The Theater
Apartment
- Once you arrive, a message in a tube will also arrive (above the developing trays straight ahead). Click on it to read the message inside.
- Take a closer look at the device near the purple lights at the back of the room. Use the FILM NEGATIVE on the upper right corner to trigger a puzzle.
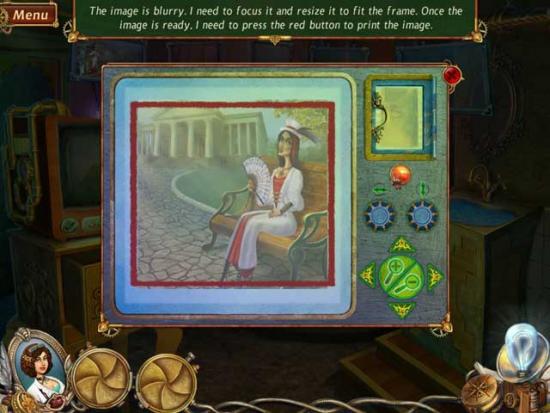
- The image is blurry. You need to focus it and resize it to fit the frame. Once the image is ready (the buttons will glow green when they’re in the proper positions), you need to press the red button to print the image. The button sequence is random, but the goal shot (when you press the red button) is shown below.
- Upon completing the puzzle, click on the UNDEVELOPED PHOTO to add it to your inventory.
- Use the UNDEVELOPED PHOTO on the green and purple liquid-filled trays to obtain the DEVELOPED PHOTO, then use it on the sink on the right to obtain the WASHED PHOTO. Place it in the second hanging frame to dry it.
- After a brief cutscene, you will find yourself at the Theater.
Theater
- Click on the clothing rack to move it aside, revealing another door.
- Click on the control panel with the red button to the right of the door. Find the objects required: their locations are circled below.
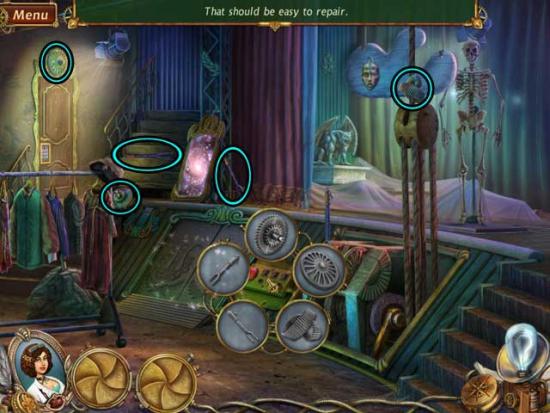
- Once you’ve found the items, click on the rightmost lever and press the button and see what happens.
- Enter the portal in the mirror.
Stage Set
- Examine the golden dragon body on the top of the right pillar. Find the objects required: their locations are circled below.
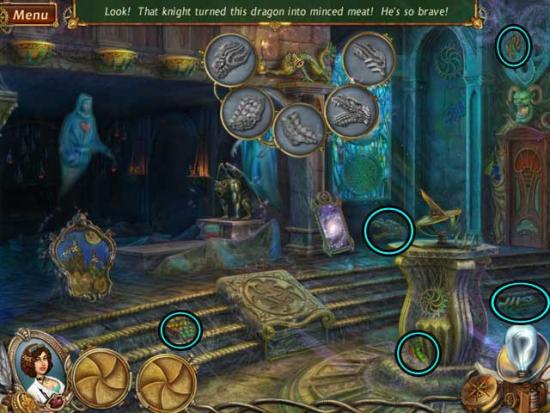
- Once you’ve completed the dragon, examine the broken stained glass window on the right. Find the objects required: their locations are circled below.
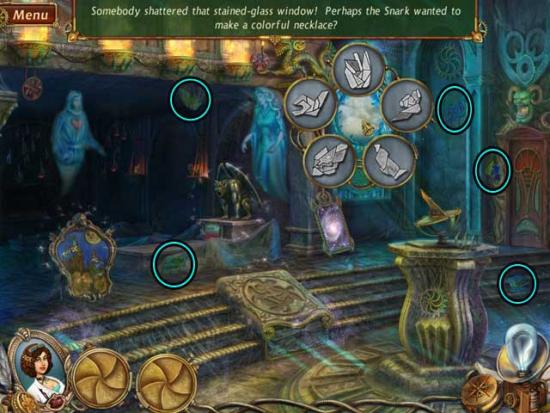
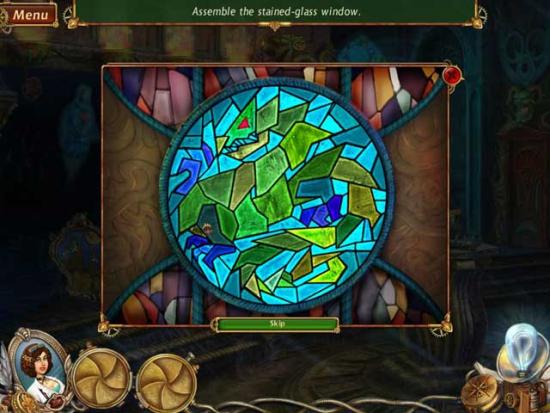
- Once you’ve found all the pieces, a puzzle will be triggered.
- Assemble the stained-glass window. The solution is shown below.
- Upon completing the puzzle, examine the frame propped up on the ground on the left. Find the objects required: their locations are circled below.
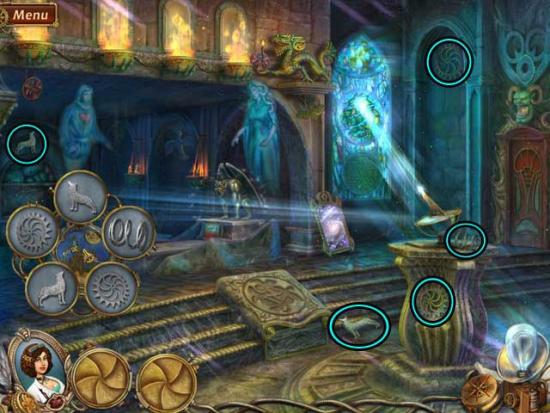
- Click on the stone plaque on the stage steps. Find the objects required: their locations are circled below.
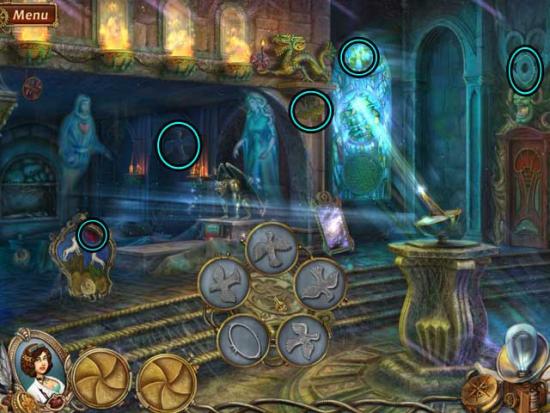
- Click on the gargoyle statue next to the female ghost. Find the objects required: their locations are circled below. Ignore the final item for now.
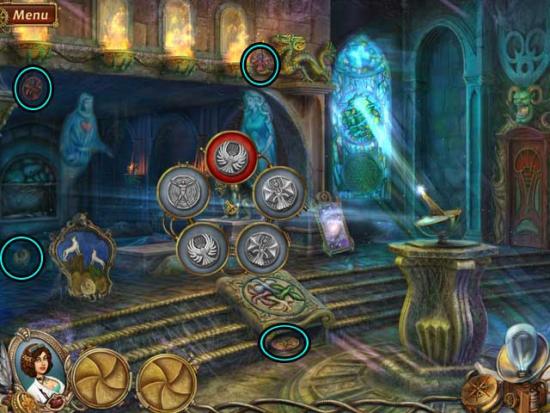
- Return to the Theater via the portal.
Theater
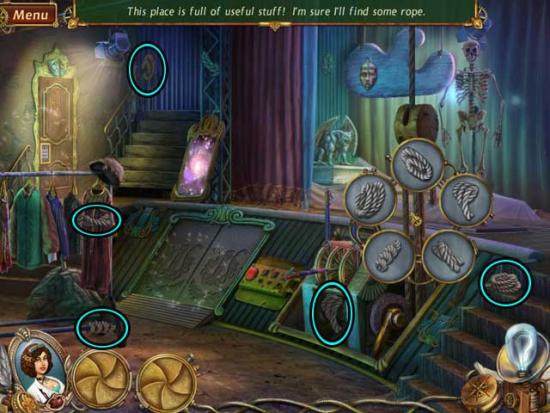
- Click on the ropes on the right. Find the objects required: their locations are circled below.
- Click on the stage levers so that the left and right levers are pointed down, and the middle is pointed up.
- Click on the hatch door towards the left. Find the objects required: their locations are circled below.
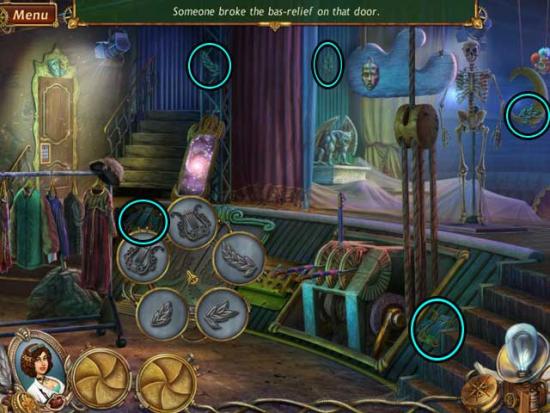
- Once you’ve reassembled the door, enter through to the next area.
Orchestra Pit
- Click on the skeleton on the right. Find the objects required: their locations are circled below.
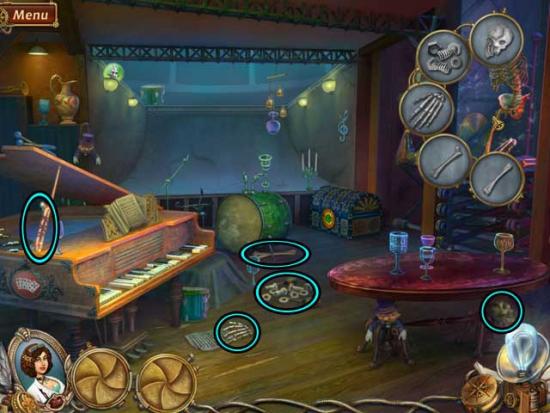
- Click on the chest on the floor towards the back right corner. Find the objects required: their locations are circled below.
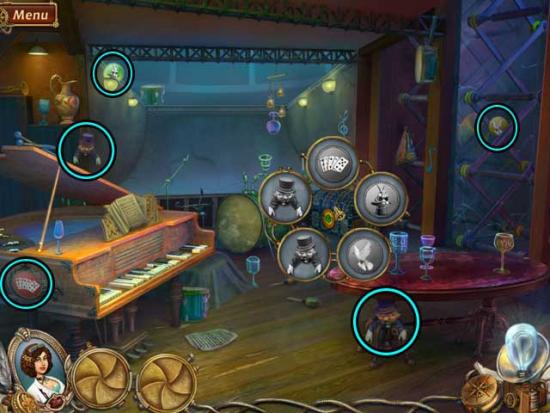
- Once you’ve found all the objects, a puzzle will be triggered.
- Put each token in the ring that matches its color. The magicians will help you. Click on a magician to swap the left and right tiles in their hands with each other. In this manner, work your way around: start by moving all the red tiles to the outer ring, then swap the yellow and green tiles in the inner ring last. The solution is shown below.
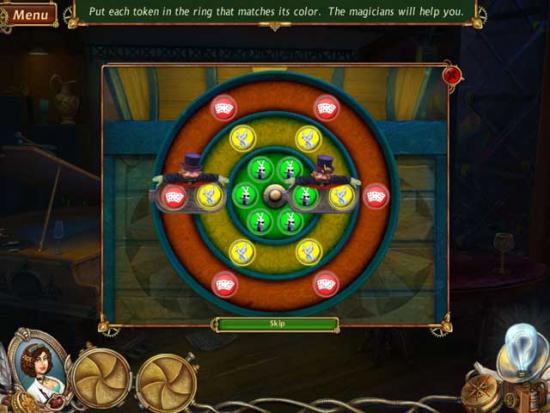
- Once you’ve opened the chest, exit the close-up back to the main area for now.
- Click on the table on the right. Find the objects required: their locations are circled below.
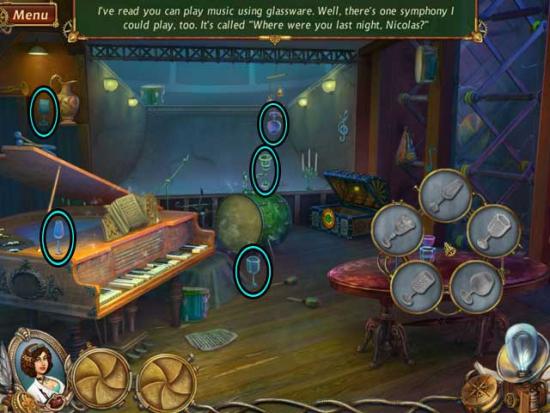
- Click on the green drum at the back of the room. Find the objects required: their locations are circled below.
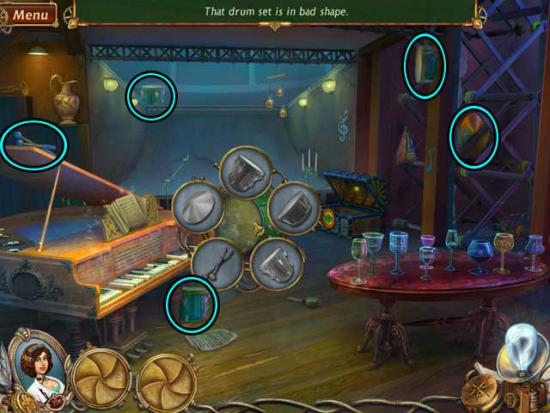
- Once you’ve completed the drums, click on the ANGEL TOKEN that appears to add it to your inventory.
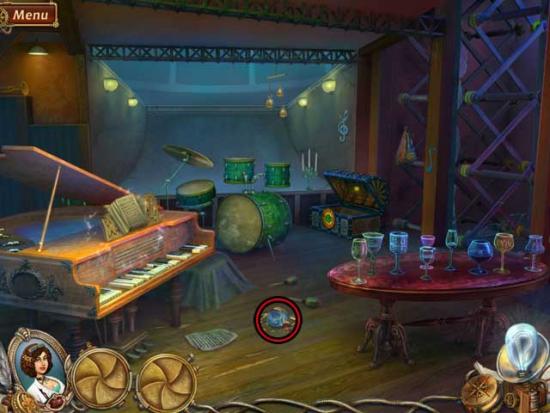
- Return to the Stage Set.
Stage Set
- Examine the gargoyle again. Use the ANGEL TOKEN to complete the set of items, triggering a puzzle. Click on the statue for a closer view.
- Return the angels to heaven and the demons to hell. The human belongs in the middle. To move an angel or a demon (or human), click on the gold button to which it’s attached. Using the screenshot below as reference, click on the gold buttons in the following order to solve the puzzle: 5, 2, 5, 2, 4, 5, 1, 2, 1, 2, 2, 3, 6, 5, 5, 2, 2, 3, 6, 4, 5, 5, 4, 2, 5, 2, 5, 2, 2.
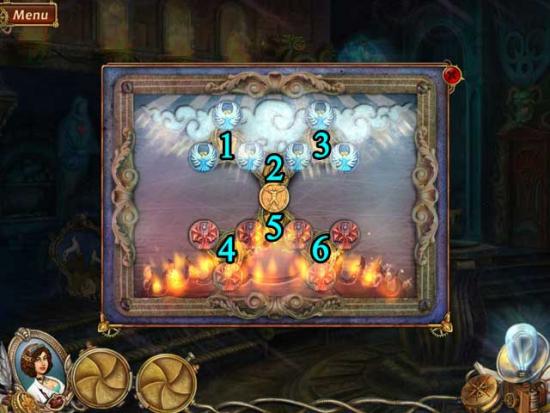
- Upon completing the puzzle, click on the CURTAIN TASSEL to add it to your inventory, and click on the Note, taking note of the numbers “39-2-69”.
- Return to the Theater.
Theater
- Use the CURTAIN TASSEL on the curtain to pull it back.
- Click on the locked door on the left. Find the objects required: their locations are circled below.
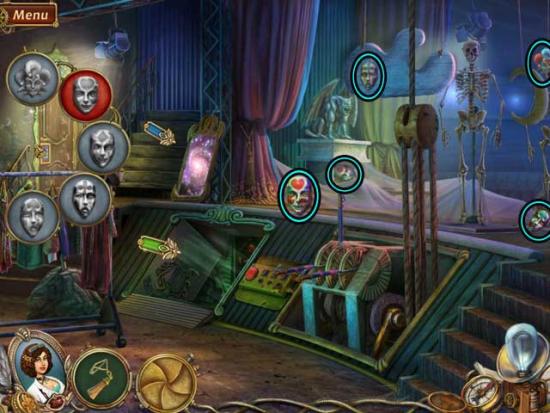
- Once you’ve found all the masks, the door will open. Proceed through to the next area.
Dressing Room
- Read the Note inside the flower basket.
- Click on the dog in the chair. Find the objects required: their locations are circled below.
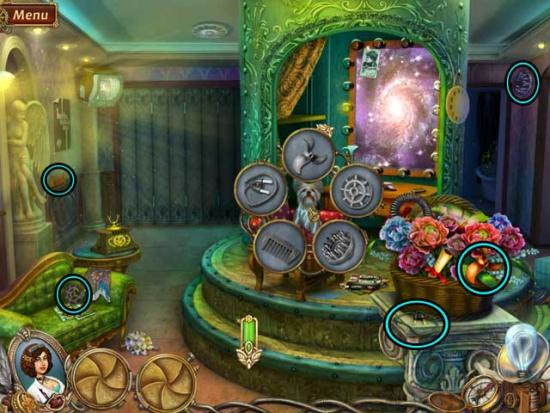
- Upon finding the objects, click on the NECKLACE to add it to your inventory.
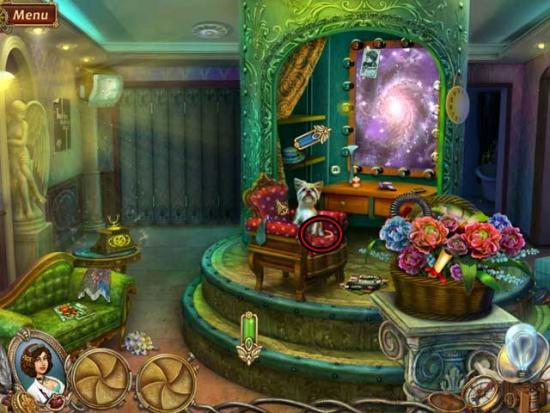
- Enter through the portal in the mirror.
Reflection Room
- Click on the door at the right rear of the room. Find the objects required: their locations are circled below.
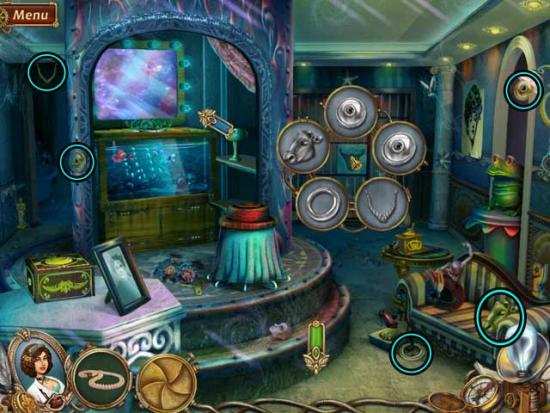
- Take a closer look at the box on the table on the left. Find the objects required: their locations are circled below. Ignore the missing final object for now.
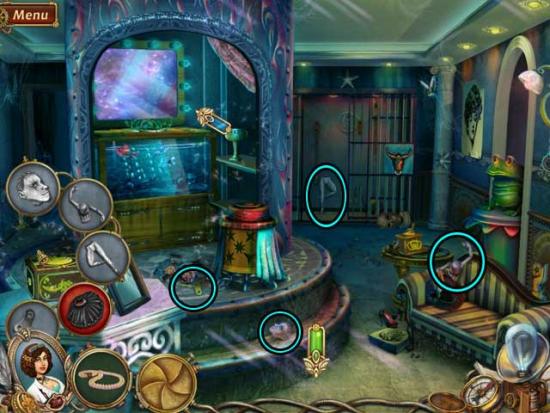
- Return to the Dressing Room.
Dressing Room
- The back closet area is open now. Take a closer look at the mannequins inside.
- Click on the center mannequin. Find the objects required: their locations are circled below.
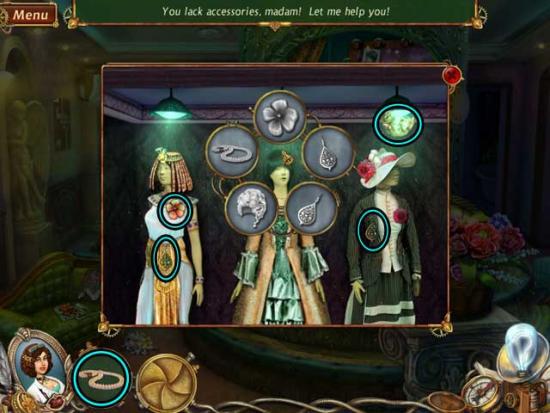
- Upon completing the mannequin, click on the MOUTHPIECE and the TUTU SKIRT inside to add them to your inventory.
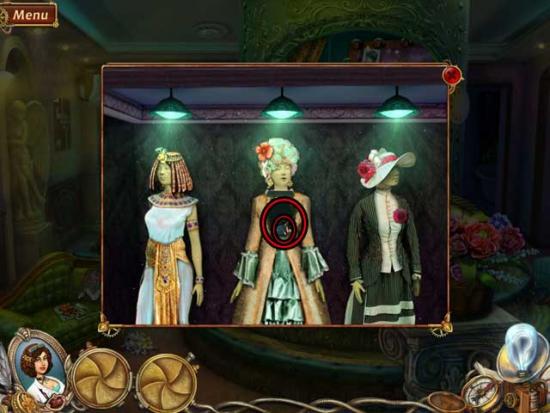
- Back in the main area, click on the phone on the left. Find the objects required: their locations are circled below. Use the MOUTHPIECE as the final item.
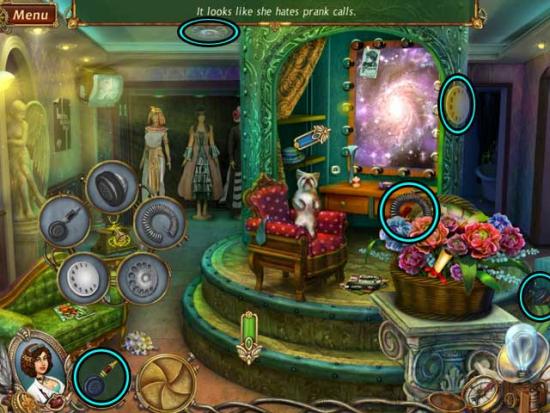
- Once you’ve found all the objects, click on the phone to trigger a puzzle.
- Simply dial the phone to call someone. Use the clue you found earlier: “39-2-69”.
- Upon completing the puzzle, return to the Reflection Room.
Reflection Room
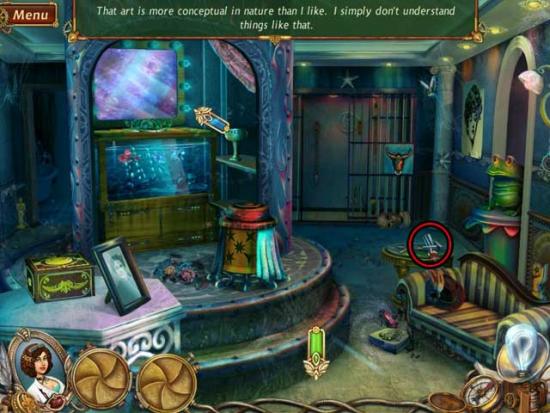
- Click on the PIANO KEYS near the giant frog to add them to your inventory.
- Return to the Orchestra Pit.
Orchestra Pit
- Click on the piano on the left. Find the objects required: their locations are circled below. Use the PIANO KEYS as the final item.
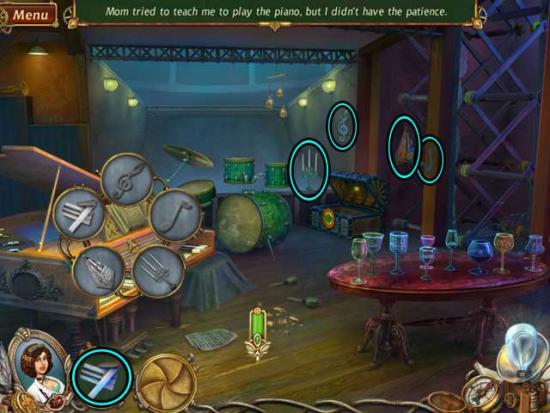
- Once you’ve assembled all the items, click on the revealed DRAGONFLY to add it to your inventory.
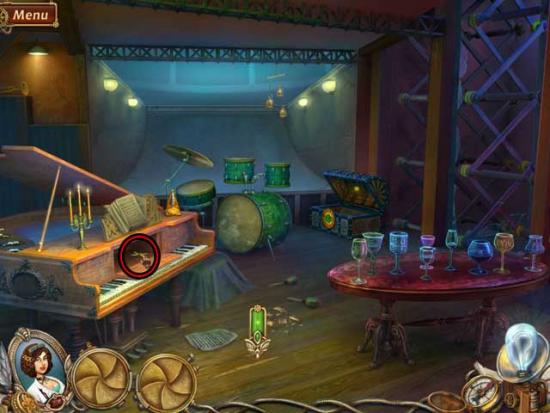
- Return to the Reflection Room.
Reflection Room
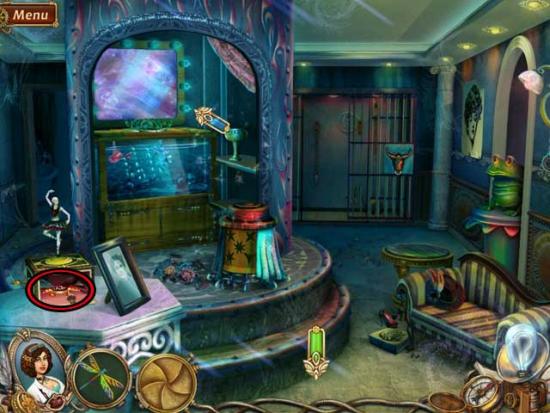
- Click on the small box on the left. Use the TUTU SKIRT on the box to finish off the objects, then click on the revealed CRAB to add it to your inventory.
- Click on the goblet on the shelf to the right of the portal. Find the objects required: their locations are circled below. Ignore the final object for now.
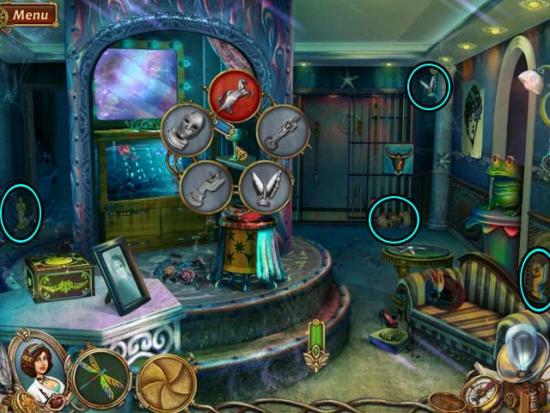
- Examine the gold, star-cut device near the edge of the steps. Find the objects required: their locations are circled below. Ignore the final object for now.
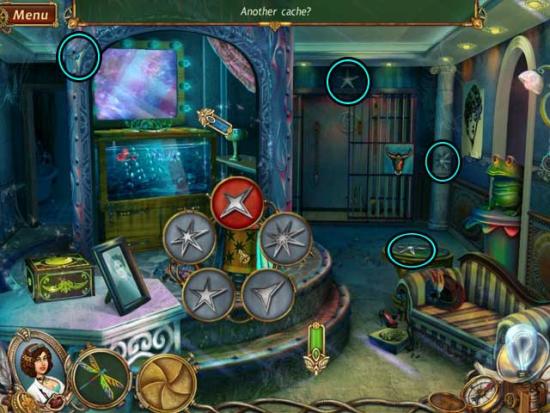
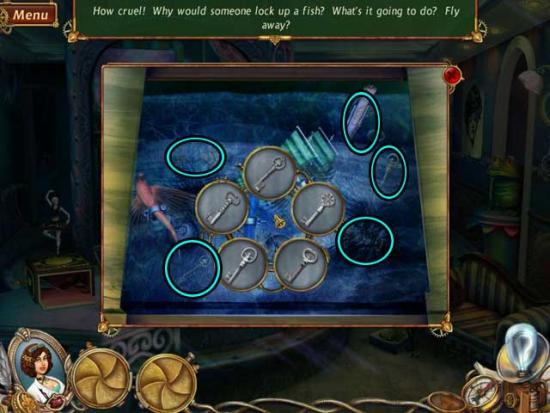
- Examine the aquarium beneath the portal for a closer view. Use the CRAB on the close-up to cut away the vines, then click on the middle of the inside of the tank.
- Find the objects required: their locations are circled below.
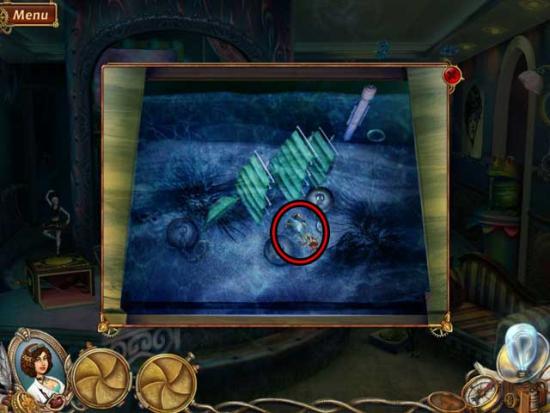
- Upon completing the area, click on the PEGASUS FIGURINE inside the tank to add it to your inventory.
- Back in the main view, click on the goblet again. Use the PEGASUS FIGURINE to complete the list of objects, then click on the bottle cannon revealed on the top shelf. This will break the picture frame on the left table, revealing the final star. Use the final star on the star-cut device to complete the list of objects.
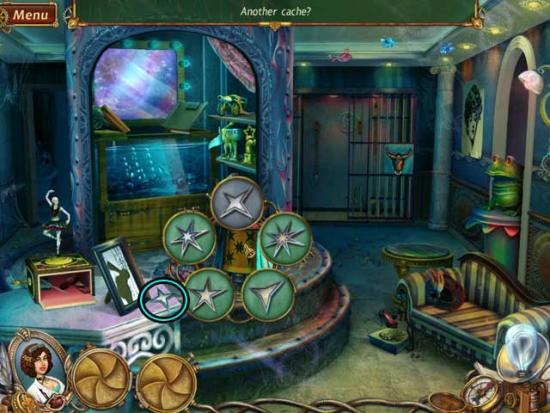
- Click on the BUTTERFLY to add it to your inventory.
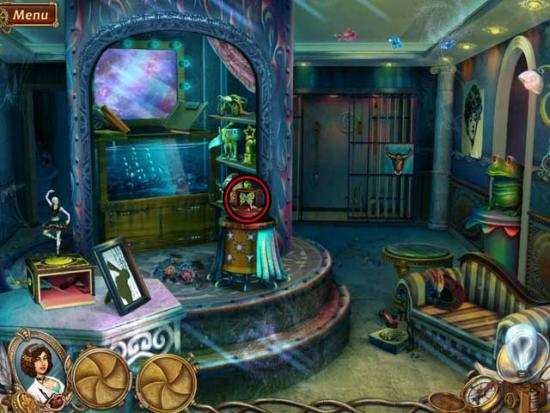
- Return to the Orchestra Pit.
Orchestra Pit
- Take a closer look at the chest in the back corner. Use the DRAGONFLY and the BUTTERFLY on the slots on the journal inside, then click on the journal to read it. Scroll through and read each of the pages, finally clicking on the note on the final page. Once you’ve finished reading, exit to the close-up inside the chest and click on the edge of the DIARY until it’s added to your inventory.
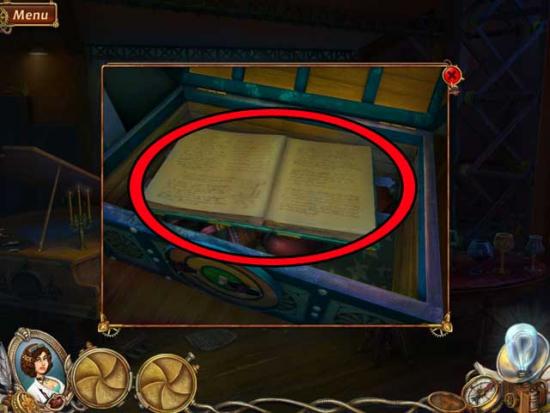
- Return to the Stage Set.
Stage Set
Show the DIARY to the ghosts. They will give you the FILM NEGATIVE in return.
Chapter 3: The Robo Park
Apartment
- Examine the machine at the back of the room, near the purple lights. Use the FILM NEGATIVE on the slot in the upper right corner to trigger a puzzle.
- The image is blurry. You need to focus it and resize it to fit the frame. Once the image is ready (the buttons will glow green when they’re in the proper positions), you need to press the red button to print the image. The button sequence is random, but the goal shot (when you press the red button) is shown below.
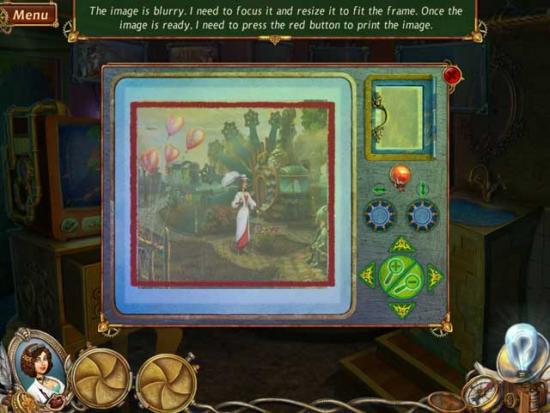
- Upon completing the puzzle, click on the UNDEVELOPED PHOTO to add it to your inventory.
- Use the UNDEVELOPED PHOTO on the green and purple fluid-filled trays to obtain the DEVELOPED PHOTO. Next, use the DEVELOPED PHOTO on the sink on the right to obtain the WASHED PHOTO, then place it in the third hanging frame from the upper left to dry it.
- After a brief cutscene, you will be taken to the Park.
Park
- Take a closer look at the cart at the end of the far pathway, beneath the balloons. Click on the middle robot. Find the objects required: their locations are circled below.
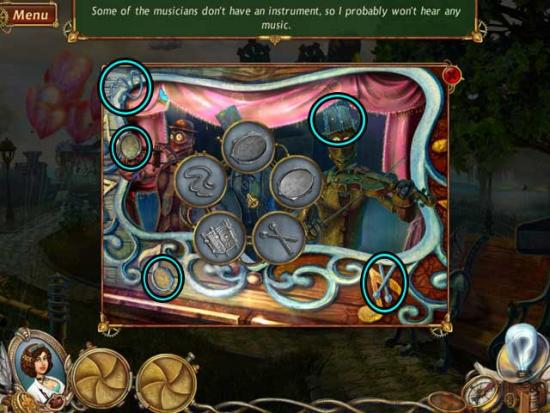
- Once you’ve restored the robot, the cart will move, revealing an item and a new path to take.
- Click on the robot sitting on the bench on the right. Find the objects required: their locations are circled below. Ignore the missing object for now.
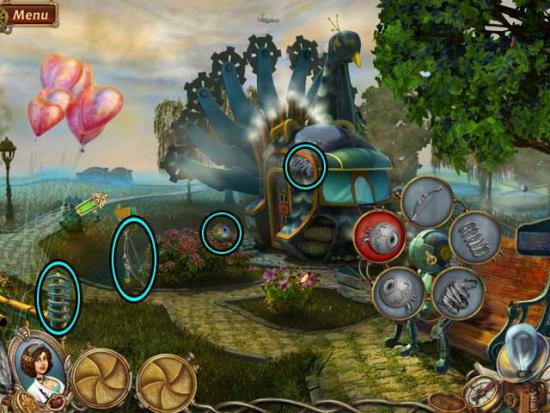
- Continue down the path to the next area.
Ship
- Take a closer look at the chest on the lower right. Click on the lock. Find the objects required: their locations are circled below.
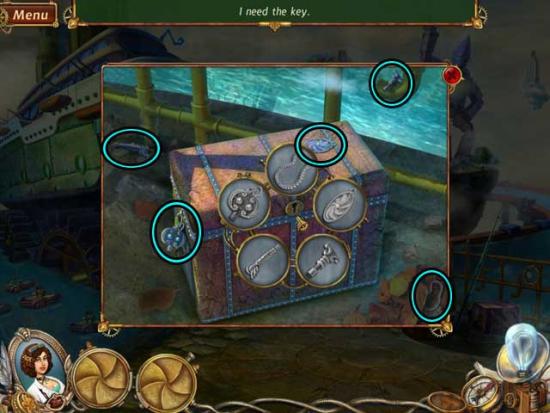
- Upon opening the chest, click on the SUGAR and the SHIP to add them to your inventory.
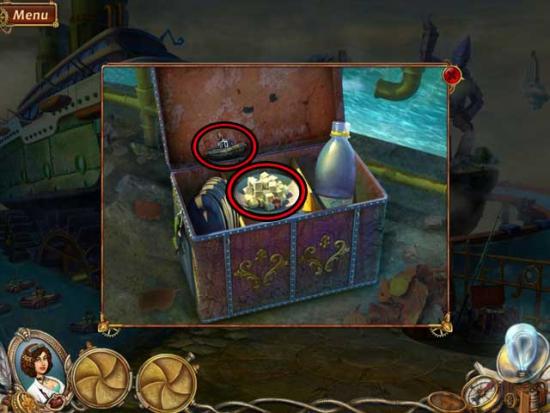
- Back in the main area, click on the ships in the water on the lower left. Find the objects required: their locations are circled below. Use the SHIP from your inventory as well.
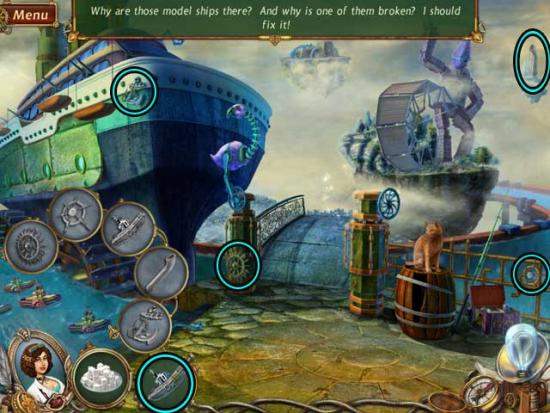
- Once you’ve completed that task, click on the HOOK in the water to add it to your inventory.
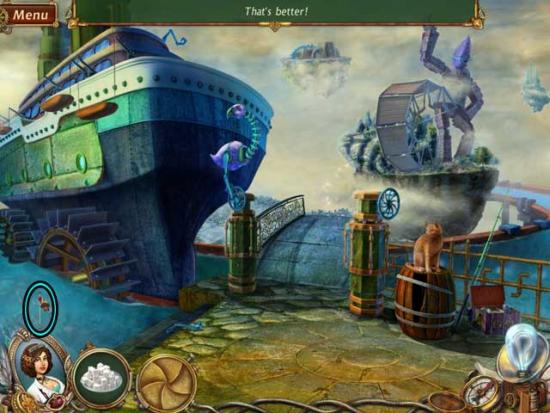
- Use the HOOK on the FISHING ROD on the right to obtain it, then use the rod on the pool of water on the left. You will catch a FISH. Give the FISH to the cat on top of the barrel on the right, revealing another item.
- Click on the right gate post. Find the objects required: their locations are circled below.
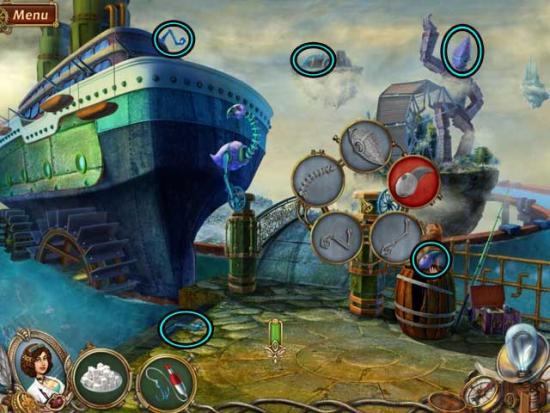
- Once you’ve completed the gate post, click on the EYE that appears to add it to your inventory.
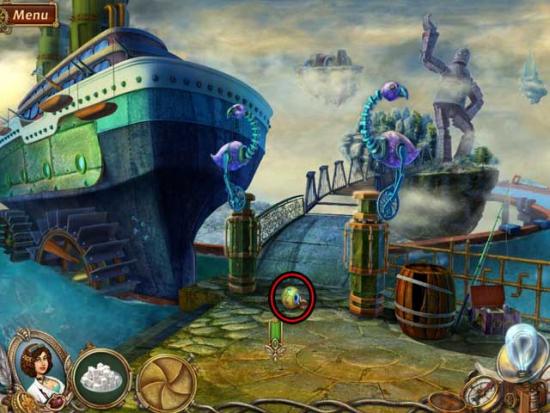
- Return to the Park.
Park
- Use the EYE to complete the robot on the right, then click on the AXE to add it to your inventory.
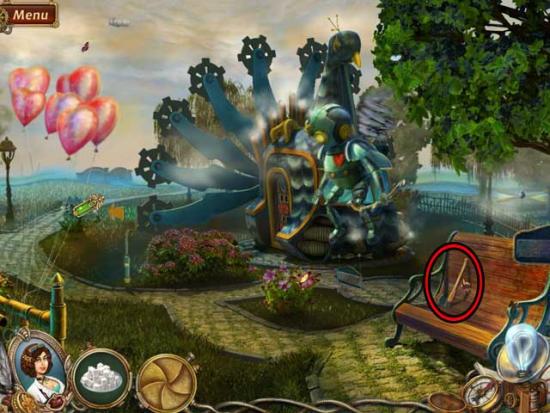
- Return to the Ship.
Ship
- Use the AXE on the barrel on the right to chop it into pieces.
- Click on the missing section of walkway attached to the bridge. Find the objects required: their locations are circled below.
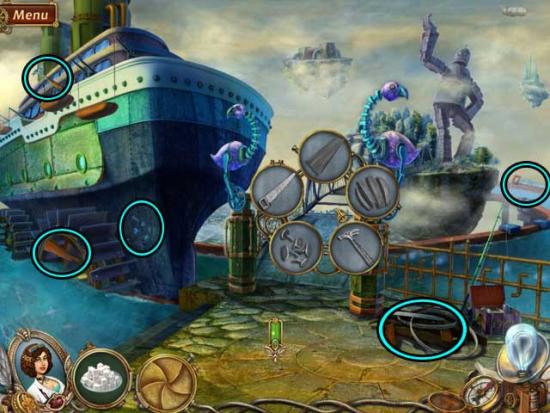
- Once you’ve completed the walkway, proceed across to the next area.
Lake
- Click on the small robotic bird on the left. Find the objects required: their locations are circled below.
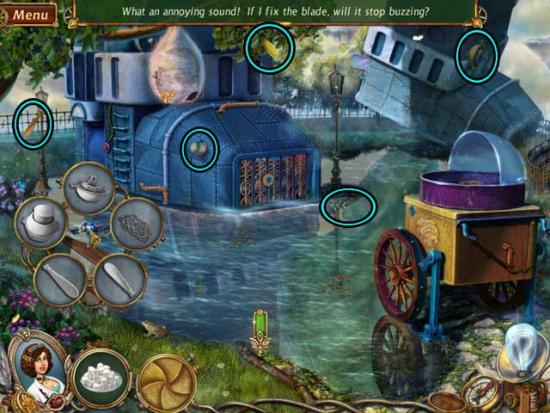
- Click on the cotton candy cart on the right. Find the objects required: their locations are circled below. Use the SUGAR from your inventory as one of the items.
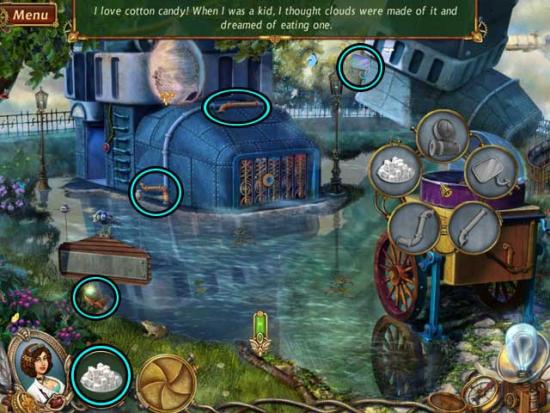
- Completing the cotton candy machine will trigger a portal appearing in the attached mirror.
- Before proceeding any further, click on the BERRIES on the left to add them to your inventory.
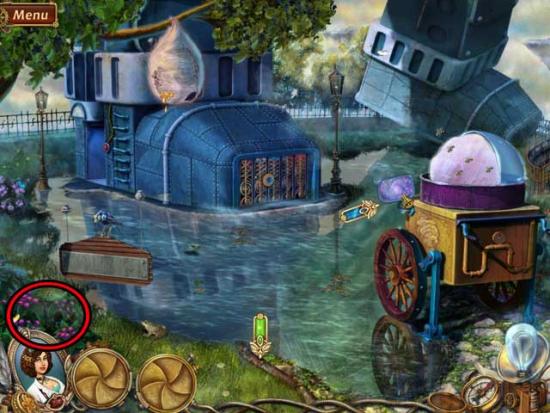
- Go through the portal to the next area.
Night Lake
- Click on the broken bird feeder towards the upper right corner. Find the objects required: their locations are circled below. The BERRIES from your inventory are one of the required items you will need.
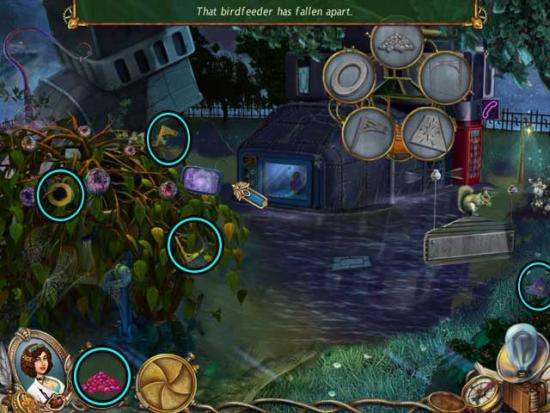
- Once you’ve reassembled the feeder, click on the SPEAKER to add it to your inventory.
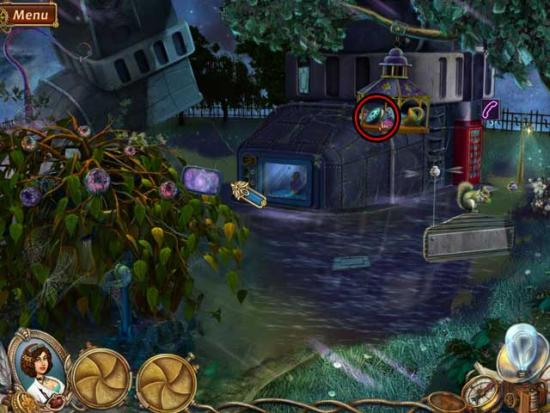
- Click on the upper portion of the bush on the left. Find the objects required: their locations are circled below.
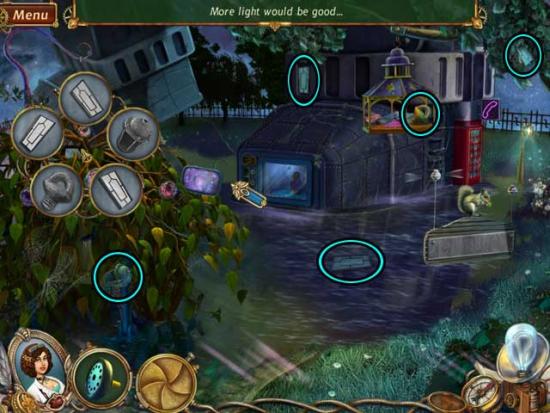
- Upon completing the area, click on the COIN to add it to your inventory.
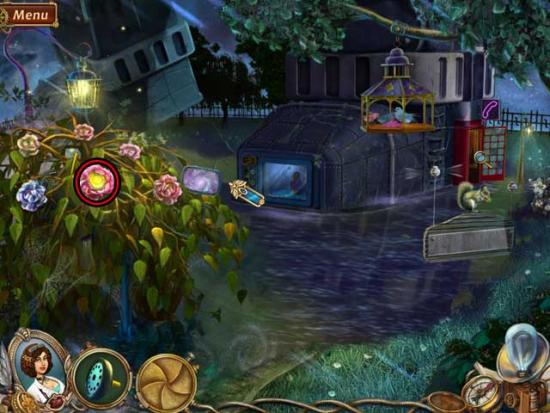
- Now, click on the red phone booth on the right to open it, then take a closer look inside. Click on the phone. Find the objects required: their locations are circled below. The SPEAKER and the COIN from your inventory are required items.
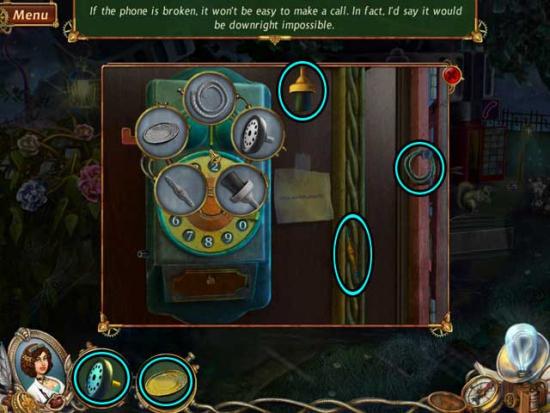
- Once the phone is fixed, take a closer look at the note to the right. Call the second number on the note: “47968”. The bottom of the phone will open in response. Collect the KEY-BOT and read the note (a phone icon that reads “28”) that appears.
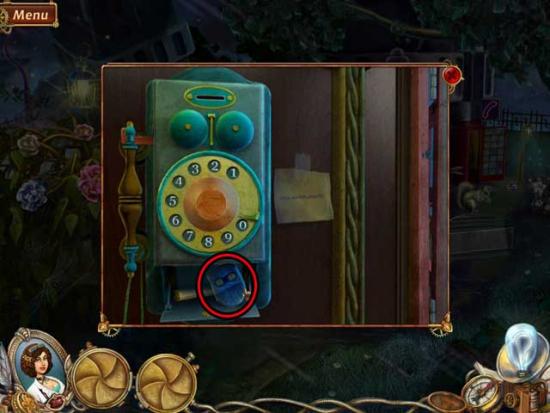
- Return to the Lake.
Lake
- Take a closer look at the grate at the tip of the large metal foot. Click on the gear with the humanoid groove. Find the objects required: their locations are circled below. The KEY-BOT is one of the required objects.
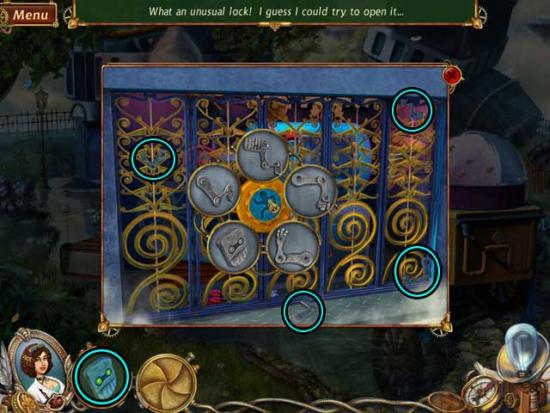
- Once you’ve opened the grate, click on the furnace door to open it and note it needs heating. Click on the BUCKET and the ARROWS to add them to your inventory.
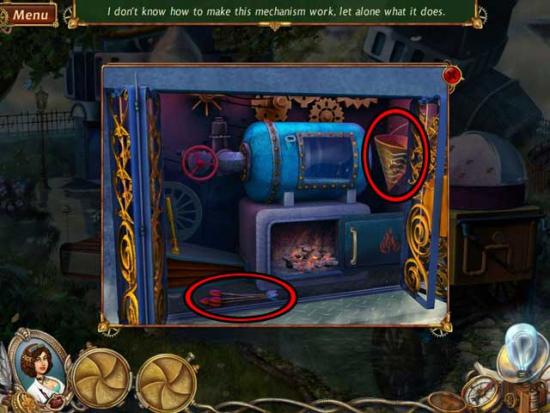
- Back in the main view of the area, use the BUCKET on the lake water to obtain the BUCKET OF WATER.
- Return to the Park.
Park
- Use the ARROWS on the flying robot. Once the balloons have been popped, read the note that floats to the ground: “03”, with a heart balloon icon.
- Examine the door of the large mechanical peacock. Use the dials to input numbers in the slots. Put “03” in the top slots next to the heart balloon icon, and “28” in the bottom slots next to the phone icon.
- After the door is open, take a closer look inside. Click on the control panel. Find the objects required: their locations are circled below.
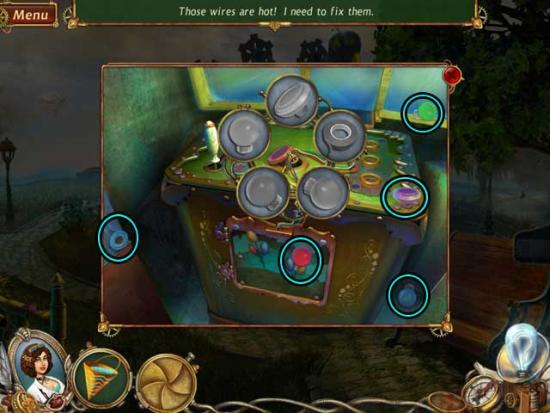
- Once reassembled, click on the red button in the middle of the panel to open a door below. Click on the KNIFE inside to add it to your inventory.
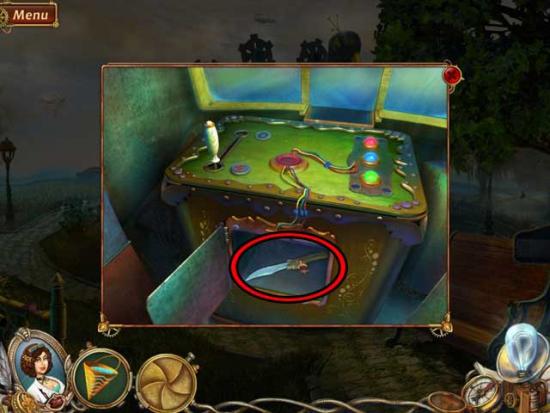
- Before leaving the peacock, click on the white/light wooden handle to the left of the red button to shift it into the “up” position.
- Make your way back to the Ship.
Ship
- Examine the chest on the lower right again. Use the KNIFE on the water bottle to cut a portion of it off, acquiring the MAKESHIFT FUNNEL.
- Go to the Lake.
Lake
- Examine the front of the large metal foot again. Click on the cap on the top tank to the left of the window to remove it, then place the MAKESHIFT FUNNEL inside. Use the BUCKET OF WATER on the funnel. Click on the INDUCTOR COIL that appears to add it to your inventory.
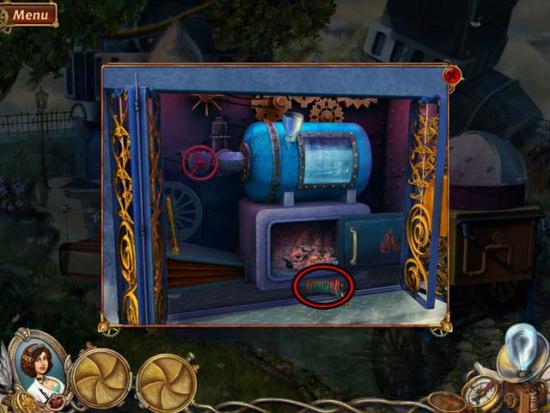
- Go to the Night Lake.
Night Lake
- Take a closer look at the front of the large metal foot here. Use the INDUCTOR COIL on the empty middle coil slot to restore it. This will trigger an elevator appearing at the Lake.
- Return to the Lake.
Lake
- Take a closer look at the purple elevator at the side of the large metal foot. Click on the large red button to open it, then click on the mechanism inside to use it.
Giant Head
- Click on the robotic head straight ahead. Find the objects required: their locations are circled below.
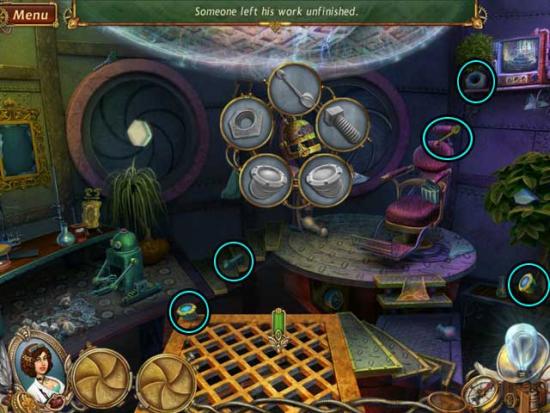
- Upon reassembling it, click on the ROBOT’S HEAD to add it to your inventory.
- Click on the broken picture frame on the left. Find the objects required: their locations are circled below.
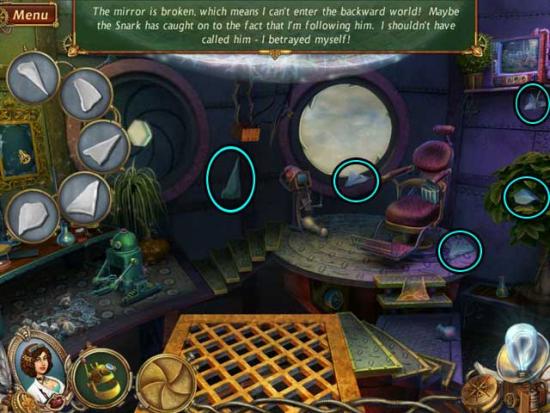
- Upon completing the mirror, a portal will activate within the frame. Click on it to proceed to the next area.
Plant Domain
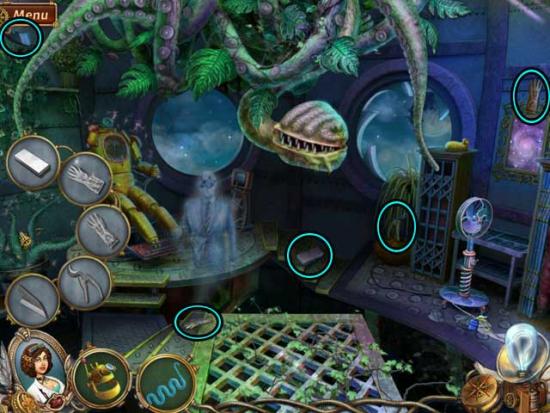
- Speak with the ghost, then click on the incomplete stand on the right. Find the objects required: their locations are circled below.
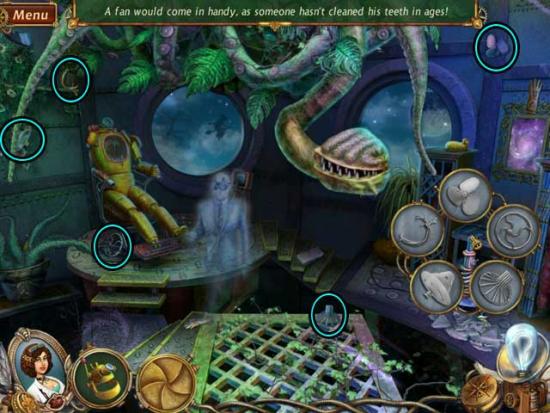
- Once you’ve completed the fan, click on the GLASS COIL to add it to your inventory.
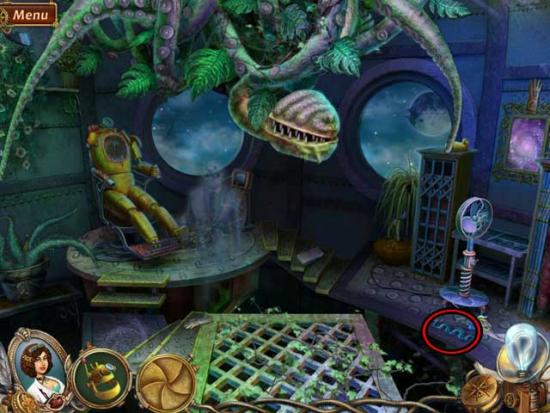
- Click on the potted plant on the left. Find the objects required: their locations are circled below.
- Return to the Giant Head.
Giant Head
- Click on the lab table beneath the portal on the left. Find the objects required: their locations are circled below. The GLASS COIL is a required object.
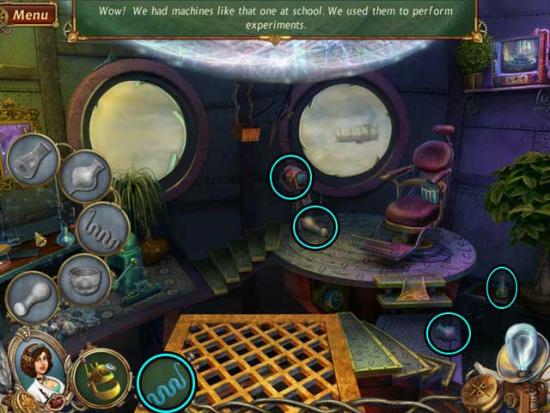
- Once completed, examine the table on the left. In the close-up, click on the wooden box on the right. Find the objects required: their locations are circled below.
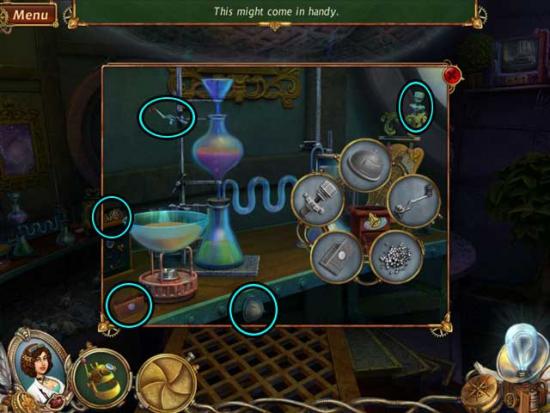
- Upon assembling the grinder, click on the GROUND PEPPER to add it to your inventory.
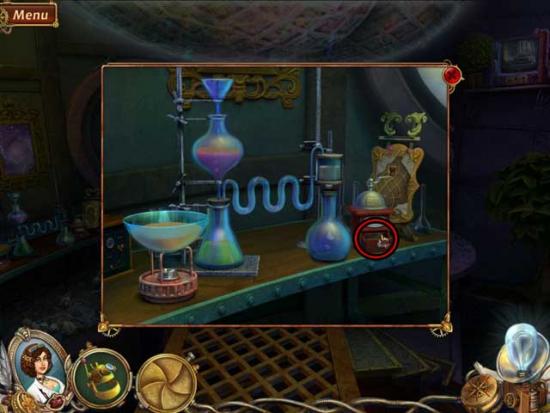
- Back in the main area, click on the cleaning bot on the lower left. Find the objects required: their locations are circled below. Ignore the missing object for now.
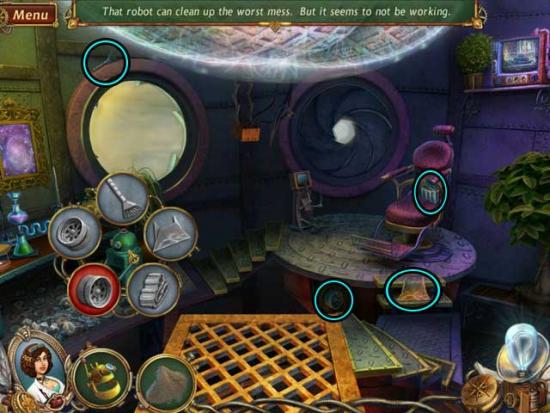
- Return to the Plant Domain.
Plant Domain
- Click on the yellow robot in the chair. Find the objects required: their locations are circled below. The ROBOT’S HEAD is a required object. Ignore the missing object for now.
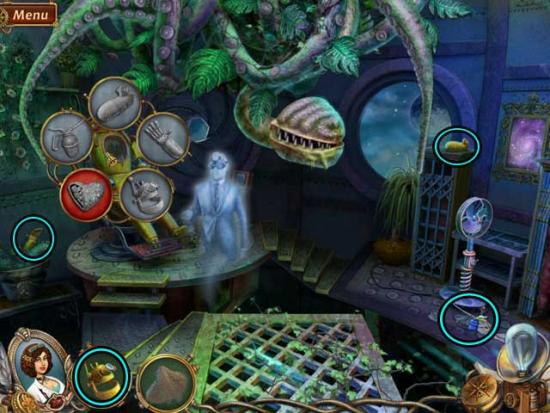
- Use the GROUND PEPPER on the fan on the right, then click on the object the plant coughs up. Find the objects required: their locations are circled below.
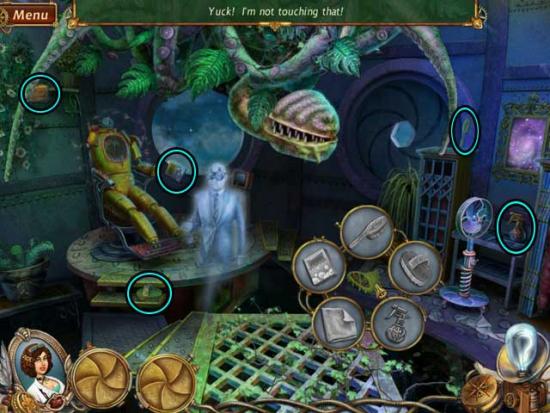
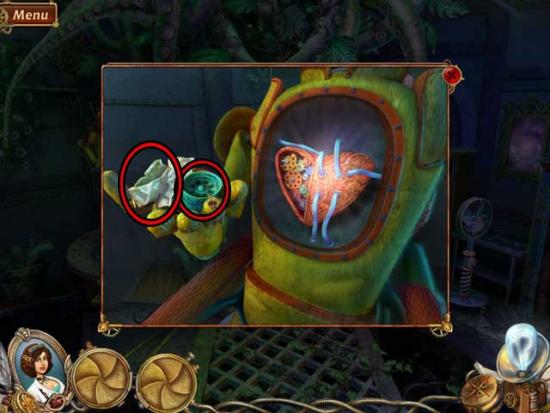
- Click on the resulting HEART to add it to your inventory. Use it on the yellow robot, then click for a closer view. Click on the CASTOR and the SCHEMATIC (you may have to read it first, then try again) to add them to your inventory.
- Return to the Giant Head.
Giant Head
- Use the CASTOR on the cleaning robot on the lower left, then click on the MATCHES to add them to your inventory.
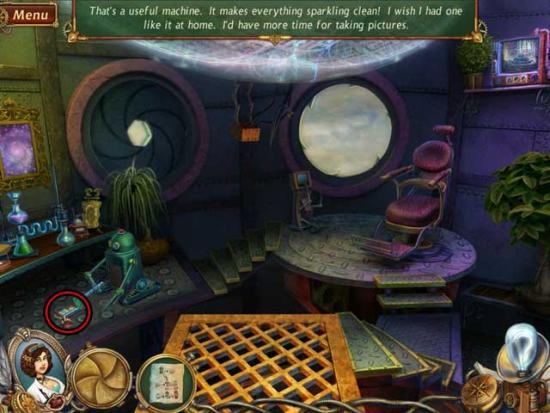
- Take a closer look at the table on the left again. Place the SCHEMATIC in the broken frame on the right. You can view it again at any time. Use the MATCHES on the burner on the left. Wait until the liquid inside the bowl turns to a POWDER, then use it on the funnel at the top of the chemistry set. Click on the resulting NEUTRALIZER to add it to your inventory.
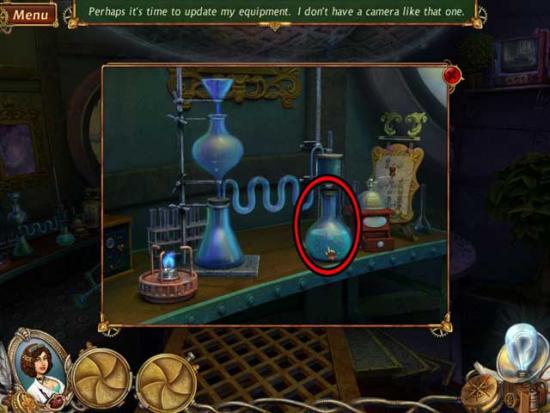
- Go back to the Plant Domain.
Plant Domain
- Use the NEUTRALIZER on the giant plant’s head.
- Speak with the ghost. You will be rewarded with the FILM NEGATIVE.
Chapter 4: The Flying Islands
Apartment
- Examine the machine at the back of the room, near the purple lights. Use the FILM NEGATIVE on the slot in the upper right corner to trigger a puzzle.
- The image is blurry. You need to focus it and resize it to fit the frame. Once the image is ready (the buttons will glow green when they’re in the proper positions), you need to press the red button to print the image. The button sequence is random, but the goal shot (when you press the red button) is shown below.
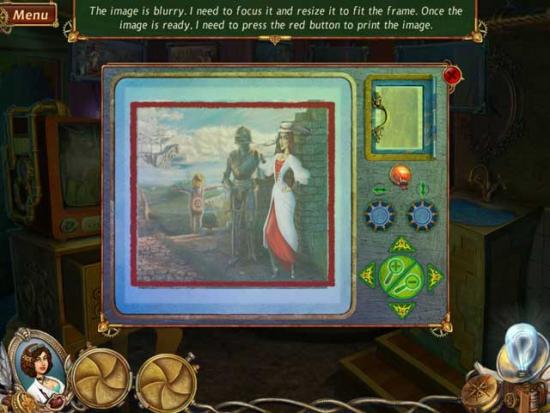
- Upon completing the puzzle, click on the UNDEVELOPED PHOTO to add it to your inventory.
- Use the UNDEVELOPED PHOTO on the green and purple fluid-filled trays to obtain the DEVELOPED PHOTO. Next, use the DEVELOPED PHOTO on the sink on the right to obtain the WASHED PHOTO, then place it in the fourth hanging frame from the upper left to dry it.
- After a brief cutscene, you will be taken to the Flying Islands.
Field
- Click on the windmill on the left. Find the objects required: their locations are circled below.
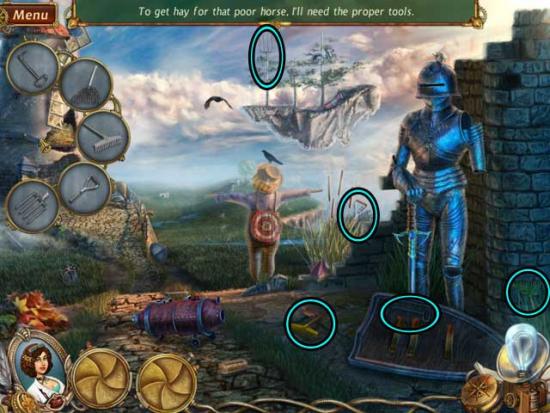
- Next, click on the suit of armor on the right. Find the objects required: their locations are circled below.
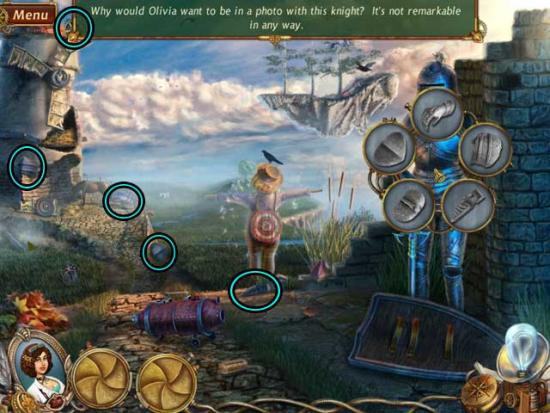
- Next, click on the red device on the ground. Find the objects required: their locations are circled below.
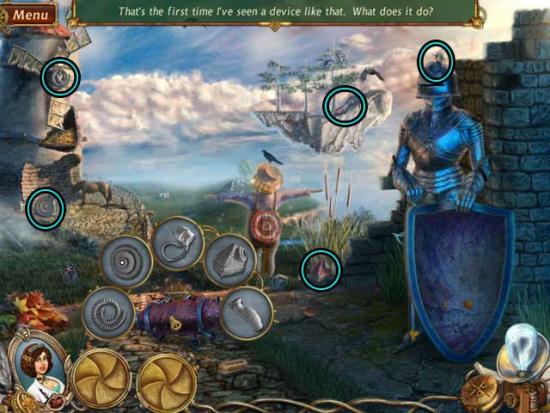
- Once you’ve completed the device, click on the KEY and the BRUSH to add them to your inventory.
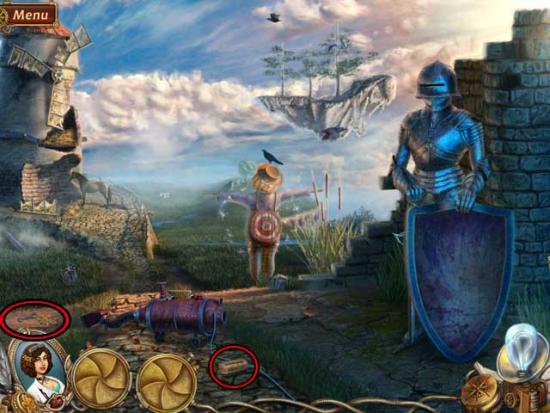
- Use the BRUSH on the knight’s shield on the right to polish it. Click on the portal that appears to proceed to the next area.
Farm
- Speak with the ghost, then use the KEY on the windmill to open it and proceed inside.
Windmill
- First and foremost, click on the hammock to unravel it.
- Next, click on the broken pipe on the right. Find the objects required: their locations are circled below.
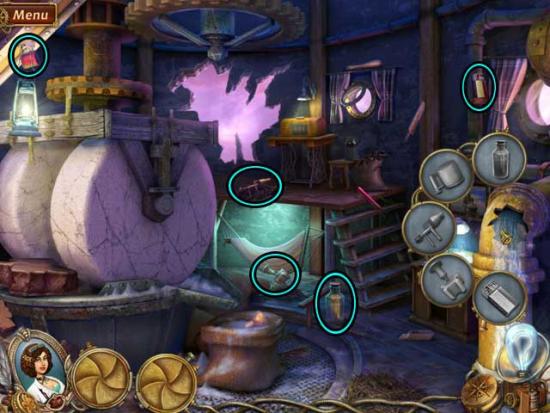
- Once the pipe is repaired, examine the desk to the immediate left of it. Click on the bulb of the lamp. Find the objects required: their locations are circled below.
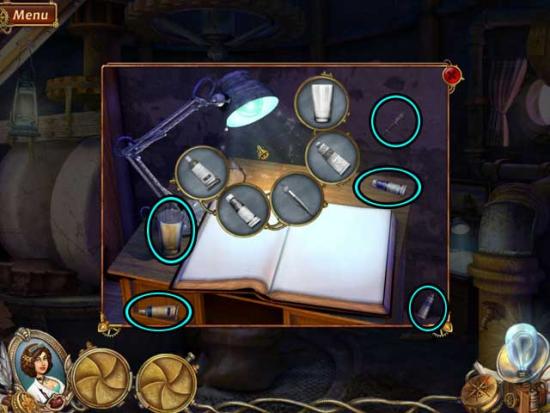
- Upon completing the list of objects, take a closer look at the pages of the journal below. Take note of the symbols and the numbers associated with them given by the hints (7 for fire, and 6 for earth).
- Take a closer look at the small chest next to the large hole in the wall to trigger a puzzle.
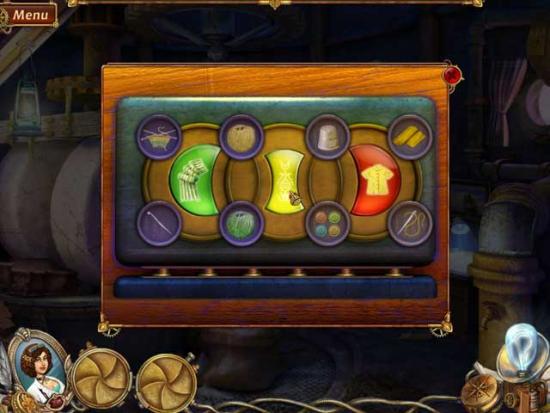
- Click on the green, yellow, and red buttons to arrange the tokens. Each button should be surrounded by the things that go into the creation of the image on the button. Click on the buttons in the following sequence to complete the puzzle: Green= G, Yellow= Y, Red= R. Solution: G, Y, Y, R, R, Y, G, G, Y, G, Y, Y, Y.
- Click on the sewing machine. Find the objects required: their locations are circled below.
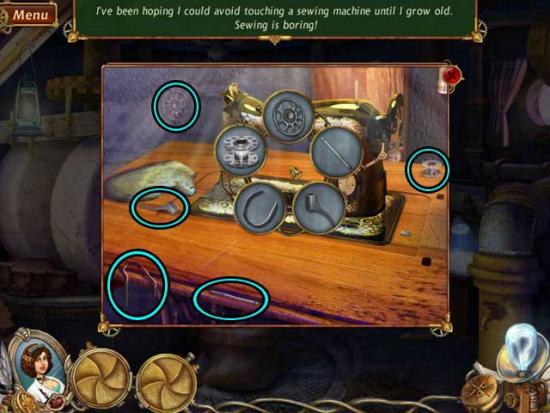
- Once you’ve completed the sewing machine, return to the Farm.
Farm
- Click on the KNIFE to add it to your inventory.
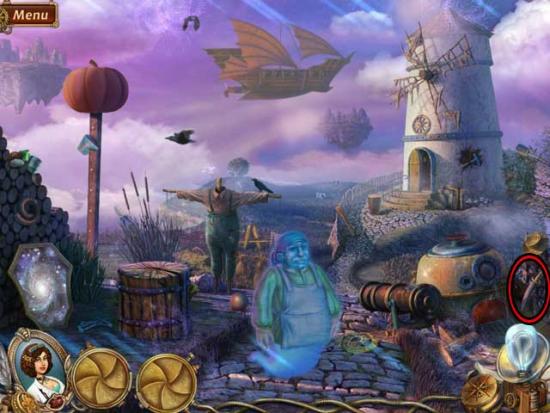
- Use the KNIFE on the pumpkin on top of the pole on the left to carve it.
- Next, click on the scarecrow. Find the objects required: their locations are circled below.
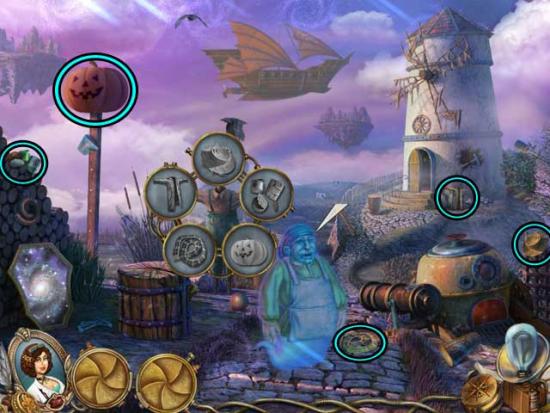
- Upon completing the scarecrow, click on the BULLET that falls to the ground to add it to your inventory.
- Return to the Field.
Field
- Click on the scarecrow here. Find the objects required: their locations are circled below. The BULLET is one of the objects required.
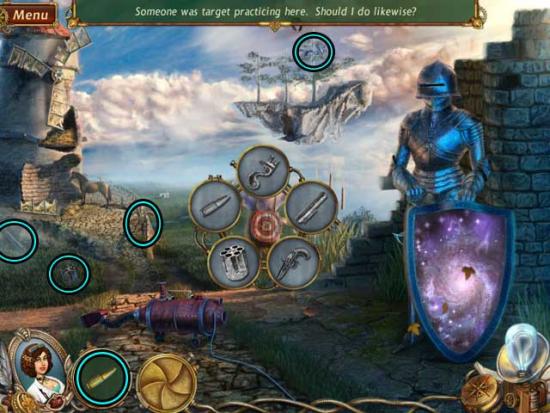
- Once you’ve completed the scarecrow, click on the MALLET to add it to your inventory.
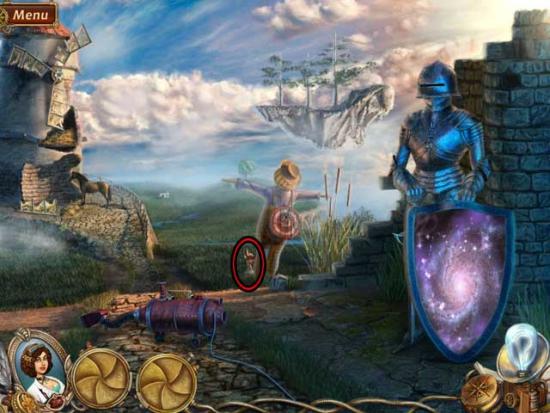
- Go back to the Farm.
Farm
- Click on the windmill in the upper right corner. Find the objects required: their locations are circled below. The MALLET is one of the objects required.
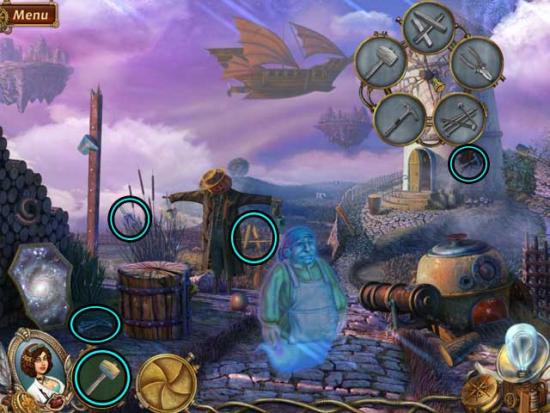
- Once complete, return to the inside of the Windmill.
Windmill
- Click on the stone blocking the millstone on the left. Find the objects required: their locations are circled below.
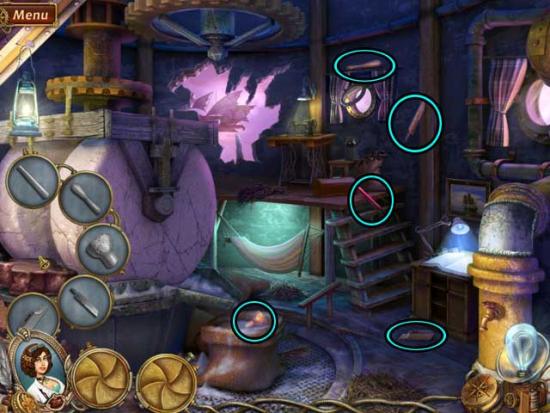
- Return to the Farm.
Farm
- Click on the wooden stump on the left. Find the objects required: their locations are circled below.
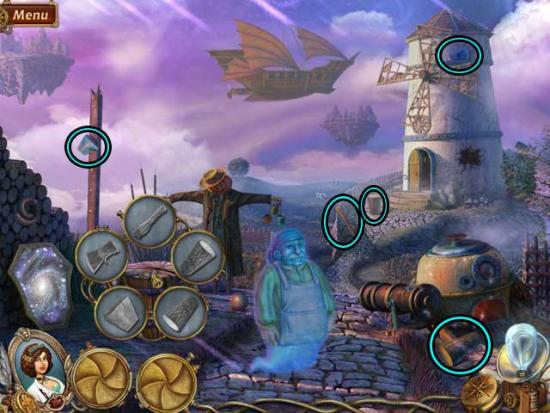
- Next, click on the furnace on the right. Find the objects required: their locations are circled below.
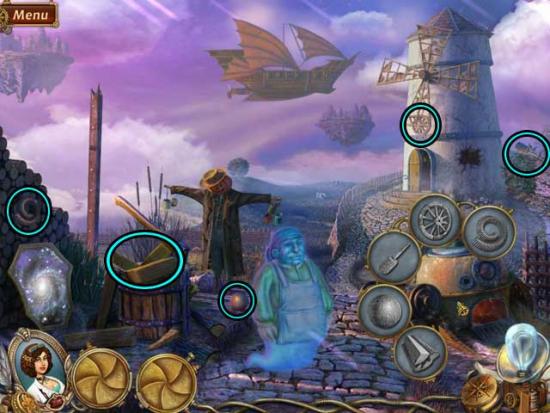
- After the cannon fires, proceed up the steps to the ship’s deck.
Deck
- Click on the chest towards the left. Find the objects required: their locations are circled below.
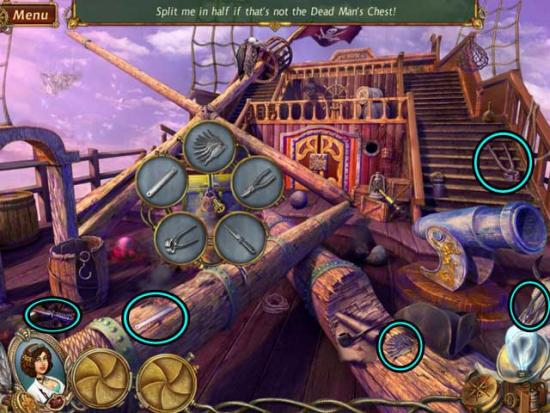
- Click on the BUCKET to add it to your inventory.
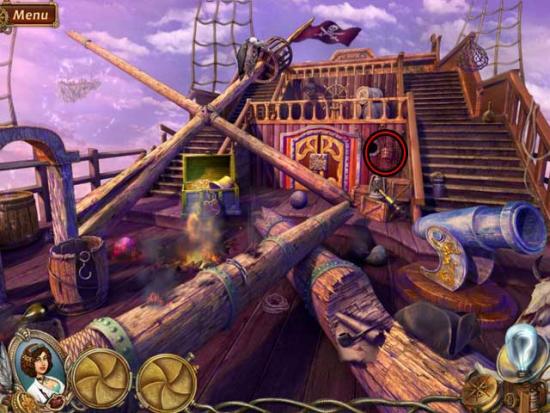
- Return to the Windmill.
Windmill
- Use the BUCKET on the faucet on the lower right to fill it, then click on the BUCKET OF WATER to add it to your inventory.
- Exit to the Farm.
Farm
- Click on the SPLINTER to add it to your inventory.
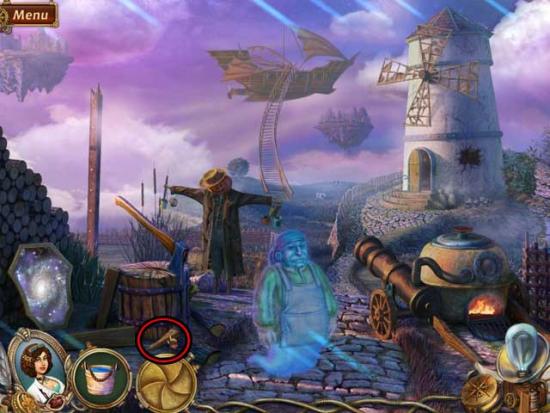
- Use the SPLINTER on the furnace on the right to acquire the BURNING SPLINTER.
- Return to the Deck.
Deck
- Click on the barrel on the far left. Find the objects required: their locations are circled below. Ignore the missing object for now.
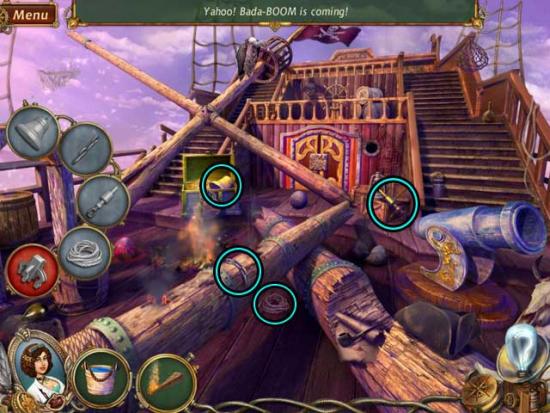
- Use the BUCKET OF WATER on the pink flaming cannon ball on the left to cool it.
- Click on the area of sky on the left beneath the fallen mast. Find the objects required: their locations are circled below.
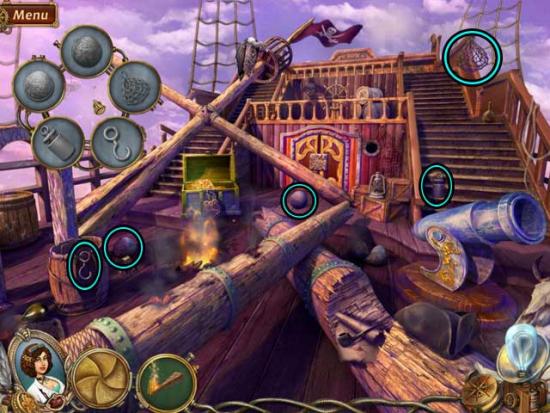
- Next, click on the barrel on the far left again. Add the final object to the set, it’s location is shown below.
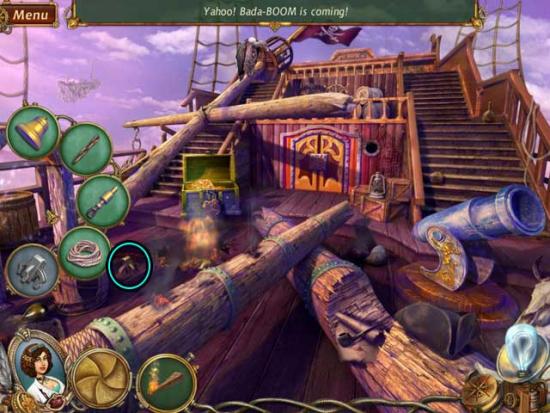
- Take a closer look at the crow’s nest at the top of the fallen mast. Click on the skeleton’s hand. Find the objects required: their locations are circled below.
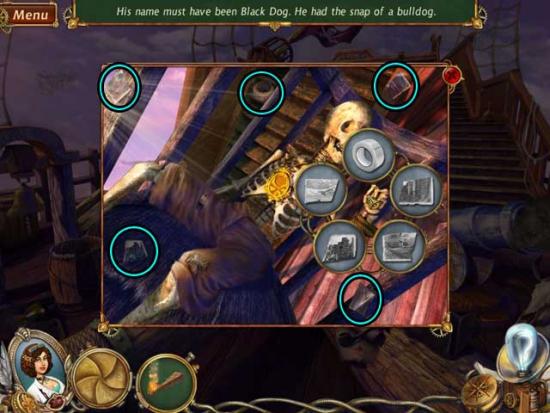
- Once you’ve assembled all the items, click on the photo in the skeleton’s hand for a closer view. Note the spot marked with an “x”.
- Back in the main area, examine the large orange doors at the far end of the deck to trigger a puzzle.
- Place each gear with its corresponding gears. Refer to the screenshot below for the solution. Click on the numbers in the following order to solve the puzzle: 4, 1, 2, 3, 4, 2, 1, 6.
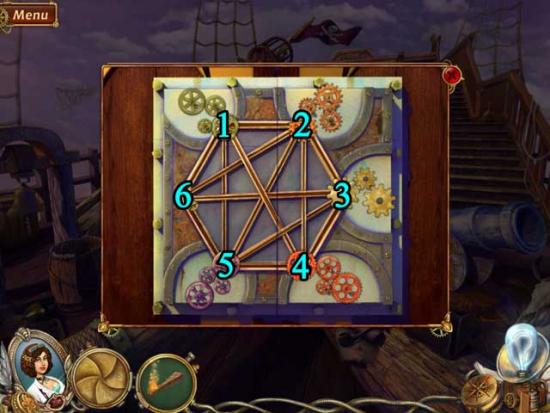
- Upon completing the puzzle, proceed inside the Cabin.
Cabin
- Click on the globe on the left. Find the objects required: their locations are circled below.
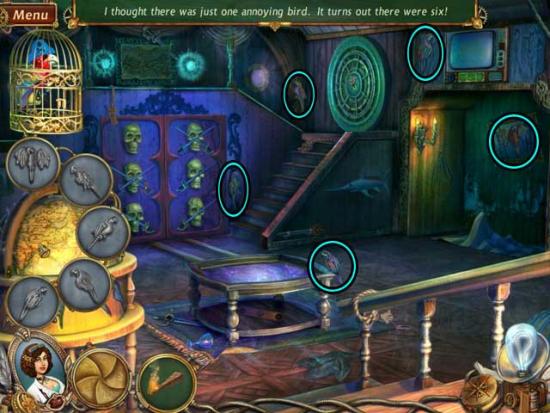
- Next, click on the striped cloth on the far right. Find the objects required: their locations are circled below.
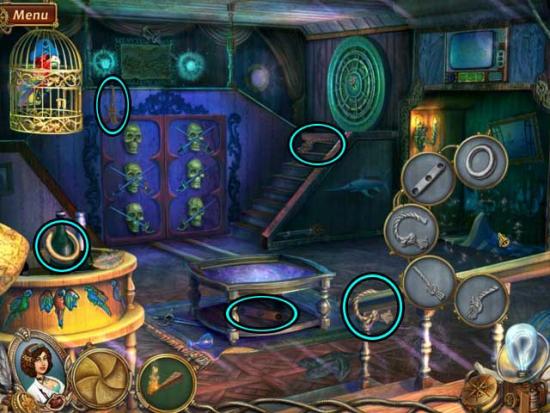
- Click on the portal on top of the table to proceed to the next area.
Cabin Bedroom
- Click on the brown portion of wall to the right of the pink bed curtains on the left. Find the objects required: their locations are circled below.
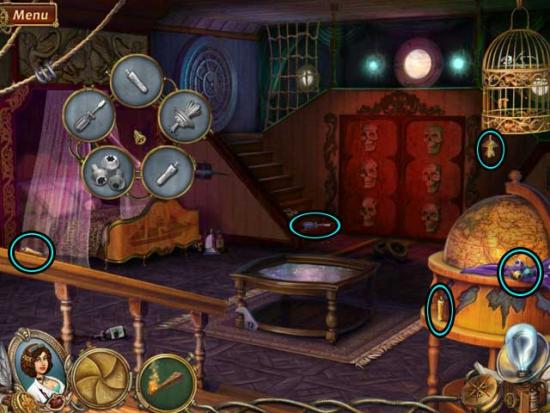
- Use the BURNING SPLINTER on the now-assembled candelabra on the wall to light it.
- Click on the left pink bed curtain to move it aside, then click on the SABRE to add it to your inventory.
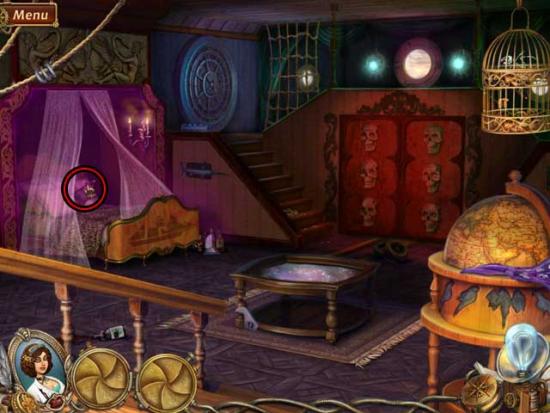
- Return to the Cabin.
Cabin
- Click on the door with the gold skulls. Find the objects required: their locations are circled below. The SABRE is one of the objects required.
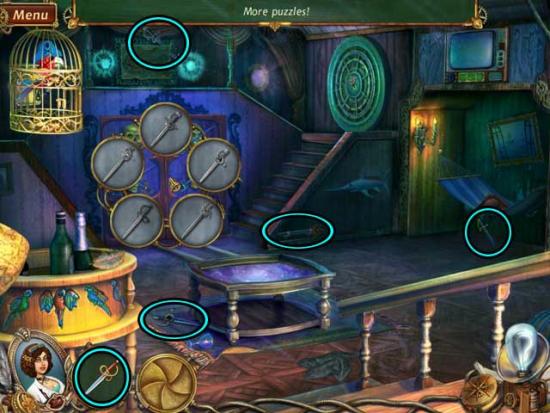
- Once the doors are open, click on the WRENCH PART inside to add it to your inventory.
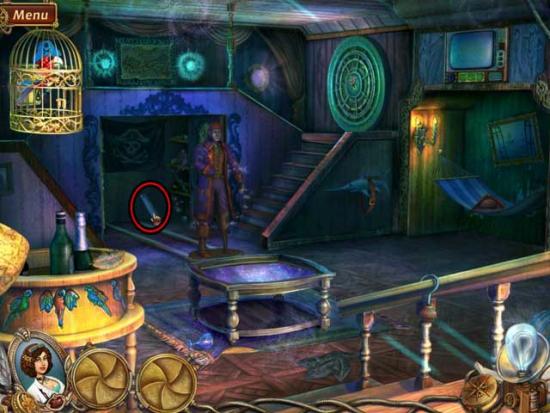
- Return to the Cabin Bedroom.
Cabin Bedroom
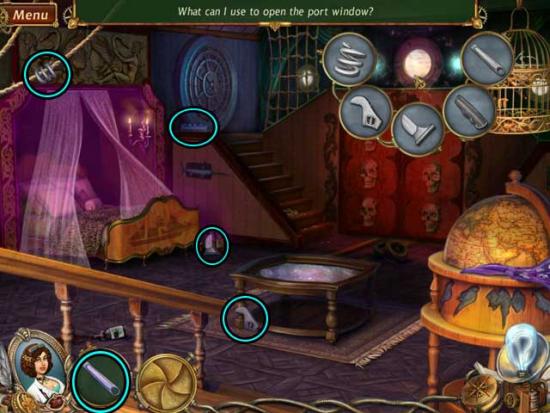
- Click on the porthole window above the doors. Find the objects required: their locations are circled below. The WRENCH PART is one of the objects required.
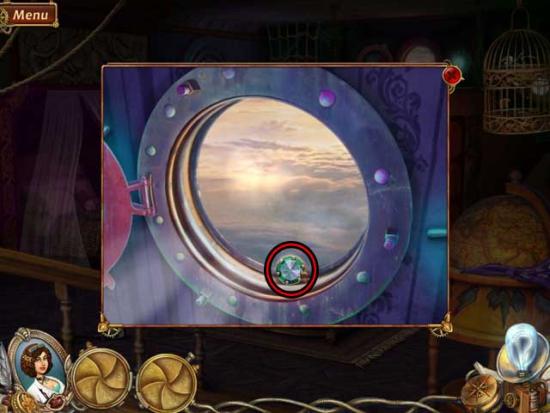
- Once the window is open, click on the EMERALD to add it to your inventory.
- Return to the Cabin.
Cabin
- Examine the circular door towards the upper right. Use the EMERALD on the door, then exit for now.
- Make your way back to the Field.
Field
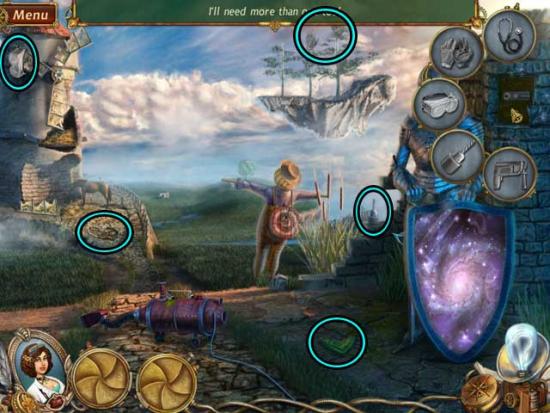
- Click on the top of the stone parapet on the upper right. Find the objects required: their locations are circled below.
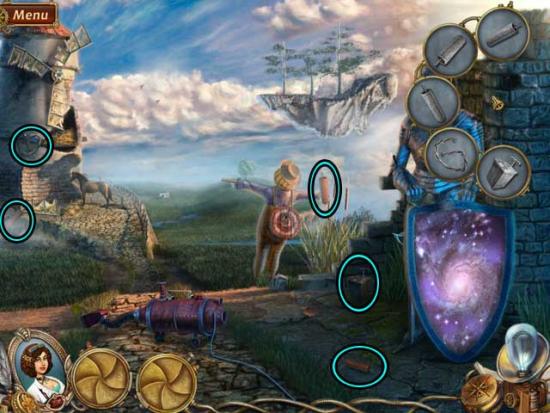
- Next, click on the same area for a new set to open the safe. Find the objects required: their locations are circled below.
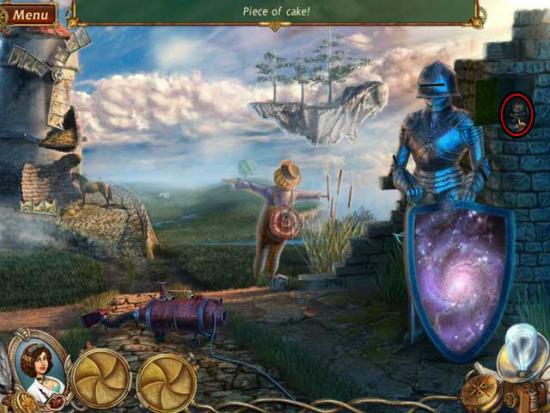
- Upon opening the safe, click on the LOCKET’S SKULL to add it to your inventory.
- Make your way back to the Deck.
Deck
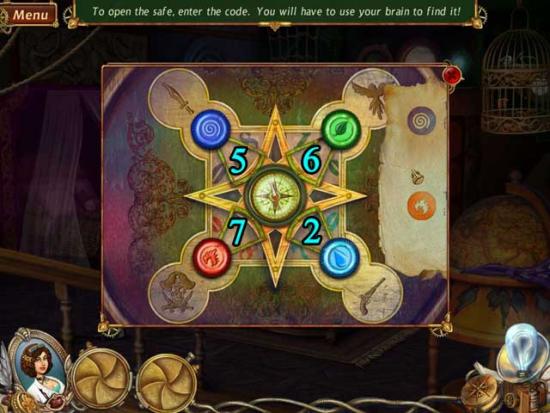
- Take a closer look at the crow’s nest at the top of the mast again. Use the LOCKET’S SKULL on the gold locket to open it, then click on the clue inside and take note of it (water= 2, wind= 5).
- Enter the Cabin again.
Cabin
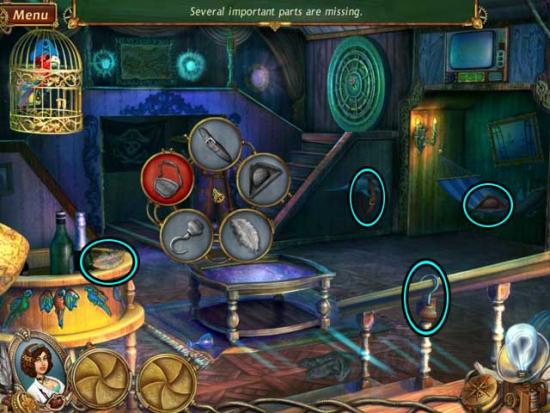
- Click on the pirate. Find the objects required: their locations are circled below. Ignore the missing object for now.
- Enter the portal.
Cabin Bedroom
- Click on the large circular door on the upper left to trigger a puzzle.
- To open the safe, enter the code. A note on the right is available so you can re-view the clues you found earlier. Click on a colored button to rotate the numbers until the correct one comes into view. The solution is shown below.
- Upon completing the puzzle, examine the inside of the safe. Click on the gold peacock. Find the objects required: their locations are circled below.
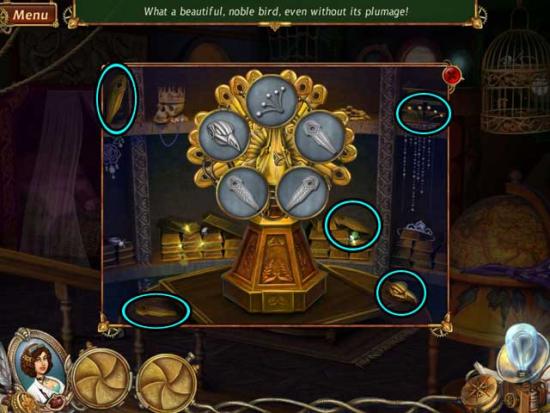
- Upon completing the peacock, click on the CAGE KEY that appears to add it to your inventory.
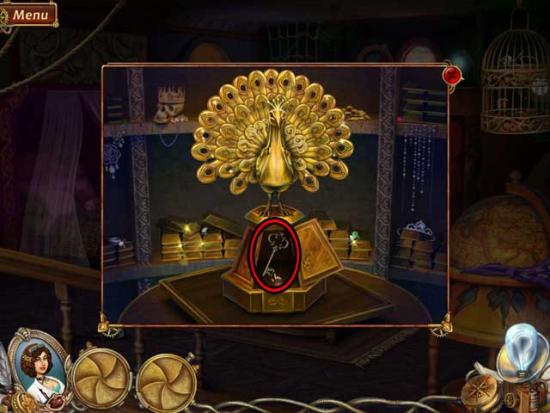
- Return to the Cabin.
Cabin
- Examine the parrot cage on the upper left. Use the CAGE KEY to open the door, then click on the EYE PATCH inside to add it to your inventory.
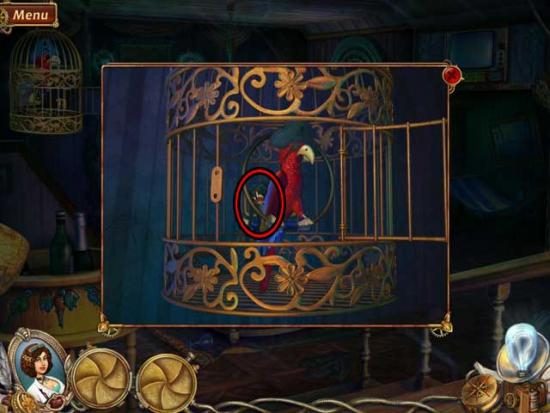
- Back in the main area, use the EYE PATCH on the pirate to complete him, causing the parrot to fly to his side.
- Take a closer look inside the cage again. Click on the RUBY inside to add it to your inventory.
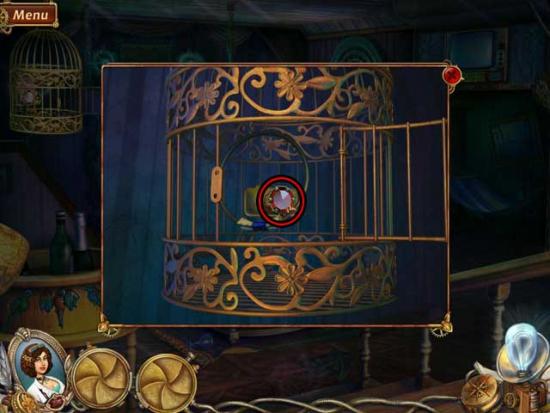
- Examine the circular door on the upper right again. Use the RUBY on the door to unlock it, then take a closer look inside. Click on the SILK to add it to your inventory.

- Return to the Windmill.
Windmill
- Examine the sewing machine on the table to the right of the gaping hole in the wall. Use the SILK on the sewing machine to obtain the SAIL.
- Go out to the Farm.
Farm
- Use the SAIL on the tattered windmill blades to restore it. The ghost will reward you with the FILM NEGATIVE.
Chapter 5: The Duchess’ Mansion
Apartment
- Examine the machine at the back of the room, near the purple lights. Use the FILM NEGATIVE on the slot in the upper right corner to trigger a puzzle.
- The image is blurry. You need to focus it and resize it to fit the frame. Once the image is ready (the buttons will glow green when they’re in the proper positions), you need to press the red button to print the image. The button sequence is random, but the goal shot (when you press the red button) is shown below.
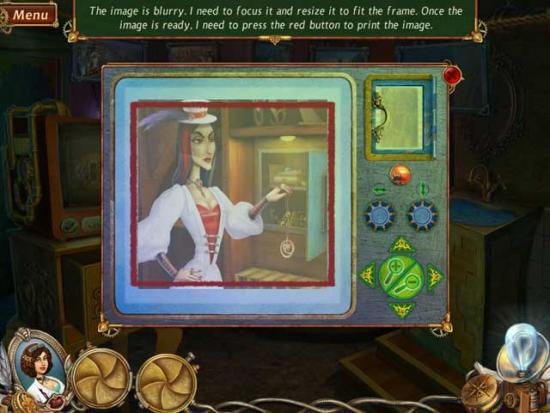
- Upon completing the puzzle, click on the UNDEVELOPED PHOTO to add it to your inventory.
- Use the UNDEVELOPED PHOTO on the green and purple fluid-filled trays to obtain the DEVELOPED PHOTO. Next, use the DEVELOPED PHOTO on the sink on the right to obtain the WASHED PHOTO, then place it in the fifth hanging frame from the upper left to dry it.
- After a brief cutscene, you will be taken to the inside of the Duchess’ Mansion.
Bedroom
- Click on the ELEPHANT to add it to your inventory.
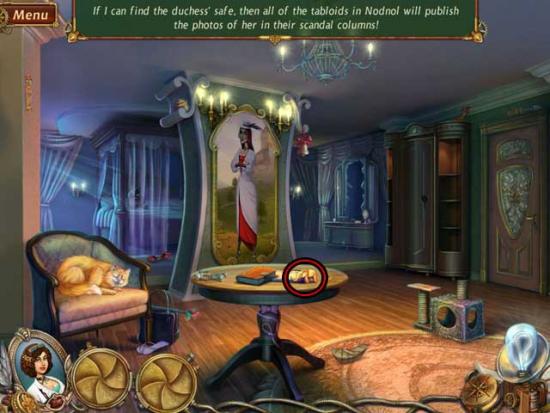
- Proceed through the door on the right.
Hallway
- Click on the elephant on top of the railing on the left. Find the objects required: their locations are circled below. The ELEPHANT is one of the objects required.
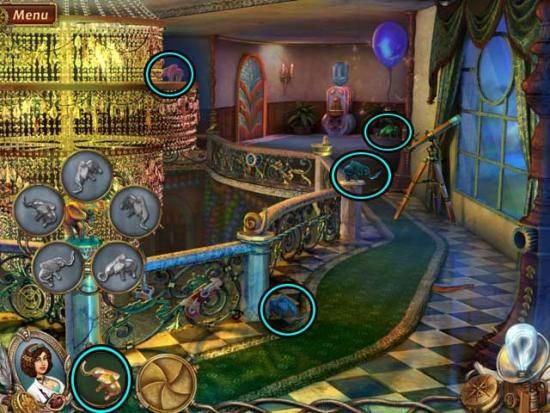
- Click on the resulting HANDLE to add it to your inventory.
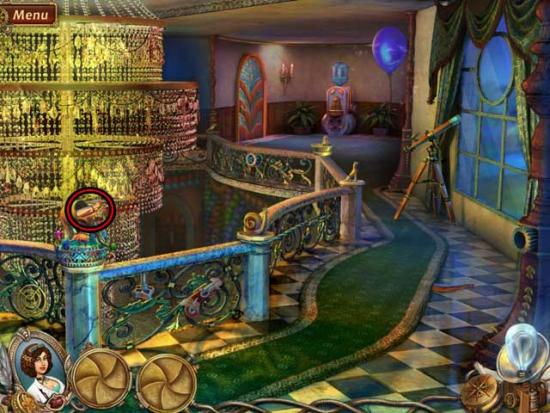
- Go back to the Bedroom.
Bedroom
- Click on the wardrobe on the right. Find the objects required: their locations are circled below. The HANDLE is one of the objects required.
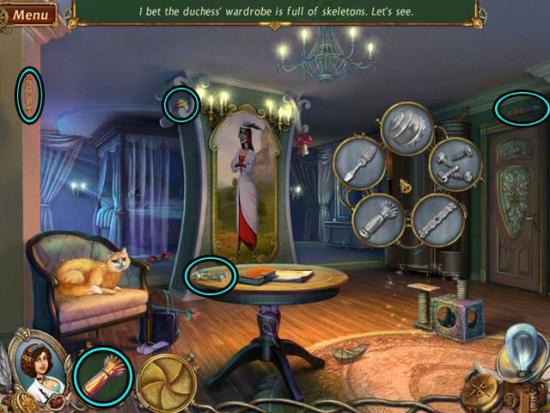
- Proceed through the portal that’s revealed within the wardrobe to the next area.
Ice Bedroom
- Click on the box on the chair on the right. Find the objects required: their locations are circled below.
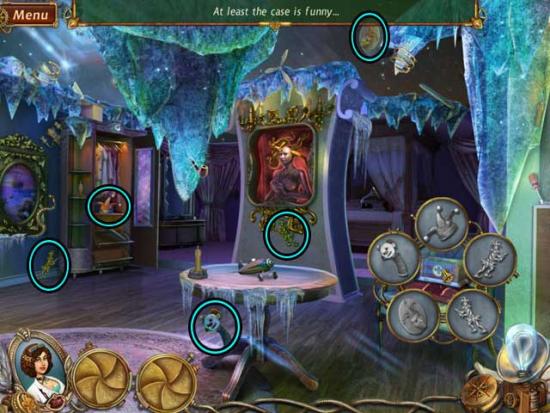
- Once the box is opened, click on the MOUSE inside to add it to your inventory.
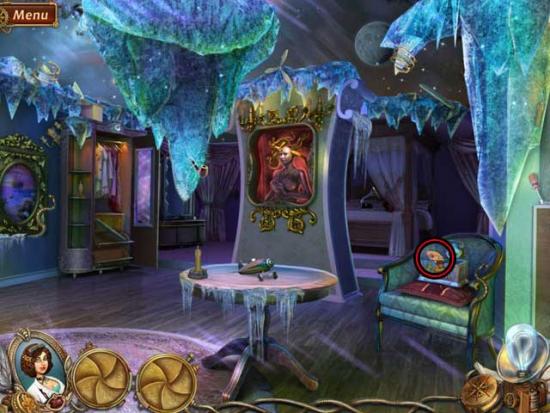
- Return to the Bedroom.
Bedroom
- Click on the cat post on the lower right. Find the objects required: their locations are circled below. The MOUSE is one of the objects required.
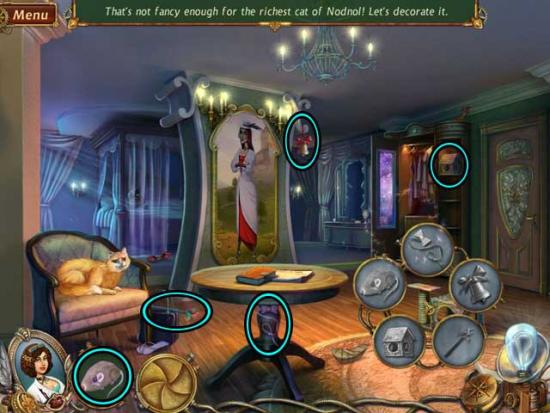
- Next, click on the lower shelf within the wardrobe. Find the objects required: their locations are circled below.
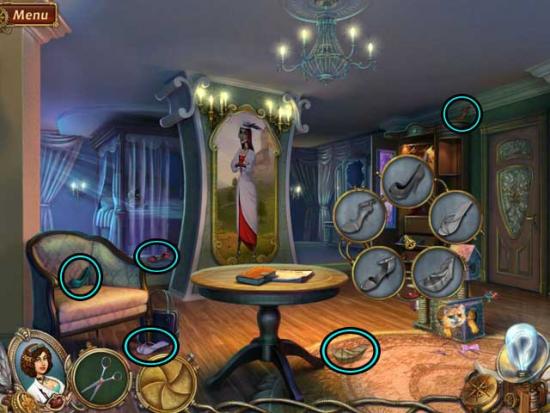
- Once finished, click on the SCISSORS and the RING to add them to your inventory.
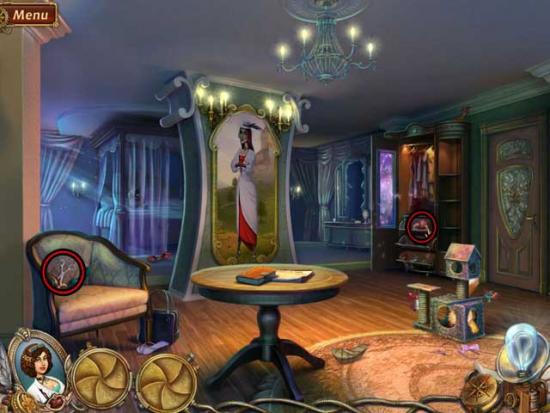
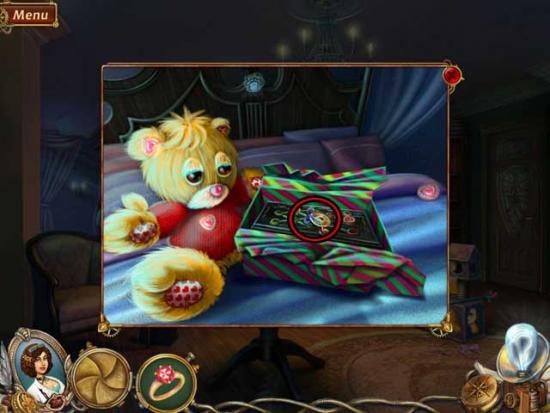
- Take a closer look at the bed behind the partition on the left. Use the SCISSORS on the present to open it, then click on the LOCKET inside to add it to your inventory.
- Exit the close-up back to the main area, then take a closer look at the broken dresser mirror, to the left of the wardrobe.
- Click on the gate beneath the blue cat. Find the objects required: their locations are circled below. The RING and the LOCKET are required objects.
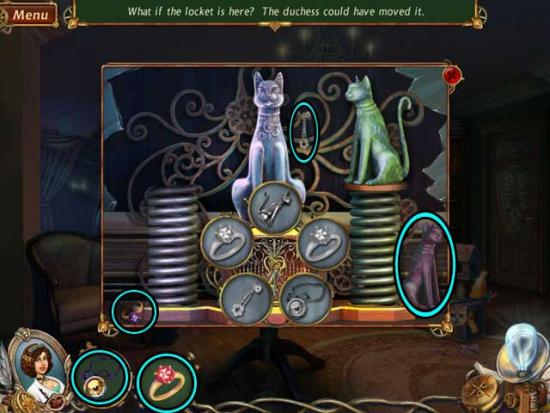
- Once the gate is open, click on the OFFICE KEY to add it to your inventory.
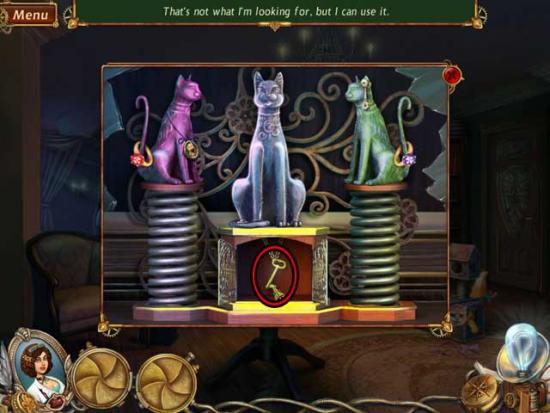
- Return to the Hallway.
Hallway
- Take a closer look at the door at the far end of the Hallway. Use the OFFICE KEY on the door to unlock it, then proceed inside.
Office
- For now, continue through the portal above the fireplace on the left.
Ghost Study
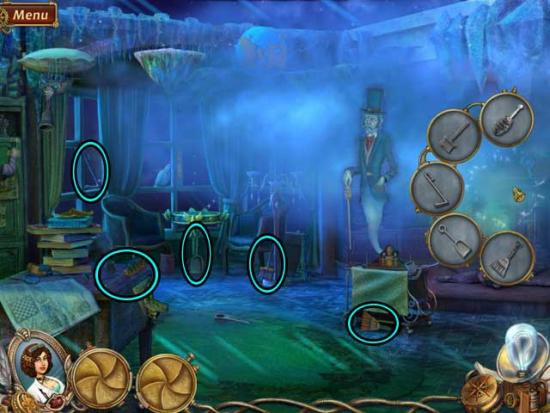
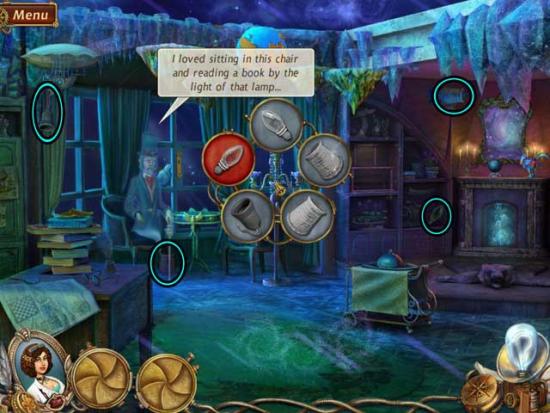
- Speak with the ghost, then click on the fireplace on the right. Find the objects required: their locations are circled below.
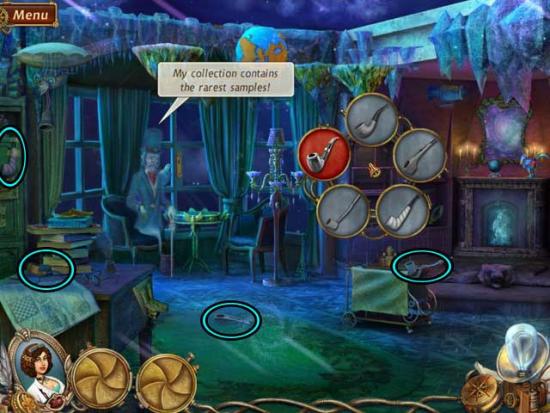
- Click on the empty rack on the shelf on the right. Find the objects required: their locations are circled below. Ignore the missing object for now.
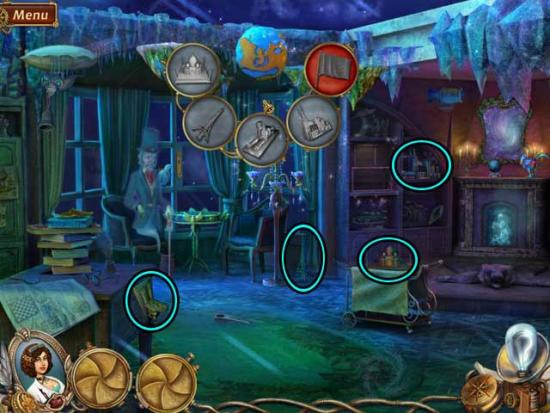
- Next, take a closer look at the globe near the top of the screen. Find the objects required: their locations are circled below. Ignore the missing object for now.
- Next, examine the lamp beneath the globe. Find the objects required: their locations are circled below. Ignore the missing object for now.
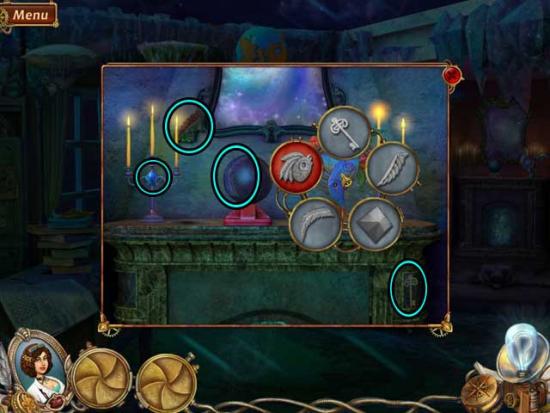
- Examine the mantle of the fireplace on the right. Click on the mechanical rooster. Find the objects required: their locations are circled below. Ignore the missing object for now.
- Return to the Office.
Office
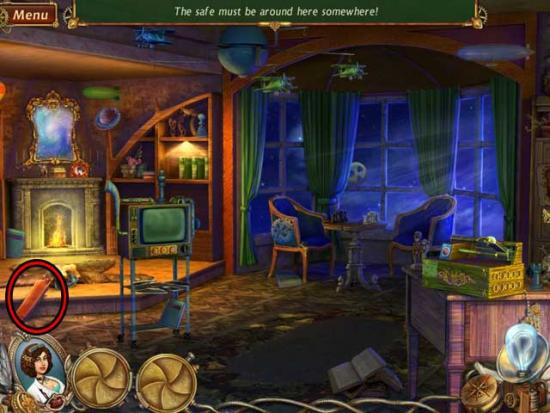
- Click on the QUIVER OF ARROWS to add it to your inventory.
- Go out to the Hallway.
Hallway
- Click on the blue balloon towards the upper right. Find the objects required: their locations are circled below. The QUIVER OF ARROWS is one of the objects required.
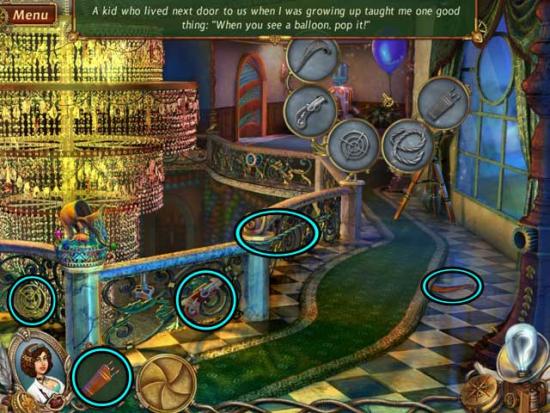
- Once the balloon is popped, click on the resulting CHESS PIECE that lands on the floor to add it to your inventory.
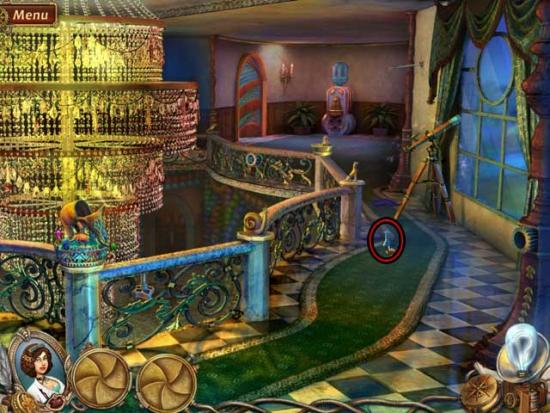
- Return to the Office.
Office
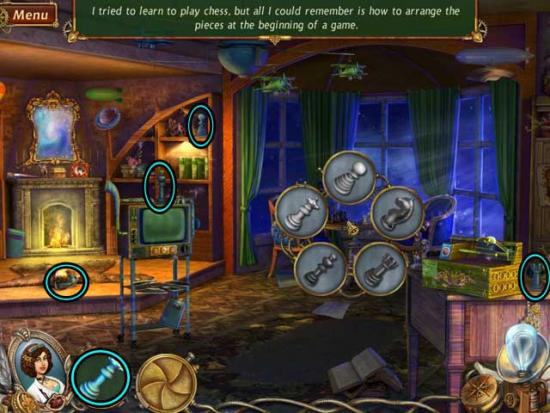
- Click on the small table in front of the window. Find the objects required: their locations are circled below. The CHESS PIECE is one of the objects required.
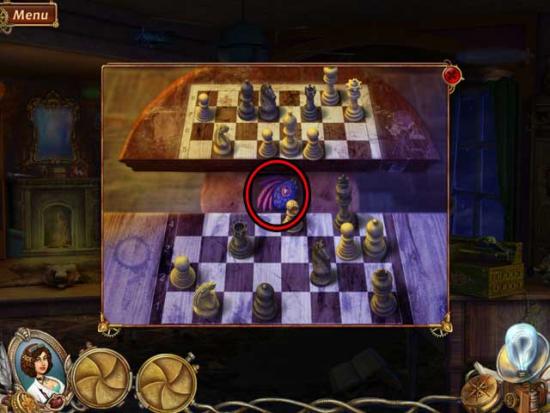
- Take a closer look at the completed chess board. Click on the ROOSTER HEAD to add it to your inventory.
- Return to the Ghost Study via the portal.
Ghost Study
- Examine the mantle of the fireplace on the right. Use the ROOSTER HEAD on the mechanical rooster to complete it, then click on the BULB to add it to your inventory.
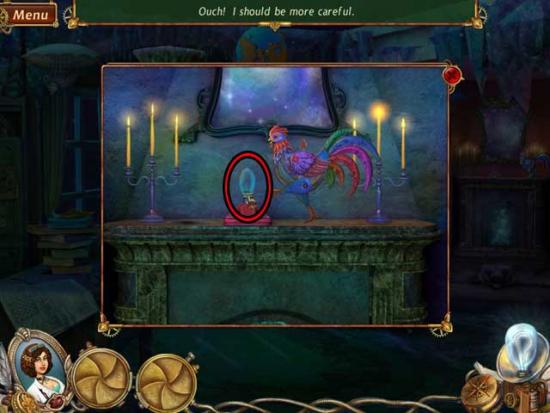
- Take a closer look at the lamp beneath the globe again. Use the BULB on the lamp to complete it, restoring light to the area.
- Click on the BOOK to add it to your inventory.
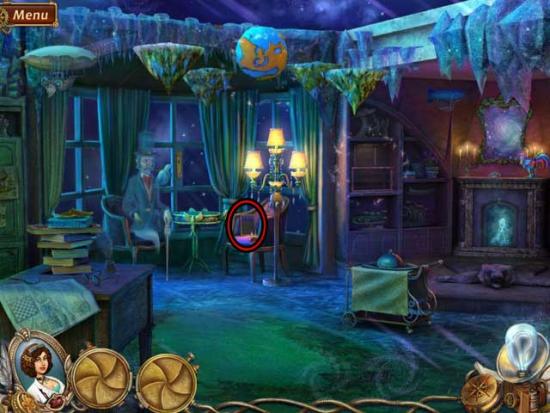
- Return to the Office.
Office
- Click on the shelf with the green books at the back of the room. Find the objects required: their locations are circled below. The BOOK is one of the objects required.
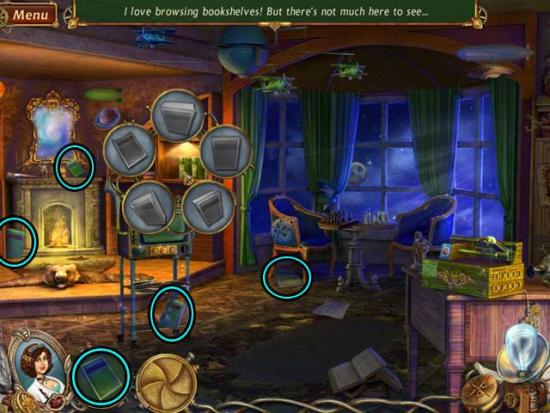
- Once you’ve completed the set of books, you will zoom in on the safe. Click on the SMALL KEY to add it to your inventory.
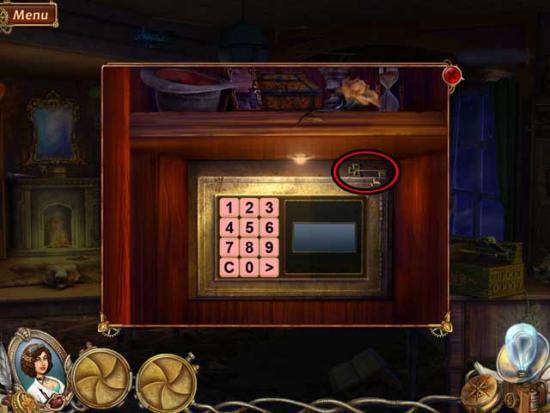
- Back in the main area, click on the gold recording box on the right. Find the objects required: their locations are circled below. Ignore the missing object for now.
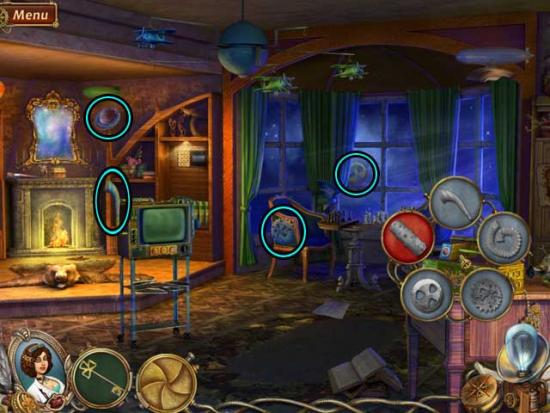
- Next, click on the broken record beneath the TV. Find the objects required: their locations are circled below. Ignore the missing object for now.
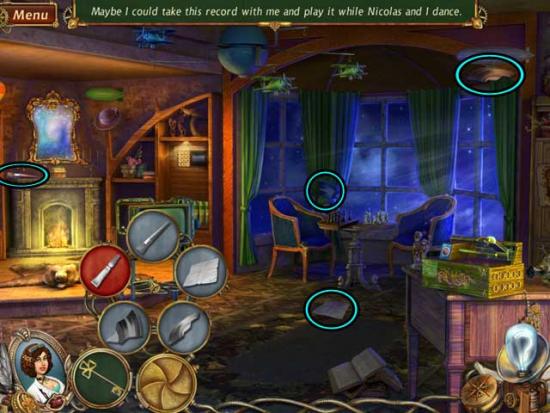
- Go out to the Hallway.
Hallway
- Click on the telescope on the right. Find the objects required: their locations are circled below. Ignore the missing object for now.
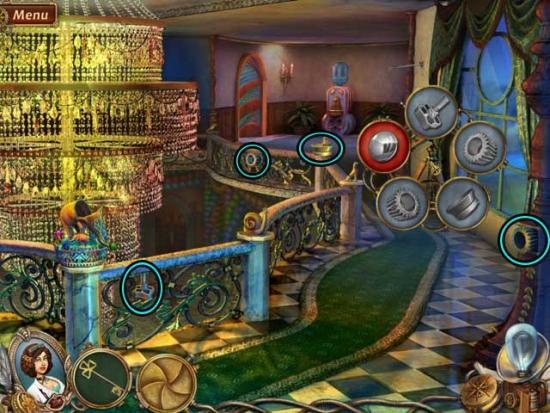
- Take a closer look at the water dispenser at the far, back end of the Hallway. Click on it to receive a list of objects to find. Find the objects required: their locations are circled below. Ignore the missing object for now.
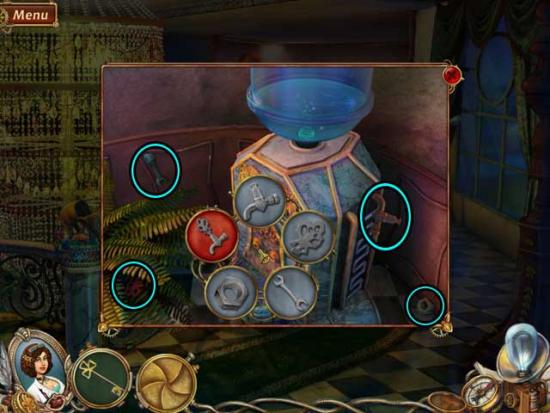
- Make your way back to the Bedroom.
Bedroom
- Take a closer look at the bed again, then take a closer look at the box on the bed. Find the objects required: their locations are circled below. Ignore the missing object for now.
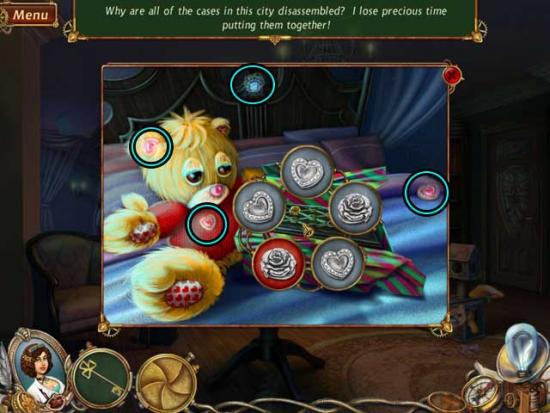
- Next, return to the Ice Bedroom.
Ice Bedroom
- Take a closer look at the red Medusa sculpture. Find the objects required: their locations are circled below. Ignore the missing object for now.
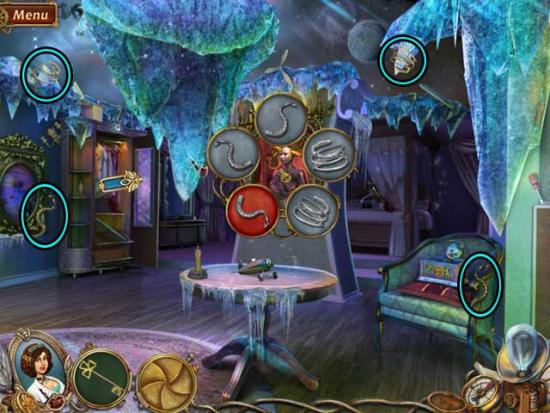
- Click on the bed to the right of the partition. Find the objects required: their locations are circled below. Ignore the missing object for now.
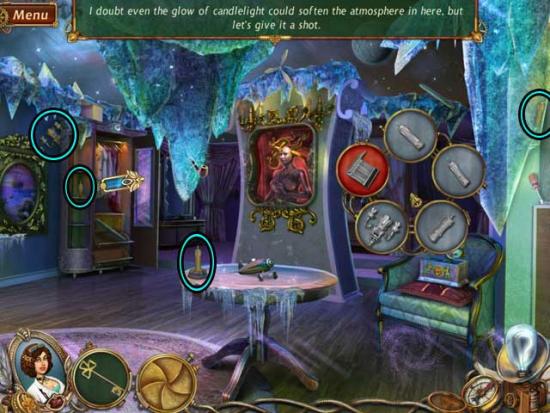
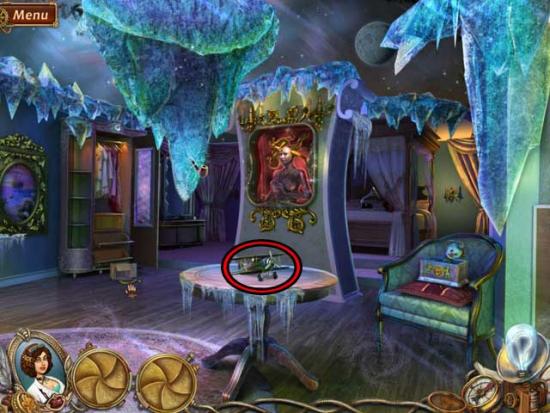
- Click on the airplane sitting on the table. Find the objects required: their locations are circled below. Ignore the missing object for now.
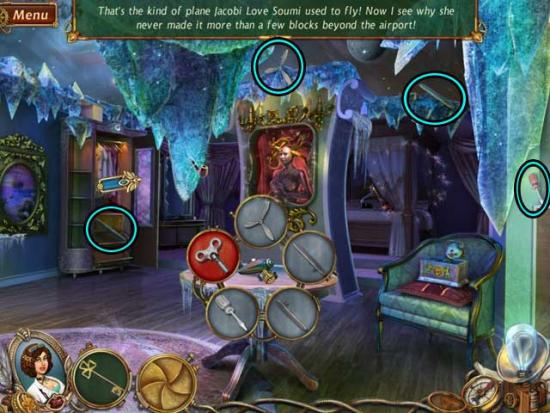
- Go back to the Bedroom.
Bedroom
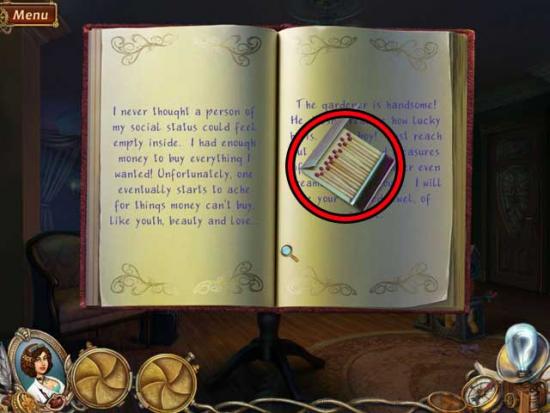
- Take a closer look at the diary lying on the table. Use the SMALL KEY to open it, then read the writing inside. First, take note of the safe code clue. Then, click on the MATCHES inside to add them to your inventory.
- Return to the Ice Bedroom.
Ice Bedroom
- Use the MATCHES on the bed to complete the list of objects. Once the area is lit, click on it for a closer view.
- Click on the gramophone. Find the objects required: their locations are circled below. Ignore the missing object for now. Also, click on the HANDLE to add it to your inventory.
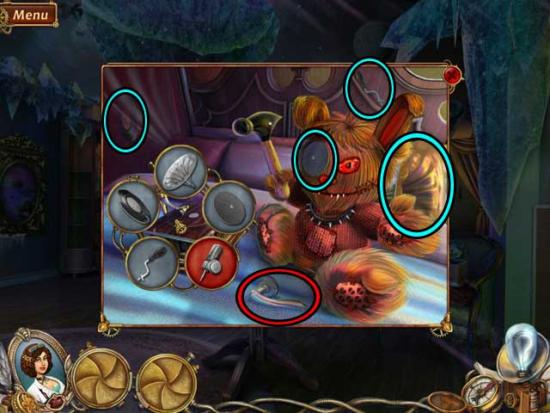
- Make your way back to the Ghost Study.
Ghost Study
- Take a closer look at the window next to the ghost. Use the HANDLE on the window to open it, then take a closer look at the note that floats to the ground.
- Take a closer look at the window again. Click on the NEEDLE sitting on the table to add it to your inventory.
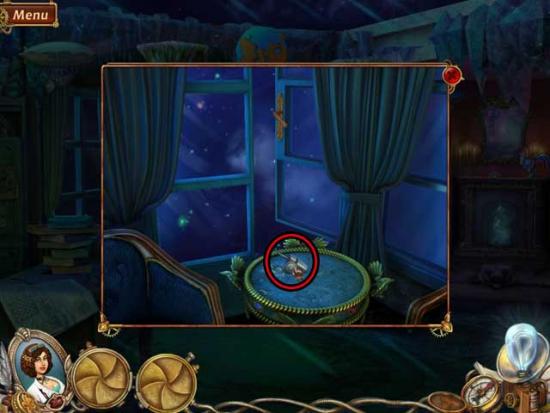
- Return to the Ice Bedroom.
Ice Bedroom
- Take a closer look at the bed again. Use the NEEDLE to complete the gramophone. After a moment, click on the broken disc to clear it away, then click on the GLUE to add it to your inventory.
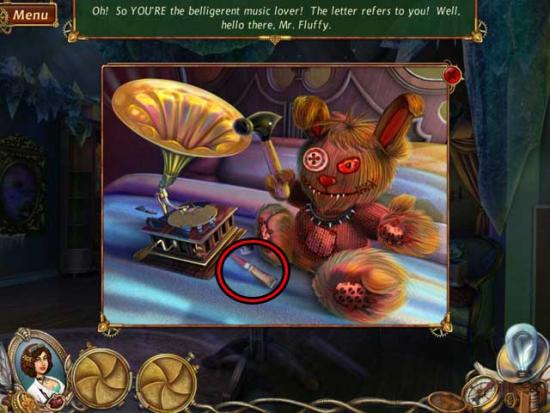
- Go back to the Office.
Office
- Use the GLUE to complete the broken record beneath the TV. Once fixed, the RECORD will be added to your inventory.
- Return to the Ice Bedroom.
Ice Bedroom
- Take a closer look at the bed again. Use the RECORD on the gramophone, then click on the booklet inside the plush. Note the month: May. Click on the WIND-UP KEY to add it to your inventory.
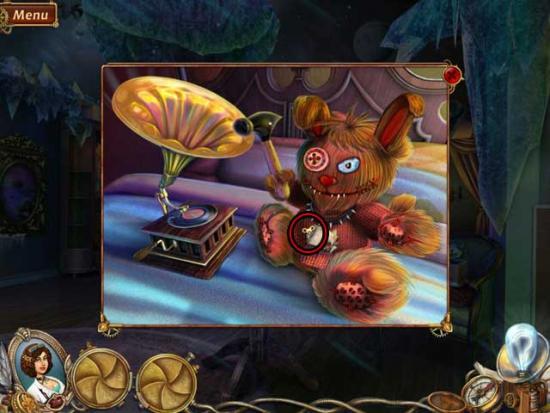
- Exit the close-up back to the main area of the room. Use the WIND-UP KEY on the plane to complete it, then click on the PLANE to add it to your inventory.
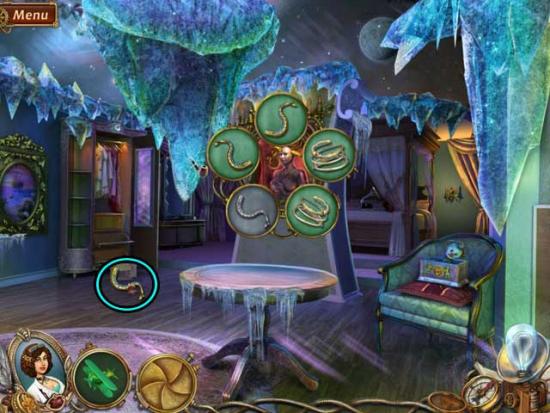
- Next, complete the Medusa statue. The final piece is shown below.
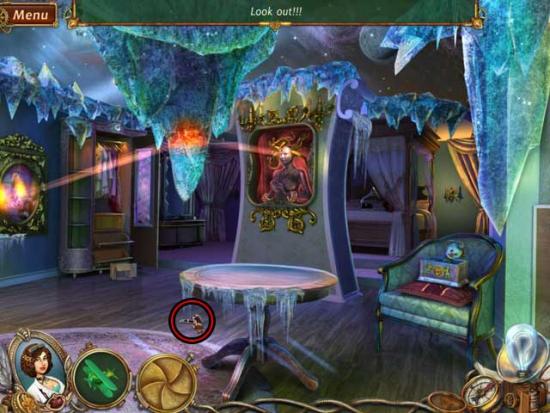
- Once completed, the statue will shoot intense heat from its eyes. Click on the PIPE that falls to the floor to add it to your inventory.
- Return to the Ghost Study.
Ghost Study
- Use the PIPE to complete the pipe collection on the shelf. The ghost will reward you with the PLANE (2).
- Go to the Office.
Office
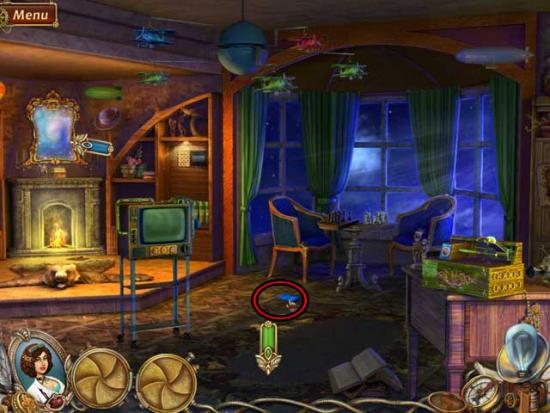
- Use the PLANES (x2) on the mobile on the ceiling, and note the number of green planes (there’s 3 total).
- Click on the FLAG that falls to the floor to add it to your inventory.
- Go back to the Ghost Study.
Ghost Study
- Use the FLAG to complete the globe on the ceiling, then click on the TAP inside the globe to add it to your inventory.
- Go to the Hallway.
Hallway
- Take a closer look at the water dispenser at the far end of the Hallway. Use the TAP on the dispenser to restore it, rewarding you with the ROSE.
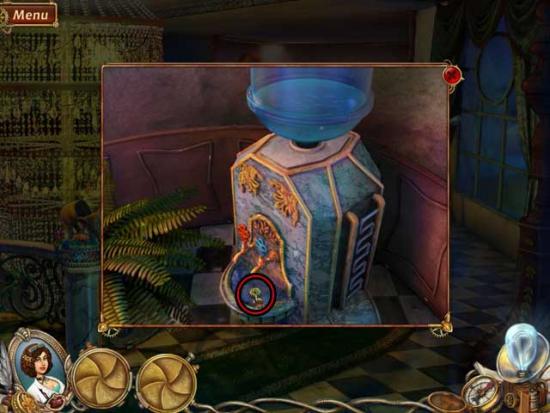
- Go to the Bedroom.
Bedroom
- Take a closer look at the bed again. Use the ROSE on the box to finish it and trigger a puzzle.
- Move each figurine onto a matching cell (a space of the same color, either red or yellow). Refer to the screenshot below as reference to the solution. The first number will indicate the space you should click on, and the second will indicate the space you should move the figurine to, i.e. #-#. Referring to the screenshot below, the solution is as follows: 10-12, 4-10, 5-7, 8-2, 10-8, 7-5, 13-7, 8-10, 10-13, 7-4, 12-10, 10-7, 9-12, 12-8, 11-9, 9-12, 7-11, 6-7, 4-6, 7-9, 1-10, 2-1, 5-4, 9-2, 3-9, 8-3, 10-8, 2-5, and 12-10.
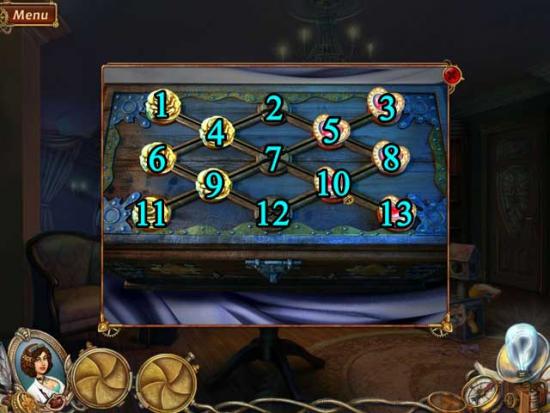
- Upon completing the puzzle, click on the HEART to add it to your inventory.
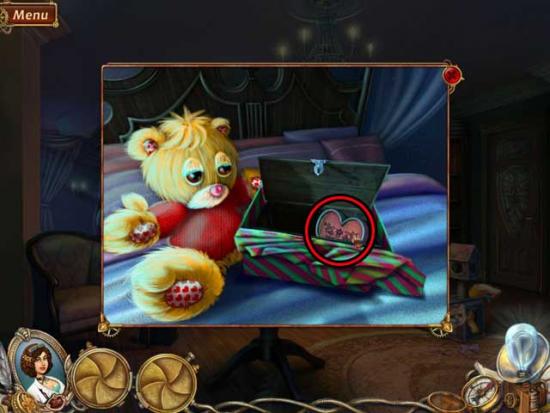
- Return to the Ice Bedroom.
Ice Bedroom
- Use the HEART on the red Medusa statue, then click on the VASE to add it to your inventory.
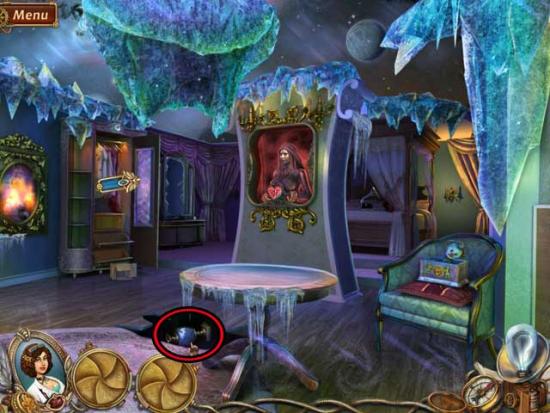
- Go to the Hallway.
Hallway
- Take a closer look at the water dispenser at the far end of the Hallway. Use the VASE on the dispenser to fill it with water, then click on the VASE WITH WATER to add it to your inventory.
- Go back to the Ice Bedroom.
Ice Bedroom
- Use the VASE WITH WATER on the flaming frame on the left, then click on the LENS and the BREAD inside to add them to your inventory.
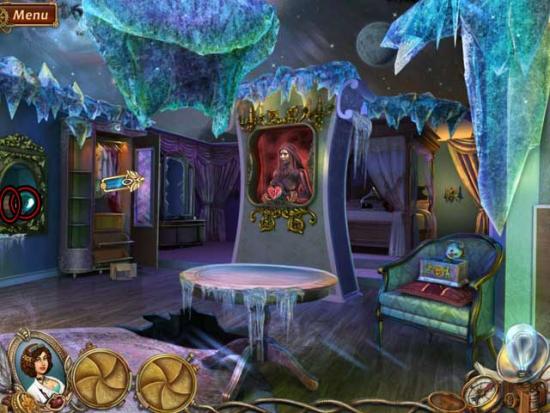
- Return to the Hallway.
Hallway
- Use the LENS to complete the telescope on the right, then click on it for a closer view. Click on the STICKY TAPE covering the lens to add it to your inventory, then note the number of spires in the distance: 4.
- Go to the Ghost Study.
Ghost Study
- Take a closer look at the window next to the ghost. Use the BREAD on the small table, then wait a moment and examine it again. Use the STICKY TAPE to fix the note left by the bird, then click on it to read a memo about the number of birds in the aviary. Note there are 4 peacocks.
- Once you’ve read the note, the ghost will reward you with the CYLINDER.
- Go to the Office.
Office
- Use the CYLINDER to complete the recording box on the right, then click on the red button to play the recording. Note the number clue: 5.
- Now, examine the safe on the shelf. Input the code according to the clues in the diary. The solution is as follows:
1)The month of my birth: 5 (May)
2)The number of green planes father owns: 3
3)The number of spires seen from the hall window: 4
4)The number of peacocks in my aviary: 4
5)A secret number (hint in the Dictaphone): 5
- Input the code “53445” to open the safe, then click on the LOCKET inside.
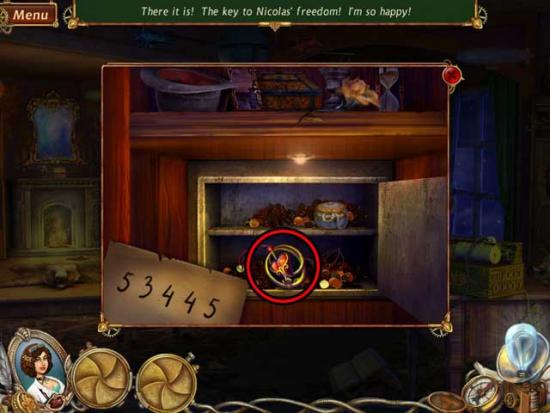
- Watch the cutscene that ensues.
Congratulations! You’ve completed Snark Busters: High Society!
More articles...
Monopoly GO! Free Rolls – Links For Free Dice
By Glen Fox
Wondering how to get Monopoly GO! free rolls? Well, you’ve come to the right place. In this guide, we provide you with a bunch of tips and tricks to get some free rolls for the hit new mobile game. We’ll …Best Roblox Horror Games to Play Right Now – Updated Weekly
By Adele Wilson
Our Best Roblox Horror Games guide features the scariest and most creative experiences to play right now on the platform!The BEST Roblox Games of The Week – Games You Need To Play!
By Sho Roberts
Our feature shares our pick for the Best Roblox Games of the week! With our feature, we guarantee you'll find something new to play!All Grades in Type Soul – Each Race Explained
By Adele Wilson
Our All Grades in Type Soul guide lists every grade in the game for all races, including how to increase your grade quickly!


