![Hololive Dreams Tier List [Best Cards]](/wp-content/uploads/2026/07/hololive-dreams-tier-list.jpg "Hololive Dreams Tier List [Best Cards]")
Hololive Dreams Tier List [Best Cards]
The best cards for the best performances.


![Iron Soul Dungeon Weapon Tier List [Best Weapons]](/wp-content/uploads/2026/07/iron-soul-dungeon-weapon-tier-list.jpg "Iron Soul Dungeon Weapon Tier List [Best Weapons]")

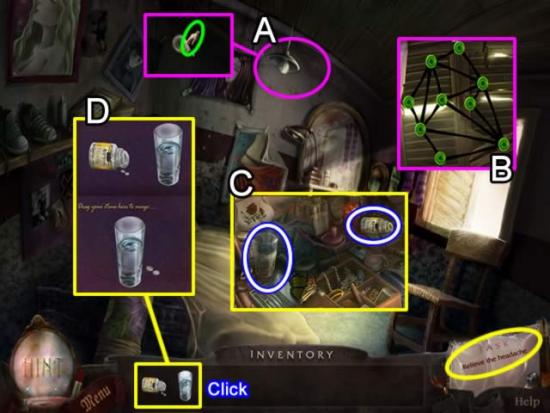
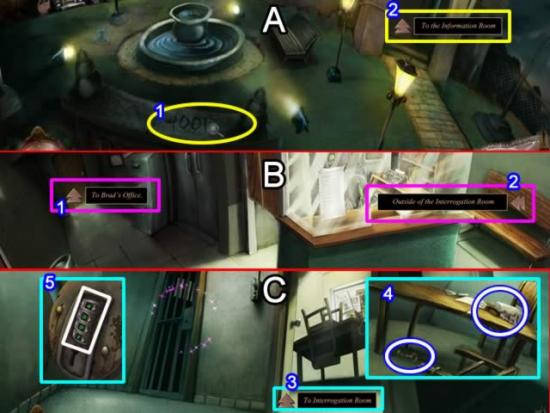
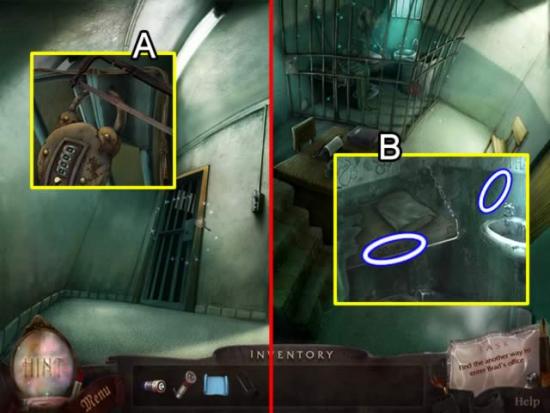
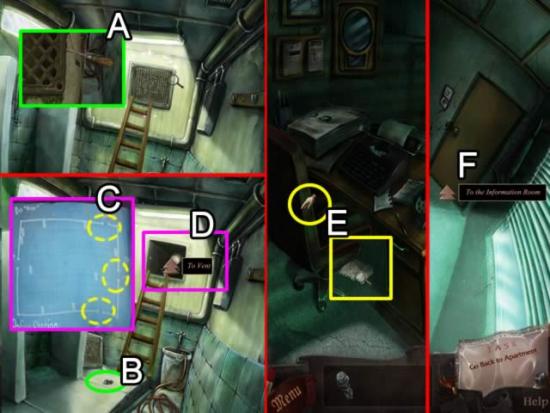
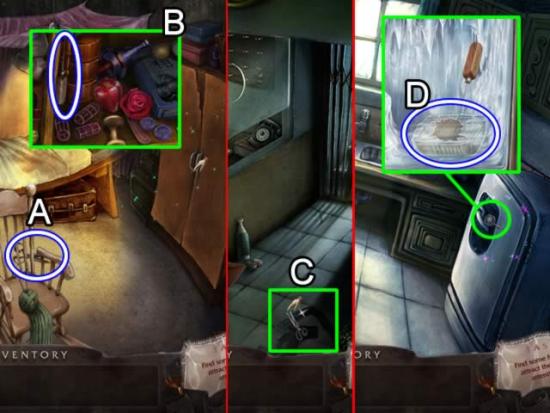
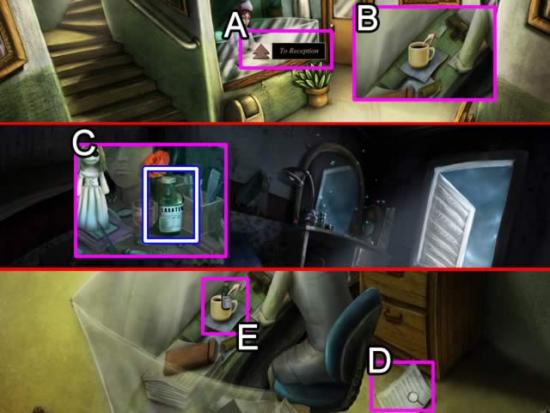
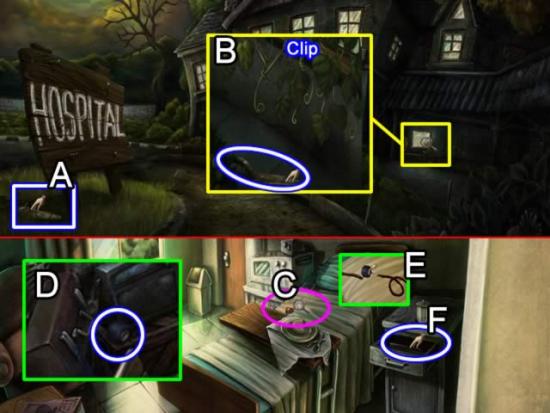
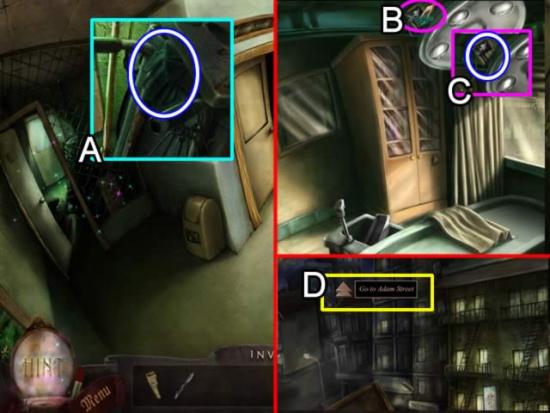
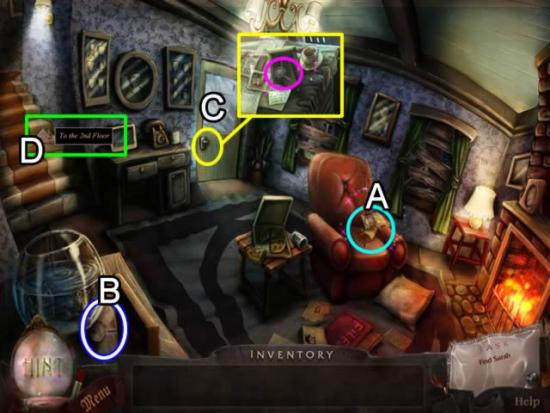
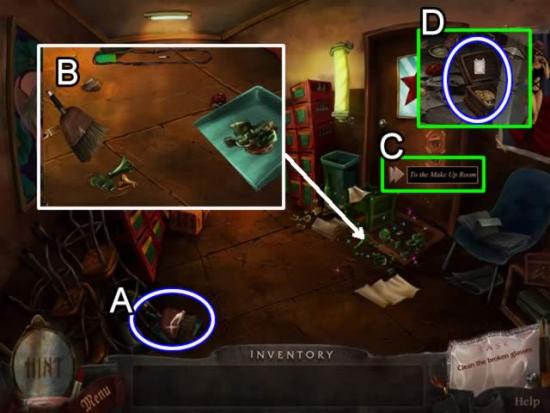
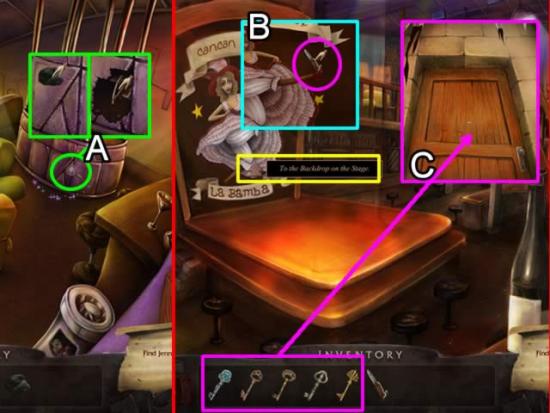
Welcome to the Silent Scream: The Dancer walkthrough on Gamezebo. Silent Scream: The Dancer is a Hidden Object Game played on the PC created by Maximize Games. This walkthrough includes tips and tricks, helpful hints and a strategy guide on how to complete Silent Scream: The Dancer.
Welcome to the Silent Scream: The Dancer walkthrough on Gamezebo. Silent Scream: The Dancer is a Hidden Object Game played on the PC created by Maximize Games. This walkthrough includes tips and tricks, helpful hints and a strategy guide on how to complete Silent Scream: The Dancer.
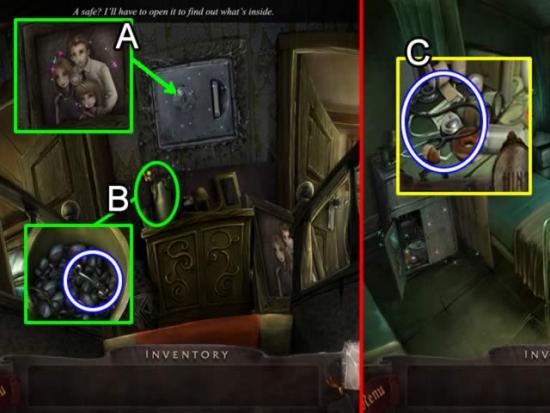
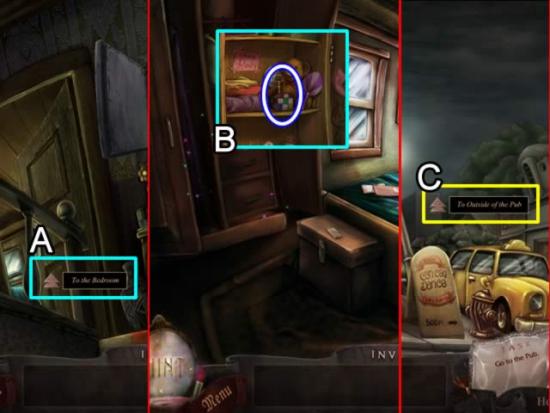
This hidden object game requires visiting several locations and using inventory items to advance play.
Main Menu:
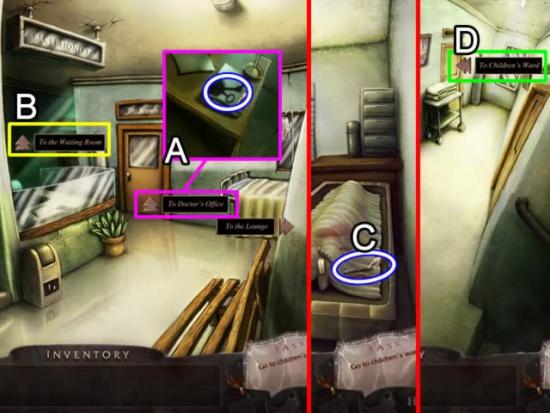
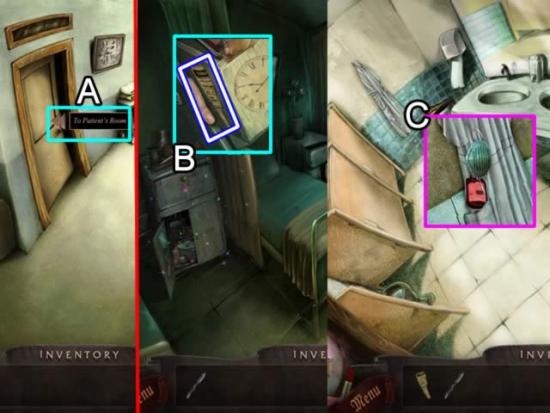
Navigation:
Symbol Meanings:
A clip explains the background and introduces the story line for play.
Casual mode play has an interactive tutorial for the first few scenes.
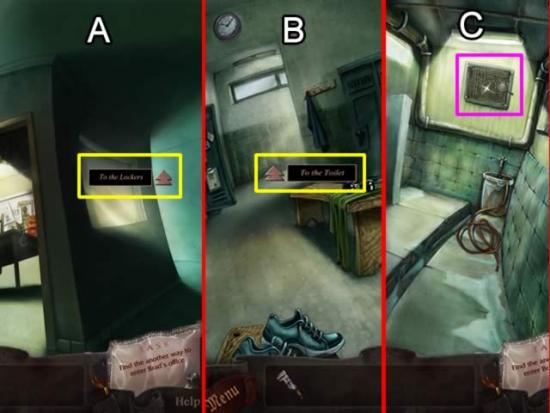
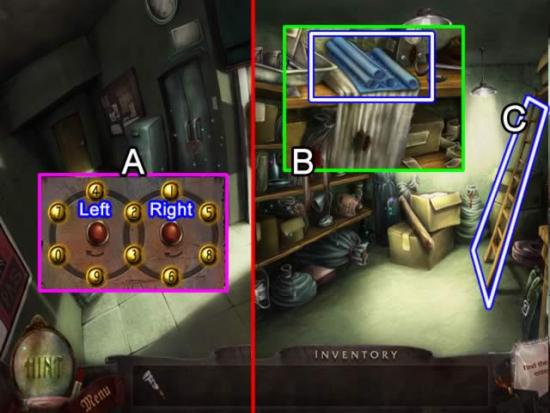
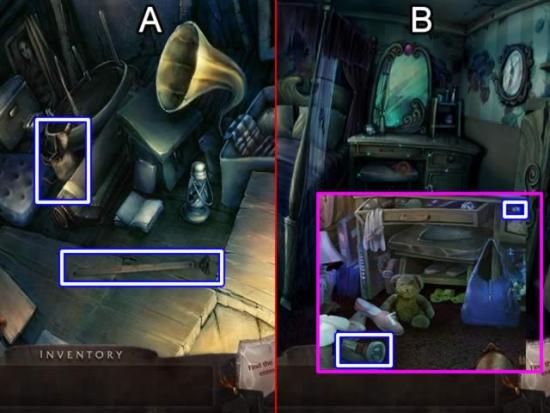
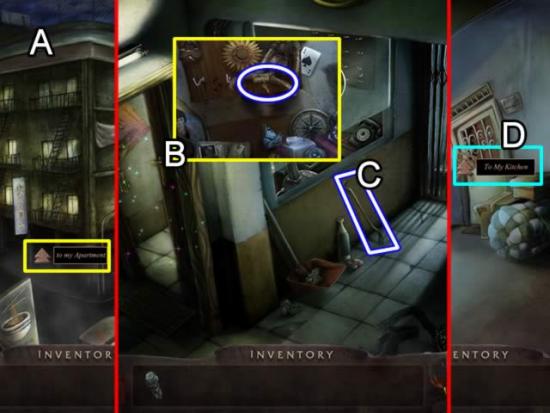
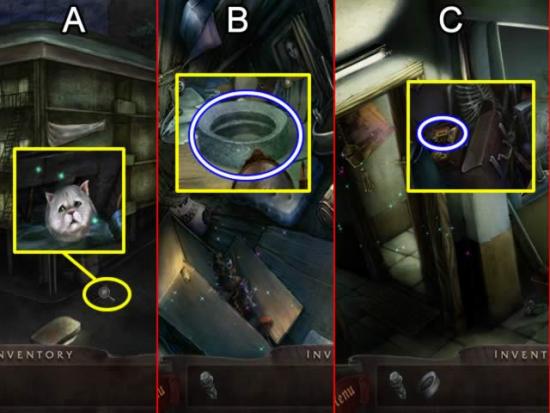
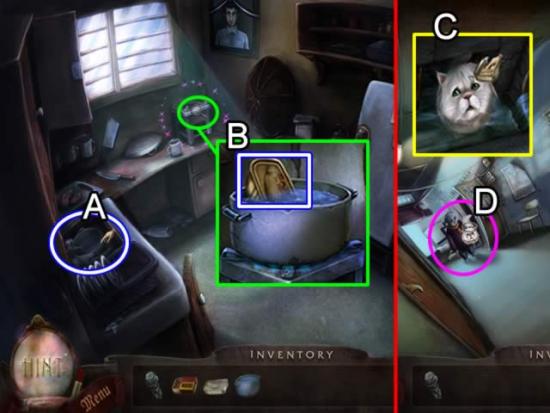
For this walkthrough, only inventory items are shown in hidden object scenes. They are highlighted in white with a blue border. The items are CAPITALIZED in the screen shot description to make it easier to find where this guide may deviate from your own play.
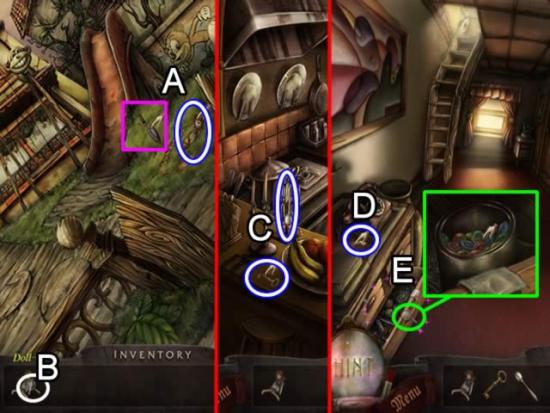
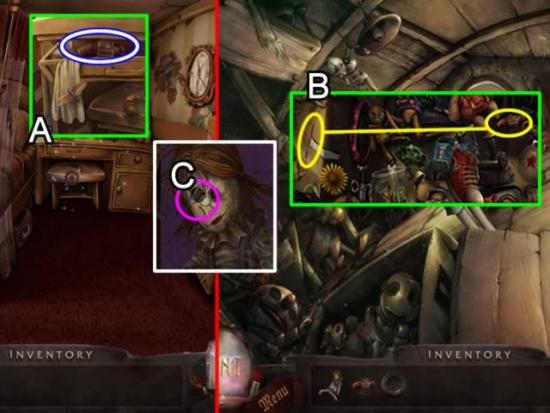
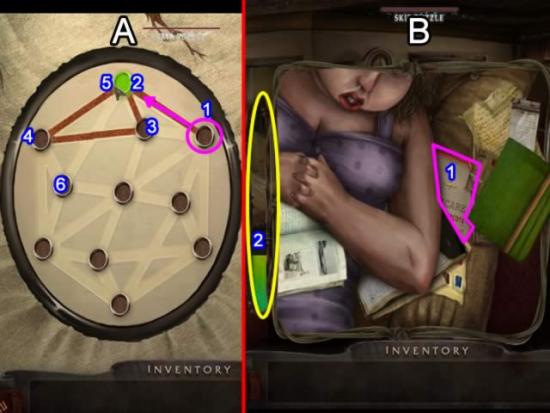
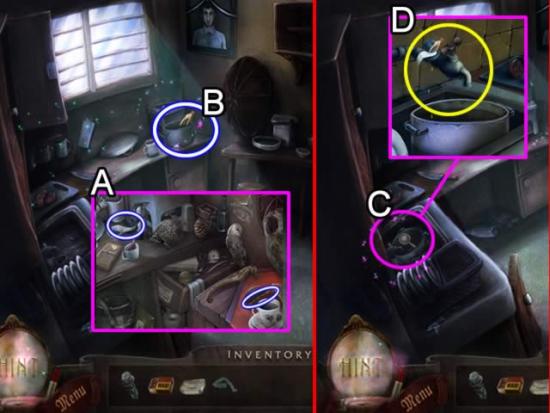
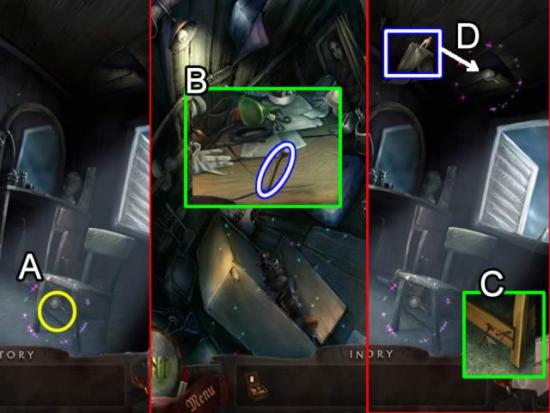
Revisiting locations is common in adventure/hidden object games. This walkthrough attempts to complete the game the in fastest way possible by minimizing backtracking and by picking up as many items in a location as permissible.
Assumptions:


NOTE: This solution should work. It was done with a pre-release version of the game, however, and there was a glitch. If an update is needed, it will be added to the “User Tips and Tricks” section on Gamezebo. Be sure and check that tab if you are having problems.
Congratulations! You have finished playing Silent Scream: The Dancer!
After you have completed the game, click “Extras” from the main menu. Click the “Bonus Chapter” link to begin play.


Congratulations! You have finished playing the bonus chapter of Silent Scream: The Dancer!
