![All VV Ultimatum Titles [How to Get]](/wp-content/uploads/2026/06/vv-ultimatum-titles.jpg "All VV Ultimatum Titles [How to Get]")
All VV Ultimatum Titles [How to Get]
Do titles provide buffs?


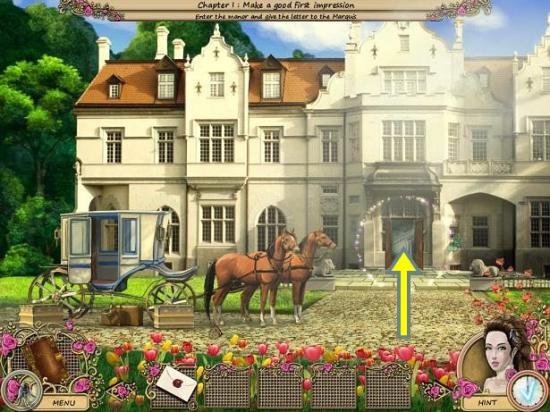
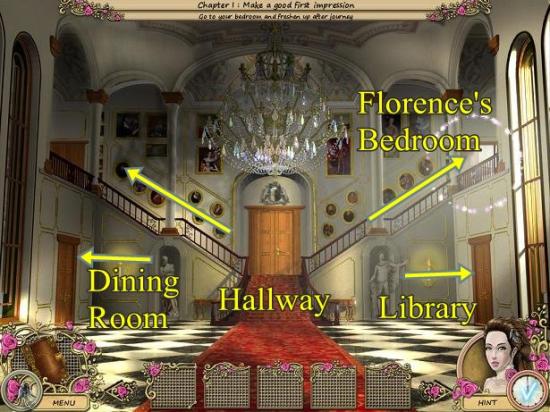
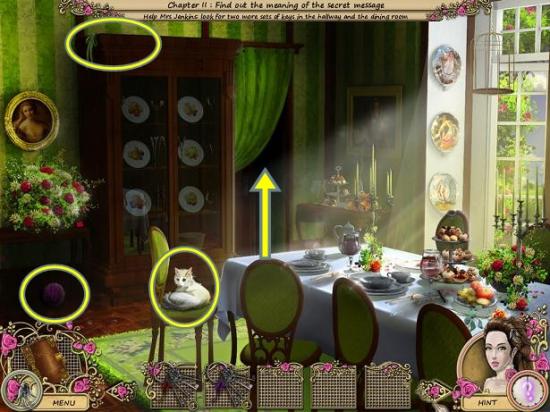
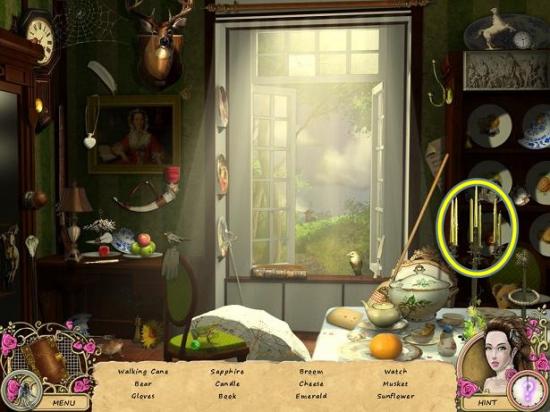
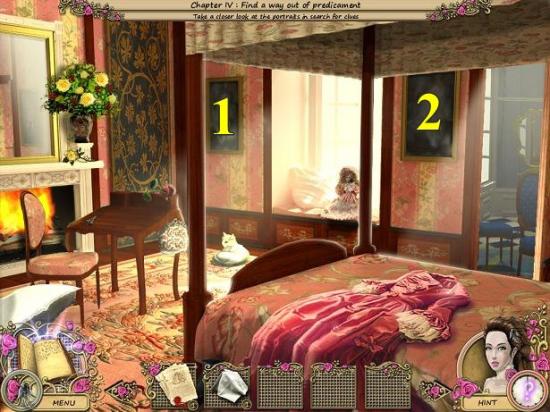
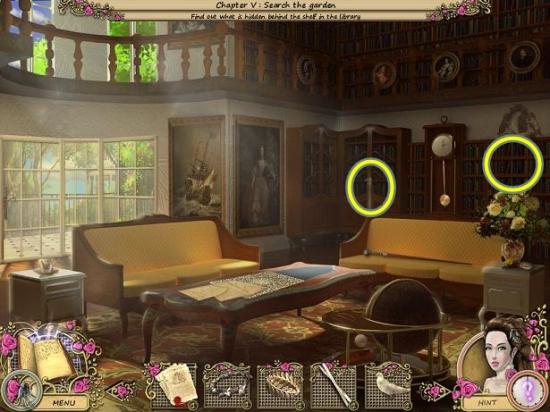
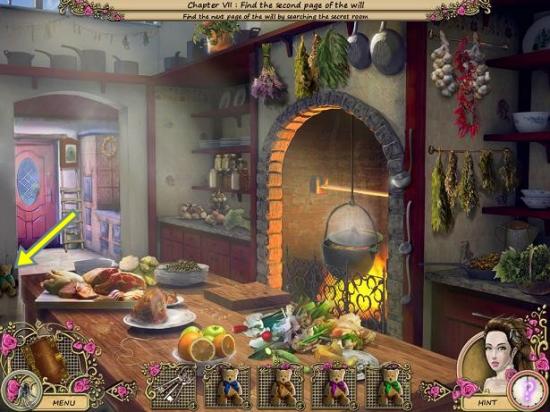
Welcome to the Secret Diaries: Florence Ashford walkthrough on Gamezebo. Secret Diaries: Florence Ashford is a hidden object/adventure game played on the PC created by World Loom. This walkthrough includes tips and tricks, helpful hints, and a strategy guide to how to complete Secret Diaries: Florence Ashford.
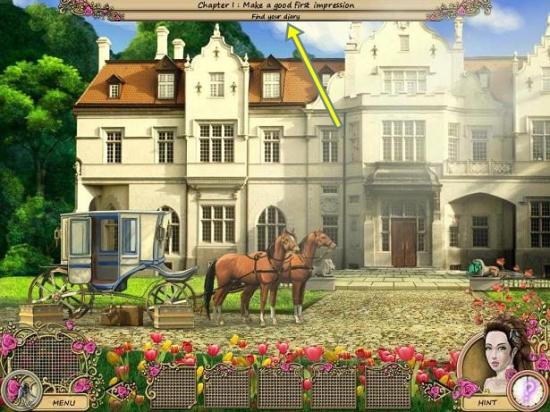
Welcome to the Secret Diaries: Florence Ashford walkthrough on Gamezebo. Secret Diaries: Florence Ashford is a hidden object/adventure game played on the PC created by World Loom. This walkthrough includes tips and tricks, helpful hints, and a strategy guide to how to complete Secret Diaries: Florence Ashford.
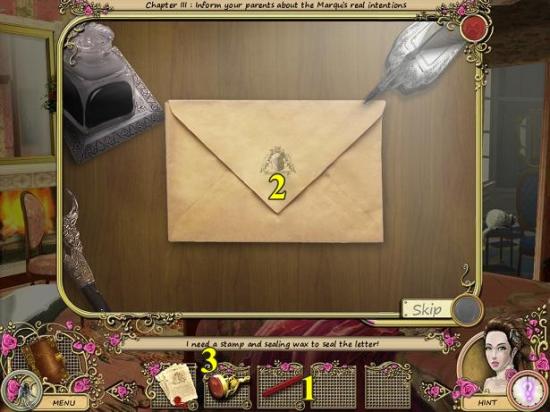
o Screenshots will only highlight the items that are added to your inventory.
o In this walkthrough, they will be written in bold.
o The walkthrough will state, “Use the inventory item on the blah blah,” because it assumes you have the item. If you don’t have the item, on your keyboard, press CTRL+F (at the same time). In the text box, type the name of the item you are looking for and press ENTER. This will scan this page for the appearance of that word.
o If you are looking for inventory items, if you hover your mouse over an item, its name will appear above the inventory area (in addition to your cursor changing).
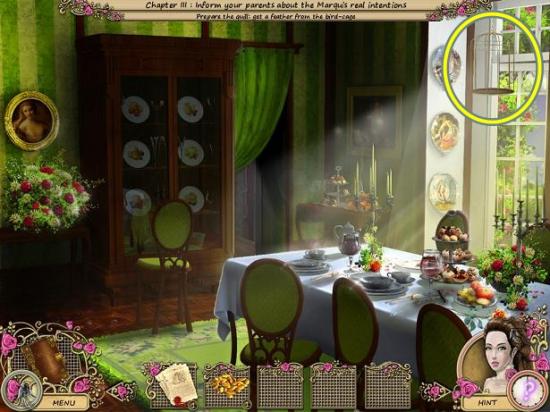
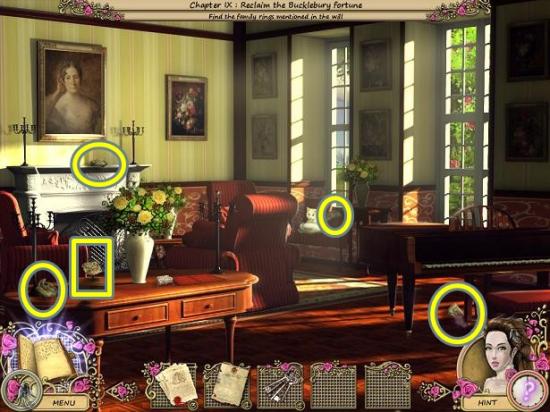
o Open hand – Your cursor will turn into an open hand when hovered over an area of interest. Click to zoom in on a puzzle or a hidden object hunt.
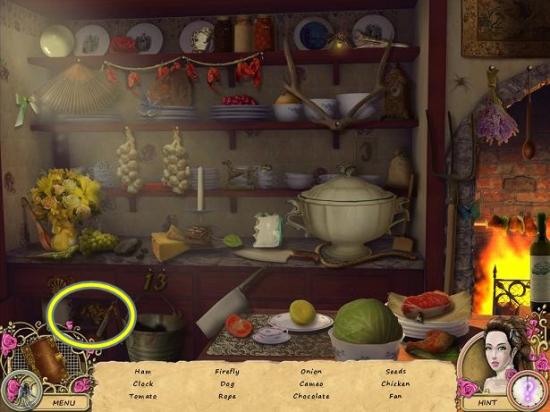
o Eye – Your cursor will turn into an eye when there’s a hidden object hunt to complete.
o You have unlimited hints however it takes time to recharge between uses. If you play on Casual mode, it takes about 30 seconds, Challenge takes about a minute.
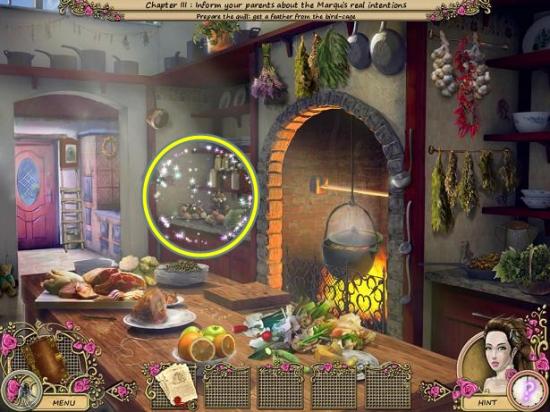
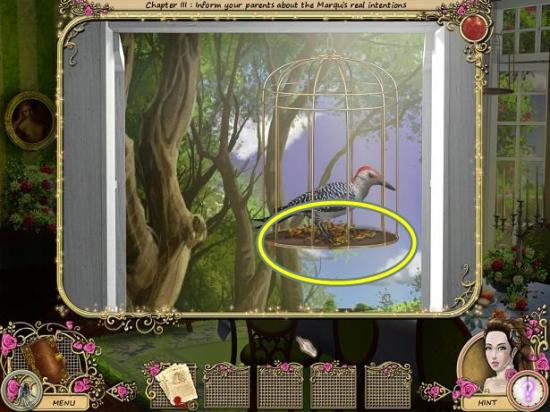
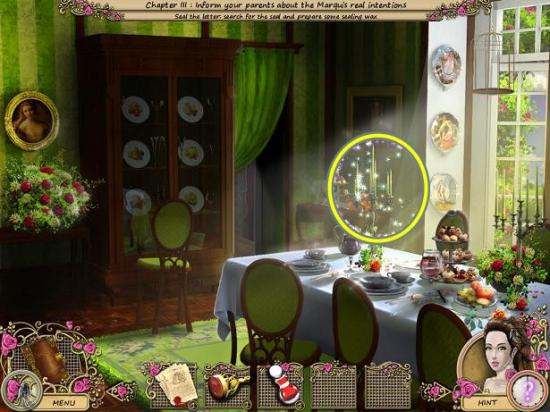
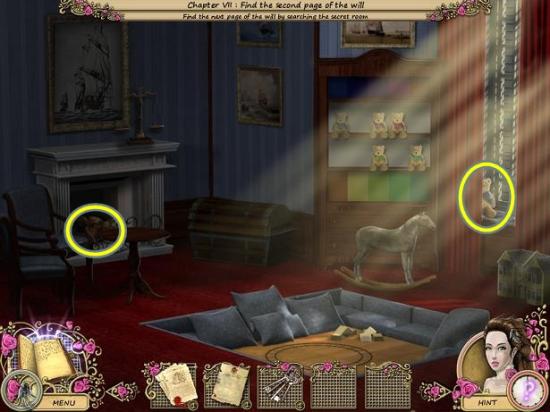
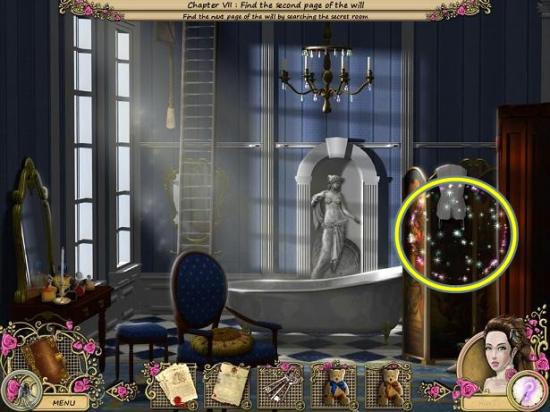
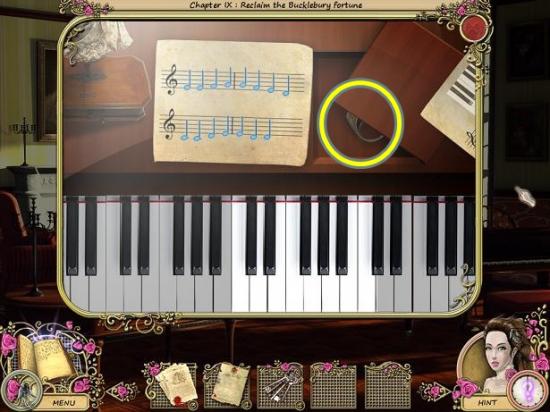
o Hidden object scenes – Click Hint and an item will be encircled by shimmery lights.
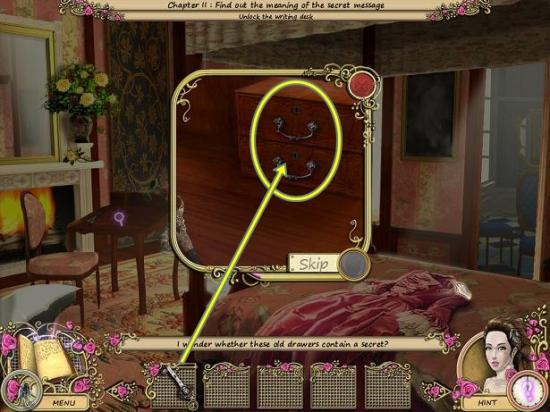
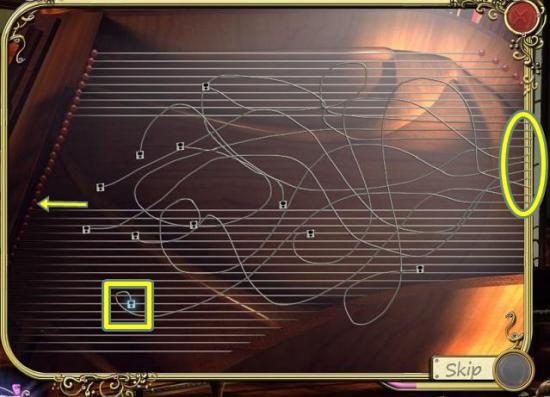
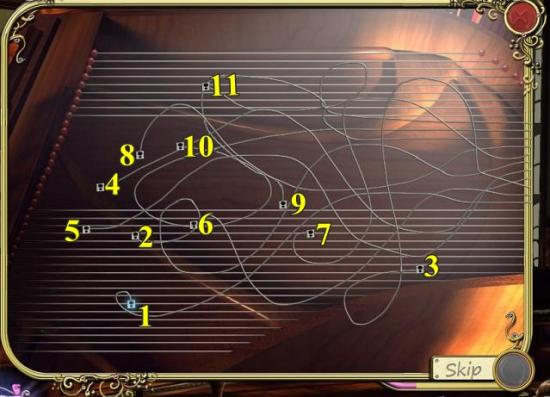
o In a mini-puzzle, the Hint button will explain what to do. The Skip button will skip the puzzle and move you forward (you have to wait about a minute for it to generate).
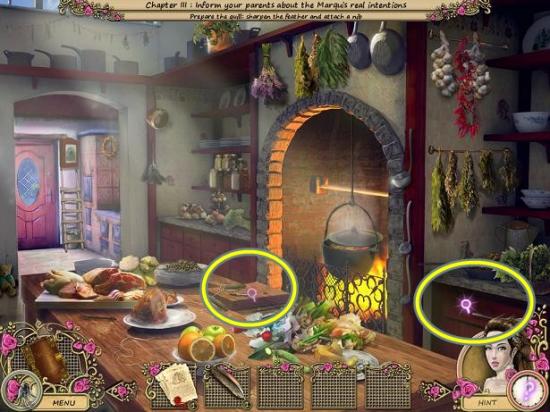
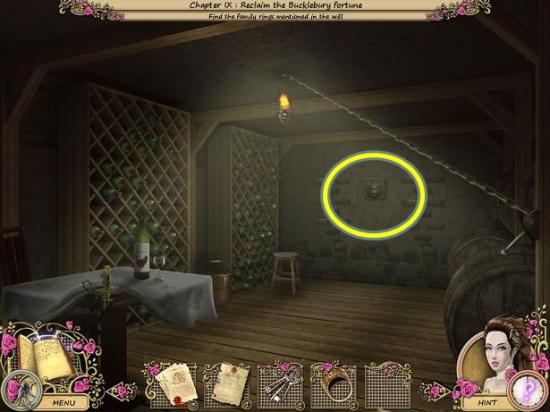
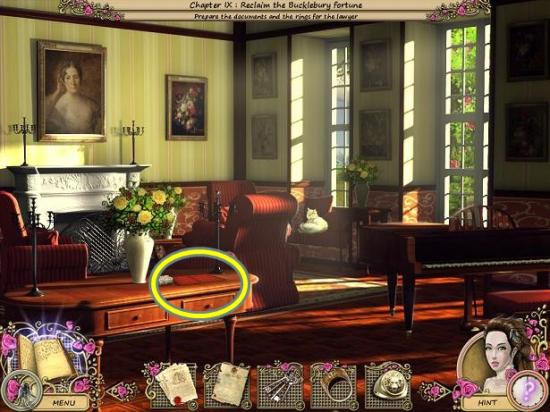
o In free roam mode, the Hint button will highlight an area of the scene you can interact with or it will tell you to explore other scenes.
o Skip will complete the puzzle and move you forward. There seems to be no penalty.
o Leaving a puzzle and returning to it resets it.

o Normal Mode: According to the instructions, hints generate faster and clues are given to help find objects and figure out what to do next. In actuality, it also offers a tutorial for all new elements. Areas that need further investigation are highlighted in shimmery lights.
o Expert Mode: According to the instructions, hints take longer to generate and no clues are given to help find objects or figure out what to do next. In actuality, no tutorial is given and areas of interest are hot highlighted. Although no tutorial is given, if you have played other games of this genre, you will be fine. This game offers nothing new.
o Note: On Expert and clues were given as to what to do next. The difference between Normal and Expert are areas that need to be explored/inventory items, etc. are circled in shimmery lights.
o I really recommend playing on Expert Mode. Normal Mode is just too easy. Although sometimes it’s nice to play an easy, stress-free game, Normal Mode tells you what to every step of the way. The only thing to do on your own is play the mini-puzzles.
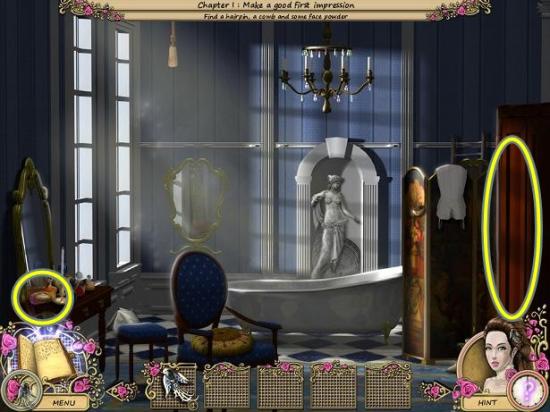
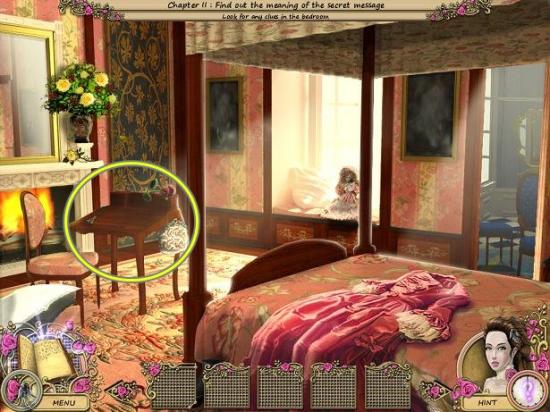
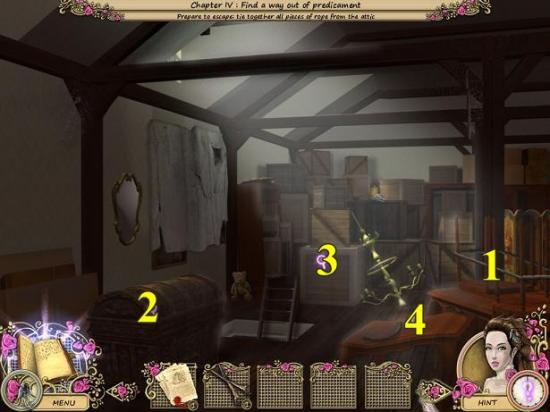
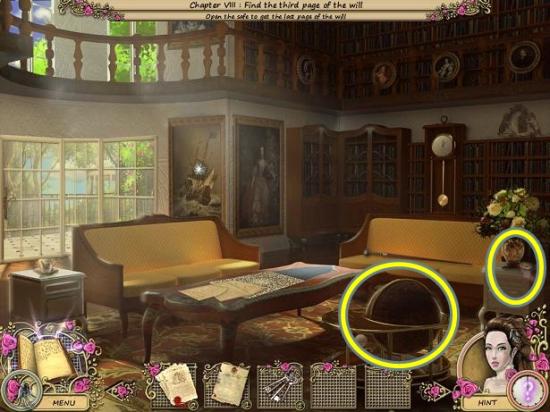
o If you are playing in Normal Mode, running your cursor over the trunk (or waiting) will result in a highlighted mirror.
o If you are playing in Expert Mode, hovering your mouse over the trunk will change the cursor to an open hand.
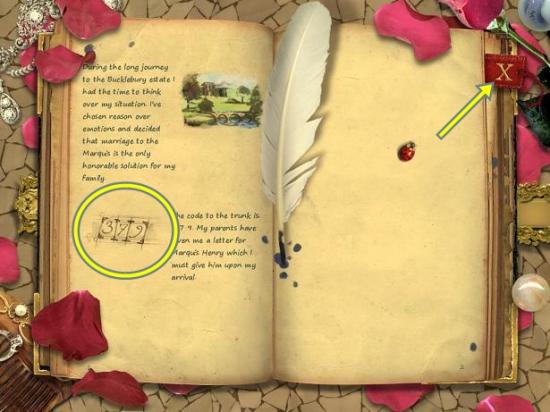
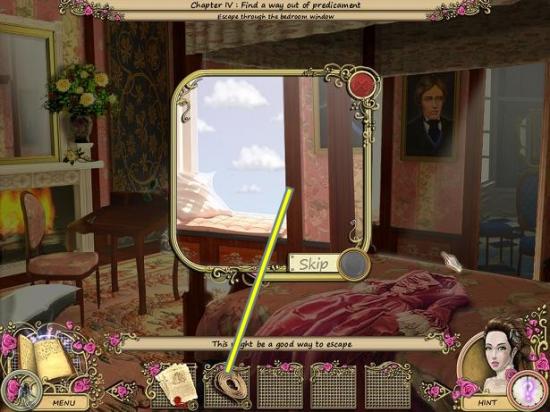
o To close the diary, click the X at the top right of the screen.
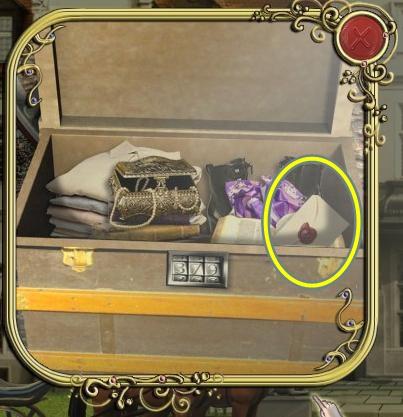

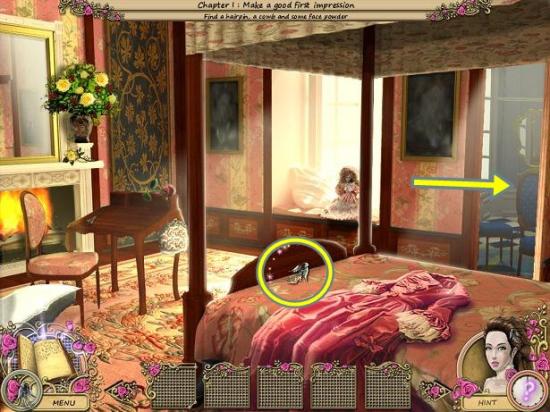
o Note: Notice when you hover your mouse over the hairpin, its name appears above the inventory item list. This happens for all inventory items, regardless of what difficulty setting you are playing.


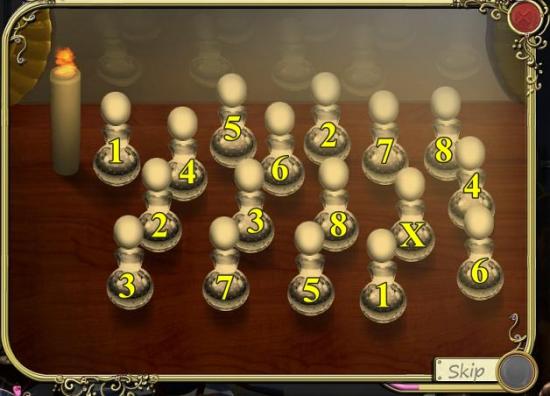

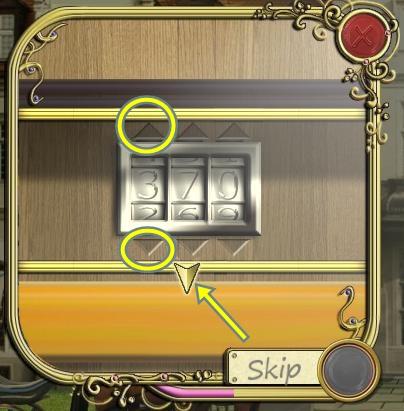
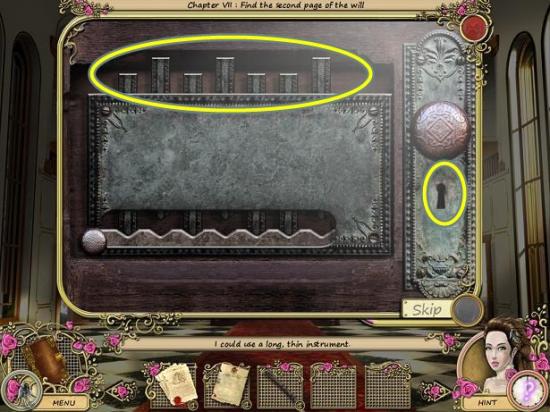
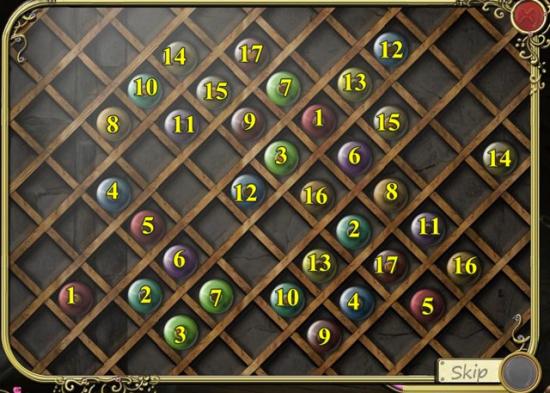
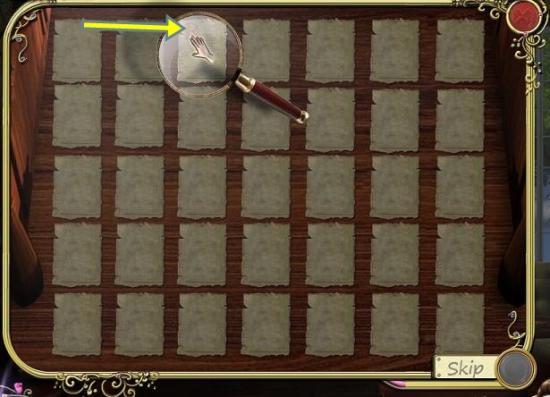
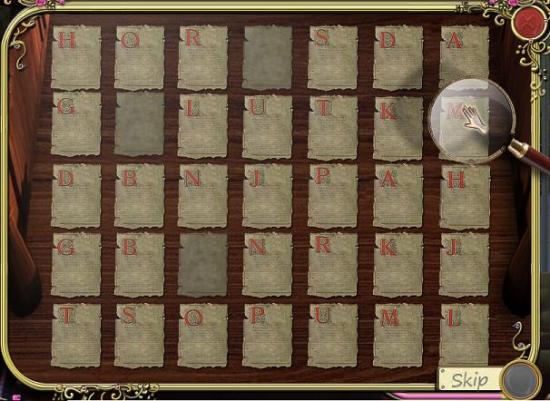
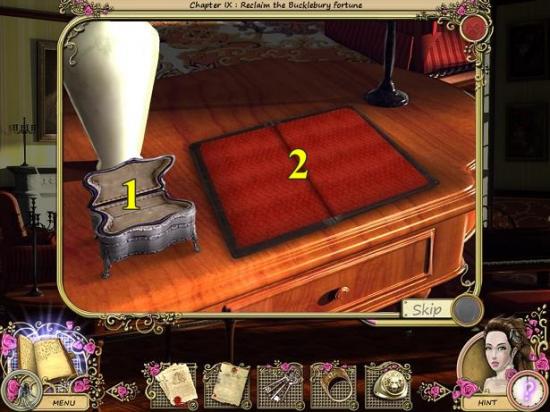
o Note: there are too many steps to give a step by step instruction for this puzzle. Try to position all the outer tiles and then position the centre tiles. Remember you can skip the puzzle once the Skip meter is full.

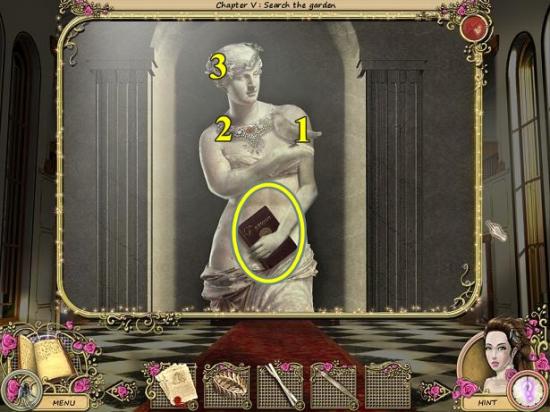
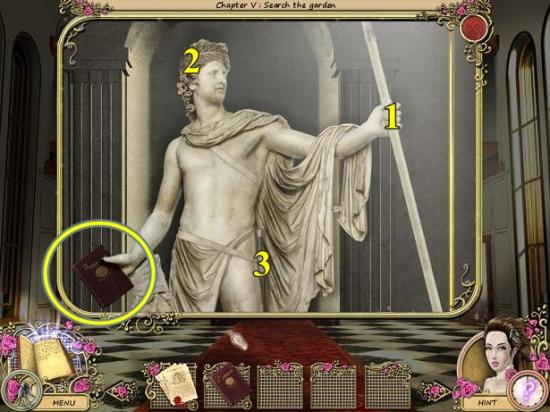
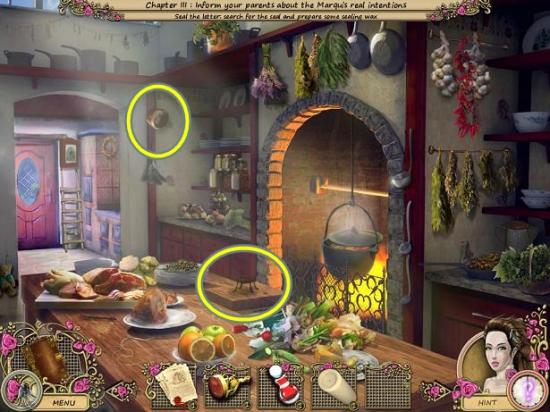
NOTE: In the version of the game we played to write the strategy guide, the chapters jumped straight from V to VII (with no VI).
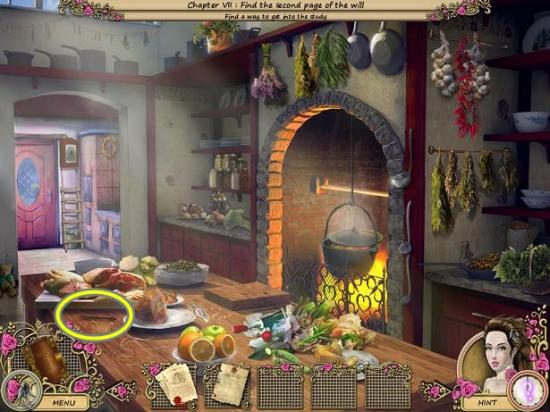


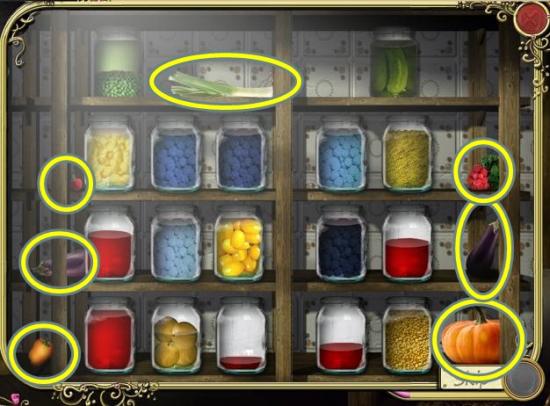
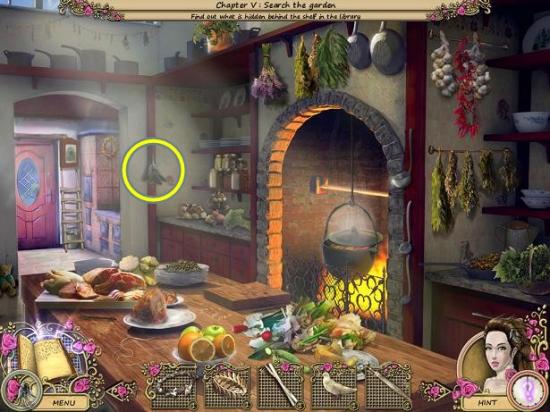
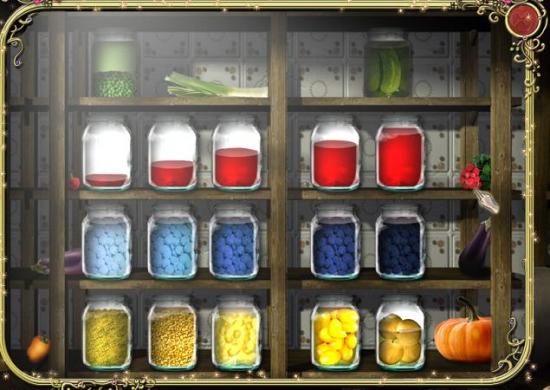
o Red jars – arrange so they go from left to right, almost empty to almost full.
o Blue jars – arrange so they run from left to right, lightest colour to darkest colour.
o Yellow jars – arrange by size so they run from left to right, smallest ingredient to biggest ingredient.

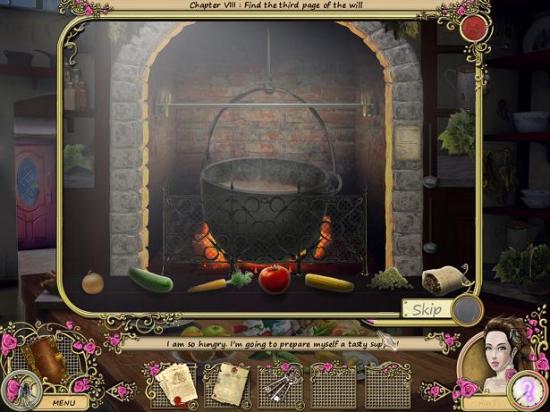
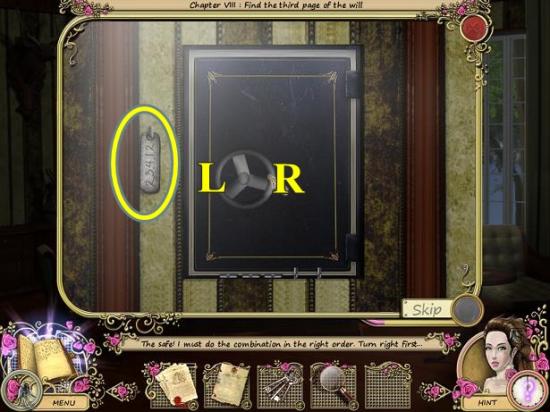
o There are five combinations. Use a pen and paper to write down the order.
o The combination is different each time so no proper solution can be given.
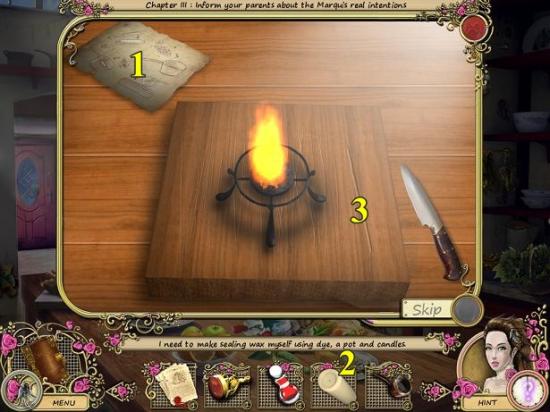
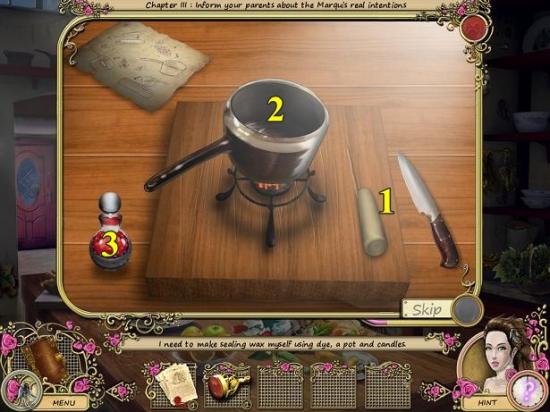
o To reset, leave the window and click on the fire again.
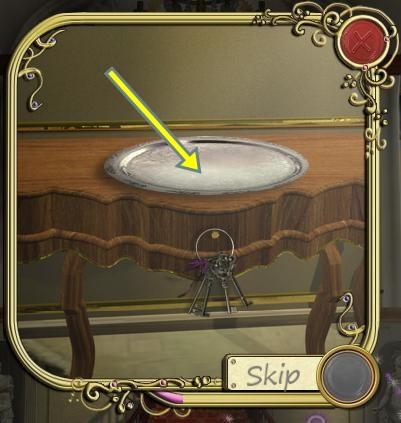
o Note: there are too many steps to give a step by step instruction for this puzzle. Try to position all the outer tiles and then position the centre tiles. Remember you can skip the puzzle once the Skip meter is full.

The end!
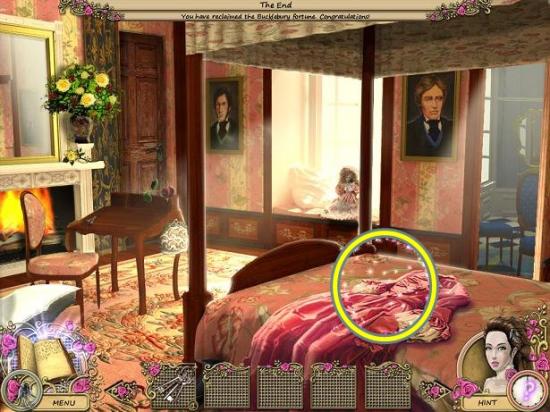
The end!
