- Wondering how to get Monopoly GO! free rolls? Well, you’ve come to the right place. In this guide, we provide you with a bunch of tips and tricks to get some free rolls for the hit new mobile game. We’ll …
Best Roblox Horror Games to Play Right Now – Updated Weekly
By Adele Wilson
Our Best Roblox Horror Games guide features the scariest and most creative experiences to play right now on the platform!The BEST Roblox Games of The Week – Games You Need To Play!
By Sho Roberts
Our feature shares our pick for the Best Roblox Games of the week! With our feature, we guarantee you'll find something new to play!All Grades in Type Soul – Each Race Explained
By Adele Wilson
Our All Grades in Type Soul guide lists every grade in the game for all races, including how to increase your grade quickly!
Samantha Swift and the Mystery from Atlantis Walkthrough
Welcome to Gamezebo's strategy guide for Samantha Swift and the Mystery from Atlantis.Navigation: General Tips Chapter 1: Seal Plate Chapter 2: Serpent Sense of Taste Chapter 3: Bear Sense of Smell Chapter 4: Bat Sense of Hearing Chapter 5: Dolphin Sense of Thought Chapter 6: Owl Sense of Sight Chapter 7: Monkey Sense of Touch General Tips: This game features different difficulty levels: Adventurer and Expert Adventurer. Adventurer features laid-back gameplay while the Exper…
a:1:i:0;a:2:s:13:”section_title”;s:56:”Samantha Swift and the Mystery from Atlantis Walkthrough”;s:12:”section_body”;s:80645:”
Welcome to Gamezebo’s strategy guide for Samantha Swift and the Mystery from Atlantis.
Navigation:
- General Tips
- Chapter 1: Seal Plate
- Chapter 2: Serpent Sense of Taste
- Chapter 3: Bear Sense of Smell
- Chapter 4: Bat Sense of Hearing
- Chapter 5: Dolphin Sense of Thought
- Chapter 6: Owl Sense of Sight
- Chapter 7: Monkey Sense of Touch
General Tips:
- This game features different difficulty levels: Adventurer and Expert Adventurer. Adventurer features laid-back gameplay while the Expert mode is timed and more difficult.
- Options (including game appearance) can be altered from the menu. From the menu you can also look at your different contacts and re-read over the game events.
- Hints come in the form of lightning bolts. They may also be used to solve and skip puzzles.
- You can use the radar/scanner for additional help by collecting Swift Birds. It should be noted that Hidden Objects Mode can only be unlocked after you’ve found and collected all the Swift Birds in the game.
- The Museum feature allows you to go back and look through the various items and artifacts you’ve uncovered throughout the gameplay.
- In normal gameplay, items marked in yellow are worth more points.
- Items marked in blue mean that they’re hidden and you must use a tool from your inventory to uncover them. Once an item is uncovered, the text will turn white.
- For quick guide navigation, press "Ctrl+F" to search for keyword-specific things, i.e. "Red Orb".
- The inventory will automatically open and close according to whether or not you need it.
- Certain items and puzzles may be randomized and many feature more than one solution.
Walkthrough:
Chapter 1: Seal Plate
Location: Eskimo Village
Village Area
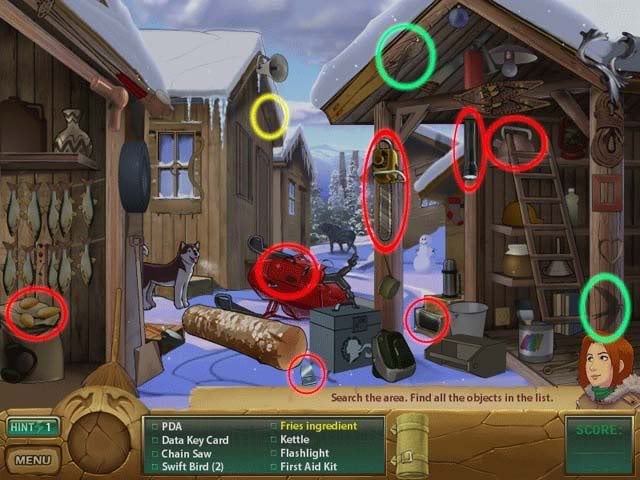
- Find all the objects listed at the bottom of the screen. Hints (lightning bolts) are circled in yellow and Swift Birds are circled in teal.

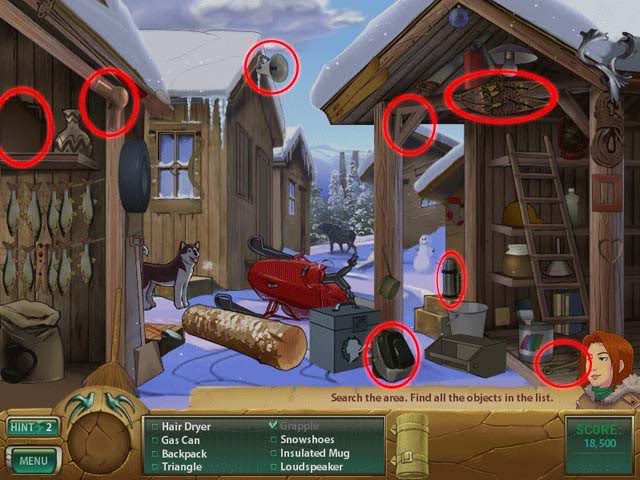
- Objects listed in blue require a tool to acquire.Below is how to get them:
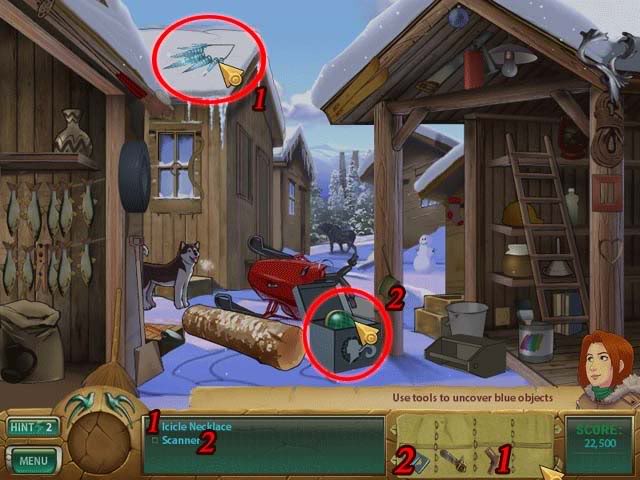
1.Use the Blowdryer on the area numbered and circled to reveal the Icicle Necklace.
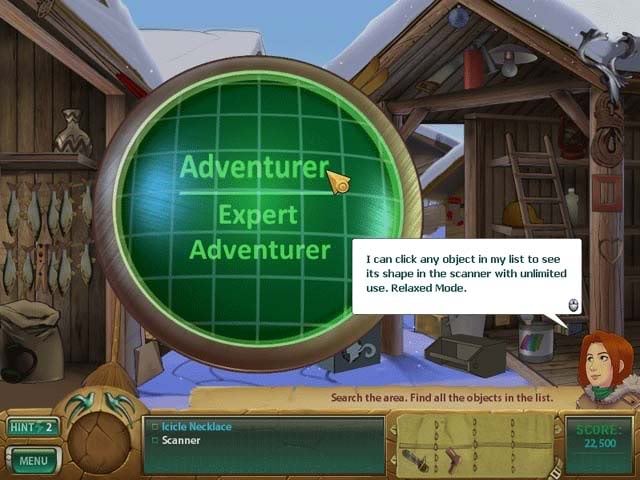
2. Use the Card Key on the area numbered and circled to reveal the Scanner. It’s at this point in time you can choose your game difficulty: Adventurer (normal difficulty/relaxed play) or Expert Adventurer (difficult timed mode).
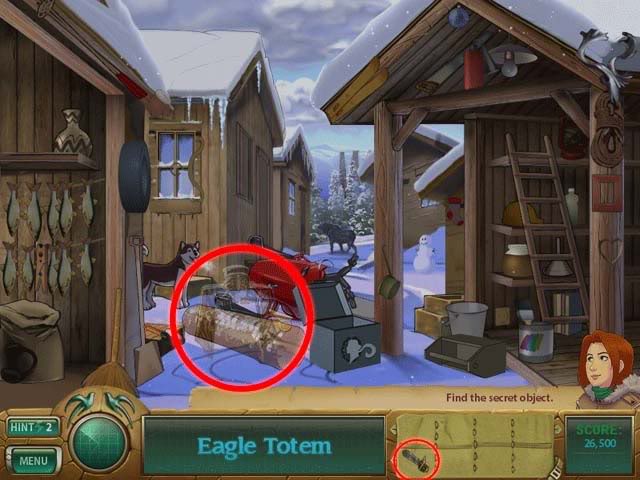
- Use the Chainsaw on the Log/Fallen Timber to carve the Eagle Totem.
River Area
- Find all the objects listed at the bottom of the screen. Hints (lightning bolts) are circled in yellow and Swift Birds are circled in teal.
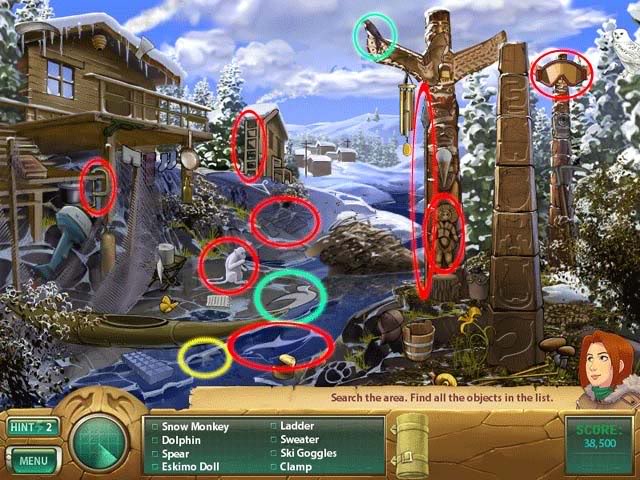
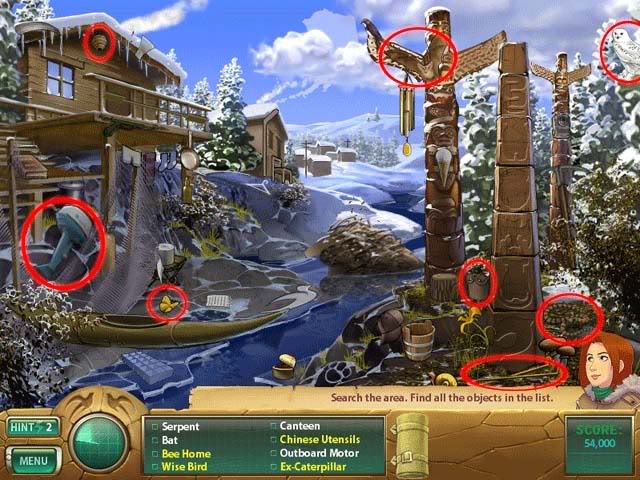
- Objects listed in blue require a tool to acquire.Below is how to get them:
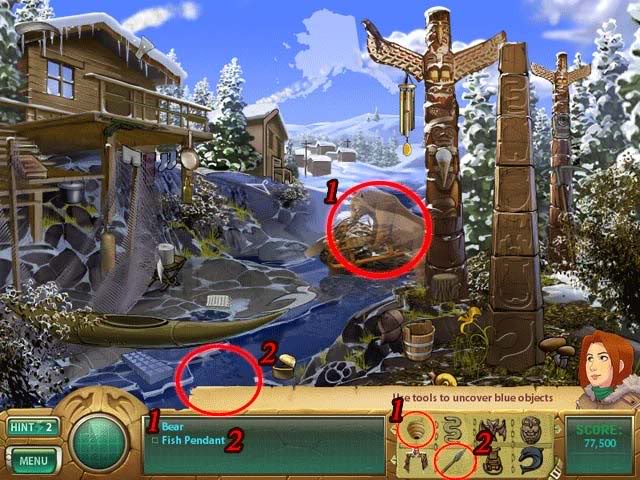
1. Use the Bee Hive on the area numbered and circled to reveal the Bear.
2. Use the Spear on the area numbered and circled to reveal the Fish Pendant.
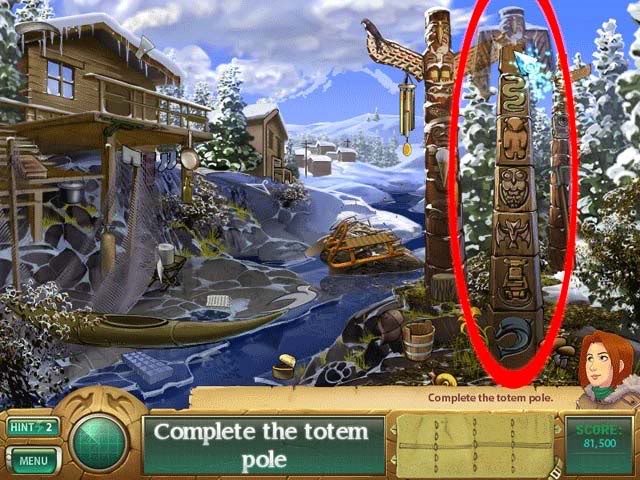
- Complete the Totem Pole by placing each symbol in its correct spot. The solution is shown below:
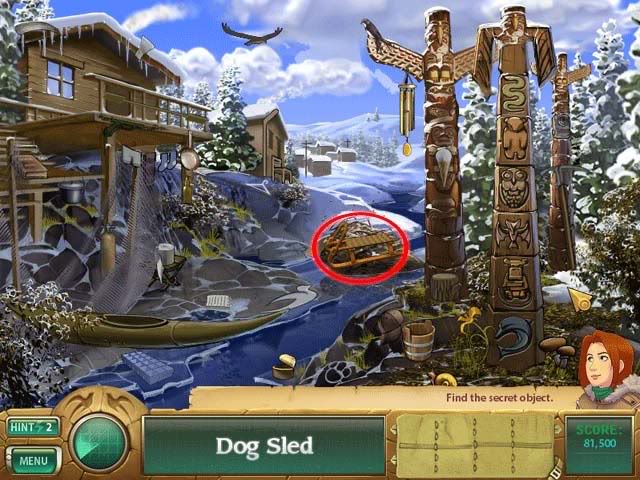
- Click on the Dog Sled circled below to complete the area.
Village Area
- Find all the objects listed at the bottom of the screen. Hints (lightning bolts) are circled in yellow and Swift Birds are circled in teal.
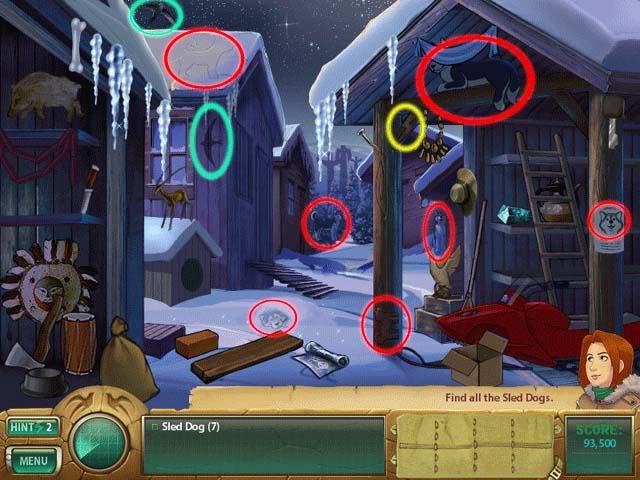
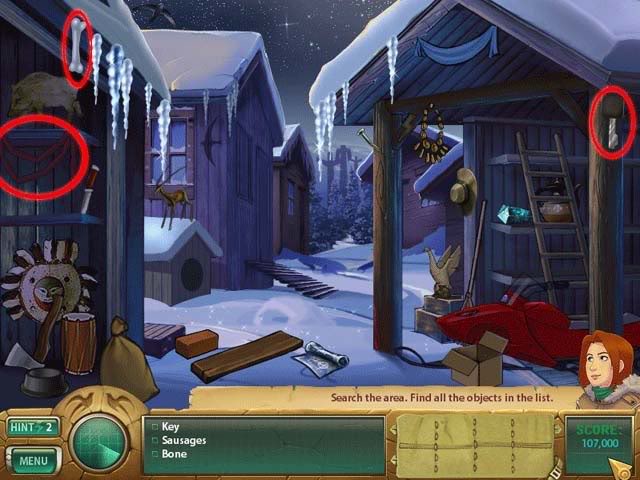
- Objects listed in blue require a tool to acquire.Find the last three Sled Dogs. Below is how to get them:
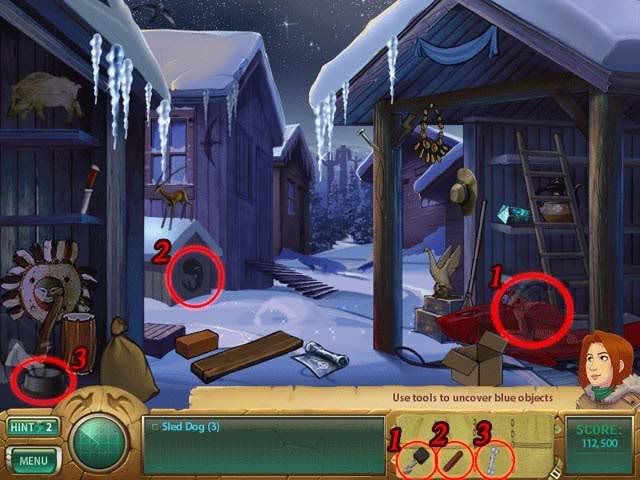
1. Use the Key on the Snow Mobile to move it and reveal the first Sled Dog.
2. Use the Sausages on the Dog House to reveal the second Sled Dog.
3. Use the Bone on the Dish to reveal the third and last Sled Dog.
Outside the Igloos
- Find all the objects listed at the bottom of the screen. Hints (lightning bolts) are circled in yellow and Swift Birds are circled in teal.
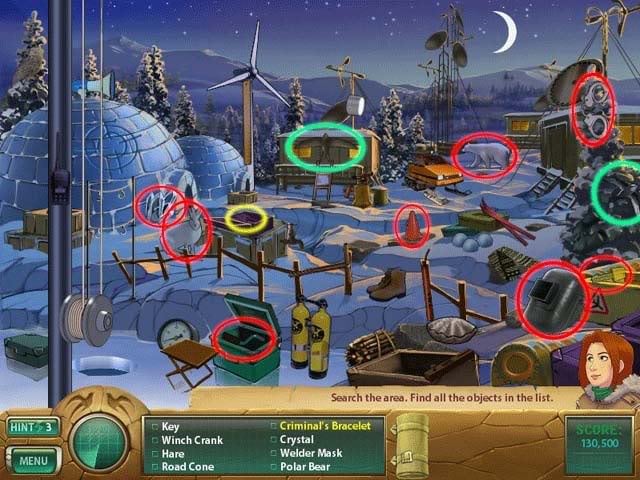
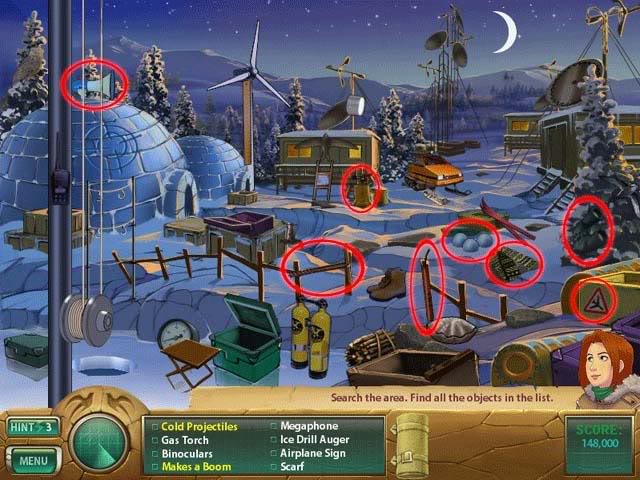
- Objects listed in blue require a tool to acquire. Below is how to get them:
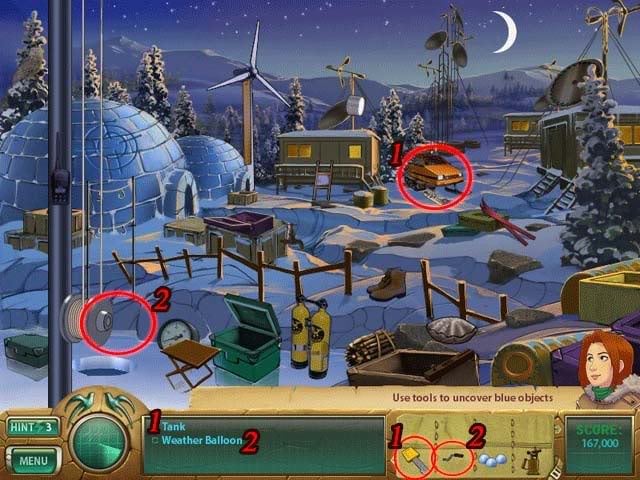
1. Use the Key on the snow vehicle to start it and reveal the Tank.
2. Use the Winch Crank on the area numbered and circled to lower the Weather Balloon.
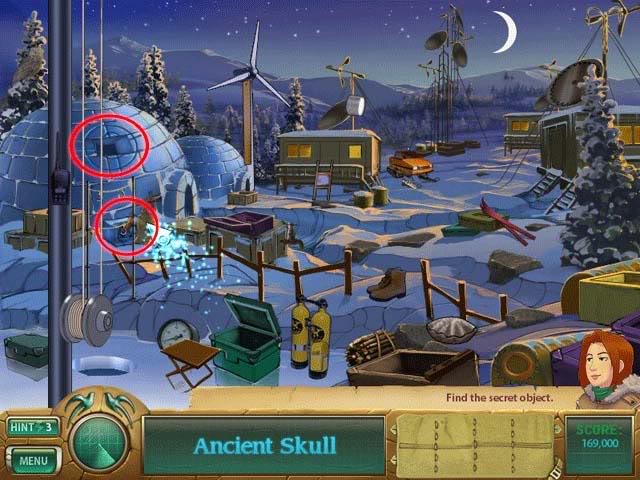
- To acquire the Ancient Skull, use the Snowballs on the circled area of the igloo. Once the ice block falls out, use the Blow Torch on it to melt it and reveal the Ancient Skull.
Inside the Igloo
- Find all the objects listed at the bottom of the screen. Hints (lightning bolts) are circled in yellow and Swift Birds are circled in teal.
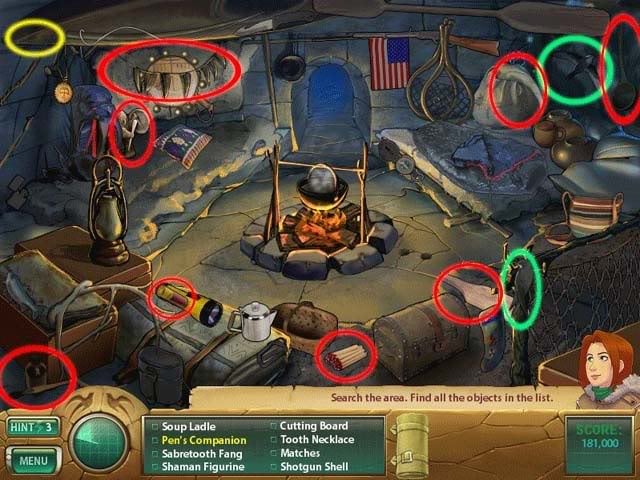
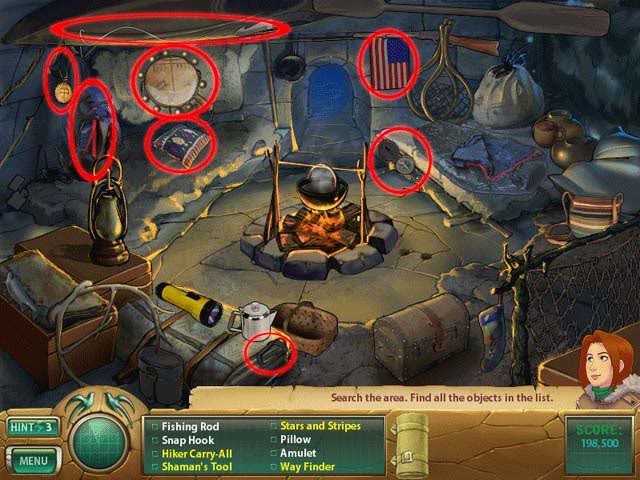
- Objects listed in blue require a tool to acquire. Below is how to get them:
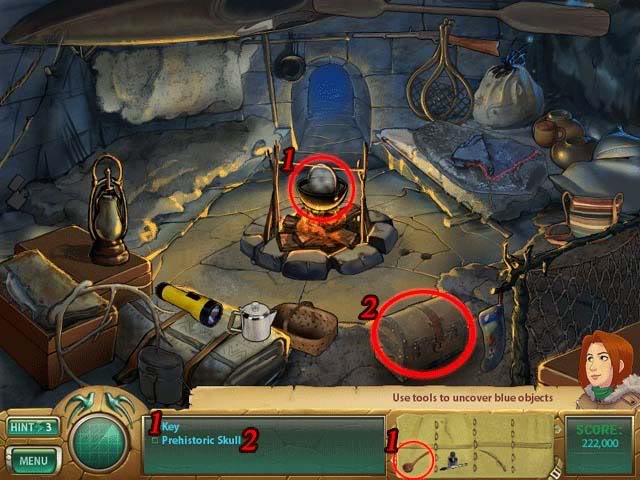
1. Use the Ladle on the cooking pot to retrieve the Key.
2. Use the Key on the chest circled in red to retrieve the Prehistoric Skull.
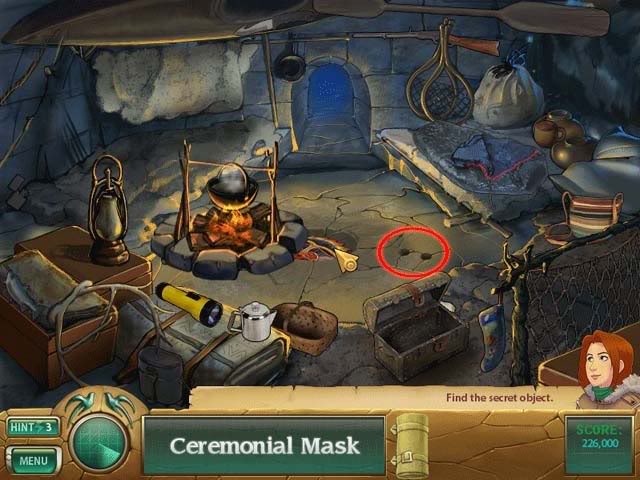
- Use the Prehistoric Skull on the area circled in red below to move the fireplace and reveal the Ceremonial Mask.
Outside the Igloos
- To obtain the Pliosaur Tooth:
1. Use the Fishing Rod on the hole circled in red below.
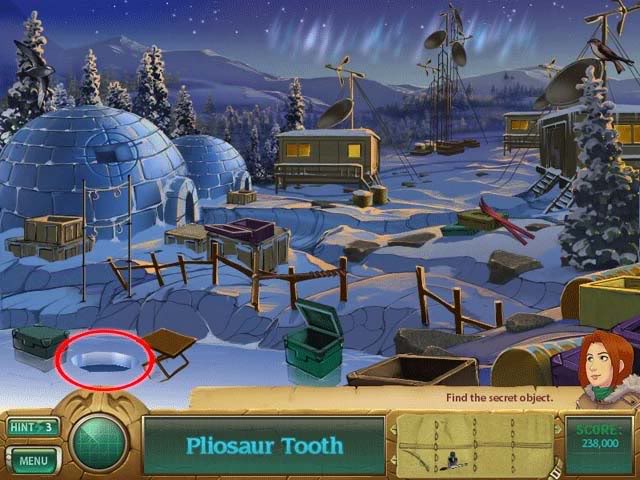
2. Pick up the Tooth once it surfaces to the top of the hole.
3. Use the Ink on the Tooth to reveal the Tooth Etching.
Snowplow Area
- Find all the objects listed at the bottom of the screen. Hints (lightning bolts) are circled in yellow and Swift Birds are circled in teal.
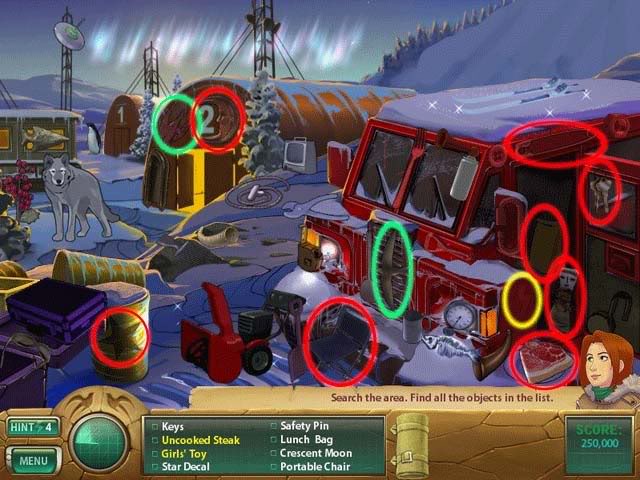
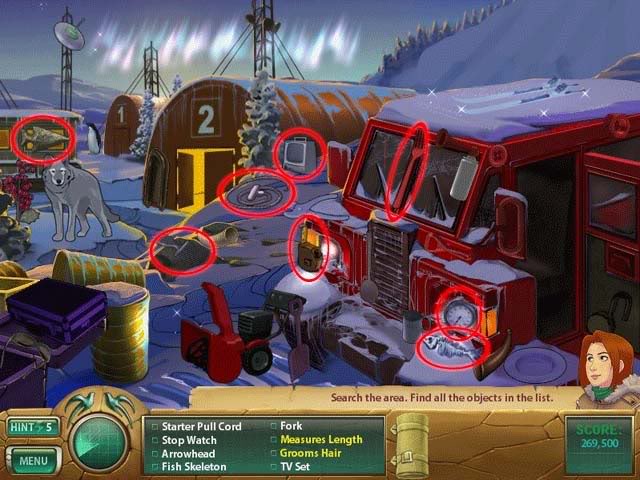
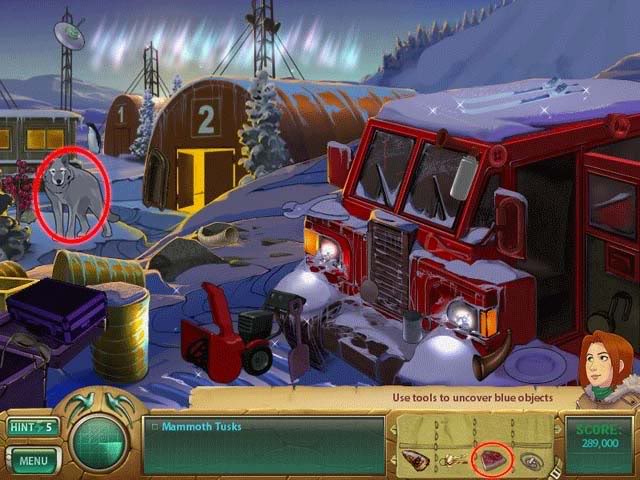
- Use the Raw Meat on the Wolf to reveal the Mammoth Tusks.
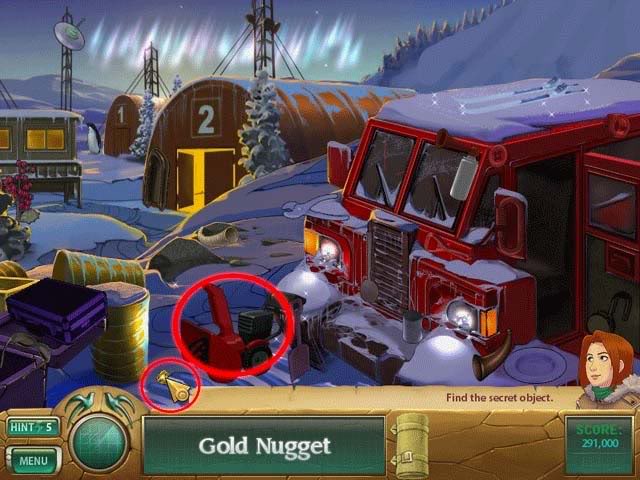
- Use the Starter Cord on the Mower to reveal the Gold Nugget.
Research Lab
- Find all the objects listed at the bottom of the screen. Hints (lightning bolts) are circled in yellow and Swift Birds are circled in teal.
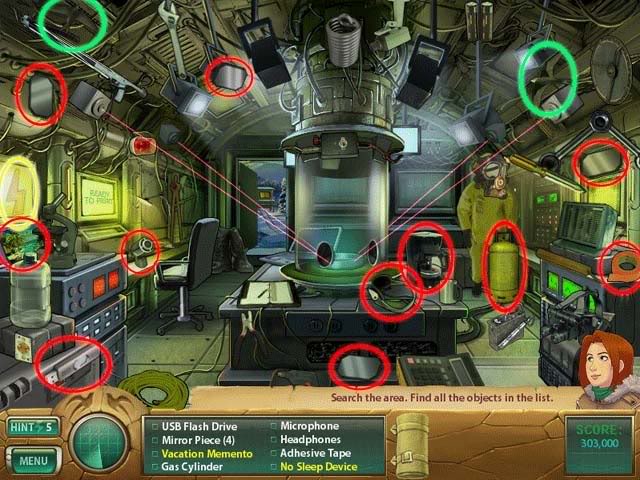
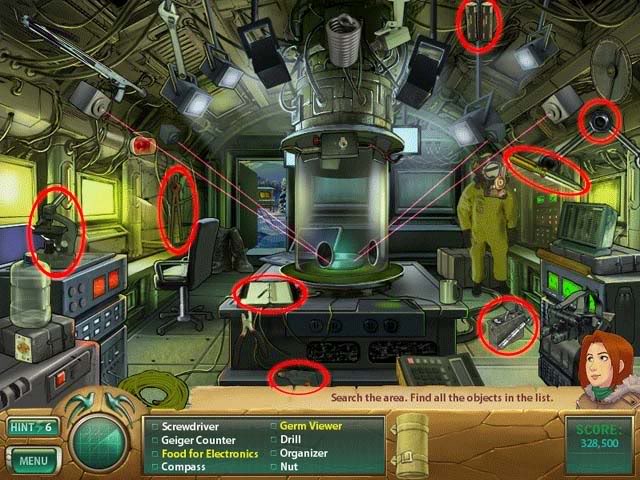
- Objects listed in blue require a tool to acquire. Below is how to get them:
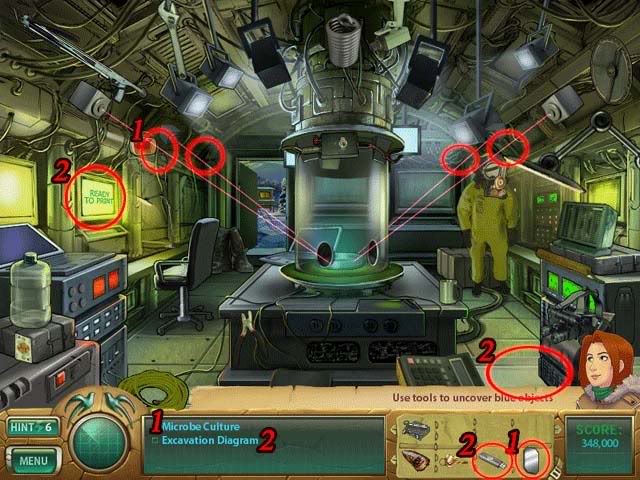
1. Place the Mirror Pieces on the circled areas over the lasers to deactivate them and obtain the Microbe Culture in the middle of the screen.
2. Use the USB Stick on the computer circled and numbered, then collect the Evacuation Diagram that prints out on the right side of the screen.
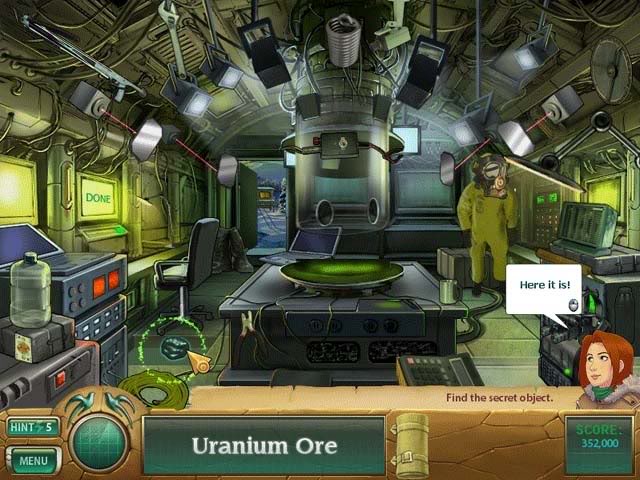
- Use the Geiger Counter on the area circled to reveal the Uranium Core.
Snowplow Area
- Find all the objects listed at the bottom of the screen. Hints (lightning bolts) are circled in yellow and Swift Birds are circled in teal.
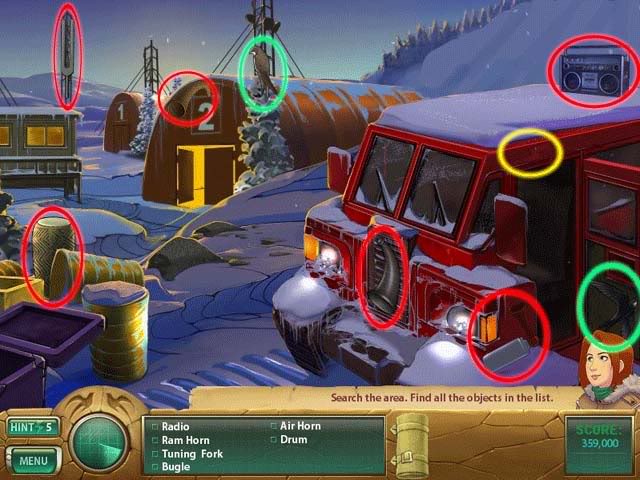
- Use the Keys on the Snowplow to start it.
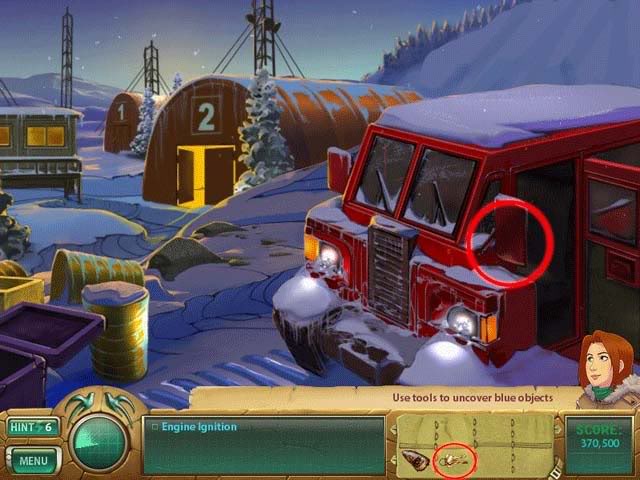
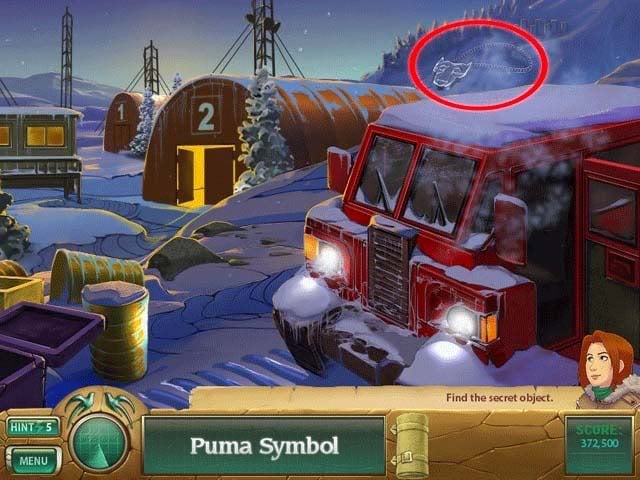
- Once the avalanche has passed, pick up the Puma Symbol circled and shown below.
Totem Site
- Find the exact pairs. Click one object in the list to highlight. Then click on the exact pair in the scene to remove them both.
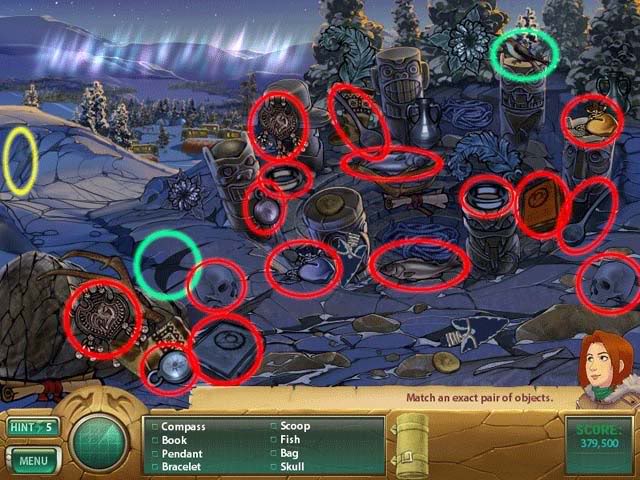
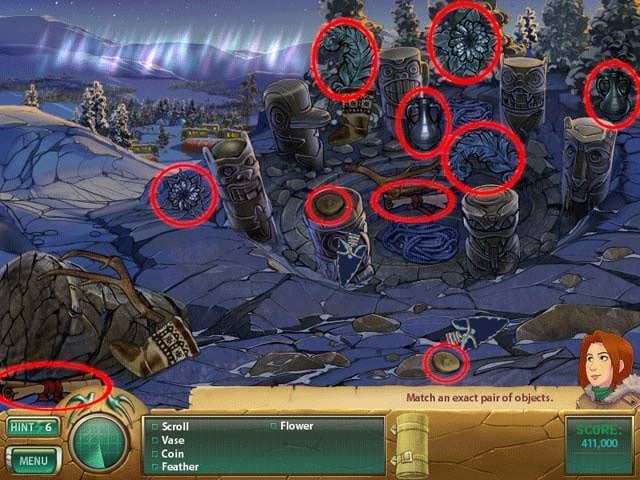
- Acquire the Seal Plate by completing the mini-game. Align each ball to the corresponding flame color.
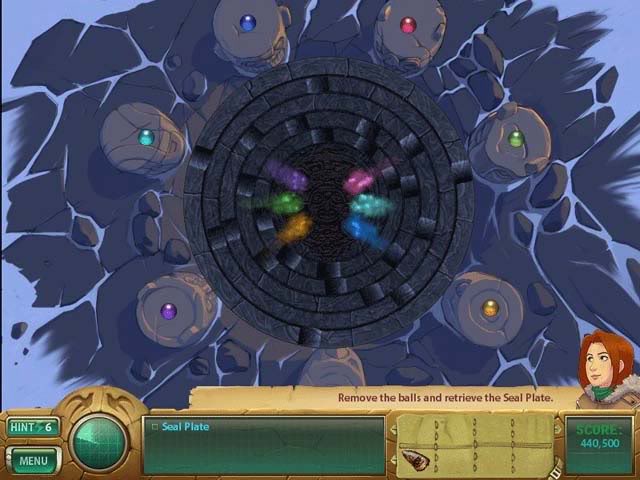
There are a couple strategies you can use here, and the mini-game itself is quite simple. One such strategy you can use is shown below:
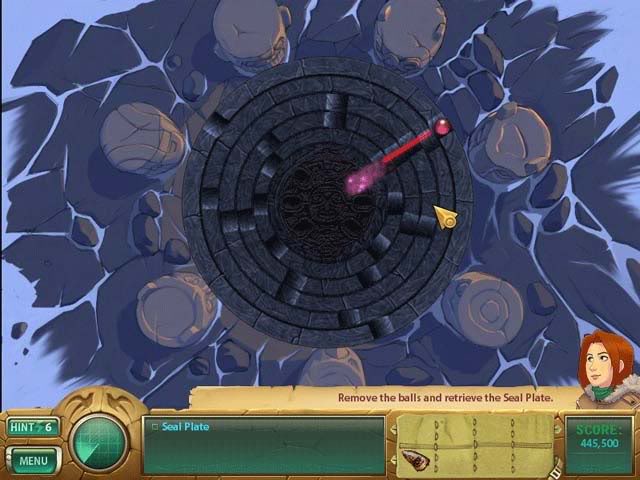
- Once you’ve completed the puzzle, click on the Seal Plate to add it to your items.
- Wait for a moment, then click on the Totem of Light to add it to your inventory.
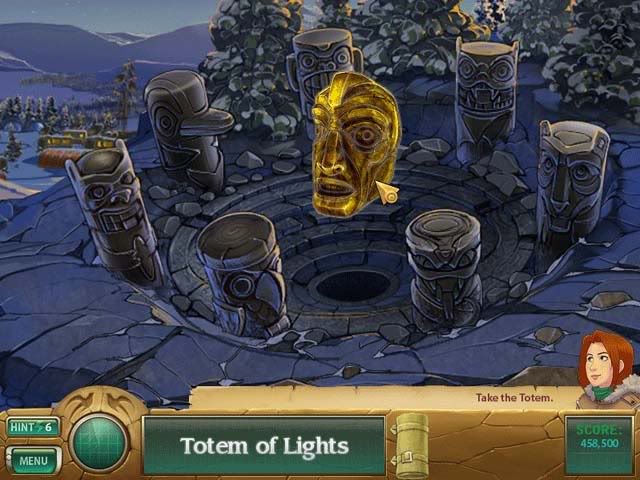
- After a brief cutscene, you’ll black out and re-awaken in another area.
Laboratory
- Find the 8 differences between the two sides.
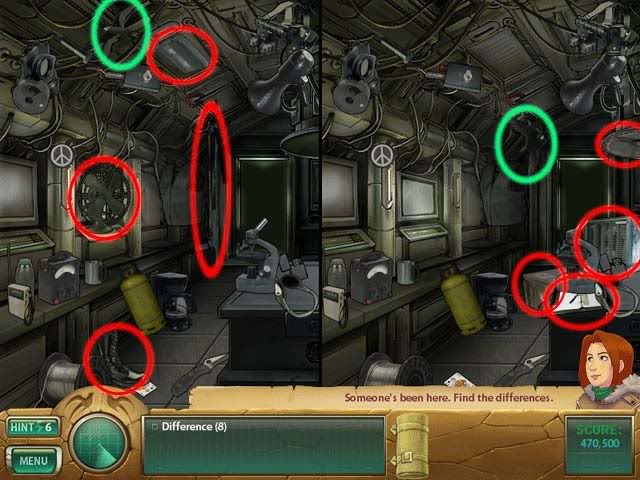
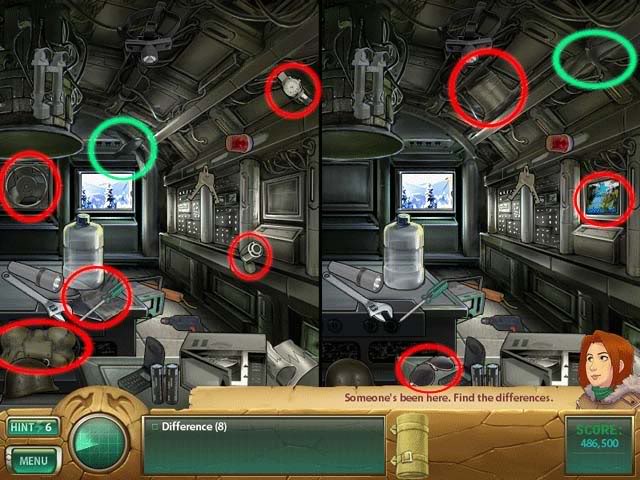
- Place the Seal Plate on the table in the middle of the room, then use the Tooth on it.
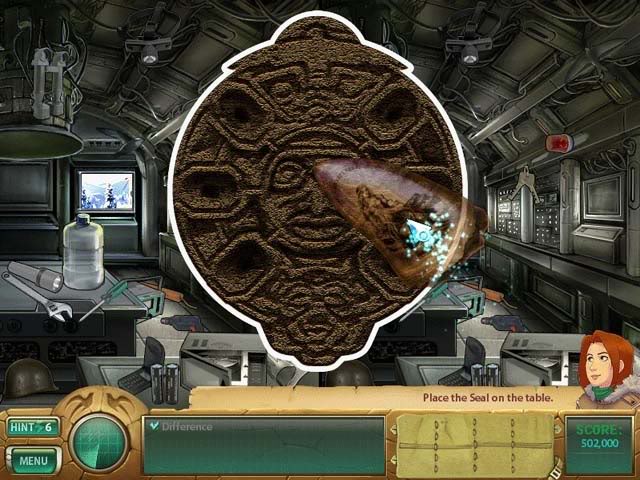
- At the end of the chapter, the following items will be added to the Museum for viewing:
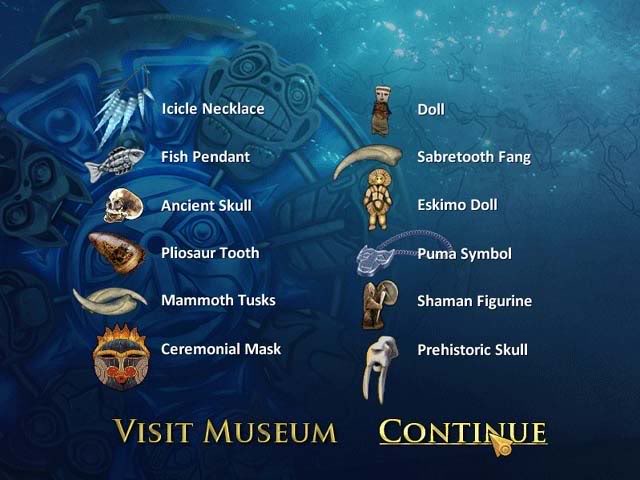
Chapter 2: Serpent Sense of Taste
Location: Magnetic Island
Underwater Wreath
- Find all the objects listed at the bottom of the screen. Hints (lightning bolts) are circled in yellow and Swift Birds are circled in teal.
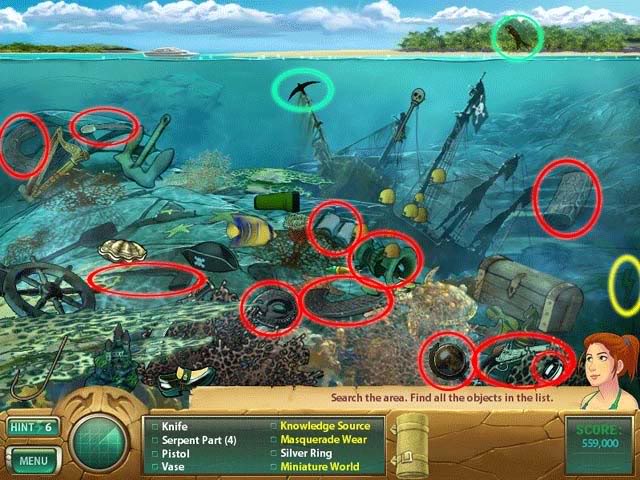
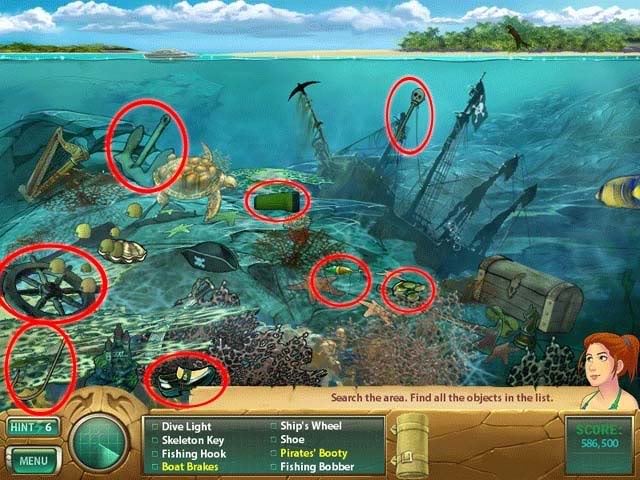
- Objects listed in blue require a tool to acquire. Below is how to get them:
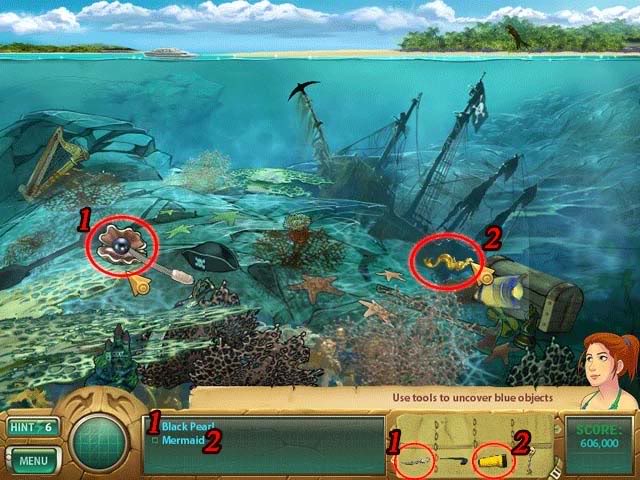
1. Use the Knife on the clam to reveal the Black Pearl.
2. Use the Diving Light on the shipwreck to reveal the Mermaid.
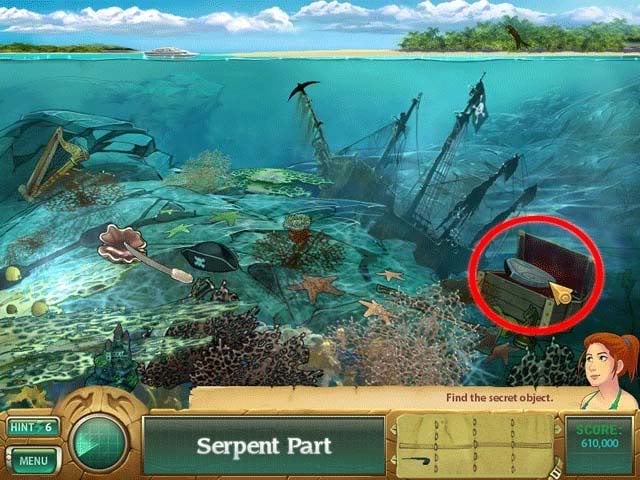
- Use the Skeleton Key from your inventory on the chest to open it and reveal the Serpent Part.
Serpent Wreath
- Find all the objects listed at the bottom of the screen. Hints (lightning bolts) are circled in yellow and Swift Birds are circled in teal.
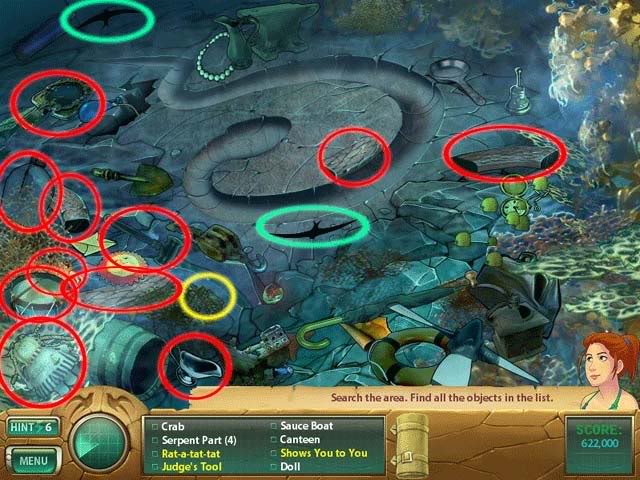
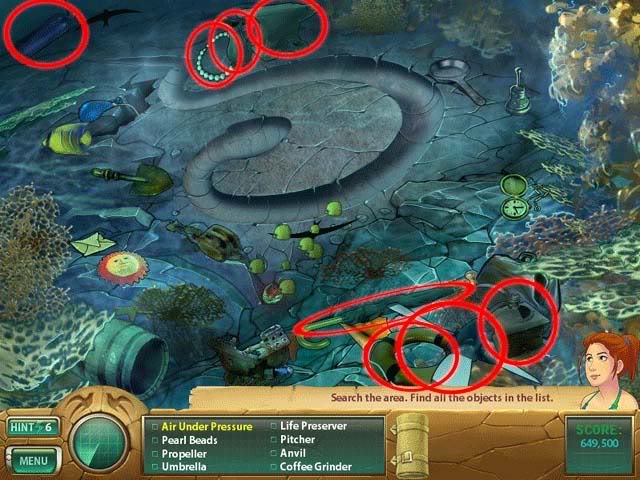
- Objects listed in blue require a tool to acquire. Below is how to get them:
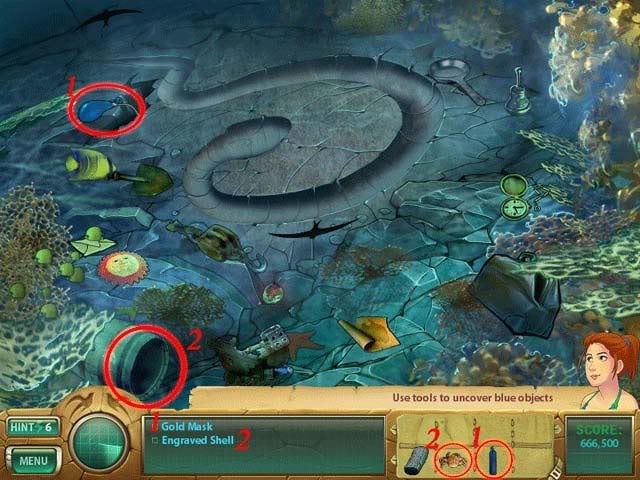
1. Use the Oxygen Tank on the circled balloon to fill it with air and lift the Golden Mask out of the crevice.
2. Use the Crab on the barrel to have it retrieve the Engraved Shell.
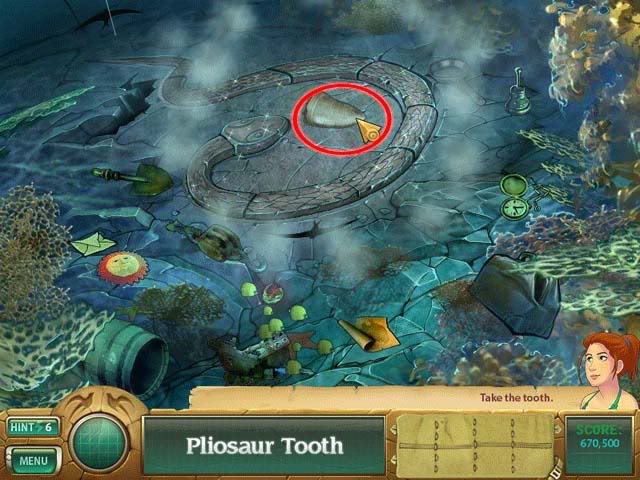
- To obtain the Pliosaur Tooth, assemble the serpent, as shown below, to reveal the Tooth. Click on it to obtain it.
Jungle
- Find all the objects listed at the bottom of the screen. Hints (lightning bolts) are circled in yellow and Swift Birds are circled in teal.
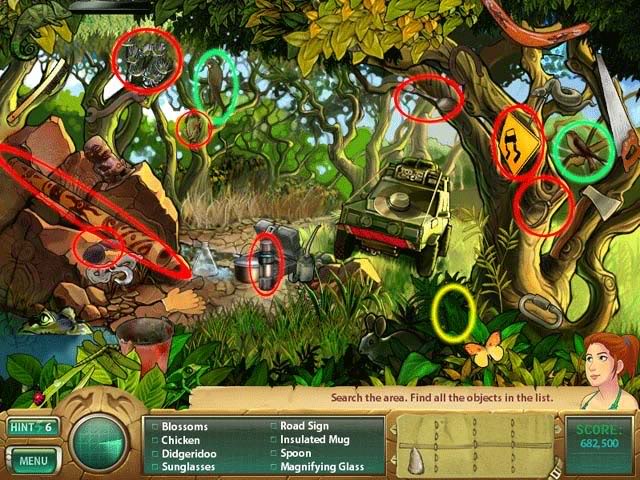
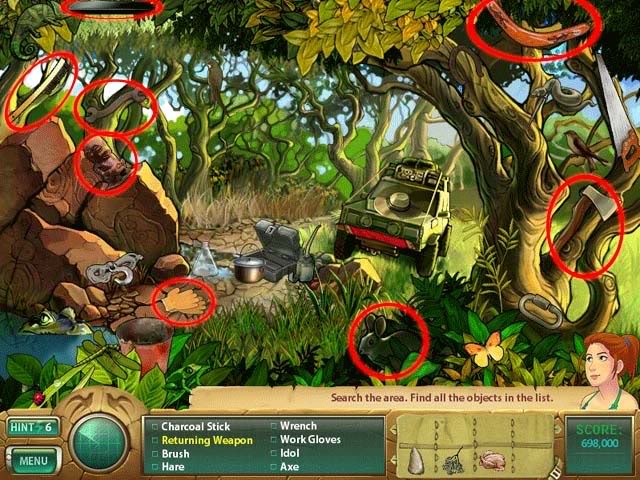
- Objects listed in blue require a tool to acquire. Below is how to get them:
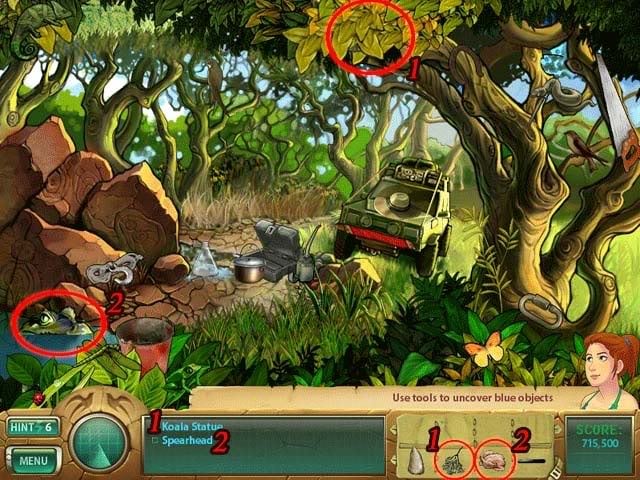
1. Use the Blossoms on the area numbered and circled to have the koala drop the Koala Statue to the ground.
2. Use the Chicken on the circled gator to have it disappear and the Spearhead appear instead.
- To obtain the Map:
-Use the Pliosaur Tooth on the guide so he gives you the Paper.
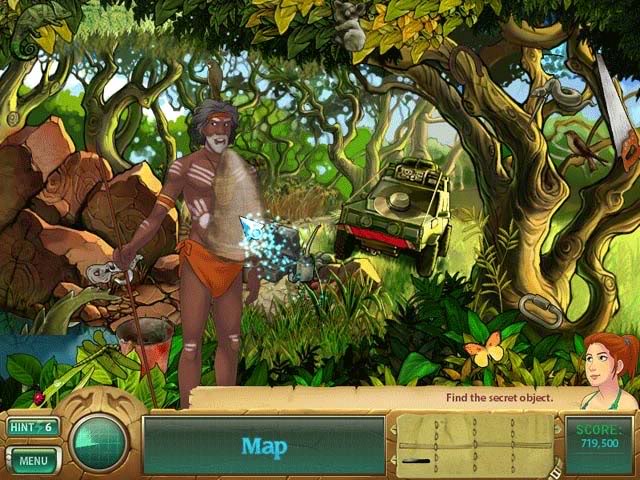
-Use the Paper on the Rock circled below. Then use the Charcoal Stick to outline it.
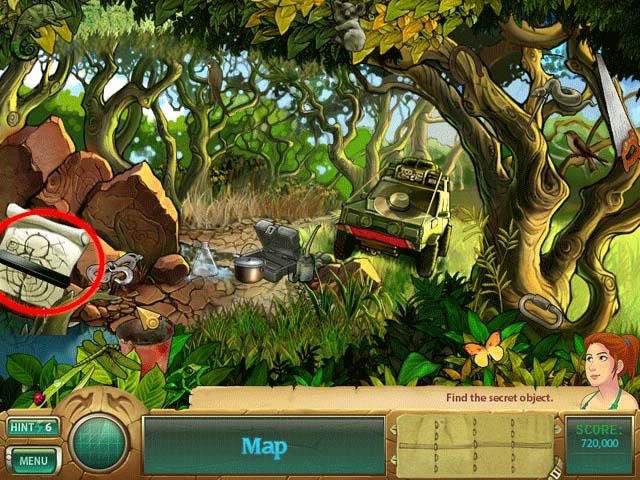
-Click on it to add it to your inventory.
Campsite
- Find all the objects listed at the bottom of the screen. Hints (lightning bolts) are circled in yellow and Swift Birds are circled in teal.
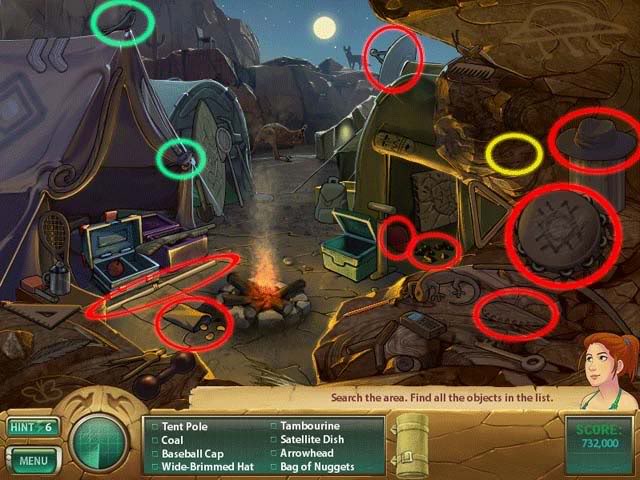
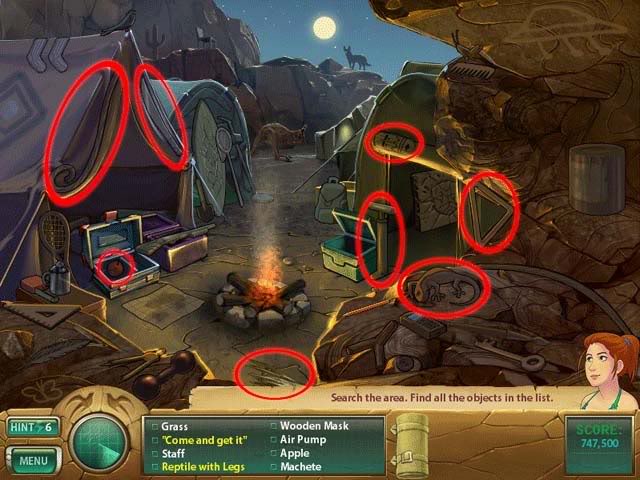
- Objects listed in blue require a tool to acquire. Below is how to get them:
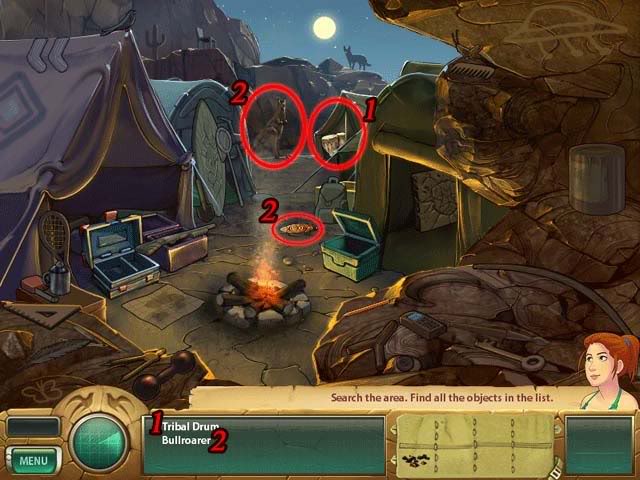
1. Use the Tent Pole on the circled and numbered tent to reveal the Tribal Drum.
2. Use the Grass on the kangaroo to have it look up and drop the Bullroarer.
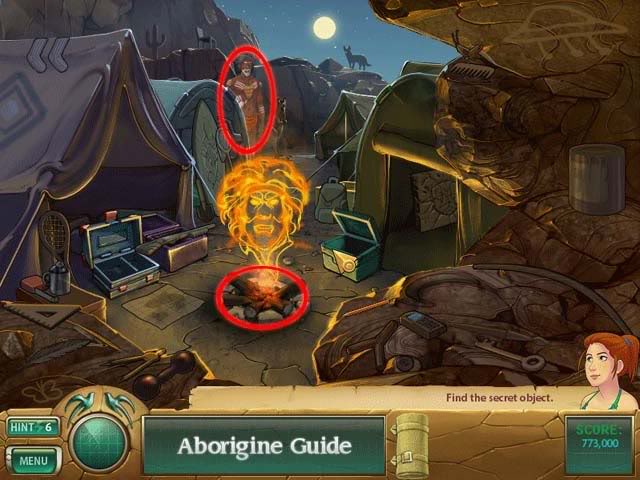
- Use the Coal on the fire to call the Aborigine Guide, then click on him (circled in the background).
Ayer’s Rock
- Find all the objects listed at the bottom of the screen. Hints (lightning bolts) are circled in yellow and Swift Birds are circled in teal.
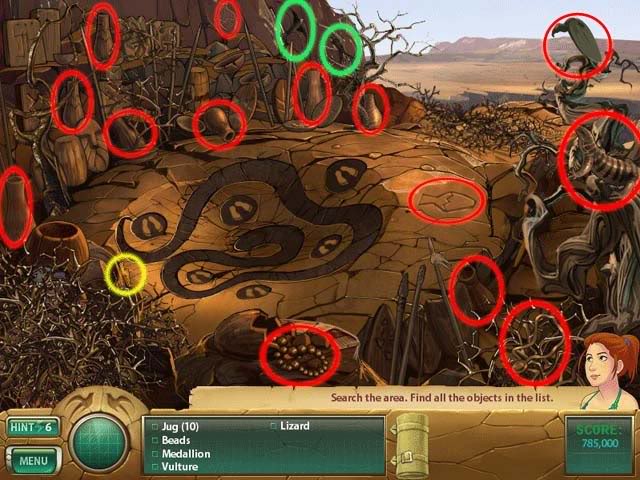
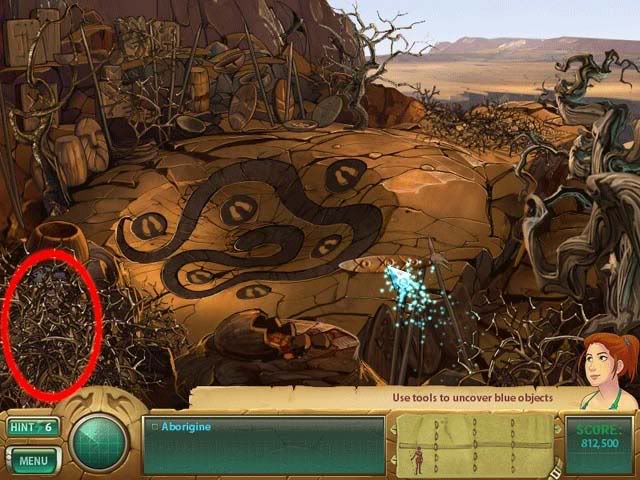
- Find the (blue marked) Aborigine by using the Bullroar in the spot desginated below. The Aborigine can be found in the area circled in red once it’s been used.
- Place the Aborigines on the circles containing the feet. Once you’ve placed both, a Match-3 puzzle will appear. Match rocks to clear a path for the four remaining Aborigines to the bottom.
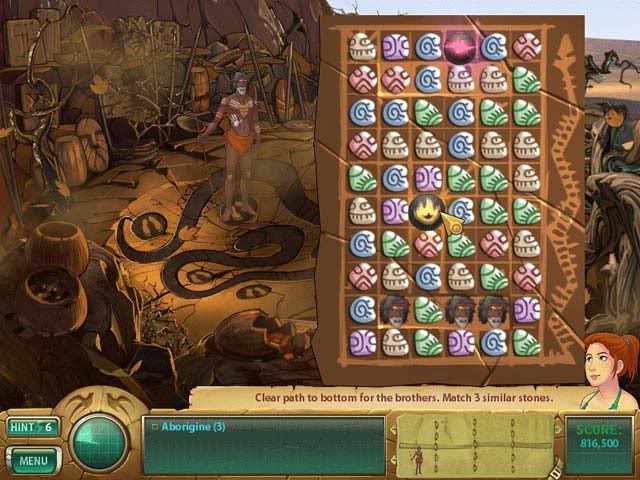
Red lightning-bolt stones will clear a horizontal row wherever you move them. Fire-marked stones will clear several stones at a time: it’s best to use these as soon as they appear. You may only move match-3 stones one space vertical or horizontal.
- Once you’ve completed the puzzle, place the four Aborigines on the areas circled in red to reveal the Serpent Sense of Taste.
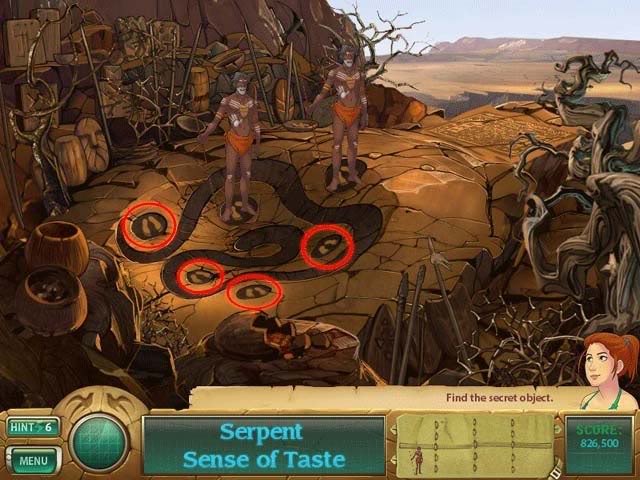
- Once the Serpent Sense of Taste appears, wait a moment before clicking on it to collect it.
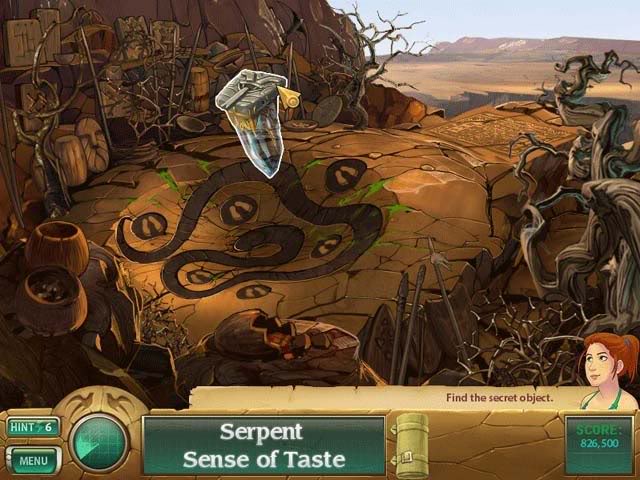
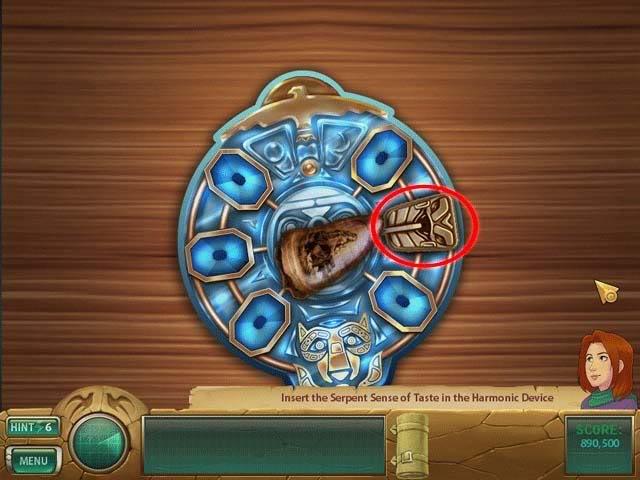
- Back in the Museum, place the Serpent Sense of Taste in it’s correct place on the Harmonic Device.
Chapter 3: Bear Sense of Smell
Location: Geomagnetic North Pole (Greenland)
Celtic Coast
- Find all the objects listed at the bottom of the screen. Hints (lightning bolts) are circled in yellow and Swift Birds are circled in teal.
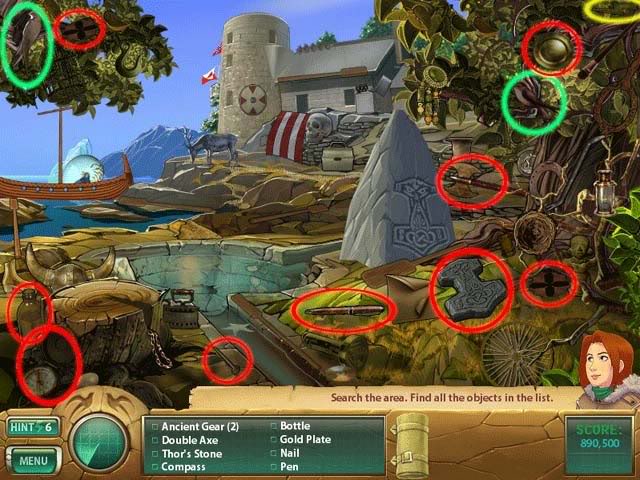
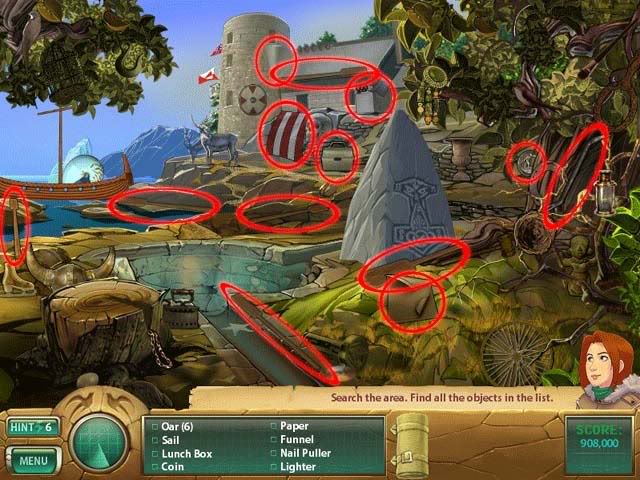
- Objects listed in blue require a tool to acquire. Below is how to get them:
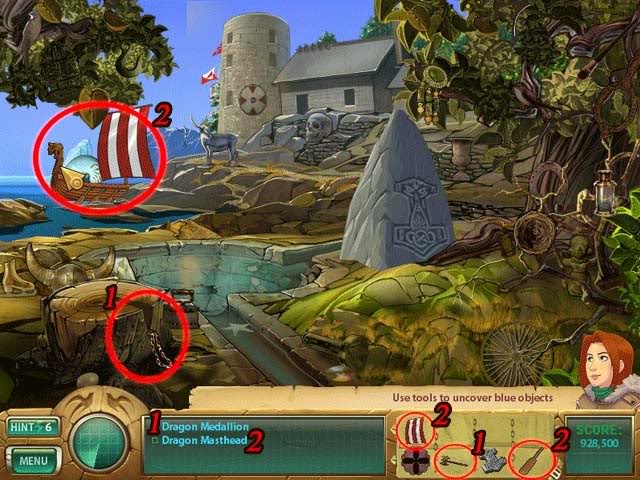
1. Use the Axe on the circled stump area to reveal the Dragon Medallion.
2. Use the Oars and Sail on the circled ship to move it. Then click on the Dragon Masthead to collect it.
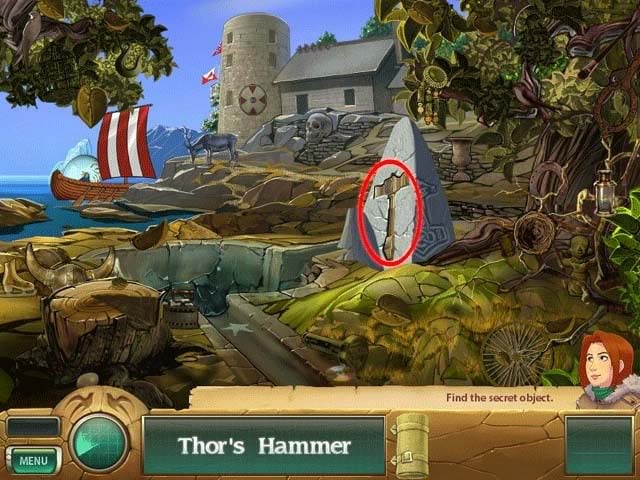
- Use Thor’s Stone on the large rock to reveal Thor’s Hammer.
Ice Cavern Entrance
- Find all the objects listed at the bottom of the screen. Hints (lightning bolts) are circled in yellow and Swift Birds are circled in teal.
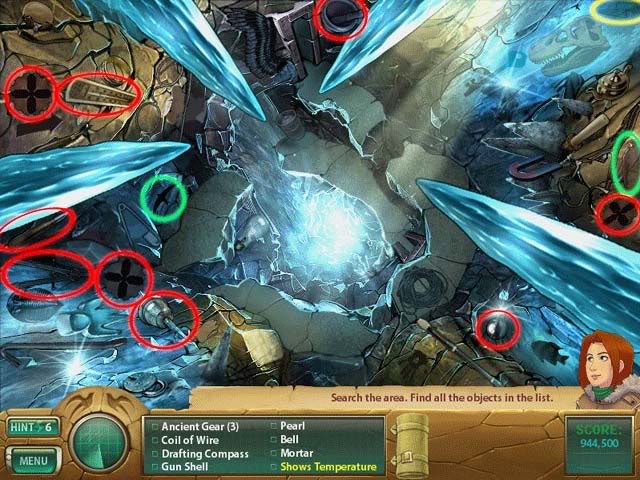
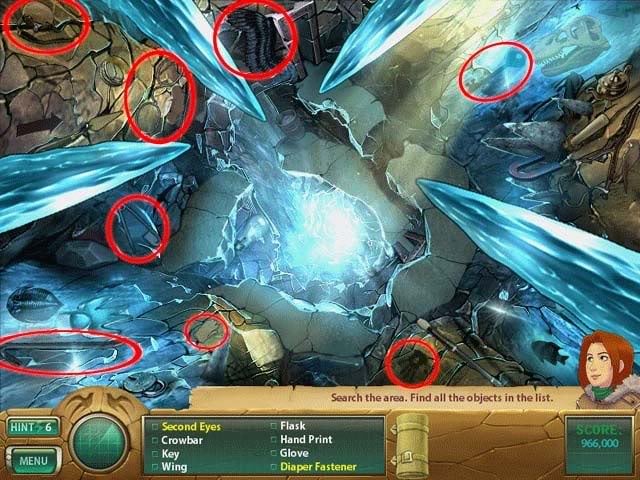
- Objects listed in blue require a tool to acquire. Below is how to get them:
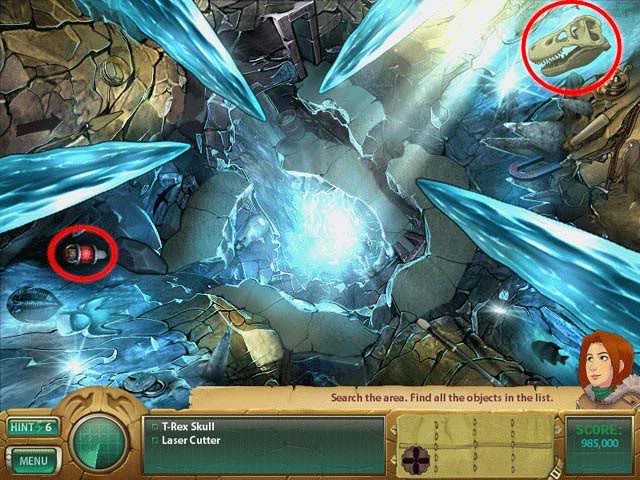
1. Use the Glasses on the light area around the T-Rex Skull to melt the ice and collect it.
2. Use the Crowbar on the rock in front of the circled Laser Cutter to collect it.
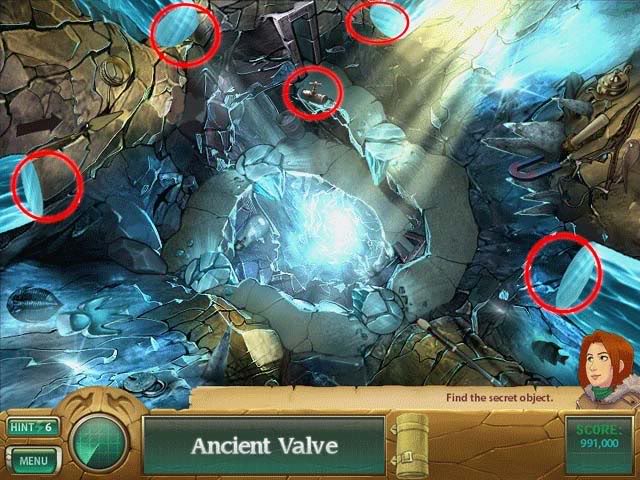
- Use the Laser Cutter on the four (circled below) prominent icicles, then pick up the Ancient Valve that appears on the walkway.
Cavern Floor
- Find all the objects listed at the bottom of the screen. Hints (lightning bolts) are circled in yellow and Swift Birds are circled in teal.
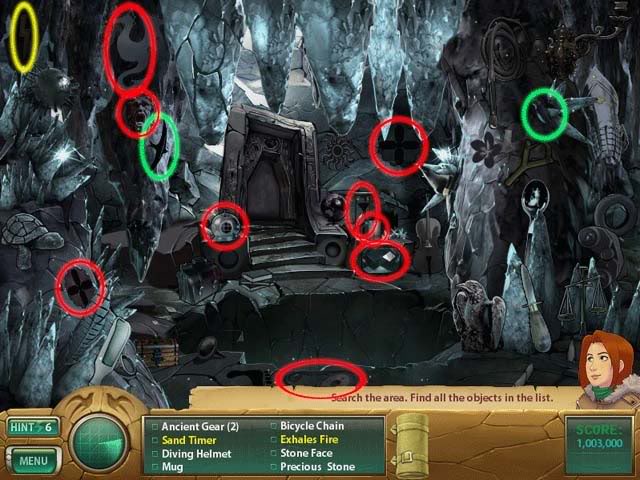
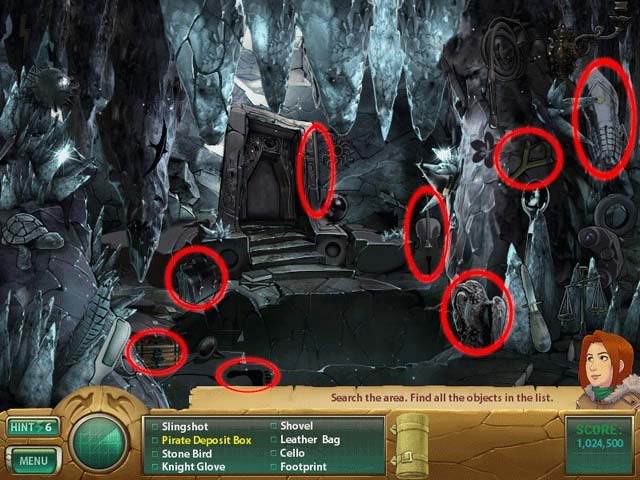
- Objects listed in blue require a tool to acquire. Below is how to get them:
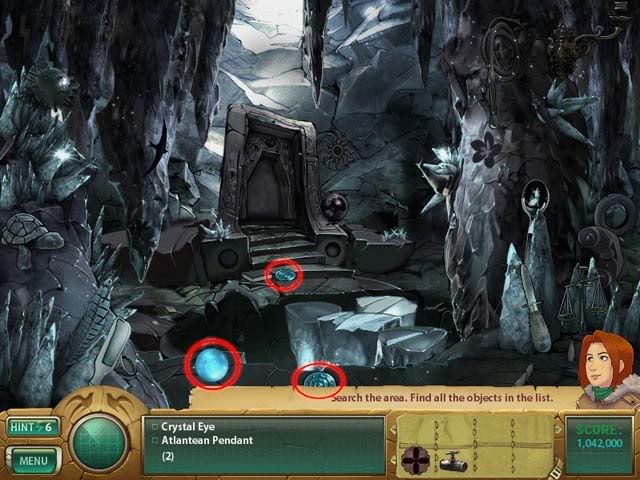
1. Use the Slingshot on all the large icy overhead stalactites to reveal the Crystal Eye and the two Atlantean Pendants.
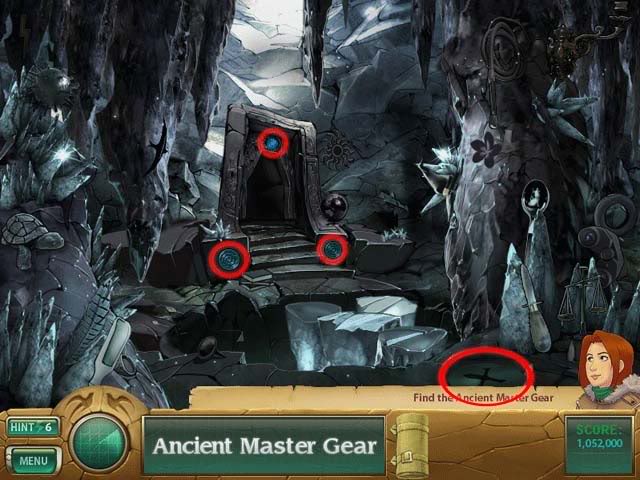
- Use the Crystal Eye above the door and the Atlantean Pendants on either side (circled small below) to release the Ancient Master Gear and collect it (circled below at the bottom of the screen).
Valve Room
- Find all the objects listed at the bottom of the screen. Hints (lightning bolts) are circled in yellow and Swift Birds are circled in teal.
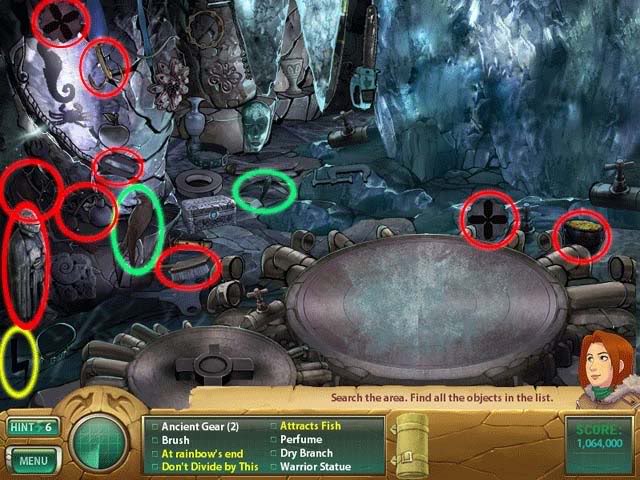
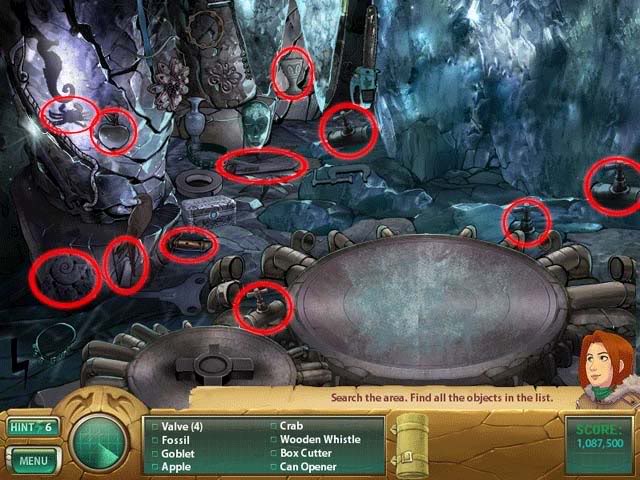
- Objects listed in blue require a tool to acquire. Below is how to get them:
1. Use the Brush to dust off the top of the large gear-like area.
2. Place the two types of gears from your inventory in their corresponding places as shown below:
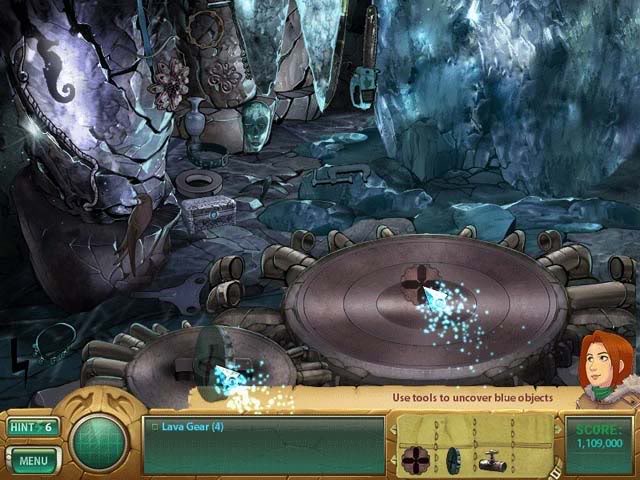
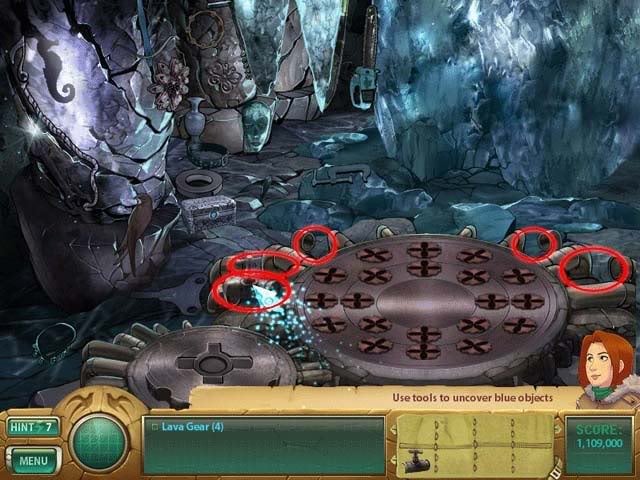
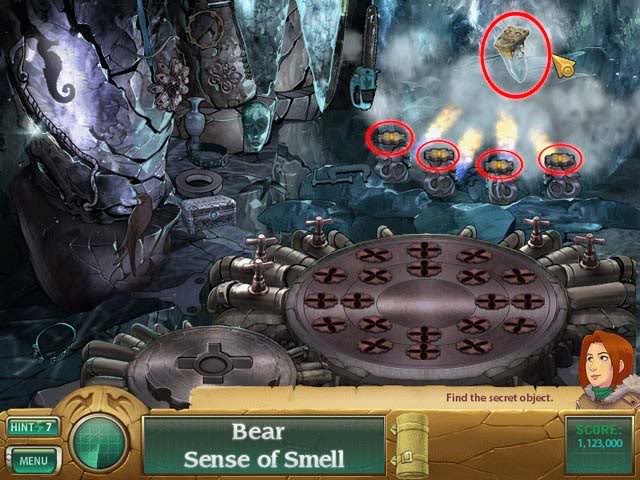
3. Place the Valves from your inventory into the locations circled below in red:
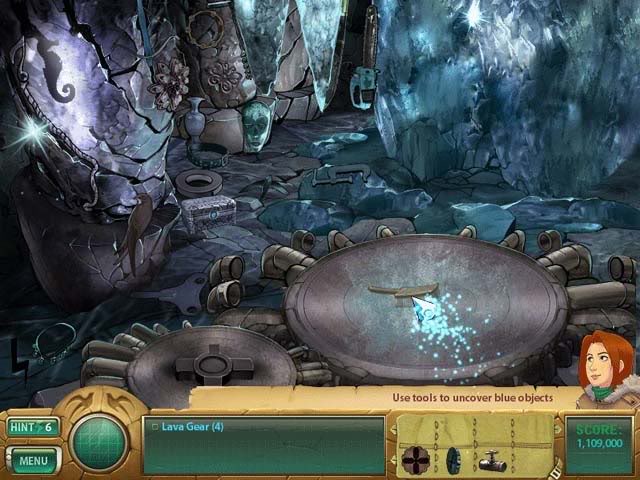
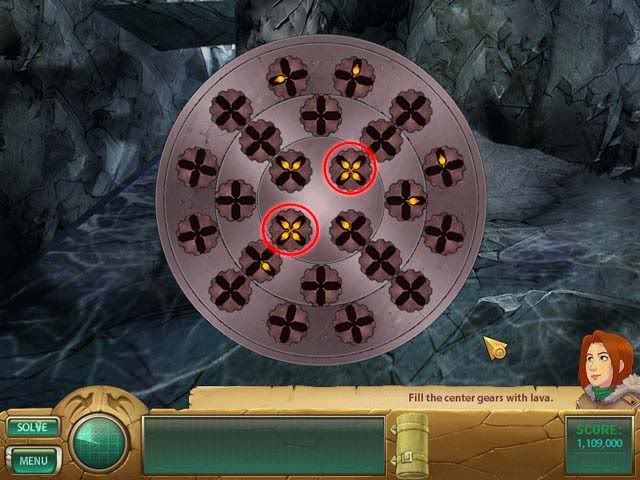
- You will enter a puzzle. Click the gears to rotate them, draining lava into the centermost gears. The goal is to fill them completely. Below, circled in red, you can see what your goal-gears should look like. All the center gears should look like this to complete the puzzle.
- Once you’ve completed the puzzle, click on the four Lava Gears circled below to add them to your inventory.
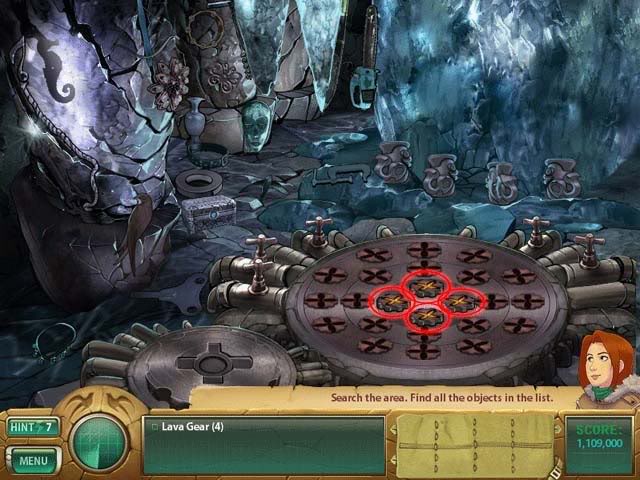
- Use the Lava Gears on the pedestals shown below to reveal the Bear Sense of Smell. Click on it for a close-up, then click on it again to officially acquire it.
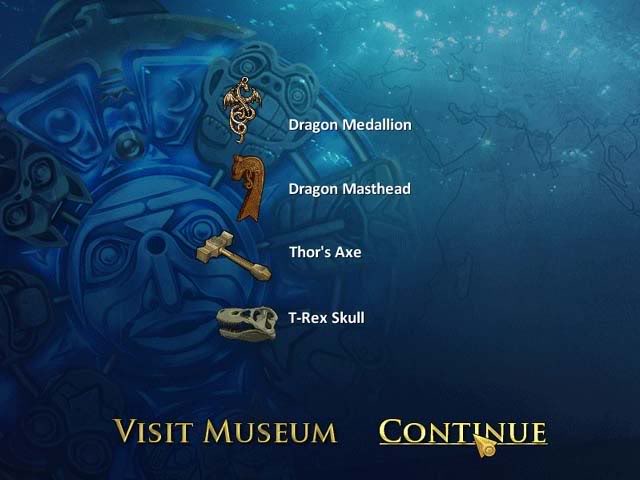
- At the end of the chapter, the following artifacts will be transferred to the museum:
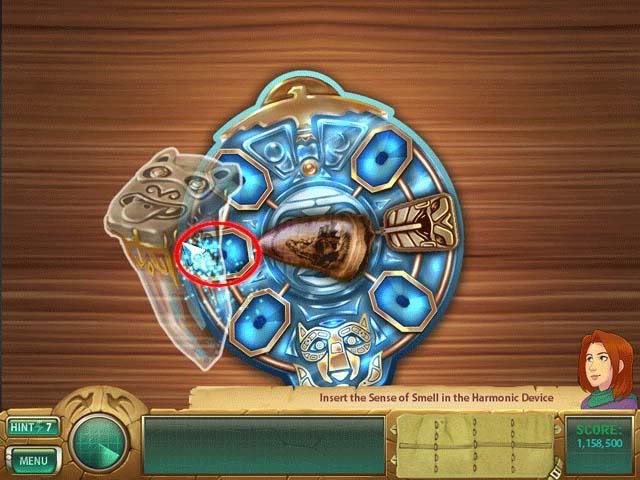
- Back at the museum, place the Bear Sense of Smell in its correct position on the Harmonic Device.
Chapter 4: Bat Sense of Hearing
Location: Museum of Secrets Lost
Office
- Find all the objects listed at the bottom of the screen. Hints (lightning bolts) are circled in yellow and Swift Birds are circled in teal.
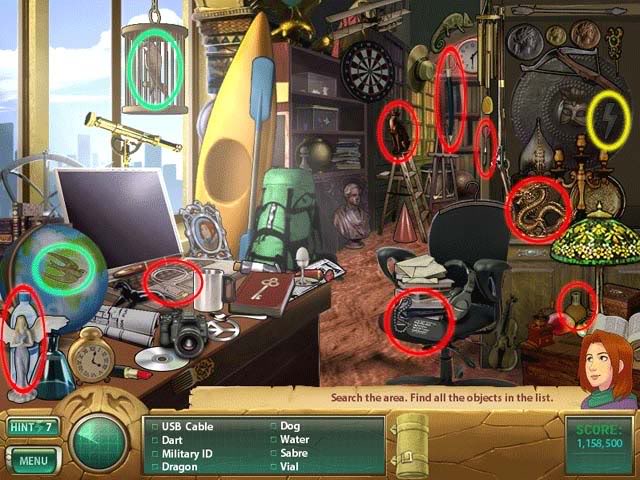
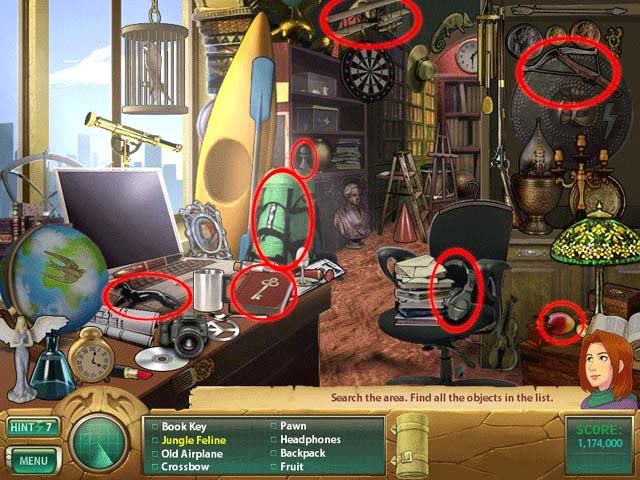
- Objects listed in blue require a tool to acquire. Below is how to get them:
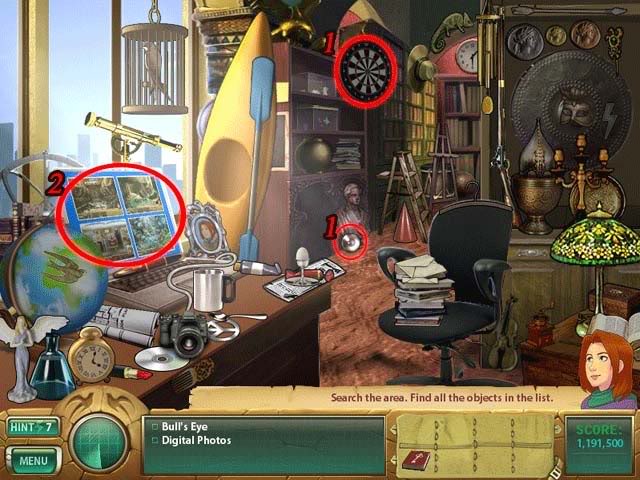
1. Use the Dart on the dartboard to make the Bull’s Eye drop and appear.
2. Use the USB Cable on the computer to make the Digital Photos appear. Click on the screen to collect them.
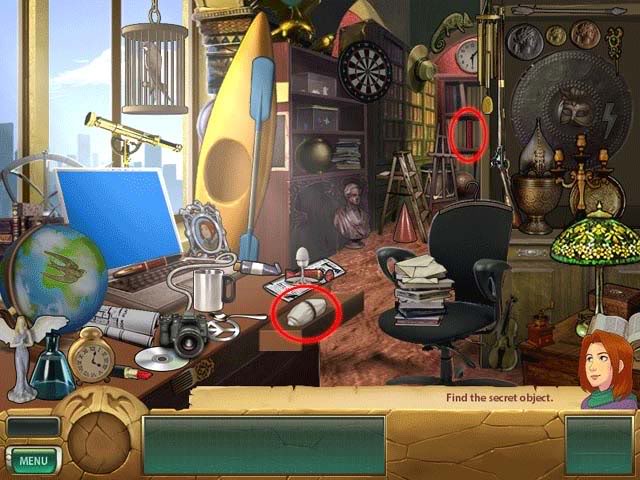
- Use the Book Key on the shelf (circled below) to make the secret drawer containing the Totem Shard appear. Click on it for a closer look, then once more to add it to your inventory.
Desk
- Find all the objects listed at the bottom of the screen. Hints (lightning bolts) are circled in yellow and Swift Birds are circled in teal.
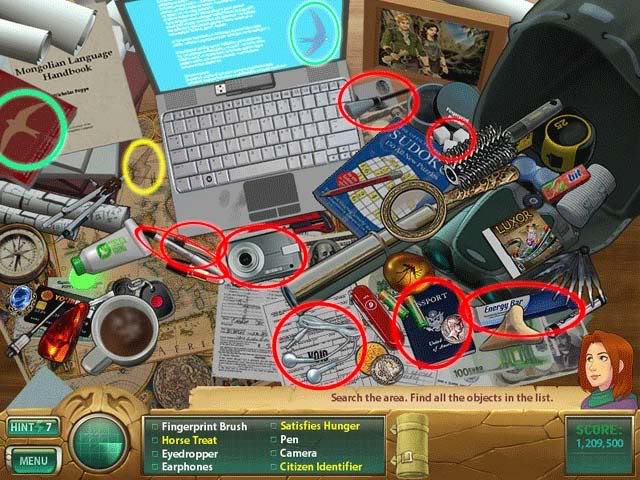
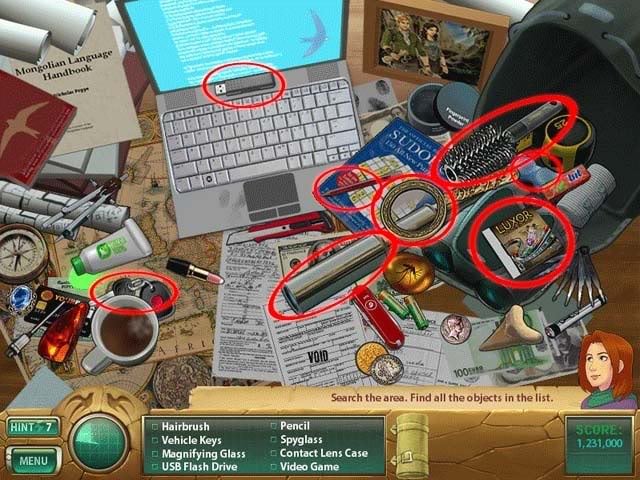
- Objects listed in blue require a tool to acquire. Below is how to get them:
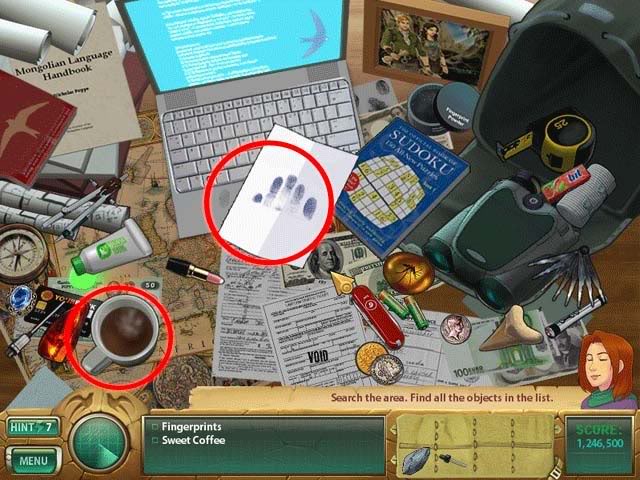
1. Use the Fingerprint Brush on the circled area on the laptop to get the Fingerprints.
2. Use the Sugar on the circled coffee to get Sweet Coffee.
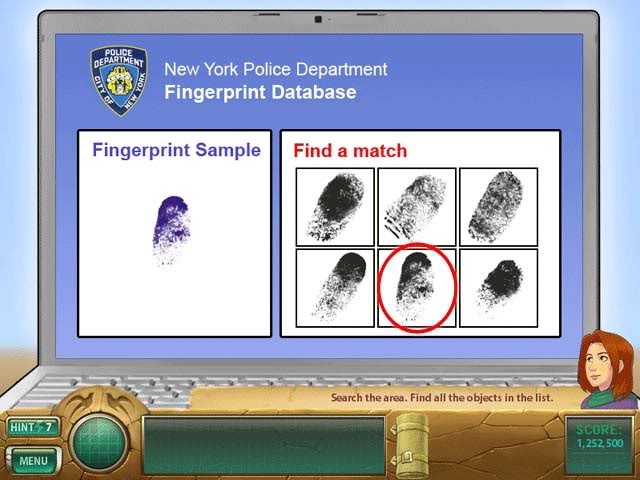
- Choose the matching fingerprint from the selection on the right. The solution has been circled for you below:
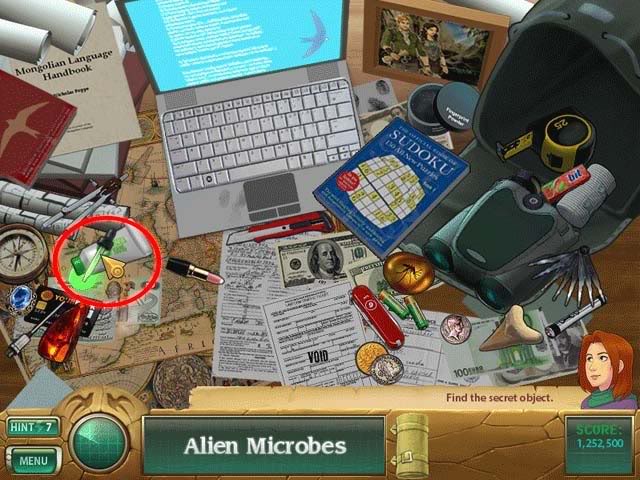
- Use the Eye Dropper on the green lotion to acquire Alien Microbes.
Lab
- Find all the objects listed at the bottom of the screen. Hints (lightning bolts) are circled in yellow and Swift Birds are circled in teal.
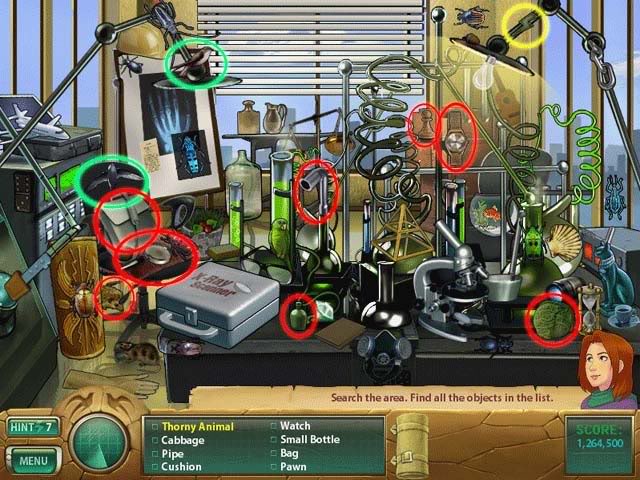
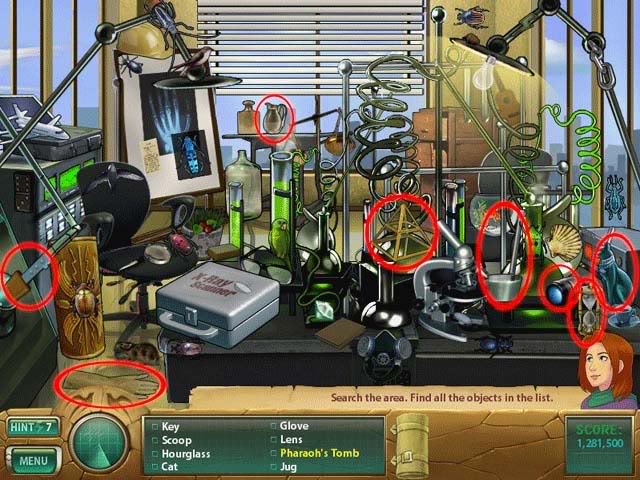
- Objects listed in blue require a tool to acquire. Below is how to get them:
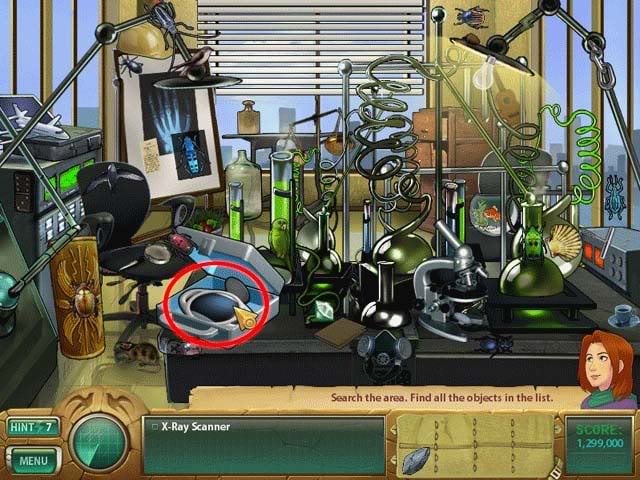
1. Use the Key on the case to acquire the X-Ray Scanner.
- Find the five Surveillance Bugs using the X-Ray Scanner. They’ll show up colorful on the blue screen. Their locations are shown below:
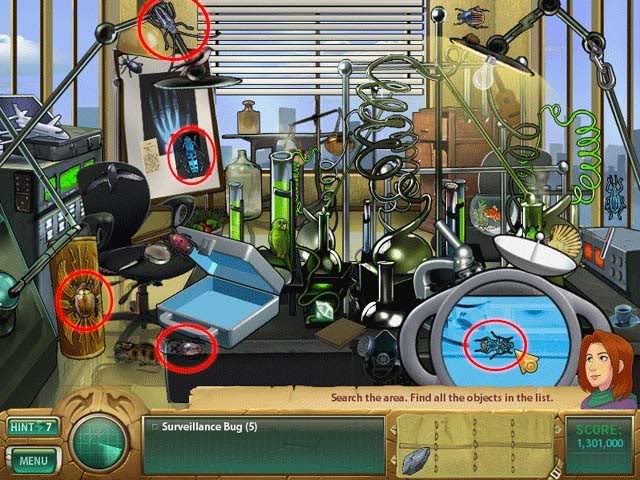
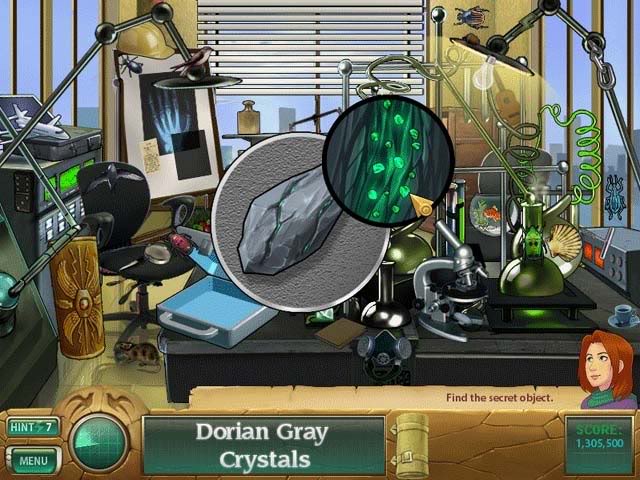
- Use the Totem Shard on the microscope for a close-up view. This will reveal the Dorian Gray Crystals: now all you have to do is click on them.
Fine Art Room
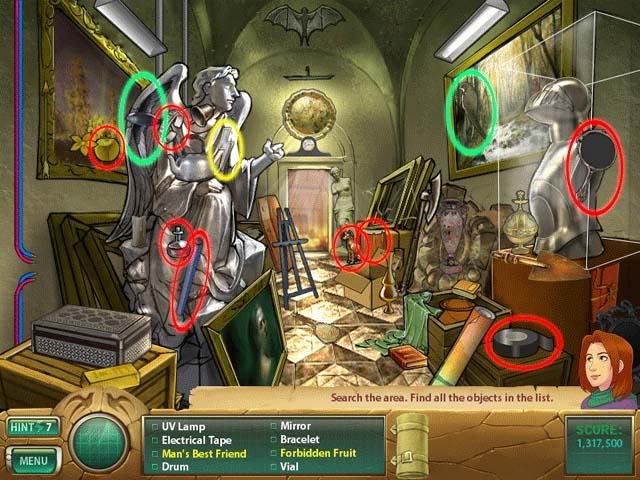
- Find all the objects listed at the bottom of the screen. Hints (lightning bolts) are circled in yellow and Swift Birds are circled in teal.
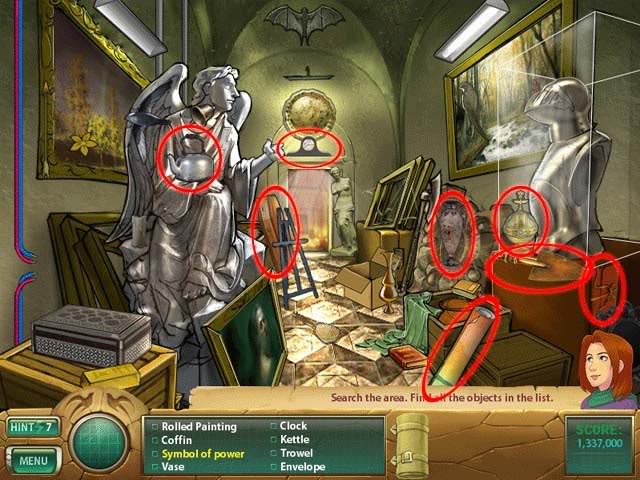
- Objects listed in blue require a tool to acquire. Below is how to get them:
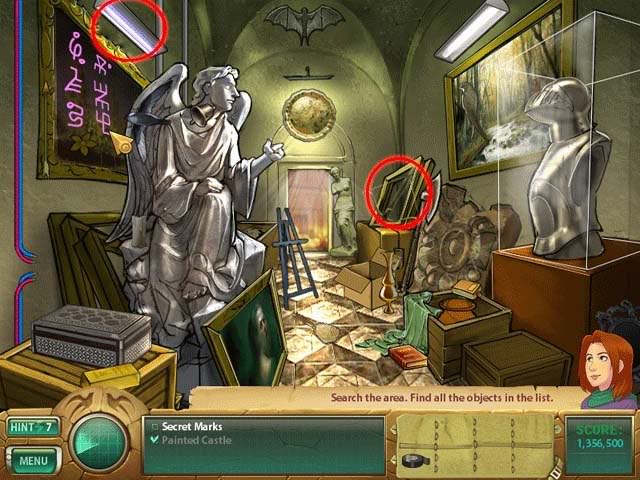
1. Use the UV Lamp on the light circled in red to reveal the Secret Marks.
2. Use the Rolled Painting on the frame circled in red to reveal the Painted Castle.
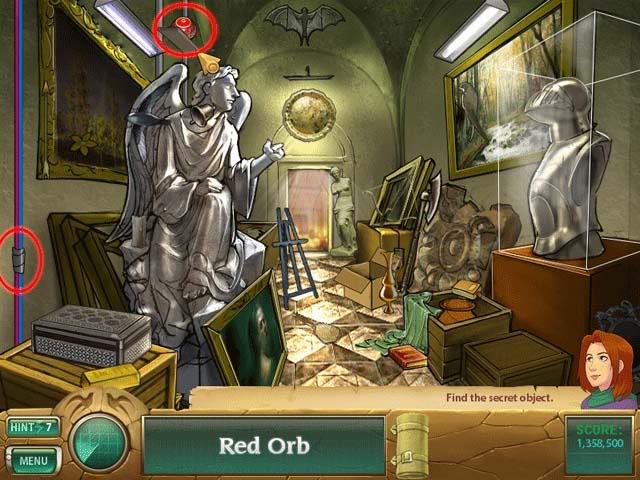
- Use the Electrical Tape on the broken wires to repair them and lower the Red Orb.
Storage Room
- Find all the objects listed at the bottom of the screen. Hints (lightning bolts) are circled in yellow and Swift Birds are circled in teal.
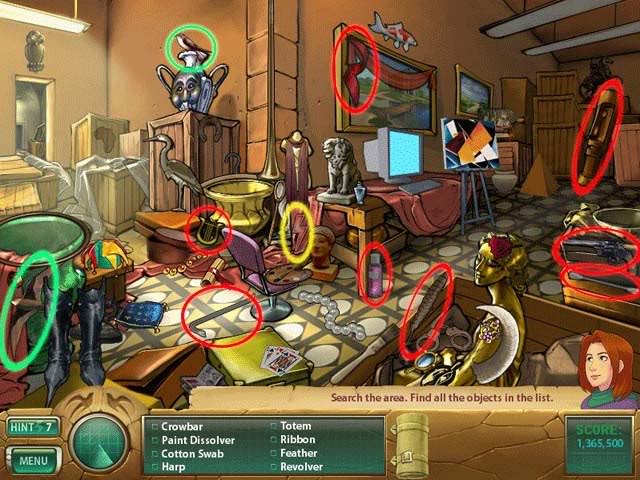
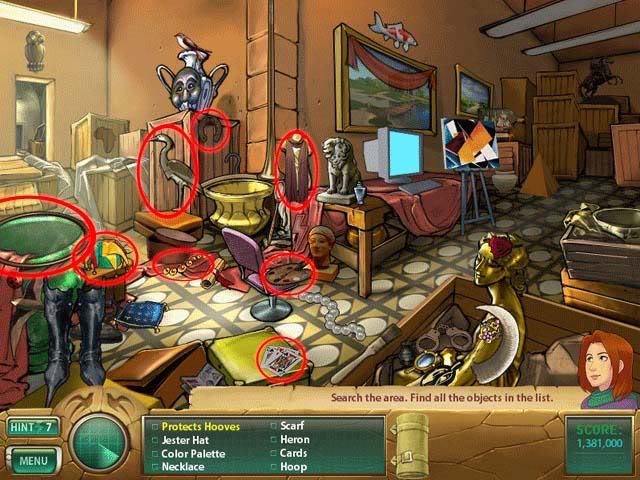
- Objects listed in blue require a tool to acquire. Below is how to get them:
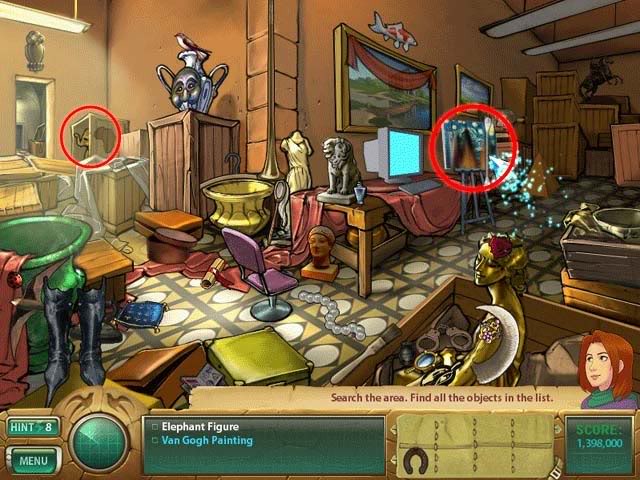
1. On the left, use the Crowbar on the crate to reveal the Elephant Figure.
2. On the right, use the Paint Dissolver, then the Cotton Swab on the painting on the easel to reveal the Van Gogh Painting.
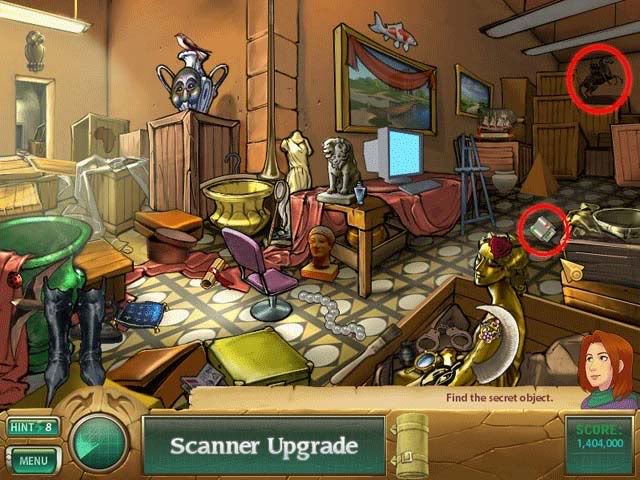
- Use the Horseshoe on the bronze horse statue to the far right to have it kick, revealing the Scanner Upgrade (also circled below).
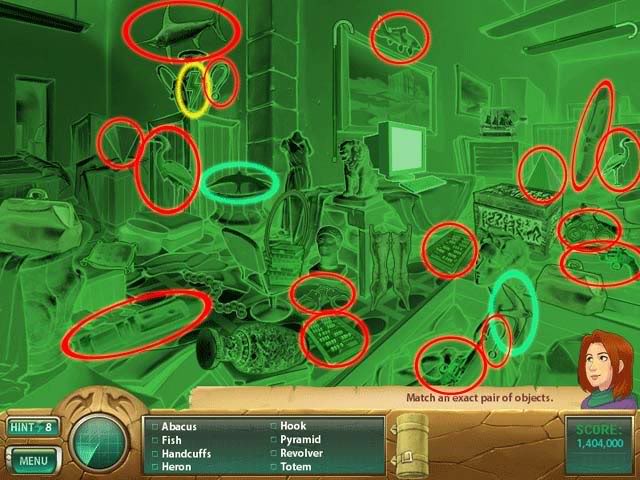
- The whole room turned green with the Scanner Upgrade, find exact pairs of objects. Solutions are circled and shown below.
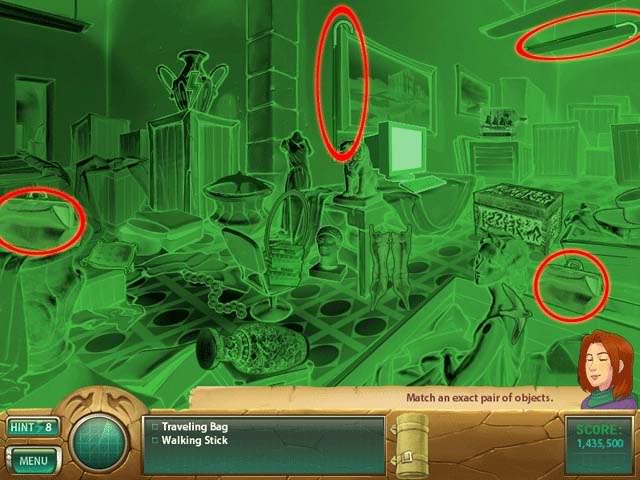
- Upon completing the area, the Bat Sense of Hearing will appear. Click on it to add it to your inventory.
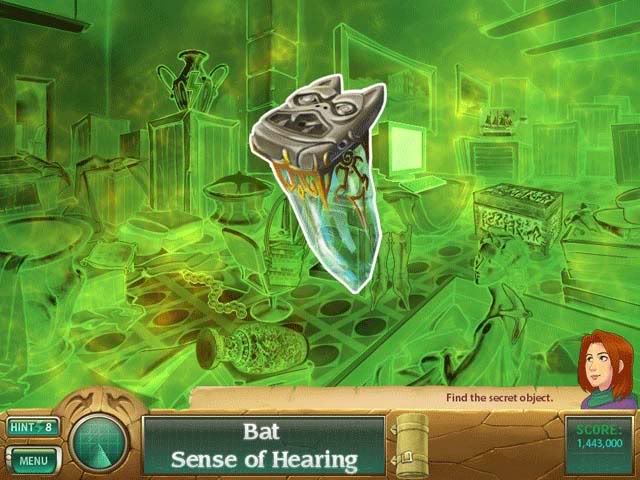
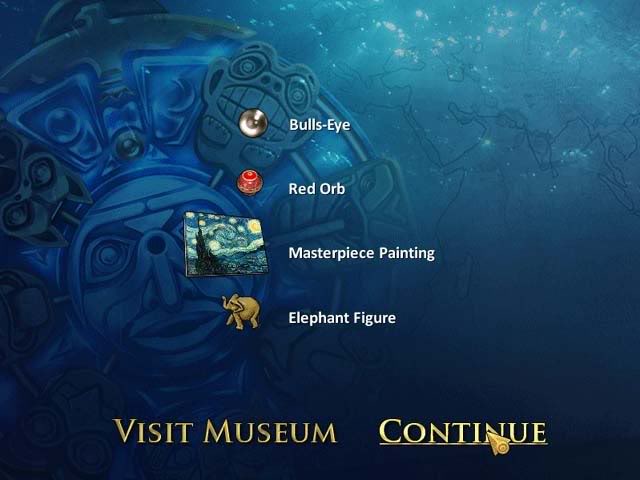
- At the end of the chapter, the following items will be available for viewing in the museum:
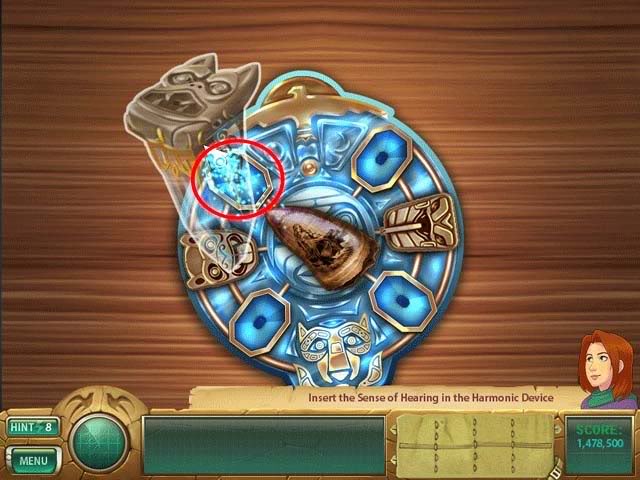
- Place the Bat Sense of Hearing in its proper slot on the Harmonic Device, shown below.
Chapter 5: Dolphin Sense of Thought
Location: Morocco & the Canary Islands
Nick’s Café Lobby
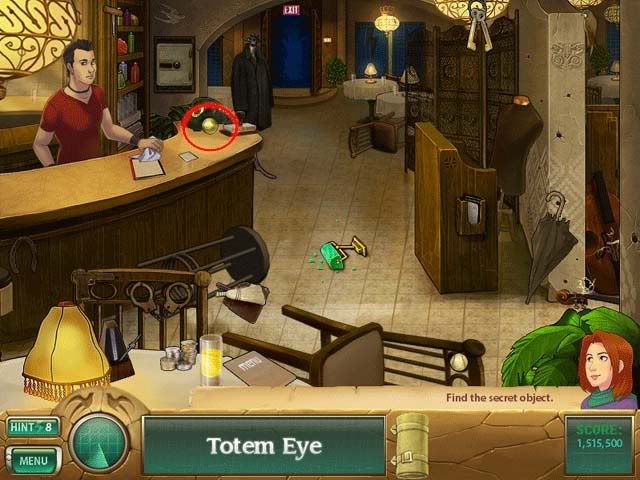
- Find all the objects listed at the bottom of the screen. Hints (lightning bolts) are circled in yellow and Swift Birds are circled in teal.
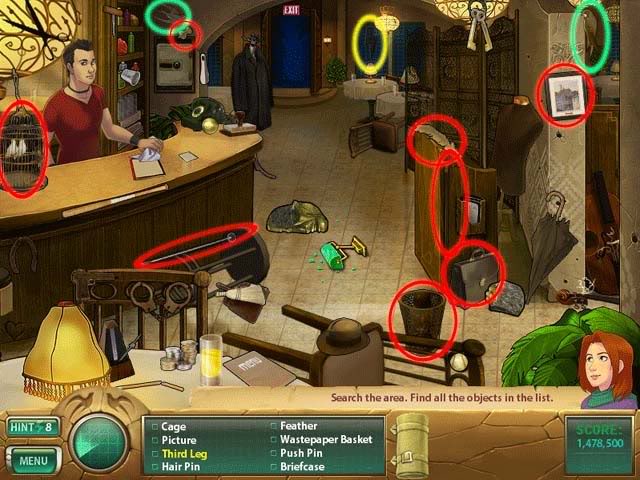
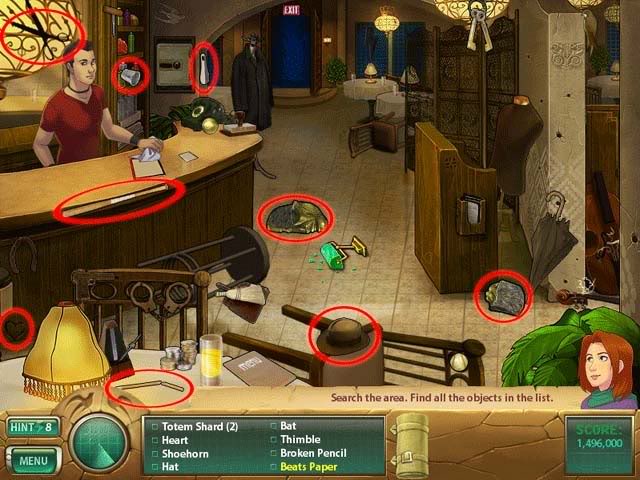
- The Totem Eye is shown and circled below.
Nick’s Café Dining Area
- Find all the objects listed at the bottom of the screen. Hints (lightning bolts) are circled in yellow and Swift Birds are circled in teal.
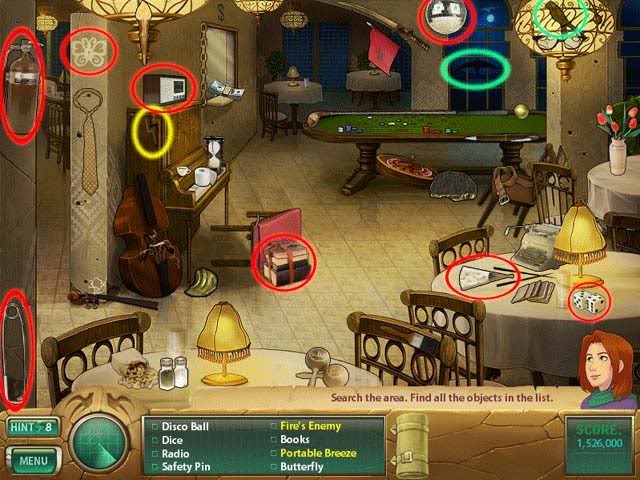
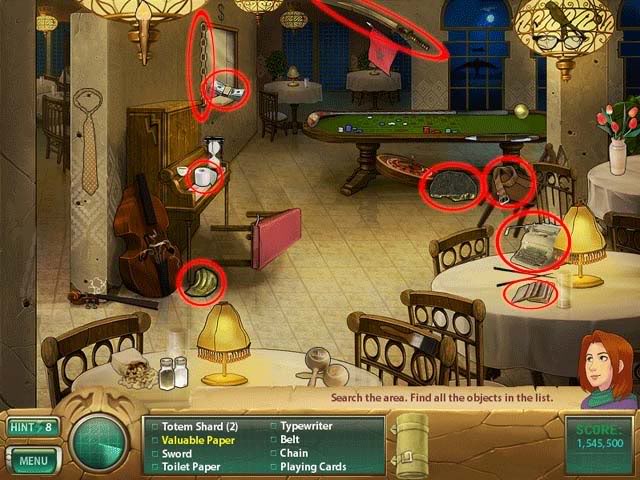
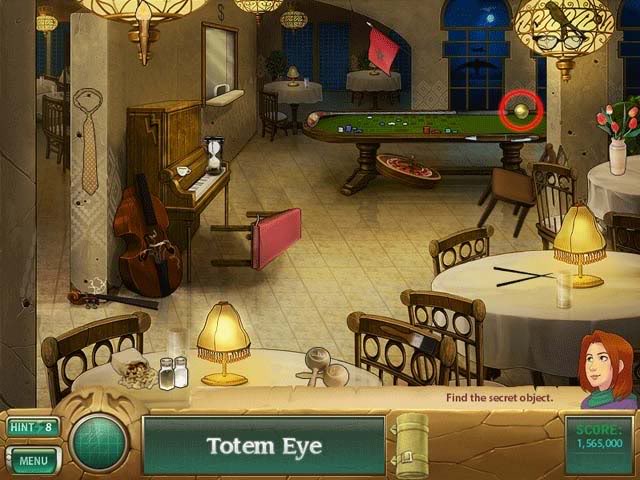
- The Totem Eye is shown and circled below.
Mermaid’s Cove
- Find all the objects listed at the bottom of the screen. Hints (lightning bolts) are circled in yellow and Swift Birds are circled in teal.
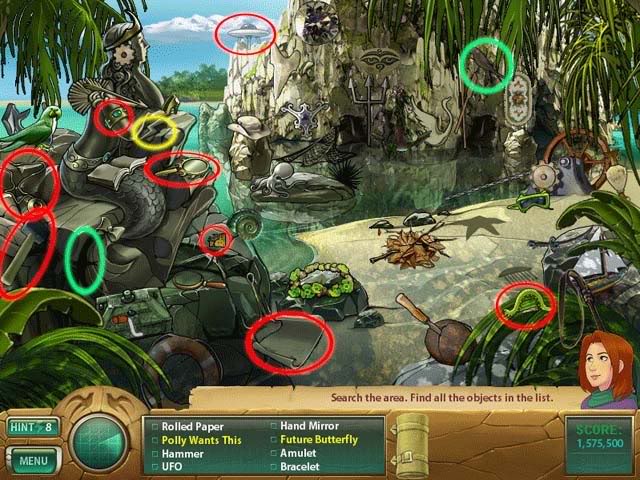
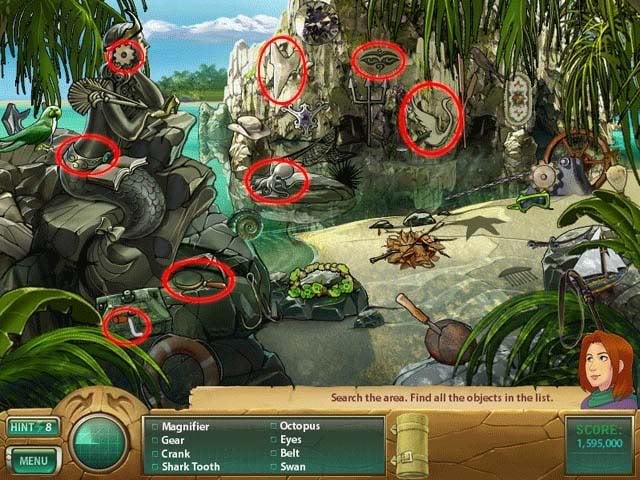
- Objects listed in blue require a tool to acquire. Below is how to get them:
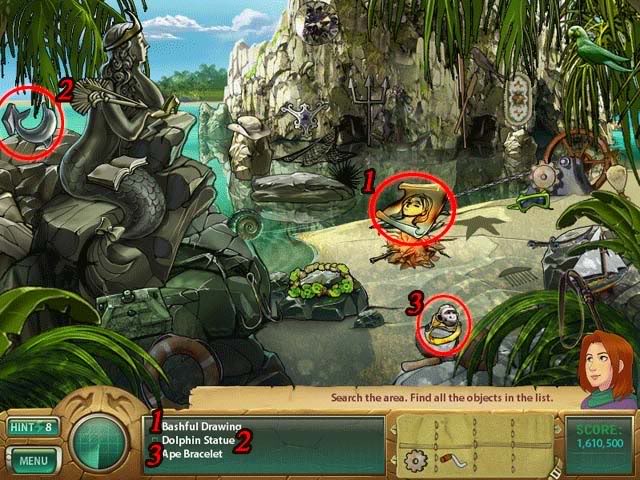
1. Use the Magnifying Lens on the leaf pile to start a fire, then use the Rolled Paper on the fire to reveal the Bashful Drawing.
2. Use the Cracker on the parrot on the far left. It’ll fly away, revealing the Dolphin Statue.
3. Use the Hammer on the coconut to split it and reveal the Ape Bracelet.
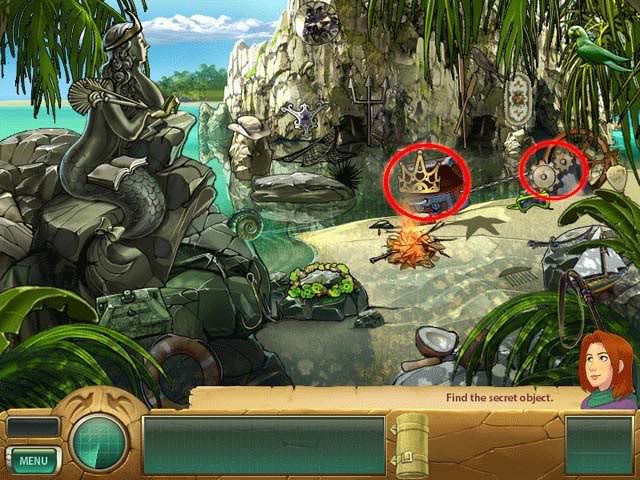
- Use the Gear on the device in the background to bring up a treasure chest. Use the Crank on the chest to open it and reveal the Crown of Poseidon.
Science Ship
- Find all the objects listed at the bottom of the screen. Hints (lightning bolts) are circled in yellow and Swift Birds are circled in teal.
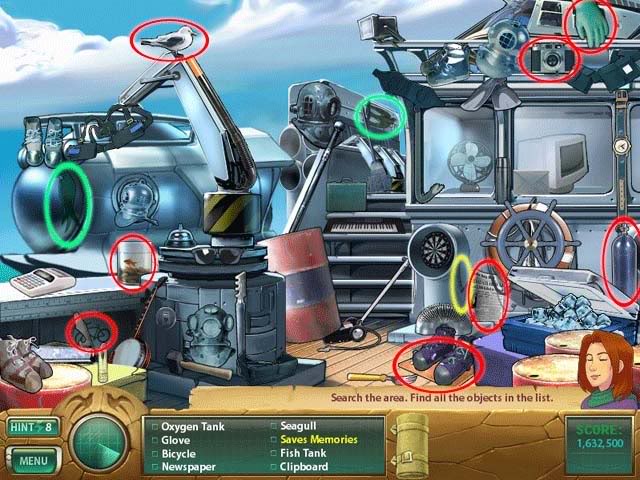
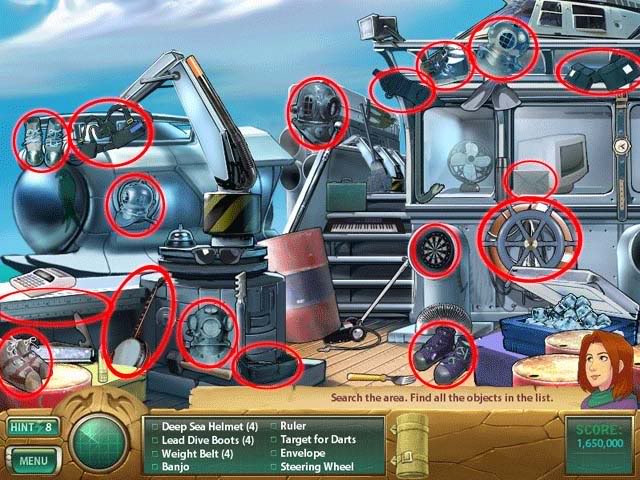
- Objects listed in blue require a tool to acquire. Below is how to get them:
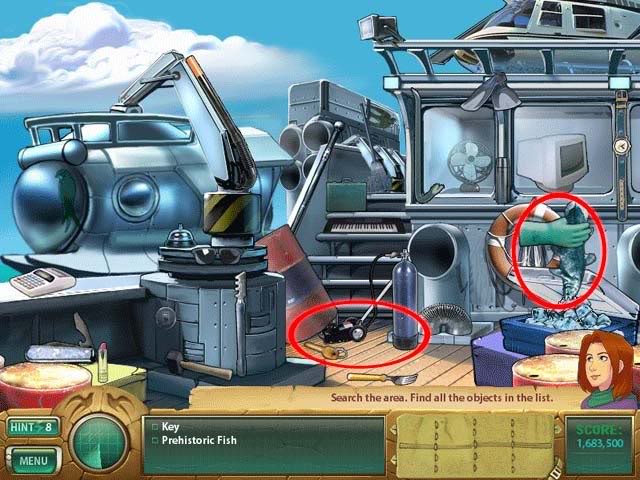
1. Use the Oxygen Tank on the jack to uncover the Key.
2. Use the Glove on the ice box to find the Prehistoric Fish.
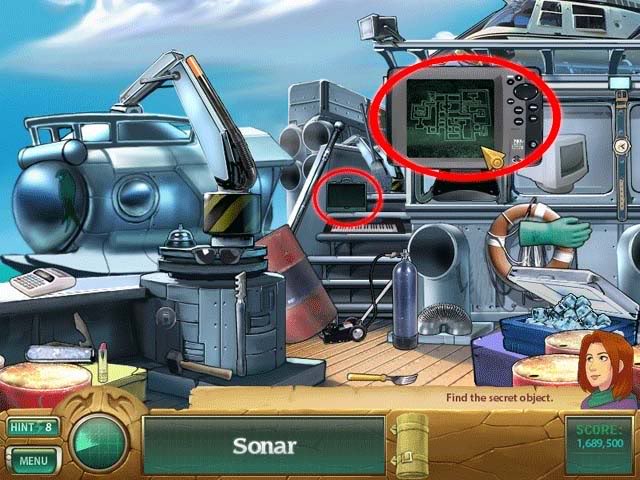
- Use the Key on the suitcase to reveal the Sonar.
Dive Site
- Find all the objects listed at the bottom of the screen. Hints (lightning bolts) are circled in yellow and Swift Birds are circled in teal.
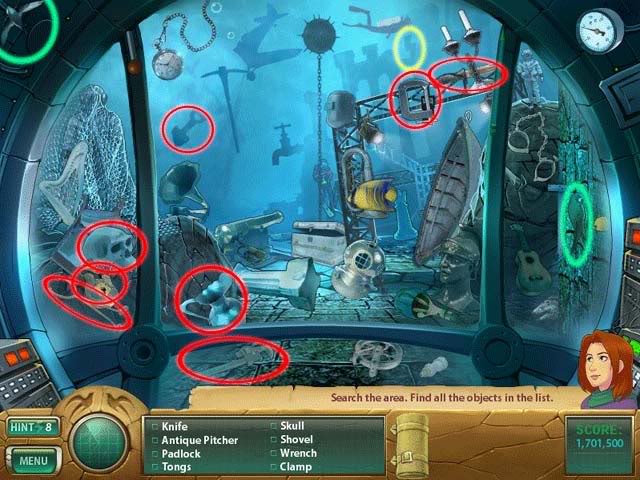
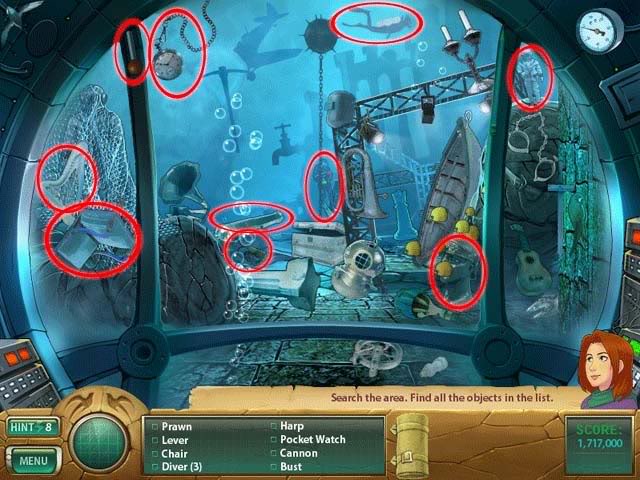
- Objects listed in blue require a tool to acquire. Below is how to get them:
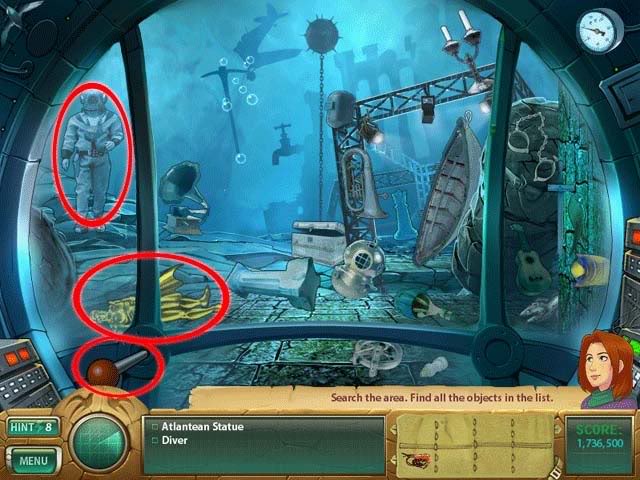
1. Attach the Lever inside the submarine to activate the claw and move the rubble. This will reveal the Atlantean Statue.
2. Use the Knife on the mass of ropes to reveal the Diver.
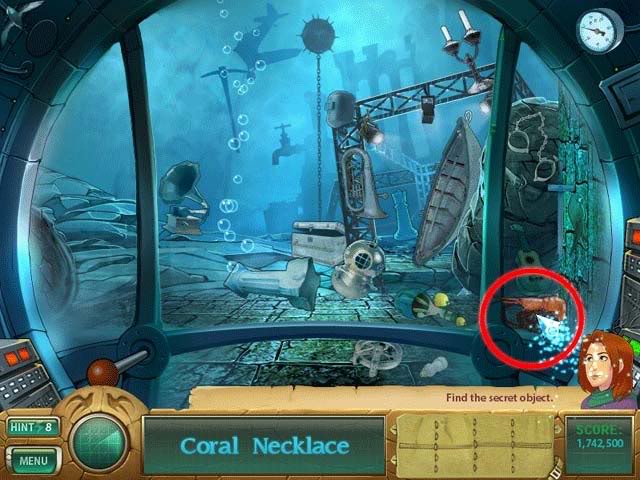
- Use the Prawn on the eel that lurks around the corner to uncover the Coral Necklace.
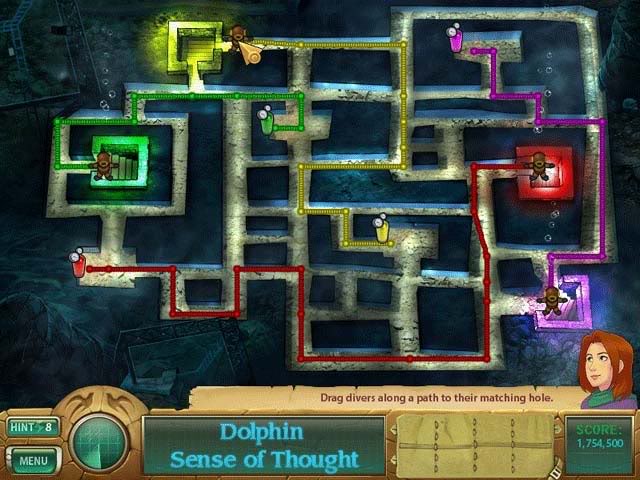
- Get the divers to their marked excavation holes without tangling their air lines. Each one will uncover a special artifact. Double-click a diver to undo the line. The solution is shown below:
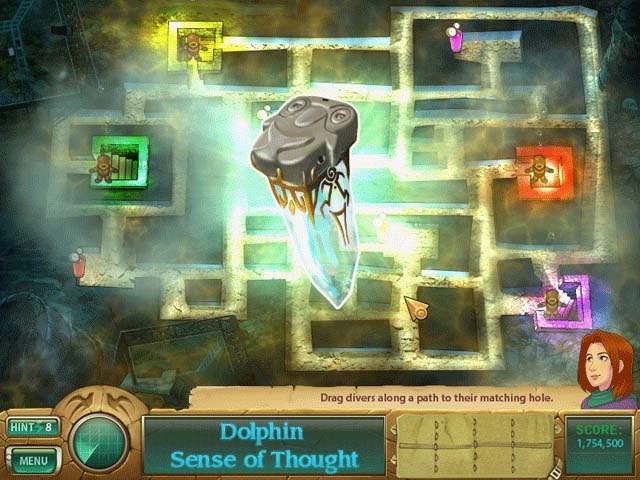
- Upon completing the puzzle, you’ll obtain the Dolphin Sense of Thought.
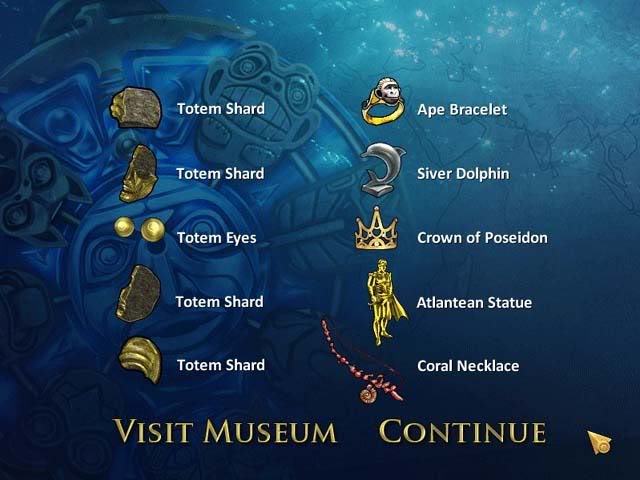
- At the end of the chapter, the following will be viewable at the museum:
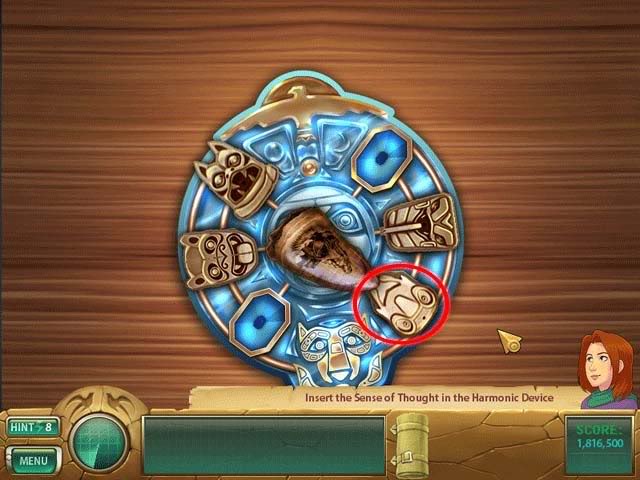
- Back at the museum, place the artifact in its proper location on the Harmonic Device.
Chapter 6: Owl Sense of Sight
Location: Alexandria
Secret Port Entrance
- Find all the objects listed at the bottom of the screen. Hints (lightning bolts) are circled in yellow and Swift Birds are circled in teal.
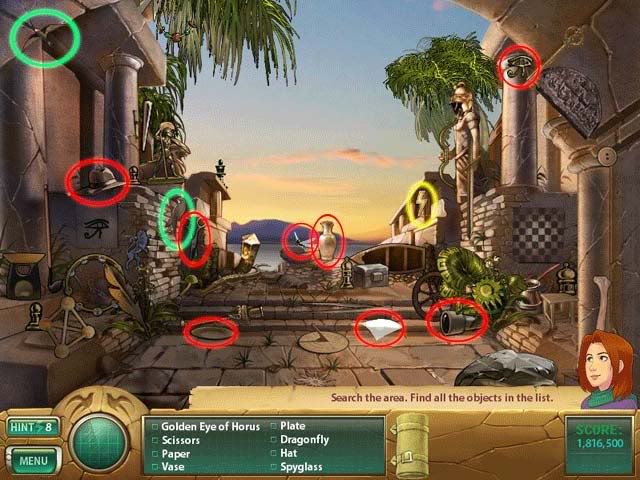
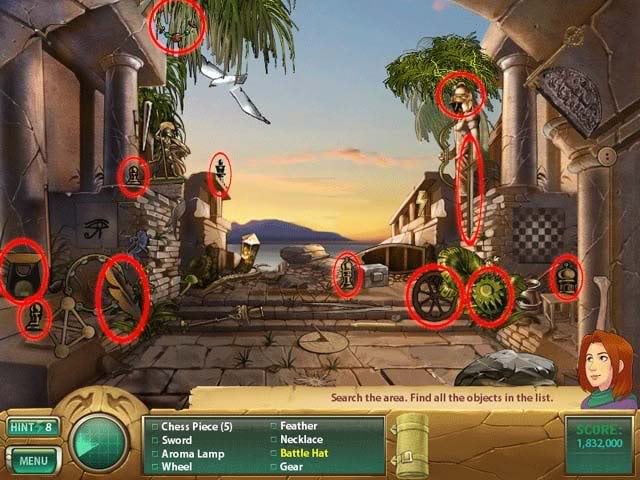
- Objects listed in blue require a tool to acquire. Below is how to get them:
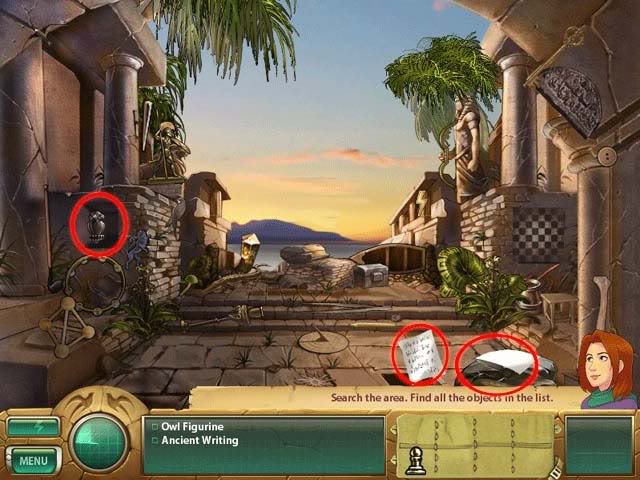
1. Use the Golden Horus Eye over the inscription on the left to reveal the Owl Figurine.
2. Use the Paper on the rock in the right foreground, then use the Scissors to cut it and reveal Ancient Writing.
- Place the Chess Pieces in their proper positions. The solution is as follows:
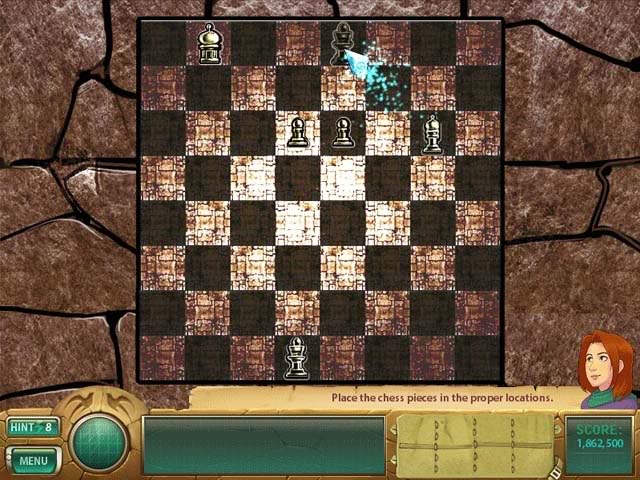
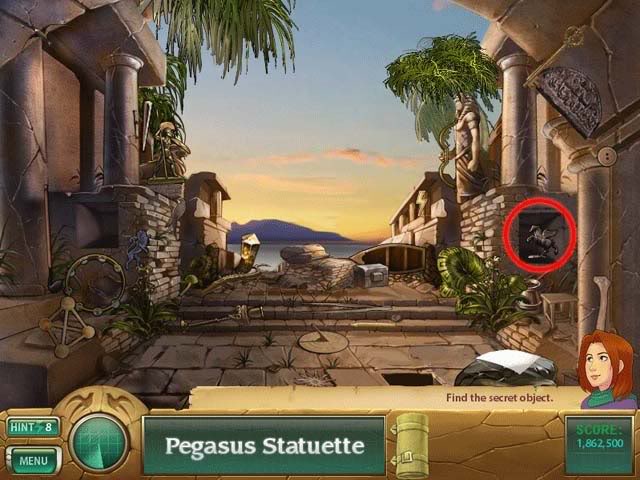
- After completing the puzzle, collect the Pegasus Statuette, circled below.
Library
- Find all the objects listed at the bottom of the screen. Hints (lightning bolts) are circled in yellow and Swift Birds are circled in teal.
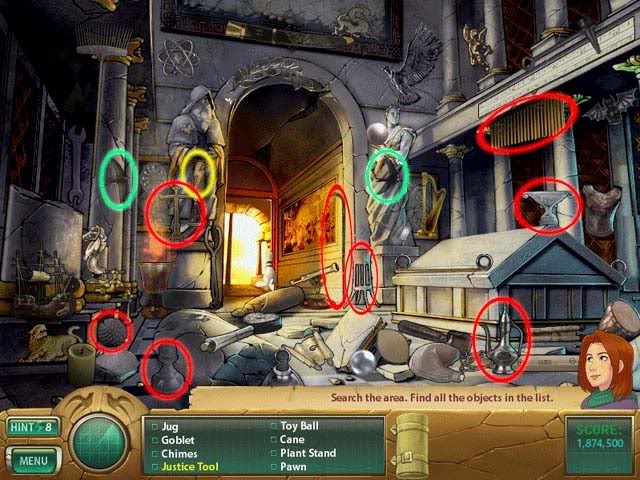
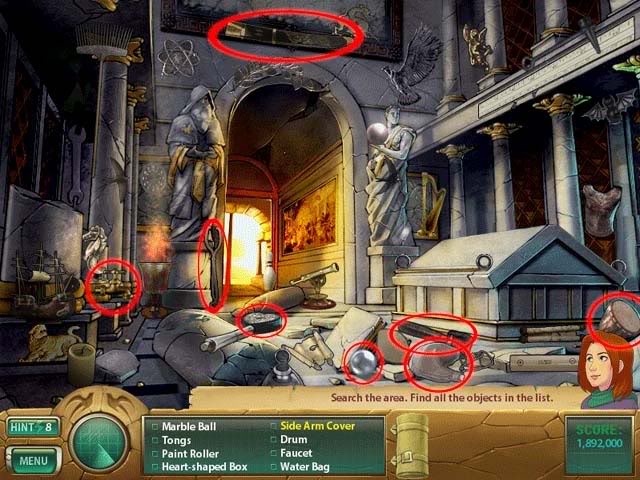
- Objects listed in blue require a tool to acquire. Below is how to get them:
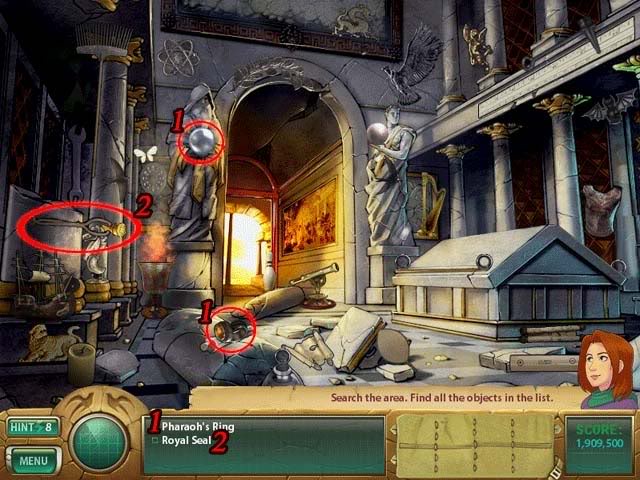
1. Use the Marble Ball on the statue’s hands, and the Pharoah’s Ring will drop from the ceiling.
2. Use the Thongs on the flame to pick out the Royal Seal.
- There’s one more item: Ancient Blueprint, but you can’t access it yet. You’ll return here later.
Ancient Hallway
- Find all the objects listed at the bottom of the screen. Hints (lightning bolts) are circled in yellow and Swift Birds are circled in teal.
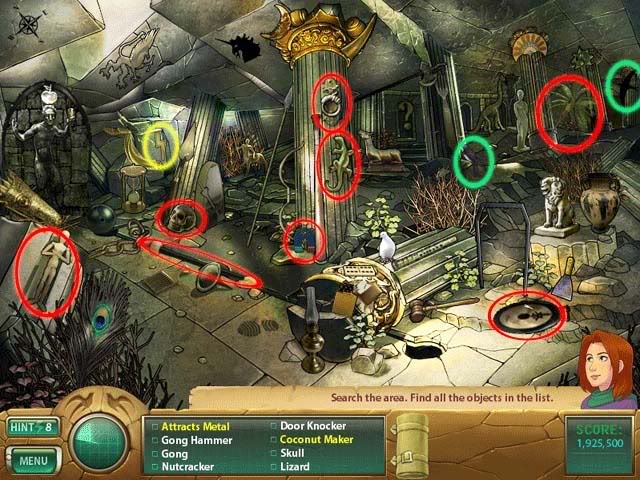
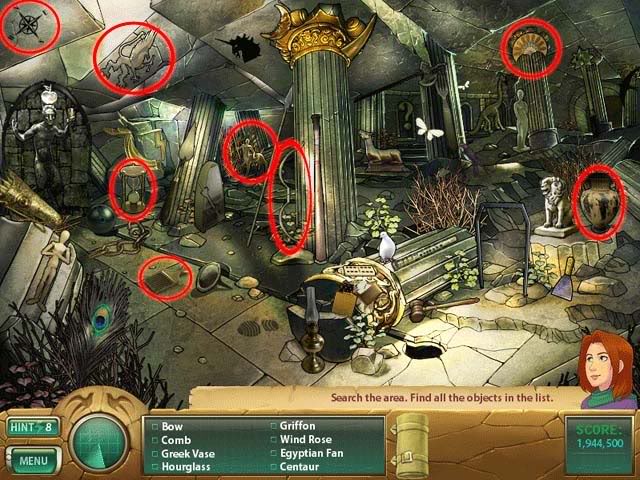
- Objects listed in blue require a tool to acquire. Below is how to get them:
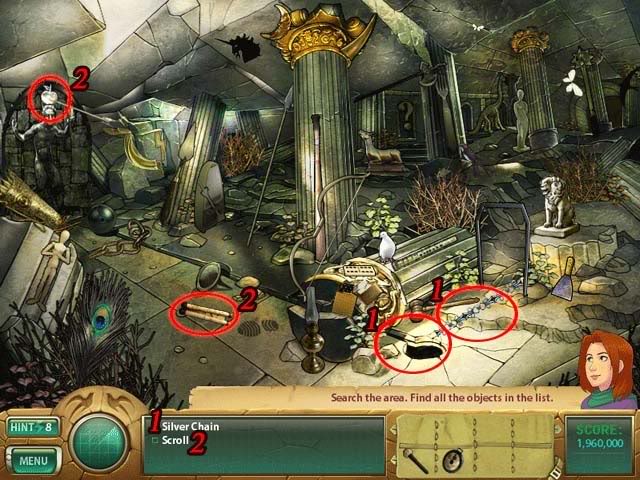
1. Use the Magnet on the hole to retrieve the Silver Chain.
2. Use the Bow on the apple on the Fawn’s head to reveal the Scroll.
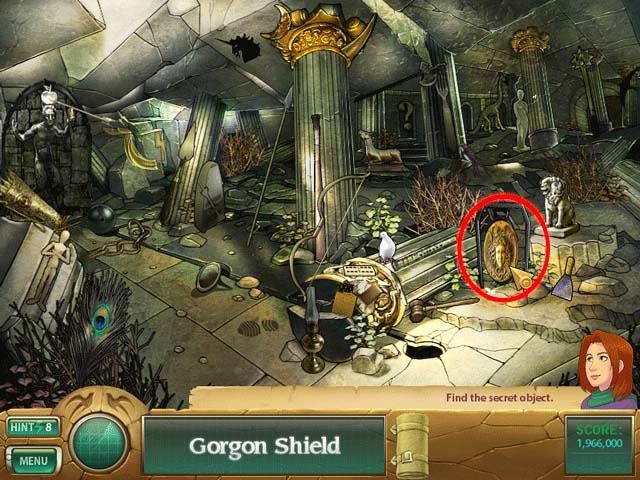
- Use the Gong and Gong Hammer in the location circled below to uncover the Gorgon Shield.
Crypt
- Find all the objects listed at the bottom of the screen. Hints (lightning bolts) are circled in yellow and Swift Birds are circled in teal.
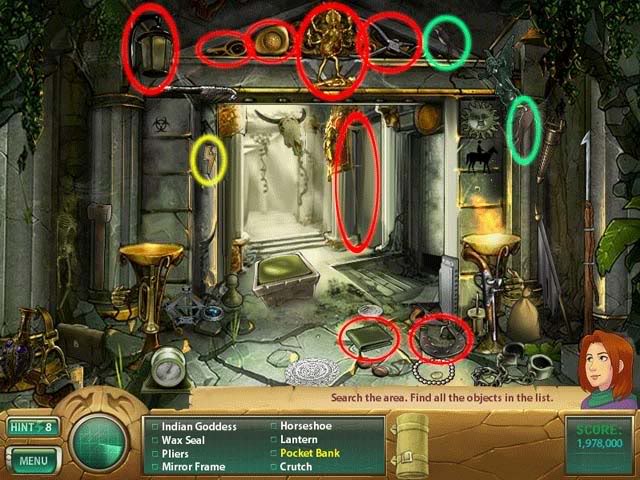
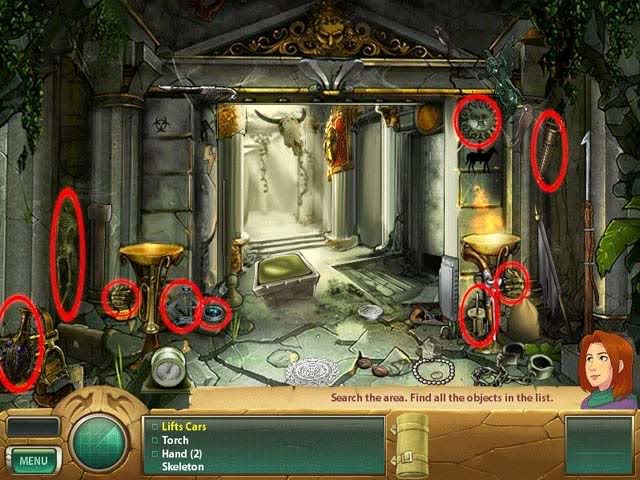
- Objects listed in blue require a tool to acquire. Below is how to get them:
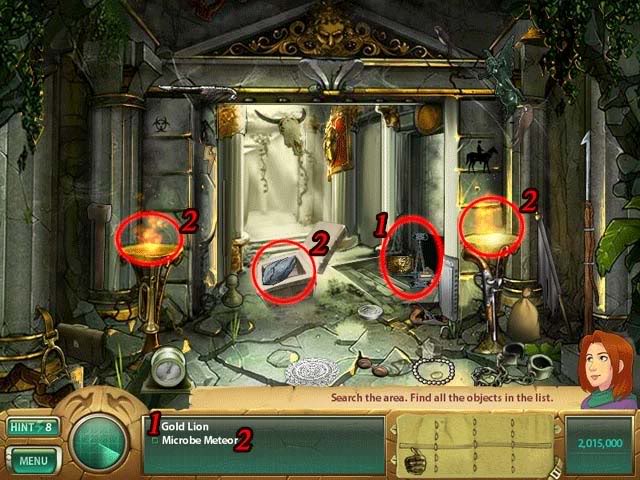
1. Use the Car Jack on the area circled and numbered below to reveal the Gold Lion.
2. Light the Torch via the fire on the right, then use it to light the dish on the left. Doing so will reveal the Microbe Meteor.
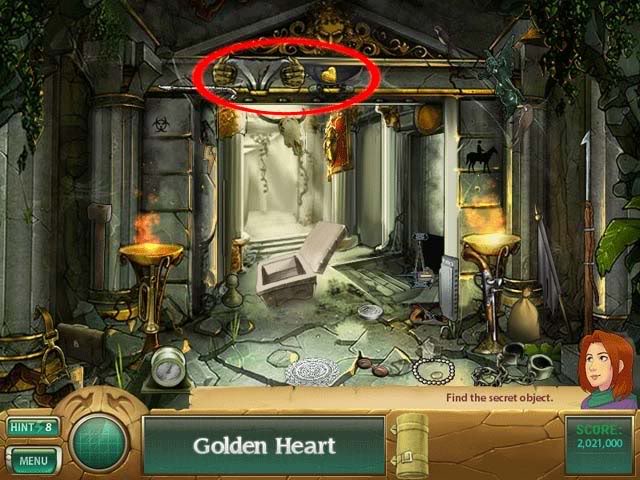
- Place the Golden Hands on either side below the face to reveal the Golden Heart. Their locations are circled below:
Observatory
- Find all the objects listed at the bottom of the screen. Hints (lightning bolts) are circled in yellow and Swift Birds are circled in teal.
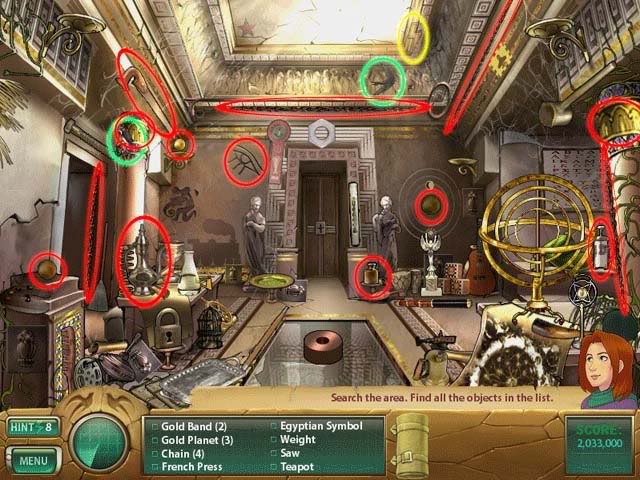
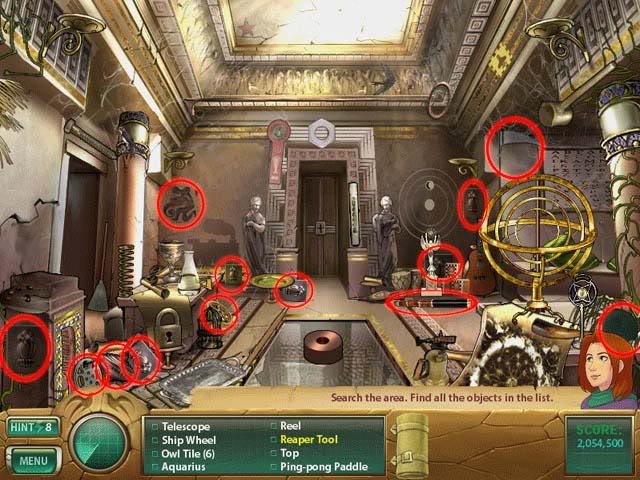
- Objects listed in blue require a tool to acquire. Below is how to get them:
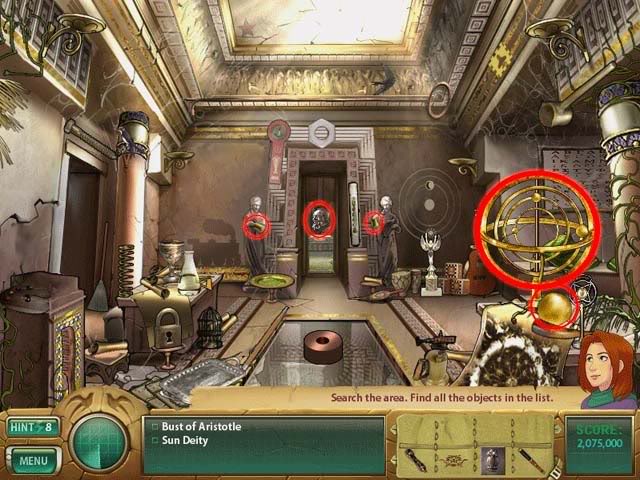
1. Place the Gold Armbands on each of the statues at the far end of the room. This will trigger the door to open, revealing the Bust of Aristotle.
2. Use the Gold Orbs on the gold planet scale to create the Sun Deity.
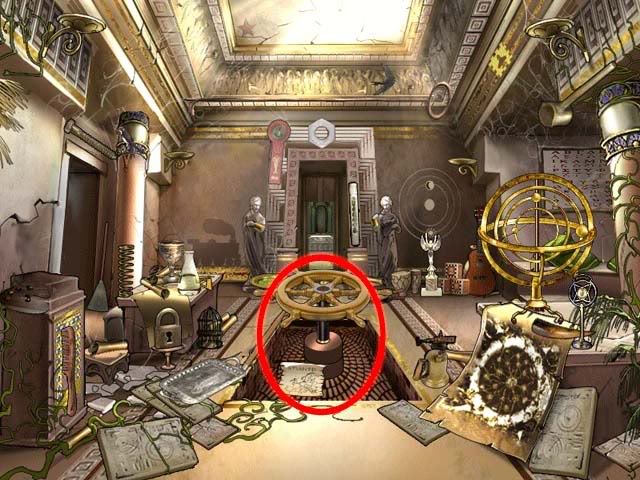
- Use the Telescope and the Ship’s Wheel on the pedestal in the middle of the room to lower the floor and reveal the Atlantis Map.
Library
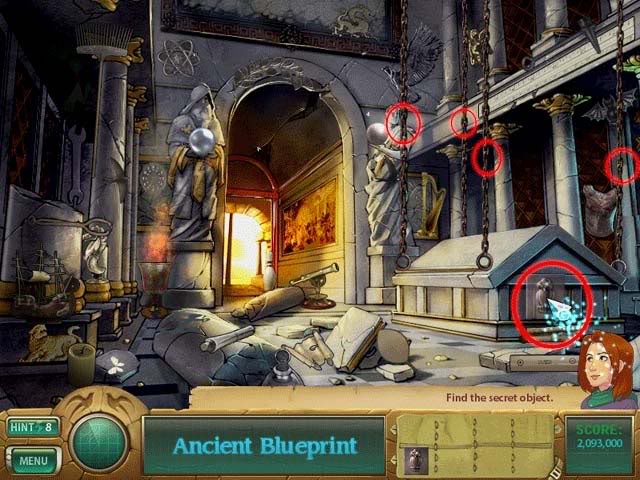
- Use the Chains and the Owl Tiles from your inventory on the large box-like structure on the right to open it.
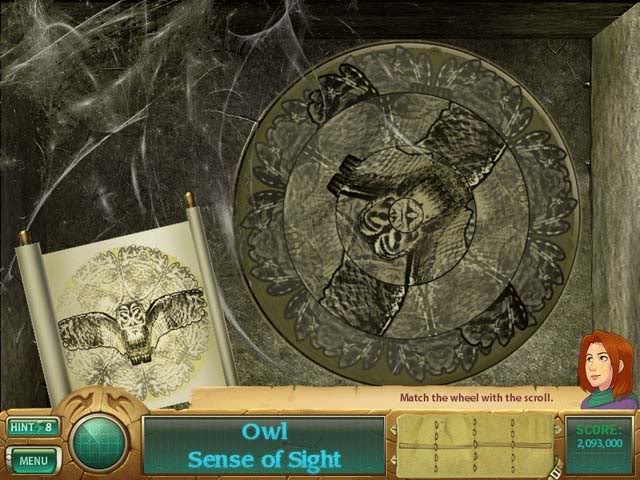
- Inside, move the pieces of the rotating puzzle so that it matches the picture of the owl displayed on the left.
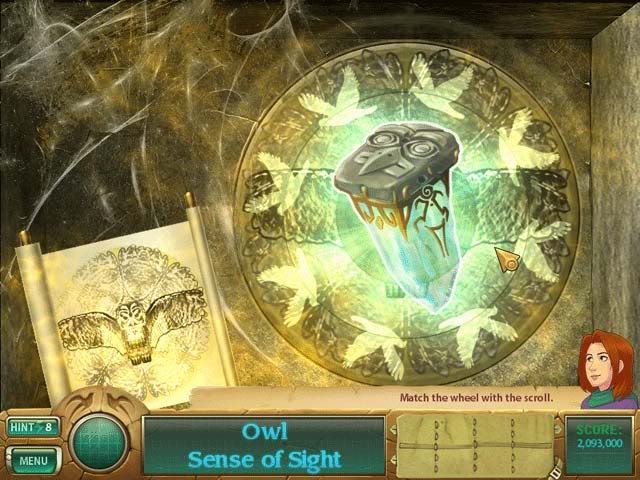
- Complete the puzzle successfully to acquire Owl Sense of Sight.
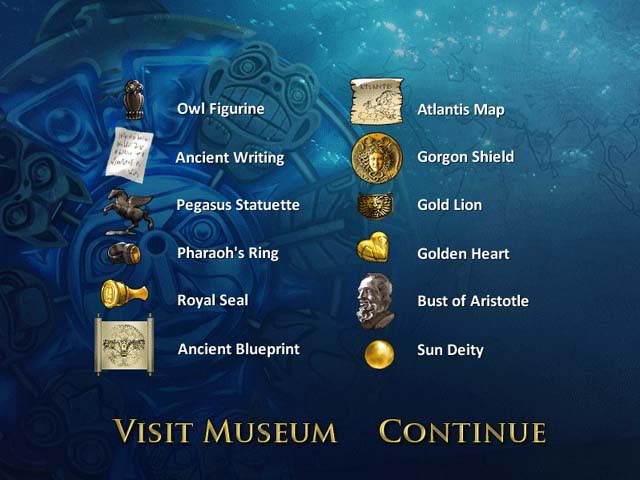
- At the end of the chapter, the following will be added to your museum collection:
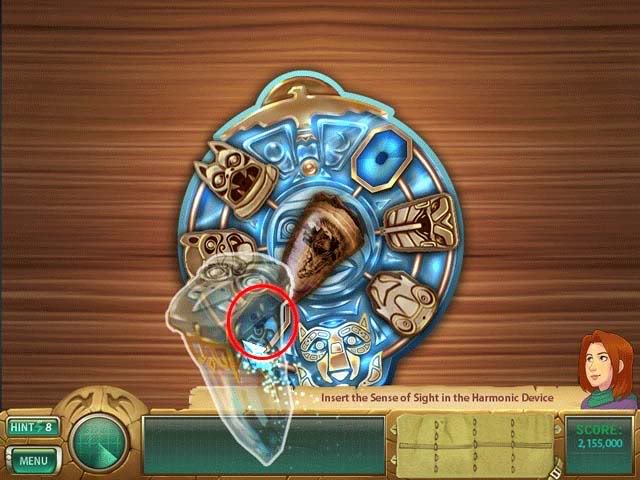
- Place the Owl Sense of Sight in the correct slot of the Harmonic Device.
Chapter 7: Monkey Sense of Touch
Location: The Congo
Remote Village
- Find all the objects listed at the bottom of the screen. Hints (lightning bolts) are circled in yellow and Swift Birds are circled in teal.
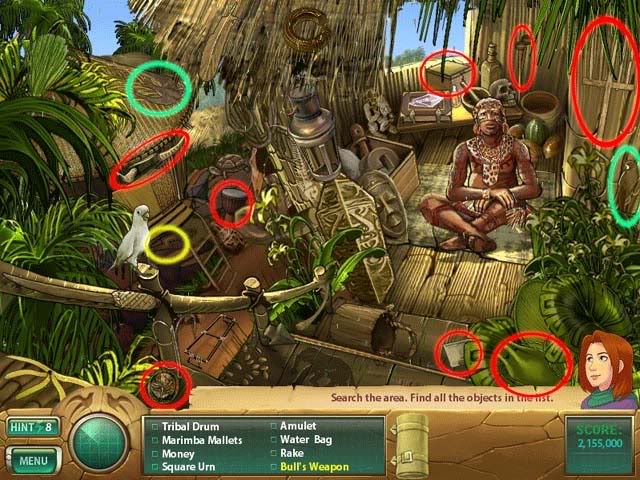
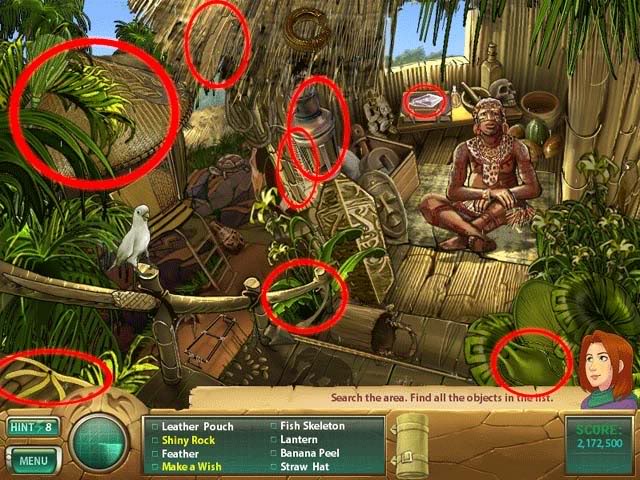
- Objects listed in blue require a tool to acquire. Below is how to get them:
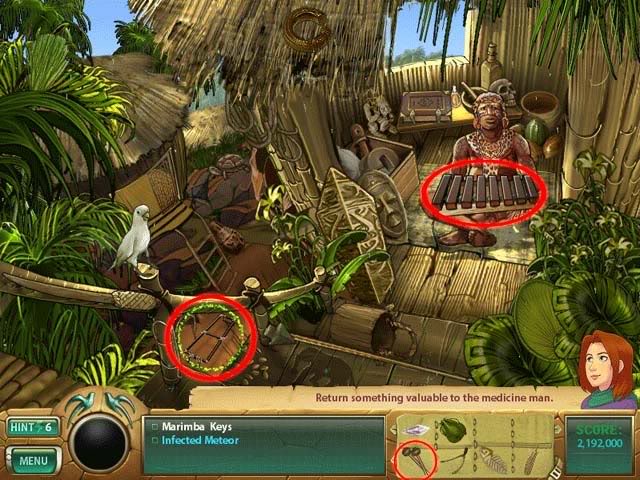
1. Give the Drum to the tribesman to get the Marimba Keys in return.
2. Use the Marimba keys on the area with the green and red circles.
3. Use the Marimba Mallets to play music.
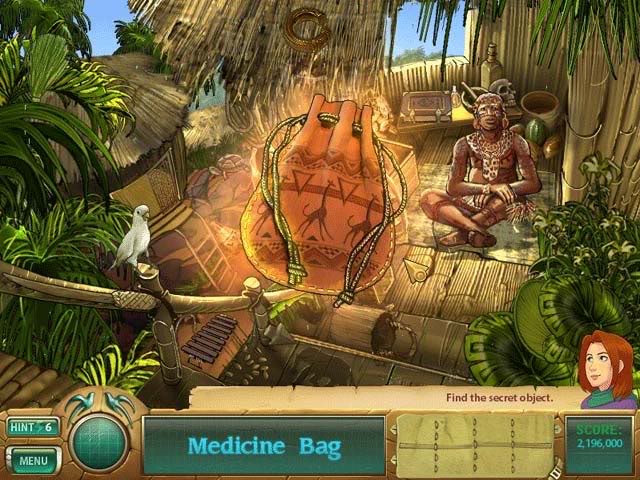
- Next, give all the items in your inventory to the tribesman to get the Medicine Bag.
Jungle Cave
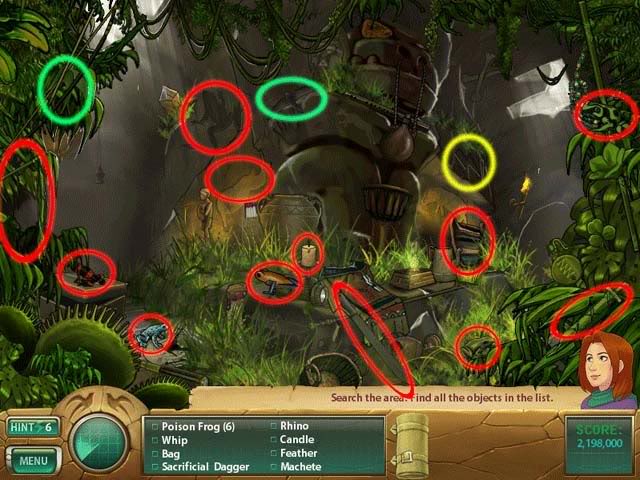
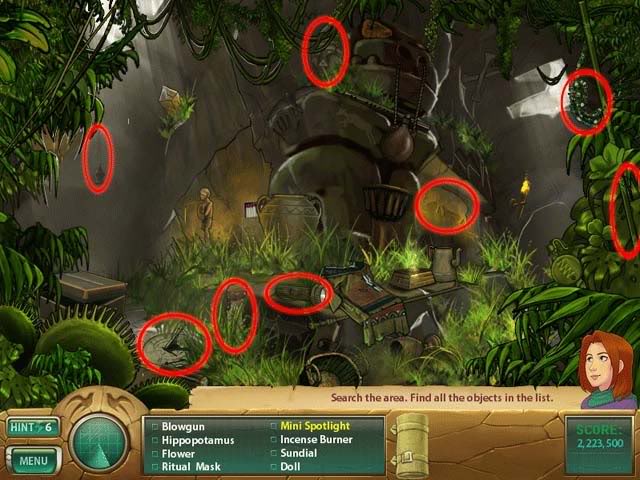
- Find all the objects listed at the bottom of the screen. Hints (lightning bolts) are circled in yellow and Swift Birds are circled in teal.
- Objects listed in blue require a tool to acquire. Below is how to get them:
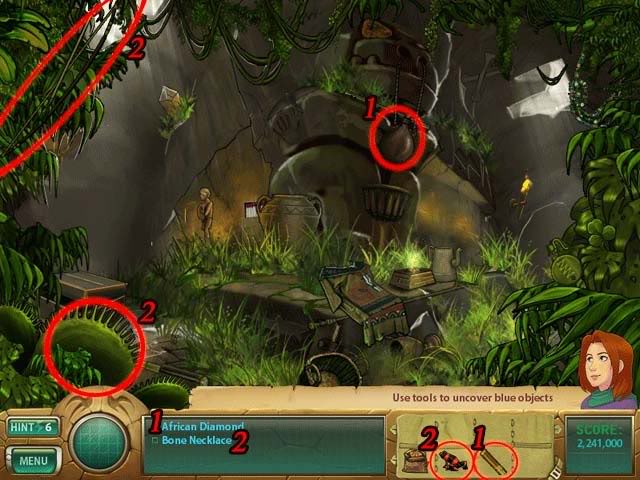
1. Use the Blowgun on the pouch to tear it and collect the African Diamond.
2. Use the Frog on the bow in the upper left corner of the screen, then use it to shoot the plant in the bottom corner. The plant will spit out the Bone Necklace.
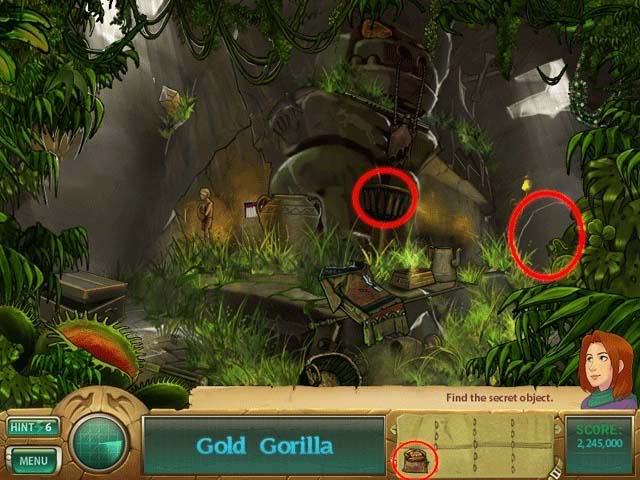
- Use the sack from your inventory to weigh down the basket beneath the statue. This will open the cave door in the background where the Gold Gorilla resides.
Altar Ruins
- Find all the objects listed at the bottom of the screen. Hints (lightning bolts) are circled in yellow and Swift Birds are circled in teal.
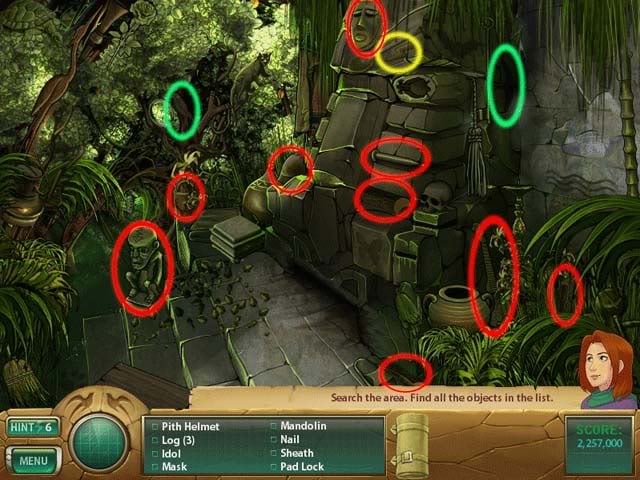
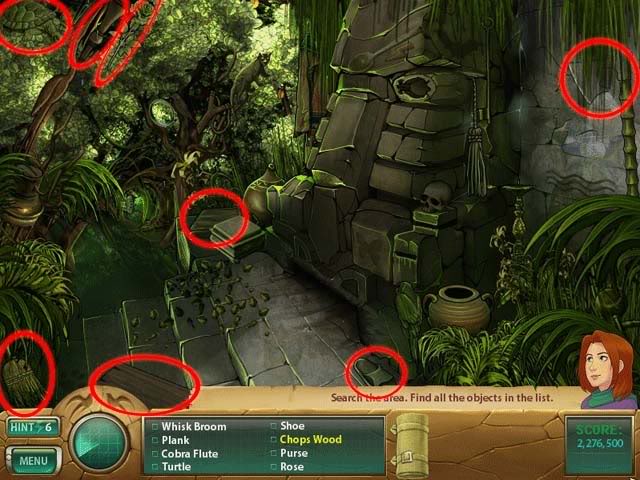
- Objects listed in blue require a tool to acquire. Below is how to get them:
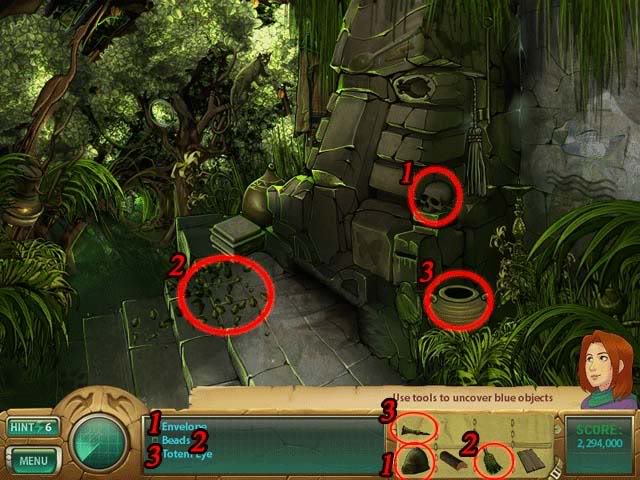
1. Use the Helmet on the skull to make the Envelope appear.
2. Use the Broom on the leaves to make the Beads appear.
3. Use the Cobra Flute on the cobra’s jar to make the Totem Eye fall out.
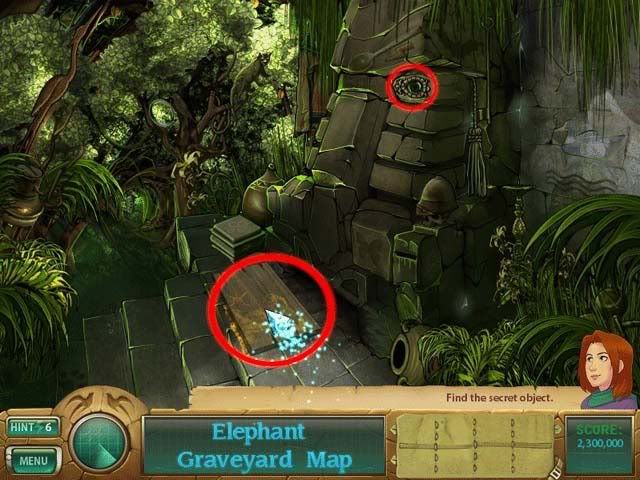
- Use the Totem Eye on the totem. Next, place all the wood logs from your inventory in front of the totem until it starts a fire. Then, use the Plank to burn the Elephant Graveyard Map into being.
Elephant Graveyard
- Find all the objects listed at the bottom of the screen. Hints (lightning bolts) are circled in yellow and Swift Birds are circled in teal.
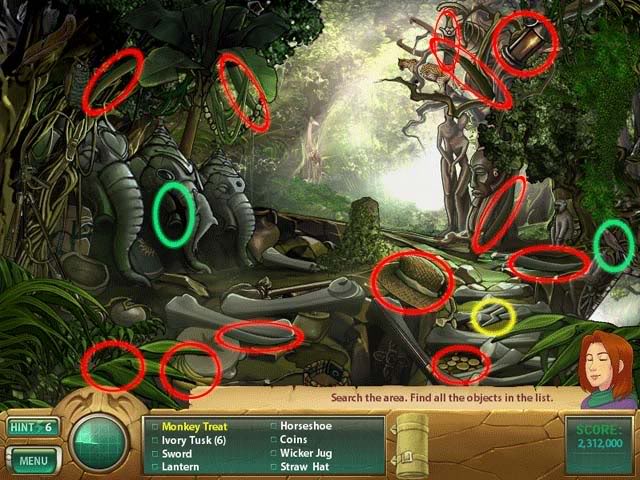
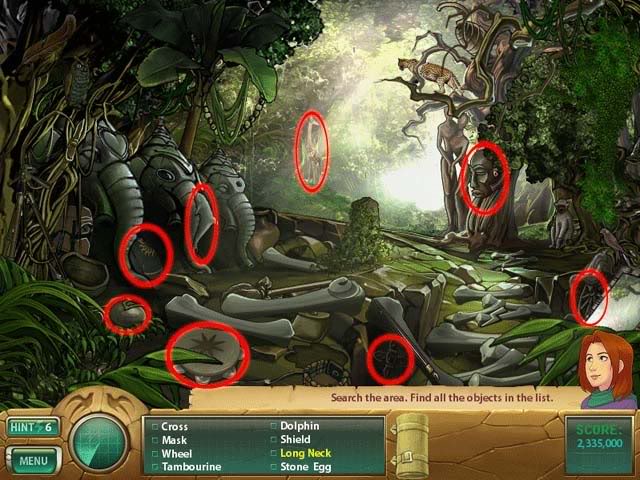
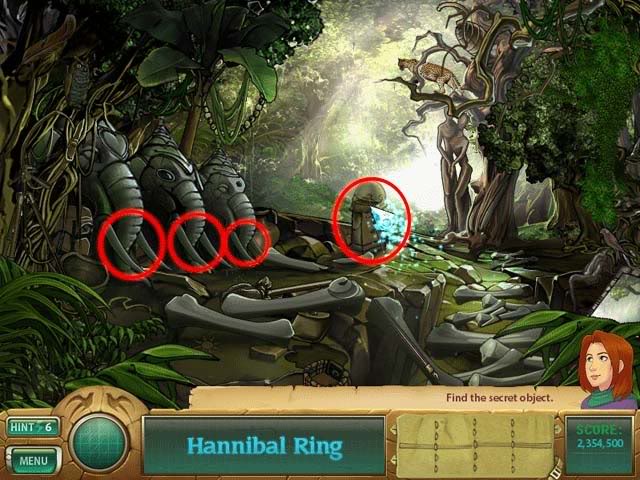
- To obtain the Helmet, give the Bananas from your inventory to the monkey circled below. He’ll run off, revealing the Helmet’s location.
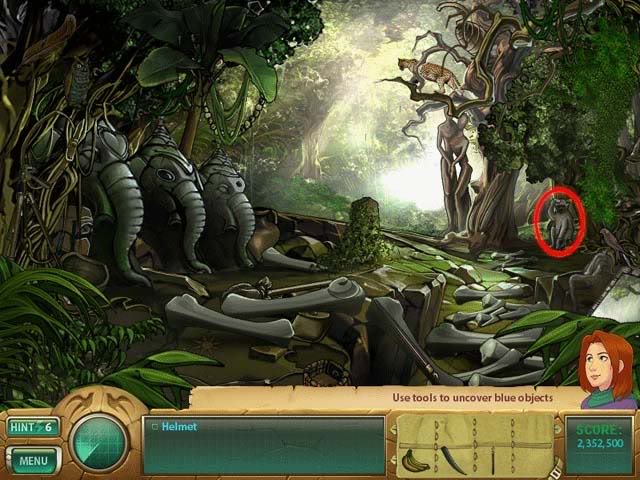
- Place all the Tusks back on the elephants, then place the Sword and the Helmet at the grave to uncover the Hannibal Ring.
Monkey Ruins
- Find all the objects listed at the bottom of the screen. Hints (lightning bolts) are circled in yellow and Swift Birds are circled in teal.
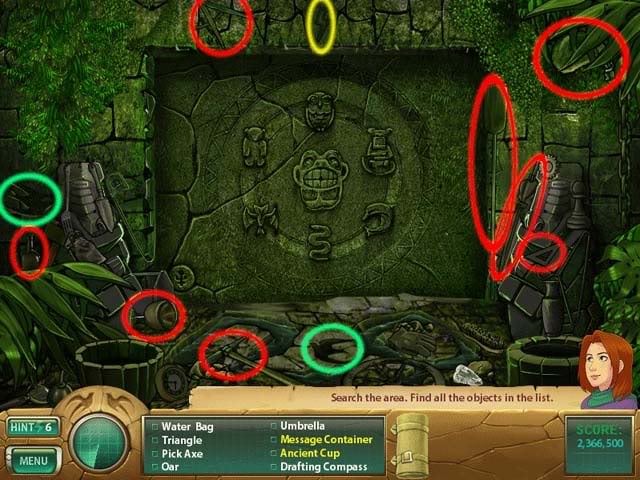
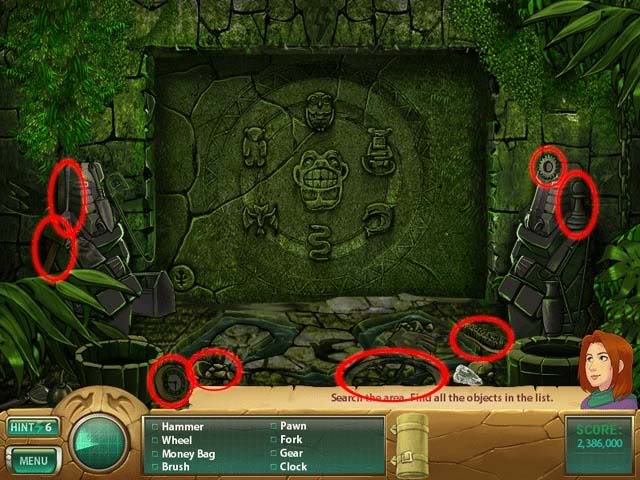
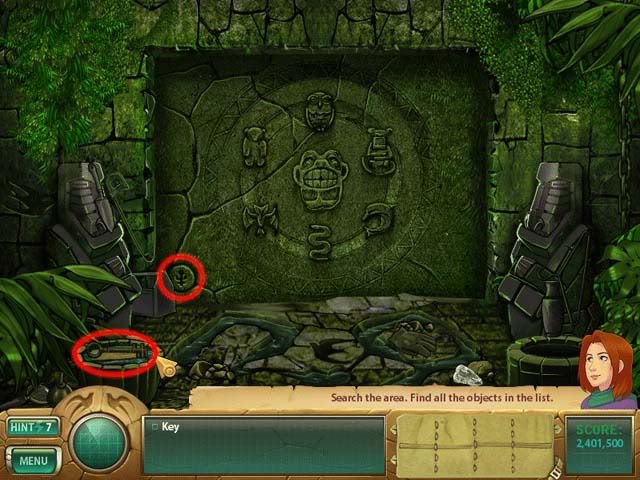
- Use the Water Bottle on the barrel on the left to reveal the Key. Use the Key on the area circled on the door.
- The goal of the puzzle is to match the pattern displayed on the totem on the right. You can click/move horizontal, vertical, or diagonal. There are multiple possible solutions. Here’s an example of the final one below:
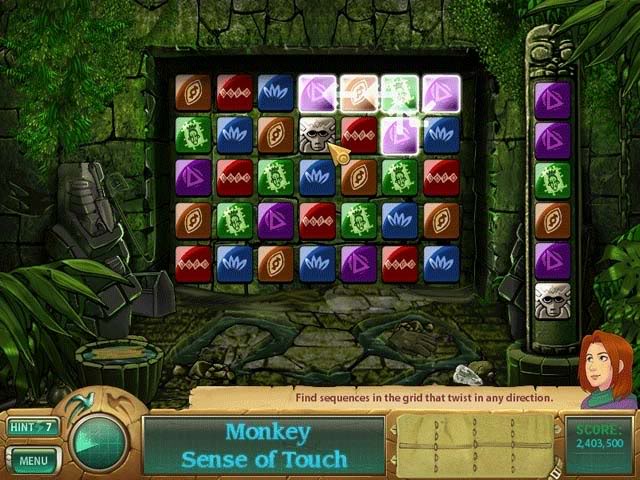
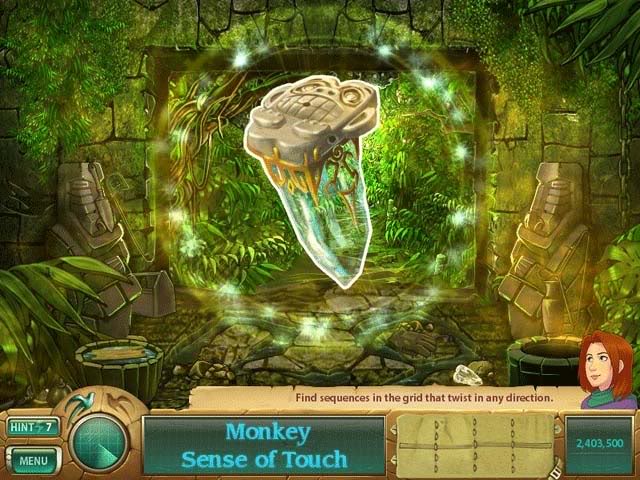
- Upon completing the puzzle, you’ll acquire the Monkey Sense of Touch.
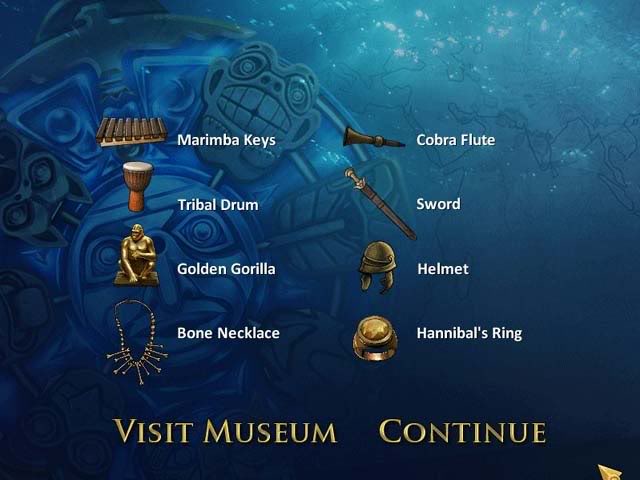
- At the end of the chapter, the following will be added to the museum:
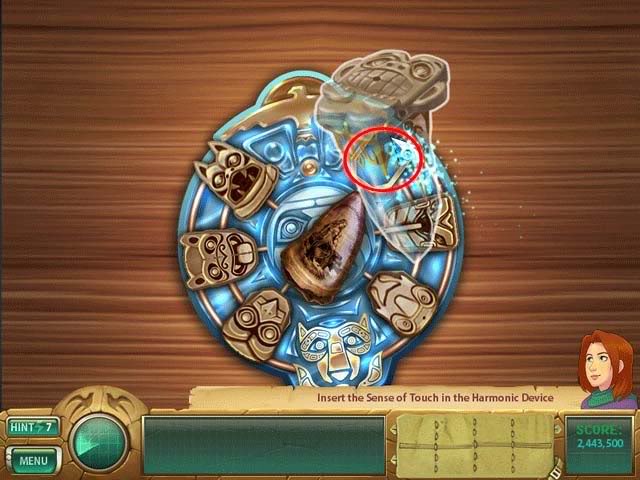
- Place the Monkey Sense of Touch in the final slot of the Harmonic Device.
- In the final showdown, use the Harmonic Device against the villianess and see what happens.
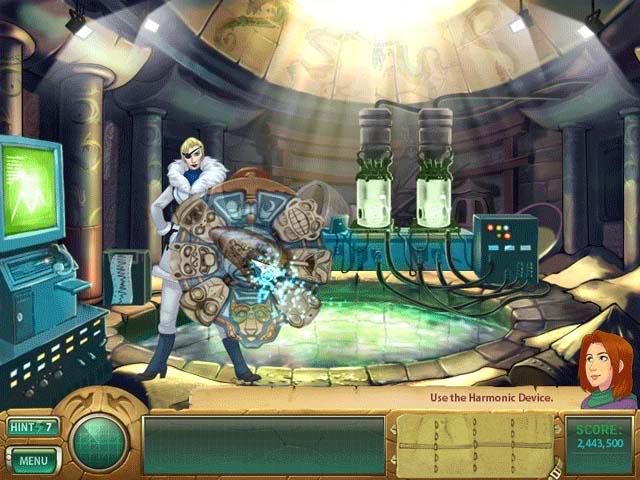
Congratulations, you’ve completed the game!
“;
More articles...
Monopoly GO! Free Rolls – Links For Free Dice
By Glen Fox
Wondering how to get Monopoly GO! free rolls? Well, you’ve come to the right place. In this guide, we provide you with a bunch of tips and tricks to get some free rolls for the hit new mobile game. We’ll …Best Roblox Horror Games to Play Right Now – Updated Weekly
By Adele Wilson
Our Best Roblox Horror Games guide features the scariest and most creative experiences to play right now on the platform!The BEST Roblox Games of The Week – Games You Need To Play!
By Sho Roberts
Our feature shares our pick for the Best Roblox Games of the week! With our feature, we guarantee you'll find something new to play!All Grades in Type Soul – Each Race Explained
By Adele Wilson
Our All Grades in Type Soul guide lists every grade in the game for all races, including how to increase your grade quickly!


