![Digimon UP Tier List [Supports, Buddies, and Partners]](/wp-content/uploads/2026/07/digimon-up-tier-list.jpg "Digimon UP Tier List [Supports, Buddies, and Partners]")
Digimon UP Tier List [Supports, Buddies, and Partners]
These Digimon will get you UP the leaderboard.


![Haze Seas Boss Drops [Chances, Locations, and How to Spawn]](/wp-content/uploads/2026/07/haze-seas-boss-drops.jpg "Haze Seas Boss Drops [Chances, Locations, and How to Spawn]")

Welcome to the Romancing the Seven Wonders: Great Pyramid walkthrough on Gamezebo. Romancing the Seven Wonders: Great Pyramid is an Adventure/Hidden Object game played on PC, created by Gameshastra and available at Big Fish Games. This walkthrough includes tips and tricks, helpful hints, and a strategy guide for how to complete Romancing the Seven Wonders: Great Pyramid.
Welcome to the Romancing the Seven Wonders: Great Pyramid walkthrough on Gamezebo. Romancing the Seven Wonders: Great Pyramid is an Adventure/Hidden Object game played on PC, created by Gameshastra and available at Big Fish Games. This walkthrough includes tips and tricks, helpful hints, and a strategy guide for how to complete Romancing the Seven Wonders: Great Pyramid.
If you choose to go to a different area, from the ones shown in this guide, scroll down to the portion of the guide that corresponds to your location. Remember, you can skip minigames, if you’ve already completed them, immediately.
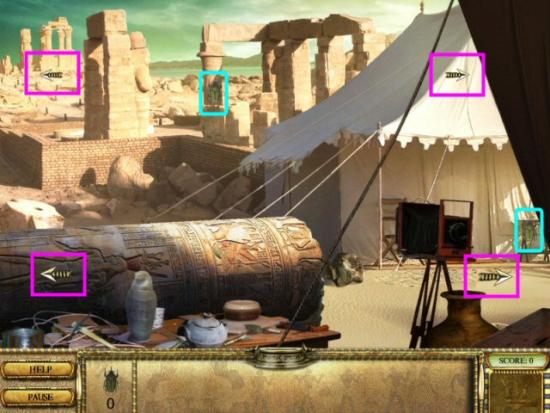
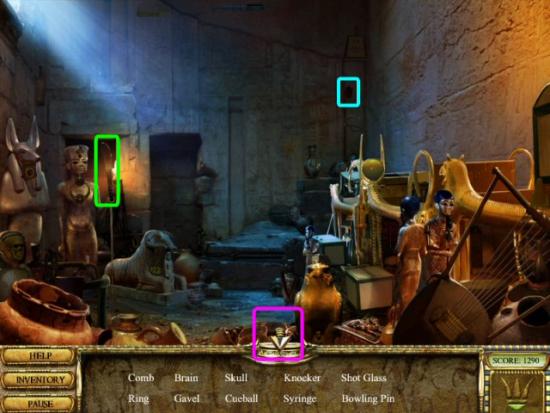
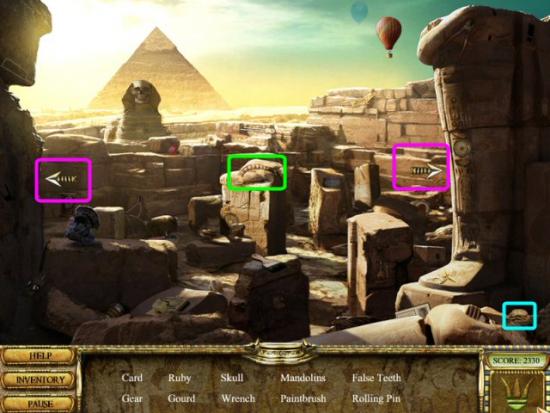
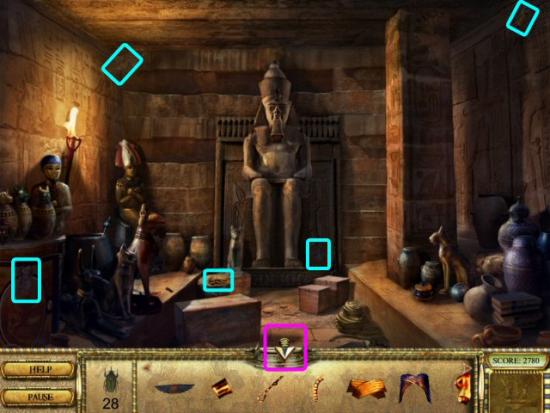
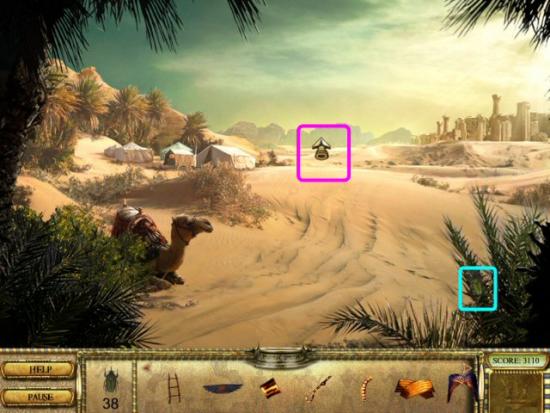
You start out at the Archaeology Camp and can choose one of four (magenta) directions to travel. Before you leave here, click on the 2 Scarabs (cyan).

Click on the upper left arrow. Collect all the items in the list, the 2 scarabs (cyan) and the Canteen (green). Click back (magenta).
Click on the lower left arrow. Collect all the items in the list, the 2 scarabs (cyan) and the Dried Dates (green). Click forward (magenta).
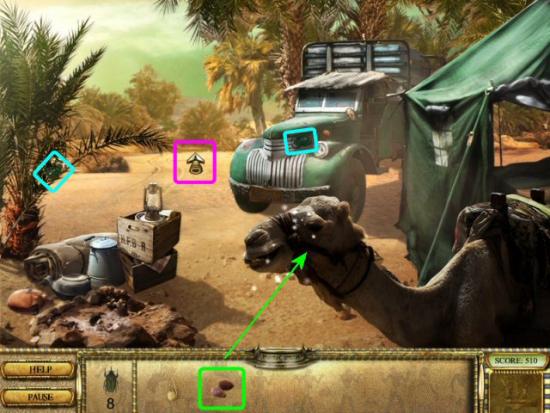
Collect the 2 scarabs (cyan). Click back twice, then click the lower right arrow.
Collect the 2 Scarabs (cyan). Select the Dried Dates (green) from your Inventory and click on the Camel. Click forward to begin your first minigame.
Hieroglyphics Tile Game 1
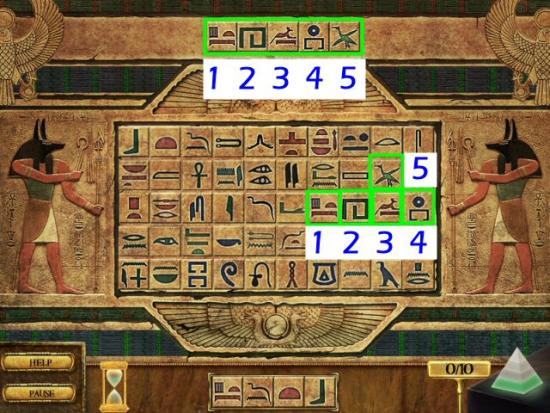
The object of this minigame is to remove the tiles, from the board, that are shown at the top. You’ll play 10 rounds, of 5 tiles, and have 10 seconds to clear each round. The tiles must be adjacent to each other (any grouping of 5; they may touch on any side or any corner) and clicked on in the exact order shown. If you haven’t cleared all 5 within the allotted time, the board will clear and you’ll be given a new set of tiles. Rounds are saved as you complete them, and you only continue from where you left off. See the screenshot for an example. Note: The solutions are different each time you play.
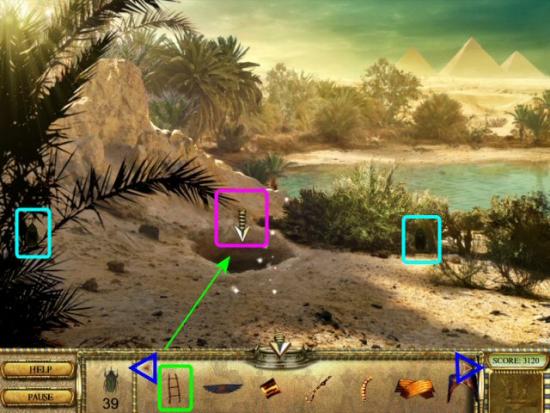
Collect the Scarab (cyan) then click right to the Oasis.
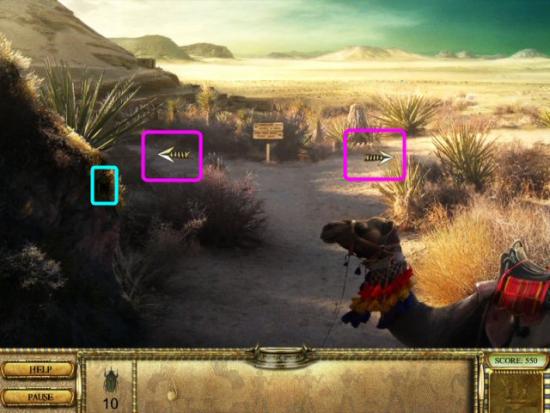
Collect all the items in the list, the 2 scarabs (cyan) and the Raft Paddle (green). You can’t go any further, yet, so click back, then click left at the Crossroads.

Click forward.
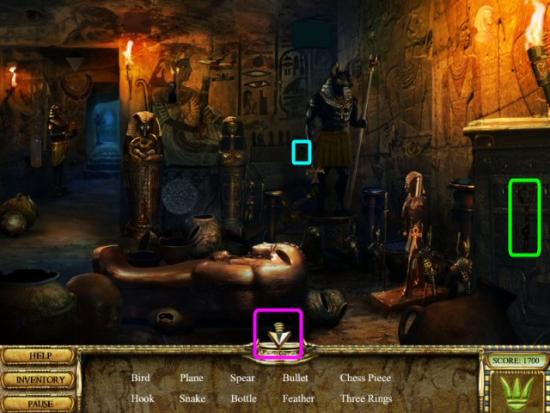
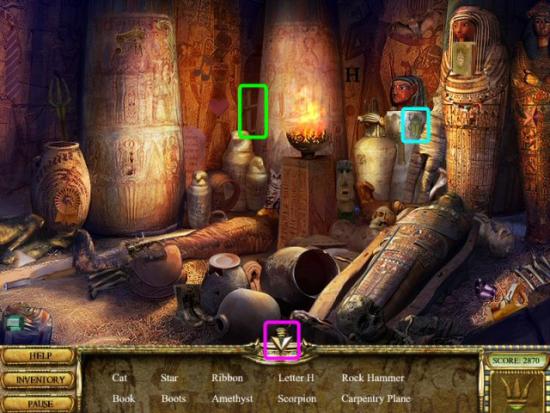
Collect all the items in the list, the Scarab (cyan) and the piece of the Queen’s Sarcophagus (green). You can’t go any further, yet, so click back, four times, to the Archaeology Camp.

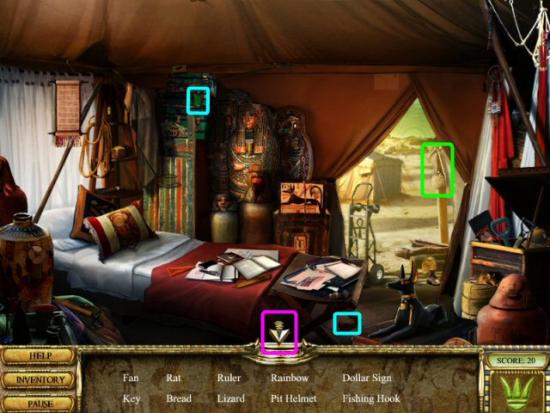
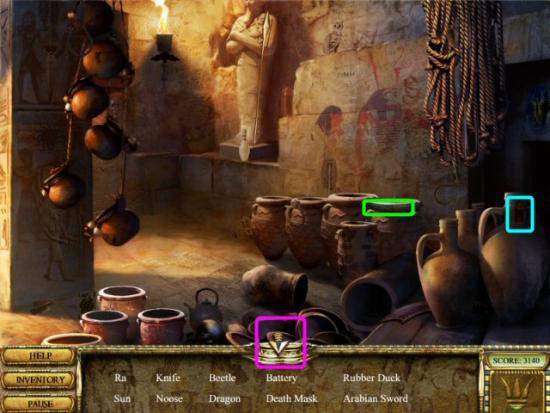
Click the arrow at the top right, collect the 2 Scarabs (cyan) then select the Canteen (green) from Inventory and click on the sparkling area to begin your next minigame.

Canopic Jar Puzzle 1
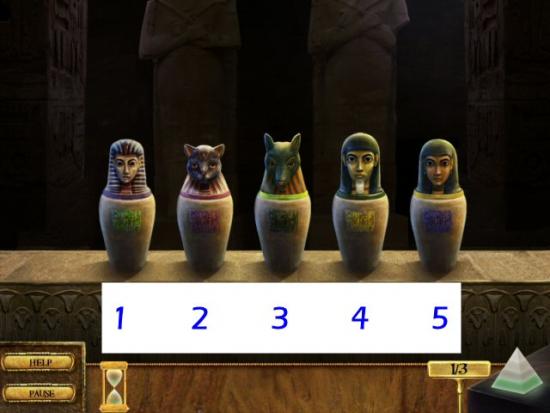
Match the lids to the correct Canopic Jar. You play 3 rounds and have 30 seconds to complete each round. If you run out of time, the current round’s puzzle will reset; you will not need to start completely over. The key to solving these is to choose either the far left or the far right jar and begin moving the lids so that you match the end jar first, then continue matching toward the opposite side. You can only switch lids with the jar directly next to it on the left or right. In the example shown below, switch the lids in the following order: 1 and 2, 2 and 3, 3 and 4, 4 and 5 and finally 1 and 2 again. Note: The solutions are different each time you play.
Collect all the items in the list, the Scarab (cyan) and the piece of the Queen’s Sarcophagus (green).
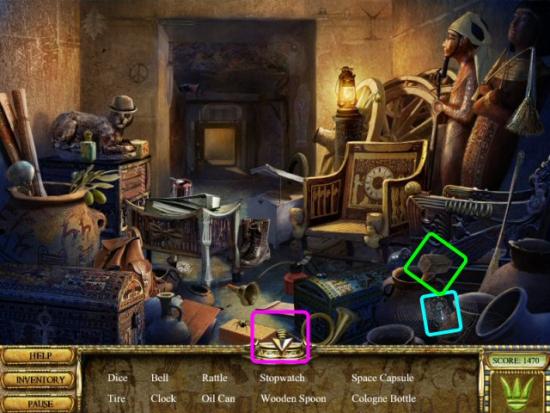
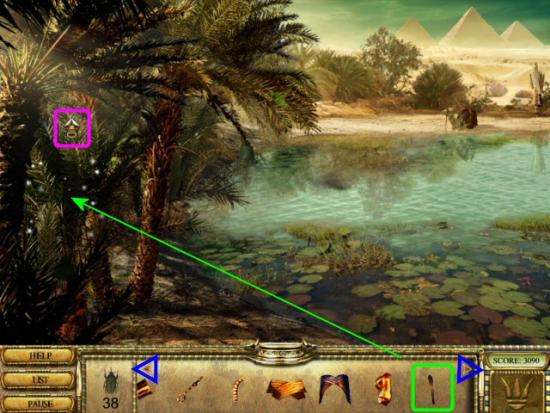
Select the Raft Paddle from Inventory then click on the sparkling area to start your next minigame.
Hierogliphics Tile Game 2
Tiles will appear from the right, in the slot above the board. Click on a matching tile, on the board, to remove it, before the slot fills up with tiles. The highlighted tiles are bonuses (magenta) and finding these will clear all the tiles once you’ve filled up the 4 scarab slots, below the board. If you wait too long, or the slot fills up, tiles will no longer be available, and the board will reset. You need to clear 30 tiles to complete the puzzle. Note: The solutions are different each time you play.
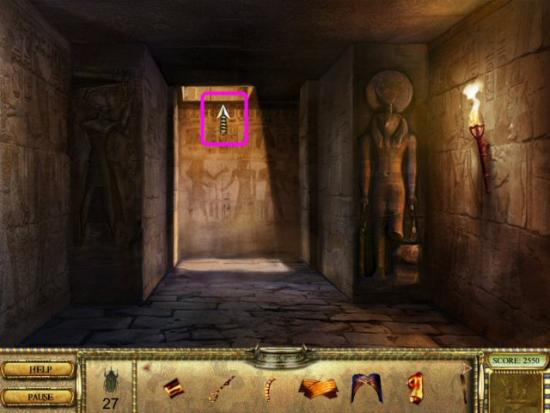
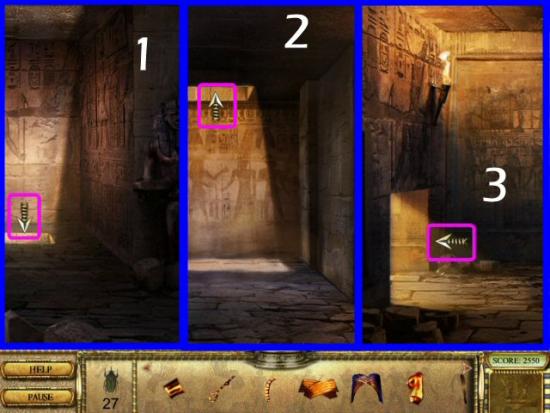
Click forward twice (1 and 2), then click right (3).

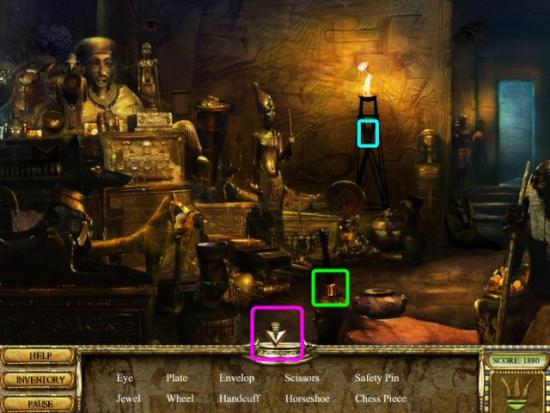
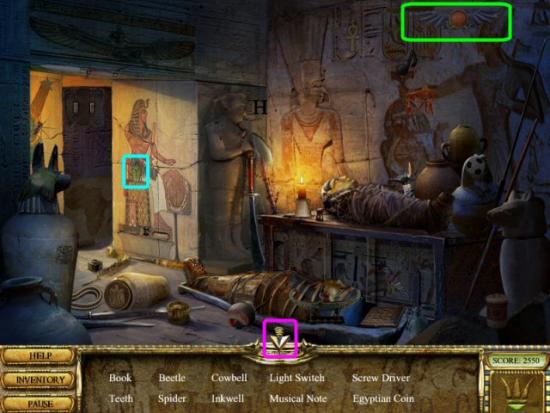
Collect all the items in the list, the Scarab (cyan) and the Machete (green). Click back, then click left.
Collect all the items in the list, the Scarab (cyan) and the Sledge Hammer (green). Click back, then forward. This starts your next minigame.
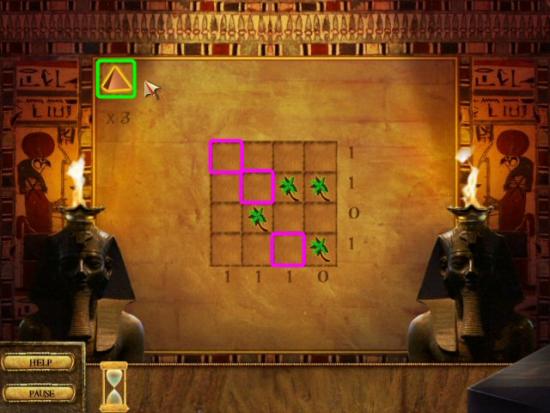
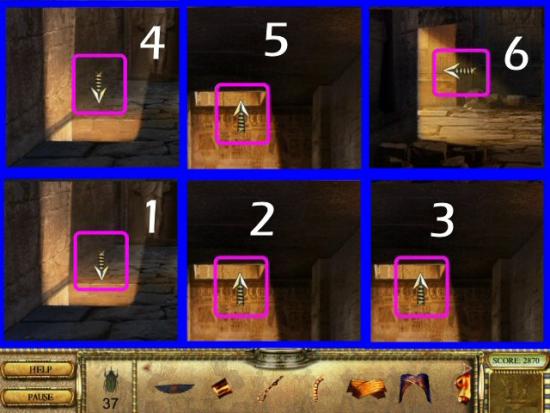
Hieroglyphic Symbols Game 1
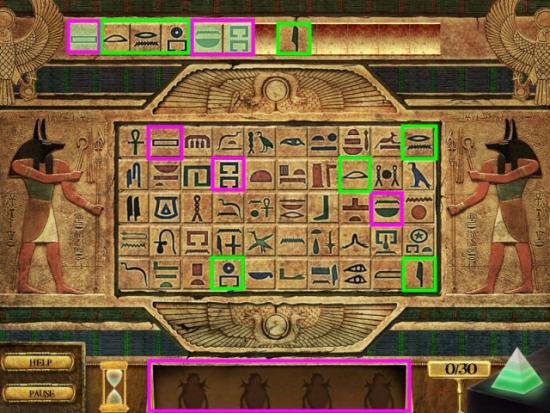
Click on the symbol at the top left (green) and place it on the board (magenta), noting how many are in each row and column, until they are all used. You won’t necessarily place them one after the other in a continuous row, as in games like World Mosaics or Gem Sweeper. You’ll play 5 rounds to complete this minigame; this minigame is not timed. See the following screenshot for an example. Note: The solutions are different each time you play.
Click right.
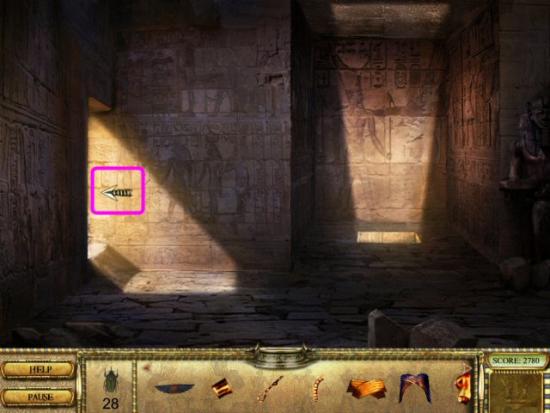
Collect all the items in the list, the Scarab (cyan) and the piece of the Queen’s Sarcophagus (green). Click back, then click left.
Collect all the items in the list, the Scarab (cyan) and the piece of the Queen’s Sarcophagus (green). Click back, then click forward.
Click right.
Collect the 4 Scarabs (cyan). Click back, then click left.
Collect all the items in the list, the Scarab (cyan) and the piece of the Queen’s Sarcophagus (green).
Click back, then forward twice. Collect all the items in the list, the Scarab (cyan) and the piece of the Queen’s Sarcophagus (green).
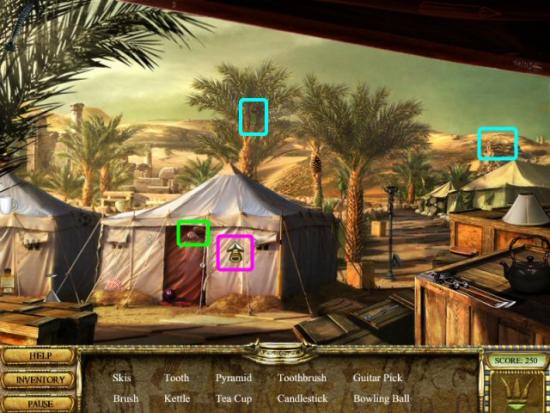
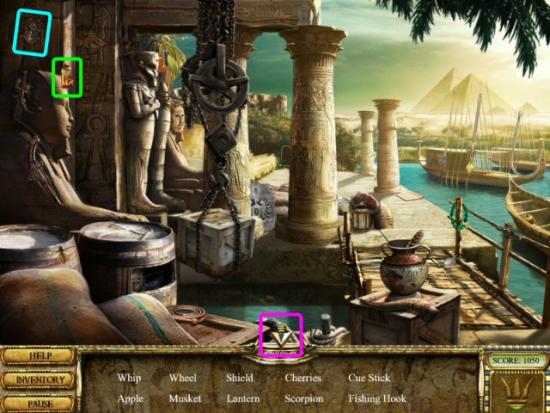
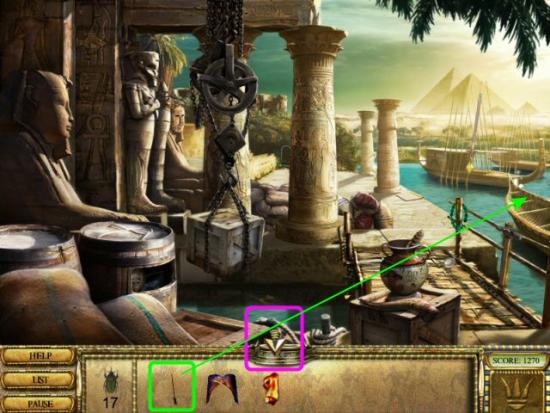
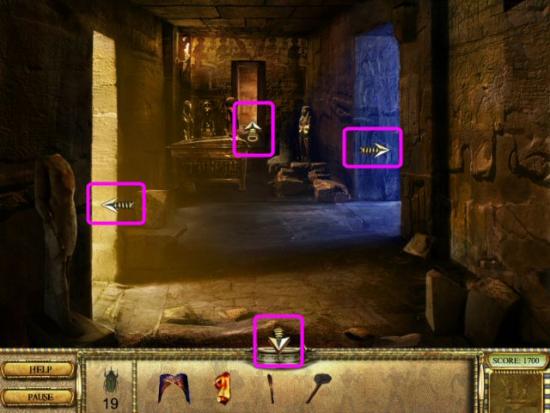
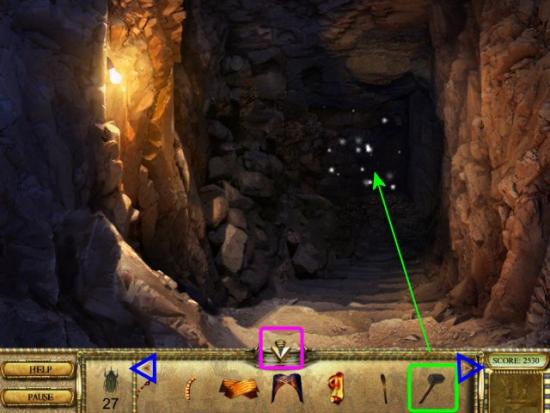
Click right to return to the Oasis, then click back once to the Crossroads. Click left, forward then right. Select the Sledge Hammer (green) from Inventory and click on the sparkling area. Note: If the Sledge Hammer doesn’t appear in your Inventory List, move your mouse cursor over the left or right arrows (blue) and the list will automatically scroll.
Click forward, twice, then up.


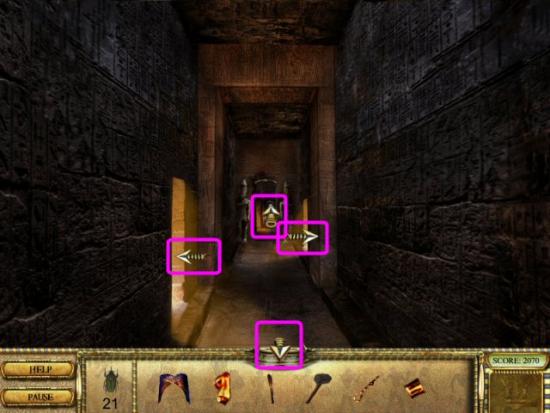
Note: It’s easy to get disoriented, as some rooms look exactly alike. If you get completely confused, click back until you’re at the entrance and move forward again. To make things easier, this guide will follow a particular path to its end, then work back, incrementally, until we’re back at the first room with more than one direction.
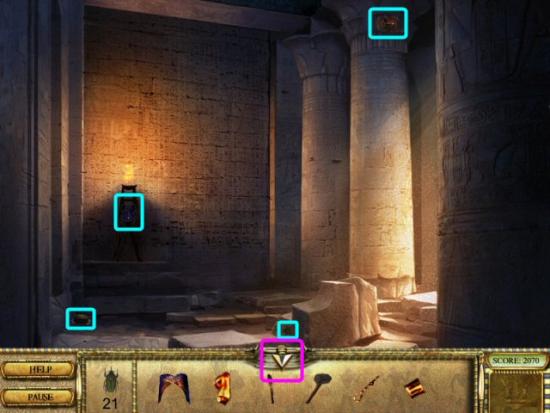
Collect 2 Scarabs (cyan), then click right.
Click up, collect 2 Scarabs (cyan), then click right.

Click down, up, left.
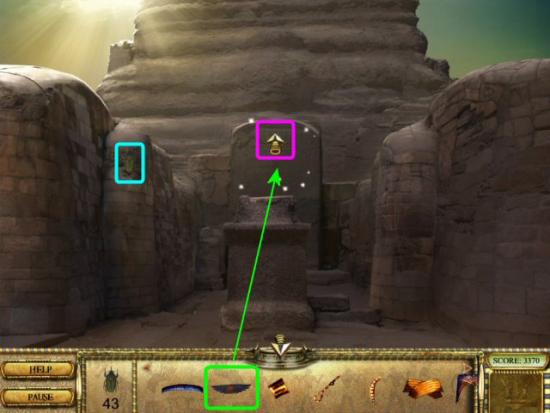
Collect all the items in the list, the Scarab (cyan) and the Egyptian Disk (green), then click back 3 times (magenta).
Click left. Collect the 5 scarabs (cyan), then click back 4 times (magenta).
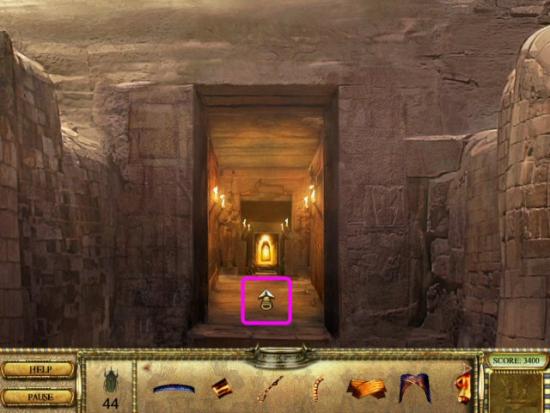
Click down, up, up, down, up, left
Collect all the items in the list, the Scarab (cyan) and the Wooden Ladder (green), then click back (magenta).
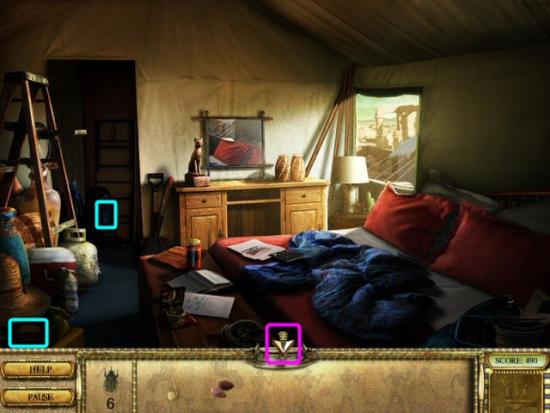
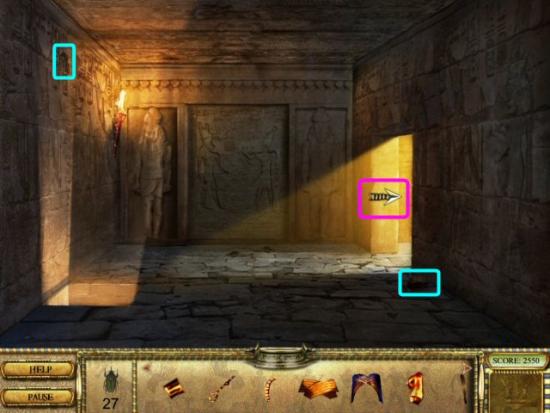
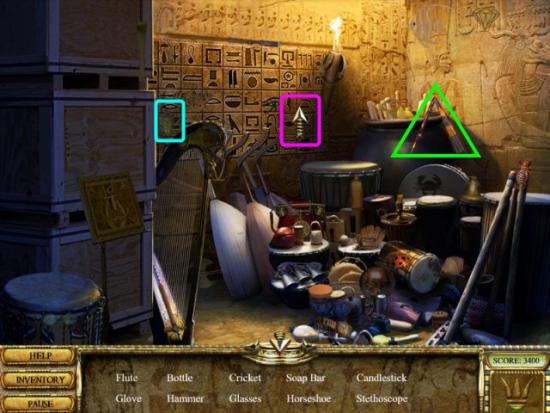
From the tomb, you need to click back, 11 times after you left the last room. This will return you to the Crossroads. Click right to the Oasis. Select the Machete (green) from your Inventory and click on the sparkling area. Note: If the Machete doesn’t appear in your Inventory List, move your mouse cursor over the left or right arrows (blue) and the list will automatically scroll. Click forward (magenta)
Collect the Scarab (cyan), then click forward (magenta).
Select the Wooden Ladder (green) from your Inventory and click on the sparkling area. Note: If the Wooden Ladder doesn’t appear in your Inventory List, move your mouse cursor over the left or right arrows (blue) and the list will automatically scroll. Collect the 2 Scarabs (cyan), then click down (magenta).
Collect all the items in the list, the Scarab (cyan) and the piece of the Queen’s Sarcophagus (green). Click back, (magenta).
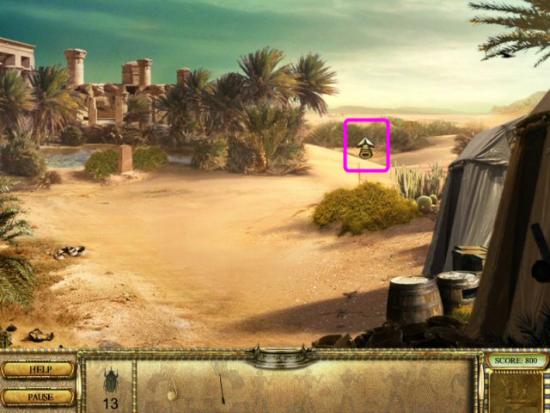
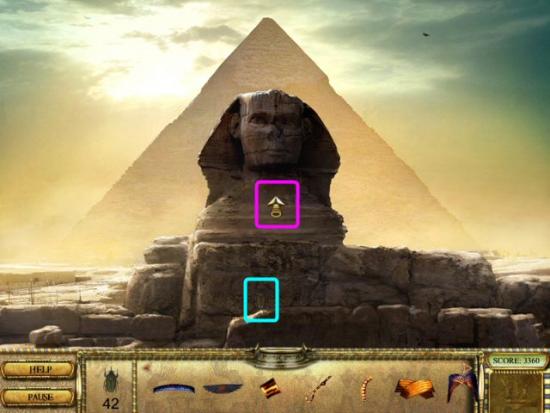
After returning out of the Sinkhole, click back 5 times to return to the Archaeology Camp, then click to the upper right. Click forward, 5 times. You’ve already played this Hieroglyphic Symbols Game, so you can click Skip, immediately. Click forward 3 times, then click left. This starts your next minigame.
Canopic Jar Puzzle 2
Match the lids to the correct Canopic Jar. You play 5 rounds and the time you have to complete each round increases as more jars are added. See the first puzzle (in the second section, The Desert, of this guide) for an example and a more detailed explanation.
Collect the Scarab (cyan), then click forward (magenta).
Collect the Scarab (cyan), then select the Egyptian Disk (green) from your Inventory and click on the sparkling area. Click forward (magenta).
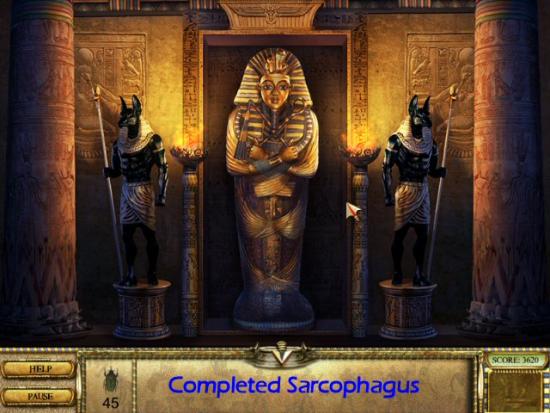
Click forward, again (magenta). Collect all the items in the list, the Scarab (cyan) and the piece of the Queen’s Sarcophagus (green). Click forward (magenta).
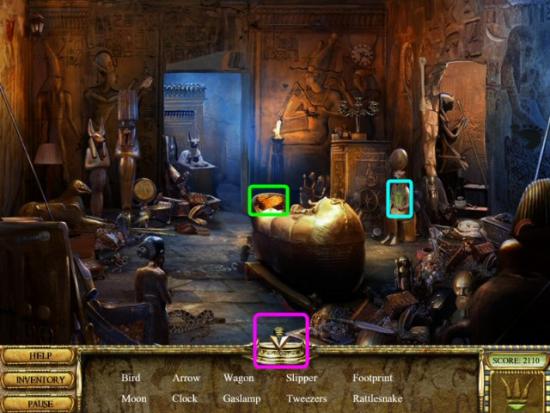
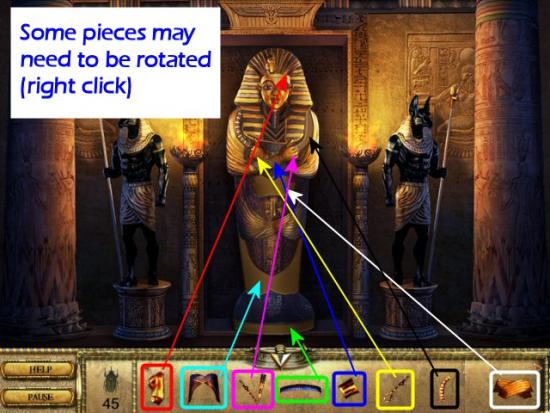
Select the piece from your Inventory, then click on the Sarcophagus to place it. Right click to rotate it into the correct position and lock it in place.
If you’ve been collecting the Scarabs, and have found at least 36, you’ve unlocked the Bonus Game.
Hieroglyphic Symbols Bonus Game
Please see the example and instructions for the Hieroglyphic Symbols Game in The Great Pyramid section of this guide. You’ll play 7 rounds to complete this minigame; this minigame is not timed.
Congratulations! You’ve completed Romancing the Seven Wonders: Great Pyramid.
