![All VV Ultimatum Titles [How to Get]](/wp-content/uploads/2026/06/vv-ultimatum-titles.jpg "All VV Ultimatum Titles [How to Get]")
All VV Ultimatum Titles [How to Get]
Do titles provide buffs?


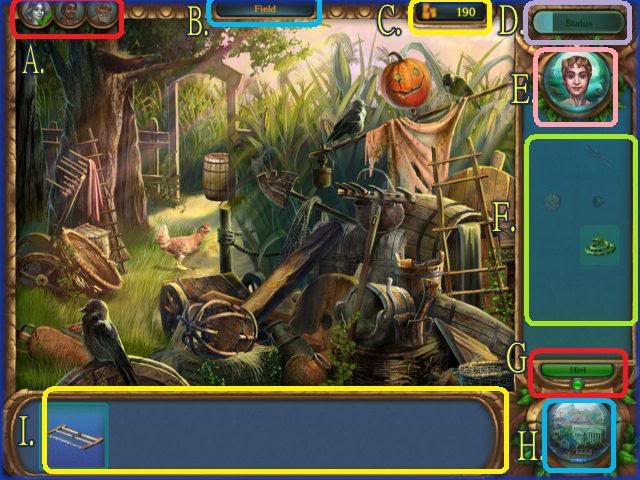
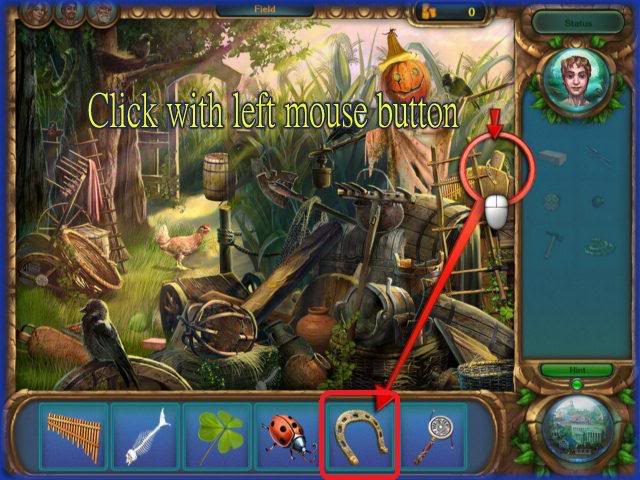
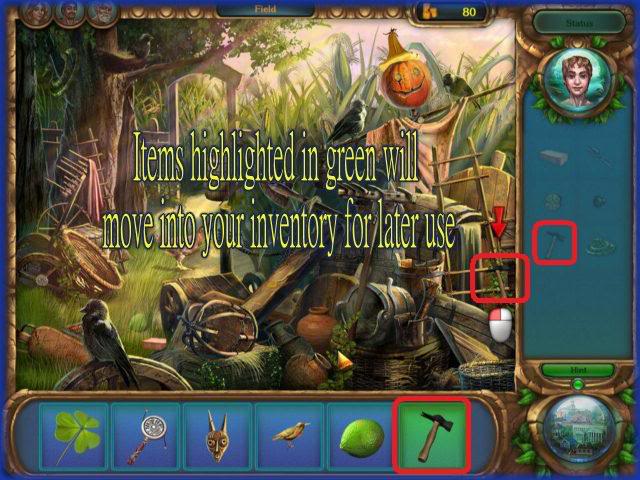
Check out our walkthrough for Romance of Rome. Don't have the game yet? Download a free trial of Romance of Rome. General Game Information/Tips The game consists of 7 Episodes each of which has 3 to 5 locations to search through and solve mini tasks given by the citizens of Rome. There is no timer in the game so you can search at a relaxed pace. There are unlimited hints in the game if you need assistance finding an object. The hint meter must recharge in between uses. The order you visit…
a:1:i:0;a:2:s:13:”section_title”;s:27:”Romance of Rome Walkthrough”;s:12:”section_body”;s:95310:”
Check out our walkthrough for Romance of Rome.
Don’t have the game yet? Download a free trial of Romance of Rome.

General Game Information/Tips
Game Elements

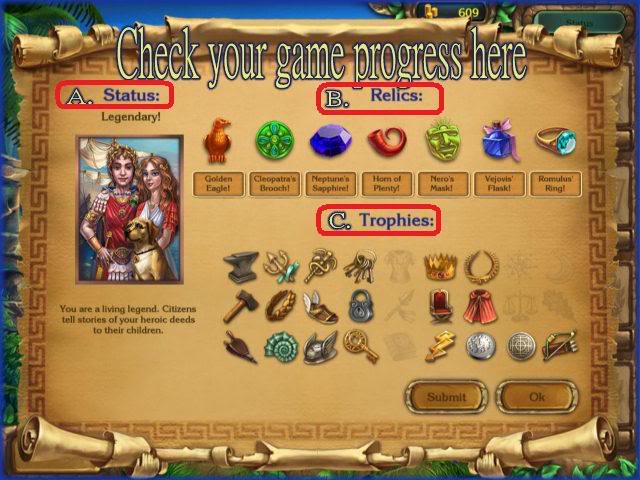
Walkthrough
EPISODE 1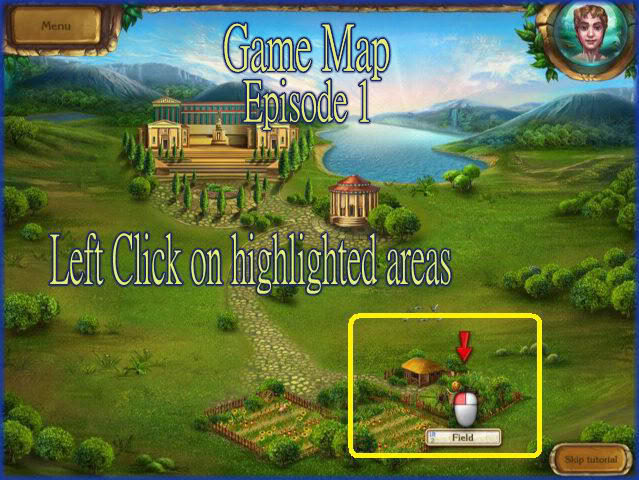
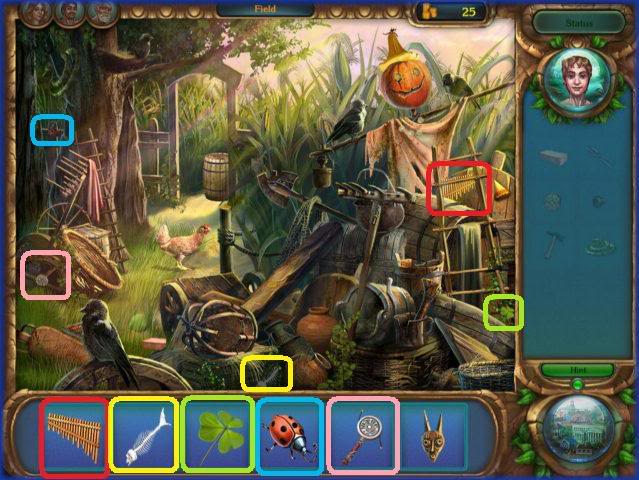
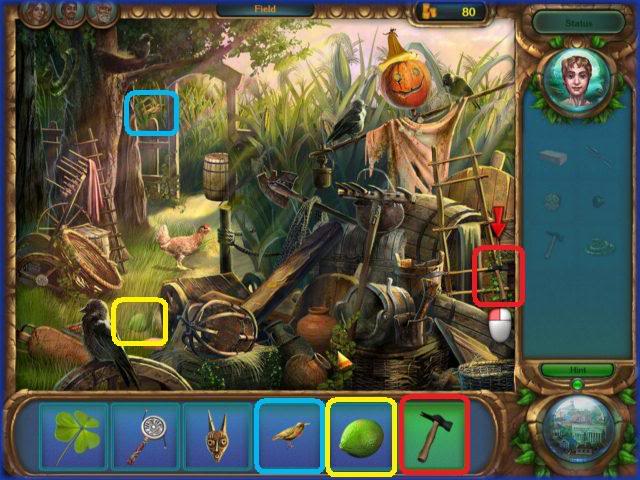
MAP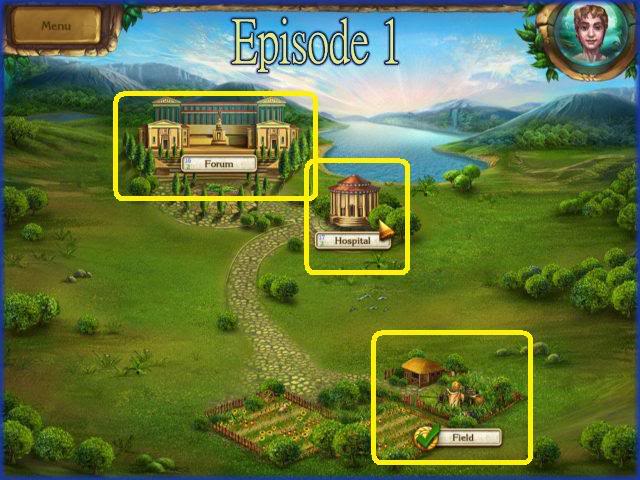
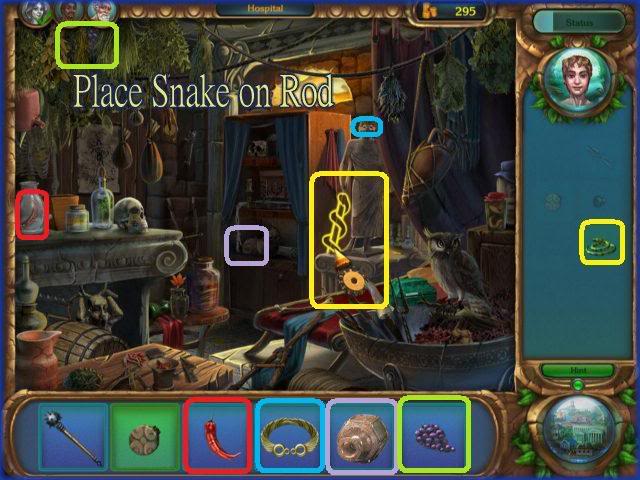
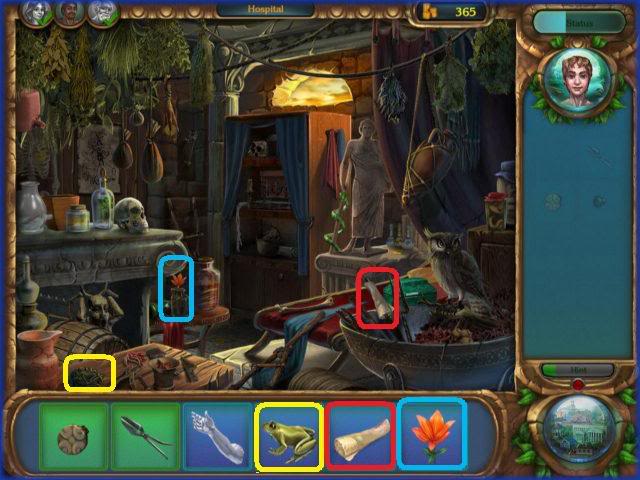
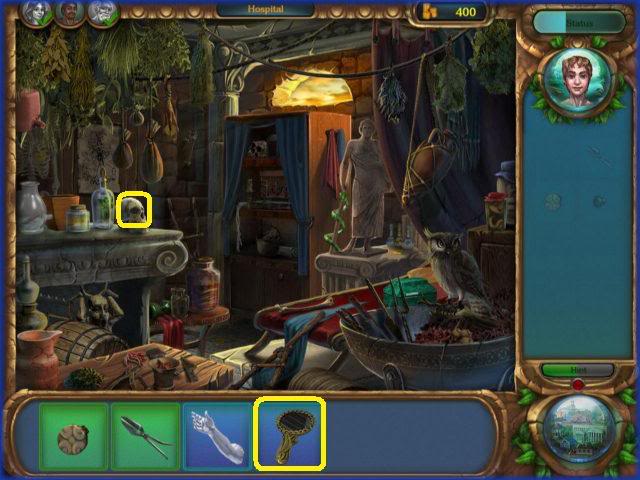
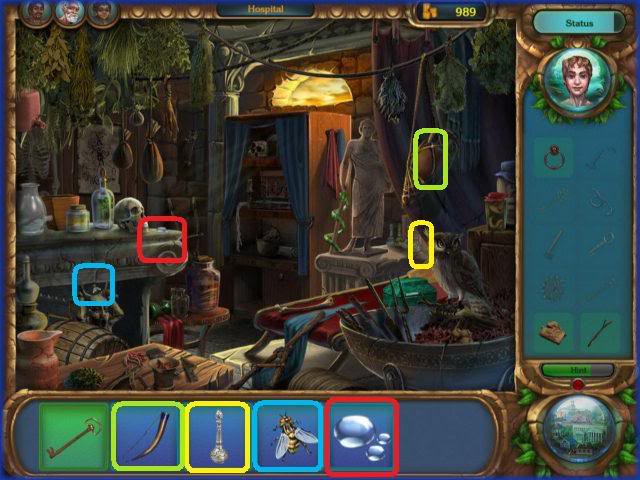
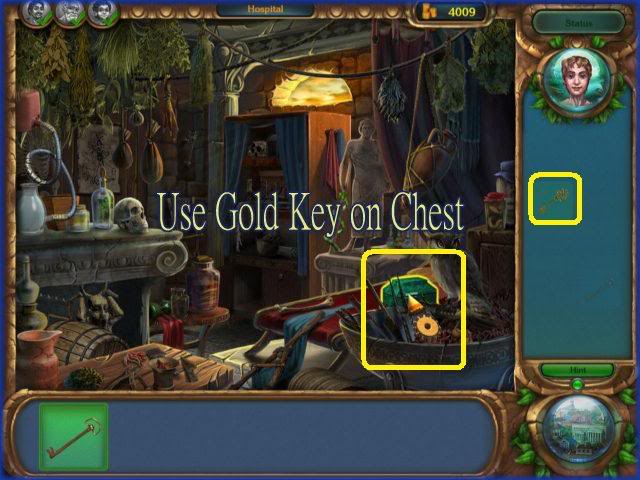
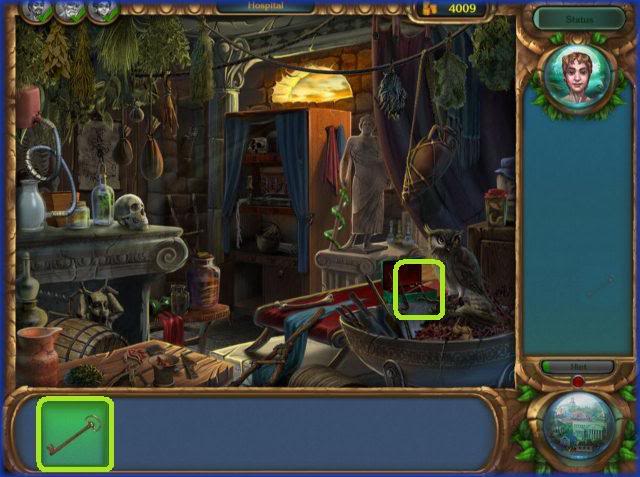
Hospital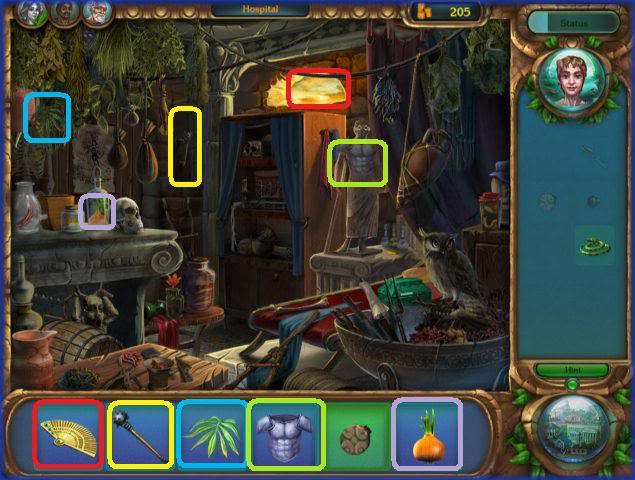
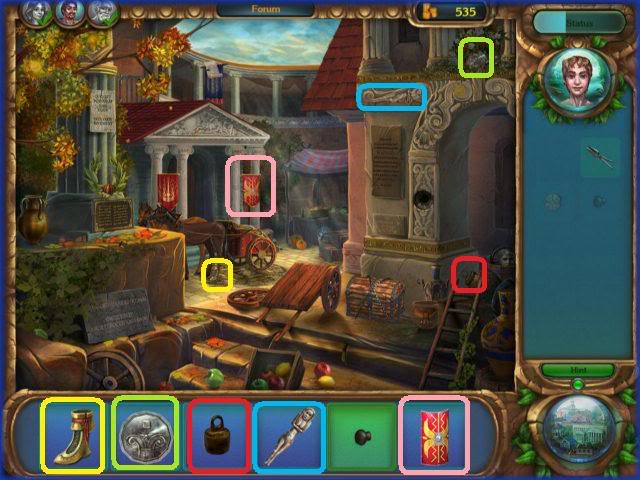
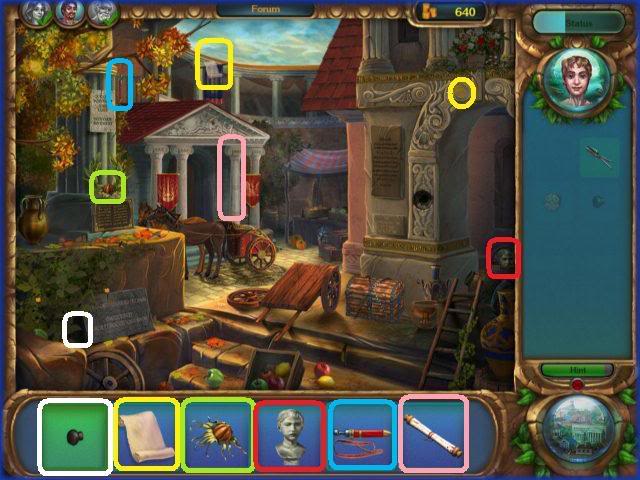
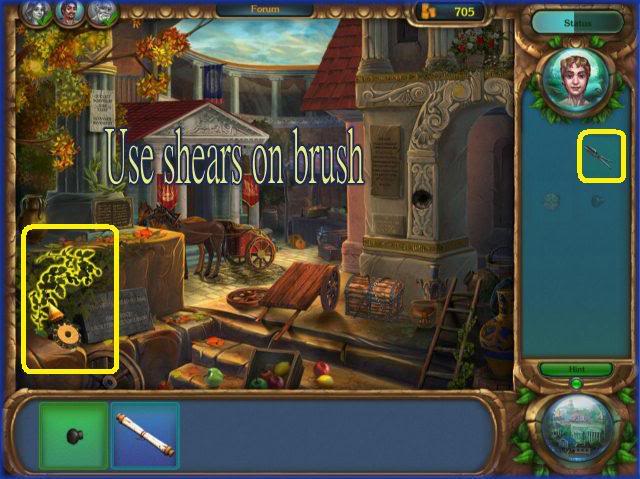
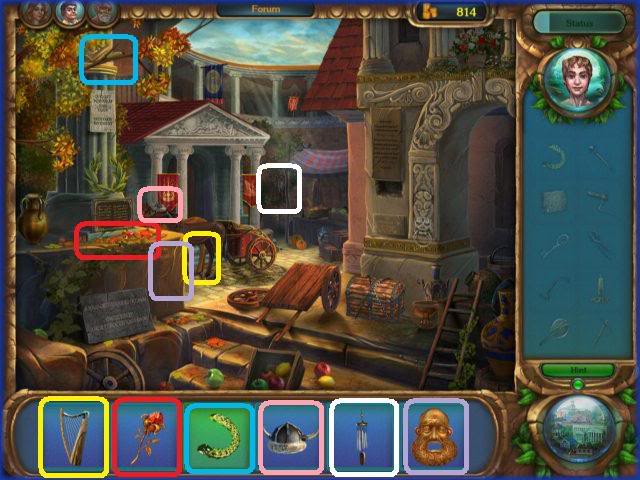
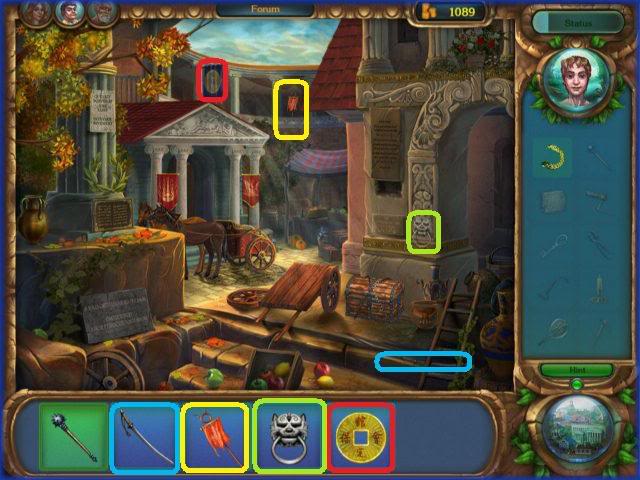
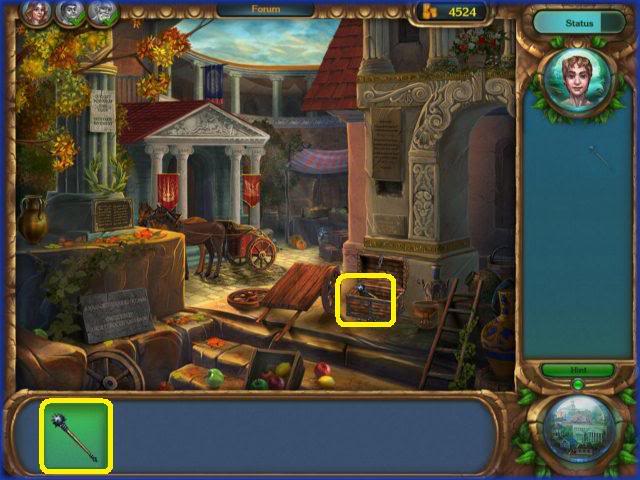
Forum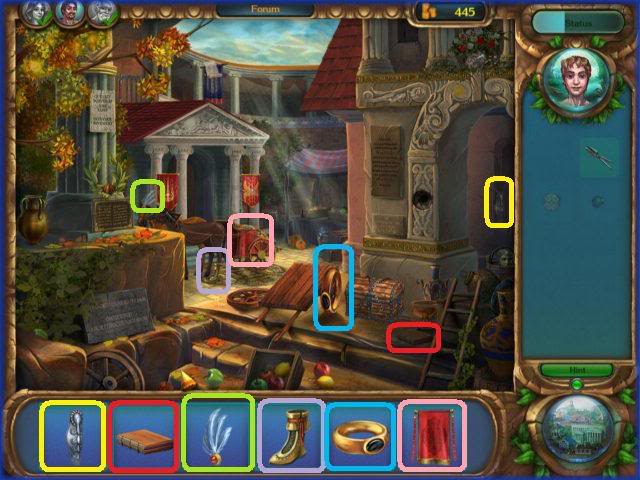
Back to the Hospital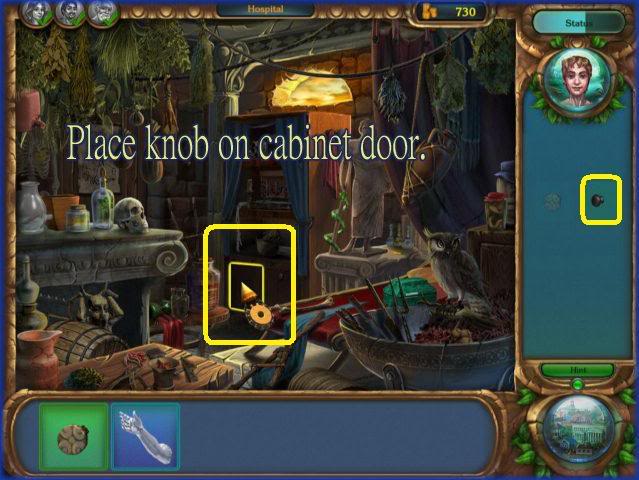

Back to the Forum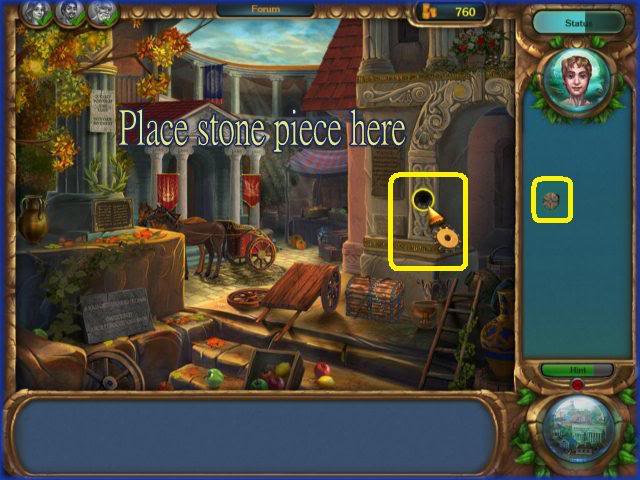
Marketplace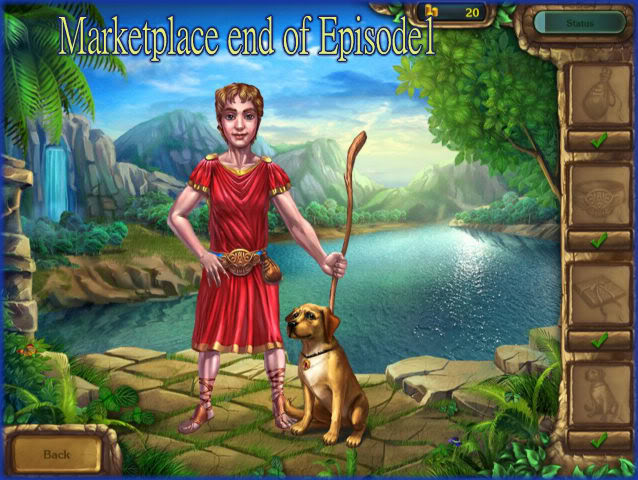
EPISODE 2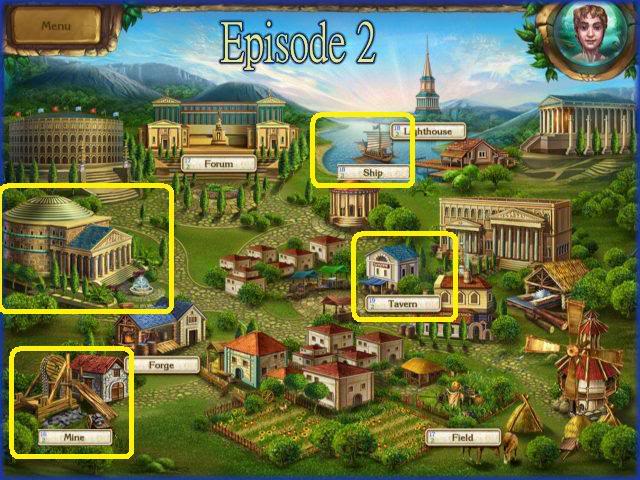
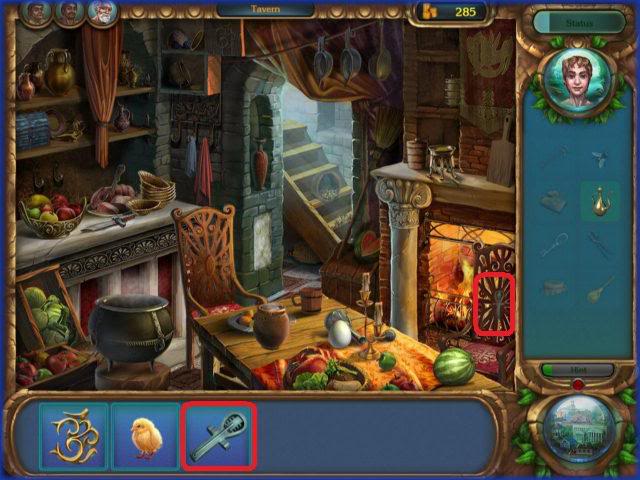
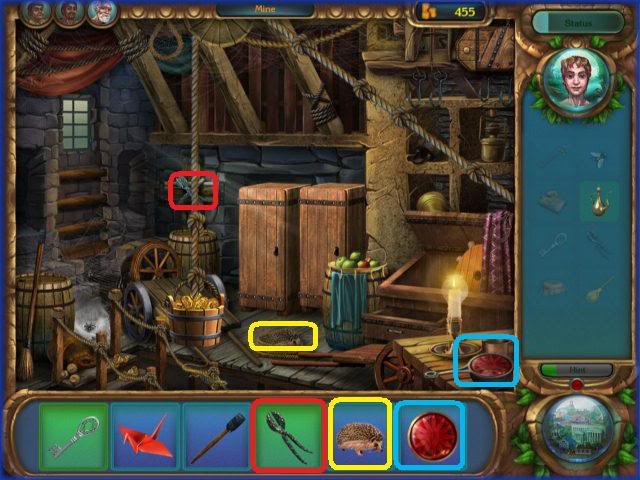
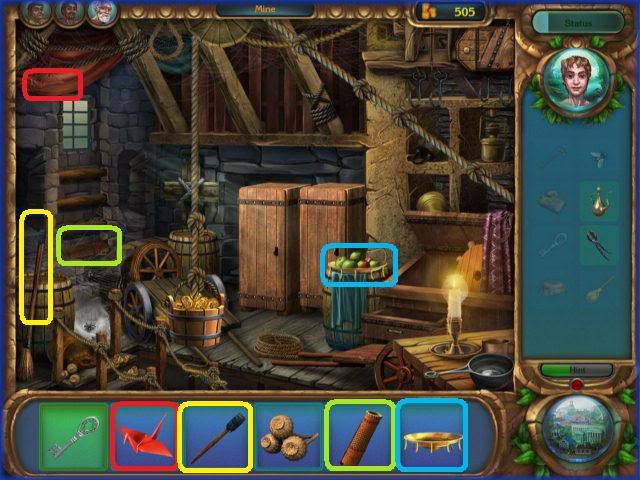
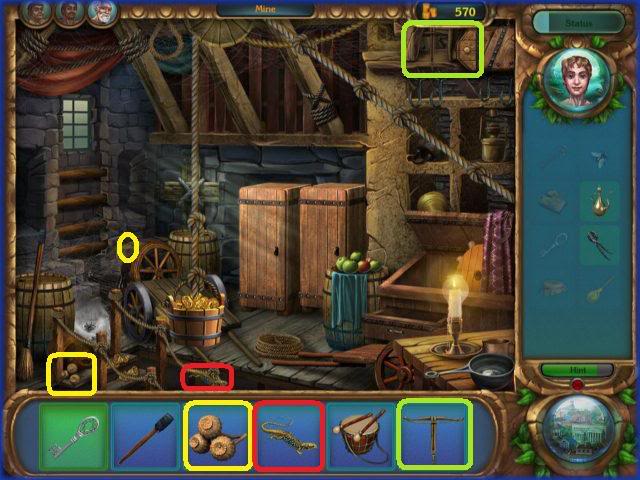
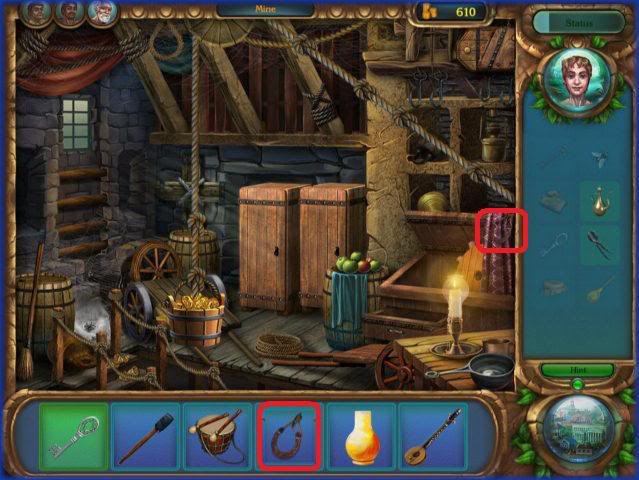
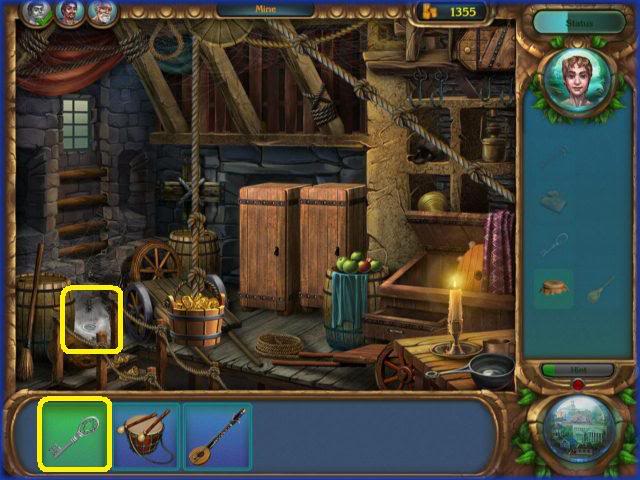
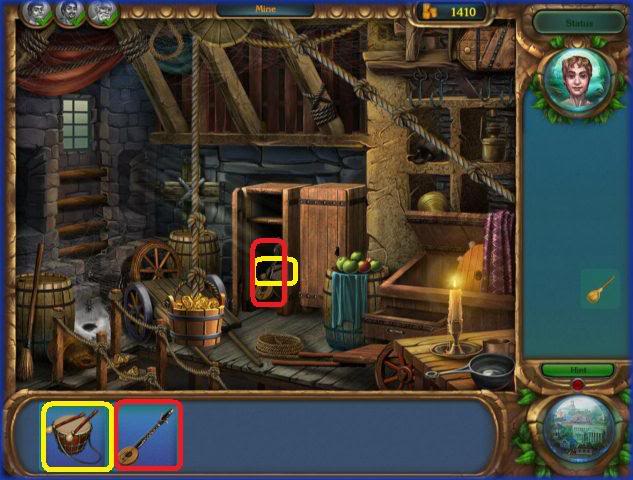
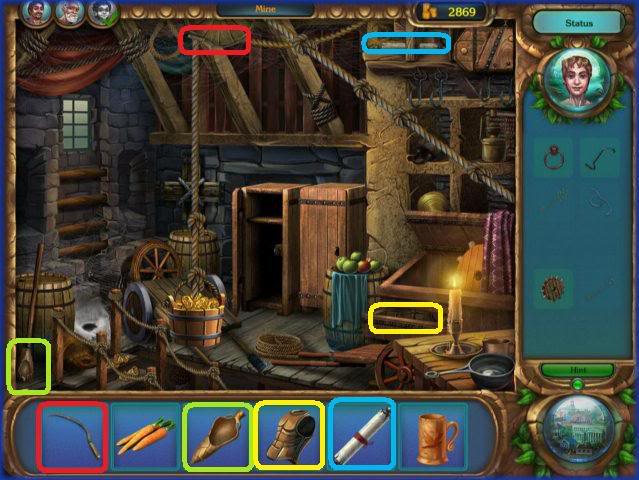
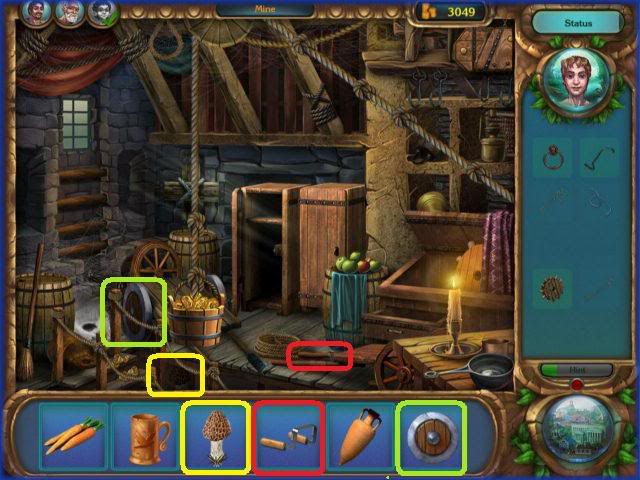
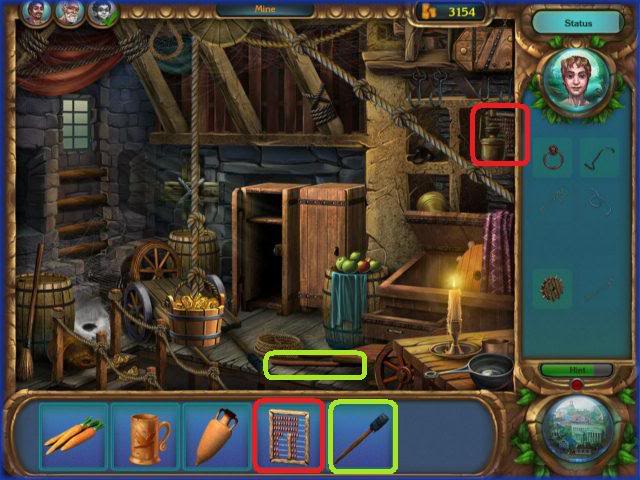
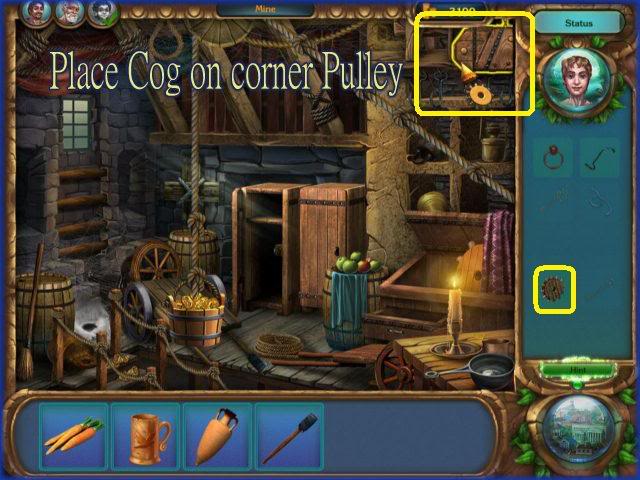
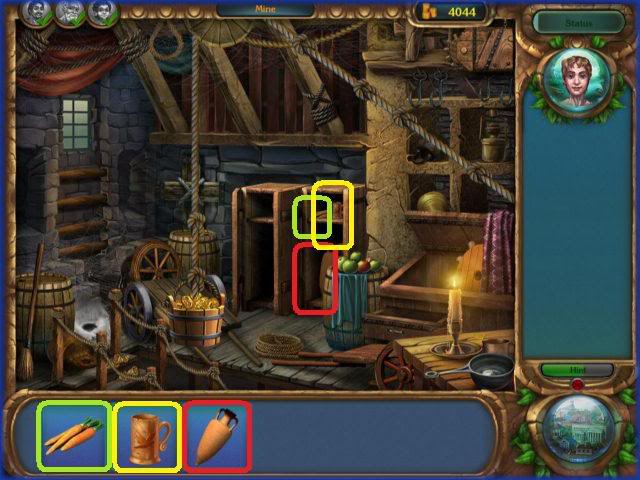
MINE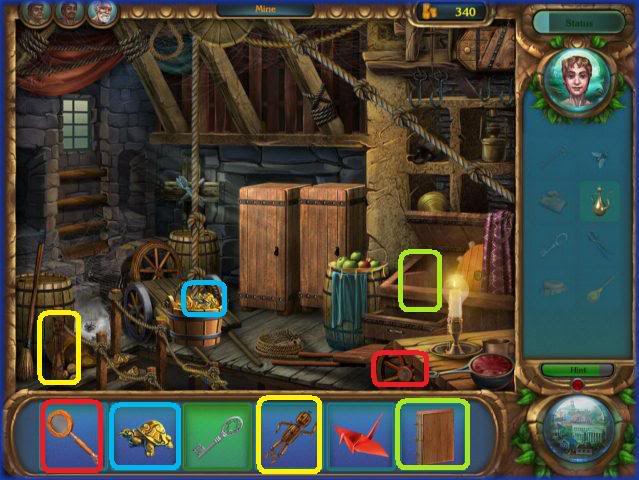
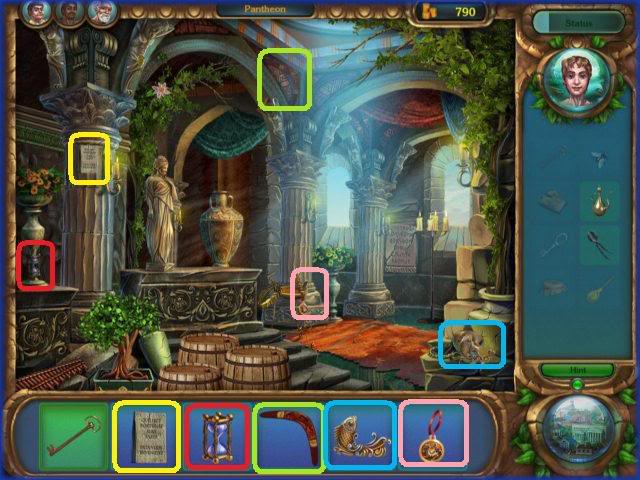
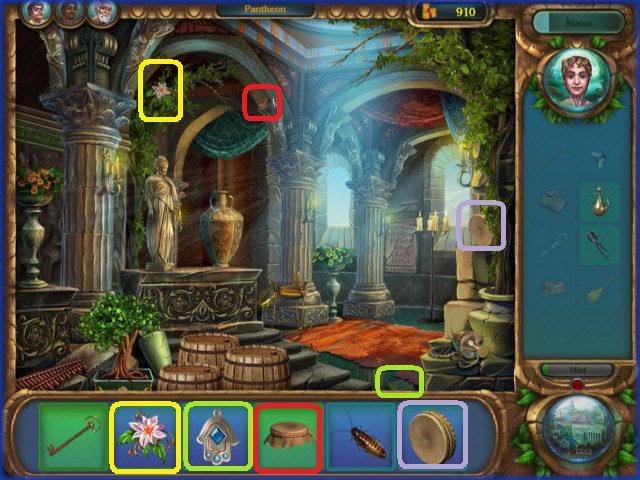
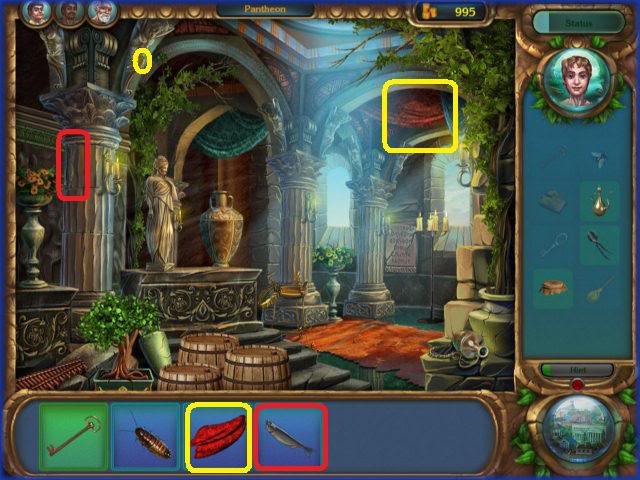
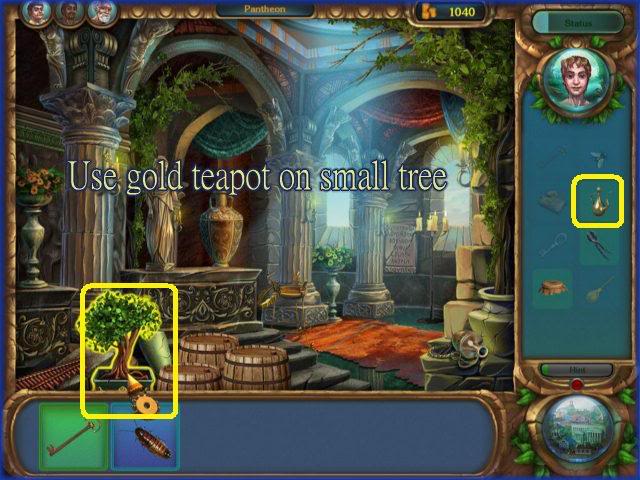
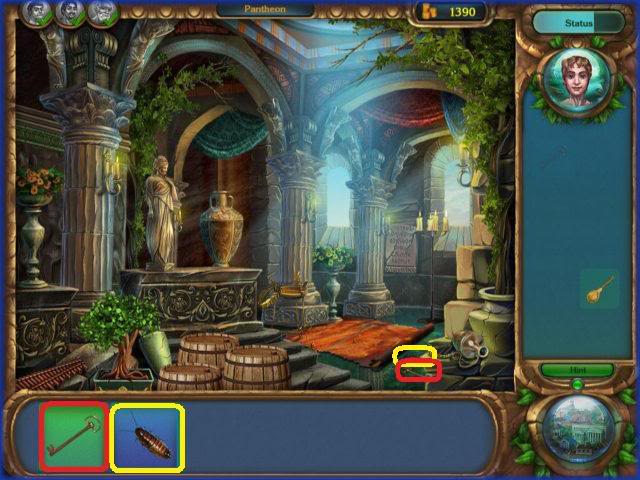
PANTHEON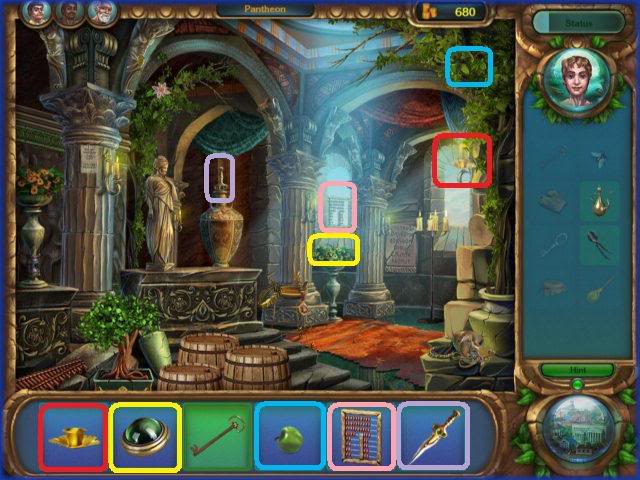
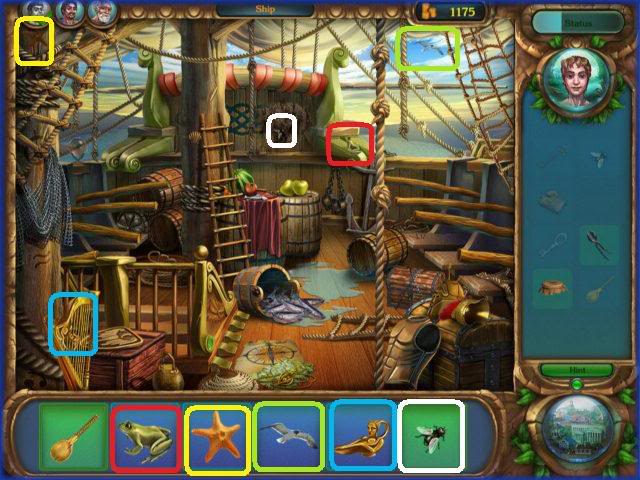
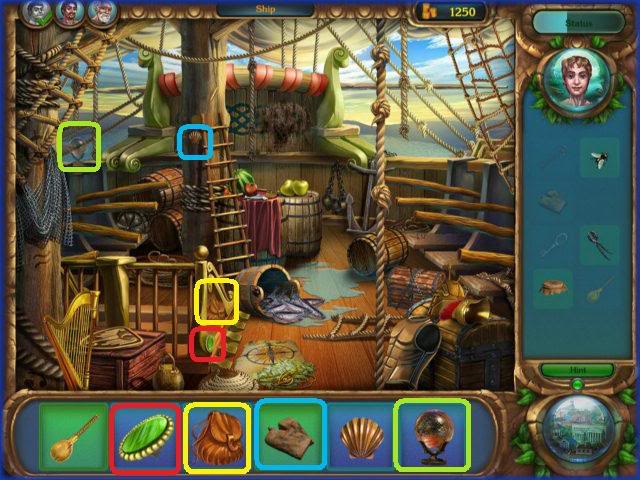
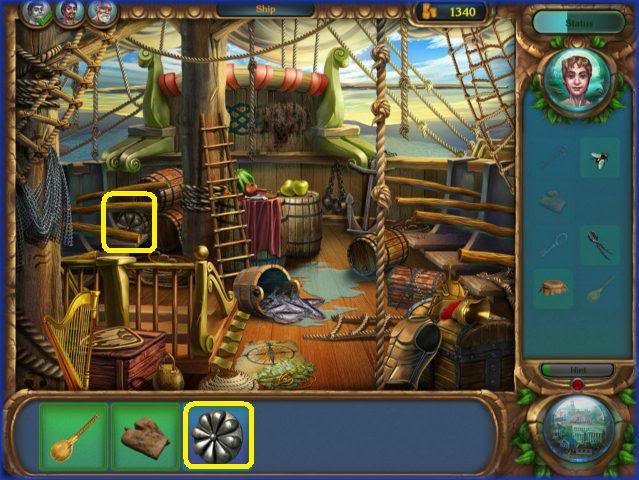
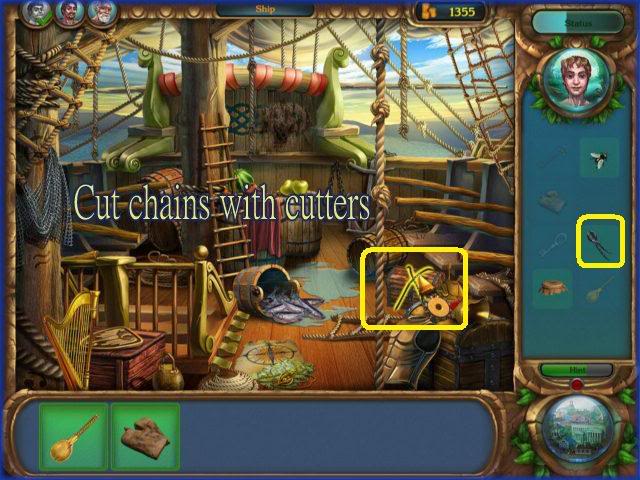
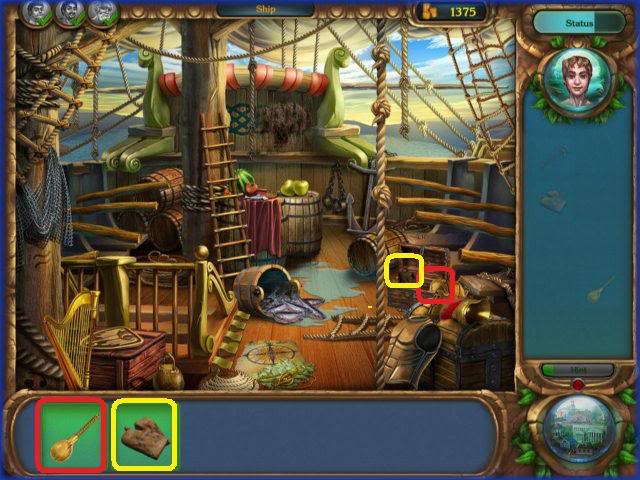
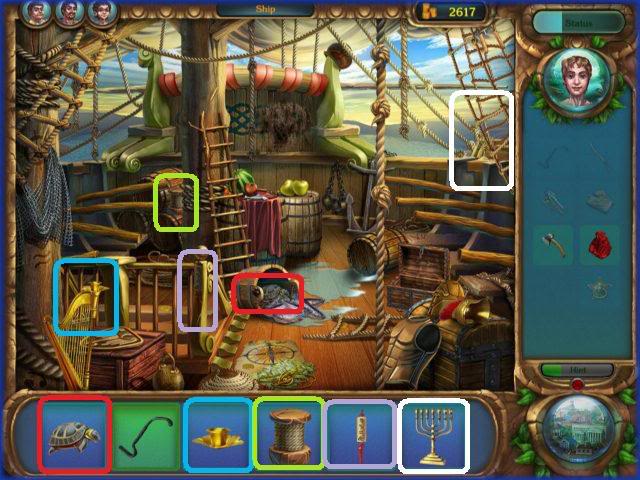
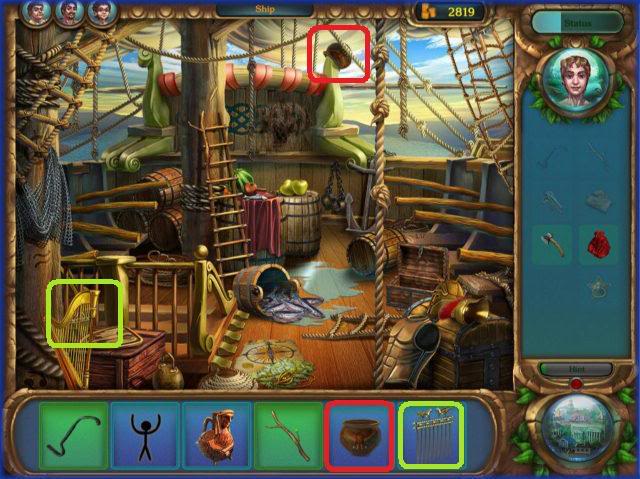
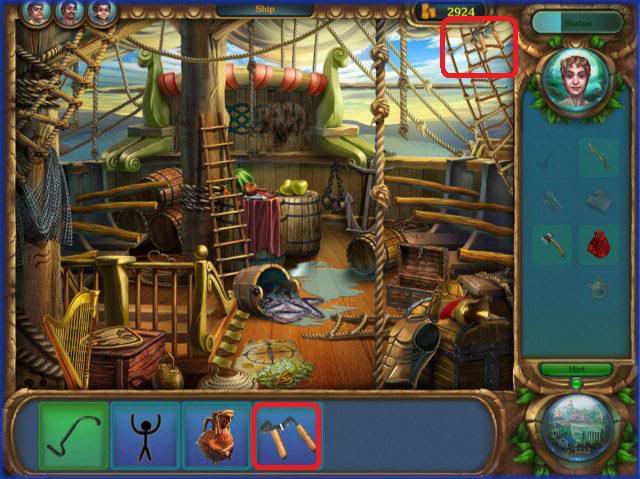
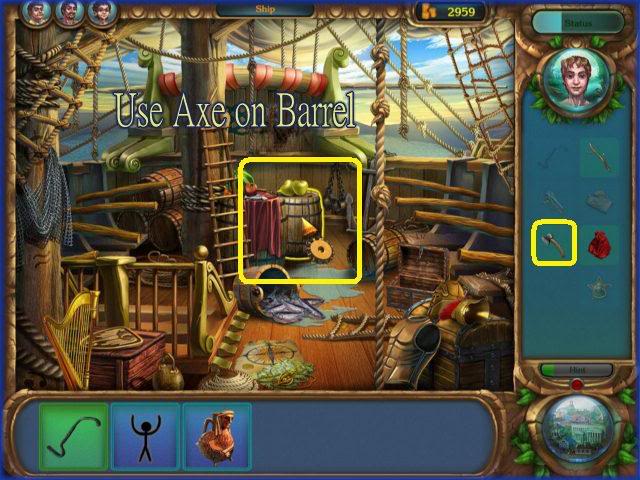
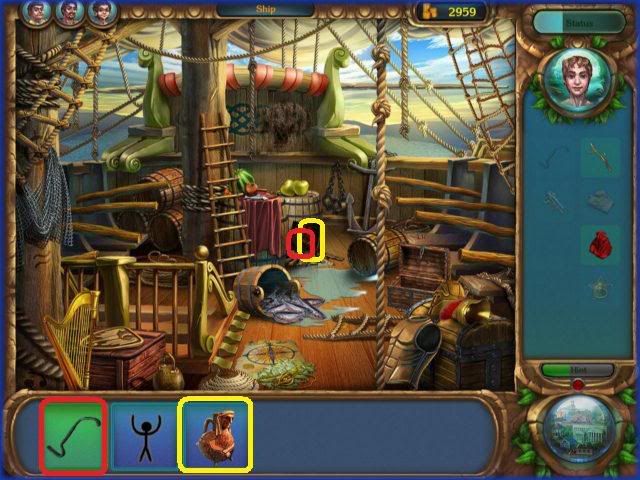
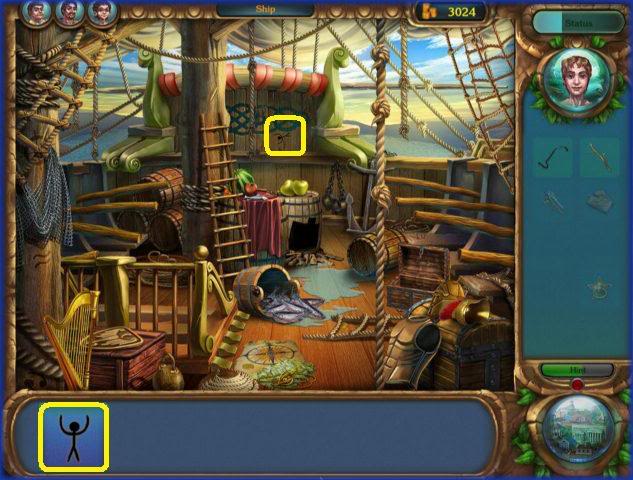
SHIP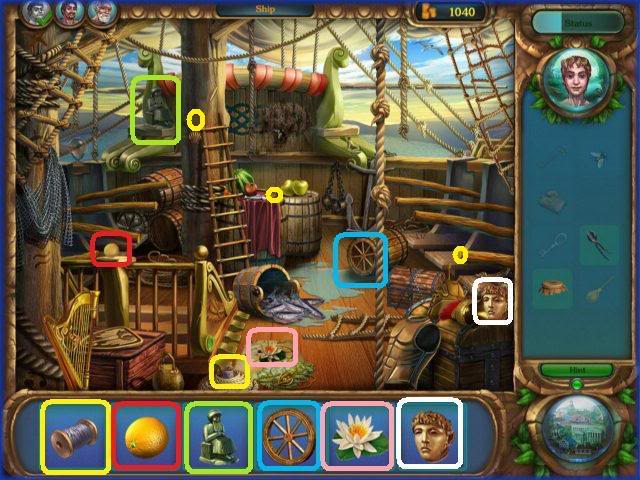
Back to the Mine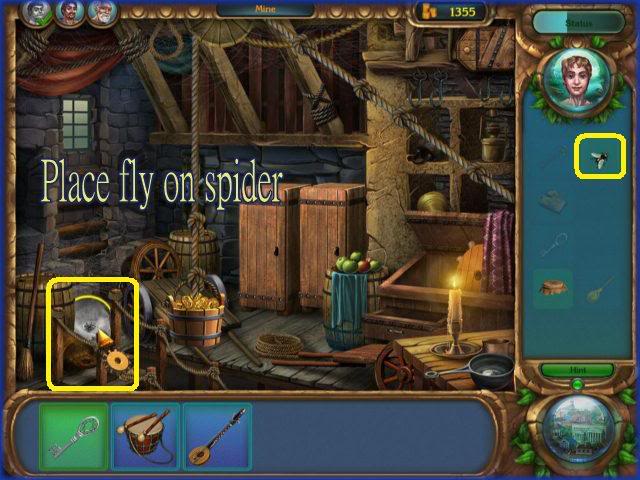
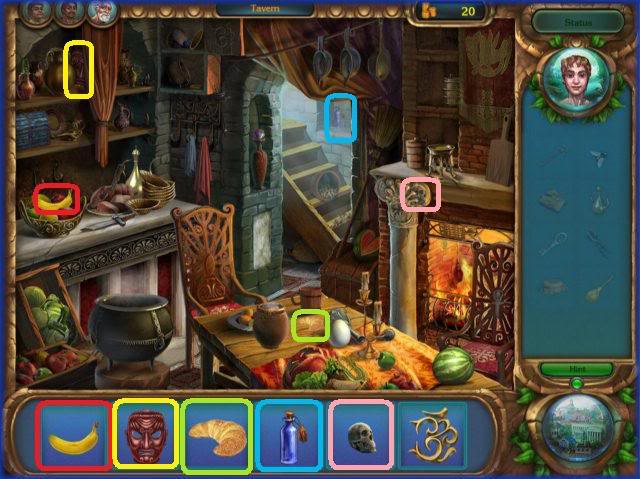
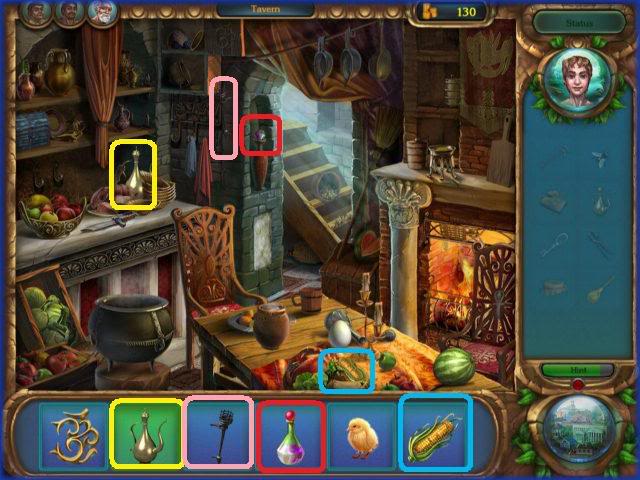
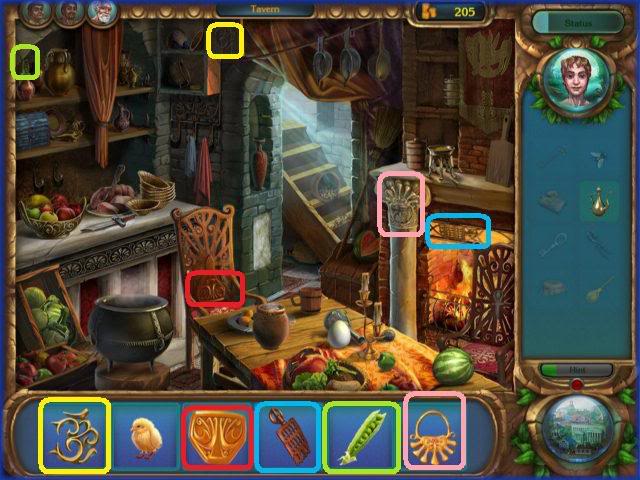
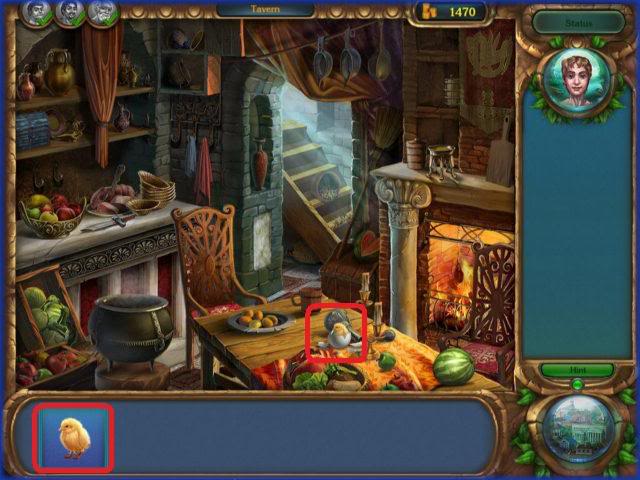
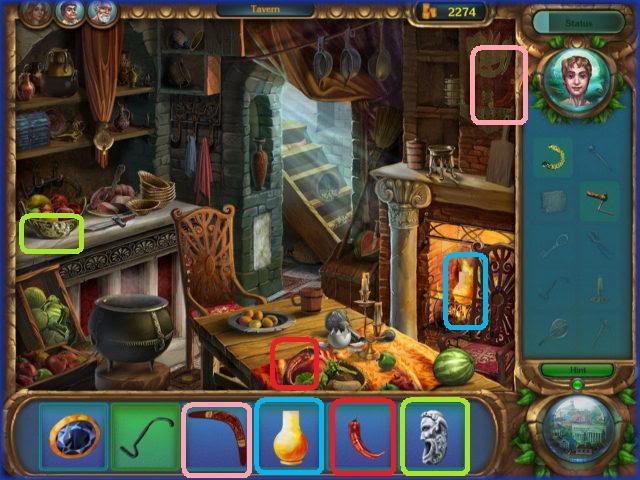
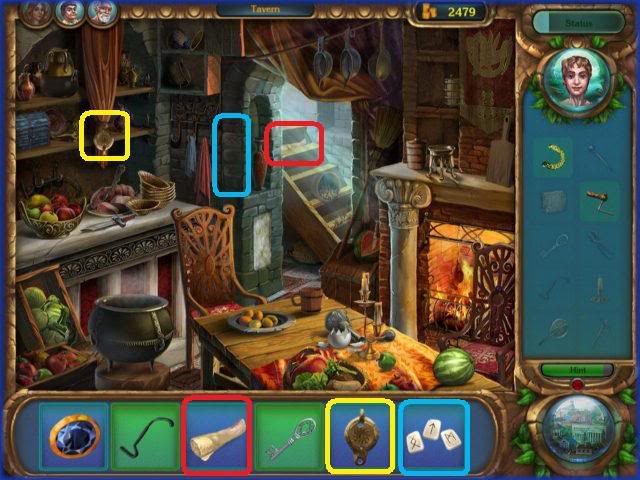
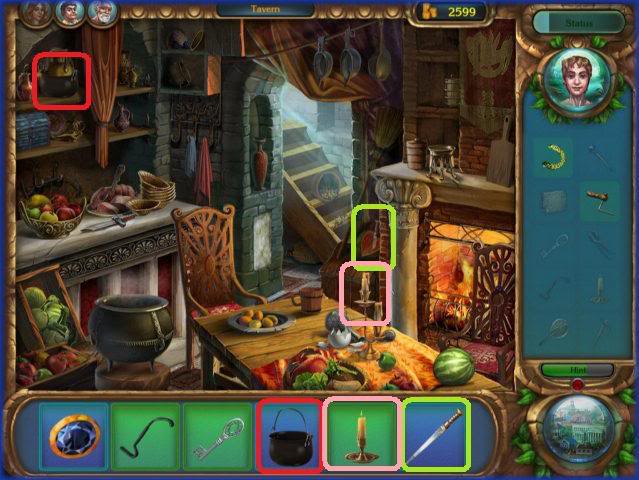
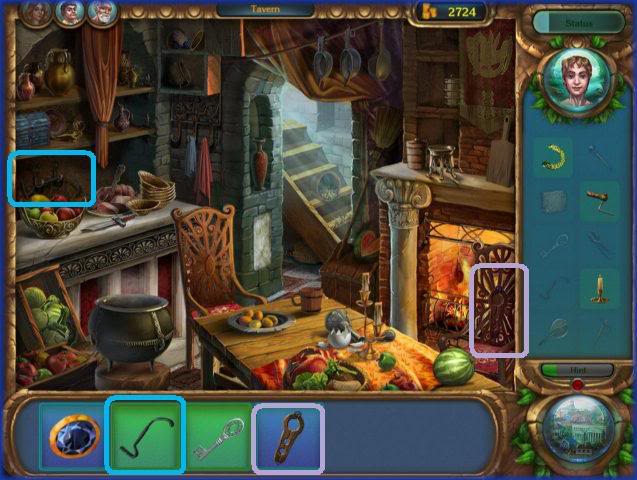
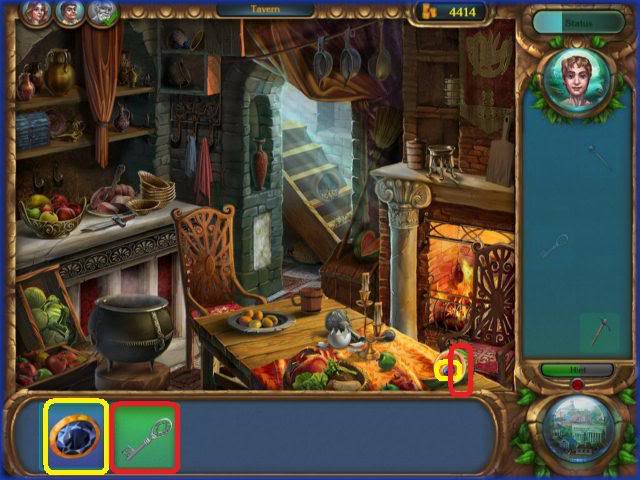
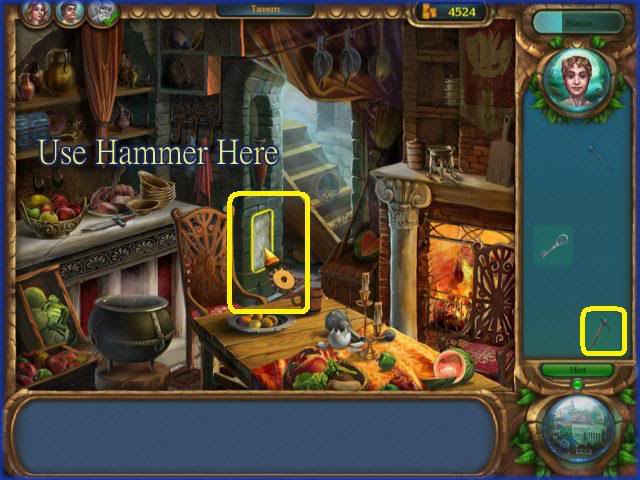
Back to Tavern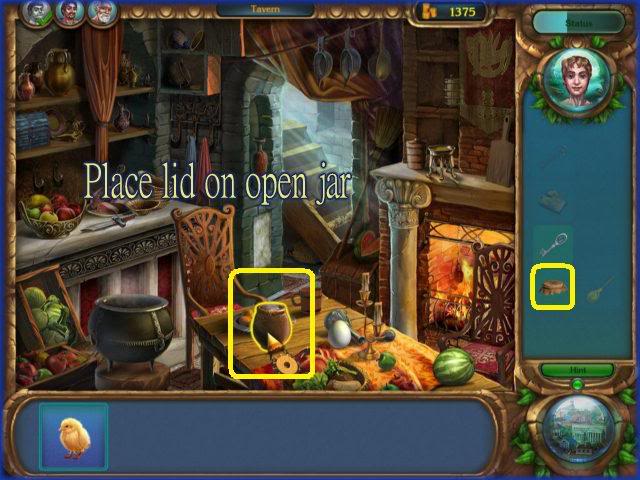
Back to Ship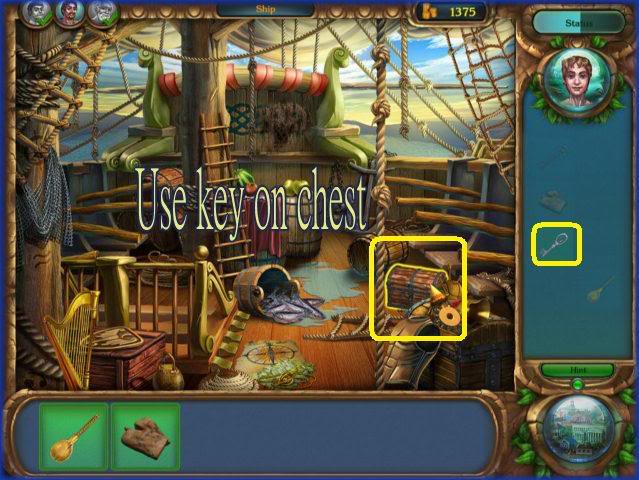
Back to Pantheon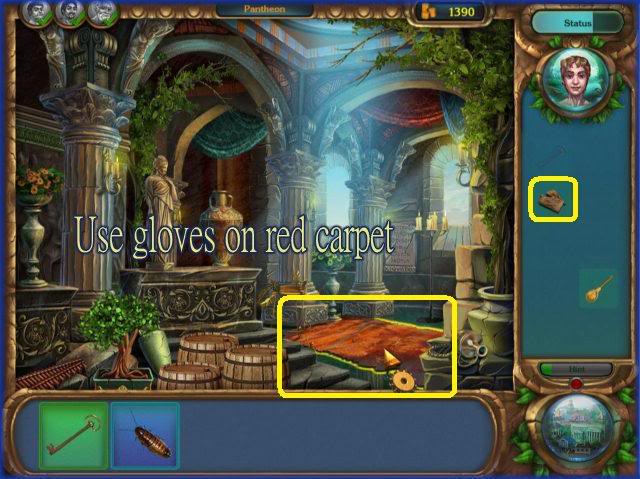
Back to Mine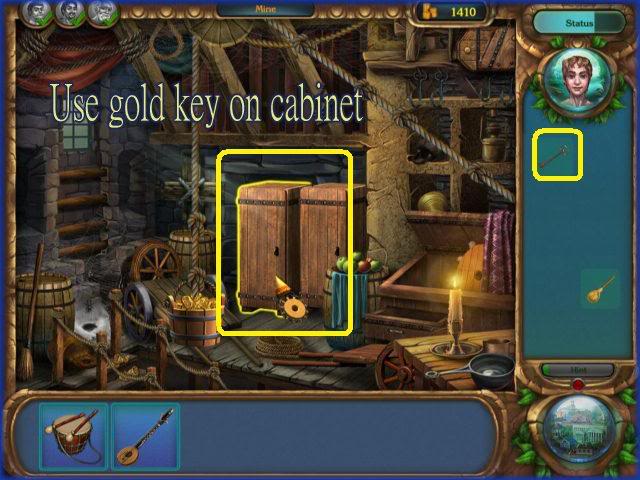
Back to Tavern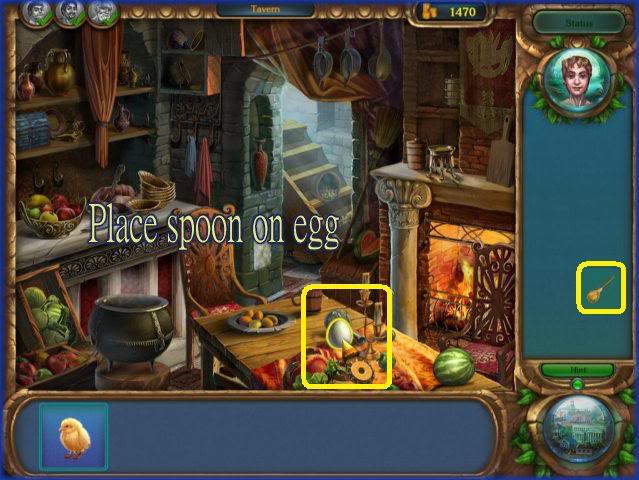
MARKETPLACE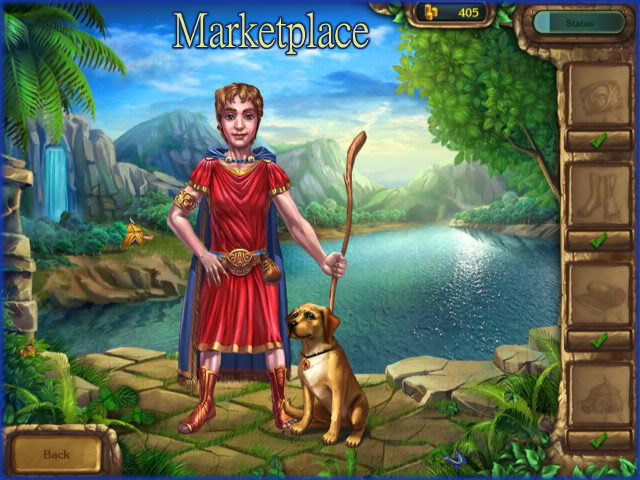
EPISODE 3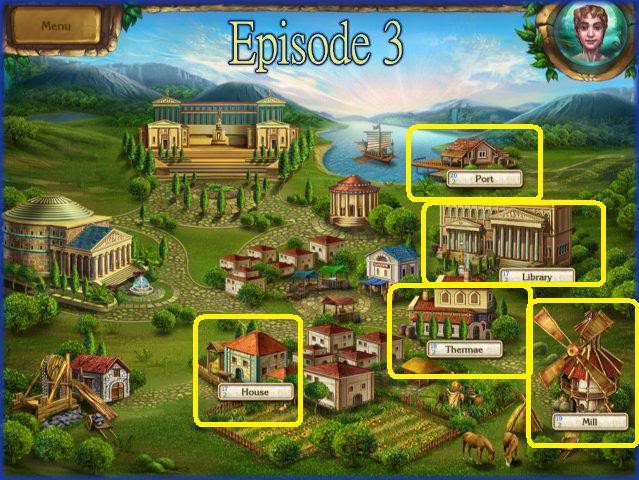
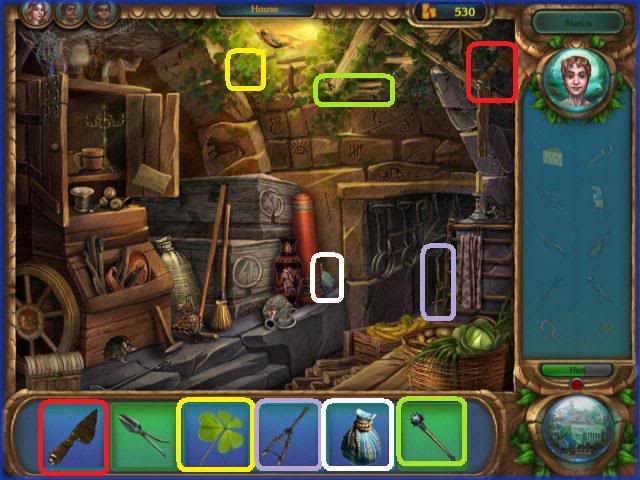
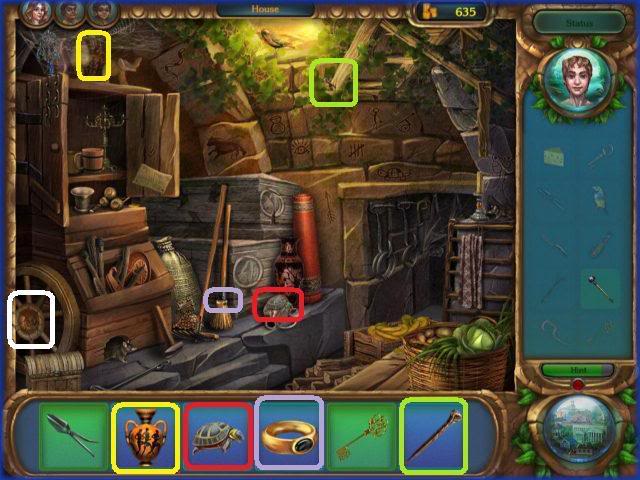
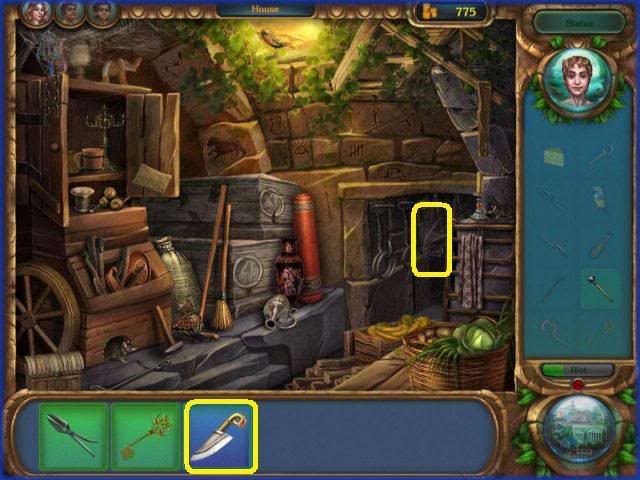
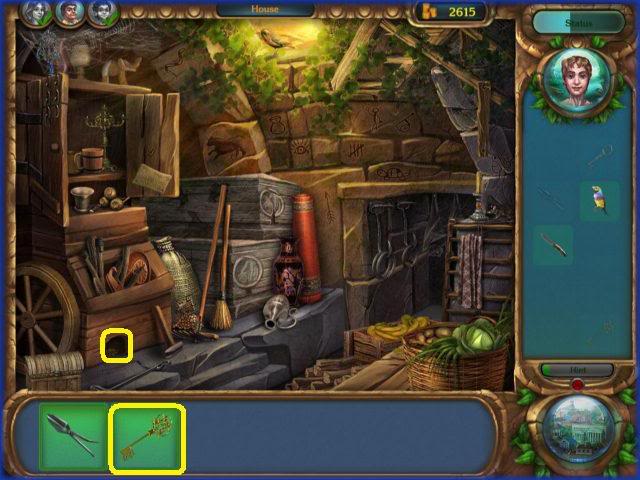
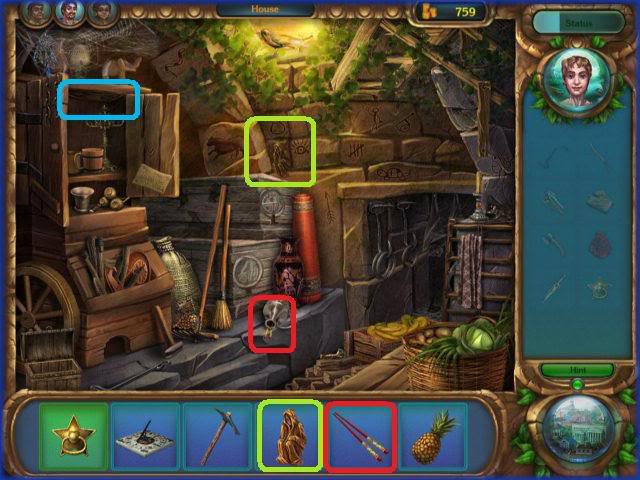
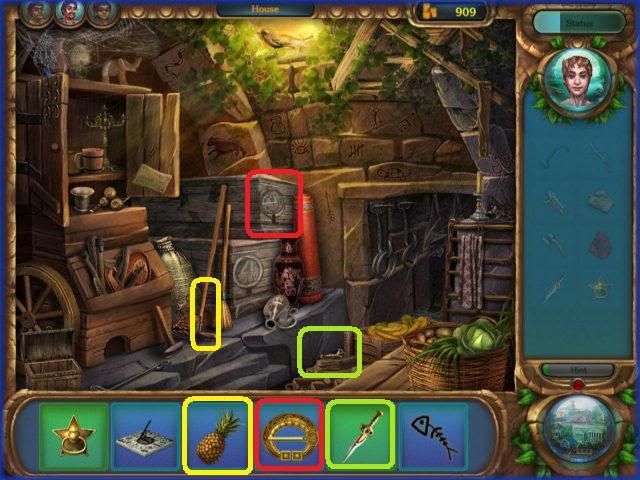
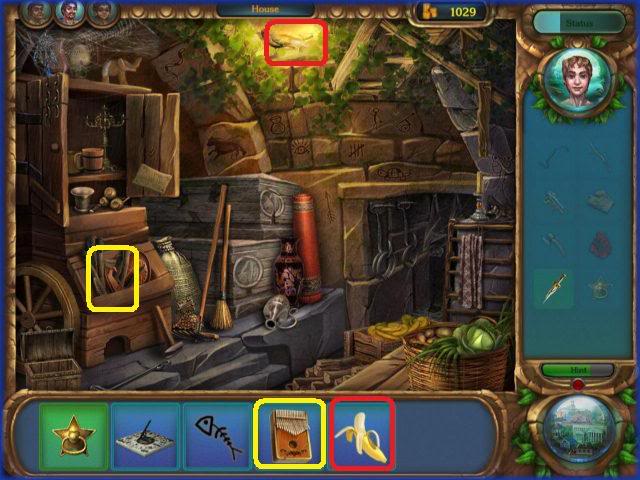
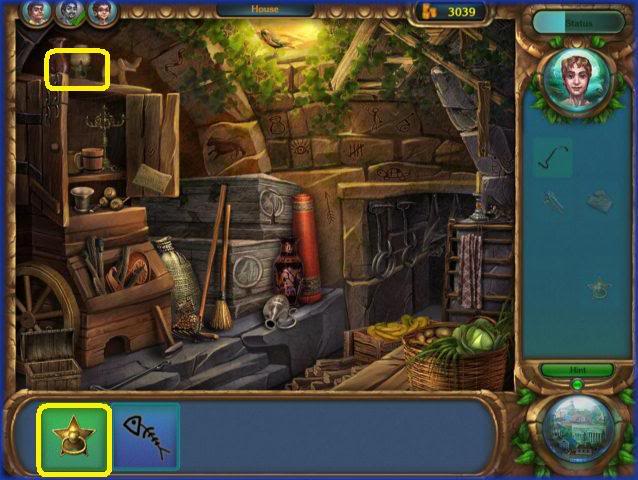
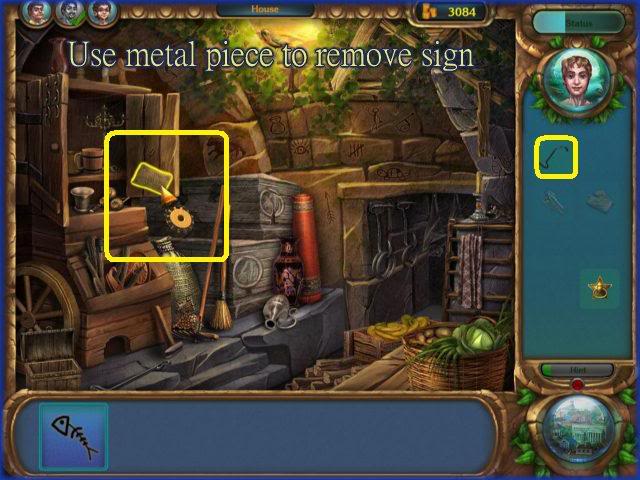
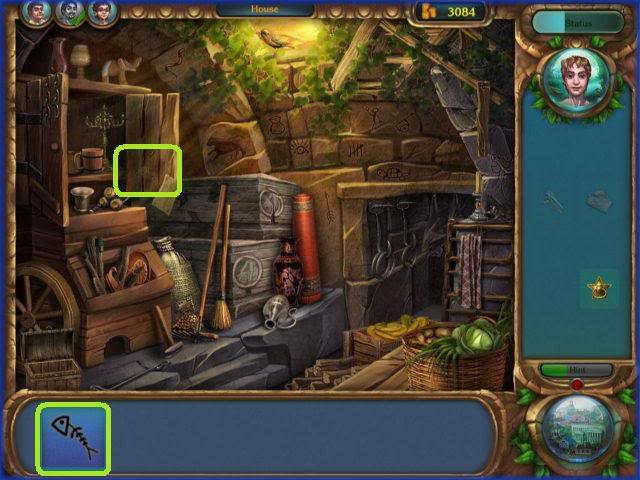
HOUSE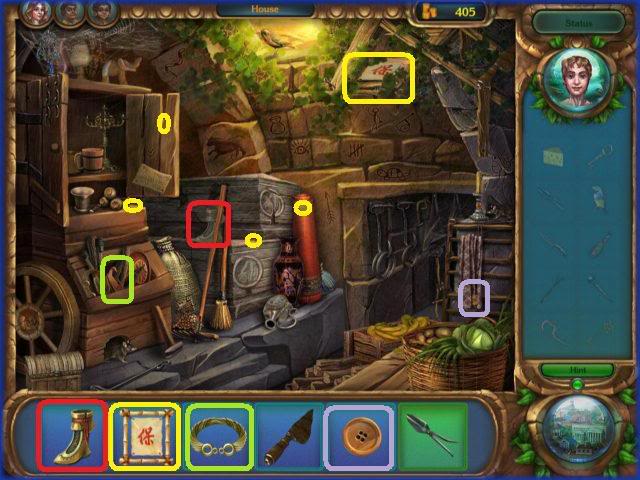
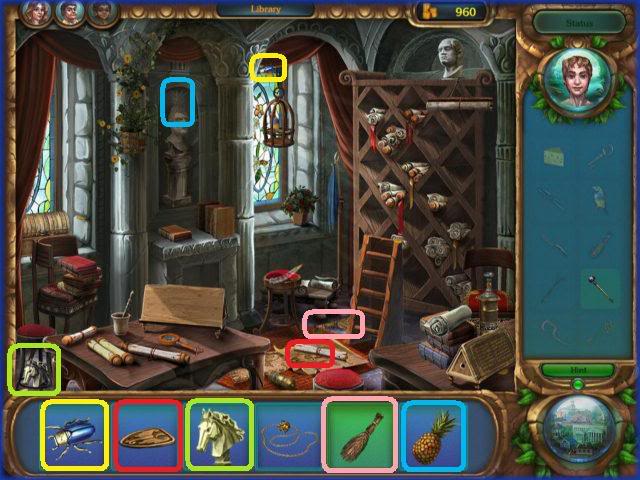
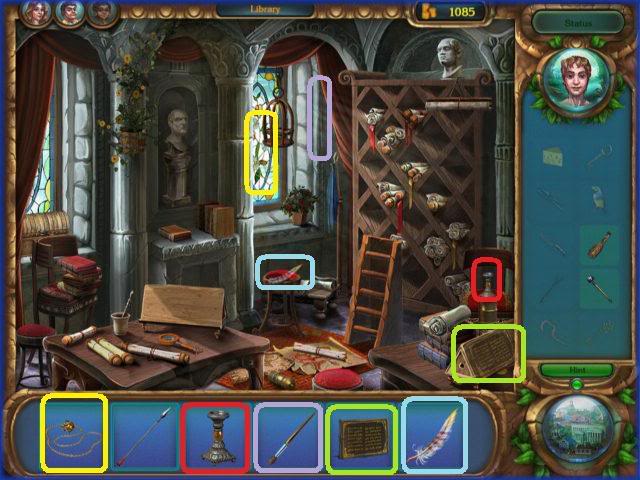
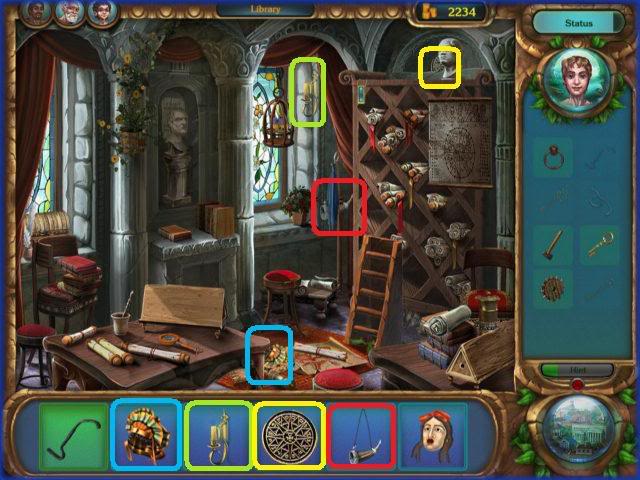
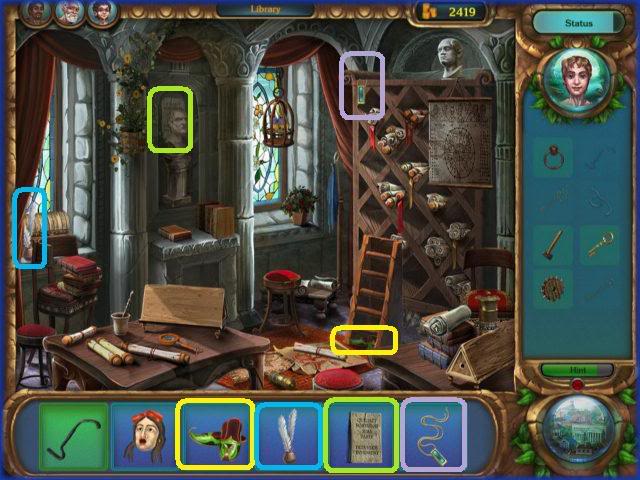
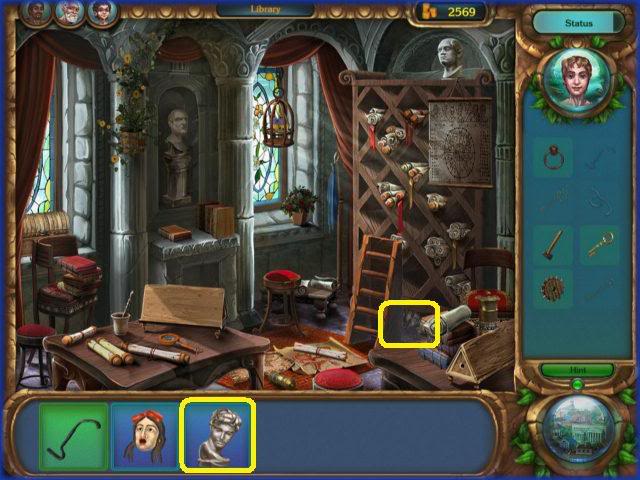
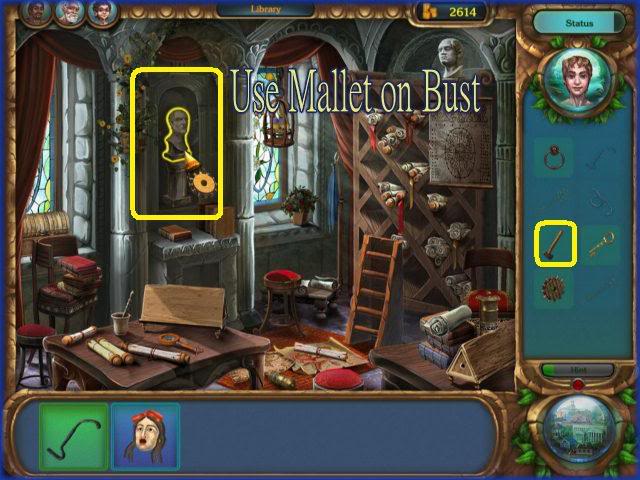
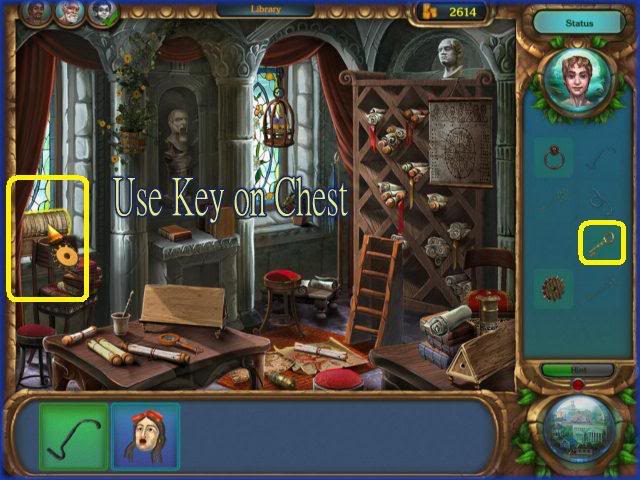
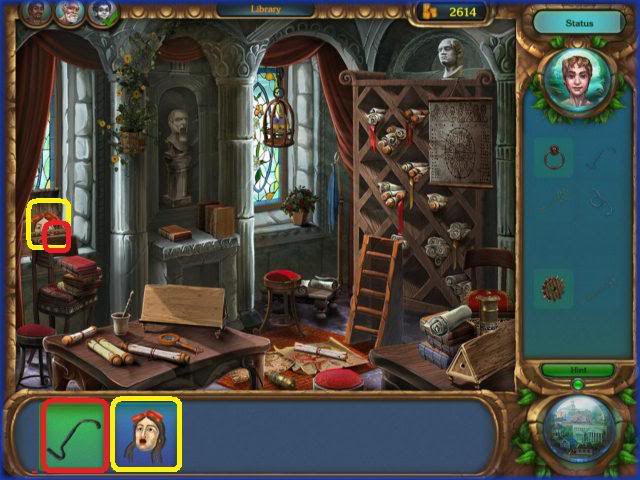
LIBRARY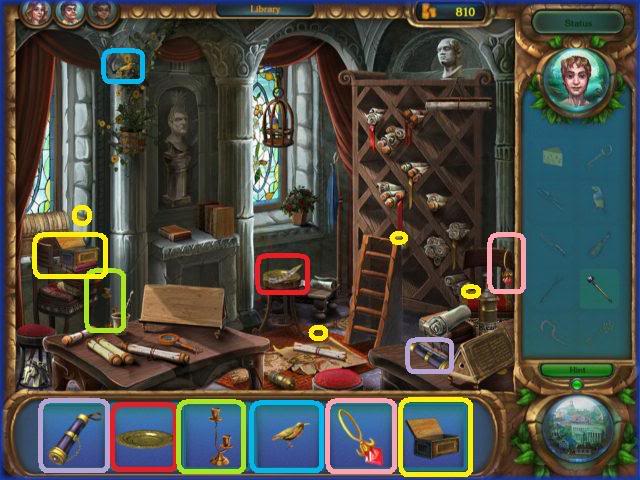
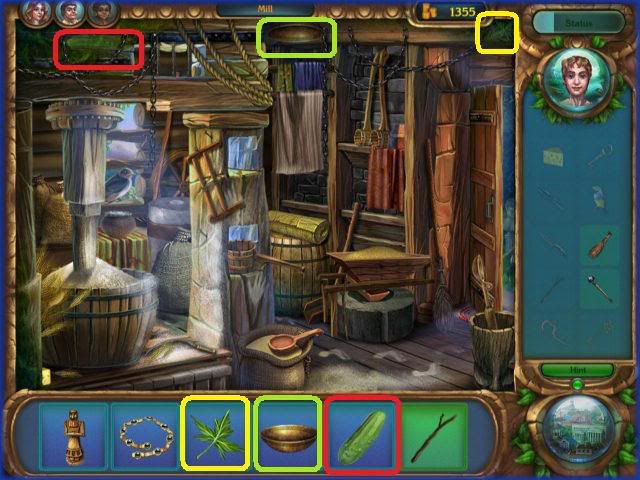
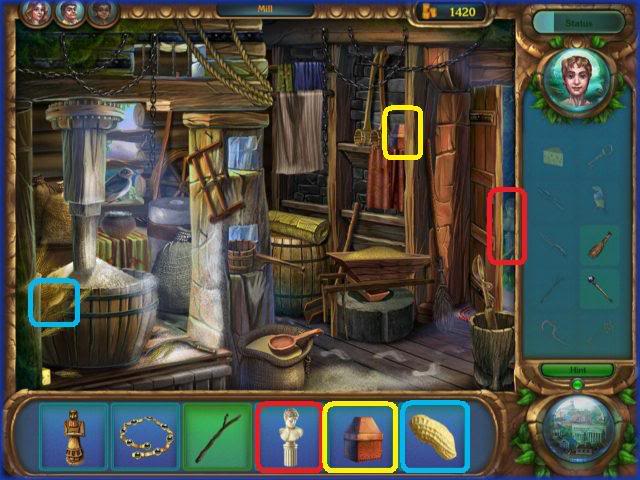
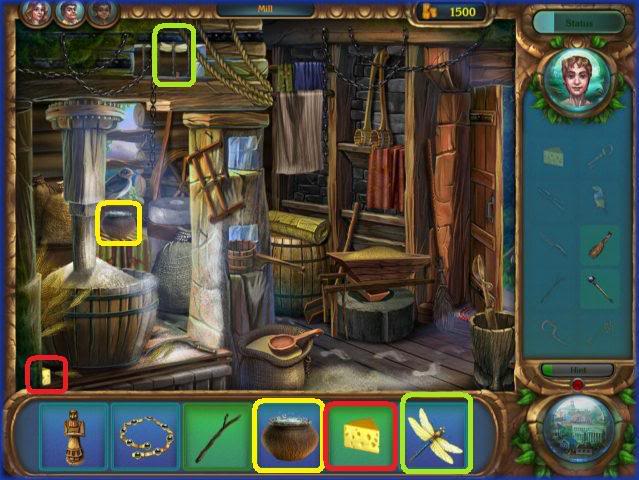
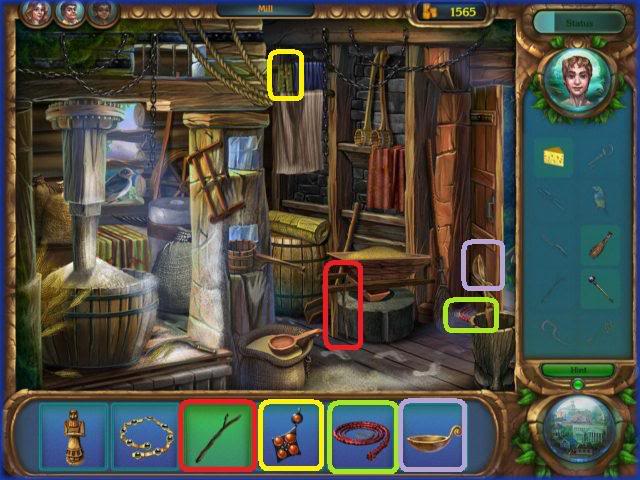
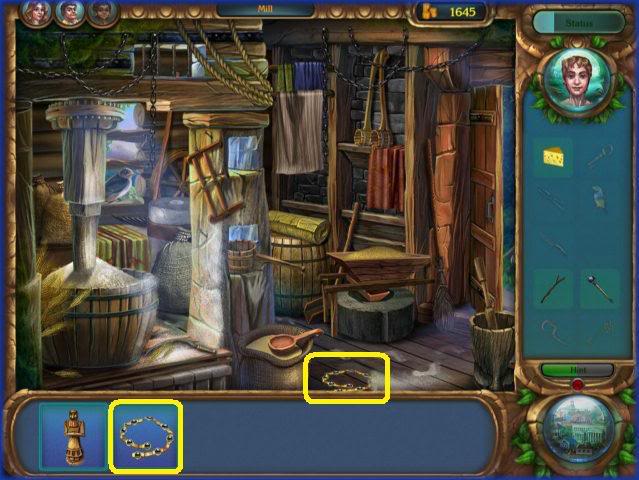
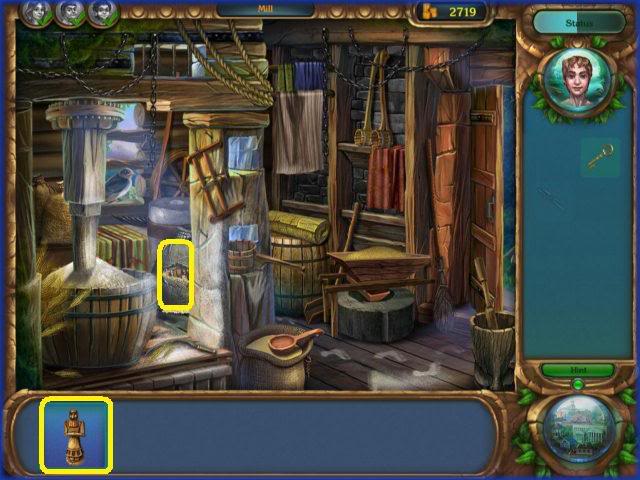
MILL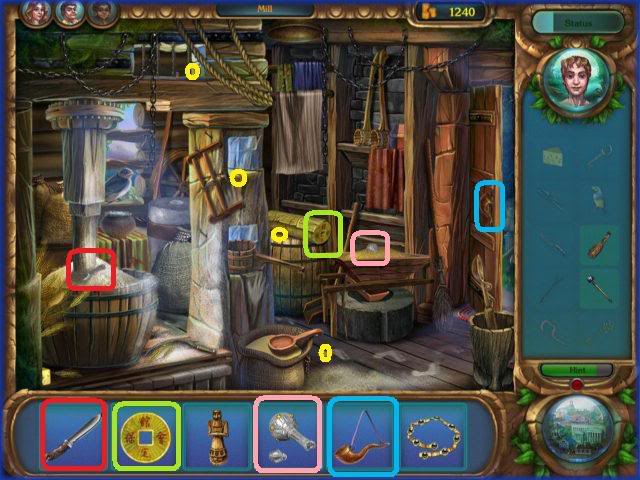

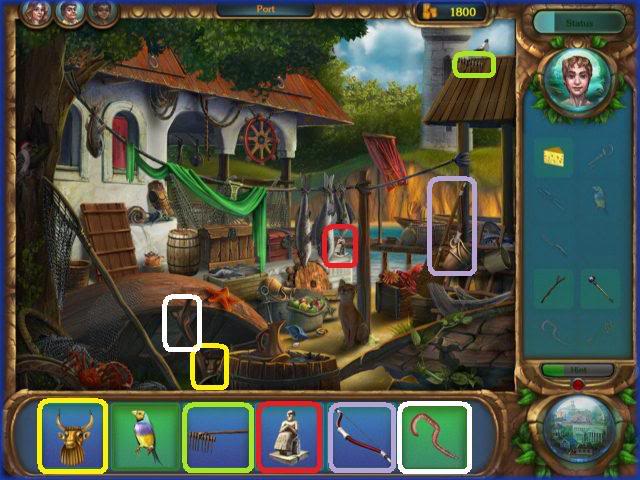
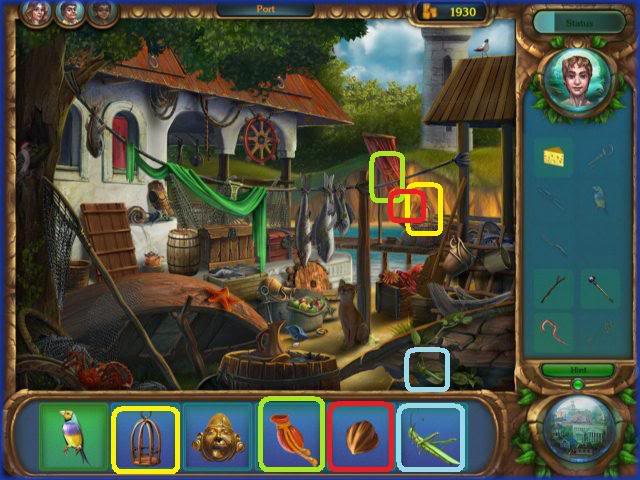
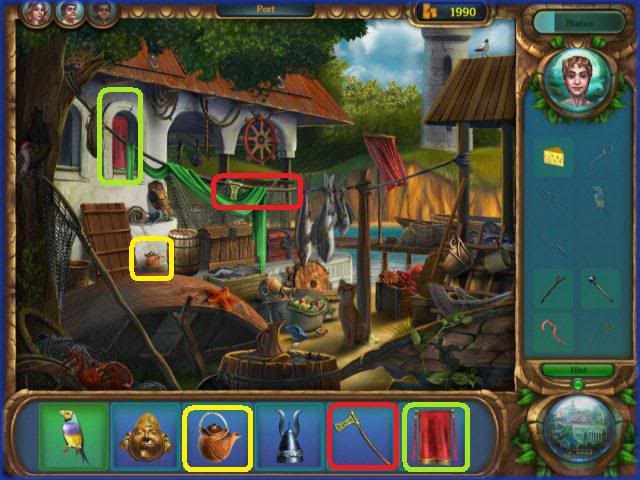
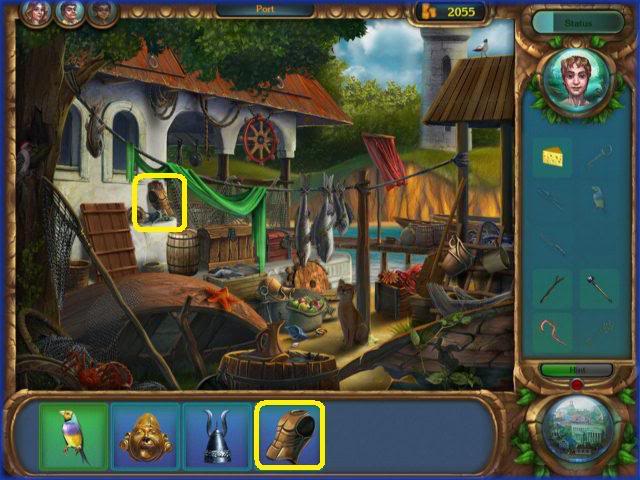
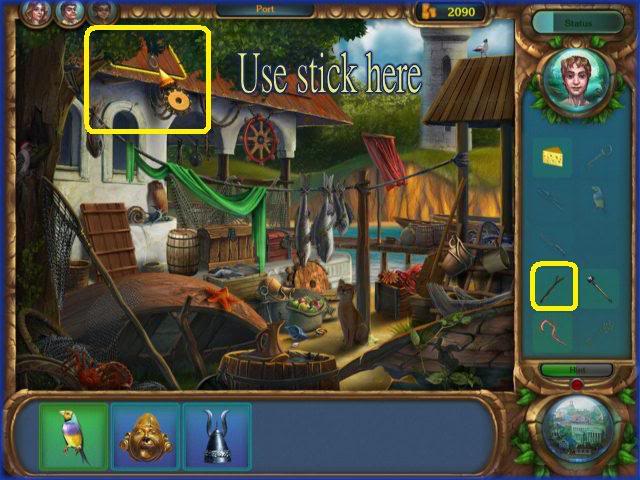
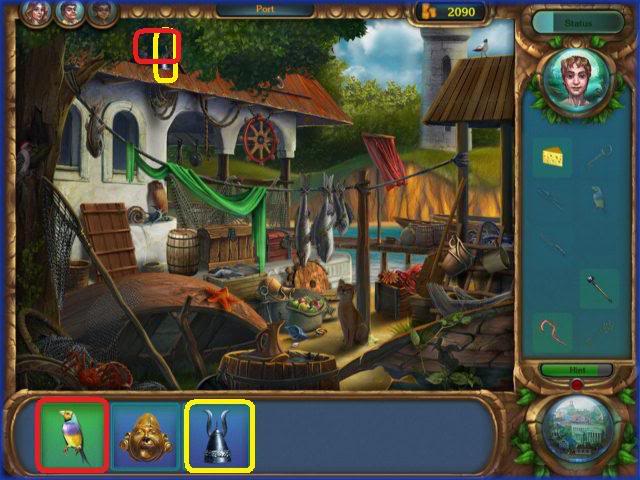
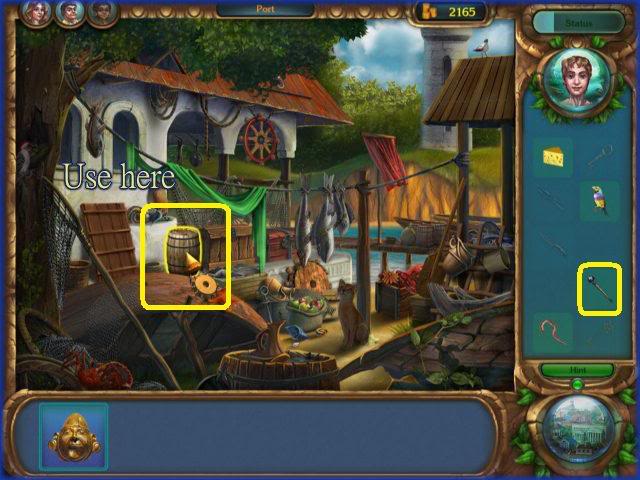
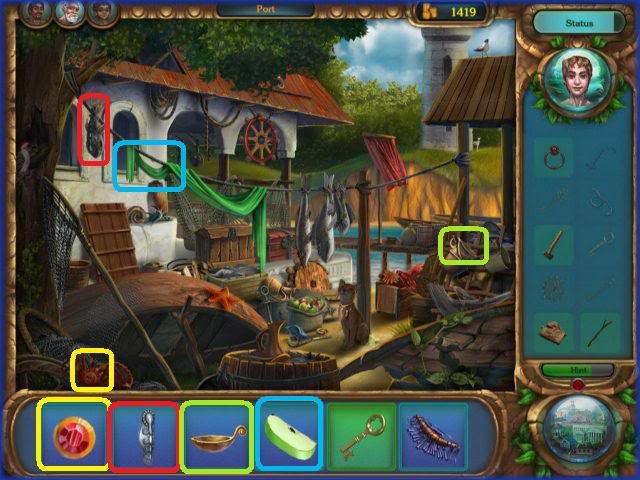
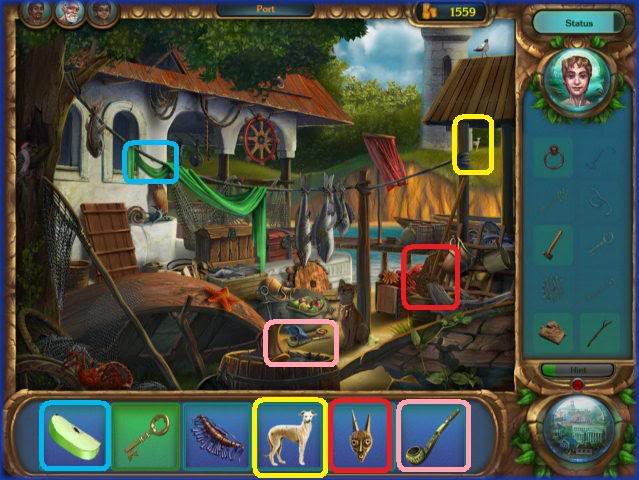
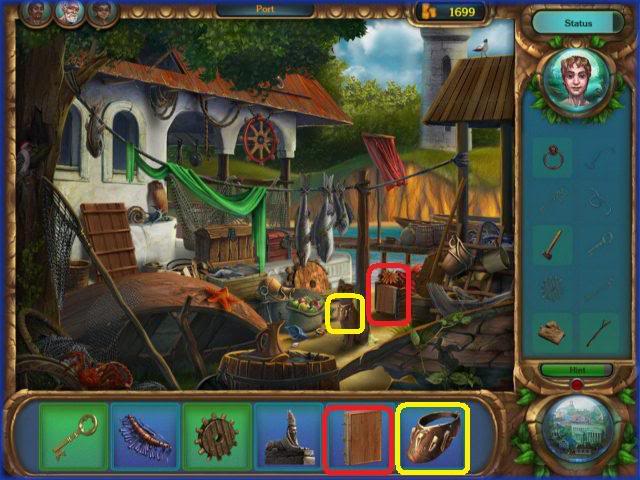
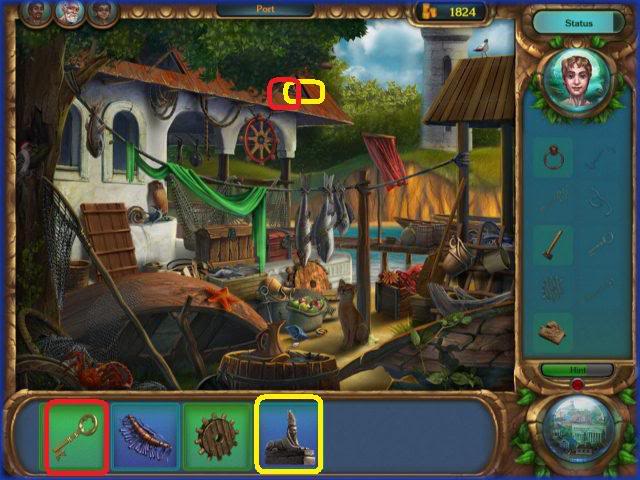
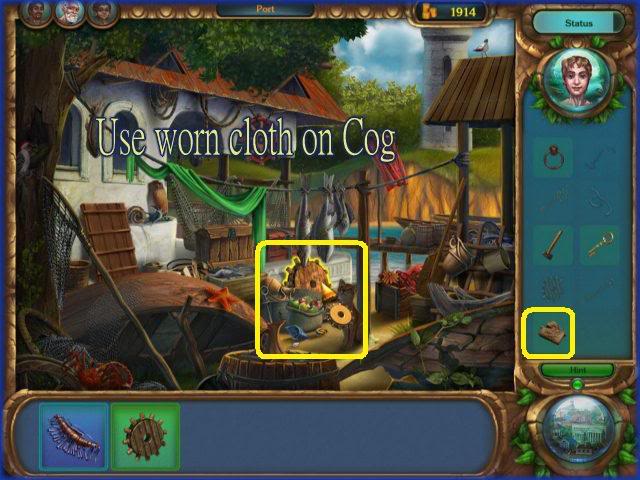
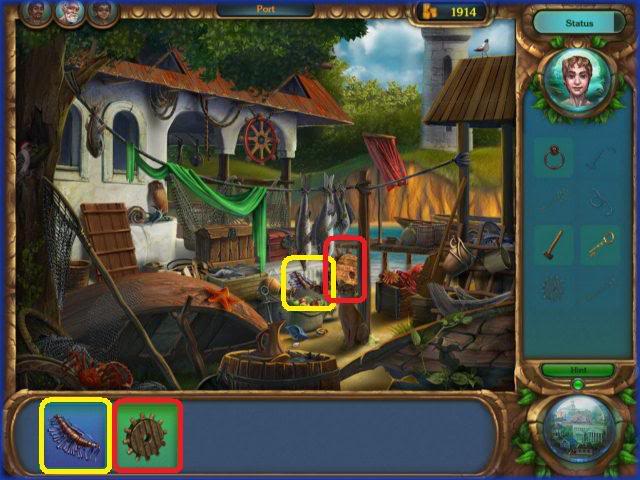
PORT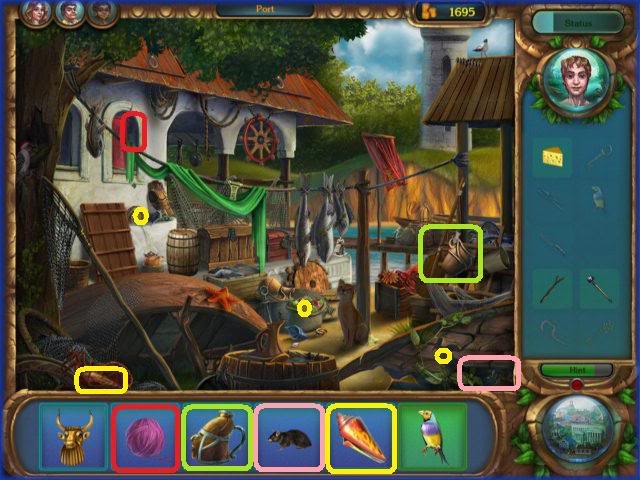

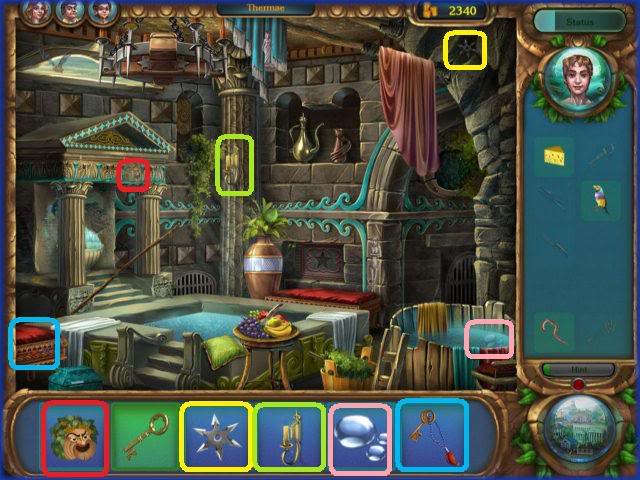
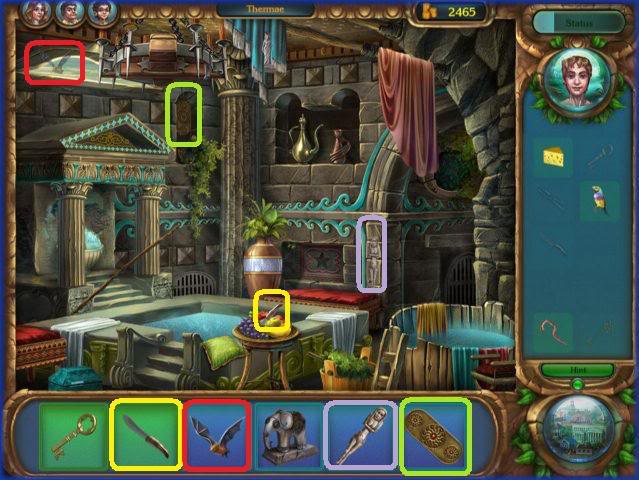
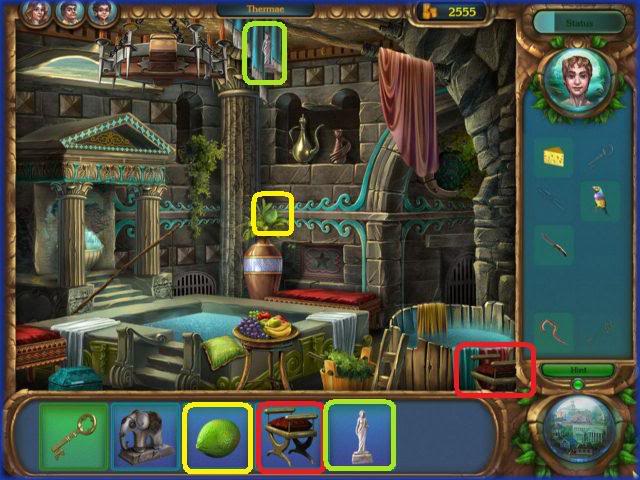
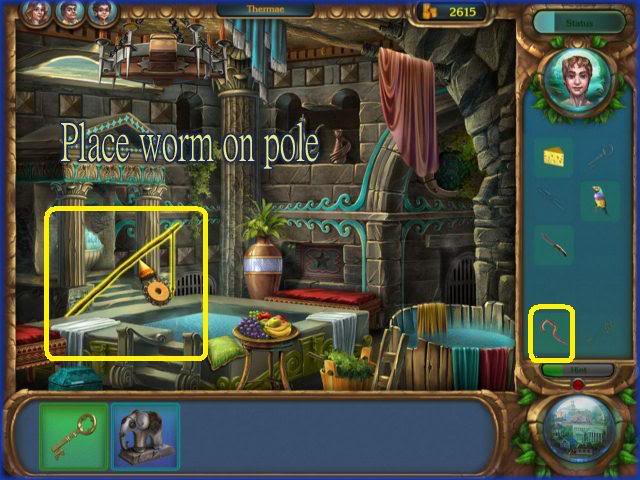
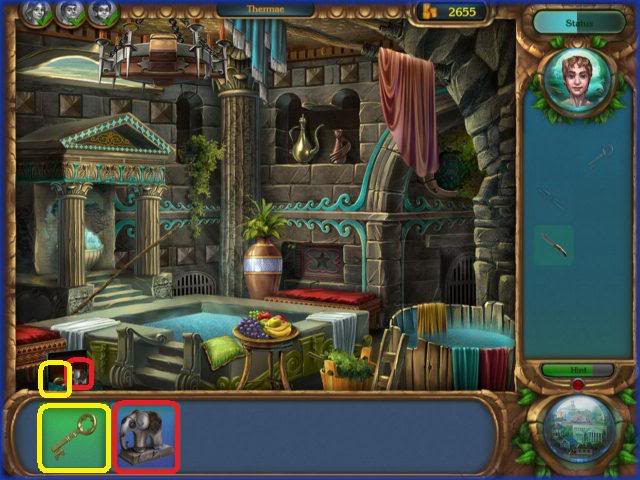
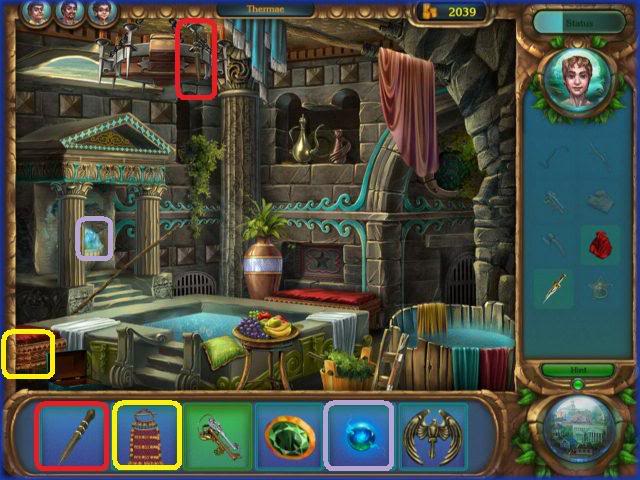
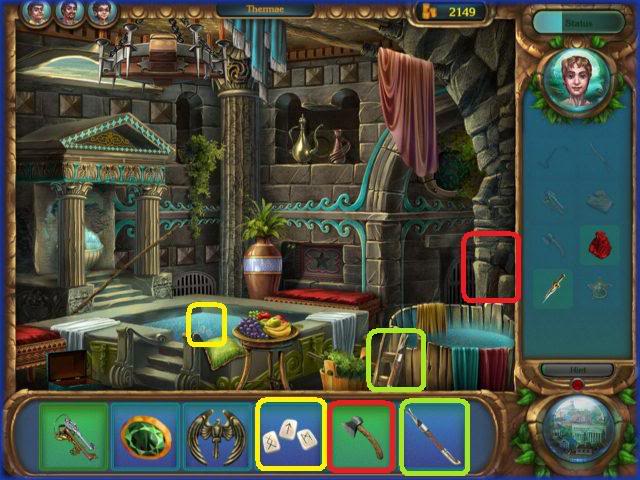
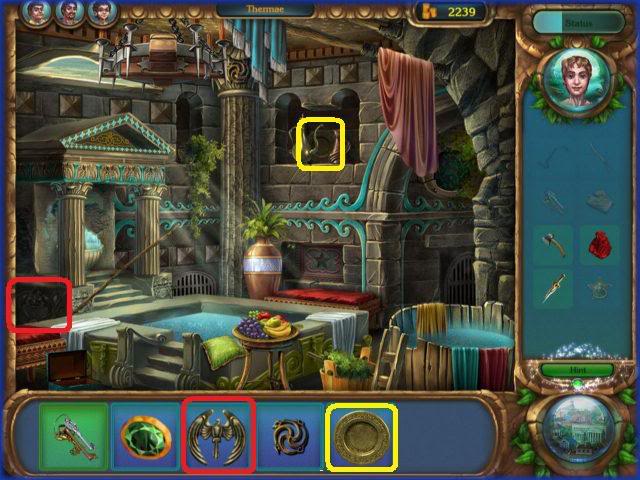
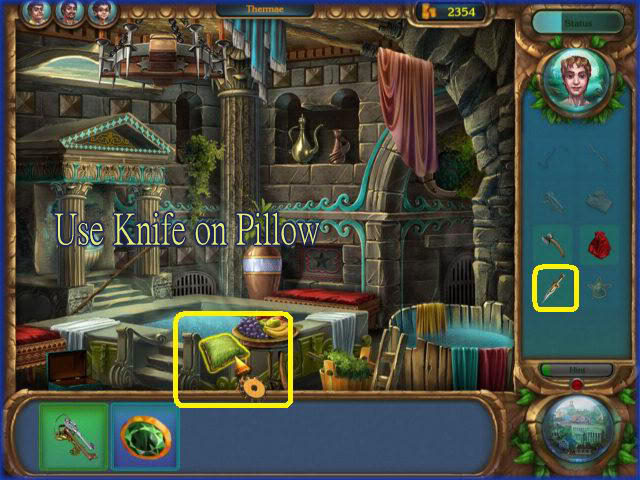
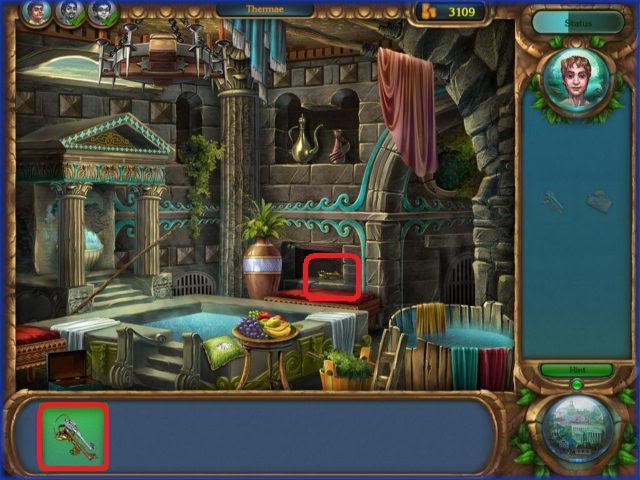
THERMAE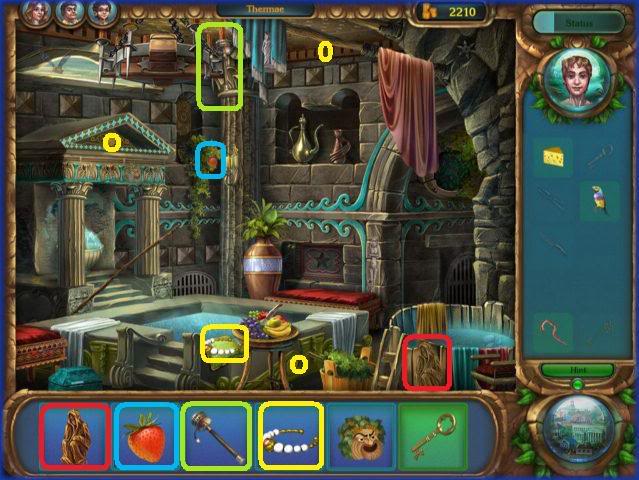
BACK TO HOUSE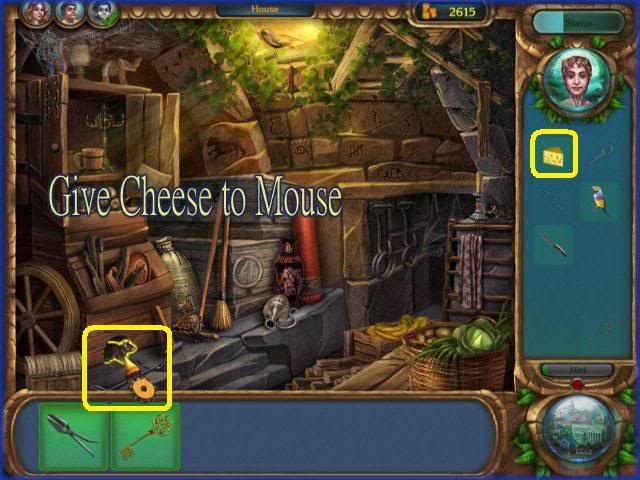
BACK TO THE LIBRARY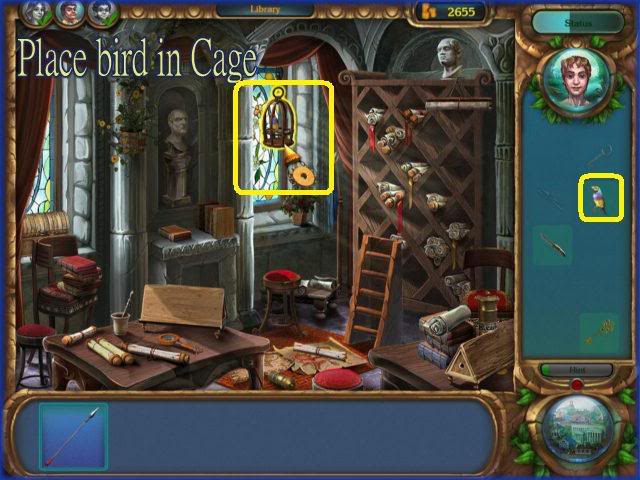
BACK TO THE THERMAE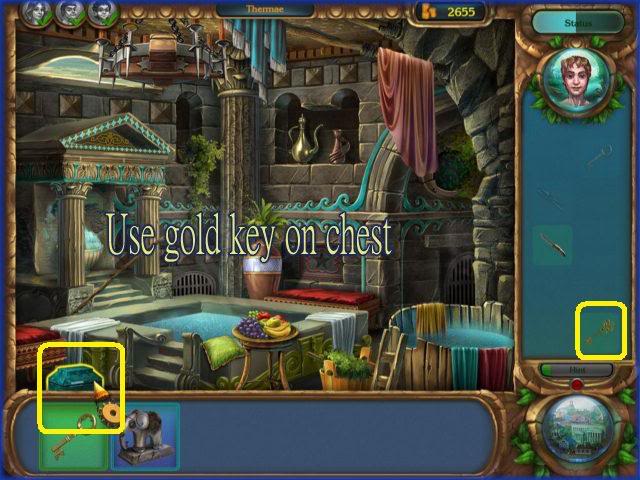
BACK TO THE MILL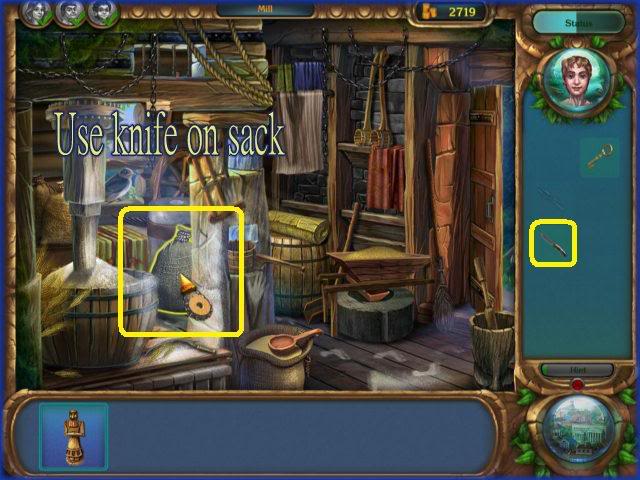
BACK TO THE HOUSE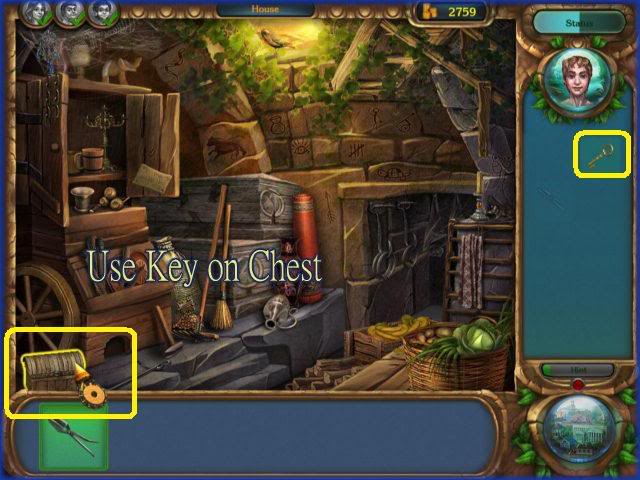
BACK TO THE LIBRARY

MARKETPLACE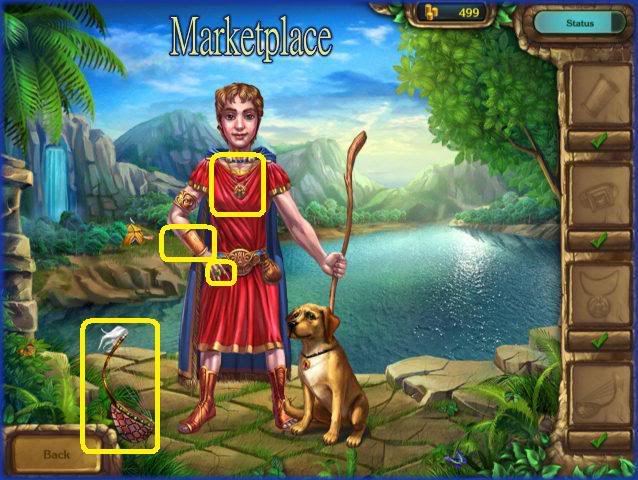
EPISODE 4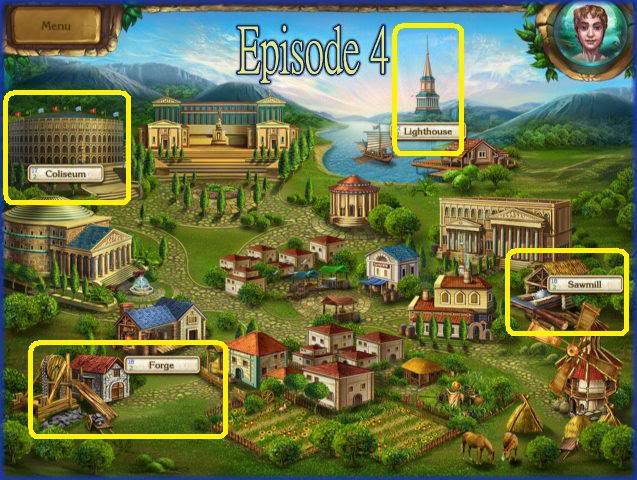
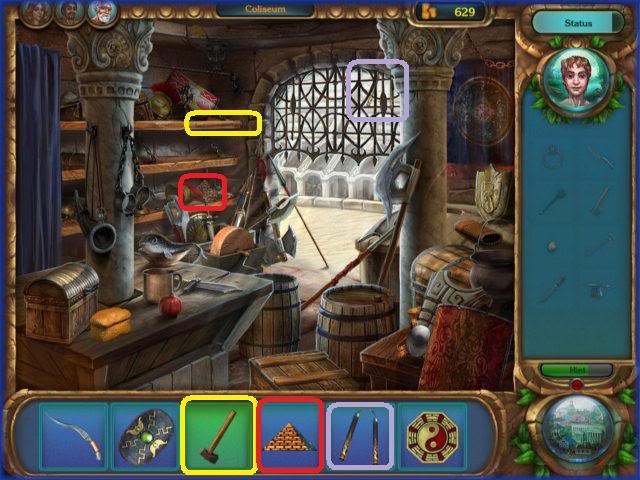
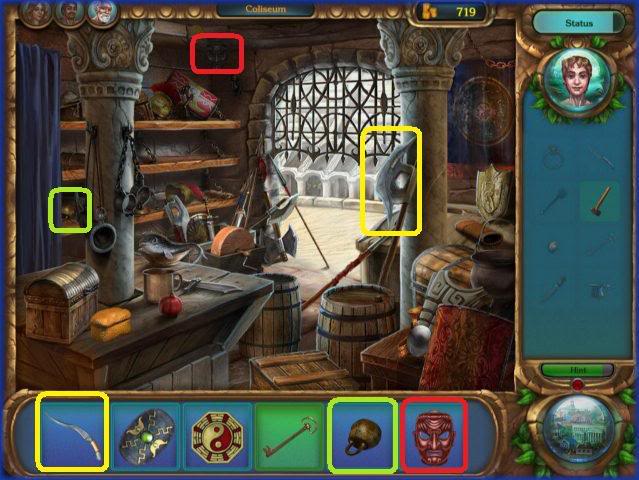
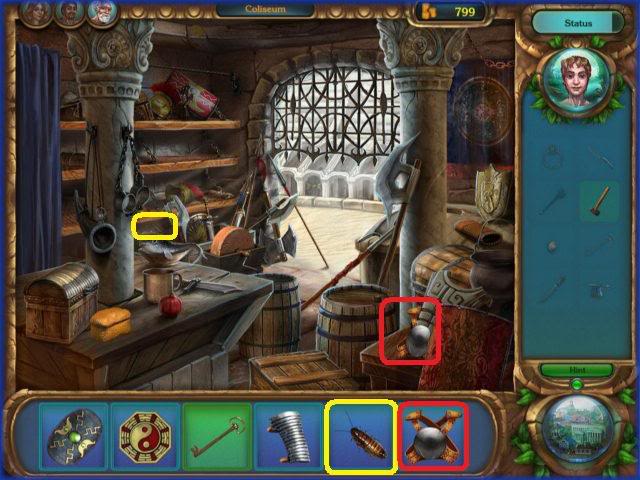
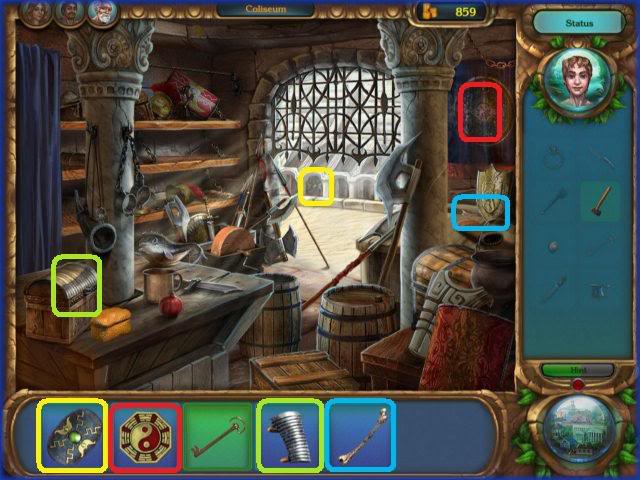
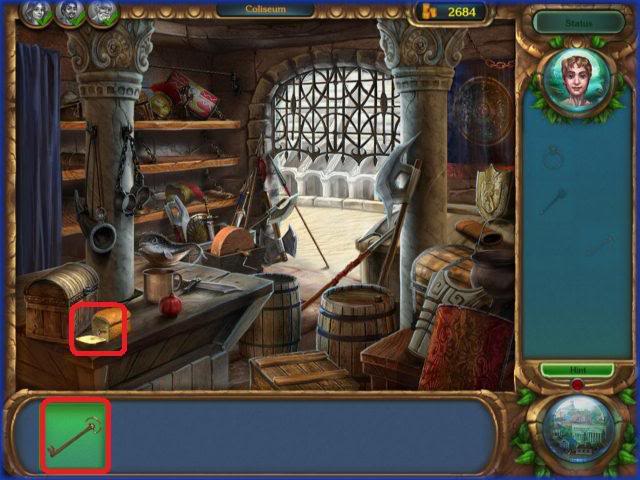
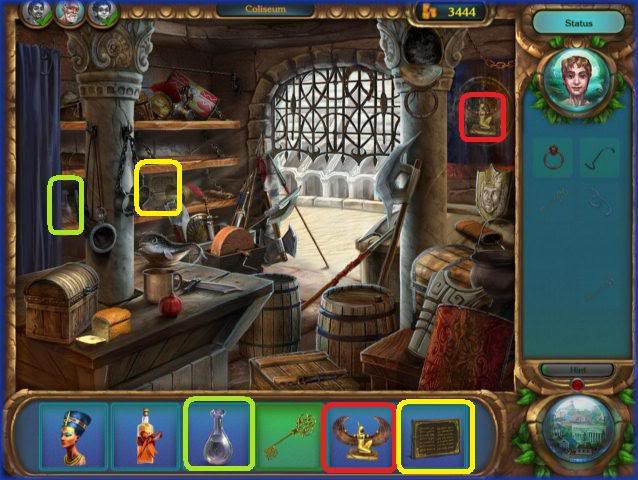
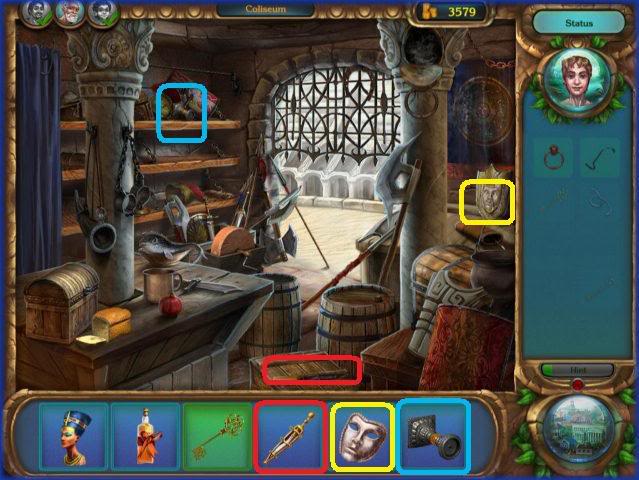
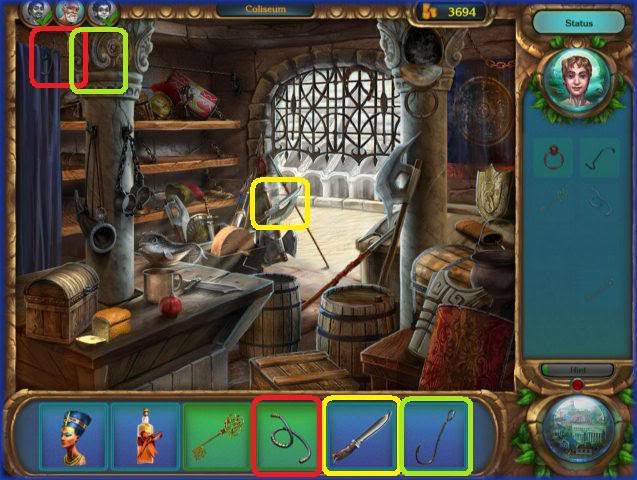
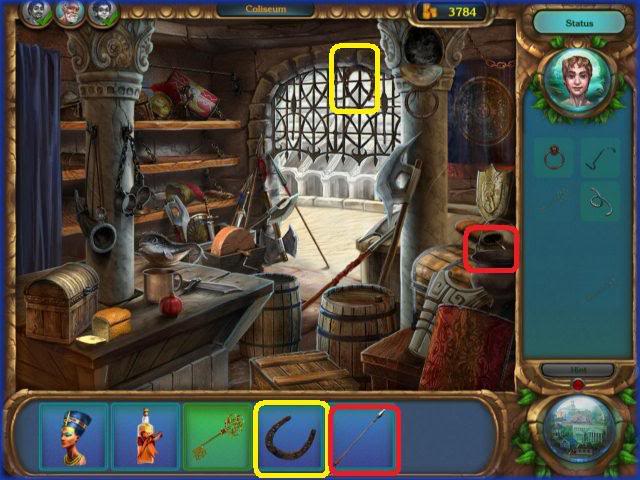
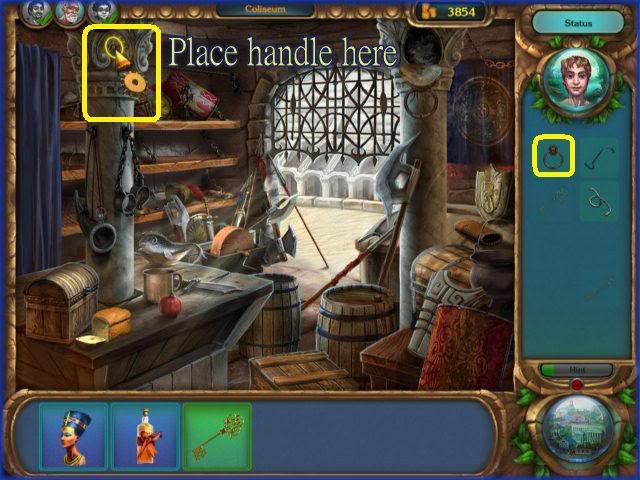
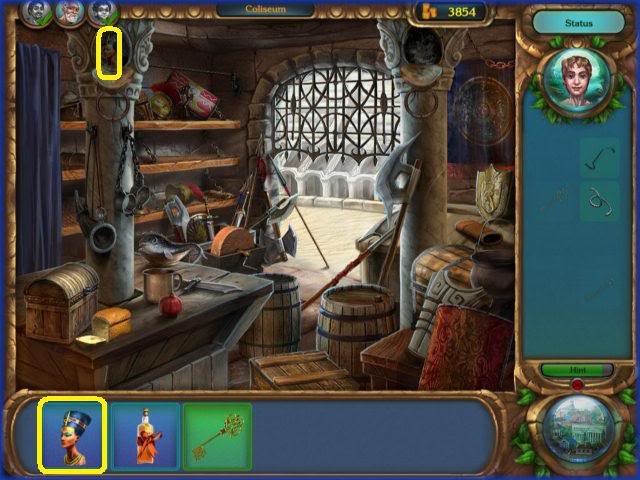
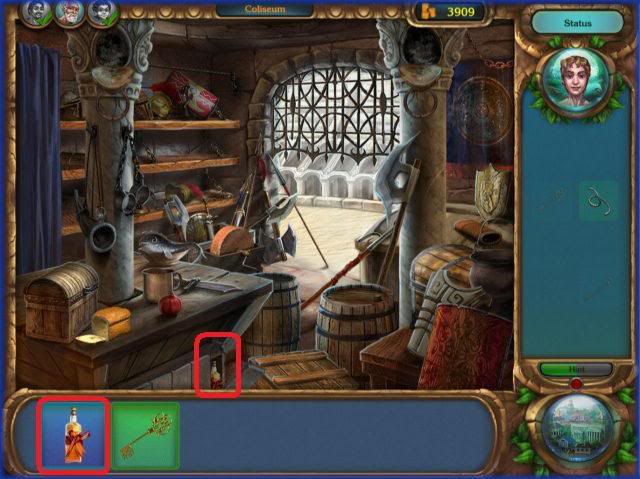
COLISEUM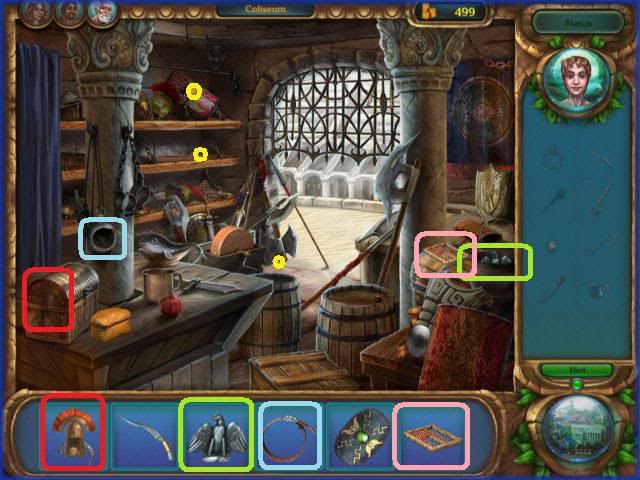
TO LIGHTHOUSE
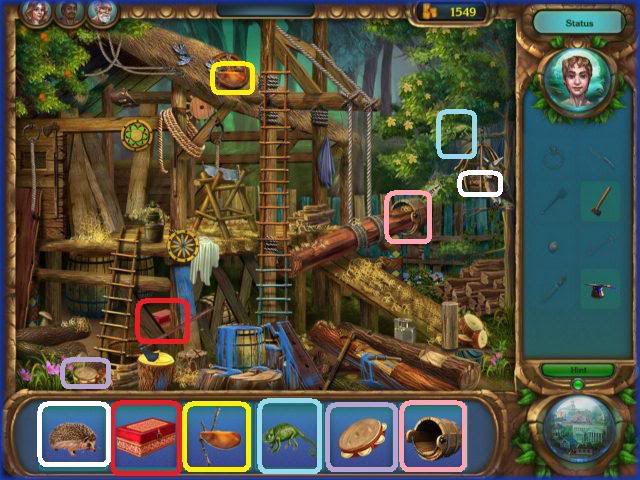
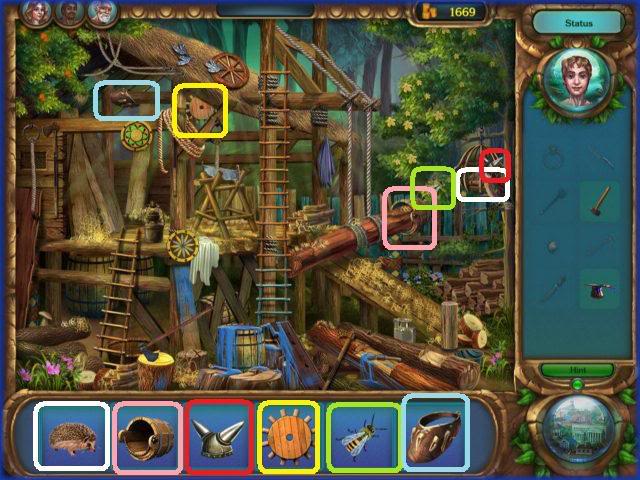
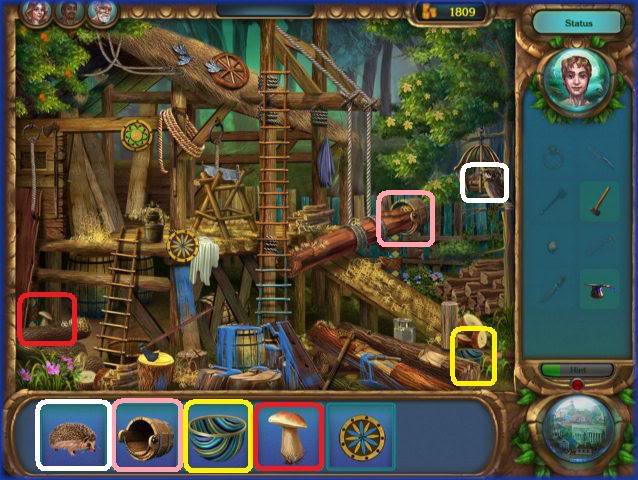
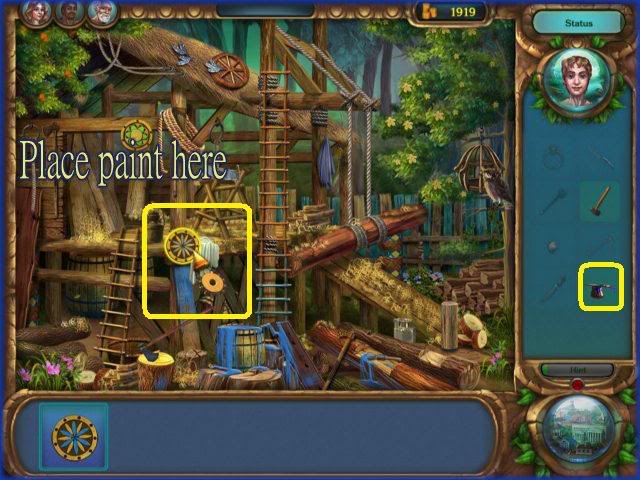
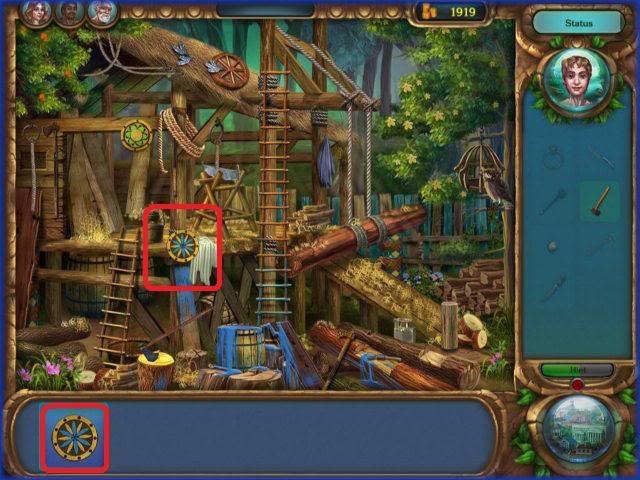
SAWMILL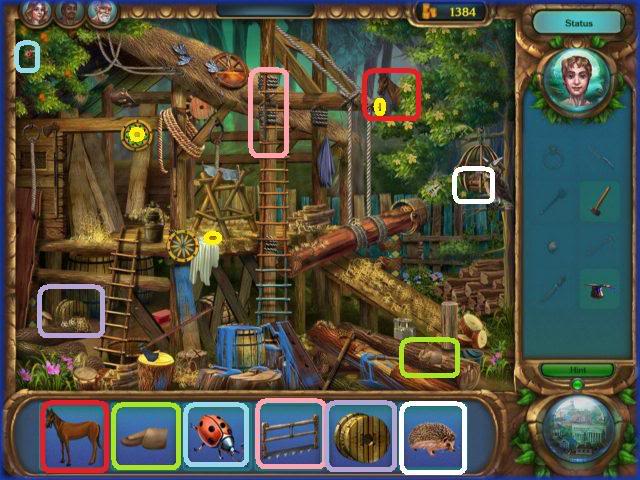
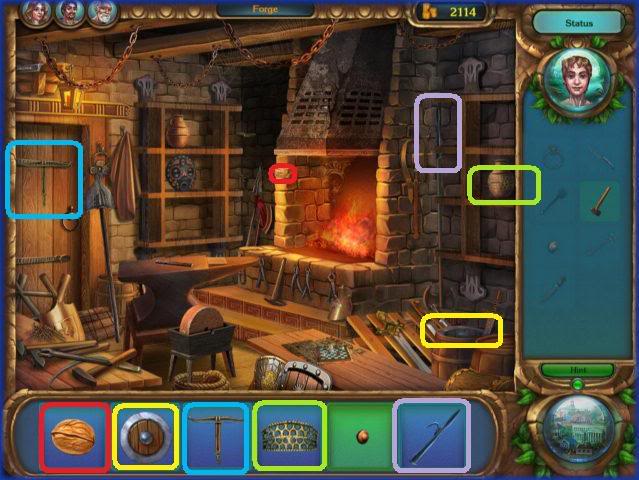
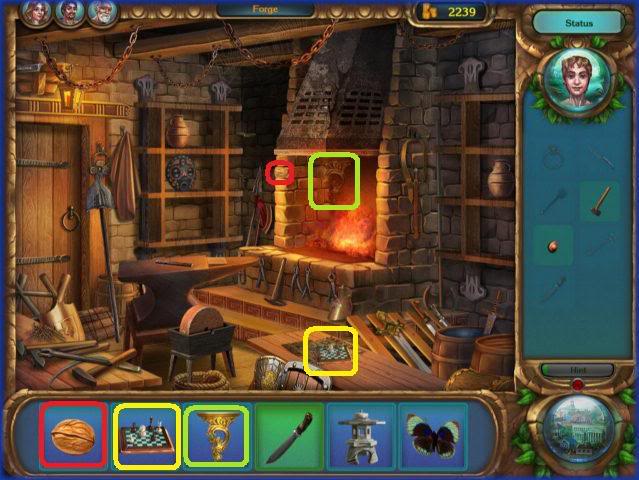
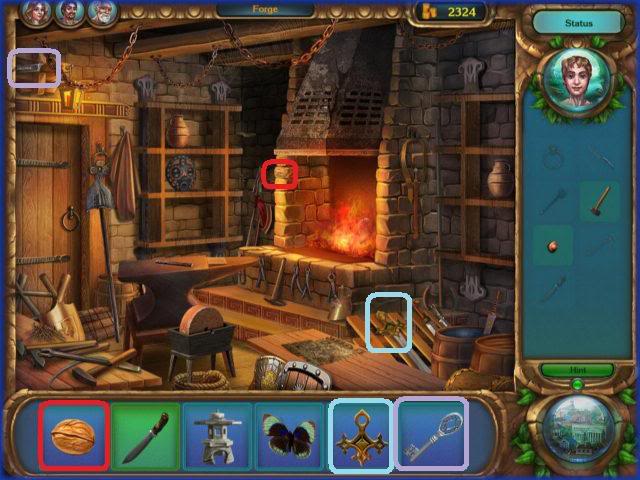
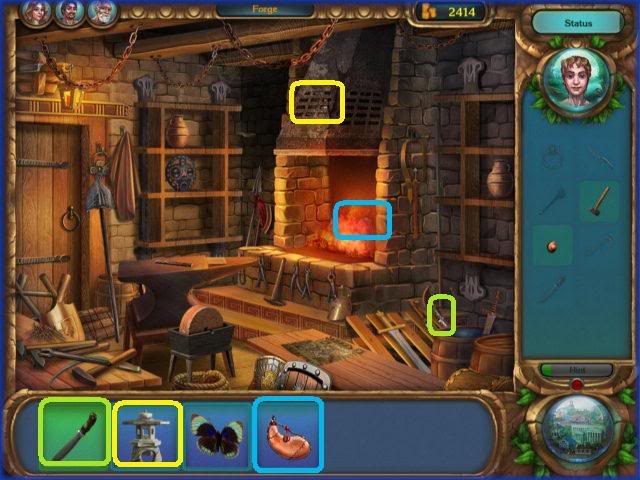
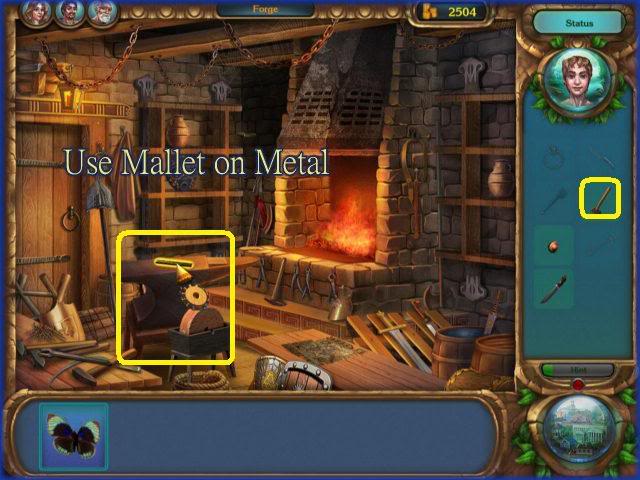
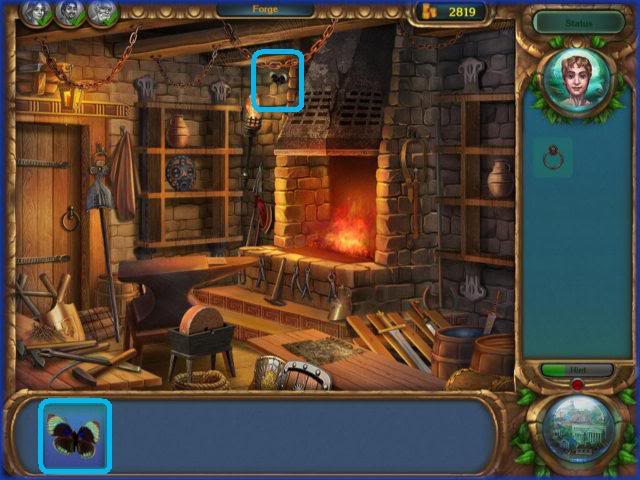
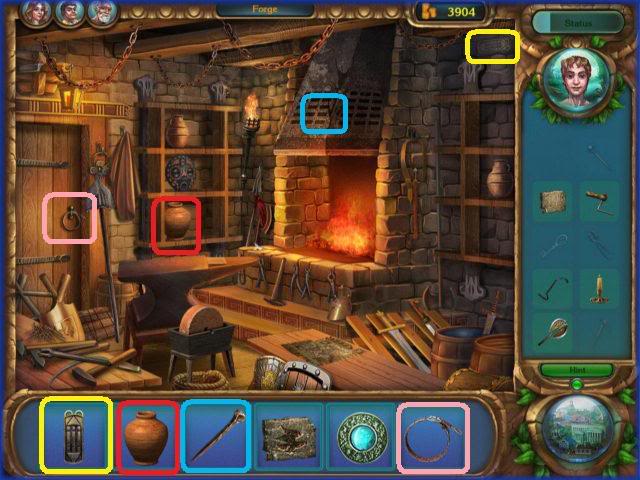
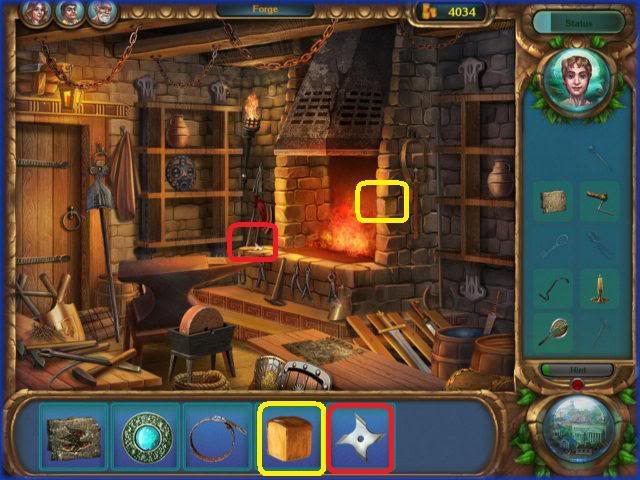
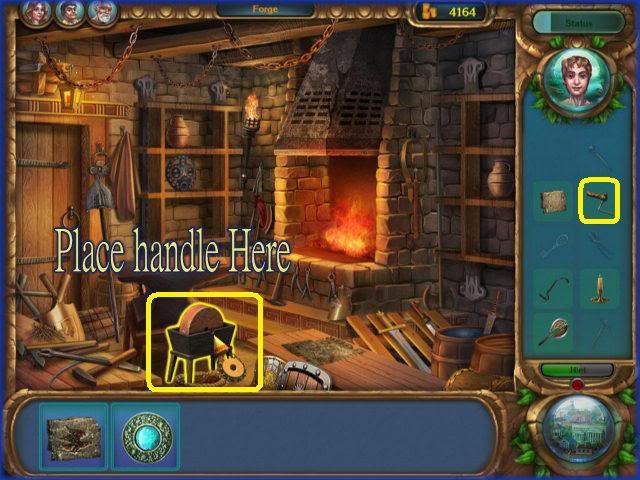
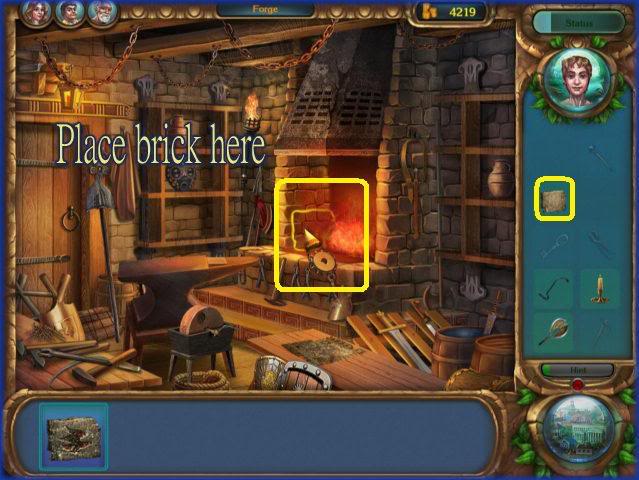
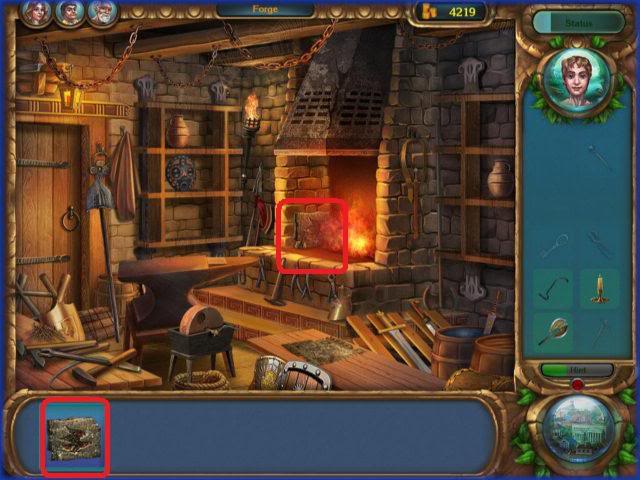
FORGE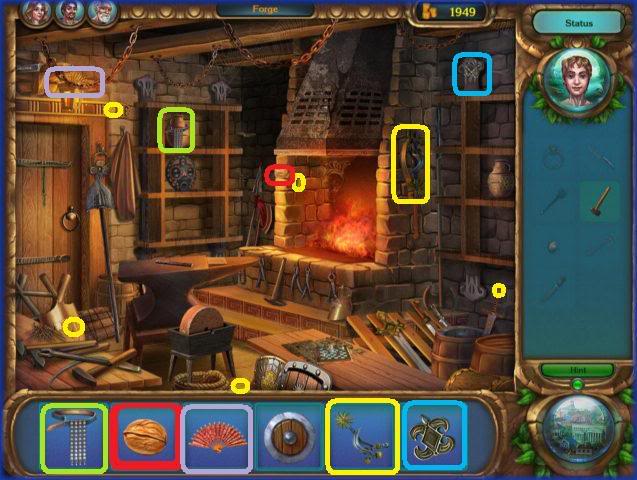
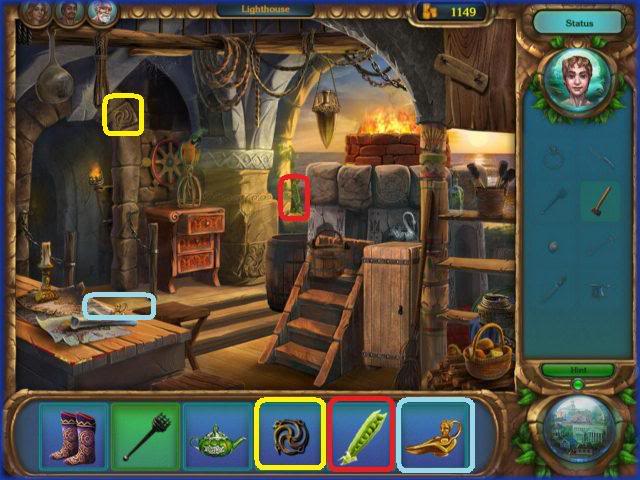
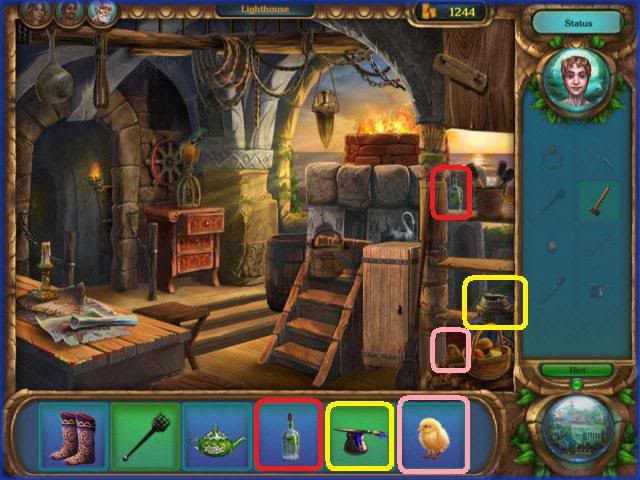
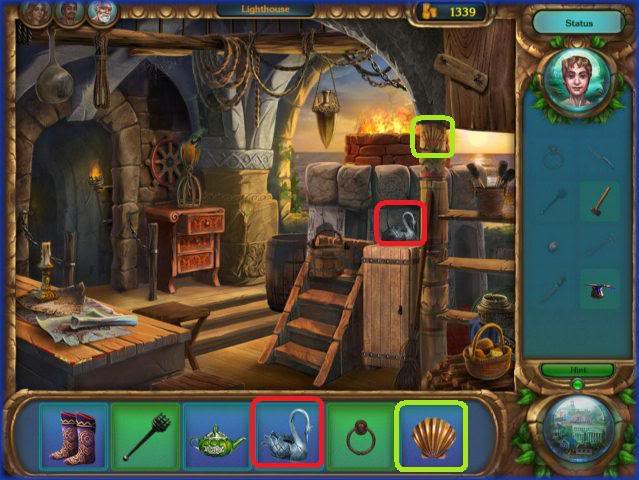
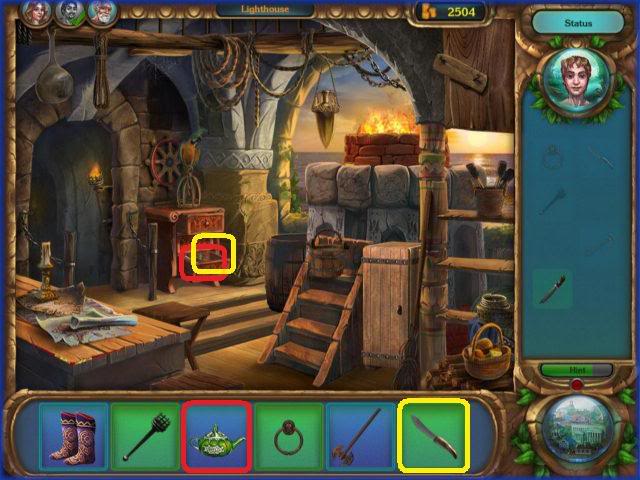
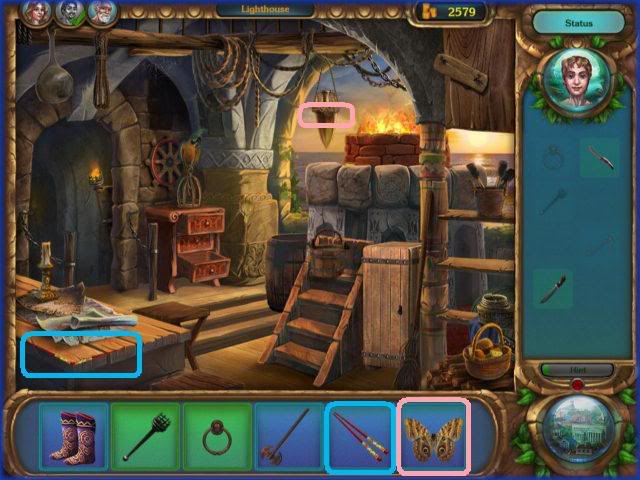
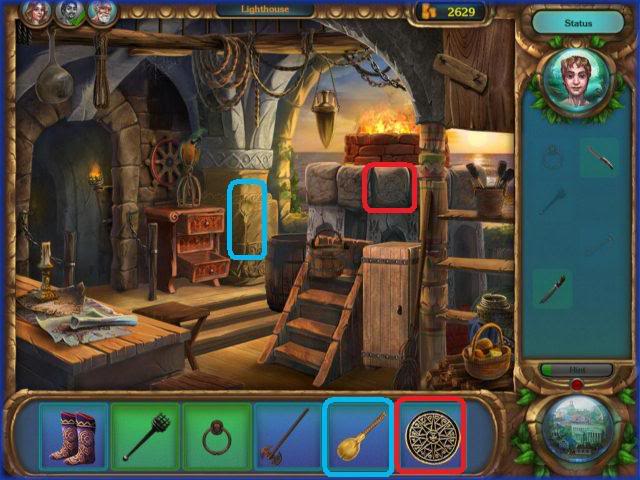
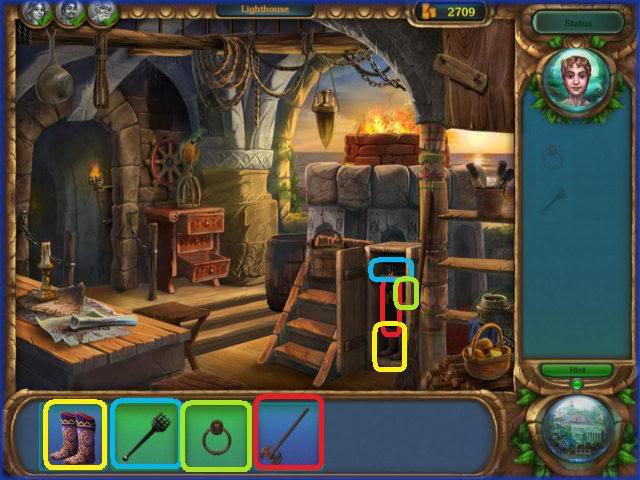
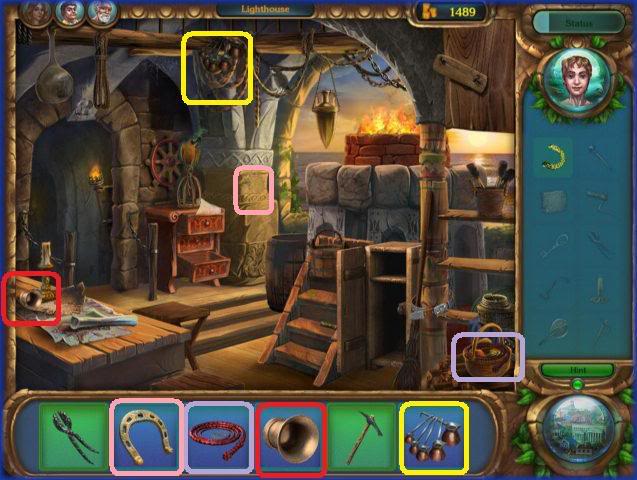
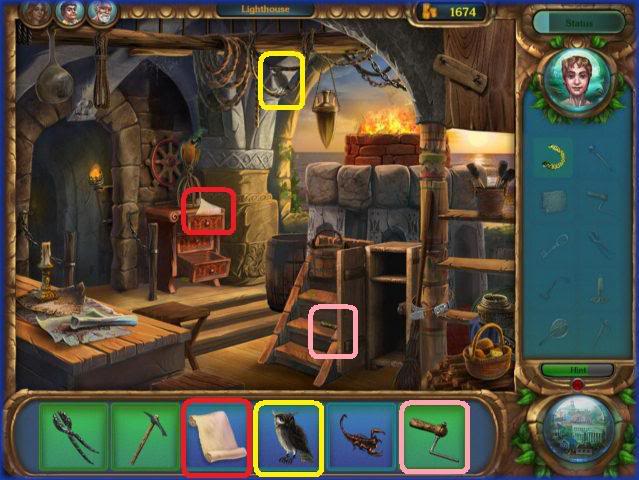
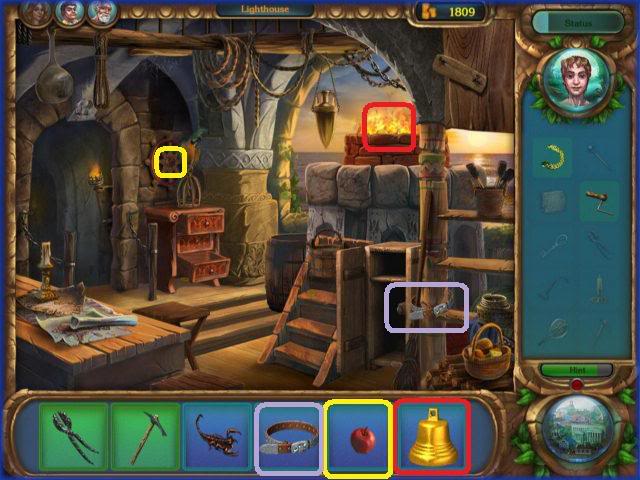
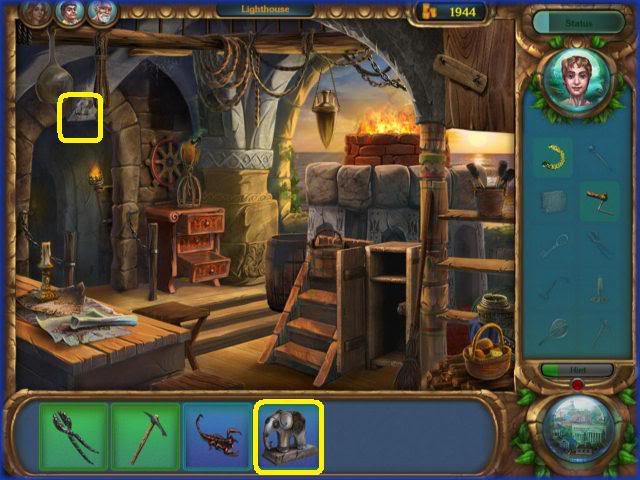
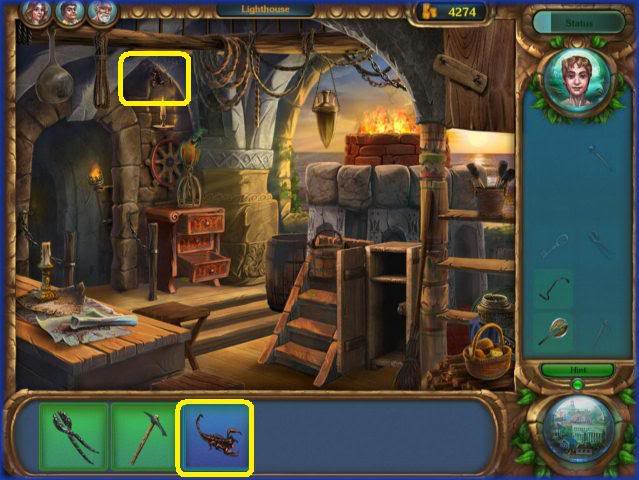
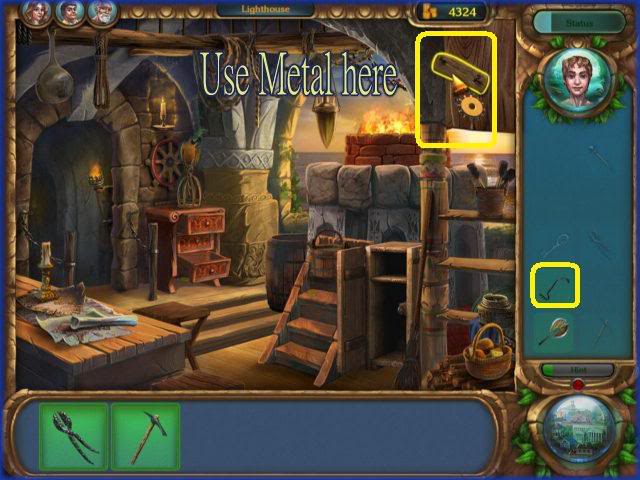
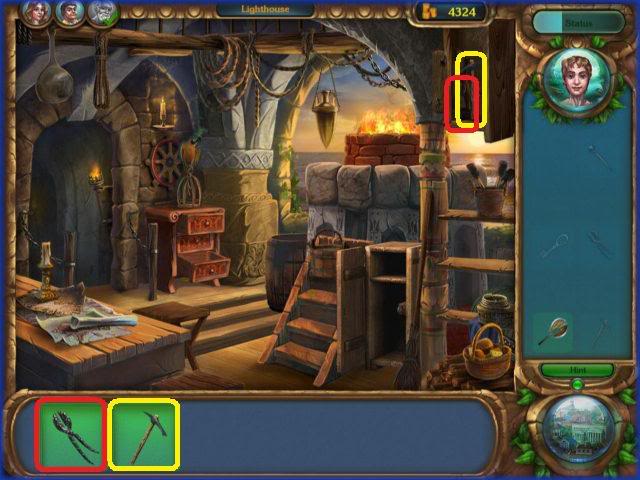
LIGHTHOUSE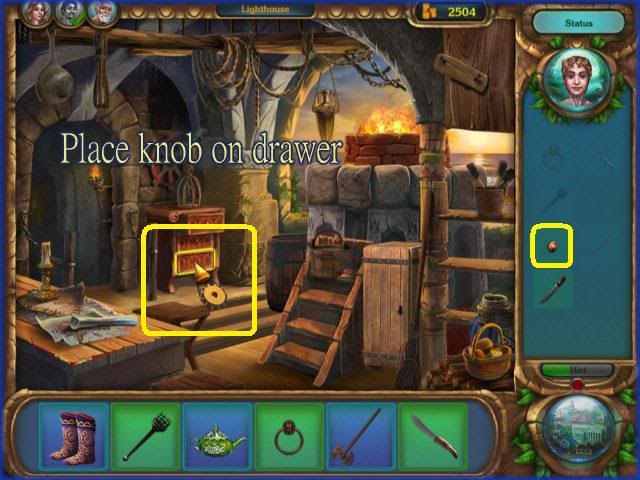
SAWMILL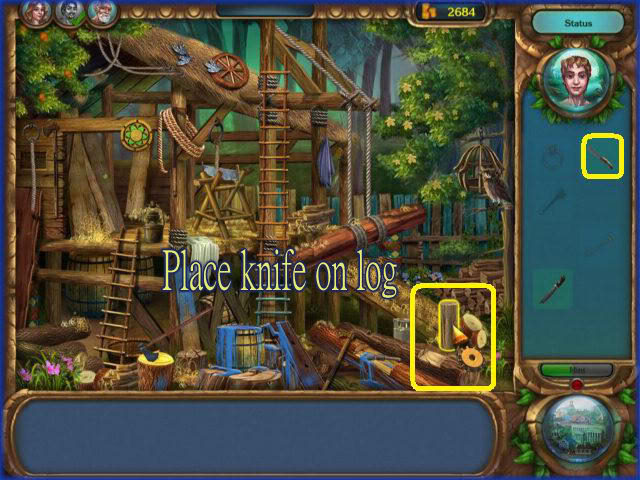
COLISEUM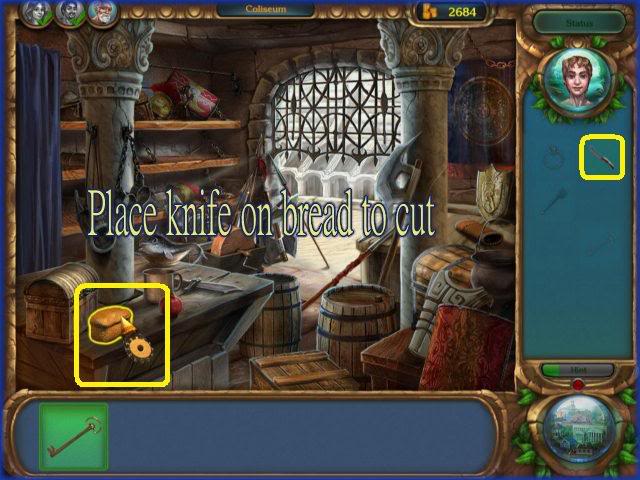
LIGHTHOUSE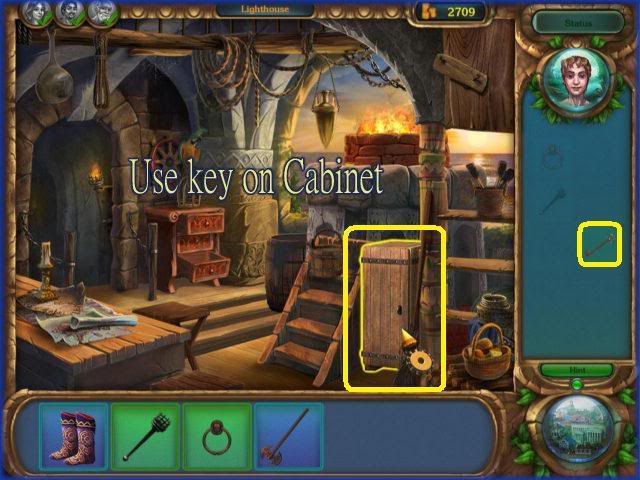
FORGE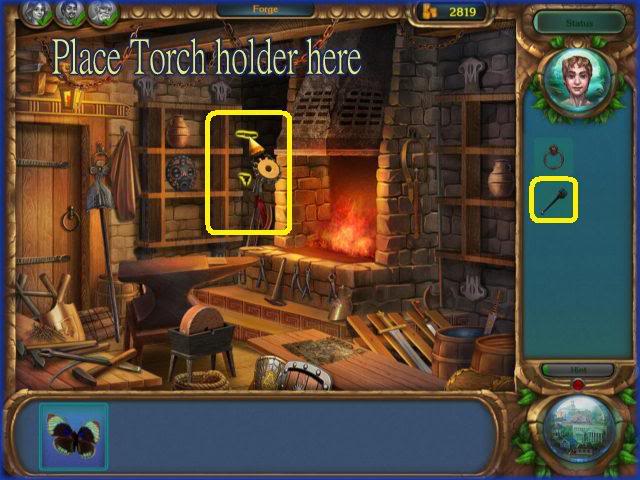
BACK TO COLISEUM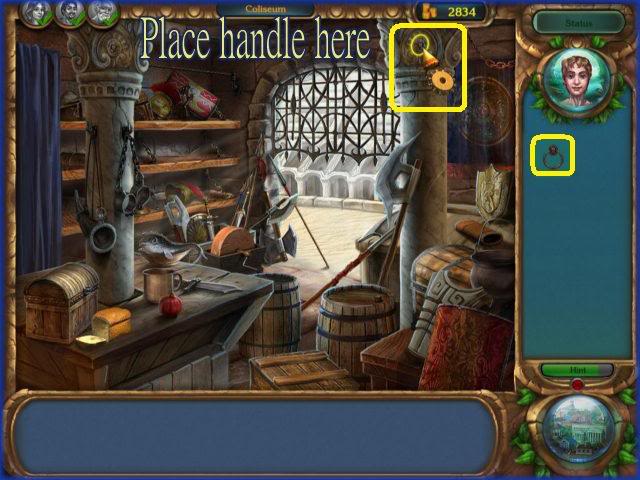
MARKETPLACE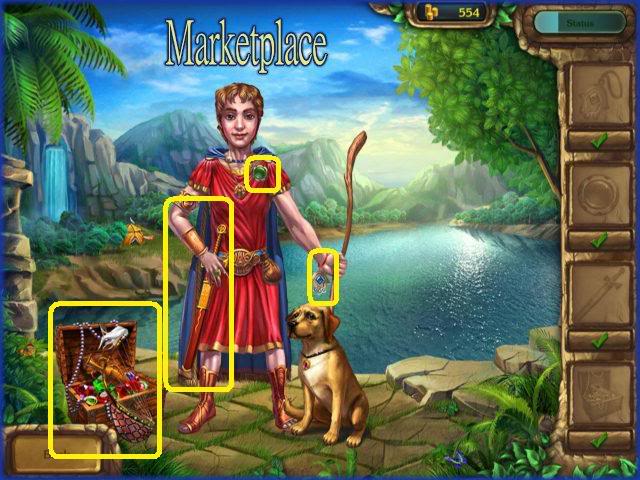
EPISODE 5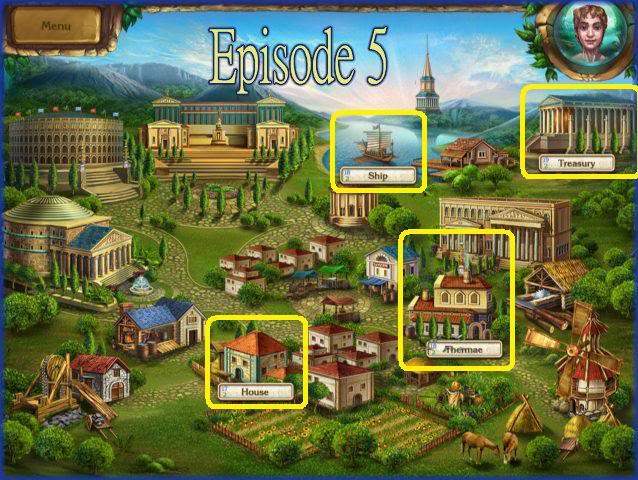
HOUSE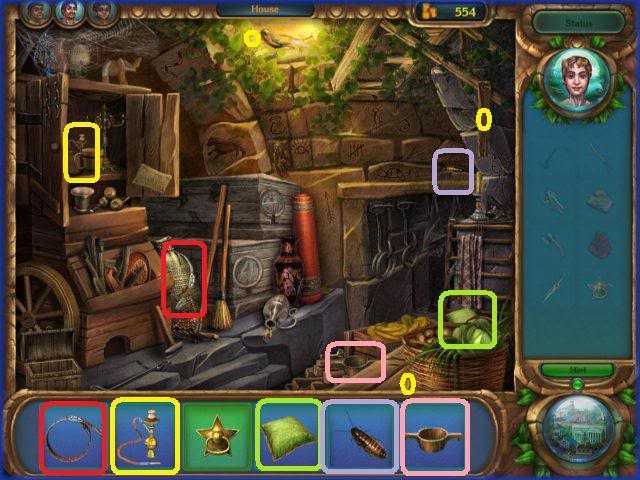
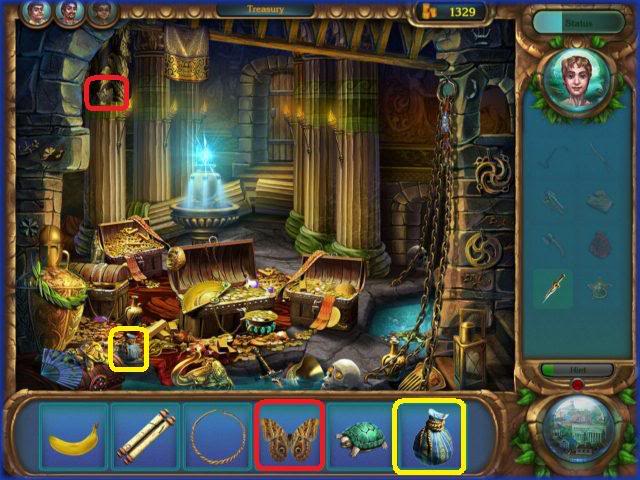
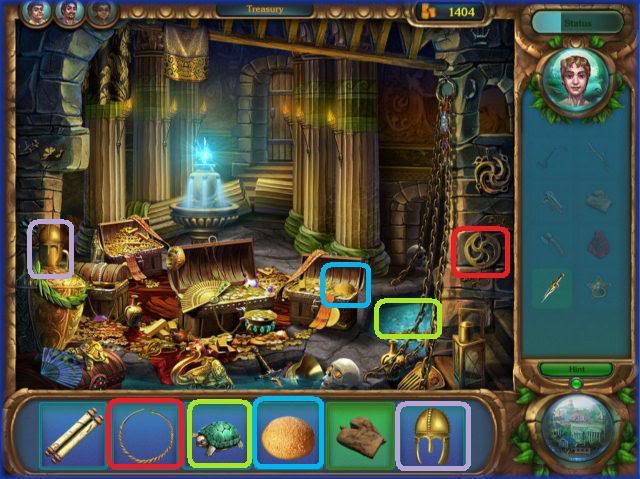
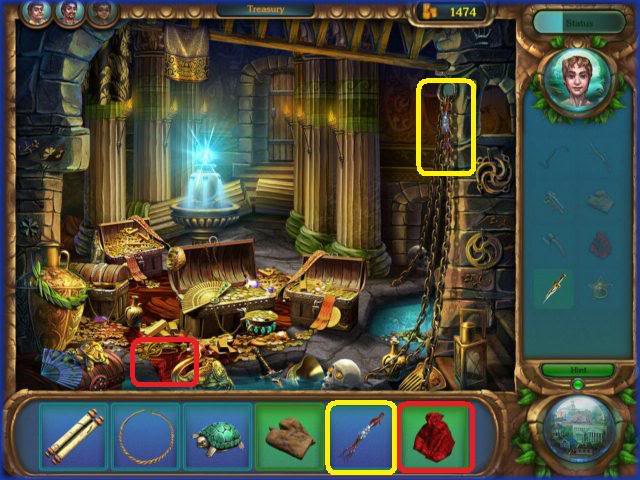
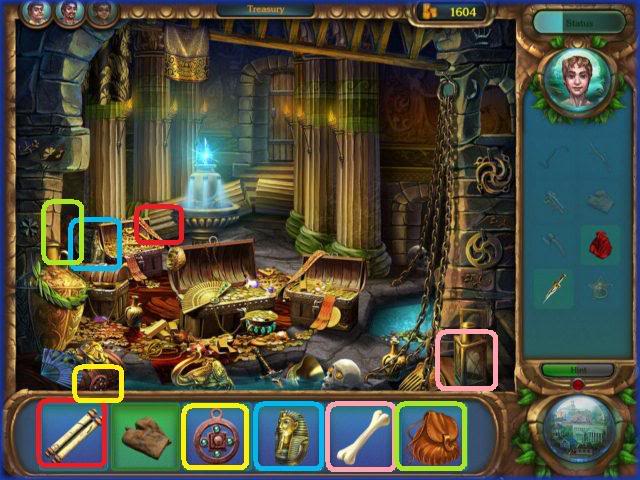
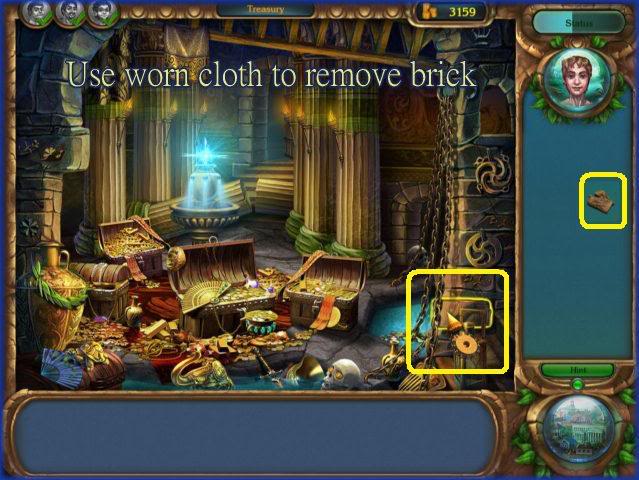
TREASURY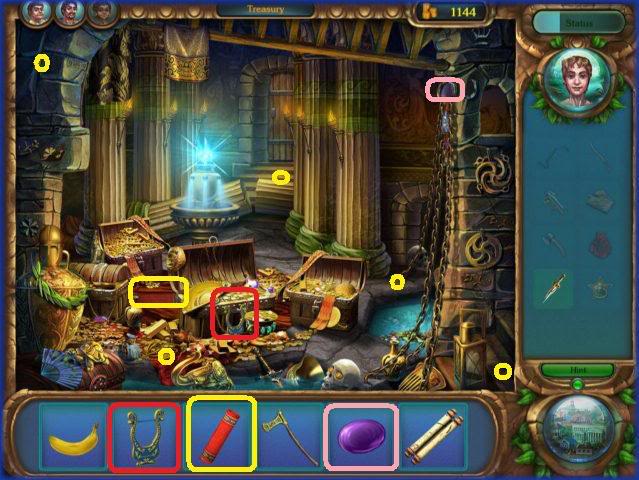
TO THERMAE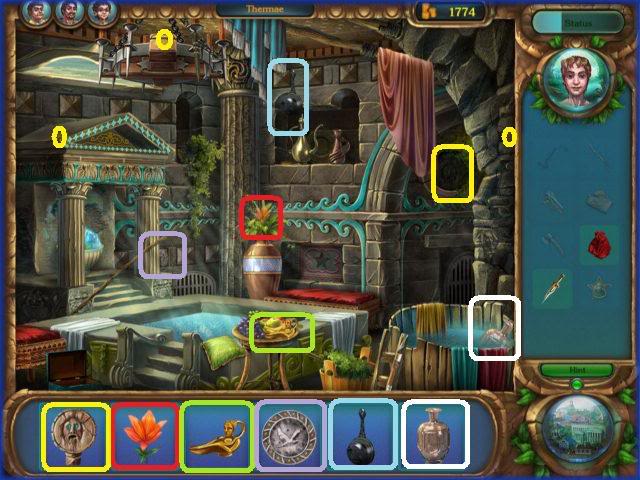

TO SHIP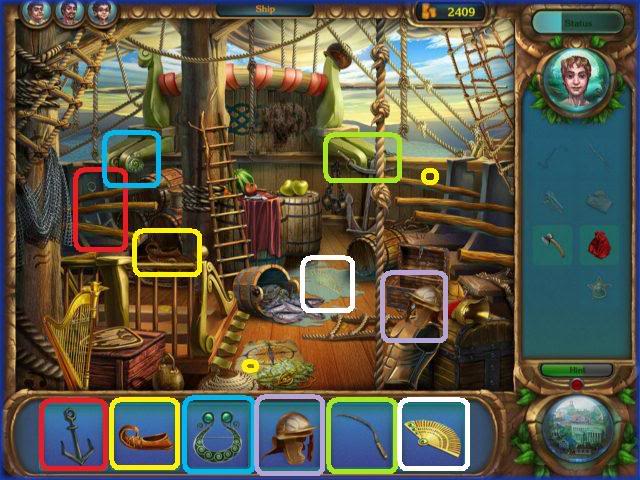

TO HOUSE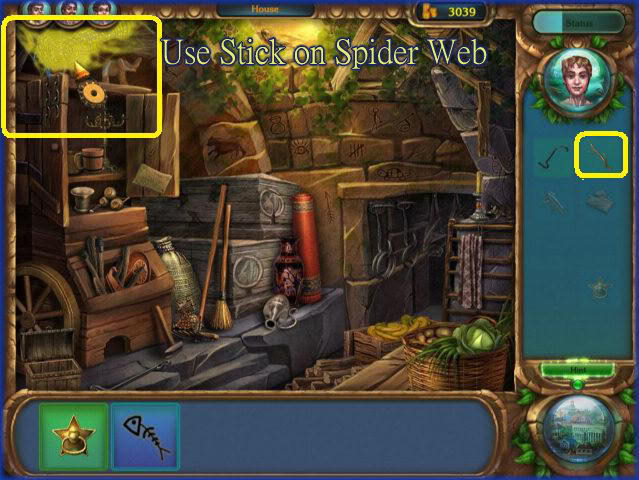
TO THERMAE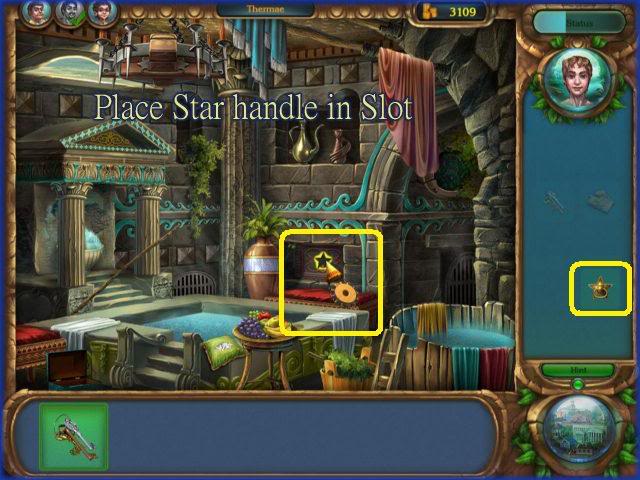
TO TREASURY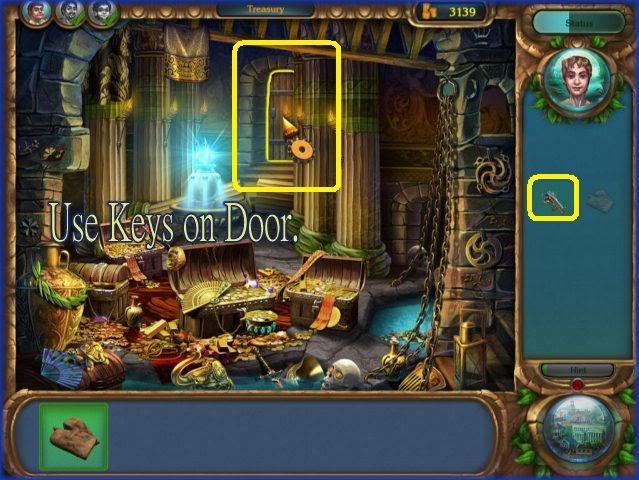

MARKETPLACE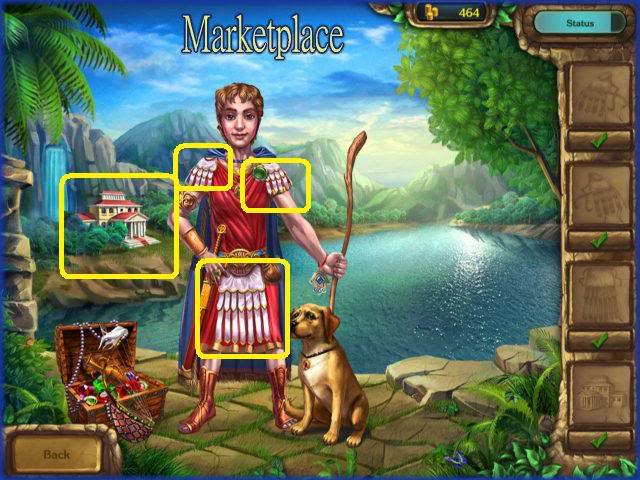
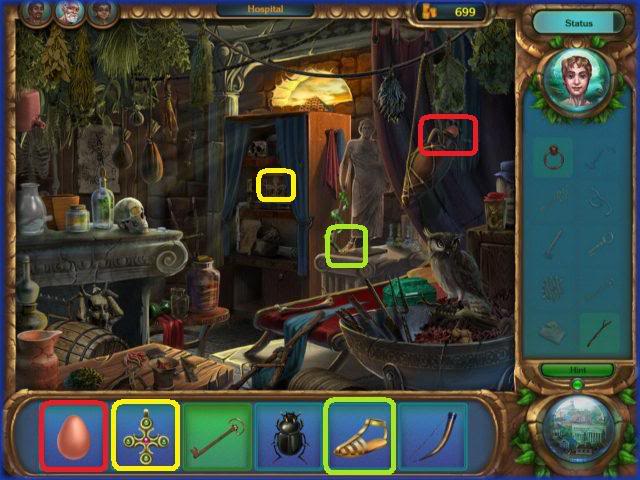
EPISODE 6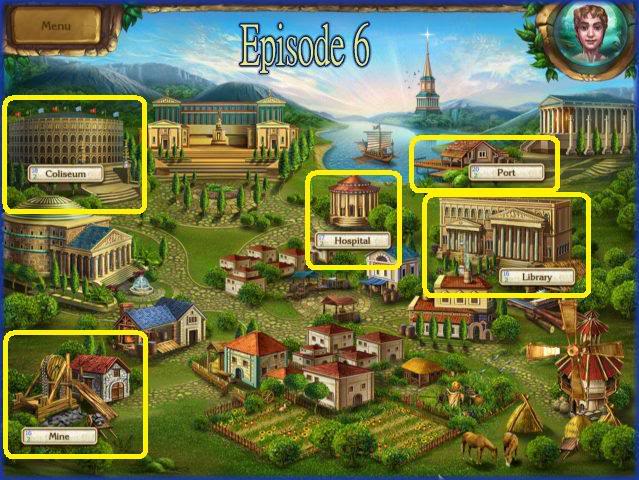
HOSPITAL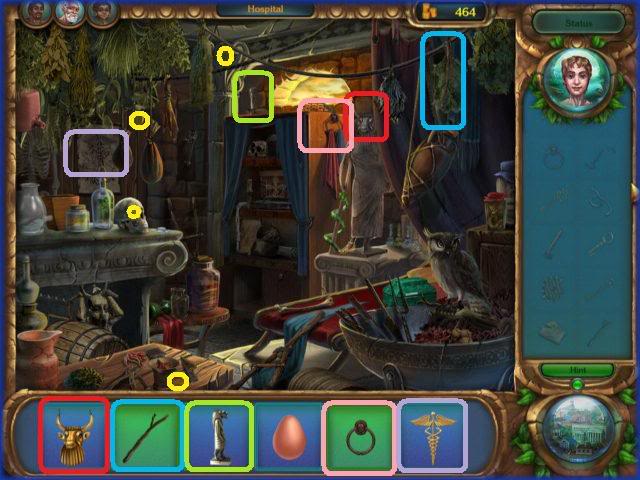

TO PORT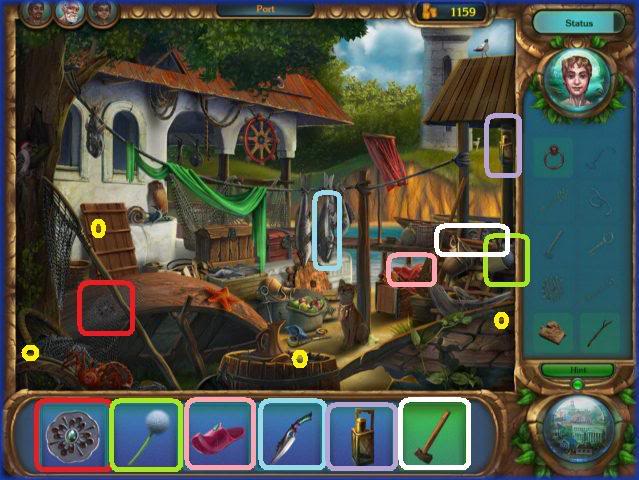

TO LIBRARY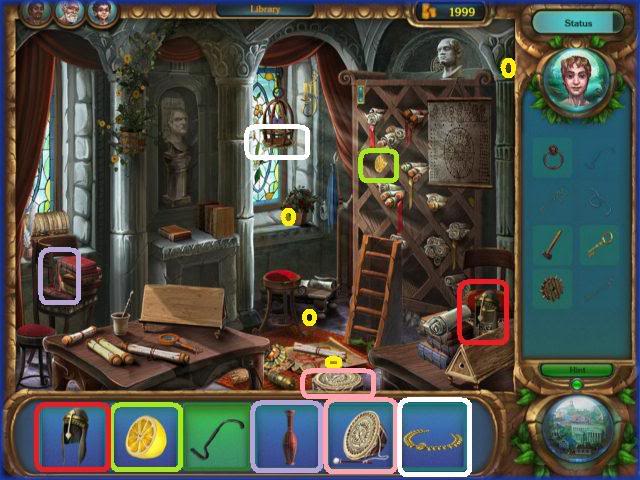
TO MINE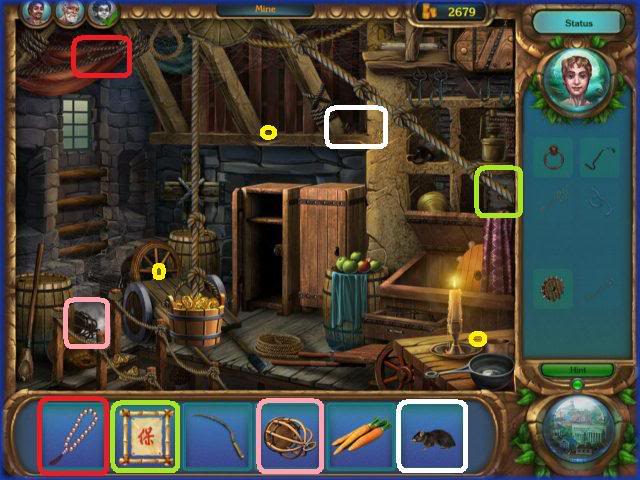
TO COLISEUM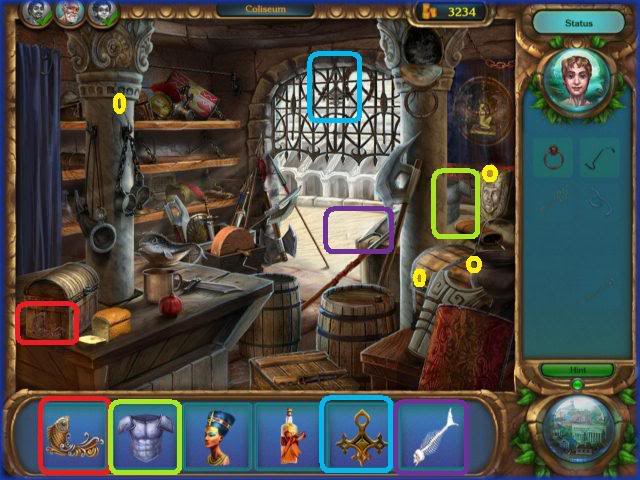

TO HOSPITAL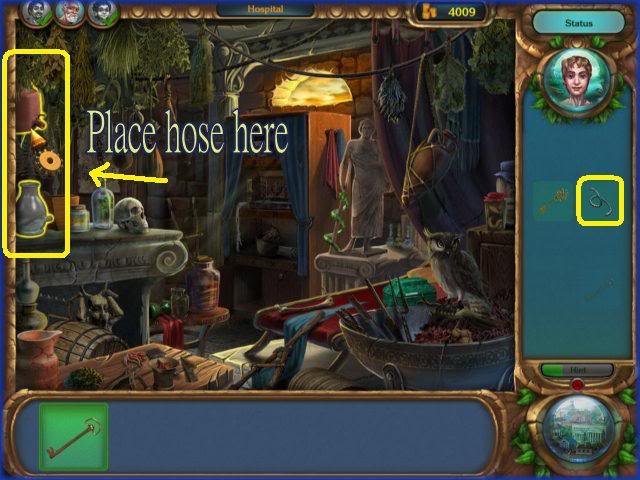
TO MINE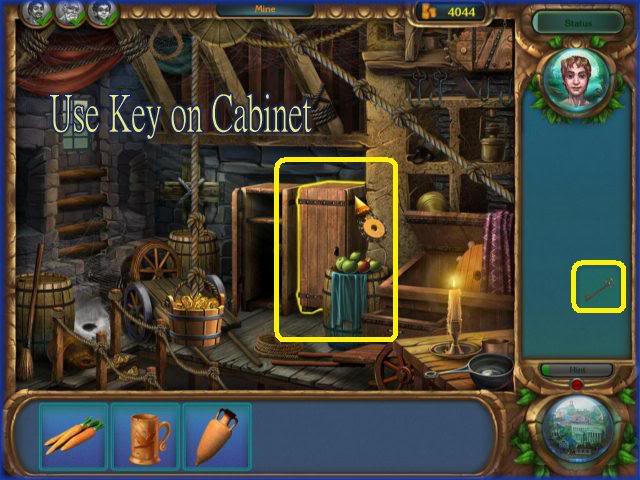
MARKETPLACE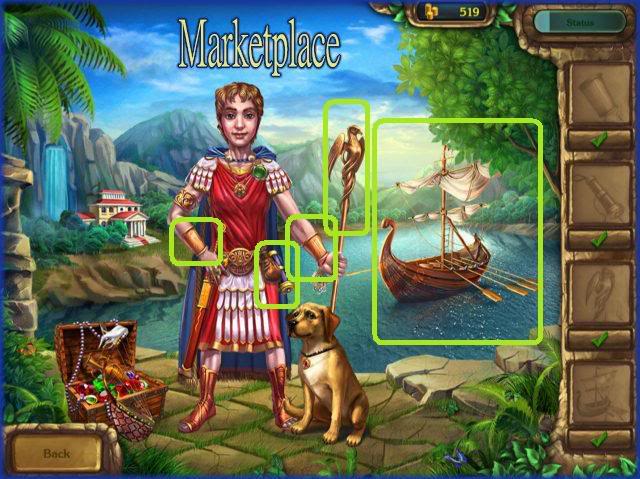
EPISODE 7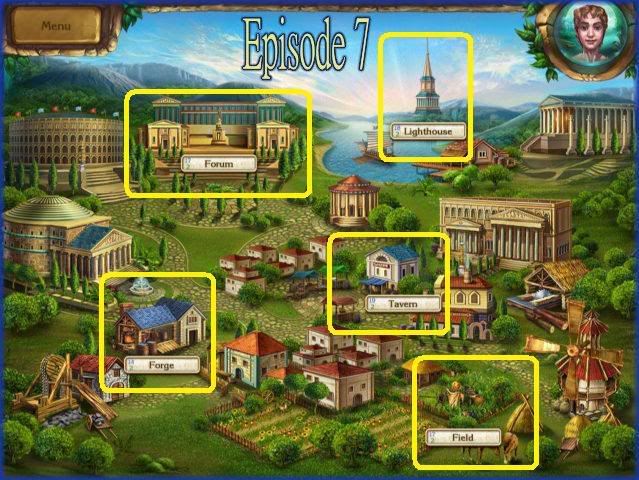
FORUM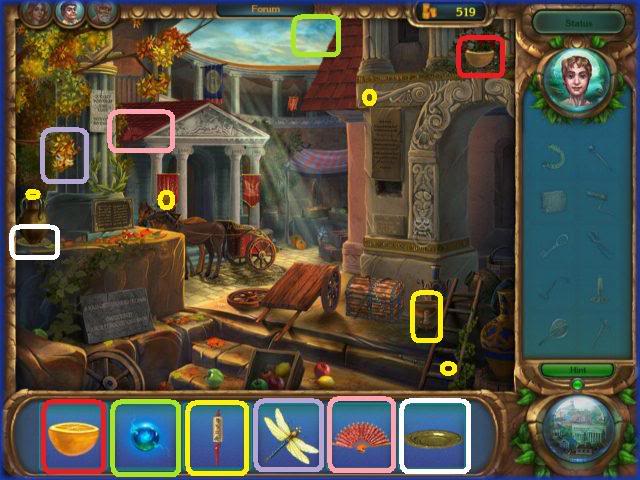
TO LIGHTHOUSE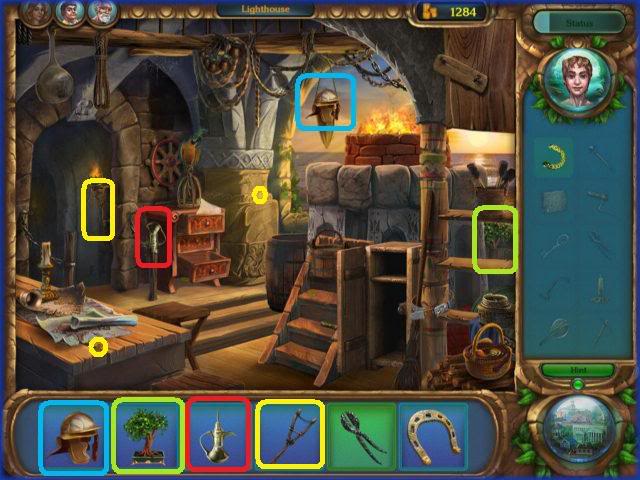
TO TAVERN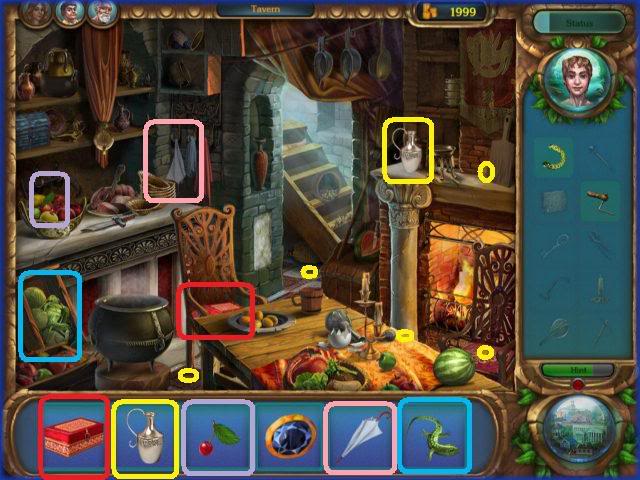
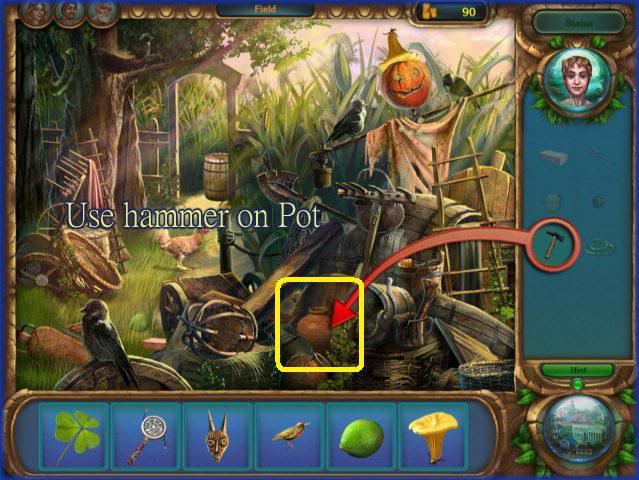
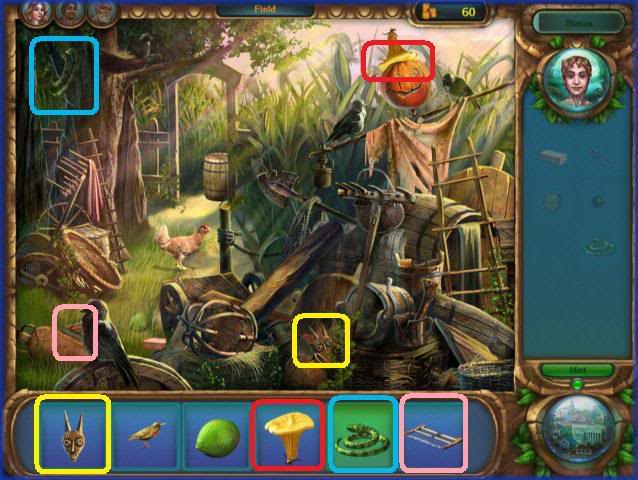
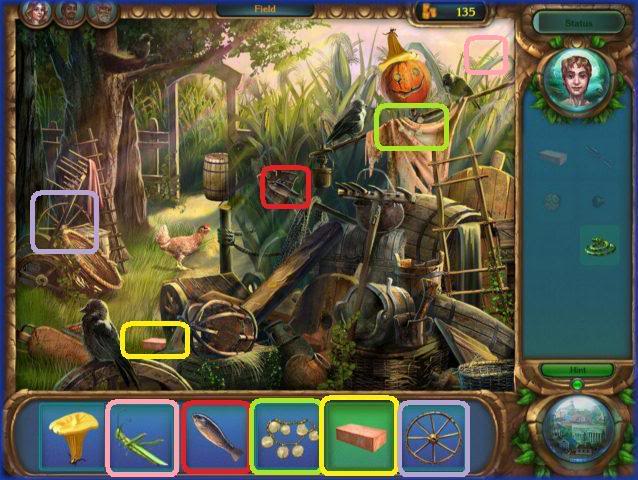
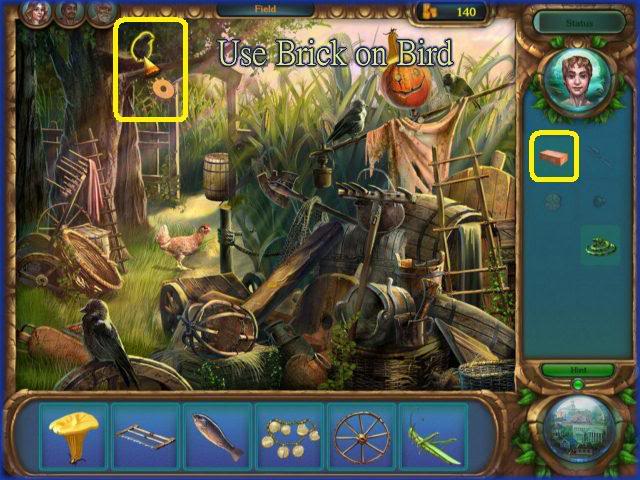
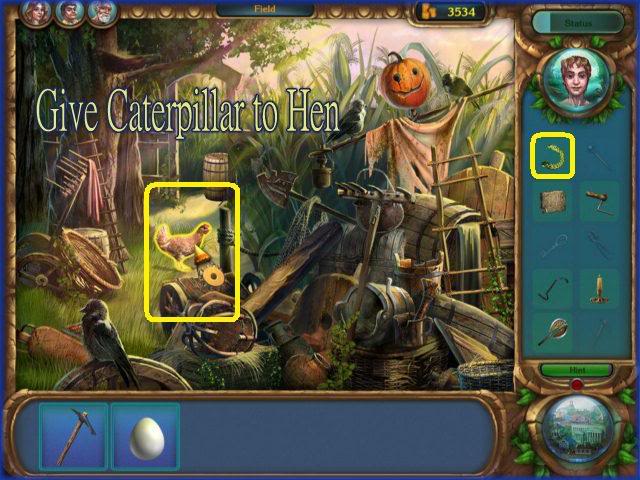
TO FIELD

TO FORGE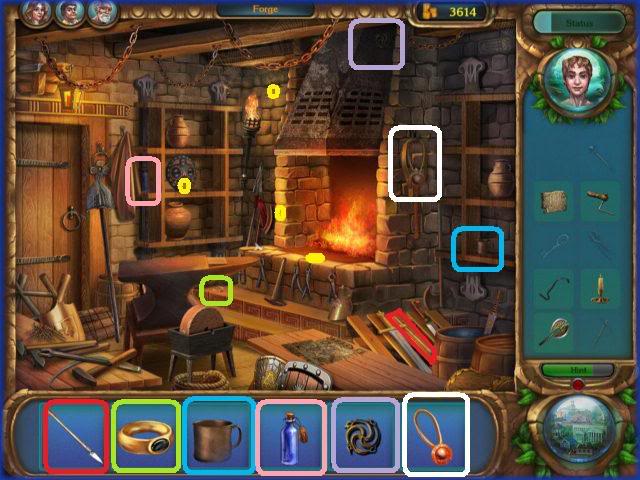

TO LIGHTHOUSE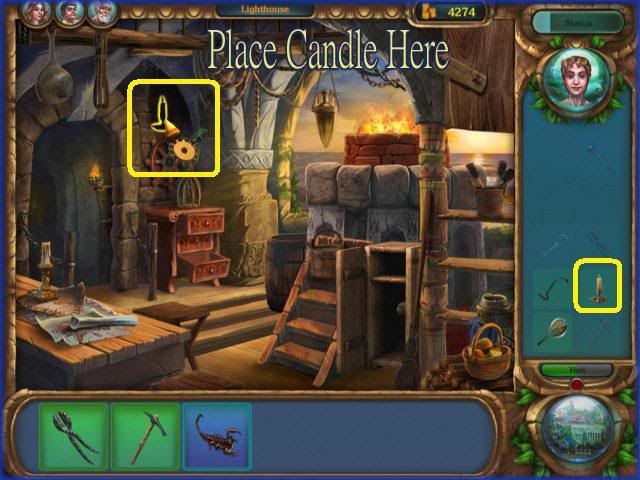
TO FORUM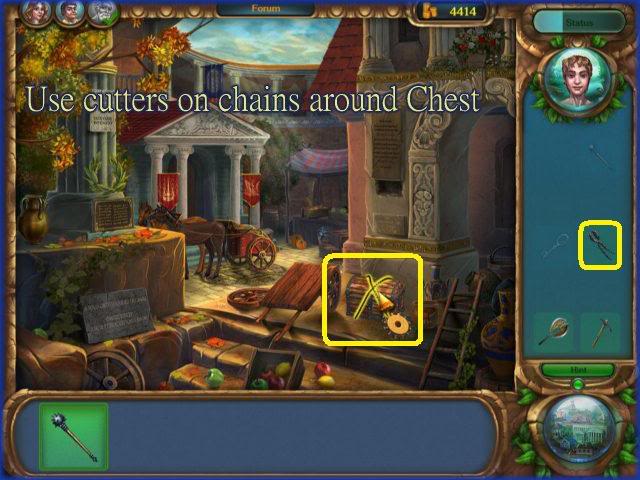
TO TAVERN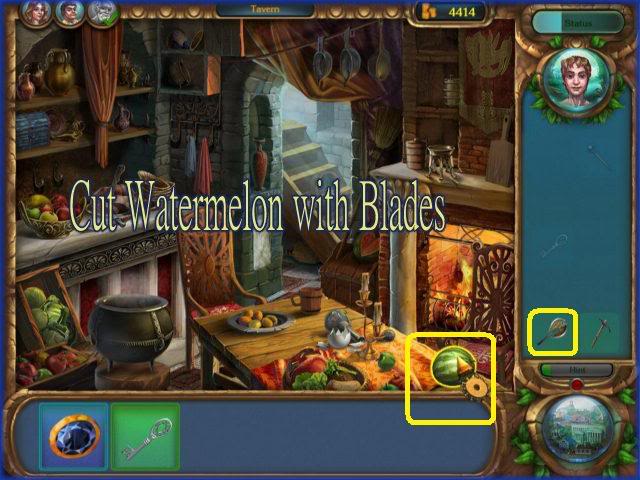
TO FORUM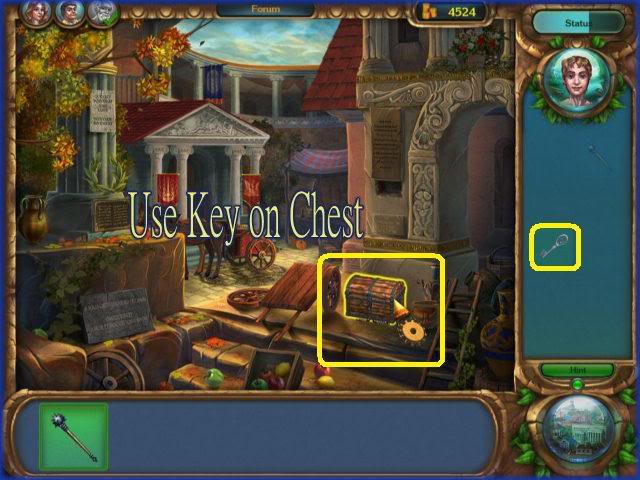
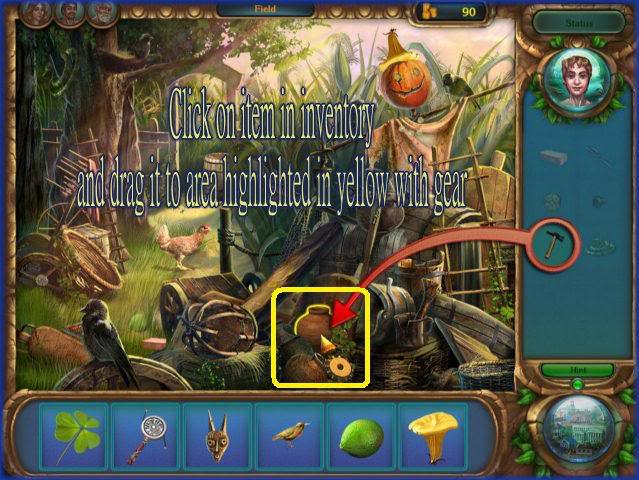
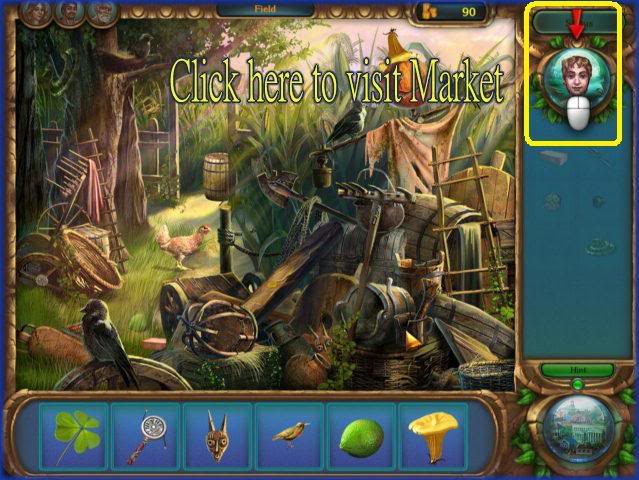
TO FIELD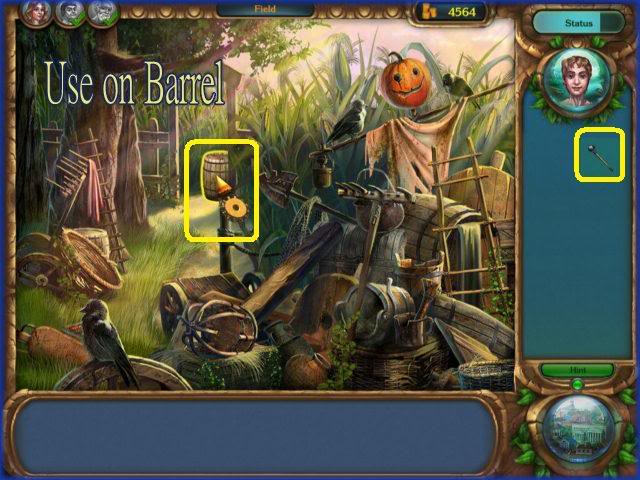
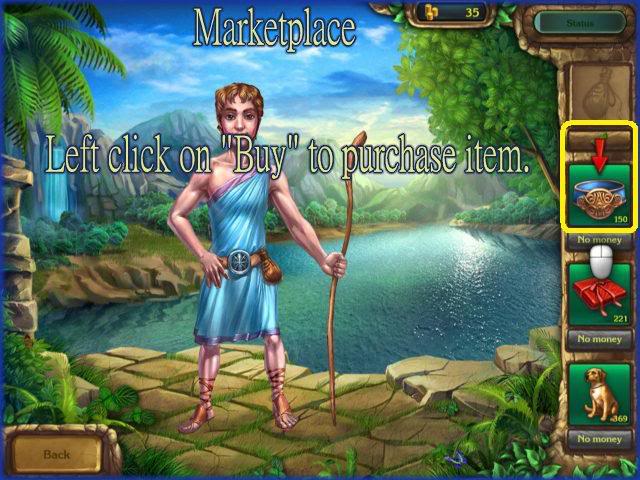
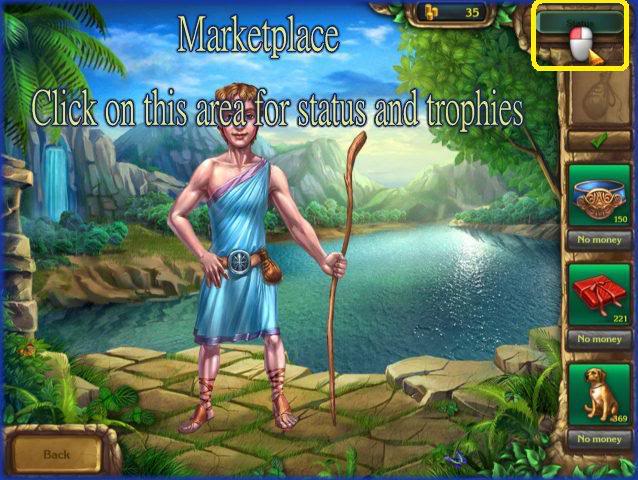
MARKETPLACE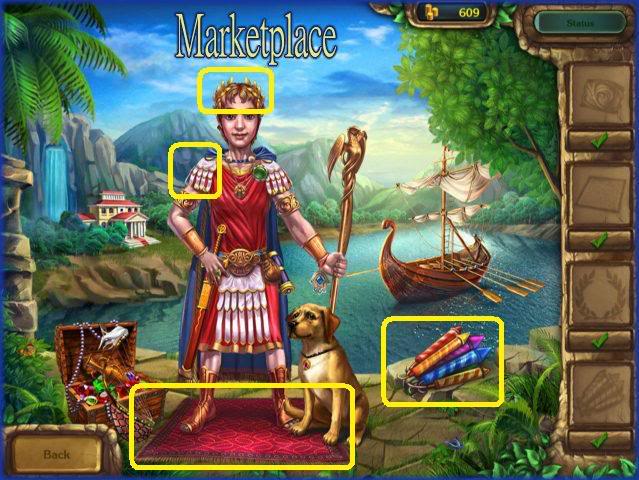
“;
