- Wondering how to get Monopoly GO! free rolls? Well, you’ve come to the right place. In this guide, we provide you with a bunch of tips and tricks to get some free rolls for the hit new mobile game. We’ll …
Best Roblox Horror Games to Play Right Now – Updated Weekly
By Adele Wilson
Our Best Roblox Horror Games guide features the scariest and most creative experiences to play right now on the platform!The BEST Roblox Games of The Week – Games You Need To Play!
By Sho Roberts
Our feature shares our pick for the Best Roblox Games of the week! With our feature, we guarantee you'll find something new to play!Type Soul Clan Rarity Guide – All Legendary And Common Clans Listed!
By Nathan Ball
Wondering what your odds of rolling a particular Clan are? Wonder no more, with my handy Type Soul Clan Rarity guide.
Remedy Rush Tips, Cheats and Strategies
Remedy Rush is a strategic endless high score chaser from Fixpoint Productions/Whitaker Trebella. In this game, players will control a home remedy as it travels through a body under attack by explosive toxins and germs. Gamezebo’s Remedy Rush Tips, Cheats …
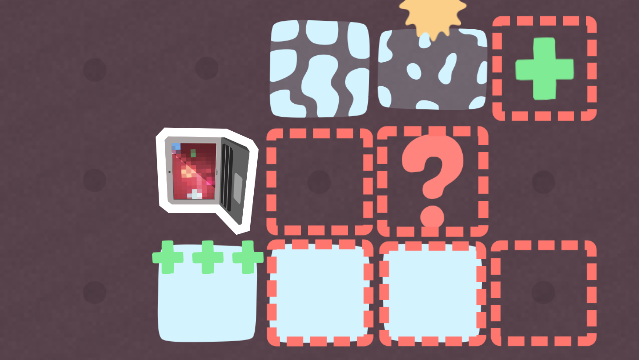
Remedy Rush is a strategic endless high score chaser from Fixpoint Productions/Whitaker Trebella. In this game, players will control a home remedy as it travels through a body under attack by explosive toxins and germs. Gamezebo’s Remedy Rush Tips, Cheats and Strategies will help you fight back against the impending sickness and snag your healthiest score yet.
How to Play
Remedy Rush is technically an endless runner, but in order to improve your score, you’ll need to do more than run. Part of the fun of the game is learning what these things are as you go along, but we’ve detailed them below if you’d like some more specific guidance.
There are a number of obstacles you’ll encounter while running through the “body” which is the game board: white blocks represents cells and basically act as walls. They won’t hurt you but they can block your passage and force you to go around. Yellow germs look like spiky bugs: these crawl around the map, often towards you, and will explode and kill you if you stand near them too long. And red blocks—shaped like squares, crosses, x’s, and question marks—are toxins. These will detonate if you bump into them and trigger a proximity explosion shortly after. If you bump into one again while it’s in this mode, it will detonate immediately.
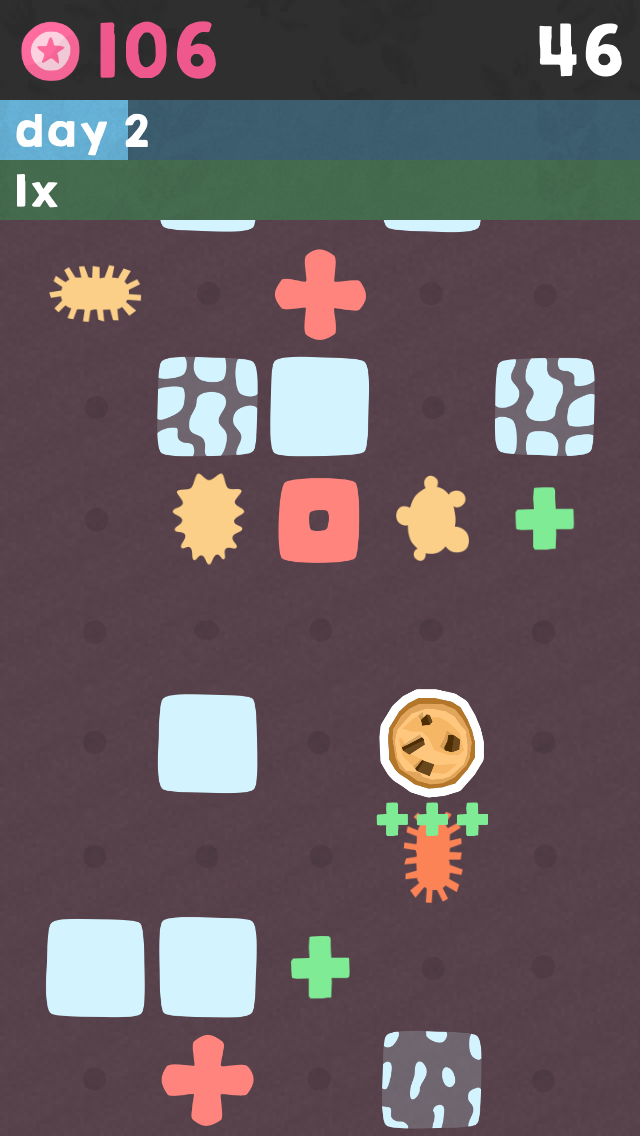
The green crosses scattered around the map are health bursts. If you walk over one of these you will pick it up and have access to a health burst to use at any time. You can store up to three health bursts at once: if you have three stored (visible under your character) and walk over another, you will not pick it up. To use a health burst, hold your finger on the screen until the green circle around your character fills in completely. This will trigger an explosion on all squares immediately touching your character, destroying any germs, weakening any cell walls, and triggering any toxins.
How to Earn Points
You can earn points three ways: 1) blow up toxins by bumping into them (and surviving their explosion by moving out of the way in time), 2) destroy germs by using health bursts on them or catching them in a toxin explosion, and 3) run far enough that you enter a new “day” which will award day number x 10 points. (So, on day 2, you earn 20 points, day 3 earns 30, etc.)
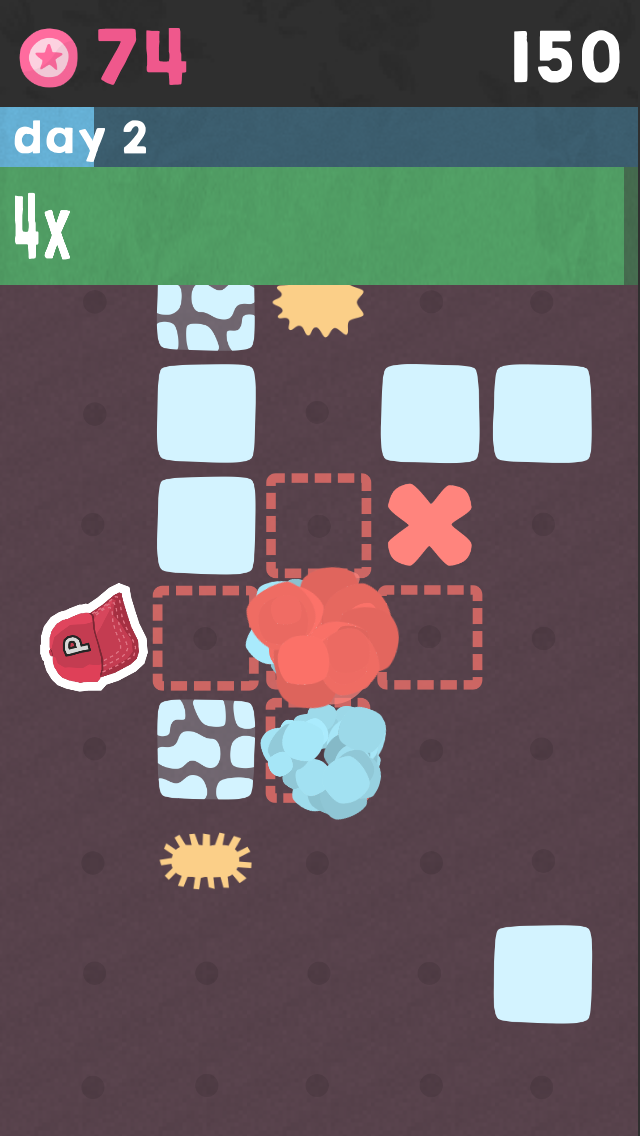
There is a combo meter at the top of the screen under the day meter. Each toxin or germ you blow up increases the combo meter by one, but it also begins counting back down almost immediately. If you keep blowing things up quickly in a row, the combo meter will continue to increase. If you do not blow up anything for a while it will reset to x1. If you blow up a lot of things in a short period of time you’ll earn a lot more points since your combo meter will also be higher: this means blowing up multiple things at once or chaining explosions is a great way to earn large amounts of points quickly.
- Toxins’ characteristics and points values: There are four types of toxins you’ll come across in Remedy Rush, designated by their shape. The shape signifies where the toxin’s explosion proximity will occur: bumping into an X, for example, causes an X-shaped explosion. The red dotted squares that you want to avoid will appear at the four diagonal corners of the X toxin. Each type of toxin is worth a different number of points (base, with your combo meter at x1) when exploded.
- X toxins: X-shaped explosion. Danger zones are the four diagonal corners. X toxins are always safe to bump into twice in a row, since its explosions will always occur on areas where you can’t touch it. They are worth 1 point.
- T toxins: T-shaped explosion. Danger zones are the four points (north, south, east, west). If you bump into a T toxin you will need to move to avoid the explosion. They are worth 2 points.
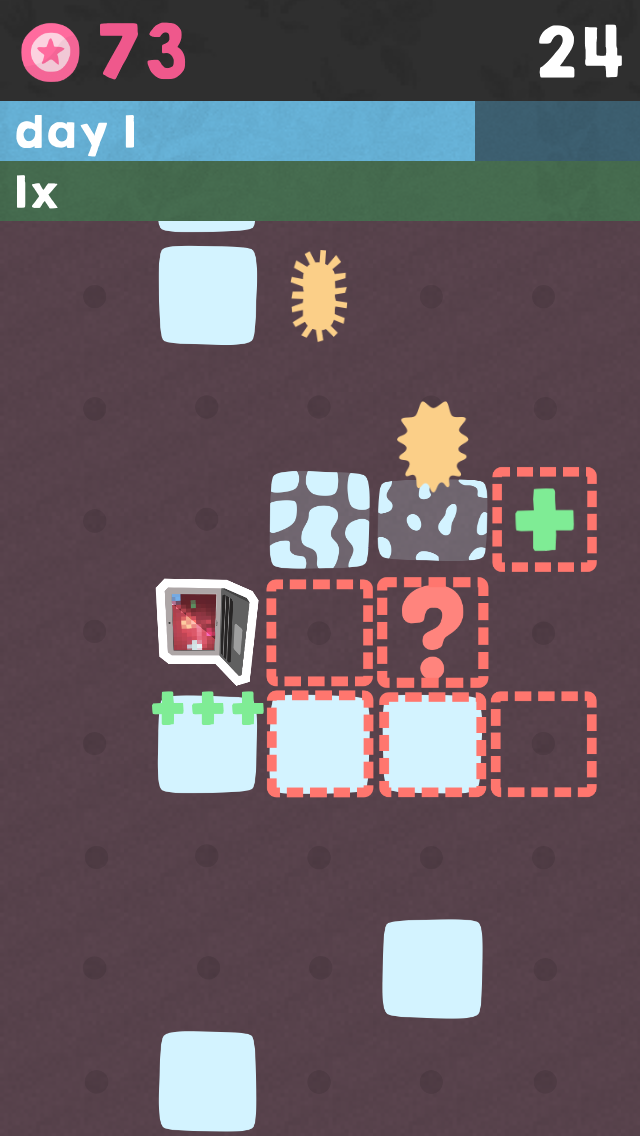
- ? toxins: Toxins shaped like a question mark. Their explosion danger zones are random; they may just be one square or they may be the entire surrounding area. You will sometimes be able to bump into these twice but you must wait to see what their explosion radius will be first. They are worth 3 points.
- Square toxins: Square explosion. Danger zones are the eight squares immediately surrounding the toxin. You will always have to step away from these toxins after bumping into them. They’re great for initiating chain reactions. They are worth 4 points.
Remember that you can set off toxins from one square away with your health burst; doing so will affect your required reaction—if you are standing diagonally from an X toxin and set it off with a health burst, you’ll need to move out of the way. Toxins’ explosions will destroy anything in their red-dotted vicinity: this includes cell walls, germs, coins, uncollected health bursts, and you.
- Germs’ characteristics and points values: Like toxins, the yellow crawly germs come in different variations and points rewards. There are three types of germs.
- Large with spikes: There are two spiky types of germs in the game. The larger kind is attracted to cell walls and will focus on breaking through walls unless you are in its direct sights. This germ is actually helpful as it will open new passageways for you and isn’t very aggressive. It is worth 5 points when blown up.
- Skinny with spikes: The other spiky germ is much longer and thinner. These germs go around walls but they are always seeking you out and will take time to go around cells to reach you. It is worth 6 points.
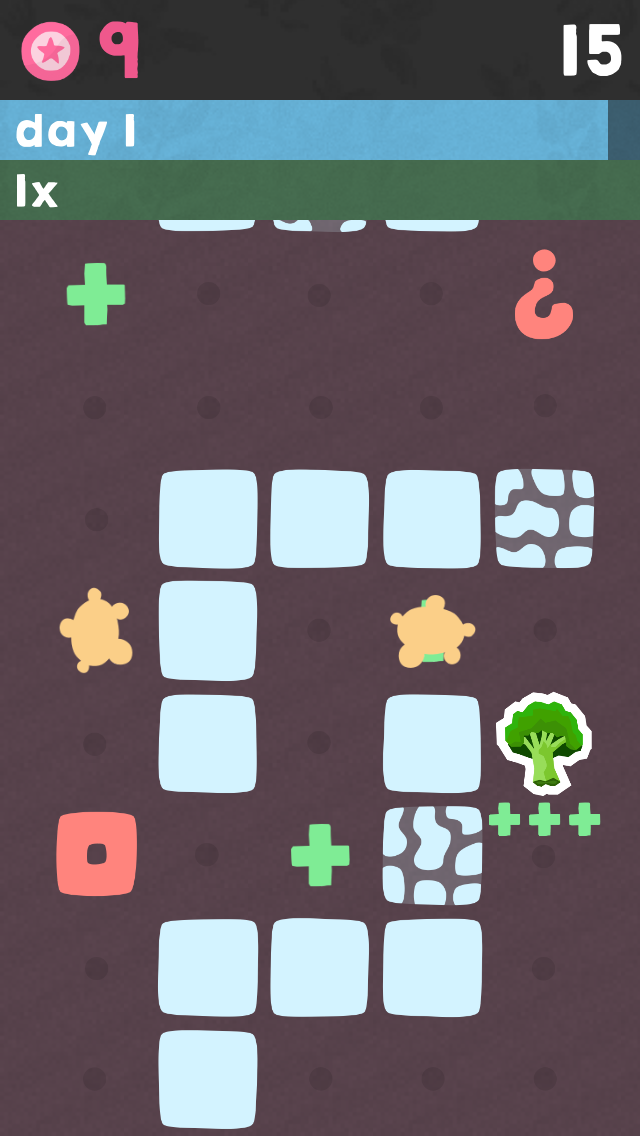
- Turtle-shaped with round protrusions: The last germ looks a little different as it isn’t spiky. This germ ignores walls as well and goes around them to get to you, but it moves faster than the skinny spiky germ. This germ also mimics your movements more closely; if you get into an open room with it and move back and forth, it will dodge back and forth, too. This germ is worth 7 points.
Germs are worth more points than toxins, but they are less predictable and harder to trap in a blast since they are always moving. The best runs will be a combination of toxin and germ destruction without focusing too much on one or the other.
- Fight back against germs: Germs will stop chasing when they get within one square of you, stand still, and begin flashing a darker orange color. After a very brief period of flashing, they will explode, killing you. You can deal with germs in a number of ways:
- 1) Just move. If you are no longer in the germ’s immediate vicinity, it will stop flashing and will start its chase over. When it catches up to you again, it will restart its flashing warning, but you’ve essentially “reset” its explosion countdown timer.
- 2) Blow it up with a health burst. The easiest way to get rid of germs is by blowing them up yourself. If you set off a health burst just as a germ is sidling up next to you, you’ll blow it up before it does you.
- 3) Bump into it. You can knock a germ back by running into it. If there is nothing behind the germ, it will be knocked back. You can push a germ down a long hallway doing this. If there is a toxin behind it, it will set off the toxin. If there is a wall behind it, it will crumble the wall partially (bumping a germ into a wall does one point of “wall health” damage out of its max of 3).If a germ is flashing its explosion warning and you bump into it and it is knocked back (into empty space), its countdown will be reset. If you bump it and it does not move (because it’s next to a toxin or wall), its timer does not reset and you should probably move out of the way.
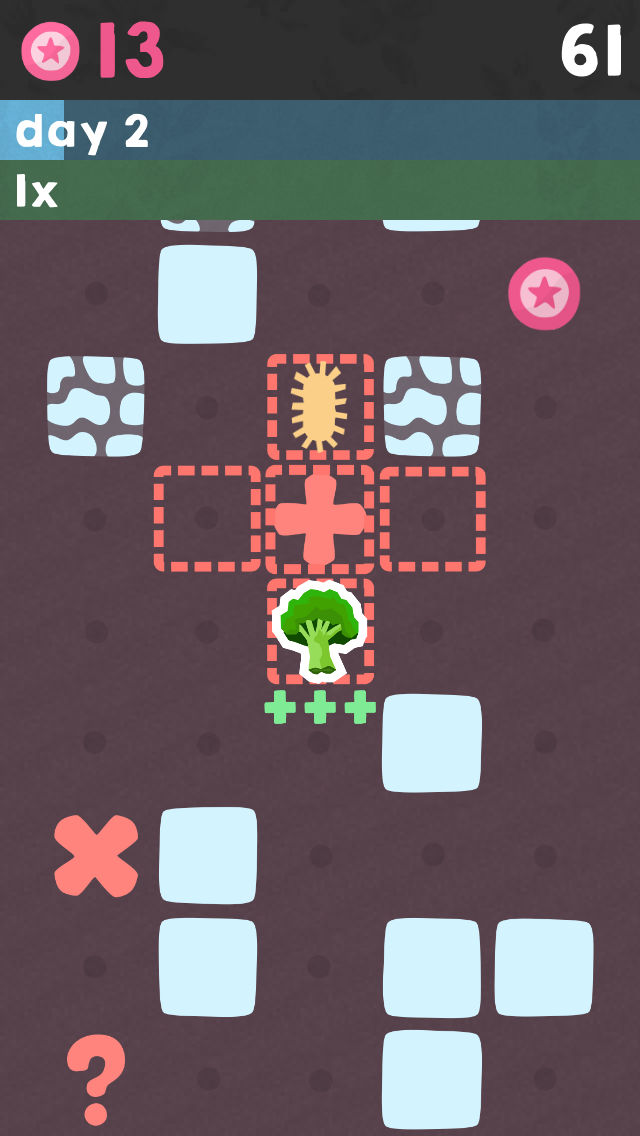
- 4) Catch it in a toxin explosion. If a germ is within the vicinity of a toxin’s explosion when it occurs, it will be destroyed. Setting off toxins as germs are moving into their path or double-bumping to set them off as soon as a germ is nearby is a good way to get rid of two dangers with one blast.
On the subject of germ-bumping: if you are trapped in a corridor with no way back, no health burst, and a germ in front of you, you can bump the germ into the wall numerous times until the wall breaks. Just step back from the germ briefly if it flashes its explosion warning.
Germs will never self-explode when not next to you since they turn off their explosion countdown as soon as you are out of their vicinity. If a germ explodes itself, you are dead.
How to Earn Better Scores
Understanding the basics and playing until you are comfortable causing and dodging explosions is the main key to getting higher scores. Here are a few other tips:
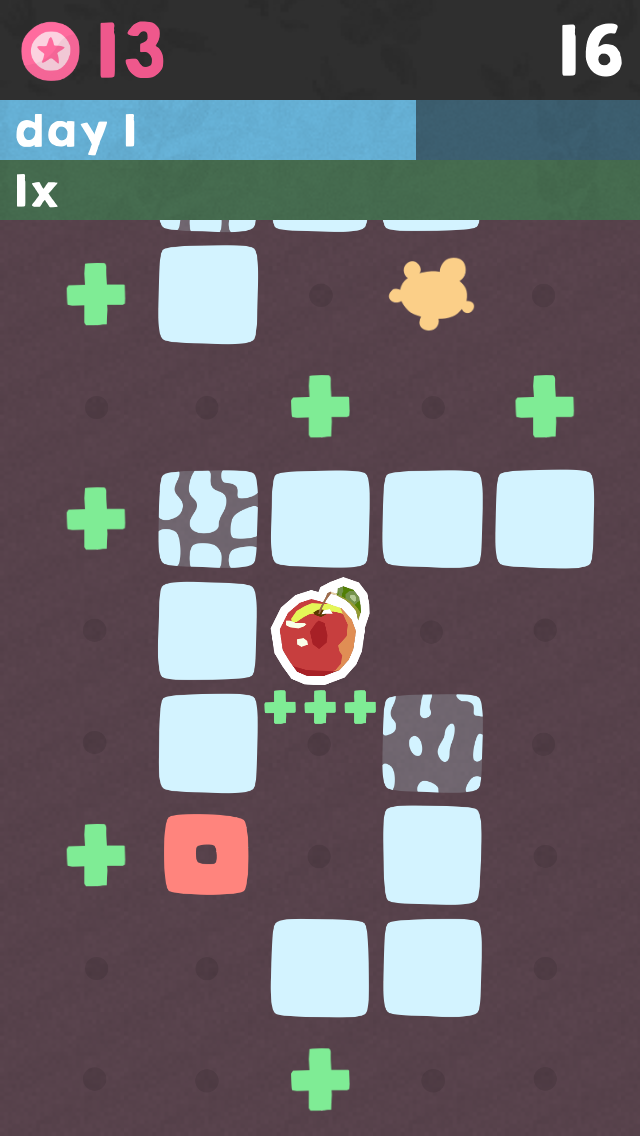
- Use your health bursts freely, especially at the start of a run. You can only hold three health bursts at a time (on most remedies) and they are scattered around the map as pick-ups, so you should not hold onto them for too long. Blow up germs when you come across them and only start thinking about saving your bursts when you get to day 4+. As you get farther, enemies will be more prevalent and pick-ups less so, meaning you’ll need to be a little stingier with their use.
- You need to get farther to get higher scores. At the start of a run germs and toxins will be too few and too spread out to properly chain together. That means you’ll generally be earning their base points, 1-7, which doesn’t add up quickly. The longer you run the more enemies will be on screen to explode, the faster your combo meter will fill, and the more points you’ll get total.
- Combos are critical. More than anything, the way to get a really great score is to charge your combo meter as high as possible. A 10x combo meter will give you 70 points per turtle germ you explode. Those turtles (and everything else) add up quickly at that rate; a high combo meter can mean the difference between a 100-point game and a 1,000-point one.
- Go for one-off explosions to keep your combo alive. If your combo meter is about to reset to x1 and there is an X-toxin nearby, bump into it twice quickly to refill your meter. Or use a health burst on a germ. Even if it’s slightly out of the way, keeping your combo meter going is much more beneficial than staying on course at that exact moment.
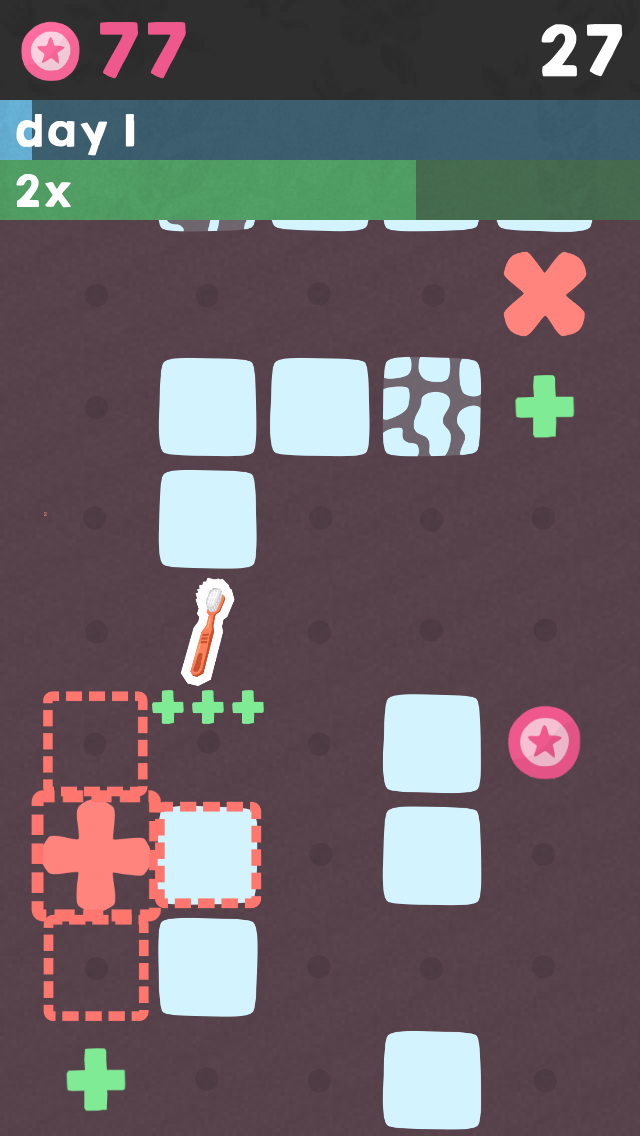
- Trigger toxins behind you for some safe, easy points. If you’re in a combo rush you don’t need to backtrack to hit every toxin, but if you’re just running along without a time crunch, hit any toxins behind you that are about to go off screen for some easy bonuses. Since you’re moving forward their explosions won’t be a danger, so there’s no reason not to just get a few extra points.
- Watch the walls. Walls have three stages of deterioration—solid white, white with some dark speckles, and mostly dark with some white speckles. A single health burst will destroy a wall in the final stage of deterioration, but it will take three bursts to destroy a fully solid white wall. An explosion from a toxin will destroy any type of wall immediately. Be aware of walls in your path and if they will be removed by any impending explosions or if you’re going to need to find a way around.
- Coins don’t give you points. Coins are only used for winning new remedies. Picking up coins during a run does not award any type of points towards your high score. So if you have to choose between a coin or a health burst on a high-scoring run, go health burst.
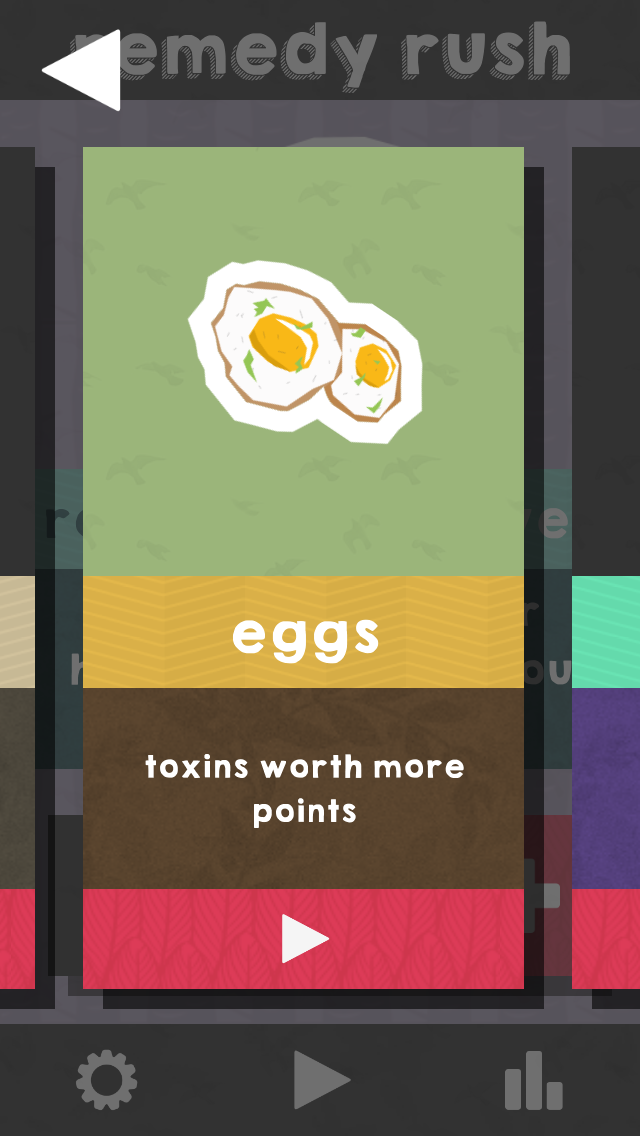
- Choose your remedy wisely. Many of the remedies in Remedy Rush affect the points you earn or even how the game is played. Eggs, for example, are an easy choice: they increase the value of every toxin you explode by 1 (so X toxins are worth 2, T toxins worth 3, etc.). Some remedies offer trade-offs that can be very valuable depending upon your playstyle. The Tennis Ball, for instance, greatly increases the size of toxin explosions. This makes it easier to trap germs and other toxins in a toxin’s explosion, but it also makes it harder to escape the blast yourself.
For a full list of the remedies/characters in the game and what they do, check out our Remedy Rush Character Guide.
More articles...
Monopoly GO! Free Rolls – Links For Free Dice
By Glen Fox
Wondering how to get Monopoly GO! free rolls? Well, you’ve come to the right place. In this guide, we provide you with a bunch of tips and tricks to get some free rolls for the hit new mobile game. We’ll …Best Roblox Horror Games to Play Right Now – Updated Weekly
By Adele Wilson
Our Best Roblox Horror Games guide features the scariest and most creative experiences to play right now on the platform!The BEST Roblox Games of The Week – Games You Need To Play!
By Sho Roberts
Our feature shares our pick for the Best Roblox Games of the week! With our feature, we guarantee you'll find something new to play!Type Soul Clan Rarity Guide – All Legendary And Common Clans Listed!
By Nathan Ball
Wondering what your odds of rolling a particular Clan are? Wonder no more, with my handy Type Soul Clan Rarity guide.


