- Wondering how to get Monopoly GO! free rolls? Well, you’ve come to the right place. In this guide, we provide you with a bunch of tips and tricks to get some free rolls for the hit new mobile game. We’ll …
Best Roblox Horror Games to Play Right Now – Updated Weekly
By Adele Wilson
Our Best Roblox Horror Games guide features the scariest and most creative experiences to play right now on the platform!The BEST Roblox Games of The Week – Games You Need To Play!
By Sho Roberts
Our feature shares our pick for the Best Roblox Games of the week! With our feature, we guarantee you'll find something new to play!Type Soul Clan Rarity Guide – All Legendary And Common Clans Listed!
By Nathan Ball
Wondering what your odds of rolling a particular Clan are? Wonder no more, with my handy Type Soul Clan Rarity guide.
Reincarnations: Uncover the Past Walkthrough
Welcome to the Reincarnations: Uncover the Past walkthrough on Gamezebo. Reincarnations: Uncover the Past is a hidden object/adventure game played on the PC created by Vogat Interactive. This walkthrough includes tips and tricks, helpful hints, and a strategy guide to how to complete Reincarnations: Uncover the Past.
Reincarnations: Uncover the Past – Game Introduction
Welcome to the Reincarnations: Uncover the Past walkthrough on Gamezebo. Reincarnations: Uncover the Past is a hidden object/adventure game played on the PC created by Vogat Interactive. This walkthrough includes tips and tricks, helpful hints, and a strategy guide to how to complete Reincarnations: Uncover the Past.
How to Use this Walkthrough
- This walkthrough is meant to be used as a guide to assist in solving mini-puzzles and acquiring all items in order to complete the game. You may explore locations in the order you wish, this walkthrough is written to take the most direct route to the game’s finish.
- Hidden object are different each time to you play the game and the hint system can help you if you are stuck.
- Screenshots will only highlight the items to which an interaction is required and the inventory item you receive.
- Inventory objects:
- In this walkthrough, they will be written in bold.
- The walkthrough will state, “Use the inventory item on the blah blah,” because it assumes you have the item. If you don’t have the item, on your keyboard, press CTRL+F (at the same time). In the text box, type the name of the item you are looking for and press ENTER. This will scan the page for the appearance of that word.
- Yellow circles – Areas of interest, inventory items, mini-puzzles and hidden object hunts.
- White circles – Inventory item acquired from a hidden object hunt.
- Zooming in on areas opens small windows. Once you get the item or information you need, close it by clicking Ok. The walkthrough will not include this instruction.
Gameplay and Tips
- This is a hidden object adventure game. You will move from location to location solving hidden object hunts, mini-puzzles and picking up items to use in order to proceed in the game.
- Areas of interest sparkle depending on the style of game you chose. Casual has more sparkles, Challenge has less.
- Hover your mouse over every aspect of a scene and watch for your cursor to change.
- Cursors:
- Magnifying glass – Your cursor will turn into a magnifying glass when hovered over an area of interest. Click to zoom in on a puzzle or a hidden object hunt.
- Finger – Your cursor will turn into a finger when hovered over an item. It can either collect the item and add it to your inventory or you can interact with it.
- Items collected will be added to your inventory (located at the bottom of your screen). To use an inventory item, click on it and click on the area it needs to be used.
- Hidden object hunts provide a list of items to find. Click on the item to cross it off the list.
- Items listed in orange aren’t readily available and you’ll have to perform an action to uncover them.
- To leave a hidden object scene, hover your mouse around the bottom of the scene until it turns into a down arrow. Click to exit the scene.
- Hint system:
- You have unlimited hints however it takes time to recharge between uses. If you play on Casual mode, it takes about 30 seconds, Challenge takes about a minute.
- Hidden object scenes – Click Hint and an item will be encircled by a blue ring.
- In a mini-puzzle, the Hint button will explain what to do. The Skip button will skip the puzzle and move you forward.
- In free roam mode, the Hint button will highlight an area of the scene you can interact with or it will tell you to explore other scenes.
- Tasks – Within the game, there’s a Tasks button at the bottom left. Clicking on that reveals all the tasks you have to complete.
- Mini-puzzles:
- Skip will complete the puzzle and move you forward. There seems to be no penalty.
- Leaving a puzzle and returning to it resets it.
- There is no timer or point system.
Starting the Game

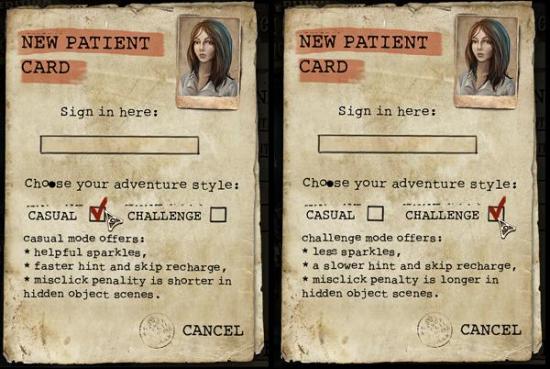
- When you start the game for the first time, you have to enter a name (your profile). You are asked if you want to play in either Casual mode or Challenge mode.
- Casual mode – Interactive areas and collectables are highlighted with more sparkles, hints are regenerated faster and the too many clicks penalty is short.
- Challenge mode – Interactive areas and collectables are highlighted with less sparkles, hints are regenerated slower and the too many clicks penalty is longer.
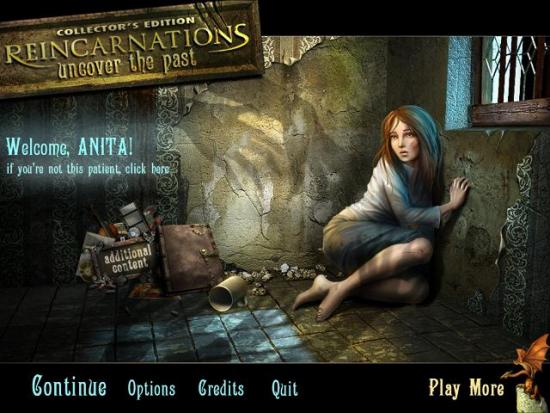
- Options allows you to adjust the volume to the sound, environment and music. You can also change the full screen mode and the custom cursor.
- Credits allows you to see the game’s credits.
- Continue, if available, allows you to continue with your game in progress.
- Play More brings you to a screen with two other games from the same developers. Clicking on them brings you to a site where you can download them.
- Additional Content is in the Collector’s Edition only. Once you’ve completed the game, bonus gameplay becomes available.
Walkthrough – Introduction
- This scene acts as a tutorial. PLAY THE TUTORIAL. Even if you have played tons of games like this, it helps orient and guide you. When asked if you’d like “to use some interactive help,” click Yes.
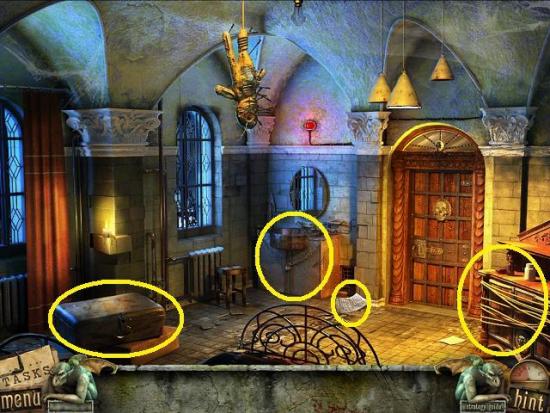
- Click the locked sink.
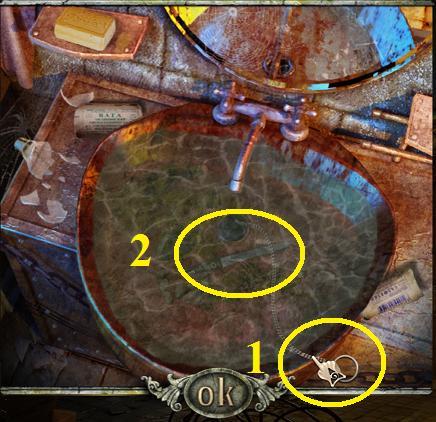
- Click on the chain to drain the sink, then take the emery board. Click the piece of paper to read the letter from Dr. Herzle. Click anywhere off the letter to return to the scene.
- Click on the suitcase (left side of scene).
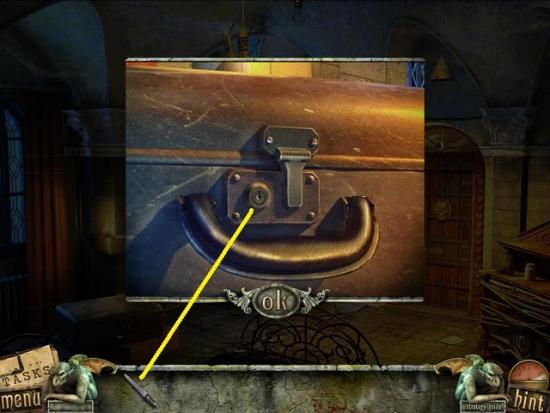
- Use the emery board to pick the lock. Click on the suitcase to start a hidden object hunt.
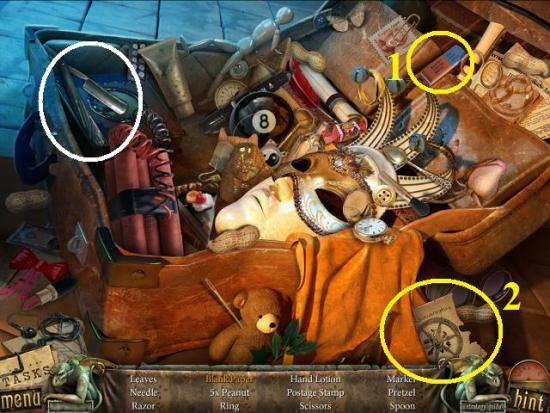
- Find all the items. To get the blank paper, take the eraser and use it on the piece of paper. Don’t forget to click on the newly made blank paper to cross it off the list.
- A razor is added to your inventory.
- Click the tied up credenza (right side of scene).
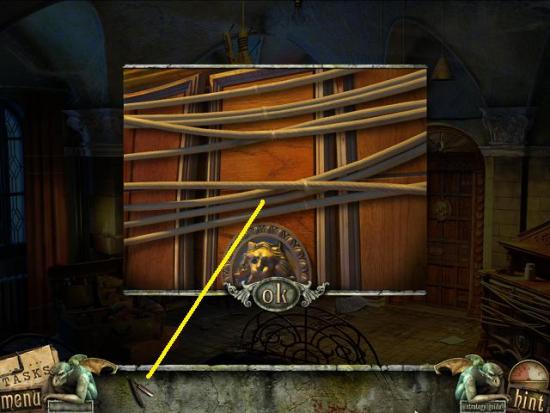
- Use the razor to cut the ropes, then click on the credenza’s door to open it, then click to examine closer. So solve this mini-puzzle, click and drag the pieces to complete the picture.

- Click to push the items out of the way to reveal the magical pendant. Click to take it.
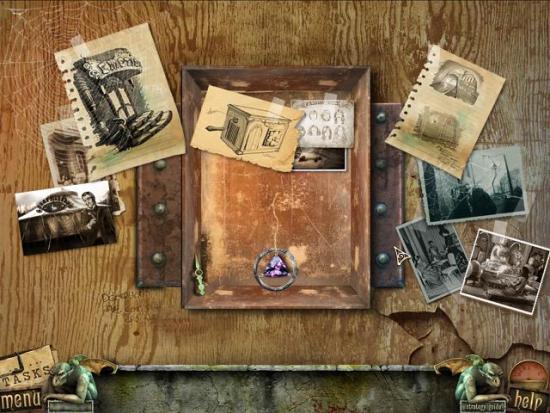
- Enter the door to the Theatre Emotion.
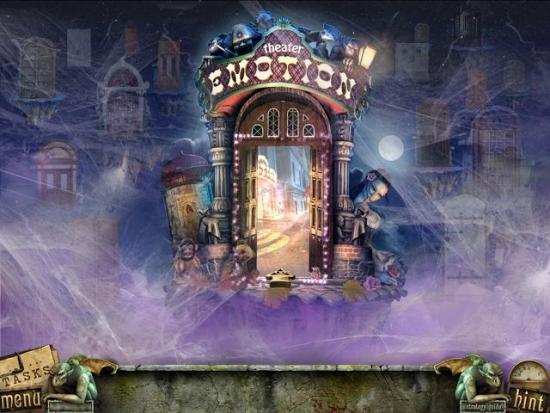
Theater Emotion
- There are a few areas of interest in this scene however you don’t yet have the proper inventory items yet. The screenshot will only highlight what you can currently do. You will go back and forth from all these scenes often.
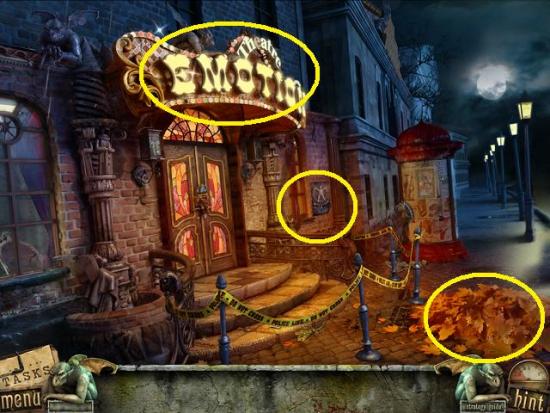
- Click the area to the right of the theatre door to start a hidden object hunt.
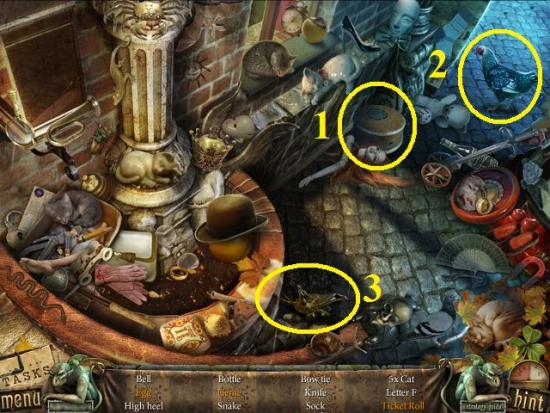
- Find all the items. To get the ticket roll, click the small box (1), click the hen to get the egg (2) and click (rub?) the lamp to get the genie. Make sure to click to remove the items when they become available, they won’t be automatically crossed off the list. A ticket roll is added to your inventory.
- Click the marquis.
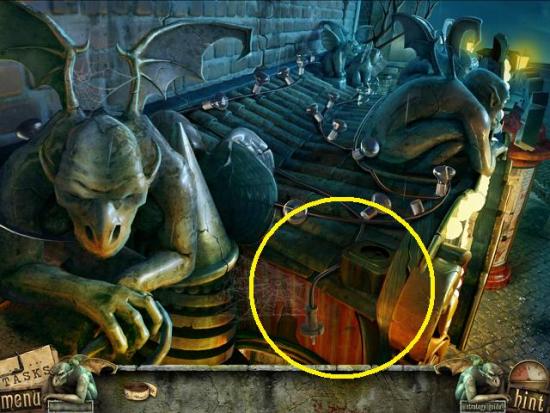
- Click the plug to plug it into the outlet. Leave the scene by hovering your mouse at the bottom of the scene (but above where your inventory is). When the cursor turns into a down arrow, click.
- Click the pile of leaves (right side of scene). Click to push the leaves away. If you are having a hard time uncovering the inventory item, move your mouse around the scene. When it turns into a finger, click to move the leaves.
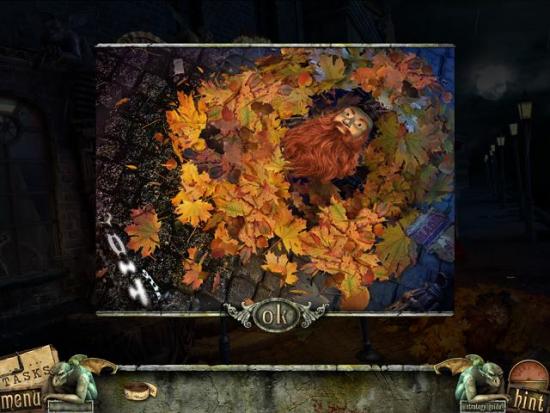
- Click to take the Theatre Keeper’s mask into your inventory.
- Click on the door.
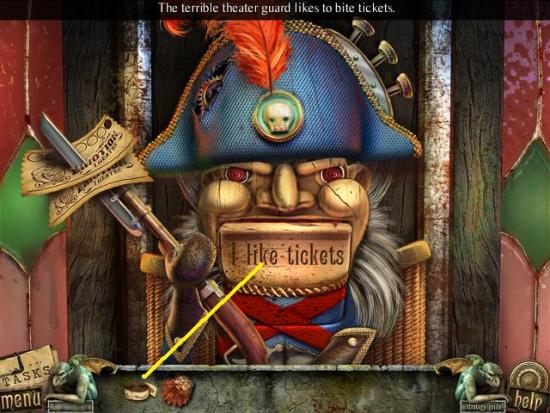
- Use the ticket roll on the theatre guard’s mouth. To solve the mini-puzzle, the theatre guard has to bite the ticket.
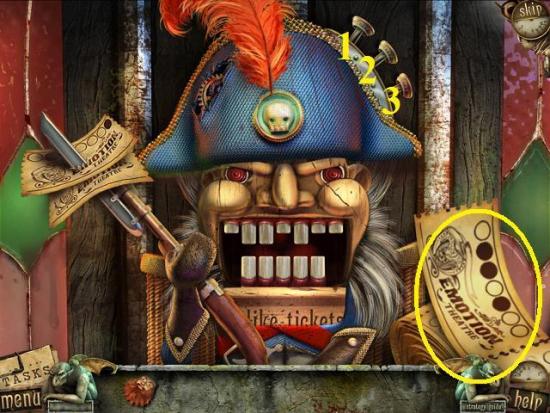
- You have to use the buttons atop the theatre guard’s hat (1,2,3 in the screenshot) to adjust his teeth to mimic the pattern on the ticket (circled).
- The guard has seven teeth. From left to right, we’ll name them A, B, C, D, E, F, G.
- Button 1 moves A, B, C, D.
- Button 2 moves B, C, D, E, F.
- Button 3 moves B, C, D, E, F, G.
- Use the buttons so A, D, F, G are up and B, C, E are down (shown in screenshot).
- Important: Once you have the teeth in place, use the ticket on his mouth. I’m ashamed to say this took me a bit of time to figure out.
- If you give up, leave the scene and return to reset it. Press buttons 3,2,1,2 in that order.
- Enter the theatre.
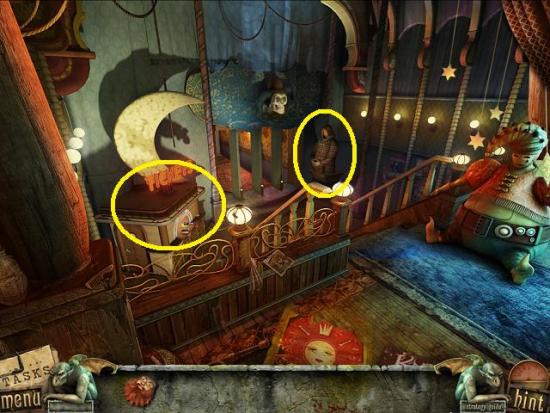
- There are a few areas of interest in this scene however you don’t yet have the proper inventory items yet. The screenshot will only highlight what you can currently do.
- Click the statue (down the stairs).
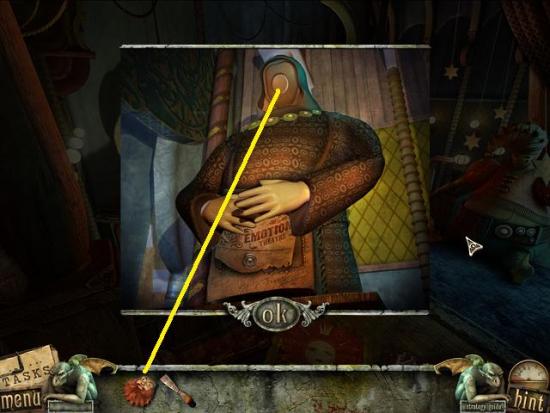
- Place the Theatre Keeper’s mask on its face. When his hands open, click on the bag against his chest.
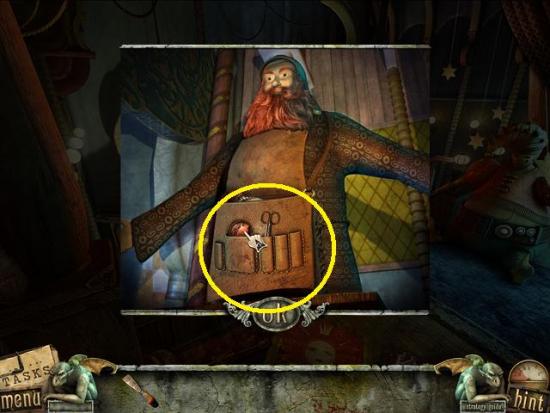
- Take the amulet.
- Click the ticket booth to start a hidden object scene.
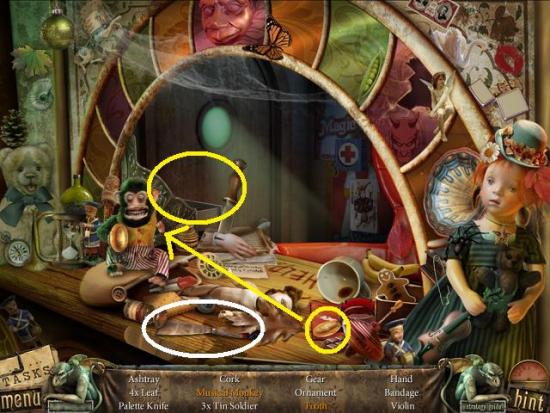
- Find all the items. Click on the cash register to get the tooth; take the cymbal to make the musical monkey. Don’t forget to click on the musical monkey to remove it from the list. A palette knife is added to your inventory.
- Leave the scene by going through the doors at the bottom of the stairs.
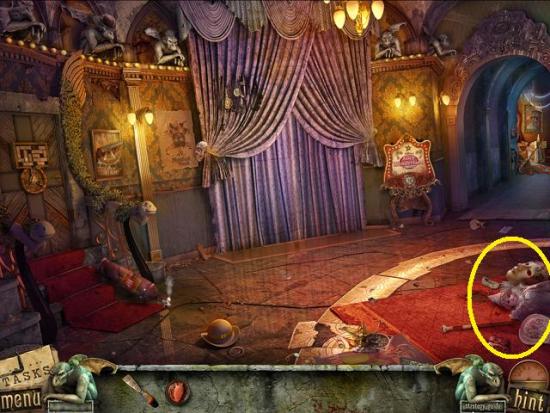
- Click the pile of dolls on the carpet (right side of scene). Click on the items to push them out of the way.
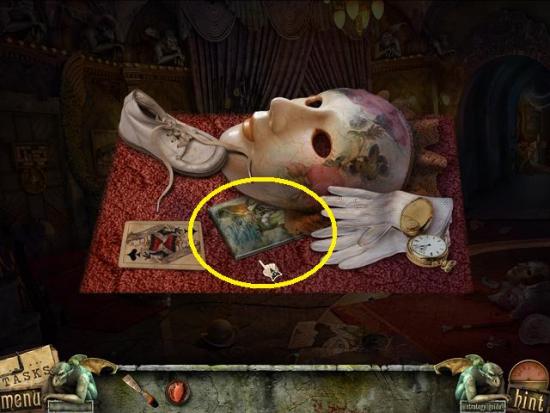
- Take the backdrop.
- No other actions can be performed in this scene. Exit this scene and take the doorway on the right.
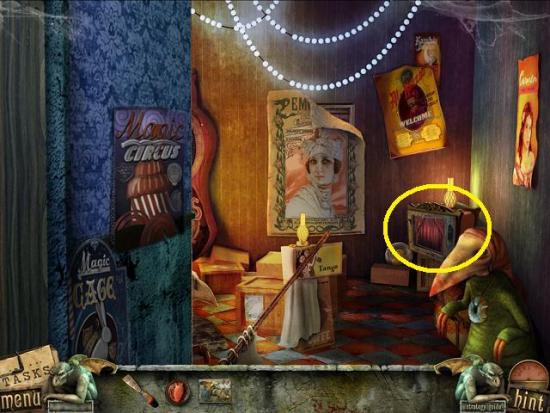
- Click the small puppet stage.
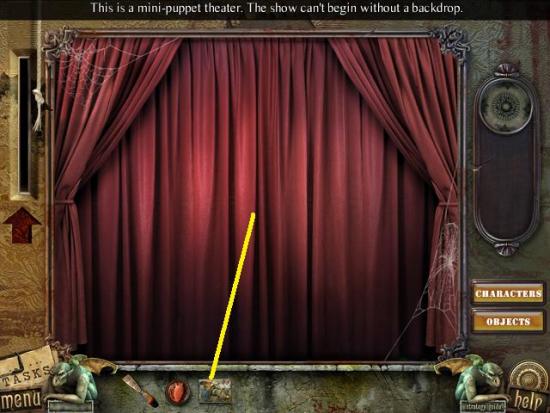
- Place the backdrop on it.
- The backdrop then appears against the stage. Click on it to move it. To solve this mini-puzzle, use the CHARACTERS and OBJECTS buttons to move the puppets and objects to match the backdrop scene.
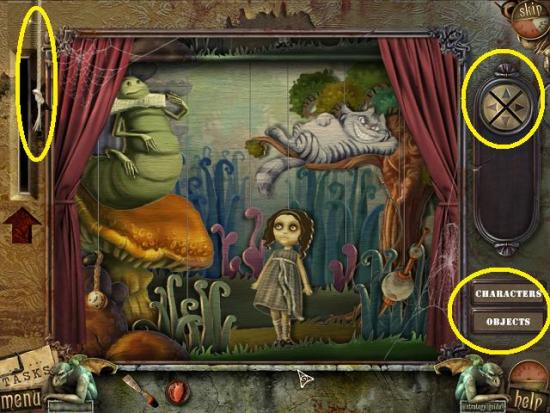
- Select CHARACTERS to make the characters appear. Click on a character to select it. Then use the directional buttons to move it up or down and left or right.
- Then select OBJECTS to make the objects appear. Click on an object to select it. Then use the directional buttons to move it up or down and left or right.
- If you forget what the scene looks like, click the curtain rope (top left of the stage) to reveal the backdrop.
- The scene looks like this:
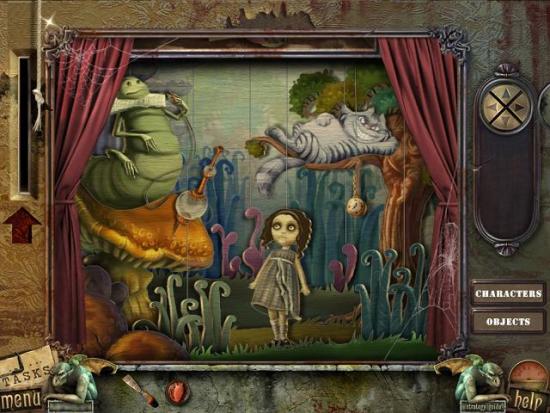
- Take the plump puppet key that appears.
- Leave the scene by continuing down the hall (left).
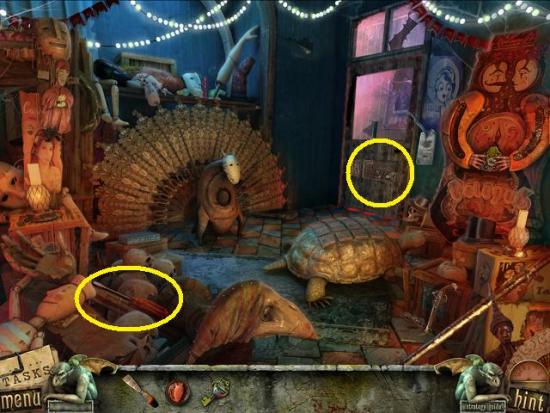
- Take the screwdriver.
- Click the door. To solve this mini-puzzle, click and drag the pieces to complete the image.
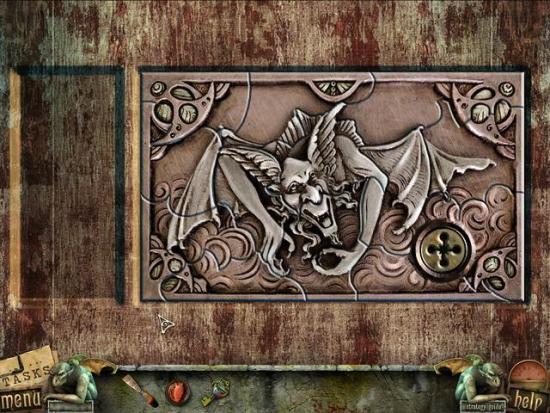
- A keyhole appears but you don’t yet have the key. Leave the scene by clicking at the bottom of the scene.
- Click the weird peacock.
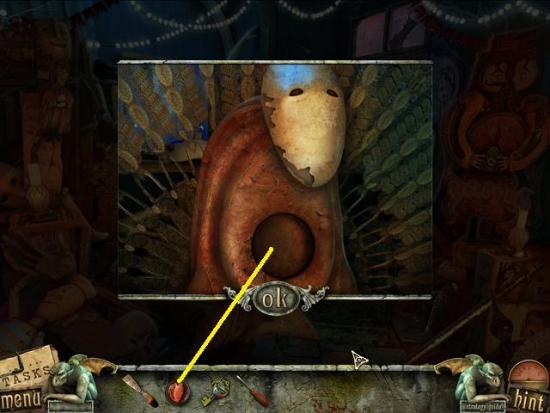
- Place the amulet on its chest. When its tail folds up, click the area behind it to start a hidden object hunt.
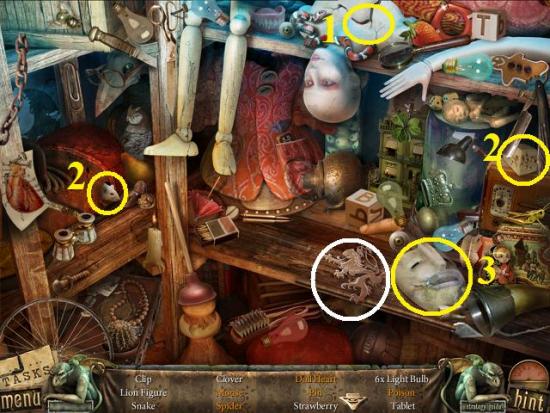
- Find all the items. Click on the hanging doll/dummy (1) to take the doll heart. Use the cheese (2) to lure out the mouse (2). Click the mask to get the spider, pin and poison.
- Note: If you are afraid of spiders, this scene isn’t that bad. A lion figure is added to your inventory.
- Leave the scene by going south (down).
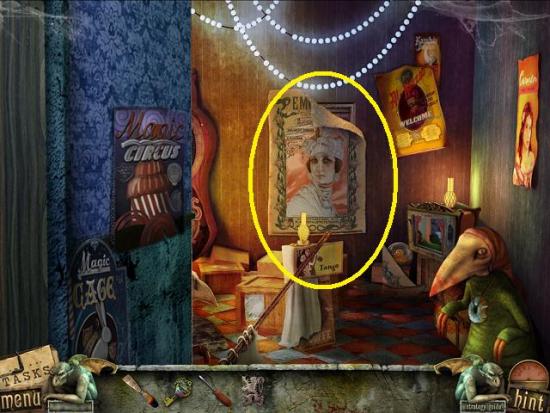
- Click on the back wall’s poster to move it. Examine the area.
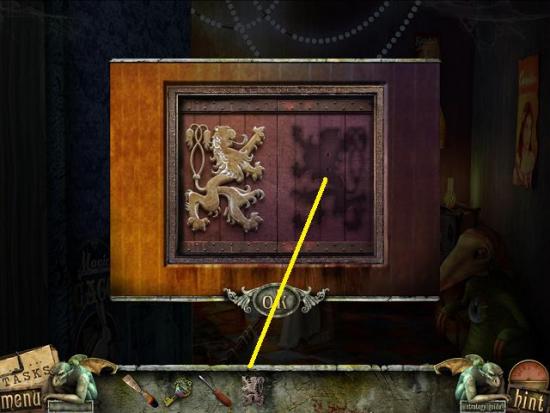
- Place the lion figure in the slot. A cache opens.
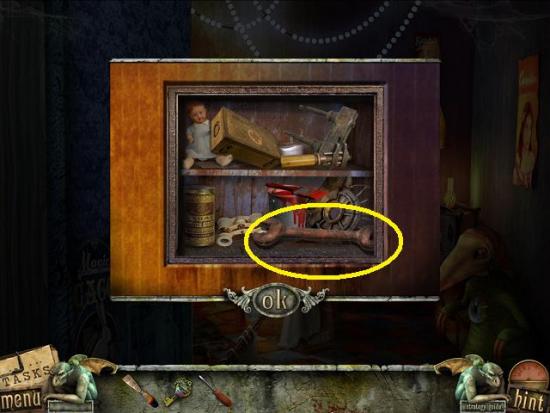
- Take the wrench.
- Leave the scene and go south (down) two scenes to the theatre’s lobby.
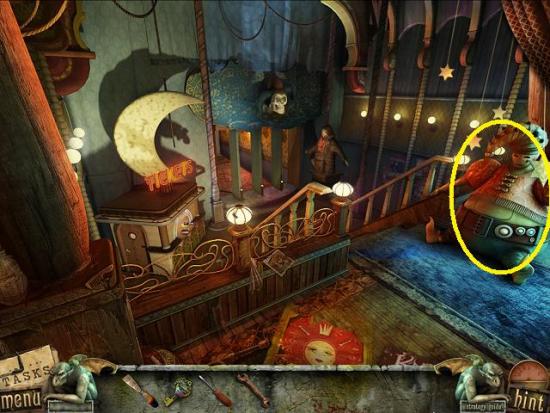
- Click on the plump puppet against the wall. Click on the buttons to open them, then use the plump puppet key to unlock its chest. Click on the opened area to start a hidden object hunt.
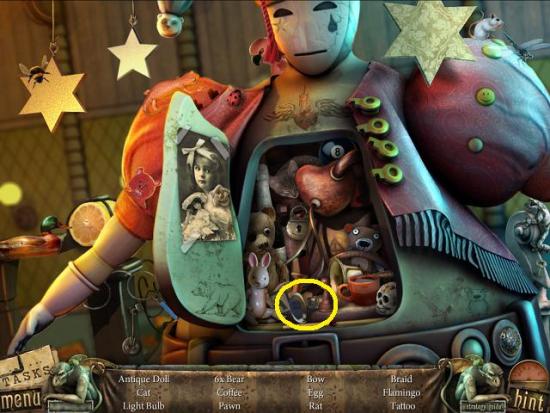
- Find all the items. There are no interactions in this scene. A light bulb is added to your inventory.
- Leave the scene by exiting the theatre (south).
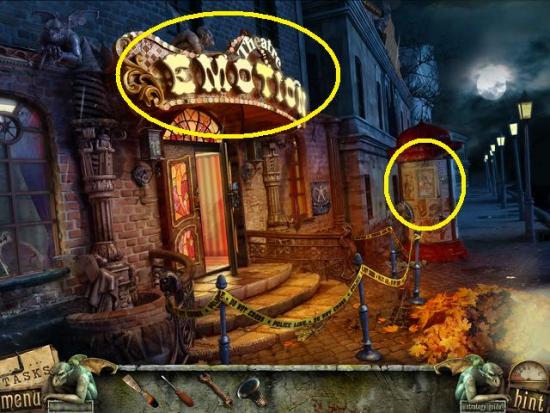
- Click on the circular notice board.
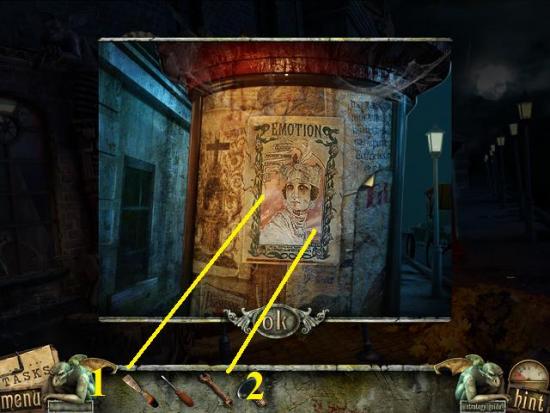
- Use the palette knife to remove the old poster, then use the wrench to undo the four nuts. Take the door key.
- Click on the marquis.
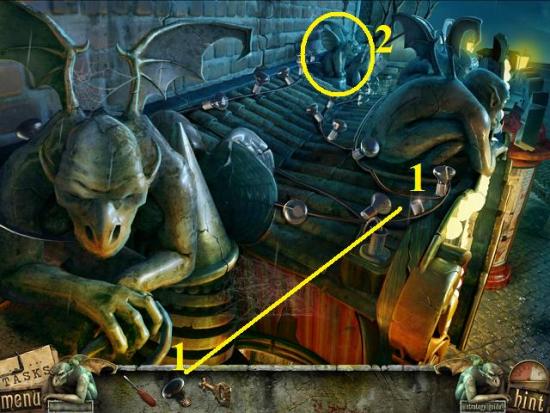
- Place the light bulb in the empty slot (1). Then click on the gargoyle at the back of the scene (2).
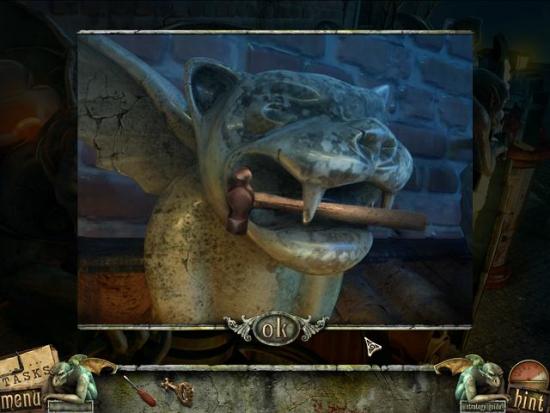
- Take the hammer from its mouth.
- Leave the scene by going south (down), then enter the theatre and continue all the way to the back (north, east then west).
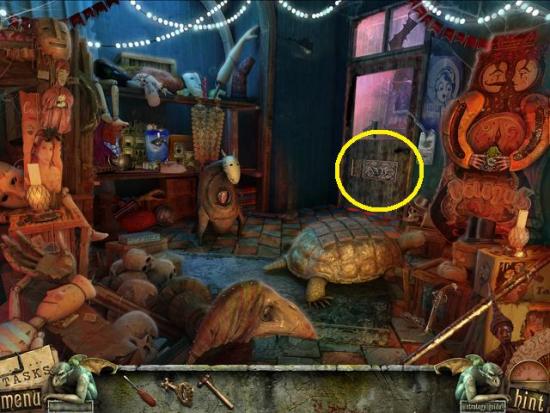
- Click the door.
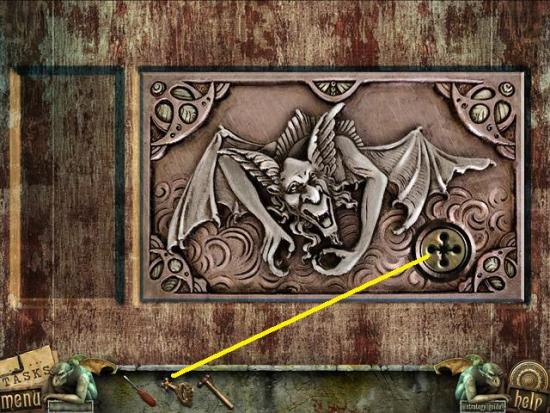
- Use the door key in the slot. Go through the door.
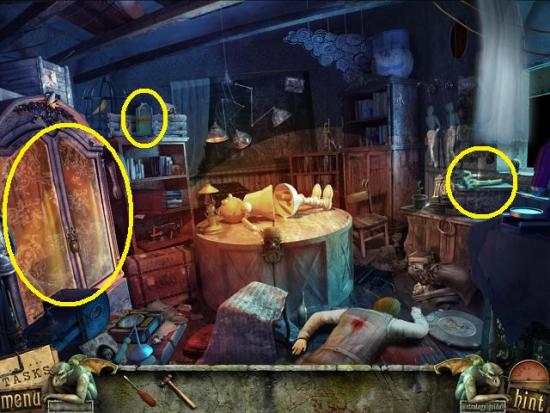
- Take the electrolyte bottle. Click the skeleton hand to zoom in.
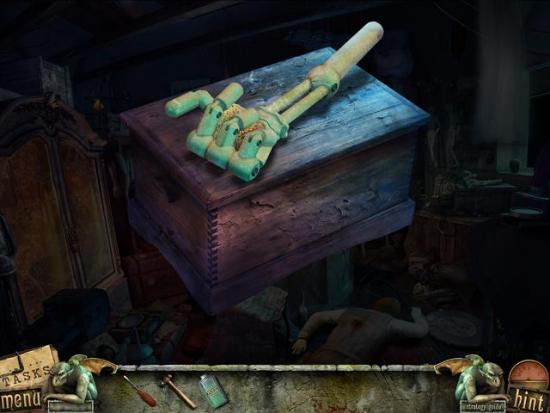
- Click on the hand to open it. Take the sponge.
- Click on the large cabinet. Use the hammer to break it open. Click on it to start a hidden object scene.
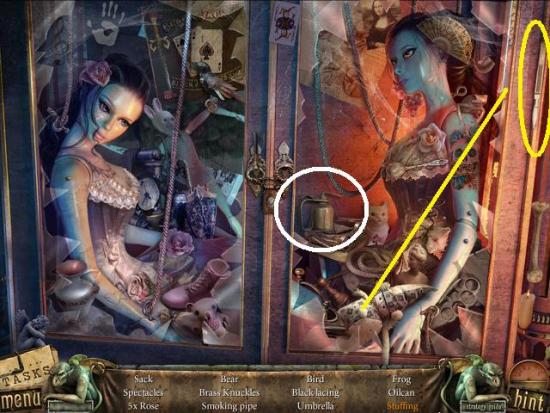
- Find all the items. Use the scalpel to cut the stuffed toy to take the stuffing. An oilcan is added to your inventory.
- Leave the scene by going south (down) and continue all the way to the outside of the theatre.
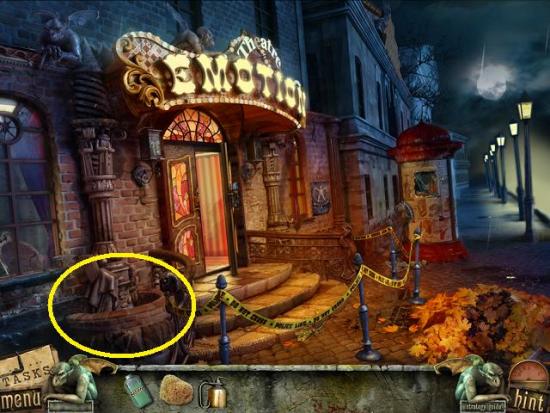
- Click on the fountain to the left of the door.
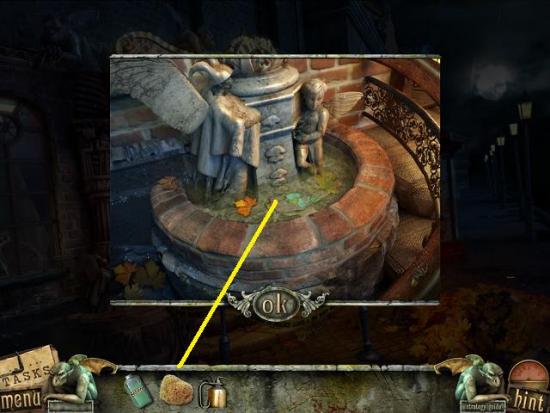
- Use the sponge to absorb the water. Take the clock ornament.
- Go back into the theatre and continue all the way to the room with your brother’s body.
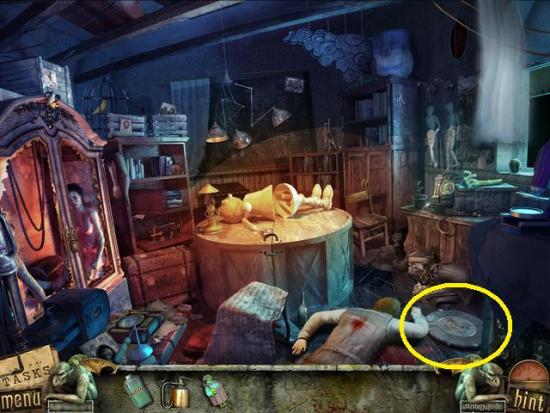
- Click on the clock.
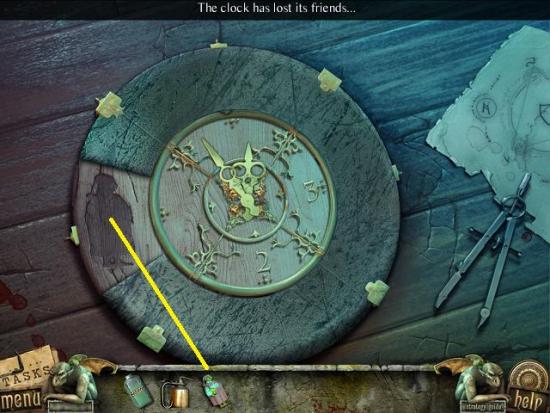
- Place the clock ornament in the slot. A drawer opens with pieces of additional ornaments. Click and drag the pieces to compete the ornaments.
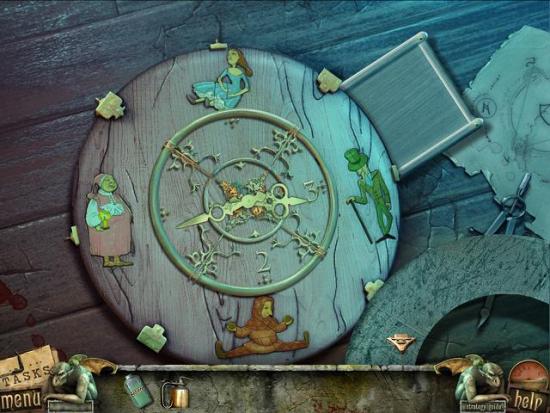
- The clock face moves. Take the spring. Leave the scene but don’t go any further.
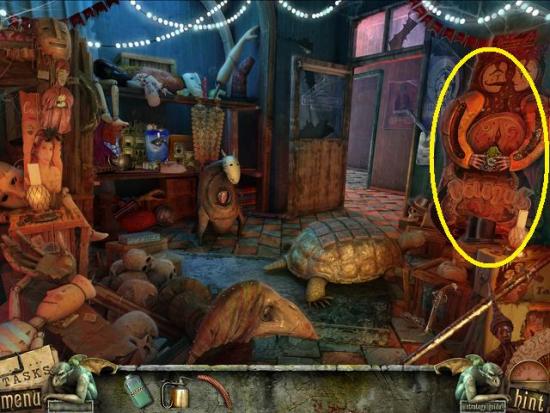
- Click the twin statue.
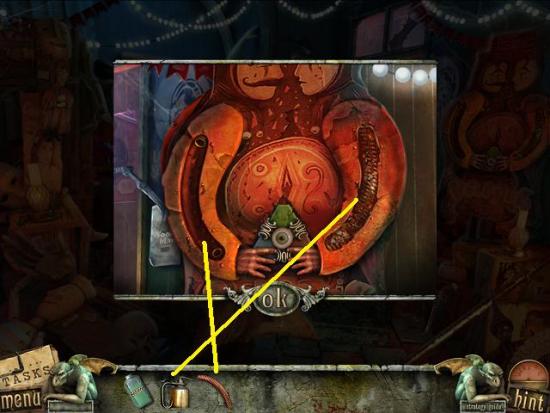
- Use the oilcan on the arm on the right and the spring on the arm on the left. When the hands move, take the triangle. Go south twice to the scene with the broken curtain.
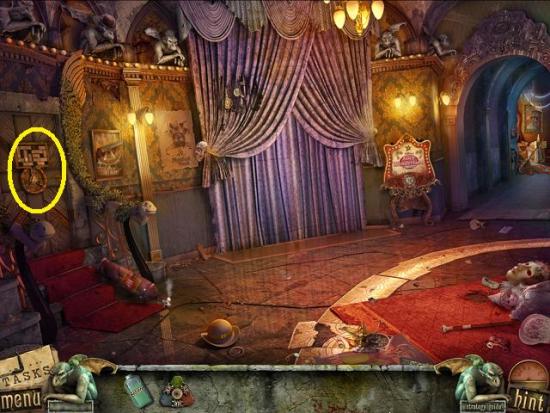
- Click the round item on the door above the stairs (left side of the scene).
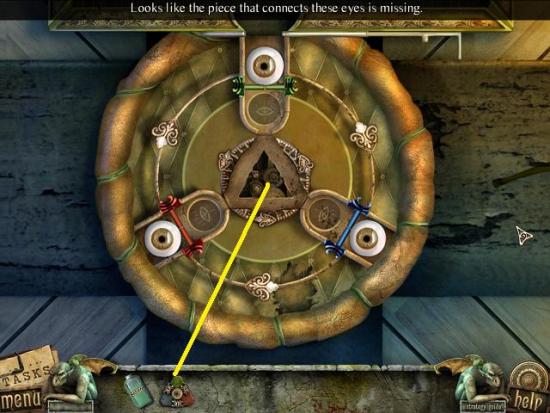
- Place the triangle in the middle of the gadget.
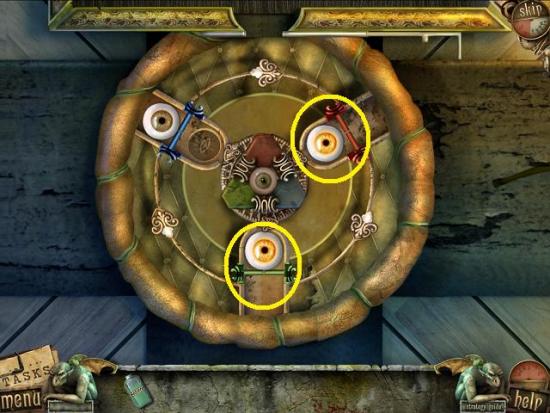
- To solve this mini-puzzle, the eyes have to be locked in their slot (circled eyes).
- Click the wheel to turn the eyes and turn the triangle to rotate it.
- Turn the wheel until a loose eye is in the top slot. Then rotate the triangle so its coloured tip is the same colour as the bars on the slot. When the eye falls into the slot, rotate the wheel and the eye becomes locked. Continue until you have all the eyes locked.
- Go through the theatre tower door.
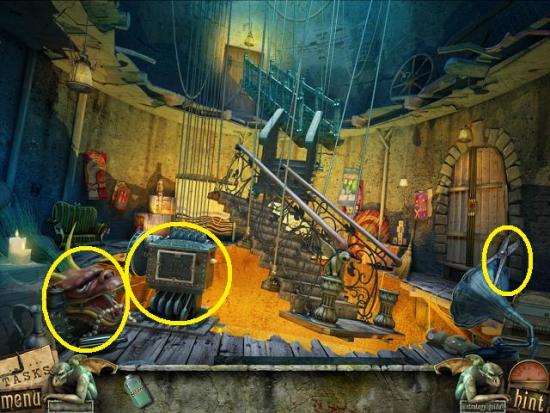
- Take the pliers.
- Click the dragon head to start a hidden object hunt.
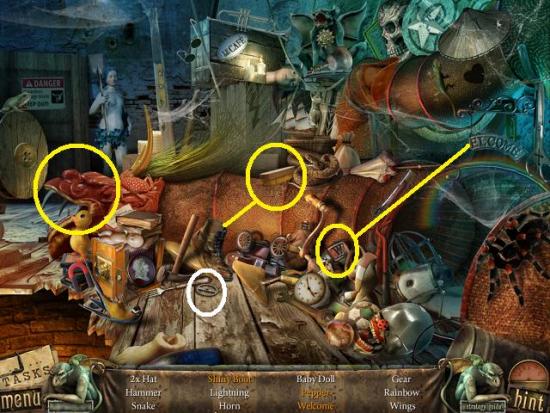
- Find all the items. Use the W on the -ELCOME sign to make WELCOME, use the brush on the boot to get the shiny boot and click on the dragon’s head to get the pepper.
- Note: There is a very big spider in the scene. If you are afraid of spiders, it’s very upsetting.
- A gear is added to your inventory.
- Click on the machine beside the dragon’s head.
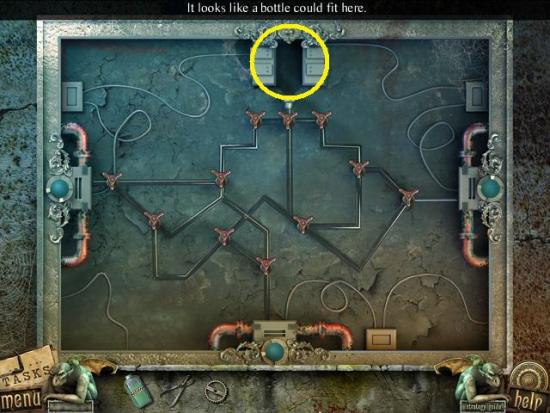
- Place the electrolyte bottle at the top of the pipes (circled). Turn the small valves so the liquid flows through all the pipes and all the valves are facing upwards. The puzzle starts with all facing downwards.
- As you click the valves, take note of what other valves they control.
- Tip: Start with the lowest valve as the only thing that controls it is the valve at the top middle valve (where the liquid starts).
- The stairs have now moved. Leave the scene by going south (down), then go east, west and out the door to the room with your brother’s body.
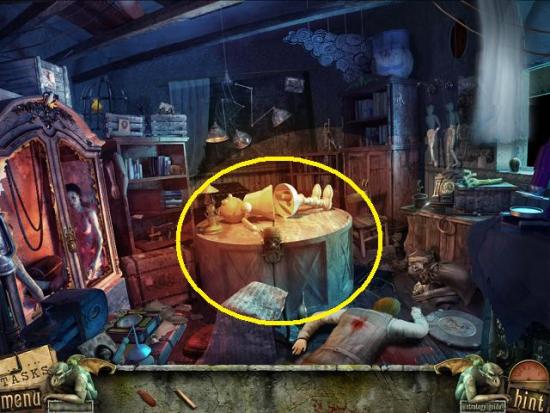
- Click on the circular chest.
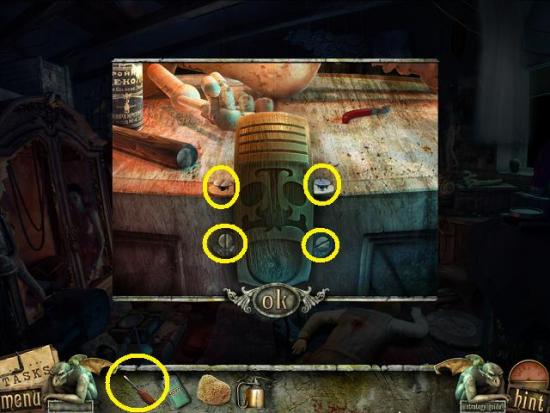
- Use the screwdriver to remove the screws, then use the pliers to open the chest.
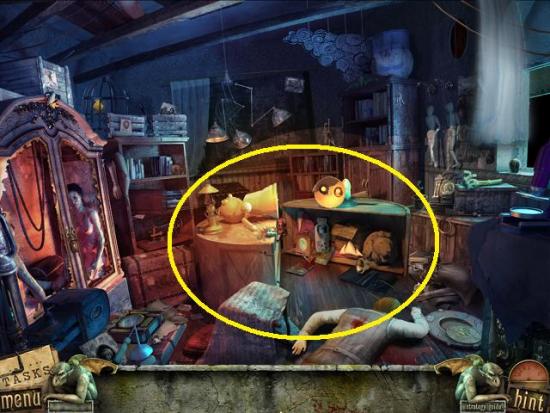
- Click on the opened chest to start a hidden object hunt.
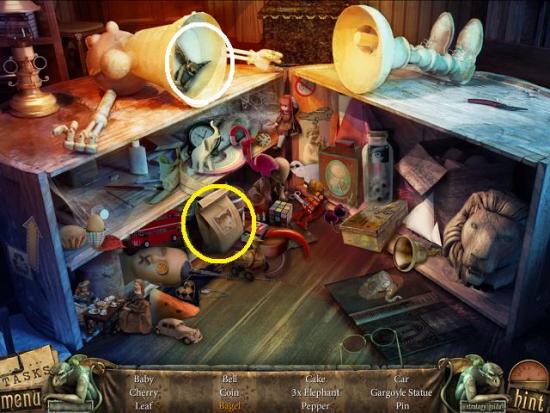
- Find all the objects. Click on the paper bag to get the bagel. A gargoyle statue is added to your inventory.
- Leave the scene by going south and continue back to the room with the curtain. Go through the doorway on the left.
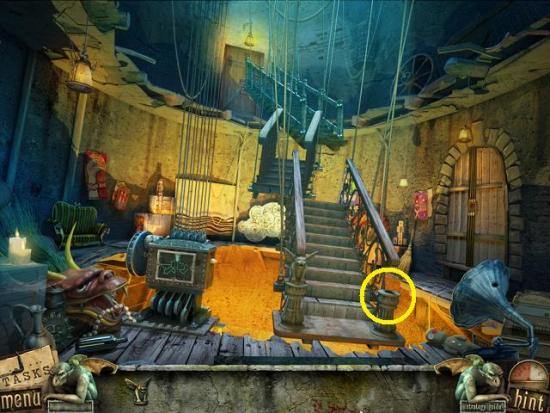
- Place the gargoyle statue in front of the stairs (circled). A step slides aside. Click to examine.
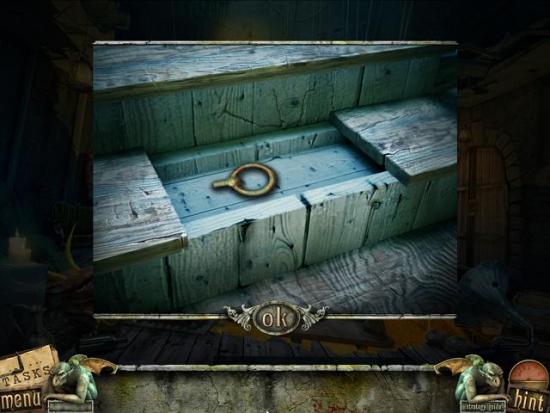
- Take the ring opener. Leave the scene by going south and go south again until you’re in the theatre’s lobby.
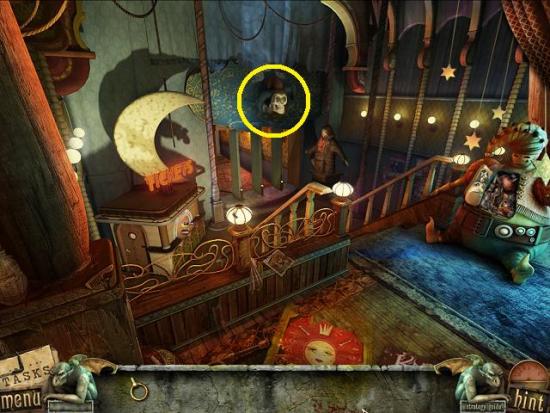
- Click the skull above the door.
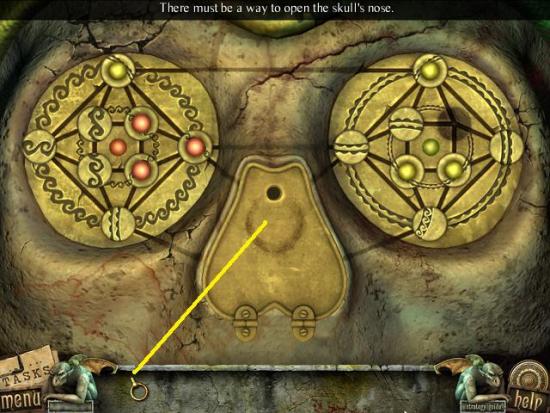
- Place the ring opener where the nose should be. Click on the nose to reveal a mini-puzzle.
- To solve the puzzle, all the discs must be in the proper position. The discs with the green or red stones must surround the green or red centre (respectively) and the outer discs have to match the design.
- Click the discs to move them. A disc can only move if there’s an empty slot beside it.
- Note: There is also a design on the discs with the coloured stones.
- The position of the discs is different each time you click on the puzzle so a solution cannot be given.
- Tip: Position the coloured stone discs first, then the outer pattern, then the smaller centre pattern.
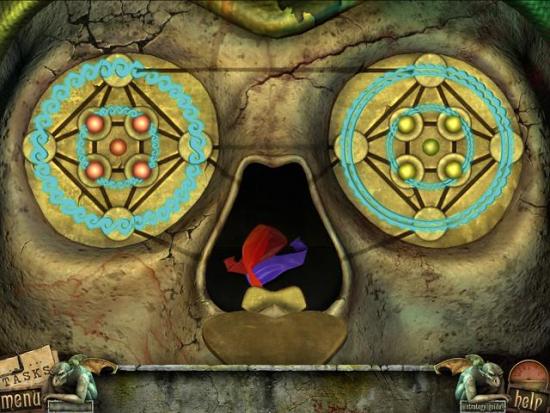
- Once the discs are all in place, the nose opens. Take the deflated balloons.
- Leave the scene and go north to the broken curtain.
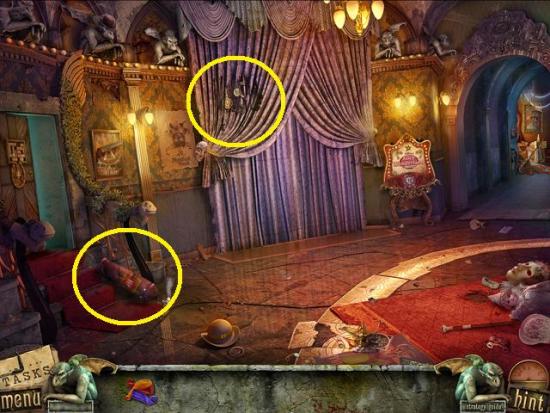
- Use the deflated balloons on the helium tank. Take the balloons.
- Click on the broken curtain mechanism.
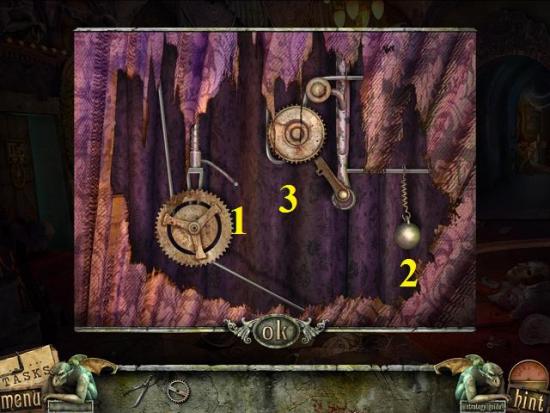
- Position the gear (1). Click on the weight (2) and hang it (3).
- Go through the newly revealed area.
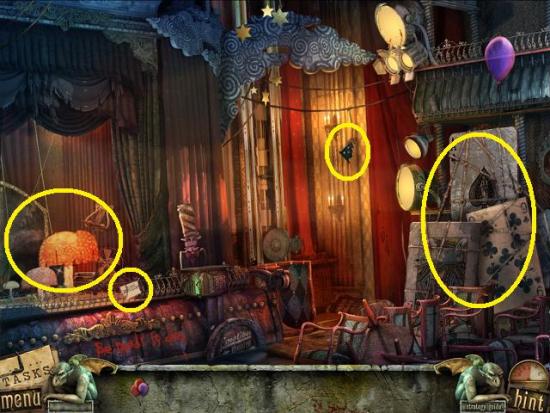
- Take the code piece. Read the note. Click anywhere off the note to close it.
- Click the stage to start a hidden object hunt.
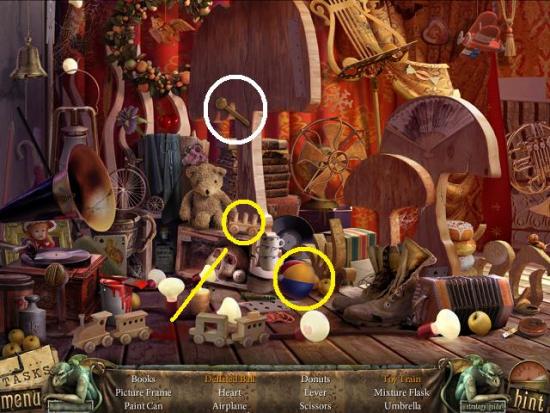
- Find all the objects. Click on the ball to turn it into the deflated ball and pick up the piece of train and position it to complete the train. A lever is added to your inventory.
- Use the balloons on the large cards (right side of scene). Once the cards are out of view, click the newly revealed area to start a hidden object hunt.
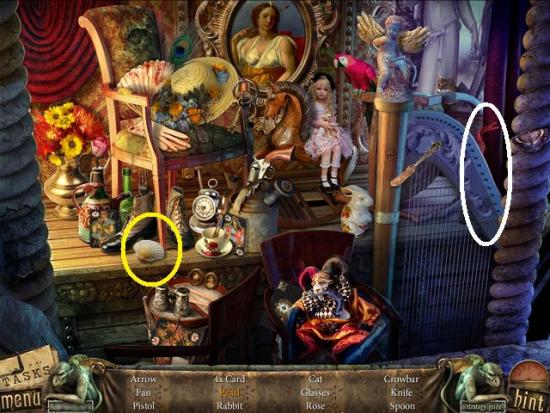
- Find all the items. Click on the shell to reveal the pearl. A crowbar is added to your inventory.
- Leave the scene and go through the door on the left.
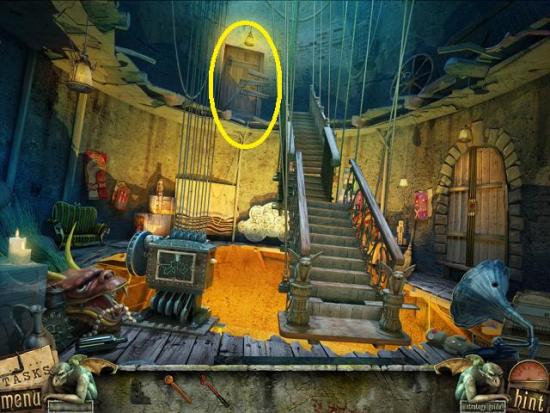
- Click on the door at the top of the stairs.
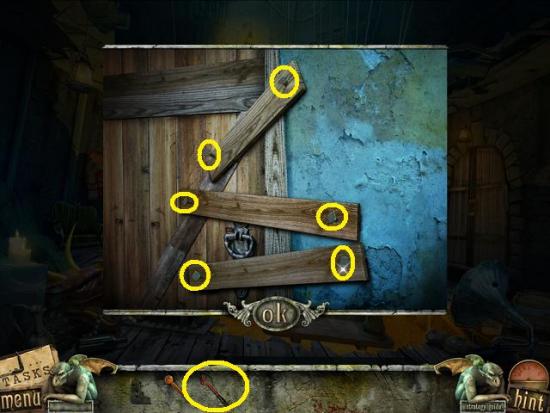
- Use the crowbar on the nails in the boards.
- Tip: Position your cursor, not the crowbar, over the nails.
- Go through the door.
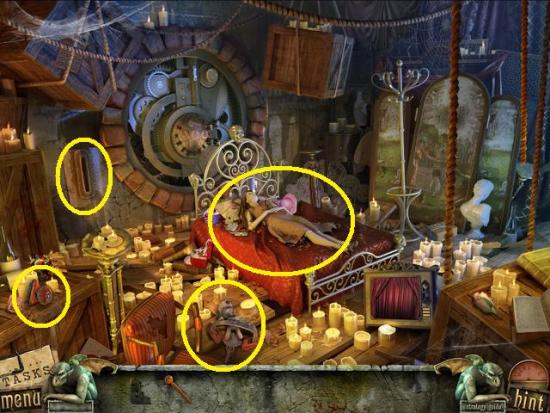
- Take the handle. Click on the toy in the bear trap.
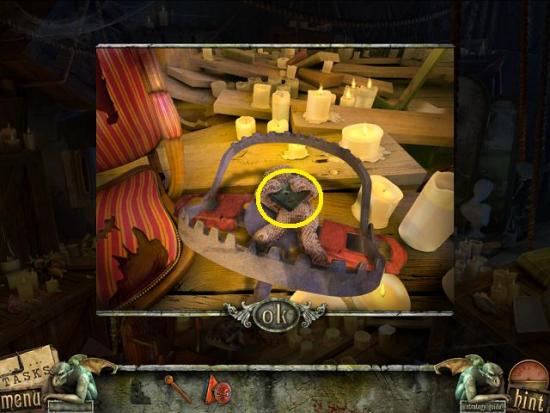
- Click on the trap to open it, then take the code piece from the toy’s hands.
- Click on the mannequin on the bed.
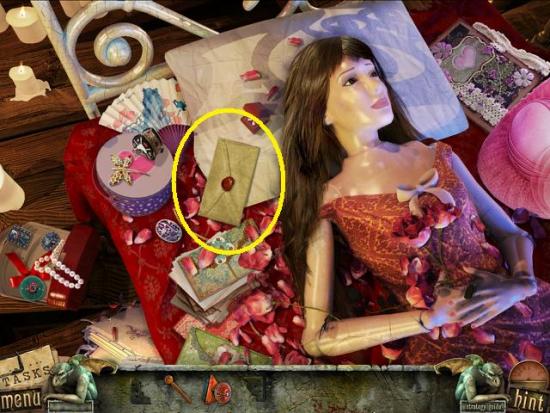
- Click to read the letter, then leave the scene.
- Position the lever on the wall, then click on it. The bed lifts. Click the newly revealed area to start a hidden object hunt.
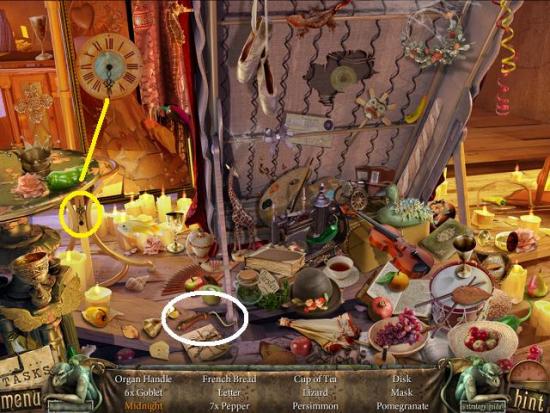
- Find all the items. Put the hour hand on the clock and it will automatically go to midnight. An crank is added to your inventory.
- Leave the scene and go down the stairs, then go to the stage (through the curtain).
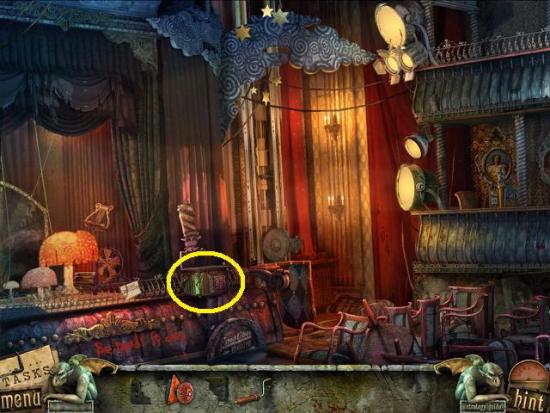
- Click on the music box.
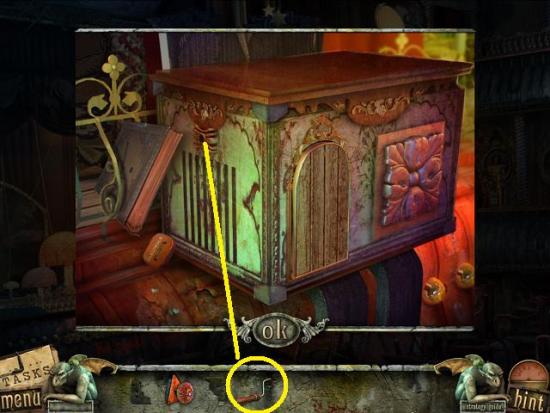
- Place the crank on it. Click on the crank to turn it. A little door opens, take the backdrop from it.
- Leave the scene and go through the door on the left and up the stairs.
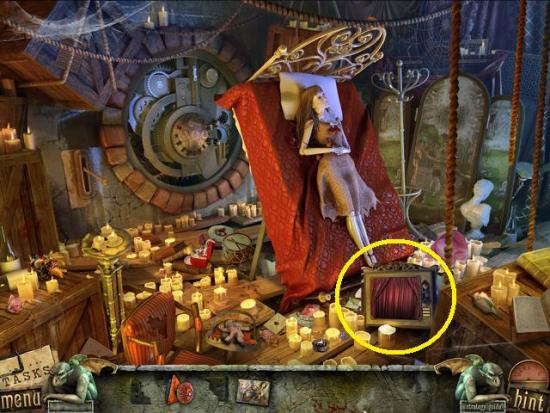
- Click on the puppet show stage.
- Pace the backdrop on the stage. Like the puzzle before, recreate the backdrop’s scene. However there are a few differences. NATURE has been added. There is now a lever that moves the item closer or farther away within the scene.
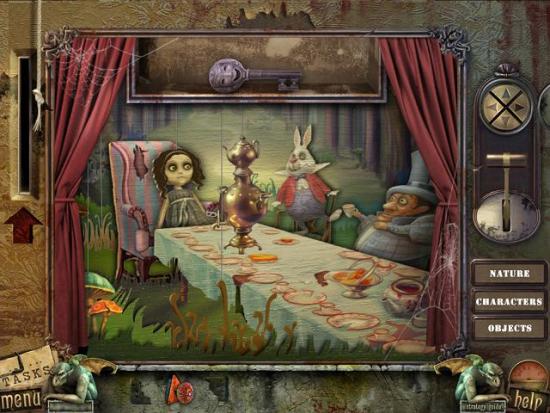
- Once you’ve arranged all the items, take the joyful key.
- Leave the scene.
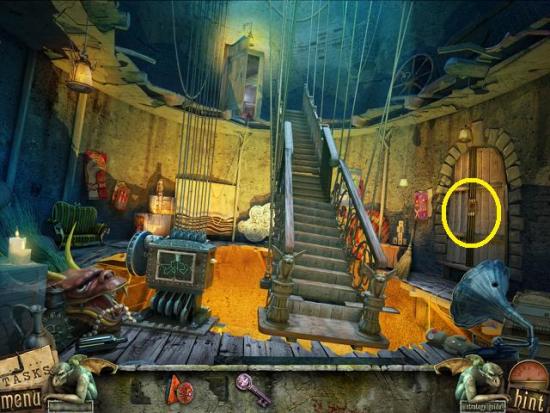
- Click on the door (right side of scene).
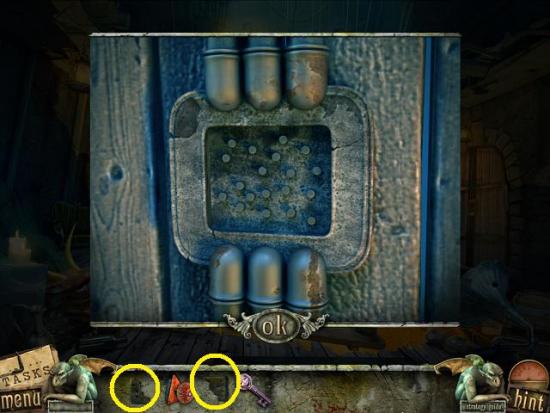
- Place the code pieces on the door. Click on the newly opened door to start a hidden object puzzle.
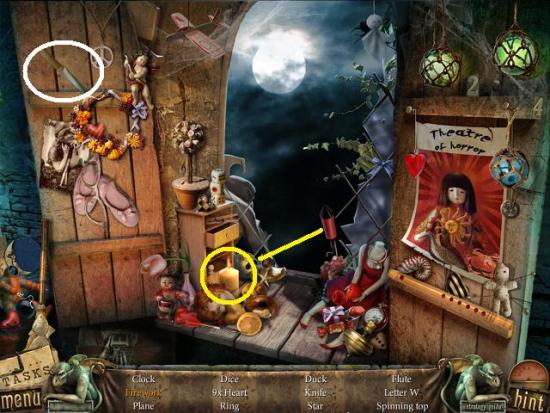
- Find all the items. Take the candle and use it to light the firecracker. Don’t forget to take the fireworks as they go off. A knife is added to your inventory.
- Go up the stairs.
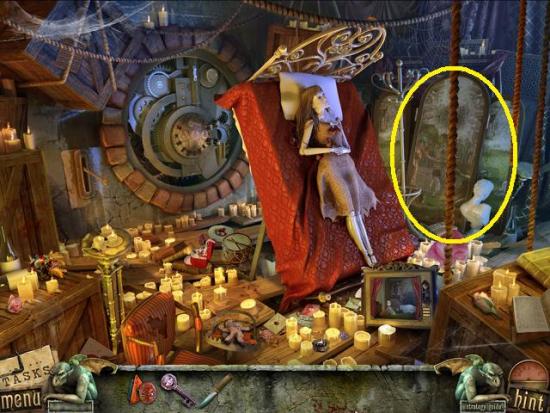
- Use the knife to rip the privacy screen. Click on the new area.
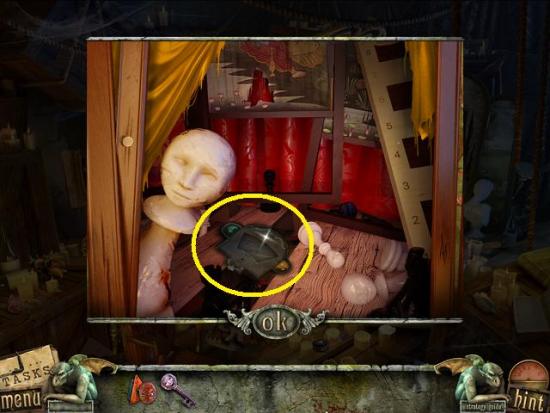
- Take the elevator panel. Leave the scene and go south one more time. Go through the curtain to the stage.
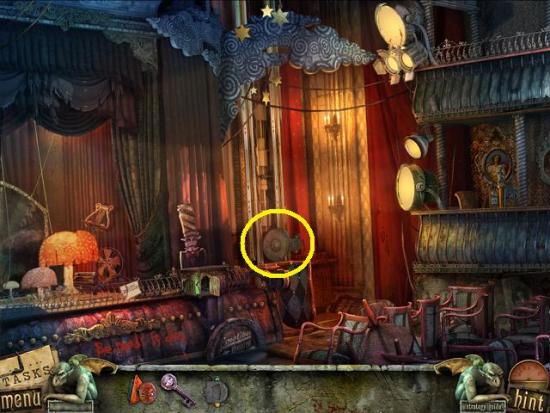
- Click on the elevator mechanism.
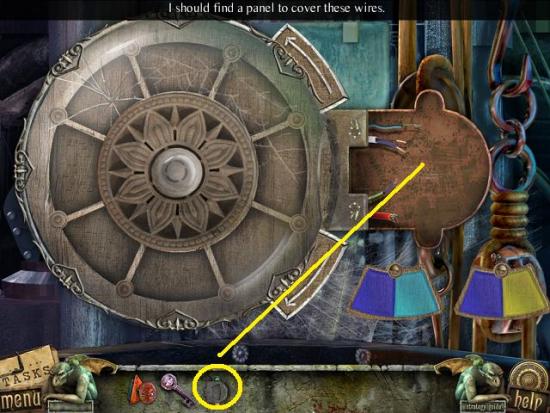
- Position the elevator panel. A mini-puzzle starts.
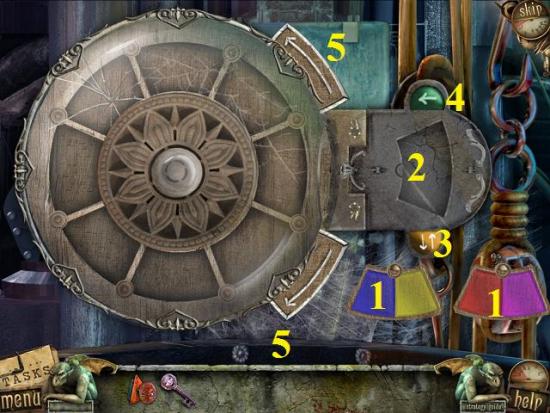
- Take the tiles (1) and put them in the slot (2). Use the up and down arrows button (3) to switch the position of the colours on the tile. The left arrow (4) pushes the tile into the wheel. The wheel’s arrows (5) rotate the wheel.
- To solve the puzzle, fill the wheel with tiles. Each tile’s side must be touching a tile of the same colour.
- To remove a tile from the wheel, line it up with the slot and press the left arrow (4).
- To begin, look at the first two tiles. If there’s a matching colour, place them in the wheel. If there is no matching colour, click a tile so it moves and you can see the tile below.
- Solutions will be different.
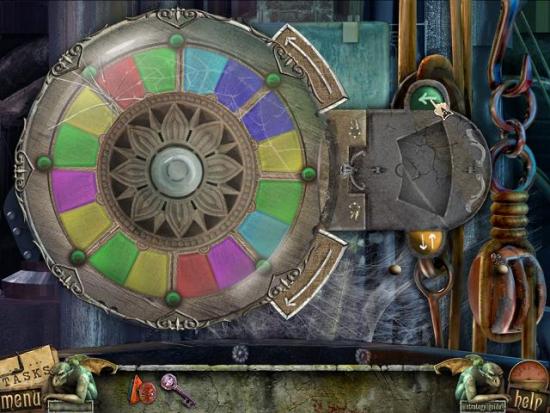
- The elevator very slowly rises.
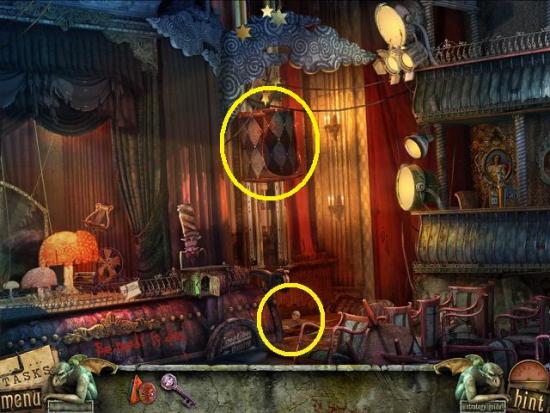
- Click the area below it to start a hidden object hunt.
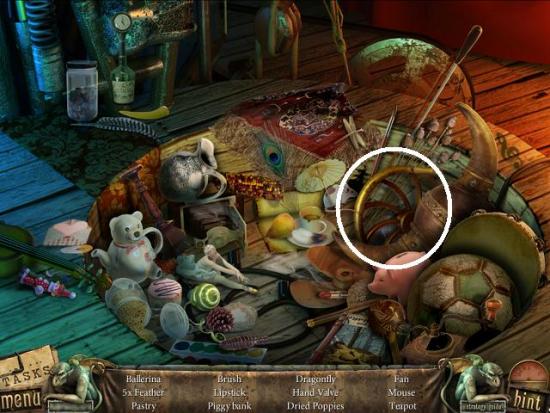
- Find all the items. There are no interactions required in this scene. A hand valve is added to your inventory.
- Leave the scene by clicking on the elevator.
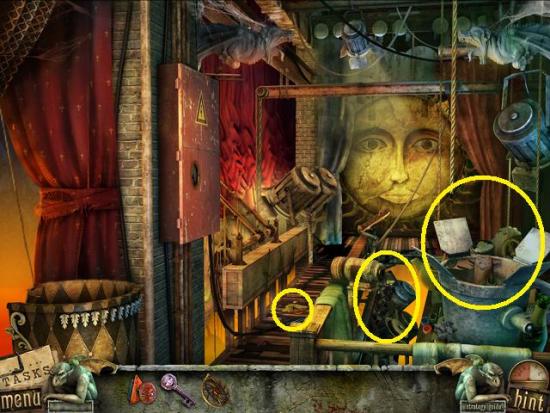
- Click on the scissors on the ground. Click on the upright spotlight (right) to start a hidden object hunt.
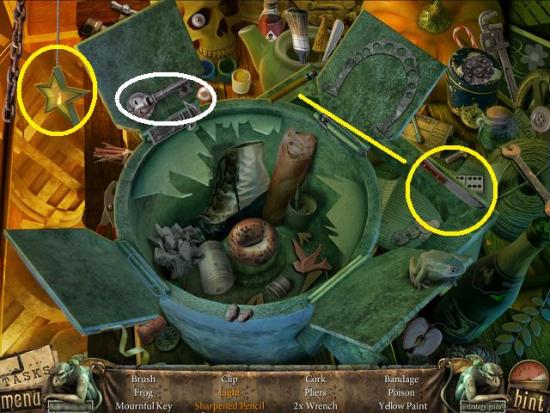
- Find all the items. Click on the hanging star to open it, then click on it to take the light. Use the knife on the pencil to make the sharpened pencil. A mournful key is added to your inventory.
- Click on the mechanism to the left of the upright spotlight.
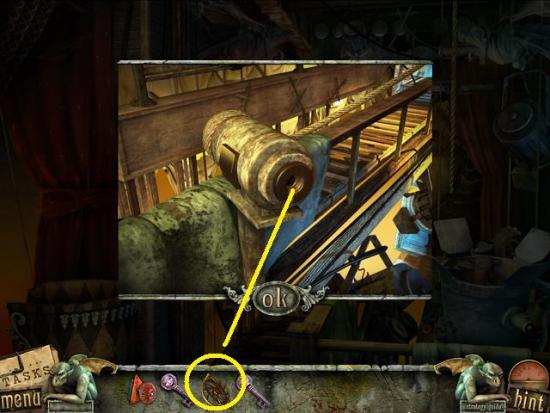
- Use the hand valve on the mechanism. Click to turn the valve. A large smile is raised (left of scene).
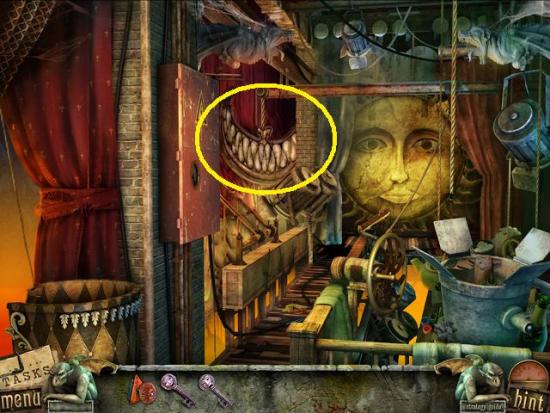
- Click on the new item.
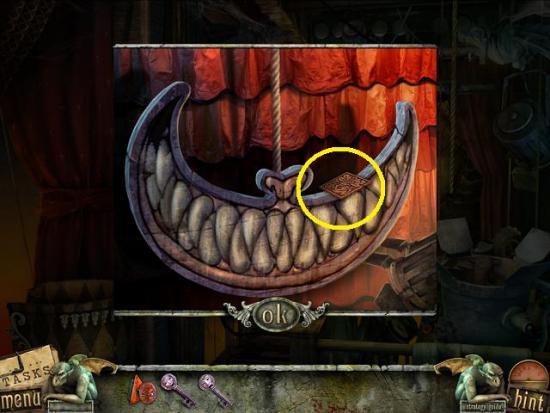
- Take the tortoise tile. Leave the scene and go south again, then go east and then west.
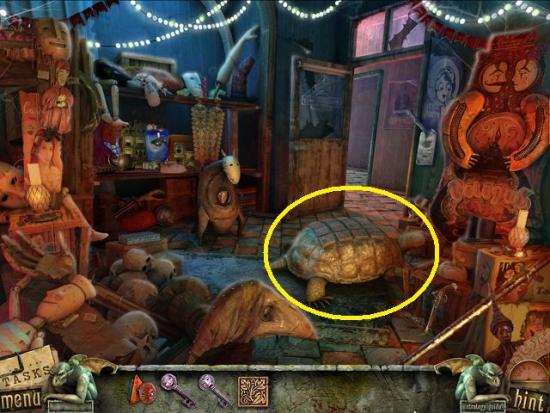
- Click on the tortoise.
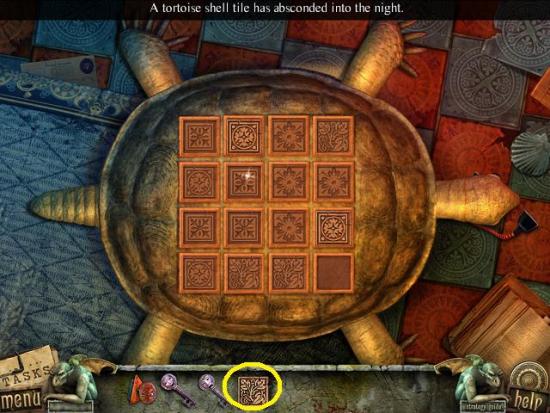
- Place the tortoise tile on the empty slot. A mini-puzzle starts. To solve this puzzle, arrange the tiles so each column and row (including the two four tiled diagonal rows) have four different tiles.
- Tiles are moved by swapping. Click two tiles to swap places with each other.
- No solution can be provided as there are multiple solutions.
- Tip: Select a tile type and arrange them, then work from there.
- Tip: Tiles are correctly positioned when they appear brighter. If a wrong tile gets moved into its row or column, it will darken.
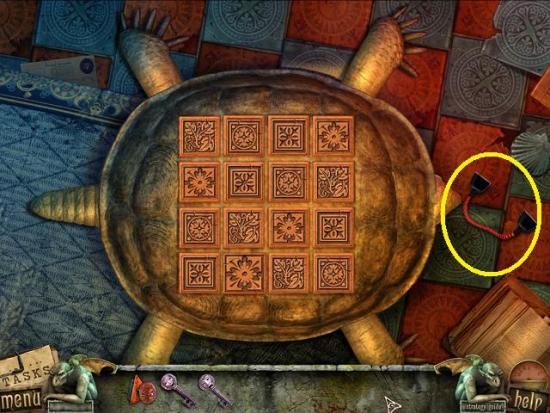
- This screenshot is one possible solution. Take the wire. Leave the scene and go south again.
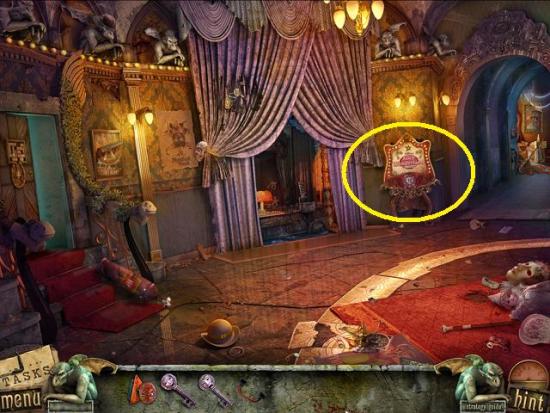
- Click the Alice in Wonderland puppet stage.
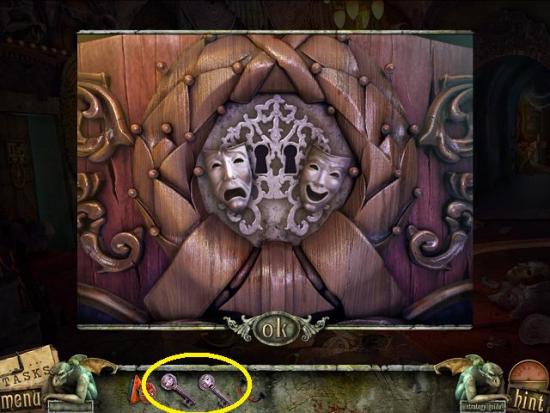
- Use the joyful key and mournful key in the locks. Click the puppet stage to start a hidden object hunt.
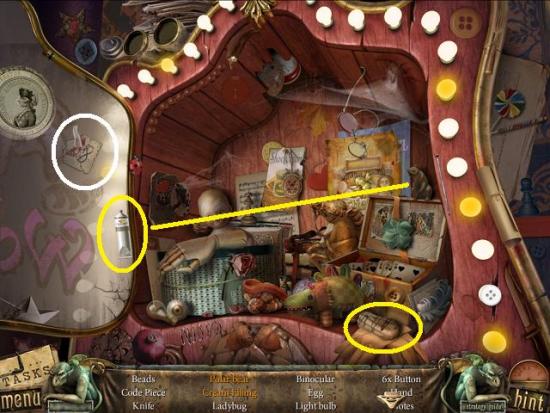
- Find all the items. Click the pastry so the cream filling pours out. Use the white paint to make the bear a polar bear. A code piece is added to your inventory.
- Go through the door on the left and up the stairs.
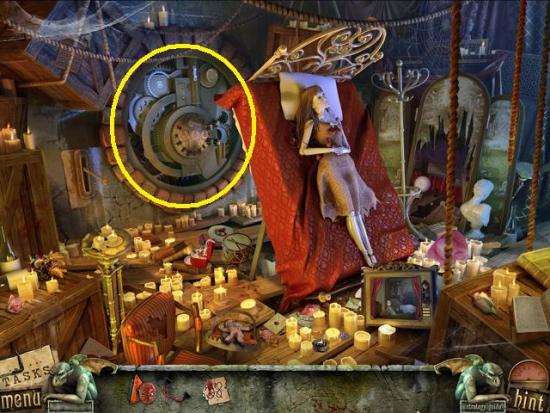
- Click on the safe on the back wall.
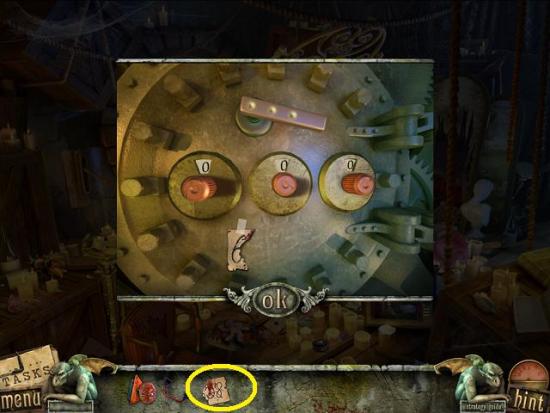
- Place the code piece to complete the code/safe combination. Then turn the dials to the combination the code piece revealed. The middle number is smudged. Position the outer dials and then turn the middle dial to each number and click on the lever until it opens.
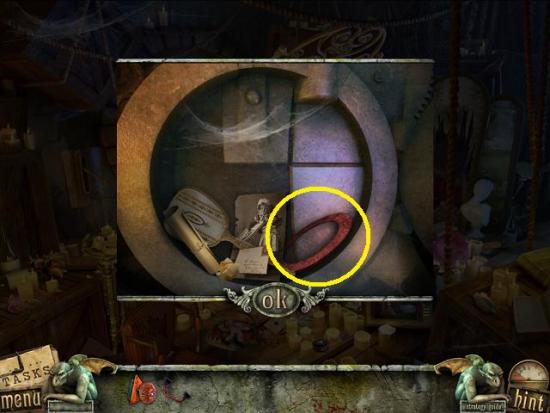
- Take the torus.
- Leave the scene and go south again, then go through the curtain to the stage. Click the elevator.
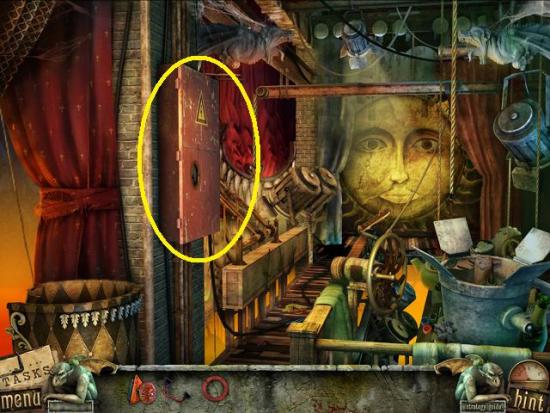
- Click the panel.
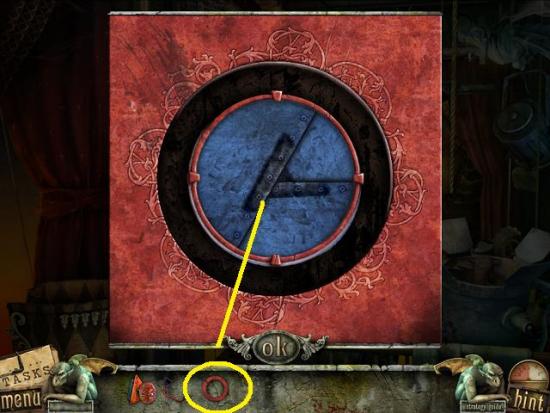
- Position the torus. Rotate the ring until the silhouette forms a triangle.
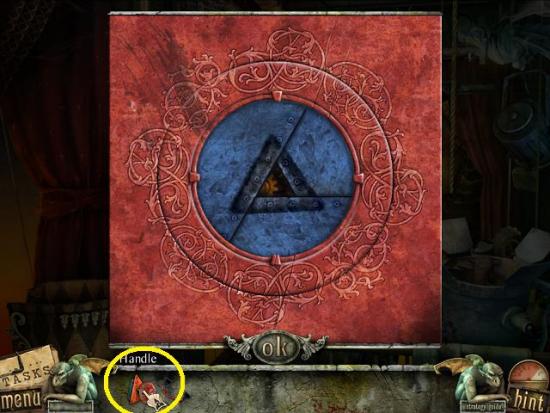
- Position the handle.
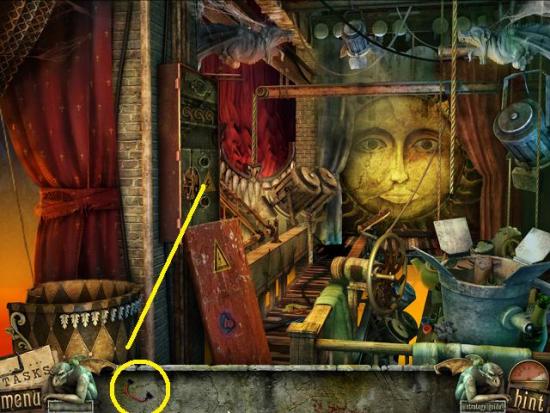
- Click on the exposed area. Use the wire on it.
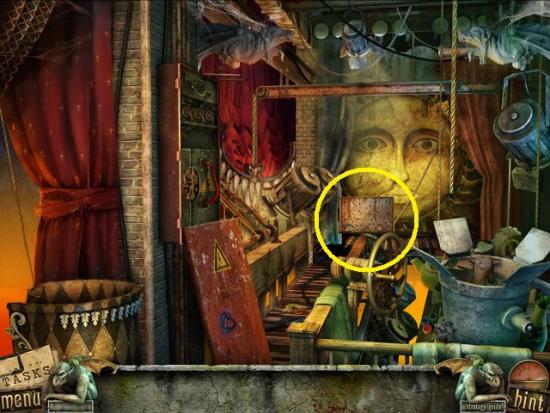
- Click on the new item.
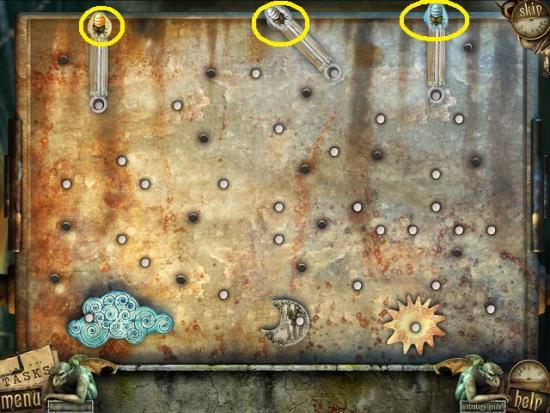
- A mini-puzzle starts. Click on a bug to move it to the bottom of its lever. Then click and drag the top of the lever to turn it downwards and fasten it to a peg. Continue moving the levers downward until the bugs meet up with an element.
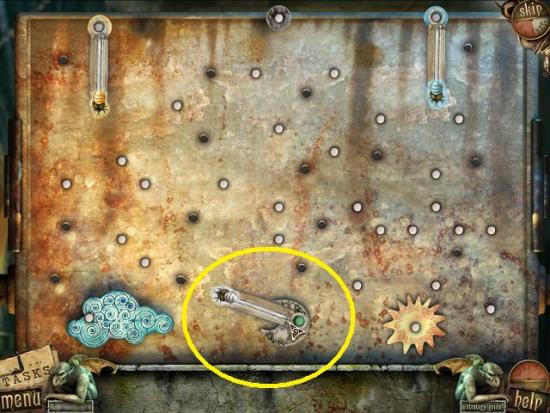
- The screenshot above shows an example of moving the levers and matching them to pegs. Click and drag an empty slot to position it on a peg.
- You can only move the lever to white pegs. If you are in the right position to stop on a peg, it will turn green.
- Once you’ve solved the puzzle, a cut scene starts and the level is over.
End of chapter!
Venice
- Go through the doorway to start the Venice level. Watch the cut scene.
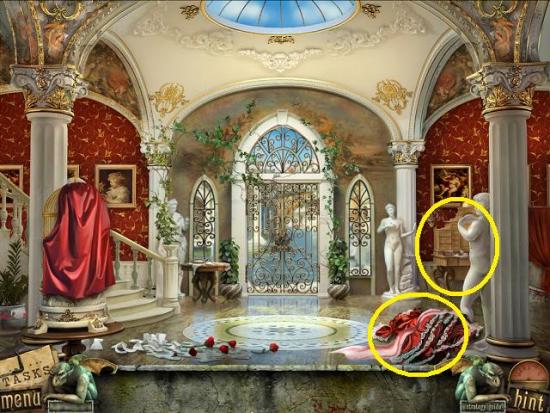
- Click the dress on the floor.
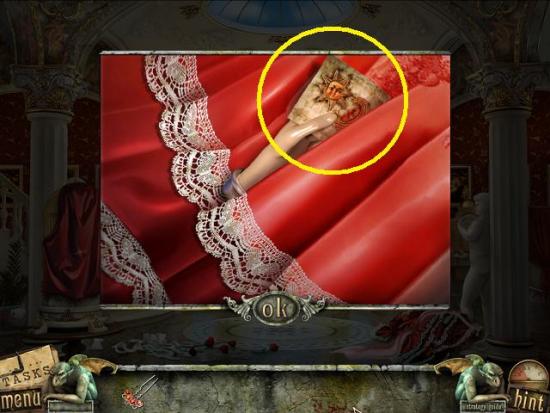
- Take the hand. Click on the credenza at the right of the scene to start a hidden object hunt.
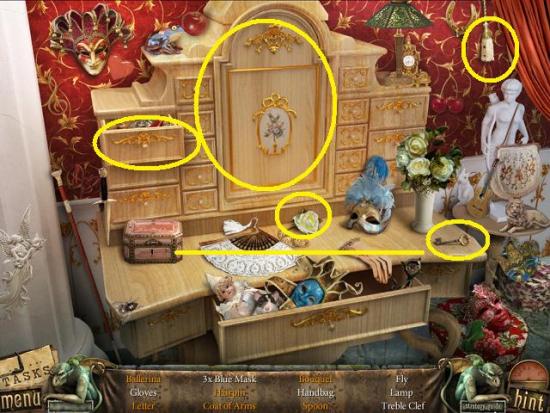
- Find all the items. Click the drawer to get the letter and hairpin. Click the middle panel to reveal the spoon. Click the tassel to reveal the coat of arms. Click the rose to return it to the bouquet. Use the key on the jewellery box to get the ballerina. The hairpin is added to your inventory.
- Leave the scene by going up the stairs (left).
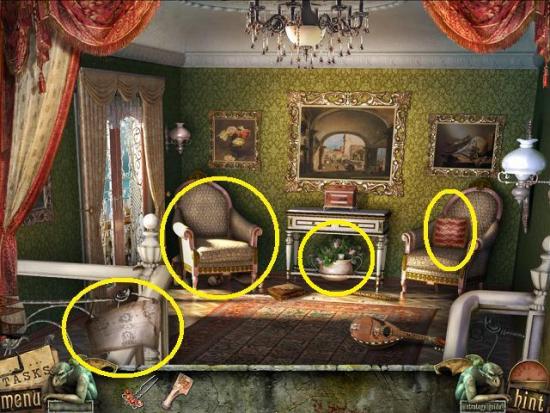
- Take the lock instructions. Click the pillow on the right chair.
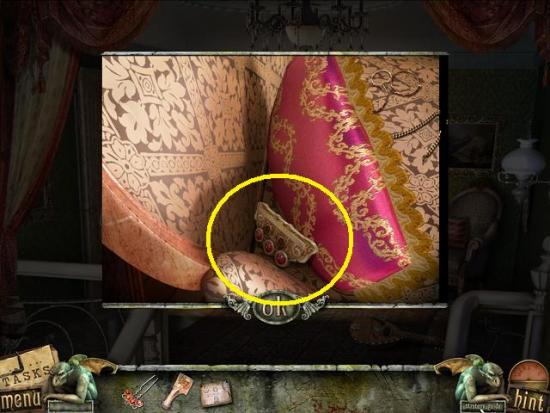
- Take the button panel. Click on the left chair to start a hidden object hunt.
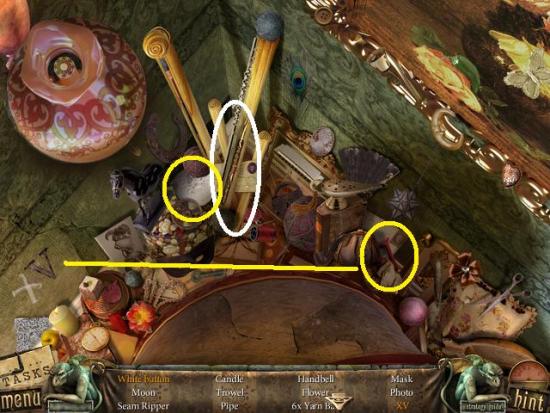
- Find all the items. Use the V on the XV on the left side. Click on the small white box to get the white button. A seam ripper is added to your inventory.
- Click on the flower pot below the table.
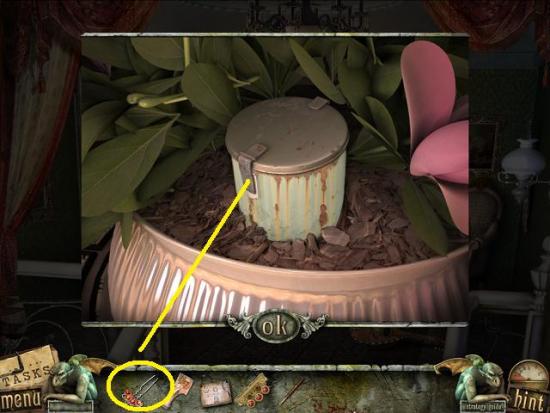
- Use the hairpin to open it. Take the cage key.
- Leave the scene by going south.
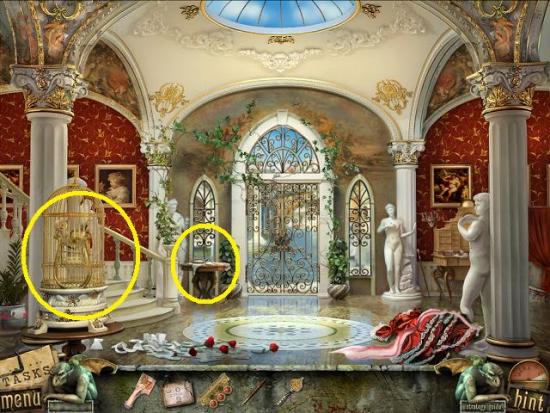
- Click the table to the left of the door.
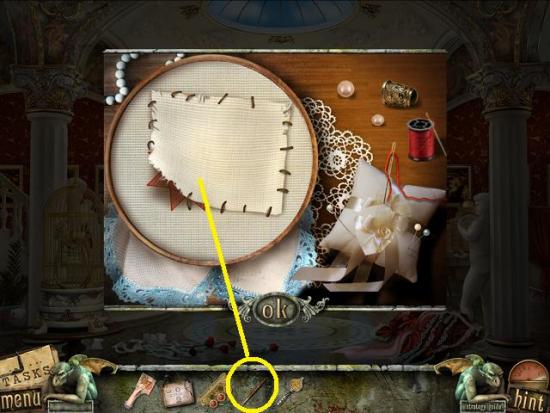
- Use the seam ripper to rip the seams on all four sides. Take the handkerchief.
- Click the cage.
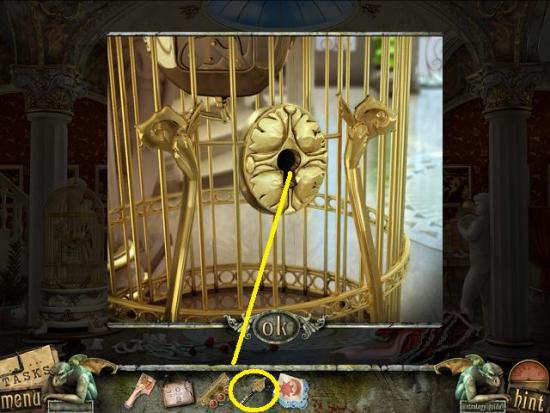
- Use the cage key to unlock the cage. Click on the open cage door to start a mini-puzzle.
- Click on the item to open its panel. Position all the gears into the main mechanism so they all rotate.
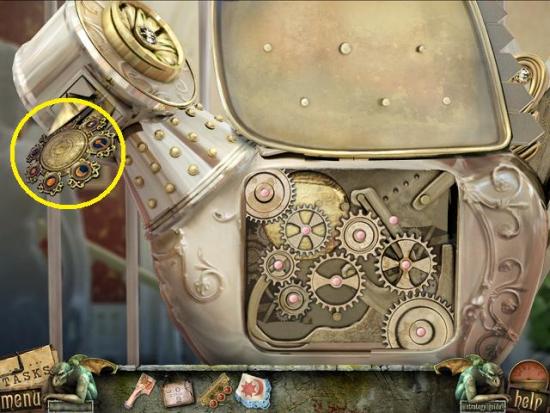
- Take the gear from the mechanical bird’s mouth.
- Go upstairs.
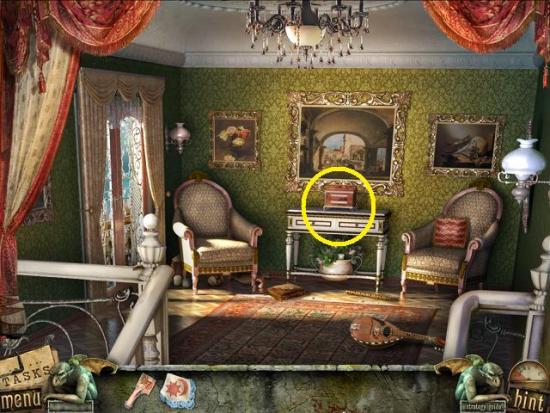
- Click on the box on the table.
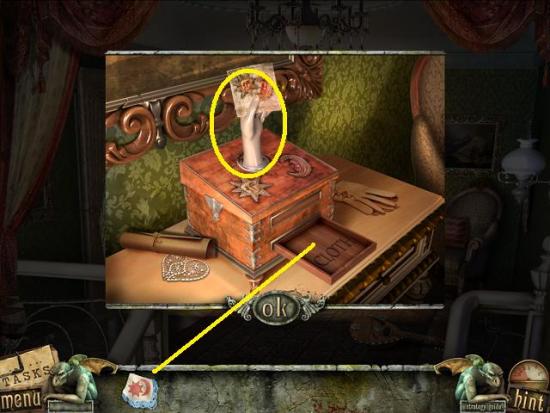
- Place the hand on top of the box and add the handkerchief to the drawer that reads “cloth.” Take the monocle.
- Return downstairs and click on the door in the middle of the scene.
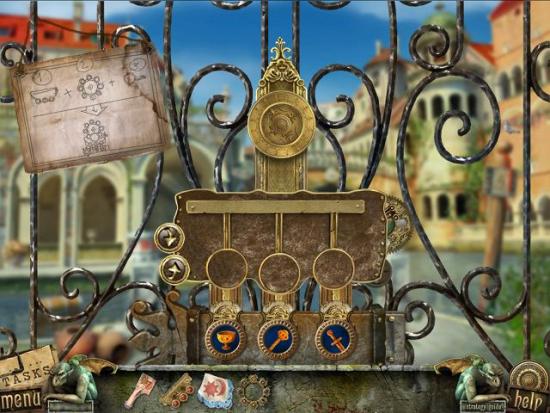
- Place the lock instructions on the mechanism. Then add the button panel, gear, and monocle.
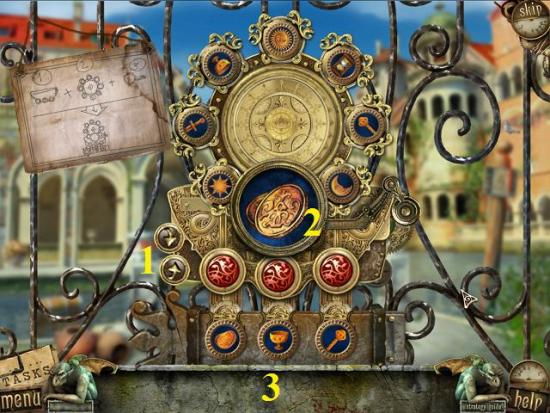
- To solve this puzzle, use the buttons (1) to rotate the top wheel so the monocle displays a symbol (2) represented in the buttons below (3).
- When the wheel is moved clockwise, it moves two positions (i.e., it skips a symbol), when the wheel is moved counter-clockwise, it moves three positions. You’ll have to work the wheel back and forth in order to get it to display the symbols you require.
- When you have one of the bottom symbols (3) displayed in the monocle (2), click the button above the appropriate symbol.
- Once complete, the door opens. Leave the room through the open door.
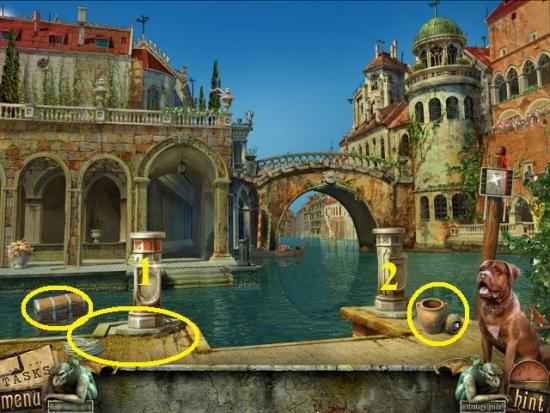
- Click on the rope with the grapple hook to pull the floating chest closer. Click on the floating chest and take the blue mask. Click on the urn. Take the red mask.
- Place the red mask on the pillar on the left (1) and the blue mask on the pillar on the right. Cross the bridge that opens as a result of this action.
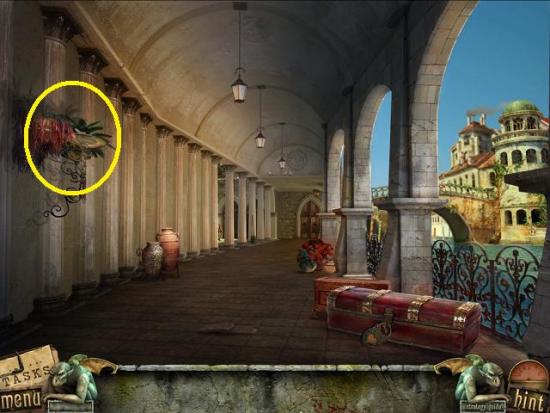
- Click the hanging plants on the left wall.
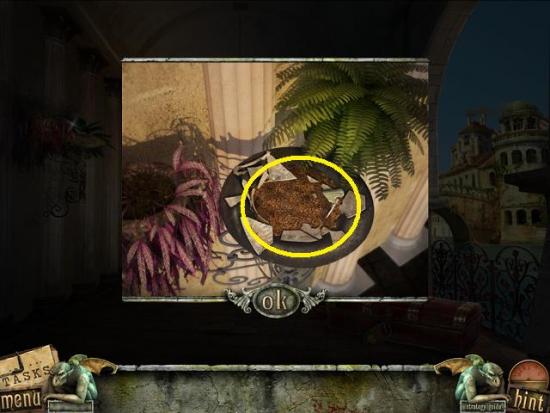
- Click several times to remove the dirt. Take the harlequin part.
- Go south.
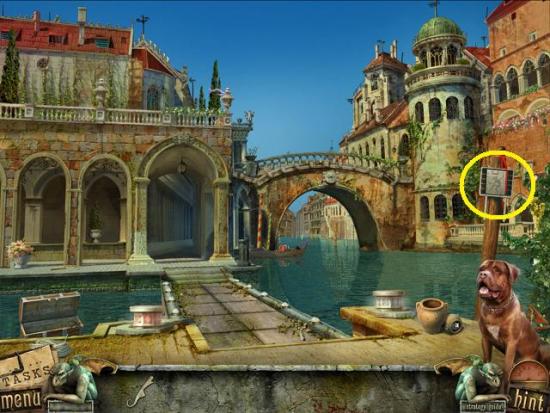
- Click on the sign post.
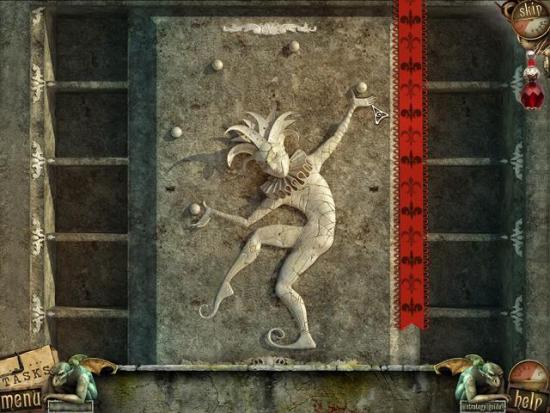
- Add the harlequin part. Complete the jigsaw puzzle. When the sign slides away, take the grapes that are revealed.
- Cross the bridge and go north one scene.
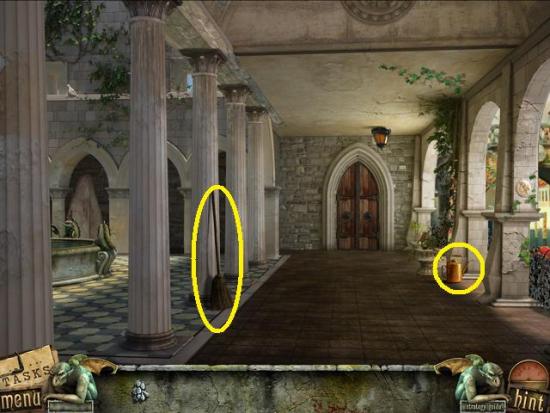
- Take the empty oilcan. Click on the broom and take the stick.
- Leave the scene by taking the path to the right.
- After the cut scene, you are given a key.
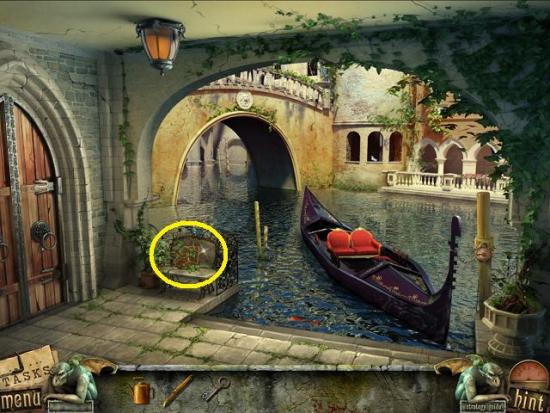
- Click the bench.
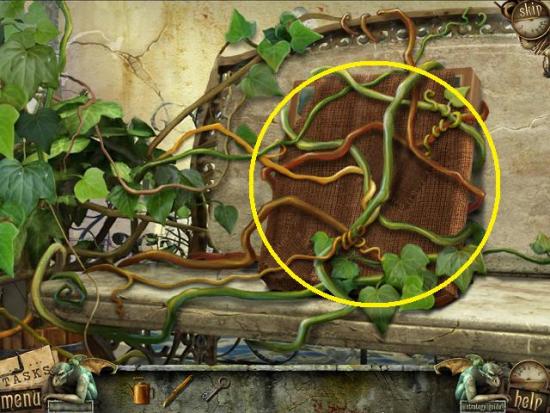
- You must remove the vines and leaves. You can only remove the vines that are up front (this puzzle uses depth) so start clicking on the vines that have no other vines crossing them. If you don’t feel like thinking, just click every single item because eventually, it will move. Take the painting.
- Leave the scene by going south, then go west (left).
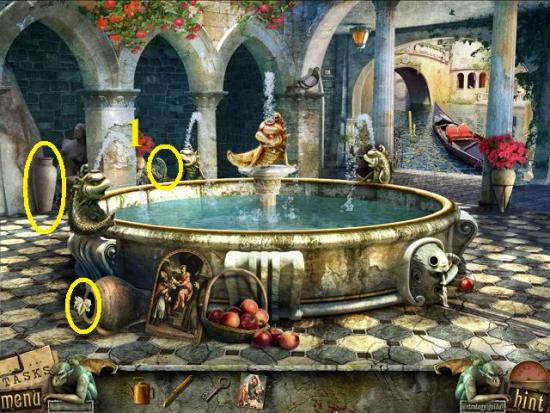
- Take the grape leaf. Click the urn at the back to start a hidden object hunt.
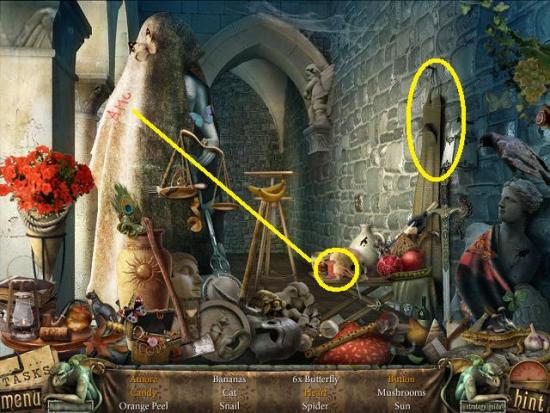
- Find all the items. Use the red thread to complete Amore and click on the apron to get the button, heart and candy. A heart key is added to your inventory.
- At the far back of the fountain, click the fish’s fin (1).
- Leave the scene by going northeast (towards the gondola) and then go south one scene.
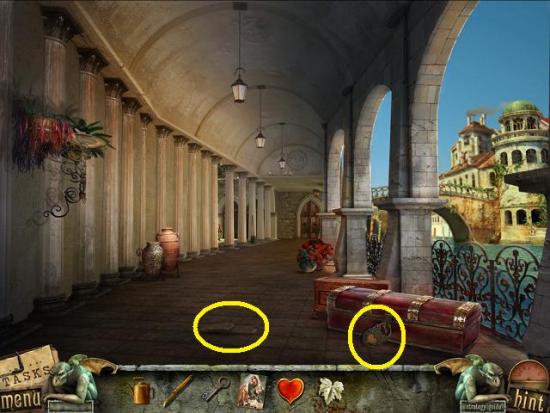
- Click on the chest and place the heart key on the lock. Click to move the items and take the grape leaf. Click on the tiles. Use the stick to loosen the tile, then take the tail fin.
- Leave the scene by going north.
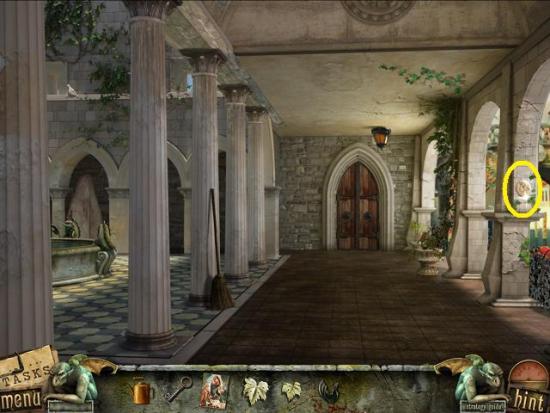
- Click on the relief on the right pillar.
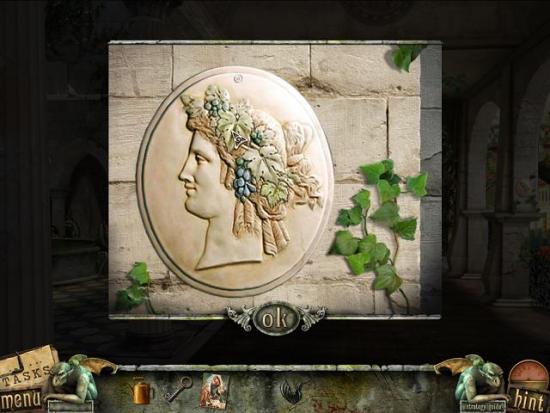
- Position the grapes and the two grape leaves on the relief. When the relief moves, take the lock pick.
- Leave the scene by going east (right).
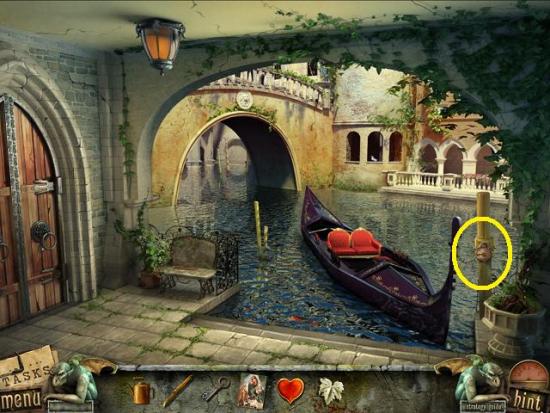
- Click on the post.
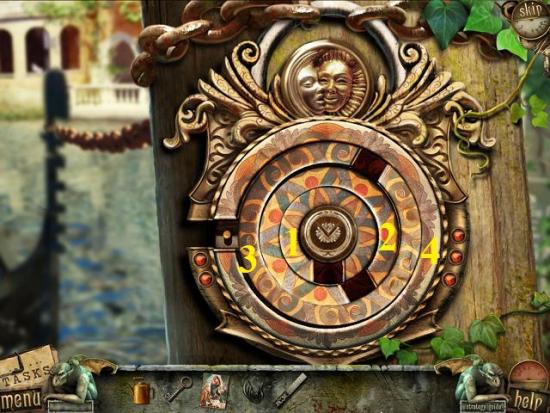
- Place the lock pick on the lock (the lock pick remains in your inventory).
- To solve this puzzle, you must rotate the rings so the slot is on the going towards the left (to allow the lock pick in)
- There are four wheels (labelled in screenshot above, 1, 2, 3, 4). Clicking on a ring rotates it. They all rotate clockwise.
- Ring 1 (smallest) rotates rings 1, 2.
- Ring 2 rotates rings 1, 2, 3.
- Ring 3 rotates rings 2, 3, 4.
- Ring 4 rotates rings 3, 4.
- Rotate ring 1 to align it. Rotate ring 3 to align ring 2. Rotate ring 4 to align ring 3. With 1, 2, 3 aligned, rotate them to align them with ring 4 (not the opening). Do this by rotating ring 2 until all four rings are aligned with each other. Then rotate rings 1 and 3 to align all the rings with the slot.
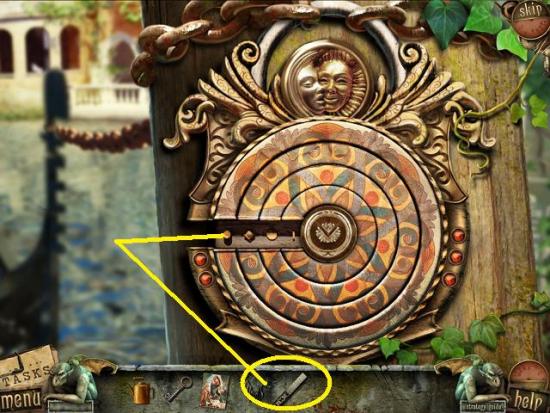
- Use the lock pick.
- Get on the gondola.
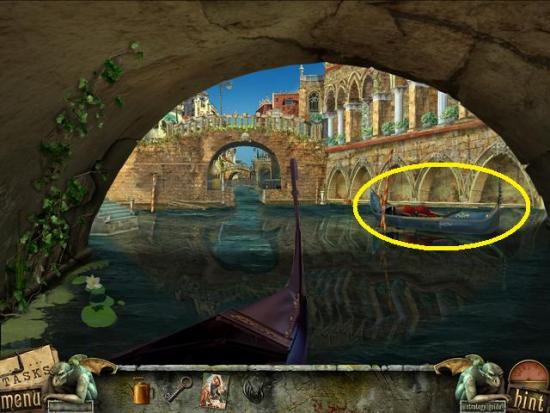
- Click the gondola to your right to start a hidden object scene.
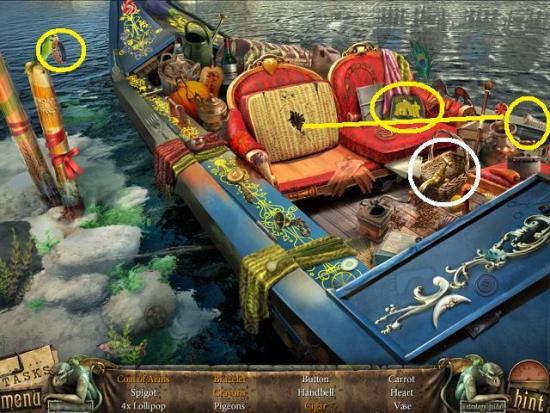
- Find all the items. Click on the bird to make it let go of the bracelet. Click on the case to get the cigar and crayons. Click the spring and put it on the chair to fix the cushion and get the coat of arms. A spigot is added to your inventory.
- Go north.
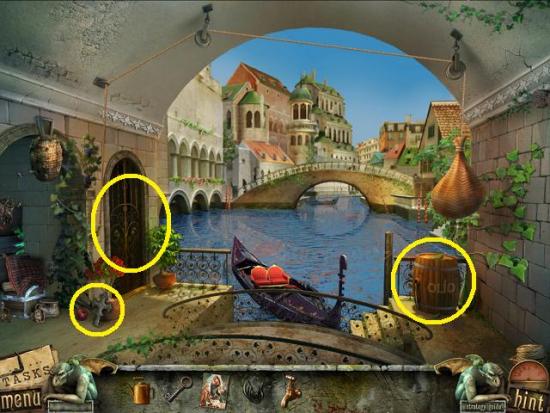
- Take the cross. Click on the barrel.
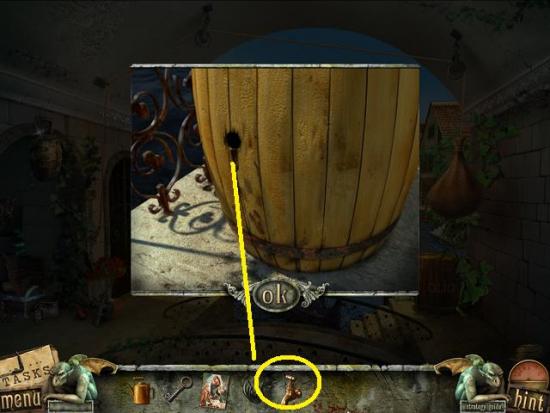
- Place the spigot on the opening. Then place the empty oilcan below the spigot. Click to take the full oilcan.
- Click on the gate.
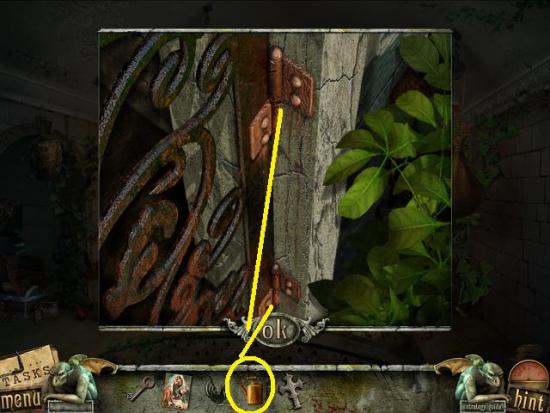
- Use the full oilcan on the two hinges.
- Go through the gate.
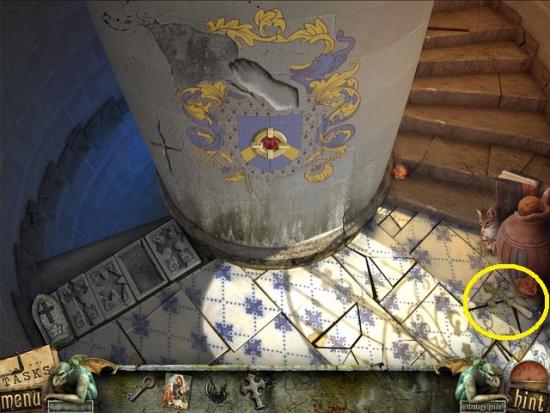
- Take the cross. Go up the stairs.
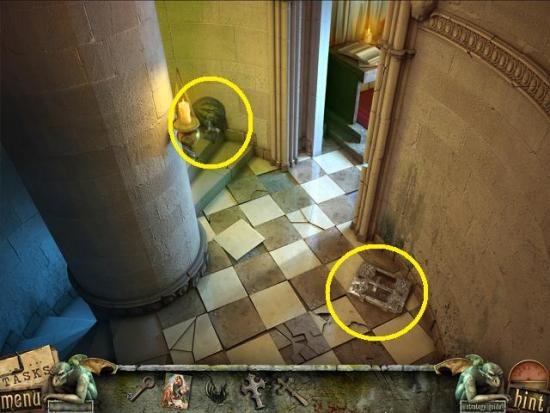
- Take the cross. Click the stairs to start a hidden object hunt.
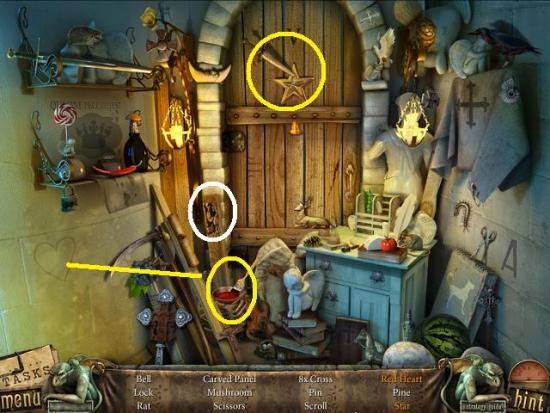
- Find all the items. Use the red paint on the heart on the wall to make a red heart and click the knife so it releases the star. Pick the star up from where it fell. A carved wood panel is added to your inventory.
- Enter the room.
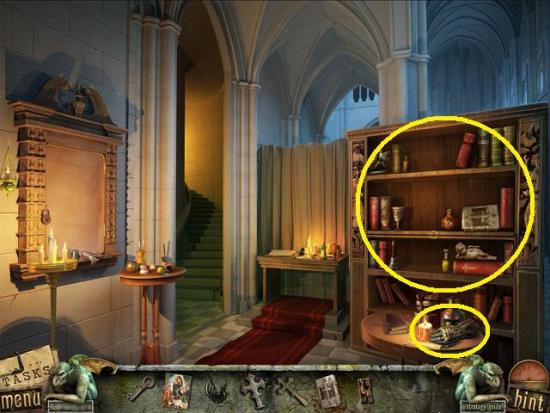
- Take the gauntlet. Click the bookshelf.
- Position the carved wood panel. To solve this mini-puzzle, you have to position the wood panels to complete their design. Panels are moved by clicking and swapping one for the other. You can also swap panels from left to right.
- Once you are complete, take the cross.
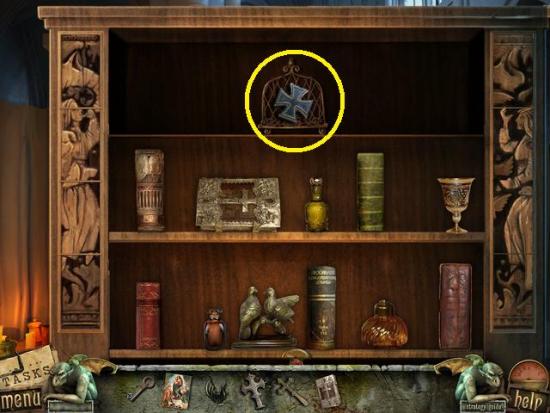
- Leave the scene and go down the stairs.
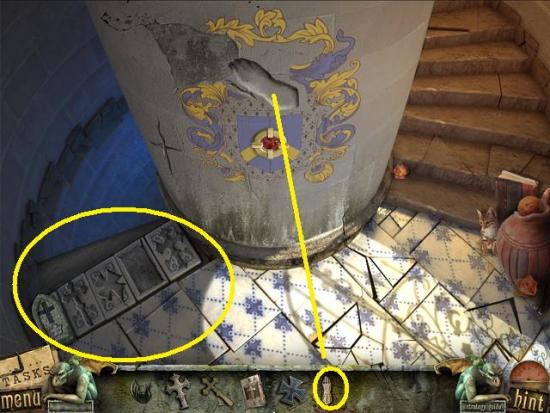
- Place the gauntlet in the slot. Take the red gem that fell.
- Place the four crosses in their appropriate slots.
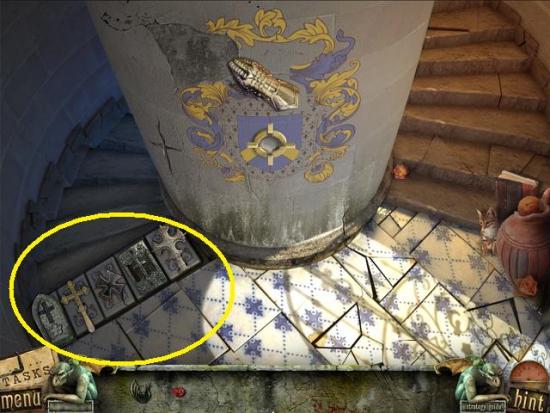
- Go down the stairs.
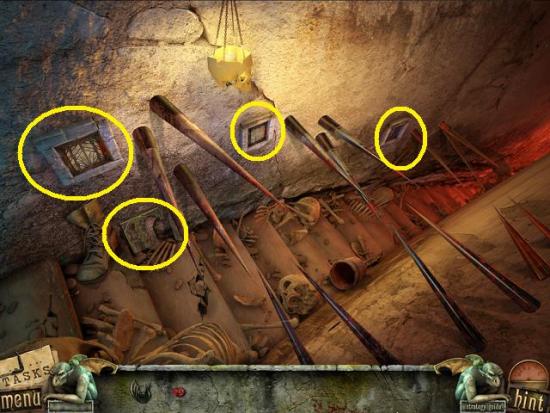
- Take the torn picture. Click the gate. Place the red gem in the slot.
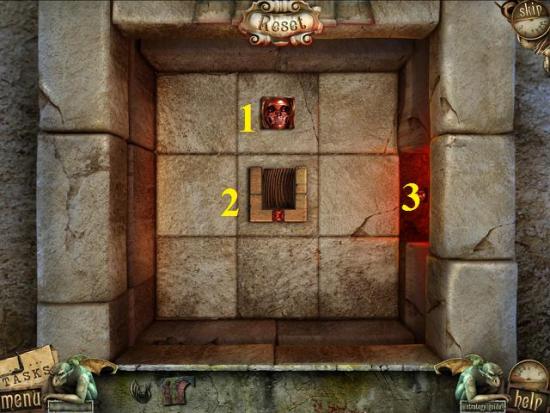
- To solve this mini-puzzle, click on the skull (1) and then click on the box (2). Once the skull is in the box, click the tile on the right of it and then click on the exit (3) to move the skull and box out of the area.
- Some spikes move. Click on the next gate.
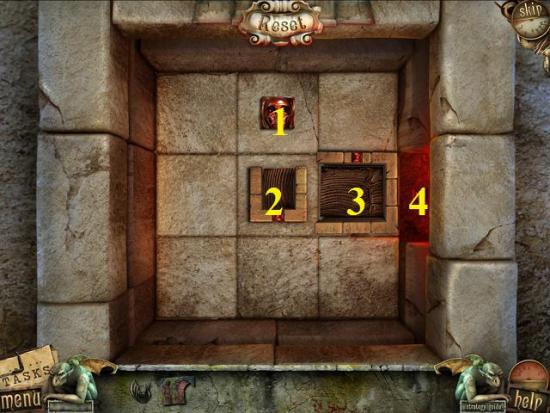
- Move the skull into the small box and then the bigger box. Follow the screenshot for the order of moves/clicks.
- More spikes move. Click on the next gate.
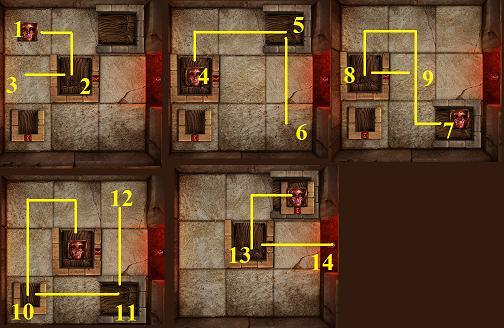
- This one is a little trickier. The two gold boxes can only move down or left and right so you’ll have to use the stone box to move the small gold box.
- Move the skull (1) one space to the right and one down into the large gold box (2). Move them one space to the left (3). Click one space up so the skull (4) leaves the box and move the skull into the large stone box (5). Move it two spaces down (6). Move the skull (7) one space to the left and go to the top, then one to the left and down into the large gold box (8). Move it one space to the right (9). Move the skull up one space, one to the left and then go all the way down into the small gold box (10). Move two spaces to the right into the large stone box (11). Move two spaces up (12). Move the skull in the box one space to the left and then one space down into the large gold box (13). Move the boxes to the exit (14).
- The path is clear. Go down the stairs.
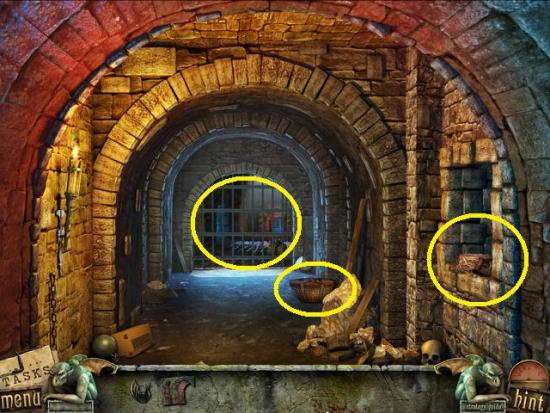
- Click the window on the right. Click to remove the items and take the meat.
- Click the basket. Click to remove the items and take the paintbrushes.
- Click the gate and take the crowbar.
- Leave the scene and go all the way up the stairs (three scenes) and return to the library.
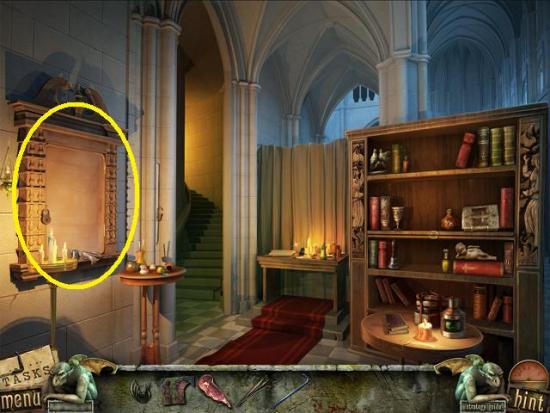
- Click on the wall case (light side of scene).
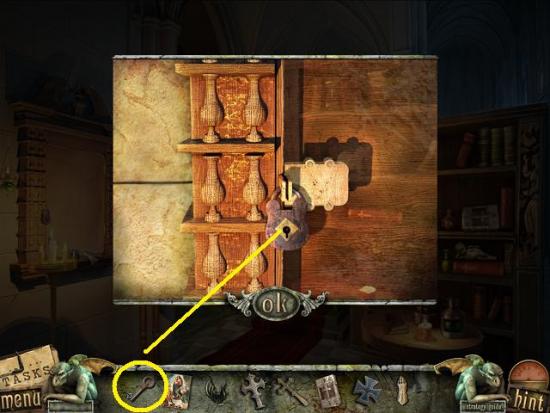
- Use the key to open the padlock. Once it’s opened, place the painting on it. Click the painting to zoom in.
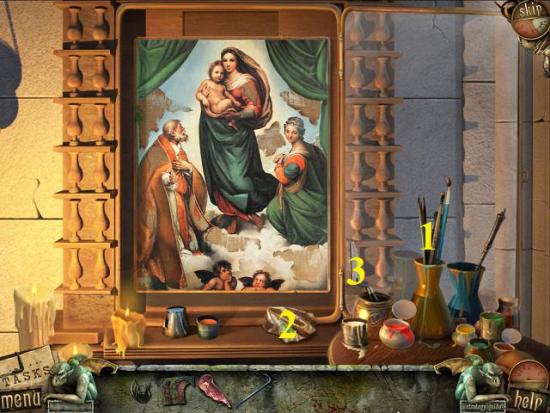
- To solve this mini-puzzle, you have to complete the painting. Put the paintbrushes in the holder (1). Take a paintbrush and dip it into a pot of paint and then click on the painting to paint the area.
- To clean the brush, click on the rag (2). If you make a mistake, use the palette knife (3).
- Note: The first time I did this puzzle, I thought I had done everything but nothing was happening. I scoured the painting for a spot I missed but couldn’t see anything. I left the scene and went back in to reset it and I quickly finished the painting and completed the puzzle.
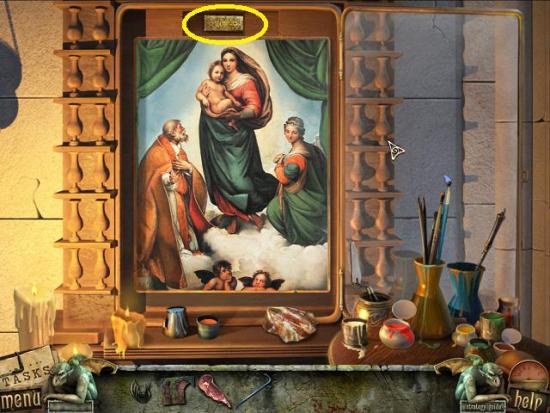
- When completed, a panel opens. Take the secret room hint.
- Leave the scene and go down the stairs. Go south (down) so you find yourself outside. Go south five times.
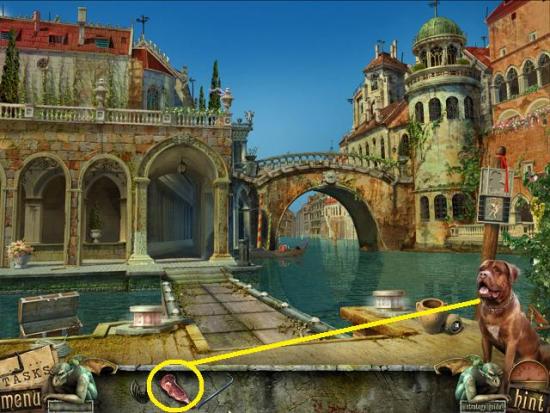
- Give the meat to the dog. Click the area the dog had been blocking to start a hidden object hunt.
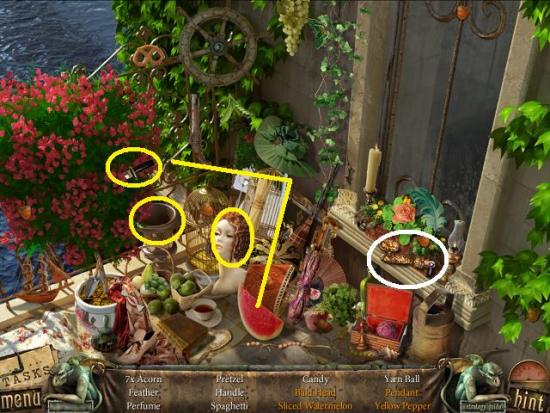
- Find all the items. Click on the mannequin head’s wig to remove it to get the bald head, use the knife on the watermelon for the sliced watermelon. Click on the pot to get the pendant and yellow pepper. A chain handle is added to your inventory.
- Go north two scenes, then east. Get on the gondola and go north twice.
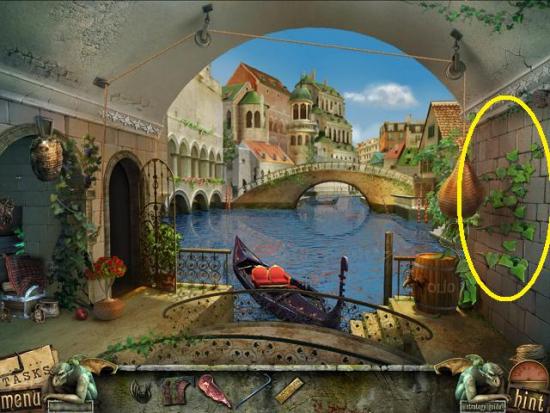
- Click on the vines to remove them, then click on the area to zoom in.
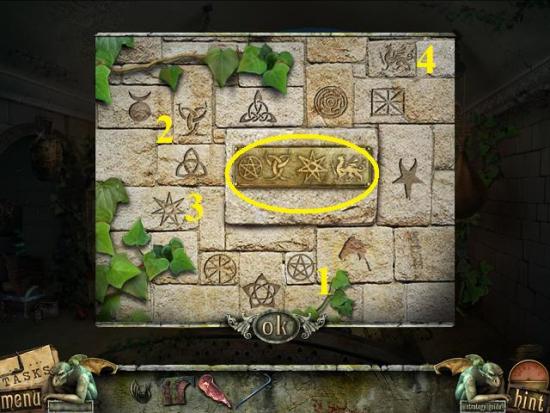
- Use the secret room hint in the slot. There are symbols scattered about the scene. Press the symbols in the order they appear in the hint.
- A hidden door opens. Enter the room.
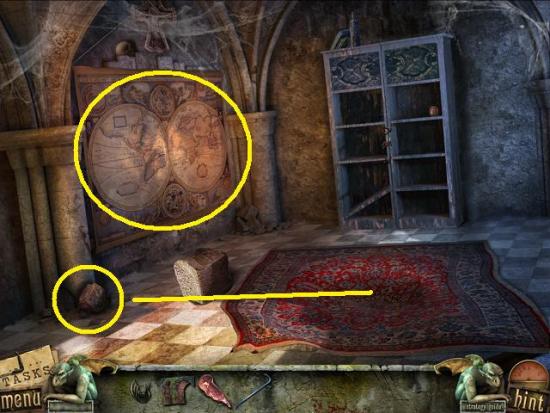
- Take the stone, then use it on the carpet.
- Click the map on the wall to move it, then click again to zoom in.
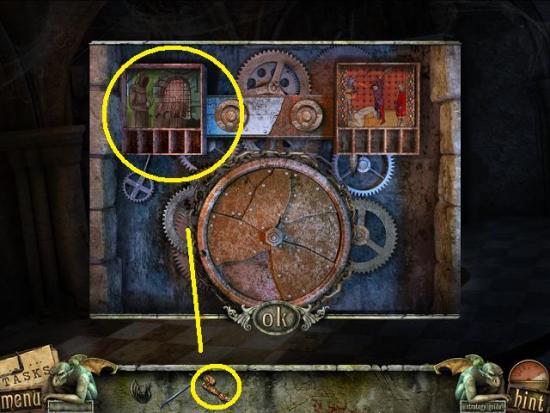
- Position the torn painting on the mechanism, then add the chain handle. Click the mechanism to start it. Click the handle.
- Click the chain to attach it to the stone. Use the crowbar to move it. Click the hole.
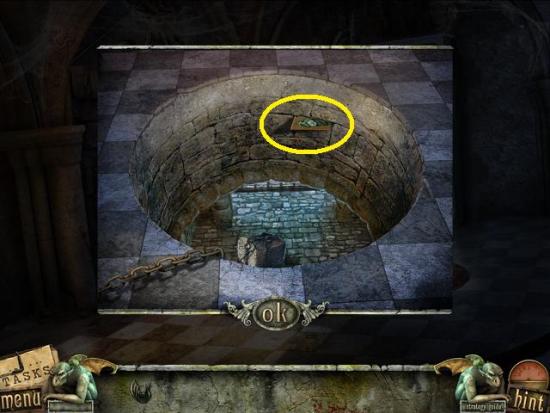
- Take the guard.
- Leave the scene and go through the gate. Go down the stairs (two scenes) and go through the now open gate.
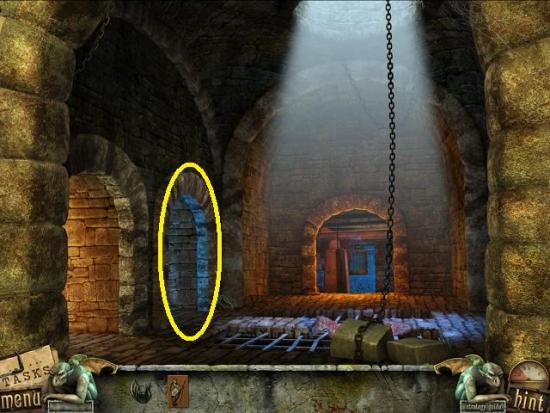
- Take the middle doorway.
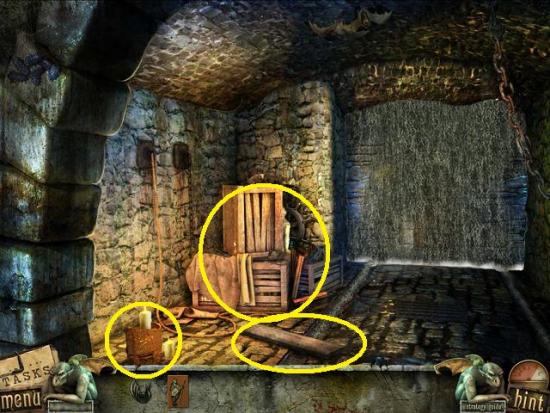
- Take the wooden plank. Click the candles and take the tail fin. Click the boxes to start a hidden object hunt.
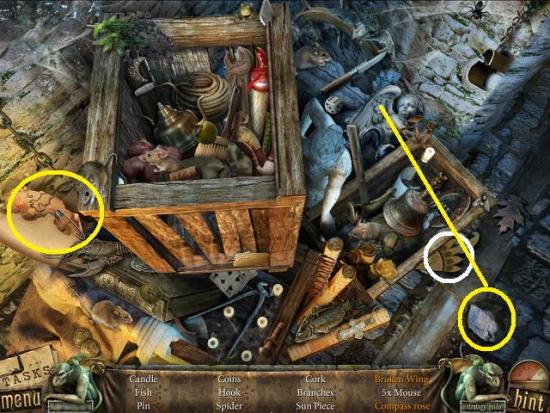
- Find all the items. Use the stone on the angel statue to get a broken wing. Click on the map to open it and reveal a compass rose. A sun piece is added to your inventory.
- Leave the scene and go through the doorway on the far left.
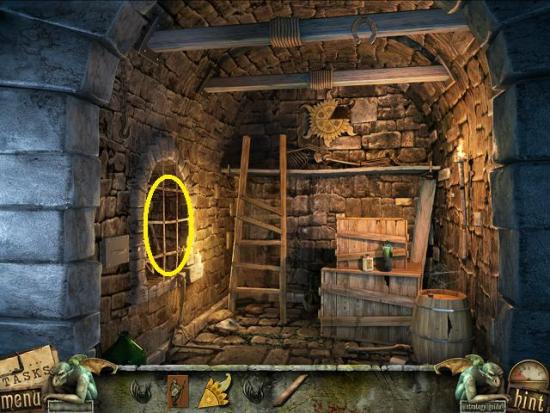
- Click the window to start a hidden object hunt.
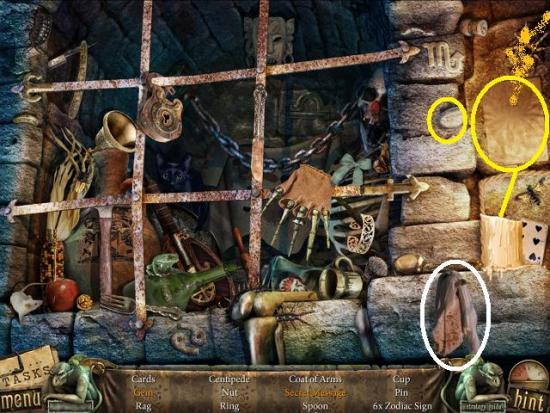
- Find all the items. Click the loose stone to reveal the gem and take the piece of paper and hold it over the candle for the secret message. A rag is added to your inventory.
- Leave the scene and take the right doorway (middle of scene).
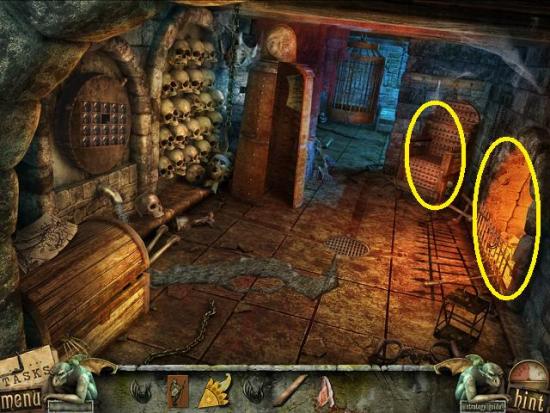
- Click the chair and take the nails. Click the fireplace.
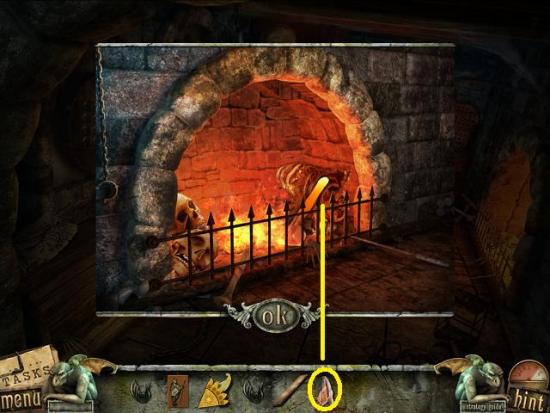
- Use the rag to take the red hot hammer.
- Click the iron maiden to start a hidden object hunt.
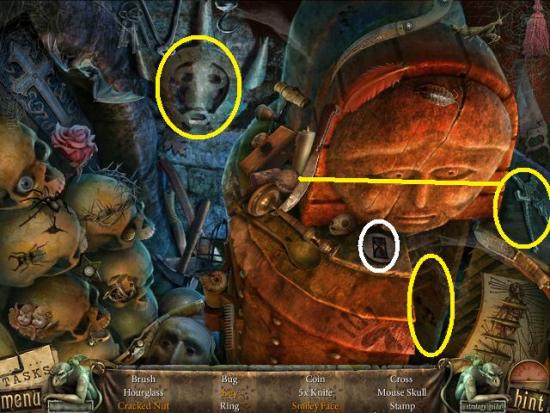
- Find all the items. Use the nutcracker on the walnut to get a cracked nut. Click the mask on the wall to reveal a smiley face and click the body of the iron maiden to reveal the key. An hourglass token is added to your inventory.
- Leave the scene and go through the middle doorway.
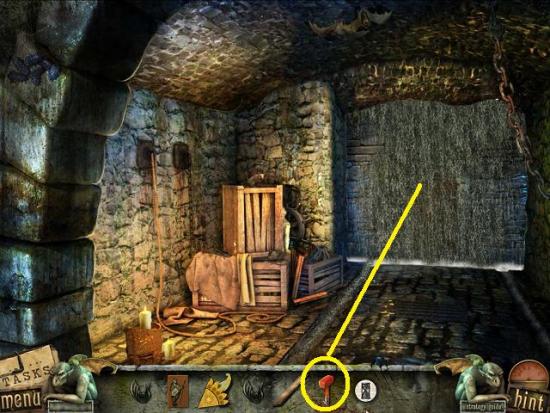
- Put the red hot hammer on the waterfall to cool it and get the sledgehammer.
- Leave the scene and go through the far left doorway.
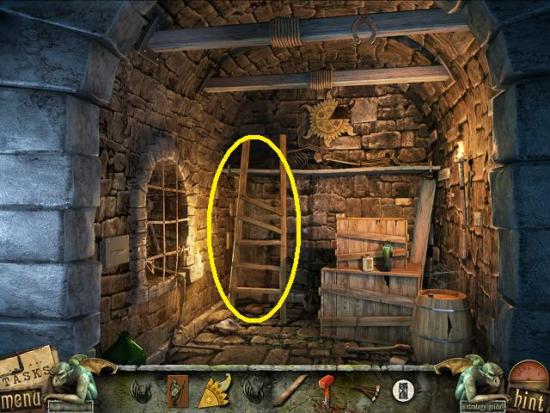
- Click on the ladder. Use the nails and then the sledgehammer on the three nails.
- Climb the ladder.
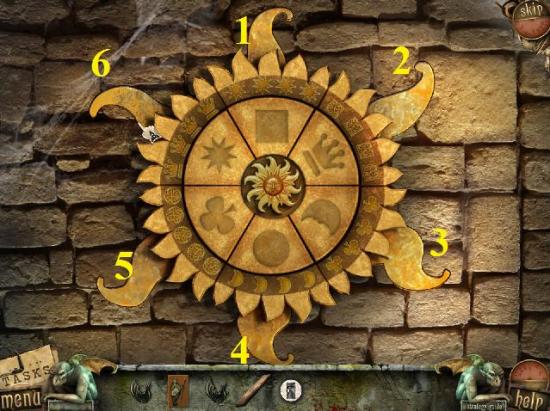
- Place the sun piece in its slot. Click the sunrays to rotate the symbols.
- There are two rings, an inner ring and an outer ring. Clicking on a ring will move them independently of each other.
- Ray 1 moves the outer rings for 1, 4 and inner rings for 3, 5.
- Ray 2 moves the outer rings for 2, 5 and inner rings for 4, 6.
- Ray 3 moves the outer rings for 3, 6 and inner rings for 1, 5.
- Ray 4 moves the outer rings for 1, 4 and inner rings for 2, 6.
- Ray 5 moves the outer rings for 2, 5 and inner rings for 1, 3.
- Ray 6 moves the outer rings for 3, 6 and inner rings for 2, 4.
- Start by clicking random rays and then once you have a few in place, work at placing the others based on what ray moves what.
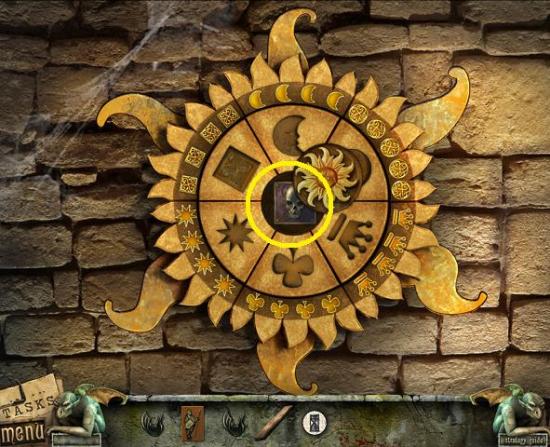
- Once you’ve solved the puzzle, take the skull.
- Leave the scene and go through the right doorway (middle of scene)
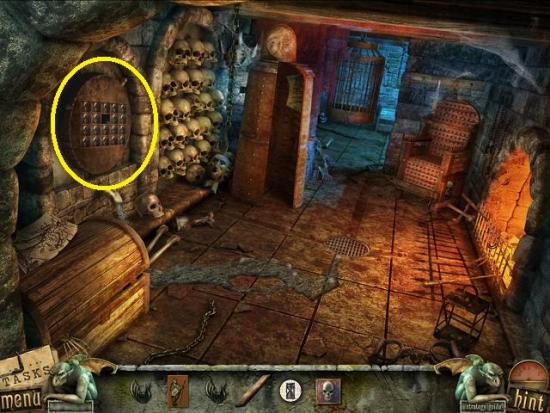
- Click on the skull pattern.
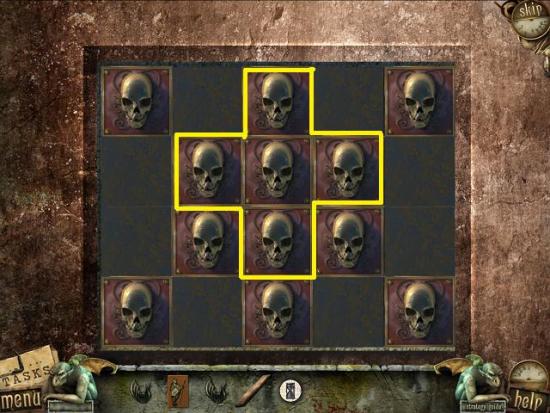
- Place the skull on the pattern. To solve this mini-puzzle, you must have all the skulls showing. Clicking on a skull will make it do the opposite of what it’s currently doing (either appearing or not appearing).
- Clicking a skull will rearrange its surrounding skulls (see screenshot above).
- Once completed, click on the crank (where the puzzle was).
- Leave the scene and take the middle doorway. Click on the door.
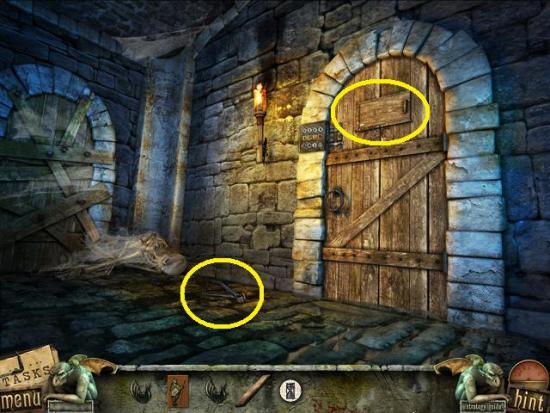
- Take the wire cutters. Click on the door slot to see your love.
- Leave the scene and go south five scenes until your are outside of the gate. Enter the doorway of the secret room.
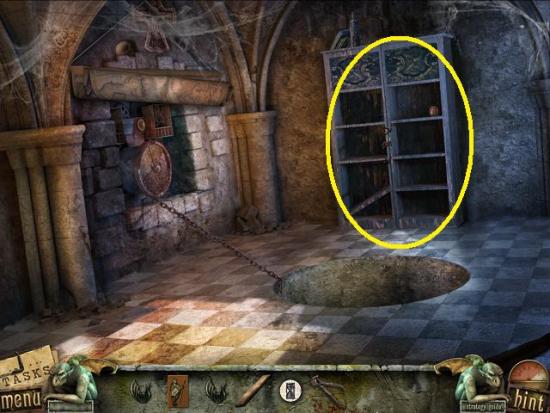
- Click on the bookshelf.
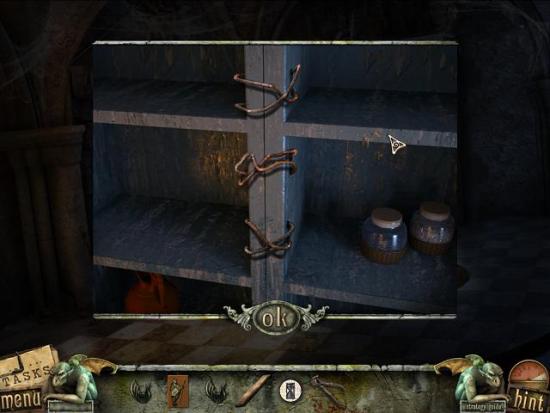
- Use the wire cutters. Click on the newly revealed area to start a hidden object hunt.
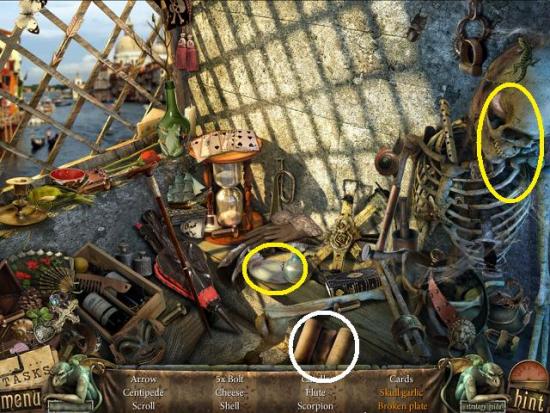
- Find all the items. Click the skull to reveal the skull garlic and click the plate to get the broken place. A scroll is added to your inventory items.
- Leave the scene and go through the gate and up the stairs, into the room.
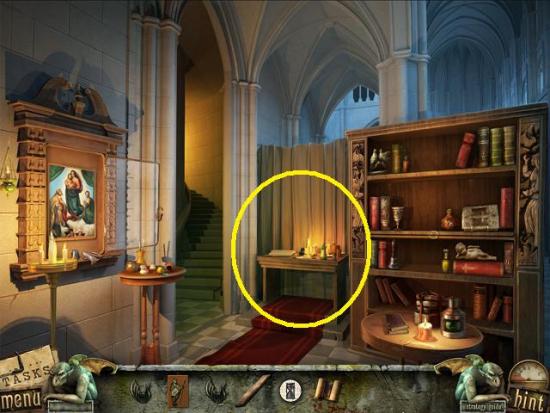
- Click on the table.
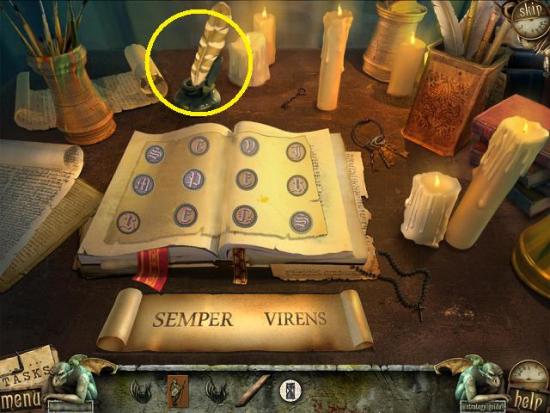
- Add the scroll. Take the quill (feather) and click on the letters of the phrase “SEMPER VIRENS.” When you’re done (the quill will disappear), click on the paper to take the secret combination.
- Leave the scene and go down the stairs, then go south to go outside. Click south twice.
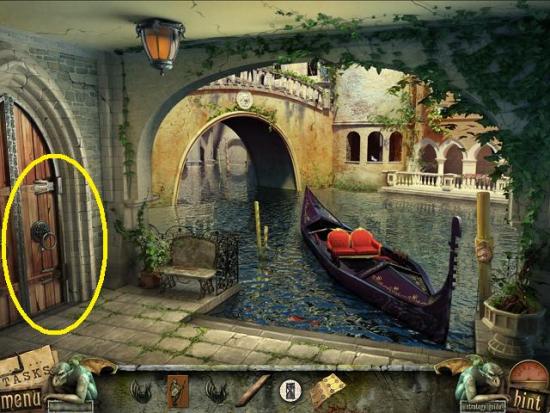
- Click on the door.
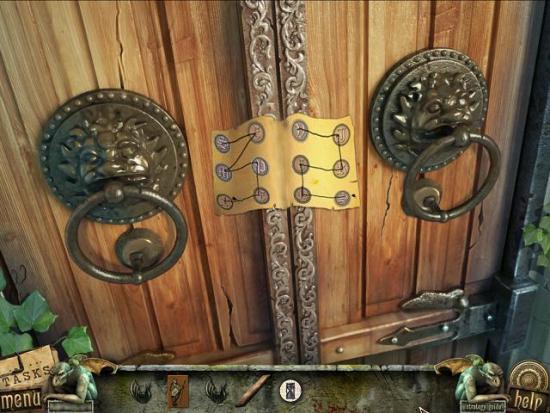
- Place the secret combination on the door. To figure out the combination, click a doorknocker. If its eyes turn green, it was a correct click. When its eyes turn red, it’s an incorrect click.
- Use a pencil and paper for this puzzle to take note of your clicks. Start by clicking either doorknob. Take note of which one turns green. Keep clicking until you get five green eyes in a row.
- If the eyes turn red, the combination “resets.”
- Once completed, go through the door.
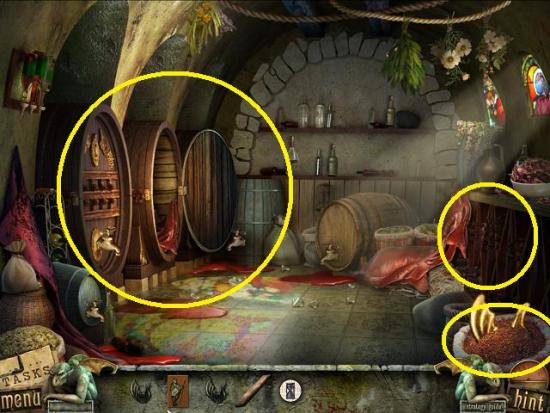
- Click the grain bag at the bottom right of the scene. Click until you can take the main tail fin.
- Click the wine rack to start a hidden object hunt.
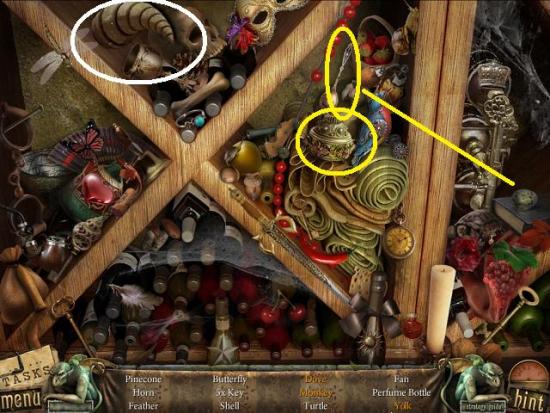
- Find all the items. Click the jewellery box to get the dove and monkey. Take the spoon and use it on the egg to get the yolk. A horn is added to your inventory.
- Click the barrels.
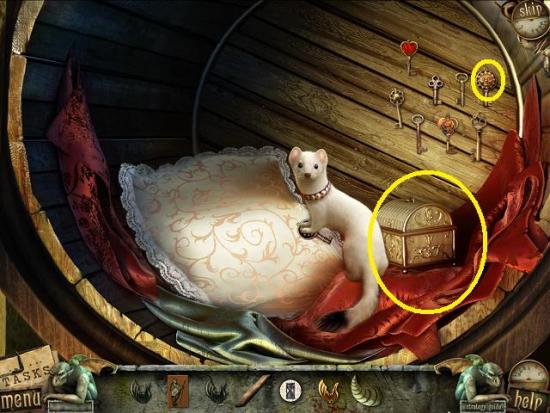
- Click on the jewellery box. Take the dagger and use it on the pillow to reveal a locked box. Place the sun key in the locked box. Take a feather and use it on the ferret so he lets go of the moon key. Use it in the jewellery box. Click on the box and take the grape picture.
- Leave the scene and go south and then west.
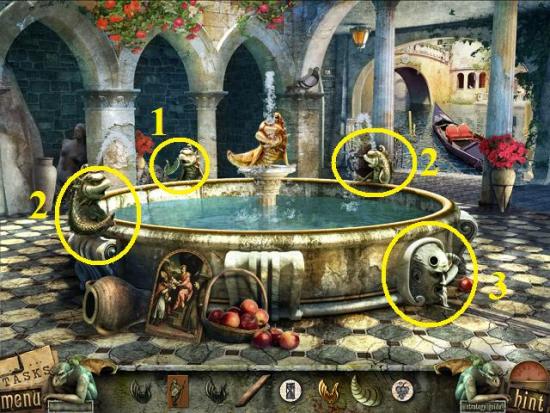
- If you haven’t already, click the fish’s fin (1) at the back of the fountain to turn off its water. Then add the tail fins to the two fish (2) on either side of the fountain. For the fish in the centre, use the wooden plank and then add the main tail fin.
- Click the tails to turn off the water.
- Click the head on the side of the fountain (3).
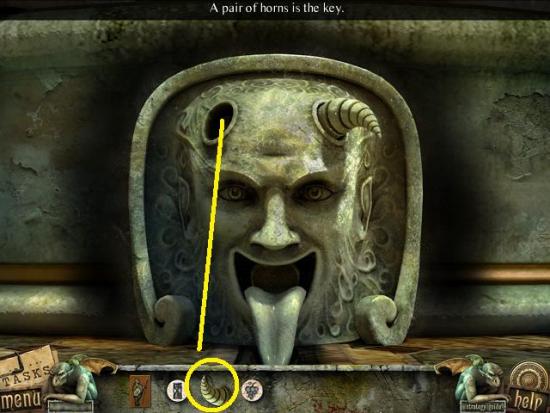
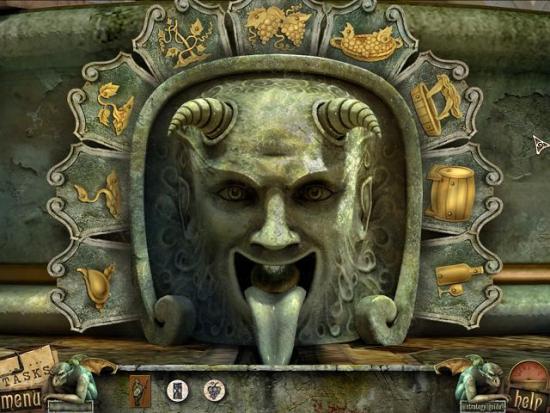
- Position the horn. To solve the mini-puzzle, rearrange the tiles so they show the order that wine is made. The bottom left tile is the “beginning.”
- Click on the fountain to start a hidden object hunt.
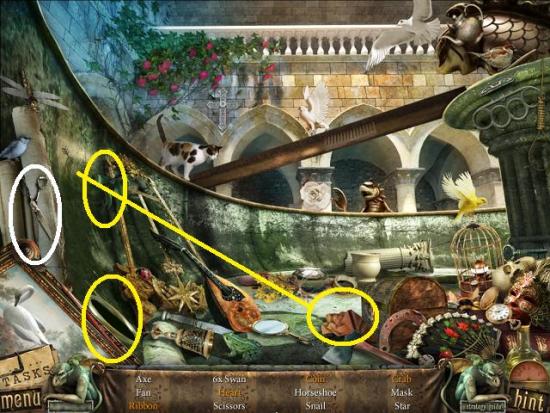
- Find all the items. Click the bow to get the ribbon. Click the portal to get the crab and coin. Use the rag on the wall to reveal the heart. Scissors are added to your inventory.
- Leave the scene by going east, then northeast. Get on the gondola and go north twice.
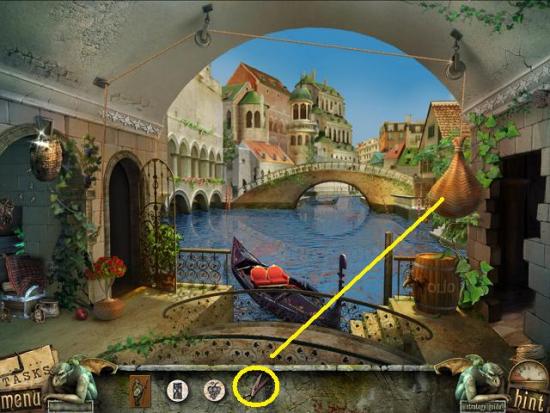
- Use the scissors on the hanging bag. Click on the item that fell.
- To solve this mini-puzzle, restore the pictures. Notice that each tile has a border on it. Restore the pictures so the border is on the outside.
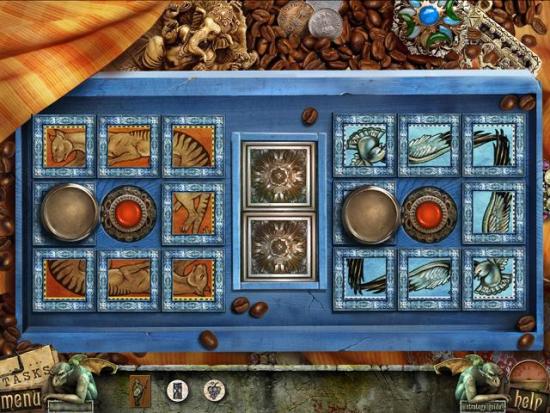
- Click the middle buttons so the middle panel opens. Take the prisoner.
- Go through the gate and go down the stairs twice.
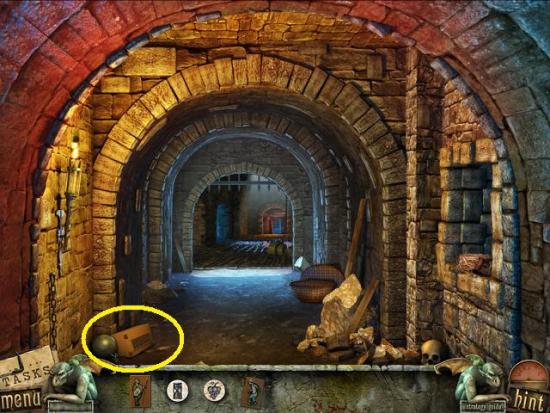
- Click on the box on the floor.
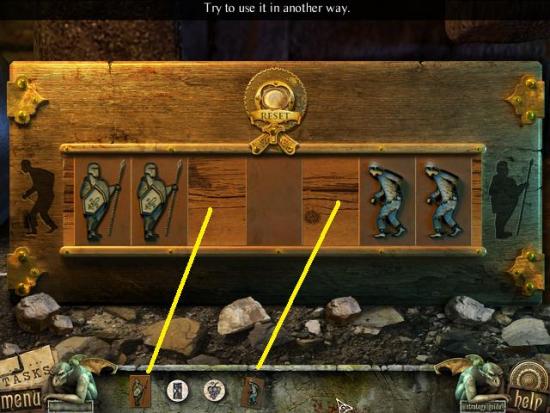
- Add the prisoner and guard tiles. To solve this mini-puzzle, reposition it so the prisoner and guard tiles are switched. Tiles can be moved only in the direction it is facing.
- It can move one space to the left or right if there’s an empty space.
- It can jump an occupied space if the tile beside it is a different character (for example, a guard tile can skip one space over a prisoner if the next space is empty).
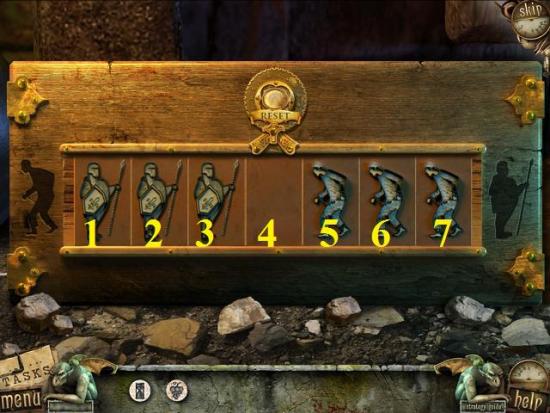
- Assuming the spaces are numbered 1-7 from left to right, click these spaces in this order: 3 – 5 – 6 – 4 – 2 – 1 – 3 – 5 – 7 – 6 – 4 – 2 – 3 – 5 – 4.
- Take the sack. Leave the scene by going south three times.
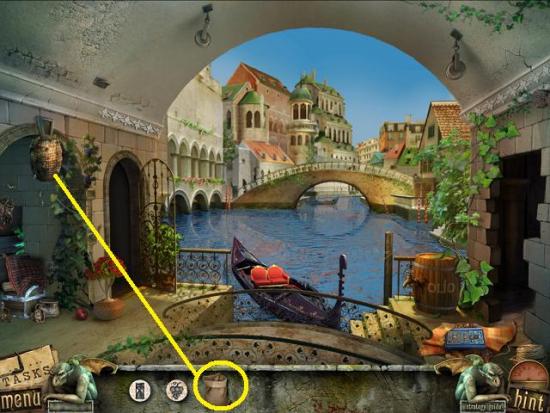
- Use the sack on the hornets’ nest. Click the area the nest was blocking to start a hidden object hunt.
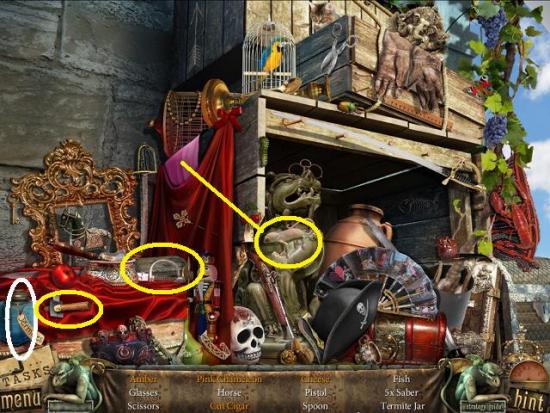
- Find all the items. Click on the cigar cutter to get the cut cigar, click the box to get the amber and cheese, then take the chameleon and put it on the pink cloth to get the pink chameleon. A termite jar is added to your inventory.
- Enter the gate and go all the way down the stairs (two clicks), then go through to the dungeon. Take the middle doorway and go through the door.
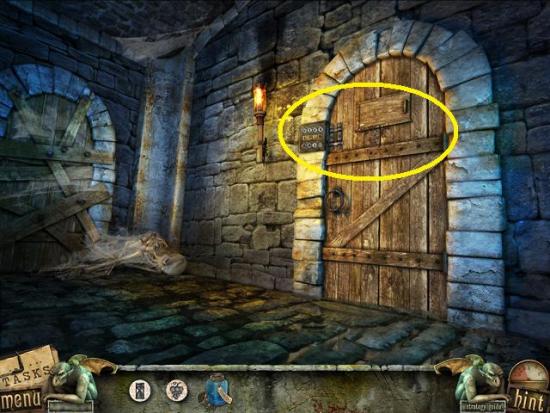
- Click on the door.
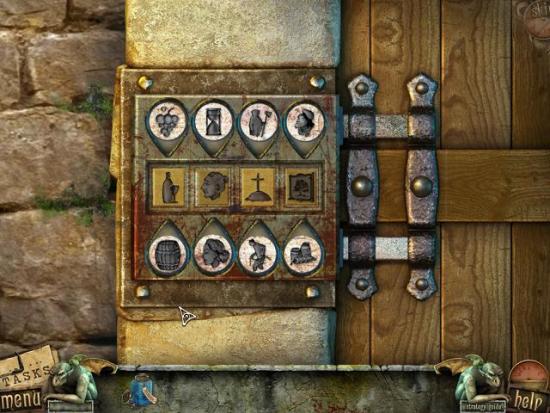
- To start the puzzle, place the hourglass token and grape picture on the lock. To solve the mini-puzzle, swap the tokens to show the cause and effect of the middle tokens.
- Tokens can only be swapped within its own row (you can’t swap top and bottom tokens).
- When a middle token has its appropriate token in place, it will depress.
- Solution:
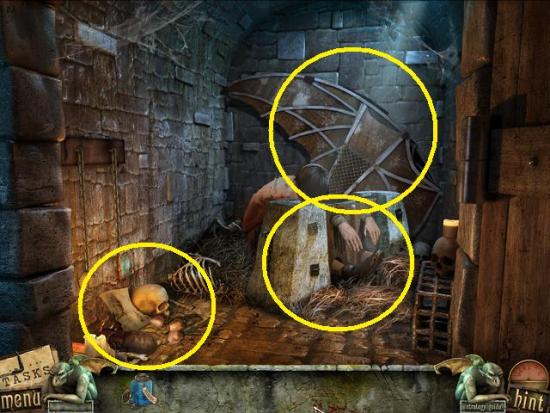
- Click on the bones to start a hidden object hunt.
- Note: There are huge spiders in this scene but you’ll likely have to remove them.
- Find all the items. There are no interactive items. A set of leather belts is added to your inventory.
- Click on the stocks. Use the termite jar to let the termites eat the wood.
- Note: If you are afraid of bugs, this scene is not bad.
- Click on the wings. Use the set of leather belts.
End of chapter!
Psychiatric Ward
- Go forward into the psychiatric ward.
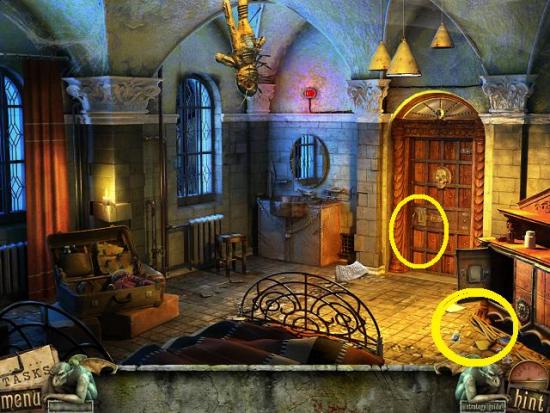
- Click the floor. Push the items out of the way and take the door key. Click the door and use the door key. Go through the door.
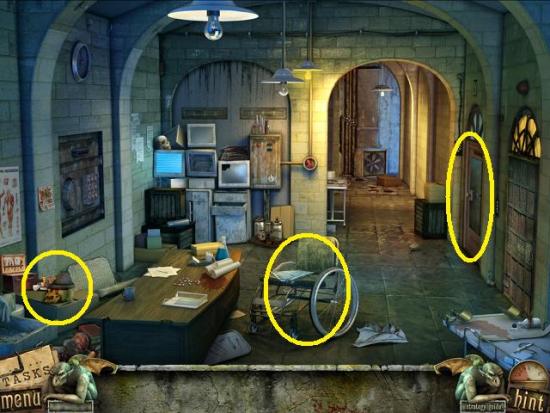
- Click the wheelchair. Click to move the papers and take the panel button. Click the skull wearing a hat to start a hidden object hunt.
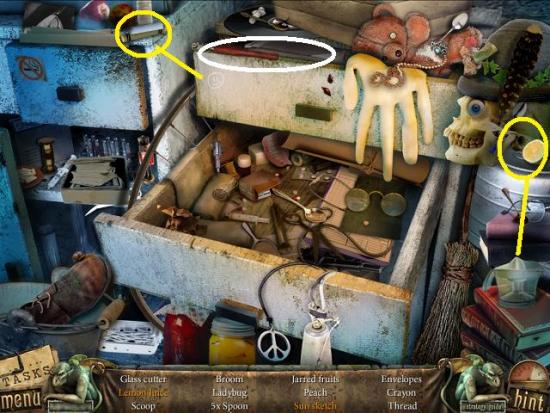
- Find all the items. Use the lemon on the juicer to get lemon juice and use the chalk on the happy face on the drawer to make a sun sketch. A glass cutter is added to your inventory.
- Click the glass door (right). Use the glass cutter, then click on the hole it made, then click on the key on the other side to open the door. Go through the newly opened door.
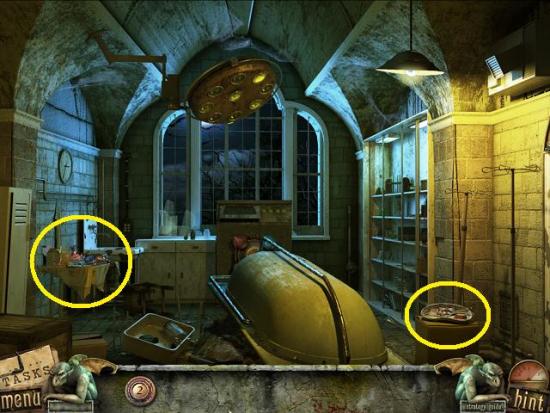
- Click the instruments on the right. Take the panel button.
- Click on the messy table to start a hidden object hunt.
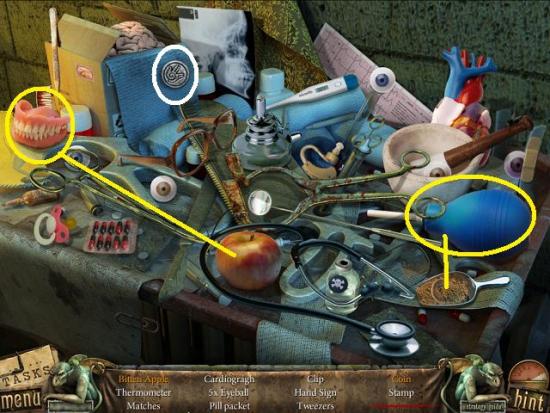
- Find all the items. Use the teeth on the apple to get the bitten apple and use the dropper on the scoop to get the coin. A hand sign is added to your inventory.
- Note: There’s a largish spider and eyeballs in this scene.
- Leave the scene and go one scene north.
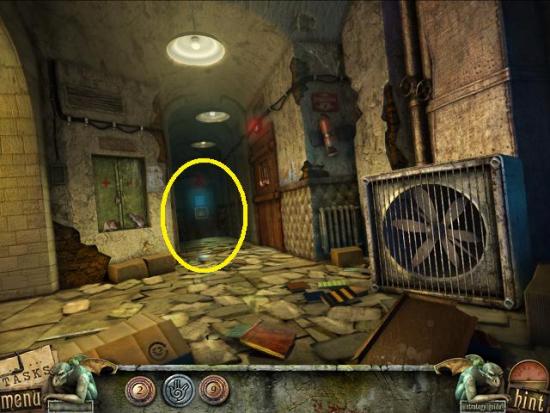
- Click the door down the hall.
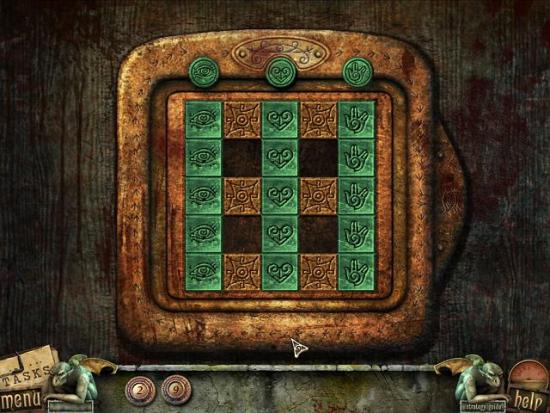
- Place the hand sign on the panel. To solve this mini-puzzle, match all the line up all the matching tiles under their corresponding token.
- Tiles can only be moved into an adjacent empty space. You can only move a tile one space at a time.
- Solution:
- Go through the door.
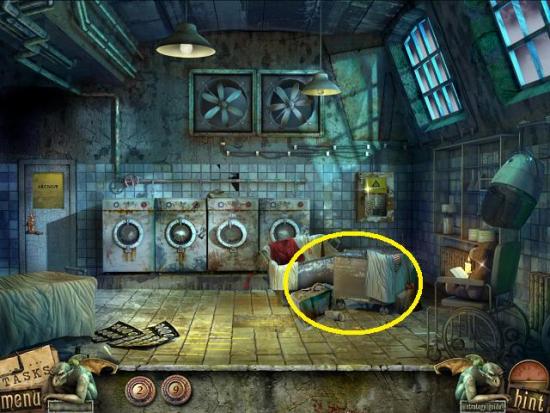
- Click on the tubs to start a hidden object hunt.
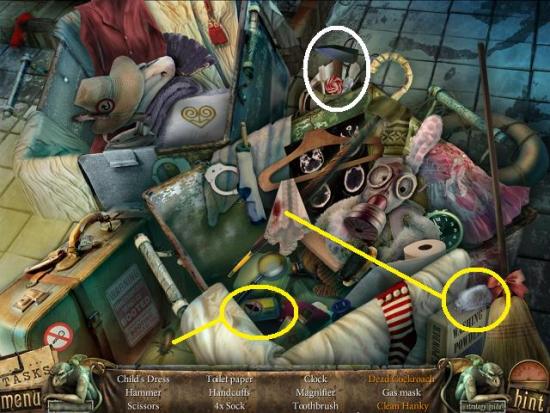
- Find all the items. Take the scrubbing rag and use it on the hanky to get a clean hanky and use the bug spray on the cockroach to get the dead cockroach. A hammer is added to your inventory.
- Leave the scene and go south one more time.
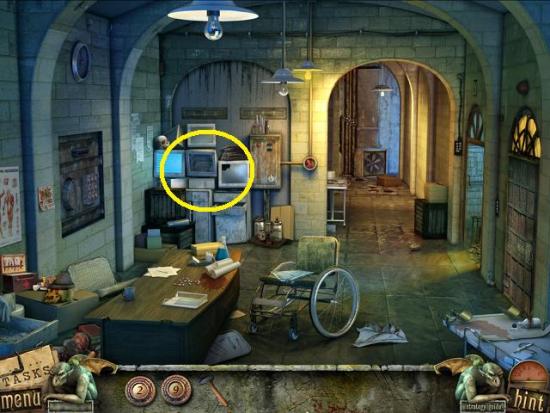
- Click on the computer monitor. Use the hammer to smash the screen. Take the archive key.
- Go north twice to the laundry room. Click on the “archive” door (left of machines). Use the archive key.
- Enter the room.
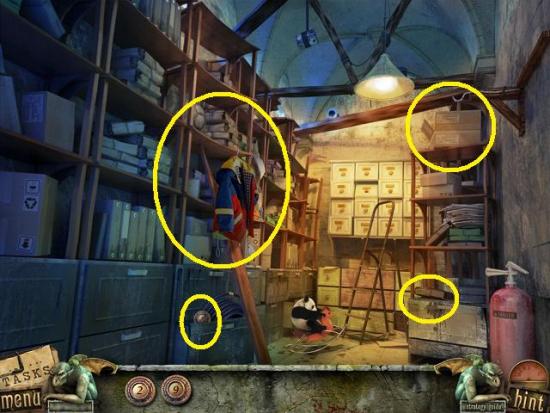
- Take the panel button. Click on your file (right shelf). Take the chocolate. Click the box on the top right shelf. Click to clear the items and then take the pipe wrench.
- Click the shelf to start a hidden object hunt.
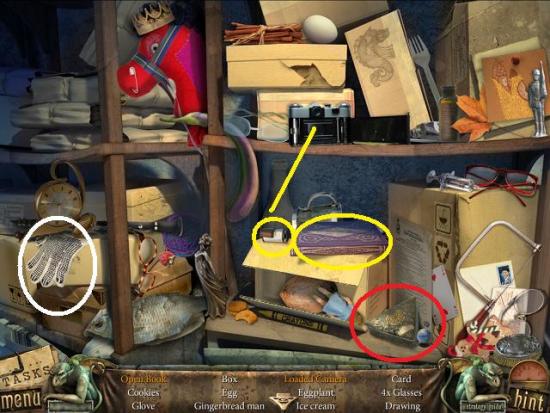
- Find all the items. Put the roll of film in the camera to get the loaded camera and click on the book to get the open book. A glove is added to your inventory.
- Note: Your list might contain a box. This is a scene full of boxes. The item is an ornate box, circled in red in the screenshot above.
- Leave the scene and go south once.
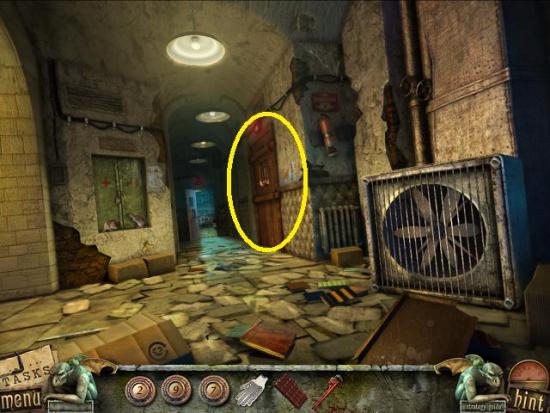
- Click on the wooden door. Give the prisoner the chocolate. Once he leaves, click the small piece of rope on the bars. Take the stop button.
- Go south one scene and then go through the door on the right.
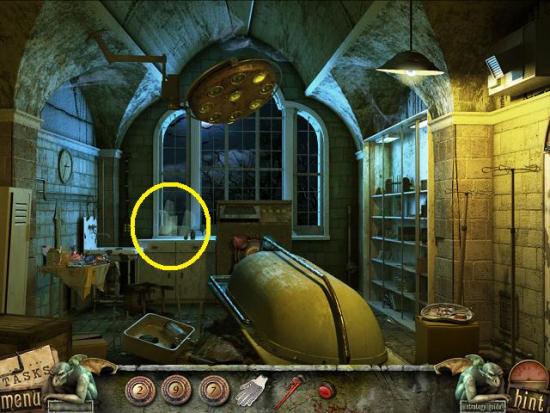
- Click on the broken glass. Use the glove to move the glass shards. Take the panel button.
- Leave the scene and click the panel on the wall.
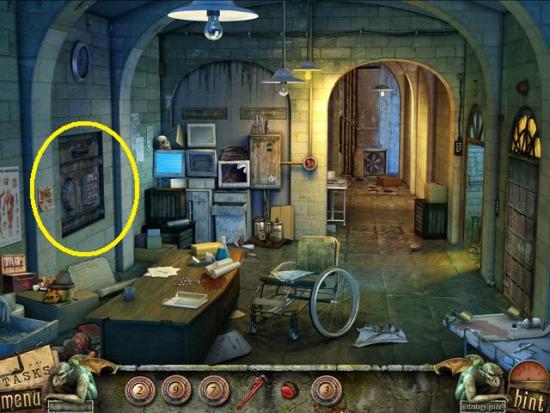
- Place all the panel buttons on the panel. To solve this puzzle, rearrange the buttons so each row equals 15.
- Click two buttons to switch their places.
- Only the rows need to equal 15, the columns do not.
- I couldn’t get a completed screenshot but the rows are 9+1+5; 4+8+3; 2+6+7.
- Click on the opened panel and take the schematic (bottom shelf).
- Go north two scenes to the laundry room.
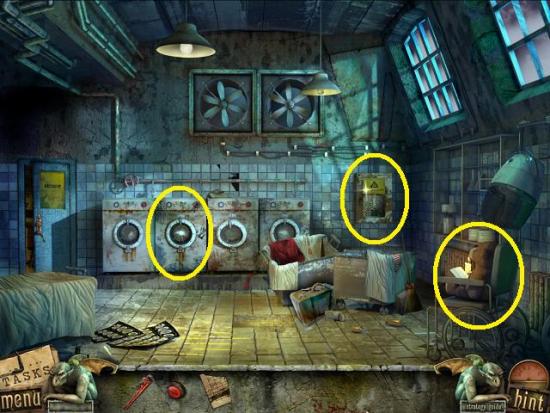
- Click on the washing machine. Place the stop button on it. Then click on the washing machine to start a hidden object hunt.
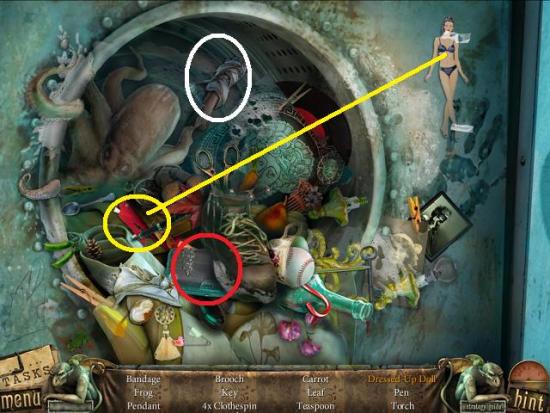
- Find all the items. Put the paper outfit on the paper doll to get a dressed up doll. A torch is added to your inventory.
- Note: If a bandage is on your list, click the red circled area in the screenshot above. I believe it’s hidden behind the box.
- Click the teddy bear in the wheelchair. Use the torch on the candle to get the burning torch.
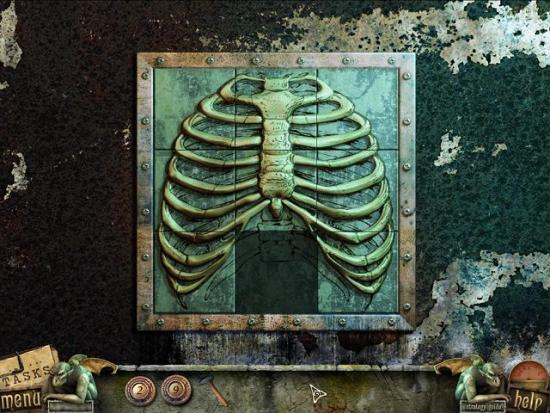
- Click the wall panel. To solve this mini-puzzle, slide the tiles so it completes the ribcage image behind it. A tile can only slide left-right or up-down and only into an empty slot.
- The tile positions are different every time so I can’t give a step by step instruction. Just keep sliding the tiles until you get it (remember there’s a Skip option).
- Solution:
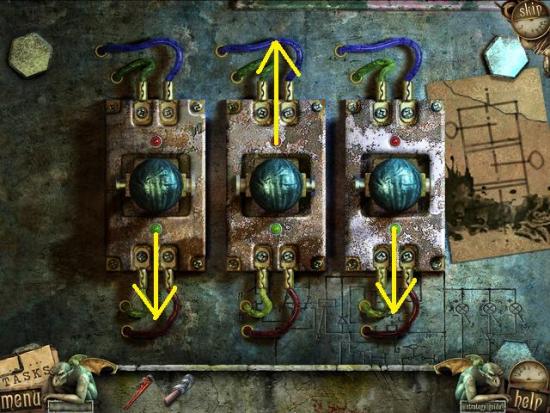
- When the panel opens, click on it. Place the schematic on the wall. To solve this mini-puzzle, match the lever positions to the schematic displayed.
- To move a lever, click on it. It will move either up or down. To move it in the other direction, click it again to centre it and then click to move it again.
- Go south one scene.
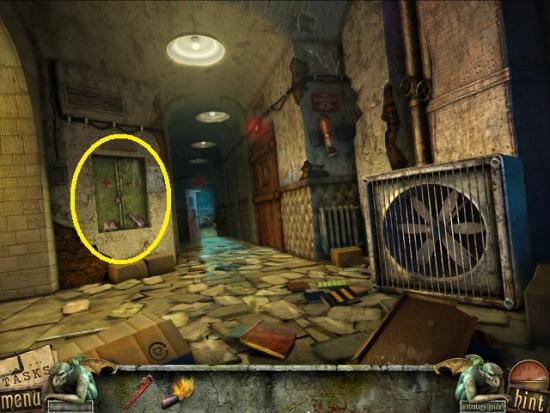
- Click on the closed cabinet on the left. Use the burning torch to scare the rats. Click on the shelves to start a hidden object hunt.
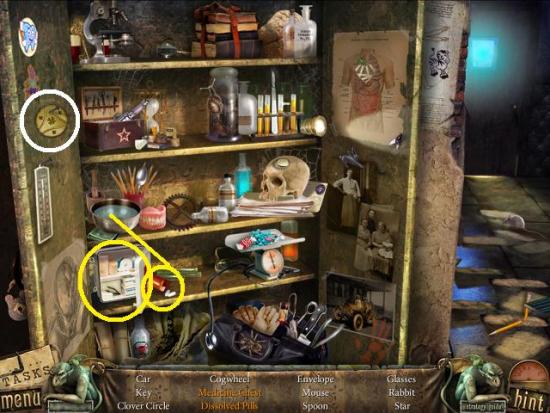
- Find all the items. Close the first aid kit to get the medicine chest and put the pills in the water to get the dissolved pills. A clover circle is added to your inventory.
- Go south one scene and then through the door on the right.
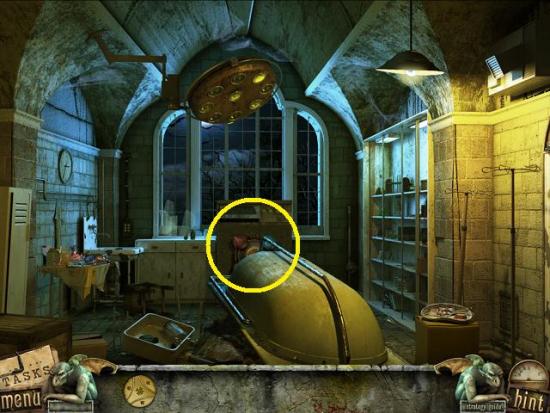
- Click on the bath. Place the clover circle on the mechanism.
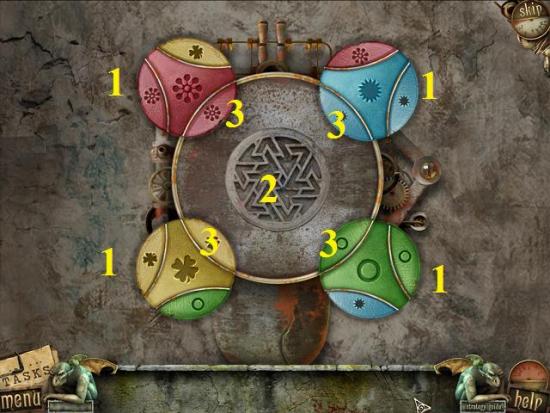
- To solve this mini-puzzle, make each disc one complete colour.
- Each disc is made up of three pieces that must match in colour.
- Click on the small discs (1) to rotate them and click the middle wheel (2) to rotate it. Rotating the wheel moves the disc pieces that are in the wheel (3).
- To solve it, rotate each disc and the wheel so each disc has two correct pieces. Then rotate the wheel until the puzzle is solved.
- Click on the newly revealed area to start a hidden object hunt.
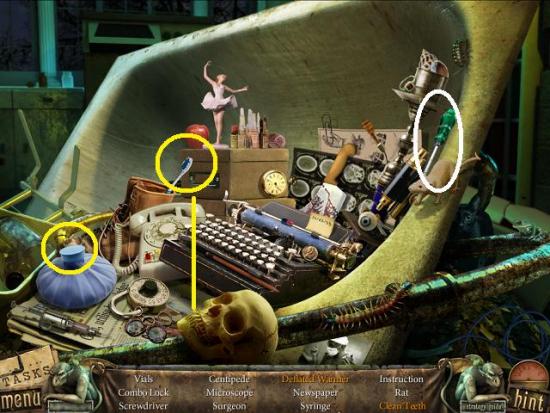
- Find all the items. Use the toothbrush on the skull to get the clean teeth and remove the cap from the warmer to get the deflated warmer. A screwdriver is added to your inventory.
- Note: There’s a big gross centipede in the middle of the scene. You might be given the ability to remove it.
- Leave the scene and go one scene north.
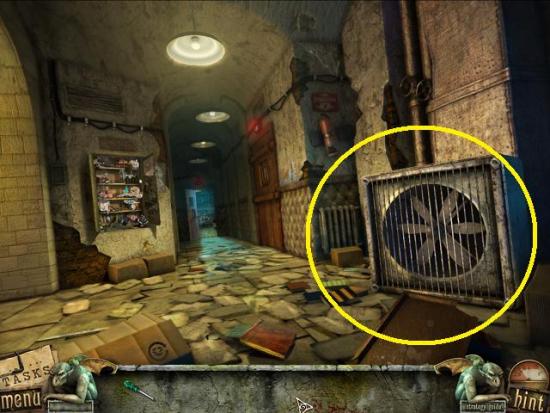
- Click the large fan. Use the pipe wrench to loosen the bolts, then use the screwdriver on the screws.
- Note: Click on the bolts and screws with your cursor, not with the tool.
- Enter the fan duct.
- Go north three screens, then right (Exit is written on the wall), then north.
End of game!
If you are playing the Collector’s Edition, once you have completed the game, return to the Main Menu and click Additional Content.
Circus Rainbow (Collector’s Edition only)
- Enter the Circus Rainbow.
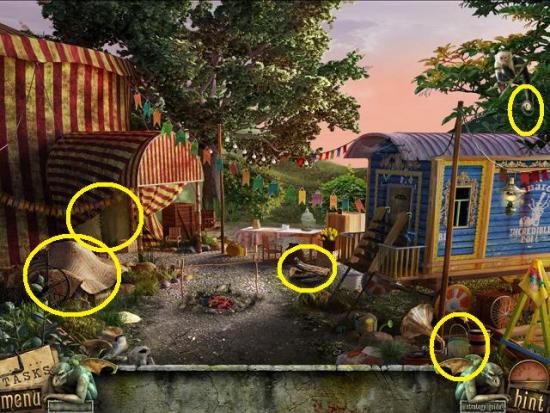
- Take the bucket of water, the firewood and the letter L. Click the tarp to move it, then click the uncovered area to start a hidden object hunt.
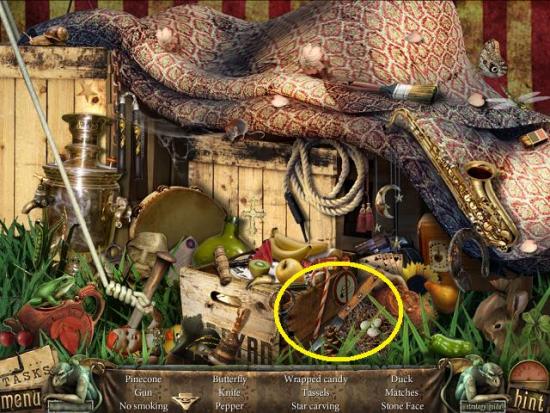
- Find all the items. There are no interactive items here. A knife is added to your inventory.
- Click on the tent entrance. Use the knife to cut the rope. Enter the tent.
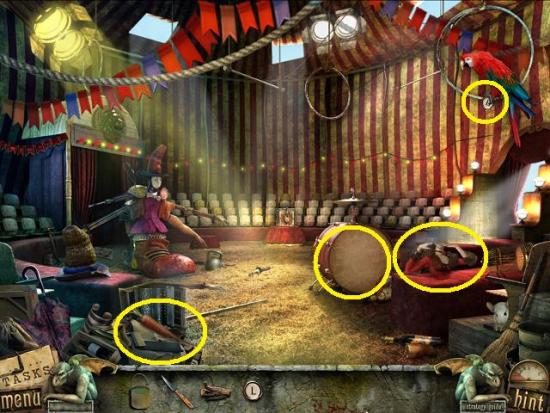
- Take the bust and the carrot. Click on the letter B that the parrot is holding. Pick it up from where it fell.
- Click on the drum. Use the knife to cut it open. The click on it to start a hidden object hunt.
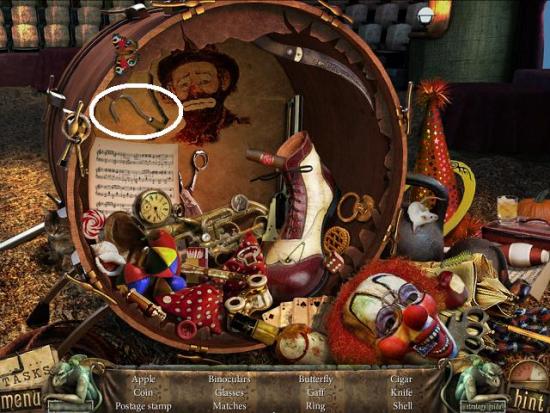
- Find all the items. There are no interactive items here. A gaff is added to your inventory.
- Leave the tent by taking the opening on the right.
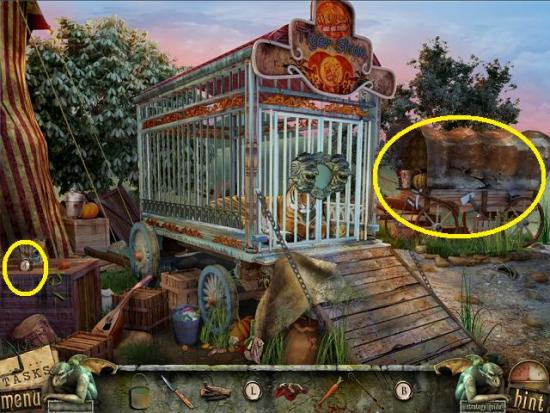
- Take the letter A.
- Click the wheel to start a hidden object hunt.
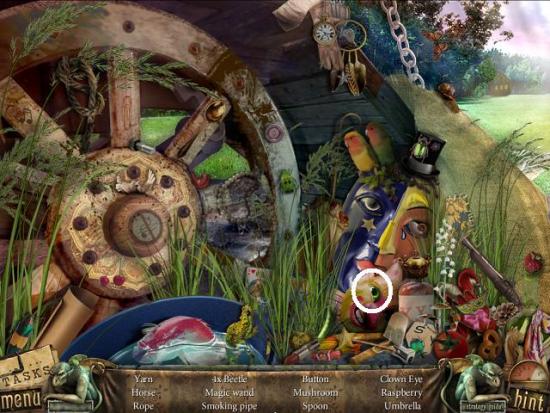
- Find all the items. There are no interactive items here. A clown eye is added to your inventory.
- Move towards the wagon.
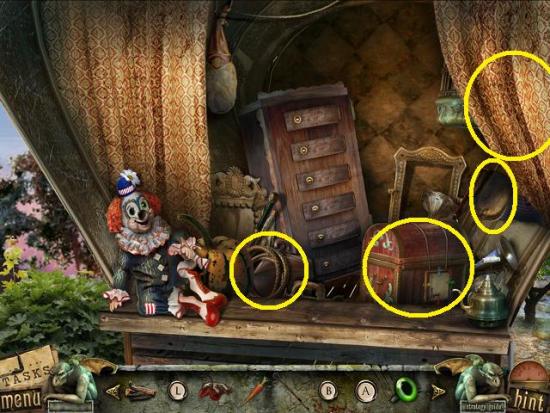
- Take the whip and the shovel. Click on the right-hand curtain and take the letter E. Click the chest.
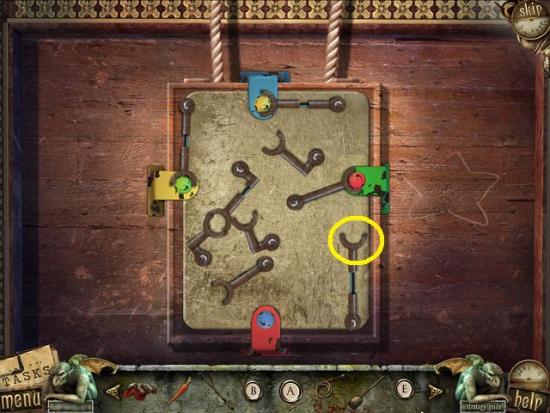
- To solve this mini-puzzle, you must place each coloured marble in its matching coloured slot.
- To move a marble, click a lever so its U shaped end (circled) lands on a coloured marble. Then click the lever to move it. Continue moving the marbles until they are in their proper coloured slot.
- Once completed, click the large brass ball. This opens the chest. Click on it to start a hidden object hunt.
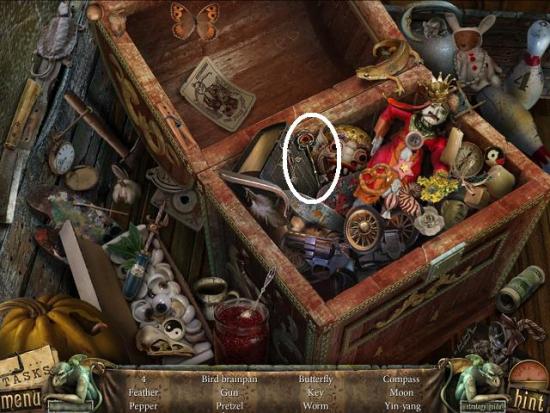
- Find all the items. There are no interactive items here. A key is added to your inventory.
- Leave the scene.
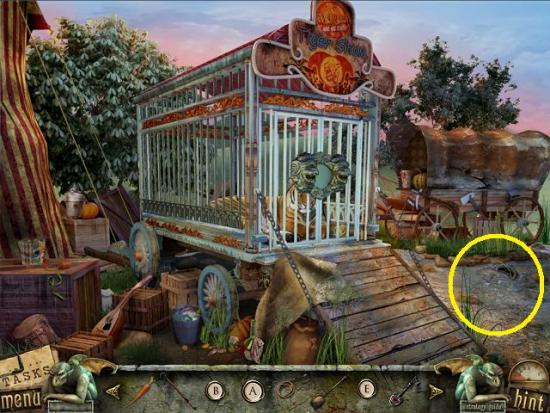
- Click on the ground. Use the shovel to get the cauldron.
- Leave the scene.
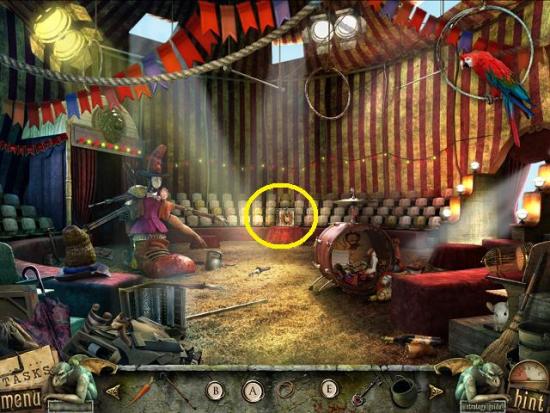
- Click the box at the back. Use the key. Take the door handle.
- Go south.
- Use the gaff on the ladder in front of the trailer. Click on the door. Place the door handle. Click to open it, then enter the doorway.
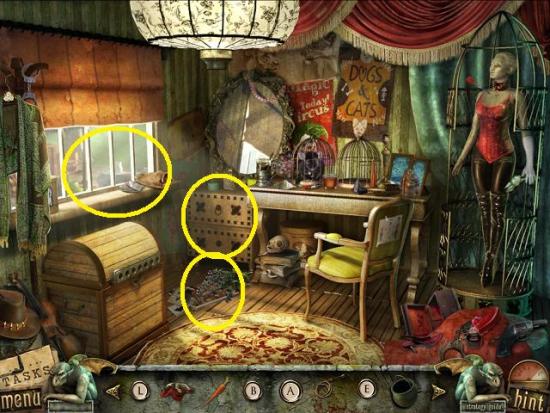
- Take the sleepy grass (on the floor). Click on the windowsill. Click on the papers to take the cheese and the meat. Click on the drawers. Click on the top drawer to open it. Take the clown nose and the letter A.
- Leave the scene.
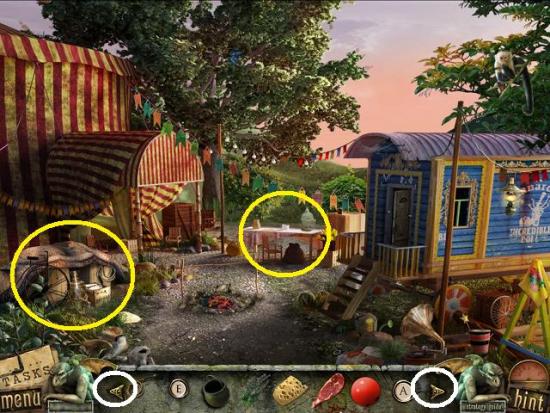
- Click on the table at the back. Place the meat on the cutting board and use the knife to cut it three times. Take the carved meat.
- Note: You may have to scroll through your inventory to find the items. Click the arrows (white circles) at either end of the inventory to scroll.
- Click on the covered boxes on the left to start a hidden object hunt.
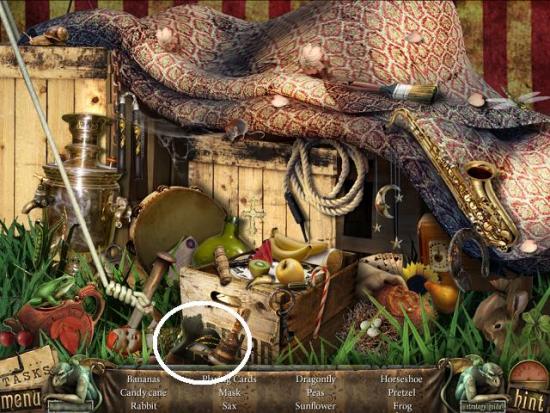
- Find all the items. There are no interactive items here. A mask is added to your inventory.
- Enter the tent.
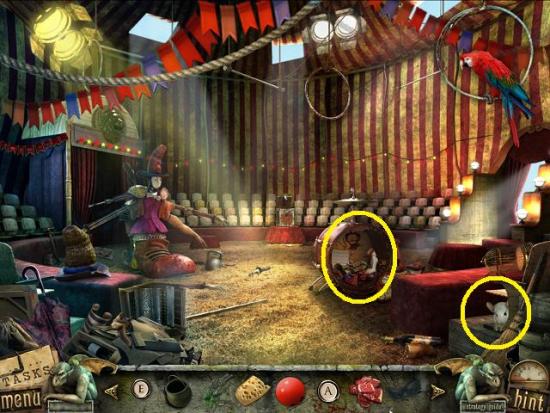
- Use the cheese to get the chinchilla (right corner of scene). Click on the ripped drum to start a hidden object hunt.
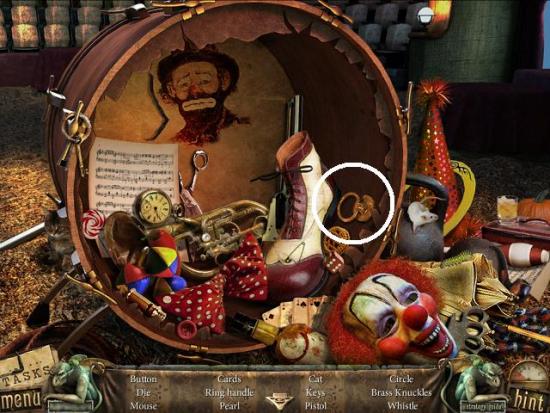
- Find all the items. There are no interactive items here. A ring handle is added to your inventory.
- Leave the scene by taking the right exit and going towards the wagon.
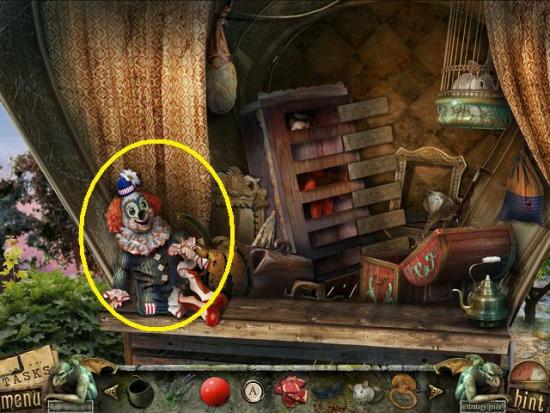
- Click on the clown. Place the clown eye and the clown nose on its face. Take the letter N from its mouth.
- Leave the scene. Click the area under the tiger’s cage to start a hidden object hunt.
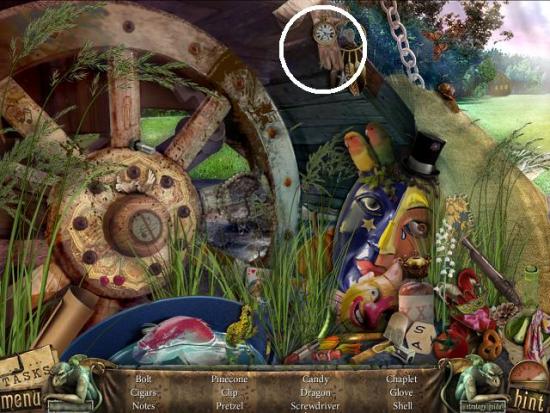
- Find all the items. There are no interactive items here. A glove is added to your inventory.
- Leave the scene and take the south exit. Go into the trailer.
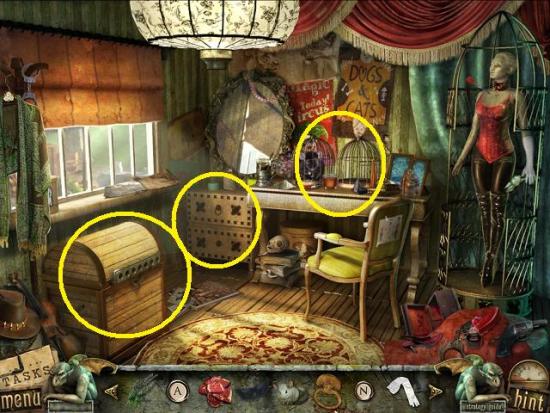
- Click the cages on the table. Place the chinchilla in the empty cage.
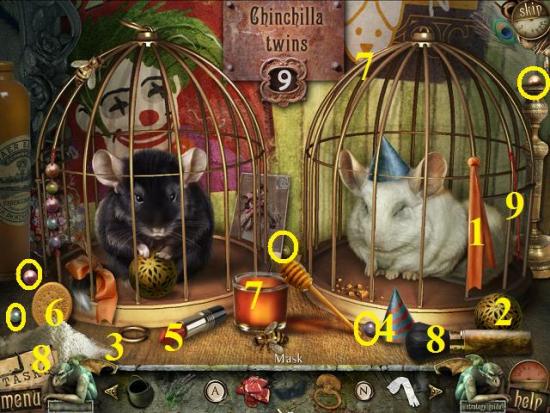
- To solve this mini-puzzle, you must make each cage a mirror image of the other.
- Under the “chinchilla twins” sign, is a number. That is the number of differences there are. As you place items, the number will go down.
- 1 – Click the ribbon and put it on the white one’s tail.
- 2 – Give the ball to the white one.
- 3 – Put the ring on top of the white one’s cage.
- 4 & 5 – Put the party hat on the black one and use the red lipstick on the white one’s hat.
- 6 – Give the cookie to the black one to make crumbs.
- 7 – Dip the honey dipper into the honey and spread some honey on the left-side of the cage to attract the bee.
- Note: Logically, the bee should be on the other side and I kept clicking and clicking but it goes on the left side.
- 8 – Dip the brush into the white powder, then use it on the black one.
- 9 – Place the five beads (circled) on the string.
- Take the letter N.
- Click the large chest. Place all the letters on the slots.
- Note: It doesn’t matter where you place the letters, they will be automatically put in the right position.
- Click the chest to start a hidden object hunt.
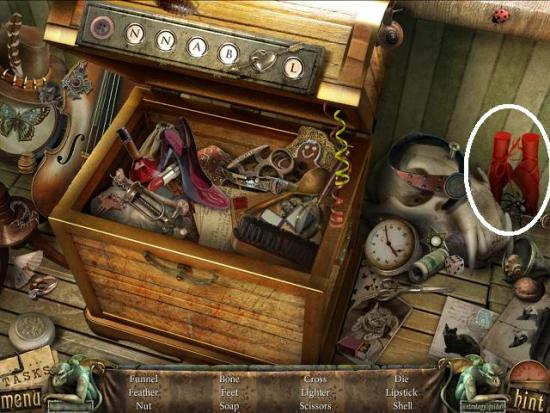
- Find all the items. There are no interactive items here. A pair of feet is added to your inventory.
- Click on the drawers. Place the ring handle on the lower drawer, then click to open it. Take the legs.
- Leave the scene and go into the tent. Take the right exit and go towards the wagon.
- Click on the tall wooden box in the middle of the scene. Click on the panels to open all of them.
- Position the bust, pair of feet and legs.
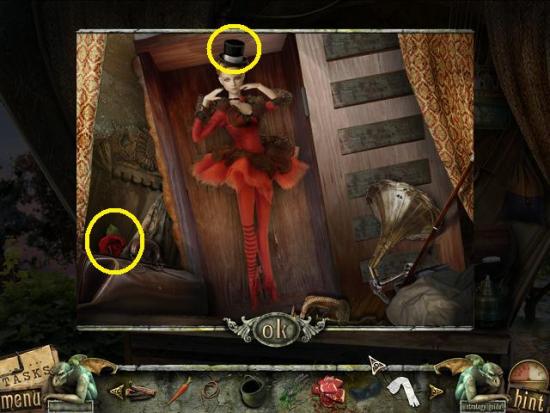
- When the box opens, take the hat and rose brooch.
- Leave the scene and return to the trailer. Click on the back of the chair for the costume’s diagram.
- On the mannequin, place the whip, rose brooch, mask, hat and glove. Take the rabbit key that the mannequin dropped.
- Click on the chest against the wall to start a hidden object hunt.
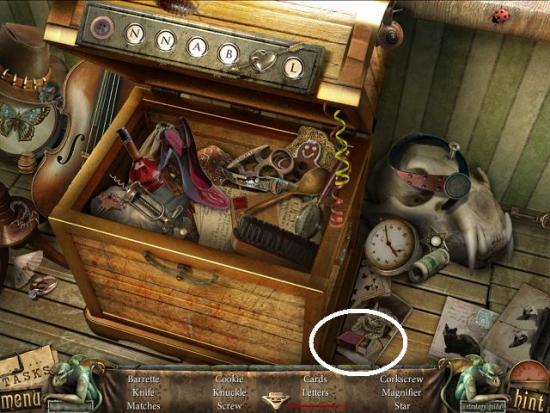
- Find all the items. There are no interactive items here. Matches are added to your inventory.
- Leave the scene.
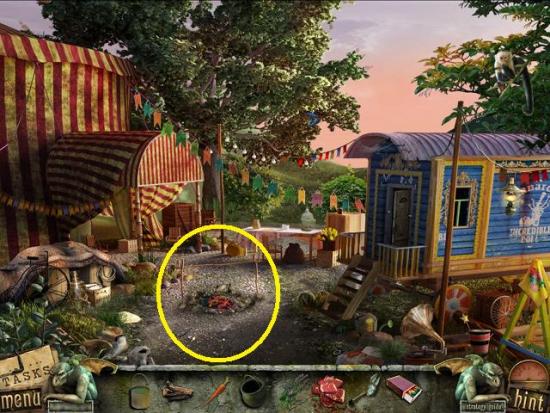
- Click on the fire pit. Place the cauldron, then add to it the bucket of water, the carved meat, and the sleepy grass. Add the firewood and use the matches to light it. Take the cauldron with contains sleeping stew.
- Leave the scene and return to the wagon. Click on the rabbit’s cage. Use the rabbit key to unlock it. Give the carrot to the rabbit and take the lock piece it drops. Leave the scene.
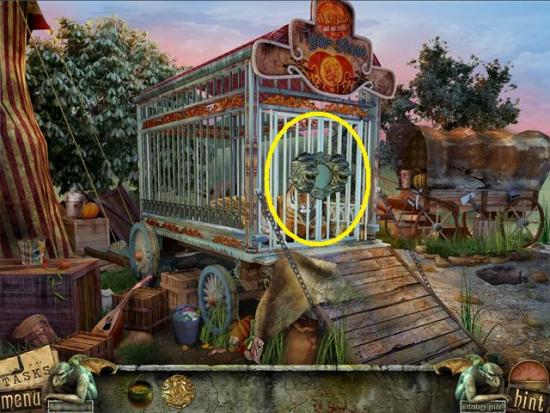
- Click on the tiger cage’s lock. Place the lock piece in the slot. Give the sleeping stew to the tiger. When he falls asleep, take the amulet.
- Leave the scene.
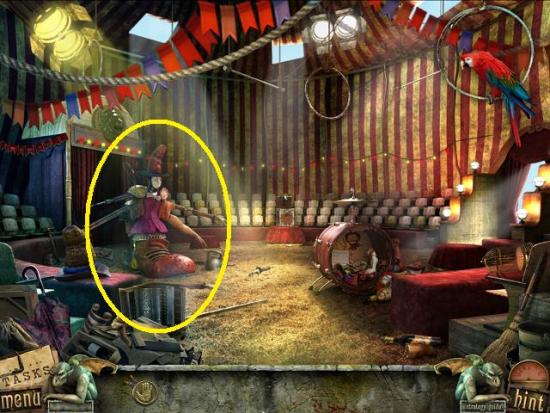
- Click on the puppet.
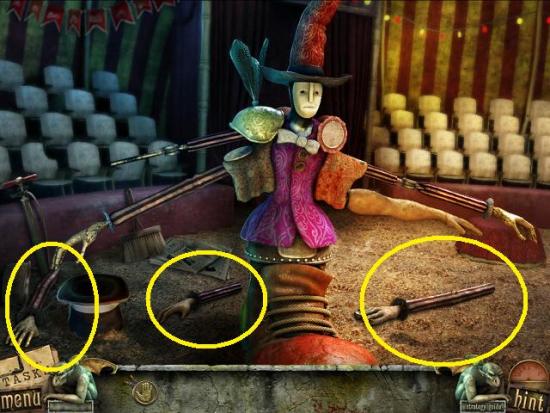
- Pick up the arms. Place them on the puppet according to the screenshot below.
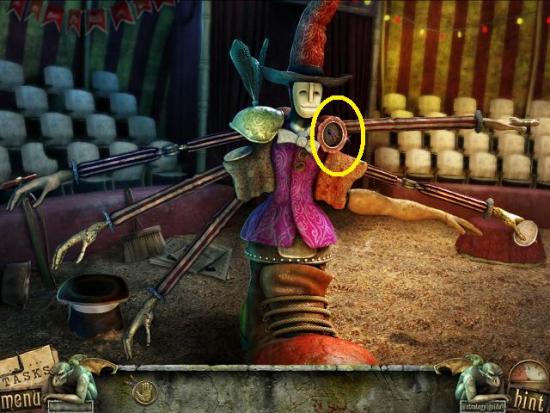
- Place the amulet on its shoulder.
Game over!
More articles...
Monopoly GO! Free Rolls – Links For Free Dice
By Glen Fox
Wondering how to get Monopoly GO! free rolls? Well, you’ve come to the right place. In this guide, we provide you with a bunch of tips and tricks to get some free rolls for the hit new mobile game. We’ll …Best Roblox Horror Games to Play Right Now – Updated Weekly
By Adele Wilson
Our Best Roblox Horror Games guide features the scariest and most creative experiences to play right now on the platform!The BEST Roblox Games of The Week – Games You Need To Play!
By Sho Roberts
Our feature shares our pick for the Best Roblox Games of the week! With our feature, we guarantee you'll find something new to play!Type Soul Clan Rarity Guide – All Legendary And Common Clans Listed!
By Nathan Ball
Wondering what your odds of rolling a particular Clan are? Wonder no more, with my handy Type Soul Clan Rarity guide.


