![All VV Ultimatum Titles [How to Get]](/wp-content/uploads/2026/06/vv-ultimatum-titles.jpg "All VV Ultimatum Titles [How to Get]")
All VV Ultimatum Titles [How to Get]
Do titles provide buffs?


Welcome to the Reincarnations: Back to Reality Collector’s Edition walkthrough on Gamezebo. Reincarnations: Back to Reality Collector’s Edition is a Hidden Object Game played on the PC created by Vogat Interactive. This walkthrough includes tips and tricks, helpful hints and a strategy guide on how to complete Reincarnations: Back to Reality Collector’s Edition.
Welcome to theReincarnations: Back to Reality Collector’s Editionwalkthrough on Gamezebo.Reincarnations: Back to Reality Collector’s Editionis a Hidden Object Game played on the PC created by Vogat Interactive. This walkthrough includes tips and tricks, helpful hints and a strategy guide on how to completeReincarnations: Back to Reality Collector’s Edition.
This hidden object game requires visiting several locations and using inventory items to advance play.
Main Menu:
Screen Navigation:
Symbol Meanings:
A short clip explains the background and introduces the story line for play.
If you are not familiar with hidden object games, click “Yes” when asked if you would like a tutorial. This will show you how to interact with objects and characters.
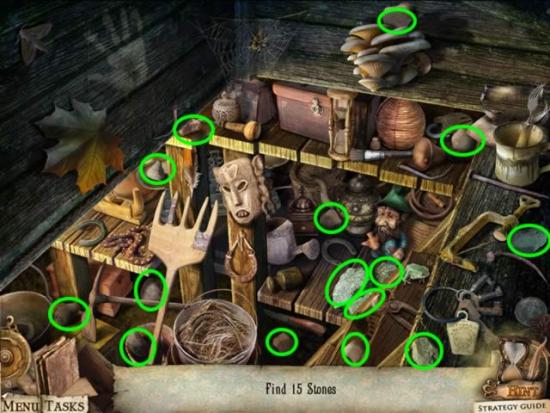
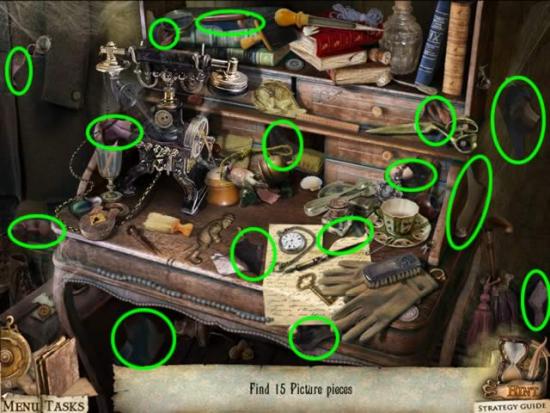
The objects for hidden object scenes are randomly generated. That is why only inventory items are shown. They are highlighted in white with a blue border. Objects in orange indicate an extra step is needed to obtain the object. Move your cursor around until the cursor turns into a hand.

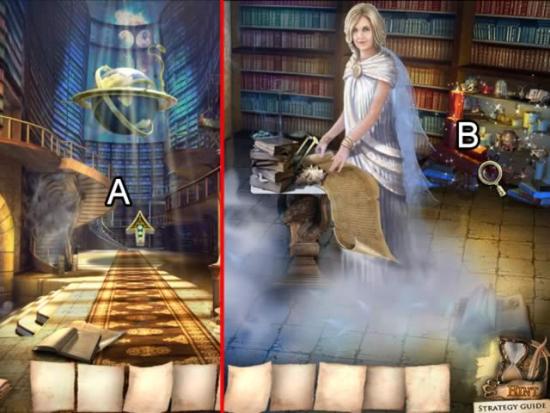
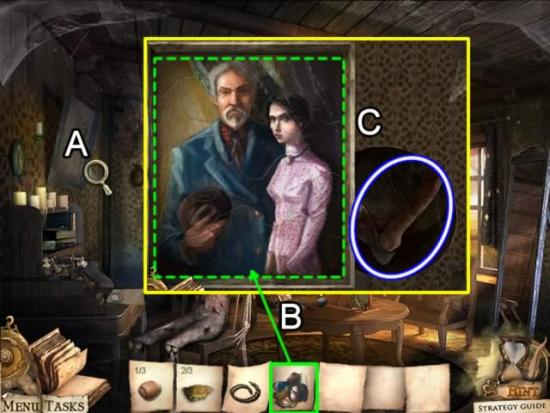
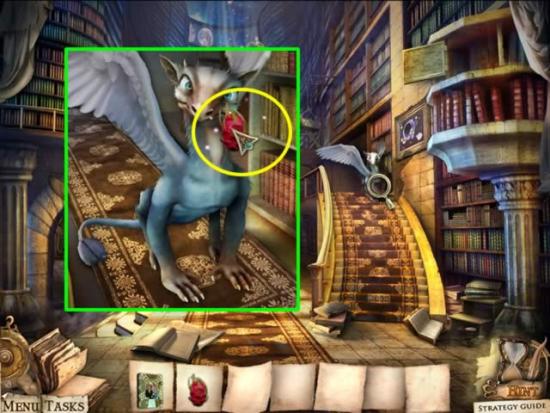
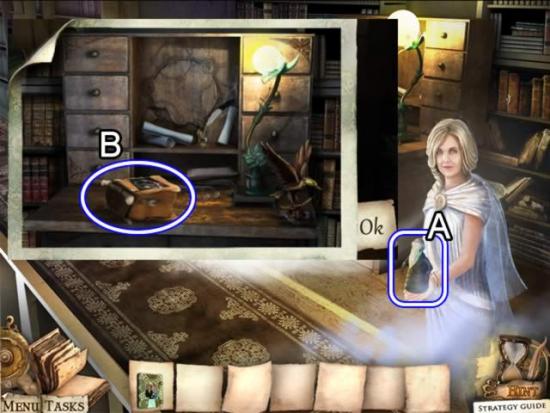
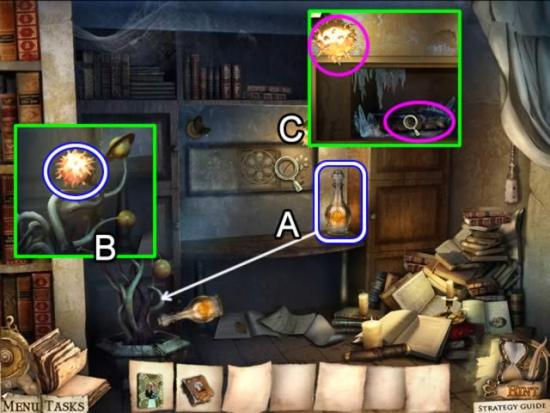
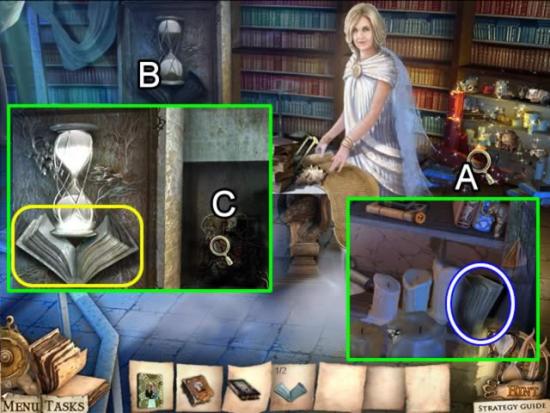
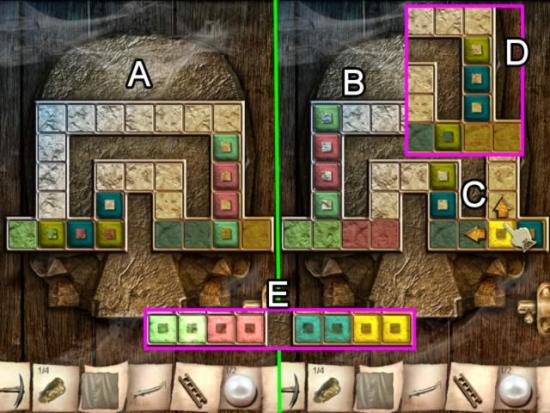
The Library
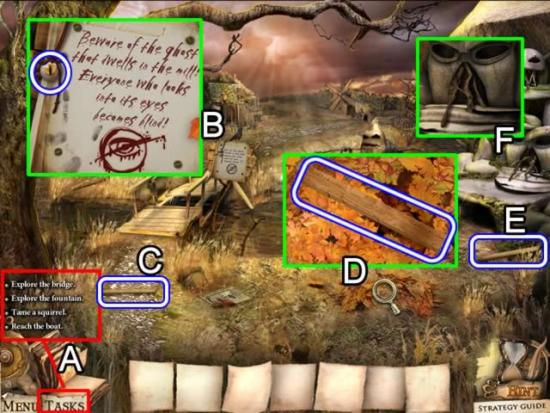
The Clearing
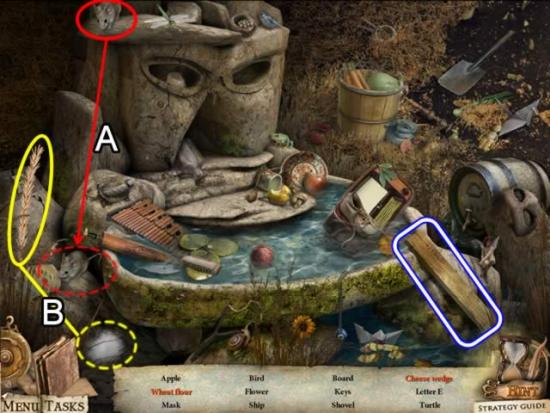
Outside the Cottage
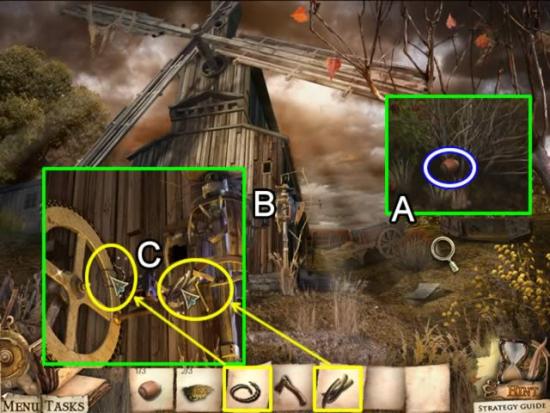
Outside the Windmill
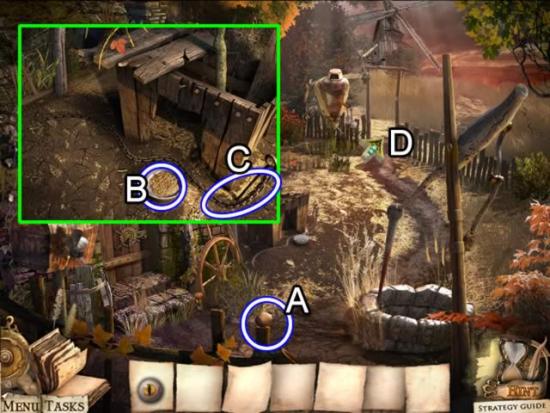
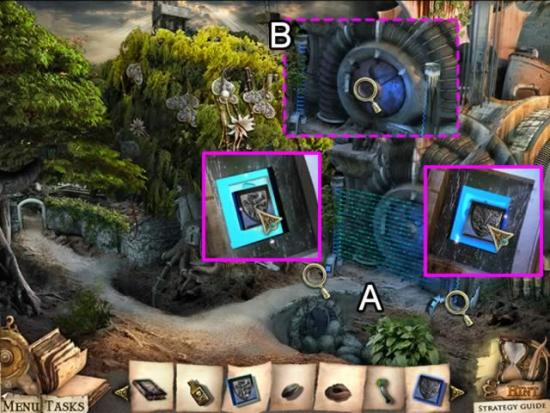
The Clearing
Outside the Cottage
Inside the Cottage
Outside the Cottage
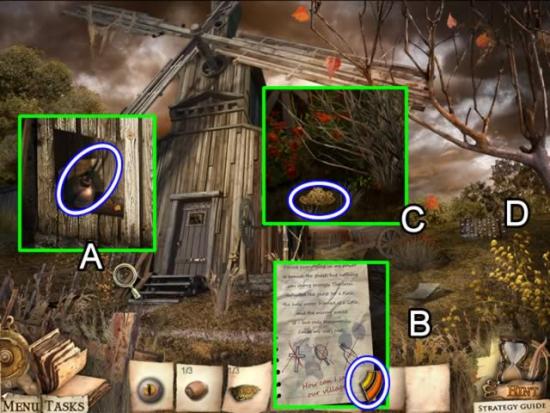
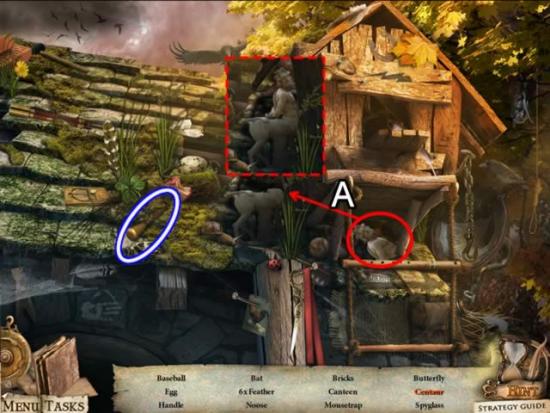
Outside the Windmill
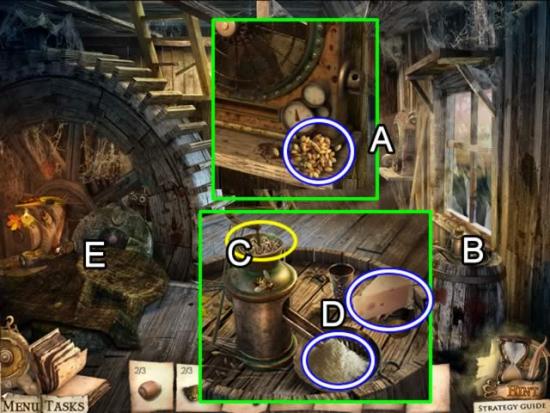
Inside the Windmill
Outside the Cottage
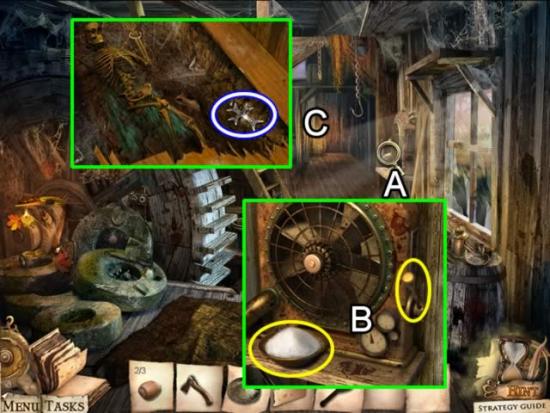
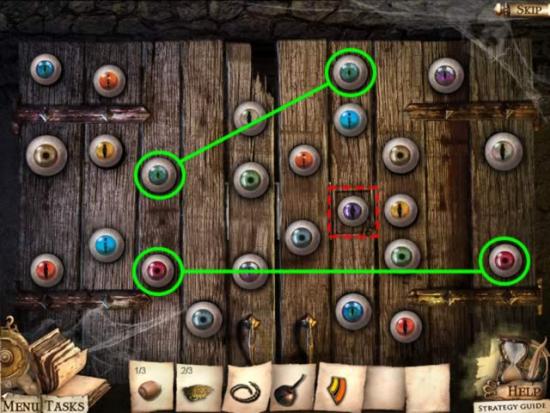
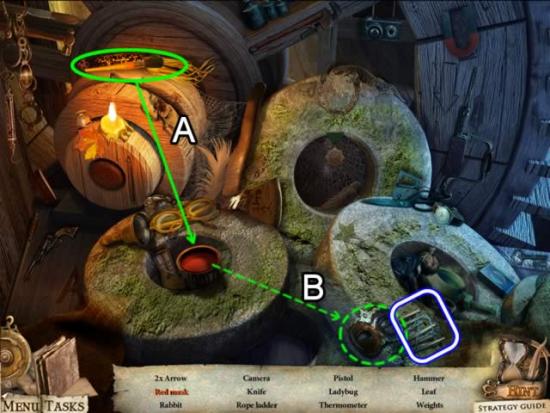
Inside the Windmill
Inside the Cottage
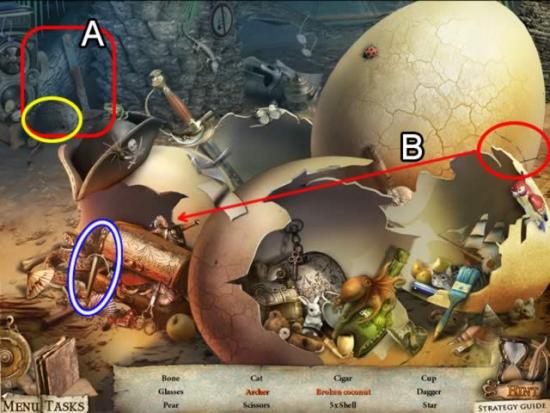
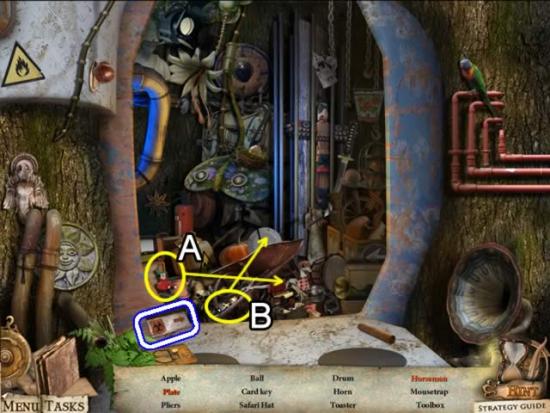
Behind the Cottage
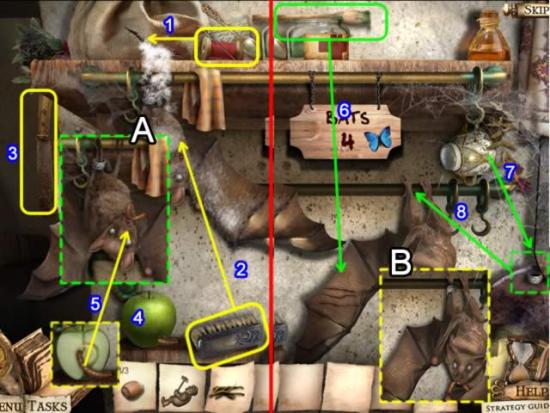
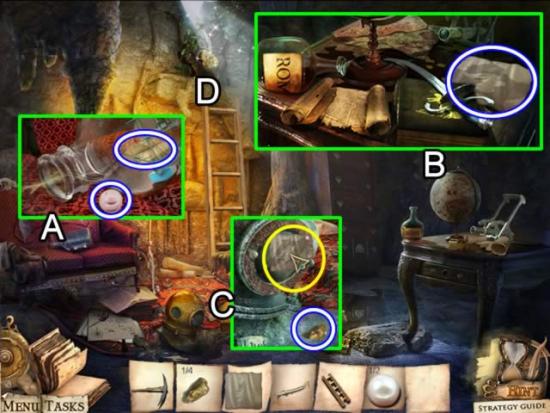
– Drag the needle and thread to sew up the tear in the leaking bag (1).
– Use the brush (2) to remove the powder.
– Both now have clean coats.
– Use the knife (3) to cut the apple (4).
– Place the worm in the bat’s mouth (5).
– Both now have worms in their mouths.
– Place the brush with healing ointment on the scratches on the wing (6).
– Both bats now have unblemished wings.
– Click the tea cup (7). A ring drops.
– Place the ring on the bat’s left leg (8).
– Both bats now have rings on their legs.
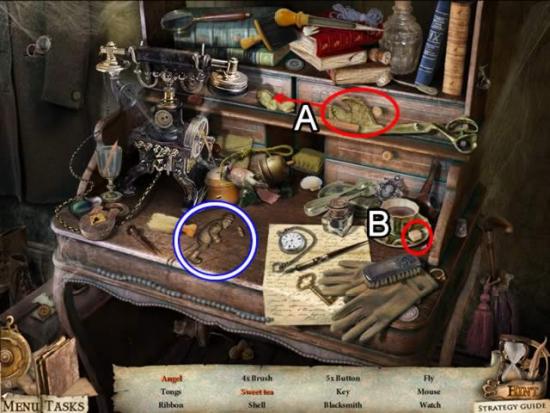
Inside the Cottage
Back of Cottage

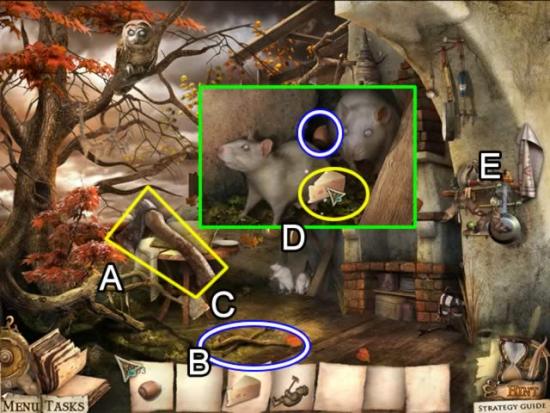
Outside the Cottage
Back of Cottage
The Clearing
Inside the Cottage
Back of Cottage.

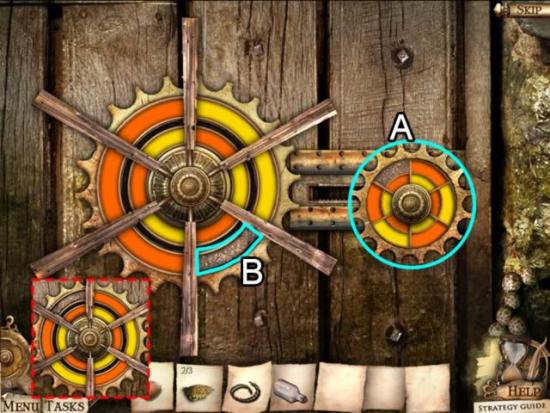
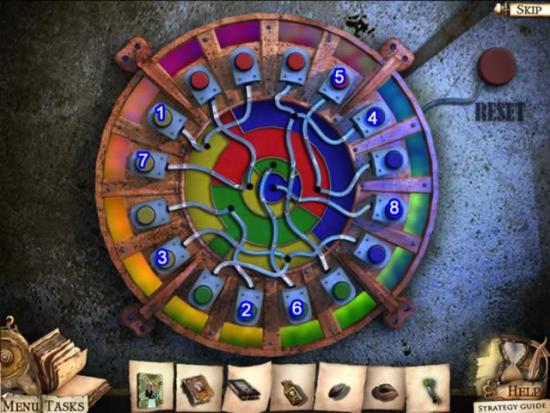
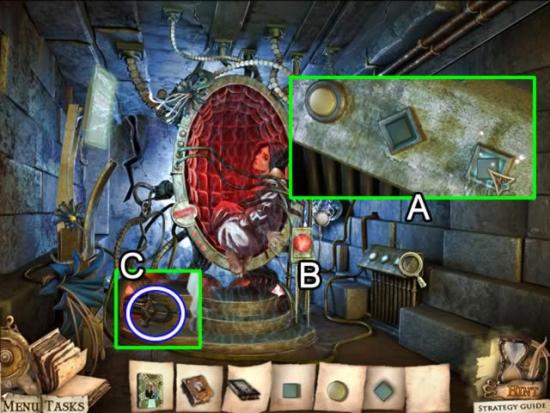
The Windmill
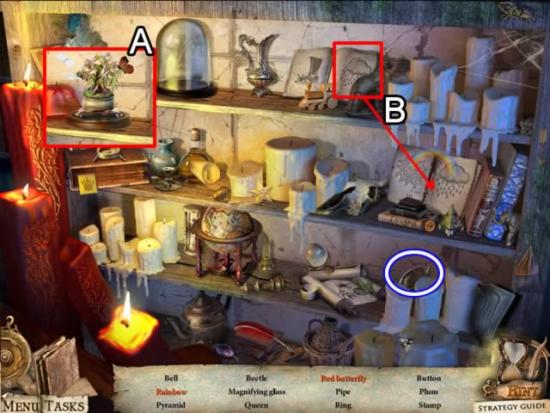
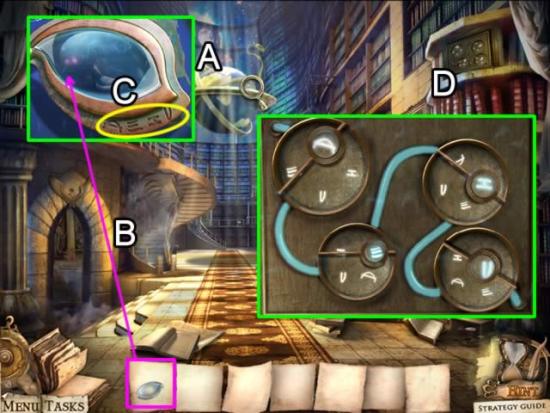
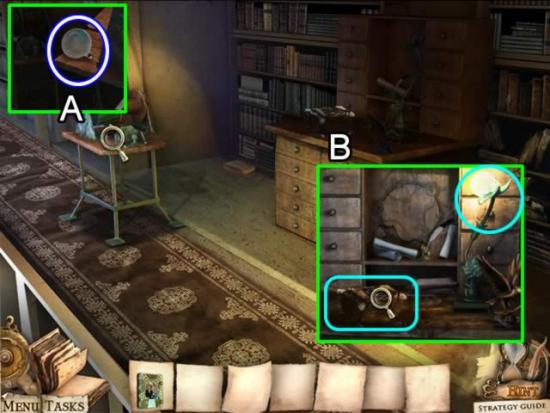
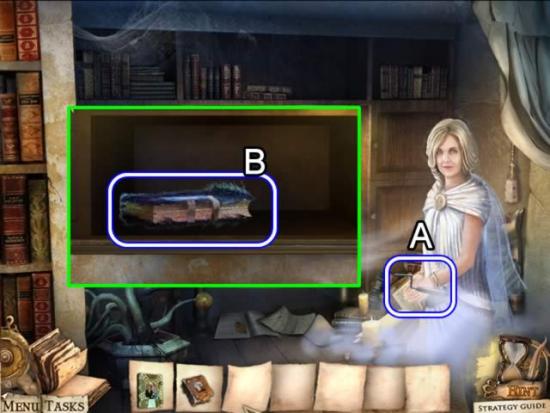
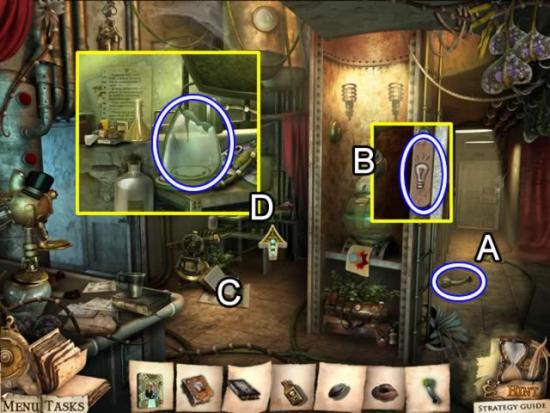
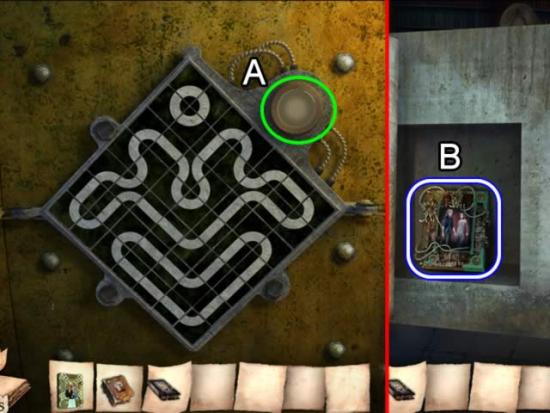
The Library
The Library
Main Hallway
Tropic Showcase
Main Hallway
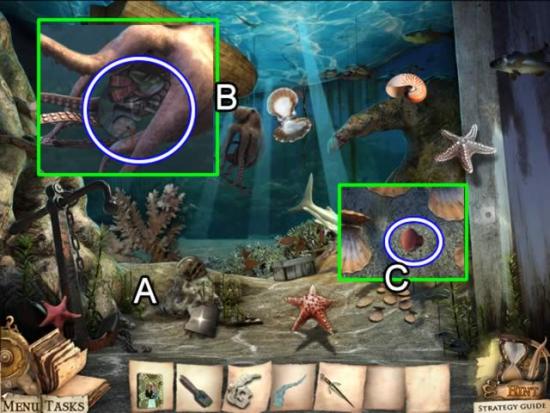
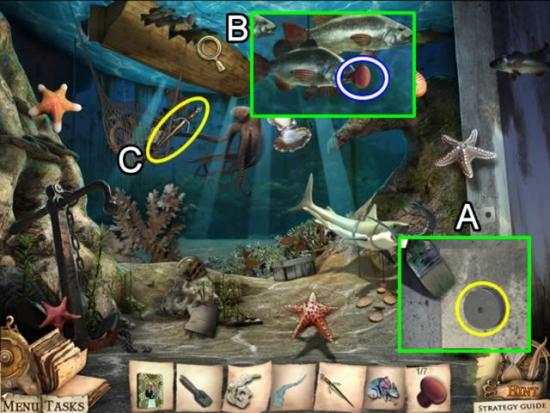
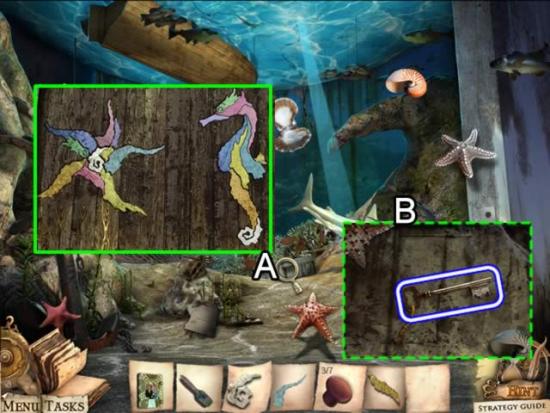
Aquarium
Tropic Showcase
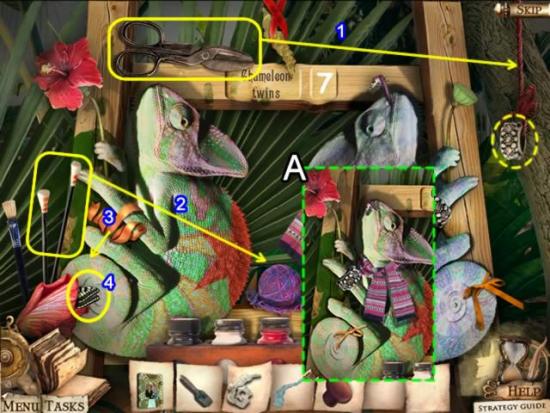
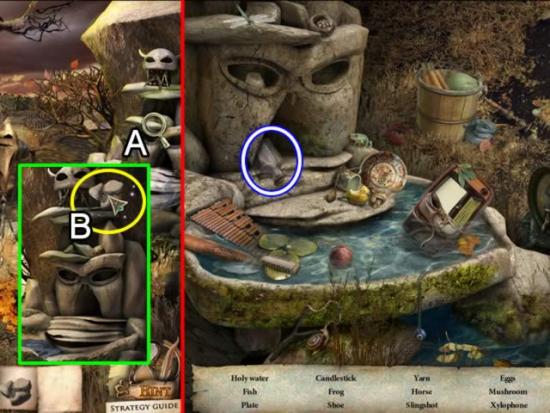
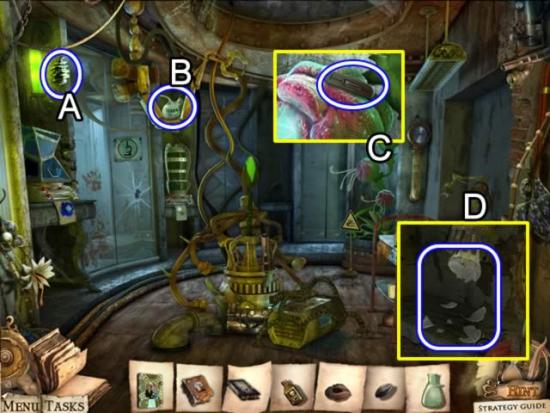
The goal is to eliminate the differences between the two chameleons.
– Use the scissors to cut the string (1) to add the bracelet to the arm.
– Drag the knitting needles to the ball of yarn (2).
– Place the knitted scarf around the chameleon’s neck.
– Drag the ribbon on the chameleon’s arm to its tail (3).
– Click the butterfly (4). It flutters upward. It winds up on the chameleon’s tongue.
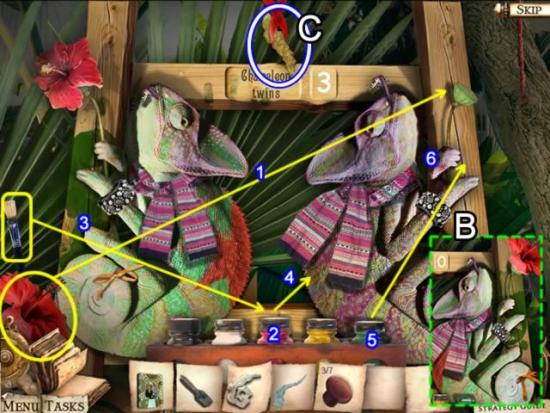
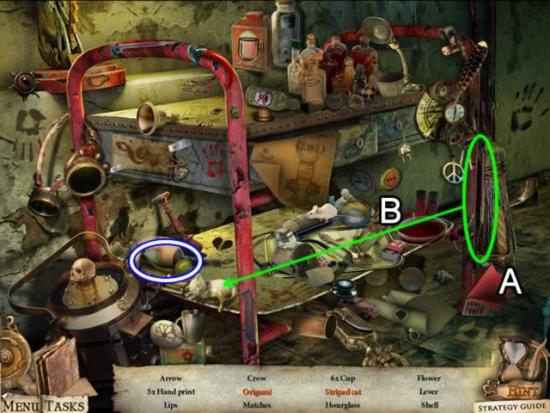
– Drag the flower to the stem (1).
– Open the jar of red paint (2).
– Dip the paint brush in the red paint (3).
– Put the brush on the chameleon’s back (4).
– Open the jar of green paint (5).
– Dip the paint brush in the green paint.
– Put the brush on the ladder strut (6). Now there is a green blotch similar to the one on the left. The chameleon adopts this color as well.
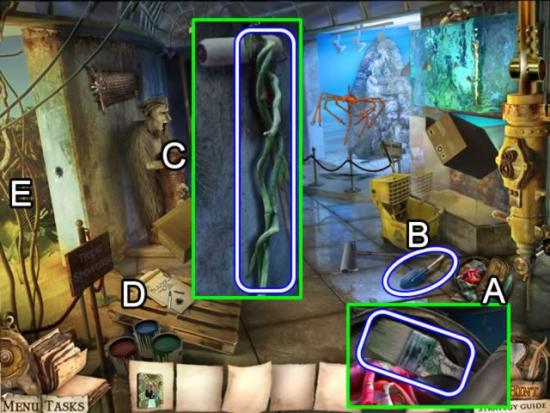
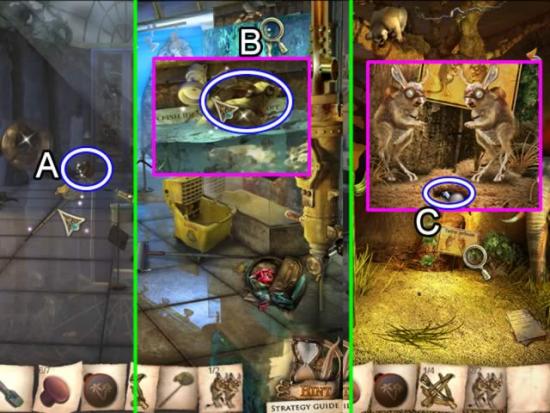
The Aquarium
Main Hallway
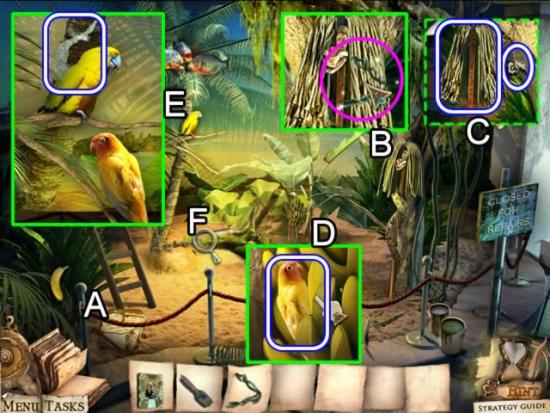
African Showcase Hallway
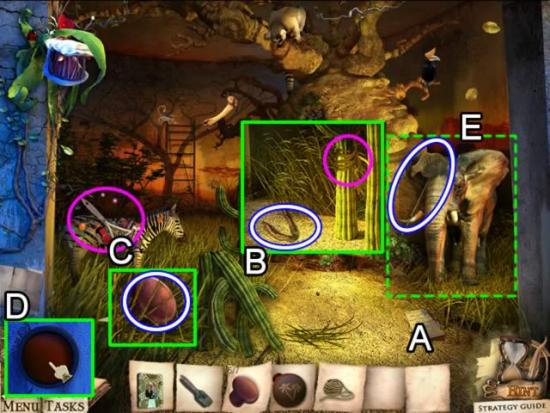
African Showcase
African Showcase Hallway
Main Hallway
African Showcase
African Showcase Hallway
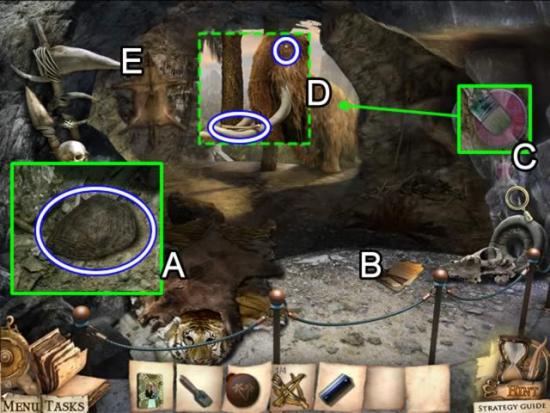
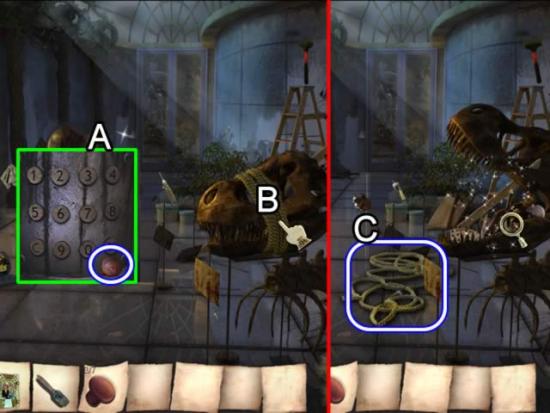
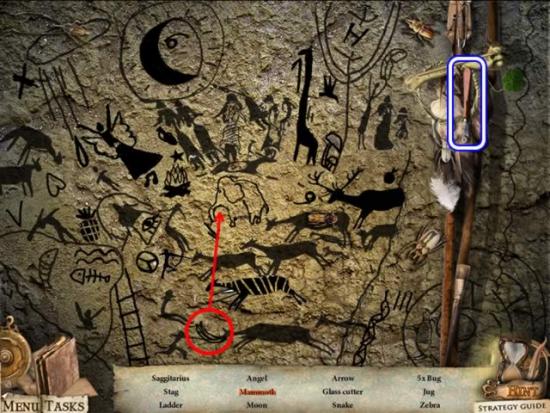
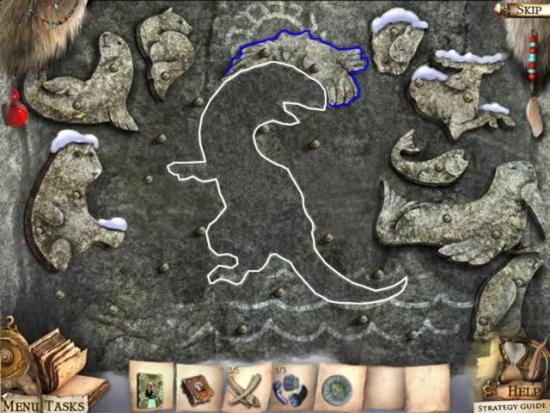
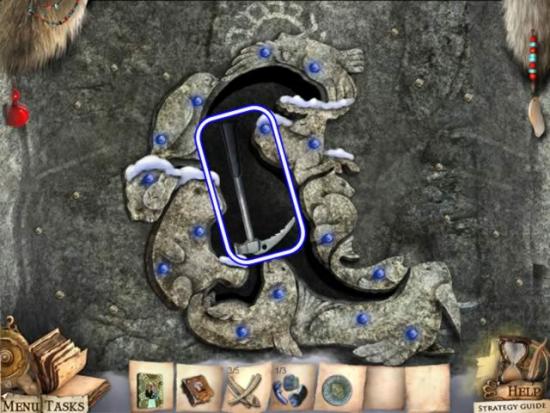
Prehistoric Showcase
African Showcase Hallway
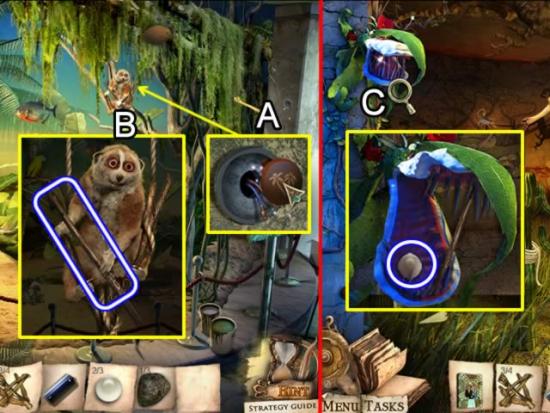
Tropic Showcase
African Showcase
Aquarium Showcase
African Showcase
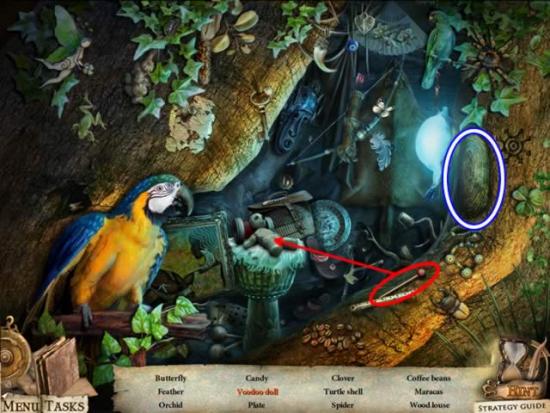
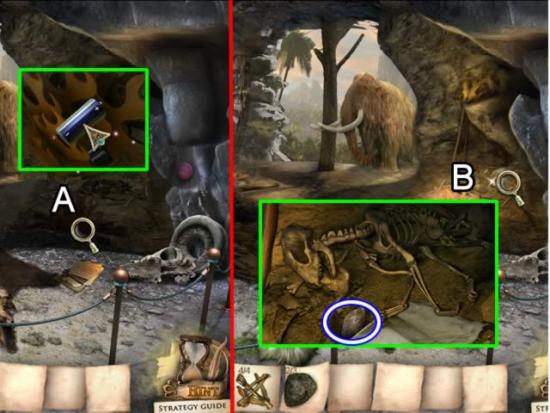
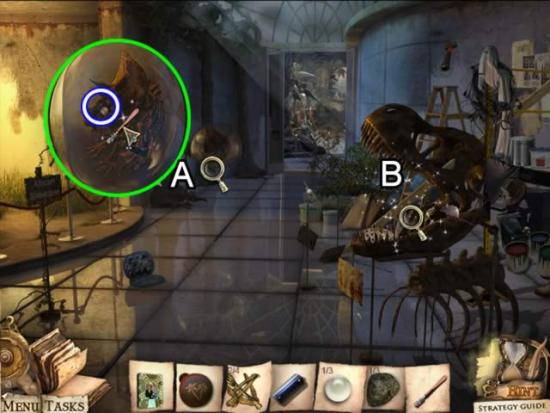
Prehistoric Showcase
Main Hallway
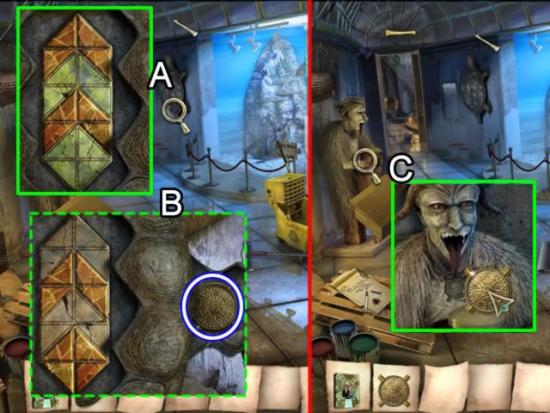
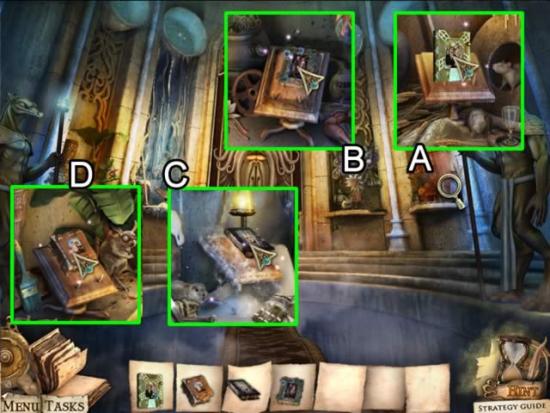
The Library
The Library – Main Hall
The Library – Second Floor
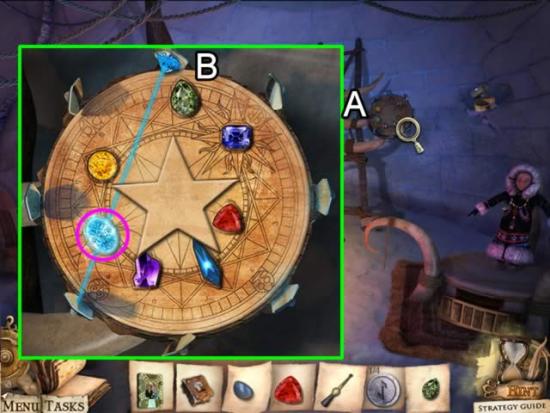
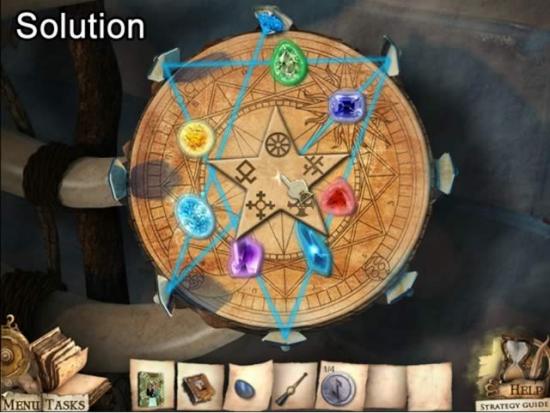
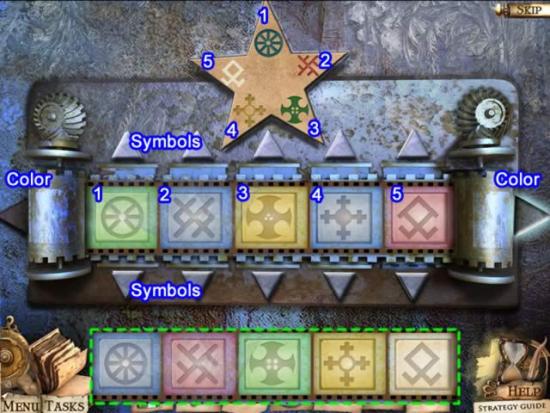
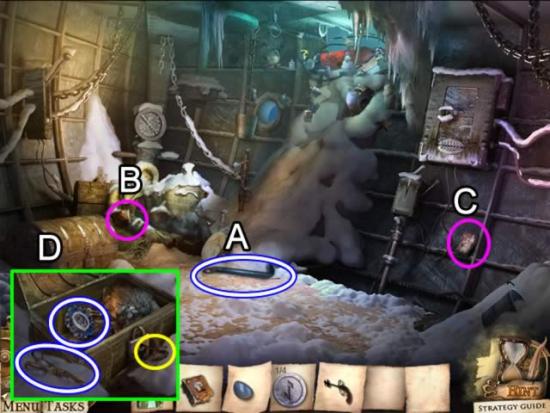
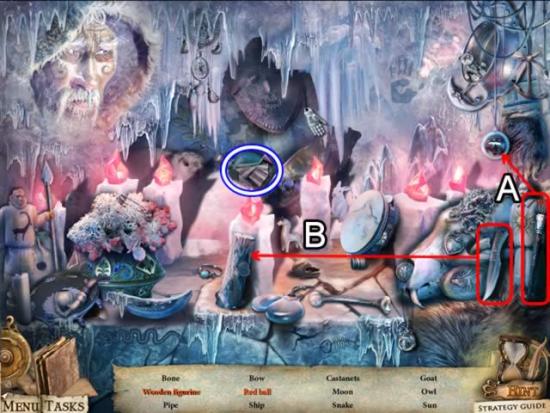
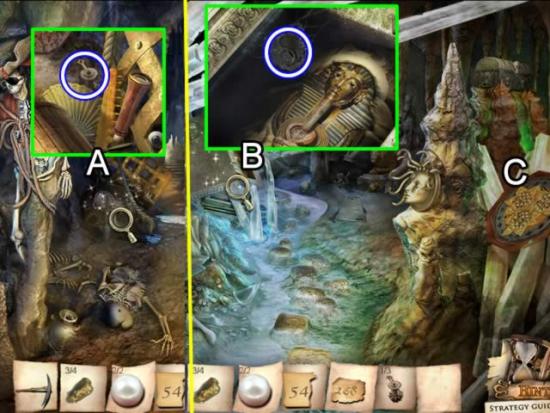
Outside the Igloo
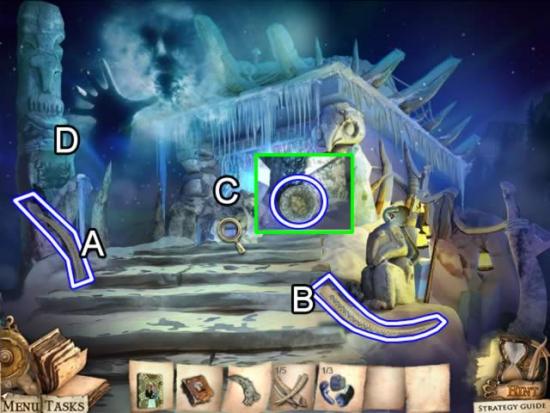
Temple Entrance
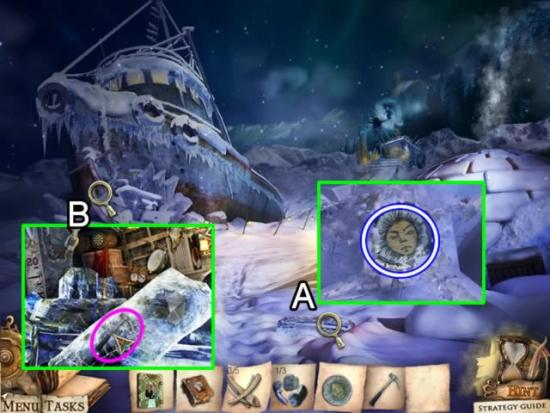
Outside the Igloo
Temple Entrance
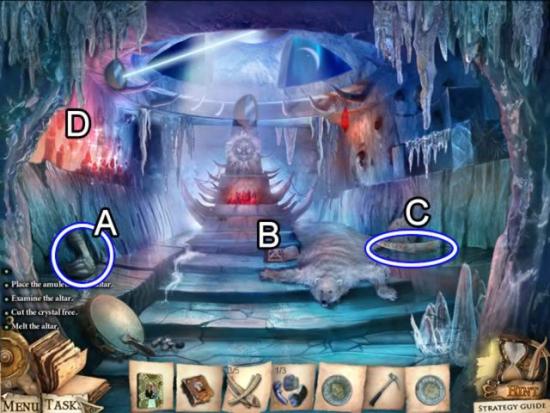
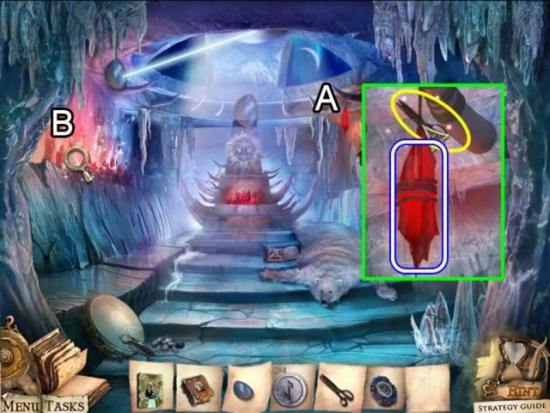
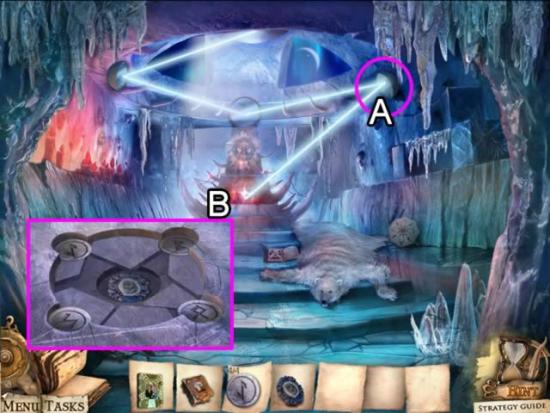
Temple Interior
Temple Exterior
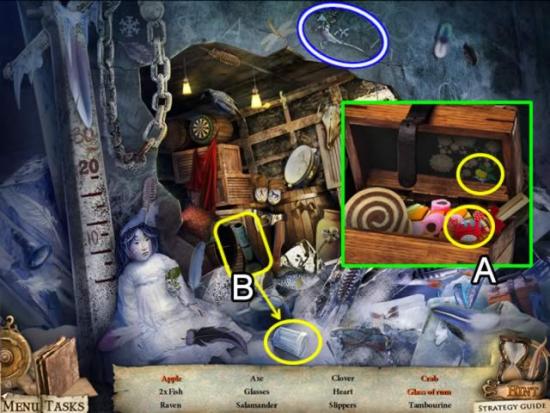
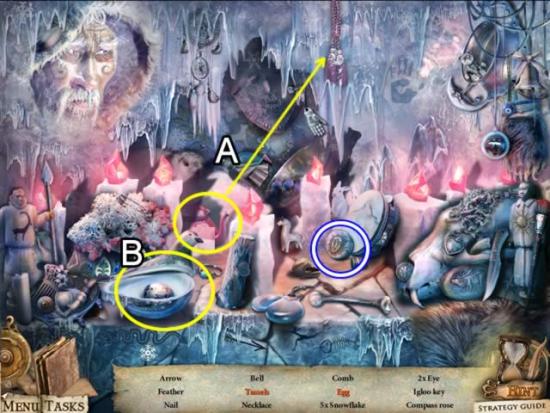
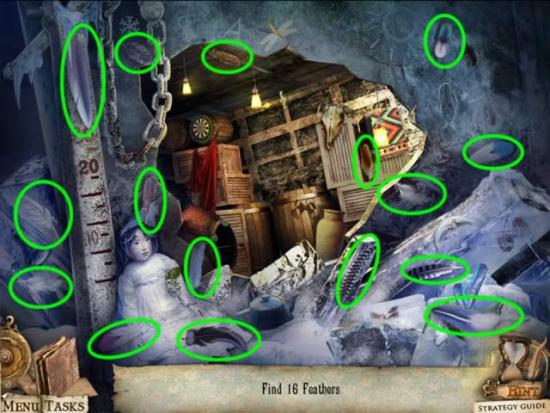
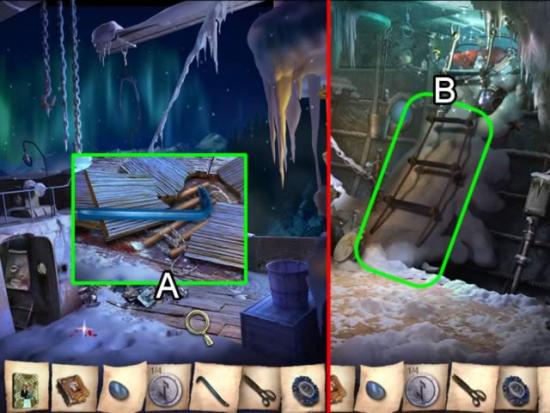
Igloo Entrance
Igloo Interior
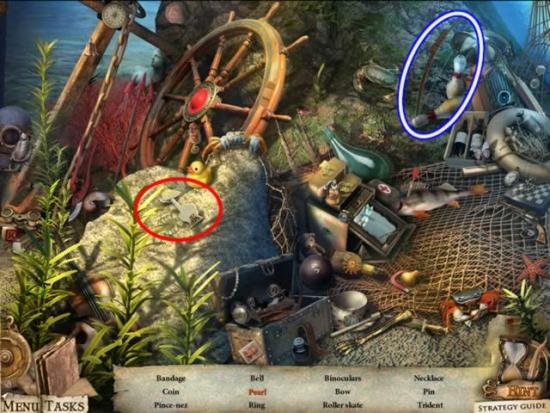
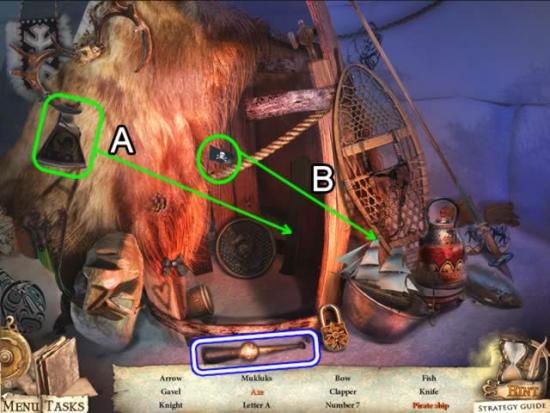
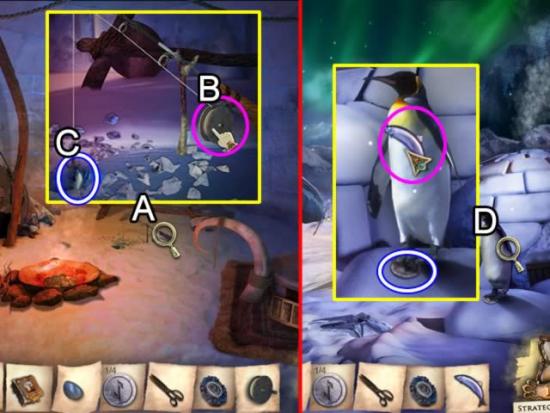
Ship’s Deck
Temple Entrance
Igloo Interior


Ship’s Deck
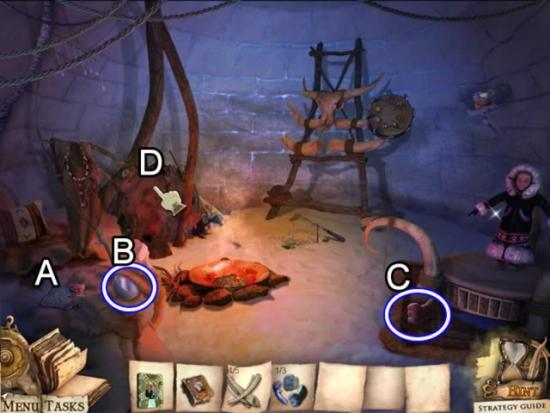
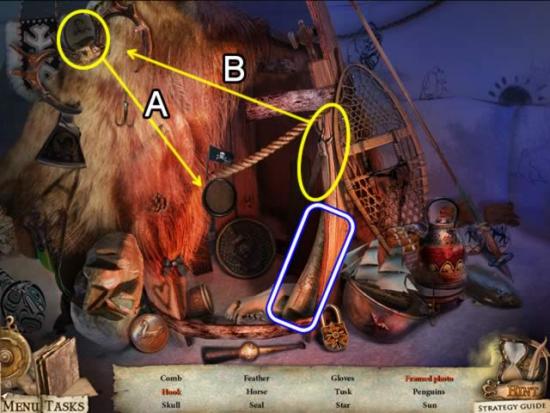
Ship’s Cabin
Ship’s Deck
Ship’s Cabin
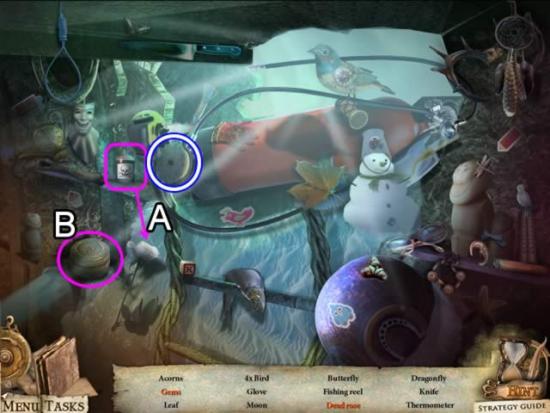
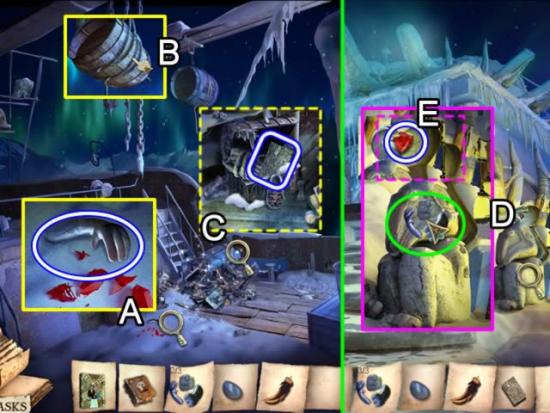
Igloo Interior
Igloo Exterior
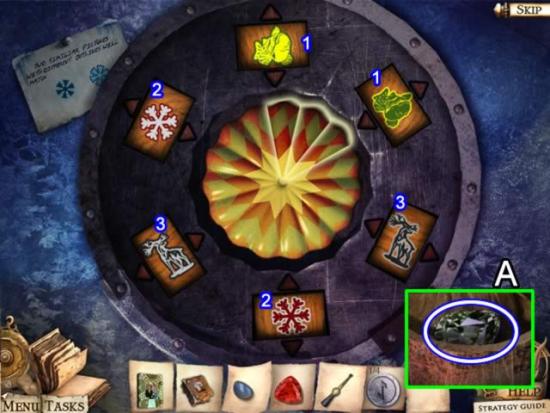
Temple Interior

Ship’s Cabin.
Temple Interior
The Library
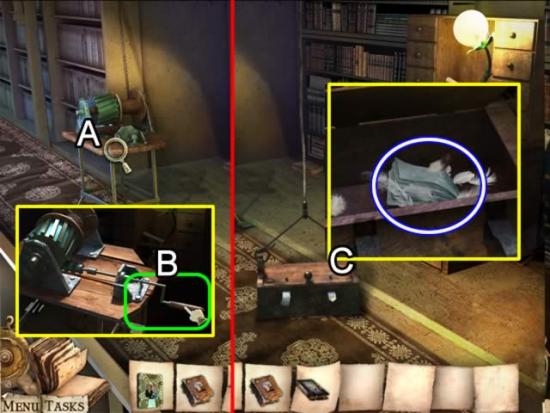
The Library
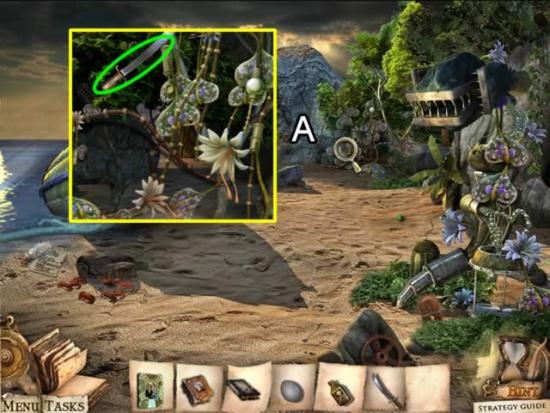
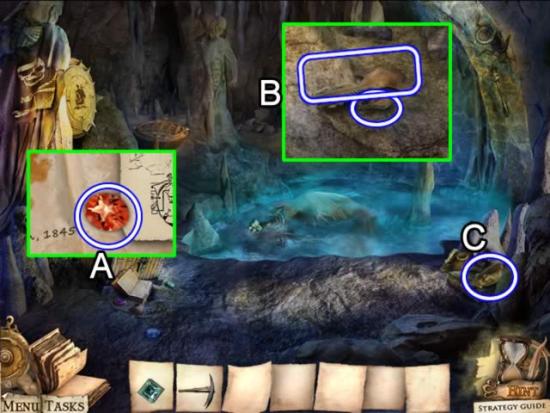
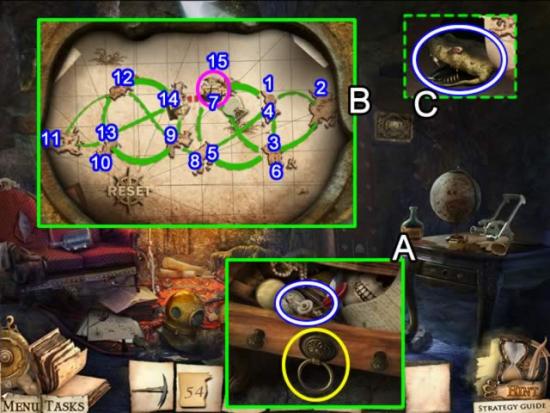
Robot Canyon
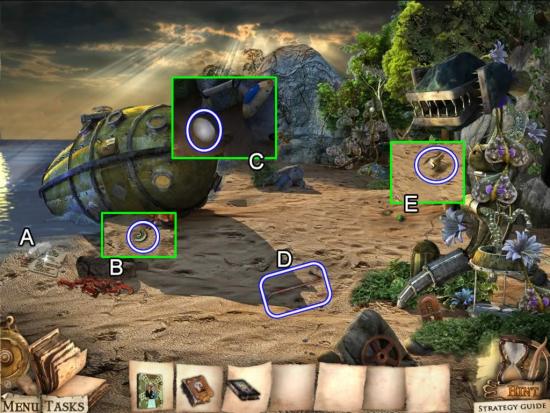
The Beach
Robot Canyon
The Beach
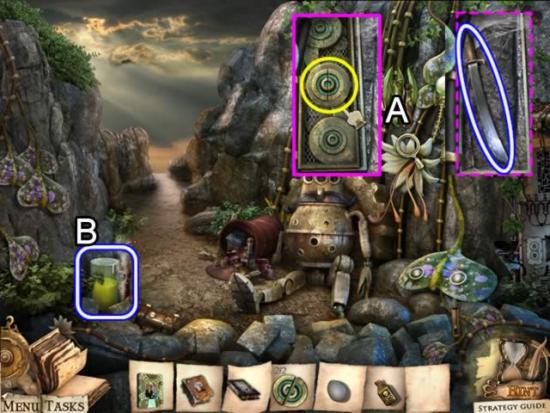
Robot Canyon
The Beach
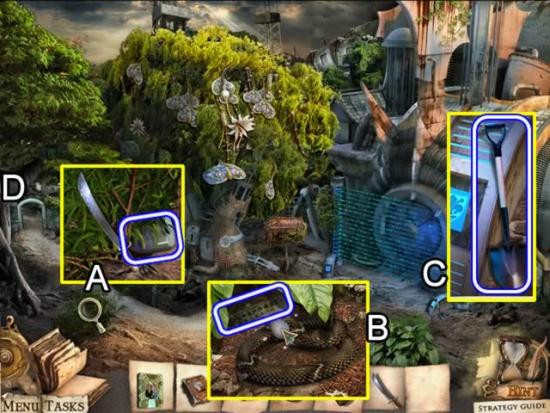
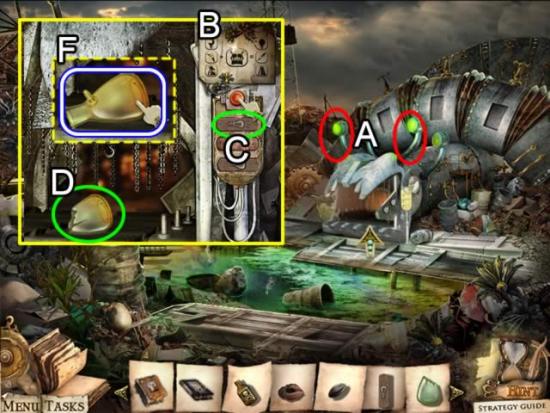
Outside the Lab

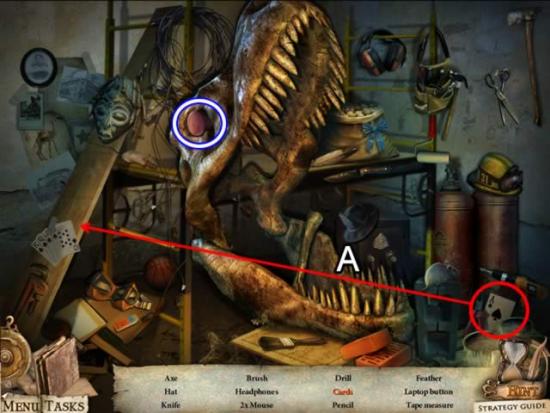
The Scrapyard

The Beach
Robot Canyon
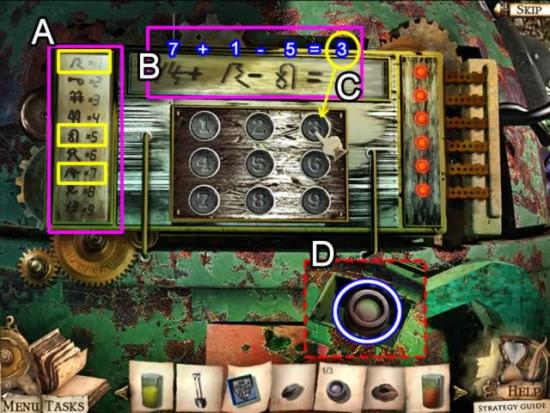
Outside the Lab
Lab Entryway
The Scrapyard
Outside the Lab
Lab Entryway
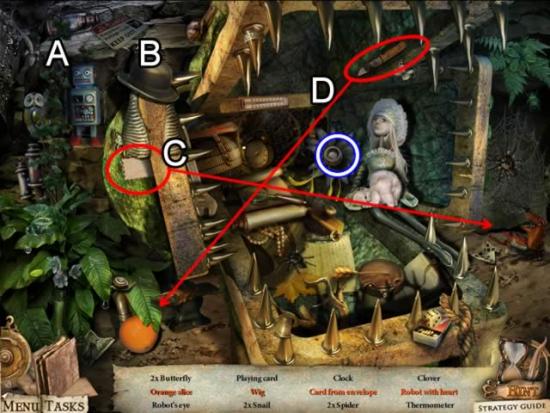
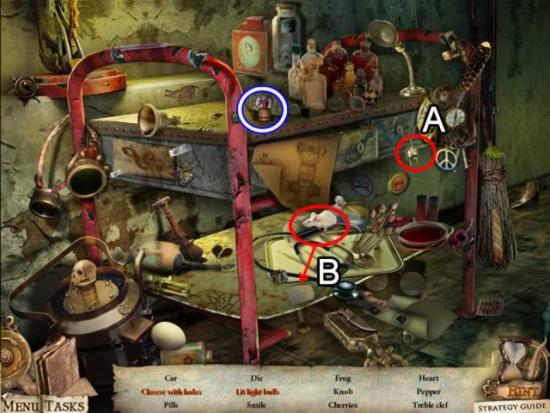
Plant Lab
Scrapyard
Plant Lab
Scrapyard
Plant Lab
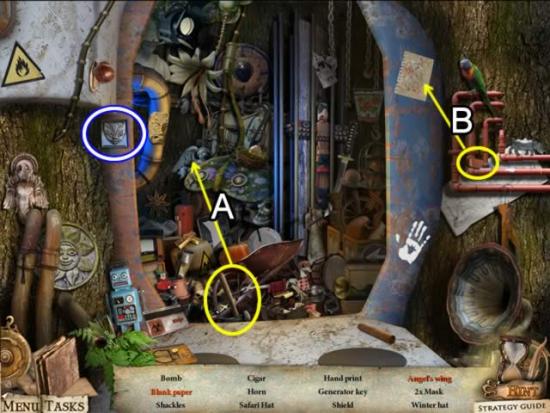
Lab Entryway Alcove
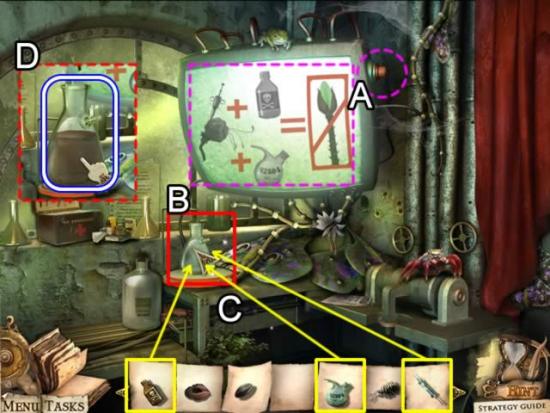
Plant Lab
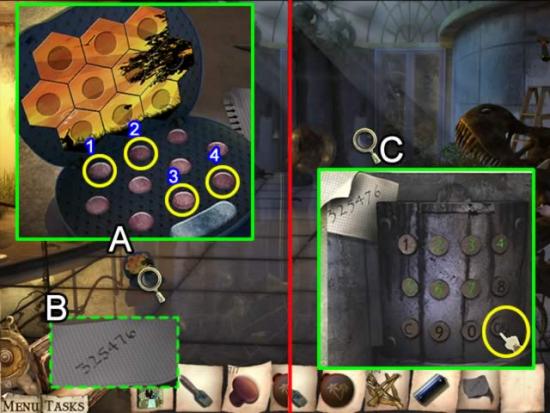
Lab Entryway

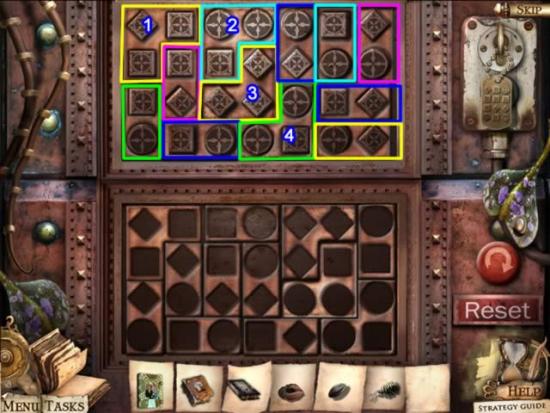
Lab Chamber
Lab Entryway

Plant Lab
Lab Entryway
Lab Chamber
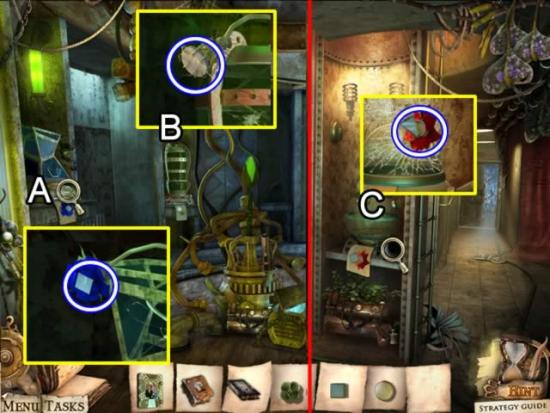
The Beach
The Library
Guardman’s Room
Congratulations! You have finished playing Reincarnations: Back to Reality Collector’s Edition. Bonus material, including an extra chapter is now available from the main menu.
Select the “Additional Content” tab from the main menu.
Click “Play”.

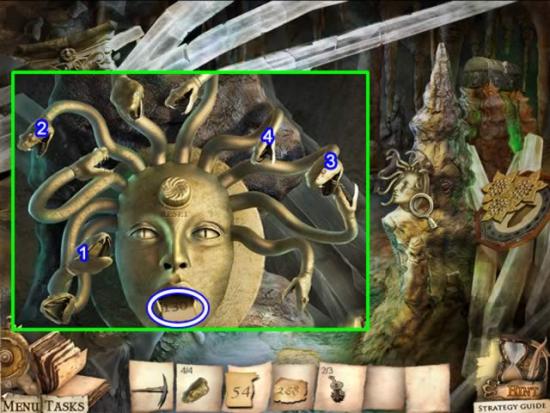
Skeleton Chamber
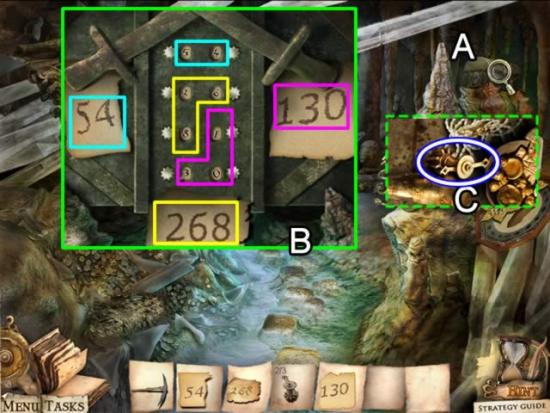
Pool Chamber

Skeleton Chamber
Pool Chamber
Skeleton Chamber
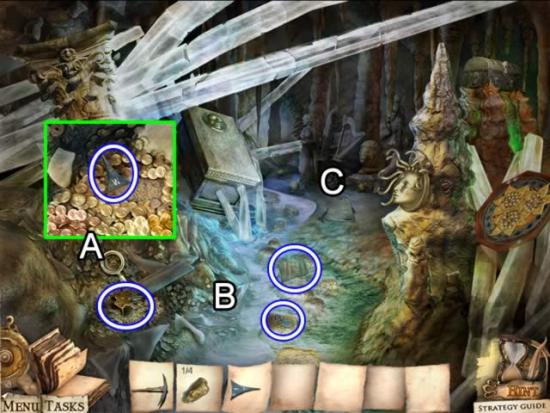
Treasure Chamber
Pool Chamber
Treasure Chamber
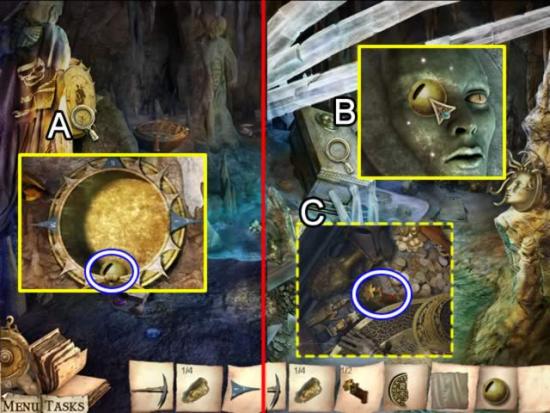
Pool Chamber
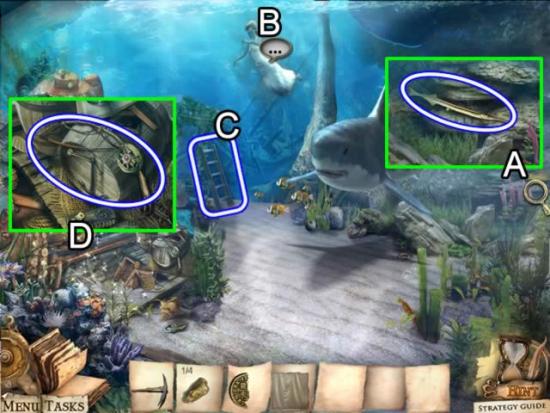
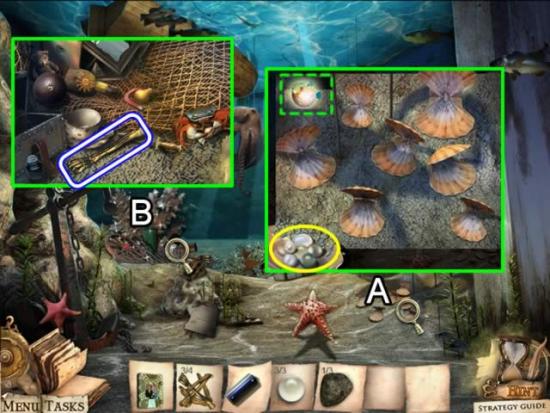
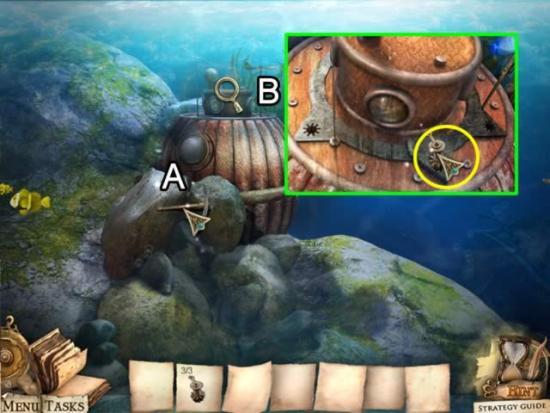
Underwater
Pool Chamber
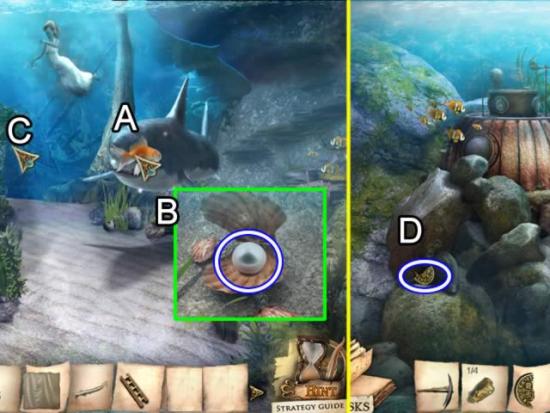
Underwater
Submarine
Pool Chamber
Pirate’s Room
Skeleton Room
Treasure Room

Pirate’s Room
Treasure Room
Submarine
Congratulations! You have finished playing the bonus chapter of Reincarnations: Back to Reality Collector’s Edition.
