- Wondering how to get Monopoly GO! free rolls? Well, you’ve come to the right place. In this guide, we provide you with a bunch of tips and tricks to get some free rolls for the hit new mobile game. We’ll …
The BEST Roblox Games of The Week – Games You Need To Play!
By Sho Roberts
Our feature shares our pick for the Best Roblox Games of the week! With our feature, we guarantee you'll find something new to play!All Grades in Type Soul – Each Race Explained
By Adele Wilson
Our All Grades in Type Soul guide lists every grade in the game for all races, including how to increase your grade quickly!Best Roblox Horror Games to Play Right Now – Updated Weekly
By Adele Wilson
Our Best Roblox Horror Games guide features the scariest and most creative experiences to play right now on the platform!
Reincarnations: Awakening Walkthrough
Welcome to Gamezebo's walkthrough for Reincarnations: Awakening. Navigation 0.General Tips I.Introduction: Jane's Office II.Chapter 1: Dr.Herzle's Mansion III.Chapter 2: Abuja & the Buddha Temple IV.Chapter 3: Stefan & the Prison V.Chapter 4: Jilberto & the City Square VI.Chapter 5: Buggy & Life in Paris VII. Chapter 6: Albertina & the Observatory 0.General Tips Clicking on the picture of the character displayed in the lower right corner of the scre…
a:1:i:0;a:2:s:13:”section_title”;s:37:”Reincarnations: Awakening Walkthrough”;s:12:”section_body”;s:82031:”
Welcome to Gamezebo’s walkthrough for Reincarnations: Awakening.
Navigation
0.General Tips
I.Introduction: Jane’s Office
II.Chapter 1: Dr.Herzle’s Mansion
III.Chapter 2: Abuja & the Buddha Temple
IV.Chapter 3: Stefan & the Prison
V.Chapter 4: Jilberto & the City Square
VI.Chapter 5: Buggy & Life in Paris
VII. Chapter 6: Albertina & the Observatory
0.General Tips
- Clicking on the picture of the character displayed in the lower right corner of the screen will allow you to see your current task at hand.
- Hints can be used to reveal items in hidden object areas. A bright circle will form around the object needed. Hints are unlimited and refill after an allotted amount of time.
- Puzzles can be skipped.
- Puzzle solutions, goals, notes, and fun facts for each character can be viewed by clicking the Diary in the lower left area of the screen.
- The navigation arrows that appear in the lower corner of a scene from time to time will allow you to move around from area to area.
- Items illuminated in orange on a hidden object list require you to interact with the environment in some way, or complete a small task to cross them from the list.
- Quitting the game will automatically save your progress and you will resume where you left off.
I.Introduction: Jane’s Office
The game begins in Jane’s Office. You can immediately chose whether or not you’d like the tutorial introduction.
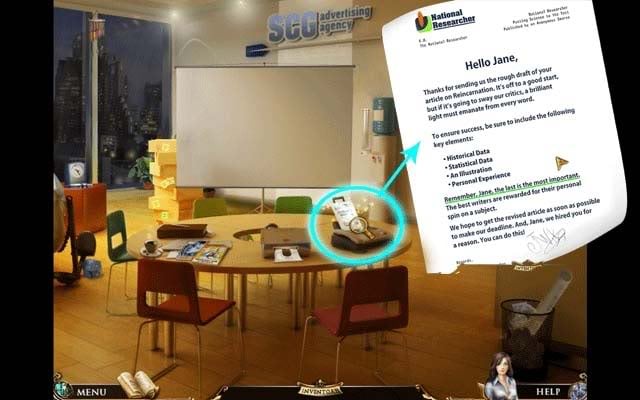
- Click on the newly received fax on the table. You’ll receive a letter from the National Researcher encouraging you in your article and letting you know what you’ll need next.

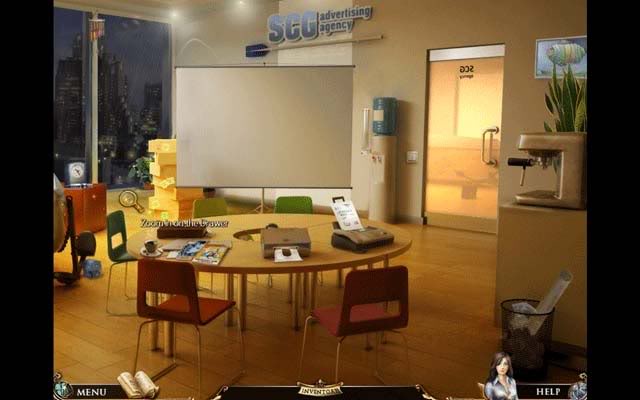
- Click on the sparkling area on the left "Zoom in on Drawer"
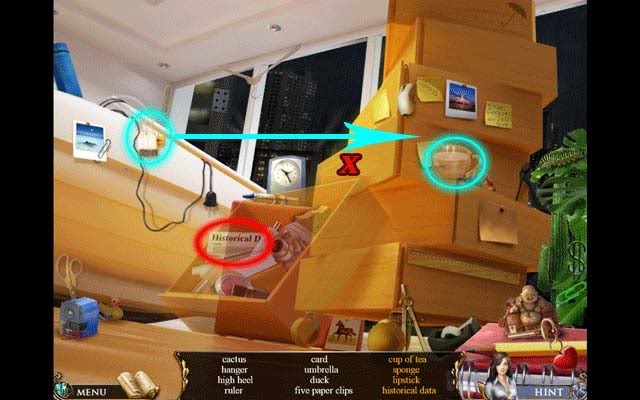
- In the hidden object area, objects in orange will require some sort of interaction. In this case, the tea bag needs to be used with the cup of hot water to make tea (circled in light blue), click the finished product to cross it from your list. All other objects listed in orange are hidden in the drawer. Click on the location of the red "X" in the screenshot to make the drawer fall and pick up the remaining items, including the Historical Paper circled in red. At the end of the area the Historical Paper will be added to your inventory.
- After finishing the first hidden object area, a (1)CD will be slipped underneath the door. Pick it up and (2)use it on the Projector.
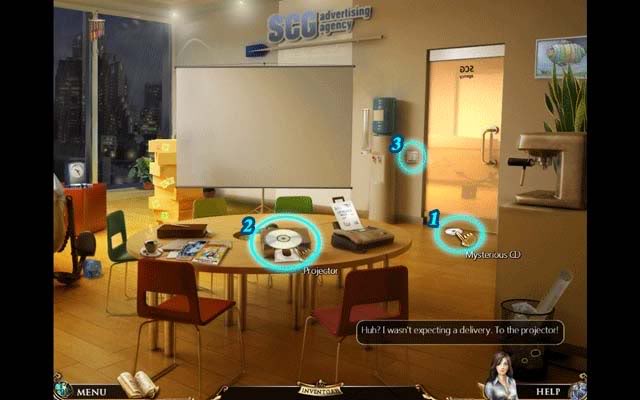
- (3)Turn off the lights and click on the projector again to start it, watching a short film. Once it’s finished, click on the arrow on the left to continue to the next area.
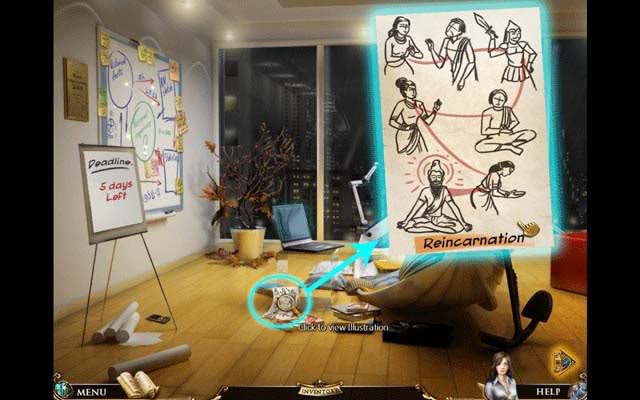
- In the next area, look at the paper on the floor. Click on it for a closer look at the Illustration, and click it again to add it to your inventory.
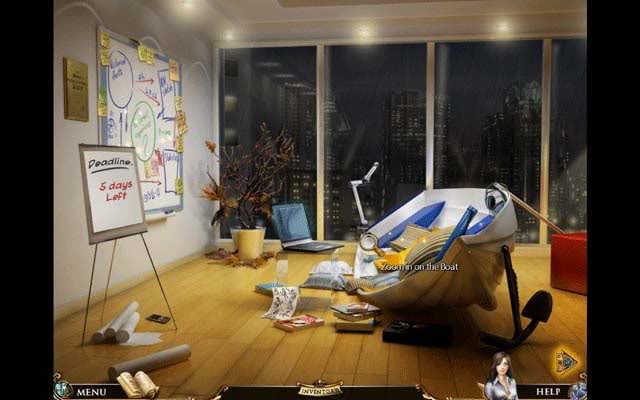
- Click on the boat in the middle of the room for a closer view.
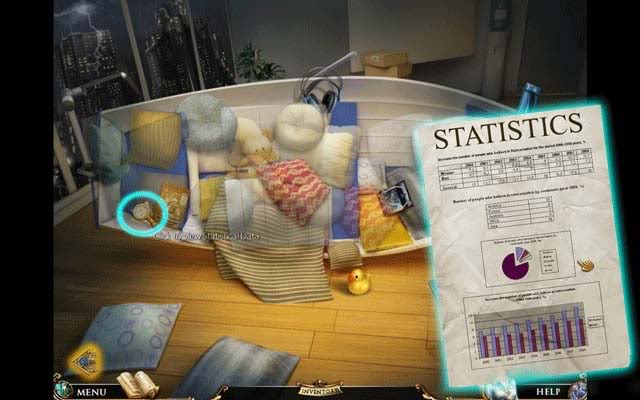
- In the close-up of the boat, you’ll need to move the pillows to check underneath them by clicking and moving the mouse. The picture below shows where the Statistics sheet is that you’re looking for, though it can also be located under other pillows. Once collected, click again to add it to your inventory.
- Once finished with the mini-game, click on the Whiteboard on the left wall to zoom in.
- Once zoomed on the Whiteboard, you’ll need to place the various sheets you’ve collected in their proper places. It’s not difficult. Match "Historical Data" to "Historical Facts", "Illustration" to "RN Sketch", and "Statistics" to "Statistics". Once you’ve done this, you’ll be able to pick up the Password circled in blue at the bottom of the Whiteboard.
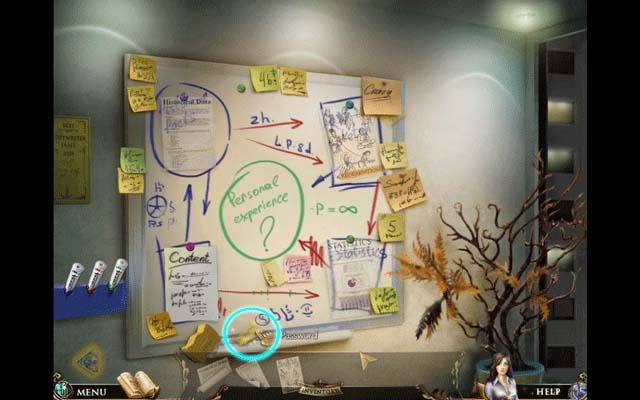
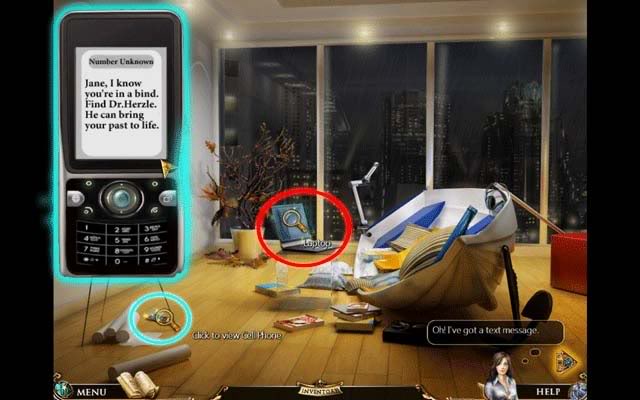
- Once you’ve picked up the Password, your phone will ring. Pick it up to read the message. Once you’ve read it, click it again to close the close-up and click on the laptop circled in red.
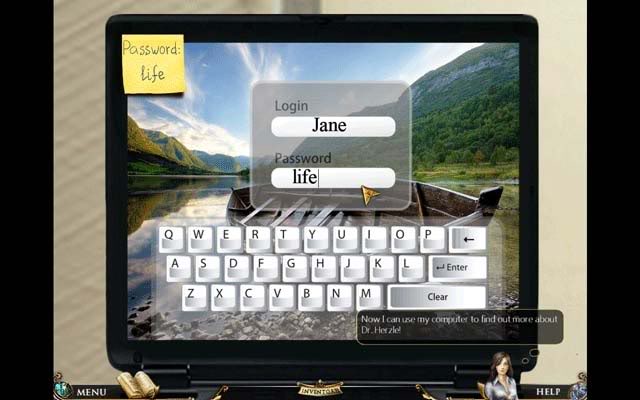
- Now zoomed in on the laptop screen, click and type to enter the password. Note passwords are randomized, and the password may also appear as "tree" or "truth". You can use your keyboard or the one on screen to type the password. Hit enter once you’ve finished.
- "Doctor Herzle" will appear in your search bar. Click "search" to continue. Read the message provided, and click "OK" to read the next one. Finally it’s time to make an appointment. After Jane types in the information, click "Submit" and "OK" to finish.
II.Chapter 1: Dr.Herzle’s Mansion
Outside
- You’ll now find yourself in front of Dr.Herzle’s Mansion. Click on the door to enter a mini-game puzzle.
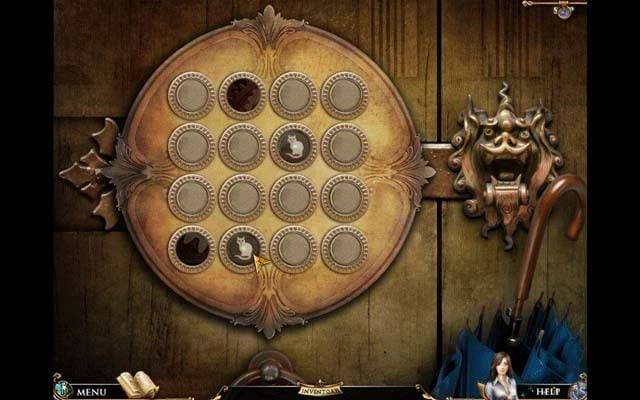
- The goal here is to match the images on the tiles until every one has been matched. Click on a tile, and then another one to compare them. Once you’ve completed the puzzle, the door will open.
Hall
- Upon entering the mansion, the phone inside will ring. Pick it up to talk with Dr.Herzle, who insists you need to find the Blue Gem before coming up to see him.
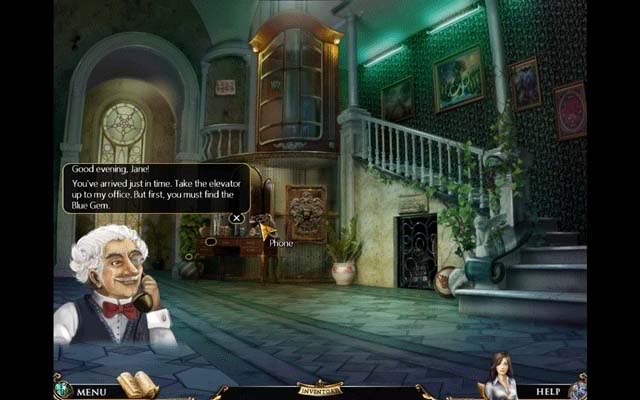
- Click on the Stained Glass Window at the end of the hall on the left side for a closer view.
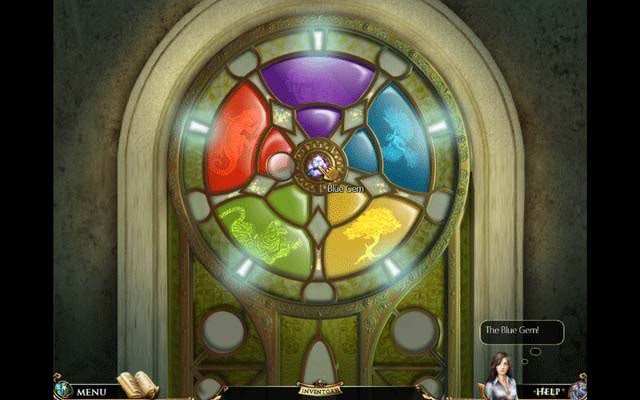
- Upon closer view, you’ll enter a mini-game. The goal here is to match the inside and outside segments of Reincarnation’s Wheel. Clicking on the various segments will allow you to move them in different ways. Clicking on an inside segment will allow you to swap colors with the outside one, while clicking on an outside segment allows you to rotate it around the wheel on the outside. The reward for completing this puzzle is the Blue Gem.
- Exit back to the hallway and click on the Elevator. You’ll discover it’s out of order and needs to be repaired. Click on the Elevator control panel for a closer look.
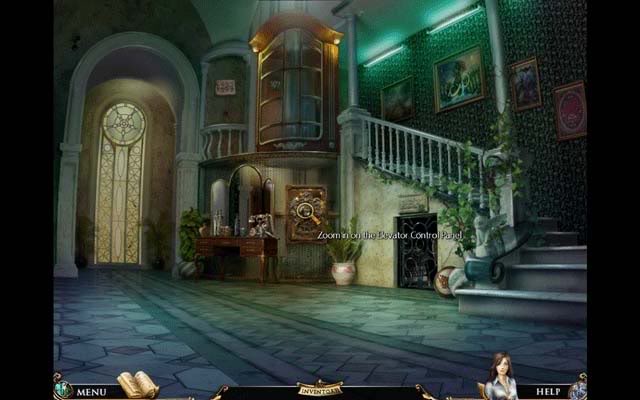
- On closer inspection, components mandatory for operating the elevator are missing. You’ll need to look in different areas to find them. Click the arrow on the lower left to exit back to the Hall.
- Zoom in on the Painting on the wall for a closer look.
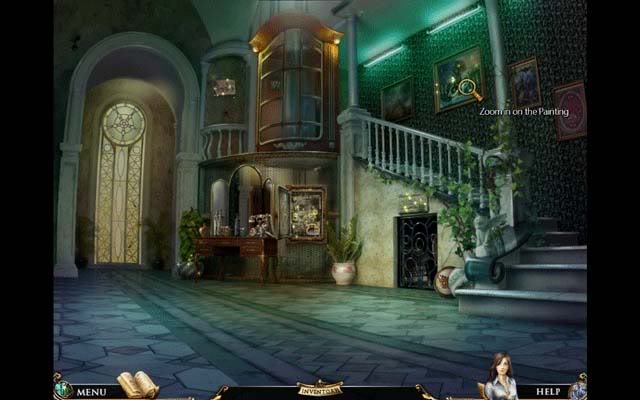
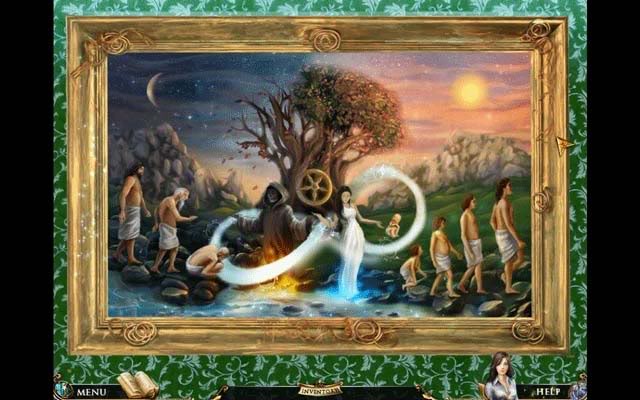
- The goal of this puzzle is to restore the painting to its original state. Click on any tile, and then a second to have them swap places. When you’ve placed a tile correctly, it will lock into place. When swapping tiles, you’ll be allowed a brief glance at the correct pattern underneath. Restoring the painting will reward you with the Elevator Gear.
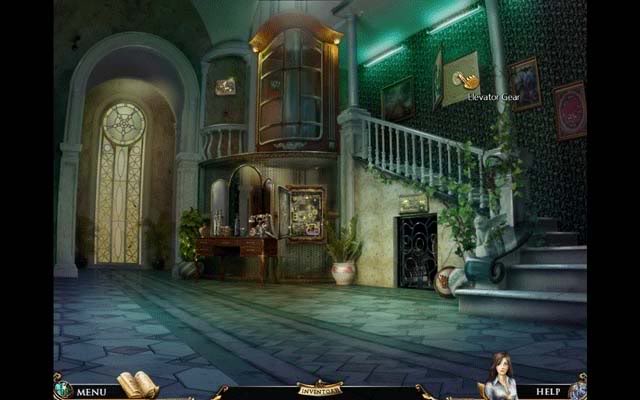
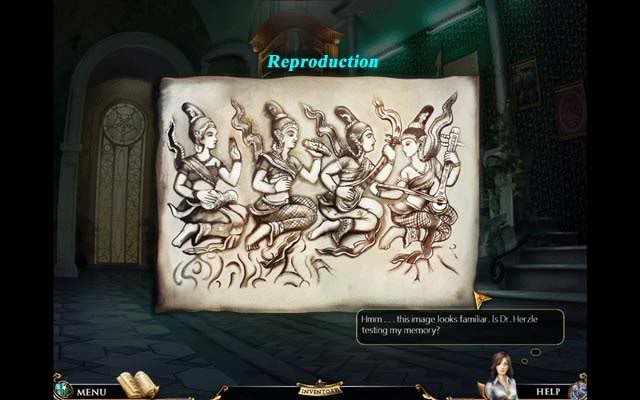
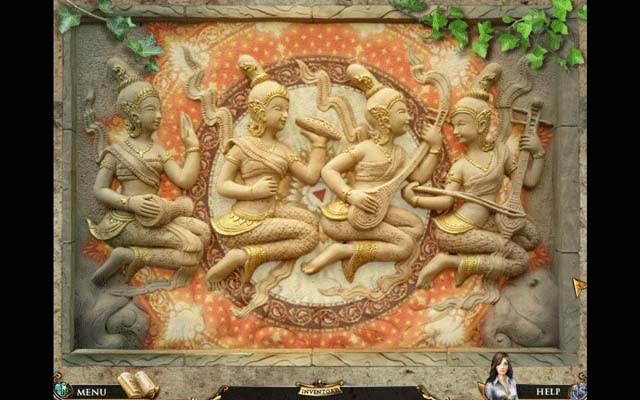
- Now it’s time to find the second missing elevator component. Click on the Reproduction to the left of the elevator to find a picture of four Thai women. Click the Relief below the stairs to enter the puzzle. Your memory is going to be tested here.
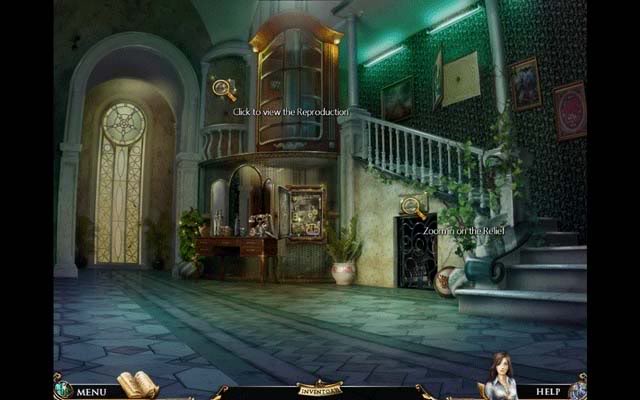
- The goal of this puzzle is to alter the Relief to match the Reproduction picture by clicking the hands, heads, and feet of the four women. The Reproduction picture and the solution for the Relief are pictured below. The starting positions of the women are randomized, but the solution is always the same. Completing the puzzle will open the door beneath the Relief.
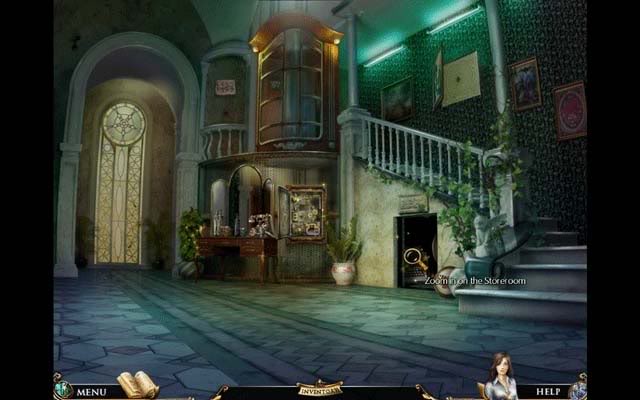
- Zoom in on the Storeroom beneath the Relief to enter another hidden object area.
- In addition to the various items in white type on the list (which are randomized), there are 3 special ones: Jack-in-the-Box, Music notes, and Flower.
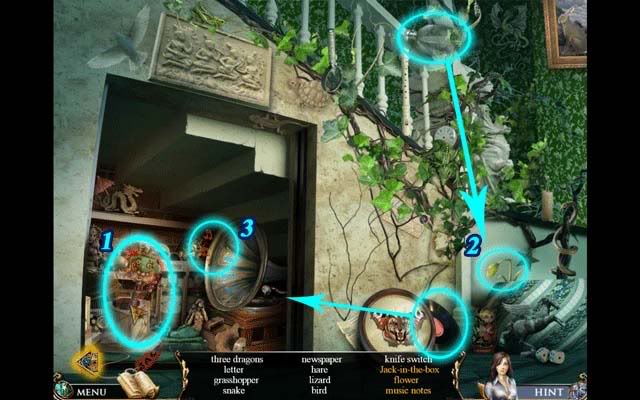
(1)Click on the red "Jack" tag in the bottom left hand corner to bring the Jack-in-the-Box out from hiding. Click on it to strike it from the list.
(2)Click the Record and place it on the Gramophone to make it play. Music notes will appear. Click them to strike them from the list.
(3)Pick up the Water Bottle and use it on the Plant to have it grow into a Flower. Click on it to strike it from the list.
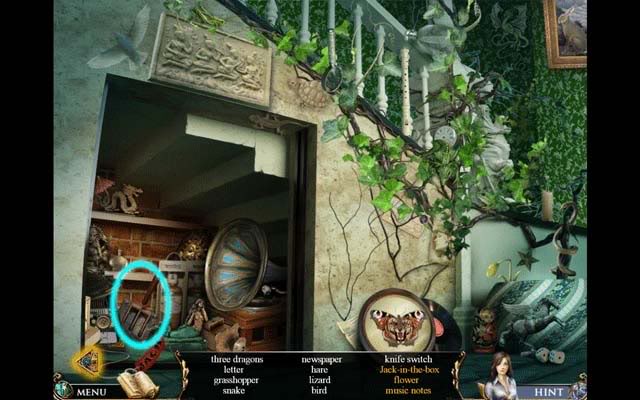
- One of the elevator components is hidden in this area: the knife switch. Refer to the image below for the exact location. Once you complete this hidden object area, the knife switch will be added to your inventory.
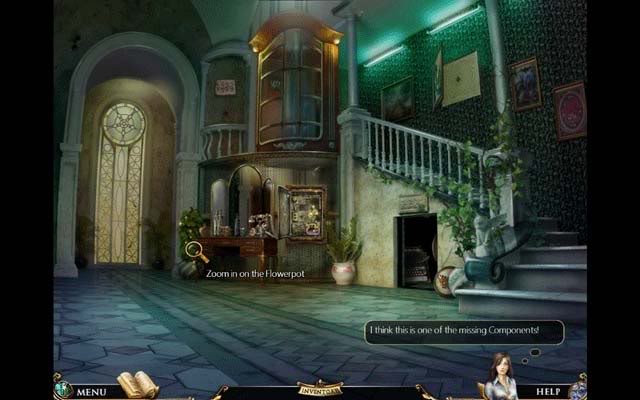
- Click to zoom in on the Flower Pot to the left of the desk. In the close-up, pick up the Elevator Light Bulb to add it to your inventory.
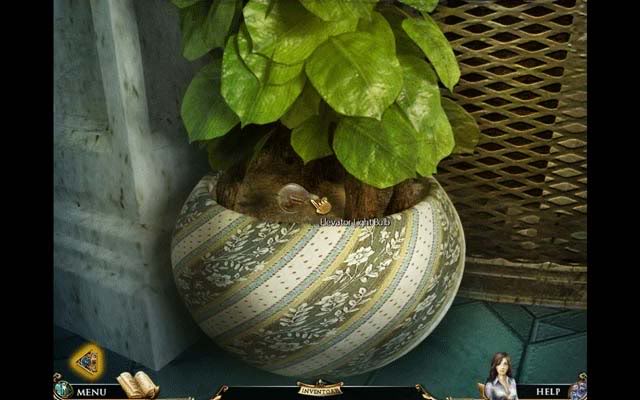
- Now it’s time to fix the elevator. Click on the elevator control panel to the right of the desk and directly below the elevator to zoom in for a closer view.
- Place the elevator components from your inventory into their proper places, shown in the screenshot below. Once you’ve placed them all in the correct spot, click the knife switch to restore working order to the elevator.
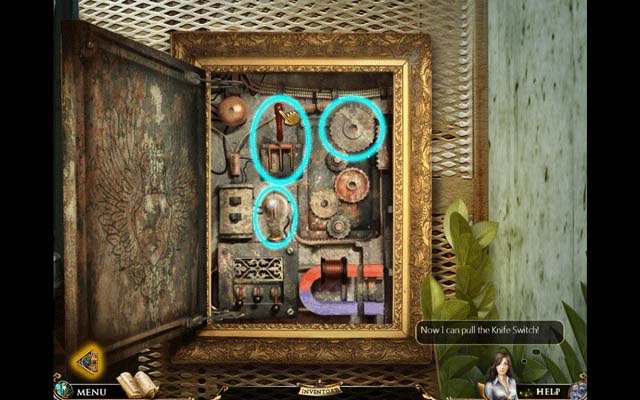
- Now click on the elevator to ascend to Dr.Herzle’s office.
Dr.Herzle’s Office
- After talking with Dr.Herzle, click on the Aura Crystal on the table in the center of the room to zoom in.
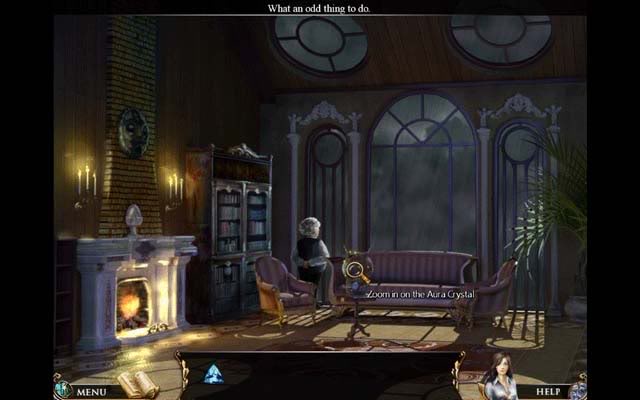
- Use the Blue Gem on the Pendulum to activate the Aura Crystal.
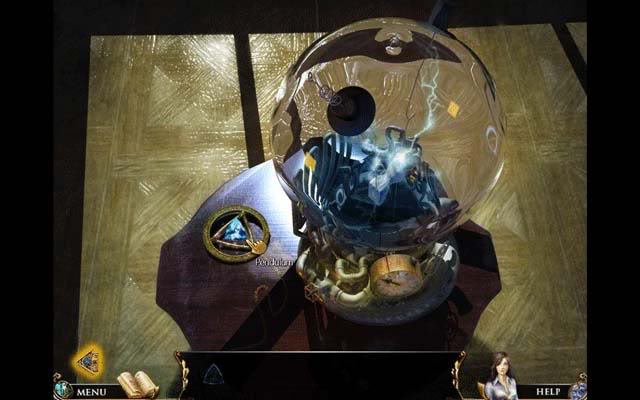
- Click on the armchair nearest to Dr.Herzle to have Jane sit down.
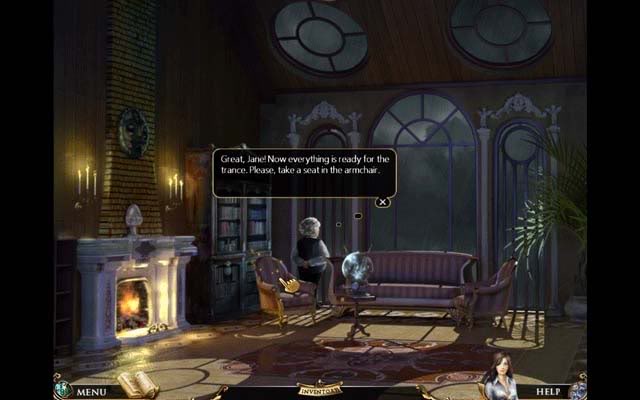
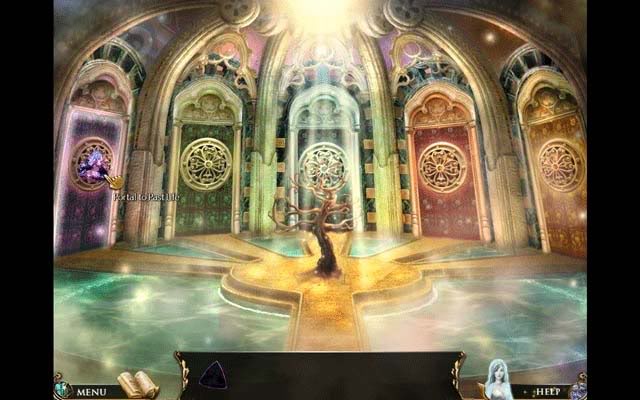
- Dr.Herzle will hypnotize Jane, who then enters her subconscious, which contains the portals to her past lives. Use the Purple Gem you’ve been given in your inventory to activate and open the purple portal on the far left. Click on it to enter a past life.
III.Chapter 2: Abuja & the Buddha Temple
Outside Temple Grounds
- Click on the Wish Tablets on the left to enter a close-up view.
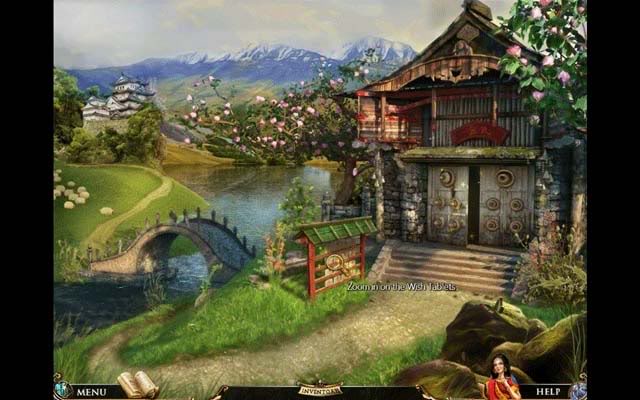
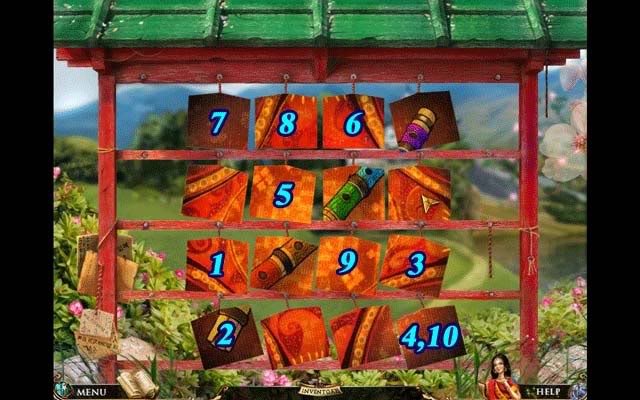
- The goal of this mini-game is to flip all the tablets over to their colored side. Clicking a tablet will result in tablets around it flipping. Some overlap on which they flip. Click the following tablets in the following order to solve the puzzle and reveal the picture shown below. Your reward will be the Manual.
- Click on the large double doors to enter the Temple.
Temple
- Once inside the Temple, click on the Broken Meditation Mat directly in front of the Buddha statue to enter a mini-game.
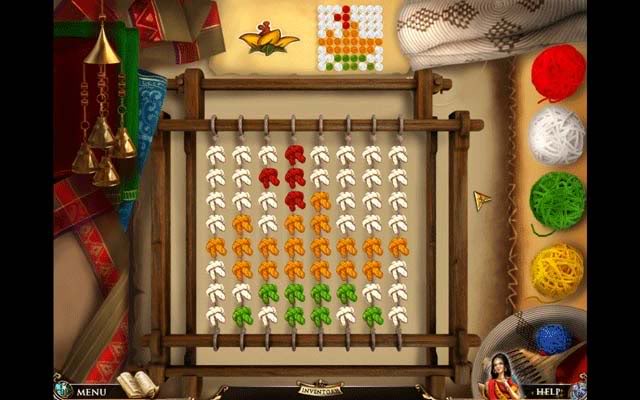
- Click on the loom with different colored threads to tie a knot where it should be located: your reference image is at the top of the screen. Simply click wherever a certain colored yarn is needed. You can change colors by clicking on the various yarn balls on the right (note: yellow=orange). The solution is shown above. Completing this mini-game successfully will reward you with the Melody Scroll.
- Once the mat is repaired, zoom in on the Wheel on the far right of the screen. You should notice the area sparkling. Click on it to enter a hidden object area.
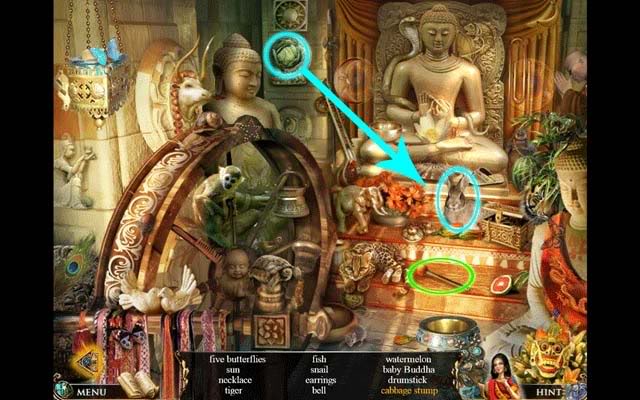
- Click the Cabbage and use it on the Rabbit (both circled in blue). The Rabbit will eat the cabbage, leaving you with the Cabbage Stump. Click on it to cross it from your list.
- The Drumstick (circled in green) is another item you’ll need to collect. Once you complete the area, it will be rewarded to you as an inventory item.
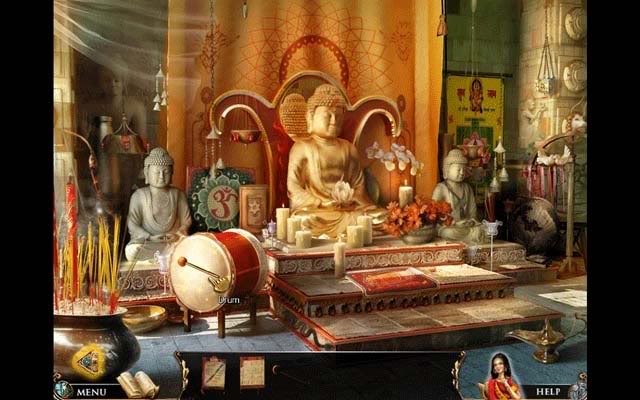
- Back in the main area of the Temple, use the Drumstick on the Drum to have a brief conversation with the Buddha, who implores you to find his lost third eye. He informs you that Kung Fu Cha (Tea Ceremony) will help.
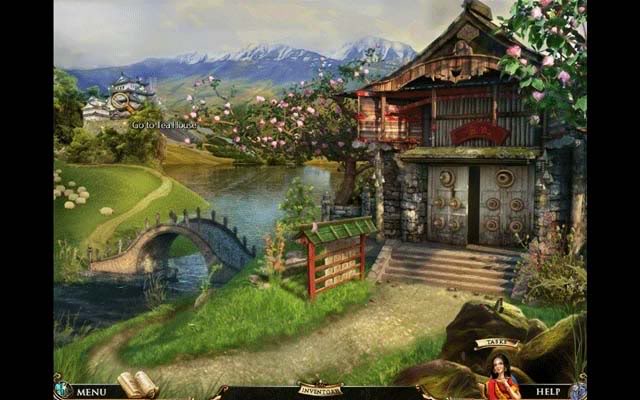
- Exit the temple and proceed to the Tea House in the distance in the upper left corner of the screen.
Tea House
- Click on the blinds on the left to lift them. Click again to take a closer look at the Shelves.
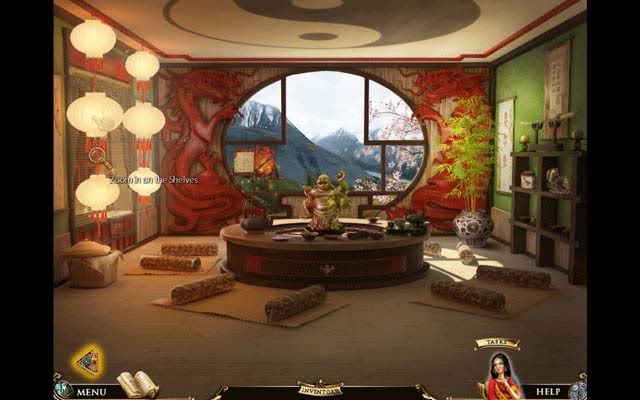
- You’ll find yourself in another hidden object area. All important objects have been circled and identified by a specific color:
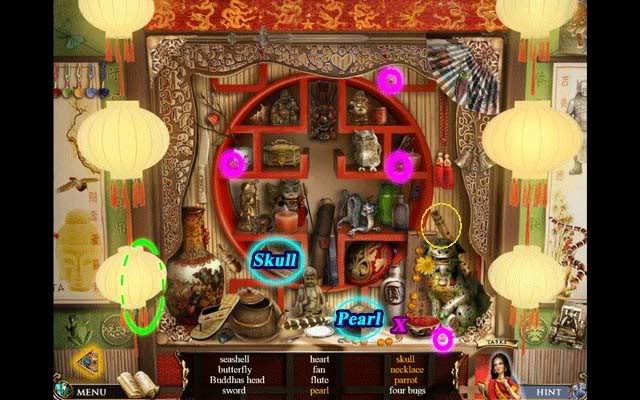
-Blue: the Pearl and the Skull can be found inside these jewelry boxes
-Green: the Parrot is hidden here. Click and drag the lanterns side to side to reveal it and click it, crossing it from the list.
-Magenta: the circles indicate the locations of the four missing beads you’ll need to complete the necklace. The necklace itself is marked with an "X" of the same color.
- The Flute (circled in yellow) will be added to your inventory once you complete the area.
- Back in the main room, click on the Music Stand to zoom in.
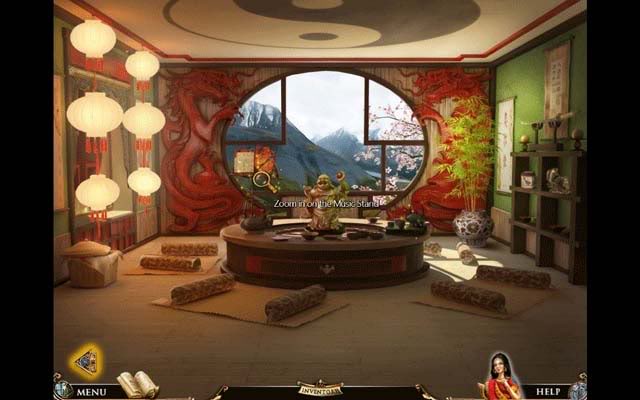
- Place the Melody Scroll and the Flute Picture on the Music Stand. Take the Flute from your inventory and place it over the Music Stand as well. Clicking will allow you to begin the mini-game.
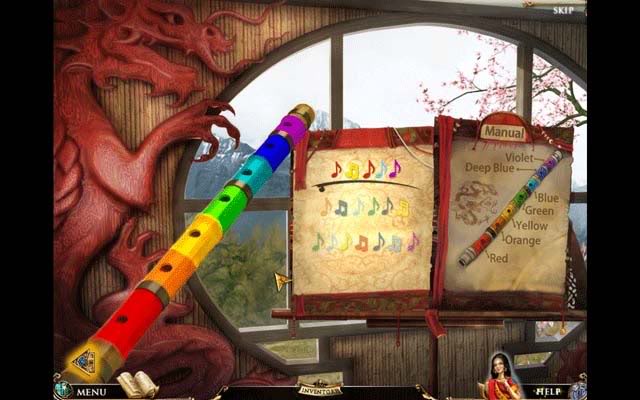
- The actual Flute you’ll be using has been colored in this picture to match the diagram on the right to make it easier for you. Play the notes in order as they appear on the Melody Scroll, each note corresponding to a specific hole of the flute via color. Octave notes (double notes, aka two notes grouped together) are to be played twice before moving on to the next one. Playing the melody successfully will allow you to begin brewing the tea for the ceremony.
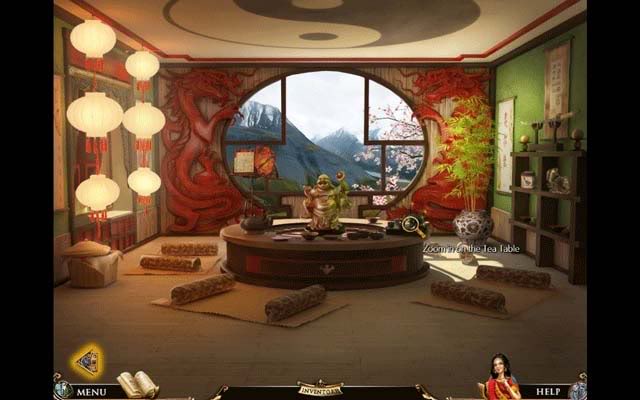
- Click on the Tea Table to zoom in and begin brewing the tea.
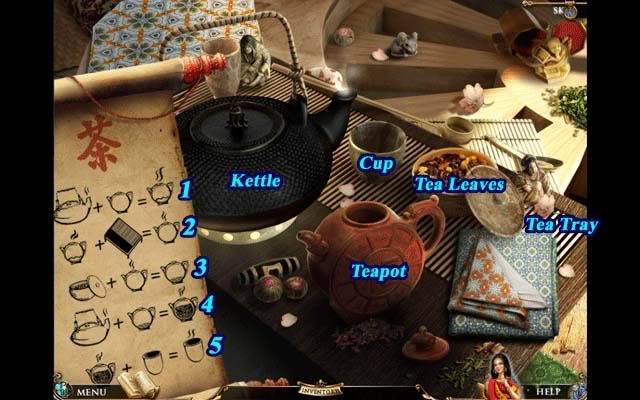
- It’s time to make the tea. The sequence shall be numbered according to the picture above. Use the labels for reference.
1.Click the Kettle and use it on the Teapot
2.Click the Teapot and use it on the Tea Tray
3.Click the Tea Leaves and use them on the Teapot
4.Click the Kettle and use it on the Teapot
5.Click the Teapot and use it on the Cup
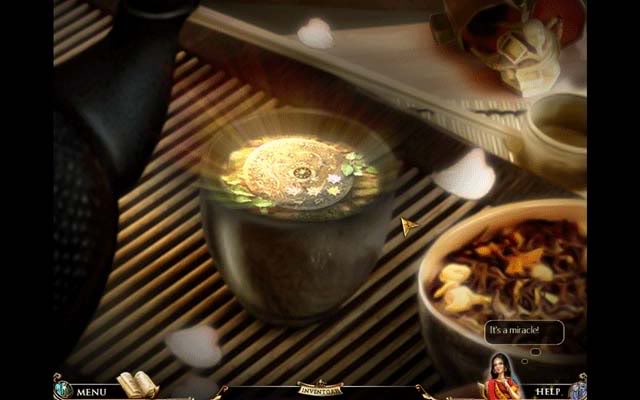
- Once completed, a vision will appear to you in the Tea, revealing a Shield near the Temple. Click anywhere to exit and return to outside of the Temple.
Outside Temple Grounds
- Back outside the Temple Grounds, click under the Bridge to zoom in to another hidden object area.
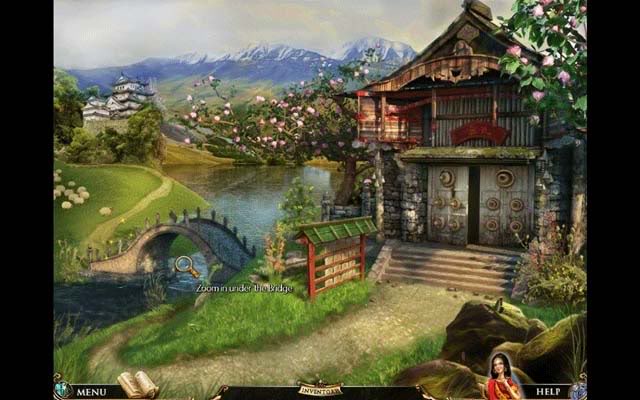
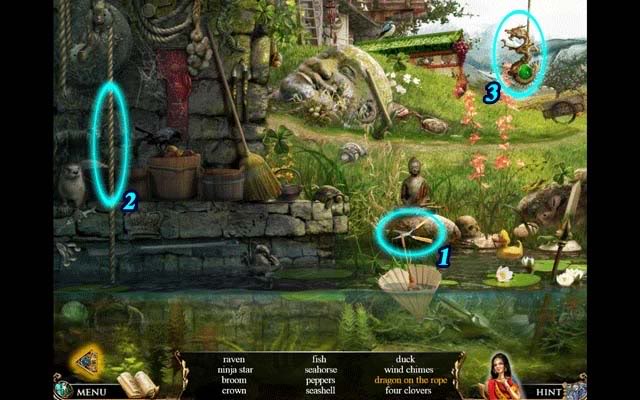
- In addition to the other randomized objects you will need to:
1.Pick up the Garden Shears
2.Use the Garden Shears on the Rope to make the Dragon on a Rope appear
3.Click on the Dragon on the Rope to cross it from your list
- When you’ve completed the area, the Garden Shears will be added to your inventory.
- Back in the main area, use the Garden Shears on the Big Shrub to the right of the Temple.
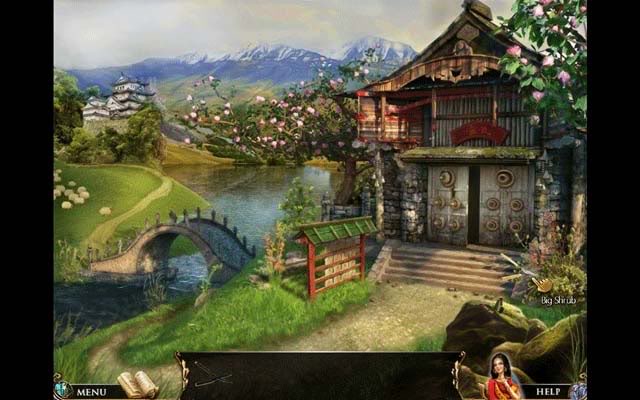
- This will reveal the Shield. Click on it to zoom in and enter another mini-game.
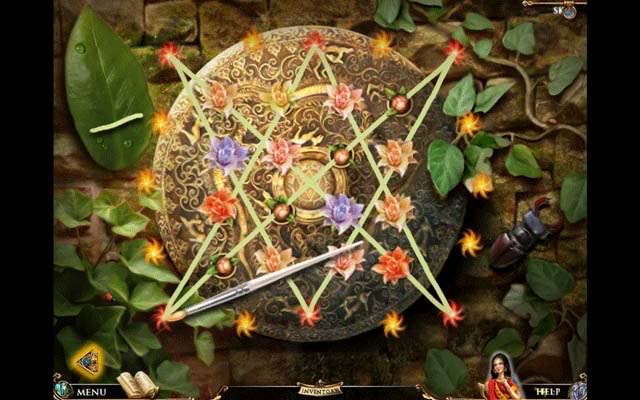
- Open all the flowers to reveal the treasure inside the shield. You’ll only be using the red orbs for connecting. Connect lines between them to open flower buds. The solution is as follows:
- Completing the puzzle will reveal Buddha’s Third Eye. Pick it up to add it to your inventory.
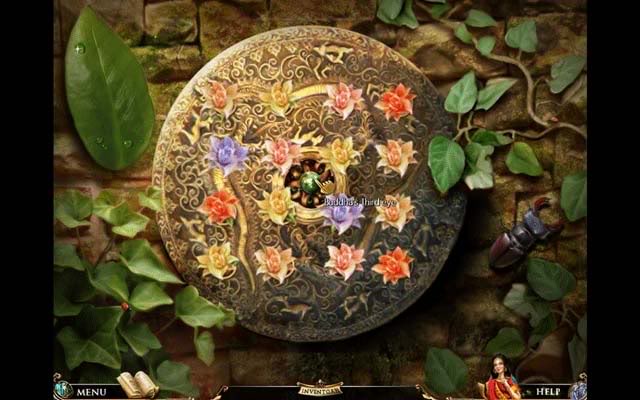
- Enter the Temple
Temple
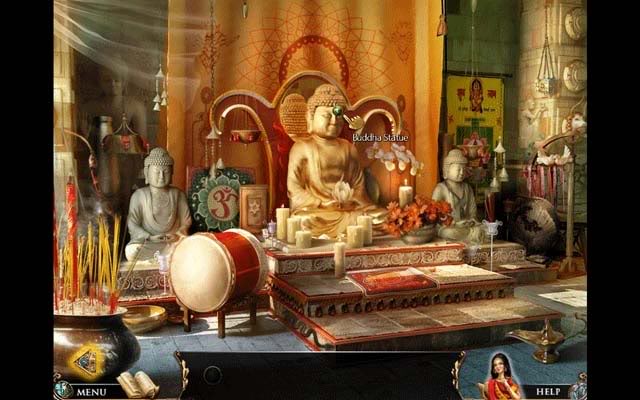
- Use Buddha’s Third Eye on the statue to achieve the peace Abuja seeks. The statue will reveal a Green Gem for you.
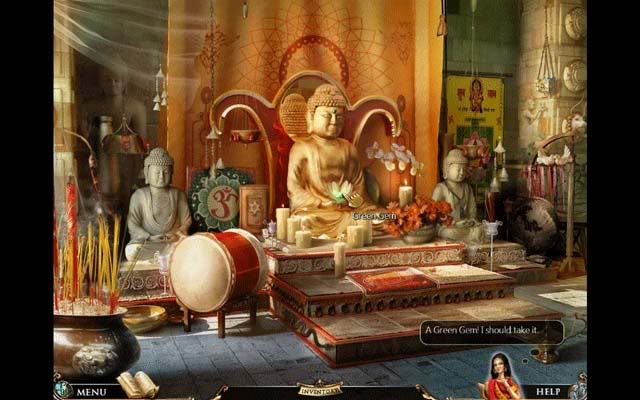
- Pick up the Green Gem from the Buddha’s hands to add it to your inventory.
IV.Chapter 3: Stefan & the Prison
Subconscious
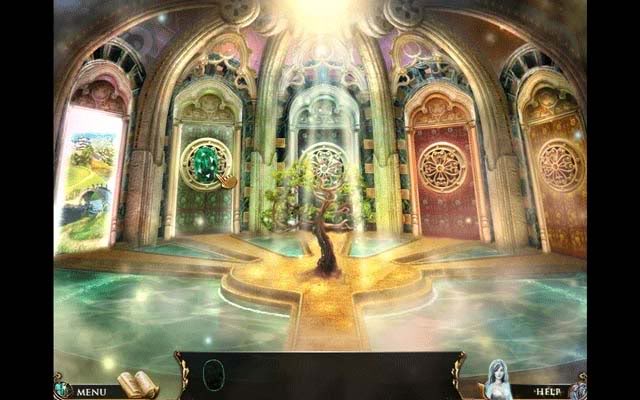
- Back in your subconscious, use the Green Gem on the green doorway to open the next portal to your past reincarnations.
Prison Cell
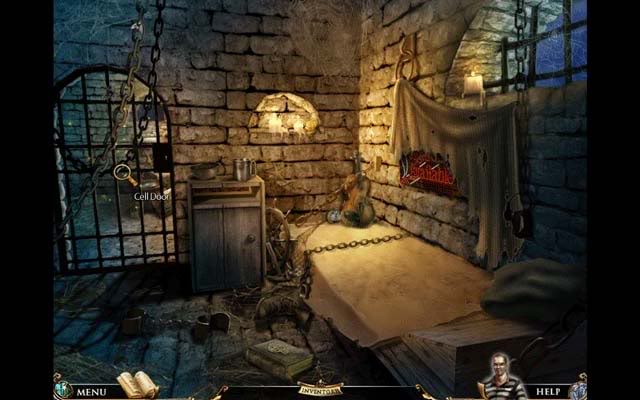
- You’ll find yourself as a man in a prison cell, plotting to escape. Click on the bed to get a closer look underneath.
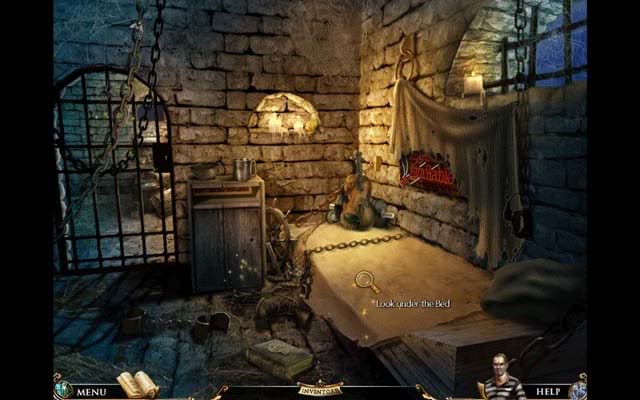
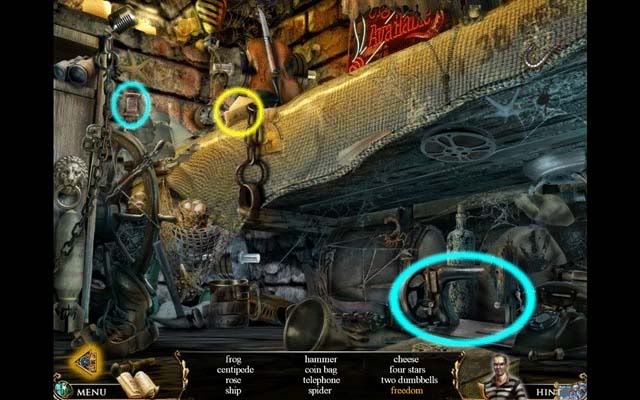
- The Cheese, which will be added to your inventory upon completing the area, is circled in yellow.
- To cross "Freedom" from your list, click on the Spool of thread and use it on the Sewing Machine, which will in turn sew "Freedom" on a cloth. Click it to cross it from the list (all circled in blue).
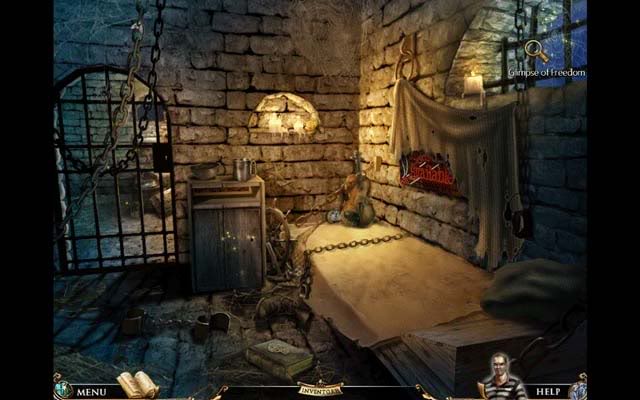
- After completing the area, back in the main cell click on the "Glimpse of Freedom", aka the cell window in the upper right corner.
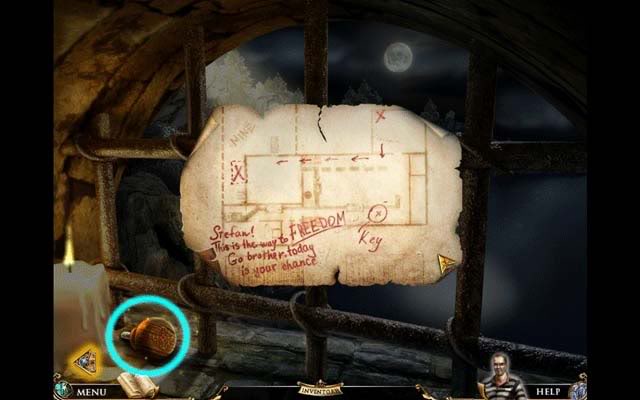
- Click on the Secret Message in the window bars to reveal a small map, and click the Cupboard Handle to add it to your inventory.
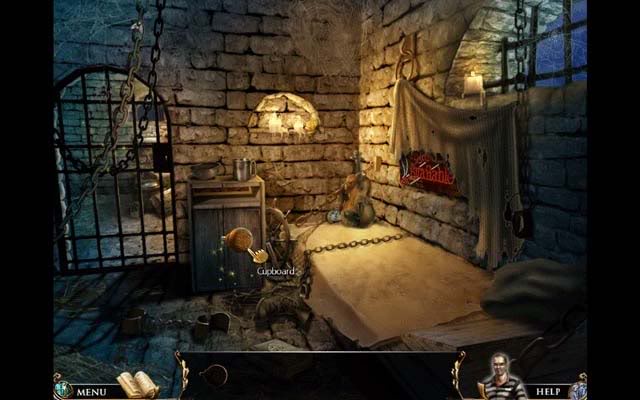
- Back in the main cell area again, use the Cupboard Handle on the Cupboard.
- Click on the Rat inside to pick it up and add it to your inventory, then click on the Cell Door for a closer view.
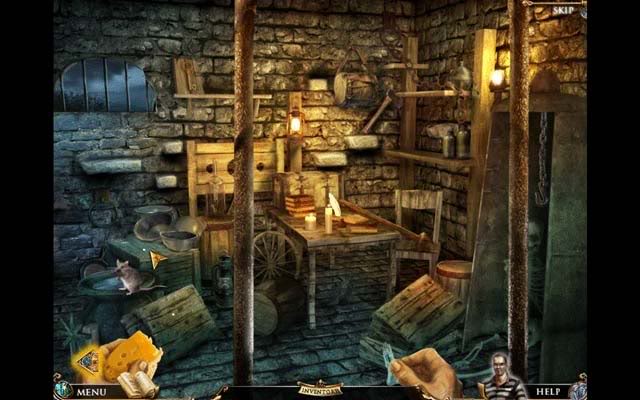
- Click on the Rat in your inventory and place it on the floor. Click the Cheese to use it to direct the rat around the area. The goal is to get the Rat to knock down the Key on the upper shelf. White circles will flash and appear on a regular basis showing you where to go. Click on those white circles to throw a piece of cheese, and the Rat will follow. Remember the goal is to move forward and/or up: don’t click on a circle that’s already been clicked on, otherwise you’ll just backtrack. The Rat will climb from the left to the far right side of the room before heading for the key.
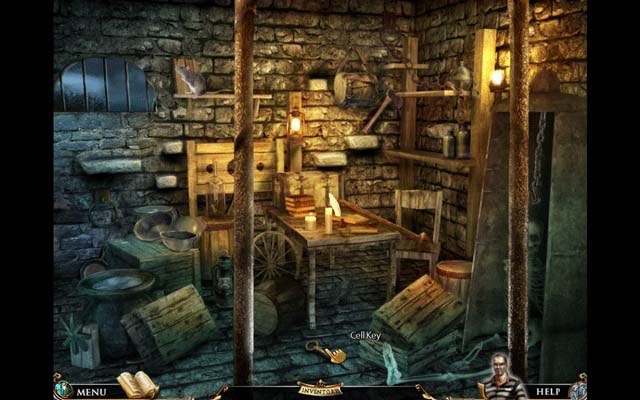
- Once the Rat reaches the key, it’ll knock it down for you. Click on the Key on the floor to add it to your inventory.
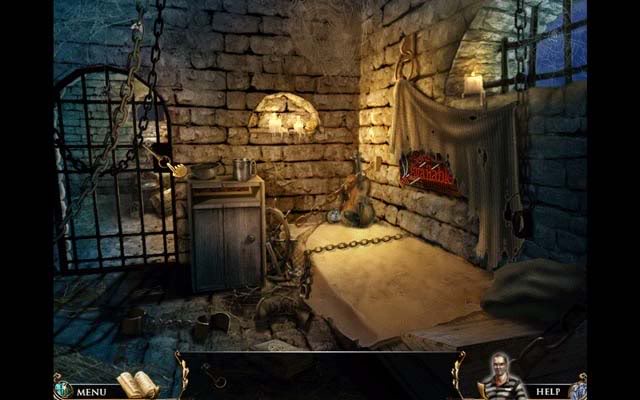
- Use the Key on the Cell Door Lock to open it and click on the doorway to exit the cell.
- Now in the Hallway, pick up the Rope in the bottom right corner.
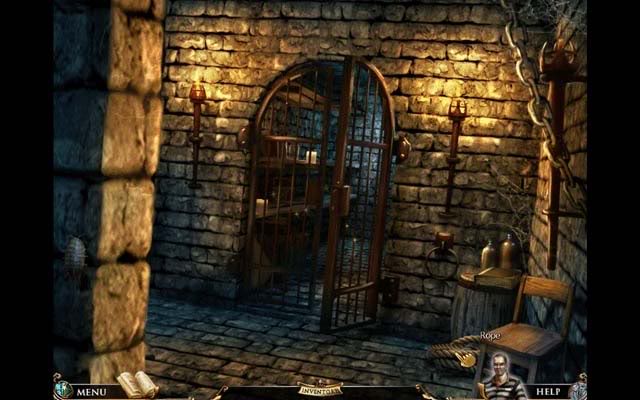
- Click on the Storeroom doorway directly in front of you to continue into the Storeroom.
Storeroom
- Now inside the Storeroom, click on the Shelves on the left to zoom in to another hidden object area.
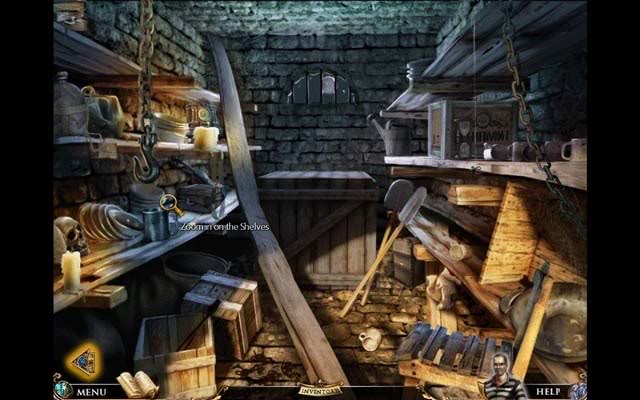
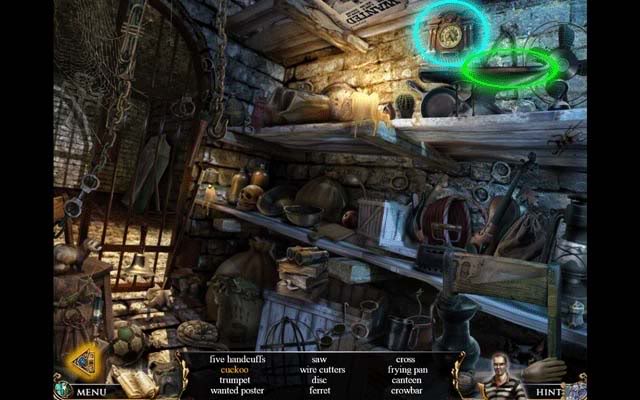
- Among the randomized objects listed at the bottom of the screen that you’ll need to find, there’s two constants.
-Click on the Cuckoo Clock (circled in blue) to make the Cuckoo bird appear. Click on it to cross "Cuckoo" from your list.
-The Crowbar, which will be added to your inventory upon completing the area, is circled in green.
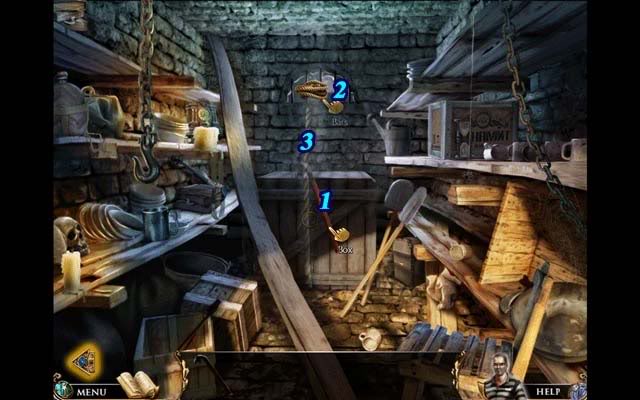
- Now that you’ve got the Crowbar:
1.Use it on the Box at the far end of the Storeroom beneath the window.
2.Use the Rope on the window bars.
3.Click on the Rope to climb down to the Mine.
Mine
- Upon entering the Mine, pick up the red Fuse (circled in blue), then zoom in on the Hand Cart on the left.
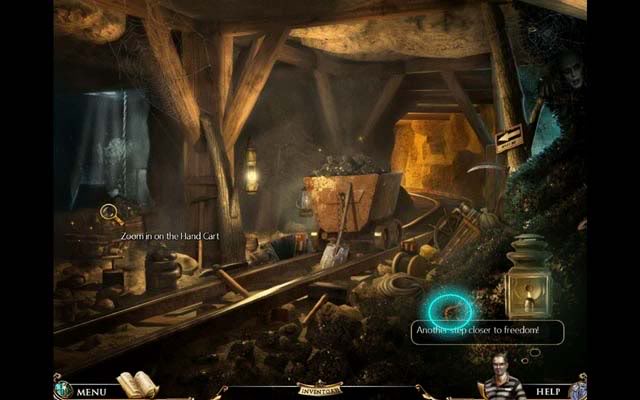
- Pick up to two Fuses and the Elegant Key all circled inside the Hand Cart.
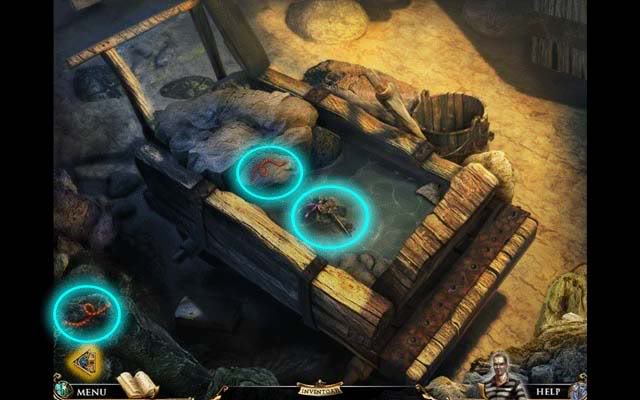
- After picking up the Fuses and the Elegant Key, exit to the main Mine area and proceed back up to the Storeroom.
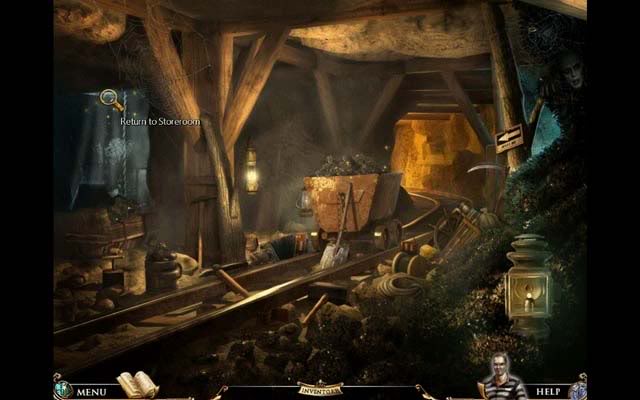
Storeroom
- Back inside the Storeroom, click on the Elegant Trunk on the left below the shelves.
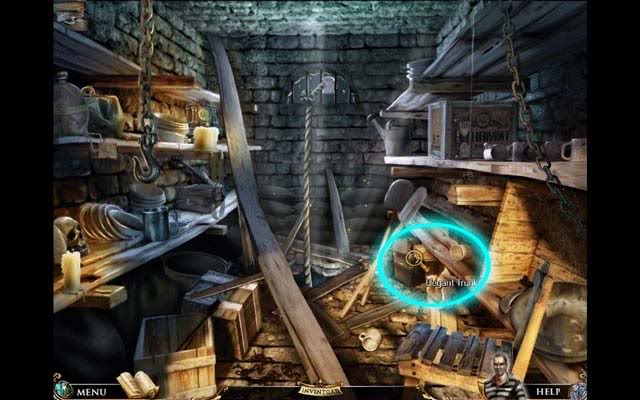
- Zoomed in, use the Elegant Key on the lock on the Elegant Trunk to open it. Click on the Elegant Trunk once more to open it for a closer view inside.
- Among the randomized objects are two constants:
-Circled in blue is a Locket. Click on it for a zoomed view of the inside. Click the word "Love" to strike "love" from the list.
-Circled in green is another Fuse. Click it and it will be added to your inventory once you completed the area.
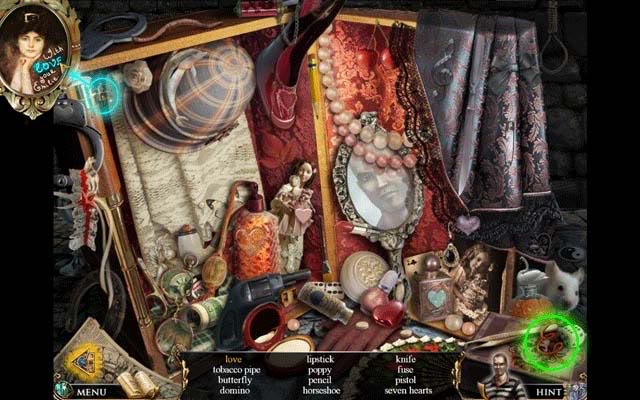
- Once completed, use the rope to return to the Mine.
Mine
- Back in the Mine, click on the Junk Pile on the right.
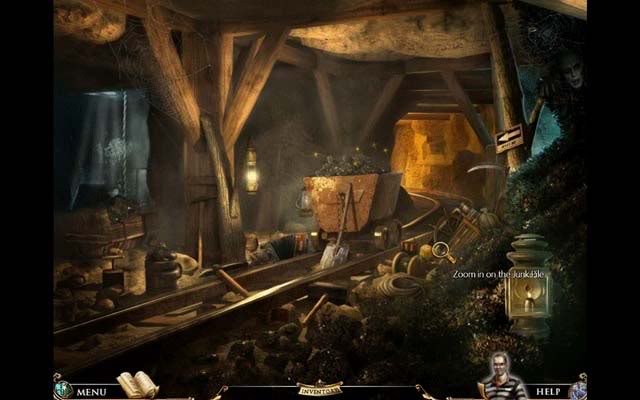
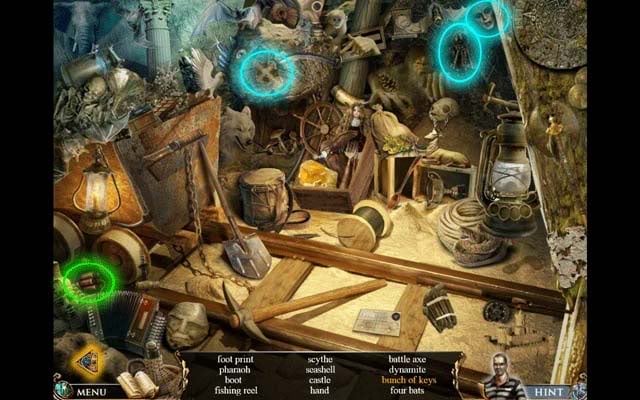
- Among the randomized objects of the Junk Pile are two important items/constants:
-Circled in blue, pick up the Cross and use it on the Vampire hiding in the dark to exorcise him. This will result in him dropping the Bunch of Keys. Click on it to cross it from the list.
-Circled in green is the Dynamite, which will be added to your inventory upon completing the area.
- Back in the main Mine area again, zoom in on the Mine Cart in the middle of the screen.
- Once zoomed in, use the Dynamite from your inventory on the Mine Cart to place it inside.
- Placing the Fuses on the Mine Cart (4/4) will result in them being laid out on a drum near the bottom right corner of the screen: each is a different length. Reading the piece of paper on the floor (circled in blue), it suggests there’s 90ft between the Mine Cart and the end of the line.
- Click Fuses numbered 2 and 4 according to the screenshot below and use them in the location of the blue "X".
- Once the 30 (Fuse 2)+60 (Fuse 4)=90ft Fuse is in place, use the Candle (circled in yellow) on the end of the Fuse to send the Mine Cart to the end of the Mine, ensuring your freedom.
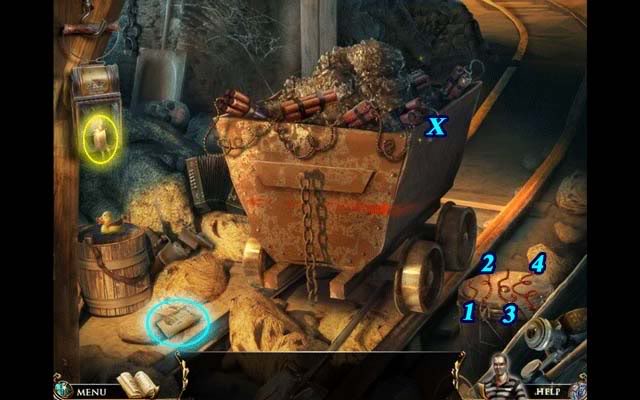
- Stefan climbs to freedom, discovering a Pendulum Gem along the way. Upon escaping he promises to become a better man, and the chapter concludes.
V. Chapter 4: Jilberto & the City Square
Subconscious
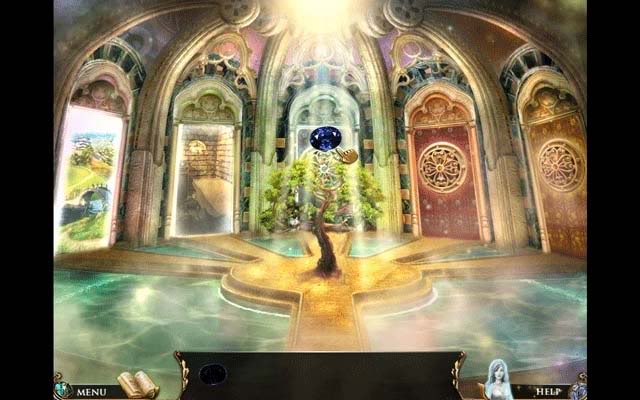
- Use the blue Pendulum Gem on the middle blue door to open the way to your next past life.
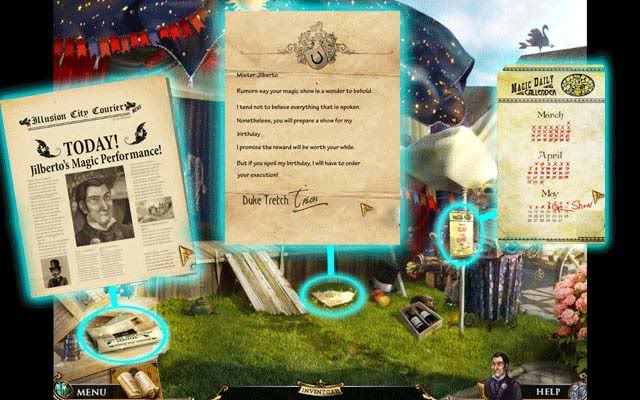
Jilberto’s Tent
- There’s a Newspaper, Calendar, and Letter from the Duke all scattered around the area and shown below. Click on them to read their contents and gather more information on the circumstances of this particular past life.
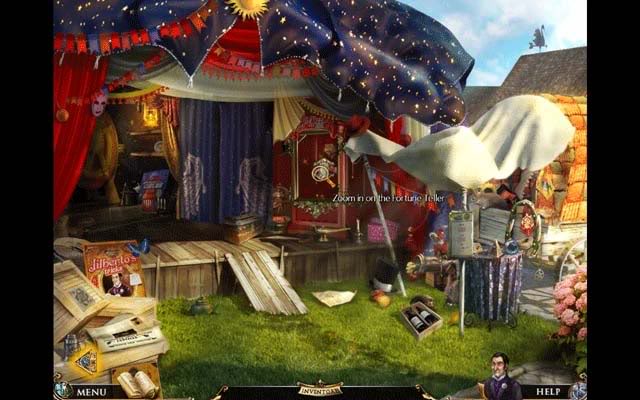
- Click on the Fortune Teller on the stage for a closer view.
Stage
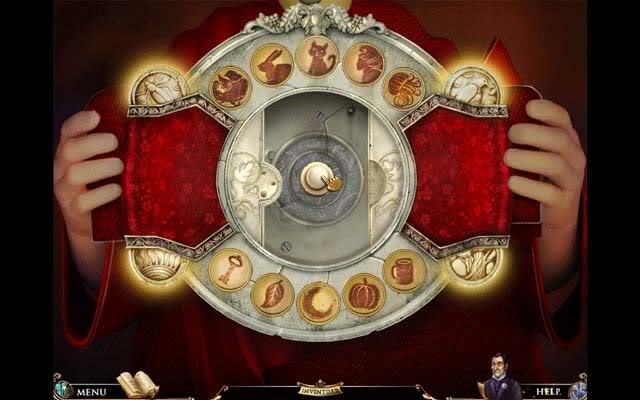
- You’ll need to find your diary to prepare your magic tricks, but it’s missing. Click on the wheel in the Fortune Teller’s hands to enter a mini-game.
- The goal of the mini-game is to separate the animate objects from the inanimate objects shown on the various tokens. You can place them in any order. The solution is shown below and is as follows:
-Top row: hen, rabbit, cat, woman, jellyfish
-Bottom row: key, leaf, moon, pumpkin, mug
- Once you’ve completed the puzzle, click the button revealed in the middle of the panel.
- Exiting the mini-game, you’ll notice a compartment has been opened containing your diary. Click on the Diary for a closer few and browse through it to discover you still need to prepare and rehearse two tricks: Invisible Rabbit and Lucky Harry.
- Don’t forget to pick up the Map Piece circled in yellow.
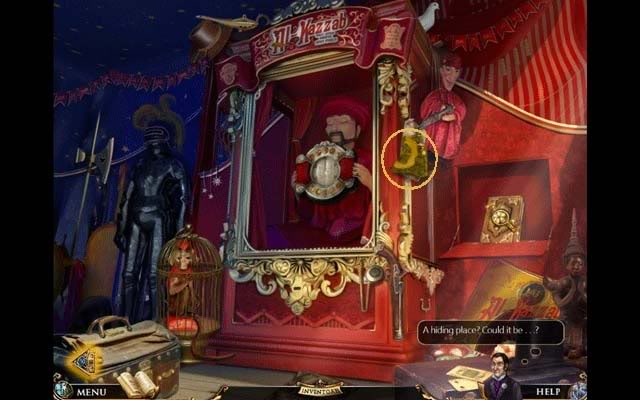
- Exit the area via the arrow in the bottom left corner of the screen back to Jilberto’s Tent
Jilberto’s Tent
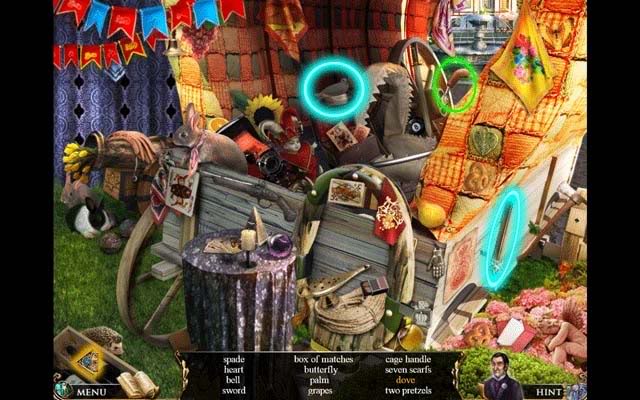
- Zoom in on the Wagon on the right to enter a hidden object area: you’ll need to go here before you can prepare the Invisible Rabbit or Lucky Harry tricks.
- Among all the randomized objects are a couple constants:
-Circled in blue: to reveal the Dove, use the Magic Wand on the Top Hat. Click the Dove to strike it from the list.
-Circled in green: the Cage Handle. This will be added to your inventory upon completing the area.
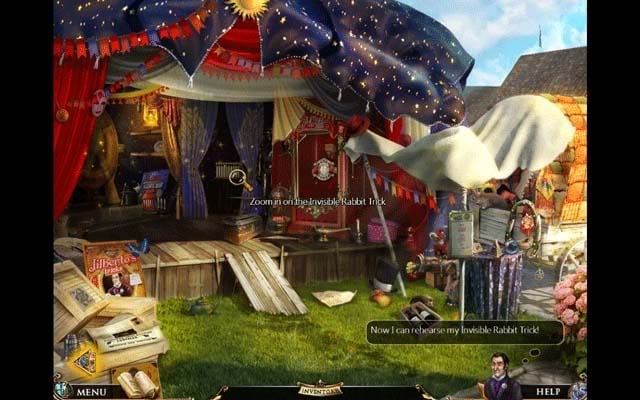
- Now you can perform the Invisible Rabbit trick. Click on the cage between the blue curtains on the stage.
- Place the Handle on the top of the cage (circled in green). Now you’ll need to find the six cage keys scattered around the cage (circled in blue and shown below).
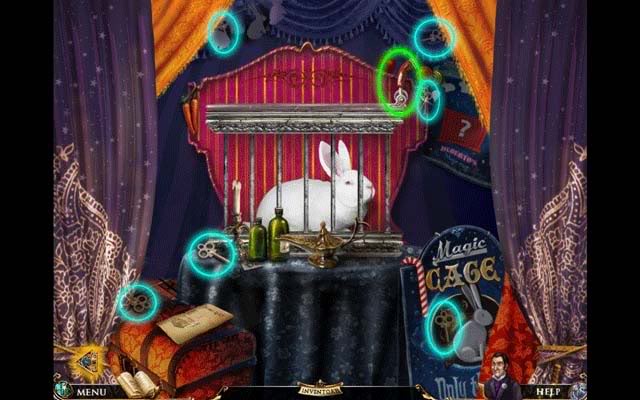
- Click the keys above the mirror panels on the cage to rotate them until they all match the background, then click the handle once more at the top of the cage. Do this until the diary reappears showing the trick is rehearsed.
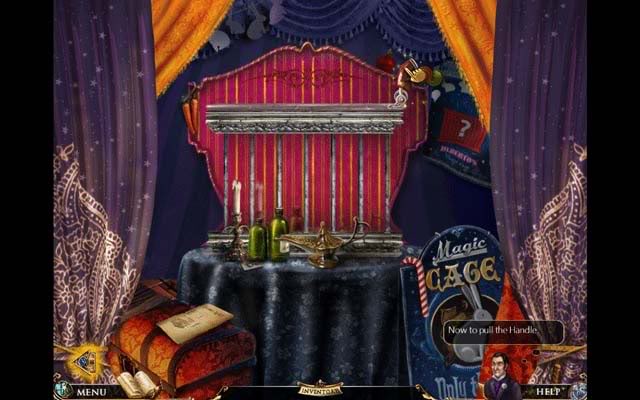
- Return to Jilberto’s Tent and click the arrow in the lower left hand corner to exit to the City Square.
City Square
- Click on the Fountain in the middle of the screen for a closer view.
Fountain
- Pick up the Map Piece circled in blue. That’s all you will need to do in this area, then exit back to the City Square.
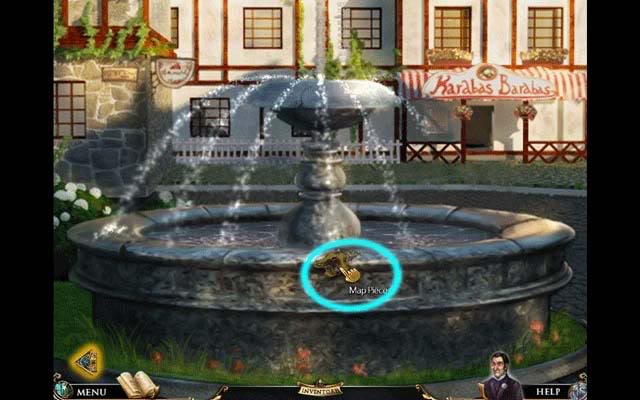
City Square
- Click on the Car/Wagon in the middle of the street. This will start another mini-game.
Wagon
- Rotate the pipes by clicking on them to repair the car engine. If you need help on the solution, you can check your diary for an exact drawing of it. However, the actual solution is shown below. You will need to use all the pipes and have no extra water flowing. Completing the puzzle successfully will reward you with another Map Piece.
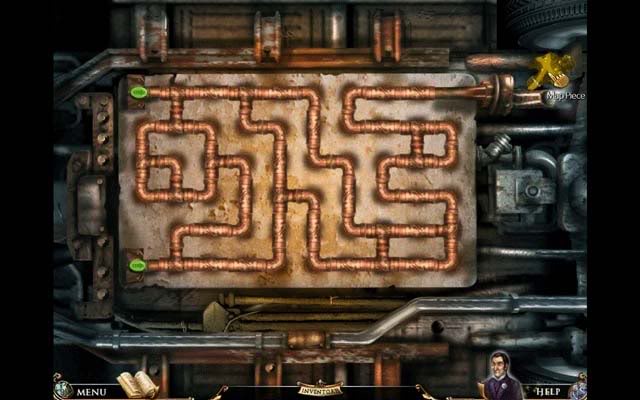
City Square
- Back in the City Square, click on the Barber Shop to enter.

Barber Shop
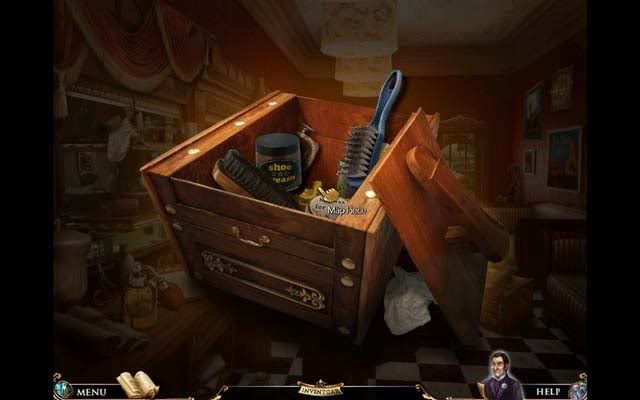
- Upon entering, click on the box sitting on the floor in front of the couch.
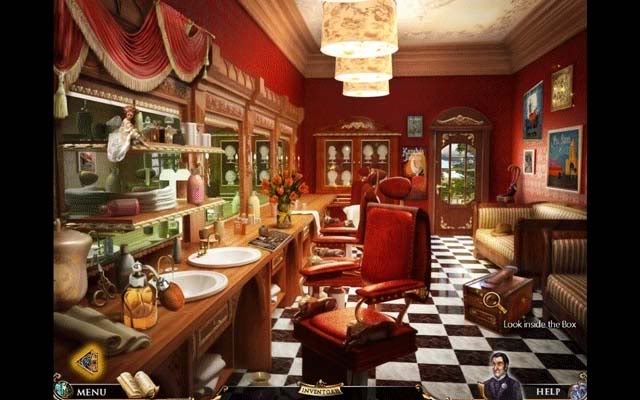
- There’s a map piece hidden inside the box. Just like the pillow mini-game back in Jane’s Office, click the various objects and drag them to move them and reveal the Map Piece at the bottom of the box. Click it to add it to your inventory.
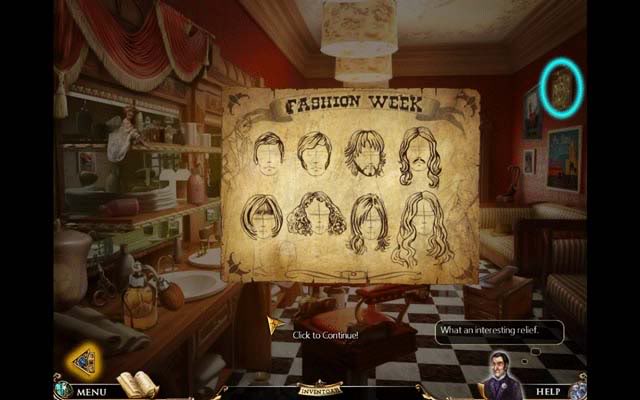
- Click on the Relief on the wall to see a Fashion Week poster displaying various haircuts: specifically men’s and women’s, shortest to longest. The original location is circled below:
- Zoom in on the Wig Case directly in front of you at the far end of the room to enter another mini-game.
- The goal of this mini-game is to arrange the wigs as they appeared on the relief: the top row being men’s and the bottom row being women’s. On the left should be the shortest of each, and on the right, the longest. Click on a wig, and then another to have them switch places. If you forgot the order, you can check your diary which has the solution drawn out. The solution is as follows:

- Completing the Wig Puzzle will reward you with another map piece, which appears at the top of the wig case. Click on it to add it to your inventory.
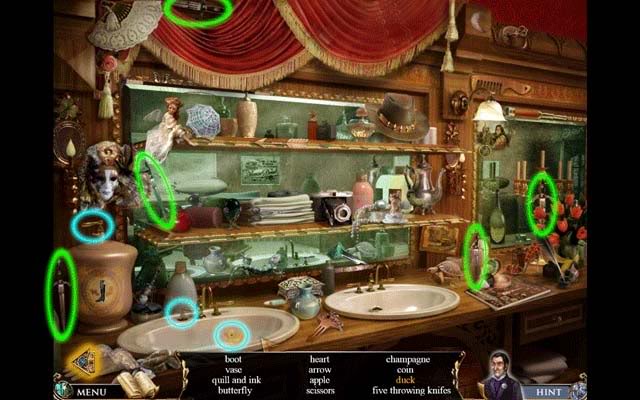
- Zoom in on the Shelves on the left to enter another hidden object area. Among the randomized objects are two constants:
-Duck: to make the Duck appear, click the handle and attach it to the sink. Click it again to turn the water on, making the Duck appear. Click it to cross it from the list. Everything is circled in blue.
-Throwing Knives: all five throwing knives are circled in green and shown below. When you finish the area, they will be added to your inventory.
- Exit the Barber Shop and return to the City Square.
City Square
- Zoom in on the Pillar next to the Barber Shop.
Pillar
- Time to reassemble the map. There are ten map pieces hidden throughout the pillar area (shown below in blue). The remaining five map pieces are in your inventory. Drag your inventory Map Pieces onto the Pillar to reassemble them and complete the map. The solution is shown below with the map pieces. When reassembling the map, try reassembling corner pieces first: this will make things much easier. When a piece has been correctly placed, it will lock onto the map.
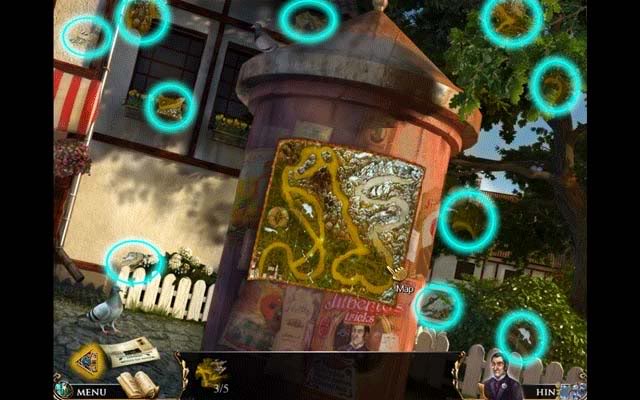
- Click the map once it’s been assembled to add it to your inventory. You can also optionally read the newspaper lying on the ground on the lower left.
City Square
- Return to Jilberto’s Tent
Jilberto’s Tent
- Click on the Lucky Harry trick on the far left side of the stage to rehearse it.
- Place the Knives on the left side of the screen to use them. If you throw any at Lucky Harry, you’ll notice they keep hitting him. Click on the sparkling area beneath the wheel to reveal a red button and click it.
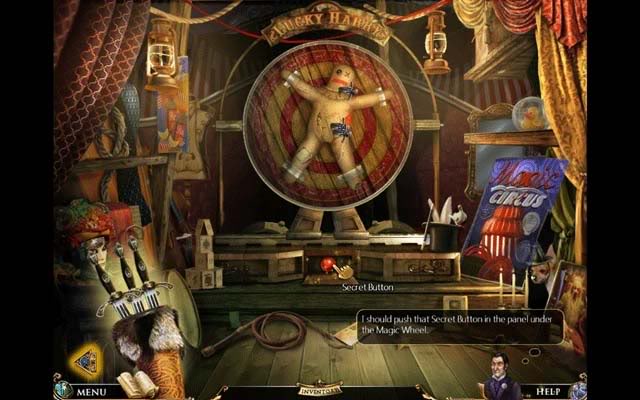
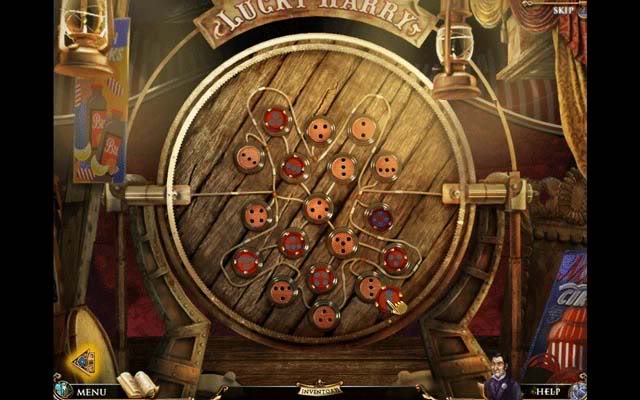
- This will flip the wheel. You’ll have to change the magnet locations. The solution is shown in your diary. Click the magnets (red and blue) and place them in their proper places outside of the Lucky Harry dummy outline. Match them to the correct number of dots, as well as the correct direction.
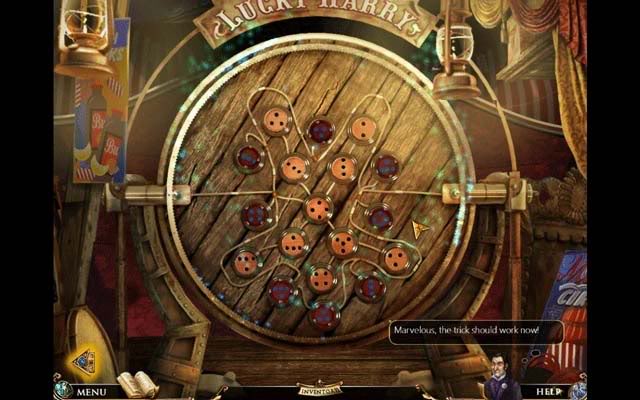
- The solution looks like this:
- Once you’ve successfully completed the puzzle, throw all of the knives at Lucky Harry. Click on one of the knives on the left to transfer it to your right hand, then click on the wheel to throw it.
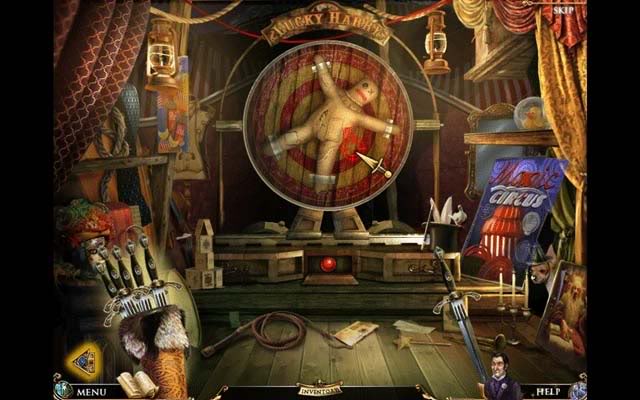
- Be careful not to hit Harry. Once you’ve thrown all the knives successfully missing Harry, you’ll be taken back to the Fortune Teller to view your diary. All the acts have been rehearsed. Return to the City Square.
City Square
- Click on the Mayor’s Porch for a closer view and to find the Circular Key needed to return to your Blimp.
Mayor’s Porch
- There are some constants in this area:
1.Circular Key: the circular key is circled and numbered below. It will be rewarded to your inventory upon successfully completing this area.
2.Laughing Dog: circled and numbered below, use the feather on the dog to make it laugh. Click it to cross it from the list.
3.Rabbit: the rabbit is hanging on the clothes line. Click the clothes pins to drop it to the ground, then click on it to cross it from your list.
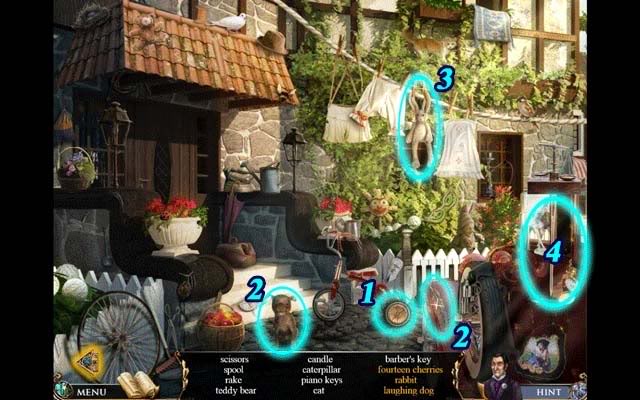
- 4.Fourteen Cherries: Click on the car on the right for a closer view. All fourteen cherries are hidden here and circled below:
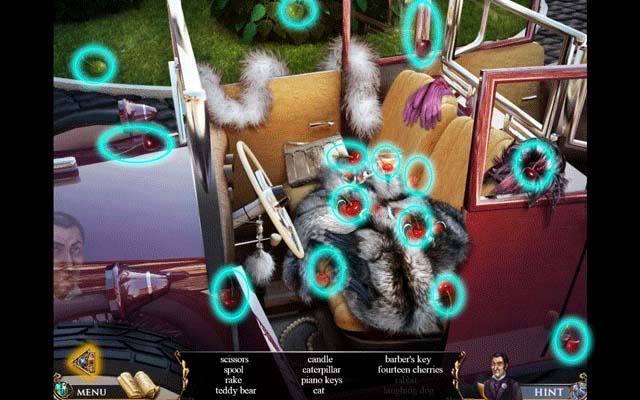
- After completing this area and being rewarded with the Circular Key, return to the Barber Shop.
Barber Shop
- Click on the door (aka "Way to Blimp") at the far end of the shop for a closer view.
- Use the Circular Key on the door. Click it to rotate it until it fits with the surrounding design to form a pair of scissors.
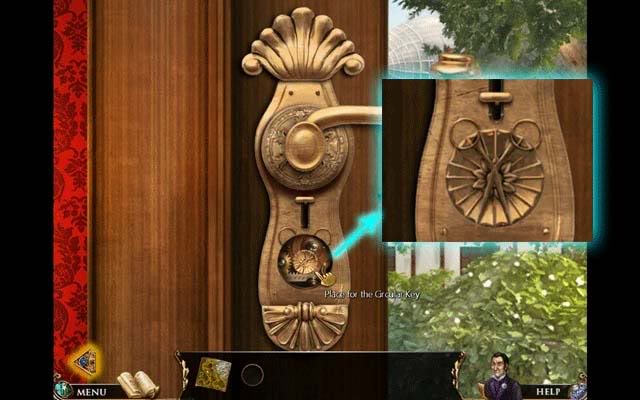
- Click to handle twice to open the door and proceed to the Blimp.
Blimp
- Aboard the Blimp another hidden object area awaits. There are a couple constants:
-(Circled in Blue) to find the Cow, use the Telescope on the position marked with a blue "X". Click the cow once it appears to cross it from your list.
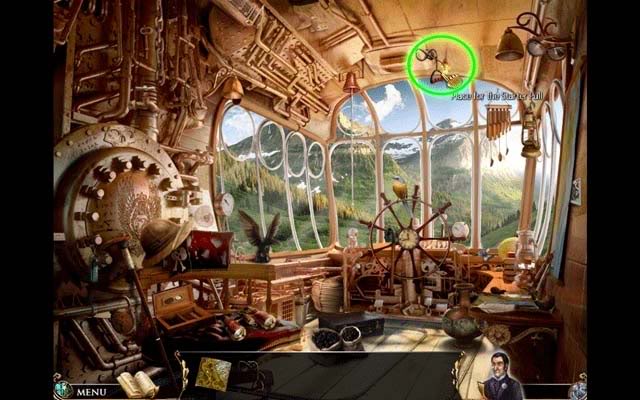
-(Circled in Green) is the the Starter Pull you’ll be rewarded with once you complete the area.
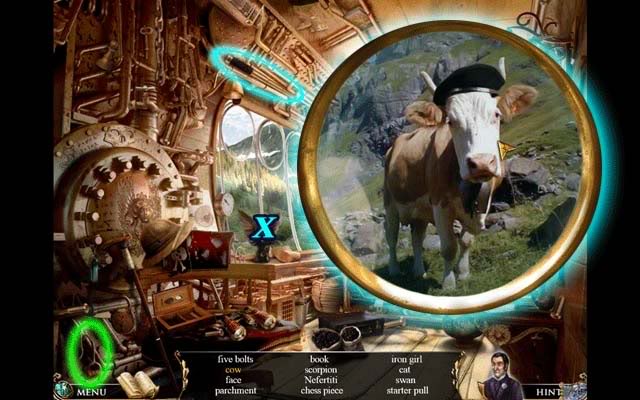
- Upon completing the hidden object puzzle, use the Starter Pull on the "Place for Starter Pull", then click it again to start the Blimp.
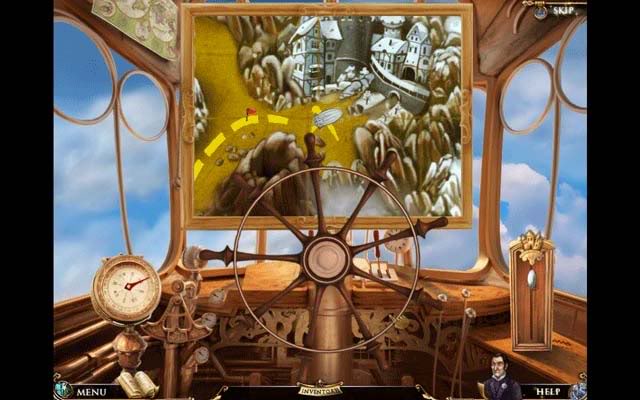
- Take the Map from your inventory and place it in the large frame in front of the wheel. Click and hold the Wheel to turn it and direct the Blimp to the Duke’s Castle. Follow the yellow dotted line for the best route, or any of the red flags. If you "crash" the Blimp by not following the path closely enough, you will be reset briefly before the point of collision.
- It’s a happy ending for Jilberto, and Jane comes away with the Red Gem.
VI.Chapter 5: Buggy & Life in Paris
Subconscious
- Use the Red Gem on the red door on the right to open the portal to your next past life.
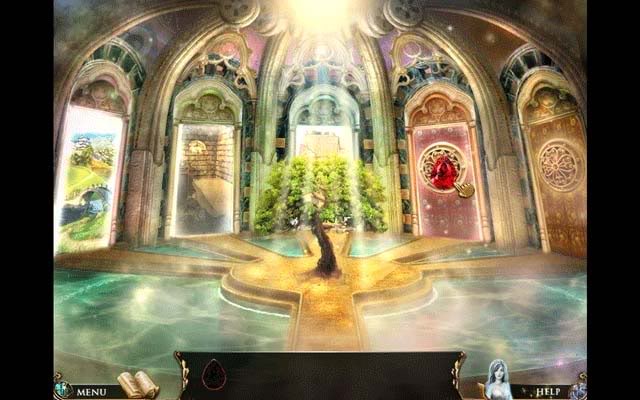
The Streets of Paris
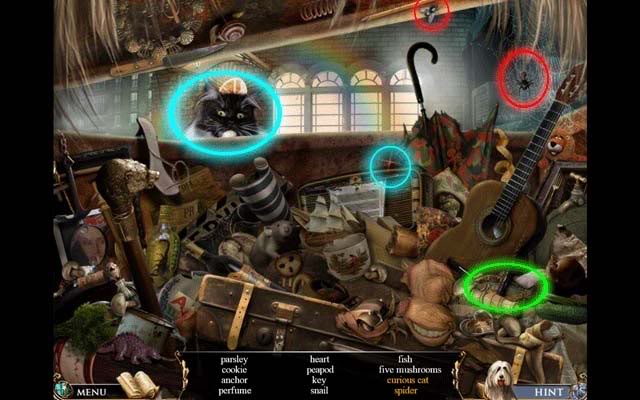
- You’ll immediately find yourself in a hidden object area. Like all the others, it had some constants:
-(Circled in Blue): Click the radio to bring out the Curious Cat. Click the cat it strike it from the list.
-(Circled in Green): the Fish will be added to your inventory once you complete the area.
-(Circled in Red): Click the fly and place it on the spider web to make the Spider appear. Click the Spider to strike it from the list.
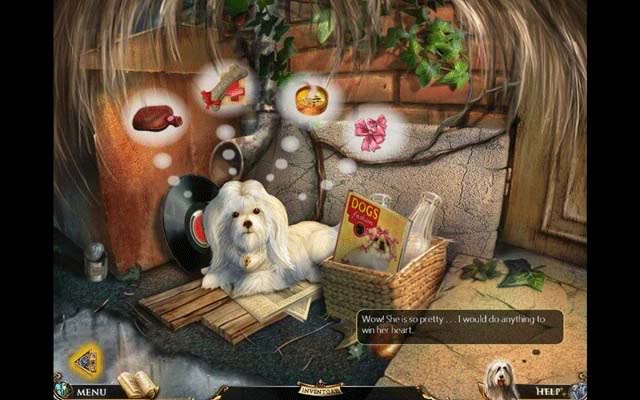
- Once you’ve completed the area, exit the dumpster and notice the small white Maltese sitting outside. It’s love at first sight, but in order to earn her love, you’ll need to get her four things, shown in bubbles above her head.
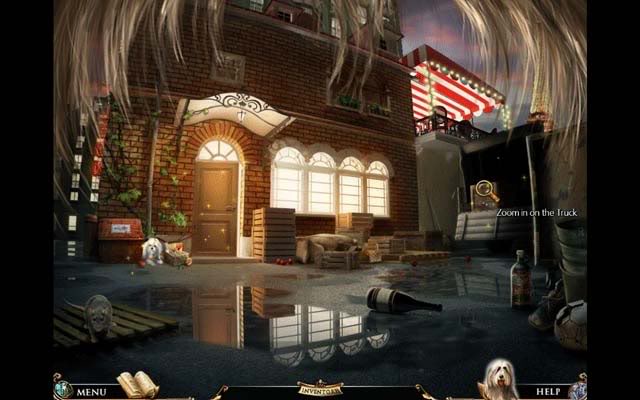
- Back out in the main street area, click on the Truck on the far right to zoom in.
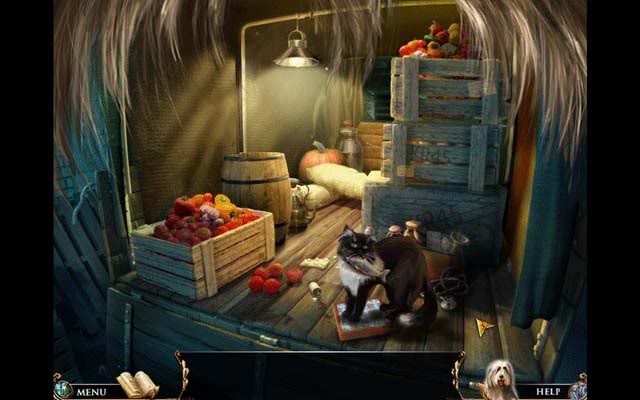
- Give the Fish to the Hungry Cat inside the truck to make it move, and click on the Blue Box on which it sat to start a mini-game.
- Click the various tiles to flip them into the correct position. It’s easiest to start in one corner and work your way up and down the columns. A tile will sparkle and lock into place when flipped correctly. The solution is as follows:
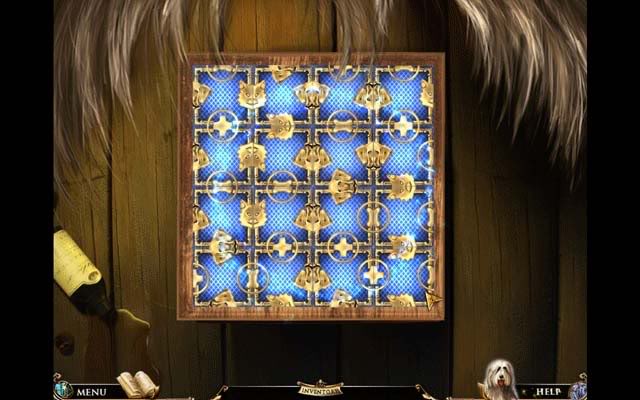
- Completing the puzzle will reveal a Medical Bone. Click it to add it to your inventory.
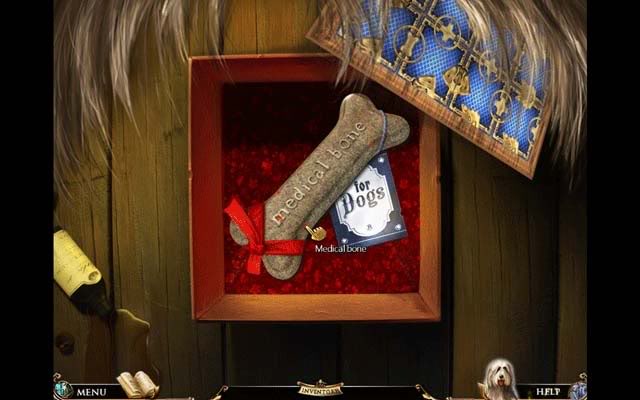
- Click near the back of the truck to zoom into the Truck Bed for another hidden object area.
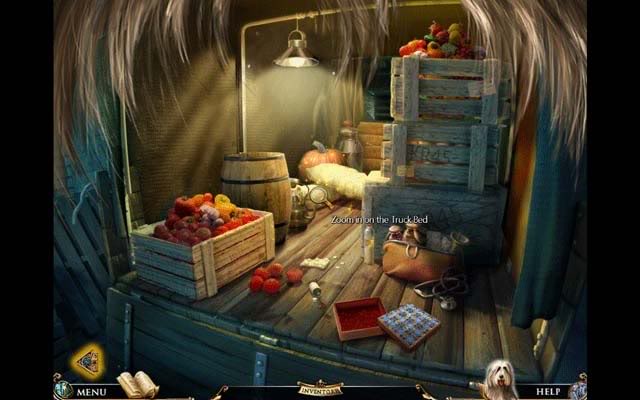
- Among the randomized objects in this scene are two constants:
1.Circled in red is the Hot Water Bottle, which will be added to your inventory upon completing the area.
2.Circled in blue is the corn cob and the blow torch. Click the blow torch to activate it. Click the corn cob and place it in front of the blow torch to make Popcorn. Pick it up once it’s all popped to cross it from the list.
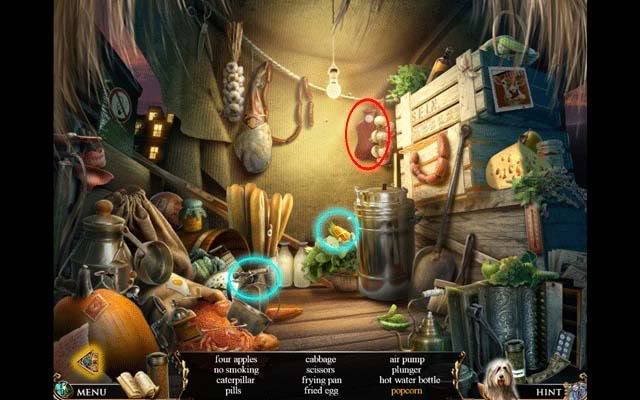
- Exit the area back to the street.
- Click on the door next to the Maltese to enter the Kitchen.
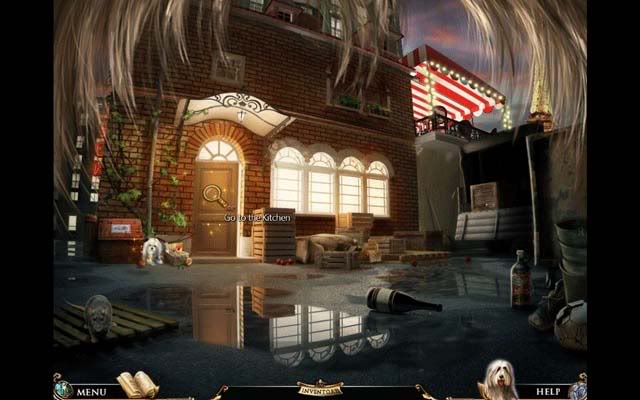
Kitchen
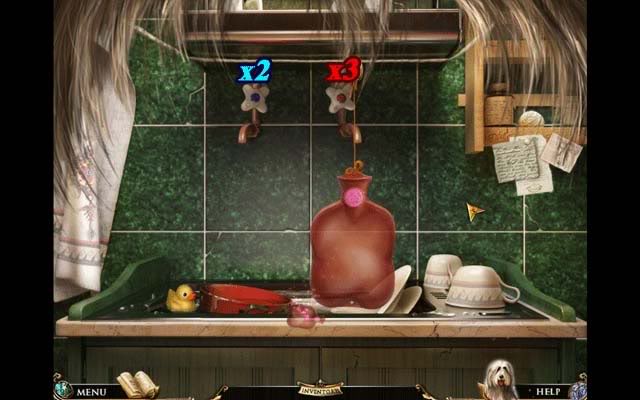
- Click on the Kitchen Sink (green tile area) near the back of the Kitchen for a closer view.
- Use the Hot Water Bottle on the sink to fill it with the right amount of hot and cold water. Once the Hot Water Bottle is on the screen, click the hot water tap 3 times and the cold water tap 2 times to fill it correctly. Click it to add it to your inventory.
- Back in the main Kitchen area, click to zoom in on the Top of the Table on the left.
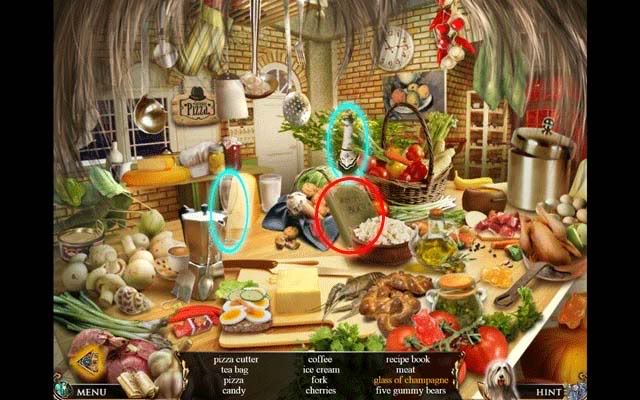
- You’ll enter another hidden object area. There are two constants here:
1.Circled in blue, click the Champagne bottle to pop the cork, then use the Champagne bottle on the Champagne glass to fill it. Click the glass to cross it from the list.
2.Circled in red is the Recipe Book, which will be added to your inventory upon completing the area.
- Once you complete the area, the Cutting Board on the right of the table will begin sparkling blue. Click on it to zoom in on another task.
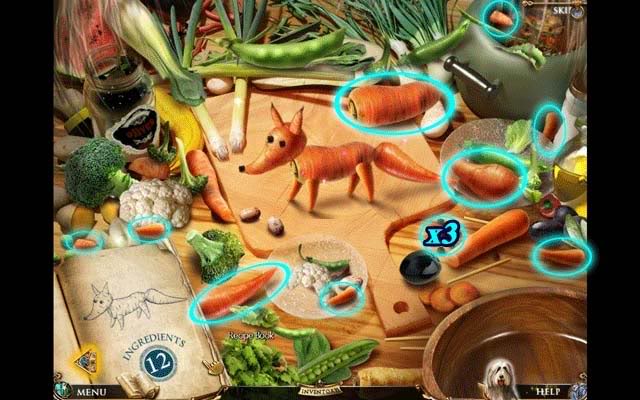
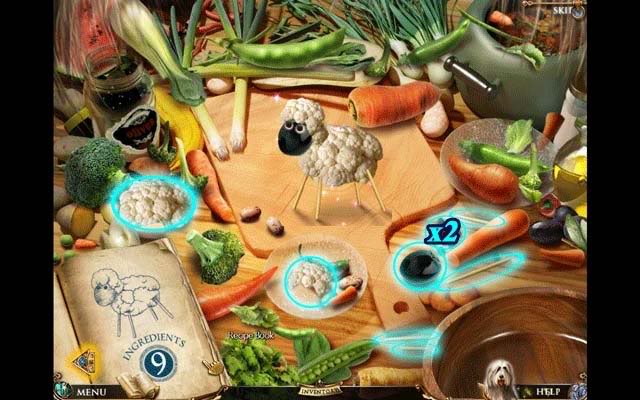
- Use the Recipe Book to make the Vegetable animals needed for the Funny Soup. You’ll need to make the following; refer to the screenshots below for the necessary ingredients, all circled:
-Carrot Fox:
-Cauliflower Sheep:
-Broccoli Poodle:
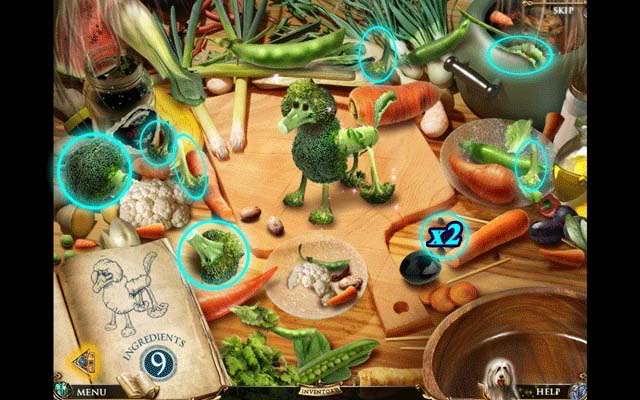
-Peas Grasshopper:
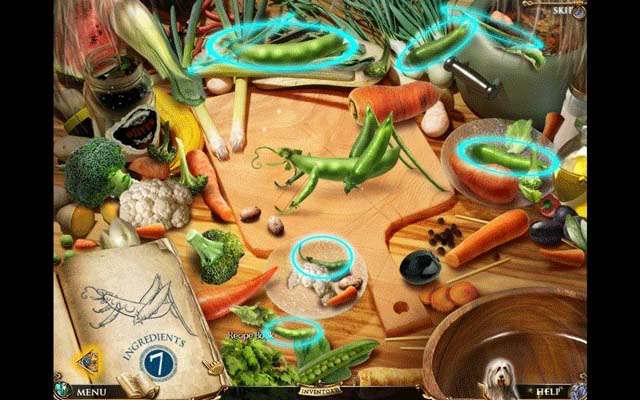
-China Cabbage Fish:
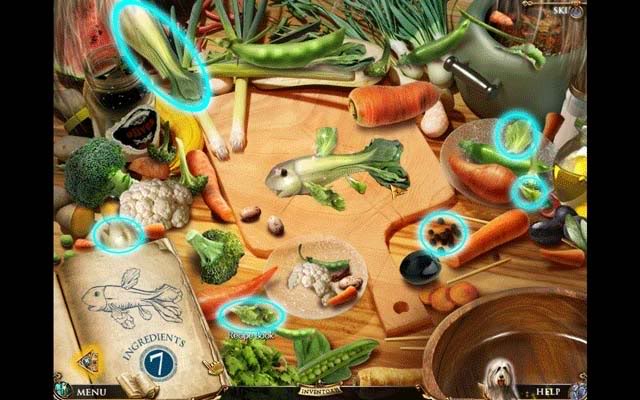
- Completing all these animals will result in Vegetable Mix being added to your inventory and you’ll be taken back to the main Kitchen area.
- Click on the Kitchen Stove in the upper right area of the screen.
- In this puzzle, you’ll need to figure out a way to cook the Funny Soup. The screenshot below has been numbered to show you exactly how to complete each step. You can also check the paper circled in blue for a diagram of how to set things up.
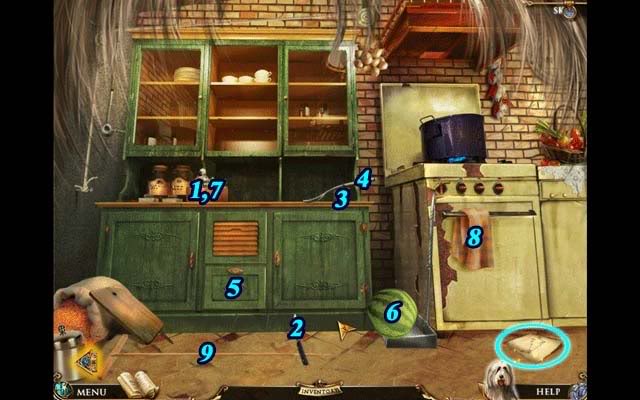
1.Place the Vegetable Mix on the counter
2.Click the Knife in the Drawer to place it on the floor
3.Click the Canned Food to place it in the correct area of the counter
4.Click the Ladle in the Drawer to place it on top of the Canned Food
5.Click the Drawer to close it
6.Click the Watermelon to roll it across the floor, turning on the stove
7.Click the Vegetable Mix to fling it into the Ladle
8.Click the Towel to wrap it around the kitchen Knife on the floor
9.Click the Mop. This will drop the onions and fling the Vegetable Mix into the stove, cooking the Funny Soup, which will then be added to your inventory.
The Streets of Paris
- Return to the streets and click on the Maltese/your Soul Mate for a closer view.
- Give the Hot Water Bottle, Funny Soup, and Medical Bone to your Soul Mate. Now you just need the Ribbons. Exit the close-up.
- Zoom in on the Crates below the restaurant windows to enter another close-up view.
- Move the Produce to uncover the six pink Ribbons you’ll need. Their locations are shown here:
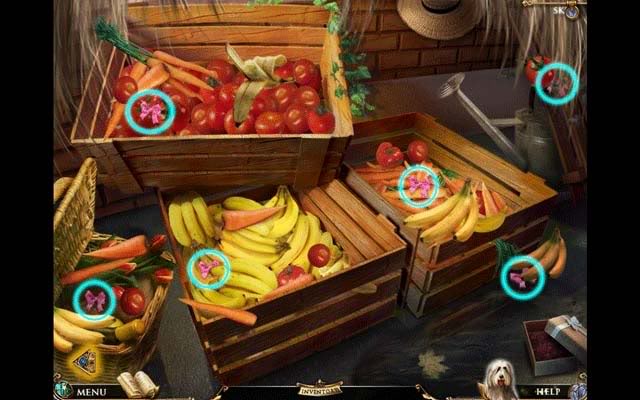
- After all the Ribbons have been collected, return to your Soul Mate.
- Place the Ribbons on your Soul Mate according to the magazine cover. The solution is shown here:
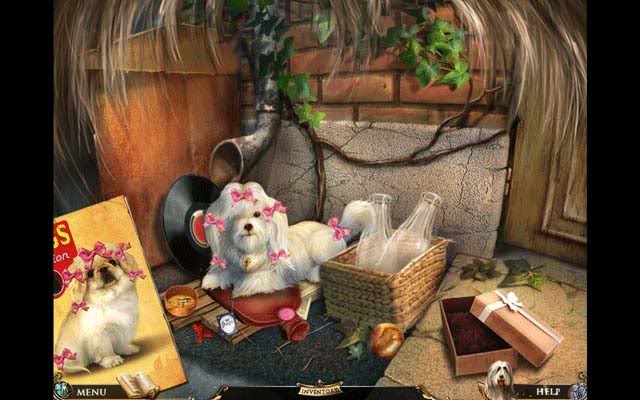
- It’s another happy ending, and the Yellow Gem from the Soul Mate’s necklace will be added to your inventory.
VII.Chapter 6: Albertina & the Observatory
Subconscious
- Use the Yellow Gem on the rightmost Portal to a Past Life to open it and enter.
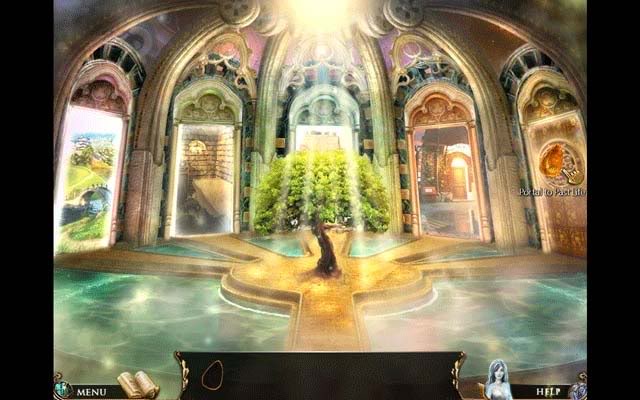
Park
- Click on the Star Cannon on the left side of the screen to zoom in and get a closer view.
Star Cannon
- If you check the Cannon or the Control Panel in this area you’ll notice pieces are missing for both: the Cannon requires a Capsule and the Control Panel requires 3 additional dials to operate.
- Zoom in on the Trailer on the right to enter a hidden object area.
- Among all the random objects are two constants here:
-Circled in blue, pick up the Wire Piece and use it on the disconnected wires to turn on the light. This will reveal the Illuminated Smile. Click it to cross it from the list.
-Circled in green is the Capsule. It will be added to your inventory upon completing this area.
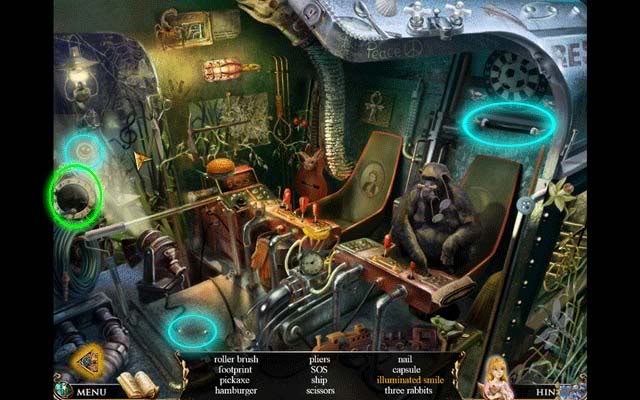
- Upon completing the area, click on the Cannon in the middle of the screen for a closer view.
- Click the Cannon hatch to open it: use the Capsule, Letter, and Teddy Bear from your inventory on the open Cannon hatch. Click it again to close it.
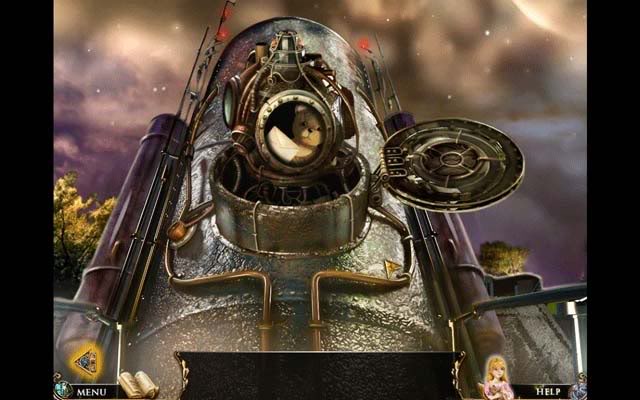
- After you’ve done this and return to the main Star Cannon area, click the arrow on the lower left of the screen to exit back to the Park.
Park
- Click on the Gazebo on the right for a closer view.
Gazebo
- Find the seven missing statue pieces in order to restore the statue. The location of the pieces is shown here:
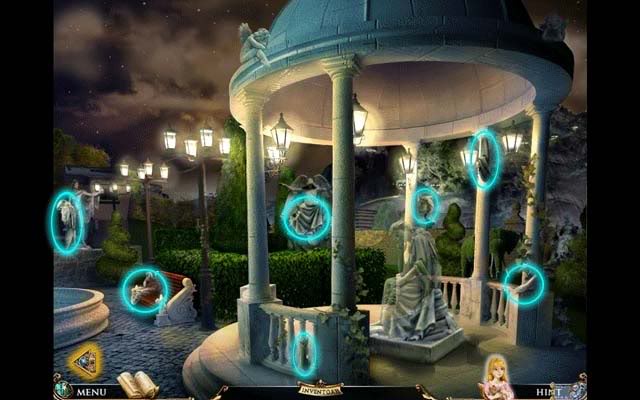
- After completing the statue, it will lower into the ground, and an Index Dial will appear on the steps. Pick it up to add it to your inventory.
Park
- Click on the Bench to the right of the Fountain for a closer view.
Bench
- Among the hidden objects here are two constants:
-Circled in blue, place the Soldier on the Horse to make the "Soldier on a Horse". Click it to cross it from your list.
-Circled in green is the Index Dial that will be added to your inventory upon completing the area.
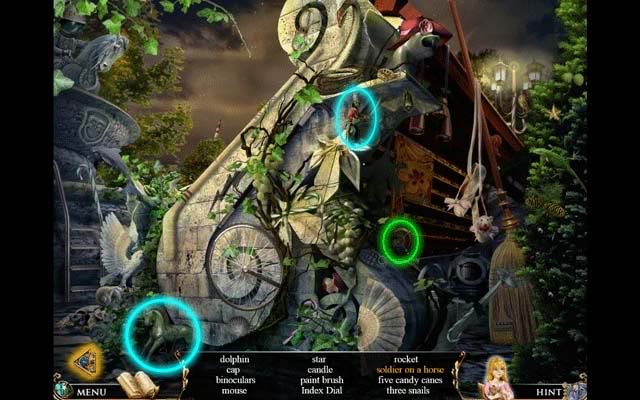
Park
- Zoom in on the Gate above the Bench in the middle of the screen.
Gate
- To unlock the Gate, you will need to complete a puzzle. The goal is to match the Zodiac signs in the same order horizontally as they were placed vertically. The Zodiac signs on the wheel around the tiles will glow when a tile of the corresponding sign is in the correct position. Below are the starting tiles, with the correct order of the Zodiac signs around the wheel numbered, as well as the solution.
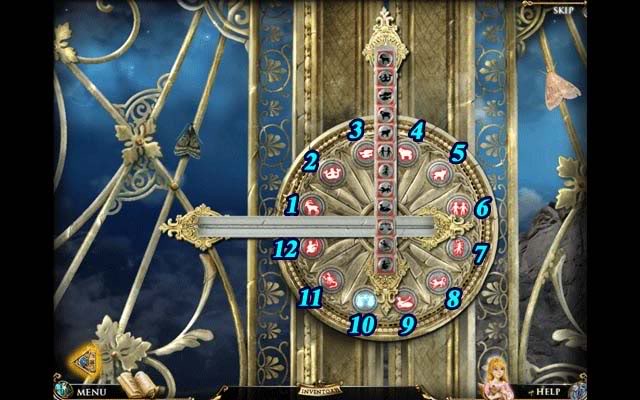
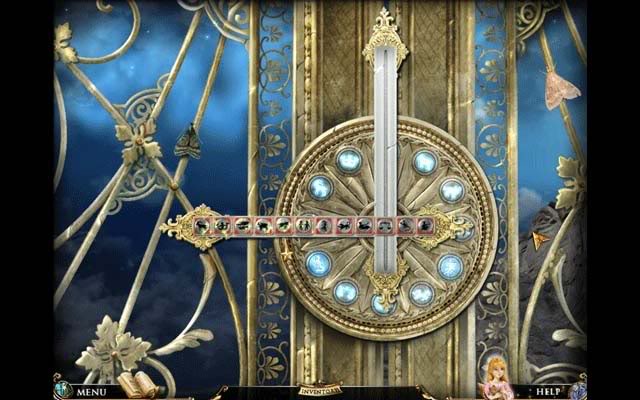
- Once you’ve successfully completed the puzzle, the Wheel will spin and unlock the Gate. Continue to the Observatory.
Observatory
- Zoom in on the Clock on the right side of the screen for a closer view.
- Rearrange the cone ornaments hanging from the clock chains until they’re of equal weight. The solution is shown below. Doing this successfully will result in the clock face opening and rewarding you with the last Index Dial. Click it to add it to your inventory.
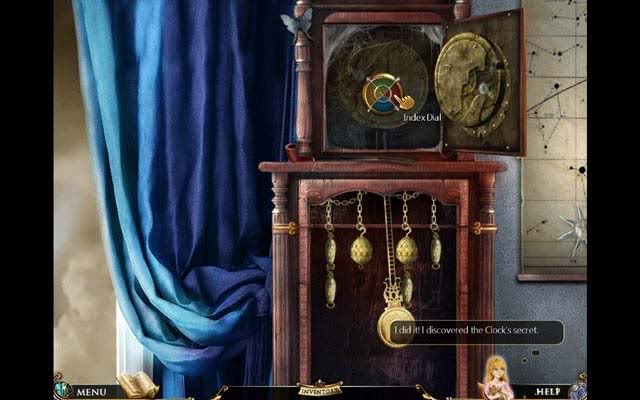
- Zoom in on the Bookshelves on the left side of the room to enter another hidden object area.
- Among the randomized hidden objects are some constants:
-Circled in blue, find the four plane propellers and use them on the hanging toy plane to have the Flying Airplane cross off from your list.
-Circled in green, use the Key on the Locked Book to open it. Click on it again for a closer view and to click the words "Reincarnation Tales", striking them from the list.
-Circled in yellow is the Control Wheel which will be added to your inventory upon completing the area.
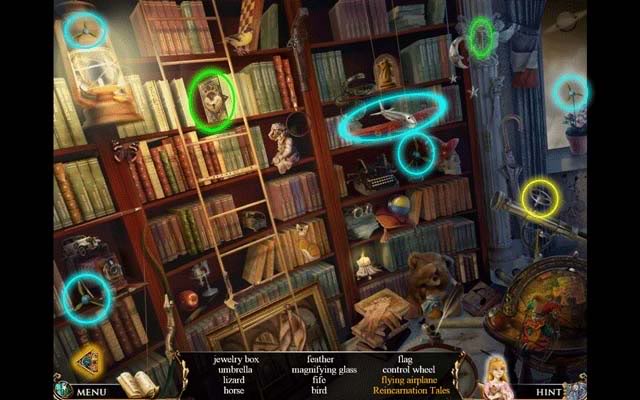
- After completing this area, click on the Table beneath the open window for a closer view.
- Click the "Model of the Solar System" box to open it. The goal is to reassemble the tiles so that they show the Magic Constellation. Click a tile and then any other tile to swap them: tiles should be ordered in the same order as that of the planets of our solar system. A tile will glow when it’s put in the correct place. You’ll be taken back to the Observatory upon completing the puzzle. The solution is as follows:
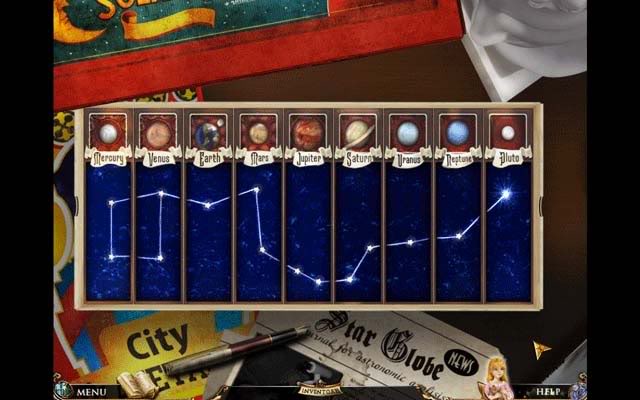
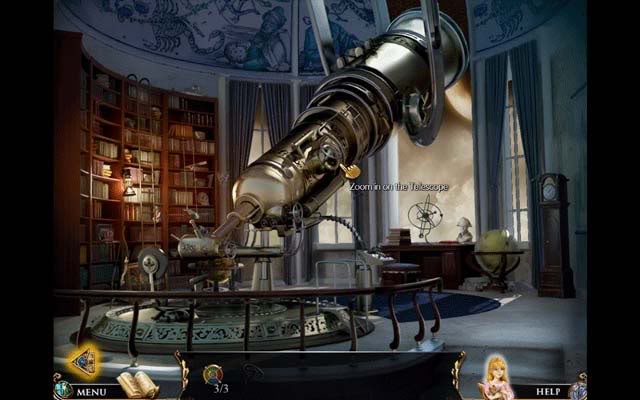
- Back in the main Observatory area, use the Control Wheel from your inventory on the large Telescope to activate it. Click on it for a closer look.
- Reproduce the Dragon Constellation by moving the X and Y axis. You can press the "X" or "Y" buttons to do this, or toggle the vertical and horizontal dials to move the viewfinder (mapped out below with lines and labels). The goal is to center it over a star. Once you’ve done this, press the red button with the star icons on it: this will make it glow. Do this for each of the stars in the constellation until you’ve completed it. Once completed, press the red star button one more time to print out the star coordinates "0686". Click the paper to add it to your inventory.
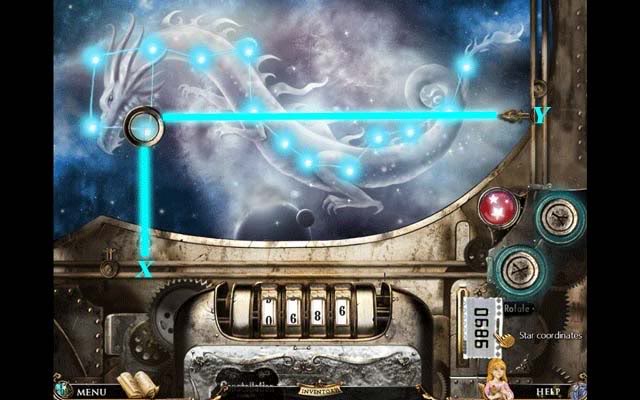
- Albertina will automatically return to the Park.
Park
- Click on the Star Cannon area on the left for a closer view.
Star Cannon
- Click on the Control Panel for a closer view.
- Take the Index Dials from your inventory and place them into the slots next to the original, then click the red Power Button to start the machine.
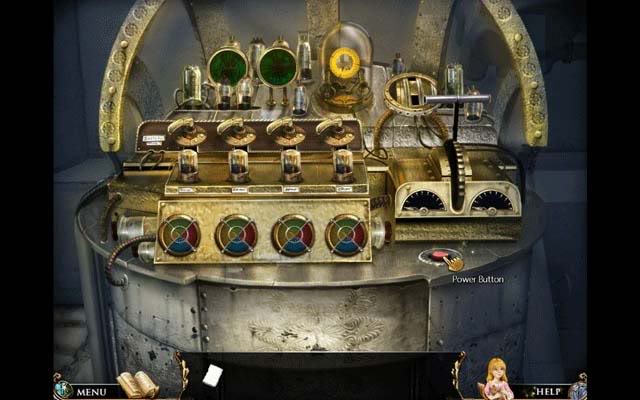
- The machine will light up. Click the handles above the glowing colored lights to switch the lights on the dials to match the lights above them. Here’s an example of how a solution should look and match with the colored lights:
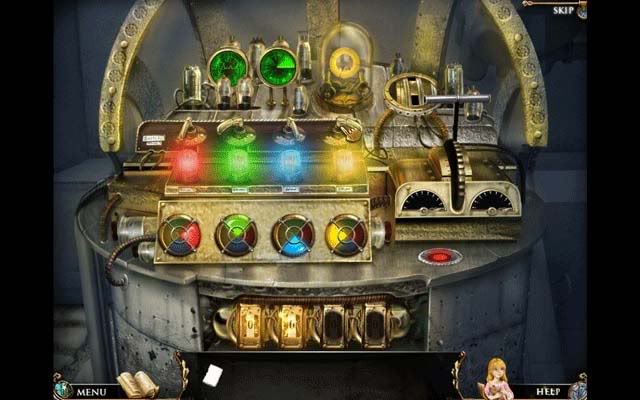
- Once the Input Console illuminated in gold at the bottom of the machine is completely lit, use the Star Coordinates from your inventory and drop them anywhere on the scene so you can refer to the numbers. Click the numbers on the various Input Console dials until they read "0686".
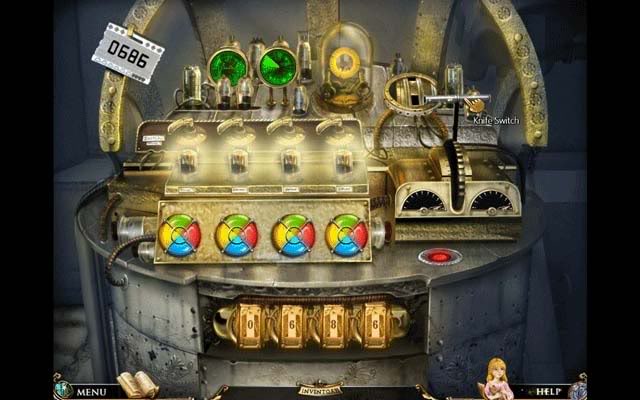
- Once you’ve finished this, click the Knife Switch on the right side of the console to send off the Capsule from the Star Cannon.
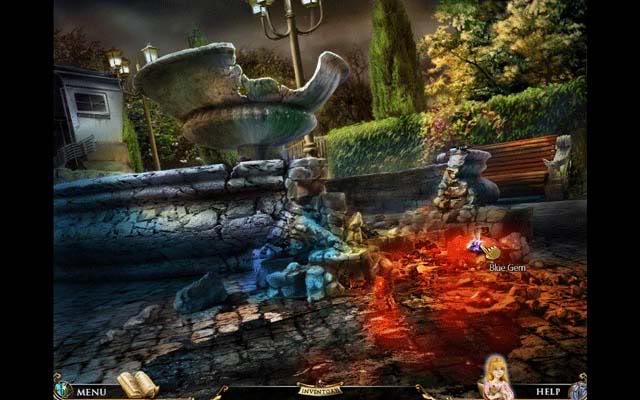
- A cutscene will take place, and you’ll automatically go back to the Fountain. Pick up the Blue Gem sparkling on the ground.
Subconscious
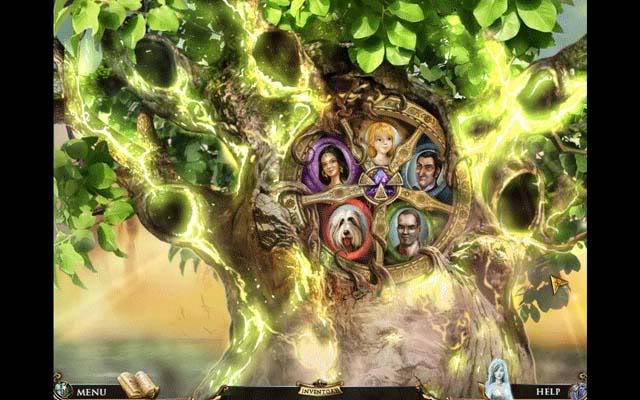
- Click on the Tree of Life in the middle of the screen for a closer view.
- Place the Blue Gem you picked up in the middle of the Wheel on the tree, then place each of Jane’s incarnations in their proper area. Their pictures are outlined in the same color as where they should go on the Wheel. Place them all in their correct places and the tree will light up brilliantly.
Congratulations, you’ve completed Reincarnations: Awakening!
“;
More articles...
Monopoly GO! Free Rolls – Links For Free Dice
By Glen Fox
Wondering how to get Monopoly GO! free rolls? Well, you’ve come to the right place. In this guide, we provide you with a bunch of tips and tricks to get some free rolls for the hit new mobile game. We’ll …The BEST Roblox Games of The Week – Games You Need To Play!
By Sho Roberts
Our feature shares our pick for the Best Roblox Games of the week! With our feature, we guarantee you'll find something new to play!All Grades in Type Soul – Each Race Explained
By Adele Wilson
Our All Grades in Type Soul guide lists every grade in the game for all races, including how to increase your grade quickly!Best Roblox Horror Games to Play Right Now – Updated Weekly
By Adele Wilson
Our Best Roblox Horror Games guide features the scariest and most creative experiences to play right now on the platform!


