- Wondering how to get Monopoly GO! free rolls? Well, you’ve come to the right place. In this guide, we provide you with a bunch of tips and tricks to get some free rolls for the hit new mobile game. We’ll …
Best Roblox Horror Games to Play Right Now – Updated Weekly
By Adele Wilson
Our Best Roblox Horror Games guide features the scariest and most creative experiences to play right now on the platform!The BEST Roblox Games of The Week – Games You Need To Play!
By Sho Roberts
Our feature shares our pick for the Best Roblox Games of the week! With our feature, we guarantee you'll find something new to play!All Grades in Type Soul – Each Race Explained
By Adele Wilson
Our All Grades in Type Soul guide lists every grade in the game for all races, including how to increase your grade quickly!
Redrum: Time Lies Walkthrough
Welcome to the Redrum: Time Lies walkthrough on Gamezebo. Redrum: Time Lies is an Interactive/Hidden Object game played on PC, created by Anarchy Games and available at BigFish Games. This walkthrough includes tips and tricks, helpful hints, and a strategy guide for how to complete Redrum: Time Lies.
Warning: This game contains stylized images and videos that may be disturbing to some.
General Information
- Enter your profile name to start the game. You can create up to 10 profiles.
- Click on Options to adjust Music and Sound FX volumes, choose Visual Quality, Full Screen and Custom Cursors. The default is High, Yes and Yes, respectively.
- Click on Credits to view them, click on Intro to watch the opening movie without playing the game and click on Play to start the game.
- Choose Relaxed (no penalties) or Paranoid (penalty for rapid clicking) game modes.
- Once you get access to it, you can use the Map to travel quickly to specific locations, without having to click back and forth.
- You begin with 5 Hints (magnifying glass). You’ll find additional Hints throughout the game. There are a total of 29 Hints.
- Puzzles and Minigames in the Rooms (the Cards) can be skipped. It takes 120 seconds (2 minutes) for the Skip button to charge.
- Item List, Shape and Hexagon searches can NOT be skipped. Use a Hint if you’re stuck.
- Gameplay consists of Item List searches, Item Shape searches, Matching Hexagon searches, Multiple Item searches, Jigsaw Puzzles, Switch Image Puzzles, Sliding Column and Row Puzzles and various Tasks.
- You’ll collect needed items from the Raven, Edgar Allen Crow, and as you complete tasks.
- New tasks are indicated by small Sparkling Stars. Remaining tasks, inventory items and unvisited areas are indicated by large Sparkling Stars.
- While gameplay is non-linear (you can go where you want, when you want), the game and story are linear. You will be playing several areas at the same time. The game consists of 10 Victims whose souls you need to “release.” You will need to work on more than one victim at a time, in addition to completing various other tasks (Dr. Fraud’s Office, Atrium, Antechambers, etc.) to collect needed items.
- During gameplay, your inventory (lower right) will change depending on the task. In Multiple Item searches it will change to a counter (it will count down how many remaining items you need to find). In other areas it will show your accumulated Inventory.
Game Tips
- If your computer is older (RAM and graphics card), you may want to choose Low for Visual Quality and turn the Custom Cursor off. It may help speed up gameplay; however you won’t get the Skeleton Hand, Magnifying Glass and directional Arrow icons.
- Be prepared to be startled, occasionally, both visually and aurally.
- You may complete any section, in any order you choose, although some areas/items aren’t available until you complete certain tasks.
- Use the Map to travel quickly to each location, rather than clicking forward and back, as the game tells you.
- Be sure to revisit the transitional/additional areas (Atrium, Atrium West and East, Victim area Courtyards, Antechambers, etc.) from time to time, to collect items the Raven has waiting for you and perform other tasks. If you forget, you won’t be able to progress in certain areas.
- The Jigsaw Puzzles in this game are traditional jigsaw puzzles and they get progressively larger (more pieces) as you continue in the game. I recommend sorting the pieces (4 corners, each of 4 sides, light and dark center pieces), then attacking the puzzle by placing the corner pieces first, edges pieces next and center pieces last.
- For the Sliding Columns/Rows Puzzles, you may find it easier if you concentrate on one direction (vertical or horizontal) at a time. Do one, then the other.
- For the Switch Images Puzzles, you may find it easier to locate and place all the border pieces first. They all have pulsing, color-changing borders to make them easy to identify.
- The images in the Hexagon Puzzles morph every 5 seconds, however the location of the hexagon doesn’t change.
Walkthrough
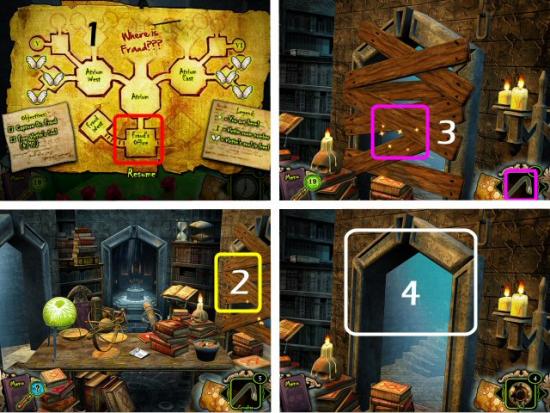
Watch the opening nightmare, waken Detective Ravenwood (click on him), collect the Map (to the right of his head) and click on Dr. Fraud’s Office to proceed. Remember: Use the Map to travel to each area to avoid a lot of clicking back and forth. The Map is located at the lower right, just to the left of the Inventory/Item Count button.
Victim #1
Victim #1
Release the soul of the first victim.
Dr. Fraud’s Office
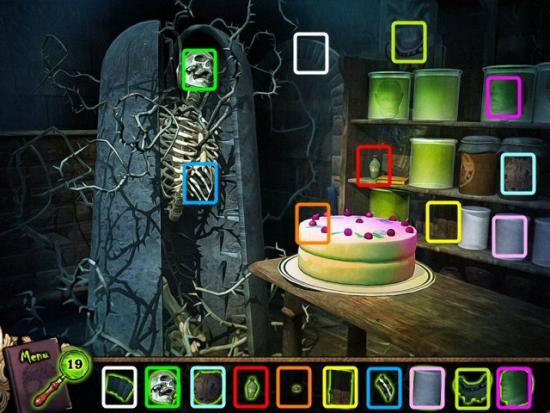
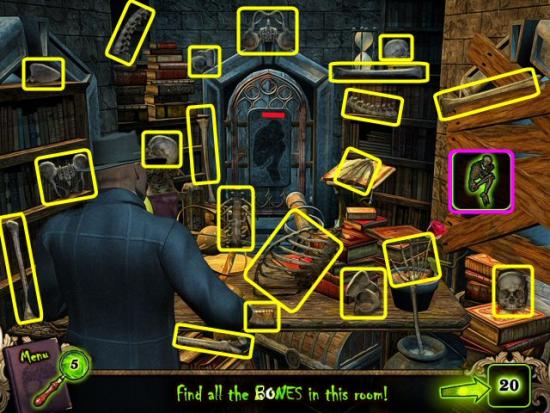
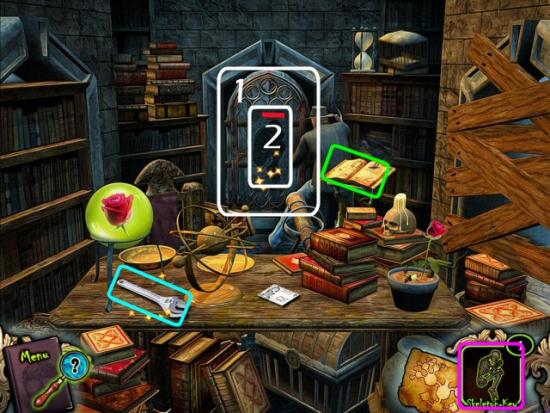
Collect 20 Bones, click on the Table and receive the Skeleton Key (magenta).

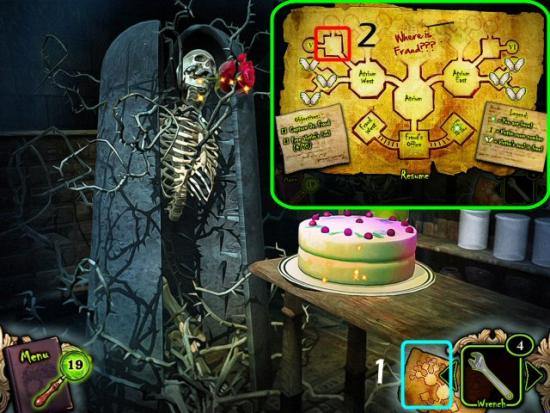
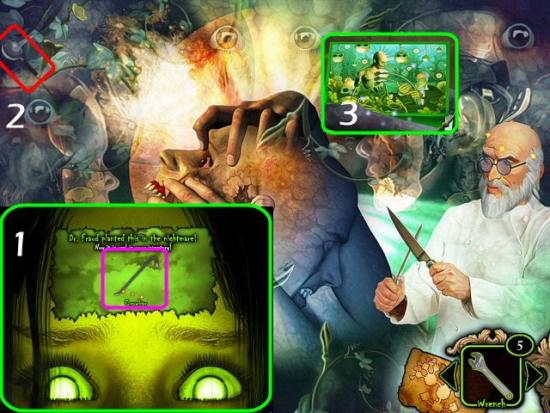
Click on the Journal (green) to read about the characters and various elements in the game. Collect the Wrench (cyan), click on the Door (1) and use the Skeleton Key (magenta) on the Indentation (2). Use the Inventory arrows to scroll through your items.
Room 1 – Yoga Instructor Sarah Pale
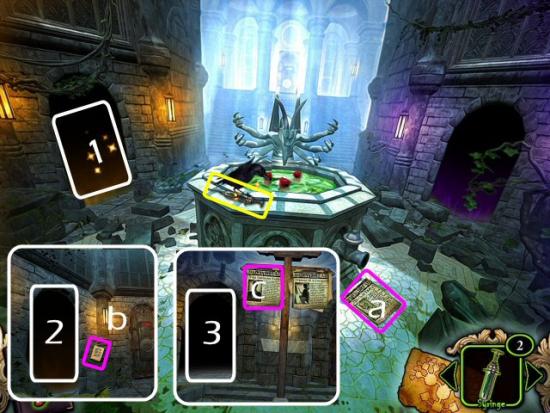
Follow Rose to the Atrium, collect the Syringe (yellow) and read the Newspaper Clipping (a). Click on the Doorway (1). Read the Diary Page (b) and click on the Doorway (2). Read the Newspaper Clipping (c) and click on the Doorway (3).
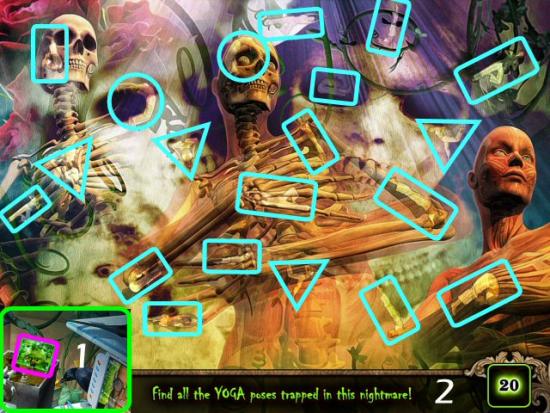
Click on the small Get Well Card (1) and find 20 Yoga Poses (2).
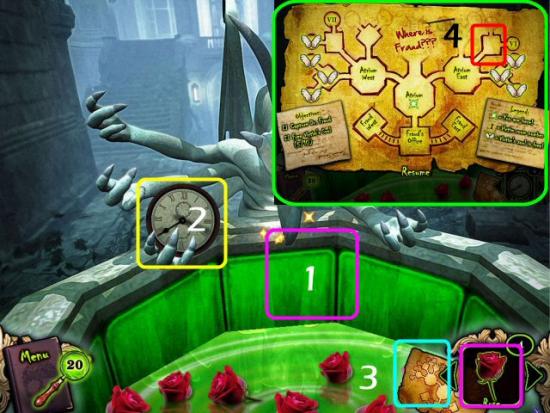
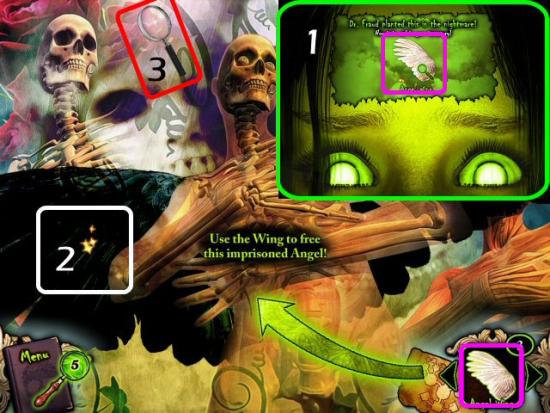
Click on the White Angel Wing (1), use it on the Black Wing (2) and collect the Magnifying Glass Hint (3).
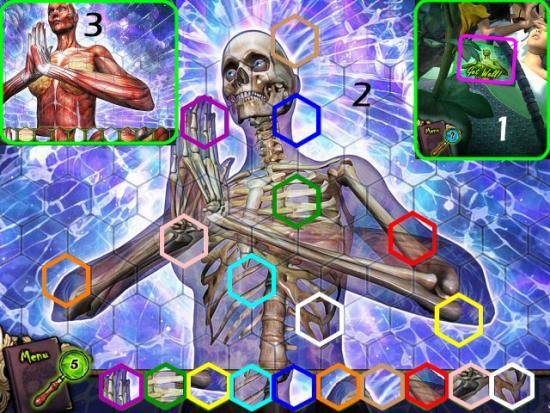
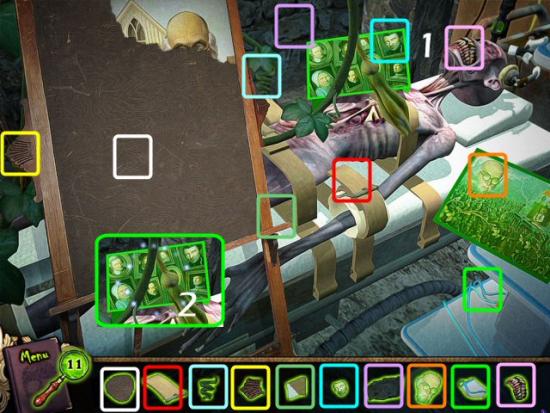
Click on the large Get Well Card (1) and find all the matching Hexagons (2). Note that the picture morphs between the muscle structure and the skeletal structure (3). Your hexagons may be different or in a different order.
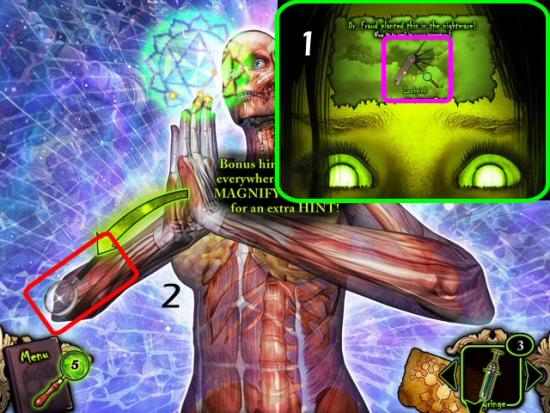
Collect the Lock pick (1) and Magnifying Glass Hint (2).
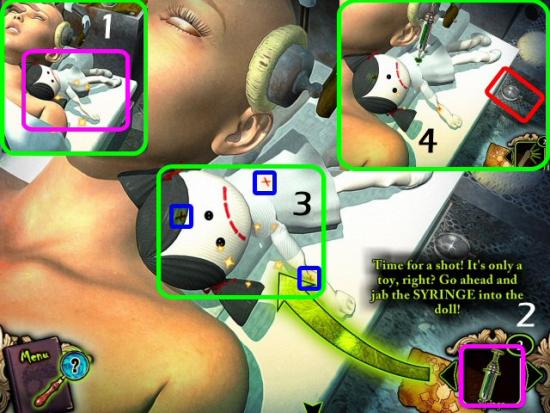
Click on the Voodoo Doll (1), use the Syringe (2) on any one of the 3 red “X”s (3) and collect the Magnifying Glass Hint (4).
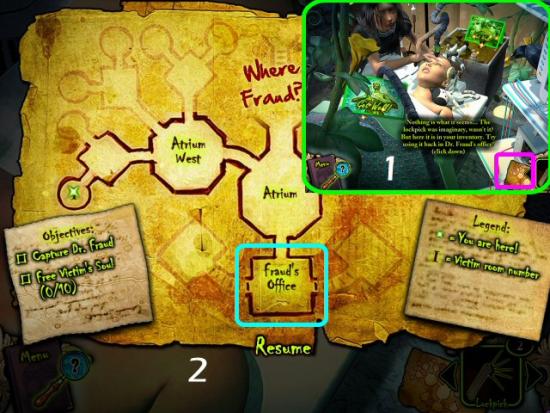
Click on the Map (1) and click on Dr. Fraud’s Office (2) to return there. The game will tell you to keep clicking “back”; don’t bother. Always use the Map to travel to the locations, unless you LIKE mindless clicking. LOL!
Dr. Fraud’s Office
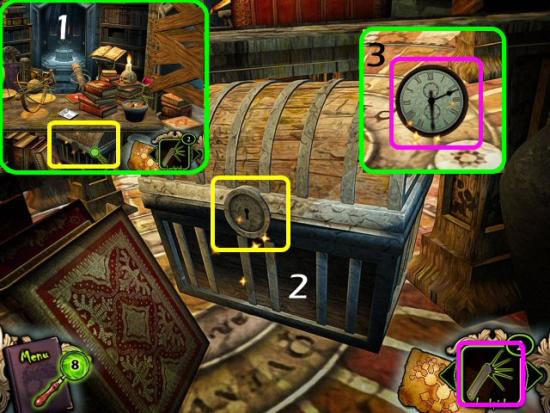
Click on the Chest (1) under the desk, use the Lock pick on the Lock (2) and collect the Time Lies 2:00 Clock (3).
Atrium East
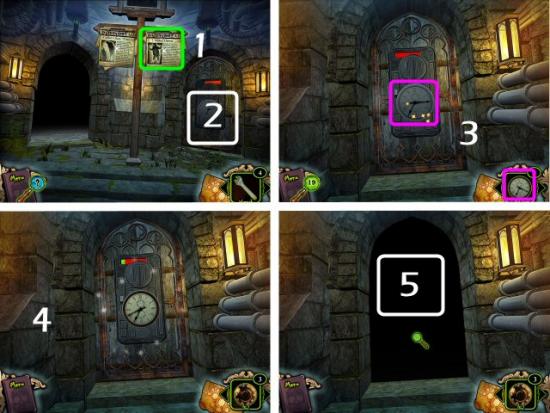
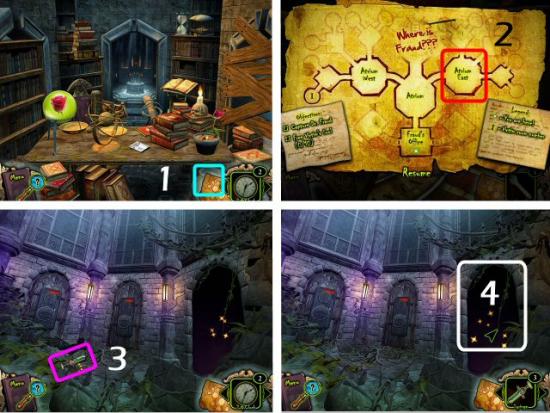
Click on the Map (1), click on Atrium East (2), collect the Syringe from the Raven (3) and click on the Doorway (4).
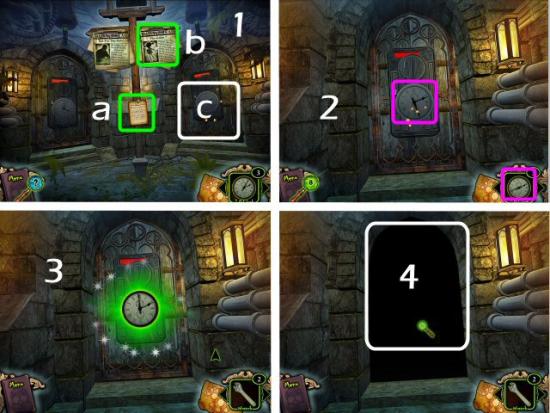
Click on Dr. Fraud’s Confession (1a), the Newspaper Clipping (1b) and the Door (1c). Use the Time Lies Clock on the Door (2), wait for the Door to open (3) and click on the Doorway (4).
Room 2 – Doll Maker
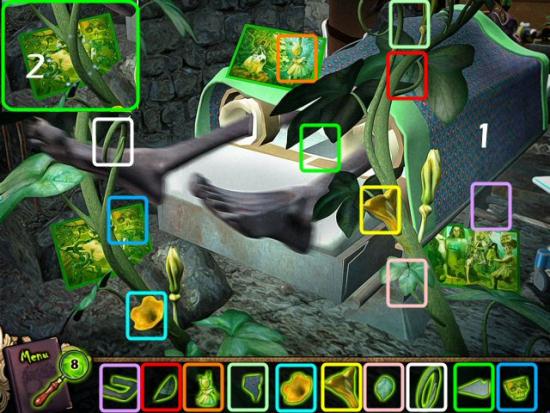
Find all 10 Shapes (1) and click on the first Card (2 – with the Skull). Your shapes may be different or in a different order.
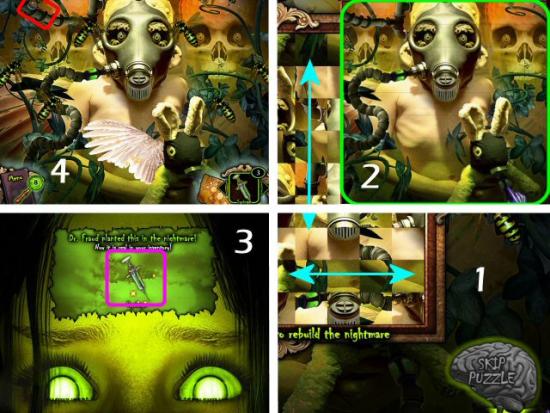
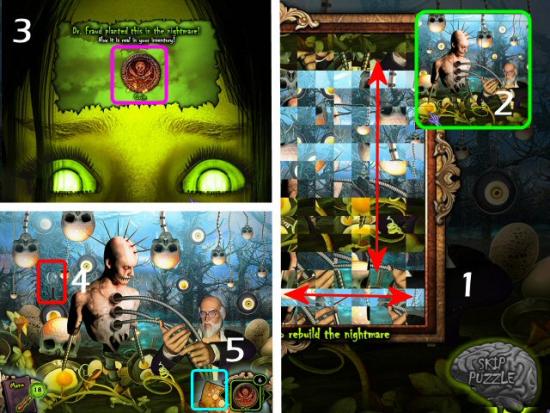
Click and drag the columns and rows (1) to form the Image. Completed Image (2). Collect the Syringe (3) and the Magnifying Glass Hint (4).
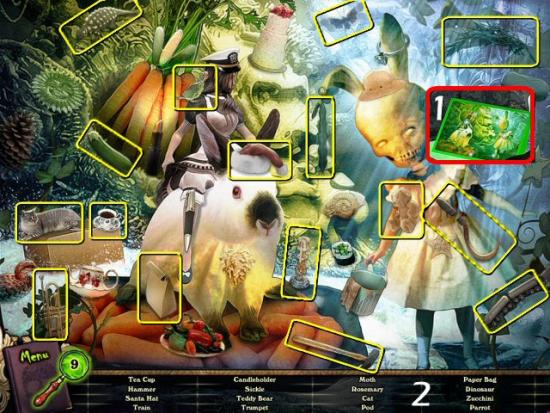
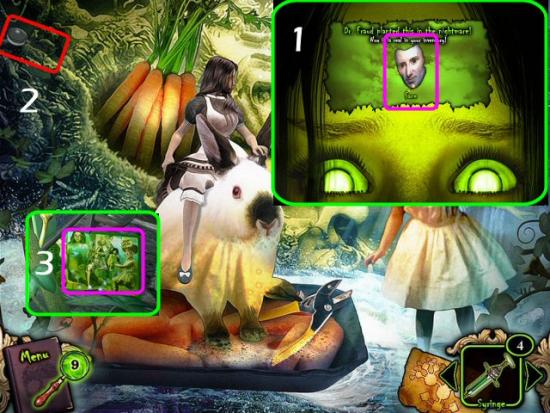
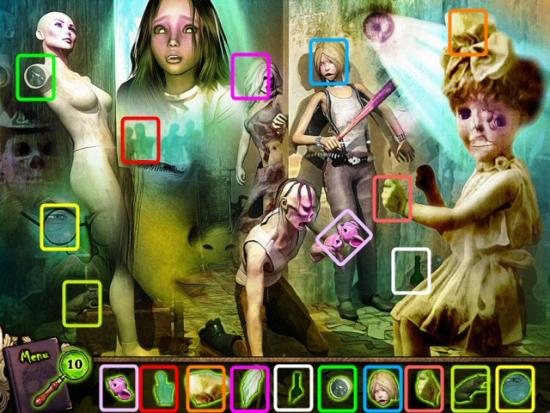
Click on the second Card (1 – with the Rabbit) and find all 16 objects in the Item List (2). Your list may be different or in a different order.
Collect the Face (1), the Magnifying Glass Hint (2) and then click on the third Card (3 – with the Little Girl).
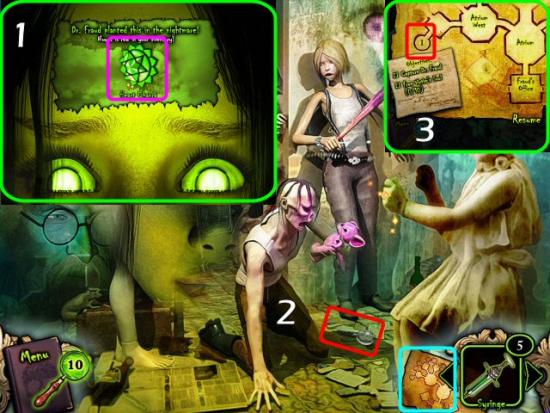
Find all 10 Shapes. Your shapes may be different or in a different order.
Collect the Heart Chakra (1), the Magnifying Glass Hint (2), click on the Map (2) and click on Room 1 (3).
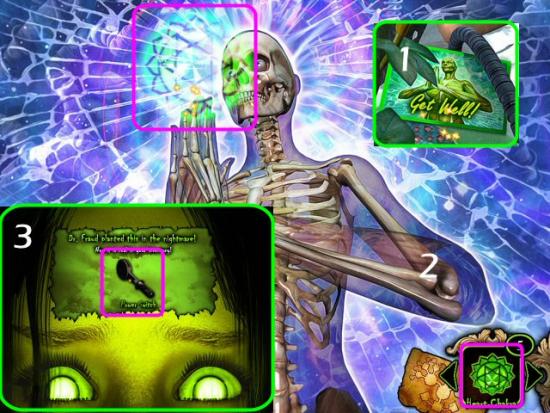
Click on the large Get Well Card (1), use the Heart Chakra in the Chakra space (2) and collect the Power Switch (3).
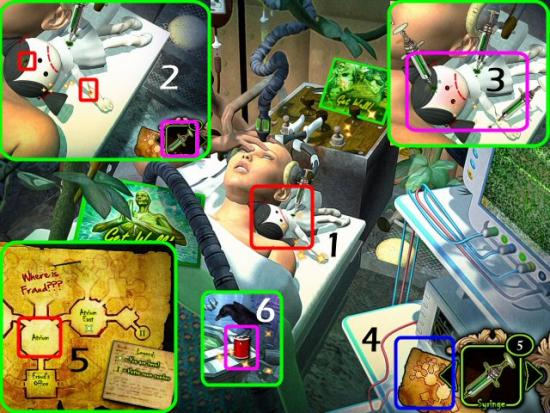
Click on the Voodoo Doll (1), use the 2 Syringes in the 2 Red “X”s (2), collect the Voodoo Doll (3), click on the Map (4), click on Atrium (5) and collect the Needle and Red Thread (6).
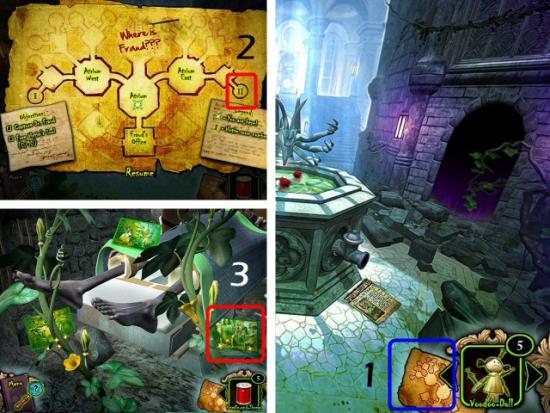
Click on the Map (1), click on Room 2 (2) and click on the third Card (3 – with the Little Girl).
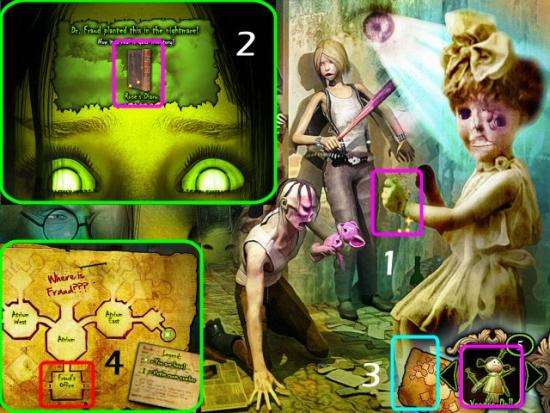
Use the Voodoo Doll on the Little Girl’s Hand (1), collect Rose’s Diary (2), click on the Map (3) and click on Dr. Fraud’s Office (4).
Dr. Fraud’s Office
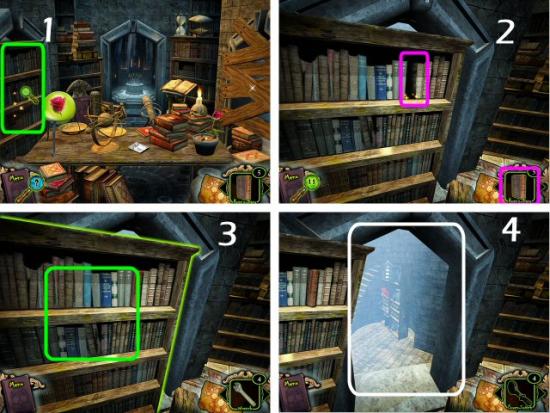
Click on the Bookshelf (1), use Rose’s Diary on the Empty Space (2), click on the Bookshelf (3) and click on the Doorway (4.)
Fraud West
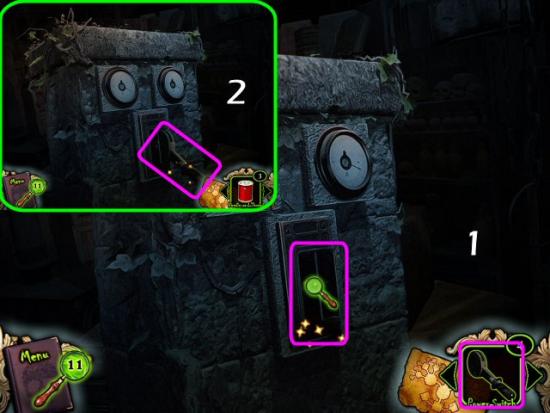
Use the Power Switch on the Control Slot (1) and click on the Handle (2)
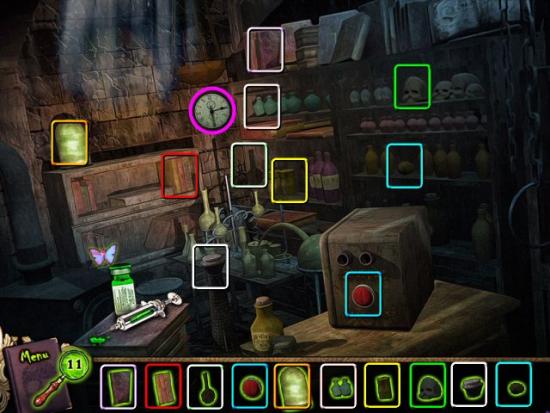
Find all 10 Shapes and collect the Time Lies 3:00 Clock (magenta). You can click on other things in the room, but you can’t do anything with them, yet. Clicking on the Syringe is a replay of the opening nightmare, which you can also access on the Main Menu by clicking on Intro. Click on it if you want; you’ve already seen it. Your shapes may be different or in a different order.
Courtyard West
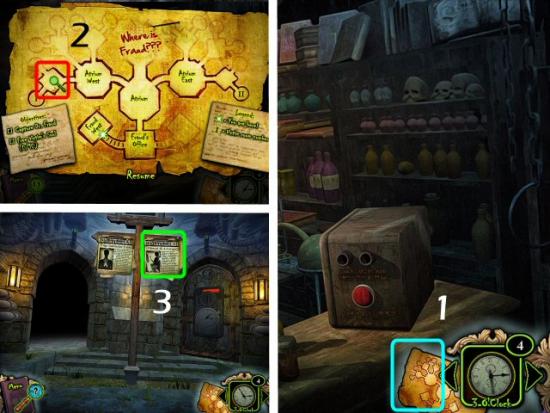
Click on the Map (1), click on the Courtyard west of Atrium West (2) and click on the Newspaper Clipping (3).
Room 3 – Portrait Painter Maurice Medecine
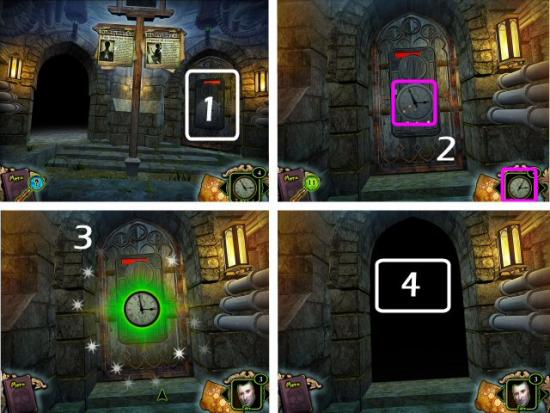
Click on the Door (1), use the Time Lies 3:00 Clock on the Door (2), wait for it to open (3) and click on the Doorway (4).
Find all 10 Shapes (1) and click on the Portraits Card (2). Your shapes may be different or in a different order.
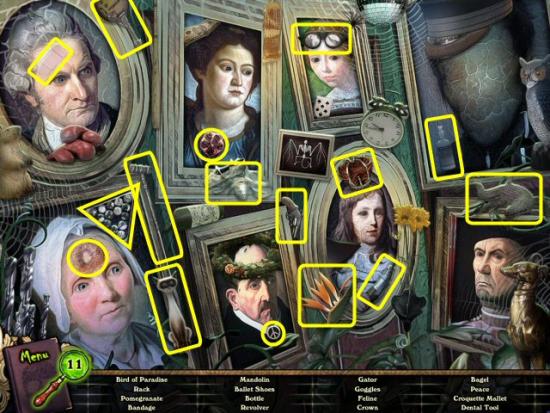
Find all 16 Items in the list. Your list may be different or be in a different order.
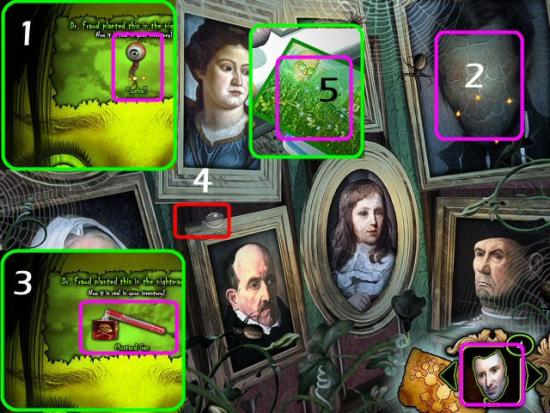
Collect the Eyeball (1), use the Face on the Blank Portrait (2), collect the Mustard Gas (3), the Magnifying Glass Hint (4) and click on the second Card (1 – with Dr. Fraud’s image (5).
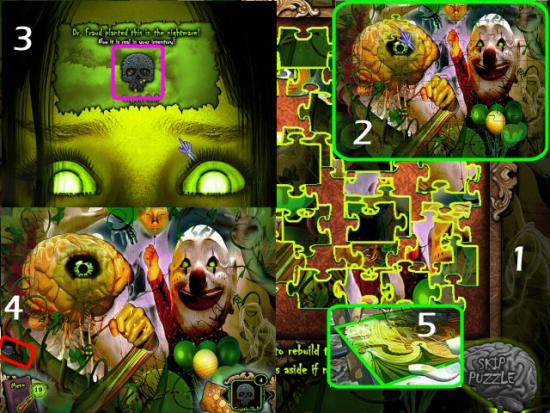
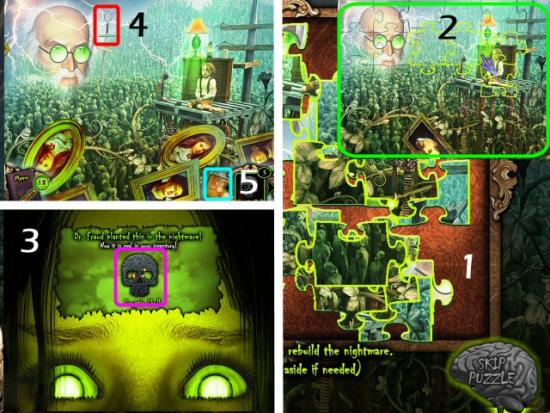
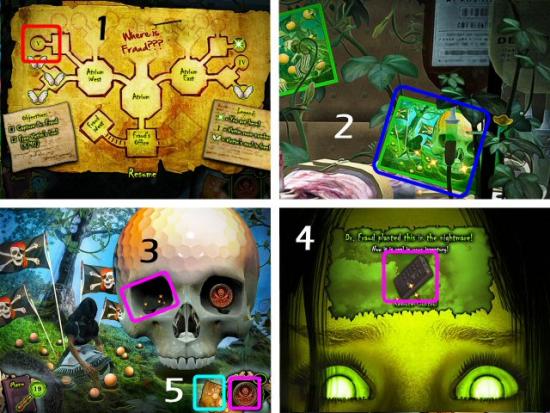
Complete the Jigsaw Puzzle (1). Completed Puzzle (2). Collect the Cryptic Skull (3), collect the Magnifying Glass Hint (4) and click on the Map (5). You may connect jigsaw pieces and then place them as a unit; you don’t need to rotate any pieces.
Room 2 – Doll Maker
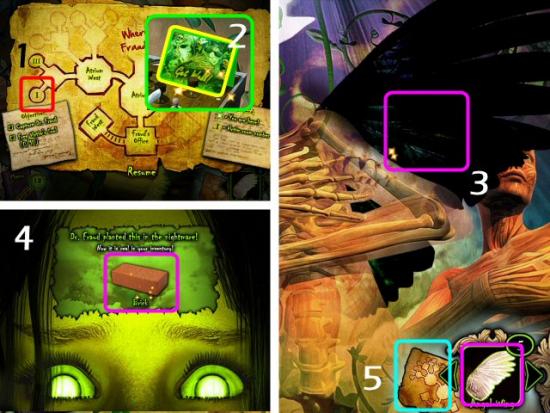
Click on Room 2 (1), click on the first Card (2 – with the Skull), use the Mustard Gas on the Bees (3), collect the White Wing (4) and click on the Map (5).
Room 1 – Yoga Instructor Sarah Pale
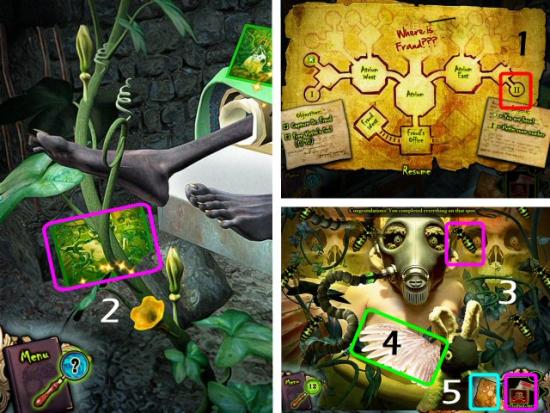
Click on Room 1 (1), click on the small Card (2), use the White Wing on the Yoga Instructor (3), collect the Brick (4) and click on the Map (5). You have now released the first victim’s soul.
Dr. Fraud’s Office
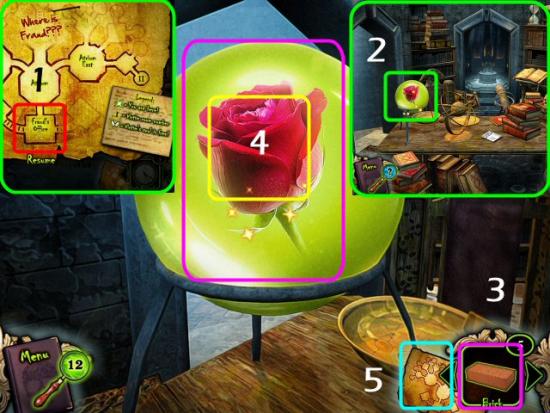
Click on Dr. Fraud’s Office (1), click on the Water Globe (2), use the Brick on the Globe (3), collect the Rose (4) and click on the Map (5).
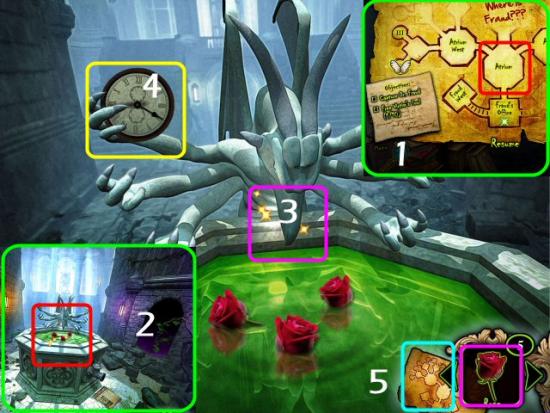
Click on the Atrium (1), click on the Fountain (2), use the Rose on the Fountain (3), collect the Time Lies 4:00 Clock (4) and click on the Map (5).
Victim #2
Release the soul of the second victim.
Atrium East
Click on Atrium East (1), collect the Dial from the Raven (2), click on the Doorway (3), read the Newspaper Clipping (4) and click on the Door (5).
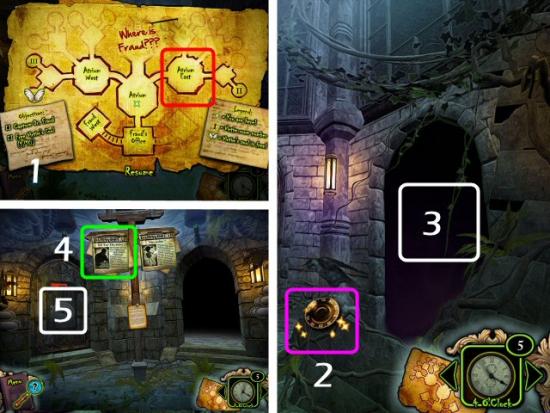
Use the Time Lies 4:00 Clock on the Door (1), wait for it to open (2) and click on the Doorway (3).
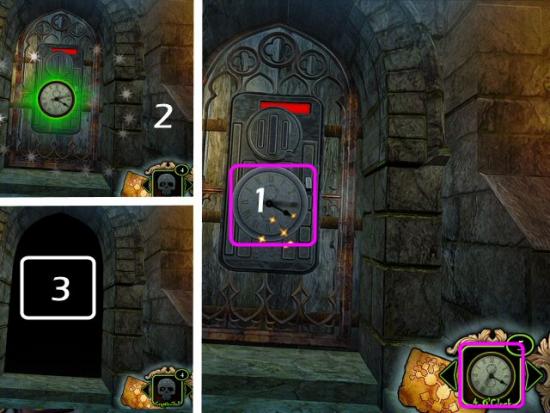
Room 4 – Children’s Book Writer Paul Green
Find all 10 Shapes (1) and click on the first Card (2 – with Bodies).
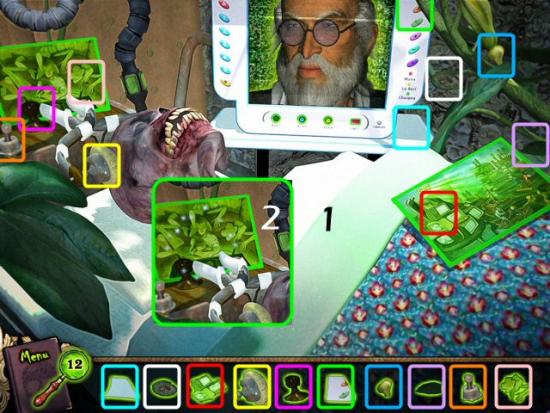
Find all 16 Items. Your list may be different or in a different order.
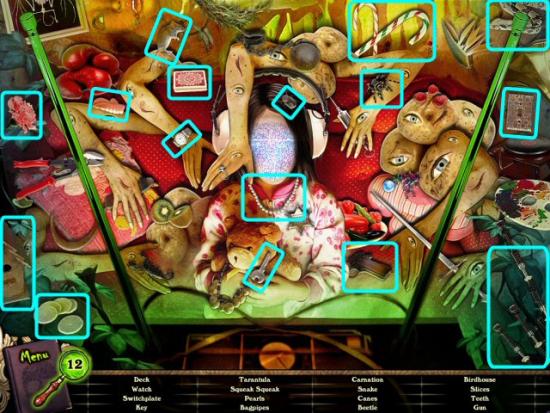
Collect the Piece of Painting (1), the Magnifying Glass Hint (2) and click on the second Card (3 – with Televisions).
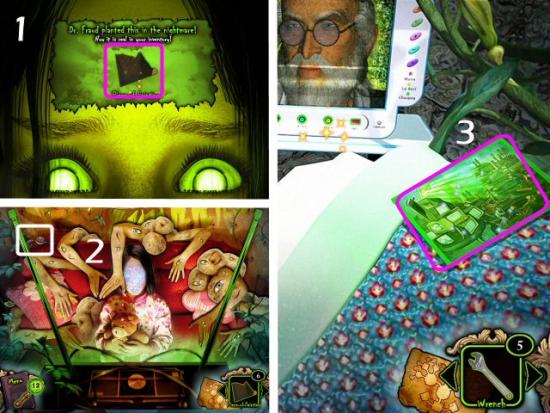
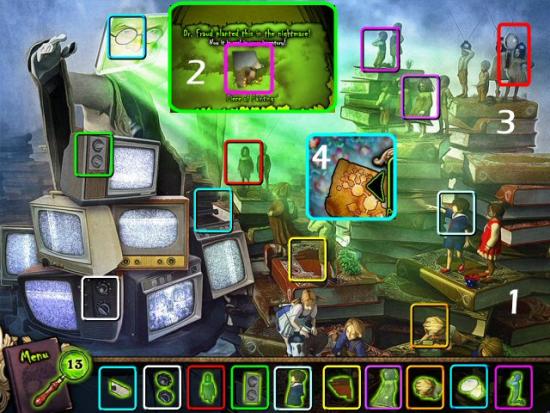
Find all 10 Shapes (1), collect the Piece of Painting (2), the Magnifying Glass Hint (3) and click on the Map (4).
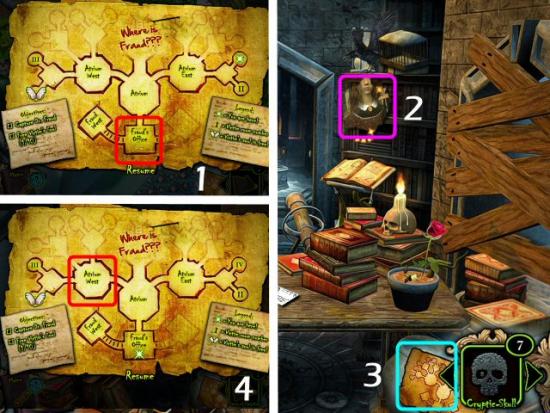
Dr. Fraud’s Office
Click on Dr. Fraud’s Office (1), collect the Piece of Painting (2), click on the Map (3) and click on Atrium West (4).
Atrium West
Click on the Door (1), use the Cryptic Skeleton on the Door (2), wait for it to open (3) and click on the Doorway (4).
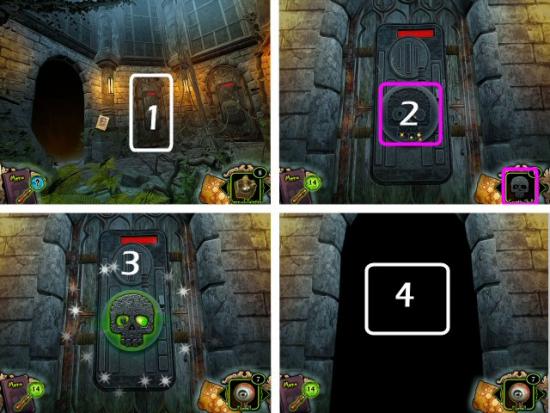
Collect the Piece of Painting (1), click on the Map (2) and click on Fraud West (3), collect the Piece of Painting (4), click on the Map (5) and click on Room 3 (6).
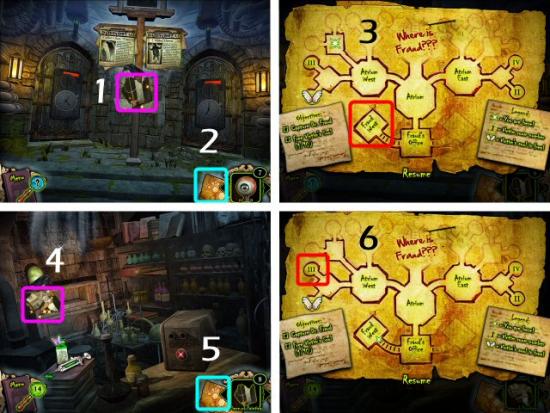
Room 3 – Portrait Painter Maurice Medecine
Use the 5 Pieces of Painting on the Unfinished Painting (1), collect the Moldy Carrot (2) and click on the Map (3).
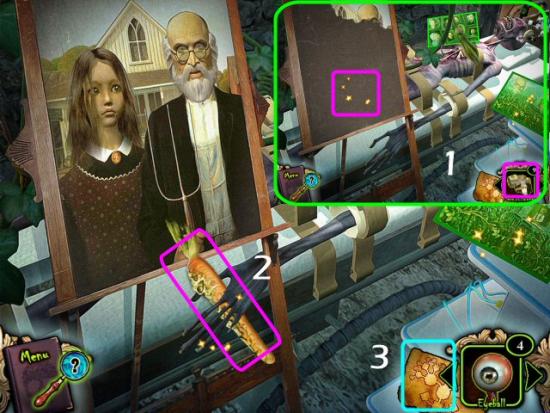
Room 2 – Doll Maker
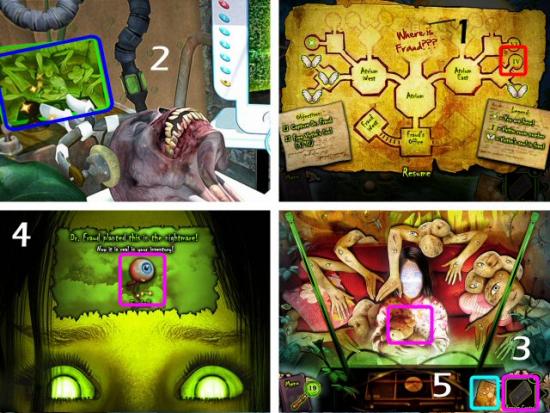
Click on Room 2 (1), click on the last Card (2), use the Moldy Carrot on the Rabbit (3) and collect the Pruning Shears (4). You have now released the second victim’s soul.
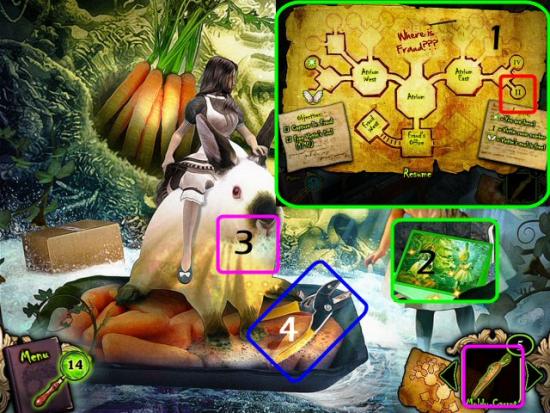
Click on the Map (1), click on Dr. Fraud’s Office (2) and click on the Potted Rose (3)
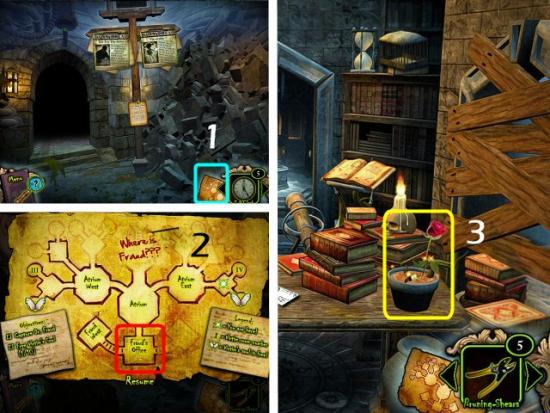
Use the Pruning Shears on the Rose (1), collect the Rose (2), click on the Map (3), click on Atrium (4) and click on the Fountain (5).
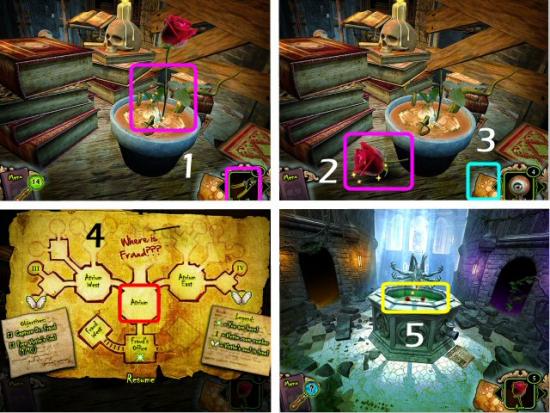
Atrium
Use the Rose on the Fountain (1), collect the Time Lies 5:00 Clock (2), click on the Map (3) and click on the Courtyard northwest of Atrium West (4).
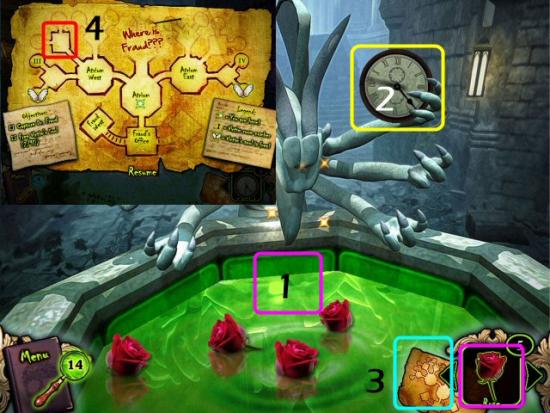
Victim #3
Release the soul of the third victim.
Room 5 – Golf Legend Bobcat Irons
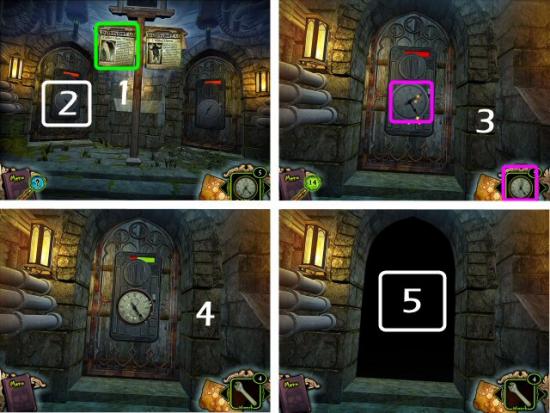
Click on the Newspaper Clipping (1), click on the Door (2), use the Time Lies 5:00 Clock on the Door (3), wait until it opens (4) and click on the Doorway (5).
Find all 10 Shapes (1) and click on the first Card (2 – with the Frog). Your shapes may be different or in a different order.
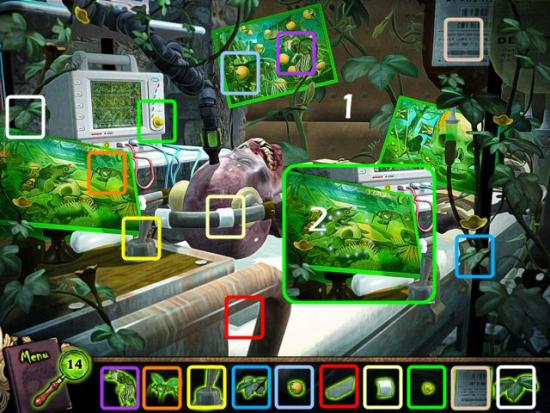
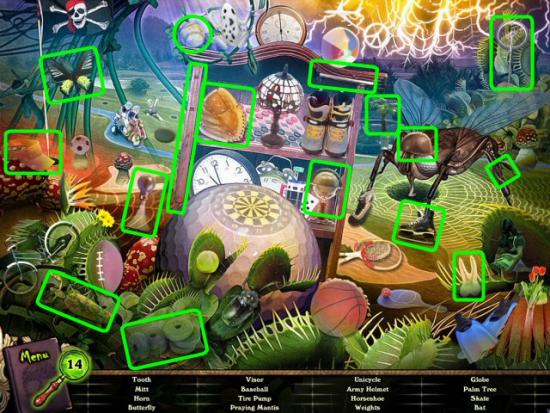
Find all 16 Items. Your items may be different or in a different order.
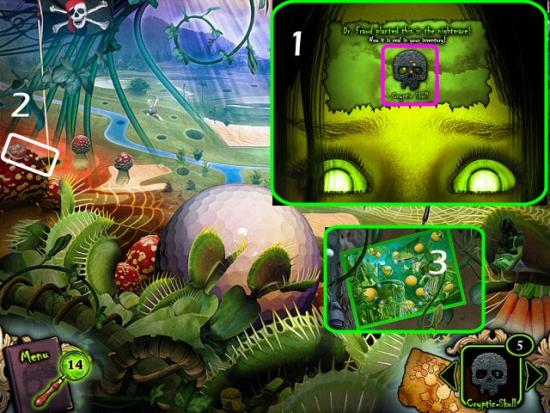
Collect the Cryptic Skull (1), the Magnifying Glass Hint (2) and click on the second Card (3 – with Golf Balls).
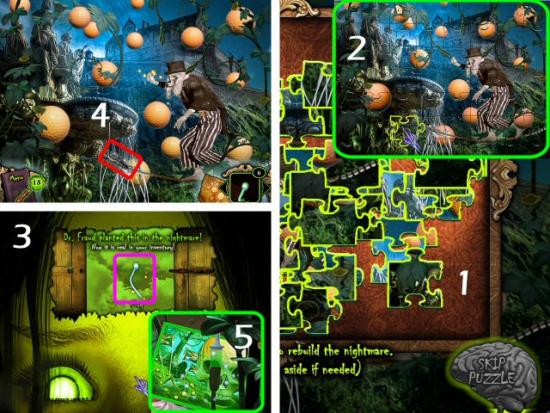
Complete the Jigsaw Puzzle (1). Completed Puzzle (2). Collect the Plug (3), the Magnifying Glass Hint (4) and click on the third Card (5 – with the large Golf Ball). You may connect jigsaw pieces and then place them as a unit; you don’t need to rotate any pieces.
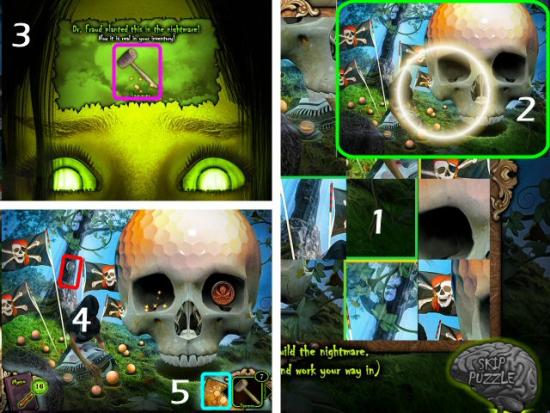
Click on one piece then another to switch their places and complete the Puzzle (1). Completed Puzzle (2). Collect the Hammer (3), the Magnifying Glass Hint (4) and click on the Map (5).
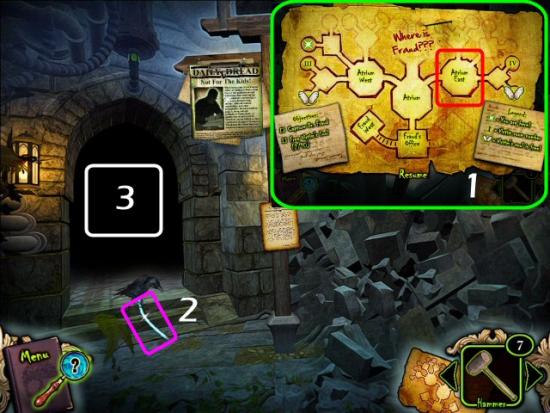
Click on Atrium East (1), collect the Plug (2) and click on the Doorway (3).
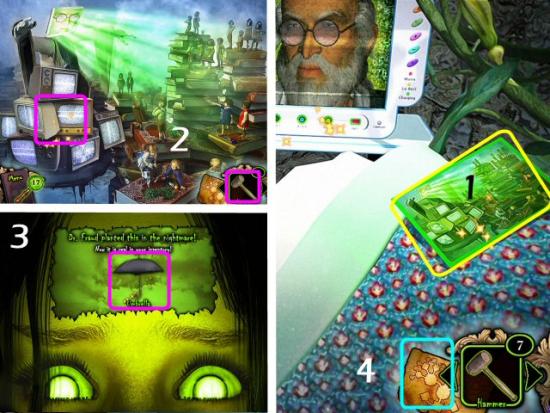
Click on the right Card (1 – with Televisions), use the Hammer on the Televisions (2), collect the Umbrella (3) and click on the Map (4).
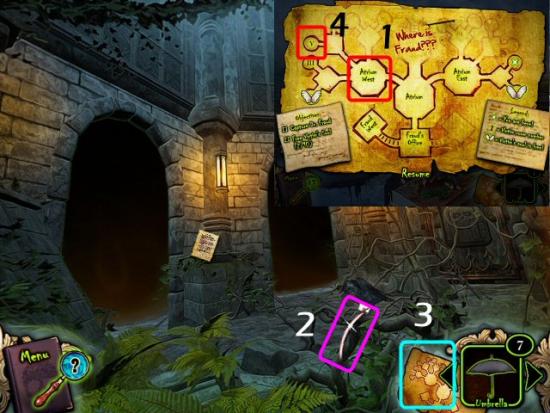
Click on Atrium West (1), collect the Plug (2), click on the Map (3) and click on Room 5 (4).
Room 5 – Golf Legend Bobcat Irons
Click on the middle Card (1 – with the Golf Balls), use the Umbrella on the Skeleton (2), collect the Plug (3), click on the Map (4) and click on Room 4 (5).
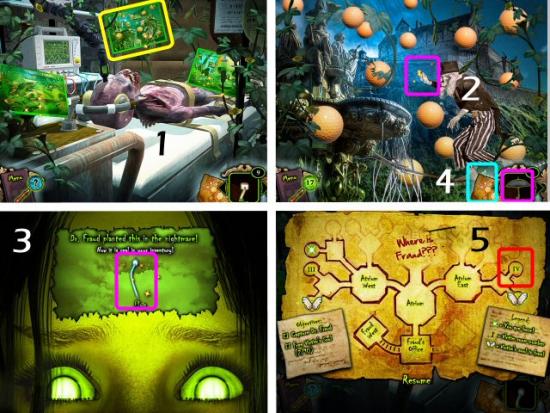
Room 4 – Children’s Book Writer Paul Green
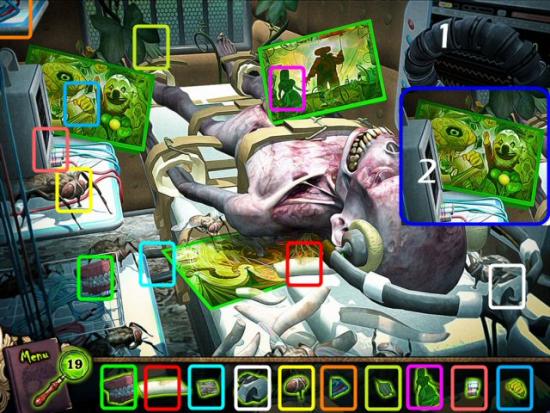
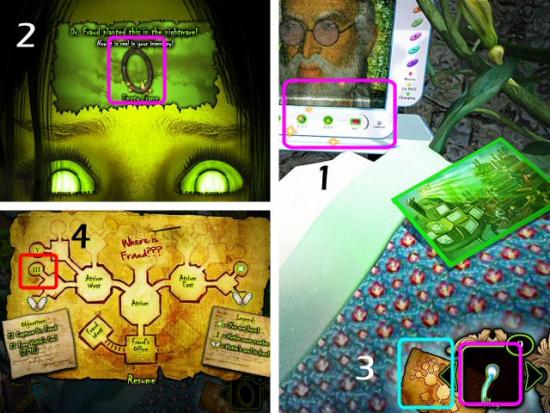
Use the 4 Plugs on the Vitals Monitor (1), collect the Empty Frame (2), click on the Map (3) and click on Room 3 (4). Your have now release
Room 3 – Portrait Painter Maurice Medecine
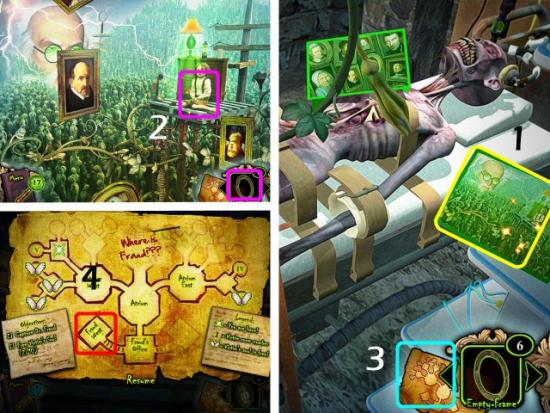
Click on the last Card (1), use the Empty Frame on the Boy (2), collect the Framed Picture, click on the Map (3) and click on Fraud West (4). You have now released the third victim’s soul.
Fraud West
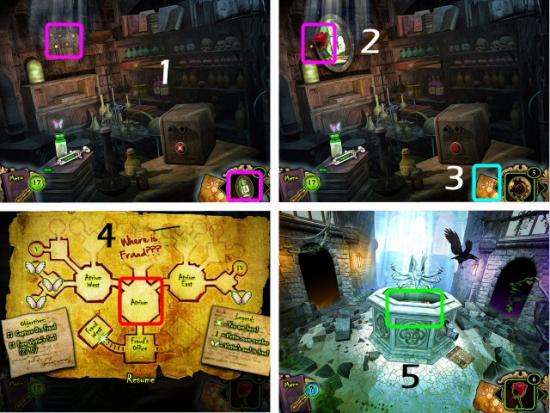
Use the Framed Picture on the Wall (1), collect the Rose (2), click on the Map (3) and click on the Atrium (4).
Atrium
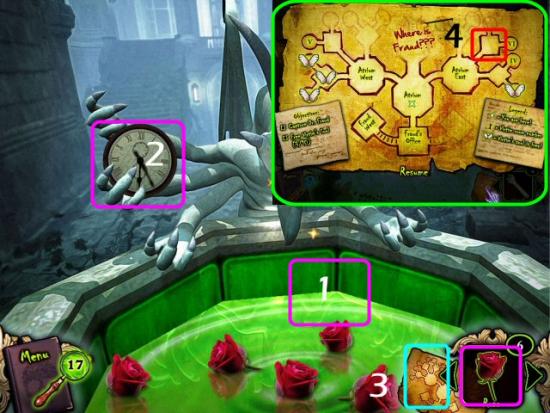
Use the Rose on the Fountain (1), collect the Time Lies 6:00 Clock (2), click on the Map (3) and click on the Courtyard northeast of Atrium East (4).
Click on the Door (1), use the Cryptic Skeleton on the Door (2), wait for the Door to open (3) and click on the Doorway (4).
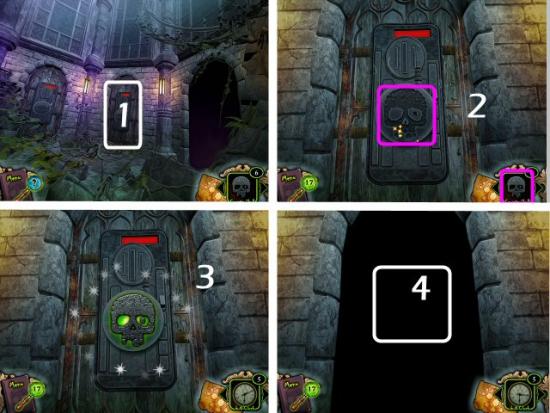
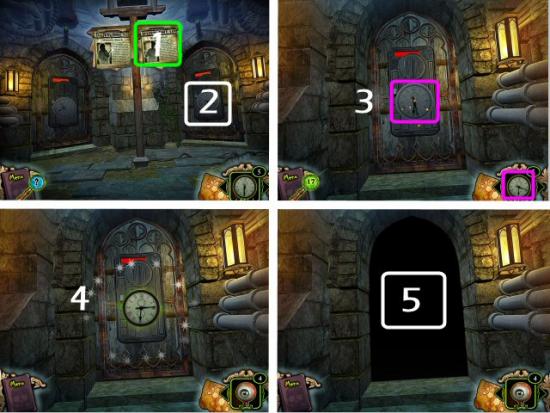
Read the Newspaper Clipping (1), click on the Door (2), use the Time Lies 6:00 Clock on the Door (3), wait for it to open (4) and click on the Doorway (5).
Victim #4
Release the soul of the fourth victim.
Room 6 – Television Chef Emil
Find all 10 Shapes (1) and click on the large Card (2). Your shapes may be different or in a different order.
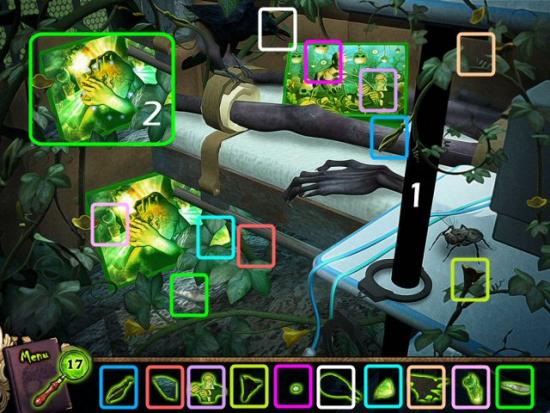
Find all 10 matching Hexagons. The hexagons morph by zooming in and out, and may look different, but they’ll be in the same location. Your hexagons may be different or in a different order.
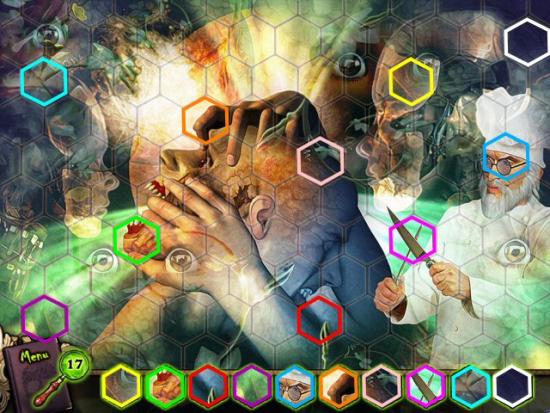
Collect the Crowbar (1), the Magnifying Glass Hint (2) and click on the next Card (3).
Click and drag the columns and rows (1) to form the Image. Completed Image (2). Collect the Coin (3), the Magnifying Glass Hint (4) and click on the Map (5).
Click on Room 5 (1), click on the right Card (2), use the Coin on the Eye Socket (3), collect the Remote Control (4) and click on the Map (5).
Room 4 – Children’s Book Writer Paul Green
Click on Room 4 (1), click on the last Card (2), use the Remote Control on the Little Girl (3), collect the Eyeball (4) and click on the Map (5). You have now released the fourth victim’s soul.
Fraud West
Click on Fraud West (1), click on the Viewing Machine (2), press the Red Button (3), use the 2 Eyeballs on the 2 Spikes (4), collect the Rose (5) and click on the Map (6).
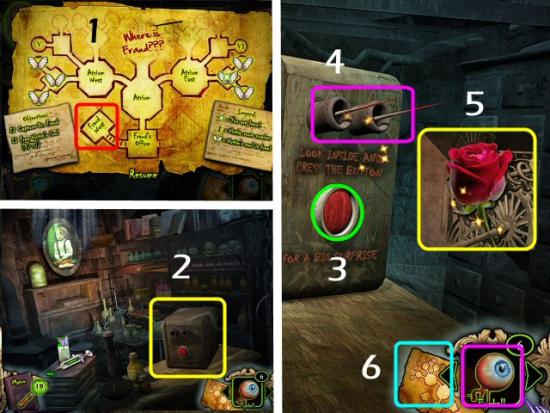
Atrium
Click on the Atrium (1), click on the Fountain (2), use the Rose on the Fountain (3), collect the Time Lies 7:00 Clock (4) and click on the Map (5).
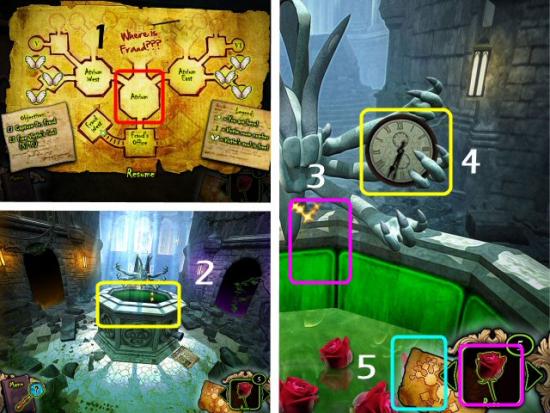
Victim #5
Release the soul of the fifth victim.
Dr. Fraud’s Office
Click on Dr. Fraud’s Office (1), click on the Boards (2), use the Crowbar on the Boards (3) and click on the Doorway (4).
Fraud East
Find all 10 Shapes. Your shapes may be different or in a different order.
Room 7 – Carnival Clown Mr. Happy
Click on the Map (1) and click on the Courtyard north of Atrium West (2).
Click on the Newspaper Clipping (1), click on the Door (2), use the Time Lies 7:00 Clock on the Door (3), wait for the Door to open (4) and click on the Doorway (5).
Find all 10 Shapes (1) and click on the first Card (2 – with the Clown Face). Your shapes may be different or in a different order.
Complete the Jigsaw Puzzle (1). Completed Puzzle (2). Collect the Cryptic Skull (3), the Magnifying Glass Hint (4) and click on the second Card (5 – with the Circus Tents). You may connect jigsaw pieces and then place them as a unit; you don’t need to rotate any pieces.
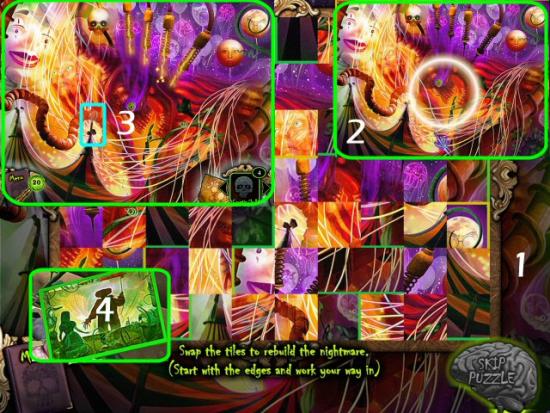
Click on one piece then another to switch their places and complete the Puzzle (1). Completed Puzzle (2). Collect the Magnifying Glass Hint (3) and click on the third Card (4).
Find all 10 Shapes. Your shapes may be different or in a different order.
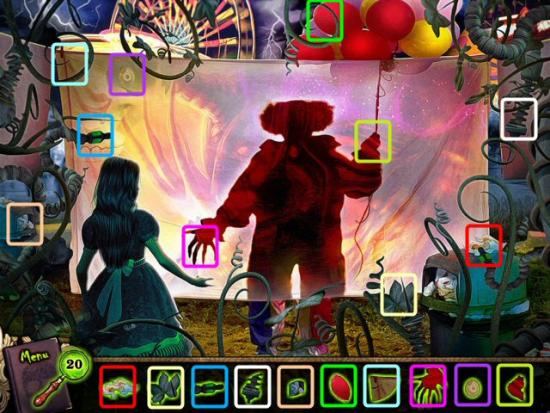
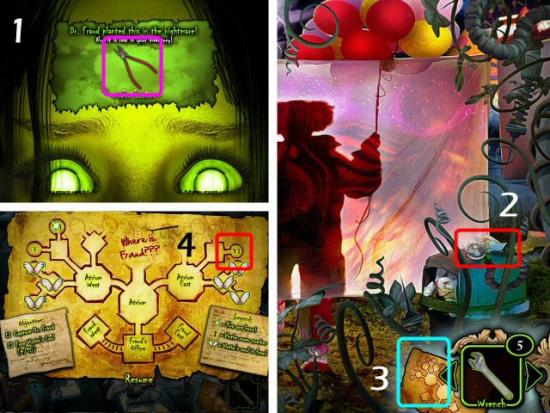
Collect the Wire Cutters (1), the Magnifying Glass Hint (2), click on the Map (3) and click on Room 6 (4).
Room 6 – Television Chef Emil
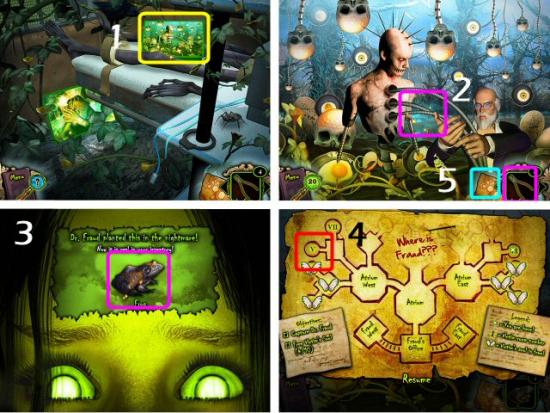
Click on the right Card (1), use the Wire Cutters on the Figure (2), collect the Frog (3), click on the Map (4) and click on Room 5 (5).
Room 5 – Golf Legend Bobcat Irons
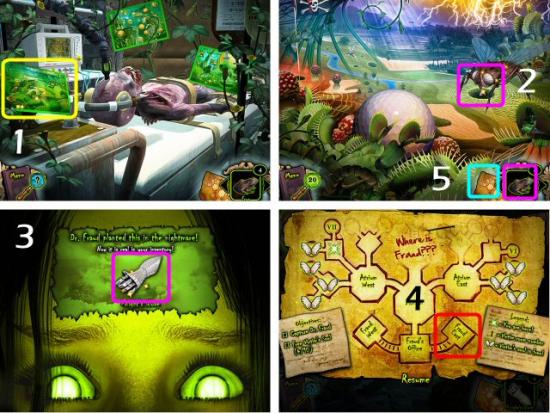
Click on the last Card (1), use the Frog on the Fly (2), collect the Knight’s Glove (3), click on the Map (4) and click on Fraud East (5). You have now released the fifth victim’s soul.
Fraud East
Click on the Skeleton (1), use the Knight’s Glove on the Skeleton (2), click on the Map (3) and click on the Atrium (4).
Atrium
Use the Rose on the Fountain (2), collect the Time Lies 8:00 Clock (3), click on the Map (4) and click on the Courtyard northeast of Atrium East (5).
Victim #6
Release the soul of the sixth victim.
Click on the Newspaper Clipping (1), click on the Door (2), use the Time Lies 8:00 Clock on the Door (3), wait for it to open (4) and click on the Doorway (5).
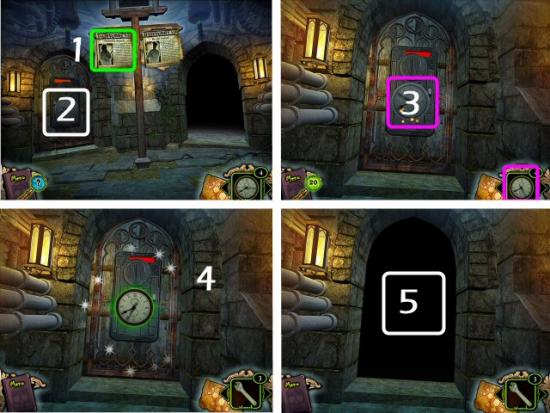
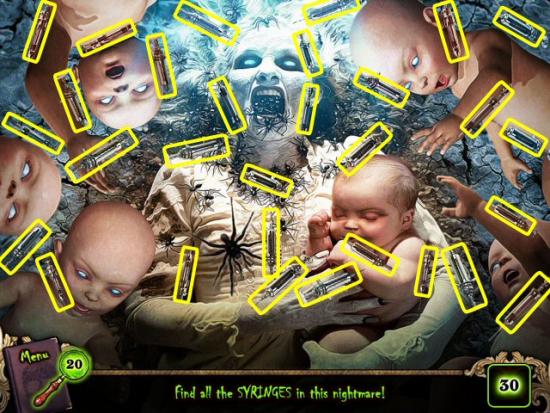
Find all 10 Shapes (1) and click on the first Card (2 – with the Babies). Your shapes may be different or in a different order.
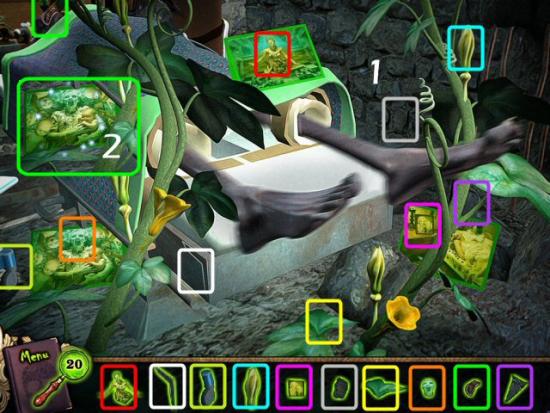
Find all 30 Syringes.
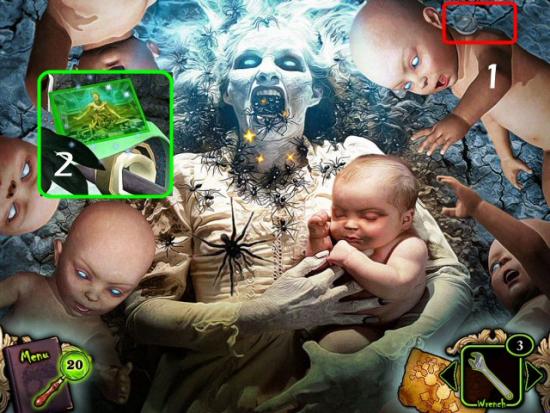
Collect the Magnifying Glass Hint (1) and click on the second Card (2 – with the Woman).
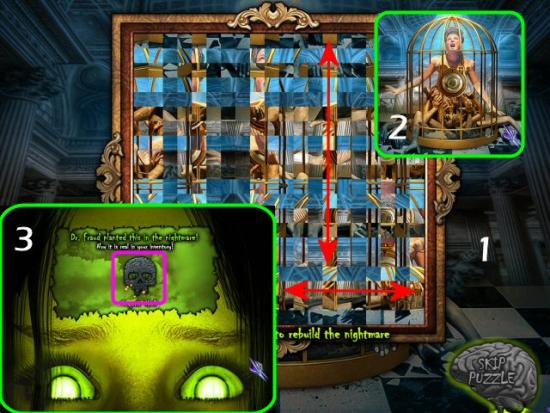
Click and drag the columns and rows (1) to form the Image. Completed Image (2). Collect the Cryptic Skull (3).
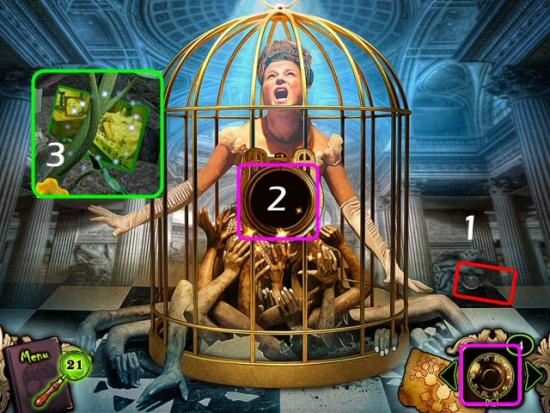
Collect the Magnifying Glass Hint (1), use the Dial on the Lock (2) and click on the third Card (3).
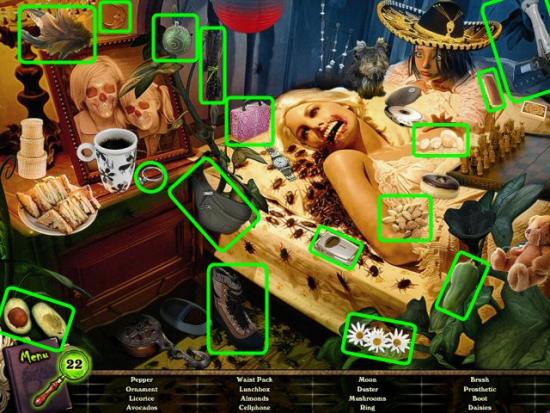
Find all 16 Items in the list.
Collect the Jar of Tears (1), the Magnifying Glass Hint (2), click on the Map (3) and click on Room 7 (4).
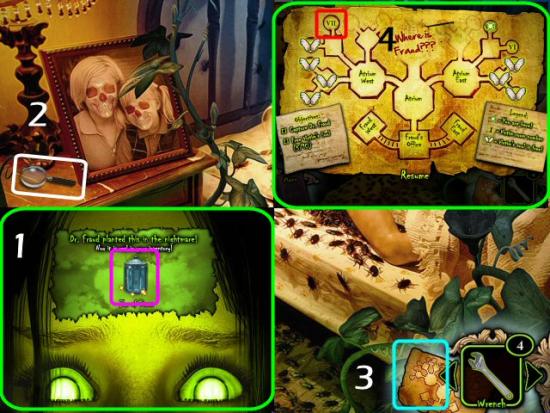
Room 7 – Carnival Clown Mr. Happy
Click on the second Card (1), use the Jar of Tears on the Power Coils (2), collect the Chef’s Hat (3), click on the Map (4) and click on Room 6 (5).
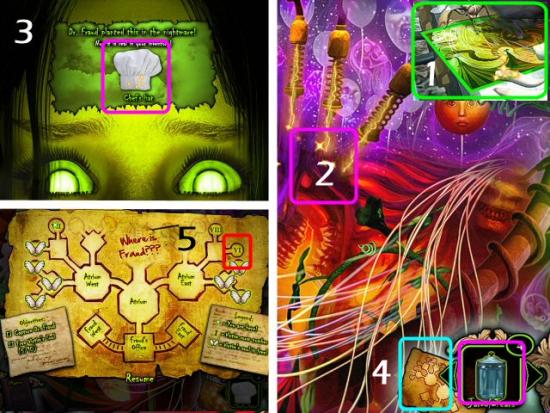
Room 6 – Television Chef Emil
Click on the last Card (1), use the Chef’s Hat on Chef Fraud (2), collect the Knife (3), click on the Map (4) and click on Fraud East (5). You have now released the sixth victim’s soul.
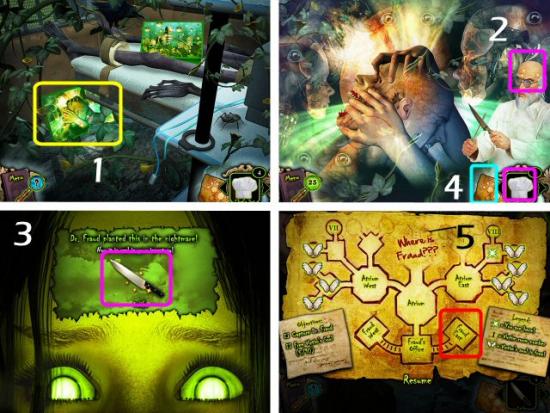
Fraud East
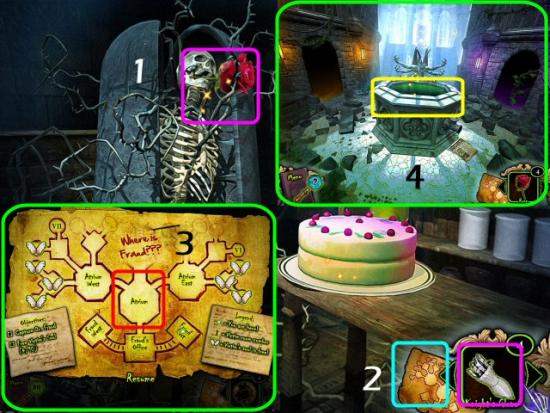
Use the Knife on the Cake (1), collect the Rose (2), click on the Map (3), click on Atrium (4) and click on the Fountain (5).
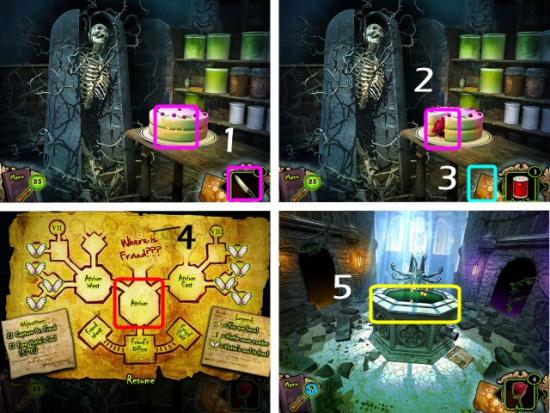
Atrium
Use the Rose on the Fountain (1), collect the Time Lies 9:00 Clock (2), click on the Map (3) and click on the Courtyard north of Atrium West.
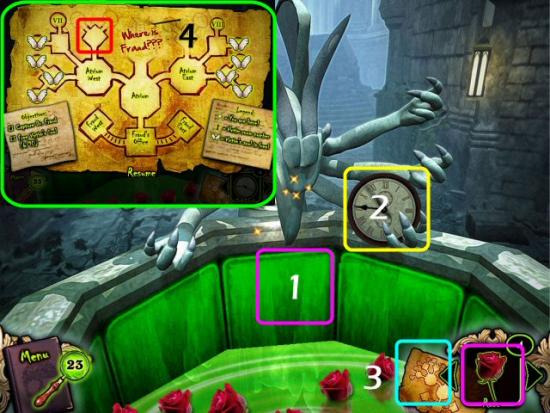
Victim #7
Release the soul of the seventh victim.
Atrium West
Click on the Door (1), use the Cryptic Skull on the Door (2), wait for it to open (3) and click on the Doorway (4).
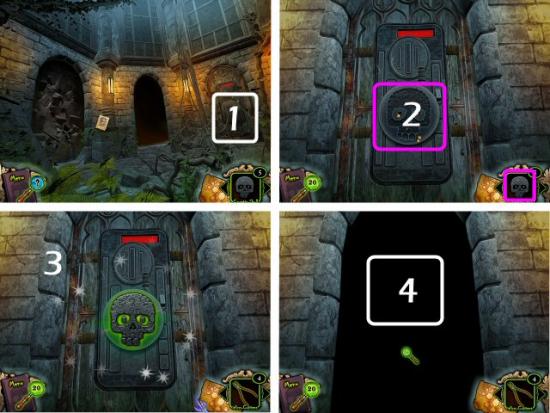
Room 9 – Romance Novelist Penny Binder
Click on the Newspaper Clipping (1), click on the Door (2), use the Time Lies 9:00 Clock on the Door (3), wait for it to open (4) and click on the Doorway (5).
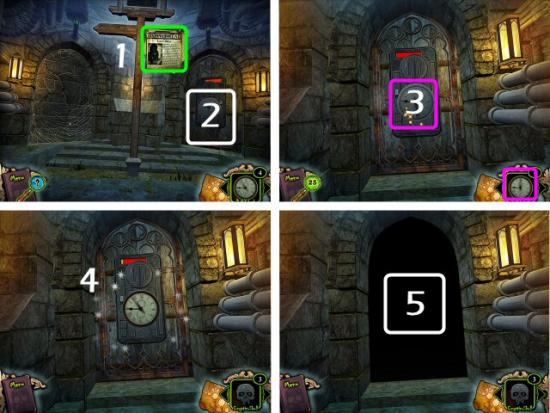
Find all 10 Shapes (1) and click on the first Card (2 – with a Heart).
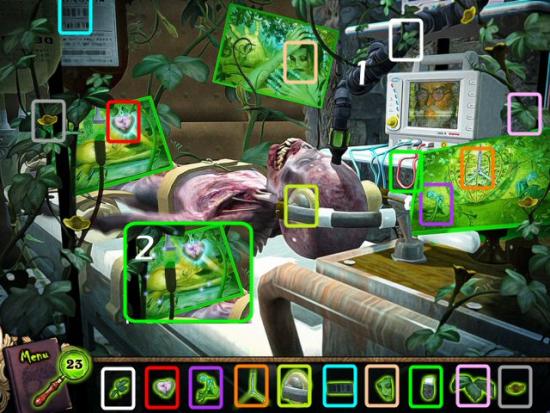
Complete the Jigsaw Puzzle (1). Completed Puzzle (2). Collect the Magnifying Glass Hint (3) and click on the second Card (4 – with the Hands). You may connect jigsaw pieces and then place them as a unit; you don’t need to rotate any pieces.
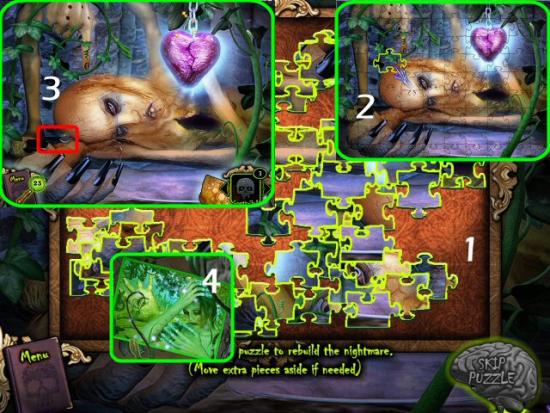
Find all 30 Scalpels.
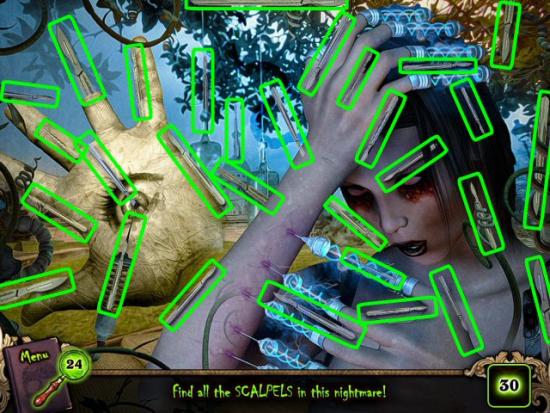
Collect the Magnifying Glass Hint (1) and click on the third Card (2 – with the Clock).
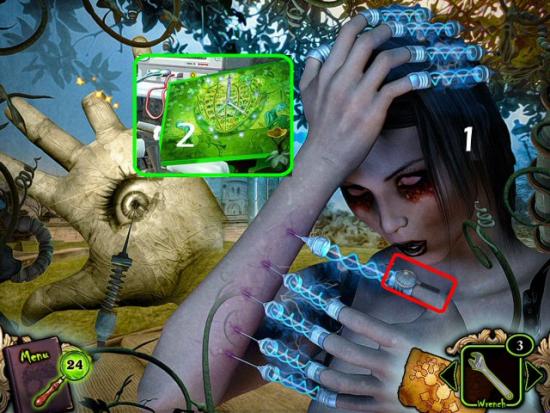
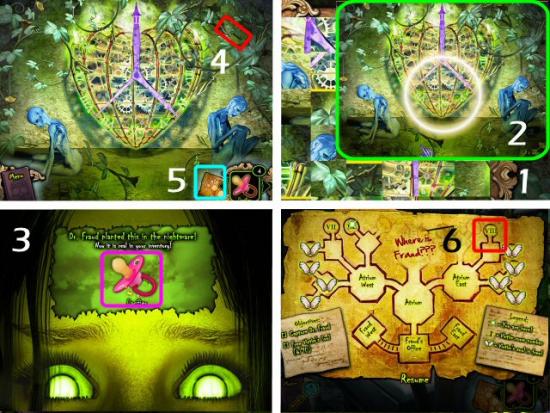
Click on one piece then another to switch their places and complete the Puzzle (1). Completed Puzzle (2). Collect the Pacifier (3), the Magnifying Glass Hint (4), click on the Map (5) and click on Room 8 (6).
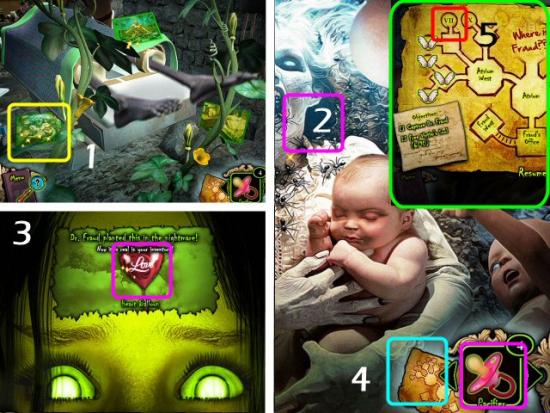
Room 8 – Midwife
Click on the first Card (1 – with the Babies), use the Pacifier on the Woman’s Mouth (2), collect the Heart Balloon (3), click on the Map (4) and click on Room 7 (5).
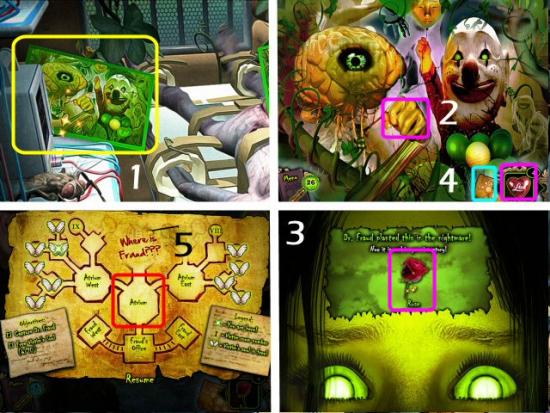
Click on the last Card (1 – Clown Face), use the Heart Balloon on the Hand (2), collect the Rose (3), click on the Map (4) and click on Atrium (5). You have now released the seventh victim’s soul.
Atrium
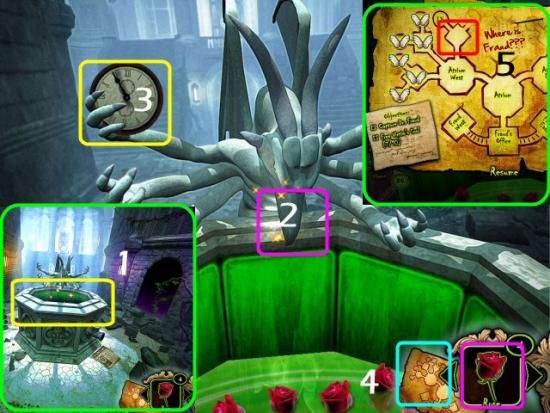
Use the Rose on the Fountain (1), collect the Time Lies 11:00 Clock (2), click on the Map (3) and click on the Courtyard north of Atrium West (4).
Victim #8
Release the soul of the eighth victim.
Room 9 – Romance Novelist Penny Binder
Collect the Bolt Cutters (1) and click on the Doorway (2).
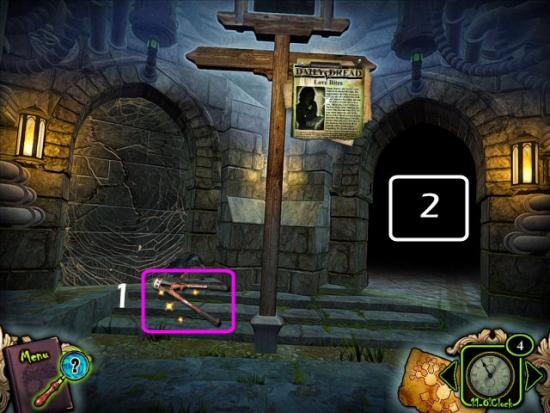
Click on the first Card (1 – with the Heart), use the Bolt Cutters on the Heart (2), use the Needle and Thread on the Chest (3), collect the Combination (4), click on the Map (5) and click on Room 8 (6).
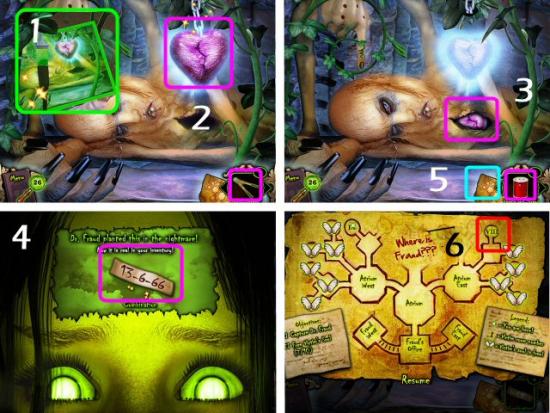
Room 8 – Midwife
Click on the last Card (1), use the Combination on the Lock (2), collect the Rose (3), click on the Map (4) and click on Atrium (5). You have now released the eighth victim’s soul.
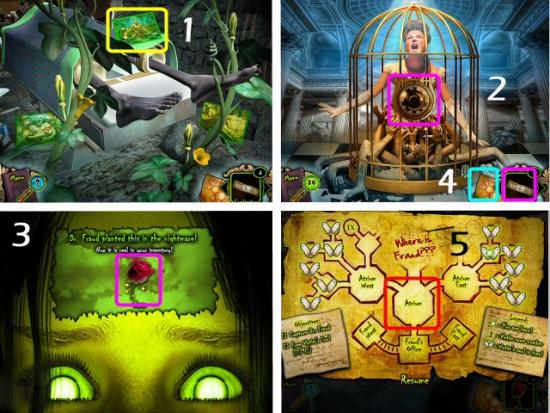
Atrium
Click on the Fountain (1), use the Rose on the Fountain (2), collect the Time Lies 10:00 Clock (3), click on the Map (4) and click on Atrium East (5).
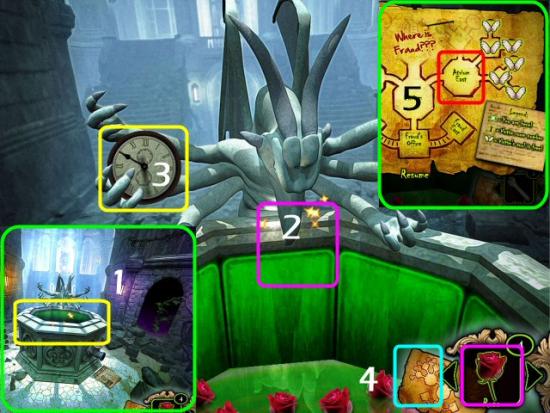
Victim #9
Release the soul of the ninth victim.
Atrium East
Click on the Door (1), use the Cryptic Skull on the Door (2), wait for it to open (3) and click on the Doorway (4).
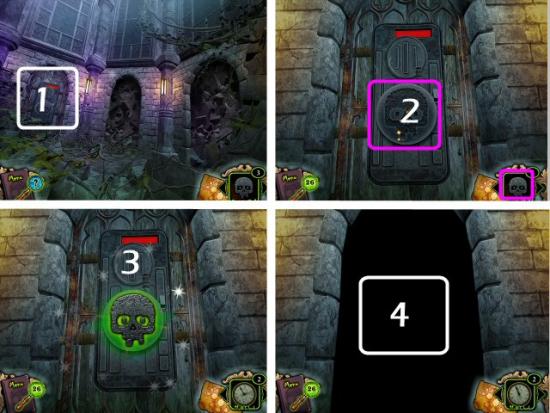
Click on the Newspaper Clipping (1), click on the Door (2), use the Time Lies 10:00 Clock on the Door (3), wait for it to open (4) and click on the Doorway (5).
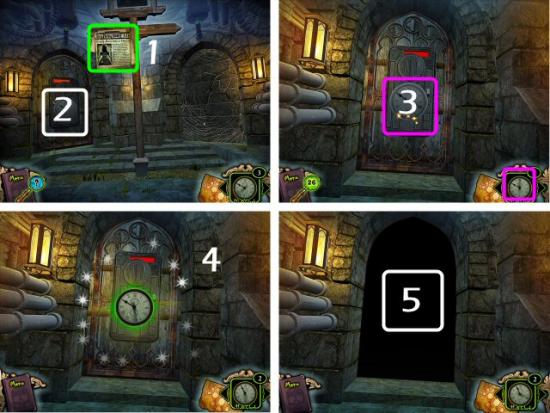
Room 10 – Mystery Victim
Find all 10 Shapes (1) and click on the first Card (2 – with the Hands). Your shapes may be different or in a different order.
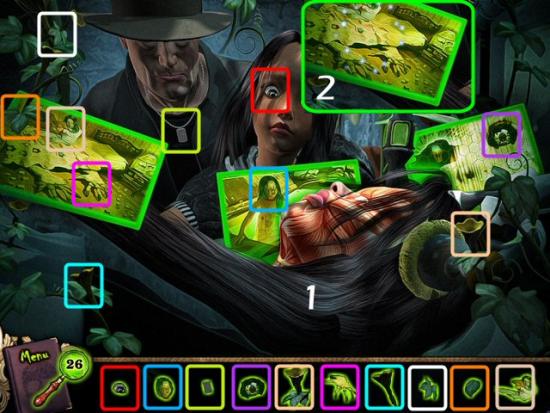
Find all 16 Items in the list. Your items may be different or in a different order.
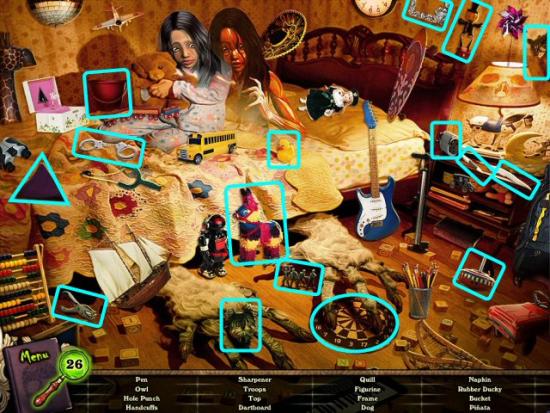
Collect the Ring Finger (1), the Magnifying Glass Hint (2) and click on the second Card (3).
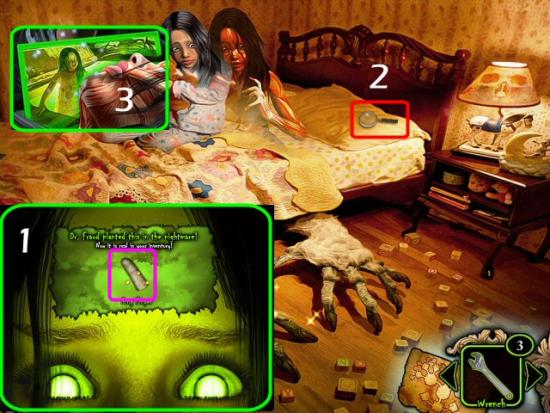
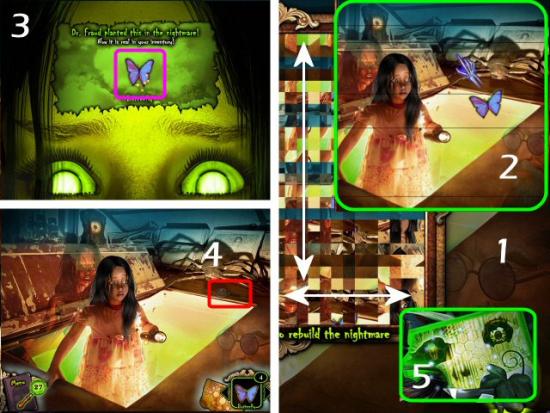
Click on one piece then another to switch their places and complete the Puzzle (1). Completed Puzzle (2). Collect the Butterfly (3), the Magnifying Glass Hint (4) and click on the third Card (5).
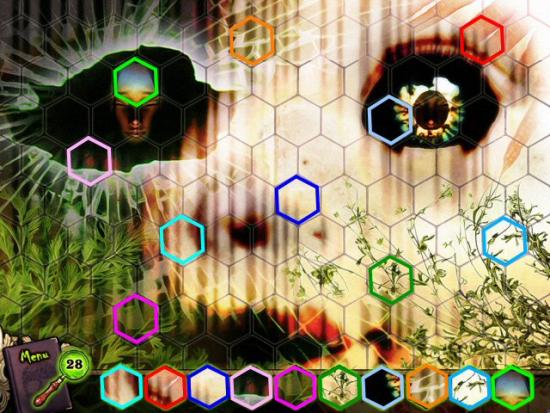
Find all 10 Hexagons. Your hexagons may be different or in a different order.
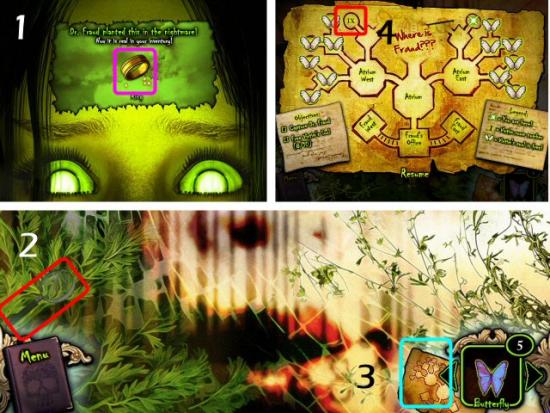
Collect the Ring (1), the Magnifying Glass Hint (2), click on the Map (3) and click on Room 9 (4).
Click on the last Card (1), use the Finger on the Hand (2), use the Ring on the Finger (3), collect the Rose (4), click on the Map (5) and click on Atrium (6). You have now released the ninth victim’s soul.
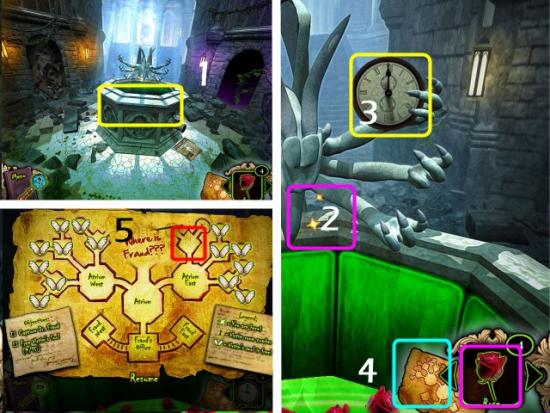
Atrium
Click on the Fountain (1), use the Rose on the Fountain (2), collect the Time Lies 12:00 Clock (3), click on the Map (4) and click on the Courtyard north of Atrium East (5).
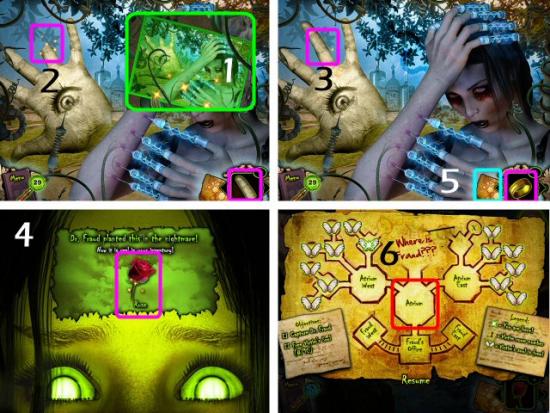
victim #10
Release the soul of the tenth victim.
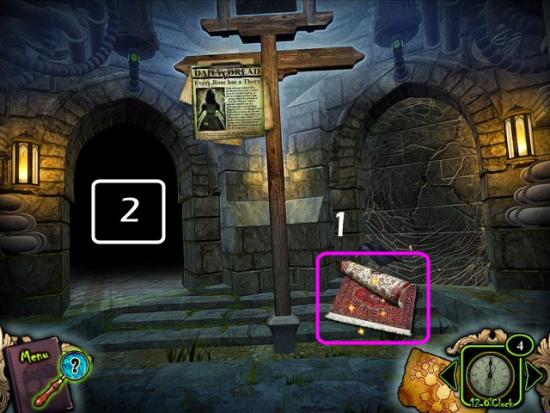
Room 10 – Mystery Victim
Collect the Rug (1) and click on the Doorway (2).
Click on the first Card (1), use the Rug on the Floor (2), collect the Batteries (3), Dr. Fraud takes them back (4), click on the Map (5) and click on Fraud West (6).
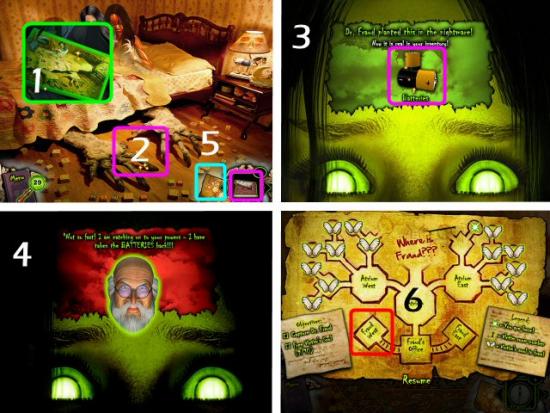
Fraud West
Collect the Batteries (1), click on the Map (2) and click on Room 10 (3).
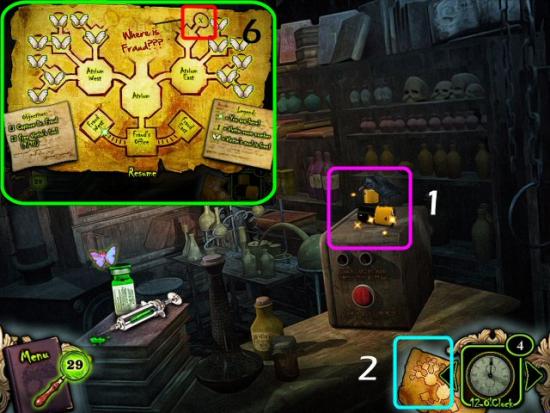
Room 10 – Mystery Victim
Click on the last Card (1), use the Batteries on the Flashlight (2) and collect the Rose (3). You have now released the soul of the tenth victim…or did you do something else?
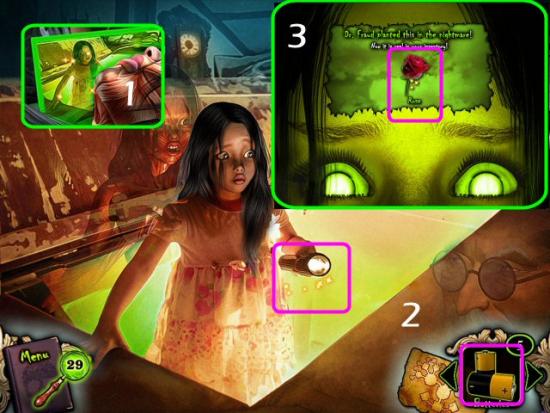
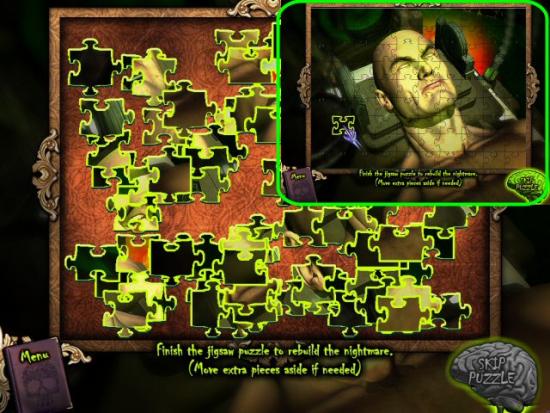
It seems our Mystery Victim, Rose’s clone, reanimated and came after Detective Ravenwood. Complete the Jigsaw Puzzle to continue.
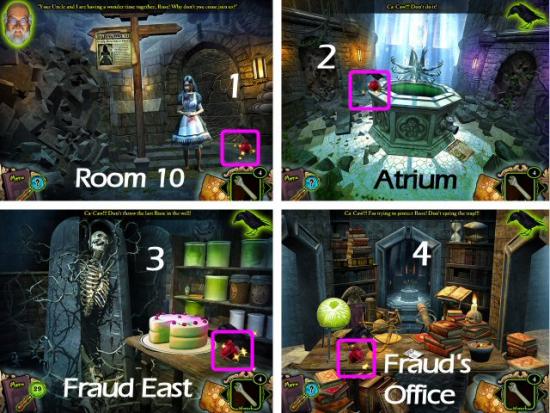
The Last Rose
You’ll follow the Raven through 4 locations; each time he’s telling you not to put the last Rose in the Fountain. Click on the Rose and the Raven will fly away. Follow him to Room 10 (1), Atrium (2), Fraud East (3) and Fraud’s Office (4). You can follow him by clicking through the areas, or by clicking on the Map to choose where to go.
Dr. Fraud’s Office
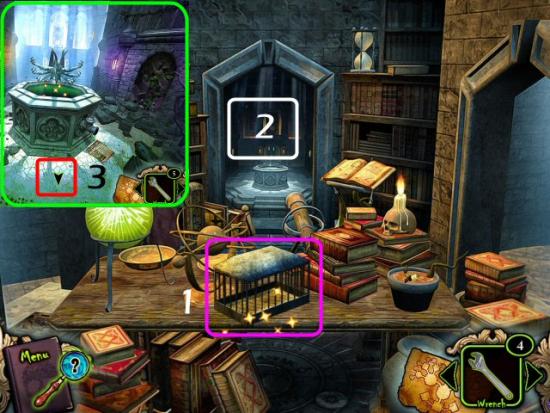
The last time you clicked on the Rose caused the Raven to fly to the top of the bookshelf and knock down the cage. Click on the Cage (1), click on the Doorway (2) and then click Back (3) to return.
Use the Cage on the Raven (1), collect the Rose (2), click on the Doorway (3) and click on the Fountain (4).
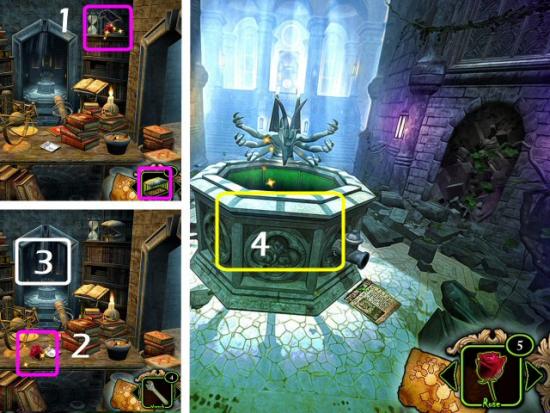
Atrium
Use the Rose on the Fountain (1) and click on the Hatch (2) after the water drains away.
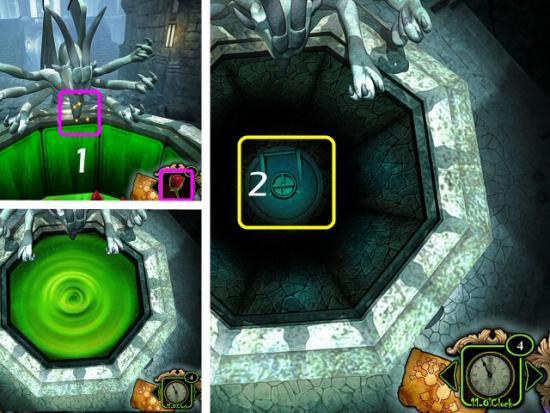
Underground
Use the Wrench on the Hatch (1), click on the Opening (2) and complete the Jigsaw Puzzle (3); Puzzle Solution (4).
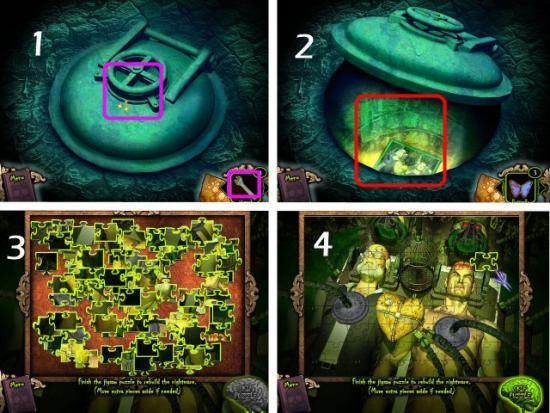
Use the Butterfly on the Cage (1), the Time Lies 11:00 Clock on Detective Ravenwood (2) and the Time Lies 12:00 Clock on Dr. Fraud (3).
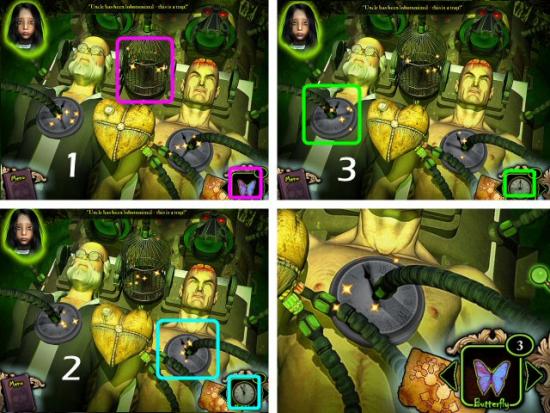
The Butterfly Cage
Click on one piece then another to switch their places and complete the Puzzle (1). Completed Puzzle (2).
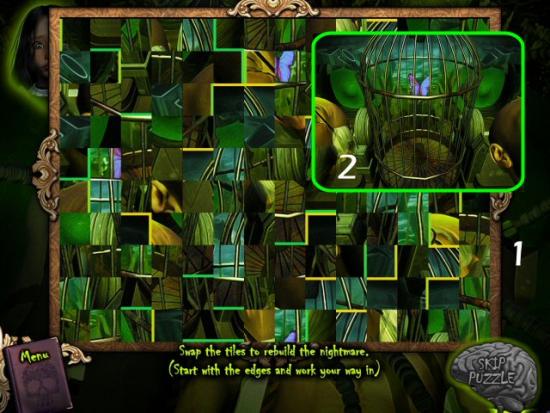
The Clones
Click and drag the columns and rows (1) to form the Image. Completed Image (2).
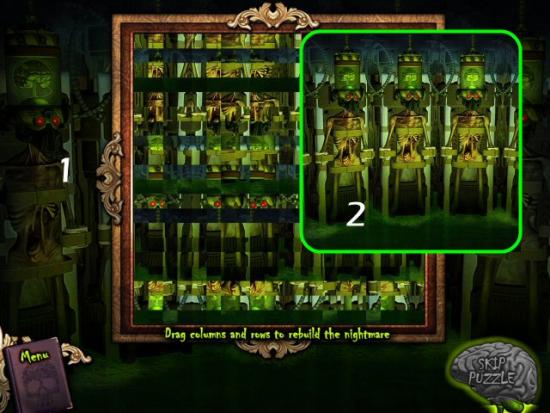
The Escape
Click on one piece then another to switch their places and complete the Puzzle (1). Completed Puzzle (2).
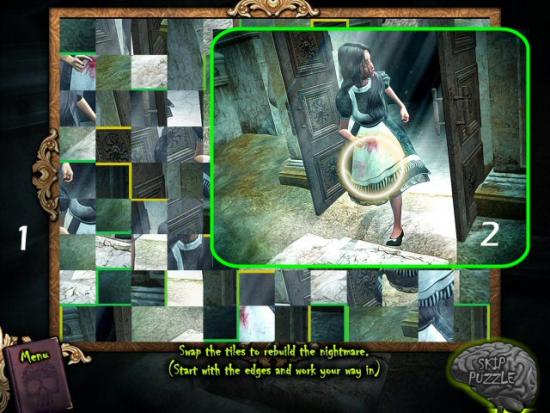
Watch the ending…watch it again, without the puzzles, from the Main Menu. Congratulations! You’ve completed Redrum: Time Lies.
More articles...
Monopoly GO! Free Rolls – Links For Free Dice
By Glen Fox
Wondering how to get Monopoly GO! free rolls? Well, you’ve come to the right place. In this guide, we provide you with a bunch of tips and tricks to get some free rolls for the hit new mobile game. We’ll …Best Roblox Horror Games to Play Right Now – Updated Weekly
By Adele Wilson
Our Best Roblox Horror Games guide features the scariest and most creative experiences to play right now on the platform!The BEST Roblox Games of The Week – Games You Need To Play!
By Sho Roberts
Our feature shares our pick for the Best Roblox Games of the week! With our feature, we guarantee you'll find something new to play!All Grades in Type Soul – Each Race Explained
By Adele Wilson
Our All Grades in Type Soul guide lists every grade in the game for all races, including how to increase your grade quickly!


