![Hololive Dreams Tier List [Best Cards]](/wp-content/uploads/2026/07/hololive-dreams-tier-list.jpg "Hololive Dreams Tier List [Best Cards]")
Hololive Dreams Tier List [Best Cards]
The best cards for the best performances.


![Iron Soul Dungeon Weapon Tier List [Best Weapons]](/wp-content/uploads/2026/07/iron-soul-dungeon-weapon-tier-list.jpg "Iron Soul Dungeon Weapon Tier List [Best Weapons]")

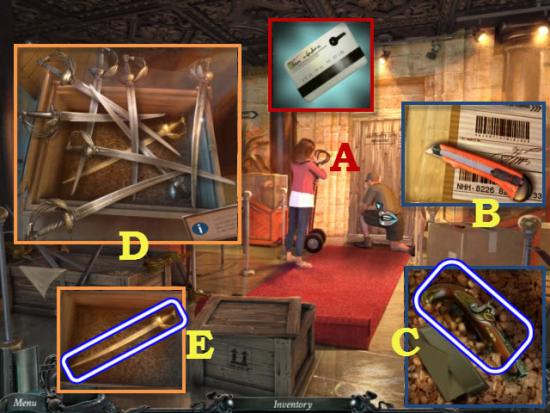
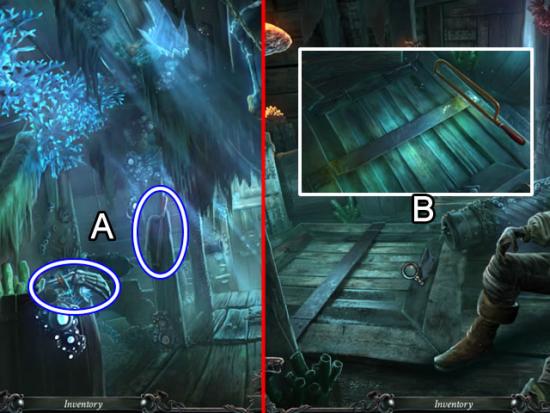
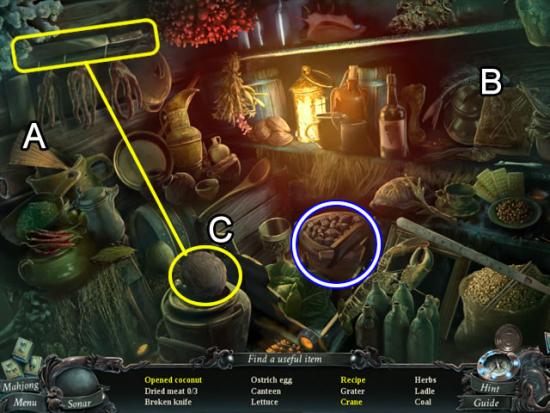
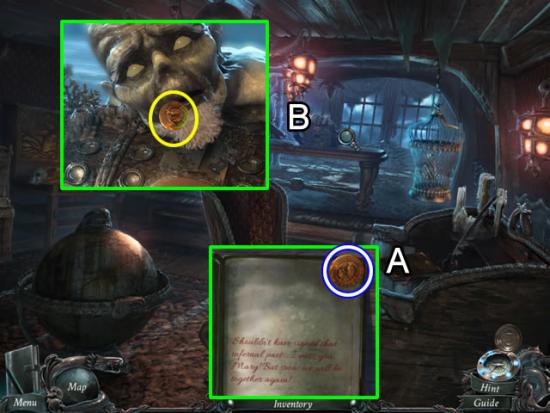
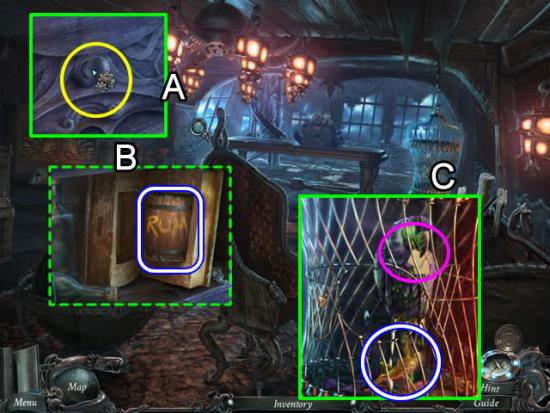
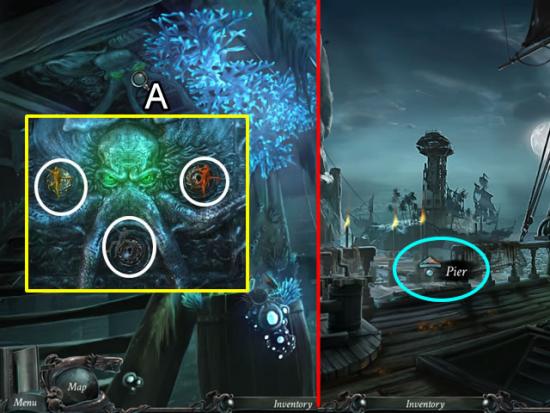
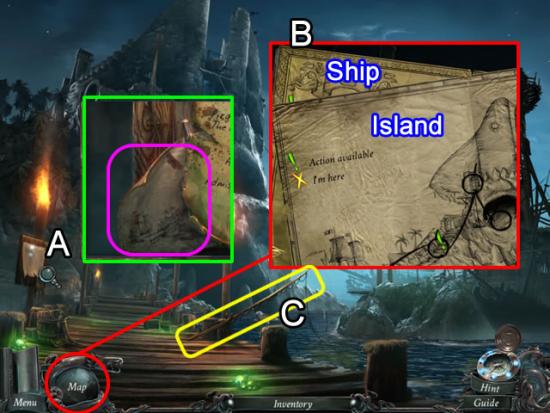
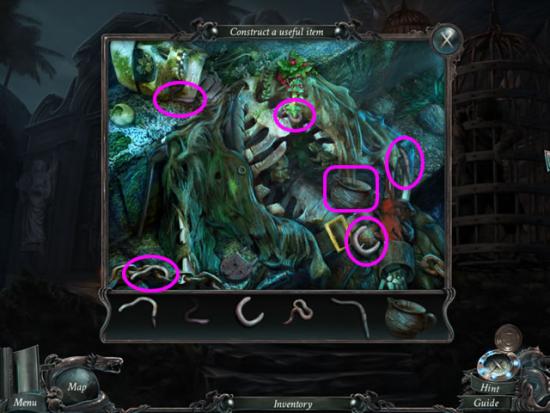
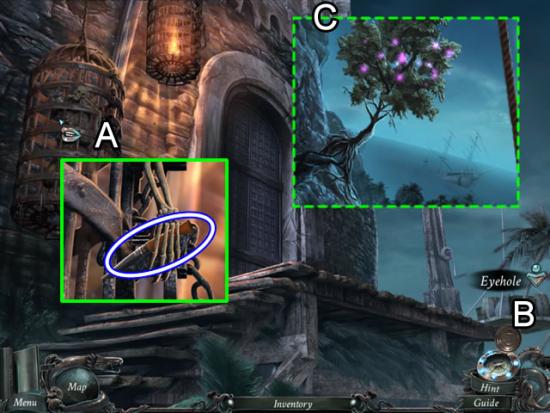
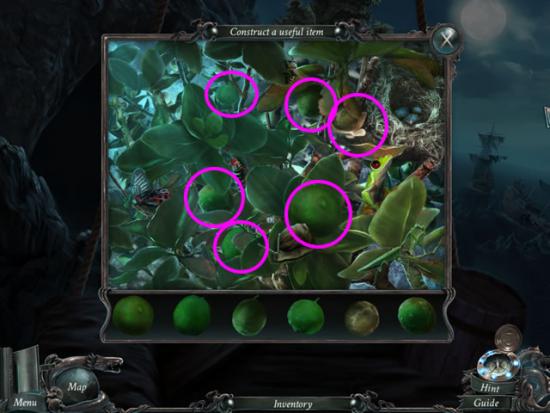
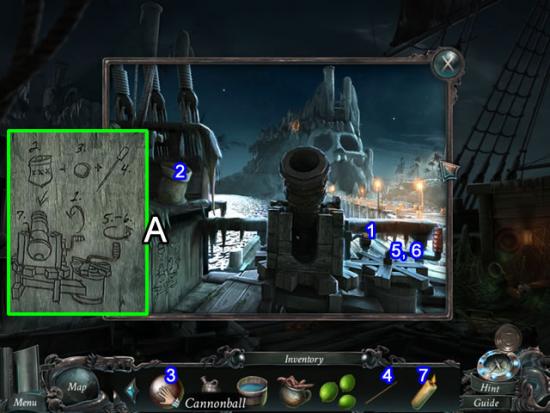
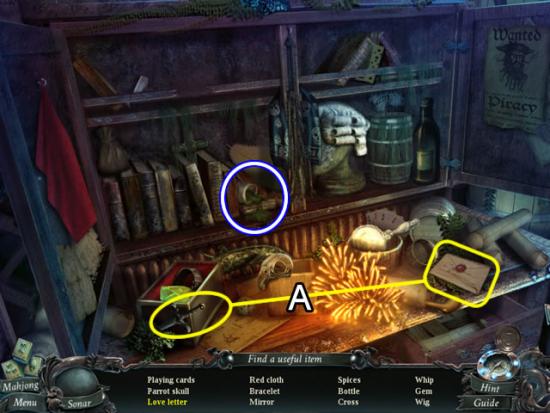
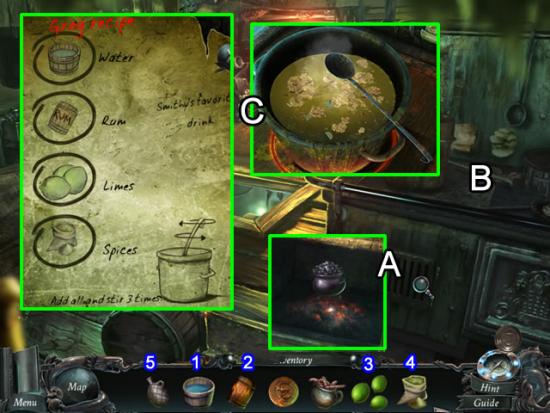
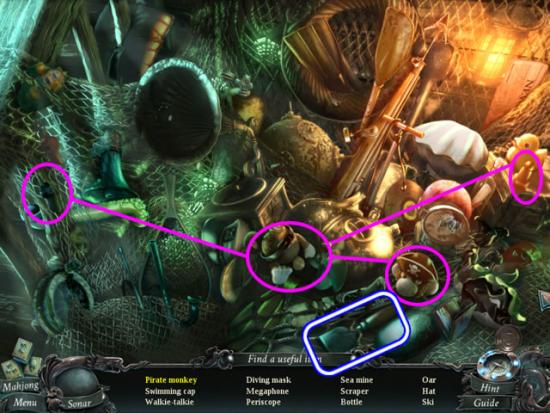
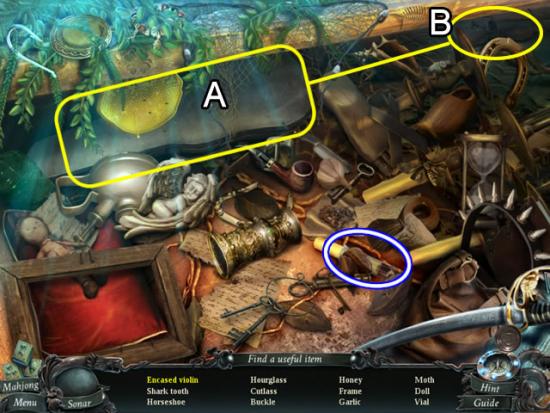
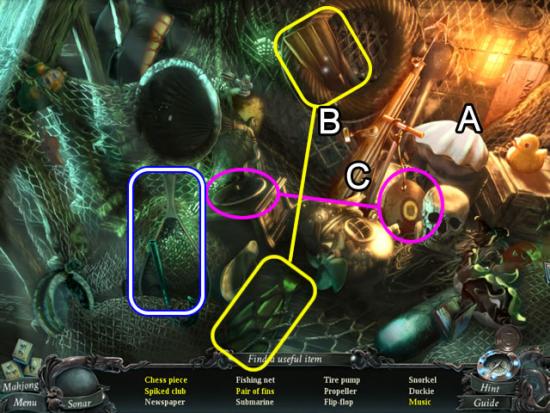
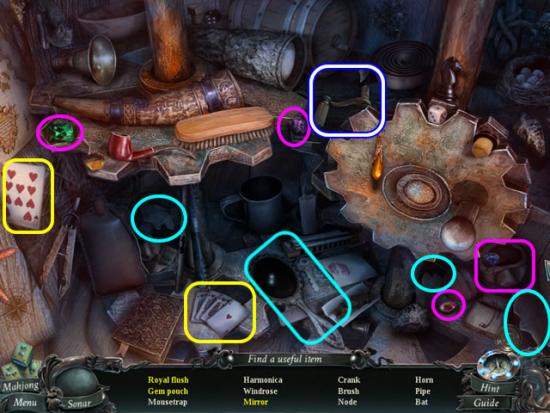
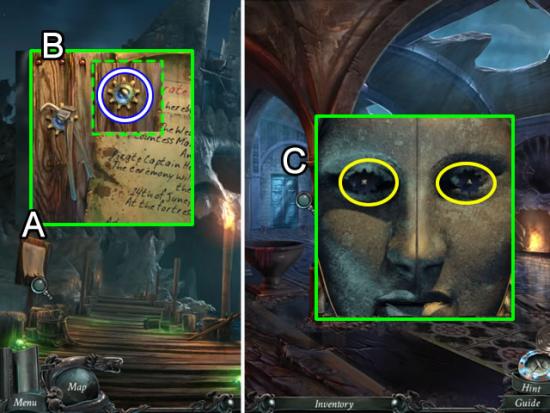
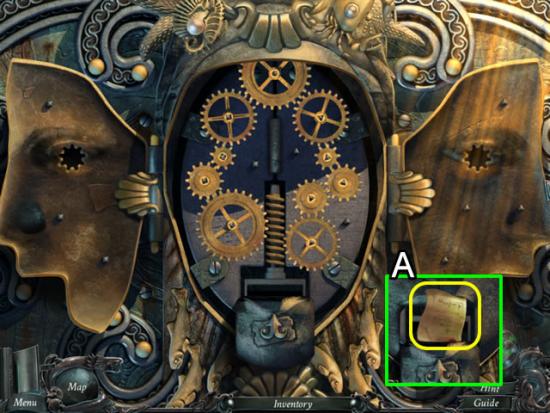
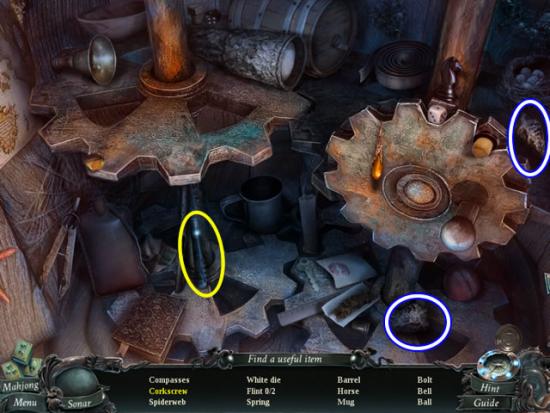
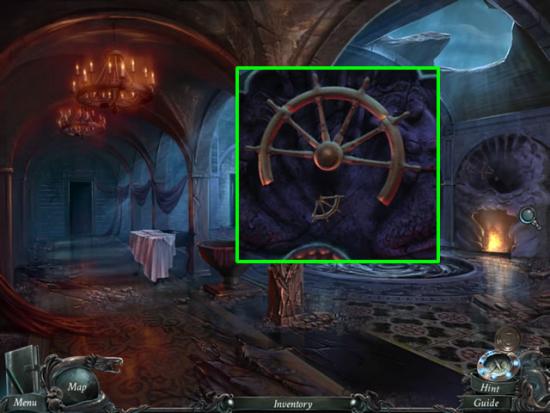
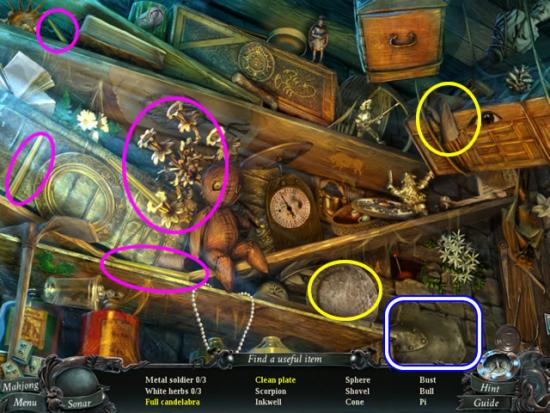
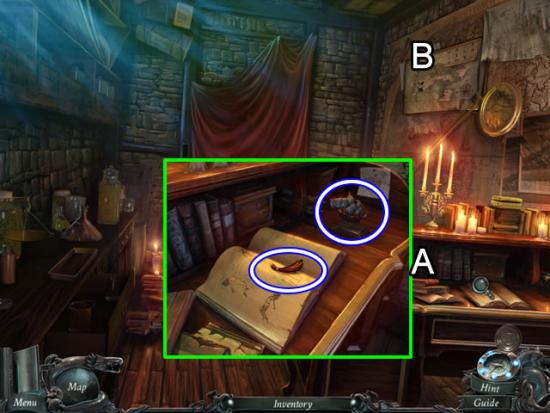
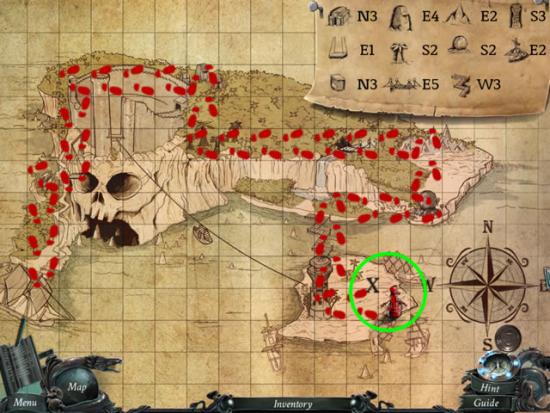
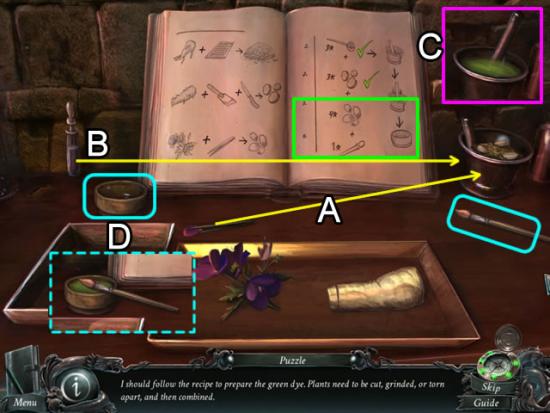
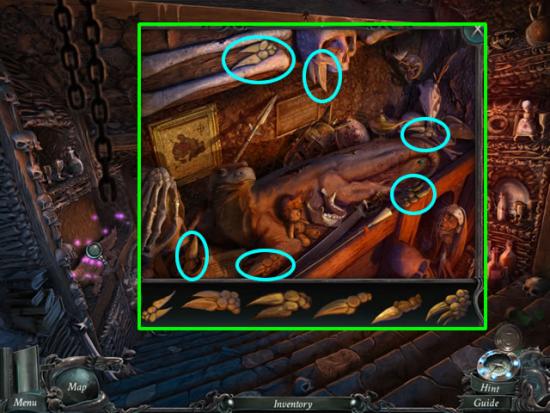
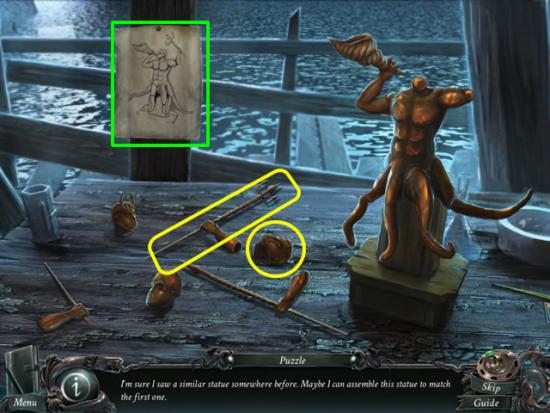
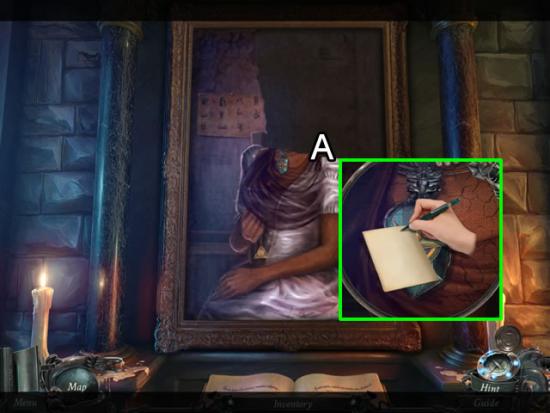
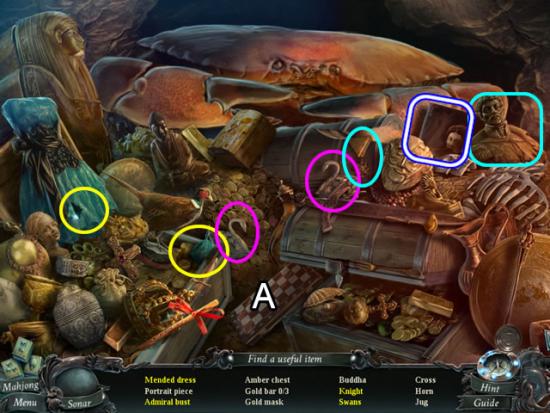
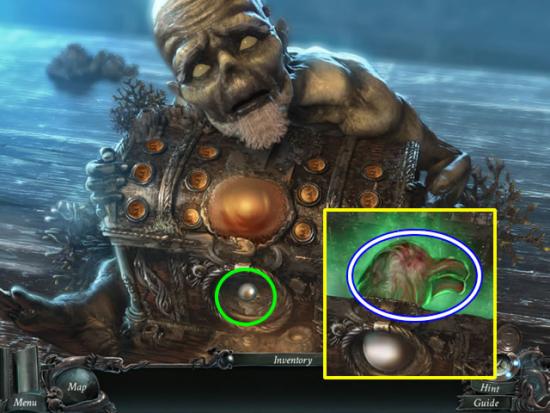
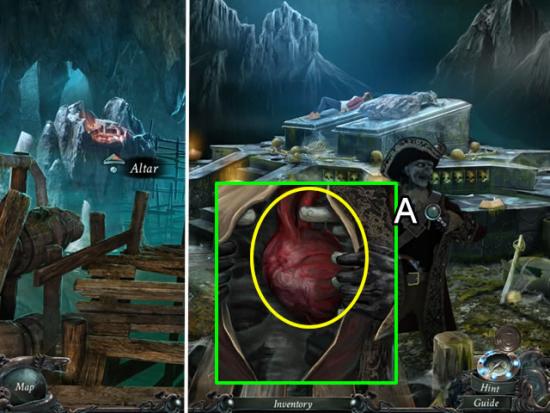
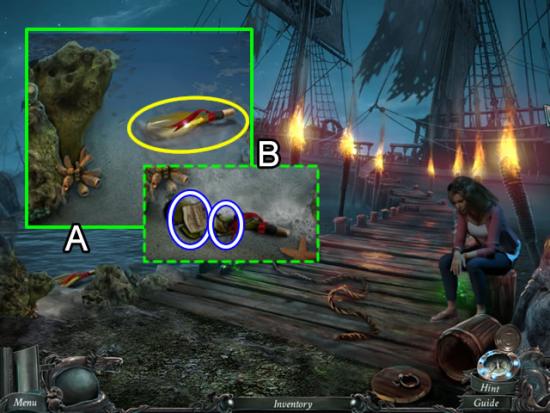
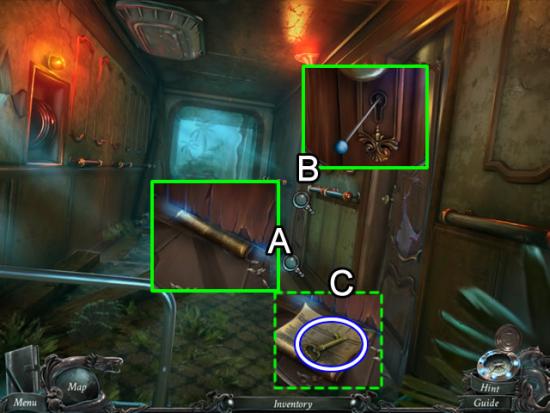
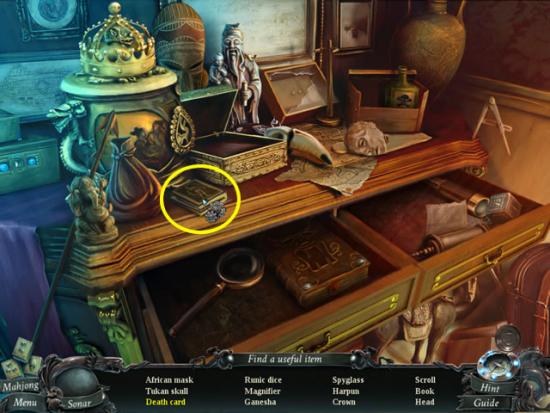
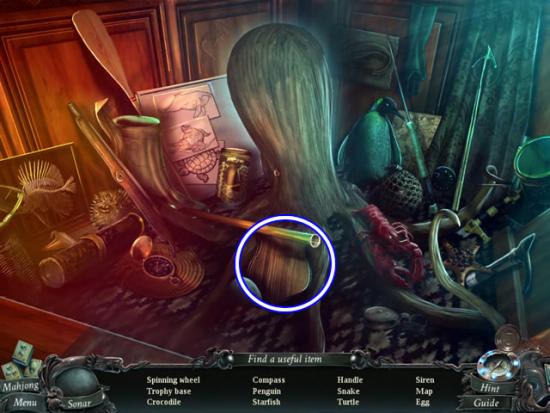
Welcome to the Nightmares from the Deep: Cursed Heart walkthrough on Gamezebo. Nightmares from the Deep: Cursed Heart is a Hidden Object Game created by Artifex Mundi. This walkthrough includes tips and tricks, helpful hints and a strategy guide on how to complete Nightmares from the Deep: Cursed Heart.
Welcome to the Nightmares from the Deep: Cursed Heart walkthrough on Gamezebo. Nightmares from the Deep: Cursed Heart is a Hidden Object Game created by Artifex Mundi. This walkthrough includes tips and tricks, helpful hints and a strategy guide on how to complete Nightmares from the Deep: Cursed Heart.
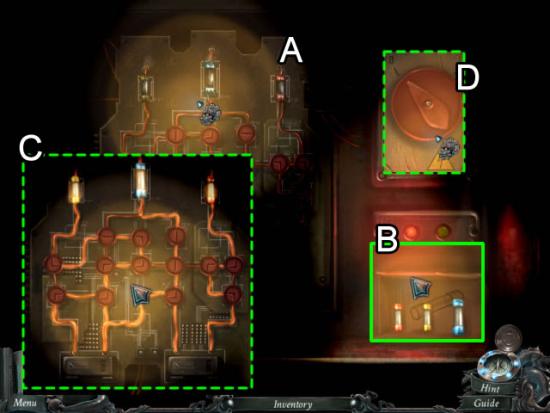
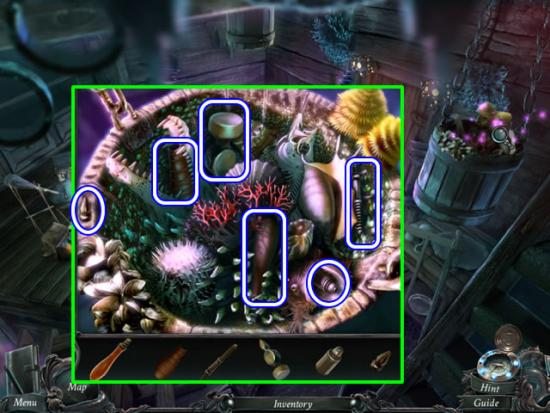
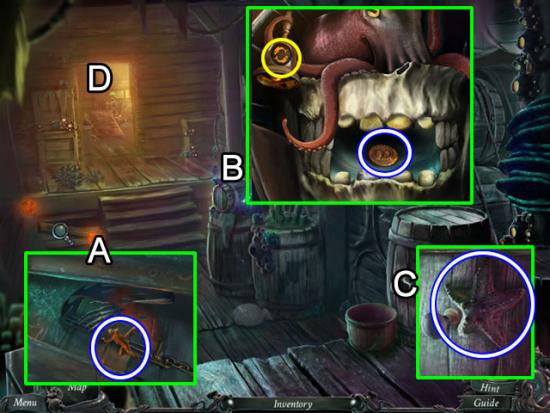
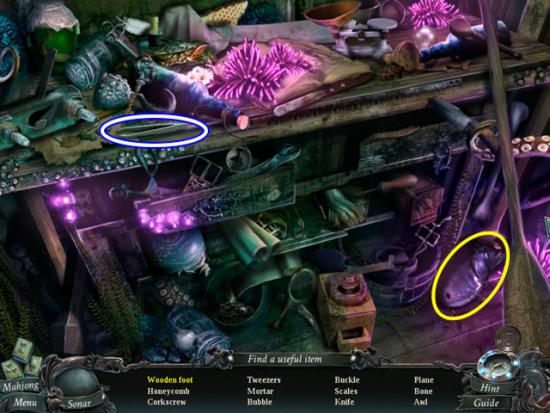
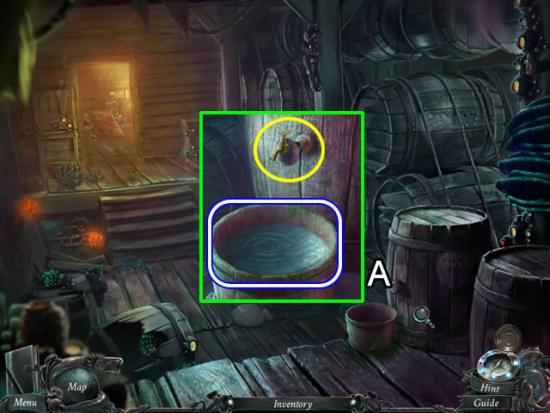
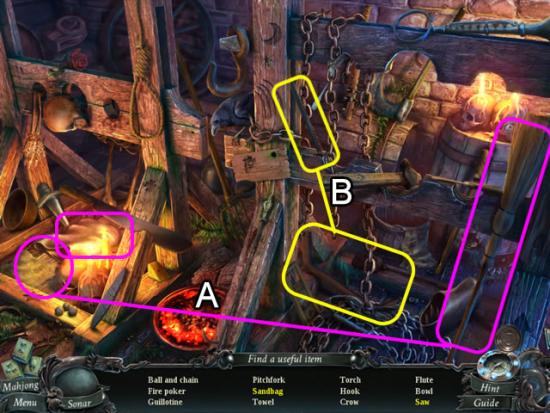
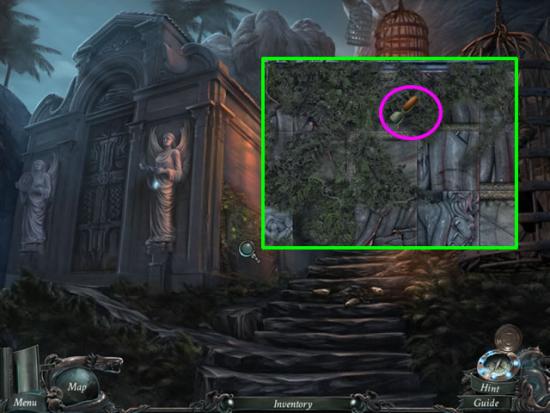
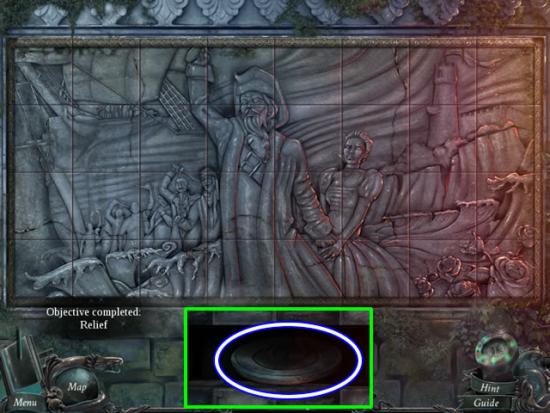
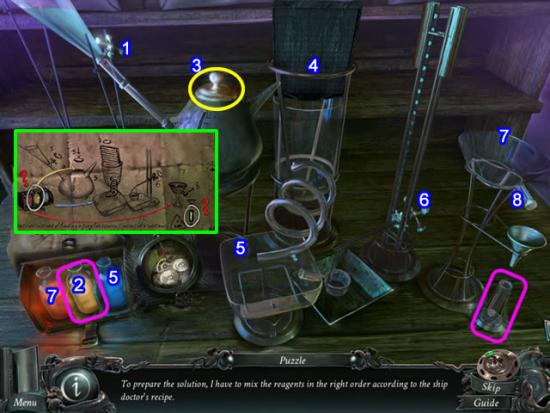
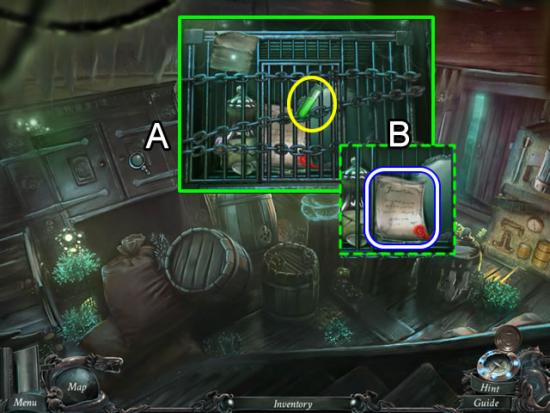
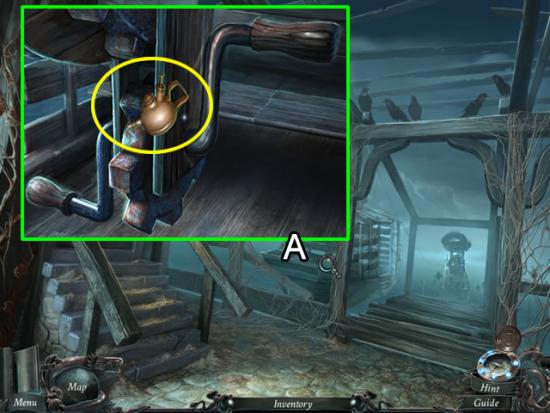
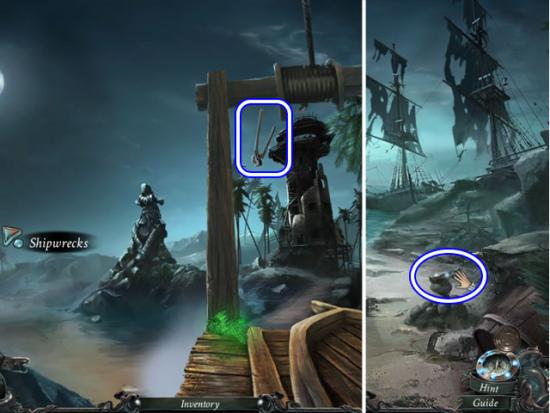
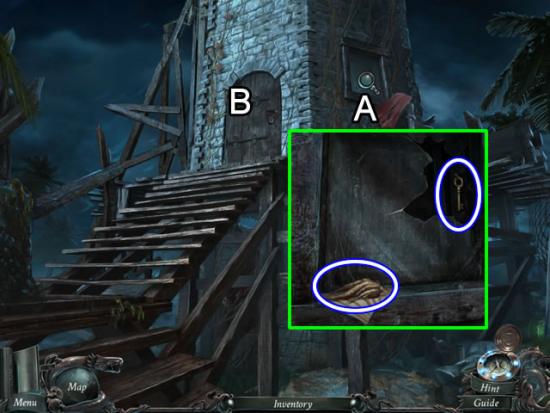
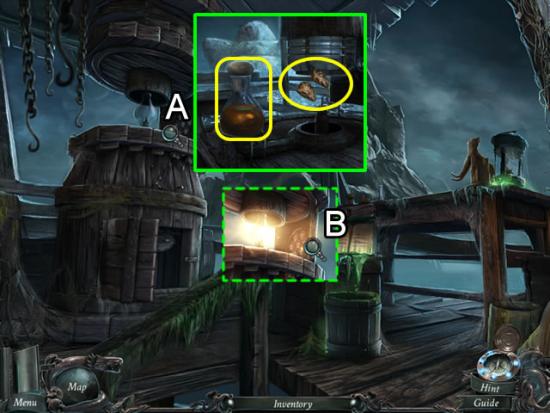
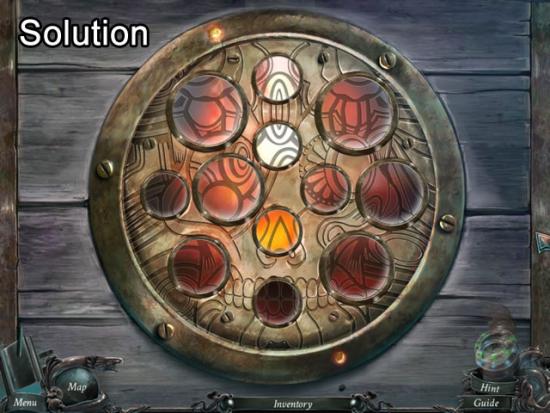
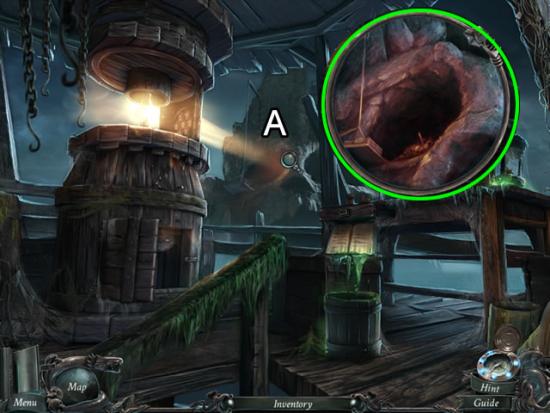
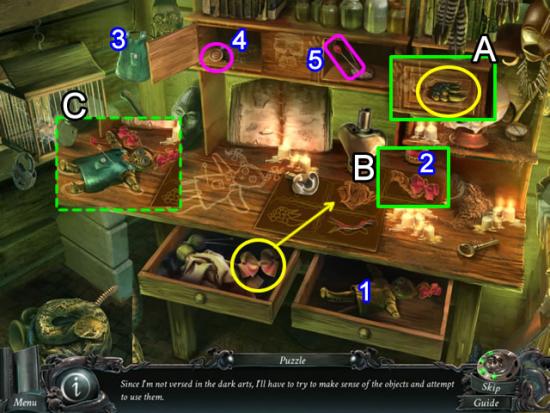
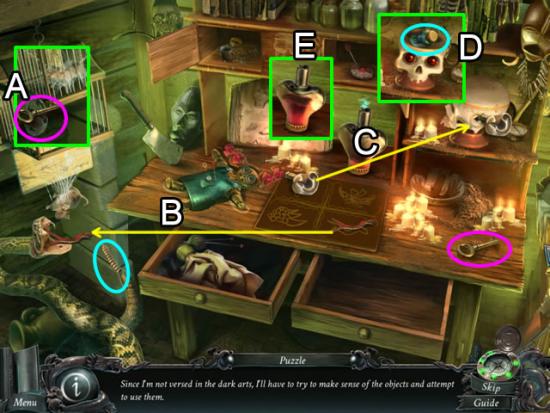
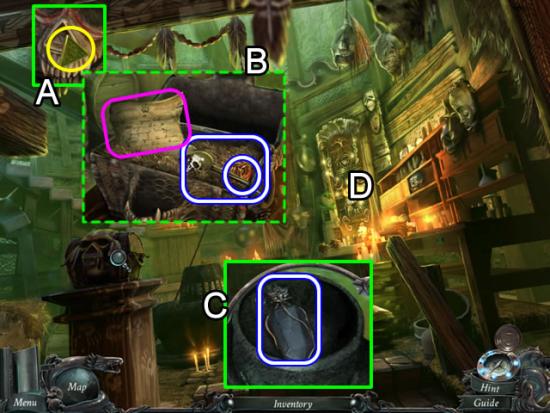
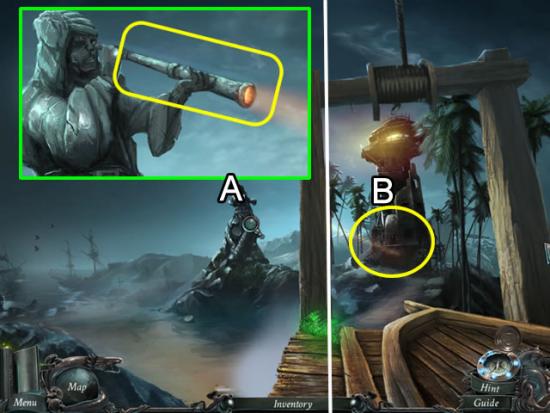
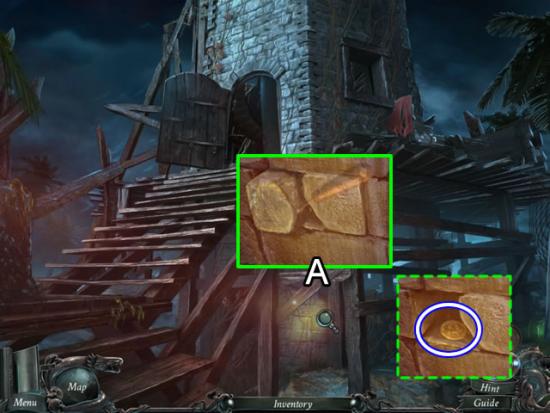
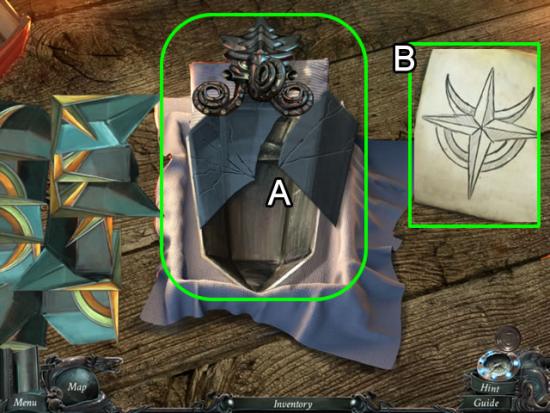
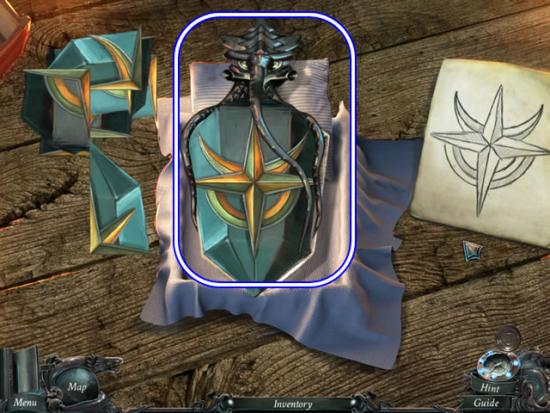
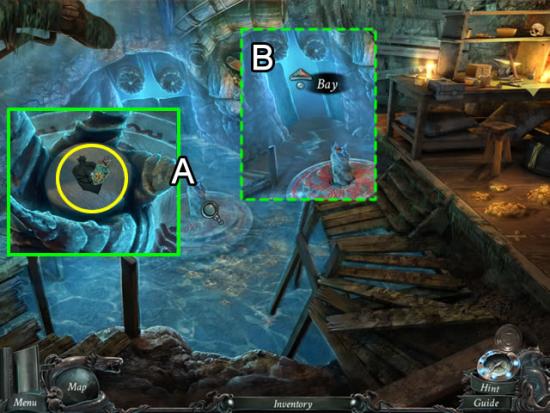
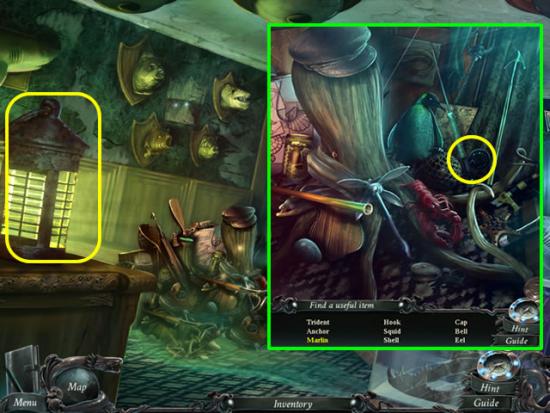
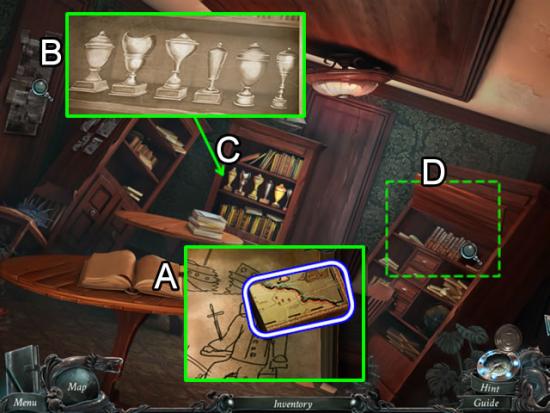
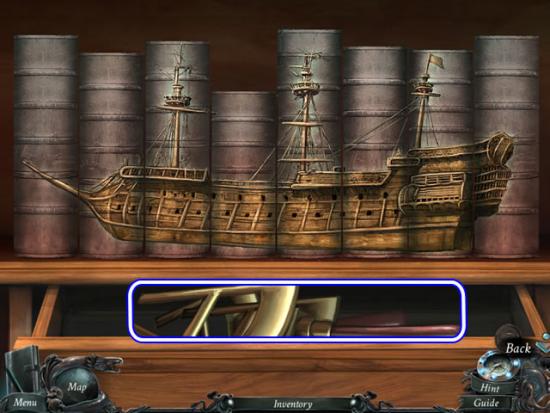
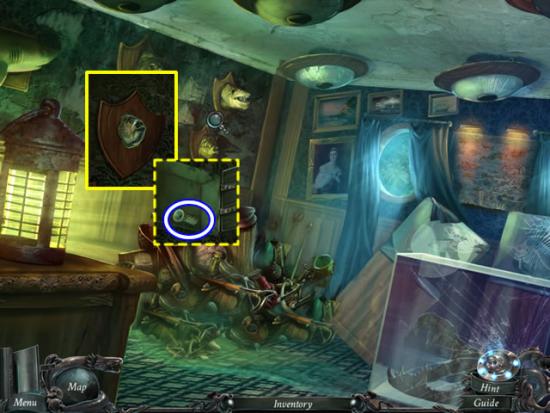
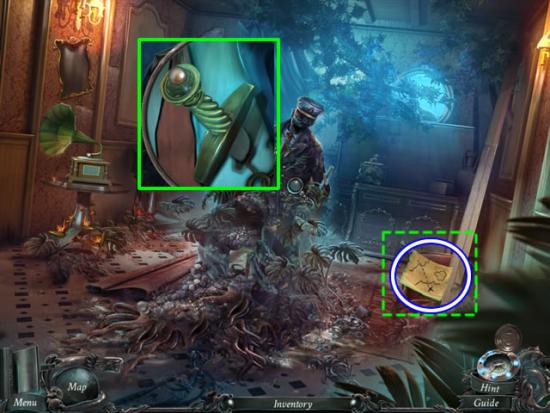
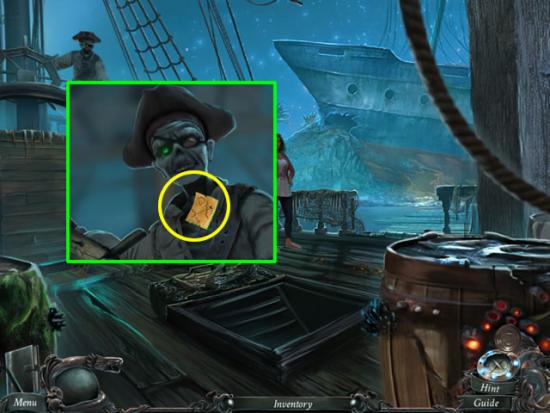
This hidden object game requires visiting several locations and using inventory items to advance play.

Hall
Exhibition
Hall
Office
Hall
Basement
Exhibition
Office
Exhibition
Basement
Exhibition
Office
Hall
Passage
Crew Quarters
Passage
Infirmary
Water Reserves
Hold

Armory
Crew Quarters
Captain’s Cabin
Passage
Infirmary
Water Reserves
Galley

Armory
Captain’s Cabin
Crew Quarters
Deck
Pier
Stairs
Wall
Eyehole
Deck
Captain’s Cabin
Galley
Passage
Deck
Wall
Yard
Stairs
Crypt
Infirmary
Hold
Deck
Yard
Lobby
Yard
Crypt
Pier
Lobby
Terrace
Crypt
Terrace
Landing
Shipwrecks
Lighthouse
Inside the Lighthouse

Landing
Pier
Lobby
Ballroom
Shipwrecks
Inside the Lighthouse
Eyehole
Lobby
Hideout
Eyehole
Shipwrecks
Hideout
Terrace
Tower
Hideout
Eyehole
Hideout
Catacombs
Tower

Crypt
Tower
Inside the Lighthouse
Landing
Lighthouse

Catacombs
Treasury
Crypt
Treasury
Hideout

Crypt
Bay
Treasury
Catacombs
Ballroom

Captain’s Cabin
Bay
Altar
Congratulations! You have finished playing Nightmares from the Deep: Cursed Heart Collector’s Edition. Select “Extras” from the main menu to play the bonus adventure.
Pier

Mess
Gangplank
Lower Deck
Captain’s Cabin
Lower Deck
Hill
Mess
Gangplank
Upper Deck
Trophy Room
Upper Deck
Library
Upper Deck
Crow’s Nest
Hill

Captain’s Cabin
Mess
Trophy Room
Captain’s Cabin
Deck
Congratulations! You have finished the bonus adventure for Nightmares from the Deep: Cursed Heart. All bonus materials are now accessible from the “Extras” link on the main menu.
