![Digimon UP Tier List [Supports, Buddies, and Partners]](/wp-content/uploads/2026/07/digimon-up-tier-list.jpg "Digimon UP Tier List [Supports, Buddies, and Partners]")
Digimon UP Tier List [Supports, Buddies, and Partners]
These Digimon will get you UP the leaderboard.


![Haze Seas Boss Drops [Chances, Locations, and How to Spawn]](/wp-content/uploads/2026/07/haze-seas-boss-drops.jpg "Haze Seas Boss Drops [Chances, Locations, and How to Spawn]")

Welcome to the Gamezebo Strategy Guide for Nancy Drew: The Case of the Scarlet Hand. This is a fullscale point and click adventure. Nancy, working as an intern in a museum, must help solve a mysterious series of robberies. This walkthrough is divided into two sections: General Tips (no spoilers) Guided Walkthrough GENERAL TIPS You can save at any time, and name your save files.Complete the tutorial to learn how to navigate and use the cursor.If you make a mistake…
a:1:i:0;a:2:s:13:”section_title”;s:50:”Nancy Drew: Secret of the Scarlet Hand Walkthrough”;s:12:”section_body”;s:97127:”
Welcome to the Gamezebo Strategy Guide for Nancy Drew: The Case of the Scarlet Hand. This is a fullscale point and click adventure. Nancy, working as an intern in a museum, must help solve a mysterious series of robberies.
This walkthrough is divided into two sections:
General Tips (no spoilers)
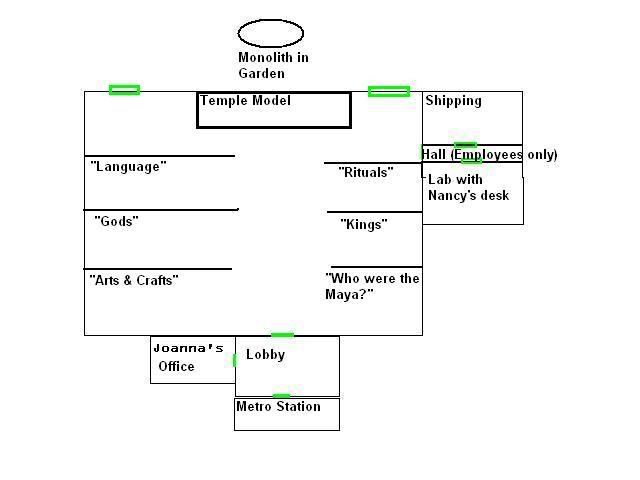
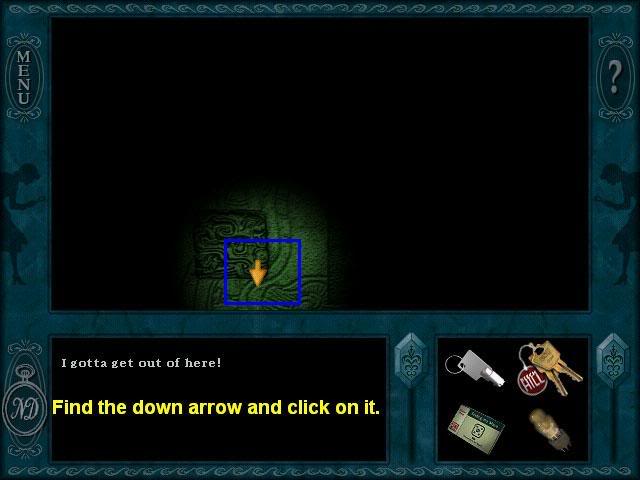
WALKTHROUGH (SPOILERS!!!!) Map of the Museum

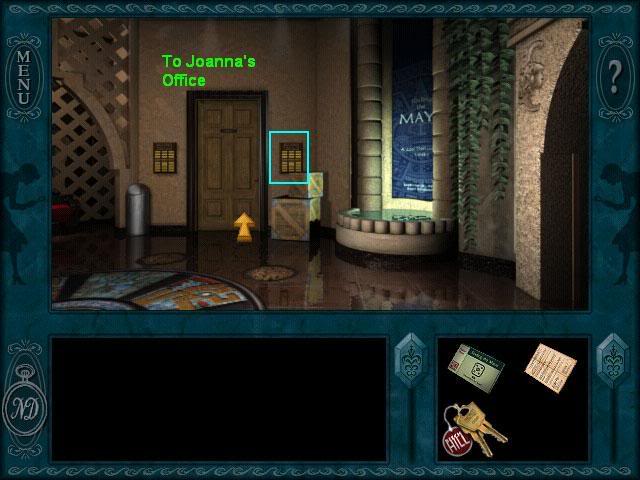
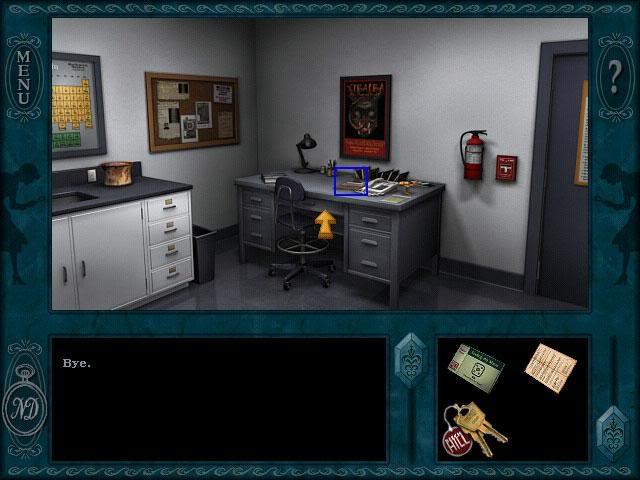
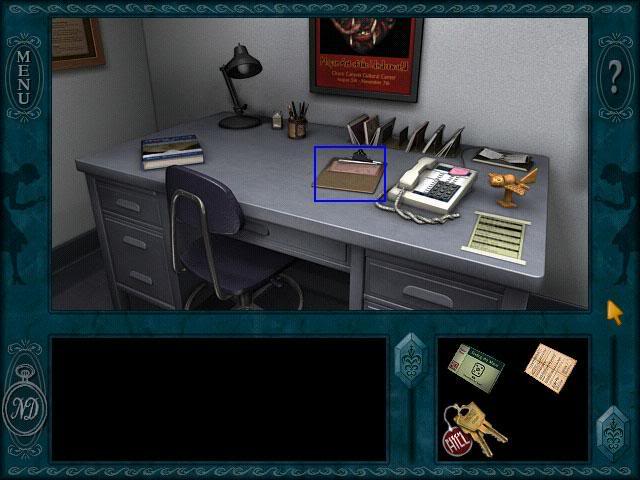
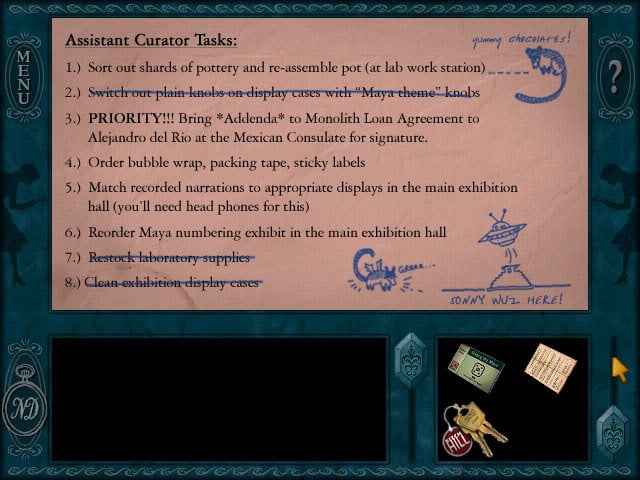
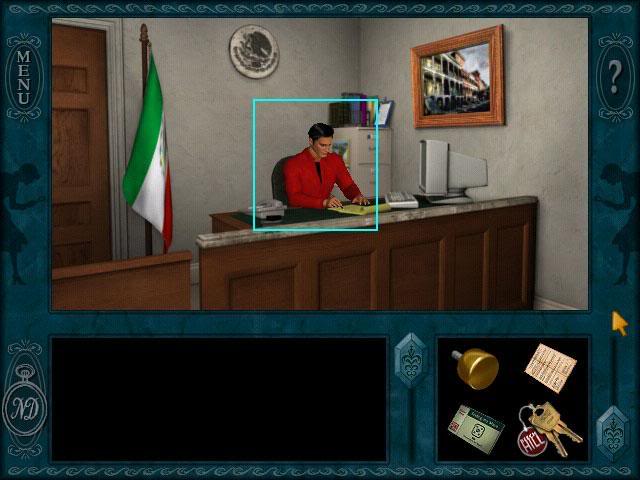
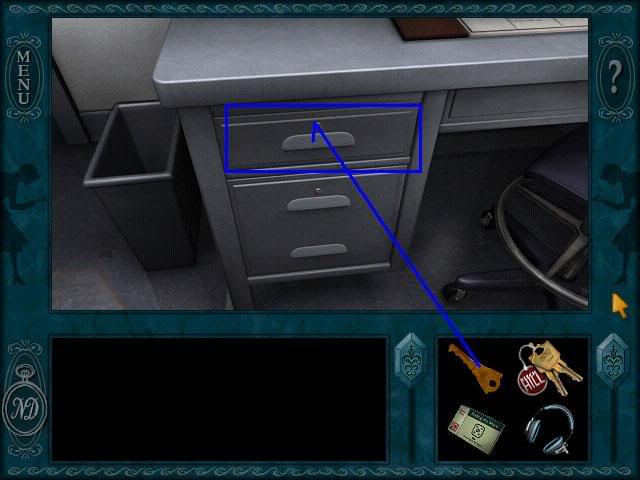
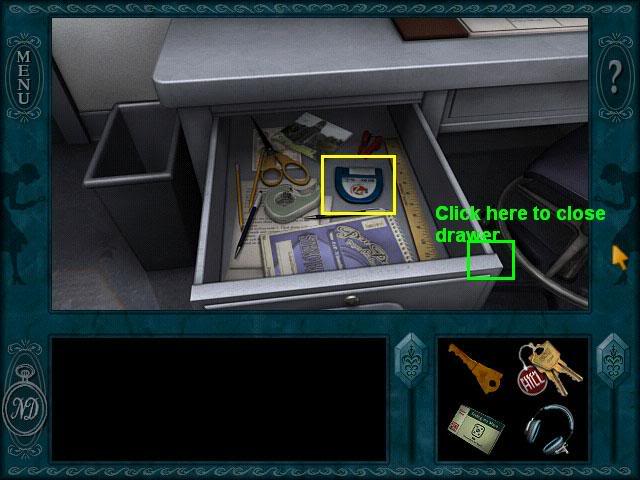
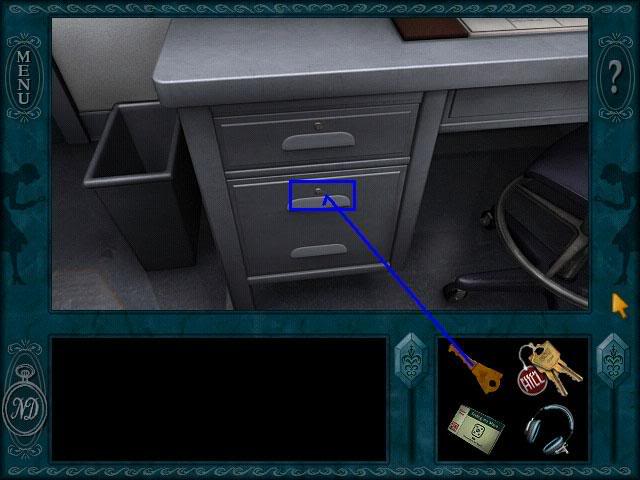
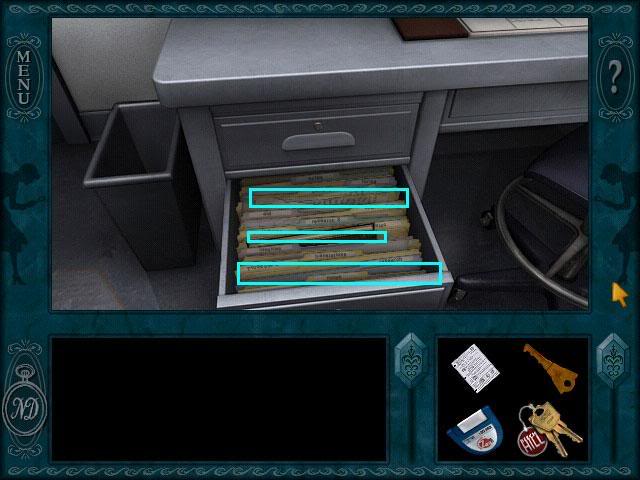
Joanna Rigg’s Office
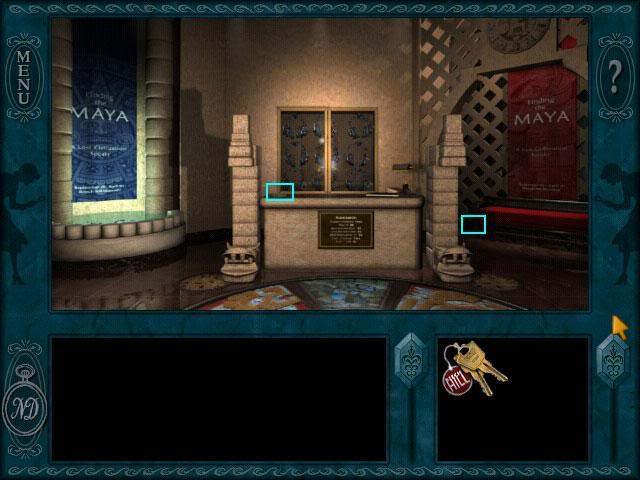
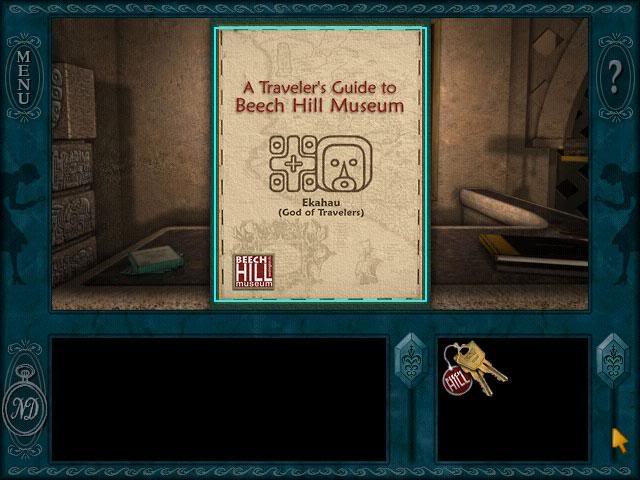
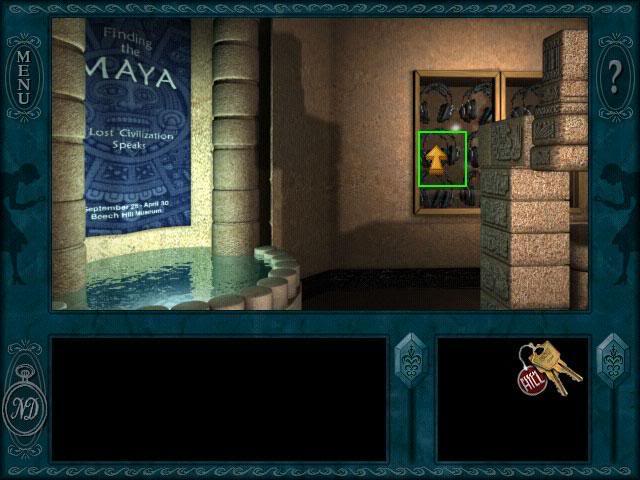
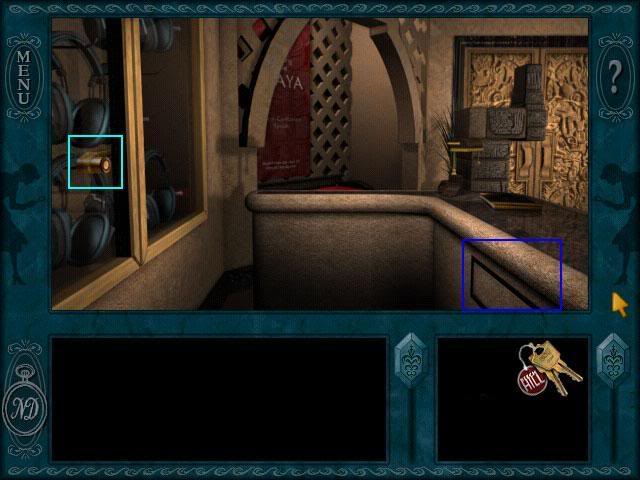
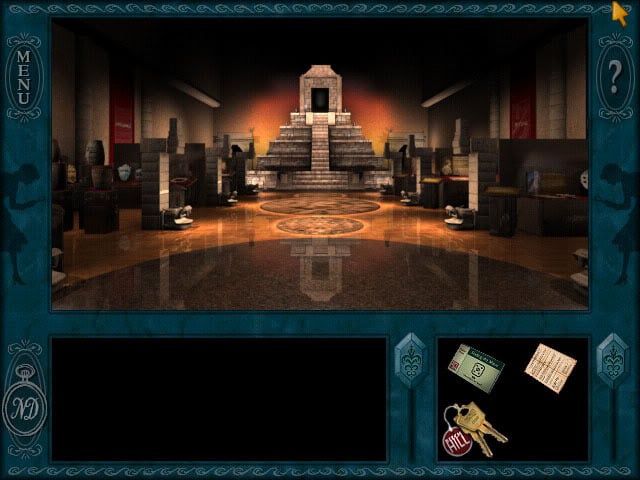
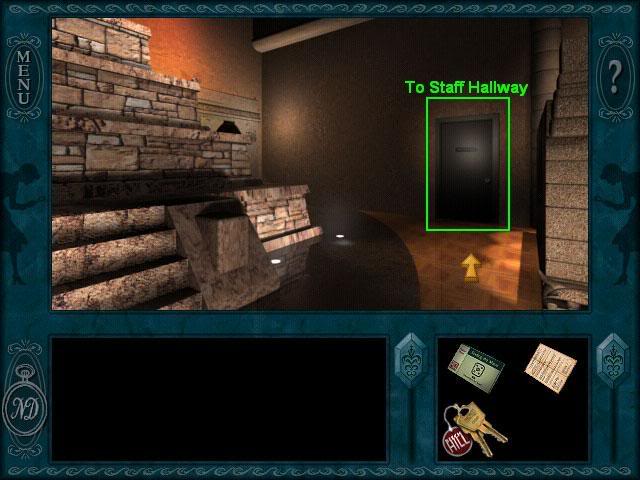
The Lobby
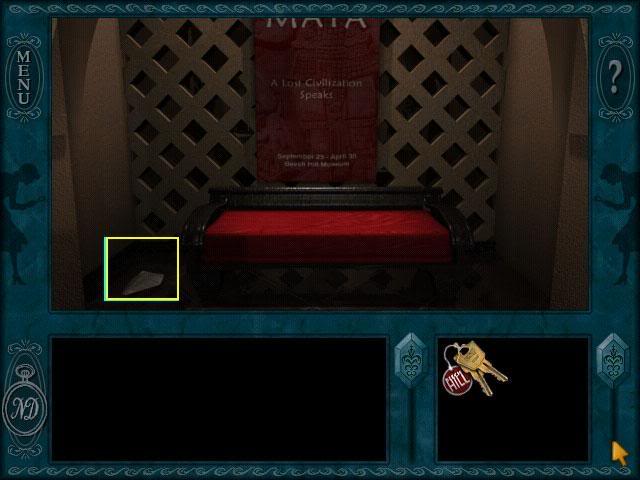
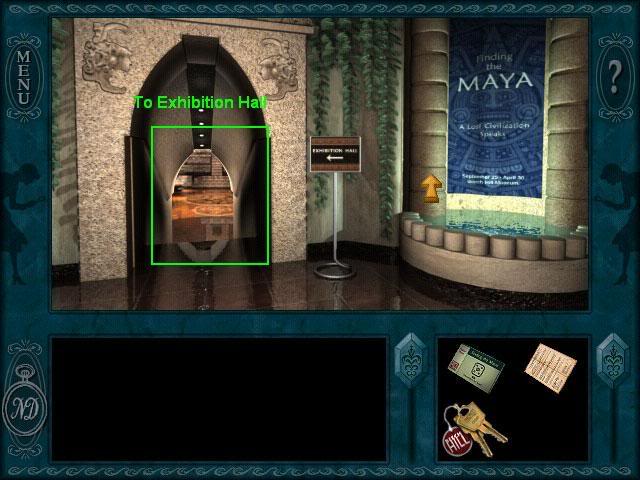
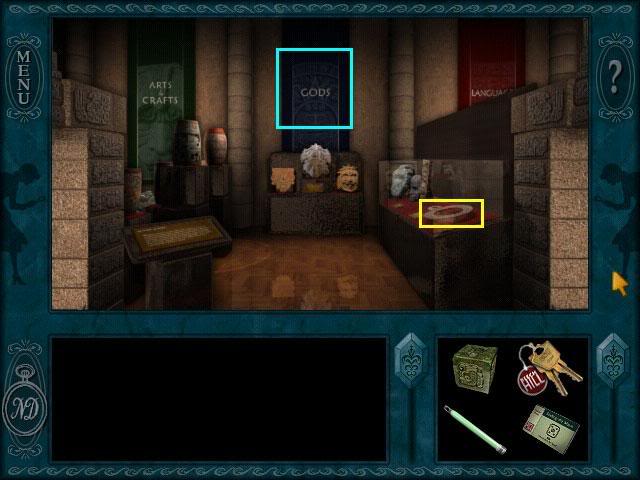
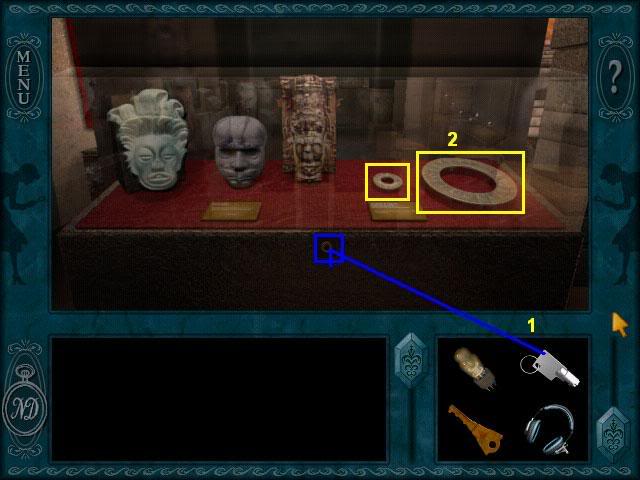
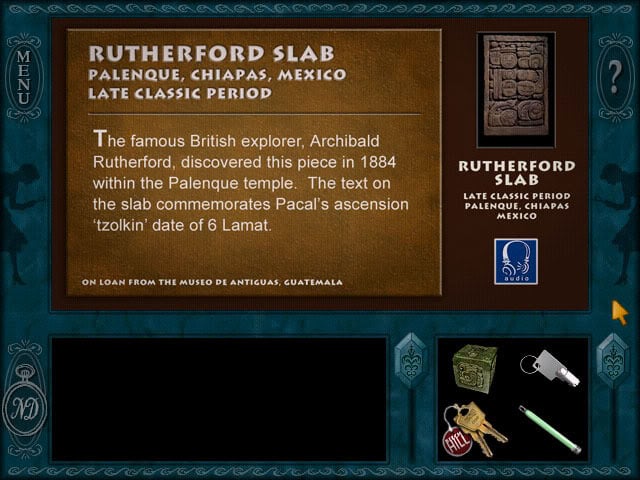
The Exhibition Hall
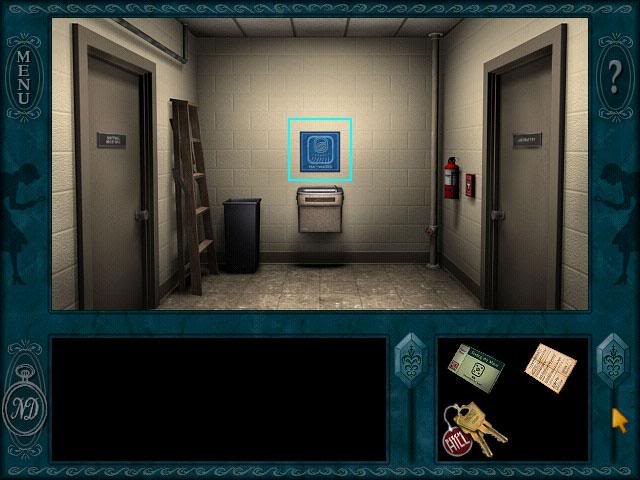
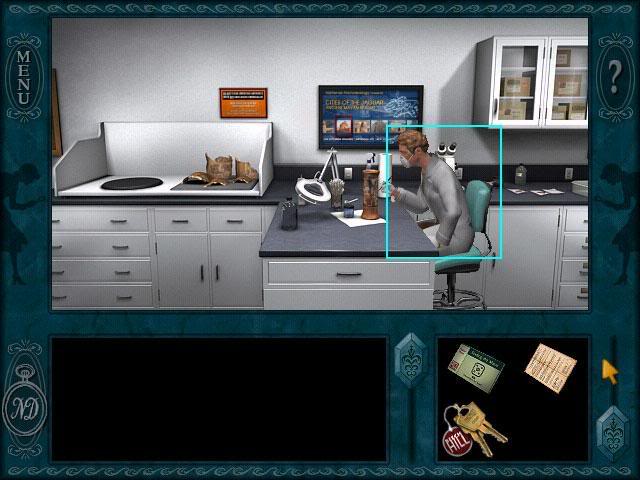
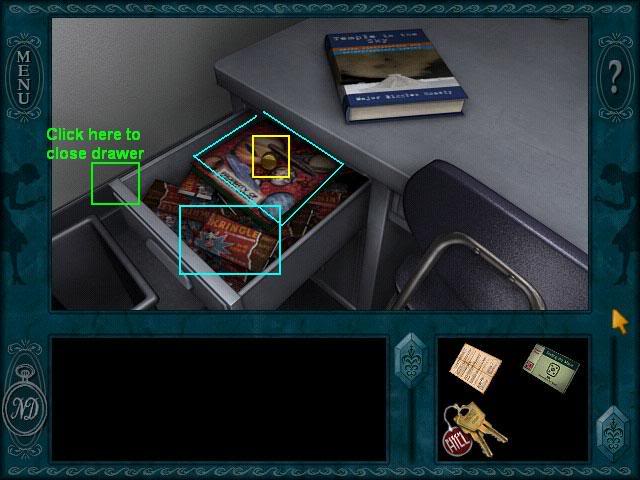
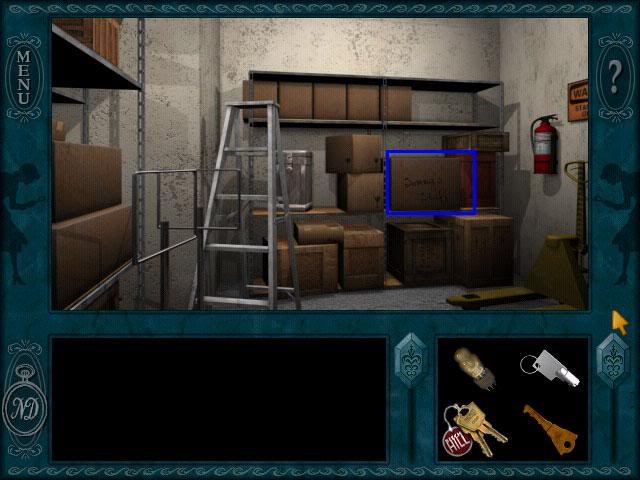
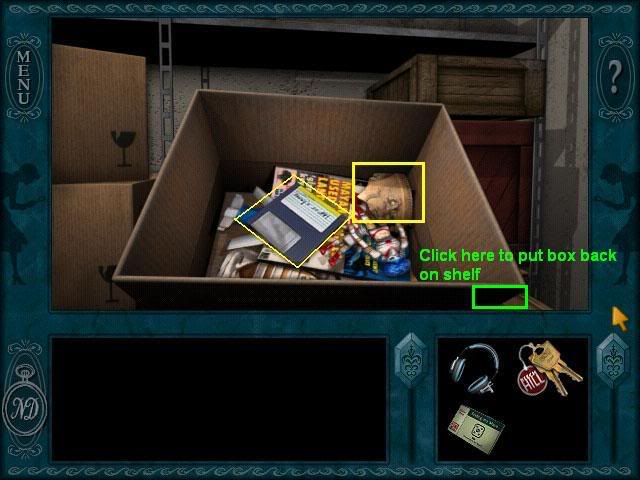
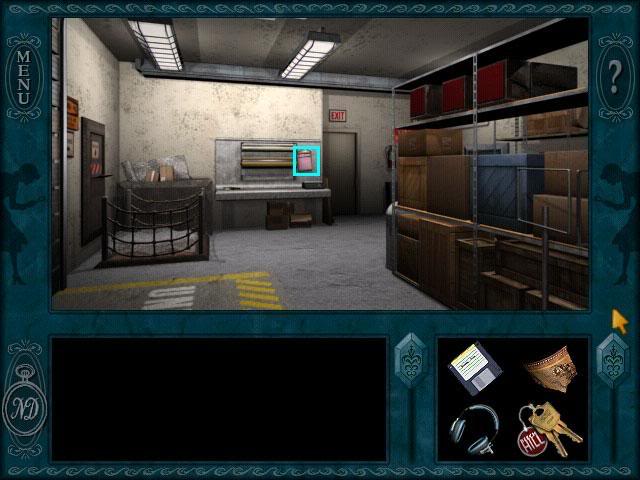
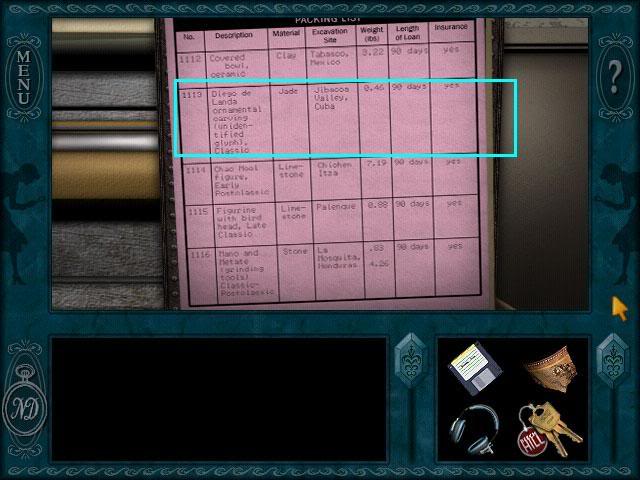
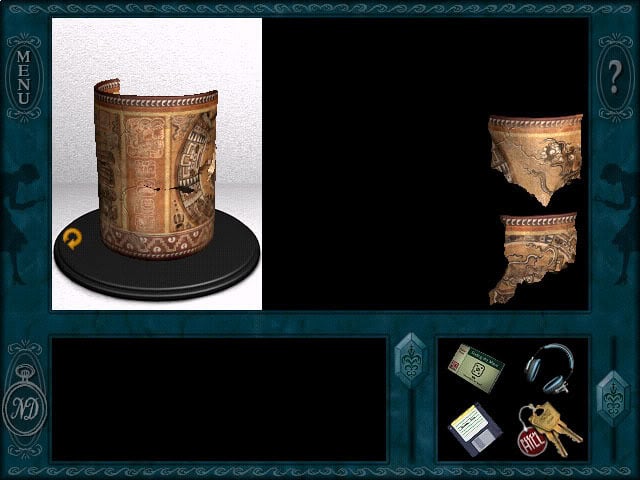
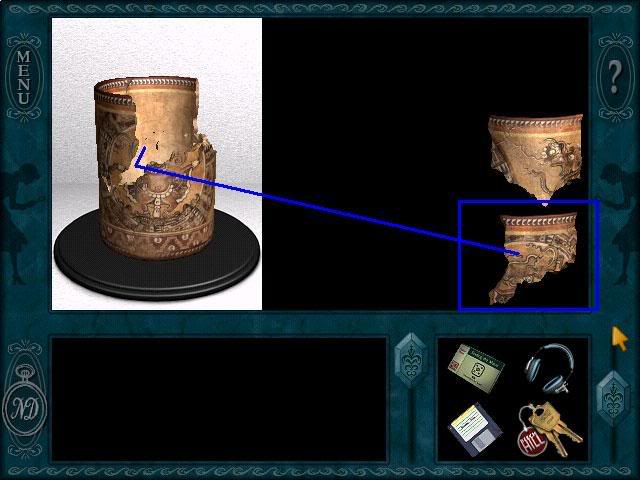
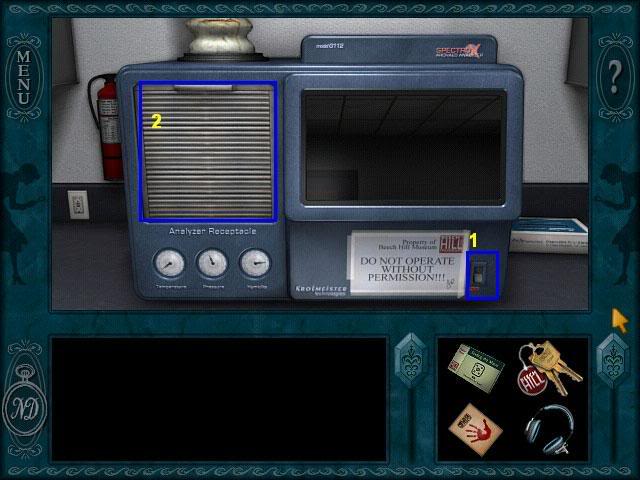
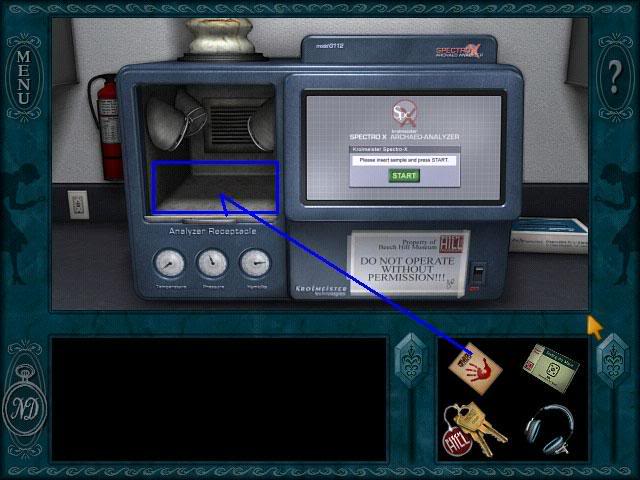
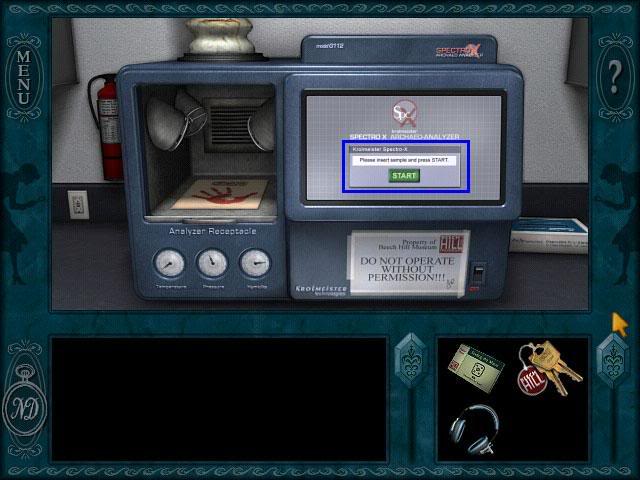
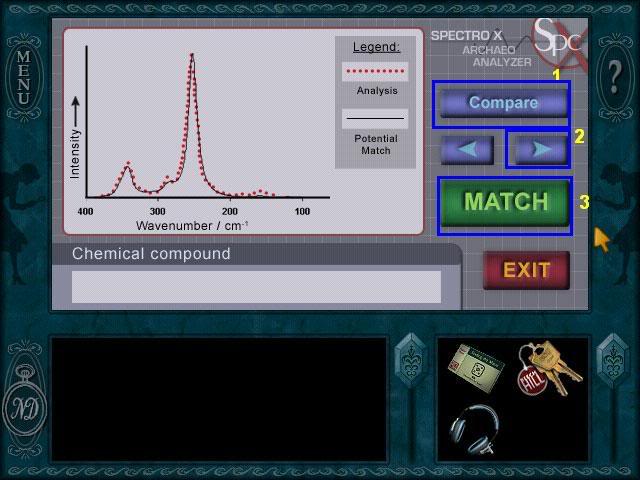
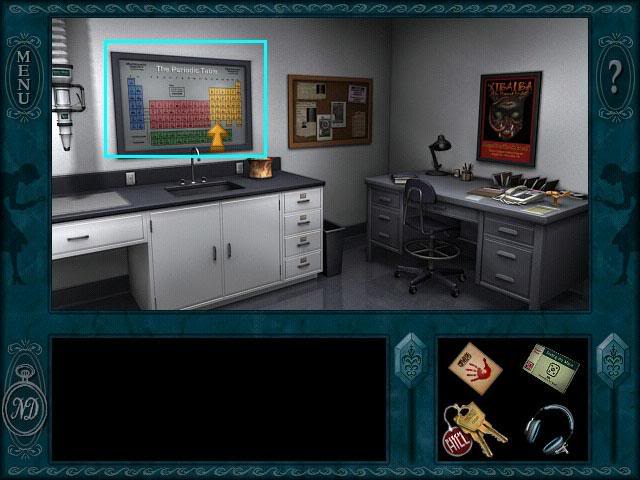
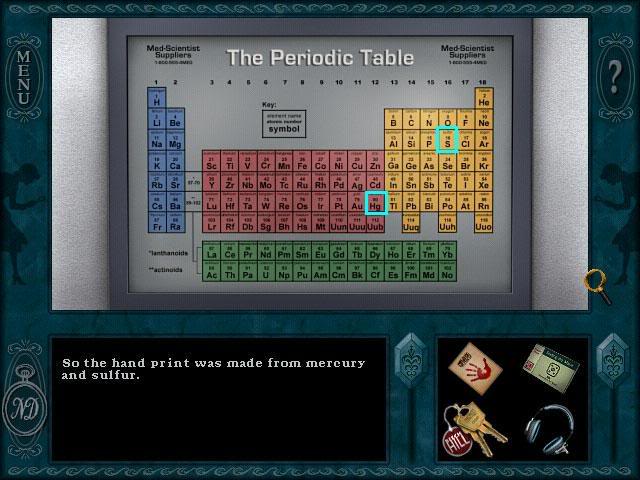
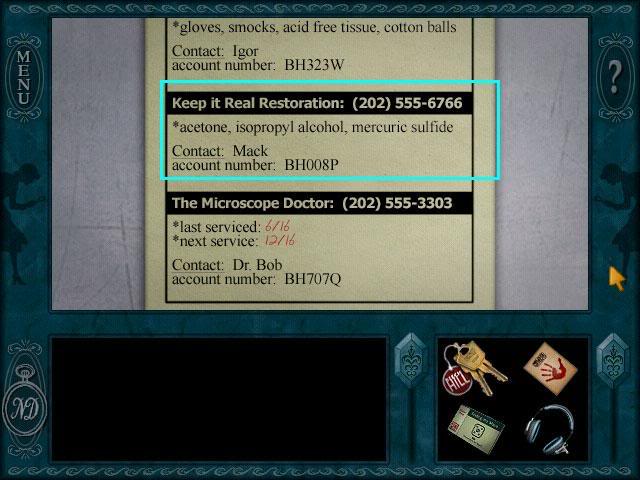
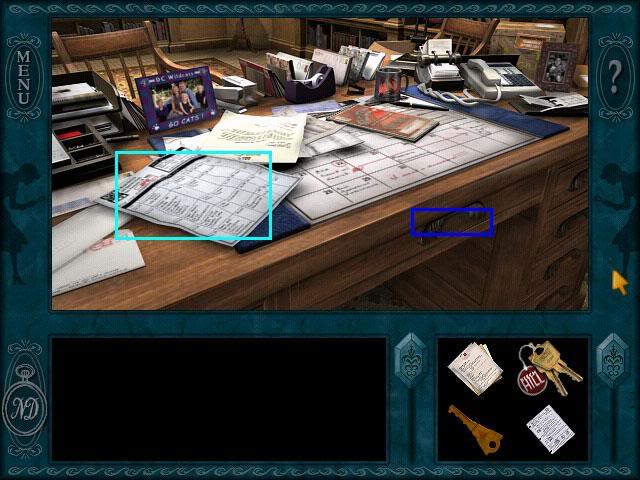
The Lab
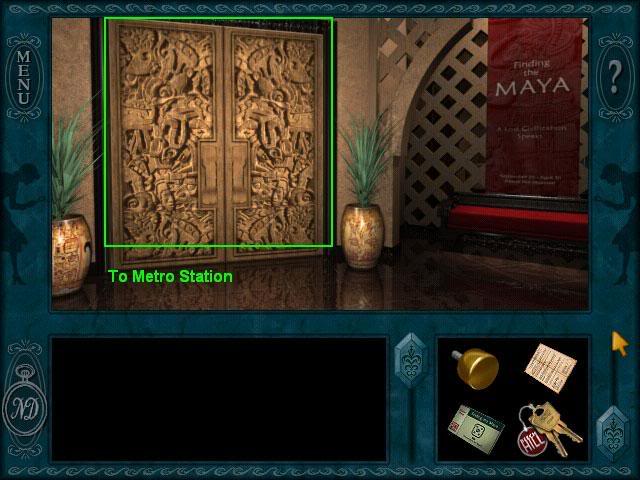
The Metro Station
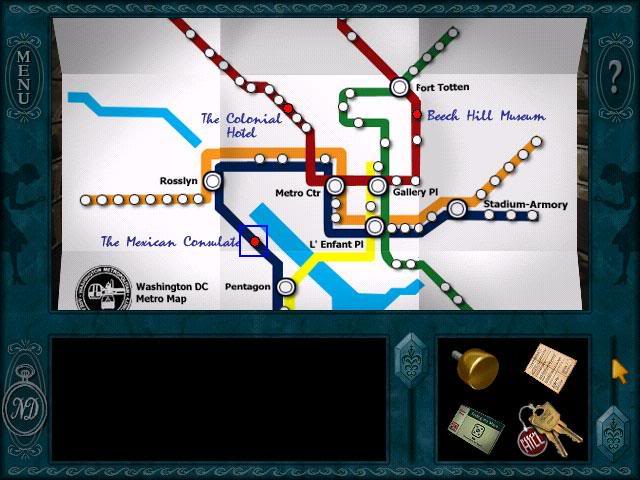
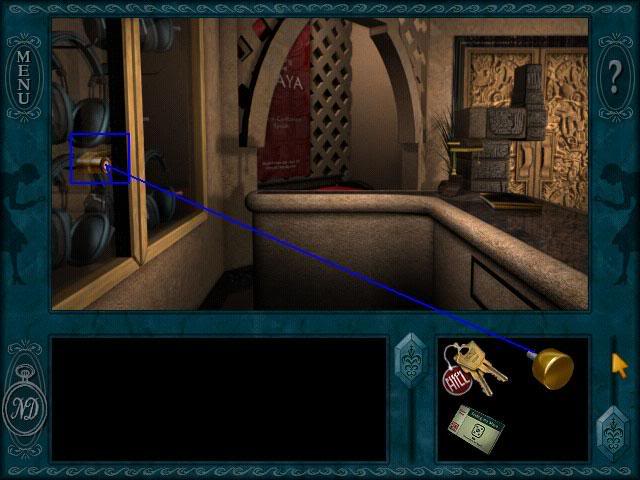
Mexican Consulate
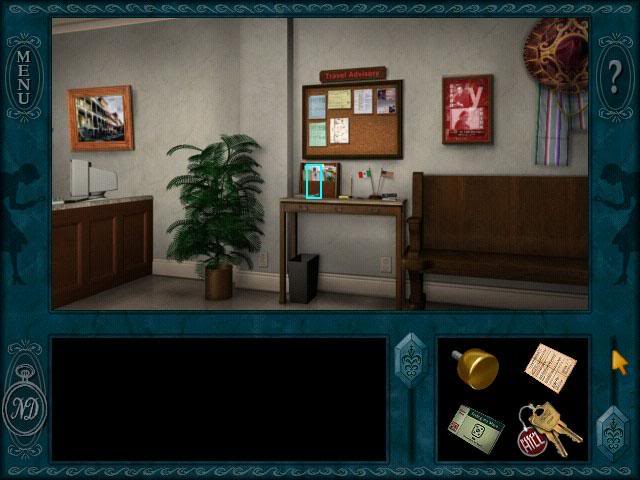
Museum Lobby
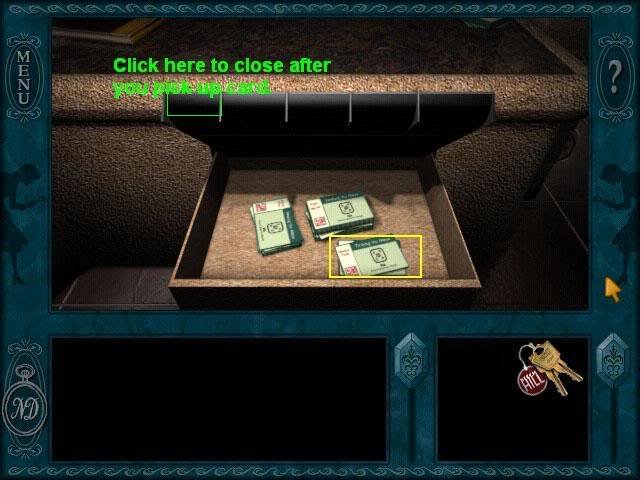
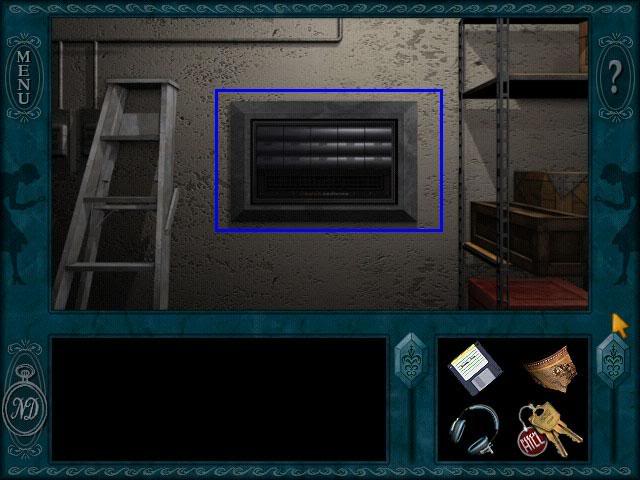
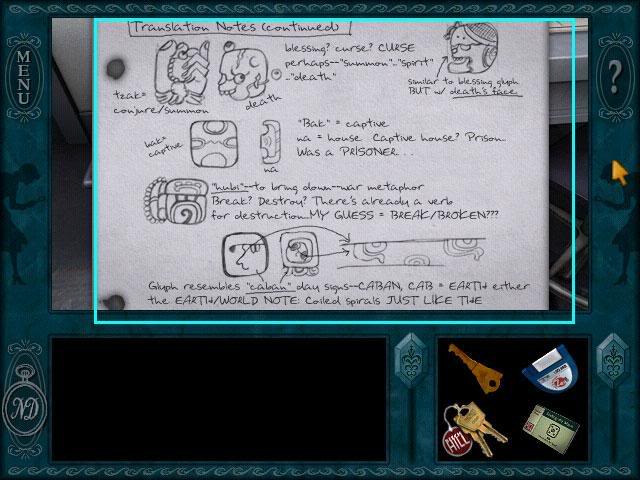
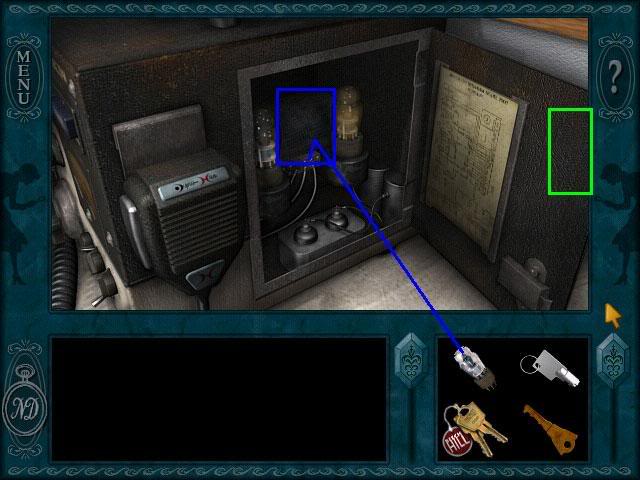
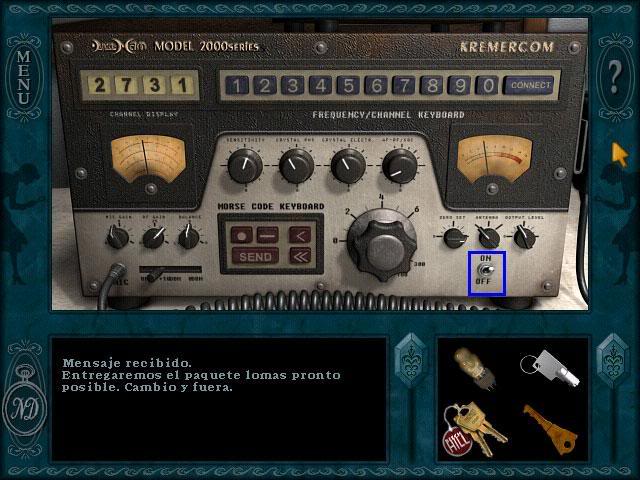
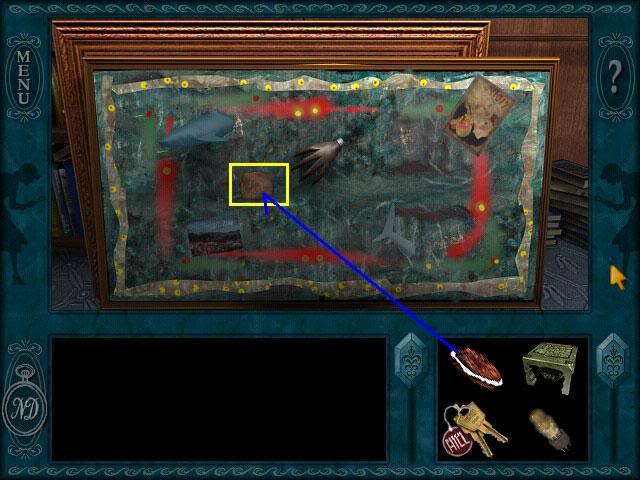
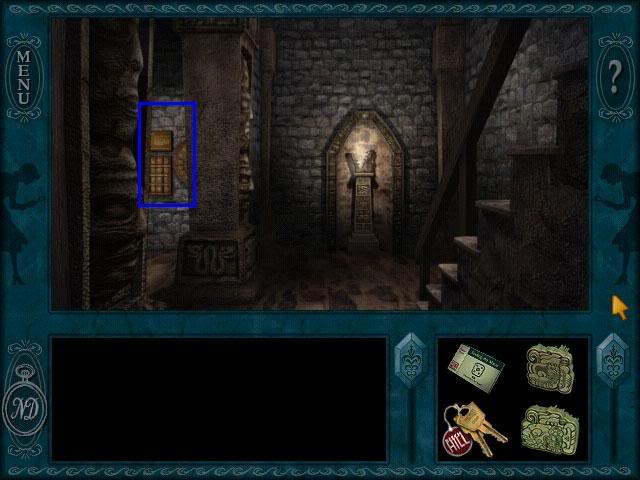
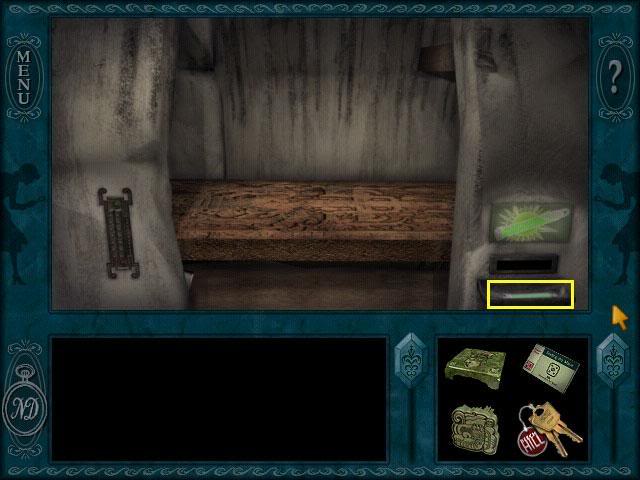
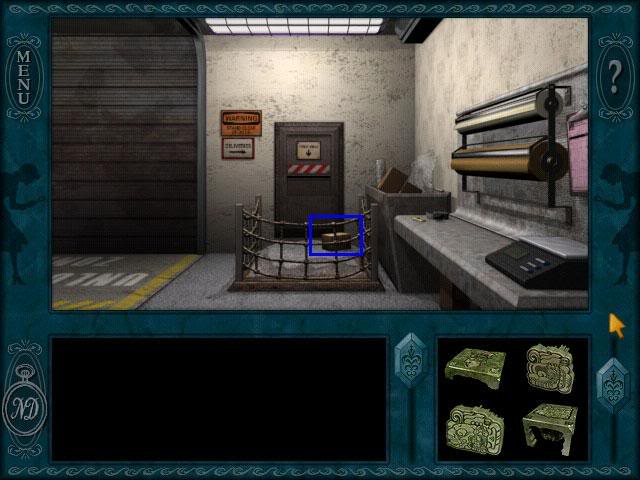
The Lab
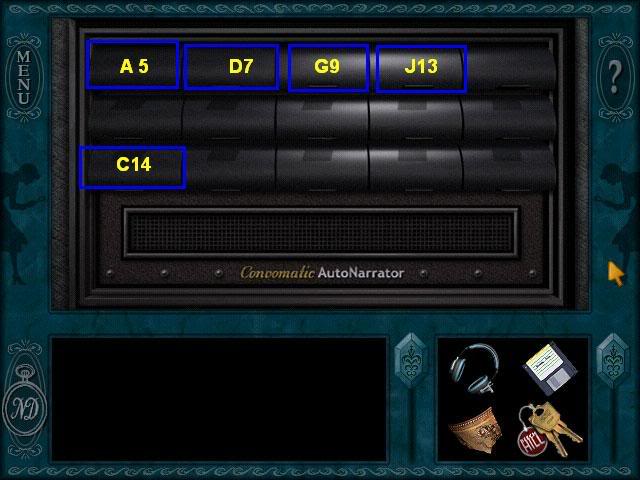
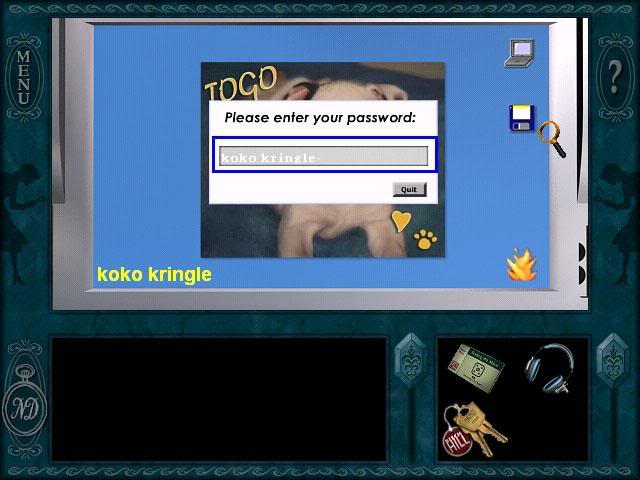
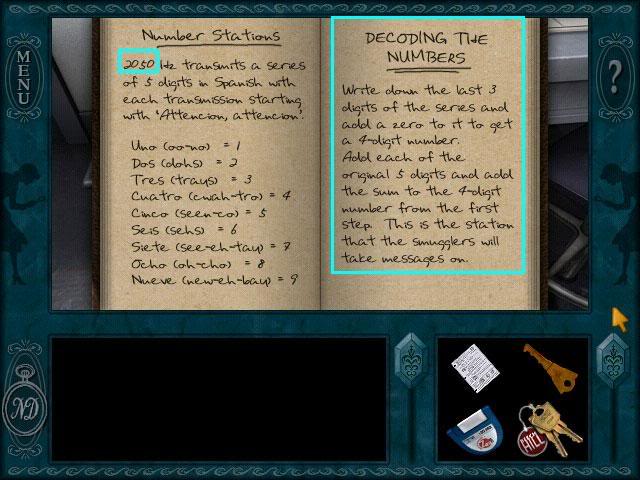
A: 5: Ham radio
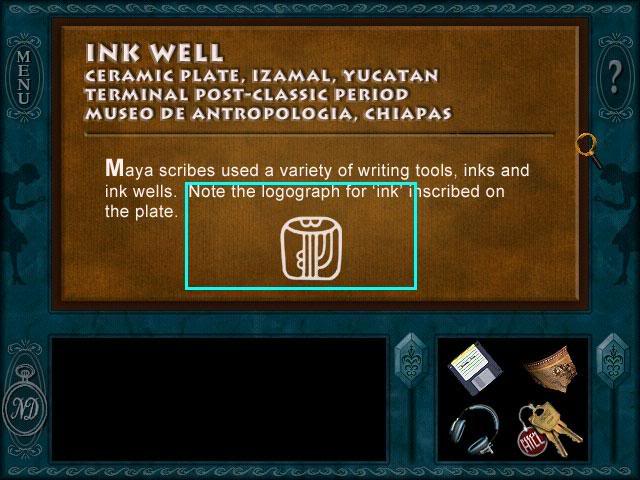
B: 8: Scribes
C: 14: Monster
D: 7: Numbering System
E: 1: Lord Pacal
F: 6: Calendar
G: 9: Body Shaping
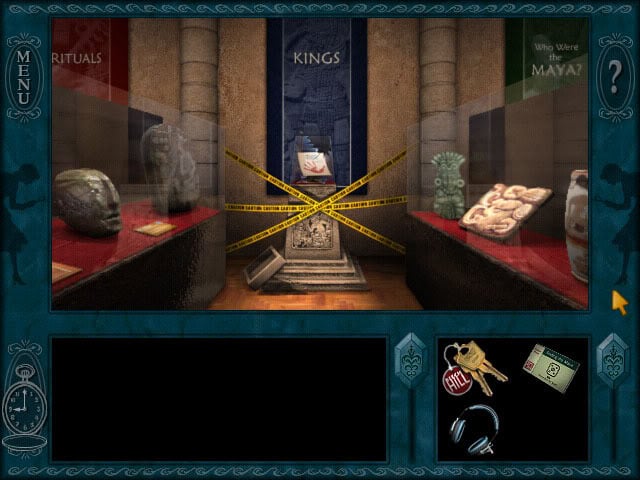
H: 15: Kings
I: 3: Gods
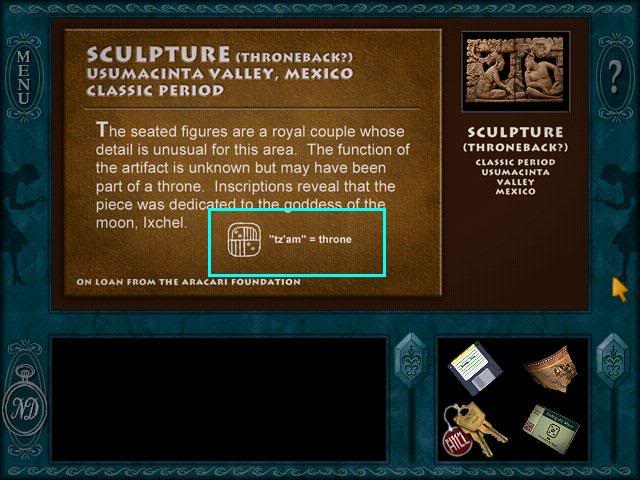
J; 13: Lady Pacal
K: 12: Twins
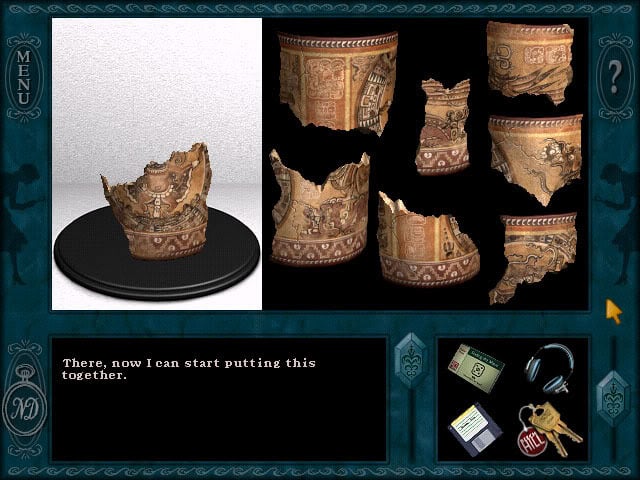
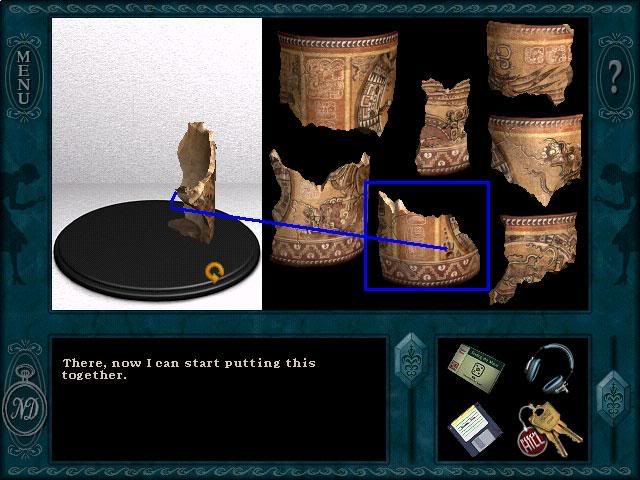
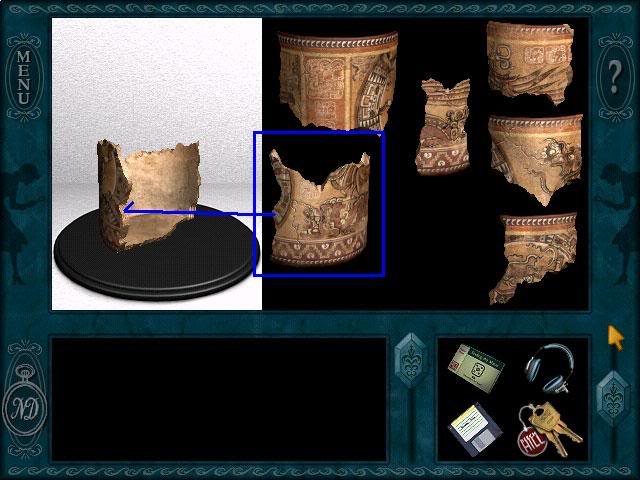
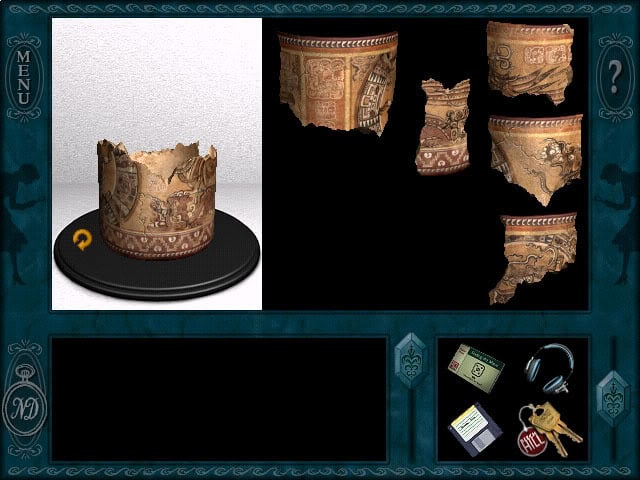
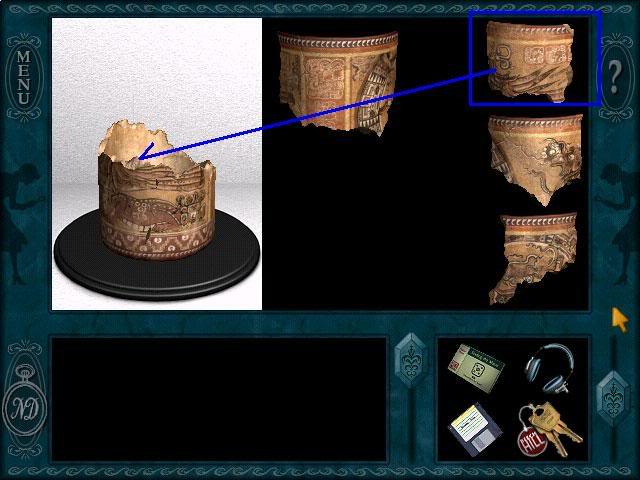
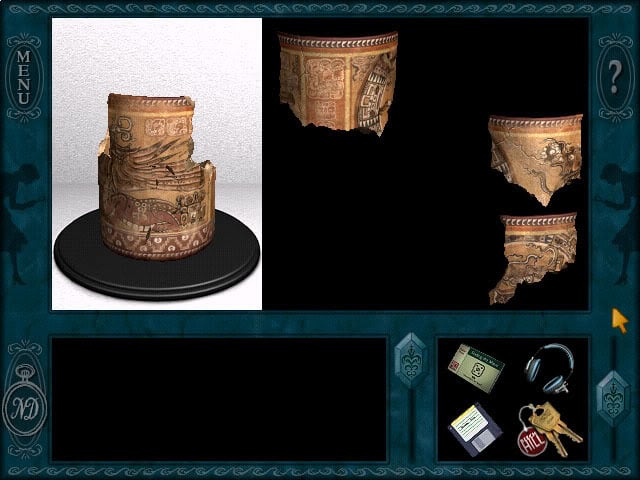
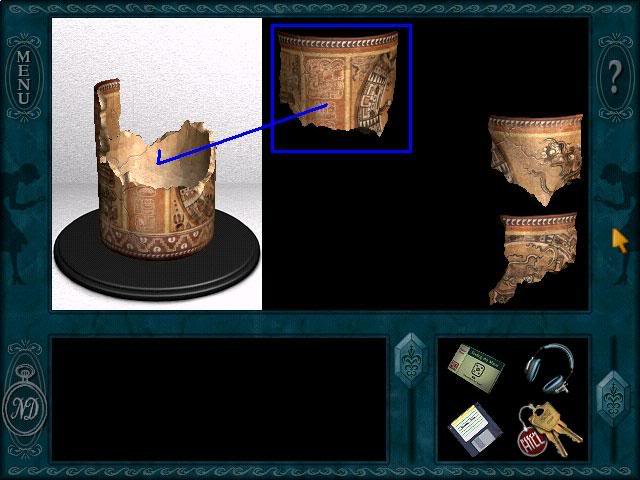
L: 4: Pottery
M: 2: Zac Kuk
N:10: Ball
O:11: bloodletting

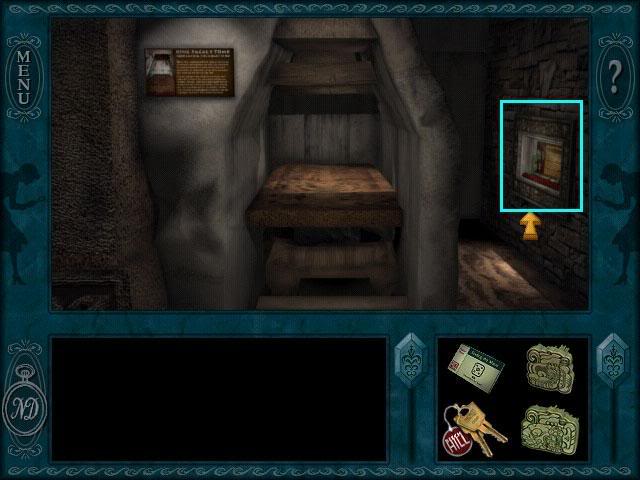
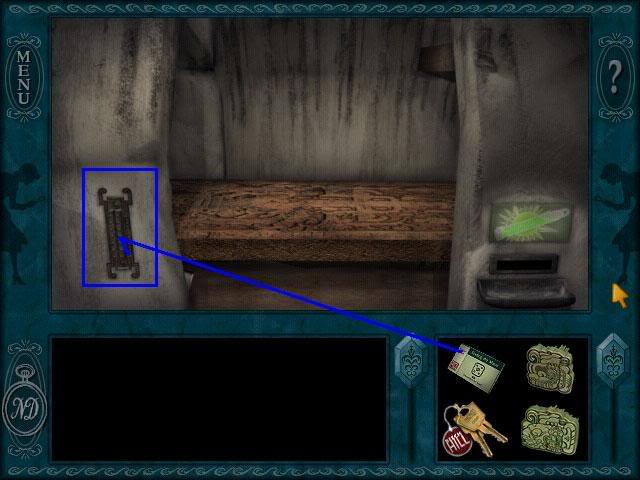
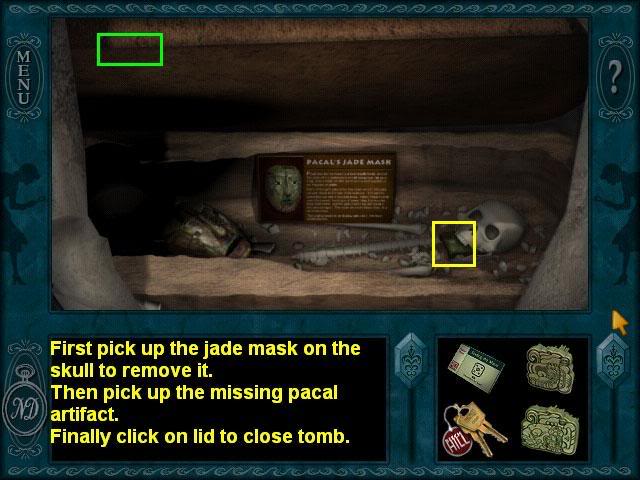
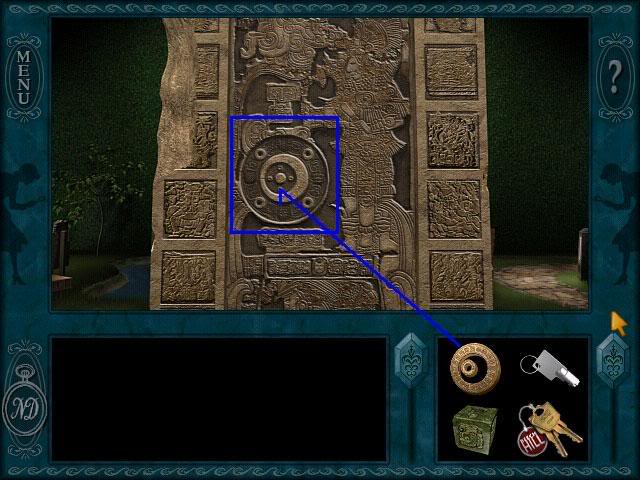
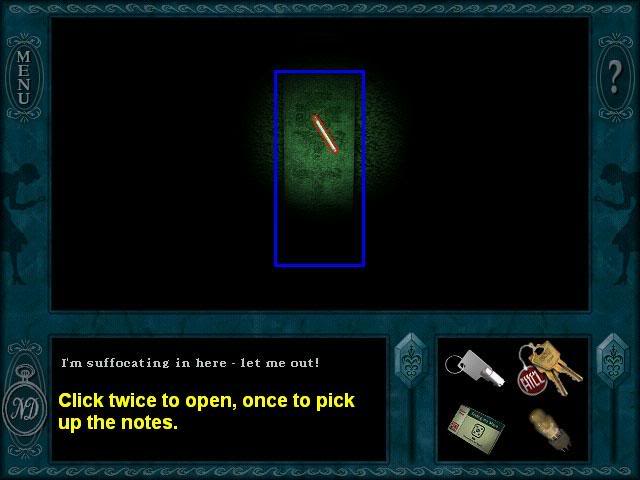
The Temple, first room
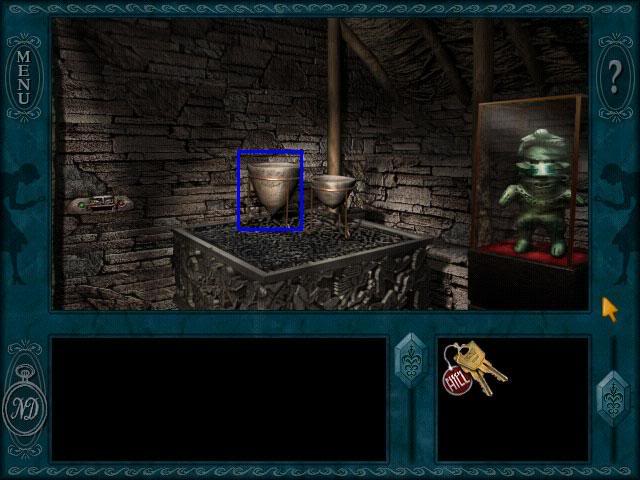
The Lab


Hotel Room
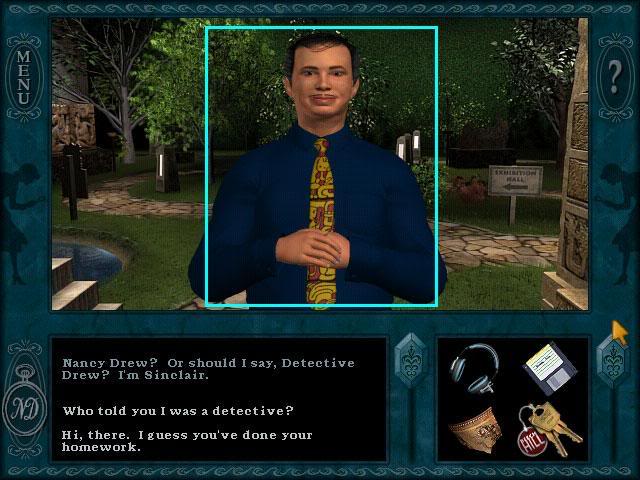
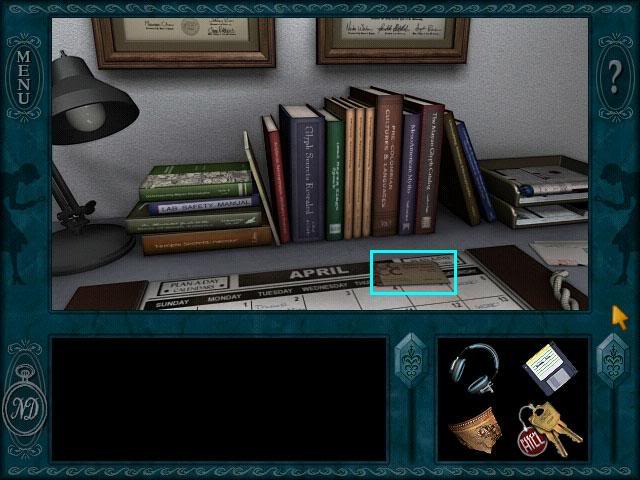
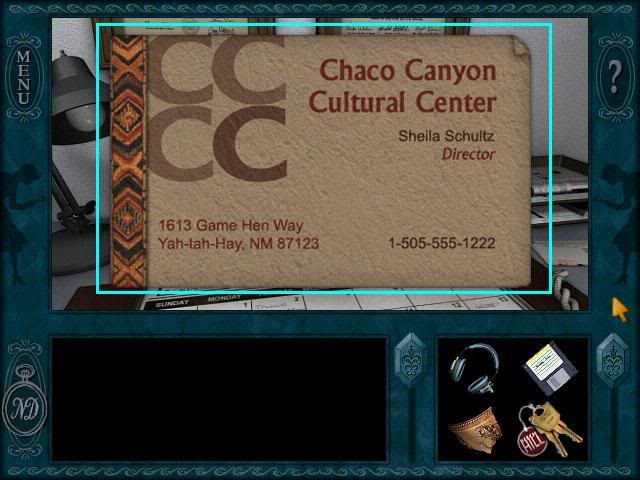
Sinclair’s Office
Mexican Consulate
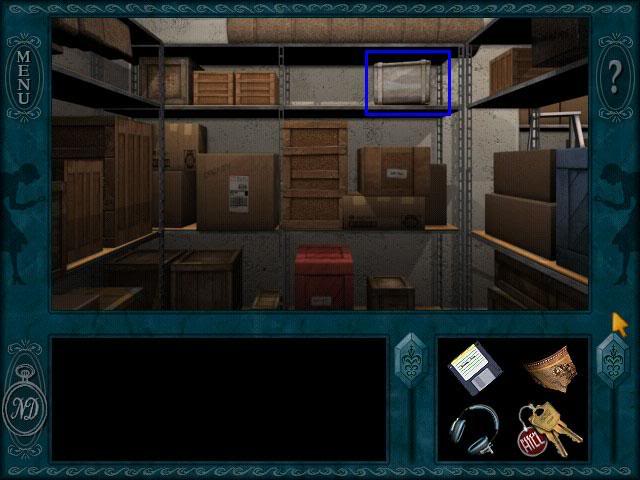
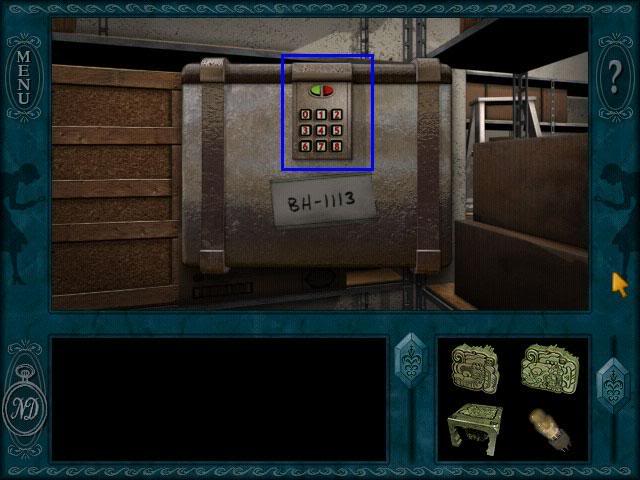
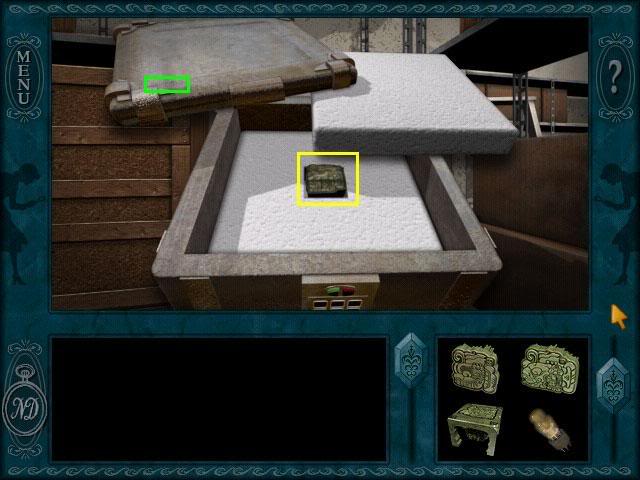
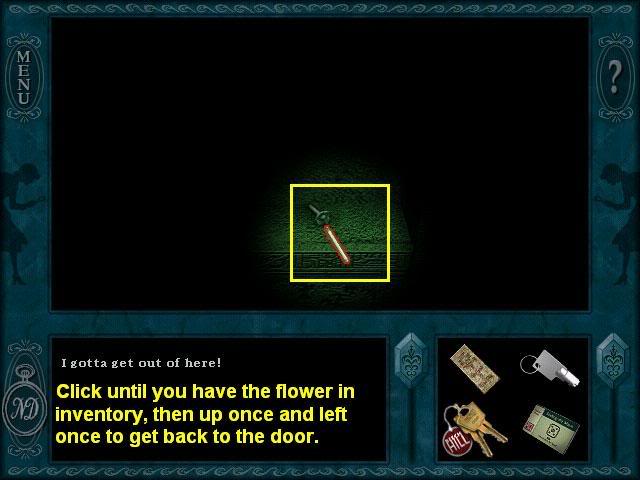
Museum: Lab
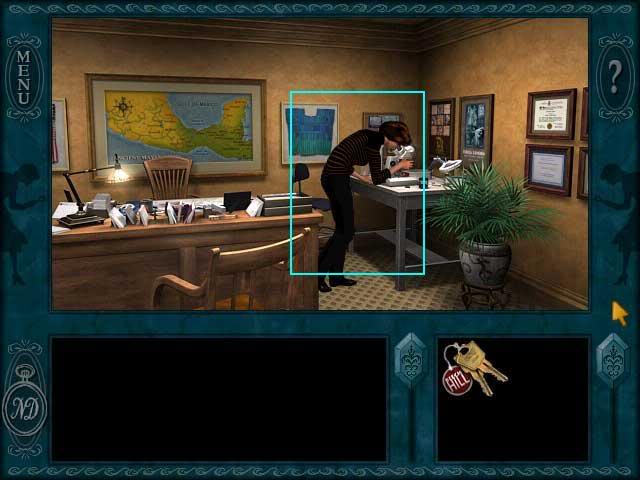
Joanna’s Office
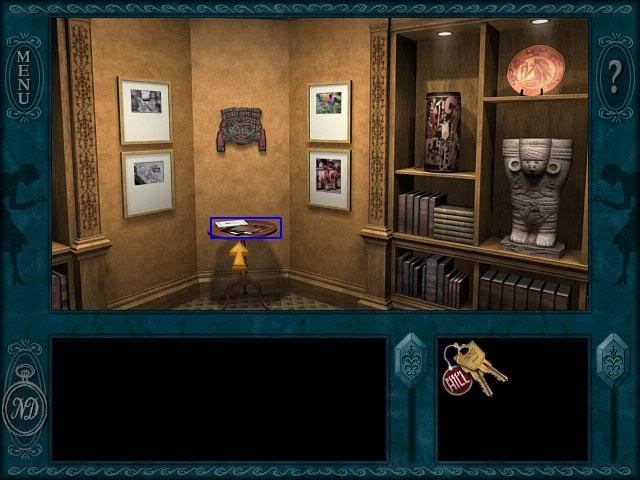
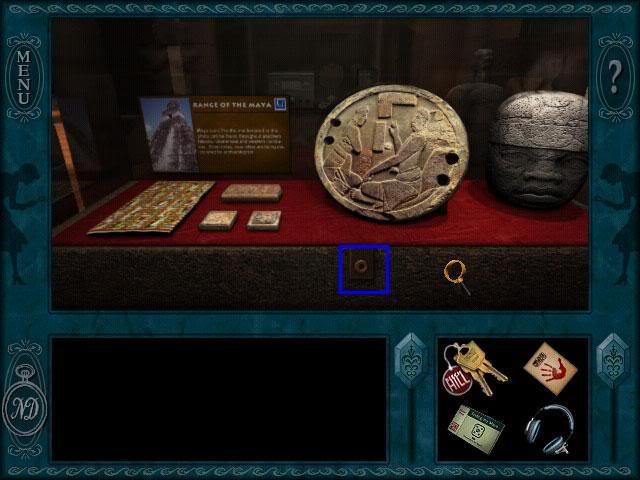
Exhibition Hall
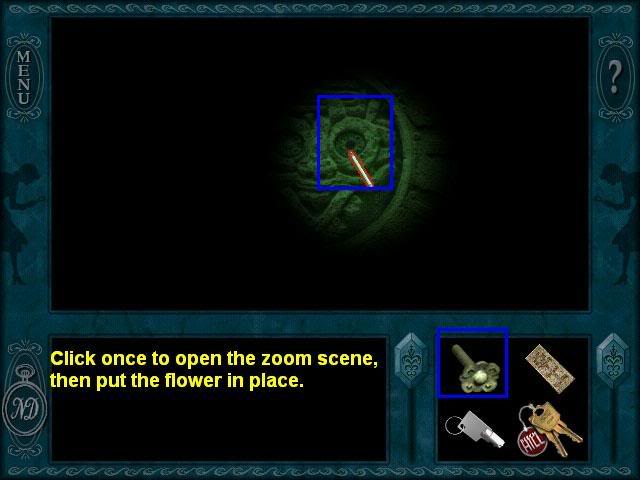
Lab

Joanna’s Office
Lab
Sinclair’s Office
Mexican Consulate
Joanna’s Office
Lab
Exhibition Hall

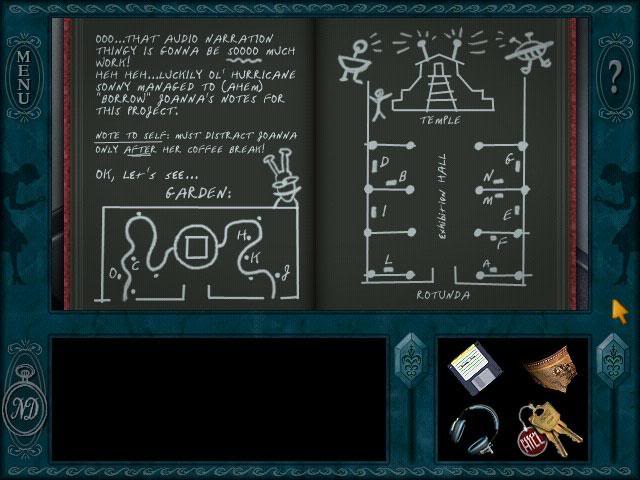
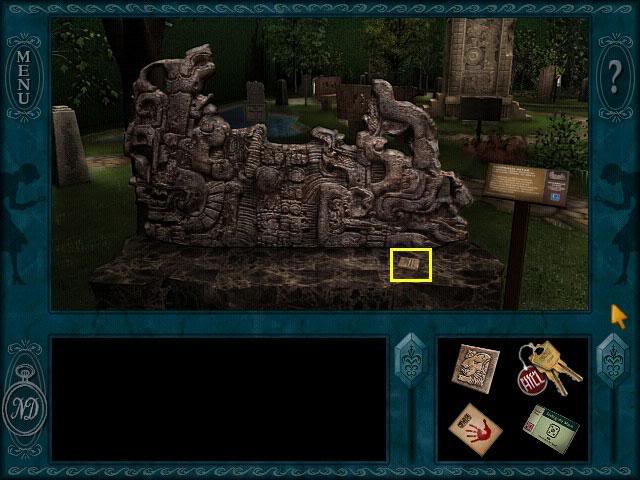
The Garden
Exhibition Hall
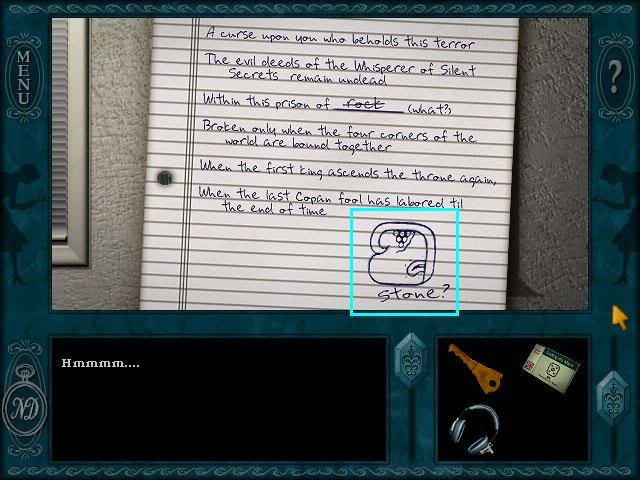
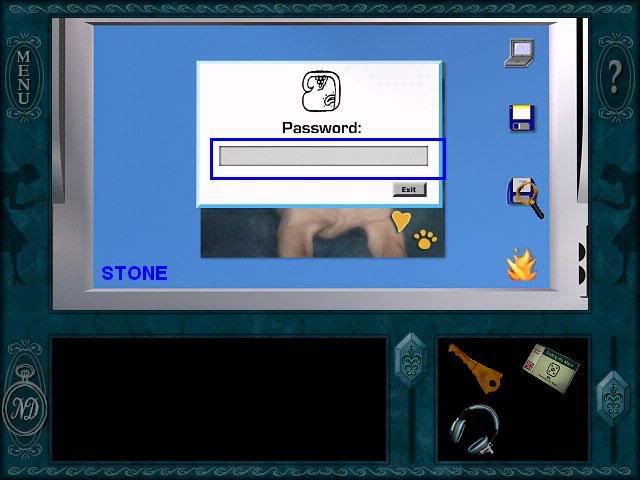
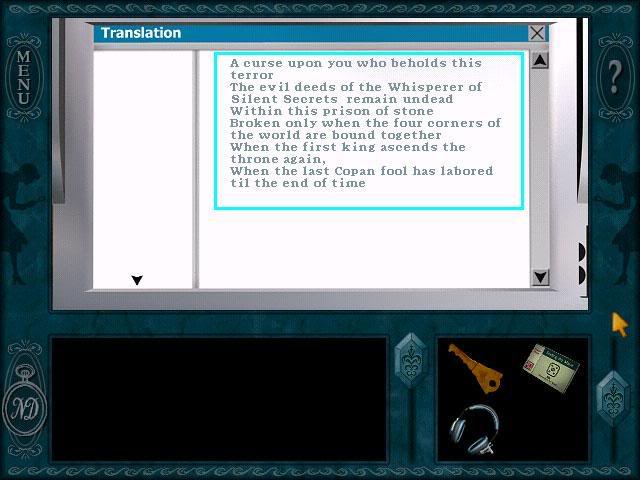
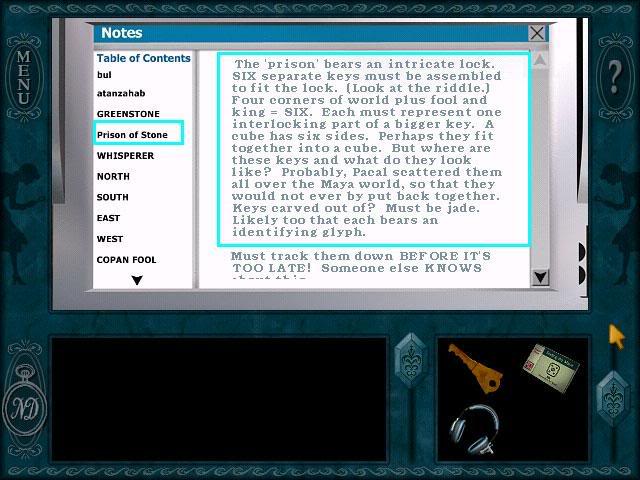
Solution:
Back to the lab.
The Lab
Joanna’s Office
The Lab
Exhibition Hall
Hotel Room
Joanna’s Office
Lab
Hospital
Sinclair’s Office
Mexican Consulate
Hospital
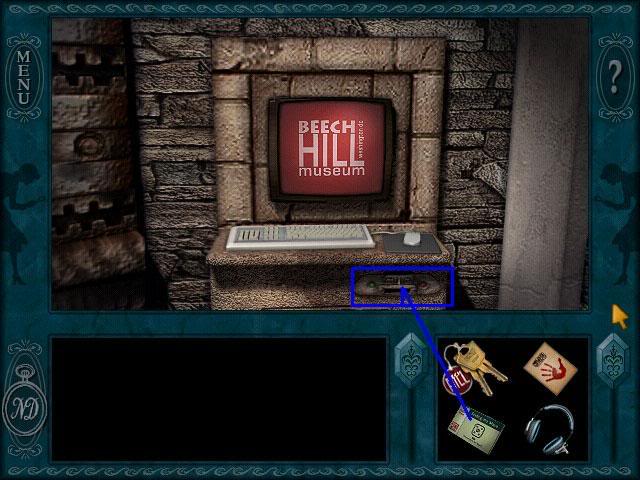
Museum: Lab

Hotel Room
Mexican Consulate
Hospital
Museum: Joanna’s Office

Mexican Consulate
Hospital
Museum: Lab
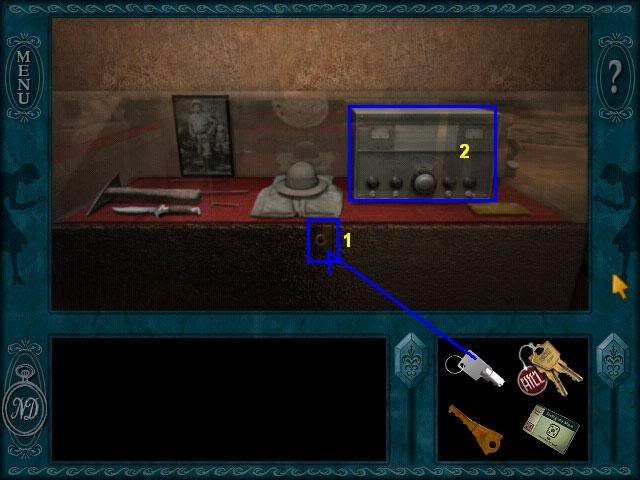
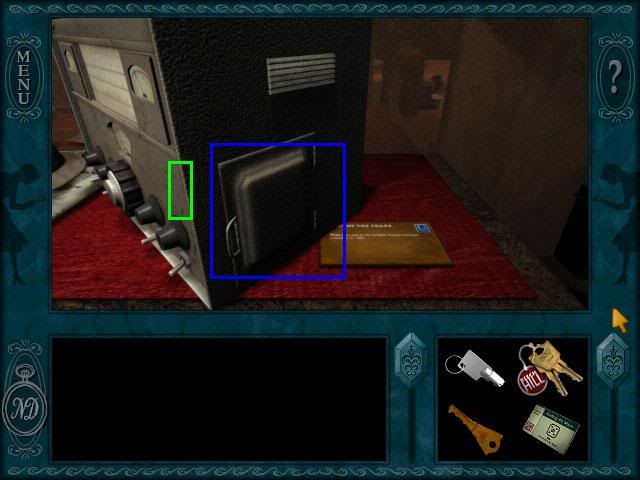
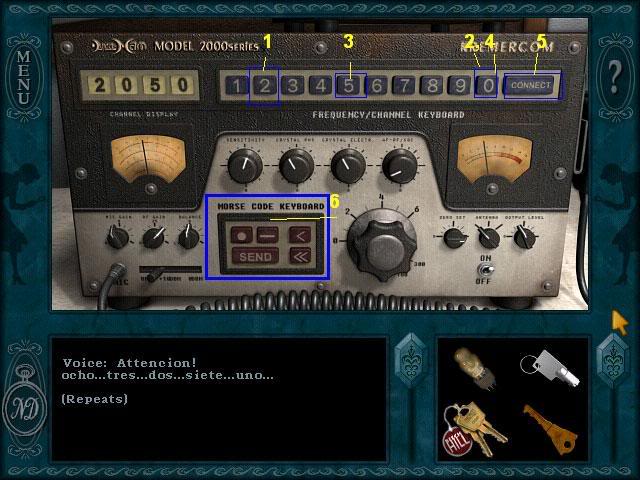
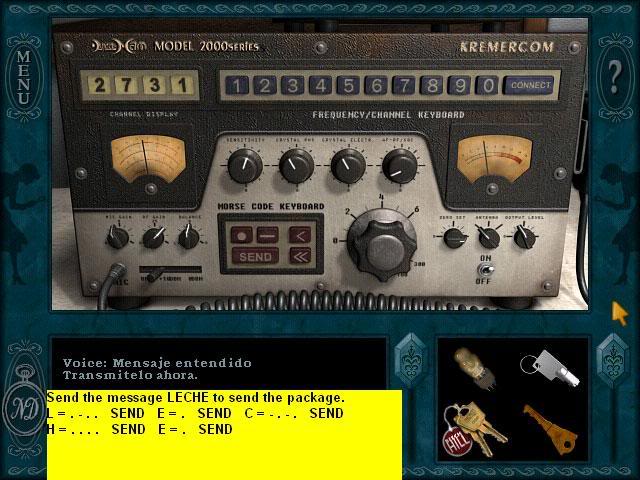
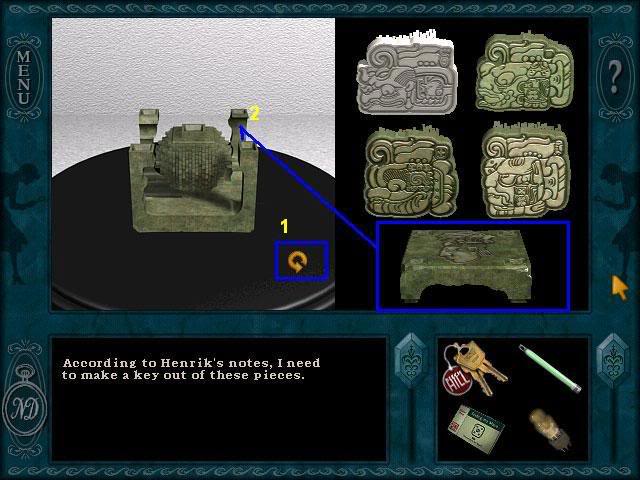
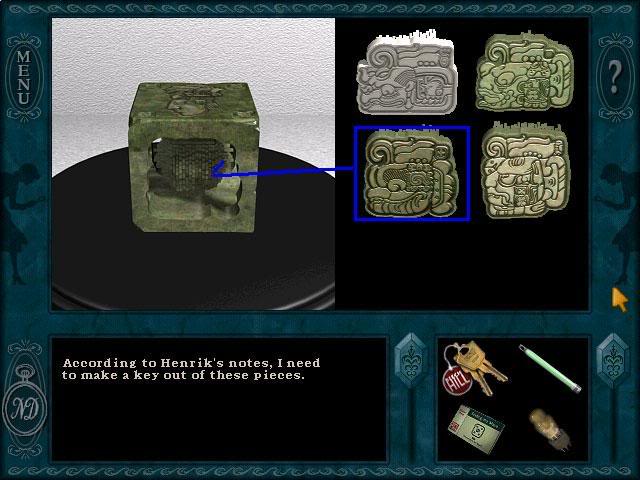
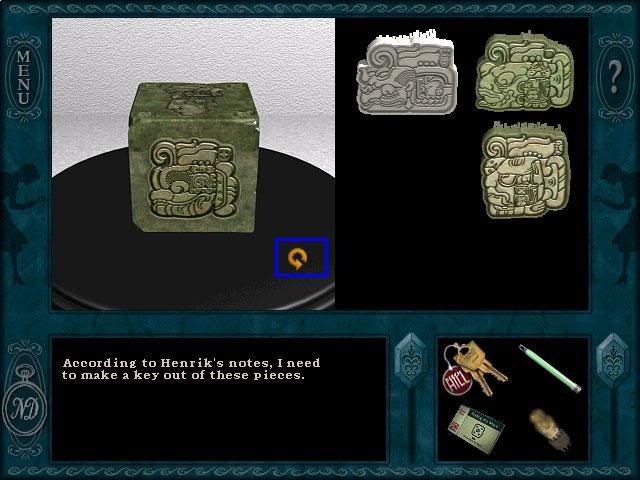
Lab
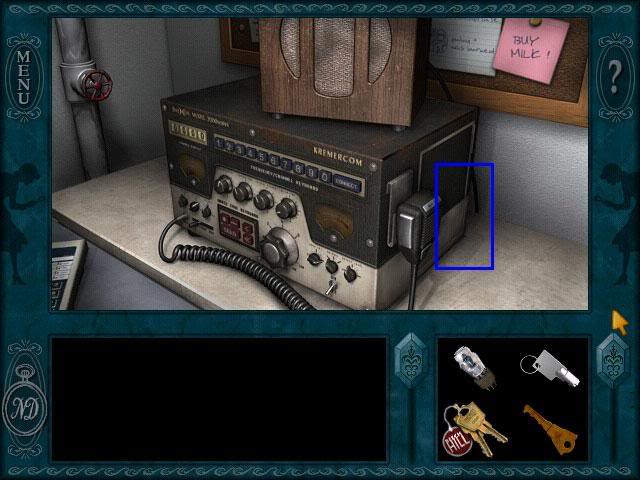
C = dash dot dash dot SEND
O = dash dash dash SEND
A = dot dash SEND
T = dash SEND
L = dot dash dot dot SEND
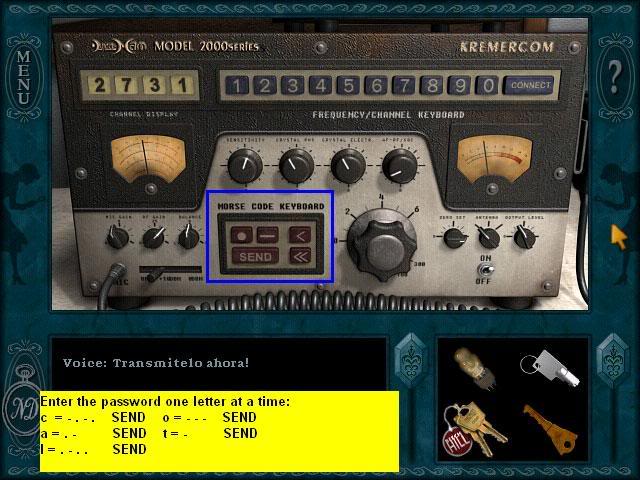
L = dot dash dot dot SEND
E = dot SEND
C = dash dot dash dot SEND
H = dot dot dot dot SEND
E = dot SEND
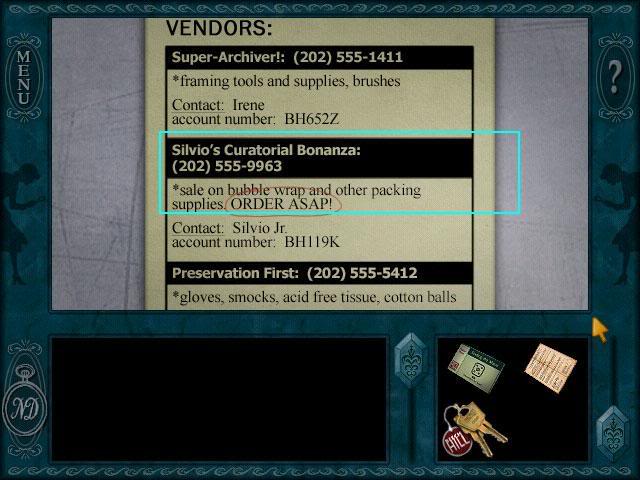
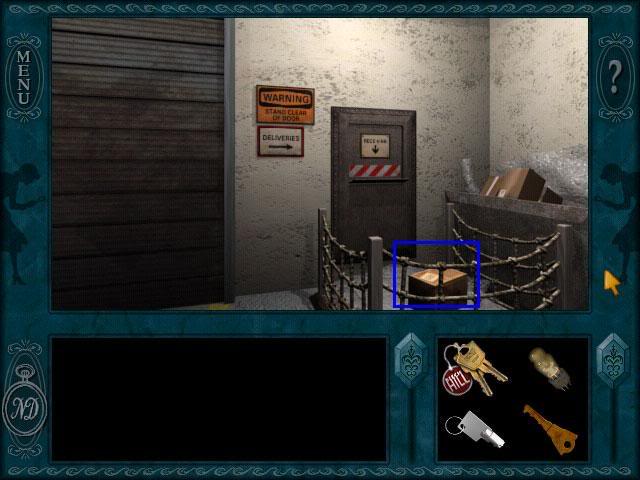
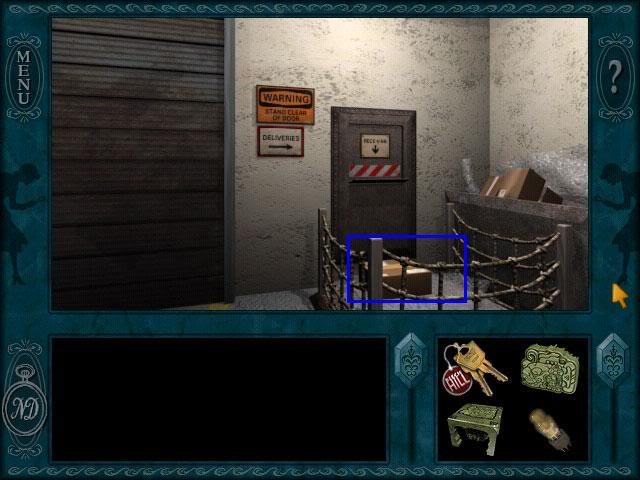
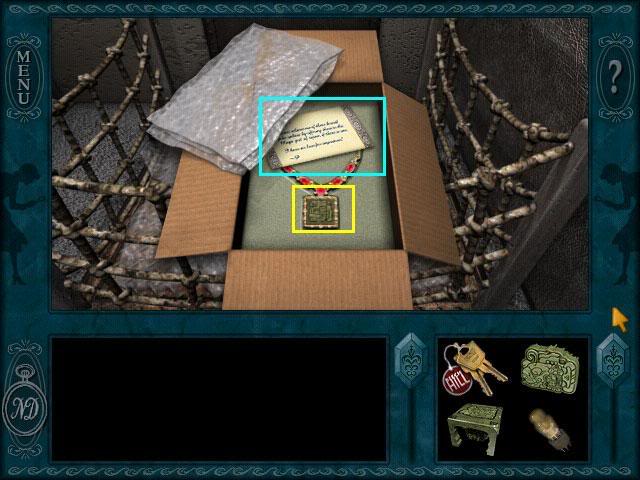
Shipping
Hospital
Hotel
Sinclair’s Office
Shipping
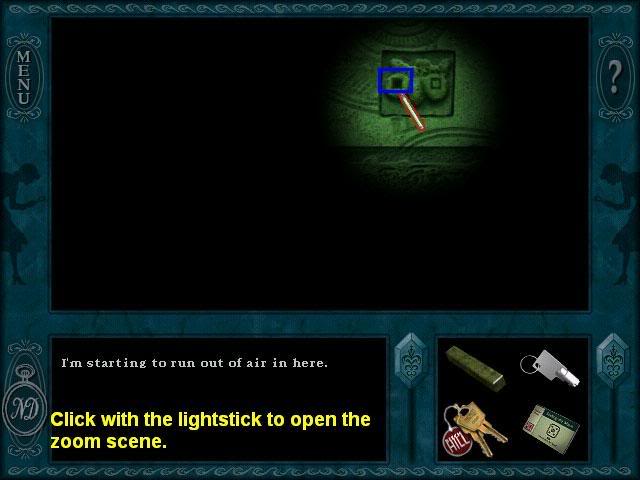
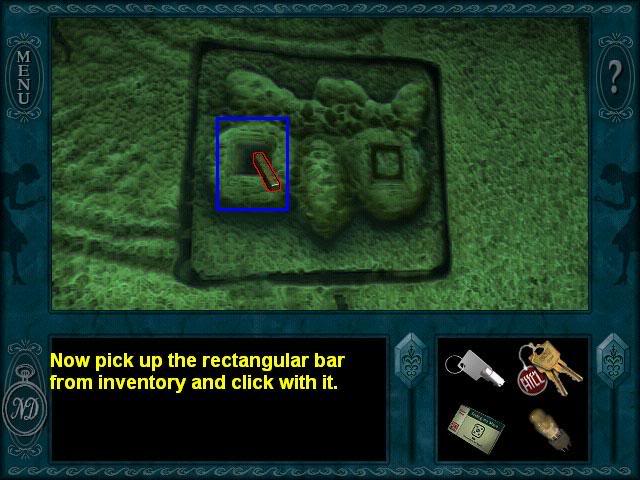
Museum: Temple
Level 1:
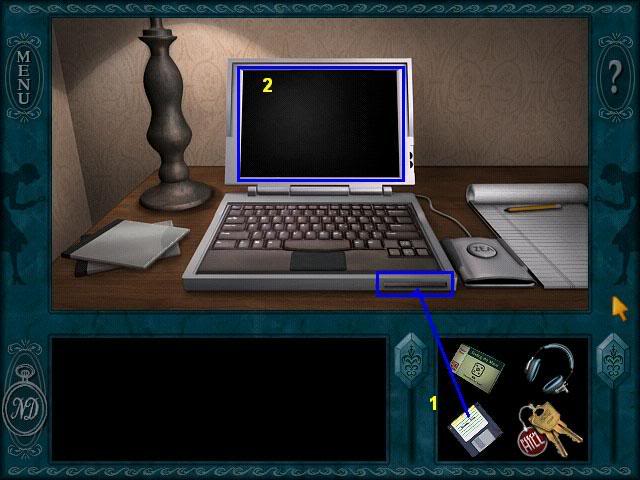
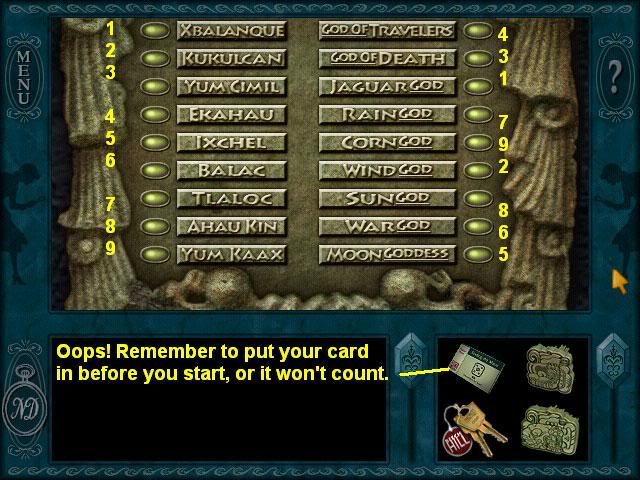
Level 1 quiz: This is on the computer on the left side of the room. Put in your card first!
Solution: Palenque, Zac Kuk, tzolkin, Itzamna, Quiche (or any of the other languages)
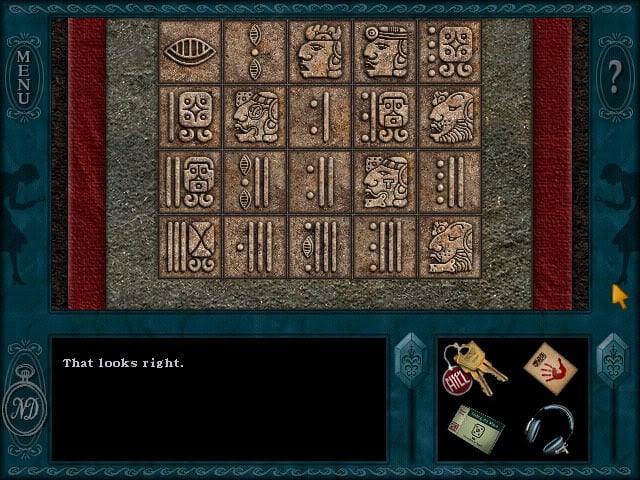
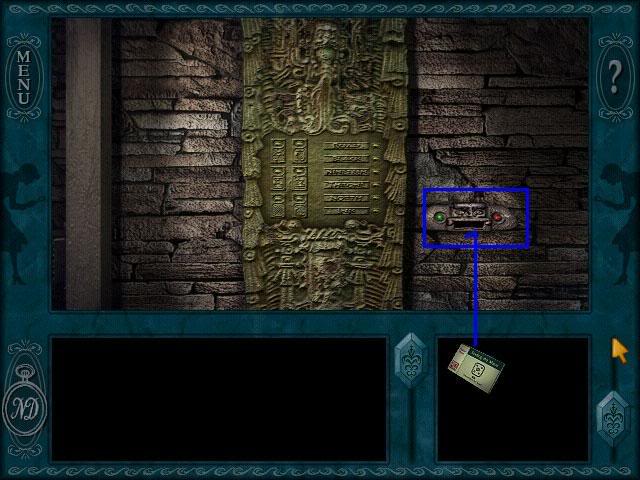
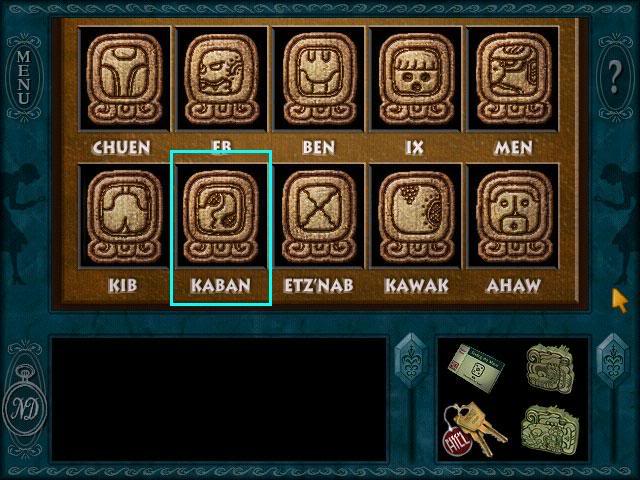
Level 1 glyph game. This is on the big green plaque in the center of the room. Again, put your temple card in first, or it won’t count. You have to click on a glyph, then its word. You have to get them all right in a row or the sequence will start from the beginning. When a word is right, it will get a green light next to it. You can do it by trial and error or by searching through all your notes for Mayan glyphs.
Solution:

Level 1 Bul game. This is on the computer on the right side of the room. Make sure you put your temple card in the slot first, or it won’t count.This seemed fairly random. I just always clicked two rolls for my side until my guy got within 4 of the right. Then I clicked 1 roll, 1 pass. For the computer, if he’s close enough to hurt you, you can pass his second turn. It worked, anyway.
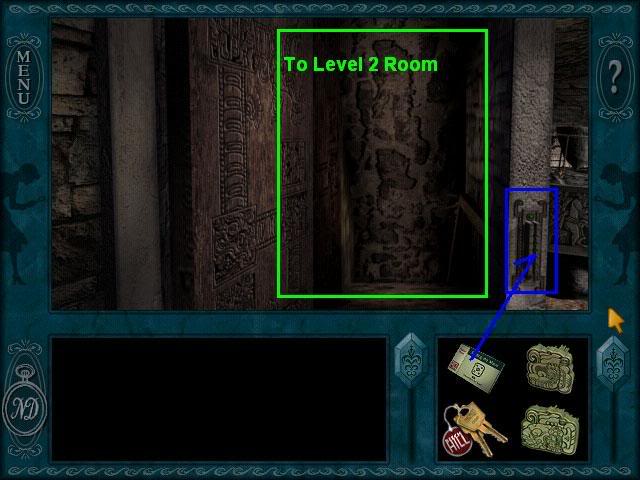
Level 2:
Level 2 quiz. This is on the computer on the left wall.
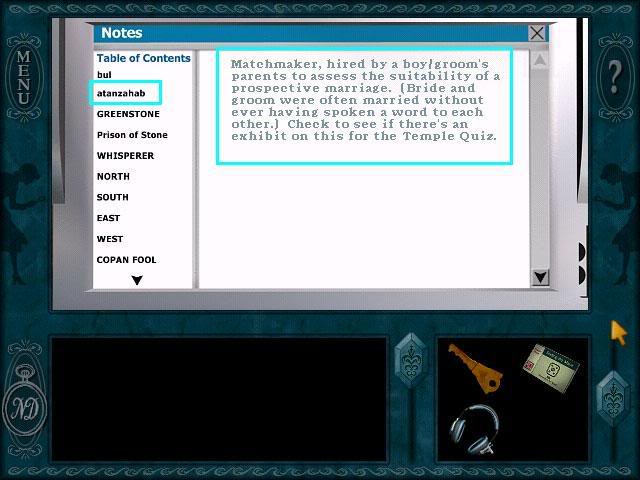
Solution: Lady Xoc, bicephalic, huipil, promiment nobleman, atanzahab
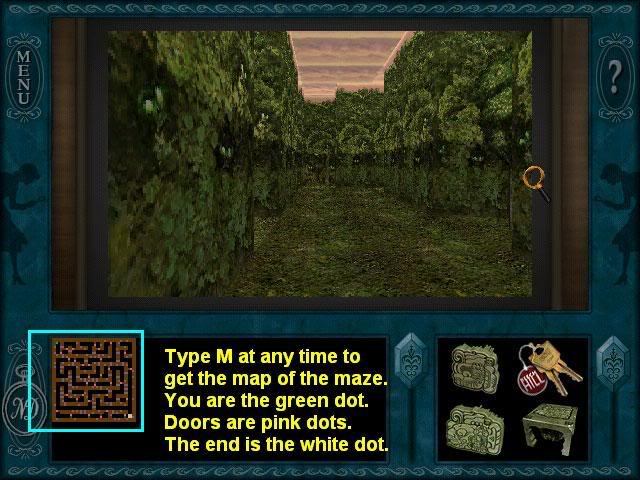
Level 2 maze. This is on the other computer station.
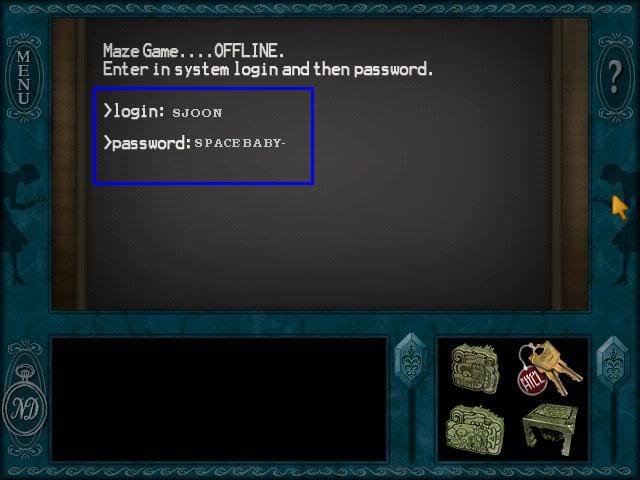
A few tips:

Level 2 Basketball game
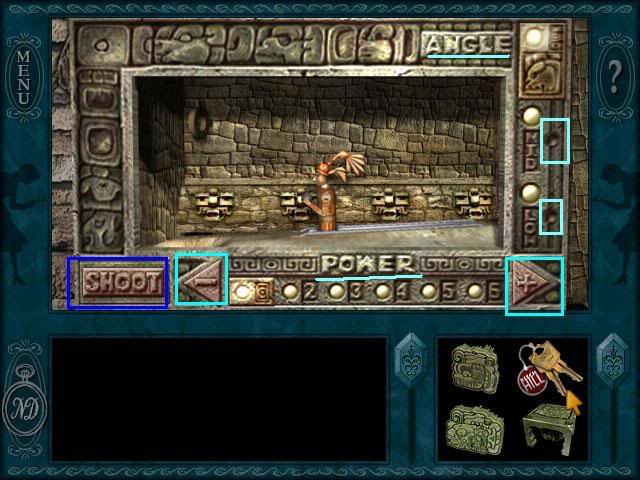
Solution:
Power 4 Angle High (original setting)
Power 3, Angle Mid
Power 5, Angle Mid
Power 6, Angle Low
Level 3:
Go downstairs, and look around.
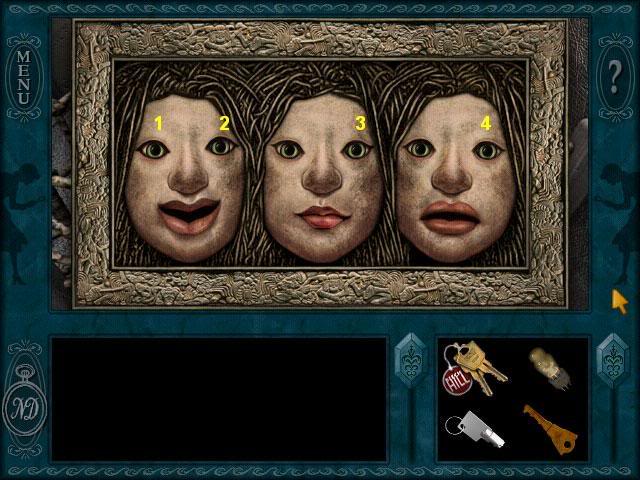
Level 3 Match Test.
Level 3 Quiz
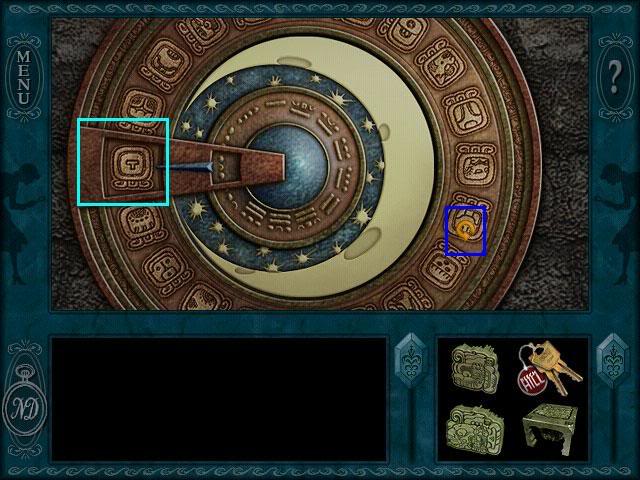
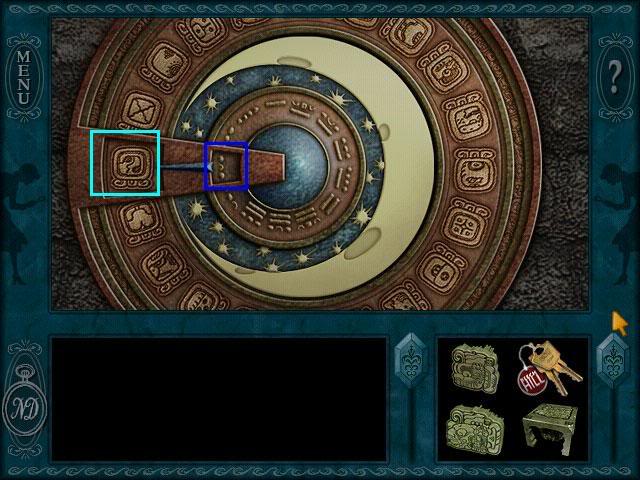
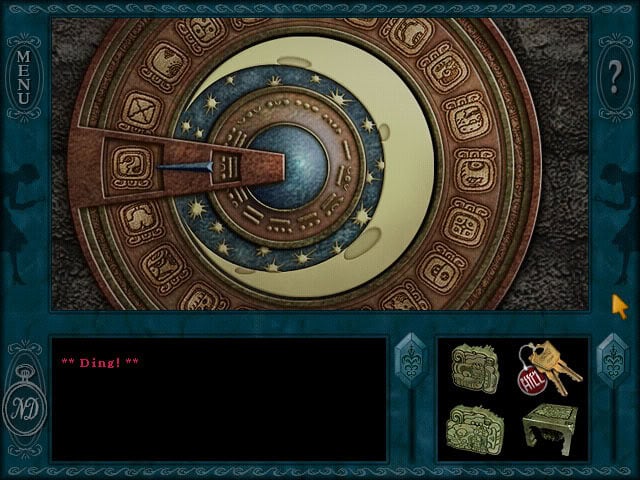
Level 3 Calendar.
Temple, Level 3 Room (after completing tasks)
A Brief Recap
Let’s recap:
Hotel Room
Museum: Joanna’s Office
Shipping
Lab

Save your game here.
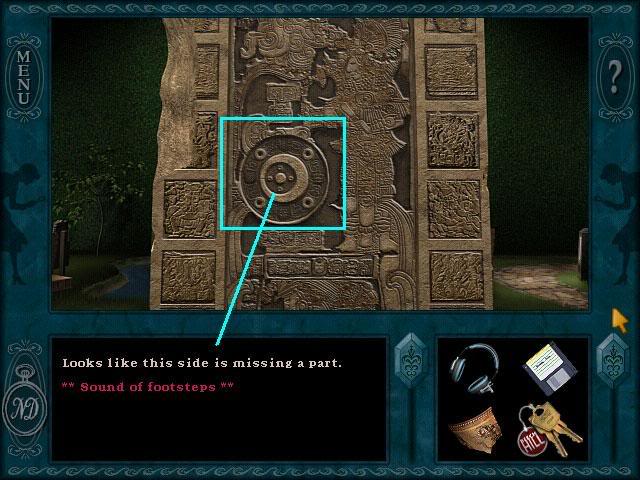
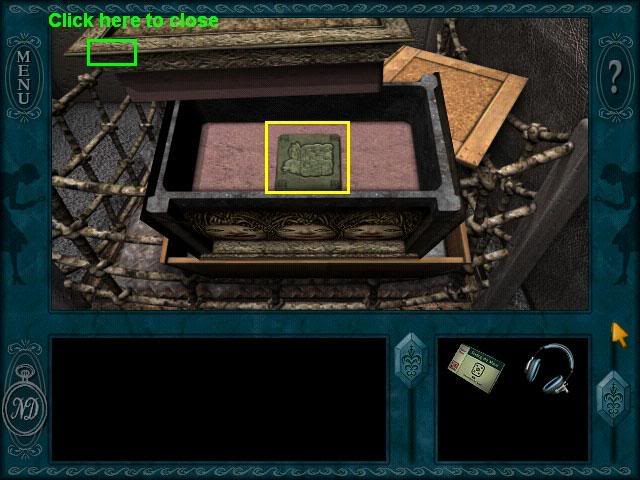
Garden: Monolith
Exhibition Hall
Garden: Monolith
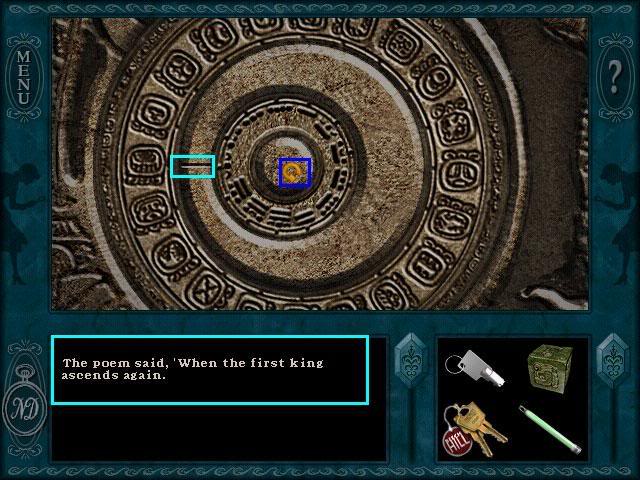
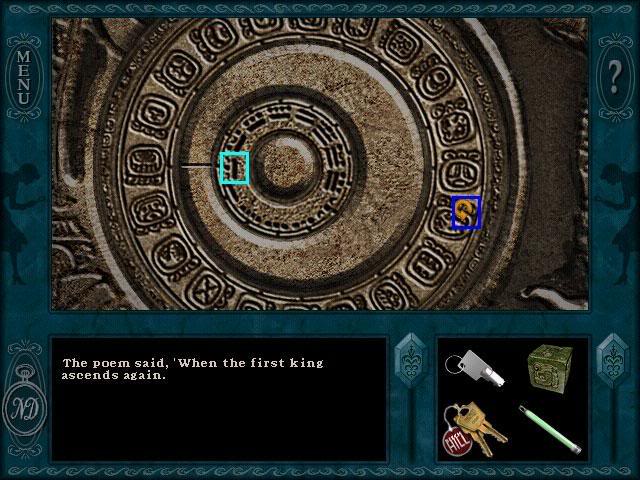
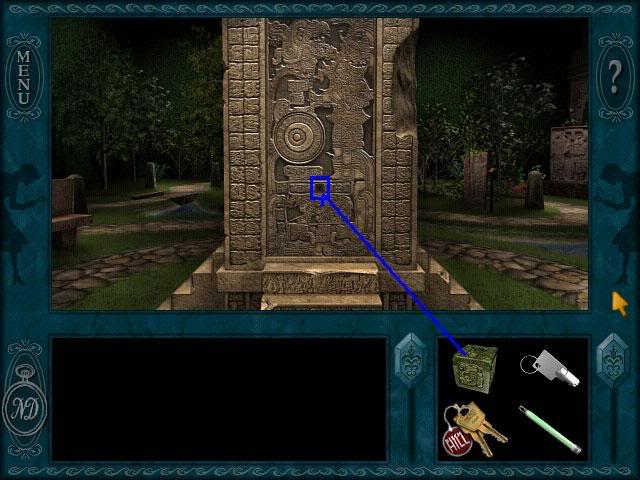
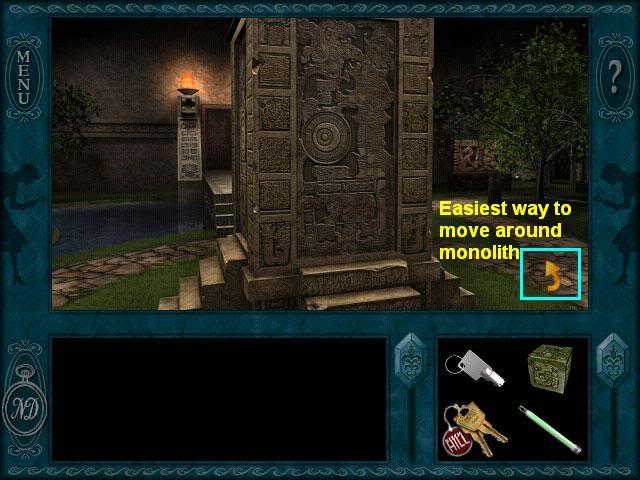
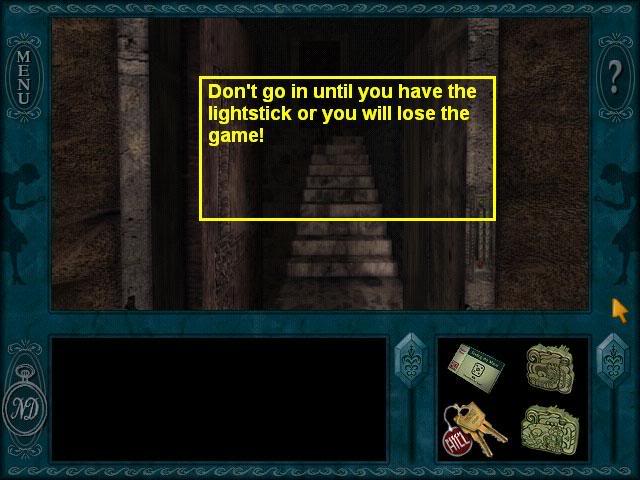
Inside the Monolith: Timed Puzzle Coming Up

Tips:
This ends the Strategy Guide.
“;
