![Digimon UP Tier List [Supports, Buddies, and Partners]](/wp-content/uploads/2026/07/digimon-up-tier-list.jpg "Digimon UP Tier List [Supports, Buddies, and Partners]")
Digimon UP Tier List [Supports, Buddies, and Partners]
These Digimon will get you UP the leaderboard.

![Haze Seas Boss Drops [Chances, Locations, and How to Spawn]](/wp-content/uploads/2026/07/haze-seas-boss-drops.jpg "Haze Seas Boss Drops [Chances, Locations, and How to Spawn]")

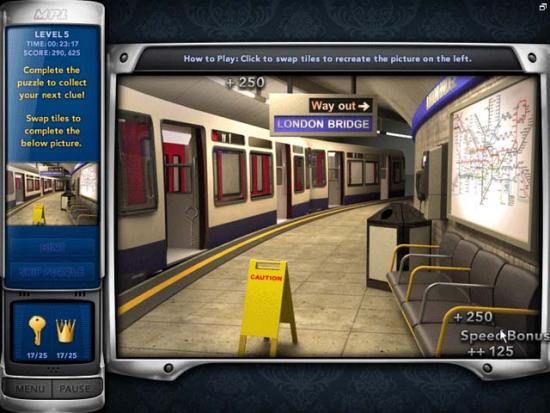
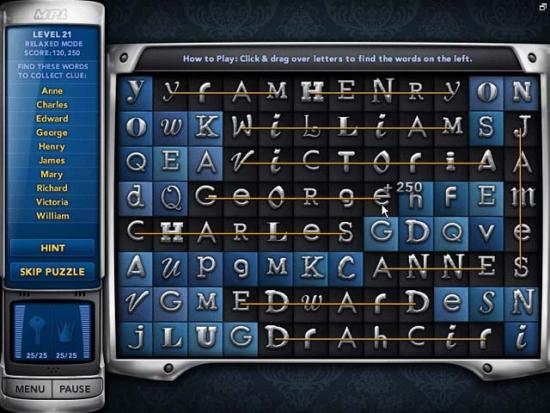
Welcome to the Mystery P.I. – The London Caper walkthrough on Gamezebo. Mystery P.I. – The London Caper is a hidden object game created by SpinTop Games. This walkthrough includes tips and tricks, helpful hints, and a strategy guide to how to complete Mystery P.I. – The London Caper.
Welcome to the Mystery P.I. – The London Caper walkthrough on Gamezebo. Mystery P.I. – The London Caper is a hidden object game created by SpinTop Games. This walkthrough includes tips and tricks, helpful hints, and a strategy guide to how to complete Mystery P.I. – The London Caper.
A note regarding this walkthrough:
This is a game that relies almost entirely on randomized objects. As a result, no two gaming experiences will be the same. Therefore, the guide, instead of being divided according to “levels”, will be divided into four sections:
General Tips; Crowns, Keys, & Handcuffs; Level End Mini-games, and The Final Puzzle
The scoring system for Mystery P.I. – The London Caper functions as follows:
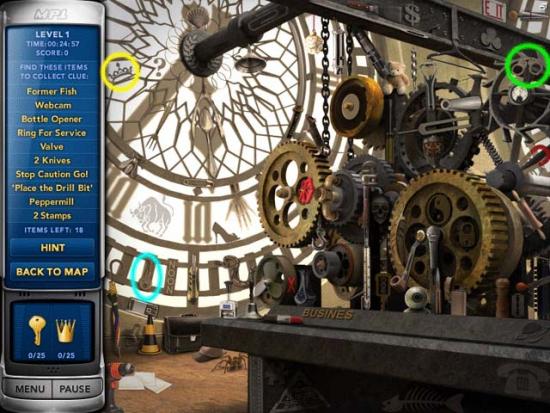
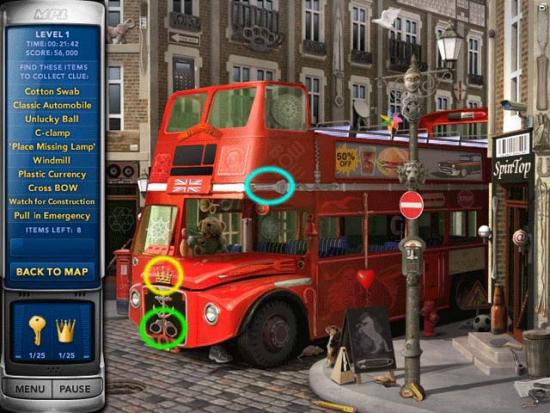
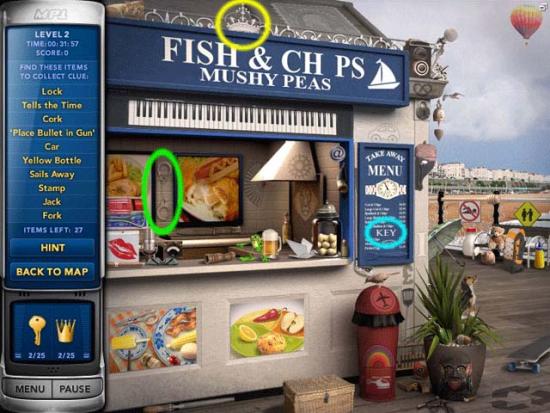
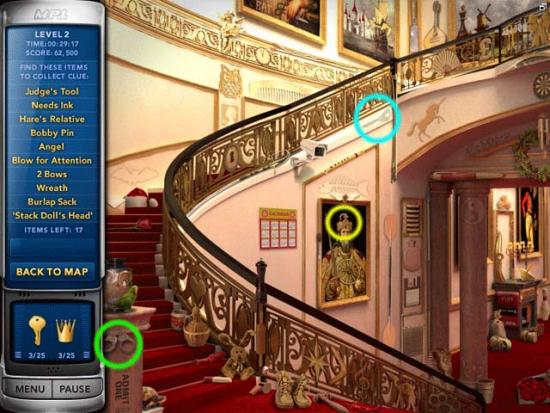
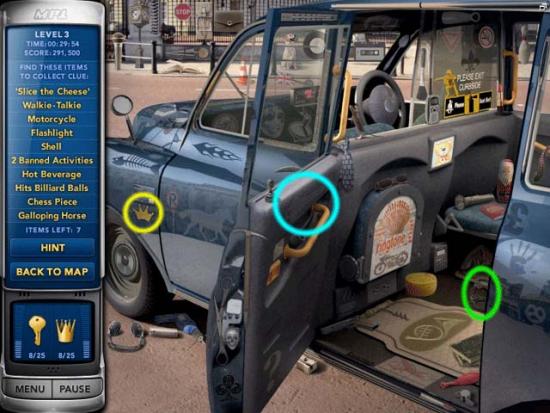
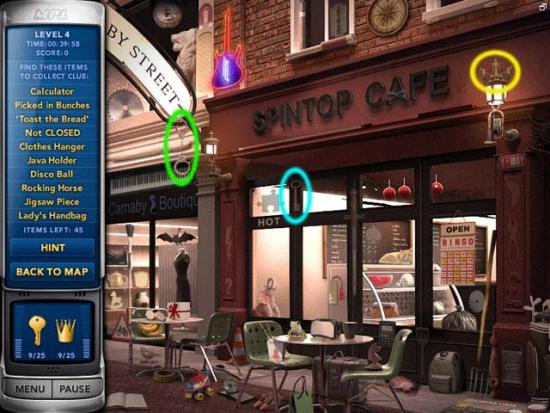
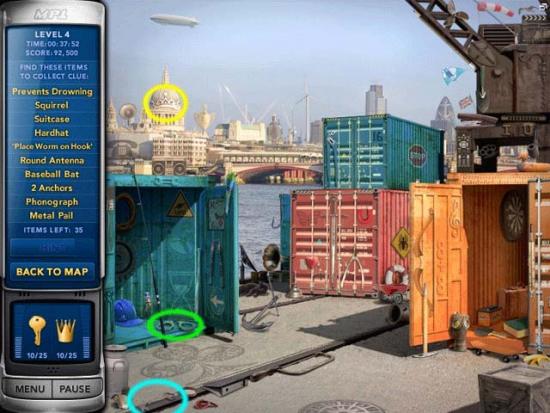
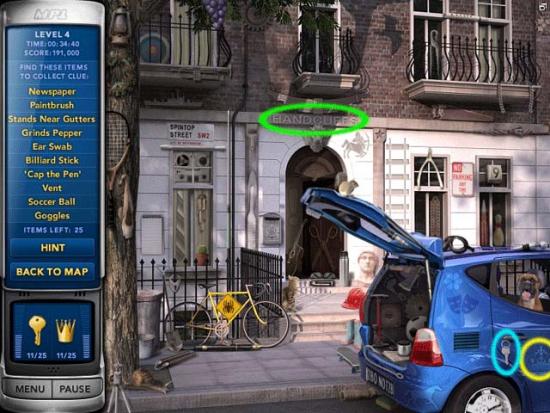
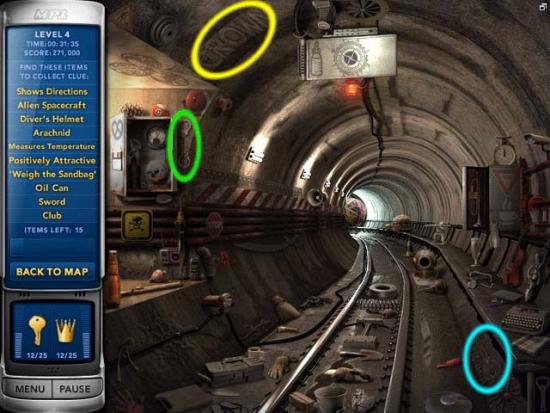
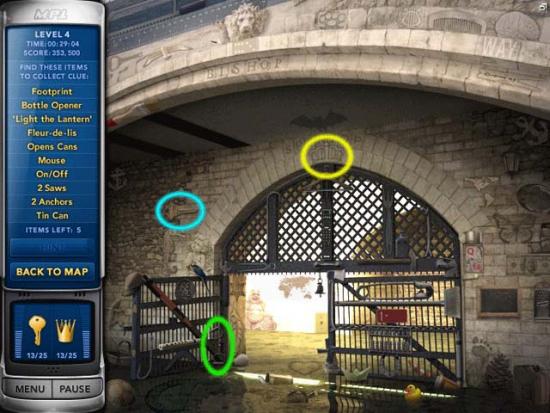
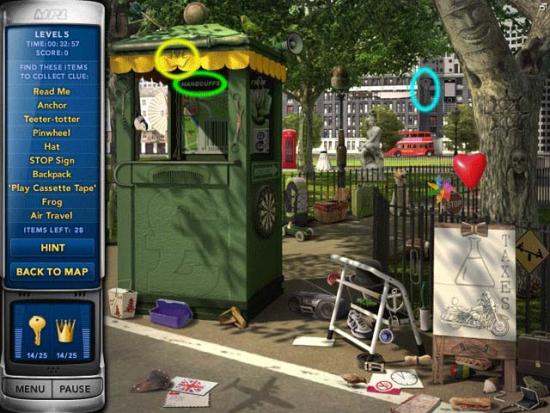
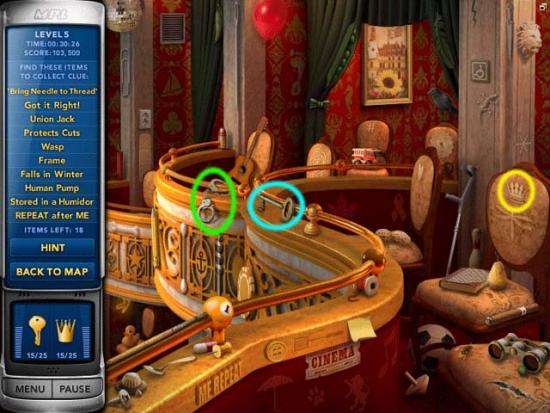
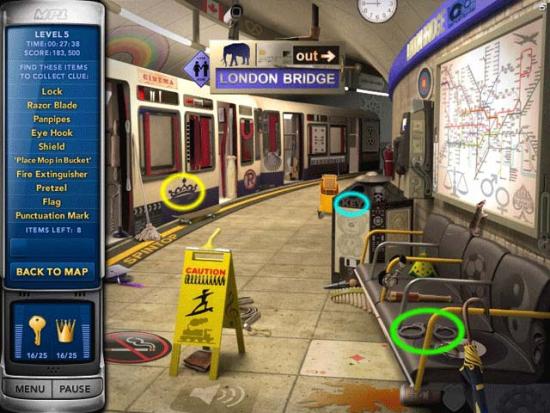
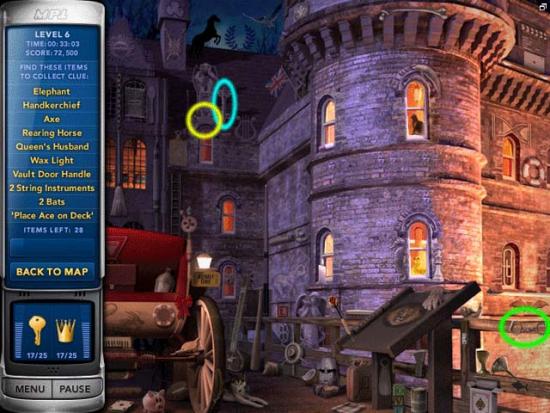
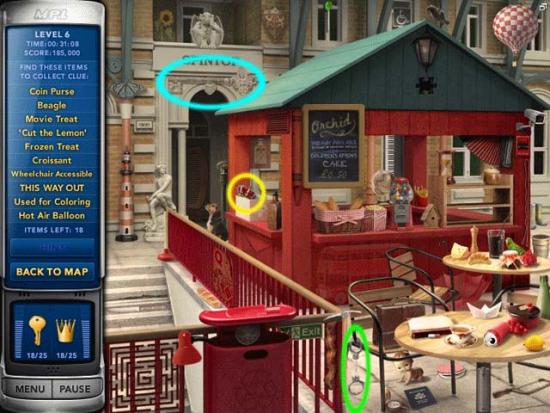
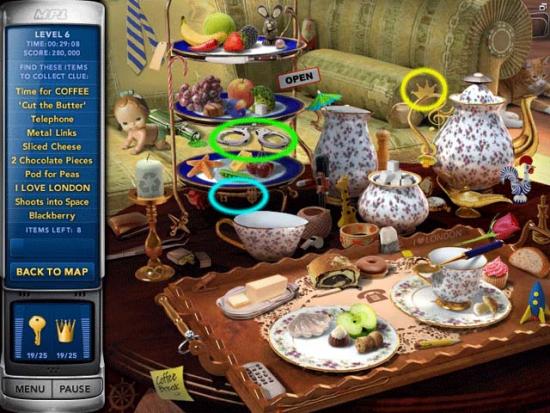
The following section concentrates on the locations of the 25 Keys, Crowns, and Handcuffs only. This section will be organized according to the order of appearance of each scene in the game. If you miss something the first time through, don’t worry: you can pick up the items in these scenes at any point of the game where these scenes occur.


This section concentrates specifically on the puzzles you will encounter at the end of each level. Puzzles will be listed according to level #.
Level 1
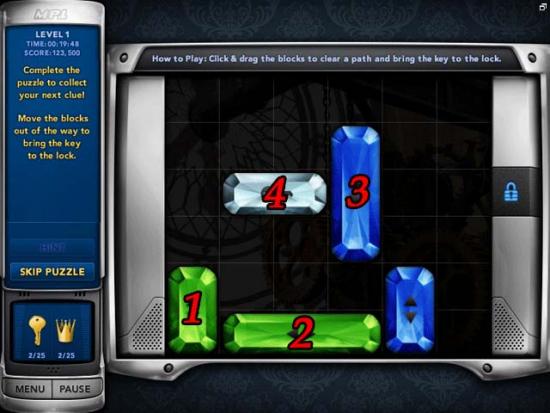
1. Slide this small green block to the top of the screen.
2. Slide this large green block all the way to the left.
3. Slide this large blue block to the bottom.
4. Slide the Key all the way to the right to unlock the lock.
Your reward will be the Faucet.
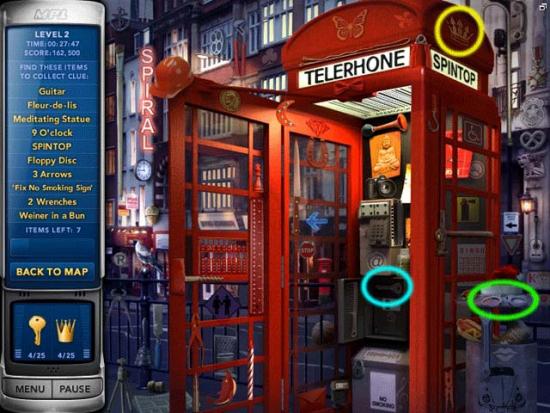
Level 2
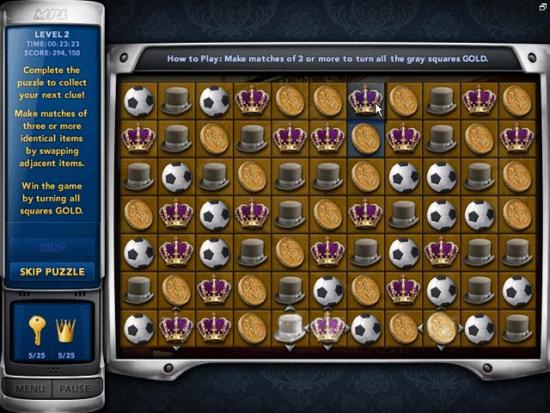
Your reward will be the Whistle.
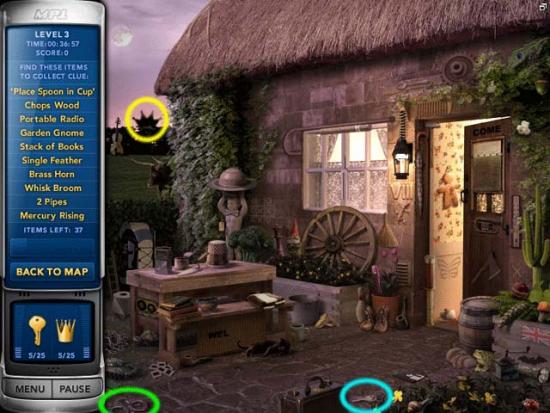
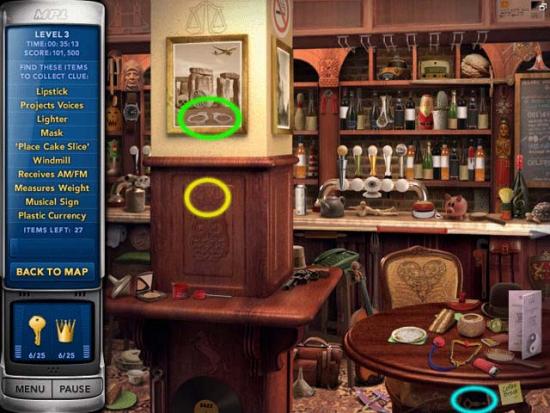
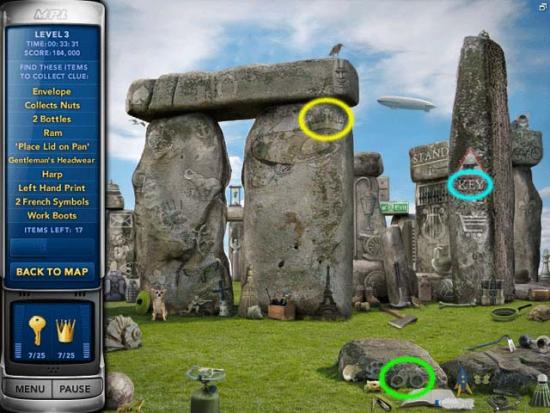
Level 3
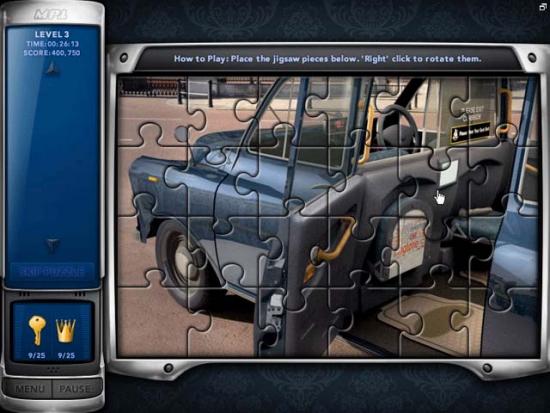
Your reward will be the Flashlight.
Level 4
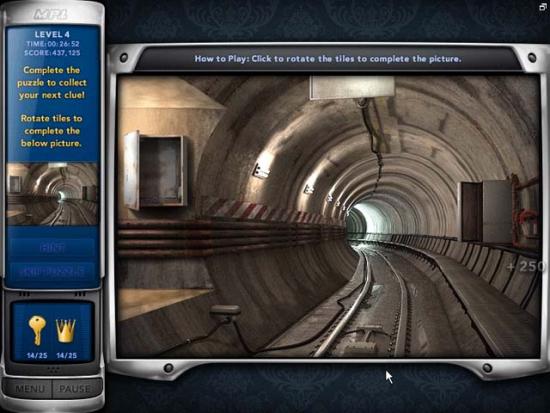
Your reward will be the Magnet.
Level 5
Your reward will be the Corkscrew.
Level 6
Your reward will be the Vault Handle.
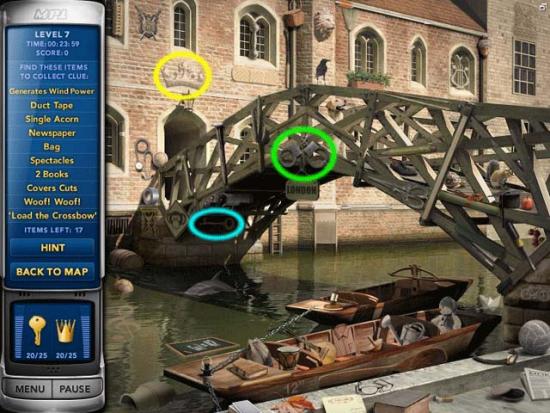
Level 7
Your reward will be the Duct Tape.
Level 8
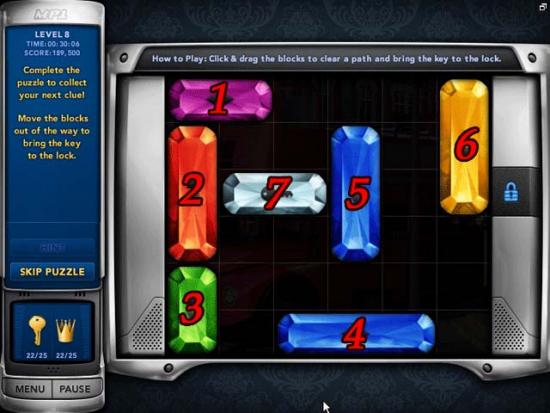
1. Move the purple block over to the right 1 space.
2. Move the red block up to the top of the screen.
3. Move the green block up so that it’s touching the red block.
4. Slide the horizontal blue block over to the far left.
5. Slide the vertical blue block all the way to the bottom.
6. Slide the yellow block all the way to the bottom.
7. Slide the Key all the way to the right to unlock the lock.
Your reward will be the Safteypin.
Level 9
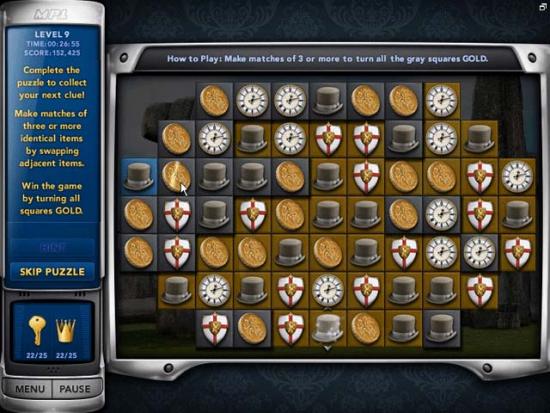
Your reward will be the Binoculars.
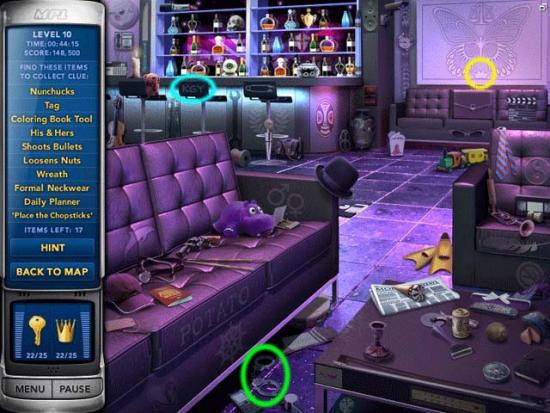
Level 10
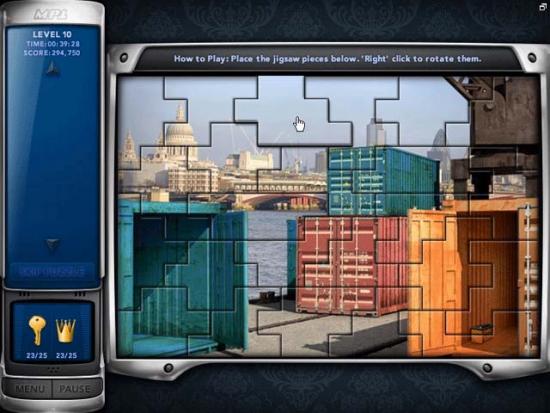
Your reward will be the Car Battery.
Level 11
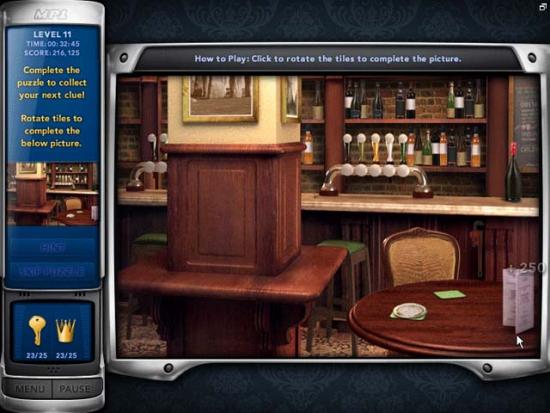
Your reward will be the Wrench.
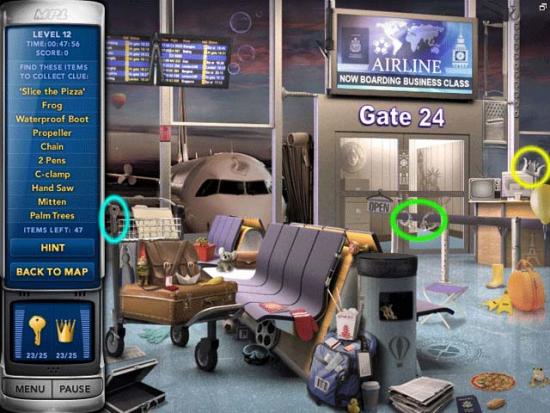
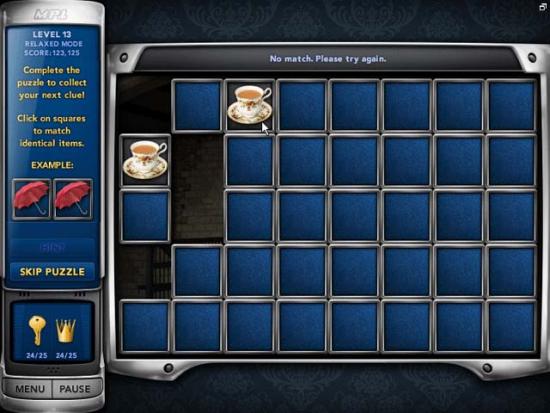
Level 12
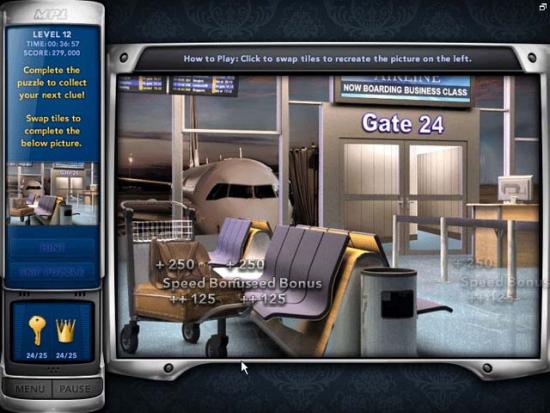
Your reward will be the C-Clamp.
Level 13
Your reward will be the Gas Can.
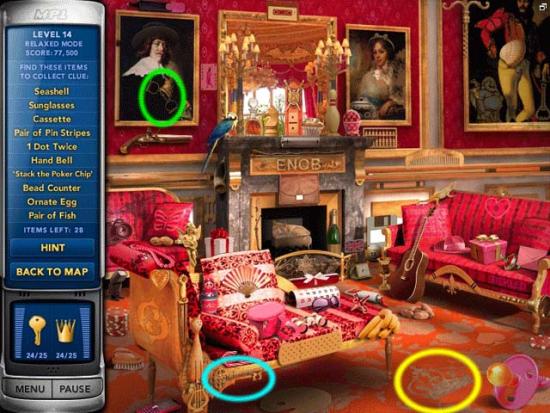
Level 14
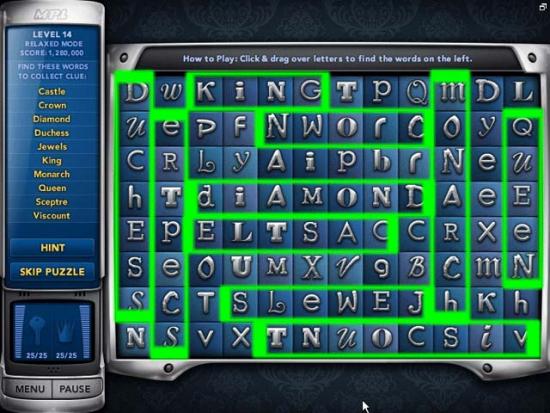
Your reward will be the Hand Bell.
Level 15
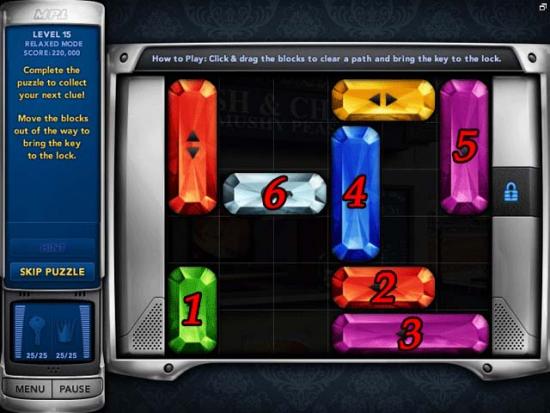
1. Slide the green block up until it touches the red block.
2. Slide the small red block over to the far left so it touches the green block.
3. Slide the horizontal purple block over to the far left wall.
4. Slide the blue block all the way down to the bottom.
5. Slide the vertical purple block all the way down to the bottom.
6. Slide the Key all the way over to the right to unlock the lock.
Your reward will be the Knife.
Level 16
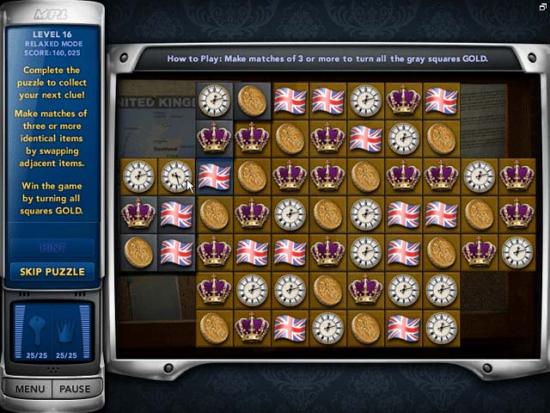
Your reward will be the Hammer.
Level 17
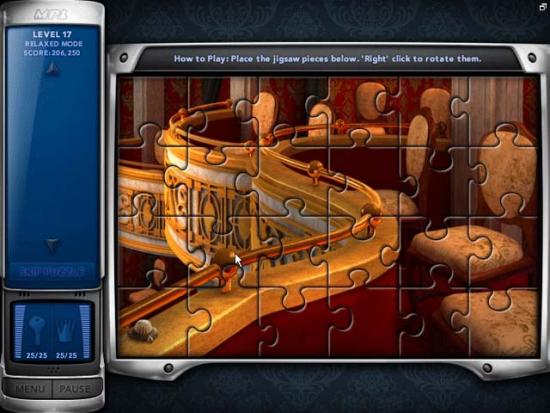
Your reward will be the Dial.
Level 18
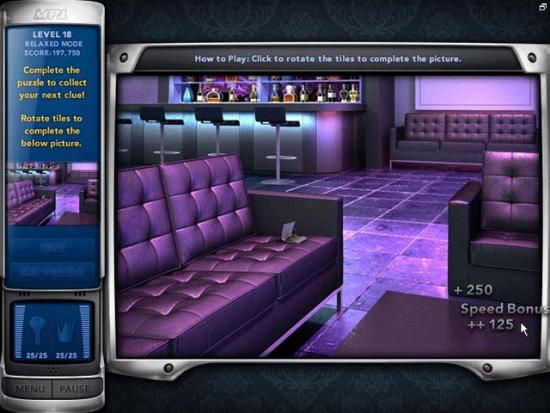
Your reward will be the Matches.
Level 19
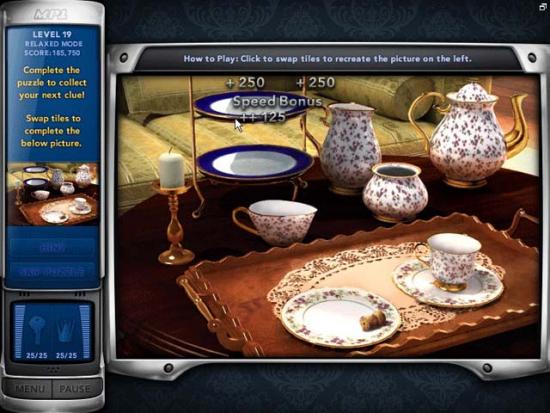
Your reward will be the Cork.
Level 20
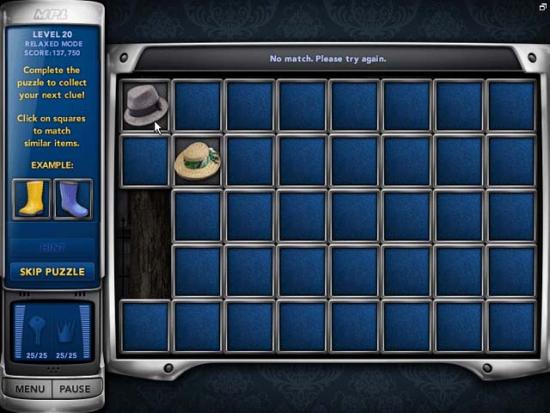
Your reward will be the Pad Key.
Level 21
Your reward will be the Gear.
Level 22
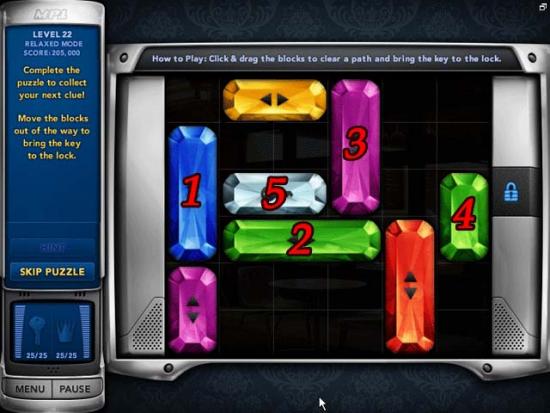
1. Slide the blue block up to the top of the screen.
2. Slide the large green block all the way over to the left.
3. Move the purple block all the way down to the bottom of the screen.
4. Slide the small green block all the way down to the bottom of the screen.
5. Slide the Key all the way over to the right to unlock the lock.
Your reward will be the Clock Hand.
Level 23
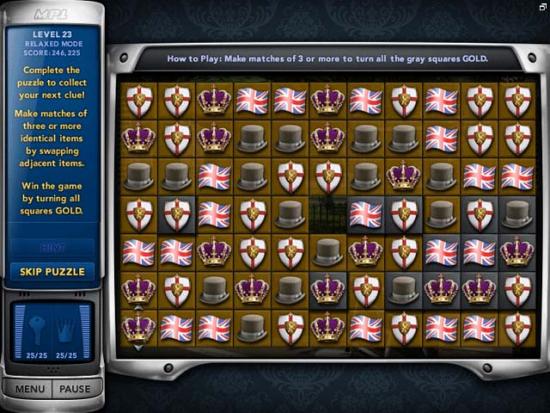
Your reward will be the Scissors.
Level 24
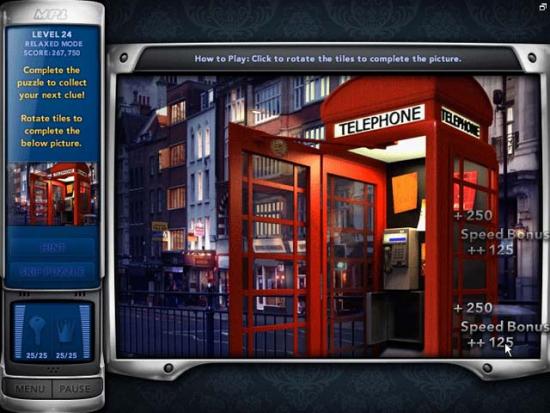
Your reward will be the Coin.
Level 25
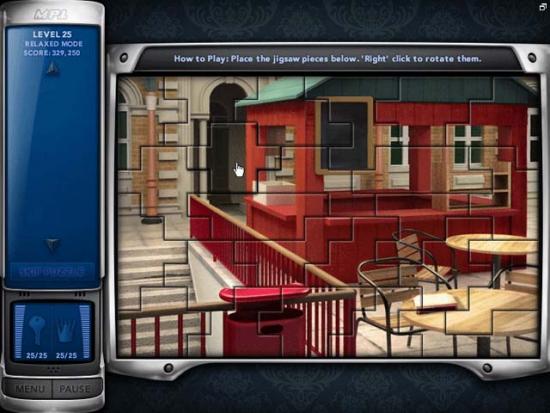
Your reward will be the Book.
This section focusses specifically on the final puzzle of the game, which takes place upon completing level 25.
Place the Objects
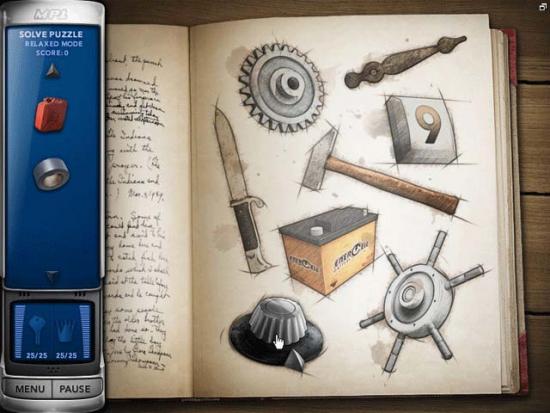
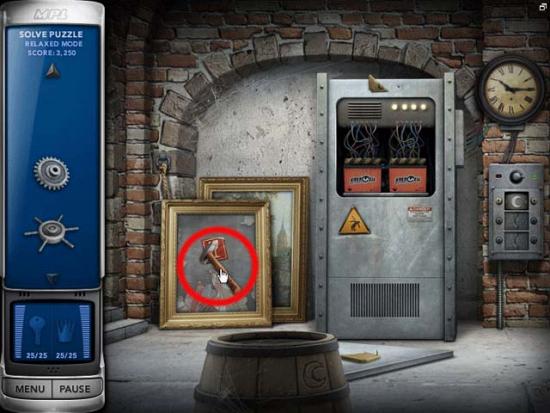
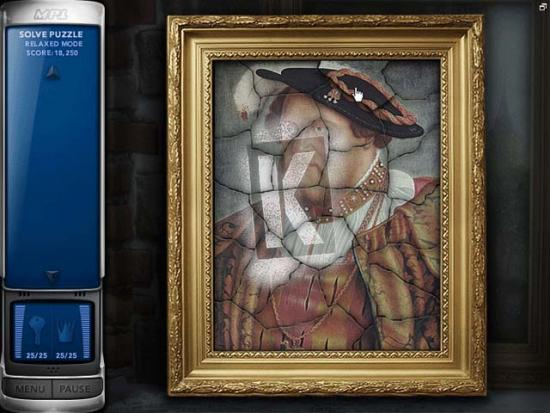
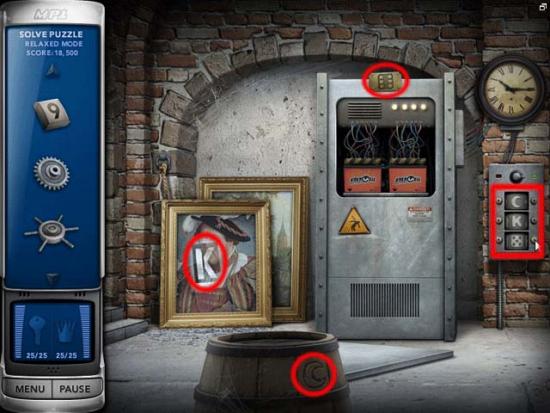
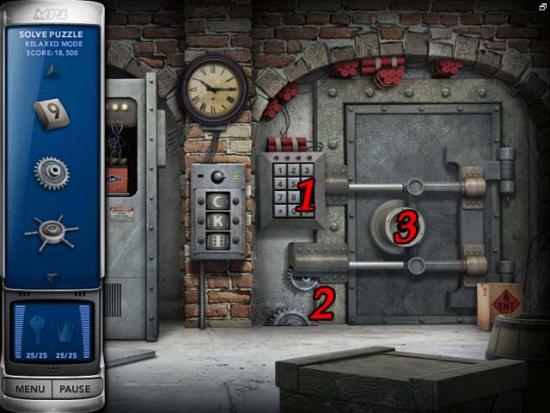
The Final Puzzle
1. Place the Clock Hand from your inventory on the clock.
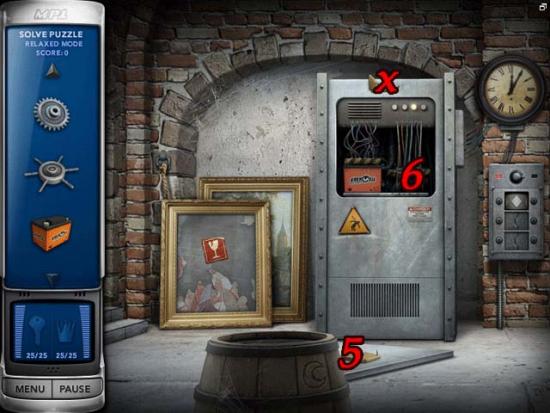
2. Click on the cloth in the barrel to remove it and reveal a crescent symbol.
3. Use the Dial on the location specified.
4. Use the Knife on the rope to cut it.

5. Pick up the fallen sign piece and place it on the area marked with an “x”.
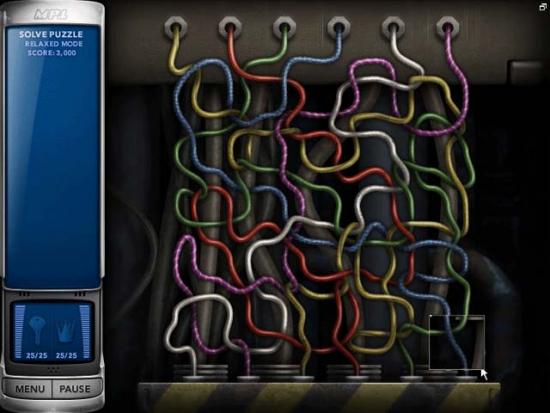
6. Use the Car Battery from your inventory on the numbered location to enter a puzzle.
1. Use the Pad Key on the combination pad.
2. Use the Gear on the specified area.
3. Use the Door Crank on the safe door.
Congratulations, you’ve completed the game!
