![Hololive Dreams Tier List [Best Cards]](/wp-content/uploads/2026/07/hololive-dreams-tier-list.jpg "Hololive Dreams Tier List [Best Cards]")
Hololive Dreams Tier List [Best Cards]
The best cards for the best performances.


![Iron Soul Dungeon Weapon Tier List [Best Weapons]](/wp-content/uploads/2026/07/iron-soul-dungeon-weapon-tier-list.jpg "Iron Soul Dungeon Weapon Tier List [Best Weapons]")

Welcome to the Midnight Mysteries: Haunted Houdini walkthrough on Gamezebo. Midnight Mysteries: Haunted Houdini is a hidden object adventure game played created by Mumbo Jumbo. This walkthrough includes tips and tricks, helpful hints, and a strategy guide for how to complete Midnight Mysteries: Haunted Houdini.
Welcome to the Midnight Mysteries: Haunted Houdini walkthrough on Gamezebo. Midnight Mysteries: Haunted Houdini is a hidden object adventure game played created by Mumbo Jumbo. This walkthrough includes tips and tricks, helpful hints, and a strategy guide for how to complete Midnight Mysteries: Haunted Houdini.

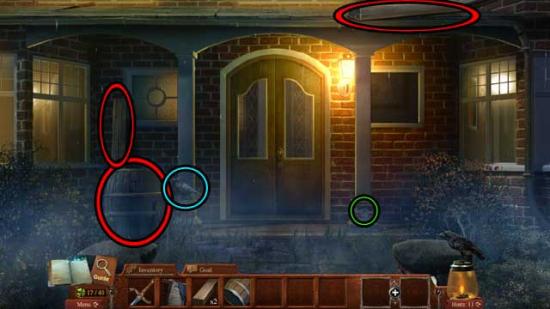
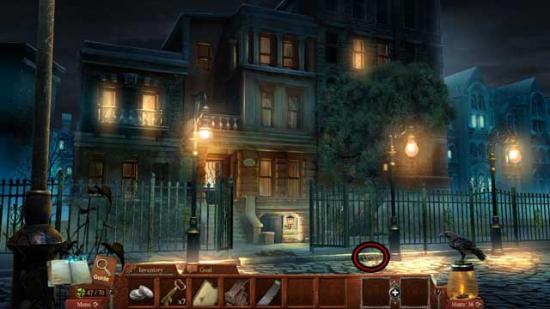
Street
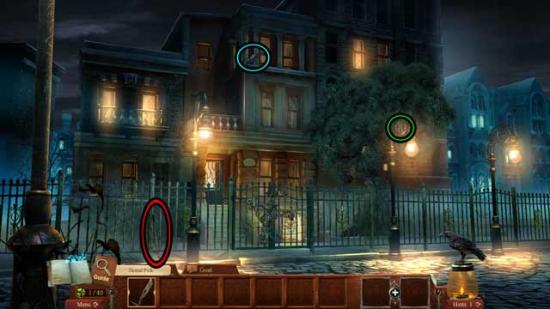
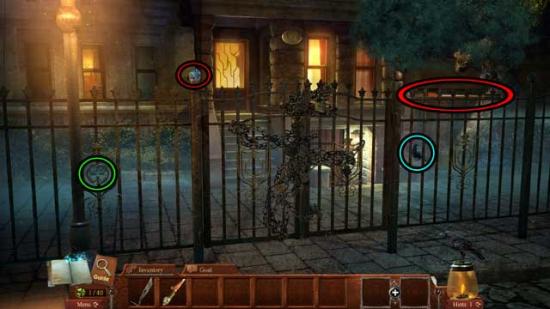
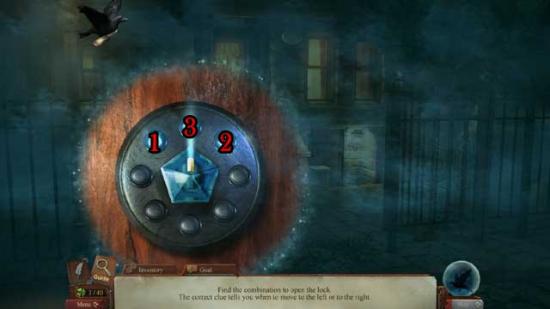
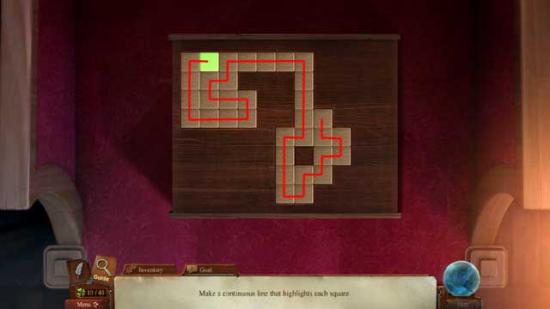
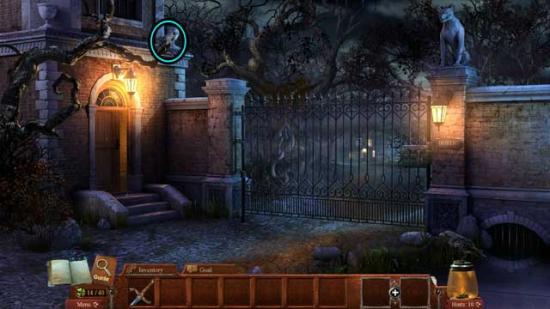
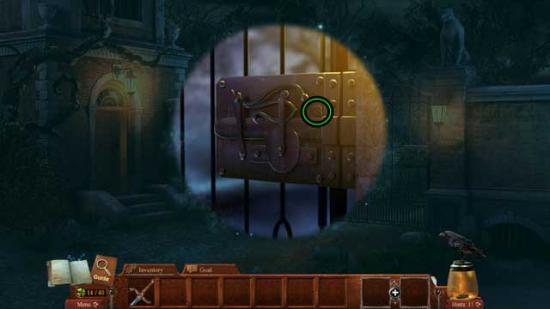
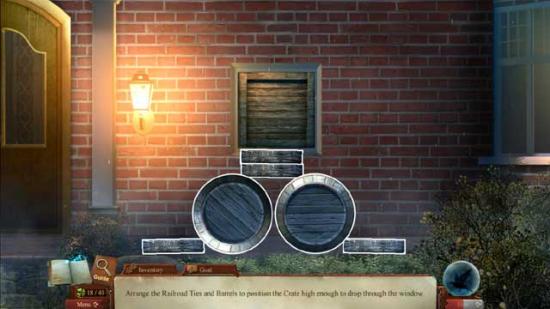
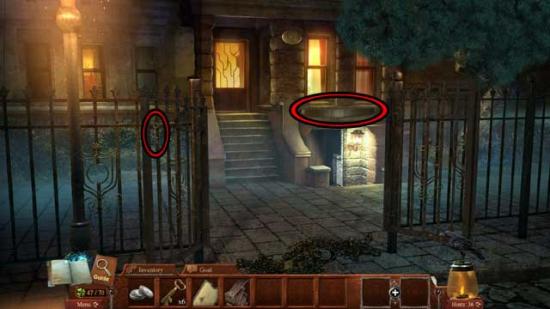
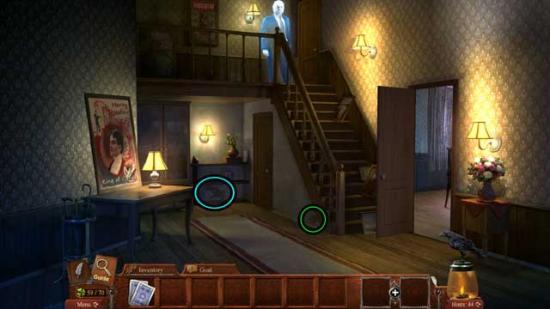
Entrance Gate
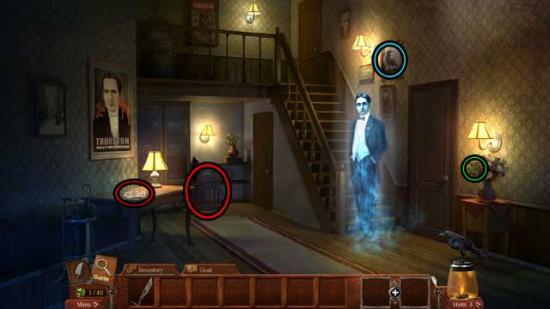
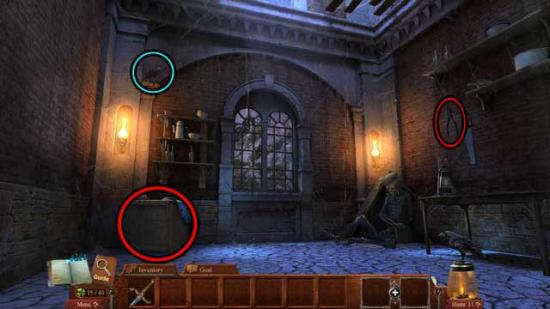
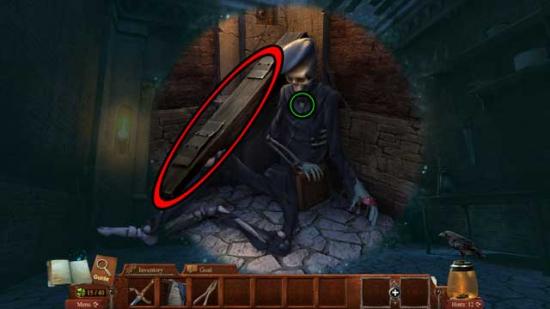
Foyer
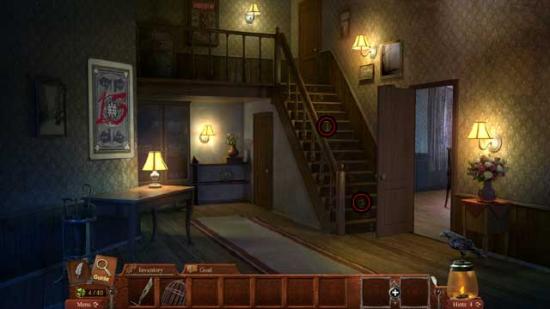
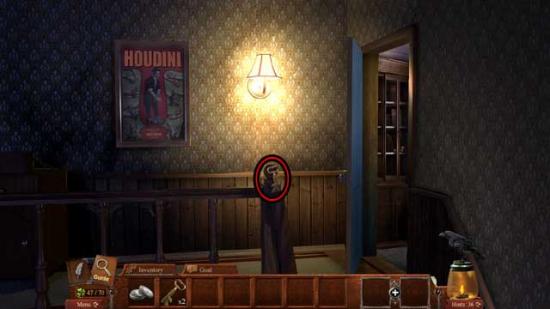
Upstairs Landing
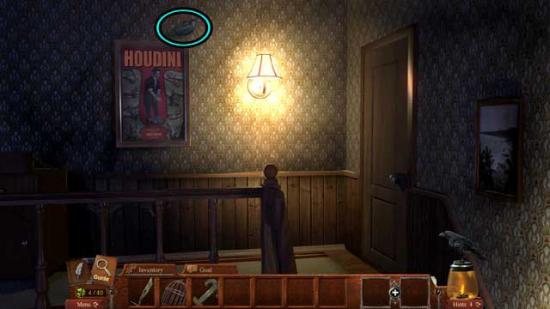
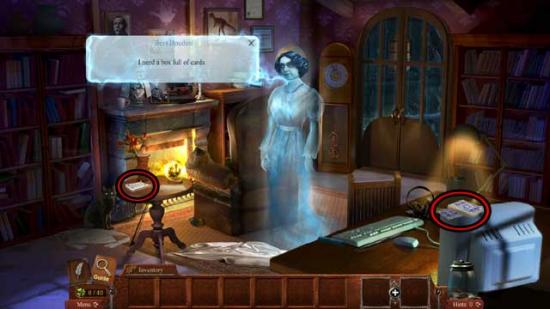
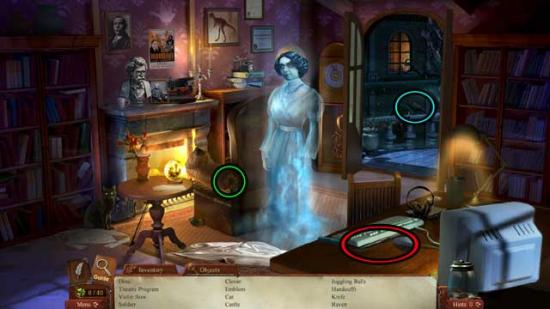
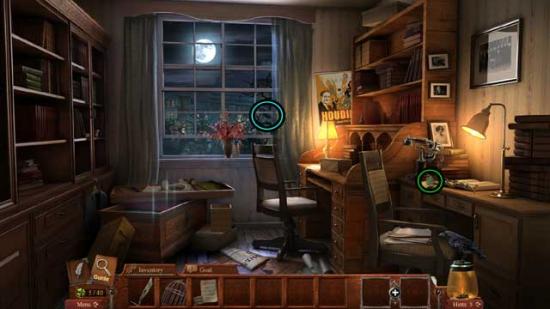
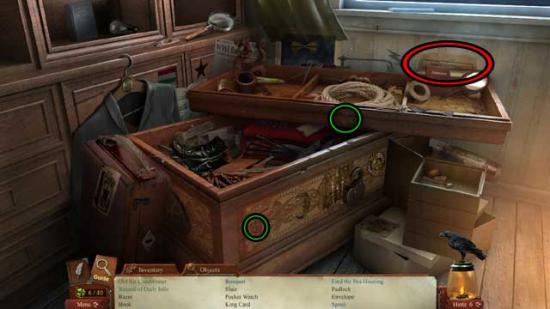
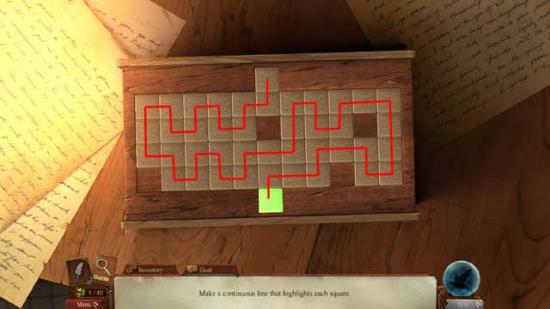
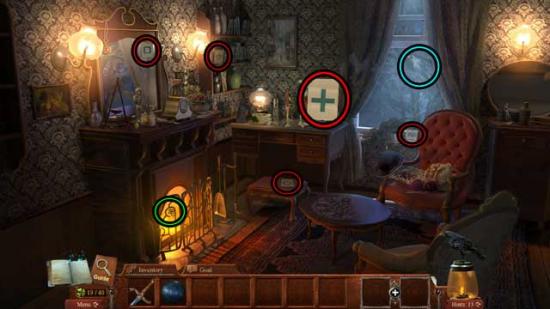
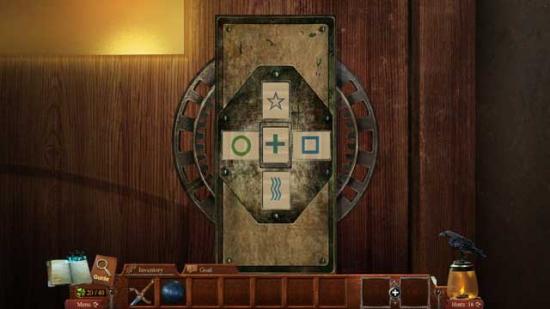
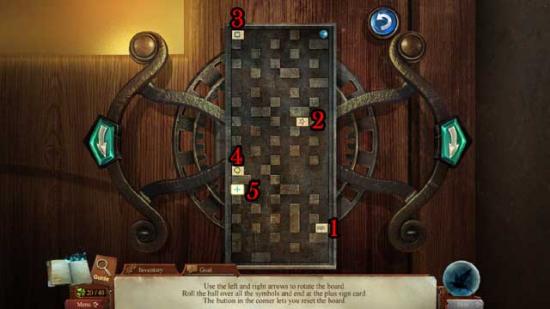
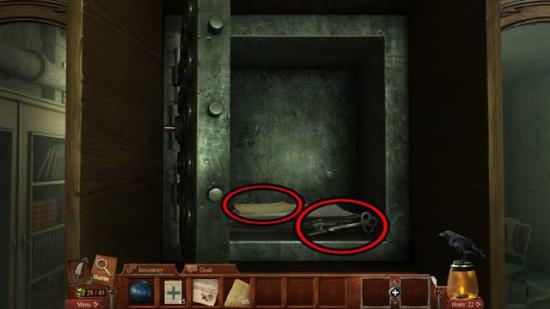
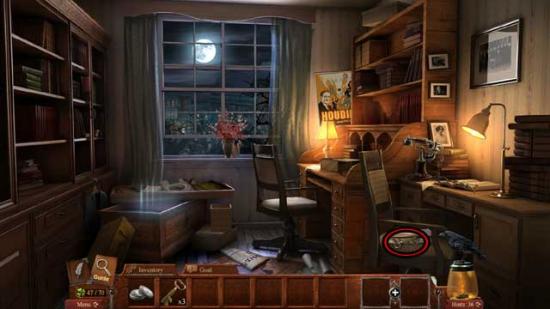
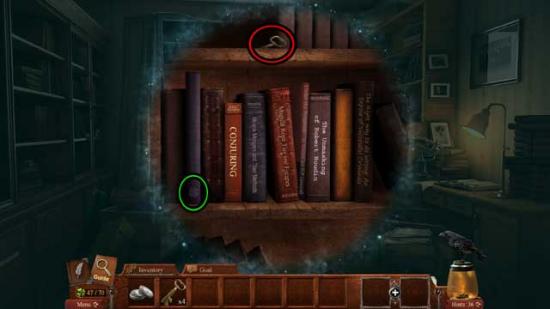
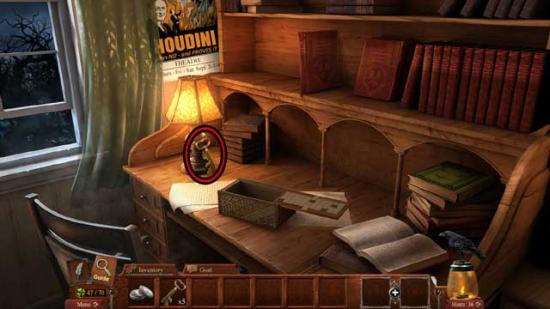
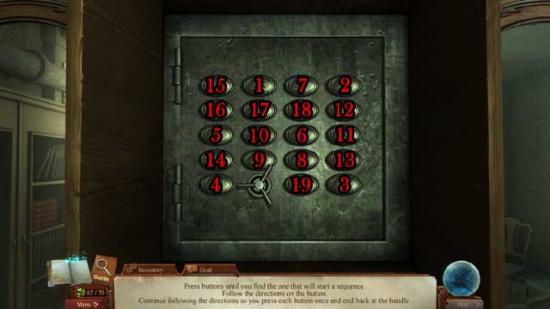
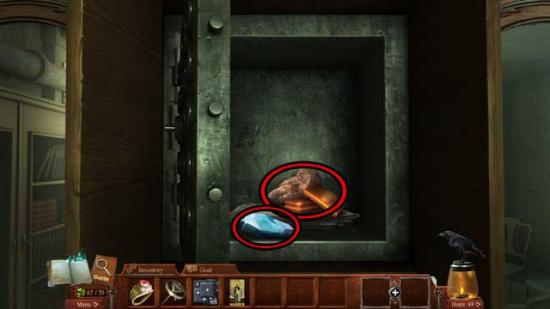
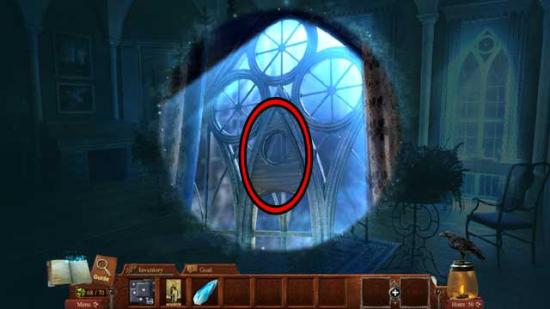
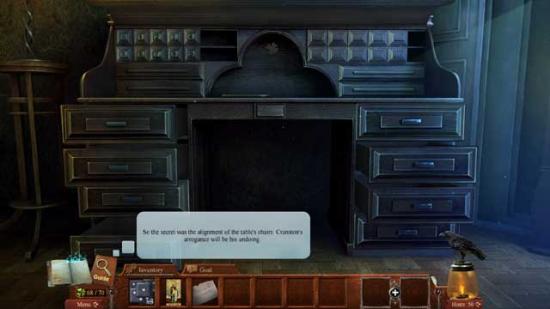
Study
Foyer
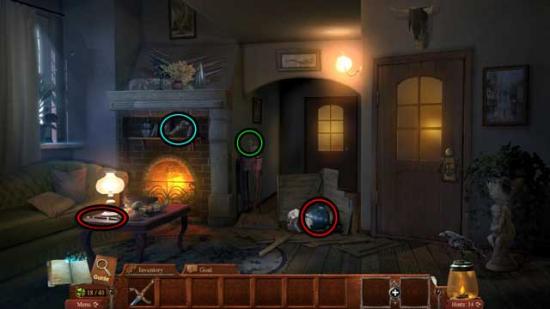
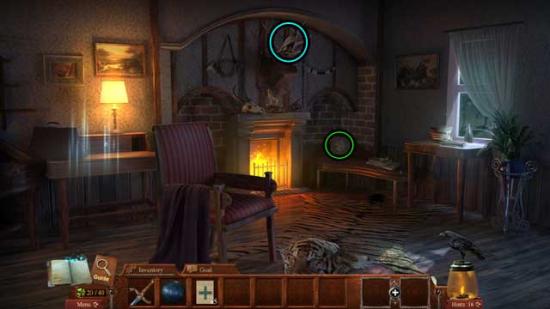
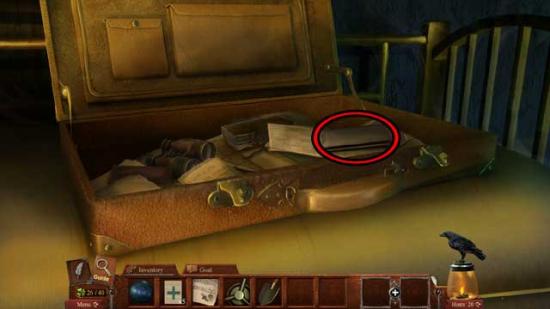
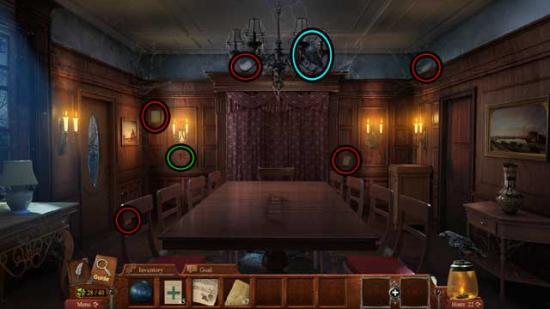
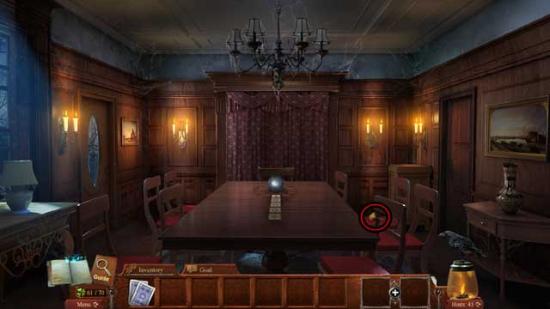
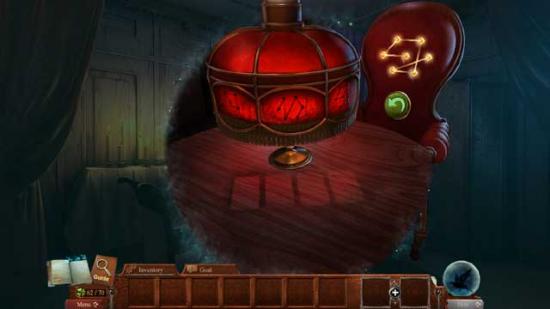
Parlor
Entrance Gate
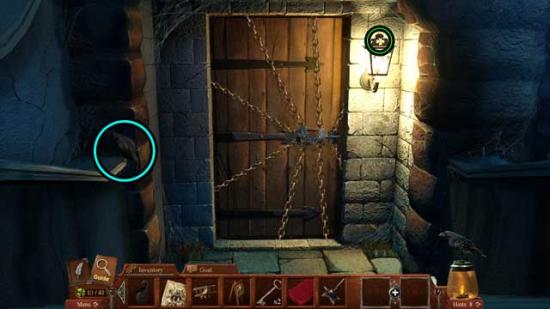
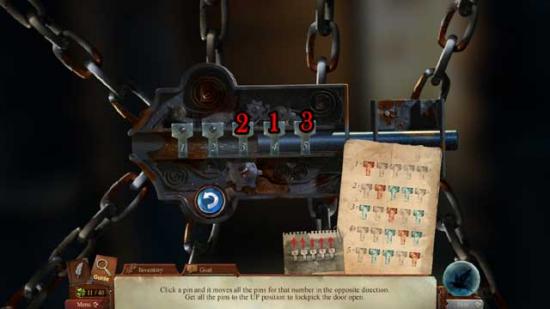
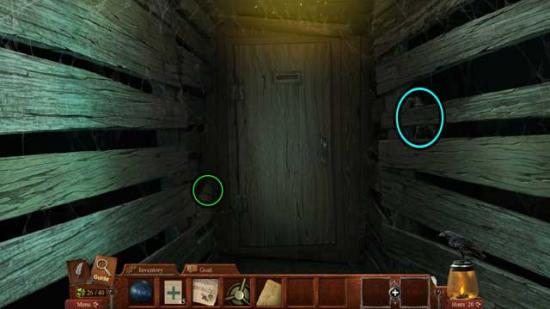
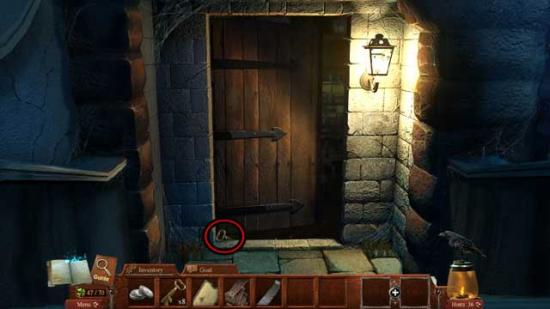
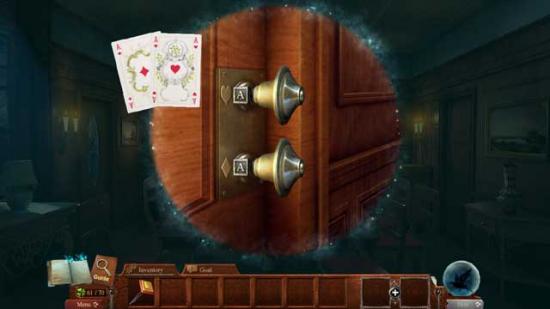
Workshop Door
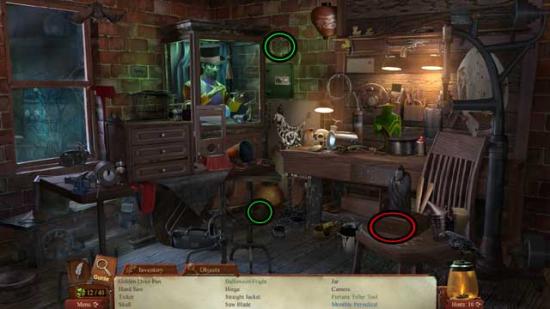
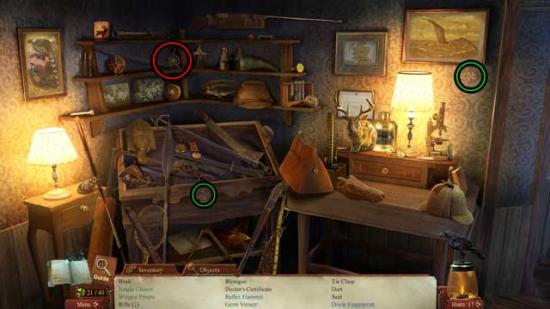
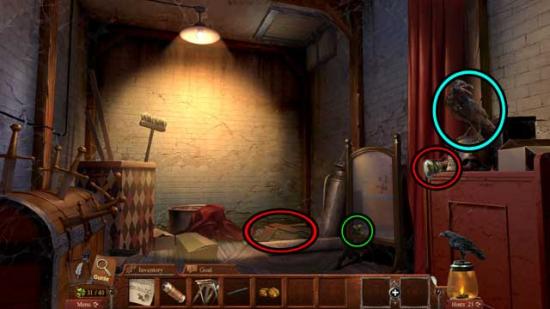
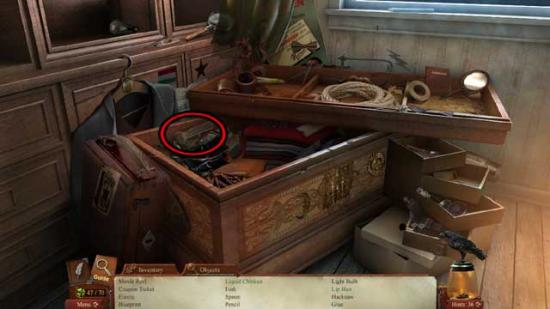
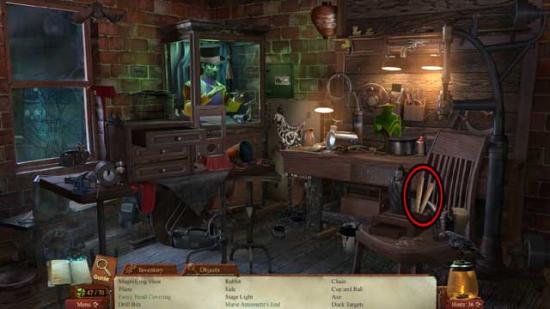
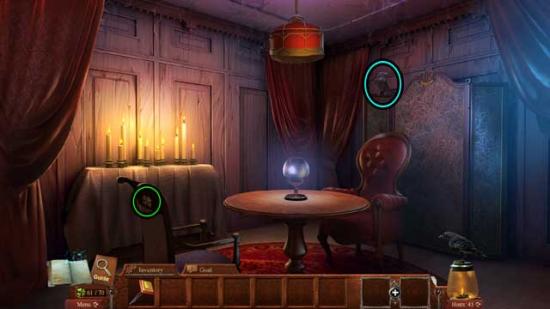
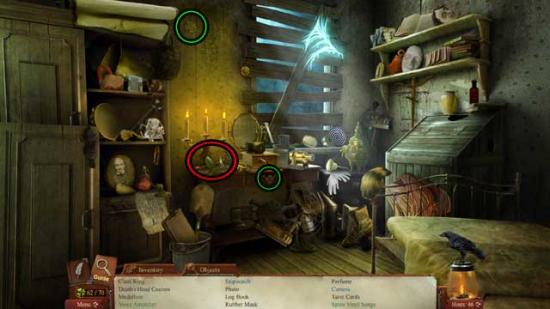
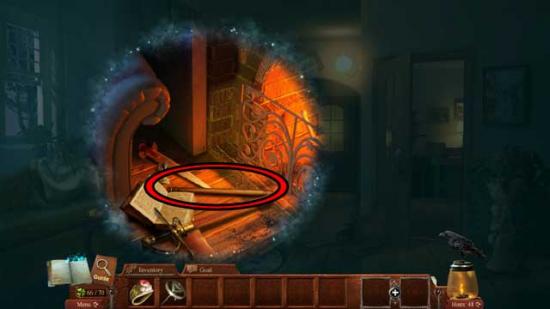
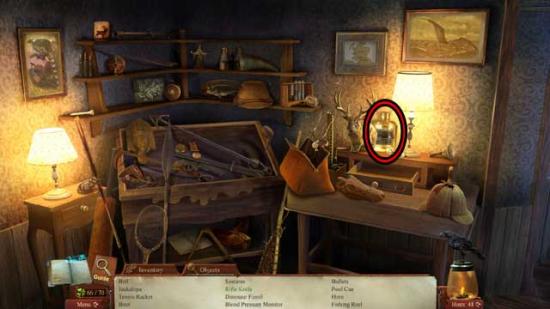
Workshop
Parlor
Entrance Gate
Gatehouse
Entrance Gate
Manor Grounds
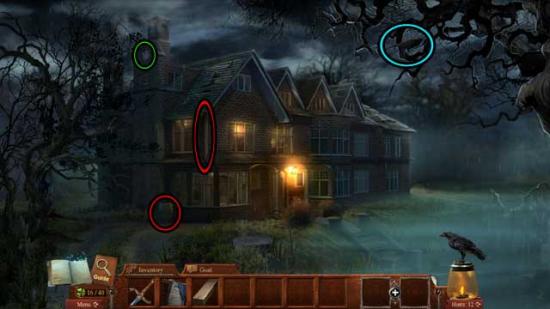
Manor Entrance
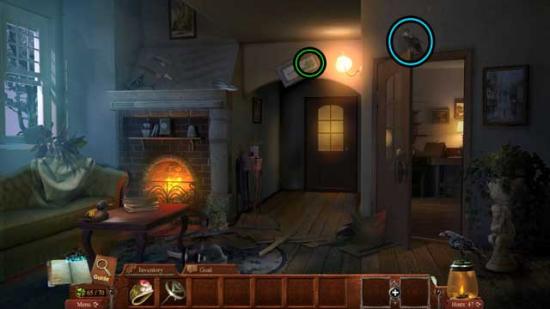
Front Room
Sitting Room
Front Room
Den
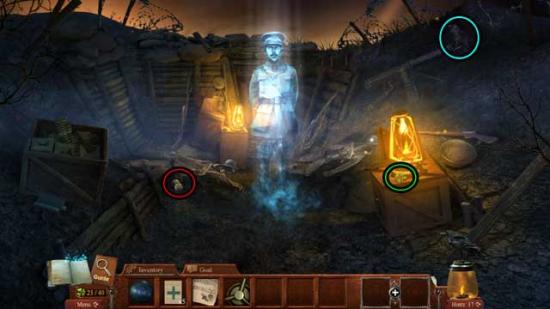
Trench
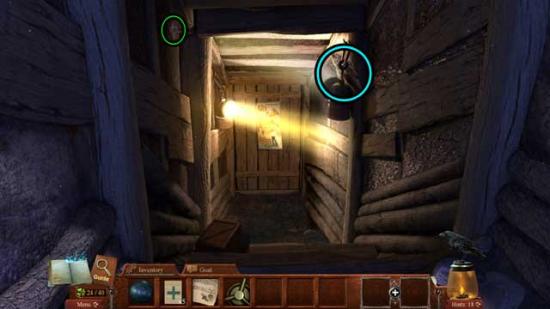
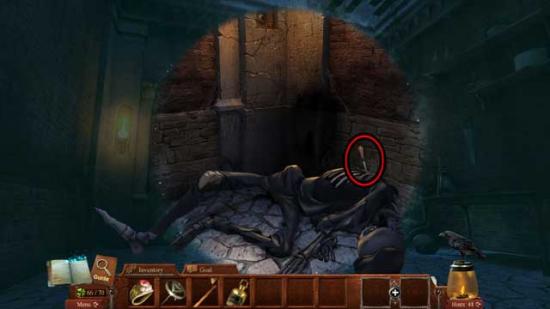
Tunnel
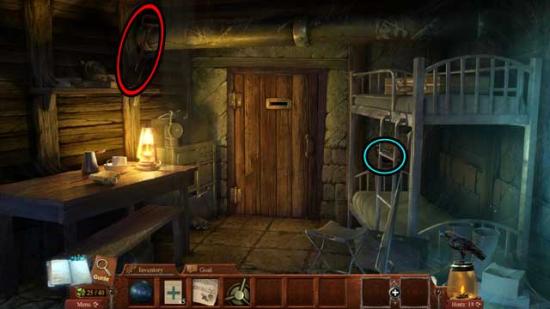
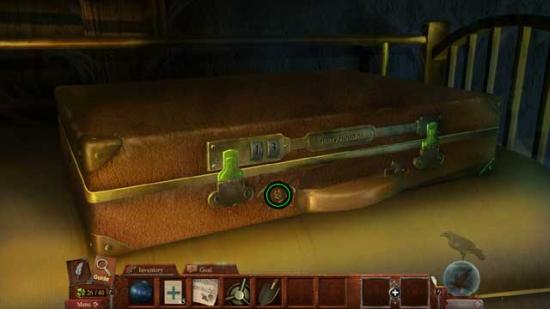
Bunker
Trench

Bunker
Secret Passage
Doorway
Ghost Club
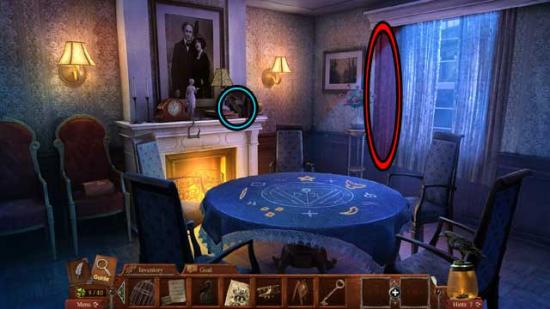
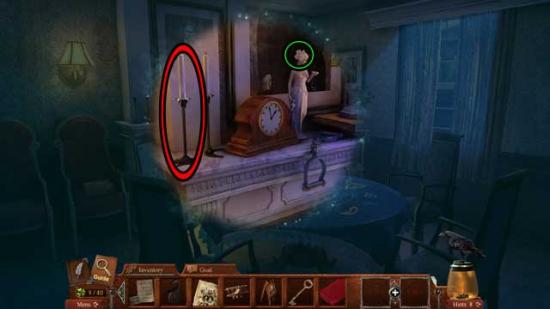
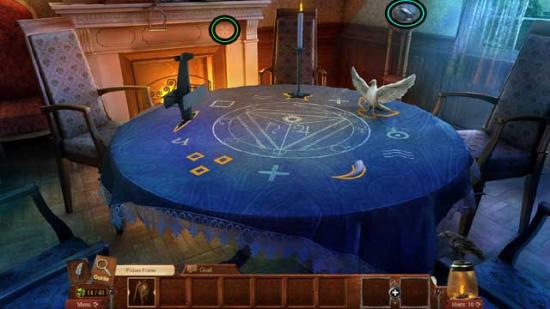
Seance Room
Garden
Seance Room
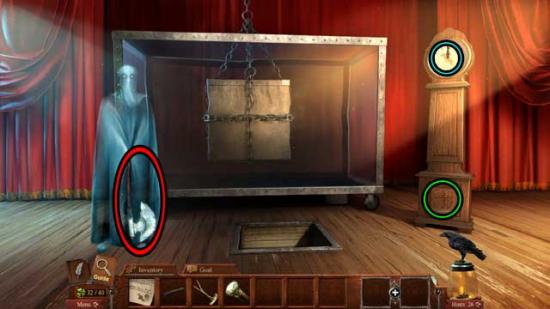
Theater Hall
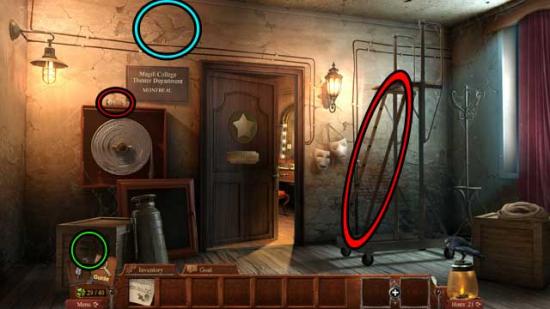
Dressing Room
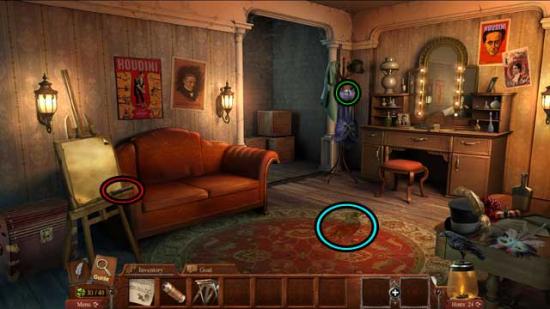
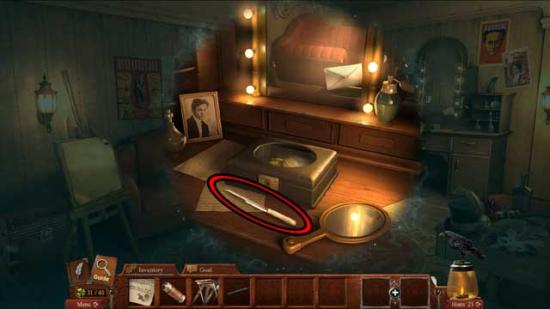
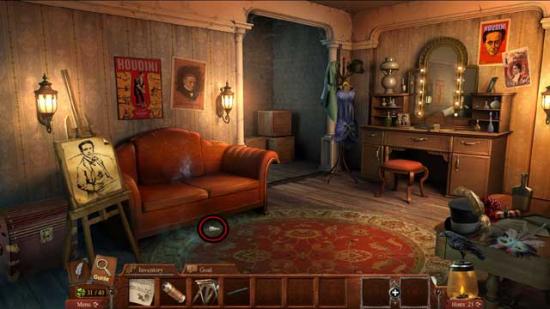
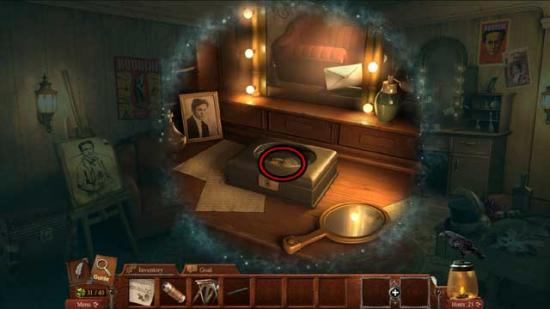
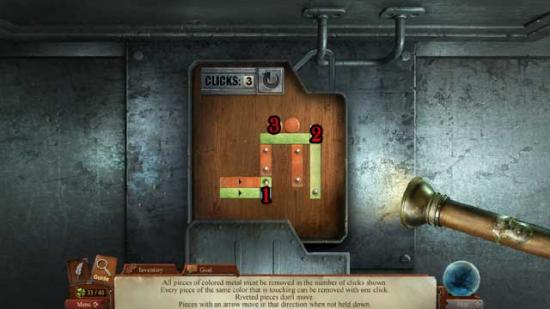
Back Room

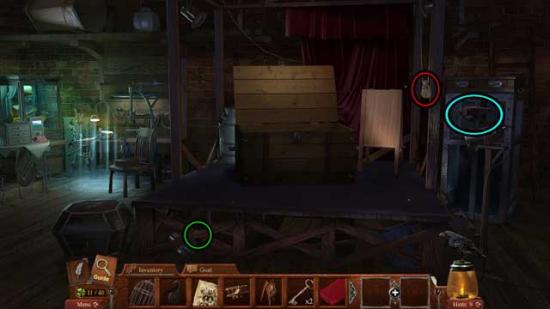
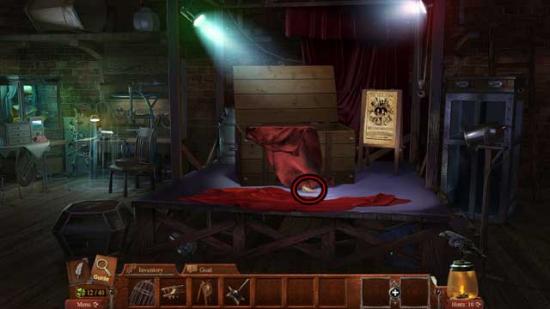
Stage
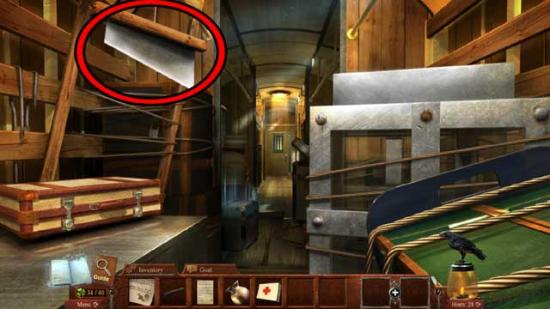
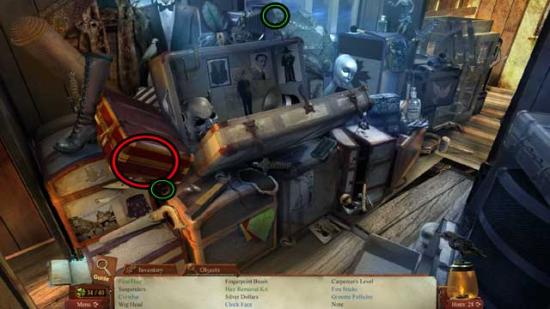
Baggage Car
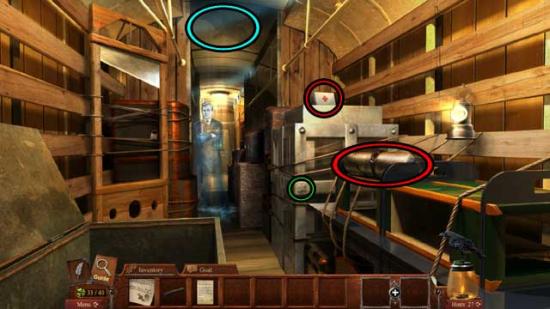
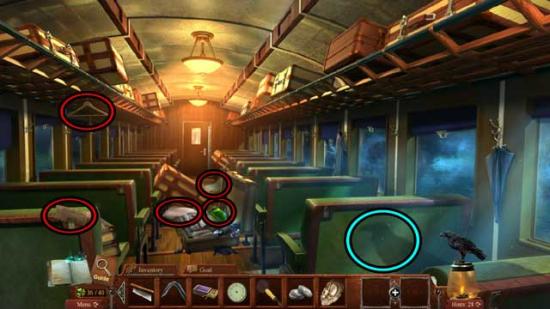
Passenger Car
Baggage Car
Passenger Car
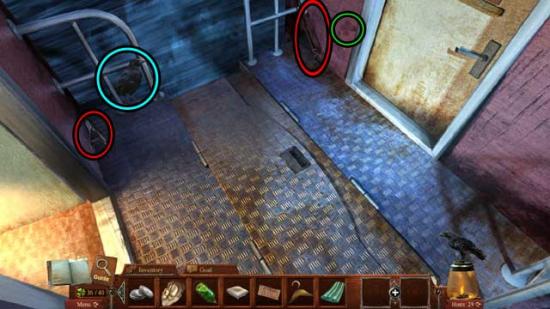
Coupling Platform
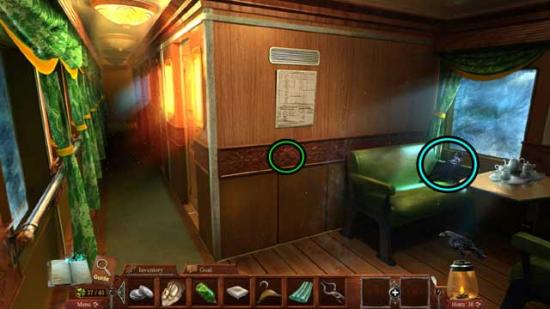
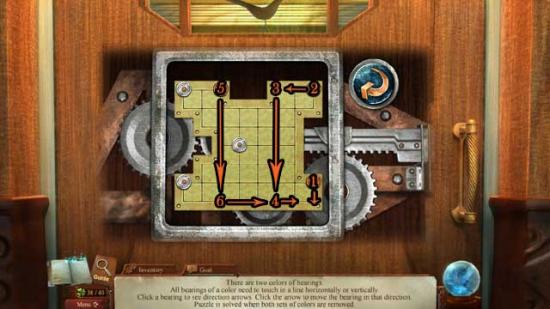
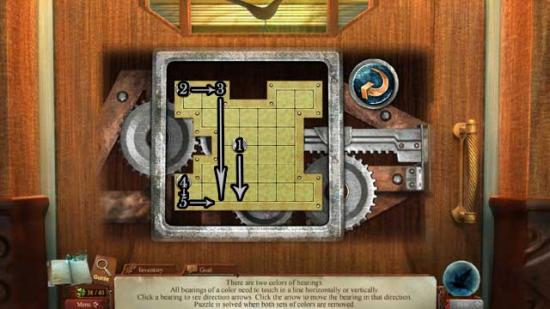
Luxury Car
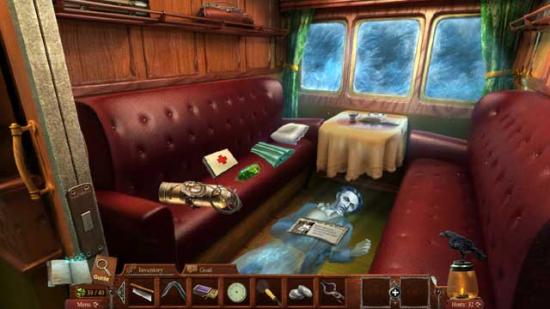
Cabin

Coupling Platform
Cabin
Waiting Room
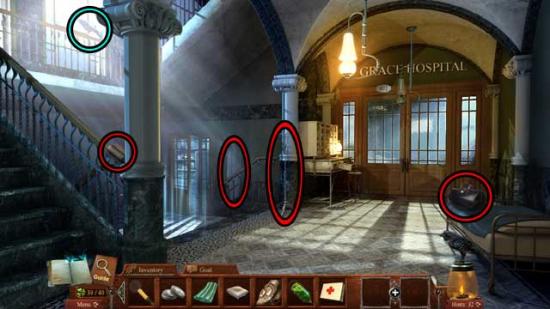
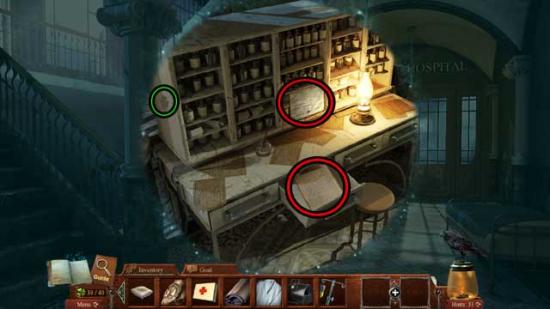
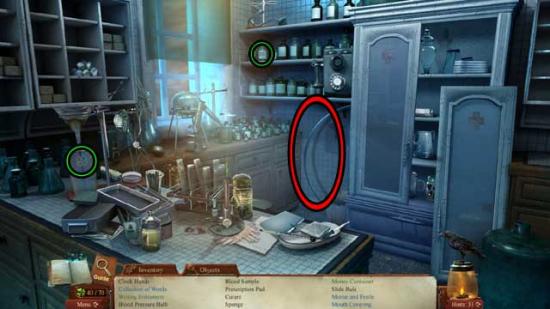
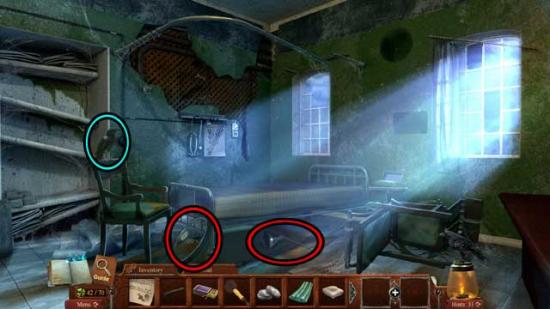
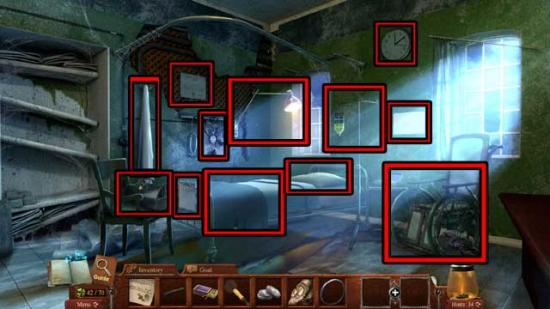
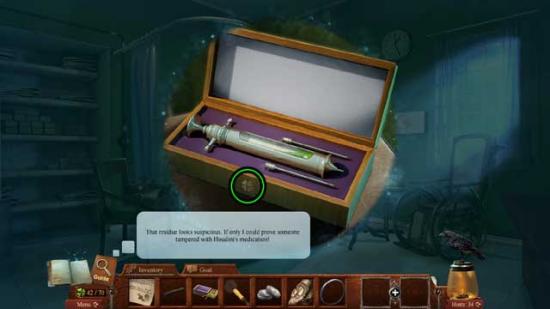
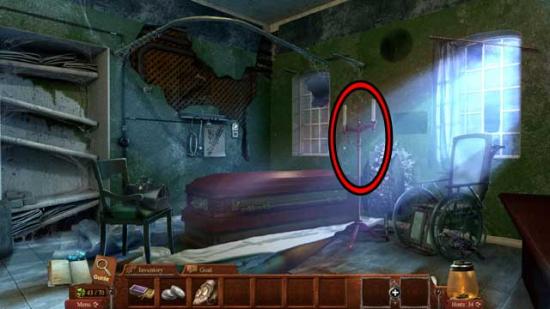
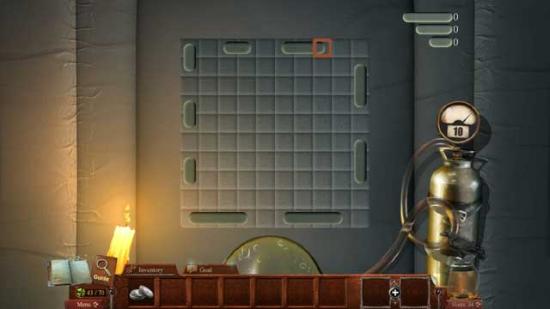
Hospital Room
Coffin
Tunnel
Cecelia’s Gravestone

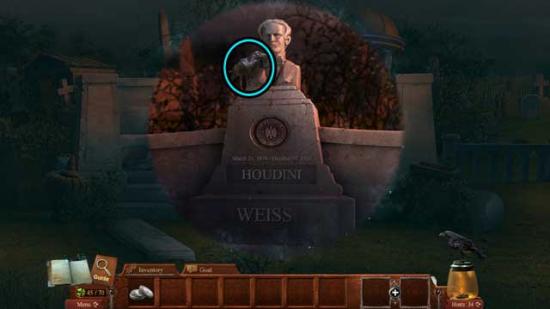
Houdini’s Gravestone
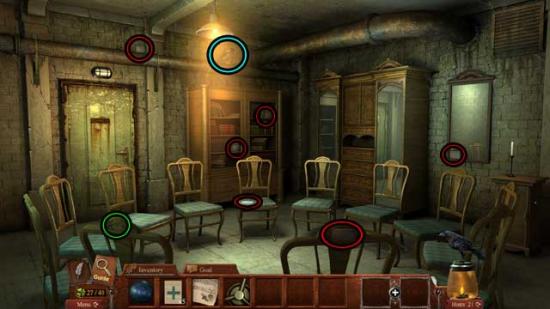
Parlor
Foyer
Upstairs Landing
Study
Entrance Gate
Street
Workshop Door
Workshop
Circus Entrance
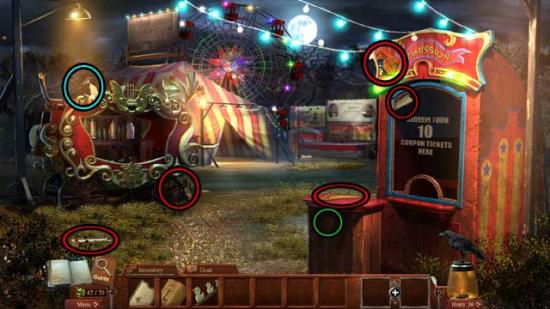
Tent

Circus Entrance
Midway
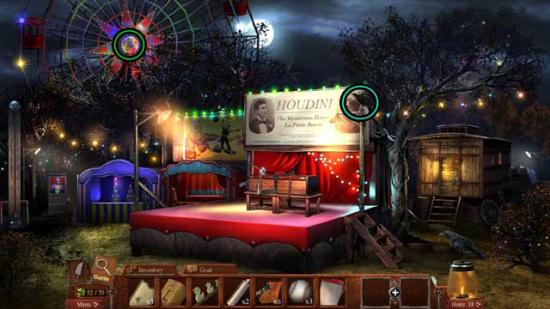
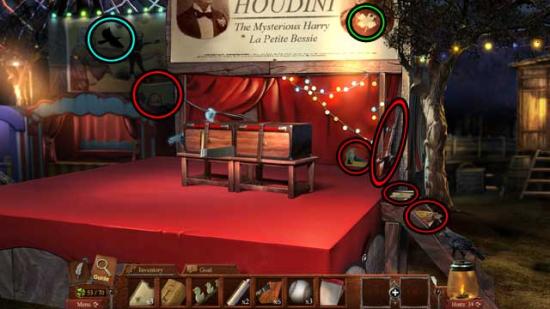
Stage
Midway
Games of Skill
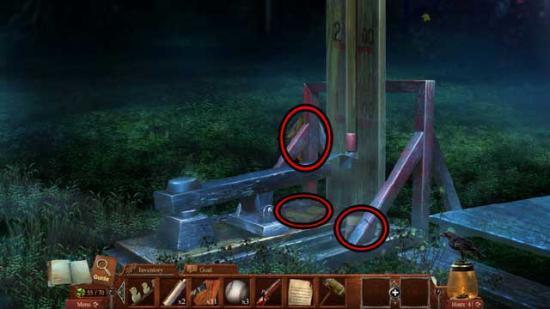
Test of Strength
Games of Skill
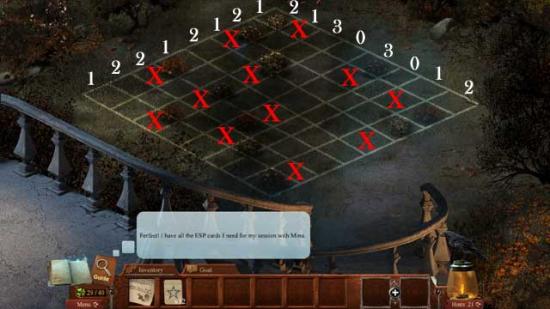
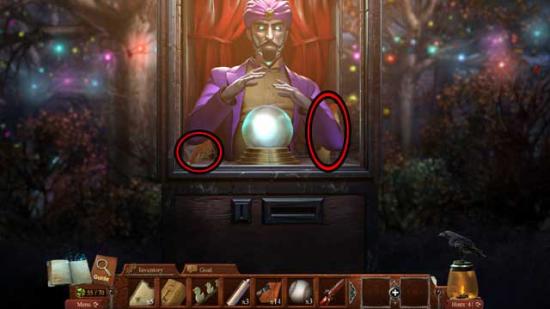
Fortune Teller Machine
Games of Skill
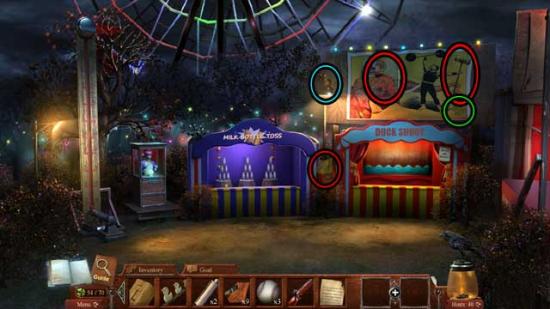
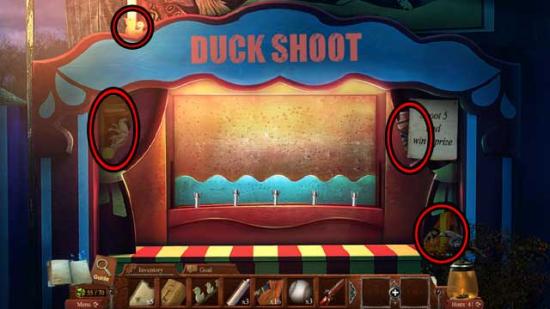
Duck Shoot Game
Games of Skill
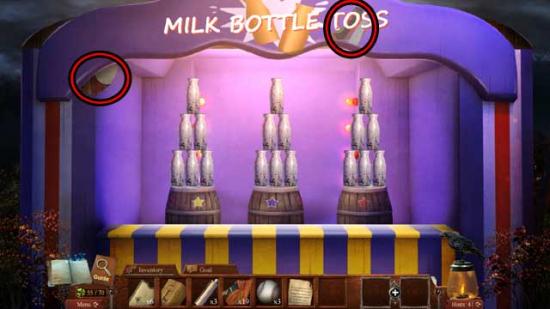
Milk Bottle Toss
Midway
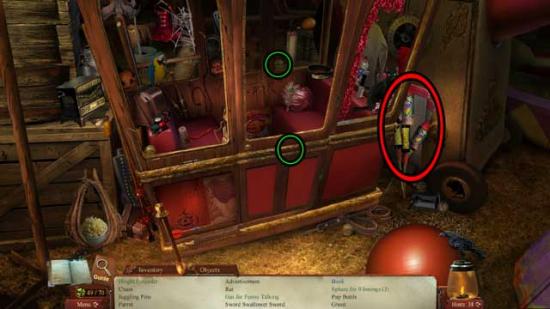
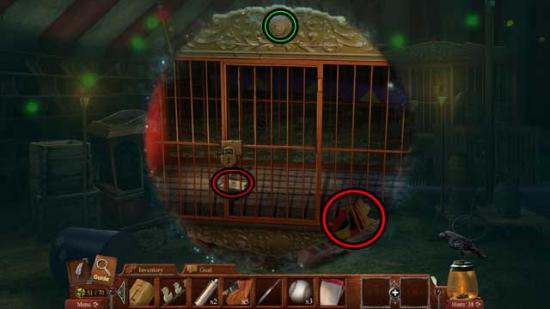
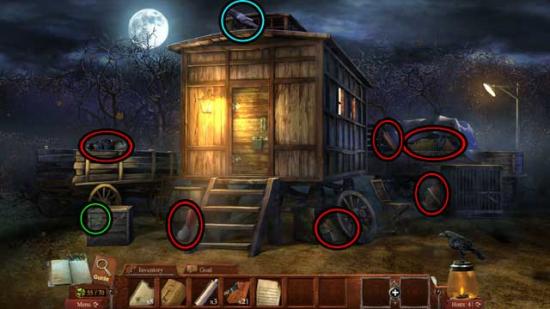
Wagon
Circus Entrance
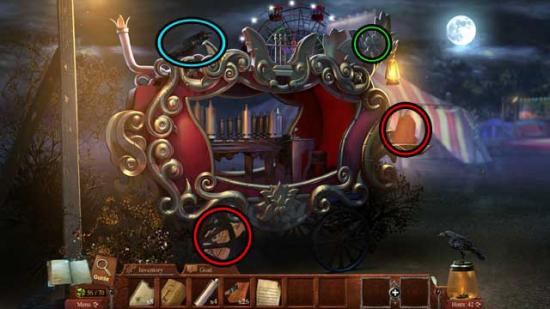
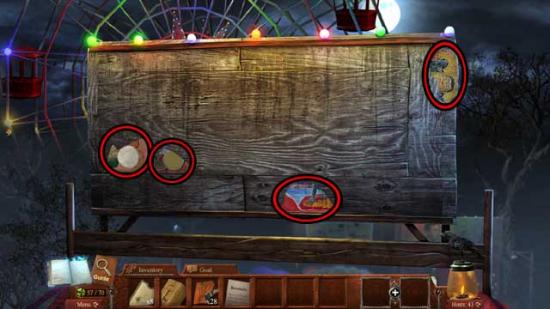
Wagon
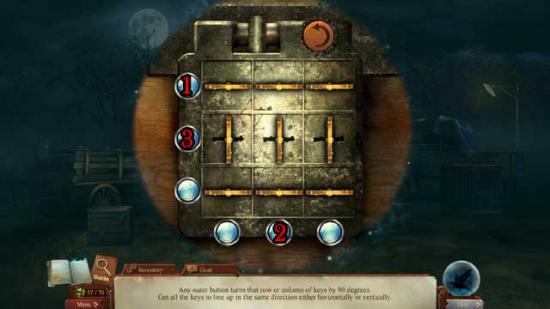
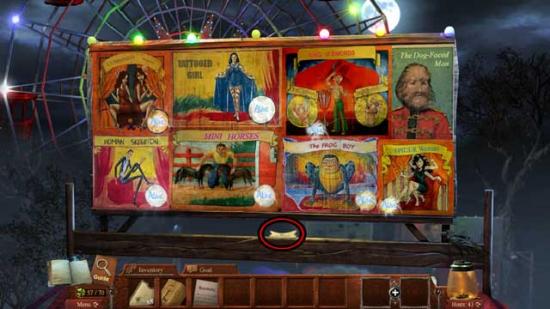
Wagon Interior
Circus Entrance
Fortune Teller Machine
Parlor
Foyer
Study

Seance Room
Fortune Telling Room
Manor Grounds
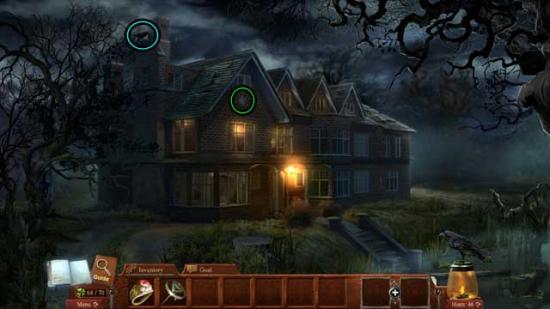
Manor Entrance
Front Room
Den
Gatehouse
Manor Grounds
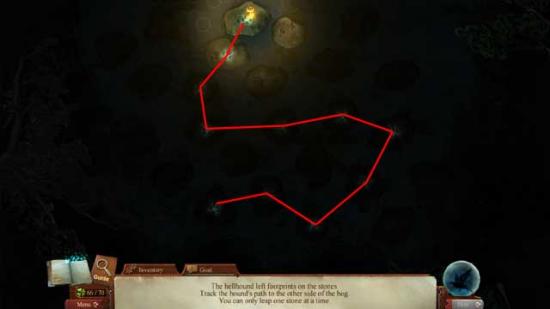
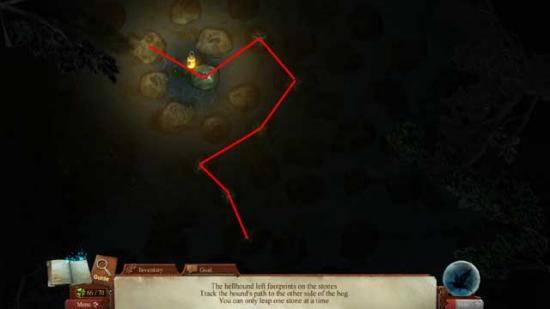
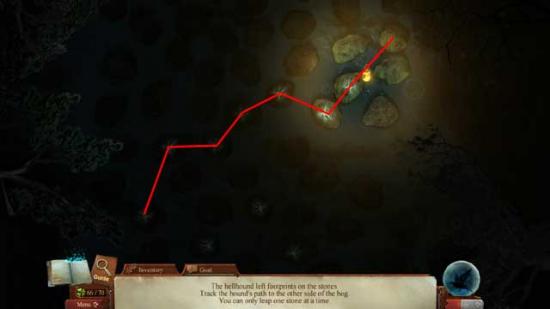
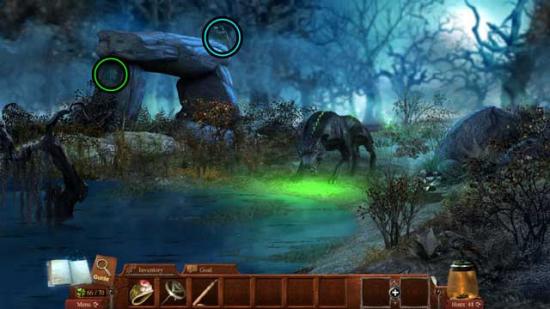
Bog
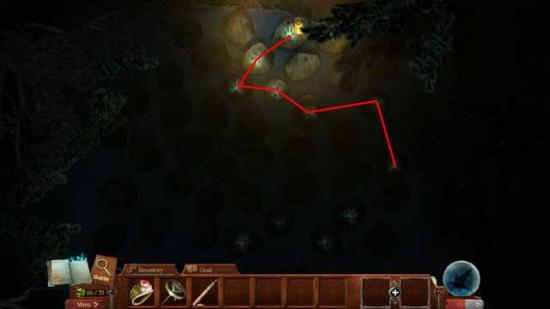
Shore

Seance Room
Ghost Club Room
Seance Room
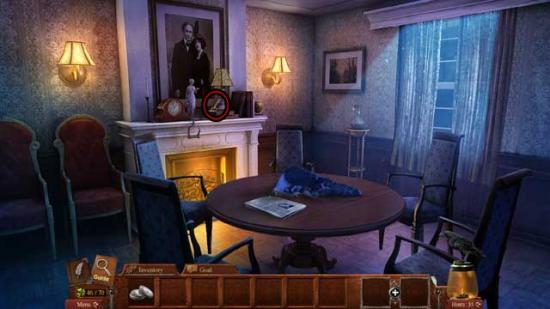
Living Room

Seance Room
Fortune Telling Room
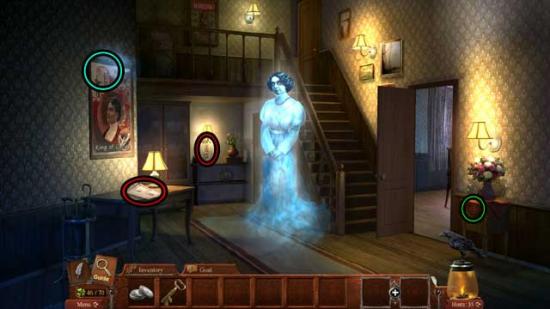
Living Room
Houdini’s Grave
Tunnel
Coffin

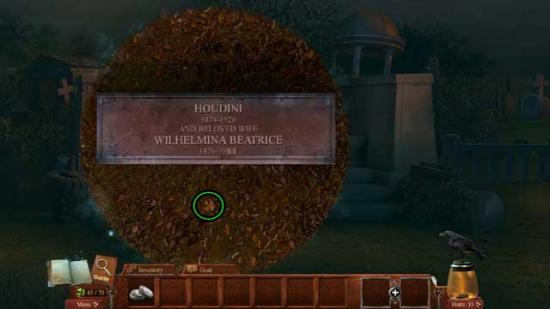
Cecilia’s Grave
Parlor
Congratulations! You’ve completed Midnight Mysteries: Haunted Houdini!
