Margrave: The Curse of the Severed Heart Walkthrough

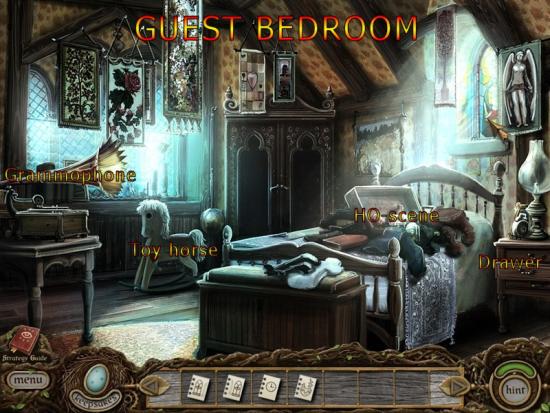
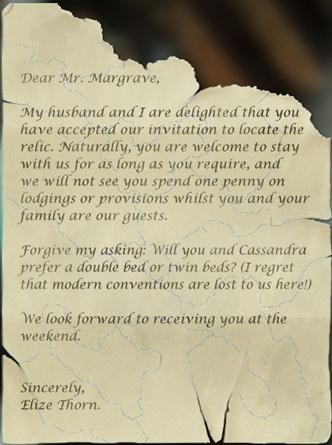
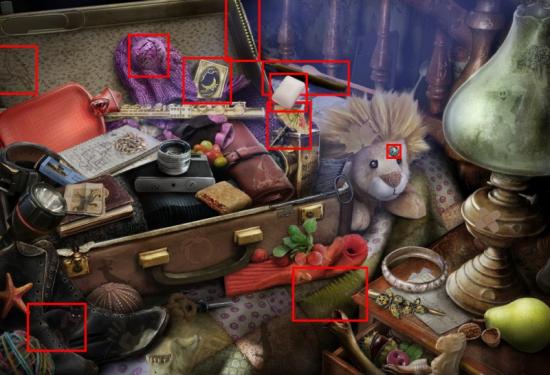
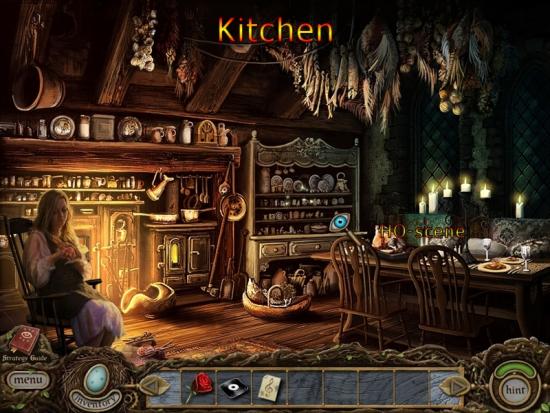
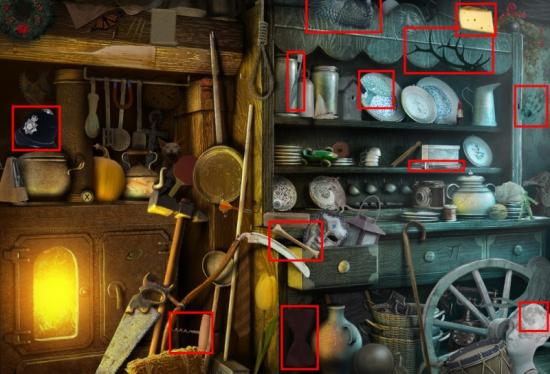
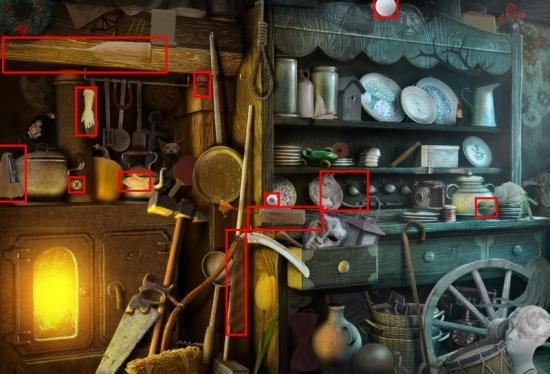
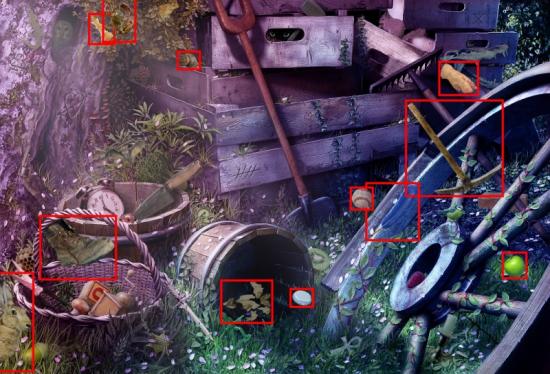
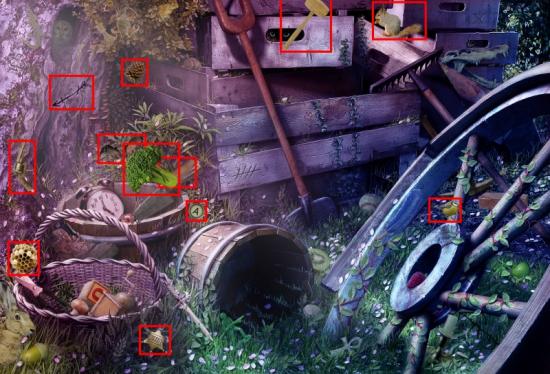
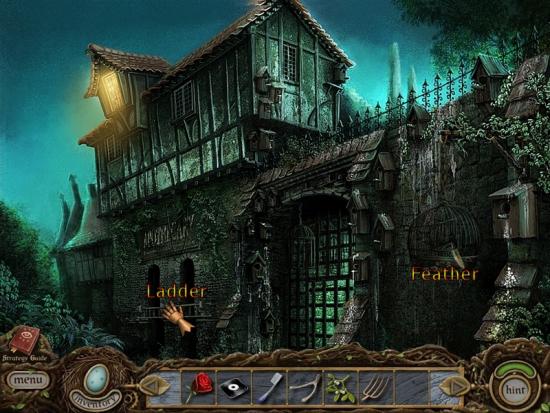
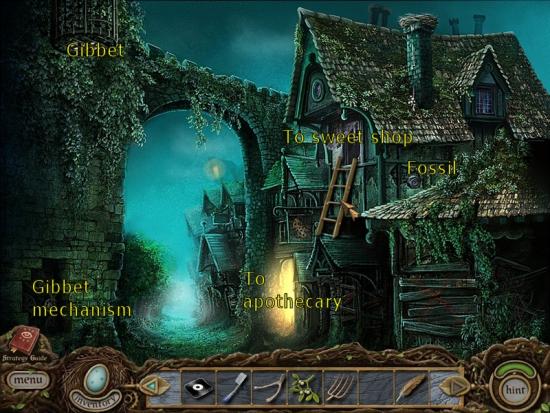
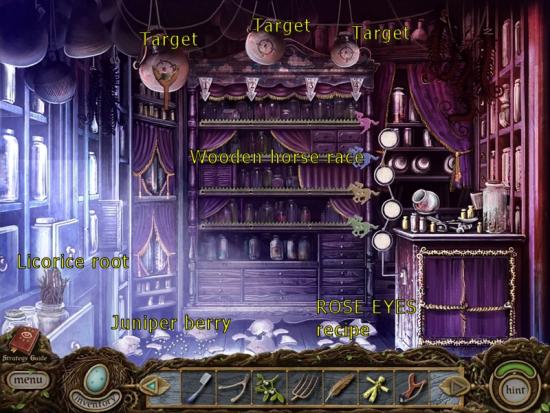
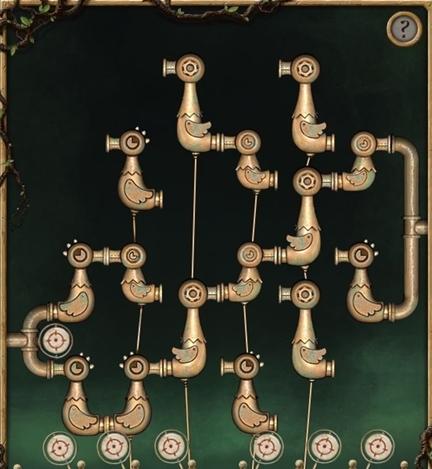
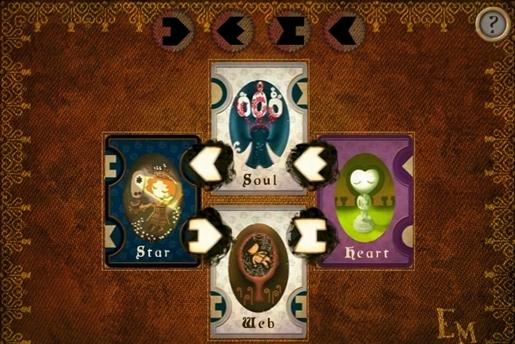
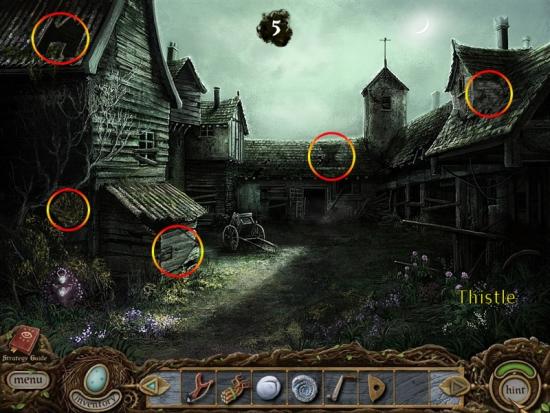
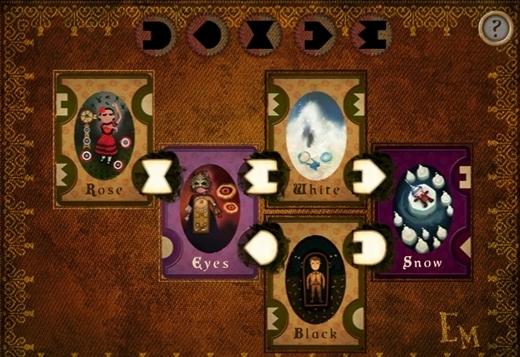
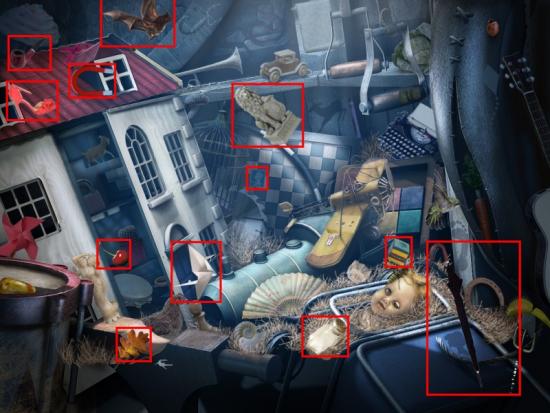
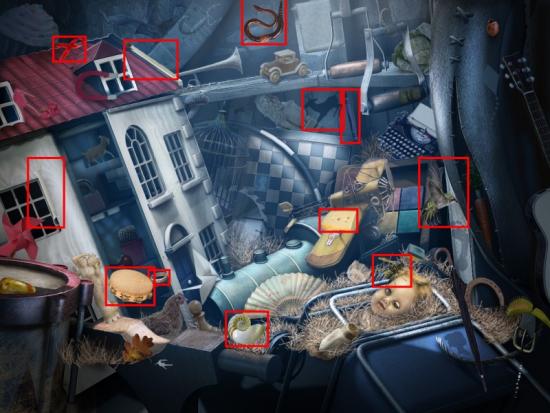
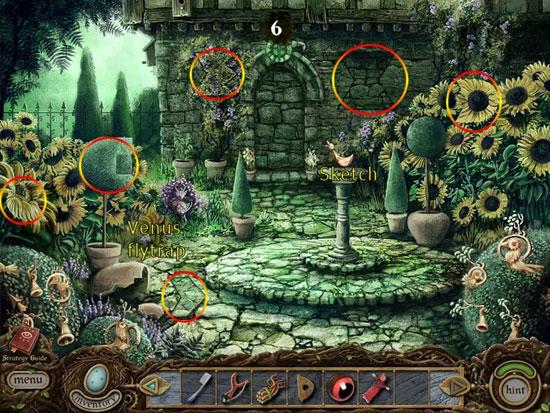
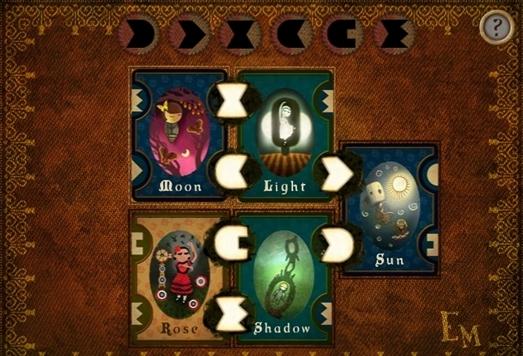
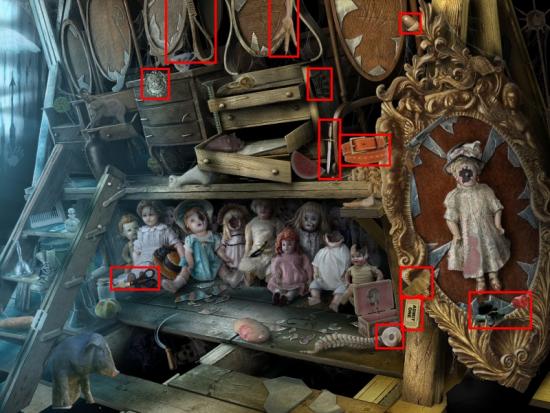
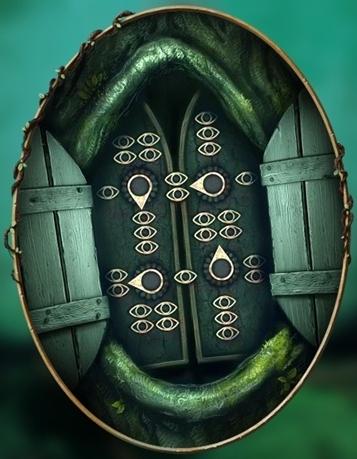
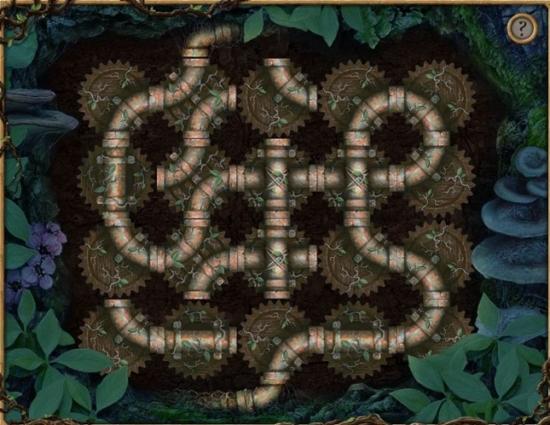
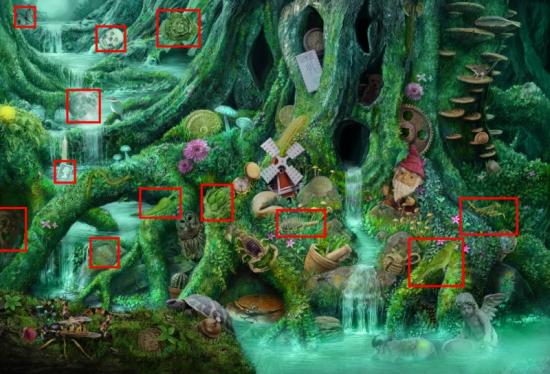
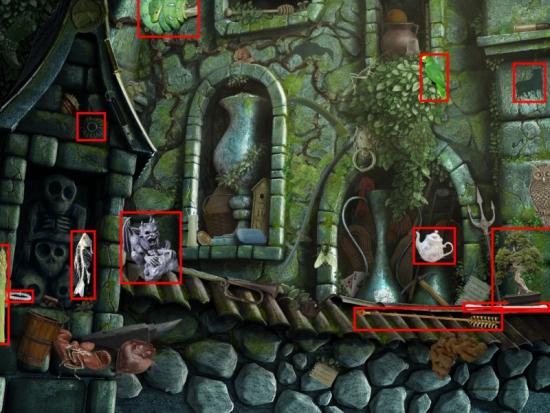
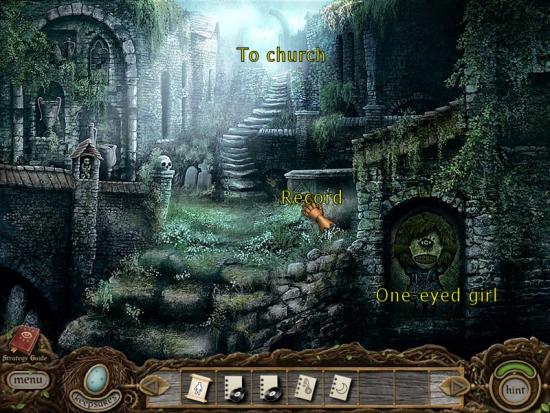
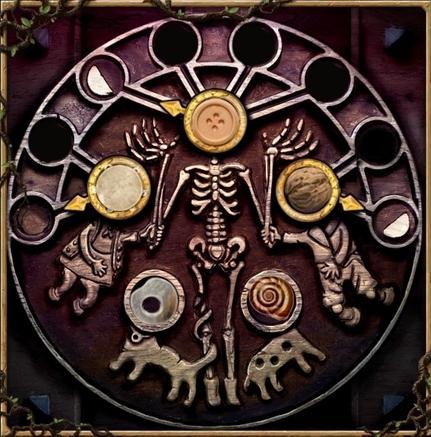
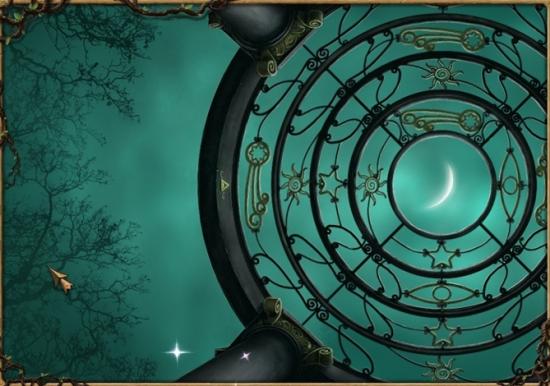
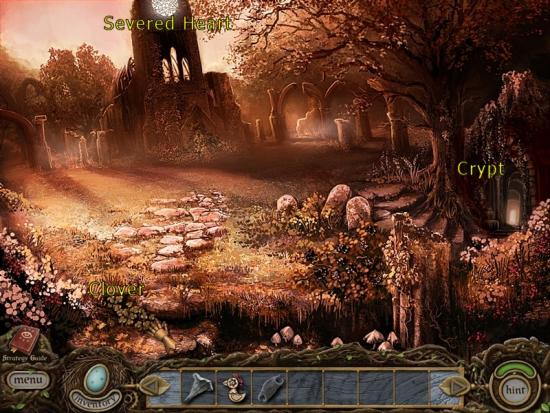
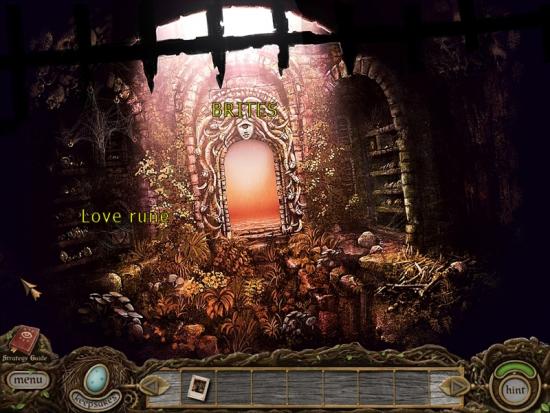
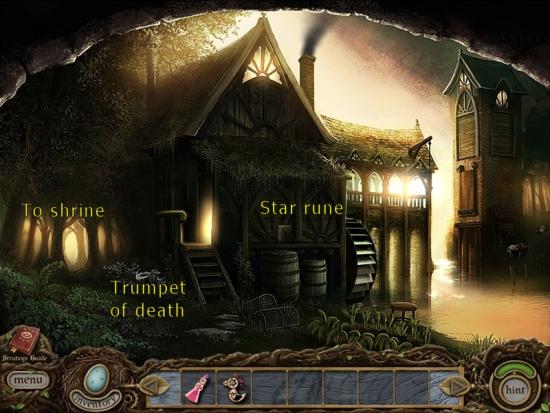
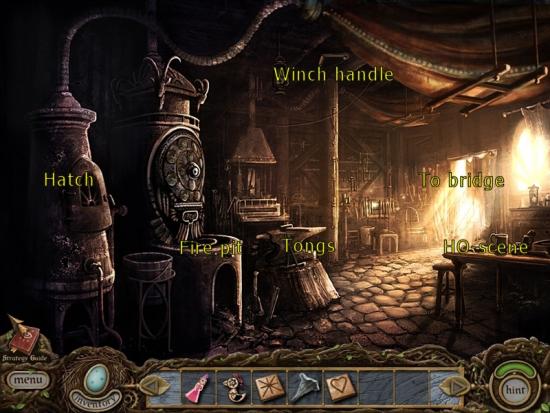
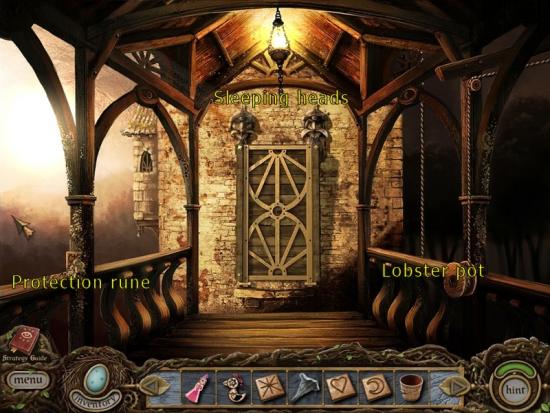
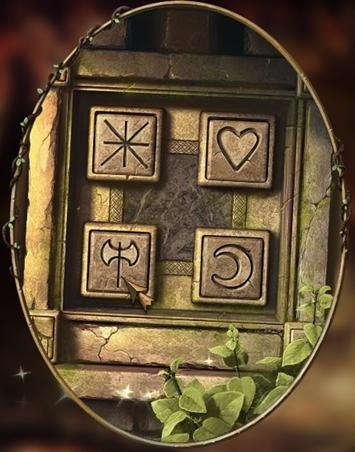
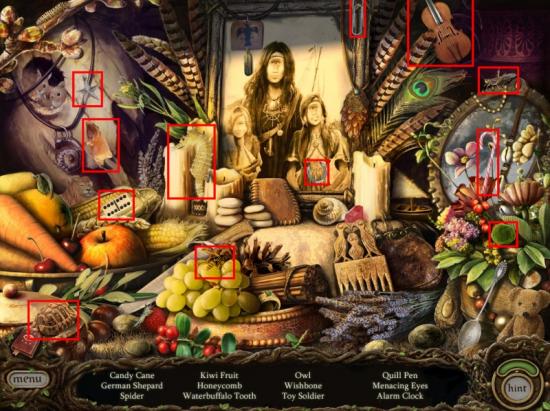
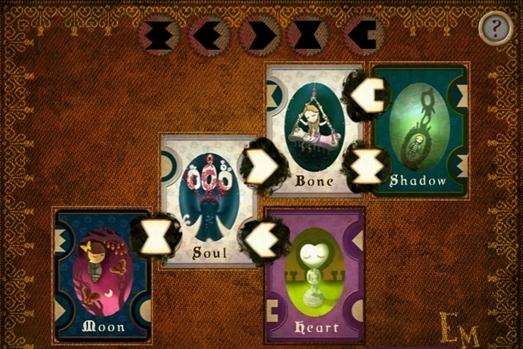
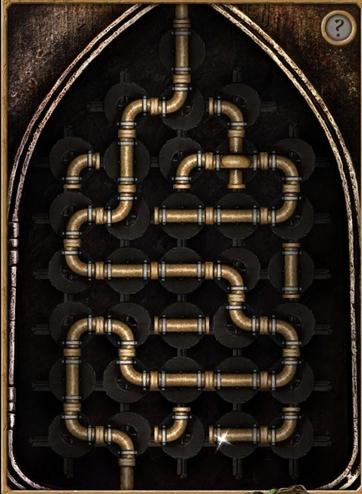
Welcome to the Margrave: Curse of the Severed Heart walkthrough on Gamzebo. Margrave: Curse of the Severed Heart is a hidden object adventure played on the PC. This walkthrough includes tips and tricks, helpful hints, and a strategy guide on how to complete Margrave: Curse of the Severed Heart.

By
Share this
  • Share this on Facebook
  • Share this on Twitter

Act 1: Opening

  • Click on the rosebush next to the gate to pick up the ROSE.
  • Click on the cottage door, and than click on the knocker to sketch it.
  • Click on the knocker once more to open the door and enter the cottage.
 The Curse of the Severed Heart
  • Click on the stained-glass windows in the back, and sketch it’s pattern.
  • Examine the old clocks on the right of the hallway, and make a sketch of them.
  • Click on the bookcase in the back, and re-arrange the books to receive a SQUARE GRAMOPHONE RECORD.
 The Curse of the Severed Heart
  • Enter the Guest Bedroom.
 The Curse of the Severed Heart
  • Open the drawer to find a ripped letter; re-assemble it to read it.
 The Curse of the Severed Heart
  • Solve the hidden object-scene for the first time to receive the DREAM CARDS.
 The Curse of the Severed Heart
  • Solve the hidden object-scene for a second time to receive the LITHOGRAPH.
 The Curse of the Severed Heart
  • Enter the kitchen, and talk to Miss Thorn.
  • Click on the cats, and use the dream cards together to divine their names, which are SNOWFIRE and SHADOWFOOT.
 The Curse of the Severed Heart
  • To show their grattitude, the cats give you the STAINED SHEET MUSIC.
 The Curse of the Severed Heart
  • Solve the hidden object-scene for the first time to receive the TOOTHBRUSH.
 The Curse of the Severed Heart
  • Solve the hidden object-scene for a second time to receive the WALNUT.
 The Curse of the Severed Heart
  • Check the chicken on the kitchen table to find the WISHBONE.
  • Enter the parlour across the hallway.
 The Curse of the Severed Heart
  • Place the STAINED SHEET MUSIC on the piano, and use the TOOTHBRUSH on it.
  • Now play the notes on the piano in the sequence of the sheet: CDEC ECDC AGAC GABC.
 The Curse of the Severed Heart
  • After playing the tune, a part of the painting will fall off, and you can grab the FLUTE KNEES RECIPE.
  • Take the SILVER COINS from the painting, and take the PHOTO from the table.

Act 1: Flute Knees Shadowlock

  • Talk to the statue outside the cottage to find it is the Flute Knees Shadowlock. To disable it, you need to find the ingredients on the FLUTE KNEES RECIPE and place them in the Shadowlock’s chalice.
  • Go to the right, and follow the path through the orchard until you reach a gazebo, where you can find the MISTLETOE hanging from it.
 The Curse of the Severed Heart
  • For the final ingredient of the recipe, you will need to go into the village.
  • Return to the orchard and talk to the ghost rams under the apple tree and use the dream cards to divine their names, which are RAINBONE and EYESHINE.
 The Curse of the Severed Heart
 The Curse of the Severed Heart
  • After naming them, the ghost rams will give you the GAZEBO KEY.
  • Pick up the HAYFORK.
  • Solve the hidden object-scene for the first time to receive the INFERNO NEWSPAPER.
 The Curse of the Severed Heart
 The Curse of the Severed Heart
  • Solve the hidden object-scene for a second time to receive the HONEYCOMB.
 The Curse of the Severed Heart
  • Return the gazebo, and use the GAZEBO KEY to open the gate to the village.

Act 1: The Village

  • Cross the bridge until you enter the village, and continue one screen further to the village wall. Pick up the LADDER from the wall, and the FEATHER from the bird cage.
 The Curse of the Severed Heart
  • Return to the village and place the ladder against the right wall to enter the sweetshop.
  • Take the FOSSIL off the roof top.
 The Curse of the Severed Heart
  • Talk to the ghost geese and use the dream cards to divine their names, which are SUNBLACK and LIGHTWHITE.
 The Curse of the Severed Heart
  • After naming the ghost geese, they will give you the CORN DOLLY.
  • Solve the hidden object-scene for the first time to receive the SLINGSHOT.
 The Curse of the Severed Heart
  • Solve the hidden object-scene for a second time to receive the TOFFEE HAMMER.
 The Curse of the Severed Heart
  • Take the SLINGSHOT, and use it on the target vases hanging from the ceiling.
  • Take the dropped JUNIPER BERRY and ROSE EYES RECIPE from the floor, and take the LICORICE ROOT from the jar.
 The Curse of the Severed Heart
  • Leave the sweet shop, and go through the door leading to the apothecary (which you can’t access yet). Examine the mechanism to the right of the door, and remove the WINCH HANDLE.
  • Return to the bridge before the village, and look at the birds on top of the structure.
  • Use the slingshot to shoot the targets, in order to create a pipe for the water to flow through.
  • Shoot the target in between the birds once, the first target on the bottom-left twice, the second target once, the third target once, the fourth target once, and the sixth target once. Don’t shoot the fifth target.
 The Curse of the Severed Heart
  • Once you’ve got the water flowing, the pipe will spit out the FISH HEAD onto the bridge; pick it up.
  • Return to the Shadowlock outside the cottage.
  • Now put the SILVER COINS from the painting, the WISHBONE from the kitchen, the MISTLETOE from the gazebo, and the CORN DOLLY from the sweet shop in the Shadowlock’s chalice.
  • Re-assemble the PIECES OF NEWS PAPER.
 The Curse of the Severed Heart
  • Go into the kitchen for a shocking revelation on Miss Thorn.

Act 2: The Shadowlocks

  • Look under the pot next to the cottage door to find the FARMYARD KEY.
  • Two piglets will appear, and they want you to divine their names, which are STARSOUL and WEBHEART.
 The Curse of the Severed Heart
  • As a thanks for naming them, they will grant you the Shadowlock MAP.
  • Take the path left over the country lane to reach the farm.
  • Pick up the STARFISH next to the bridge.
  • Use the FARMYARD KEY to open the lock and enter the farmyard.
  • Pick up the THISTLE on the right.
  • The farmyard Shadowlock has forgotten its name, and asks you to find the dream card symbols scattered across the farmyard.
 The Curse of the Severed Heart
  • Use the dreamcards to name the Shadowlock ROSE EYES.
 The Curse of the Severed Heart
  • Enter the stables and use the HAYFORK from the orchard on the stable hay on the left, to find the TOY SOLDIER.
  • Solve the hidden object-scene for the first time to receive the PIPE.
 The Curse of the Severed Heart
  • Solve the hidden object-scene for a second time to receive the TAMBOURINE.
 The Curse of the Severed Heart
  • Take the WORRY DOLL from the bucket on the right of the stables.
  • Take the HORSE’S EYE from the toy horse on the left.
  • Shoot the jar hanging from the ceiling with the SLINGSHOT, and pick up the EYE COG that drops onto the hay.
  • Return to the cottage to find all of your stuff thrown out. Among that, you will find a PENKNIFE, a TUB OF GREASE and the EEL BREEZE RECIPE.
  • First visit the Orchard, and use the PENKNIFE on the heart that is carved into the tree, to find AMBER.
  • Return to the village and zoom in on the gibbet mechanism.
  • Put the WINCH HANDLE on the mechanism, and smear some GREASE on the cogs. Now turn the winch handle to lower the gibbet. Take the WINCH HANDLE off again.
  • Inside the gibbet, take the STONE FLIES RECIPE.
  • Now to disable the Shadowlocks.
  • First go to the STONE FLIES Shadowlock in the orchard.
  • Put the FOSSIL from the village, the HONEYCOMB from the orchard hidden object scene, and the AMBER from the orchard in the Shadowlock’s chalice.
  • Now go to the EEL BREEZE Shadowlock on the country lane.
  • Put the STARFISH from the country lane, the THISTLE from the farmyard, and the TOY SOLDIER from the stables in the Shadowlock’s chalice.
  • Lastly, go to the ROSE EYES Shadowlock on the farmyard.
  • Now put the TOBACCO from the stables hidden object scene, the FEATHER from the village, and the JUNIPER BERRY from the sweet shop in the Shadowlock’s chalice.

Act 2: The Sunflower Garden Shadowlock

  • To find the last Shadowlock, return to the village and enter the door-room under the sweet shop.
  • Look at the mechanism to the right of the door, and insert the EYE COG and the WINCH HANDLE into it to open the door.
  • Go through the door, into the Sunflower Garden.
  • This Shadowlock has also forgotten its name, so find the 6 dream card symbols, and then use the dream cards to name it MOON LIGHT.
 The Curse of the Severed Heart
 The Curse of the Severed Heart
  • After naming it, the Shadowlock will give you the MOON LIGHT RECIPE.
  • Talk the the Shadowlock and put the WORRY DOLL from the stables, the VENUS FLYTRAP from the sunflower garden, and the LICORICE ROOT from the sweet shop in the Shadowlock’s chalice.
  • Before you go through the door that has just opened, examine the sundial to make a sketch of it.
  • Go through the door that has just opened to enter the apothecary.
 The Curse of the Severed Heart
  • Take the SNAKE SKIN from the table on the right, and take the BRASS WORM from the table on the left.
  • Solve the hidden object-scene for the first time to receive the WHITE SHEET MUSIC.
 The Curse of the Severed Heart
  • Solve the hidden object-scene for a second time to receive the COARSE GRAMOPHONE RECORD.
 The Curse of the Severed Heart
  • When a spy hole opens up in the cabinet, click on it to meet the true Miss Thorn.

Act 3: The Heart Lock

  • Return to the cottage to find the front door broken.
  • Enter the cottage and enter the master bedroom.
  • Zoom in on the cabinet in the back, and press the eye on the top to reveal a secret door.
  • It turns out the door is locked with a wooden heart lock, where the beast’s antlers can be turned as a clock.
  • Turn the antlers to match times on the grandfather clock sketch: 12:30 and 3:00.
 The Curse of the Severed Heart
  • A heart cavity opens up, for which you need to collect two items (one of which you should already have, the FISH HEAD).
  • Take the LOCK OF HAIR from the wooden beam on the middle-right, above the ladder.
  • Before leaving the master bedroom, solve the hidden object-scene for the first time to receive the BLACKSMITH’S HAMMER.
 The Curse of the Severed Heart
  • Solve the hidden object-scene for a second time to receive the SEA-WASHED STONE.
 The Curse of the Severed Heart
  • Return to the parlour, and place the WHITE SHEET MUSIC on the piano.
  • Now play the notes on the piano in the sequence of the sheet: EGAB AGED CDDE DGAG.
 The Curse of the Severed Heart
  • After playing the tune, a part of the painting will fall off, and you can grab the GRAMOPHONE KNOB.
  • Return to the guest bedroom, and place the GRAMOPHONE KNOB on the gramophone.
  • As you will ecnounter a number of records, a small word explanation on how the gramophone works: you use the left gramophone to start or stop playing, and you use the right gramophone knob to choose to play it forwards or backwards. If the sound of a record is scrambled, try playing it the other way.
  • Place the SQUARE GRAMOPHONE RECORD on the gramophone and listen to it.
  • Before leaving the guest bedroom, use the HORSE’S EYE on the toy horse to open a secret compartment; take the TIN HORSE HALF from it.
  • Return to the sunflower garden, and feed the mechanical bird on the sundial the BRASS WORM.
  • When it’s wing swings open, take the CLOCKWORK EGG from the opening.
  • Go to the castle wall beyond the village, to find the portcullis to the courtyard now open.
  • Go through to the courtyard and grab the FISH TAIL next to the doorway.
  • Click on the dovecot to start a mini-game. The purpose of the mini-game is to use the buttons to control a set of two of the birds to peck at the ladybugs and score 30 points. Red ladybugs are worth 1 point, golden ladybugs are worth 5 points, while the spiky insect detracts 3 points.
  • Once you’ve completed the mini-game, the window in the dovecot opens.
  • Place the CLOCKWORK EGG in the dovecot window, and a CLOCKWORK CHICK will fall into the hatch below; pick it up.
  • Climb the stairs at the far end of the courtyard to enter the woodland.
  • Place the CLOCKWORK CHICK onto the birdbath.
  • Go one screen further to find the water pump. Click on it, and place the FISH HEAD and the FISH TAIL in the opening, to open the control panel.
  • Move the dials of the control panel to match the old clocks: 12:30 and 3:00.
 The Curse of the Severed Heart
  • After firing up the water pump, a WATER SPOUT will fall on the grass; pick it up.
  • Return to the woodland, and examine the window on the pipe tree.
  • Insert the WATER SPOUT to reveal a pipe puzzle.
 The Curse of the Severed Heart
  • Now that all the water pipes are restored, the bird bath fills up, and a BRASS FISH appears in a compartment of the bird bath; take it.
  • Solve the Woodland hidden object-scene for the first time to receive the HAIRBRUSH.
 The Curse of the Severed Heart
  • Solve the hidden object-scene for a second time to receive the SNAIL SHELL.
 The Curse of the Severed Heart
  • Return to the water pump and pass it to find a cemetery.
  • Look at the sigilis that are carved into the tree, above the portculis, to make a sketch of it.
  • Take the COFFIN NAIL from the tree trunk.
  • Examine the skeleton and take the PIECES OF RACING PAPER from its eye sockets.
  • Re-assemble the pieces of paper.
 The Curse of the Severed Heart
  • Return to the sweet shop in the village, and click on the horse race.
  • Place the TIN HORSE HALF into the scene, and than click on it to zoom in.
  • Use your SLINGSHOT to hit the targets, and move the jockeys into the correct order.
  • The pink horse is in position 2
  • The blue horse is in position 1
  • The yellow horse is in position 3
  • The pink horse is in position 4
  • To get them to this order, hit the top target once, the second target twice, and the bottom target three times.
  • A curtain under the counter opens up and reveals a toffee horse.
  • Use the TOFFEE HAMMER to smash the horse to find the PALOMINO SHEET MUSIC inside it.
  • Return to the courtyard with the dovecot, and enter the Miss Thorn’s parlour through the doorway on the left.
  • Take the IVORY ANGEL from the ceiling beam, and take the SKETCH OF THE SEVERED HEART from the flower pot.
 The Curse of the Severed Heart
  • Re-arrange the books in the bookcase to receive the WARPED GRAMOPHONE RECORD.
 The Curse of the Severed Heart
  • Return to the parlour in the cottage, and place the PALOMINO SHEET MUSIC on the piano.
  • Now play the notes on the piano in the sequence of the sheet: AACE DDCB BCBA GEAA.
 The Curse of the Severed Heart
  • After playing the tune, a part of the painting will fall off, and you can grab the WOODEN HORSE.
  • Use the gramophone to play the COARSE GRAMOPHONE RECORD and the WARPED GRAMOPHONE RECORD.
  • Return to the master bedroom, and put the BRASS FISH and the WOODEN HORSE in the beasts heart cavity on the heart lock.
  • Go through the passage that opens up, and open the drawer to find a SILVER RING on a severed finger; pick it up.

Act 4: The Fire

  • Click on the ghost animals to hear their song.
  • Examine the top left alcove for a hidden object scene.
  • Solve the hidden object-scene for the first time to receive the SOUL SUMMON RECIPE.
 The Curse of the Severed Heart
  • Solve the hidden object-scene for a second time to receive the COTTON SWAB.
 The Curse of the Severed Heart
  • Pick up the MOSSY GRAMOPHONE RECORD from the stone altar.
 The Curse of the Severed Heart
  • Go up the stairs to the church.
  • Take the BLACKSMITH’S HAMMER from your inventory, and hit the shield on the altar four times.
  • As the altar slides away, a hole opens up; take the BUTTON from the edge of the hole.
  • Return to the cemetery, and inspect the one-eyed girl.
  • Use the HAIRBRUSH on the girl’s hair.
  • Use the COTTON SWAB on the girl’s ears.
  • Use the TOOTHBRUSH on the girl’s teeth.
  • Once cleaned, the girl’s face will move to reveal a SKULL; pick it up.
  • Return to the church, go down the hole into the crypt and insert the SKULL into the iron frame to open the portcullis.
  • To open the lock, you need to use five items to replace the heads on the lock.
  • Use the TAMBOURINE from the stables hidden object scene as the girl’s head.
  • Use the BUTTON from the church as the skeleton’s head.
  • Use the WALNUT from the kitchen hidden object scene as the boy’s head.
  • Use the SEA-WASHED STONE from the master bedroom hidden object scene as the cat’s head.
  • Use the SNAIL SHELL from the woodland hidden object scene as the dog’s head.
  • When the heads are correctly placed, three moondials will appear. Click on the heads to move them to the correct positions: the left dial to its second position, the top dial to its third position, and the right dial to its second position.
 The Curse of the Severed Heart

Act 4: The Celestial Sigiis

  • Return to the gazebo, and click on its dome to start a puzzle.
  • Click on the sigiis to line them up correctly with the moon.
 The Curse of the Severed Heart
  • A doorway next to the trunk leads to a CAULDRON.
  • Pick up the CAULDRON, and return to the church, and through to the sanctum that has been opened.
  • Place the CAULDRON on the cauldron stand, and put in…
  • …the SILVER RING from the drawer in the secret passage.
  • …the COFFIN NAIL from the bone cemetery.
  • …the IVORY ANGEL from Miss Thorn’s parlour.
  • …the SNAKESKIN from the apothecary.
  • …the LOCK OF HAIR from the master bedroom.
  • Finish the incantation by consulting your dream cards and ordering them.
 The Curse of the Severed Heart
  • After the cutscene, Cassandra feels empty; place the SCARLET ROSE in her chest to finish the game.

The Blacksmith’s Revenge

  • Assemble the LITOGRAPH.
 The Curse of the Severed Heart
  • Pick up the CLOVER from the steps.
 The Curse of the Severed Heart
  • Enter the crypt, and take BRITES’ EYE from your inventory and place it in the face above the door.
  • Pick up the LOVE RUNE tangled in the cobwebs.
 The Curse of the Severed Heart
  • Go through into the catacombs, and take OBAN’S POEM from the tree.
  • Take the SHIELD from the tangled roots.
 The Curse of the Severed Heart
  • Enter the Shadowlock cavern, and click on the left most panel.
  • Enter the correct symbol combination.
  • In the next connection-puzzle, move the directions and numbers to the correct columns to create a current. When done succesfully, take the SPARK COIL.
  • Do this correctly for all three panels to collect the three SPARK COILs you need.
 The Curse of the Severed Heart
 The Curse of the Severed Heart
  • Return to the catacombs, and zoom in on the serpent lock.
  • Put all three SPARK COILs in the lock to reveal dream card symbols.
  • Now place the SHIELD on the lock to uncover the correct symbols.
  • Use the dream cards to read Oban’s challenge.
 The Curse of the Severed Heart
  • Go through the door to the lakeside.
  • Pick up the TRUMPET OF DEATH and the STAR RUNE.
 The Curse of the Severed Heart
  • Enter the blacksmith’s hut and solve the hidden object-scene for the first time to receive the MOON RUNE.
 The Curse of the Severed Heart
 The Curse of the Severed Heart
  • Solve the hidden object-scene for a second time to receive the FORGE HANDLE.
 The Curse of the Severed Heart
  • Go through the door, and pick up the PROTECTION RUNE.
 The Curse of the Severed Heart
  • Return to the lakeside, and then go to the shrine area.
  • Click on the shrine, and enter the FOUR RUNES in the order shown on the LITOGRAPH.
 The Curse of the Severed Heart
  • Click on the Shrine and solve the hidden object-scene for the first time to receive the HORN.
 The Curse of the Severed Heart
  • Solve the hidden object-scene for a second time to receive the WASP.
 The Curse of the Severed Heart
  • Return to the bridge, and blow the HORN to wake the sleeping heads.
  • Not happy that they were woken, the sleeping heads want you to divine their names to be let through: MOONSOUL and BONESHADOW.
 The Curse of the Severed Heart
  • Enter the tower and talk to Oban.
  • Take the WING MOLD from under Oban’s bed, and return to the blacksmith’s hut.
  • Click on the hatch, and solve the pipe puzzle to get the bellow’s going.
 The Curse of the Severed Heart
  • Take the TONGS from the anvil, and the EMPTY BUCKET from the fire pit stand.
  • Go to the lakeside, and use the EMPTY BUCKET on the water to fill it.
  • Return to the hut and place the WING MOLD in the fire pit.
  • Put the FORGE HANDLE back in its place, and click on it to play a challenging matching mini-game.
  • After succesfully finishing the mini-game, hot iron will be poured into the mold.
  • Use the TONGS to pick up the HOT BIRD WING and transfer it to the BUCKET OF WATER to cool down.
  • Afi is now ready to fly.
  • Use Afi to retrieve the WINCH HANDLE from the beam in the blacksmith’s hut.
  • Return to Oban’s tower, and use Afi to retrieve the MOUNTAIN STRENGHT RECIPE that is hanging from the rafters.
  • Return to the bridge, and use the WINCH HANDLE on the winch on the right, to pull up the lobster pot, containing a MERMAID’S PURSE.
  • Return to the sanctum, and drop the MERMAID’S PURSE from the bridge, WINCH HANDLE from the blacksmith’s hut, the TRUMPET OF DEATH from the lake side, the CLOVER from the churchyard and the WASP from the shrine hidden object scene in the cauldron.
  • Now that Afi is fortified, return to the churchyard and have Afi collect the SEVERED HEART from the church tower.
  • Return to Oban’s tower to put an end to the curse, once and for all.