
Best Horror Games On Itch.io – July 2026
Across a bounty of subgenres.
Grow A Garden 2 Base Price List
What's the most valuable crop?![Evomon Best Starter [Leafbun, Blazpup, or Bubble?]](/wp-content/uploads/2026/06/evomon-best-starter.jpg "Evomon Best Starter [Leafbun, Blazpup, or Bubble?]")
Evomon Best Starter [Leafbun, Blazpup, or Bubble?]
Grass-type, Fire-type, or Water-type?
![[Roblox] Evomon Shiny Hunting Guide – Including Prismatic and Pris Shinies!](/wp-content/uploads/2026/06/evomon-shiny-hunting-guide.jpg "[Roblox] Evomon Shiny Hunting Guide – Including Prismatic and Pris Shinies!")
Margrave Manor 2: The Lost Ship Walkthrough
Margrave Manor 2: The Lost Ships is the sequel to The Secret of Margrave Manor and is developed by Inertia Game Studios. The intriguing story of Edwin Margrave's Granddaughter "Edwina" and her search to find the hidden treasure that her Grandfather failed to find over ten years earlier when he and his crew set off in his boat the "Aurora Dusk" to search for "Neptune's Gold" within the "Lost Continent of "Atlantis." The Margrave family are ext…


- Prefer Gamezebo on Google

a:1:i:0;a:2:s:13:”section_title”;s:43:”Margrave Manor 2: The Lost Ship Walkthrough”;s:12:”section_body”;s:51354:”

Margrave Manor 2: The Lost Ships is the sequel to The Secret of Margrave Manor and is developed by Inertia Game Studios.
The intriguing story of Edwin Margrave’s Granddaughter "Edwina" and her search to find the hidden treasure that her Grandfather failed to find over ten years earlier when he and his crew set off in his boat the "Aurora Dusk" to search for "Neptune’s Gold" within the "Lost Continent of "Atlantis."
The Margrave family are extremely talented puzzle solvers and Edwina is the only hope to solve the mystery of what happened to her Grandfather, his crew, and find the priceless "Neptune’s Gold." Danger, intrigue and suspense at every turn in this hidden object thriller with over 180 beautiful hand drawn scenes to search.
Gameplay – There are twenty chapters in the game and each chapter has six hidden object screens (each scene is a location on the ship) for you to search along with mini games, puzzles and find the difference screens.
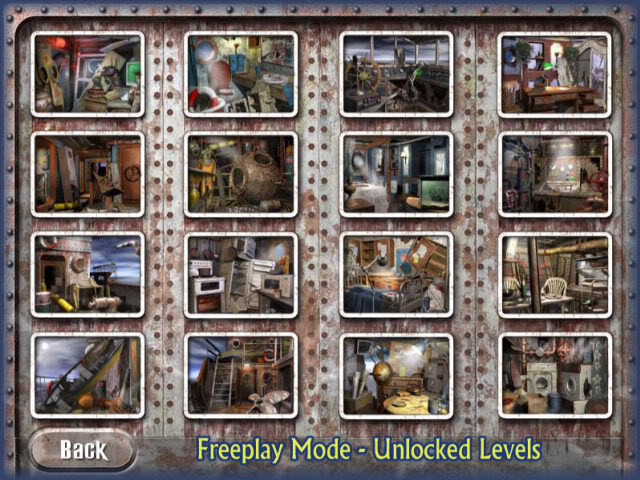
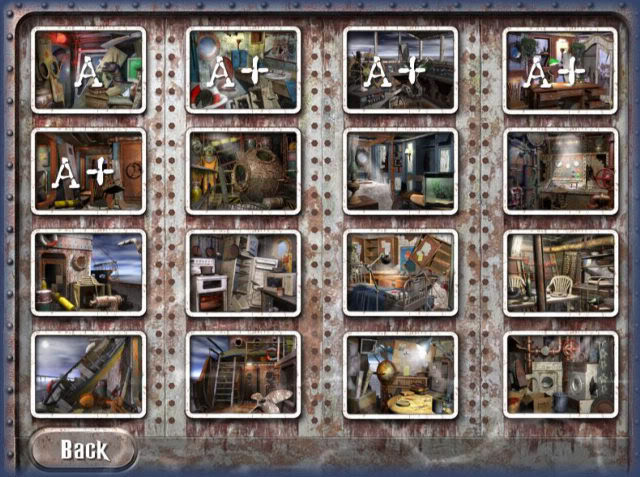
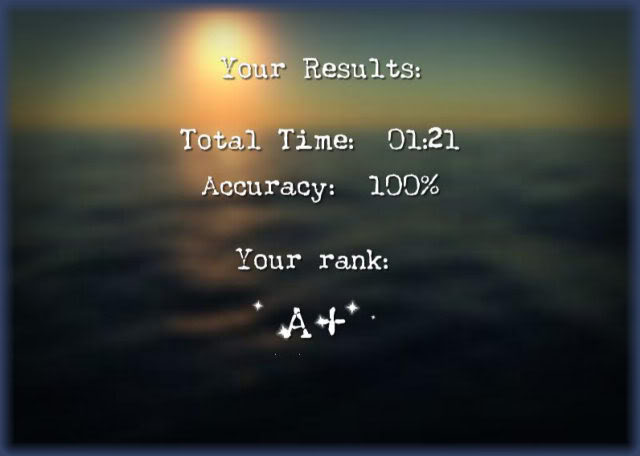
The game can be played in "Story" mode following the storyline or in "Freeplay mode" which is strictly hidden object screens with no story or mini game puzzles. Freeplay mode can only be played after Story mode is completed as you will unlock scenes every few chapters. Freeplay mode has sixteen potential scenes to search. There is no timer but at the end of every session you are ranked and the amount of time it took you to play the level, your percentage of accuracy, and a final ranking of A+ through F is assigned and displayed on the freeplay main screen. In "freeplay mode" you can play a level more than once and there is no penalty for fast clicking or incorrect clicks in either modes.
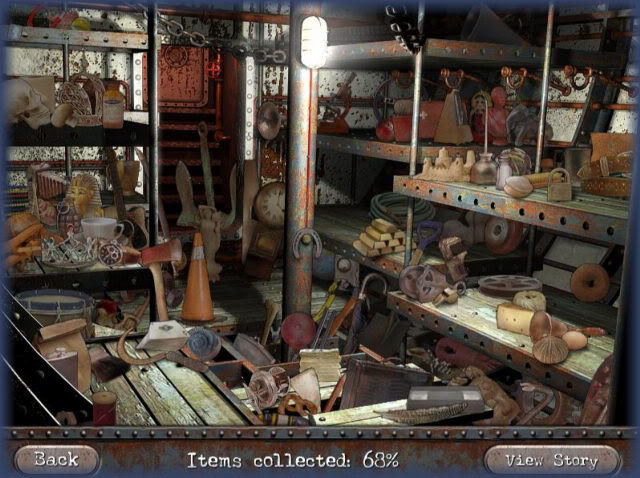
Every time you play the game you will have a different list of items to find AND the search screen will itself be different. There are multiple mini games per chapter which consist of finding the differences between two screens, picture assembly, logic puzzles, sequencing puzzles, and math puzzles. Every time you complete a location one of the items you found will be added to the "inventory" which is a store room in the boat. You will be told at the end of every location which item has been added to your collection. When you are on the main screen, you can click on. "View Collection" to see all of the items added and a percentage of how far along you are in the game to completing the collection. Note -Every game is different and if you play again you will earn an entirely new collection.
The game starts out with having you immediately find a key to open the door to the lighthouse. Once you search for the key and find it, it will be in your inventory for use. Drag the key to the door (hot spot)to start the game. (See Walkthrough) Only the items that you can read in the list can be activated and found. Once you see a desired item, click on it and it will disappear from the scene. A few objects are hidden behind other objects and won’t be viewable til the first item is out of the way.
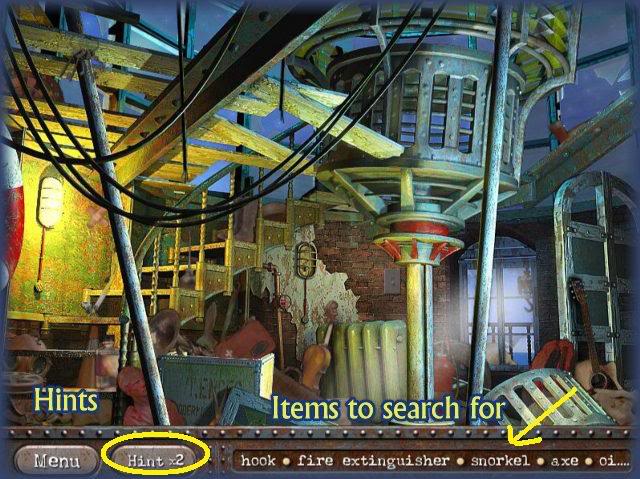
If you become stuck, you can use a hint by simply clicking on the "hint" button and then on the name of the item you wish to locate and it will turn blue and a sparkly graphic will appear showing you where the item is located. You are given 2 hints to begin with and every three minutes of game play that you have not used a hint, you will be given another hint for use only on the screen you are playing. Each screen gives a fresh set of hints. There is no penalty for using hints. The game does not award points so there is no score. You are playing to complete the story in story mode and to earn a ranking in "free-play" mode. Most puzzles in the game can be skipped by clicking on the "skip" button at the top right of the screen. If you do not have the option to skip you must complete the puzzle in order to proceed in the game.
Tips and Strategies
- Each chapter starts out with 2 hints and after 3 minutes another hint is added. There are no penalties for using the hint button in either game mode so if you are stuck be sure to use them. They do not carry over to the next screen.
- While in "free-play mode" if you click on every item carefully you will obtain 100% accuracy. Random clicking on the screen will bring this down significantly so click carefully on the items you choose.
- You will see the same items frequently so try to memorize what they look like to help you in future levels.
- There are a few items that are confusing.
- "Skittles" are a group of bowling pins.
- "A stack of crockery" is a stack of plates.
- "Gecko" is a small lizard or reptile.
- "Cog" is a gear.
- "Tankard" is a metallic mug.
- "Bandages" are seen as traditional "Band-aids" and as a roll of white gauze in the game.
- "Cutthroat Razor" is also known as a straight edge razor.
- "Parasol" is an umbrella – There is also a regular umbrella in many of the same screens. The umbrella is black and parasol is yellow.
- "Wellington Boots" Long rain boots with a rubbery appearance.
- "Heap of Powder" This is always a red powder in the game.
- "Gem Stones" are diamond shaped and in various colors.
- "Mortar and Pestle" – A cup with a rod inside that is used to crush pills. In the game there are 2. One is white and one is gold.
- "Cutlass" – A long sword in a sheath container.
- "Fossil" – In the game this is seen as a blue item with a swirl pattern.
- "Marble" – In this game the marble is white and yellow swirled pattern.
- "Megaphone" – There are 2 different ones in the game. One is blue and white battery operated and one is the old fashioned kind in black."
- "Bee" – This is one of the hardest objects to find in the game since it is so small". Look on the edges of beds and in the highest spots first.
- "Ceramic Flagon" – This is a ceramic jug. It is very large and is two colors. The top half is cream and the bottom is brown horizontally.
- "Russian Doll" – These are the stacking dolls that come in various sizes.
- If you stop the game before the end of the level it will save at the beginning of the last level you stopped on. You will have to replay anything in the level you completed previously.
- If you would like to read the letters in the story line again click on "View Collection" and then "See Story" at bottom right and you can view all the letters you have found and re-assembled in the game.
Walkthrough
**Please note that in this game you will always have different items on the search screens and different items to find listed at the bottom. It is impossible to give you the answers to the search screens because of this. Items if particularly difficult will be mentioned in the appropriate location and items that may be confusing are listed above in the "Tips and Strategies" section.
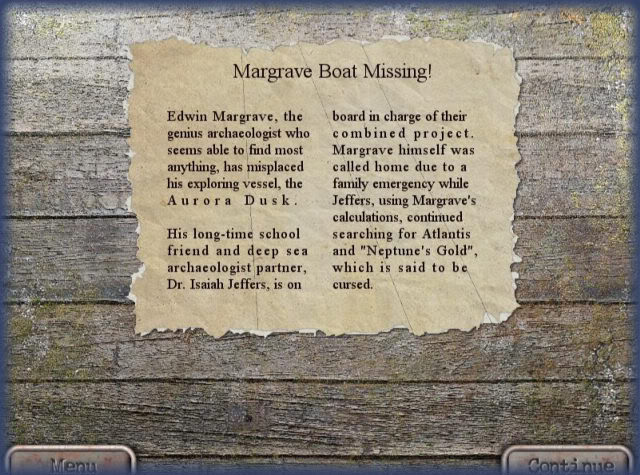
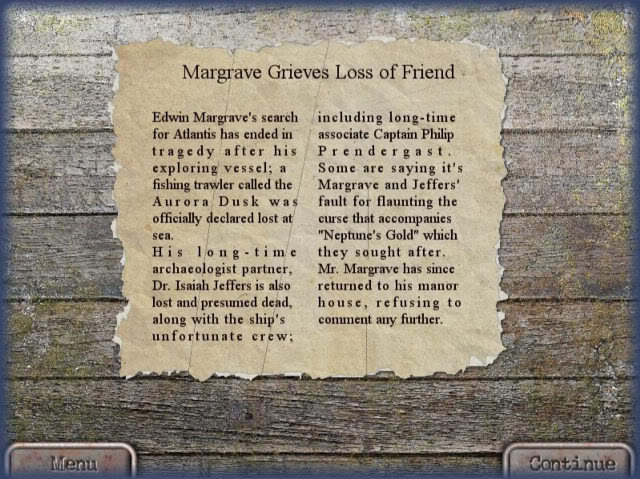
The answer to all puzzles will be listed here. There are many puzzles that require you to re-assemble letters and newspaper articles. These also vary in how they are put together but the completed puzzle/letter is here for you to use as a guide.
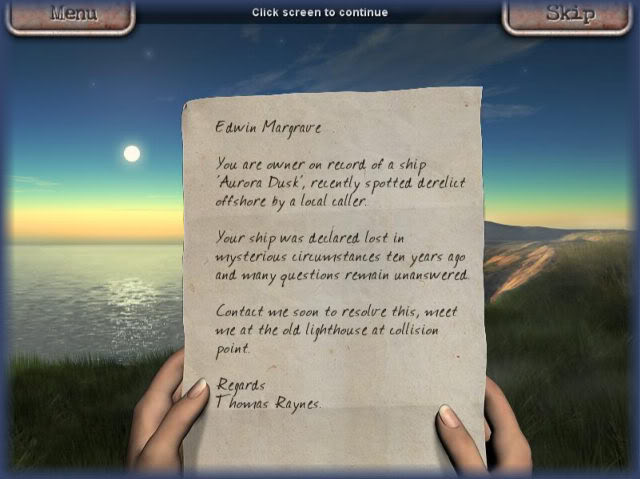
The game begins with Edwina receiving a letter from Thomas Raynes an officer of the Coast Guard, alerting her that her Grandfather’s boat, the "Aurora Dusk" which has been missing for ten years, has been spotted offshore in poor condition. She is to contact him and meet him at the Old Lighthouse at Colosseum point.
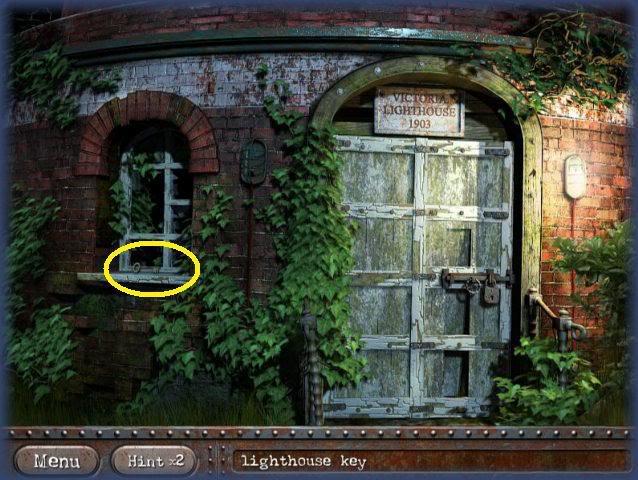
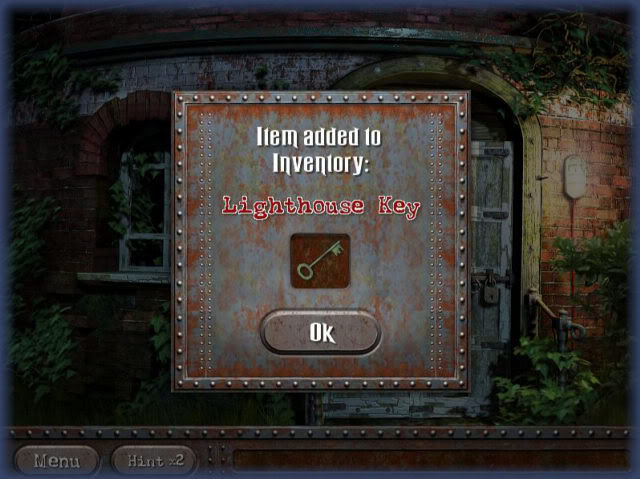
Once there you are to search for the lighthouse key and it will add to your inventory. (You will see the prompt in the picture whenever an item is added to your inventory at the end of every search screen.)
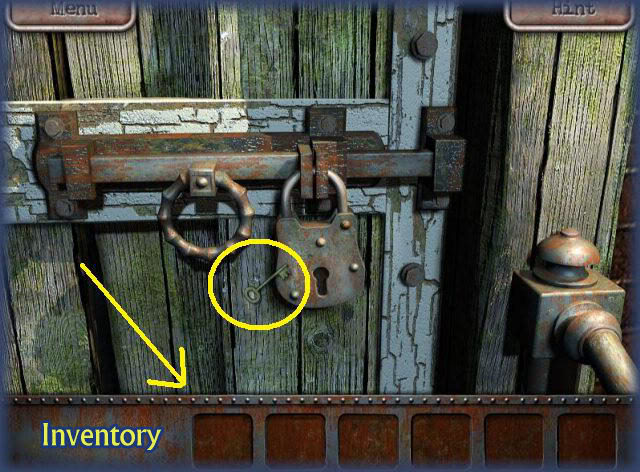
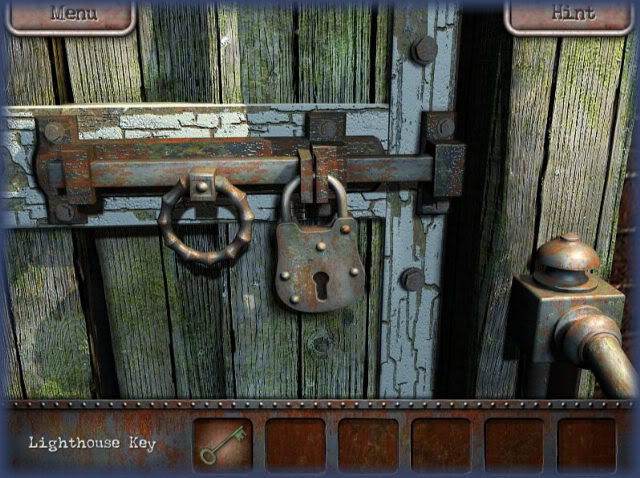
Once you have the key in your inventory, click on it and drag it to the door which will cause the door to open and the game to begin.
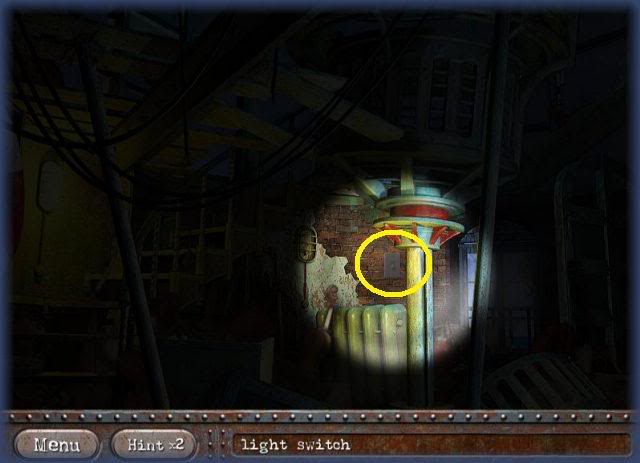
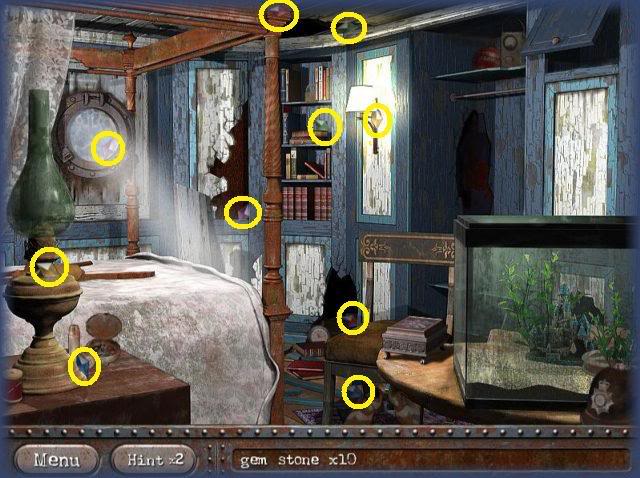
The next screen will prompt you to look for the light switch. (Circled above) The screen will stay dark until you do this. Once you click on it the scene will light up normally and you will find the items at the bottom of the screen in the list and use hints if needed but use cautiously as you only get three per level maximum.
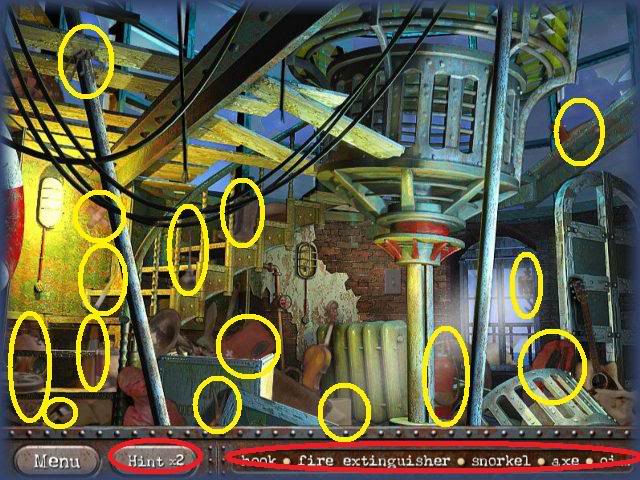
In this scene Edwina meets "Thomas Raynes" and they decide to immediately go to the ship to start searching it. Before they go they will need supplies so you will search for the following 15 items.
- Hook
- Fire Extinguisher
- Snorkel
- Axe
- Oil Can
- Warning Cone
- Toilet Paper
- Whistle
- Life Jacket
- First Aid Bag
- Wellington Boots
- Bunch of Keys
- Diver’s Helmet
- Scissors
- Band aids
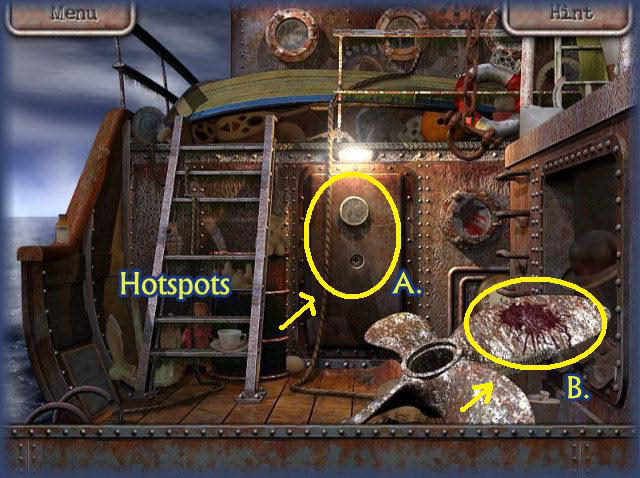
Edwina and Thomas take a small boat and arrive on the "Aurora Dusk" It is quite large and in disarray.
In this screen you have two "Hotspots" to click on. Sometimes you will have to investigate your surroundings to proceed. Click on the sparkly hotspots to investigate them further.
When you click on these hotspots, the following dialogue is heard:
A. "There should be a steering wheel like door knob here."
B. "This looks like blood!"
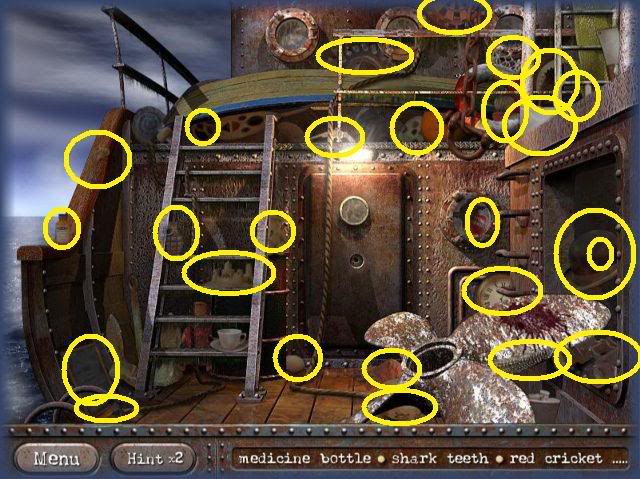
Once you click on the two hotspots you will be taken to this screen where you are to find the following items.
- Medicine Bottle
- Shark Teeth
- Red Cricket Ball
- Heap of Powder
- Pistol
- Dart Board
- Hammer
- Teddy Bear
- Hand Grenade
- Cactus
- Cog
- Pretzel
- Feather
- Binoculars
- Envelopes
- Clock
- Seahorse
- Sand Castle Black Board
- Tiara
- Egg
- Human Skull
- Tambourine
- Bowler Hat
- Ship Door Handle ** This is found underneath the Bowler hat therefore is not shown on image above.

After you find the Ship door handle it will go into your inventory. Next you will see a scene of the door. Drag the wheel to the door to open it. The door opens and Edwina and Thomas enter. There is a horrible smell and they notice there are barricades all over. Finally they make their way to Edwin Margrave’s Cabin where you are to find the following items:
- Cutthroat Razor
- Monkey Wrench
- American Football
- Greek Helmet Crowbar
- Pistol
- Dollar Bill
- Purse
- Acoustic Guitar
- Toy Car
- Gem Stone
- Parasol
- Gloves
- Medal
- Monkey Skull
- Jewelry Box
- Garlic
- Saw
- Cushion
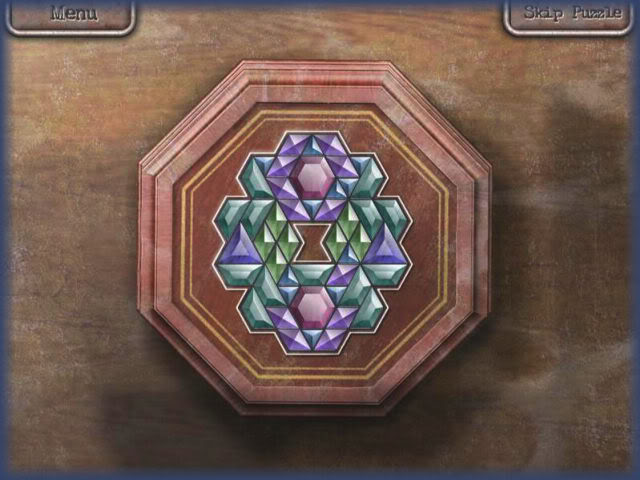
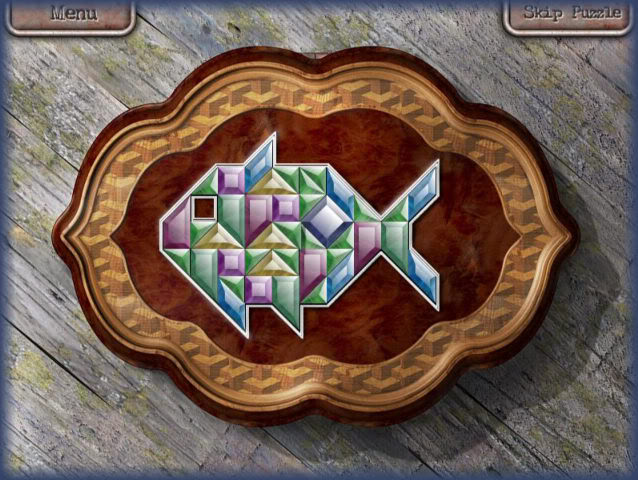
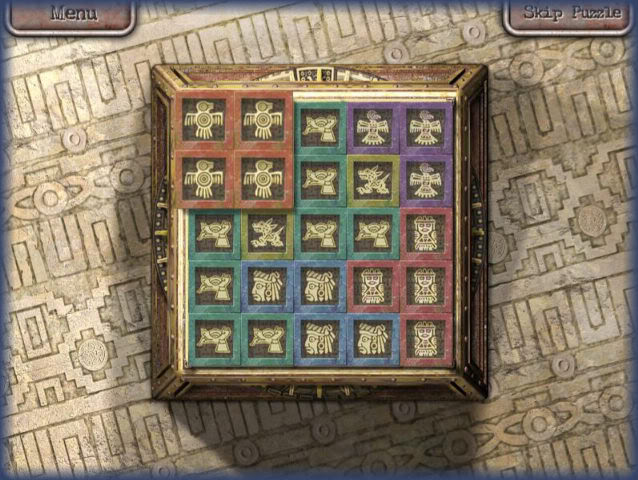
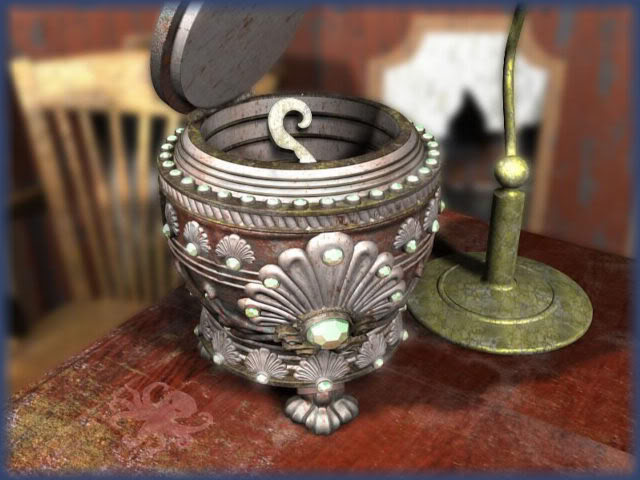
After you find all of the items the Jewelry box will be last. You learn that it is a puzzle. You will be sent to a screen with one gem stone. Click and drag that stone to the jewelry box placing it anywhere it will fit. This will activate the puzzle and send you to the search screen. First you will be required to find all of the gemstones.
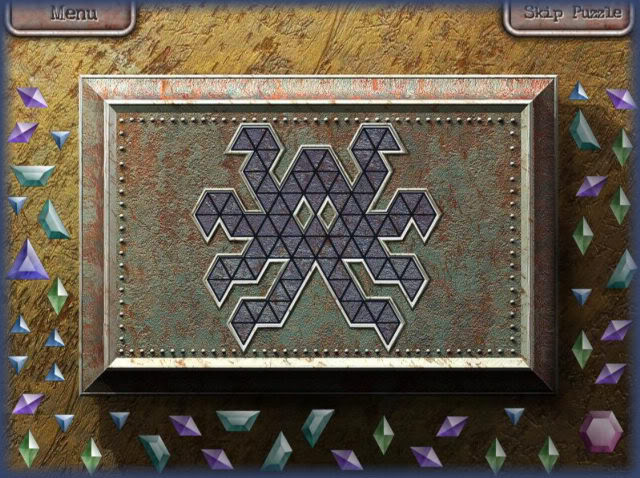
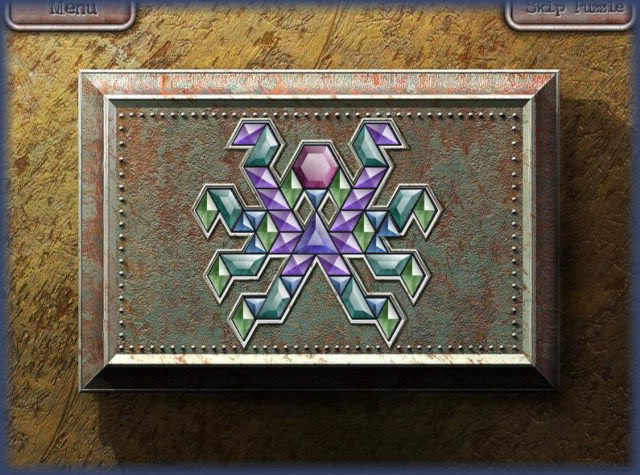
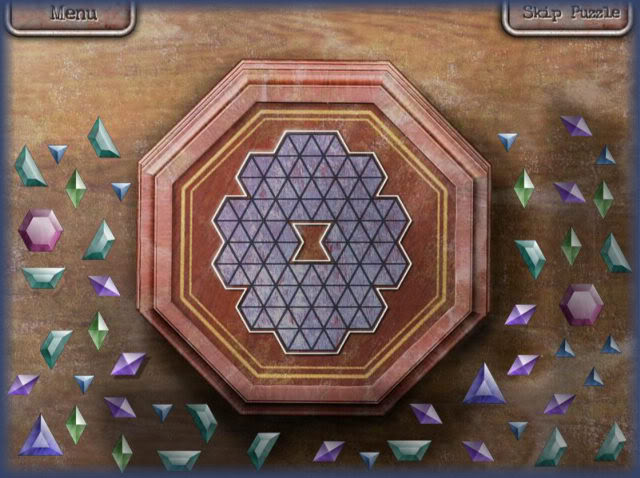
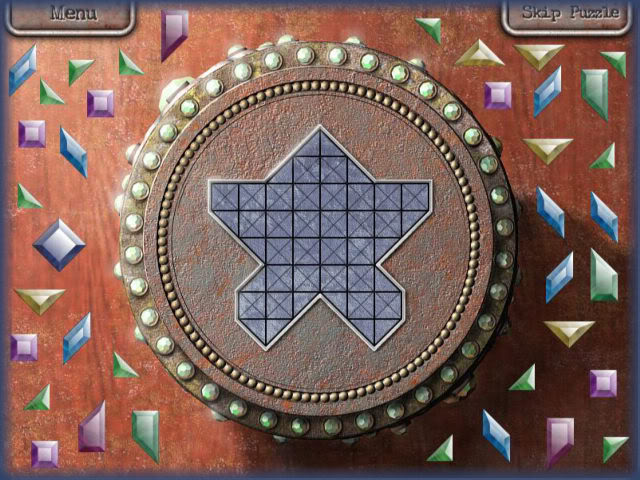
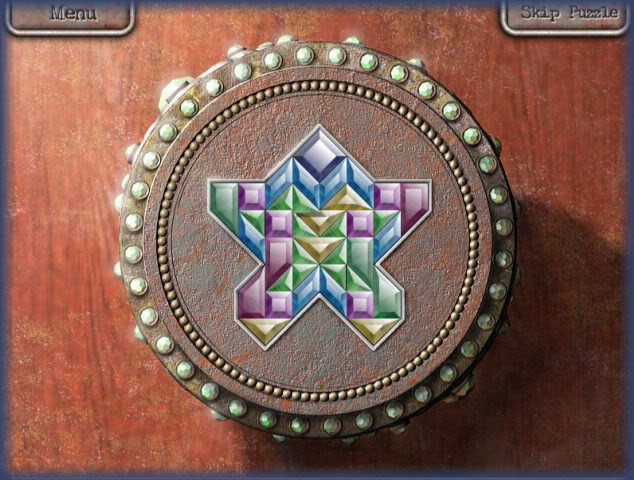
Here you will complete the first gem stone puzzle. Place the gem stones inside the image outline until every stone is used. HINT – Place all gems symmetrically. (Same on both sides) If you find this too difficult, you can click on "skip puzzle" to skip it without penalty.
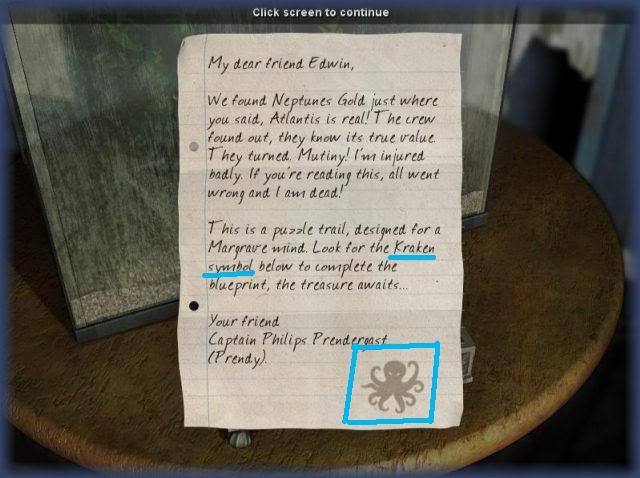
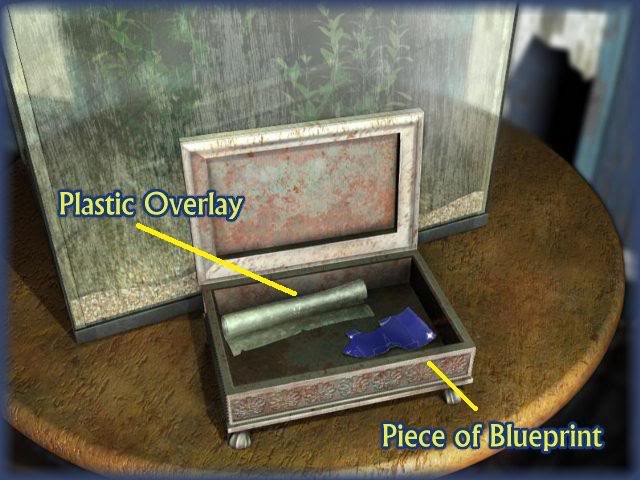
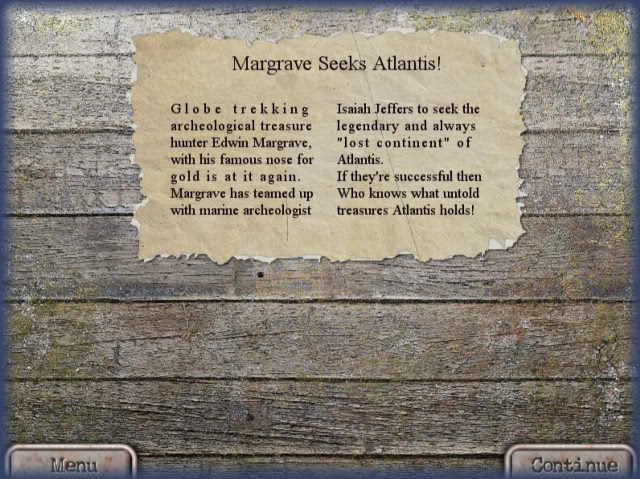
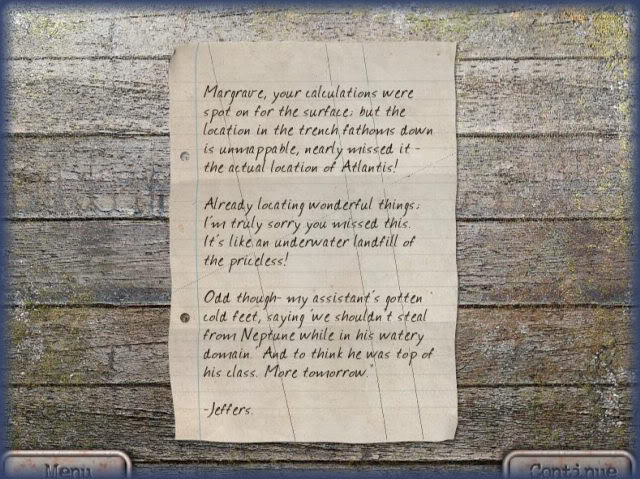
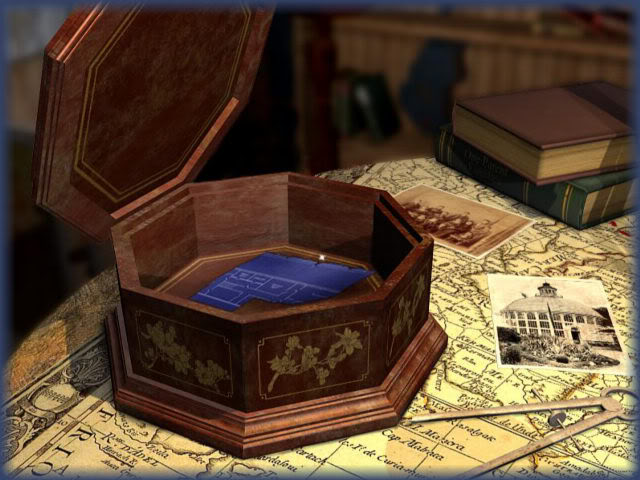
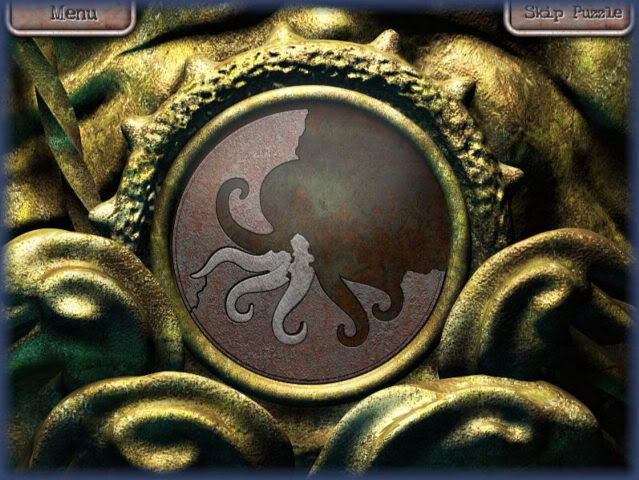
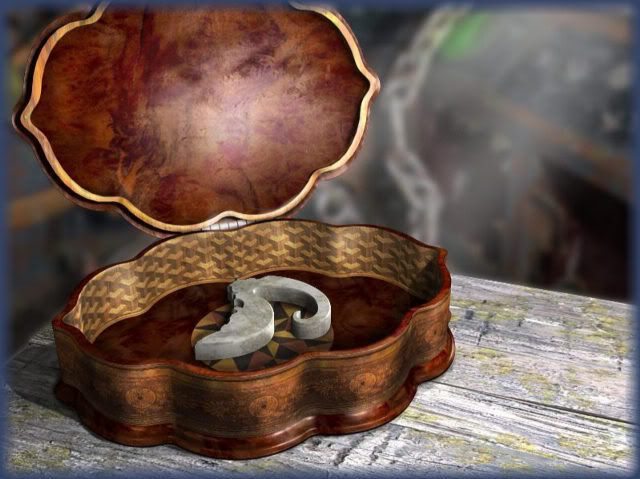
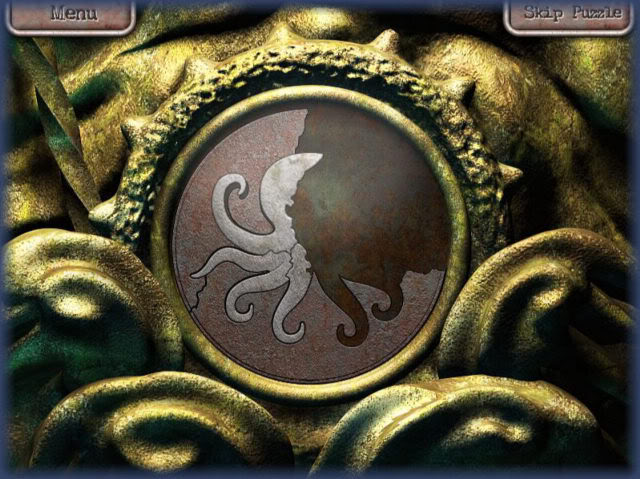
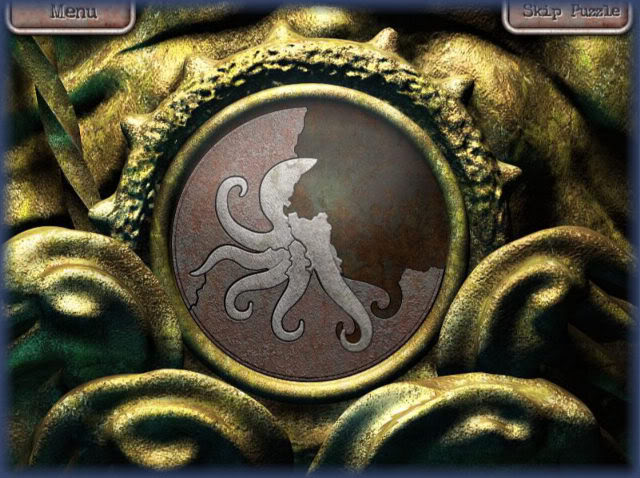
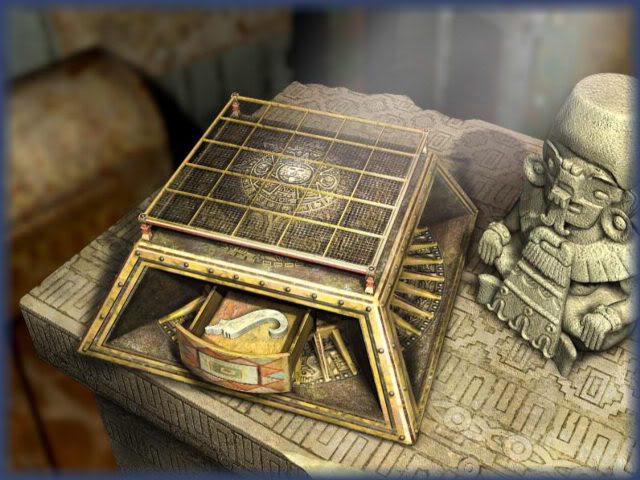
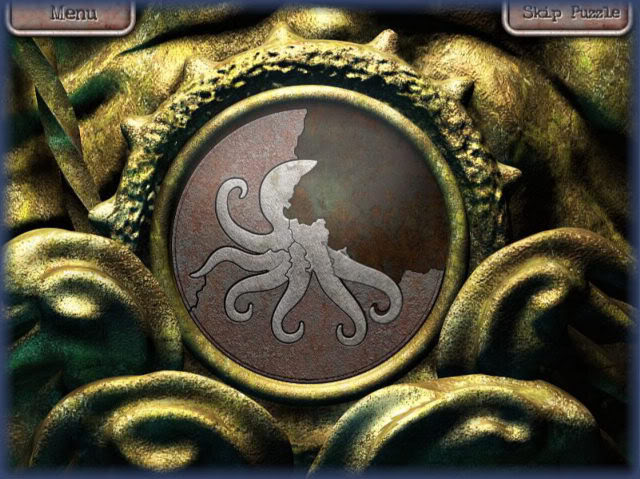
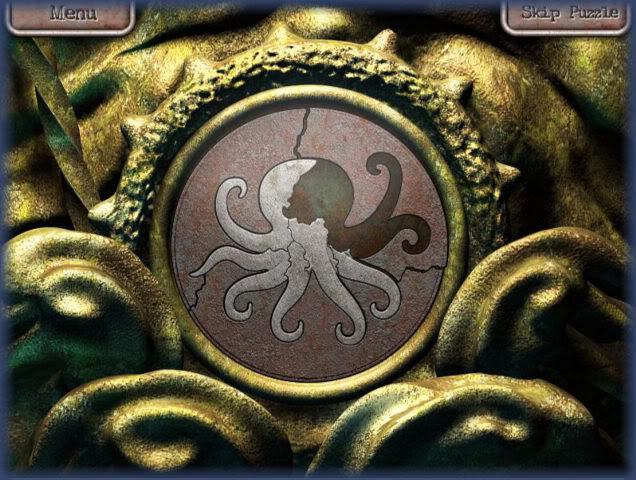
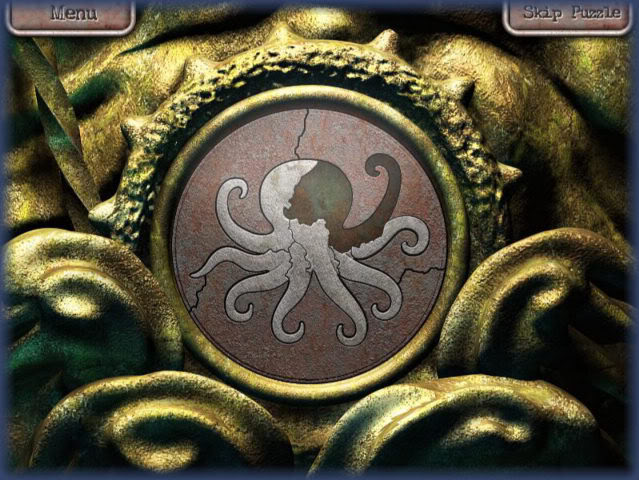
Next you will be taken to a scene where the jewelry box is opened. Inside you will see a letter and two other items. Click on the letter and it will be read to you. It tells how Margrave was searching for the "Lost city of Atlantis" (see above). The ship has been filled with puzzles that only the mind of a Margrave can handle. The symbol highlighted in blue is the "Kraken Symbol" which you will see throughout the game.
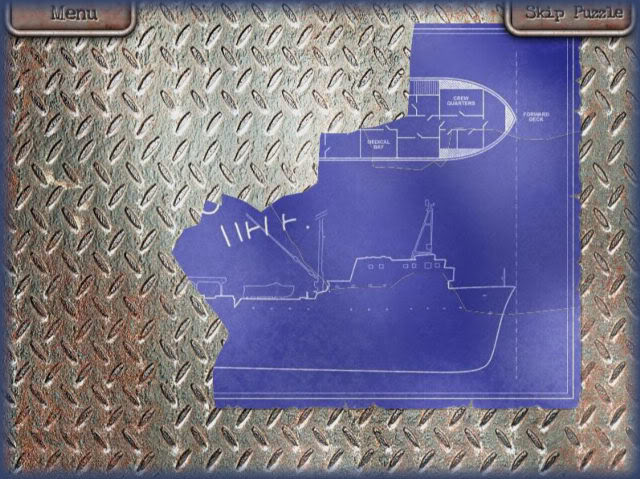
- Click on the Blueprint – Dialogue- "This is what will lead us to the treasure."
- Click on the Overlay – Dialogue – "Not sure what this is…there are strange markings on it. We had better hold onto this."
- Next we find Edwina and Thomas back in Edwin’s Cabin and while it is dark and scary in the ship, Edwina insists they continue to search for the blueprint pieces through the night.
***NOTE: Now the game will begin to be divided into chapters 1 through 20 and each chapter (Except for Chapter 9) has 6 hidden object screens at various location in the boat and varying puzzles. From this point on all search screens have different items on them and different lists so I will just list which screen you should be on at this point and the answers to any puzzles for that chapter.
**NOTE: The puzzles that require you to find the difference between 2 screens may vary from your game.
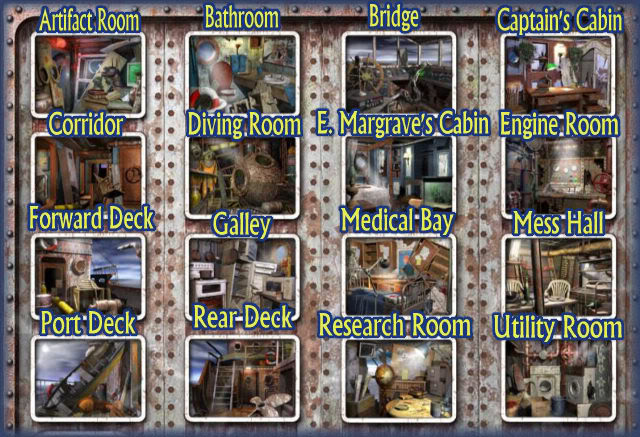
Chapter Map
CHAPTER 1
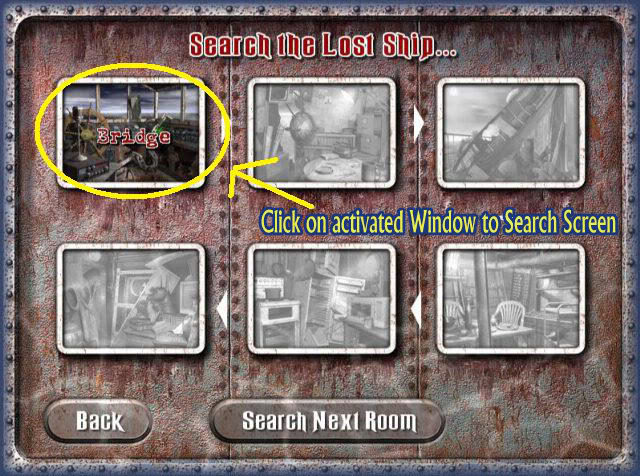
Search Screens
Bridge – Find 15 items
The last item you will find is a "Key-card" this will go into your inventory for later use.
Research Room – Find 15 items.
Port Deck – Find 15 items.
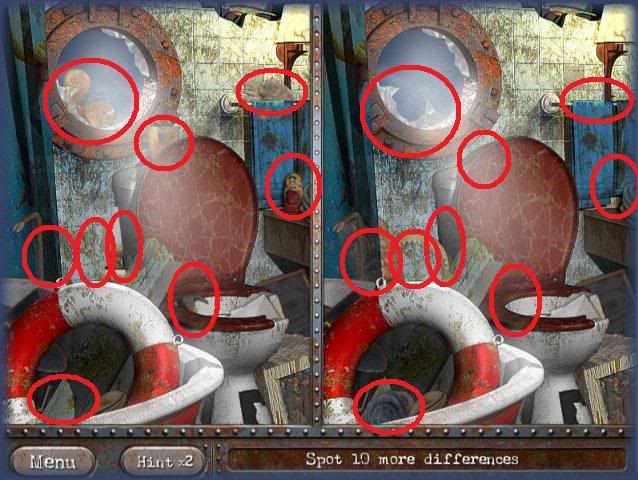
PUZZLE SOLUTION – Find the Differences between the two screens "Spot 10 more Differences" NOTE – This is an example screen this may or may not have the solution to your puzzle. Click on either side of the screen and the item that isn’t supposed to be there will disappear.
Mess Hall – Find 15 items.
PUZZLE SOLUTION
Click and drag the pieces until they lock together. It is helpful to look for the large font to guide you. Once the image is complete click on "Continue"
Galley – Find 15 items.
Artifact Room – You will not go immediately into a search screen here. You will run into a door and your inventory will open. Take the key-card you found earlier and drag it to the key-card reader then solve the puzzle that opens up.
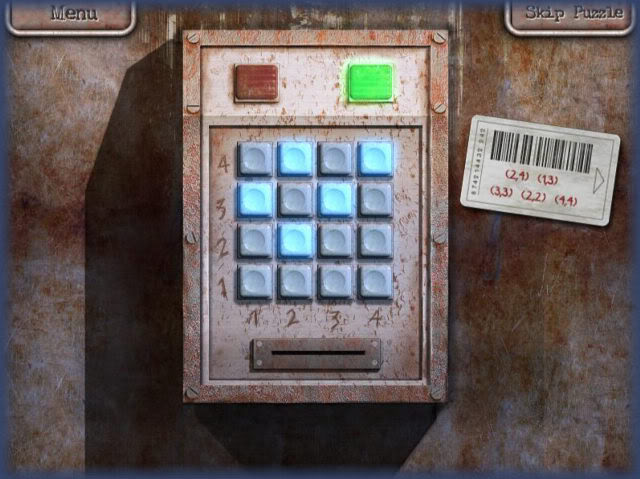
PUZZLE SOLUTION – Here the keys that are lit in the picture are the correct keys. To figure this out you must take the coordinates on the key-card to the right. The first number is a horizontal coordinate and the second number is vertical. (2,4), (1,3), (3,3), (2,2) and (4,4) For example, for (2,4) you will go across the bottom 2 keys and up 4 keys for vertical and you will click on that key. Follow suit with the other coordinates and the puzzle will immediately take you to the next screen.
Artifact room search screen – Find 15 items. Once you get to the "Plant Pot" the next blueprint piece will be there. You will be taken to a screen where you can put them together as seen above.
**You have unlocked the "Artifact Room" for the "Freeplay Mode."
CHAPTER 2
Corridor – Find 16 items.
Diving Room – Find 15 items.
PUZZLE SOLUTION
Attach the pieces of paper together to form a piece of music. The edges will connect when you have placed them correctly.
Engine Room – Find 15 items.
**Find the Differences.
Forward Deck – Find 14 items.
Bathroom – Find 17 items.
Utility Room – Find 12 items.
***You have unlocked the "Utility Room" in "Freeplay Mode."
CHAPTER 3
Medical Bay – Find 15 items.
Edwin Margrave’s Cabin – Find 15 items.
Research Room – Find 15 items.
**Find 13 Differences.
PUZZLE SOLUTION
Place pieces in correct sequence to complete the newspaper article. The items will lock together when correctly placed.
Port Deck – Find 14 items.
Rear Deck – Find 14 items.
Captain’s Cabin – Find 15 items.
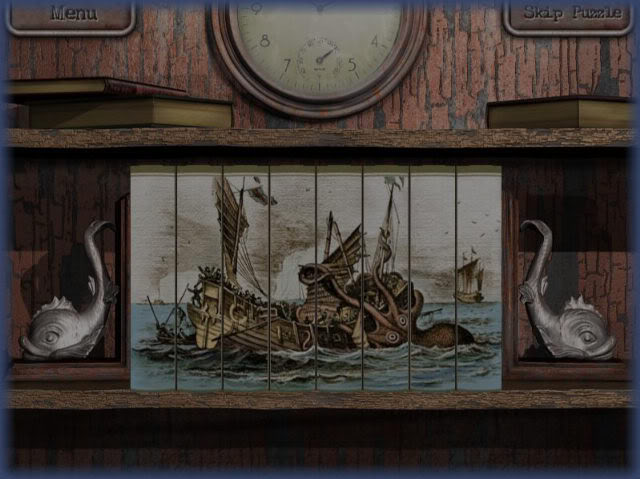
PUZZLE SOLUTION
Place the books in the correct order so their bindings form a picture. Click the one you want to move and click again with the one you wish to trade places with it. You may skip the puzzle if you wish without penalty.
**Once the puzzle is completed the book area opens up and a blueprint piece is inside it. Click on it with magnifying glass and then assemble the pieces.
**You have unlocked the "Captain’s Cabin" in "Freeplay Mode."
CHAPTER 4
Mess Hall- Find 12 items.
PUZZLE SOLUTION:
Arrange pieces until you have a completed newspaper article. The pieces will lock together when correctly placed.
Galley – Find 15 items.
Engine Room – Find 12 items.
**Find 15 Differences Puzzle.
Diving Room – Find 12 items.
Utility Room – Find 15 items.
Artifact Room – Find 15 items.
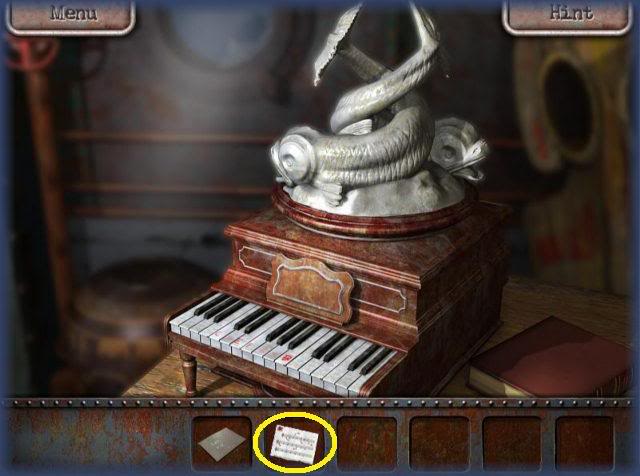
PUZZLE SOLUTION:
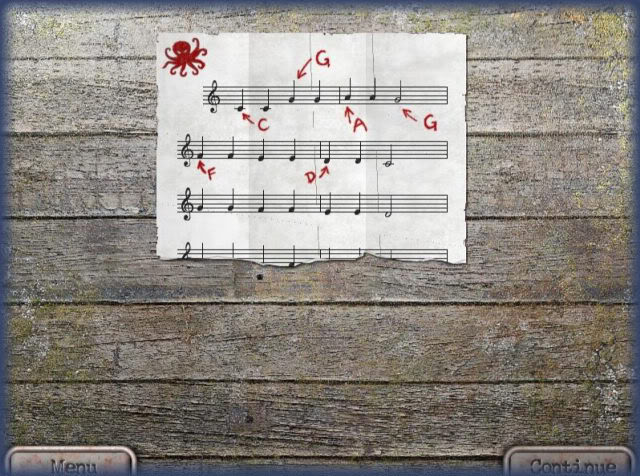
Here you will take the sheet music in inventory and drag it to the piano. Then you will be asked to play the sheet music on the piano. (The song you will be playing is "Twinkle, Twinkle, Little Star.") The notes are in this order, " CC, GG, AA, G. FF, EE, DD, C. GG, FF, E. D., GG, FF, EE, D., CC, GG, AA, G. FF, EE, DD, C.
**On the keyboard a few notes are on the keys. The correct order of keys from left to right is CDEFGAB. Make note of this order and play the song. Once you play it correctly, the Piano puzzle music box will open up. Inside there is a broken piece of stone you will hold onto in your inventory.
**You have now unlocked the "Diving Room" in the "Freeplay Mode."
CHAPTER 5
Captain’s Cabin – Find 14 items.
Bathroom – Find 12 items.
Medical Bay – Find 14 items.
**Find 12 Differences between the 2 screens.
Edwin Margrave’s Cabin – Find 12 items.
PUZZLE SOLUTION:
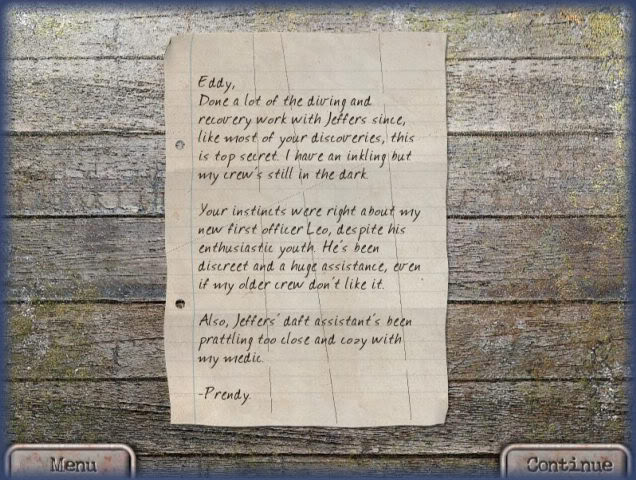
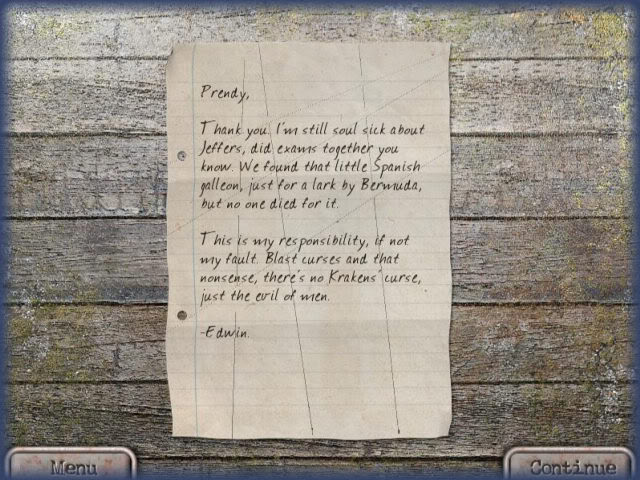
Reassemble the letter. Tip – Divide into piles before you begin. Place right edge pieces in one pile, then left side, and top and bottom. Look for paper tears and margin lines to guide you.
Corridor – Find 15 items.
Research Room – Find 16 items. The final item is the painting and the blueprint piece will be found behind it.
**You have now unlocked the "Research Room" in the "Freeplay mode."
CHAPTER 6
Forward Deck – Find 17 items.
Mess Hall – Find 13 items.
Engine Room – Find 16 items.
PUZZLE SOLUTION:
Assemble the letter.
**Find 12 Differences between the 2 screens.
Rear Deck – Find 14 items.
Diving Room – Find 12 items.
Bridge – Find 14 items.
CHAPTER 7
Utility Room – Find 13 items.
Port Deck – Find 14 items.
Captain’s Cabin – Find 15 items.
PUZZLE SOLUTION:
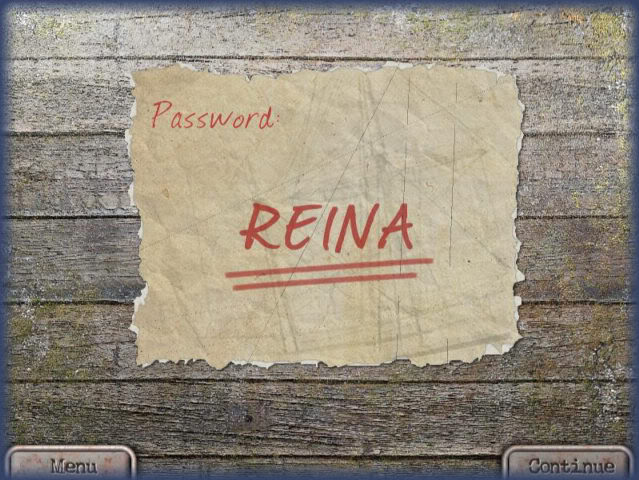
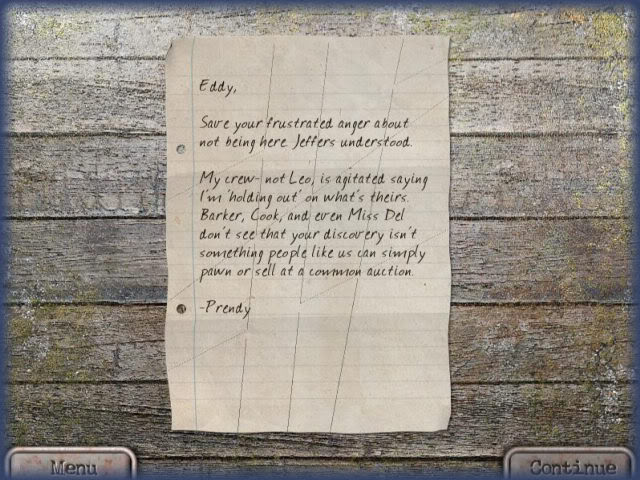
Assemble the paper – The password is "REINA" which is Edwina Margrave’s Grandmothers name.
Artifact Room – Find 15 items.
Corridor – Find 17 items.
Research Room – Find 20 items.
PUZZLE SOLUTION:
Place the jewels in the jewelry box design symmetrically until all the gem stones are used up. You may skip this puzzle if you wish without penalty.
Once the box is completed it will open and you will find a portion of the blueprint. Place it with the others.
**You have now unlocked the "Corridor" in "Freeplay Mode."
CHAPTER 8
Medical Bay – Find 14 items.
Forward Deck – Find 15 items.
Bathroom – Find 12 items.
**Find 9 Differences between the 2 screens.
PUZZLE SOLUTION
Assemble the letter.
Mess Hall – Find 12 items.
Bridge – Find 13 items.
Galley – Find 14 items.
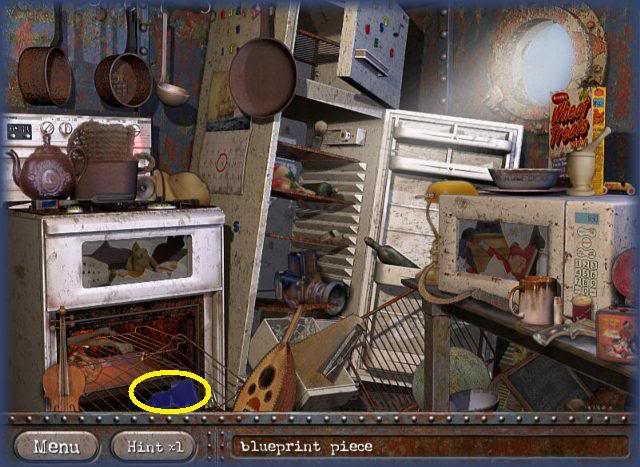
The final item is the blue print piece found in the oven.
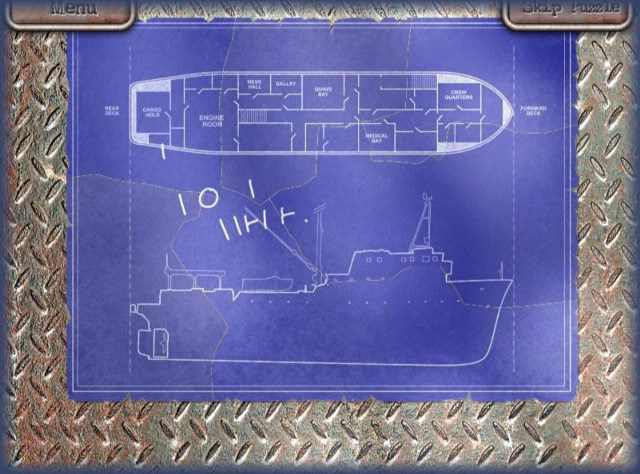
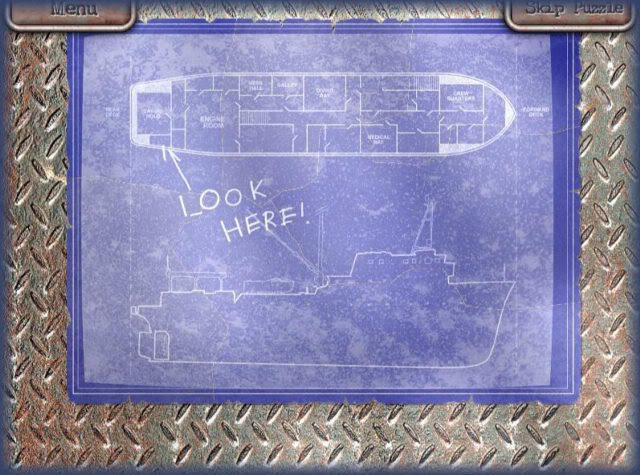
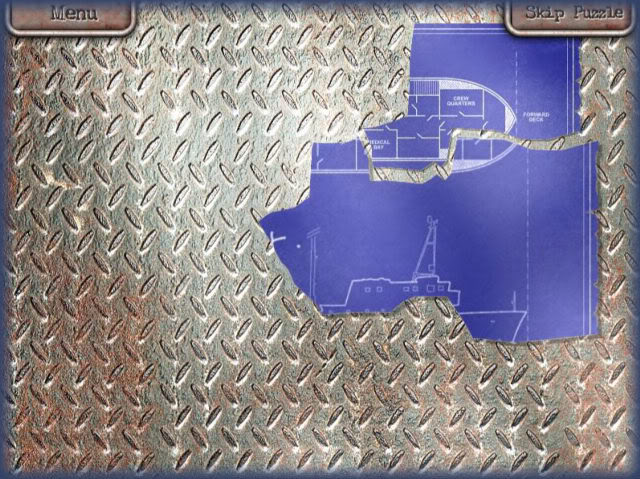
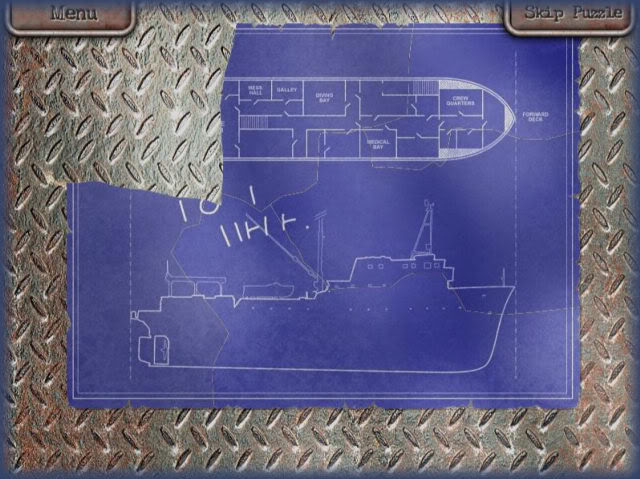
Complete the Blueprint puzzle. Place the overlay on the blueprint and find out where the secret part of the ship is located.
**You have unlocked the "Galley" in the "Freeplay Mode."
CHAPTER 9
**Storyline – The hold is flooded and they must fix it before opening the door or it will flood the boat and kill them.
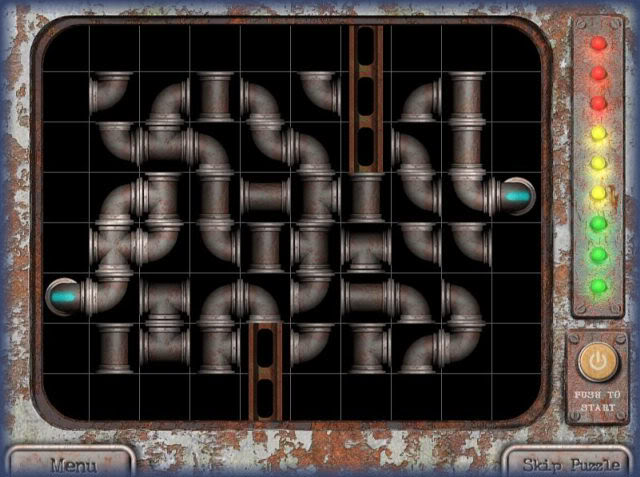
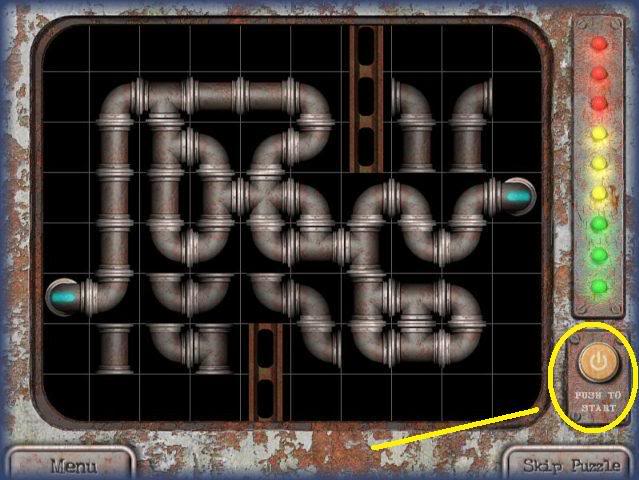
PUZZLE SOLUTION
Fix the emergency water pump. You must connect the pipes so there are no leaks. Click on one pipe and then click on the one you wish to exchange it with. Once you have them connected click on the start button to test it. NOTE – You do NOT have to use all of the pipes to solve this puzzle. (See Image)
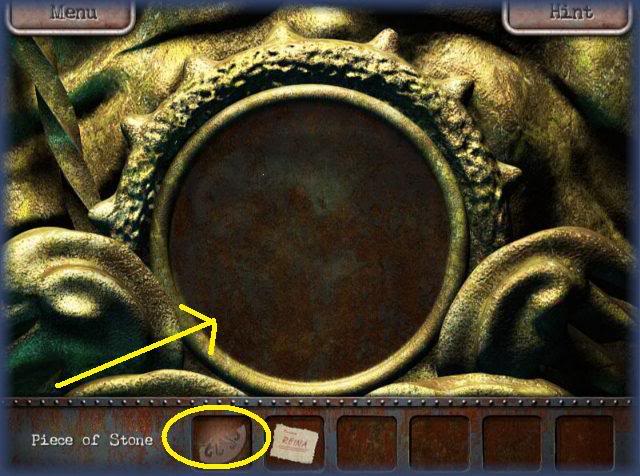
**Once the water pipes are repaired and Edwina and Tom can get past they discover a secret door. They open the door and find a vault. Edwina realizes that the stone piece she is holding will fit into the opening perfectly. Now she and Tom know they must find all the stone pieces to access the treasure.
**You have unlocked the "Mess Hall" in the "Freeplay Mode."
CHAPTER 10
Diving Room – Find 14 items.
Artifact Room – Find 15 items.
Engine Room – Find 13 items.
**Find 7 differences between the items in the 2 screens.
Medical Bay – Find 12 items.
Forward Deck – Find 15 items
PUZZLE SOLUTION
Assemble the Letter.
Port Deck – Find 14 items.
(Place stone piece in puzzle slot.)
**You have unlocked "Port Deck" in the "Freeplay Mode"
CHAPTER 11
Corridor – Find 14 items.
Utility Room – Find 15 items.
PUZZLE SOLUTION
Assemble the Letter.
Captain’s Cabin – Find 13 items.
**Find 9 Differences between the 2 screens.
Galley – Find 12 items.
Rear Deck – Find 14 items.
Artifact Room – Find 14 items.
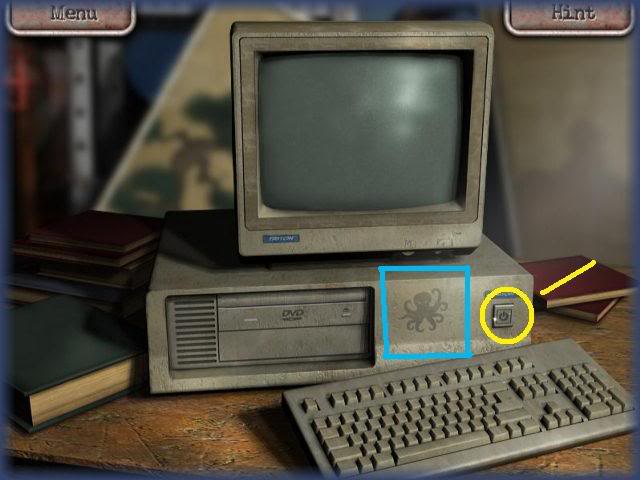
Edwina and Thomas have found a computer with the Kraken symbol on it.
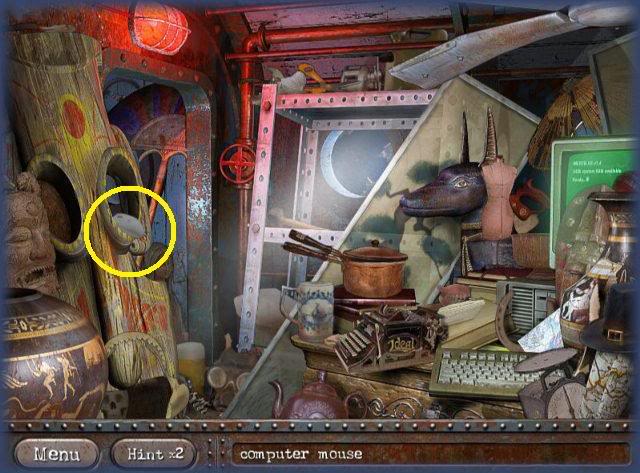
The computer will not turn on unless it has a mouse so they search for one.
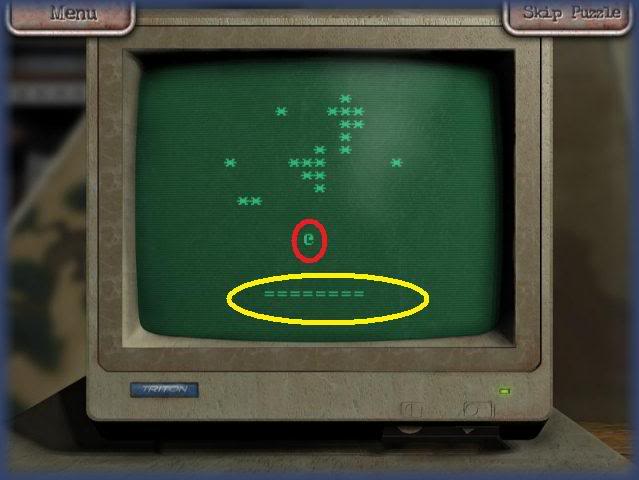
Once they have a mouse, the computer turns on and it is asking for a password. Edwina enters in "REINA" and is able to get in. A computer game called, "Ultimate Kraken" starts and you must beat the game to progress.
INSTRUCTIONS – Hit the ball with the paddle at the bottom. The ball when it hits the items above will cause them to disappear. Get rid of all the men at the top without missing the ball at the bottom.

Once you beat the game the computer’s CD tray opens up and a piece of the stone puzzle is inside.

PUZZLE SOLUTION
Place the piece inside the puzzle opening.
**You have unlocked "Rear Deck" in the "Freeplay Mode."
CHAPTER 12
Bridge – Find 14 items
Mess Hall – Find 15 items.
PUZZLE SOLUTION
Assemble the Letter.
Research Room – Find 14 items.
**Spot 14 differences between the 2 screens.
Bathroom – Find 15 items.
Engine Room – Find 16 items.
PUZZLE SOLUTION
Assemble the Letter.
Forward Deck – Find 14 items.
PUZZLE SOLUTION
Place the Stone piece into the puzzle.
**You have unlocked "Forward Deck" in the "Freeplay Mode."
CHAPTER 13
Edwin Margrave’s Cabin – Find 14 items.
Corridor – Find 13 items.
Medical Bay – Find 15 items.
PUZZLE SOLUTION
Assemble the Letter.
**Spot 14 differences between the 2 screens.
Port Deck – Find 14 items.
Mess Hall – Find 14 items.
Bridge – Find 15 items.
PUZZLE SOLUTION
Place the gem stones on top of the puzzle box without having any left over. Place as many stones as you can symmetrically. You may skip this puzzle without penalty if you wish.
Once puzzle box is complete it will open and a stone piece can be found. Place the stone piece in the correct position in puzzle.
**You have unlocked "Medical Bay" In "Freeplay Mode."
CHAPTER 14
Utility Room – Find 14 items.
PUZZLE SOLUTION
Assemble the Letter.
Research Room – Find 15 items.
Rear Deck – Find 14 items.
**Spot 6 Differences between the 2 game screens.
Diving Room – Find 13 items.
PUZZLE SOLUTION
Assemble the Letter.
Artifacts Room – Find 15 items.
Medical Bay – Find 13 items.
PUZZLE SOLUTION
Place Stone piece in puzzle.
CHAPTER 15
Bathroom – Find 14 items.
Edwin Margrave’s Cabin – Find 15 items.
PUZZLE SOLUTION
Assemble the document.
Forward Deck – Find 14 items.
**Find 14 differences between the 2 screens.
Captain’s Cabin – Find 13 items.
Galley – Find 14 items.
PUZZLE SOLUTION
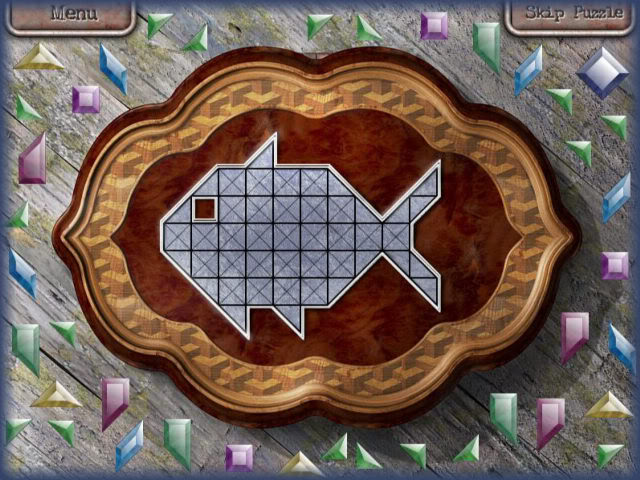
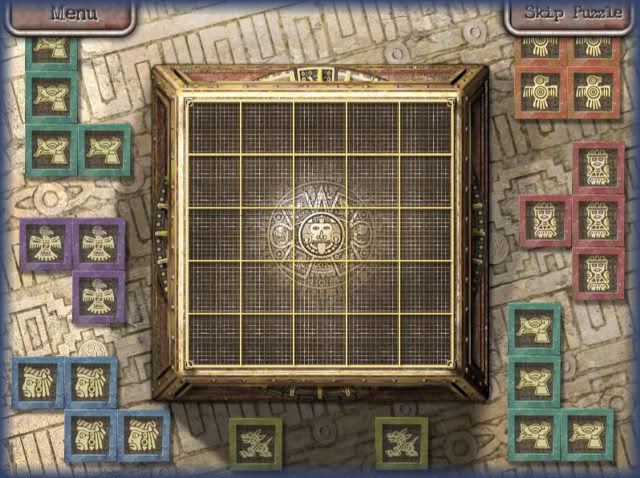
Place the colored tiles on top of the puzzle book so that they all fit without any left over.
PUZZLE SOLUTION
Once the puzzle box is solved it will open and you will find another stone piece inside. Place the stone piece in the correct position.
Engine Room – Find 14 items.
**You have unlocked Edwin Margrave’s Cabin" in "Freeplay Mode."
CHAPTER 16
Bridge – Find 14 items.

PUZZLE SOLUTION
Assemble the Document.
Port Deck – Find 15 items.
Engine Room – Find 12 items.
**Spot 13 Differences between the 2 screens.
Diving Room – Find 15 items.
Rear Deck – Find 15 items.
PUZZLE SOLUTION
Assemble the Letter.
Mess Hall – Find 14 items.
PUZZLE SOLUTION
Place stone piece in correct location.
**You have unlocked the "Engine Room" in "Freeplay Mode."
CHAPTER 17
Medical Bay – Find 15 items.
Research Room – Find 12 items.
Edwin Margrave’s Cabin – Find 14 items.
PUZZLE SOLUTION
Assemble the Document
**Find 11 Differences between the 2 game screens.
Engine Room – Find 15 items.
Bridge – Find 12 items.
Captain’s Cabin – Find 13 items.
PUZZLE SOLUTION
Place the gem stones onto the puzzle box. You may skip this puzzle if you wish without penalty.
PUZZLE SOLUTION
Remove stone piece from puzzle box and place in correct position in puzzle.
CHAPTER 18
Utility Room – Find 14 items.
PUZZLE SOLUTION
Assemble the document
Galley – Find 14 items.
Bathroom – Find 15 items.
**Spot 8 Differences between the 2 screens.
Port Deck – Find 15 items.
Corridor – Find 14 items.
Engine Room – Find 15 items.
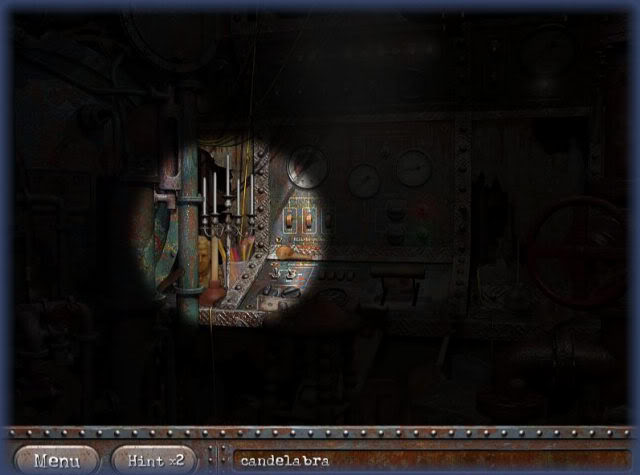
PUZZLE SOLUTION
The lights have gone out! Find the Candelabra to finish the level. (Spotlight Level)
PUZZLE SOLUTION
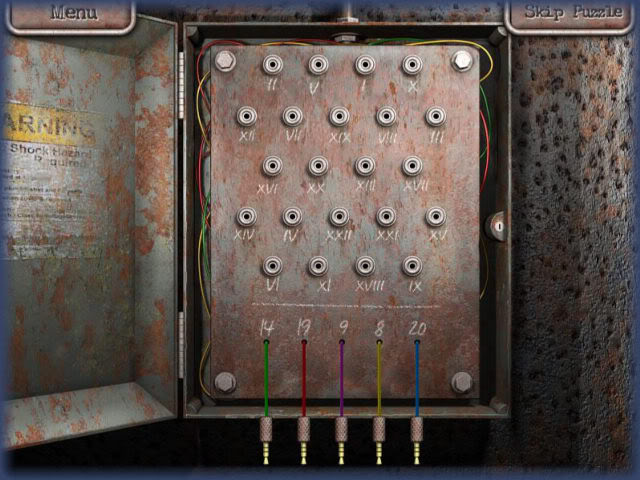
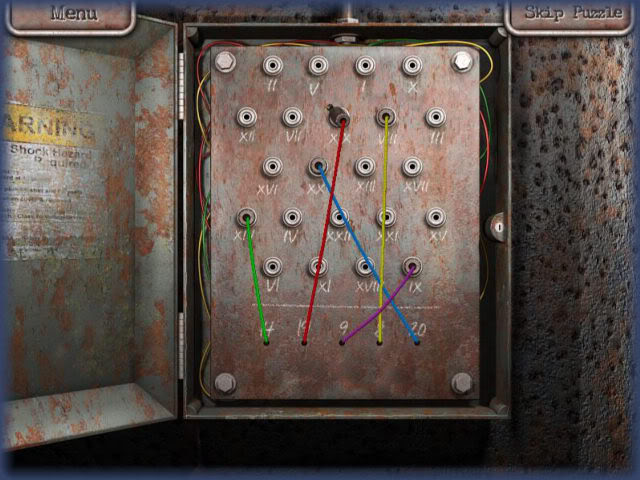
Fuse Box Puzzle – Place the correct connections in the correct receptors.
INSTRUCTIONS – The numbers at the bottom need to be figured out as Roman Numerals. (14, XIV), (19, XIX), (9,IX), (8,VIII), (20,XX)
**You have unlocked "Bathroom" In "Freeplay Mode."
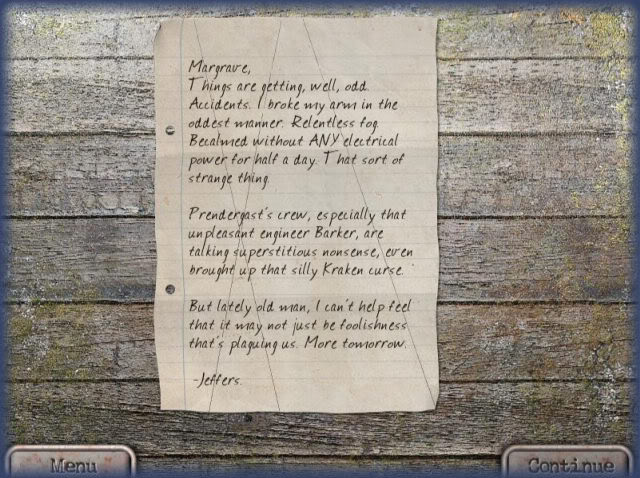
CHAPTER 19
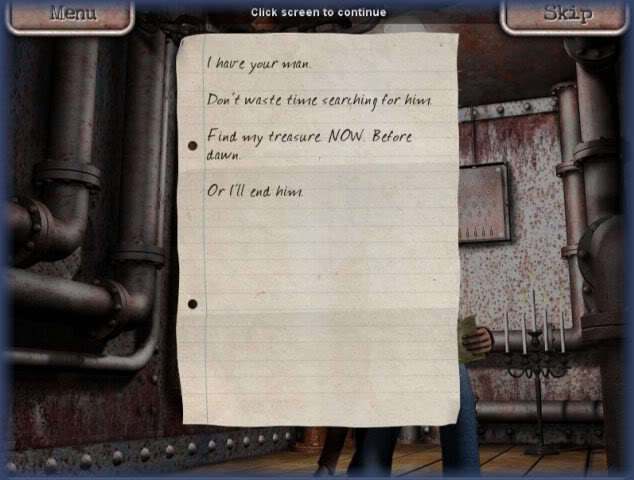
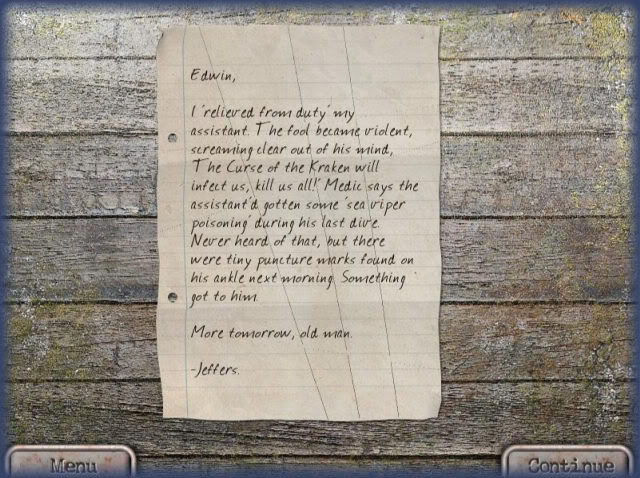
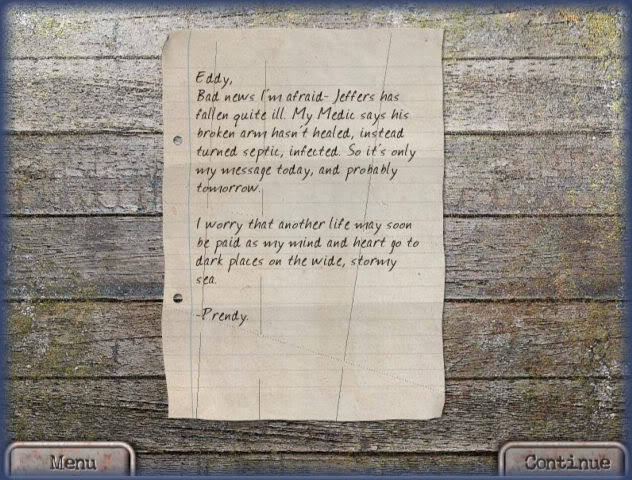
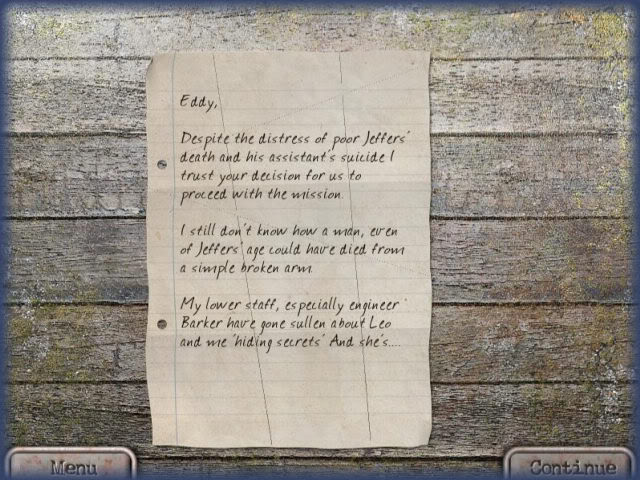
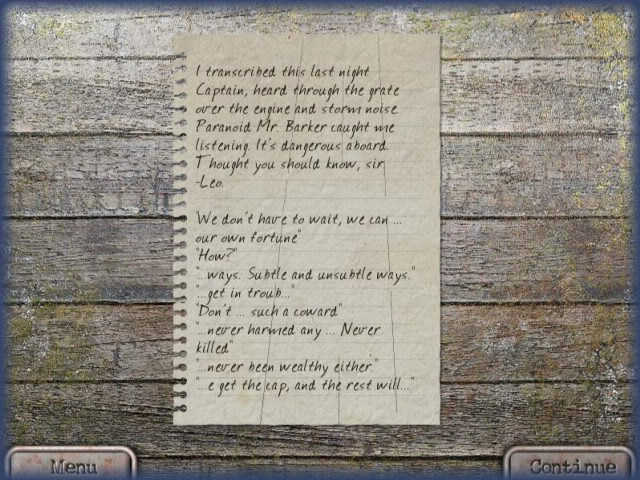
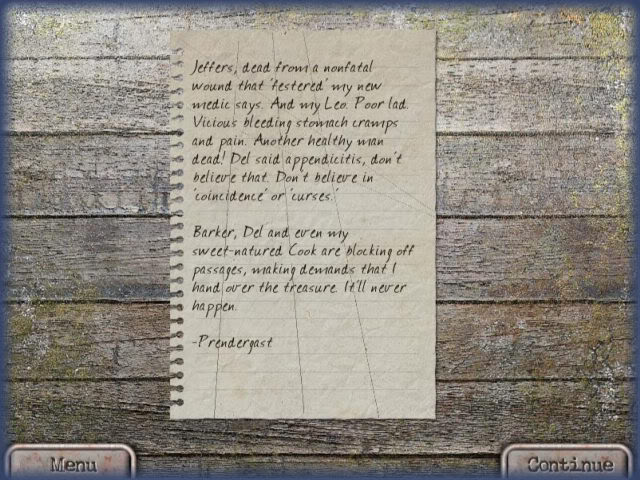
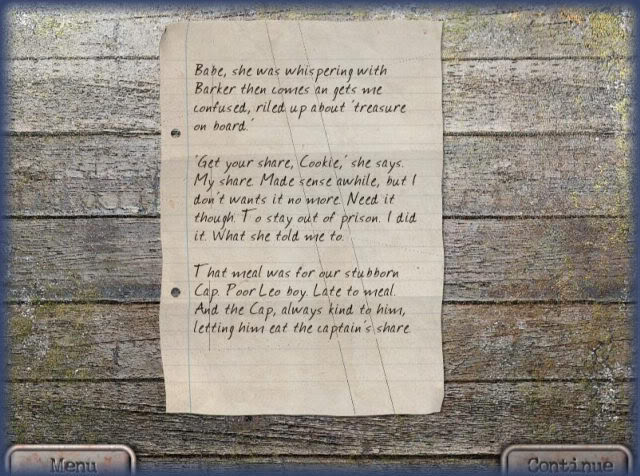
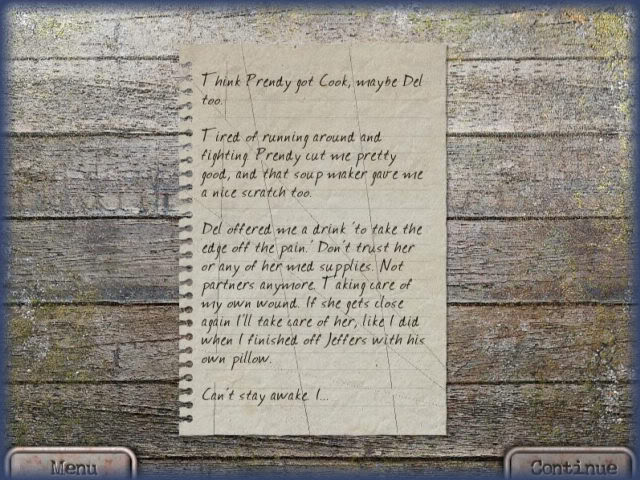
Thomas has gone missing and this note was left behind. Edwina must hurry and solve the puzzle before sunrise!
Rear Deck – Find 13 items.
PUZZLE SOLUTION
Assemble the letter.
Mess Hall – Find 15 items.
Forward Deck – Find 15 items.
**Spot 14 Differences between the 2 screens.
Edwin Margrave’s Cabin – Find 14 items.
Research Room – Find 12 items.
PUZZLE SOLUTION
Assemble the Letter.
Diving Room – Find 14 items.
PUZZLE SOLUTION
Place the stone piece in the correct position.
CHAPTER 20
Bathroom – Find 16 items.
Bridge – Find 14 items.
PUZZLE SOLUTION
Assemble the letter.
Engine Room – Find 13 items.
**Spot 10 differences between the 2 screens.
Utility Room – Find 14 items.

PUZZLE SOLUTION
Assemble the letter
Corridor – Find 14 items.
Captain’s Cabin – Find 15 items.
PUZZLE SOLUTION
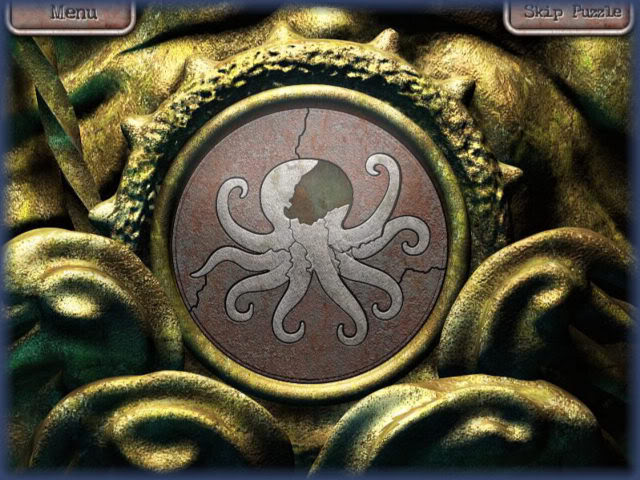
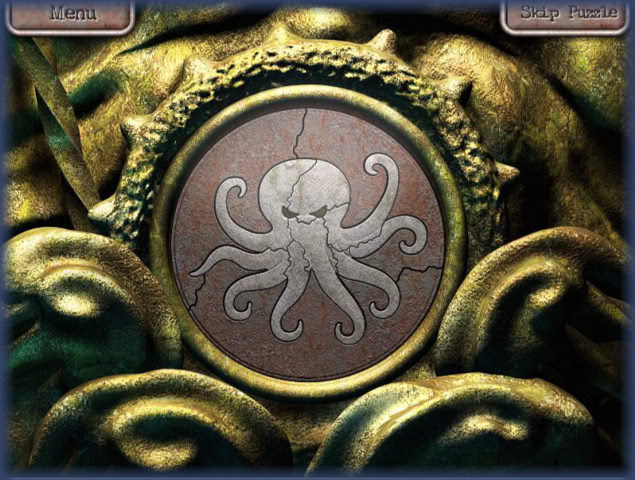
Place the final stone piece in the puzzle
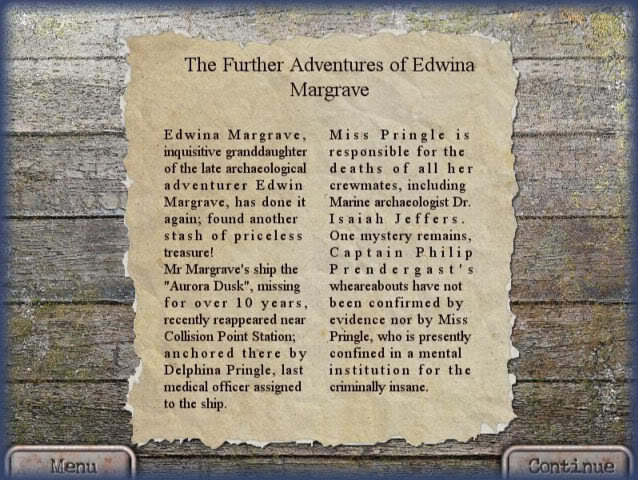
Final News Article
Storyline – Edwina is able to find the treasure in the vault after completing the stone Kraken Puzzle and brings the treasure on deck to see if she can save Thomas. Delphina is waiting for her with Thomas gagged and bound while she holds a gun on him. Delphina brags about her brilliant idea to have Edwina come do all the puzzle solving work for her as she has been trying for nearly ten years and has never been able to find the treasure. Delphina is about to shoot the both of them when all of a sudden Edwina throws the treasure overboard and Delphina leaps after it. She is able to grab her gun and turn the tables. Edwina is a hero and Delphina admits to the murders of the ship mates and is admitted to a psychiatric hospital for the criminally insane while Edwina and Thomas enjoy their new special friendship. It ends with Edwina visiting her Grandfather’s grave and states she is very happy to be a Margrave.
Congratulations! You have finished the game!
“;

More articles...
-
Best Horror Games On Itch.io – July 2026
Across a bounty of subgenres. -
Grow A Garden 2 Base Price List
What's the most valuable crop? -
Evomon Best Starter [Leafbun, Blazpup, or Bubble?]
Grass-type, Fire-type, or Water-type?