![All VV Ultimatum Titles [How to Get]](/wp-content/uploads/2026/06/vv-ultimatum-titles.jpg "All VV Ultimatum Titles [How to Get]")
All VV Ultimatum Titles [How to Get]
Do titles provide buffs?


Welcome to the Love Chronicles: The Sword and the Rose Collector’s Edition walkthrough on Gamezebo. Love Chronicles: The Sword and the Rose Collector’s Edition is a hidden object adventure game played on the PC created by Vendel Games. This walkthrough includes tips and tricks, helpful hints, and a strategy guide for how to complete Love Chronicles: The Sword and the Rose Collector’s Edition.
Welcome to the Love Chronicles: The Sword and the Rose walkthrough on Gamezebo. Love Chronicles: The Sword and the Rose is a hidden object adventure game played on the PC created by Vendel Games. This walkthrough includes tips and tricks, helpful hints, and a strategy guide for how to complete Love Chronicles: The Sword and the Rose, including the Collector’s Edition bonus chapter.
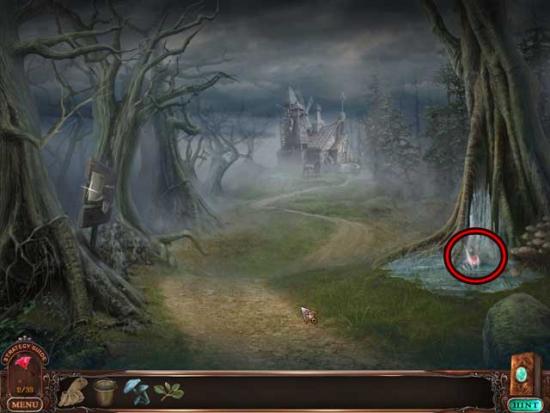
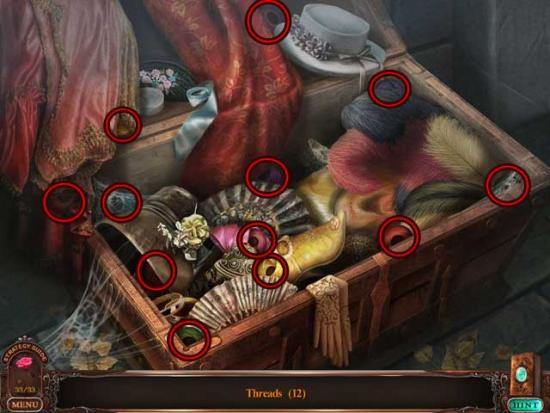
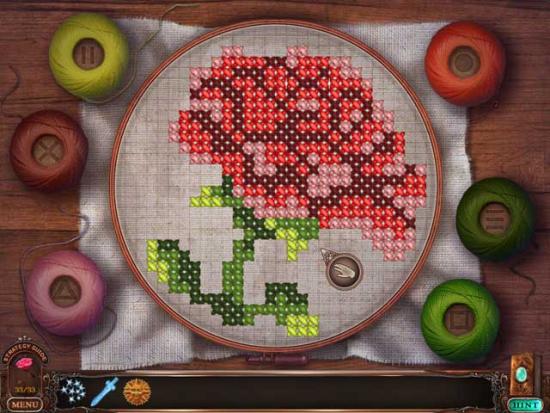
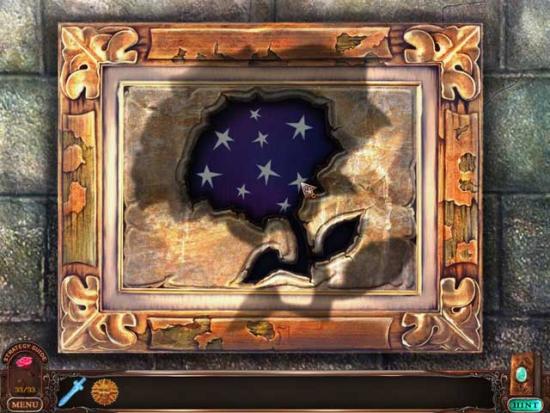
Shore
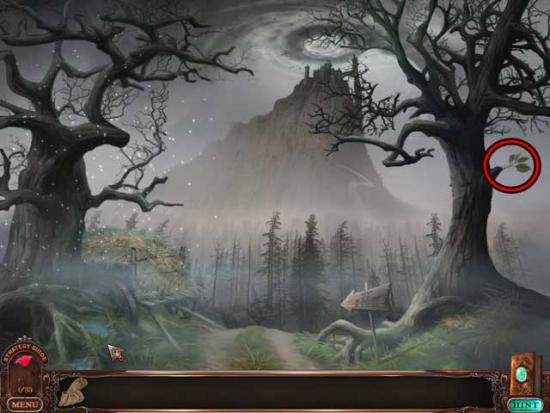
Road to the Castle

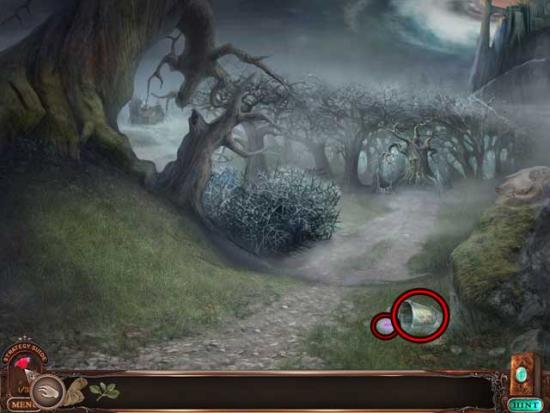
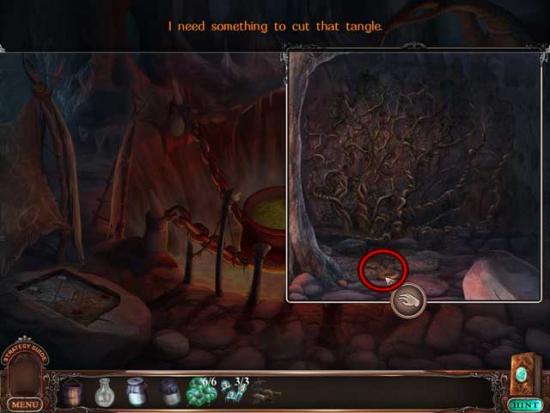
Thorn Thicket
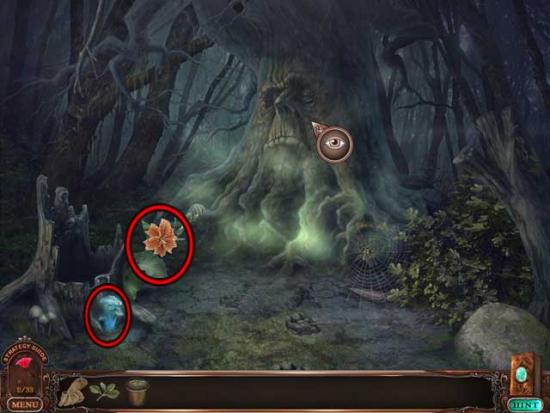
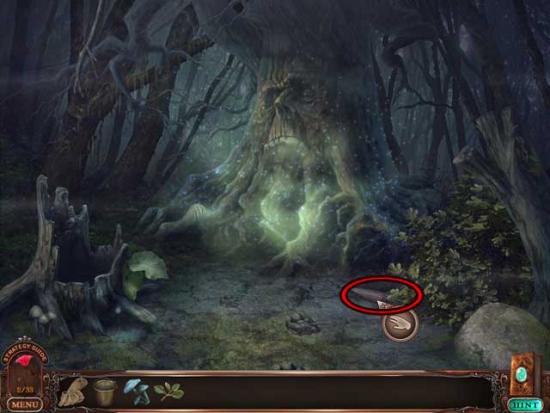
Cursed Tree
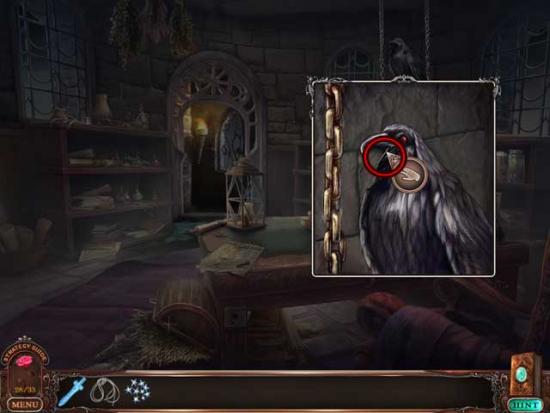
Thorn Thicket
Cursed Tree
Thorn Thicket
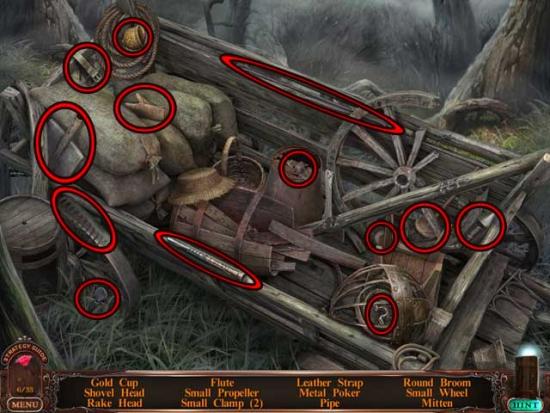
Road to Workshop
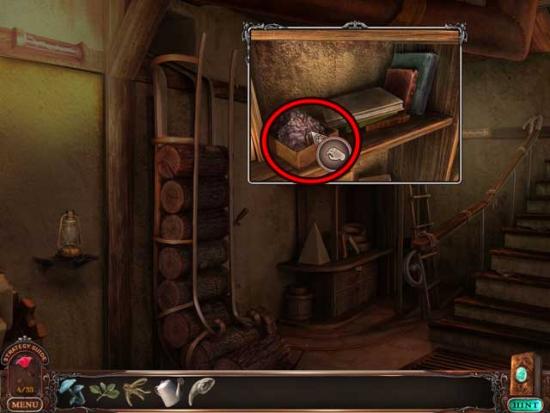
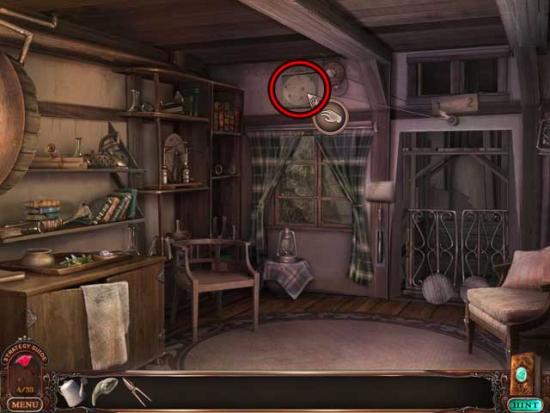
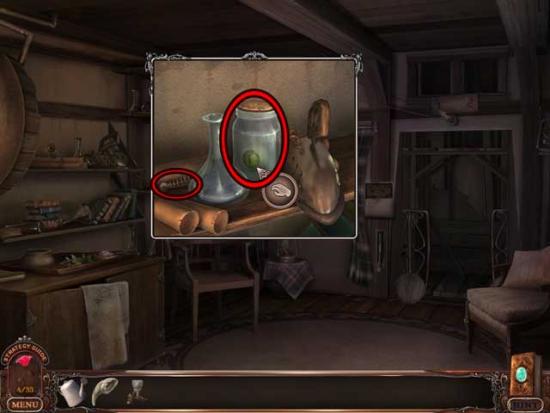
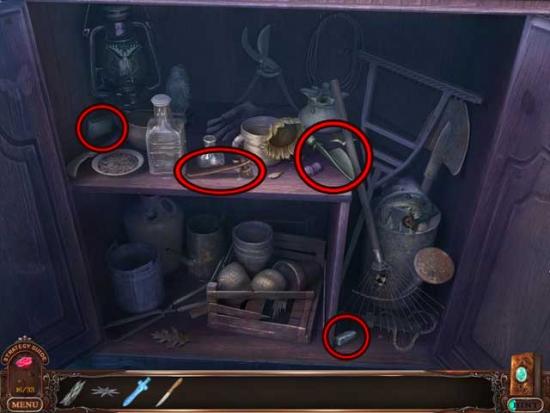
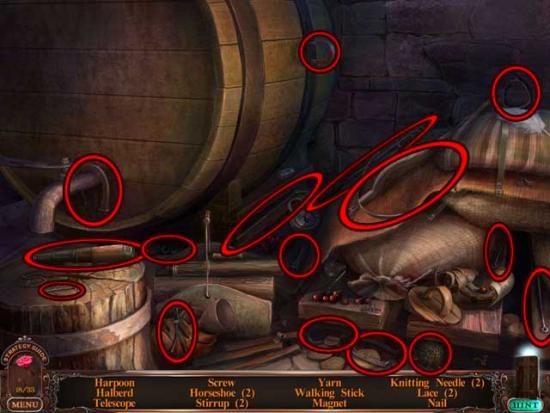
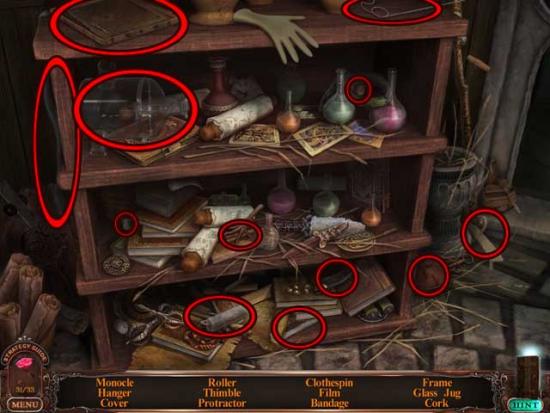
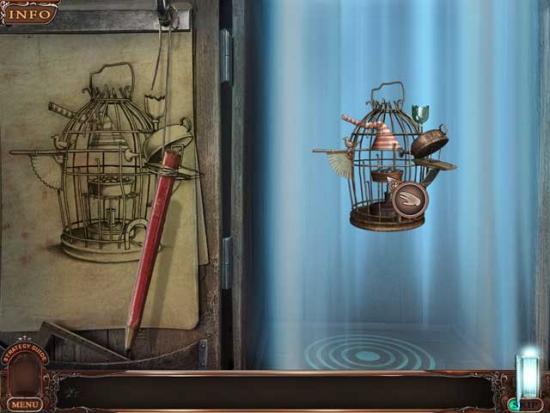
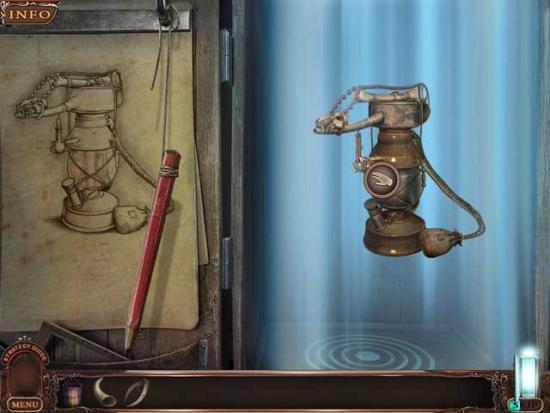
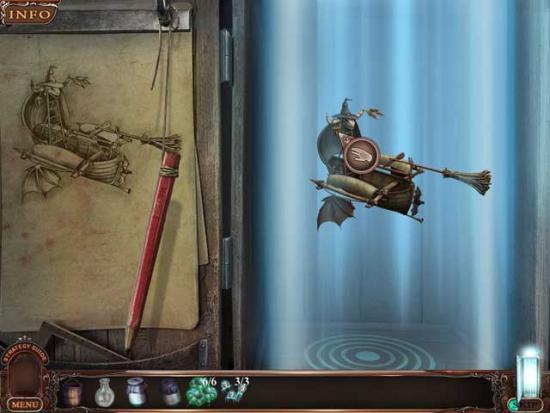
Workshop (Front)
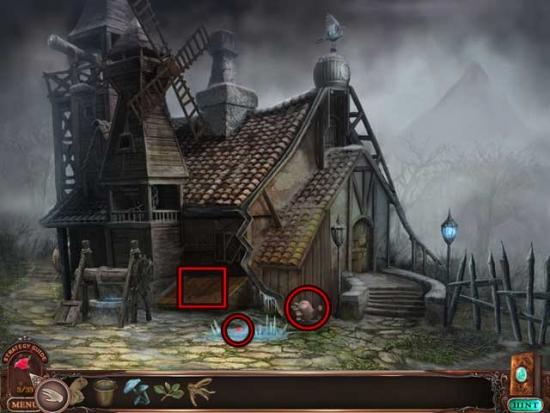
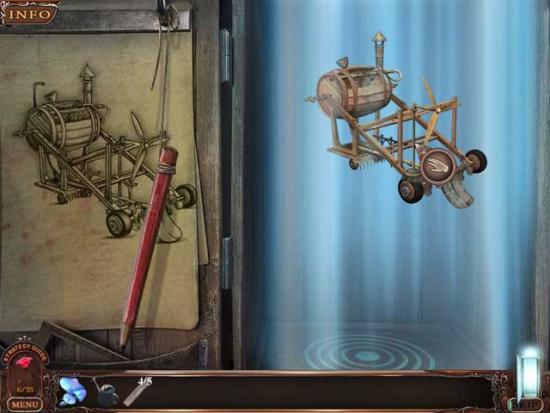
Workshop (Back)
Workshop (Front)
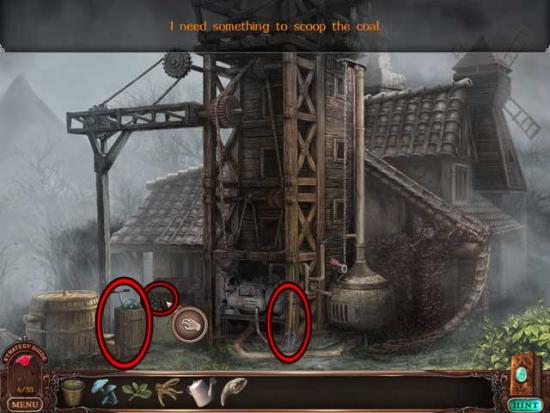
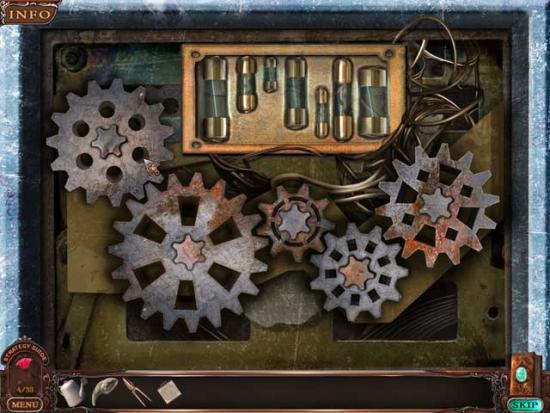
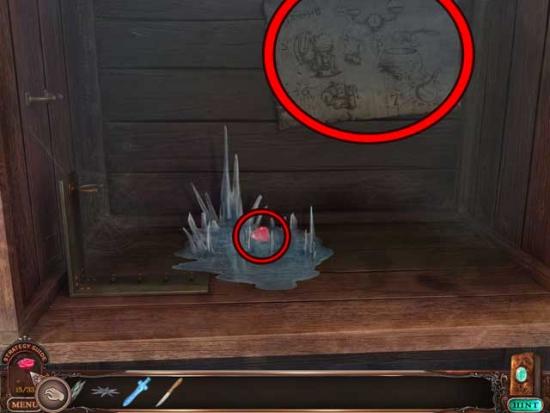
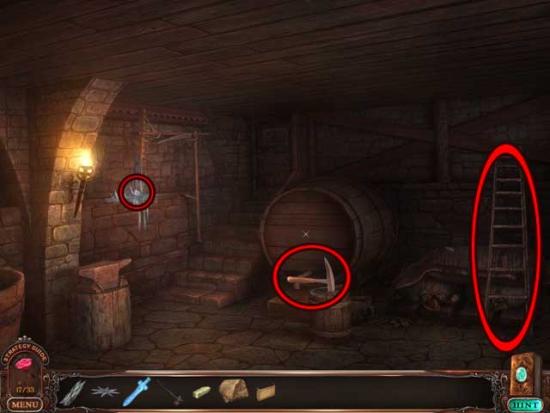
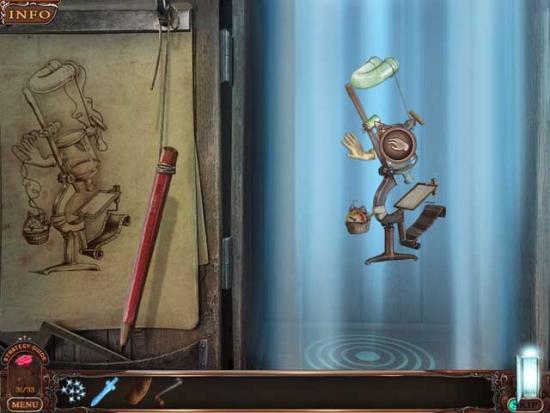
Basement
Workshop (Back)
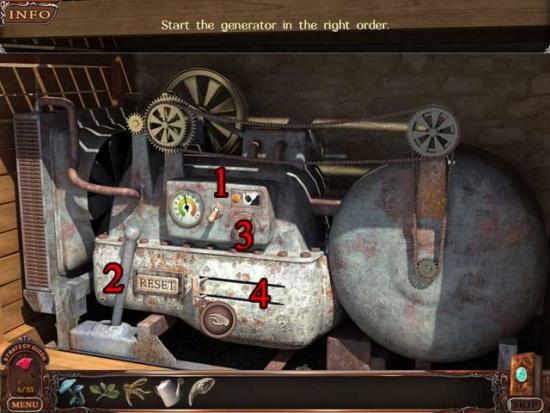
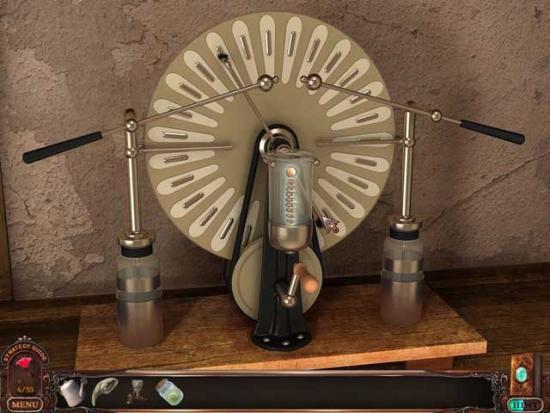
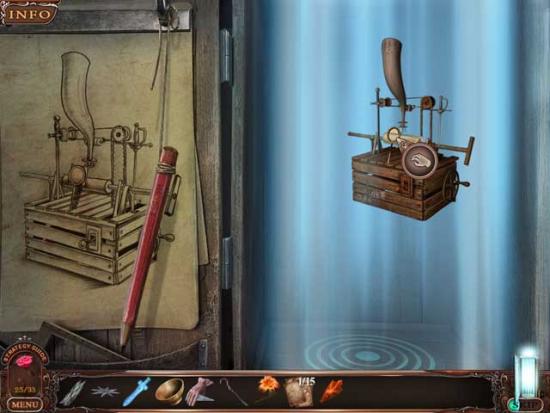
-1)Flip the switch into the down position.
-2)Move the lever to the right.
-3)Move the switch onto the third dial/setting.
-4)Pull the lever handle all the way over to the right.
Basement
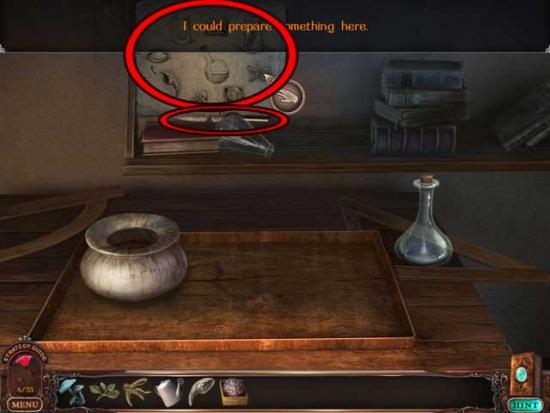
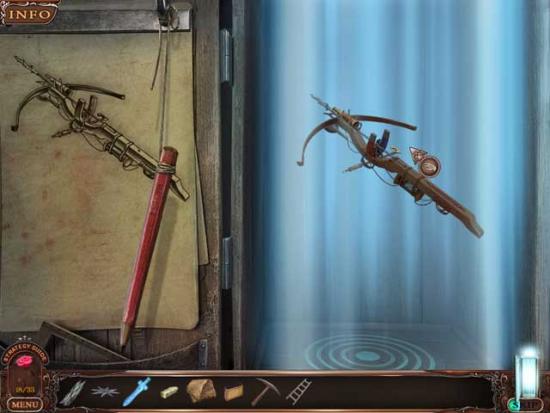
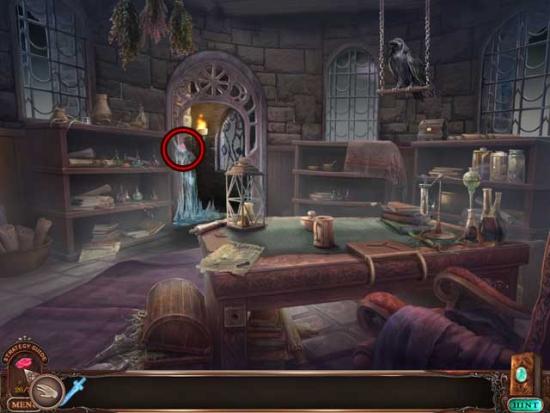
Workshop Interior
Basement
Workshop Interior
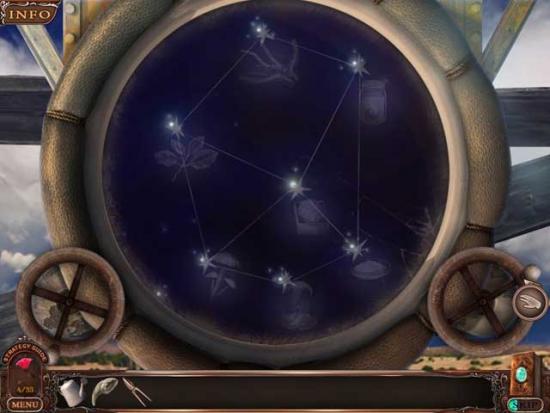
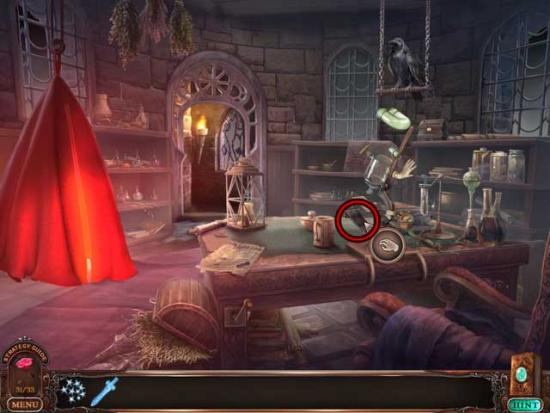
Observatory
Workshop (Back)
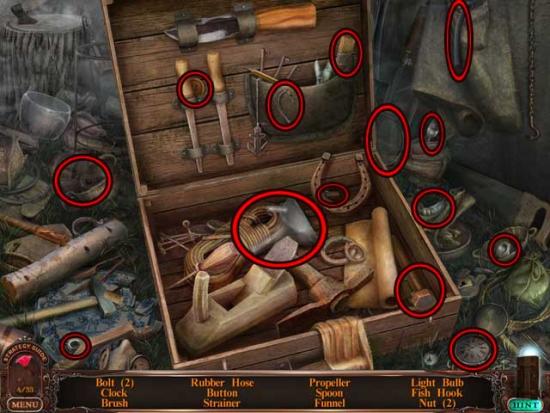
Workshop Interior
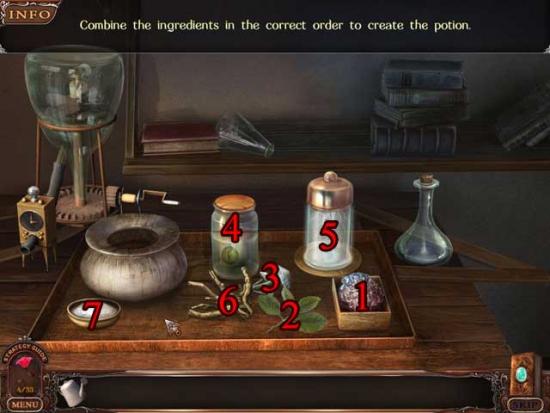
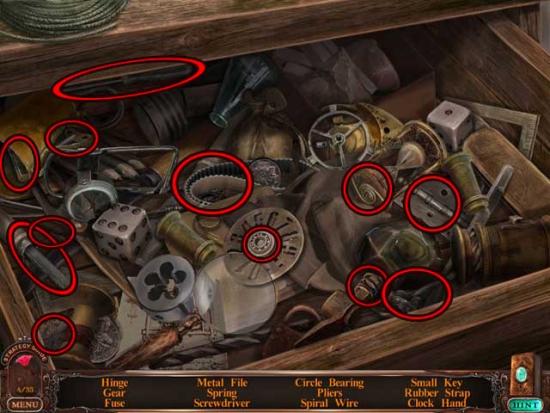
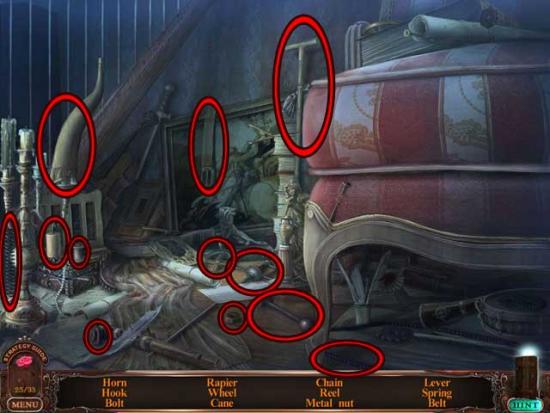
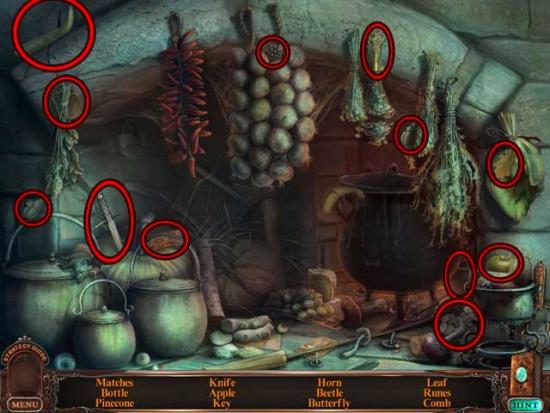
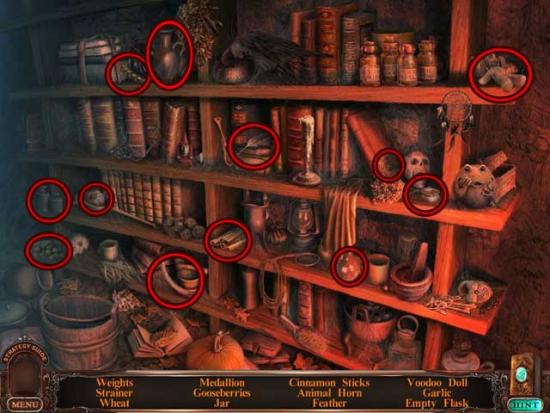
-1)Meteorite
-2)Bitter Leaves
-3)Glowing Mushrooms
-4)Pangolin’s Eye
-5)Lightning
-6)Corkscrew’s Root
-7)Claw Dust
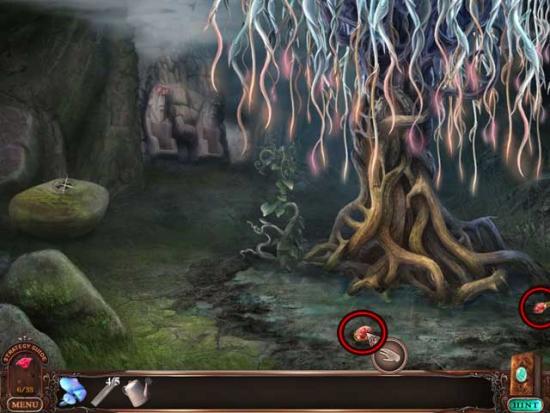
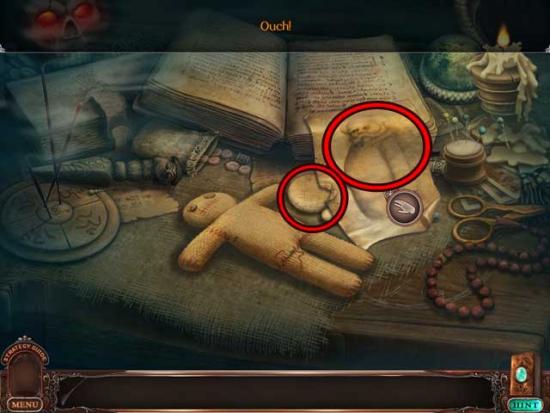
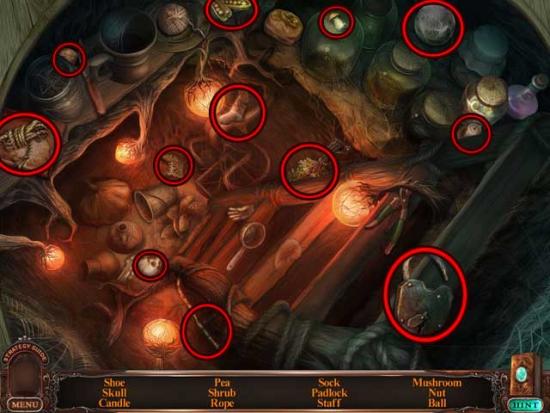
Cursed Tree
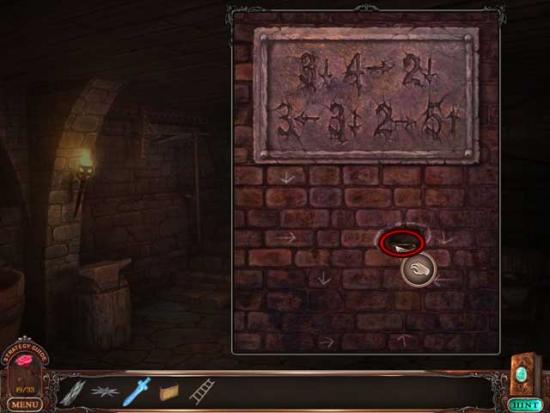
Underground Cavern
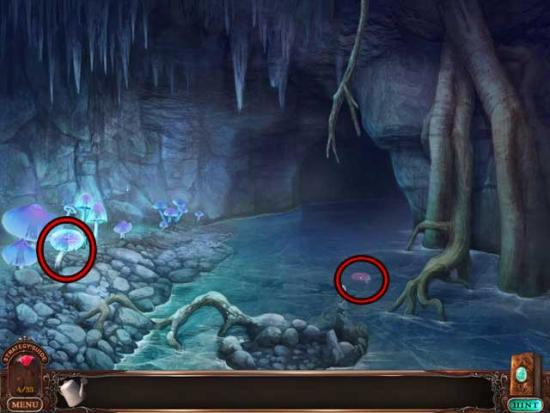
Cursed Tree
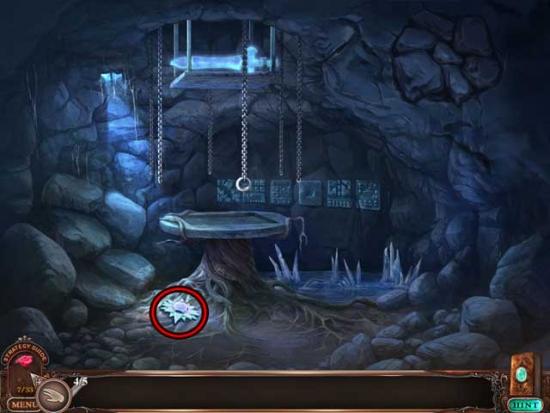
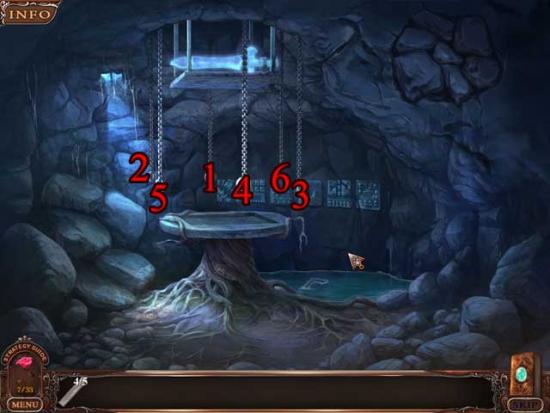
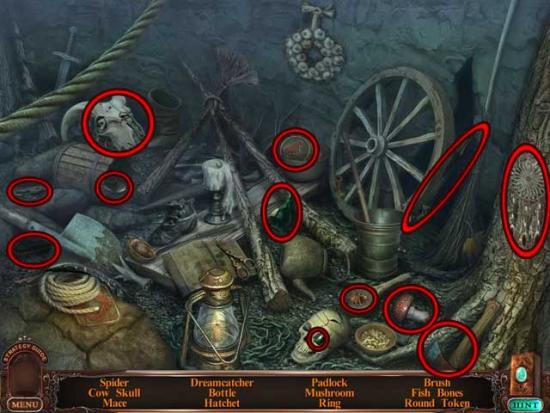
Withered Tree
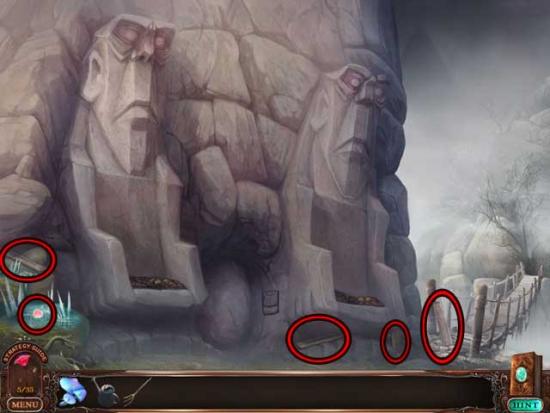
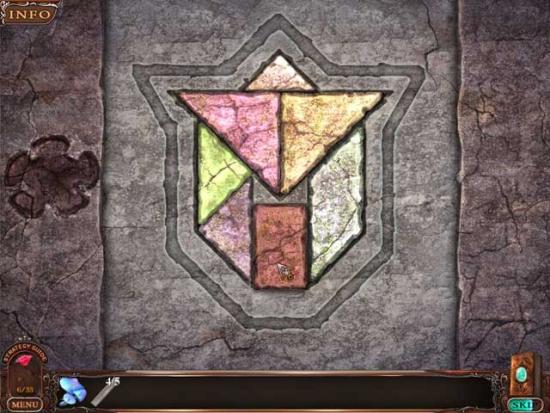
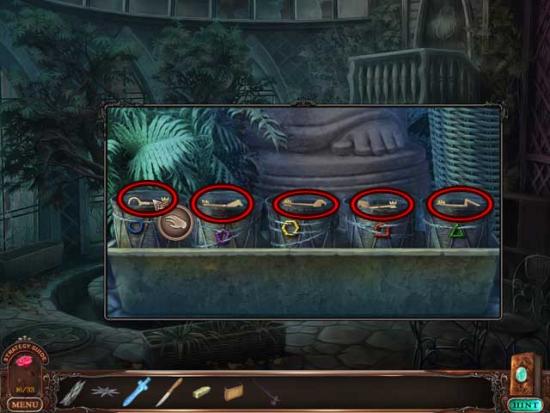
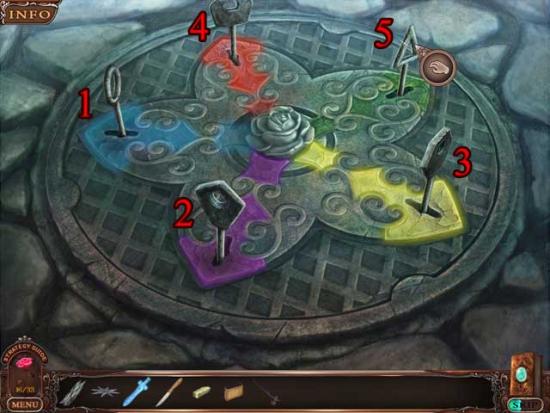
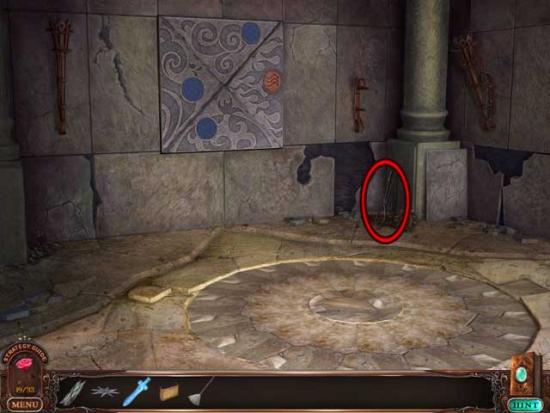
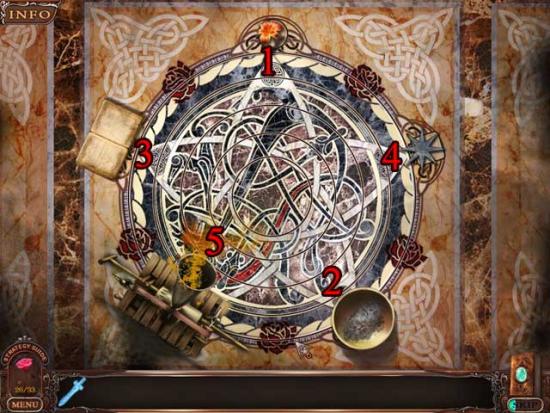
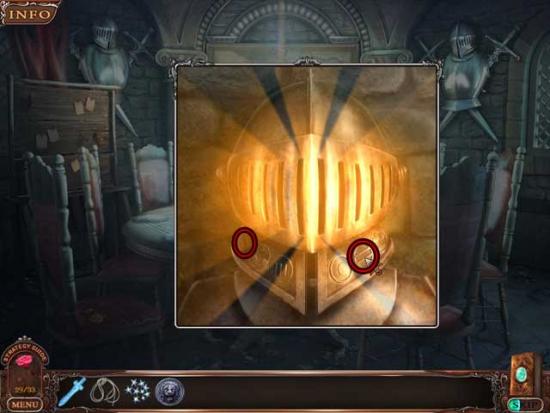
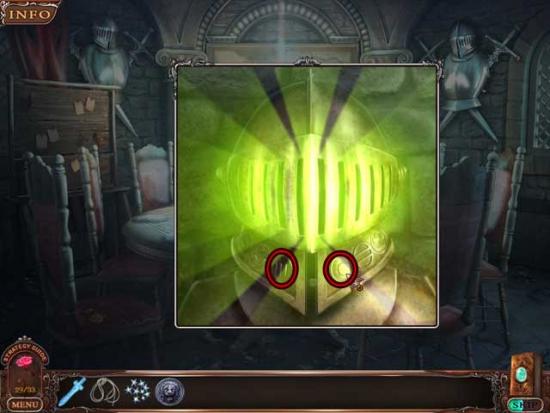
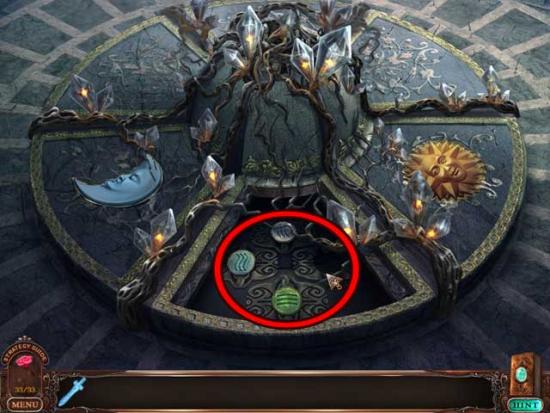
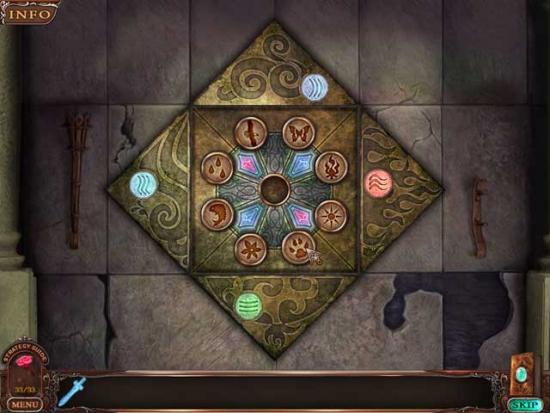
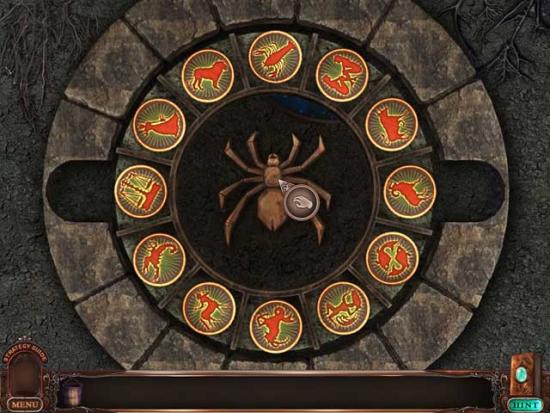
Guardian Idols
Road to the Castle
Withered Tree
Underground Cavern
Guardian Idols
Withered Tree

Guardian Idols
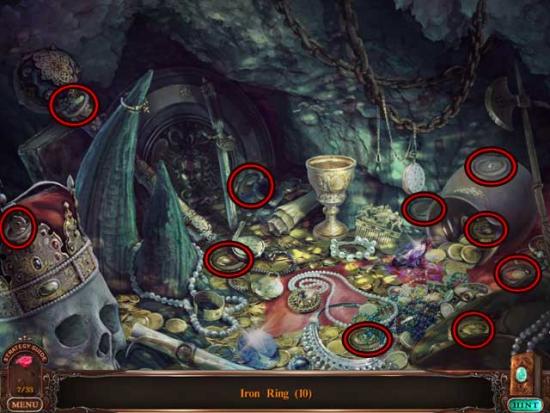
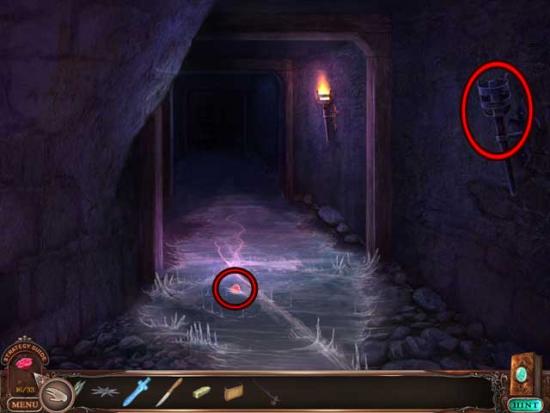
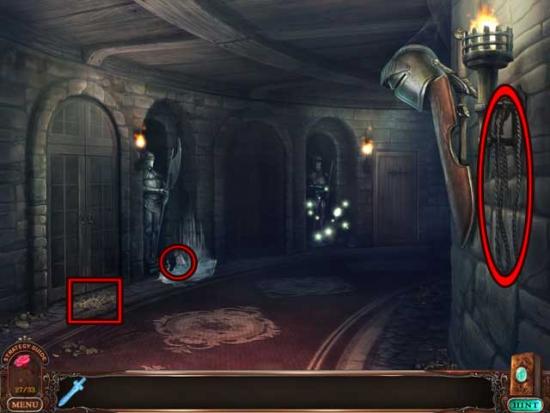
Cave
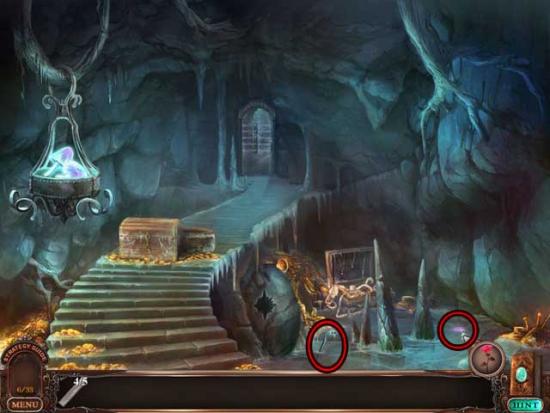
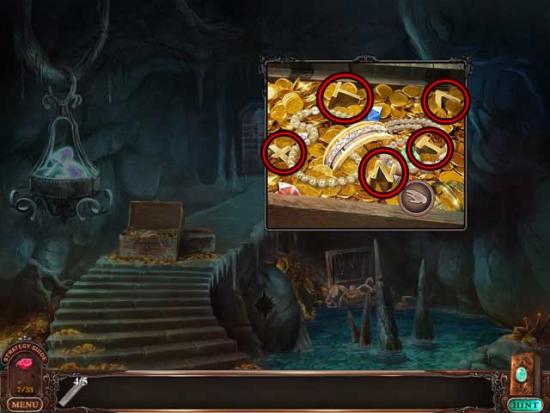
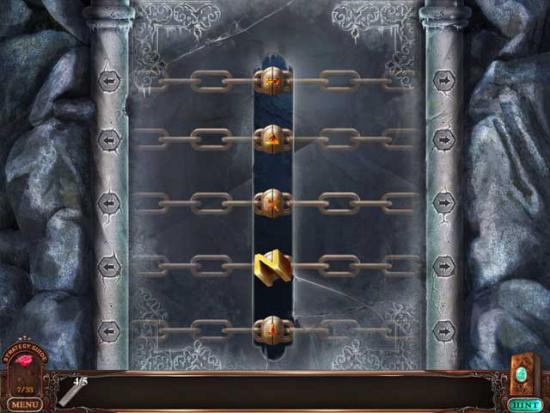
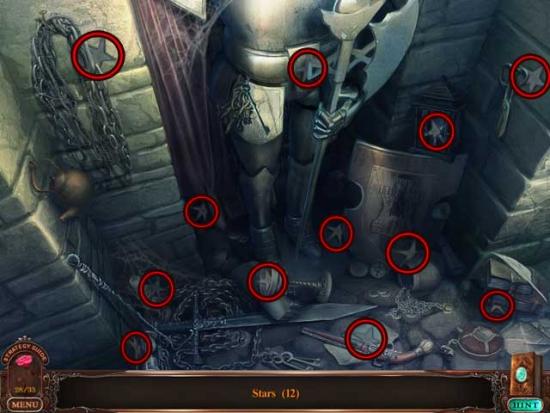
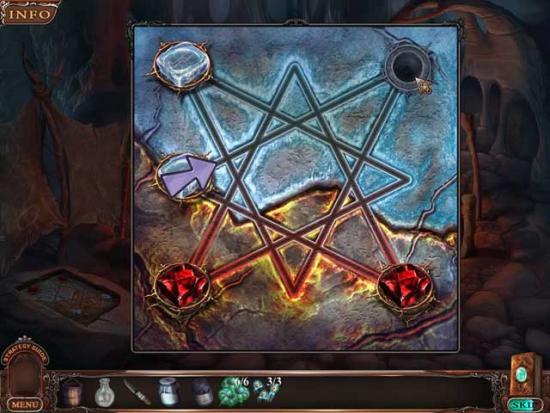
Sword Chamber
Cave
Sword Chamber
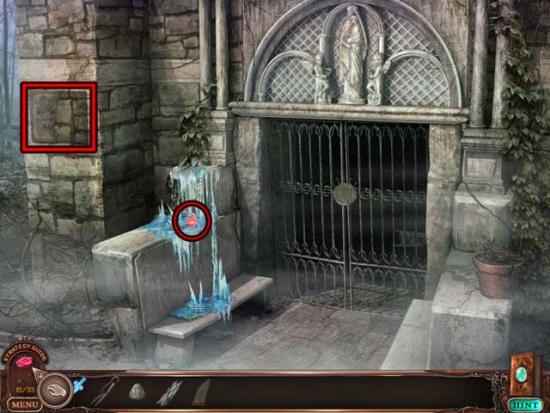
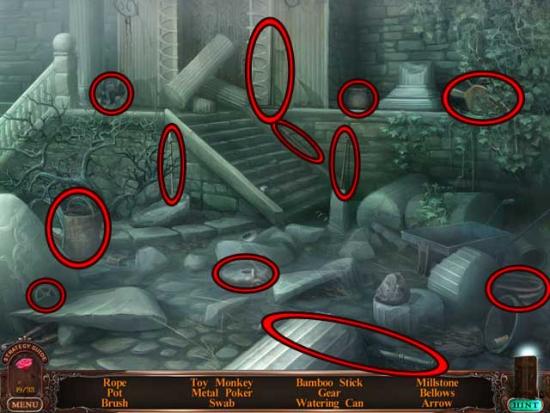
Bridge
Forest Entrance
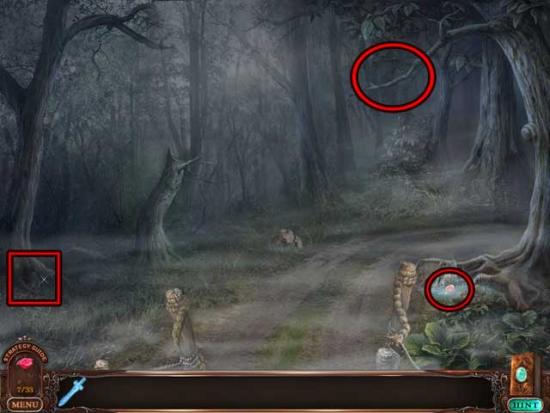
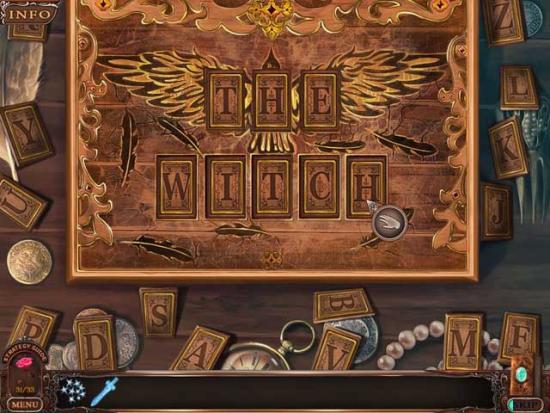
Witch’s Home
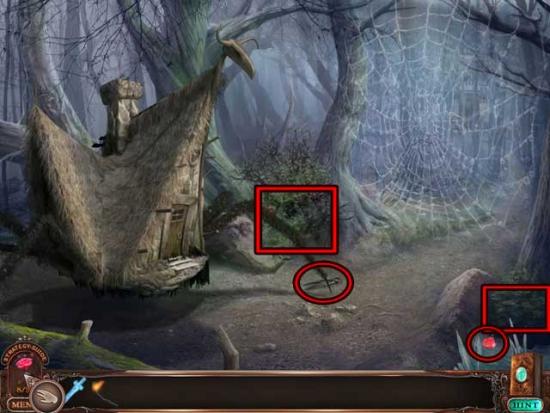
Forest Entrance
Witch’s Home
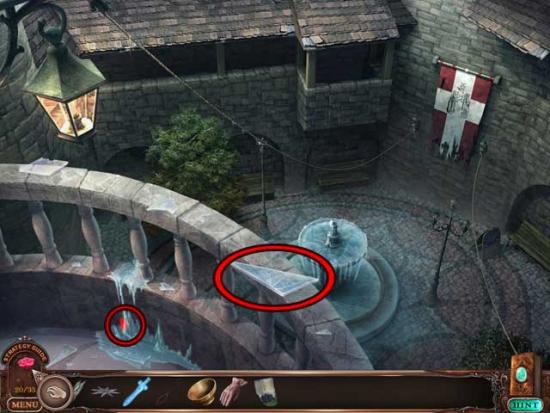
Drawbridge
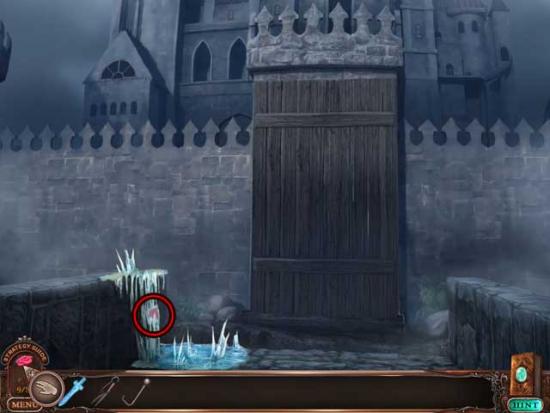
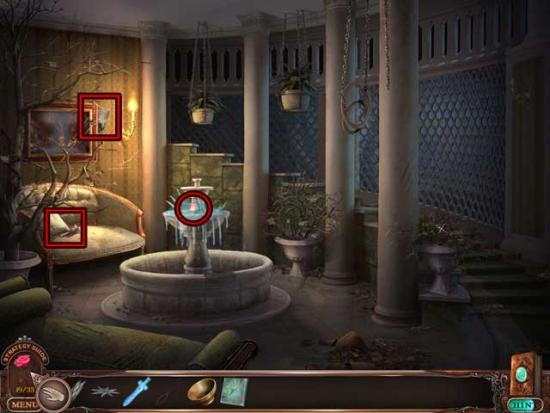
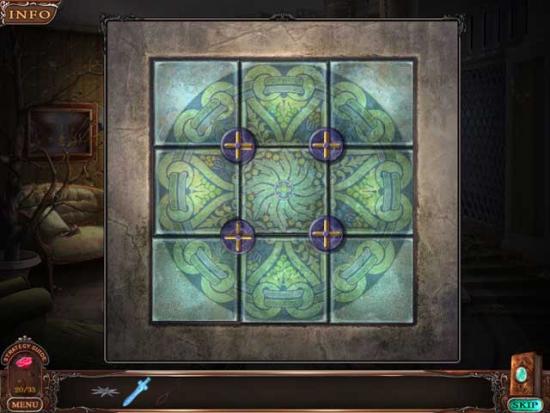
Courtyard
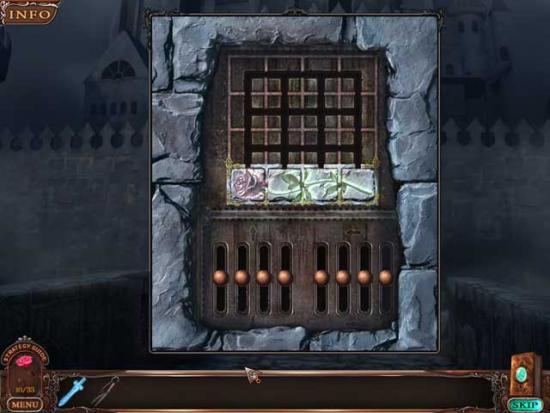
Barred Gate
Courtyard
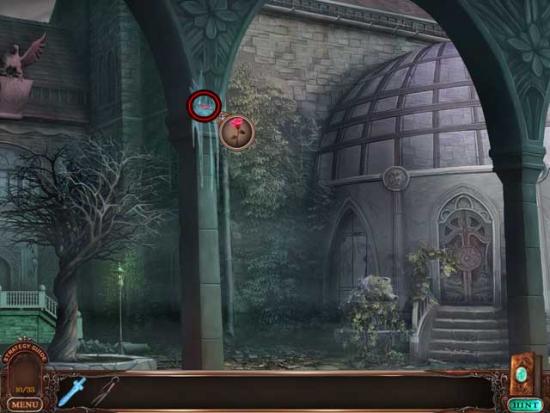
Conservatory Entrance
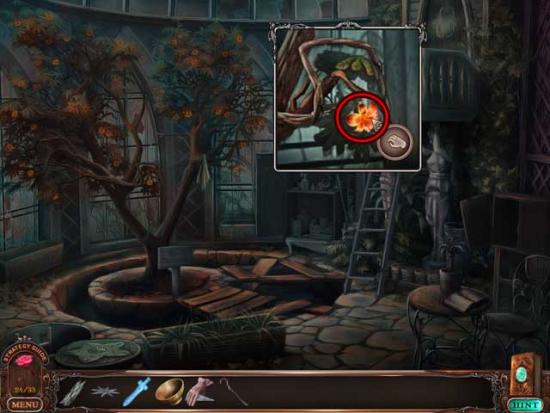
Conservatory
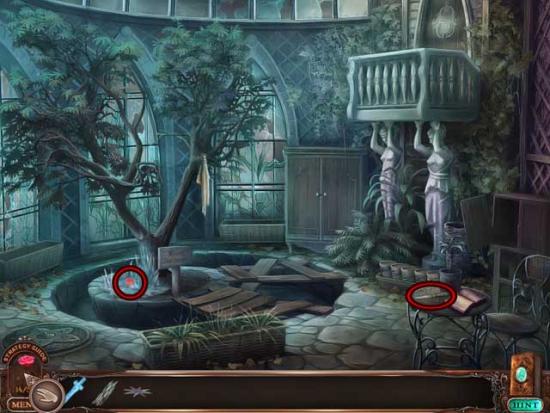
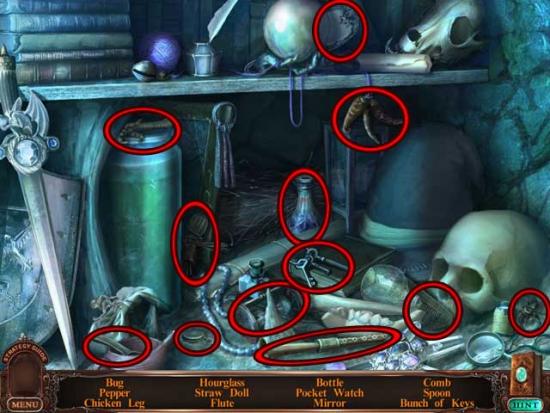
Cupboard
Conservatory
Dark Passageway
Cellar (Castle)
Conservatory
Conservatory Balcony
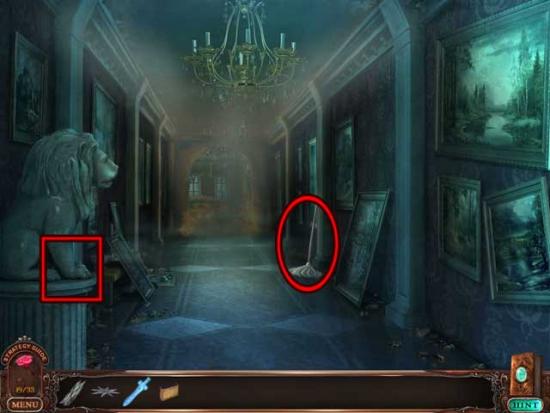
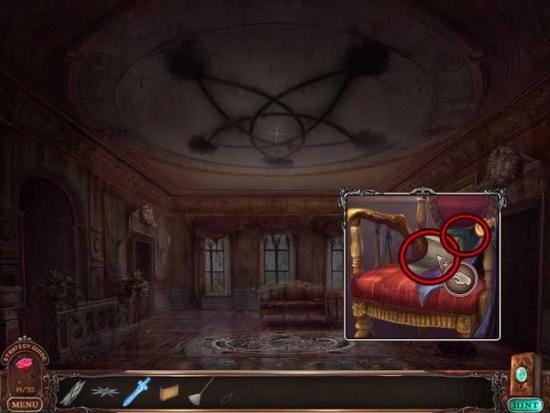
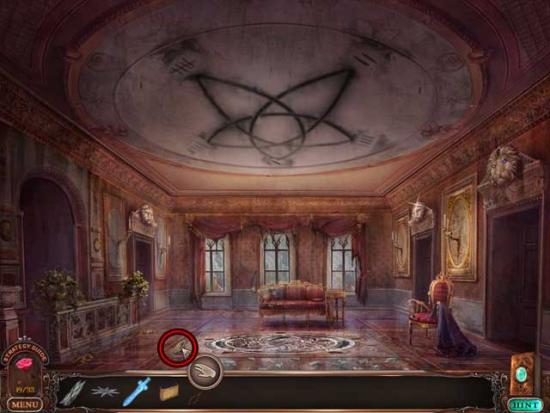
Hallway
Ballroom
Hallway
Courtyard
Barred Gate
Secret Staircase Room
Courtyard

Ballroom
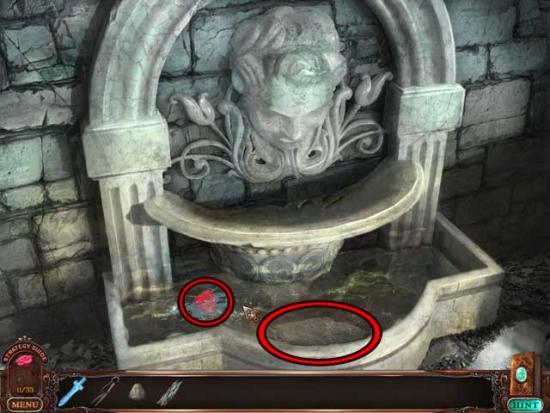
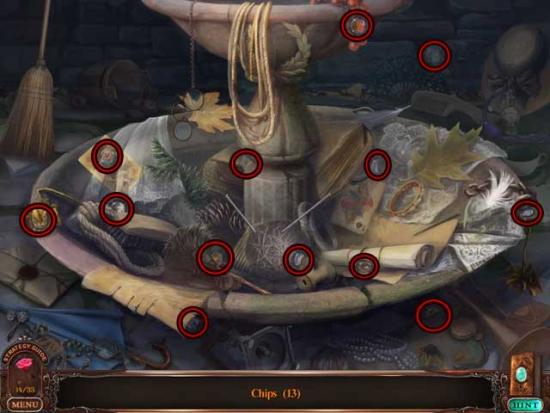
Fountain Room
Courtyard Balcony
Fountain Room
Ballroom
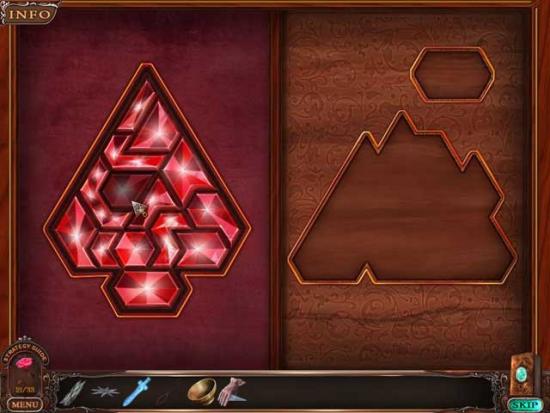
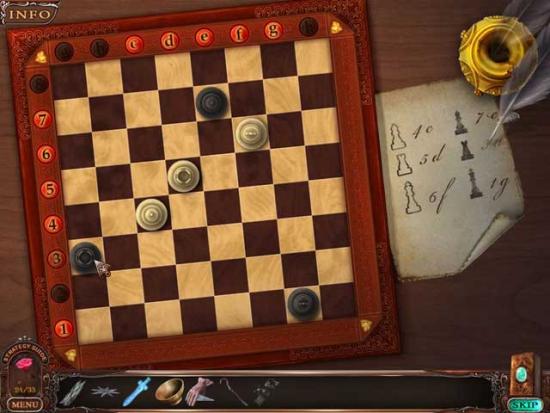
Chess Room

Study
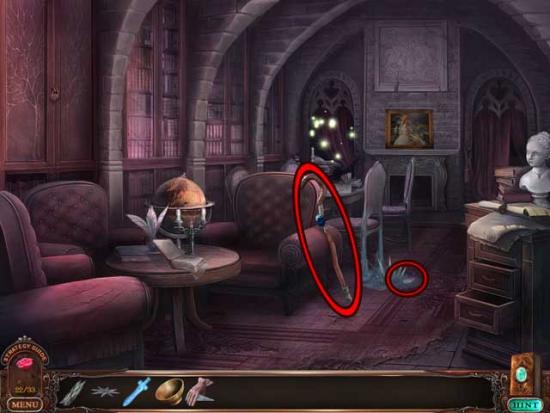
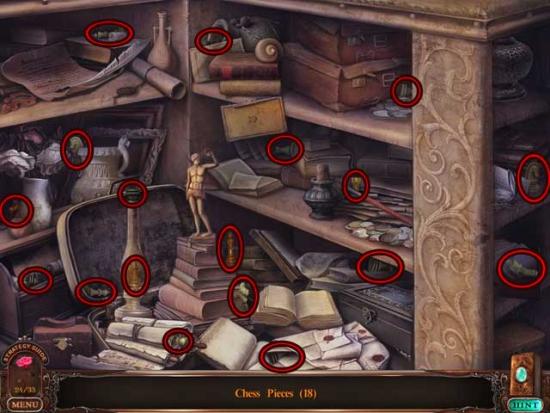
Hidden Room
Chess Room
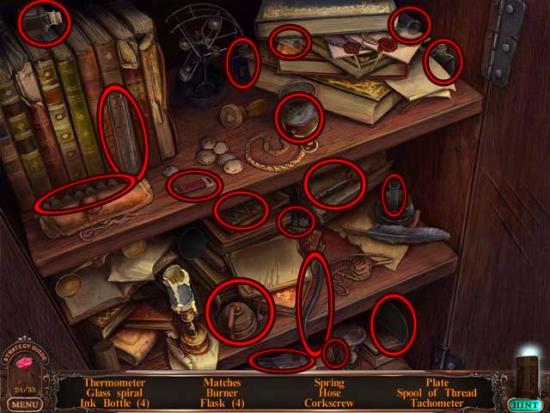
Conservatory
Cabinet
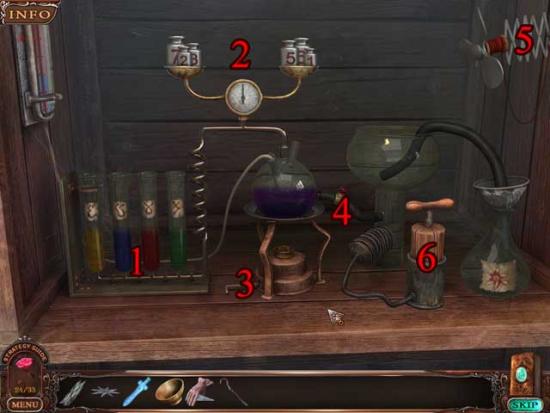
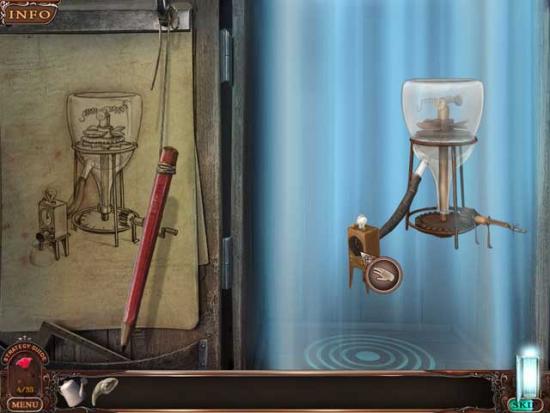
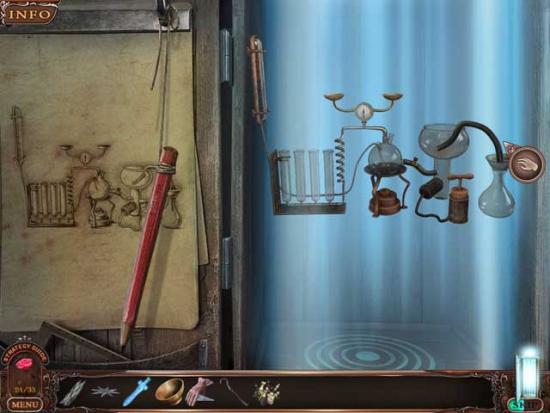
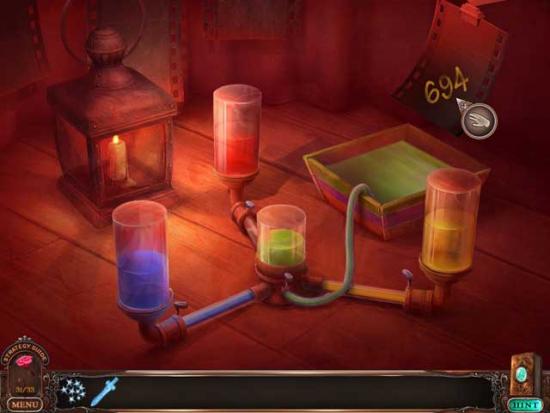
-1)Use the colored bottles of liquid on their corresponding tubes with matching symbols.
-2)Arrange the weights on the scale so that all are used and the weight is equal.(7-2-8 and 5-6-1)
-3)Click the lever to turn on the burner.
-4)Click the valve to open it and empty the boiling liquid into the next container.
-5)Click on the fan to cool the liquid.
-6)Click on the pump, holding the click and moving your cursor up and down to pump the liquid into the flask.
Conservatory
Study
Hidden Room
Study
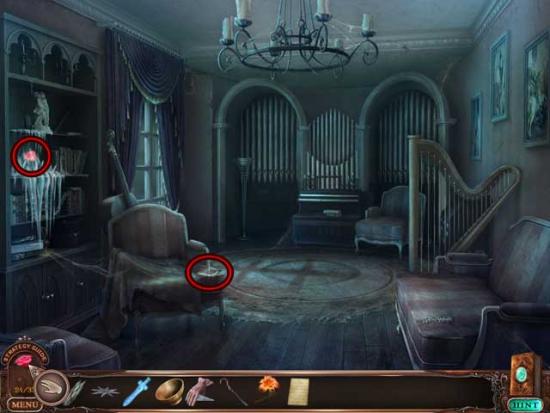
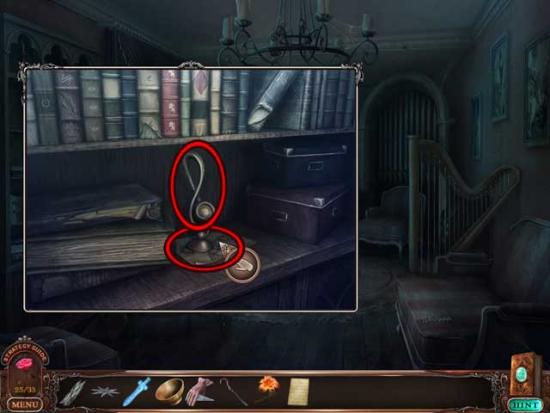
Ballroom
Music Room
Ballroom
Toy Room

Study

Music Room
Ballroom
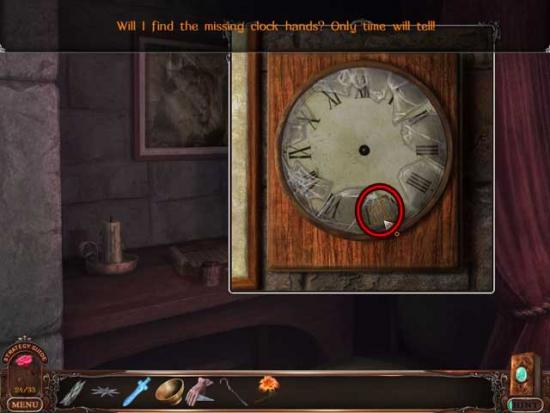
Castle Study
Castle Hall
Castle Study
Castle Hall
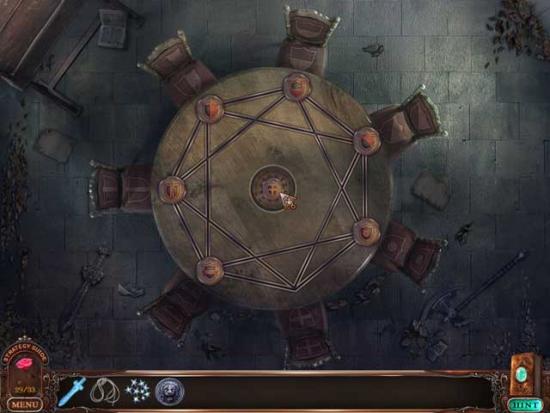
Round Table Room
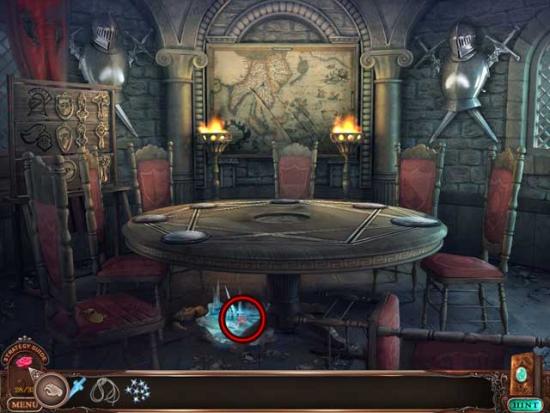

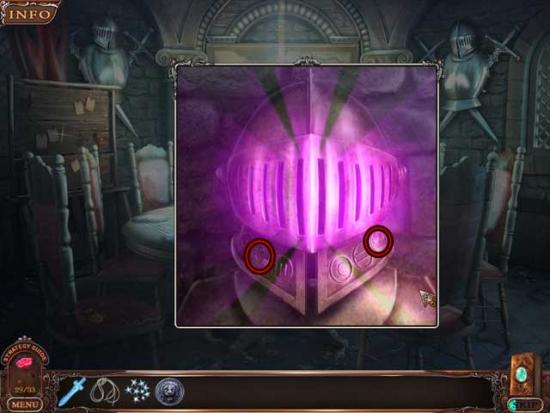
Castle Hall
Trolly Room
Castle Study
Trolly Room
Round Table Room
Trolly Room
Castle Hall
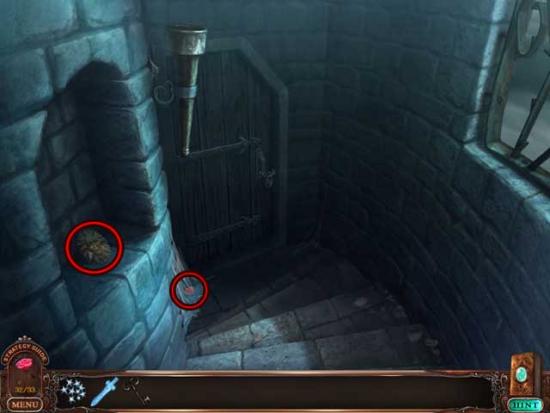
Tower Entrance
Tower Stairwell
Tower Chamber
Stairwell Bottom
Bed Chamber
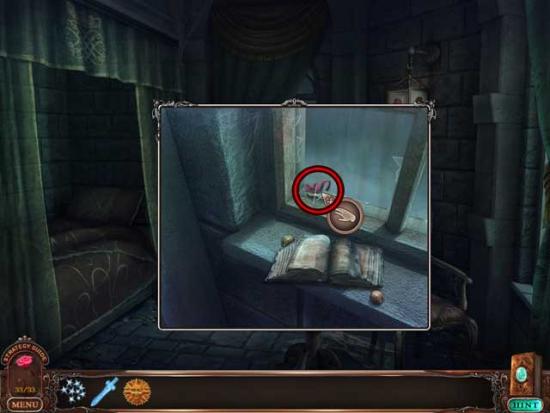
Tower Chamber
Secret Staircase Room
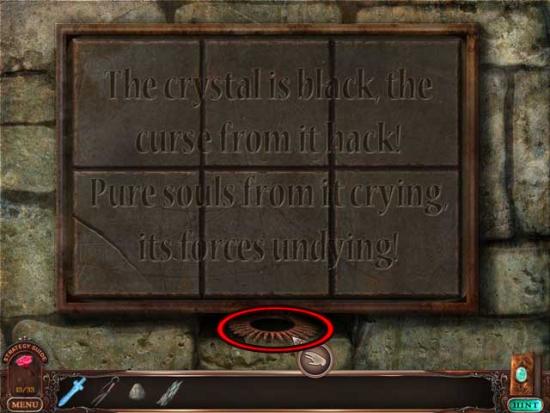
Black Crystal Chamber
Tower Chamber
Congratulations! You’ve completed Love Chronicles: The Sword and the Rose!
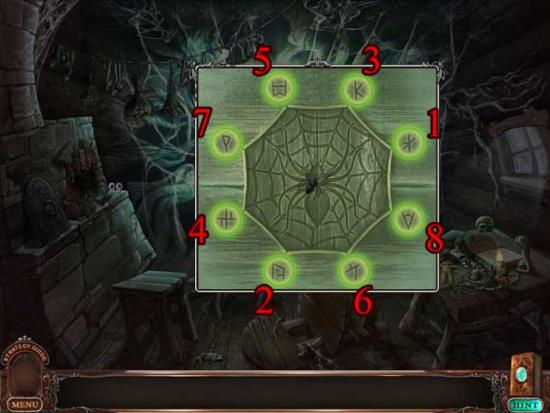
Spider House
Living Room
Spider House

Living Room
Well
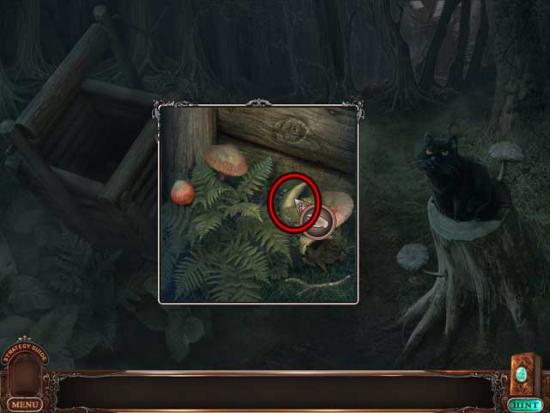
Mushroom House
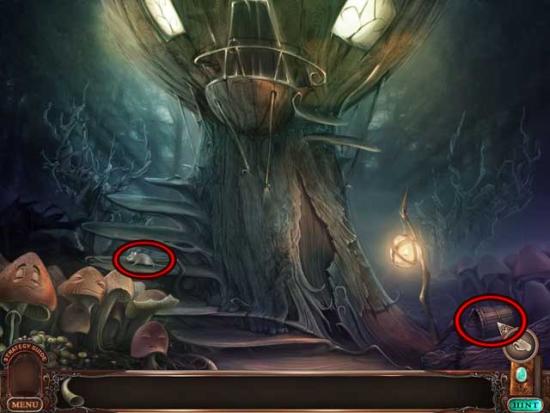
Mushroom House (Inside)
Mushroom House
Mushroom House (Inside)
Well
Mushroom House (Inside)
Well
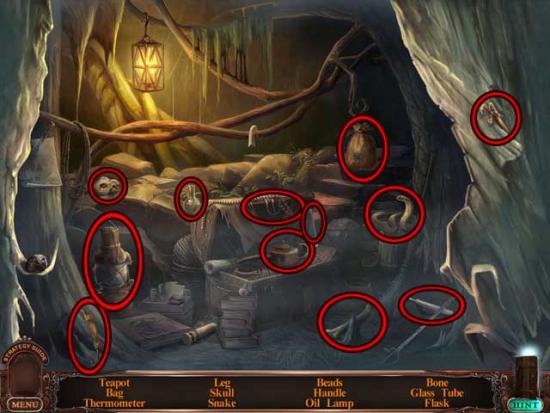
Lair Entrance
Lava Room
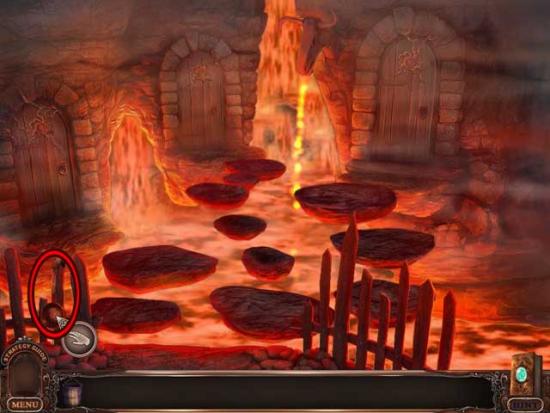
Lair Entrance
Lava Room
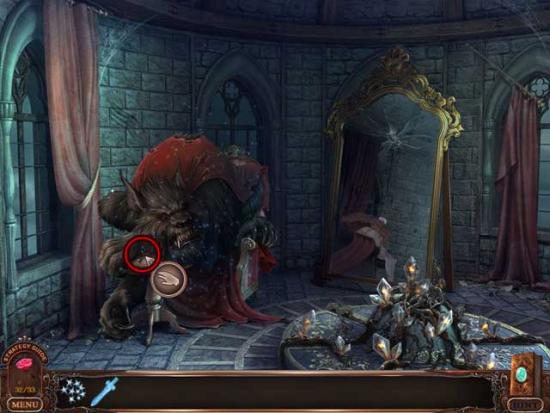
Throne Room

Lava Room
Cavern
Lava Room
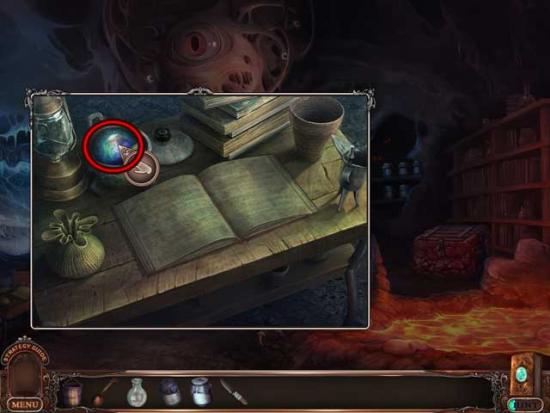
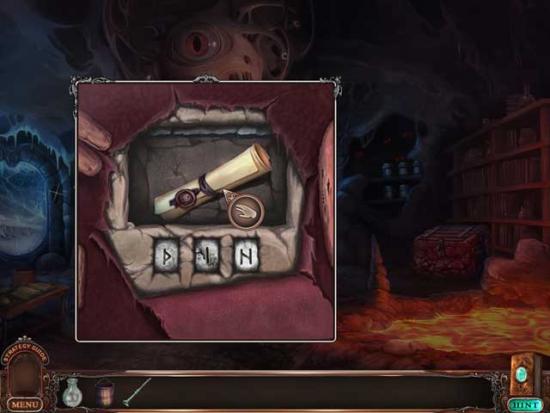
Cauldron

Cavern
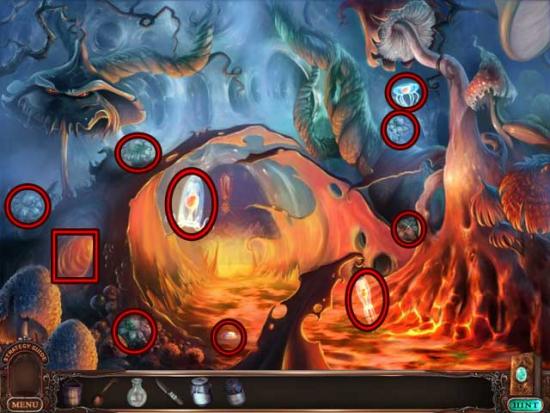
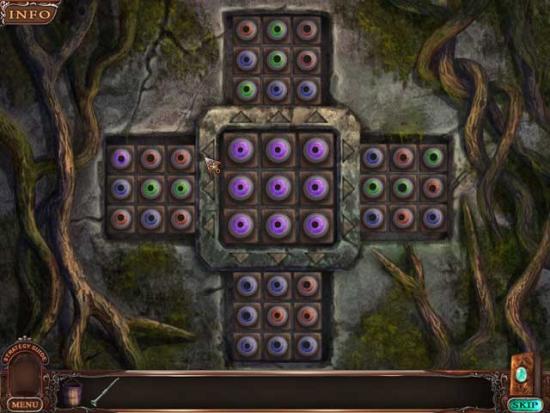
Crystal Cove
Throne Room
Cauldron
Throne Room
Cauldron
Throne Room
Prison Cell
Throne Room
Crystal Cove
Throne Room
Congratulations! You’ve completed Love Chronicles: The Sword and the Rose Collector’s Edition!
