![Digimon UP Tier List [Supports, Buddies, and Partners]](/wp-content/uploads/2026/07/digimon-up-tier-list.jpg "Digimon UP Tier List [Supports, Buddies, and Partners]")
Digimon UP Tier List [Supports, Buddies, and Partners]
These Digimon will get you UP the leaderboard.


![Haze Seas Boss Drops [Chances, Locations, and How to Spawn]](/wp-content/uploads/2026/07/haze-seas-boss-drops.jpg "Haze Seas Boss Drops [Chances, Locations, and How to Spawn]")

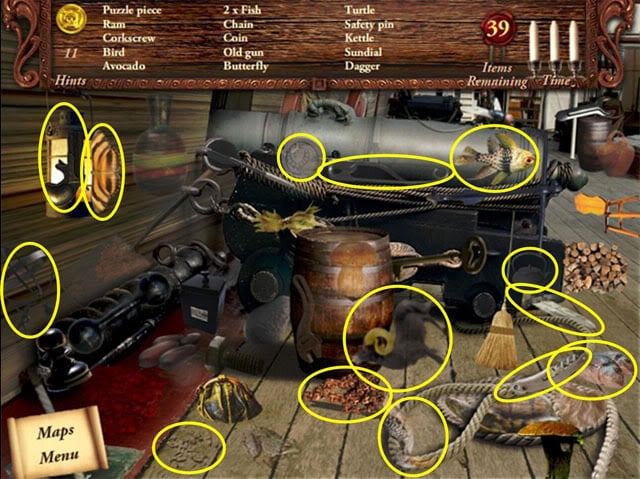
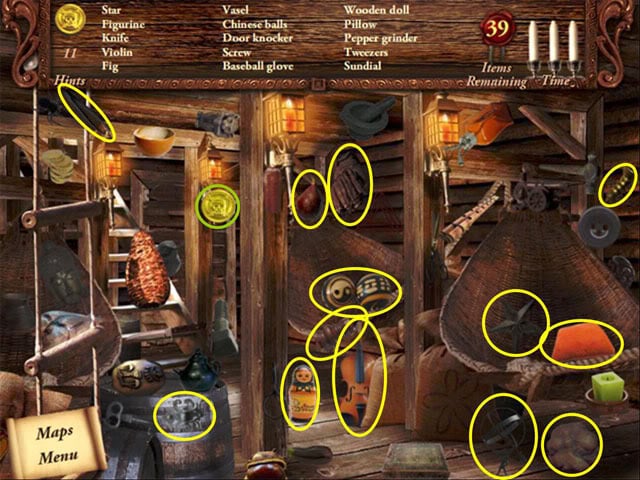
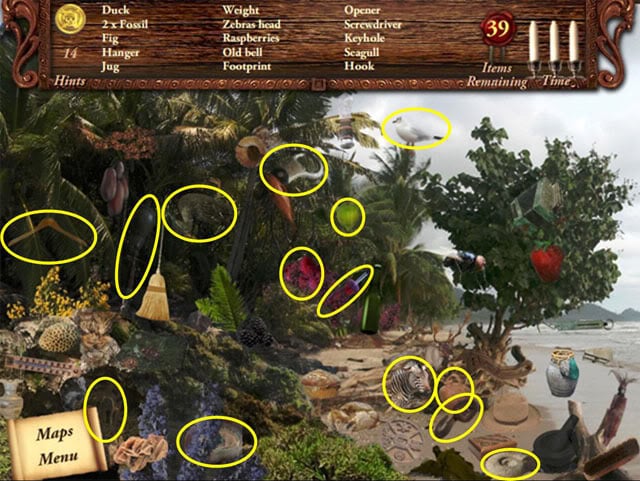
Welcome to our walkthrough for Lost Secrets: Caribbean Explorer – Secrets of the Sea. GENERAL INFOYou're playing as Anne Lafitte, the daughter of Francis Lafitte (a pirate who has hidden his treasure in the jungle and wants to retire), but he has been gravely injured and will surely die unless he can raise money for a doctor. You need to find his treasure on 16 multi-level Missions in various areas throughout the Caribbean in order to save your father."Relax Mode" (untimed) is ava…
a:1:i:0;a:2:s:13:”section_title”;s:58:”Lost Secrets: Caribbean Explorer – Secrets of the Sea Tips”;s:12:”section_body”;s:25712:”
Welcome to our walkthrough for Lost Secrets: Caribbean Explorer – Secrets of the Sea.
GENERAL INFO

PUZZLES/MINI-GAMES
Jigsaw/Map Puzzle: Used to advance you to the next mission. Once two pieces are matched, they will join to form a larger piece. As additional pieces are matched, they will also be joined. Small pieces might be obscured by larger, joined pieces.
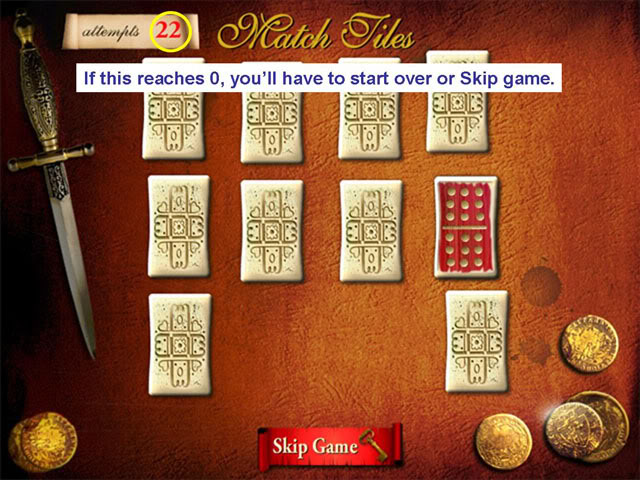
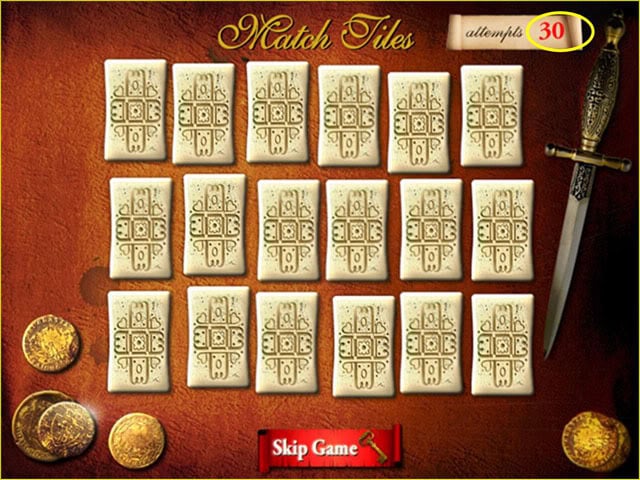
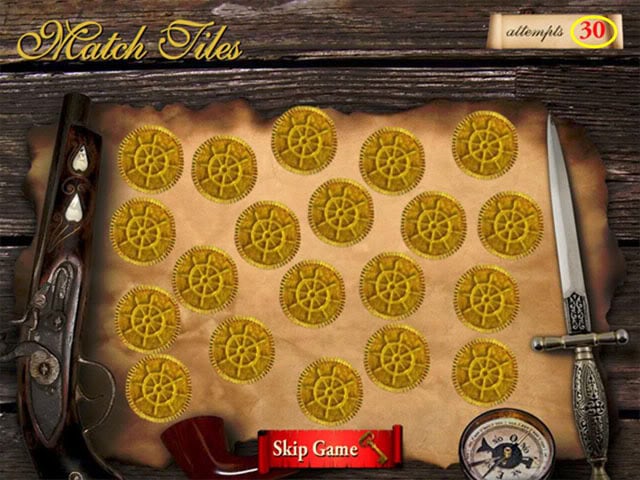
Memory Game Puzzle: Requires you to match the pictures to remove them from the board. You have a limited number of mistakes before you need to start the puzzle over.
Dice Games: You must throw the dice 3 times. If the final score is higher than 24, then you gain an extra 5 minutes for the next mission. If you score between 12 and 24, then nothing is added. If you score lower than 12, you LOSE 5 minutes for the next mission.
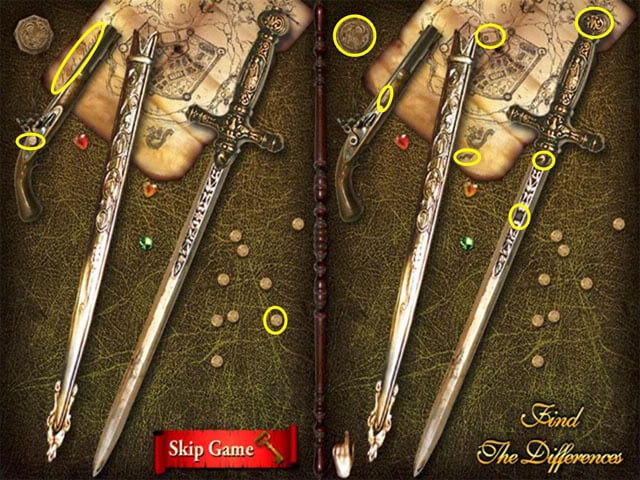
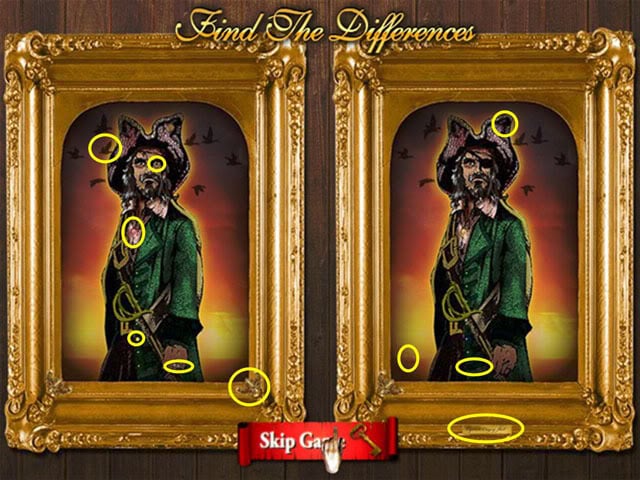
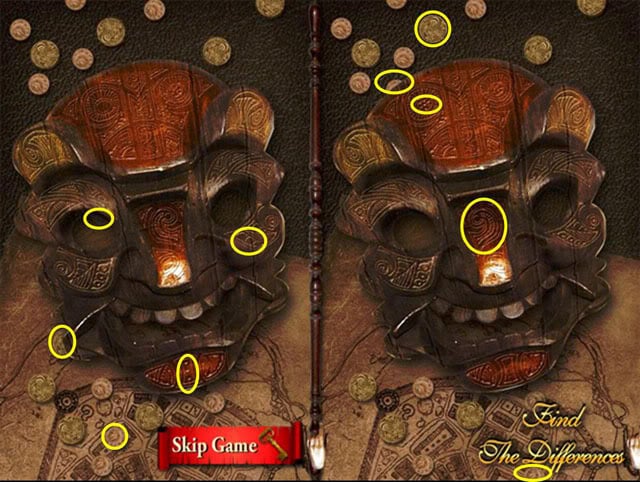
Find the Differences Puzzle: Find the differences between the two pictures. You can click on either picture.
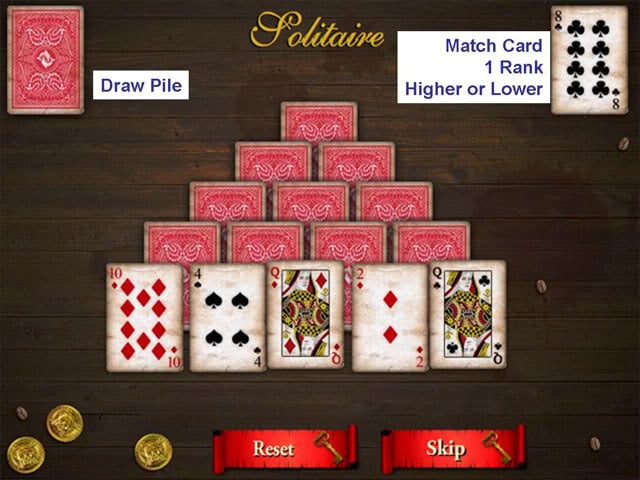
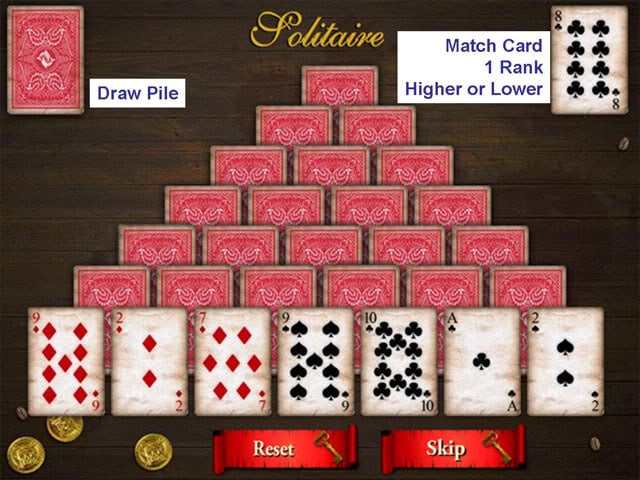
Solitaire Puzzle: Match available cards on the pyramid to the one in the upper right corner, either one rank higher or lower, to reveal the cards beneath. Clear all the cards to advance.
WALKTHROUGH
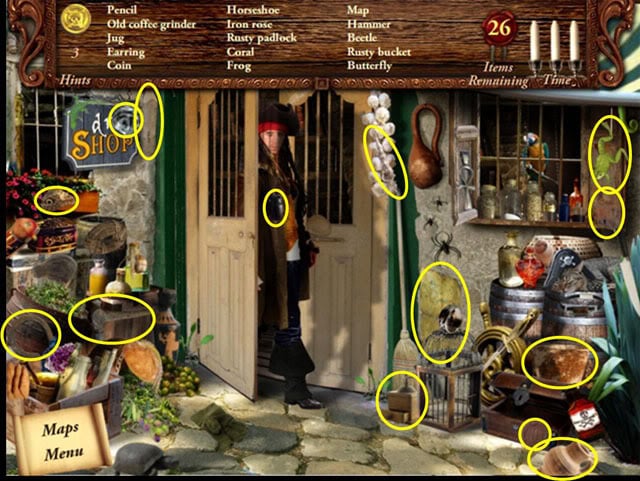
Mission 1
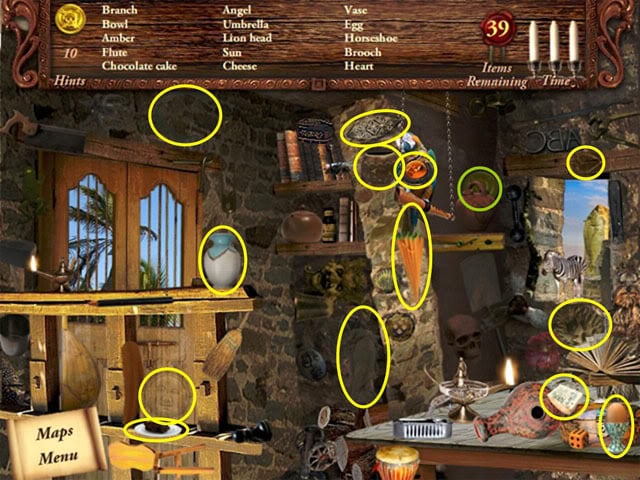
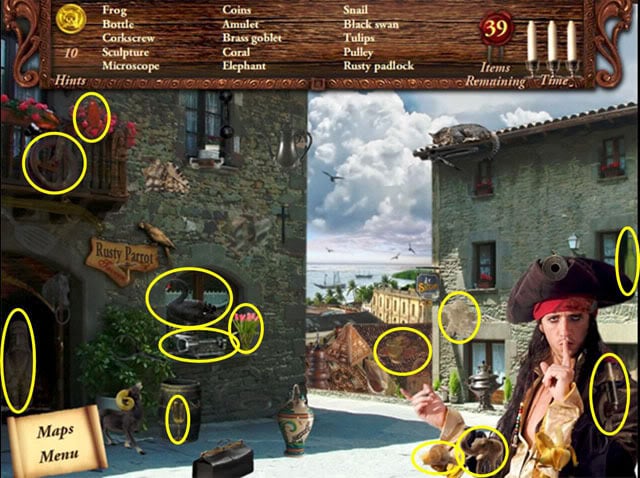
Location: Port Royal Street
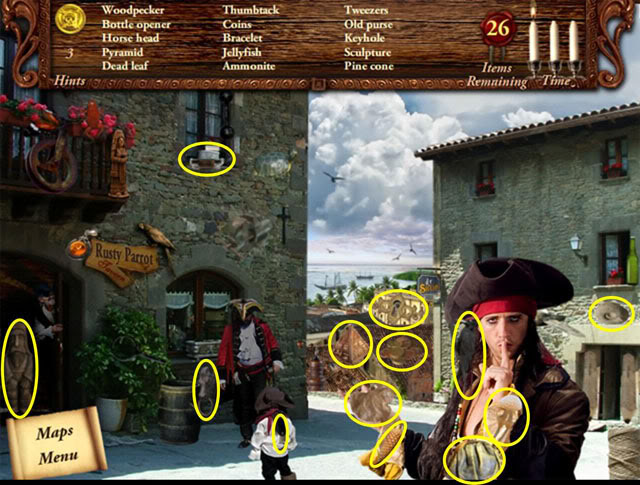
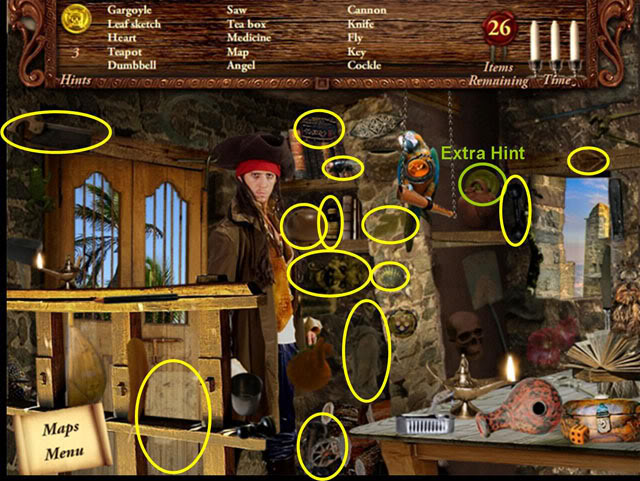
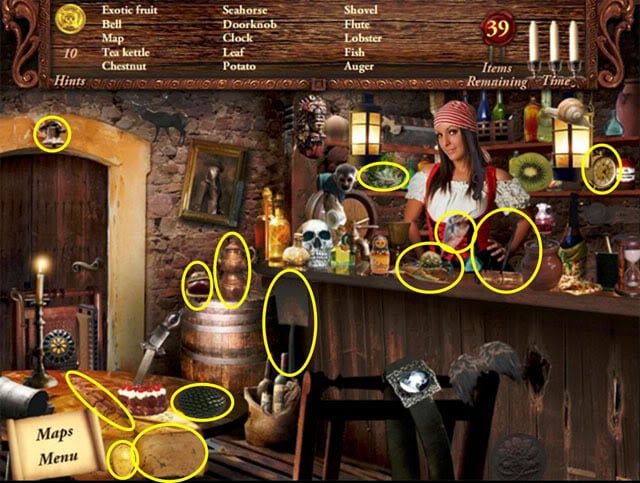
Location: Tavern
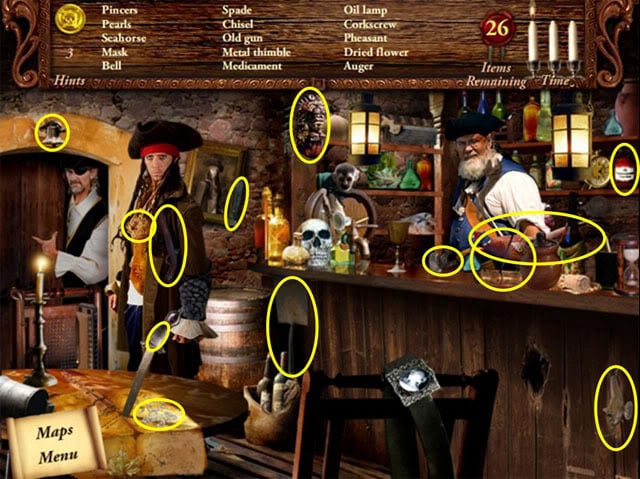
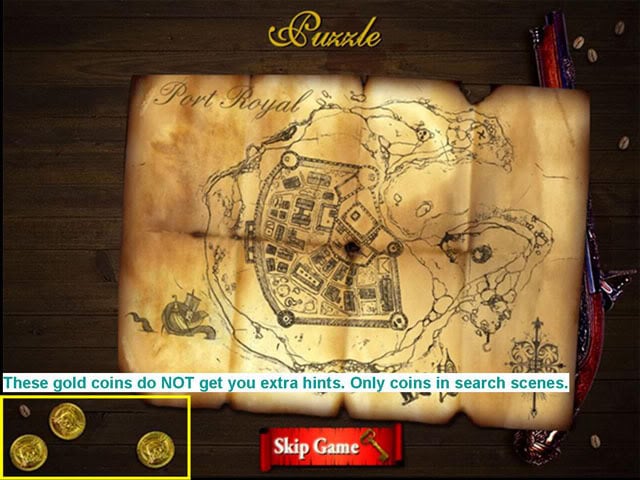
Map Puzzle
Jigsaw/Map Puzzle: Once two pieces are matched, they will join to form a larger piece. As additional pieces are matched, they will also be joined. Small pieces might be obscured by larger, joined pieces.
Mission 2
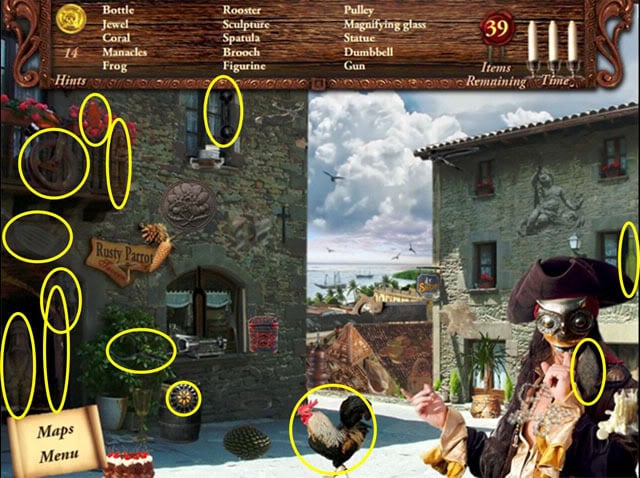
Location: Port Royal Street
Location: Barber Shop
Mission 3
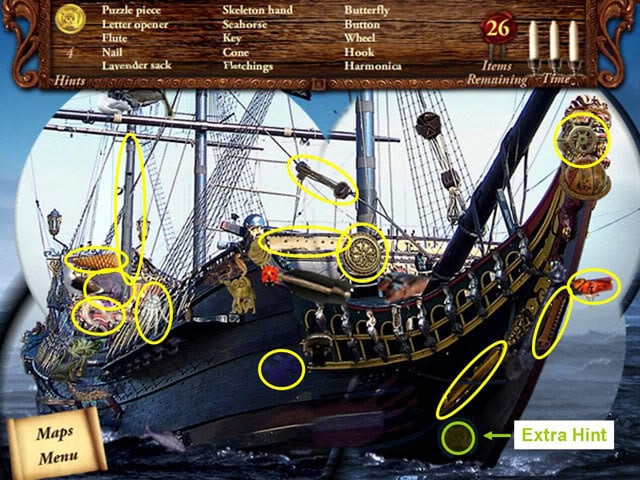
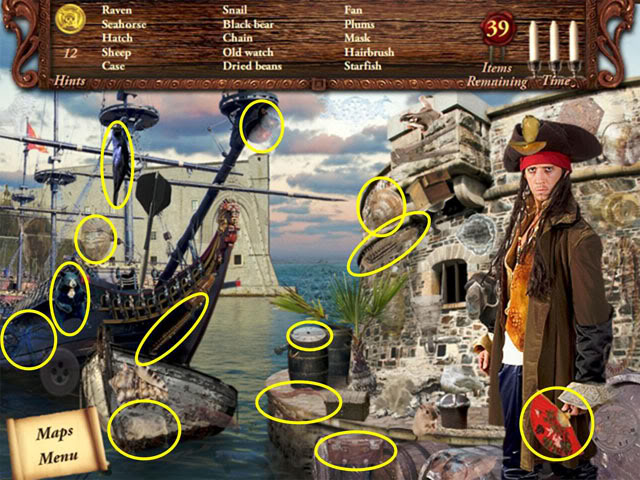
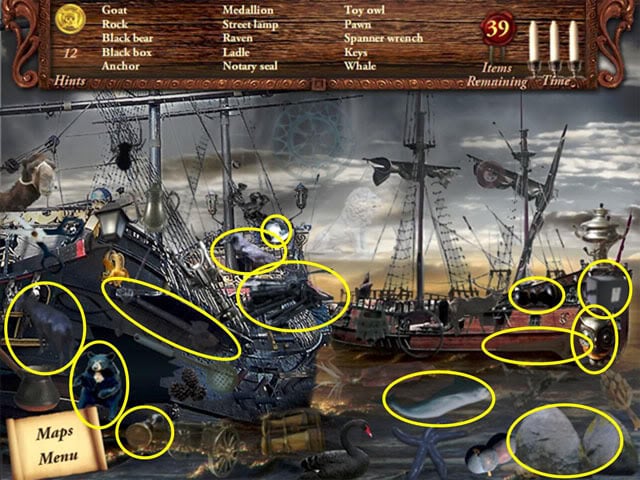
Location: Black Ship
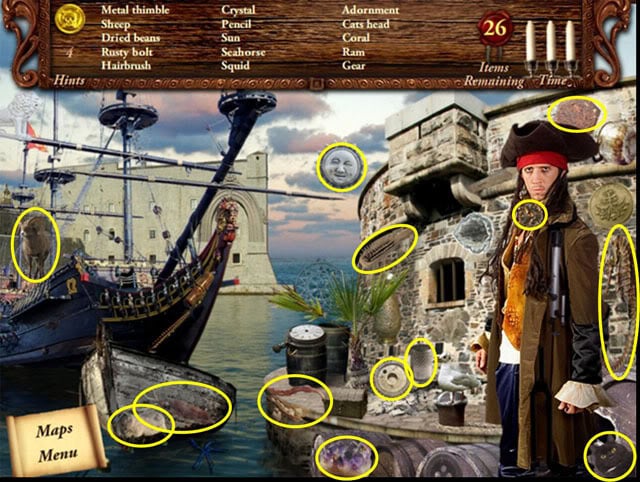
Location: The Port
Puzzle: Pyramid Solitaire
Mission 4
Location: Captain’s Cabin
Location: Crew Sleeping Quarters
Dice Game
Mission 5
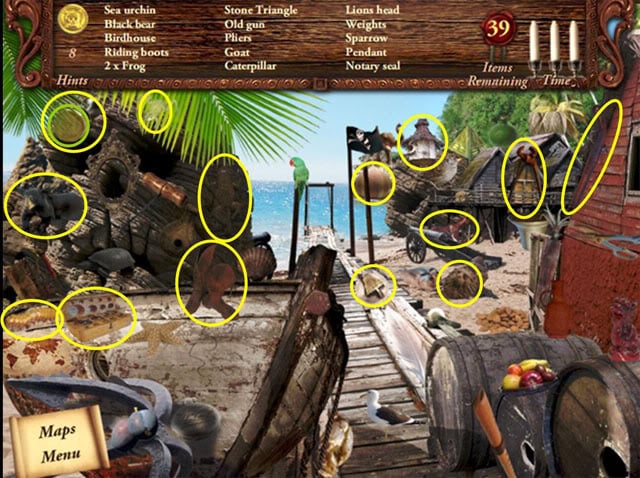
Location: The Beach
Location: The Path Through the Jungle
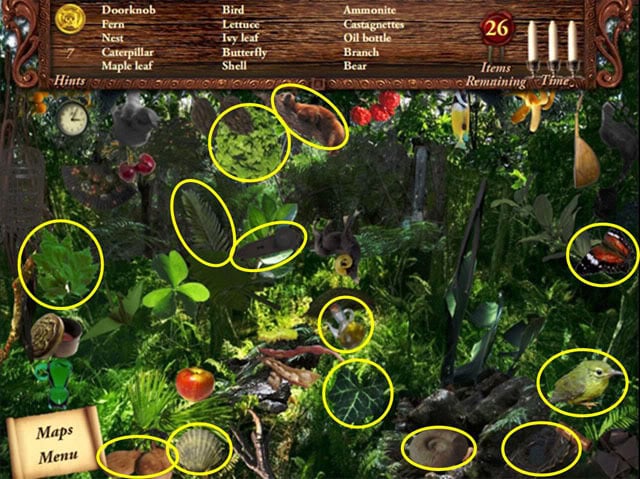
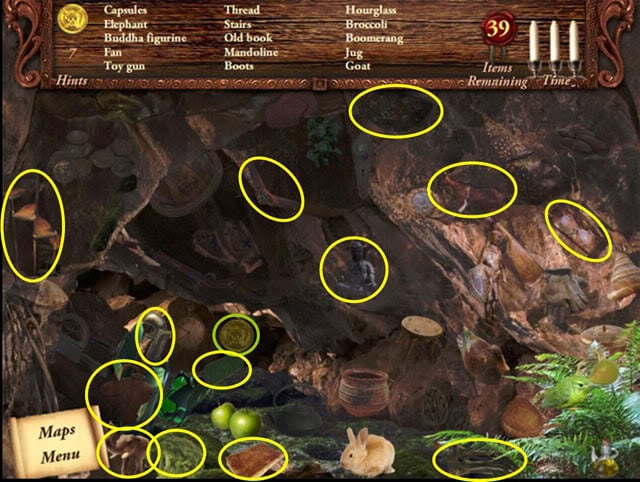
Location: The Cave
Memory Game Puzzle
Mission 6
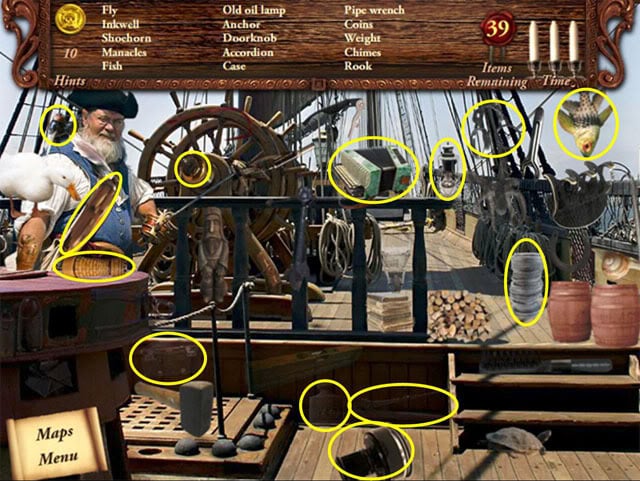
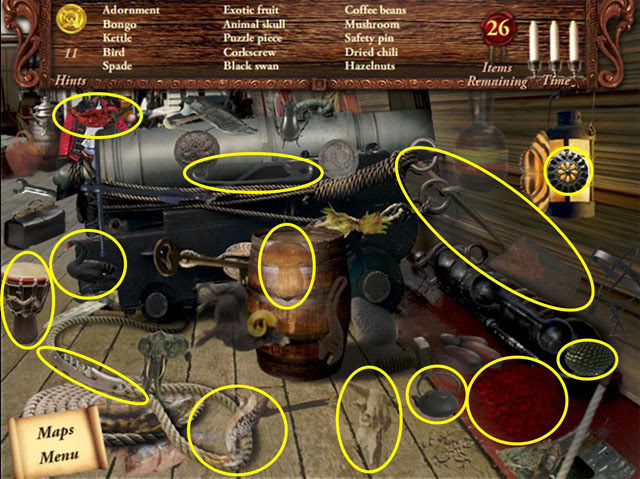
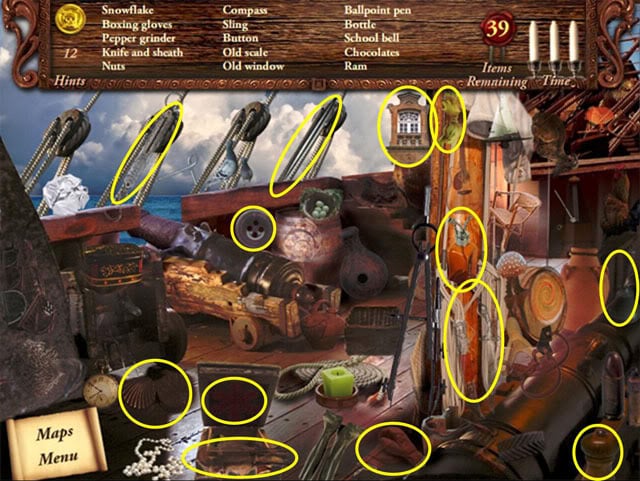
Location: The Ship Deck
Location: Pirates Village
Location: Rocky Island
Puzzle: Find the Differences
Mission 7
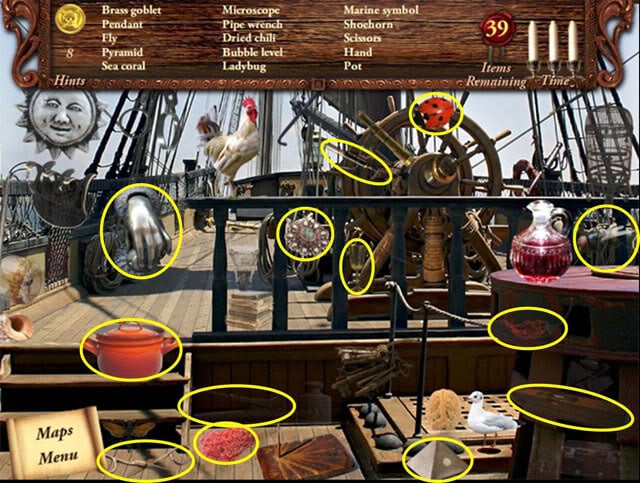
Location: Ship Deck
Location: Inside Caribbean House
Location: The Map
Dice Game
Mission 8
Location: Barber Shop
Location: Port Royal Street
Location: Tavern
Mission 9
Location: The Ship Deck
Location: The Port
Puzzle: Find the Differences
Mission 10
Location: The Captain’s Cabin
Location: The Deck
Location: Crew Sleeping Quarters
Puzzle: Pyramid Solitaire
Mission 11
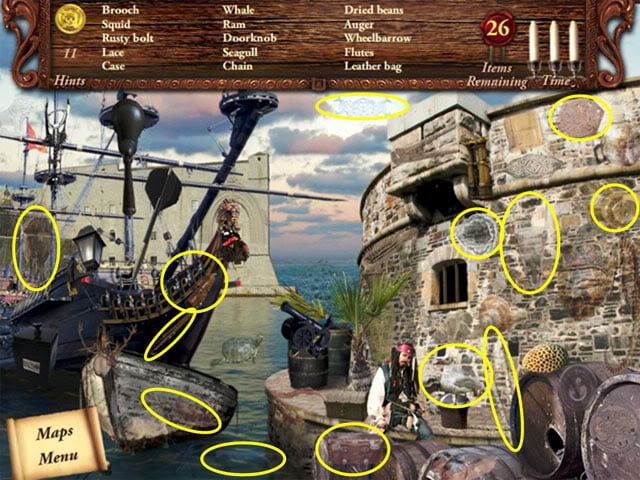
Location: The Fortress
Location: Rocky Bay
Memory Game Puzzle
Mission 12
Location: Captain’s Cabin

Location: The Ship Deck
Dice Game
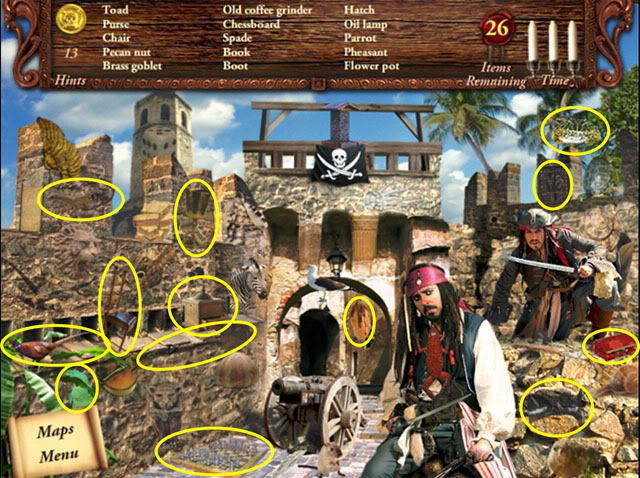
Mission 13
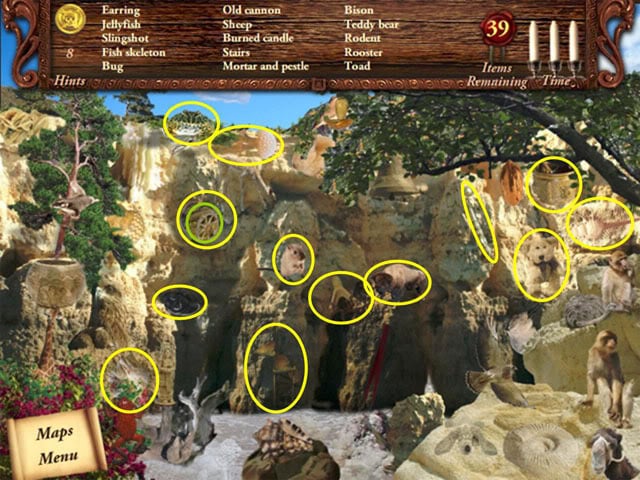
Location: The Beach
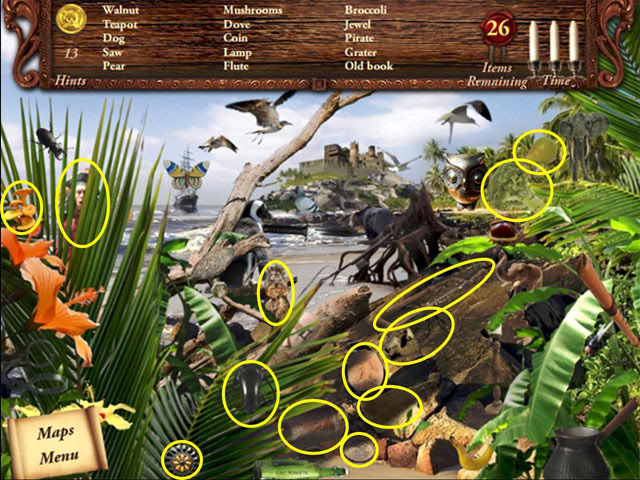
Location: The Path through the Jungle
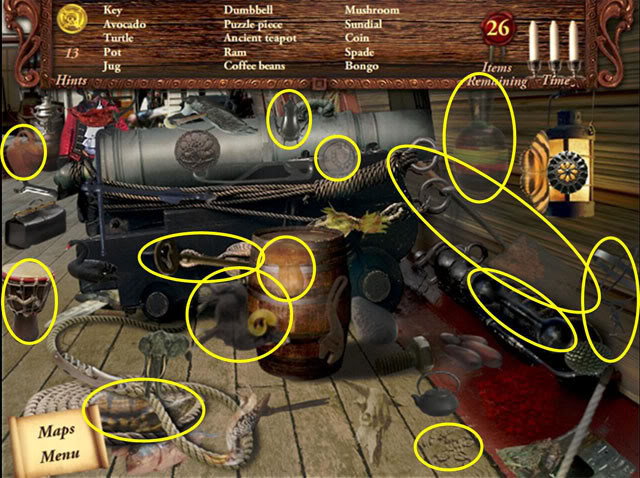
Location: The Cave
Memory Game Puzzle
Mission 14
Location: Captain’s Cabin
Location: The Deck
Location: The Port

Puzzle: Find the Differences
Mission 15
Location: Barber Shop
Location: His House
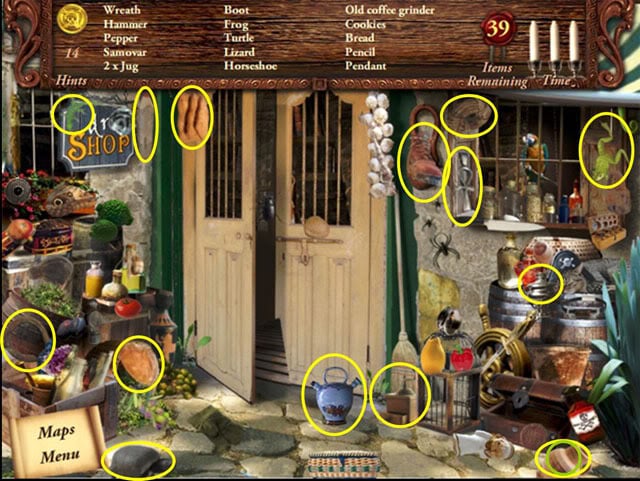
Location: Port Royal Street
Mission 16: Finale
Location: The Deck
Location: The Port
Location: The Battle
Finished!
“;
