![Digimon UP Tier List [Supports, Buddies, and Partners]](/wp-content/uploads/2026/07/digimon-up-tier-list.jpg "Digimon UP Tier List [Supports, Buddies, and Partners]")
Digimon UP Tier List [Supports, Buddies, and Partners]
These Digimon will get you UP the leaderboard.


![Haze Seas Boss Drops [Chances, Locations, and How to Spawn]](/wp-content/uploads/2026/07/haze-seas-boss-drops.jpg "Haze Seas Boss Drops [Chances, Locations, and How to Spawn]")

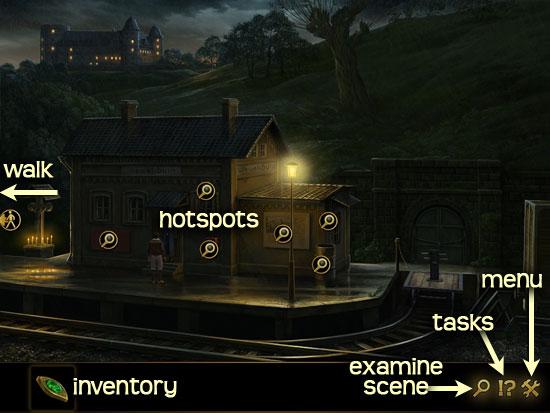
Welcome to the Lost Horizon walkthrough on Gamezebo.com. Lost Horizon is a point-and-click Adventure game for the PC developed by Animation Arts and published by Deep Silver. This walkthrough includes tips and tricks, helpful hints, and a strategy guide on how to complete Lost Horizon.
Welcome to the Lost Horizon walkthrough on Gamezebo.com. Lost Horizon is a point-and-click Adventure game for the PC developed by Animation Arts and published by Deep Silver. This walkthrough includes tips and tricks, helpful hints, and a strategy guide on how to complete Lost Horizon.

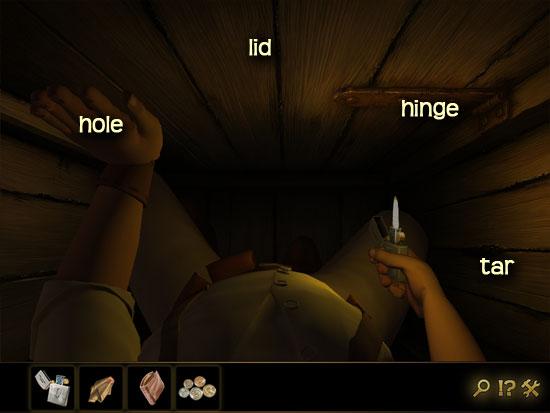
TIBET, MONASTERY
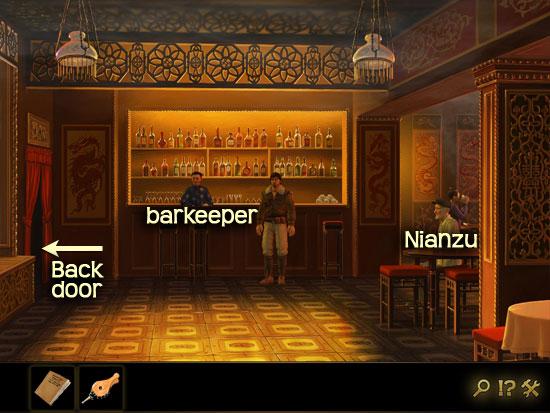
HONG KONG, NIGHTCLUB
NIGHTCLUB, BACK DOOR
UNDERWATER
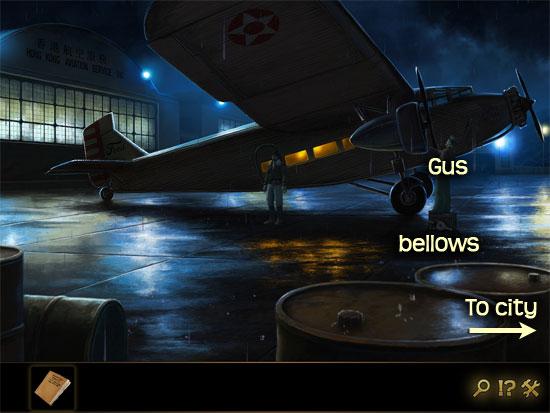
AIRPORT
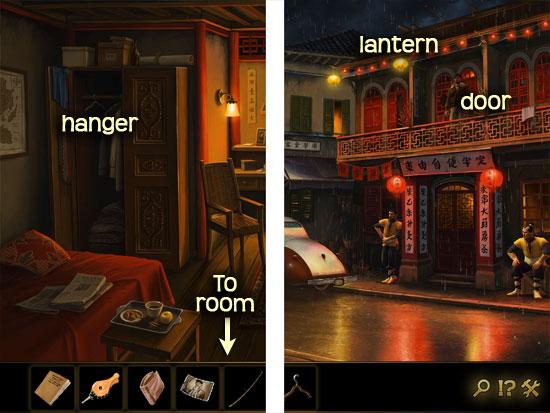
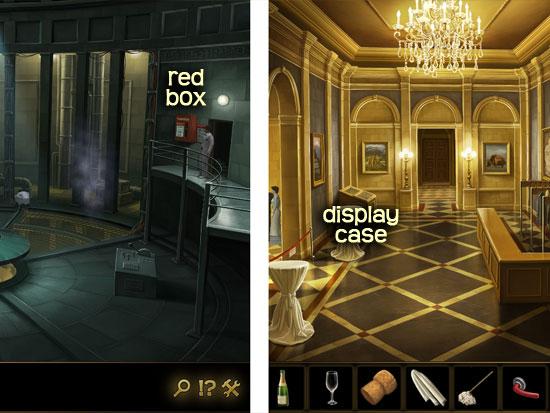
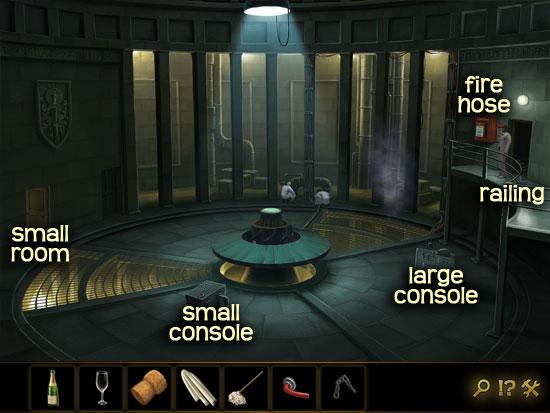
NIGHTCLUB
AIRPORT
HARBOUR
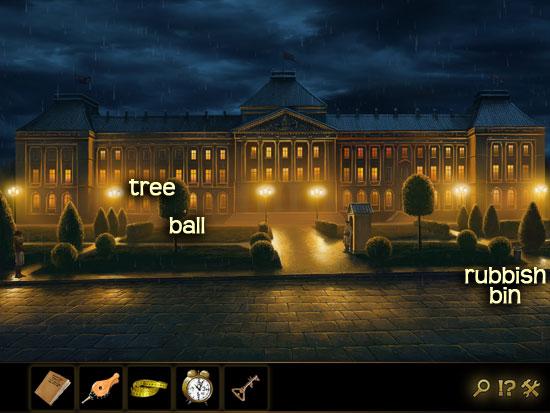
GOVERNOR’S PALACE
NIGHTCLUB
HARBOUR
AIRPORT
NIGHTCLUB
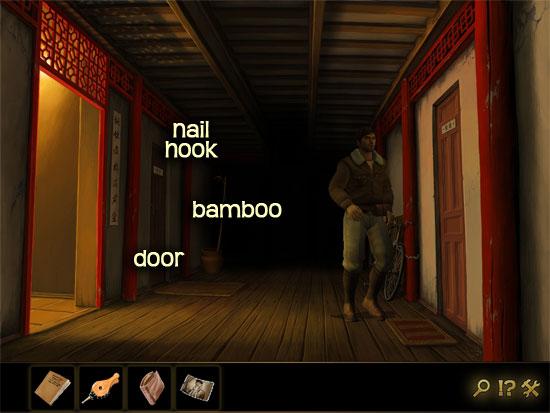
WUANG’S HOUSE
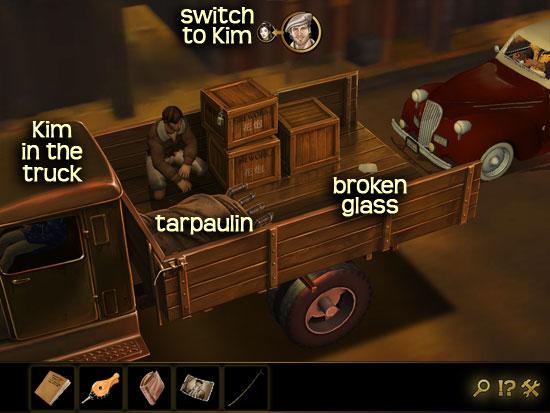
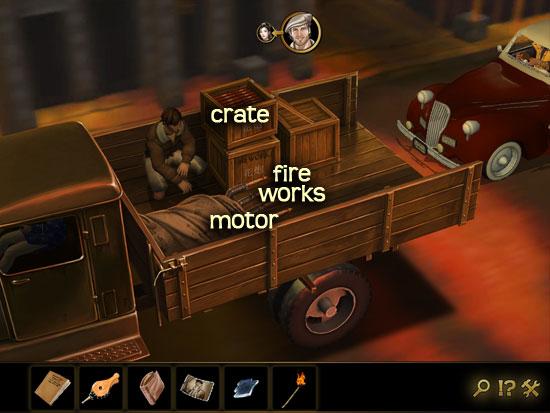
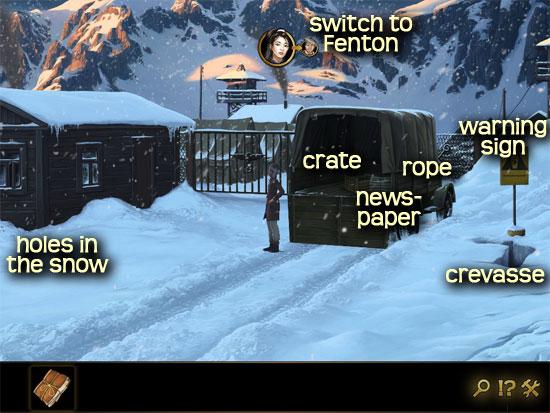
TRUCK

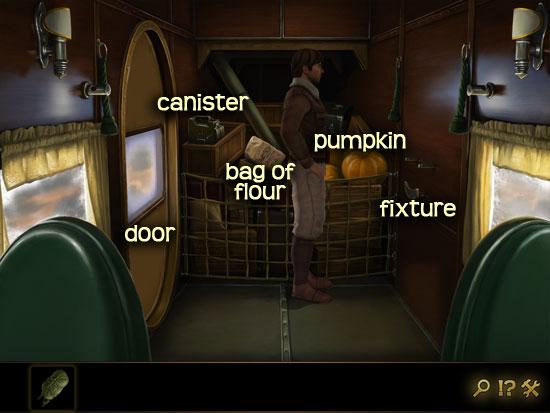
AIRPLANE
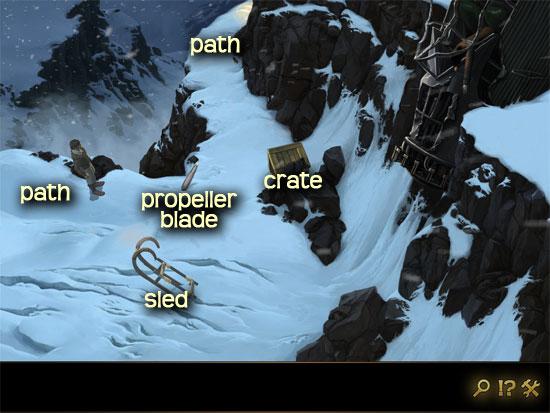
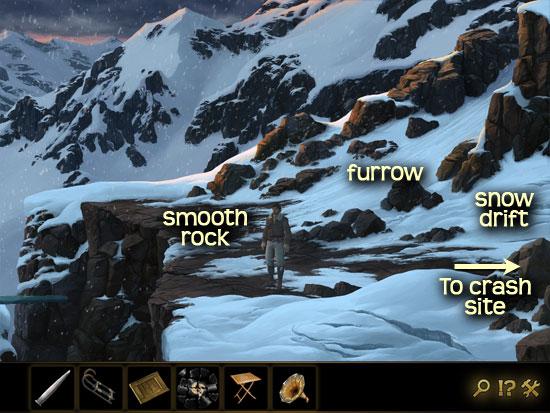
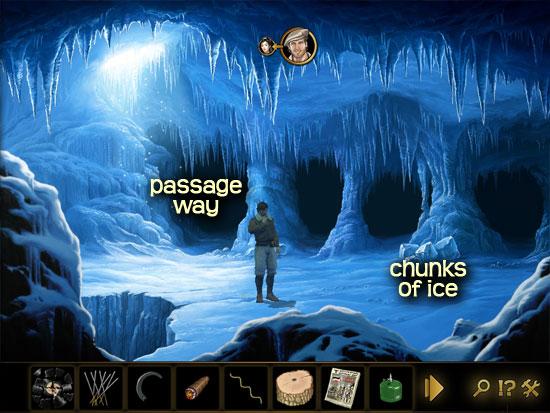
HIMALAYAS, CRASH SITE
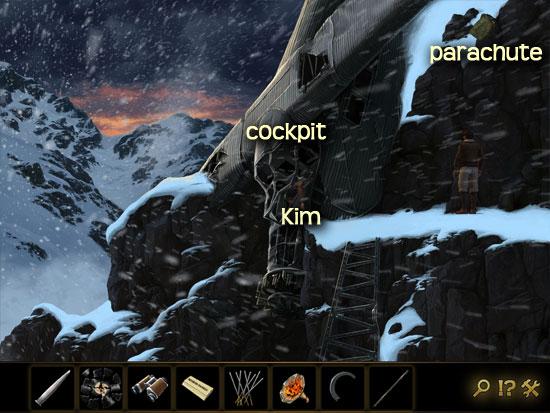
GERMAN PLANE

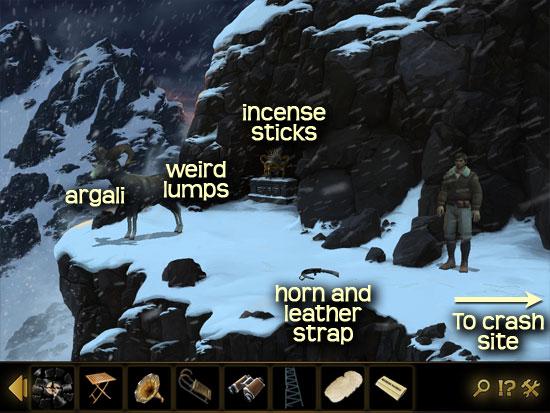
ARGALI
GERMAN PLANE
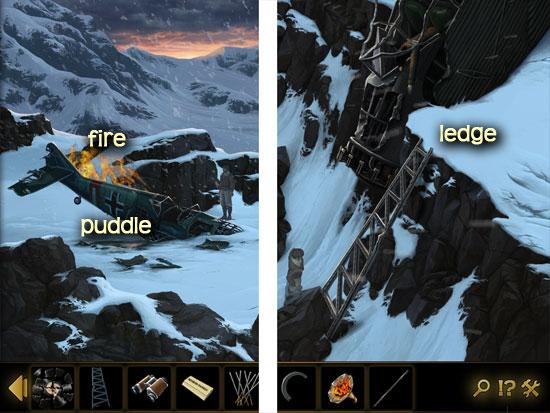
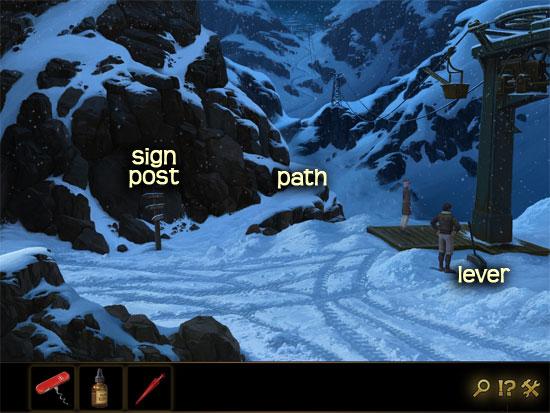
LEDGE
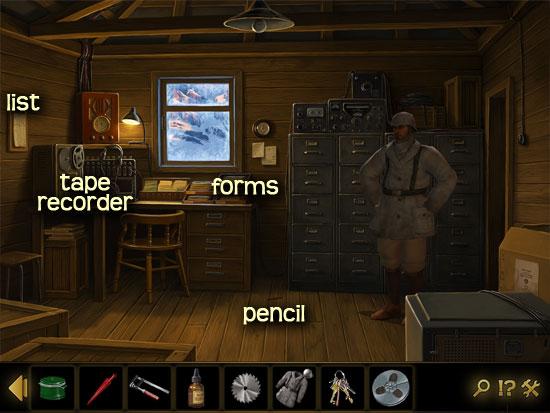
BARRACKS
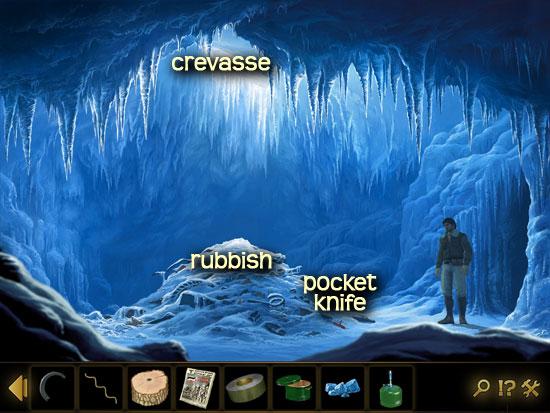
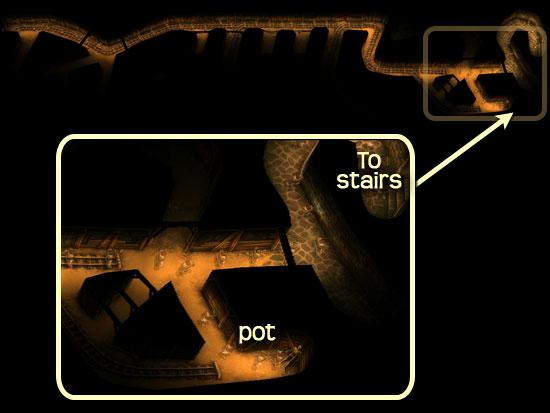
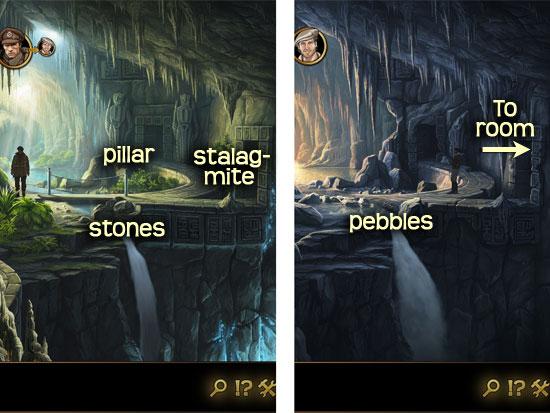
CAVES
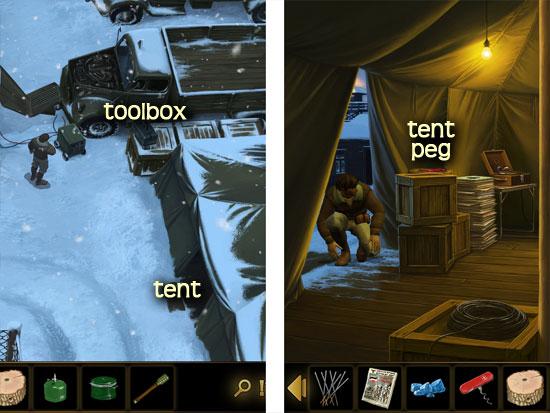
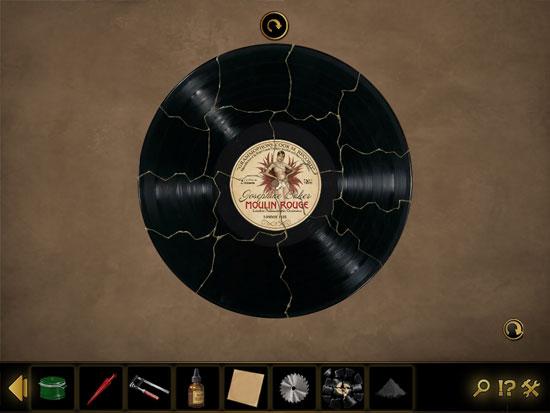
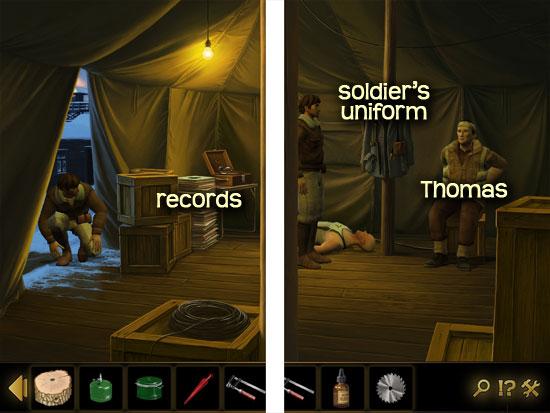
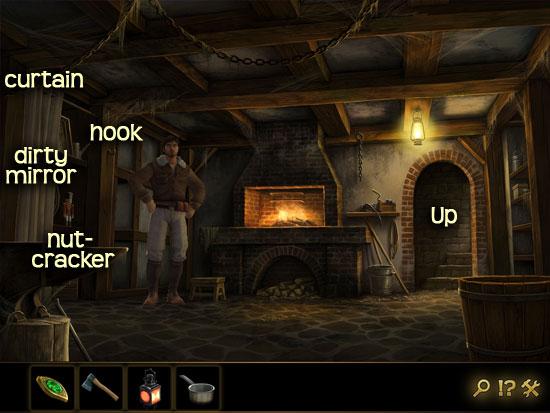
CAMP & TENT
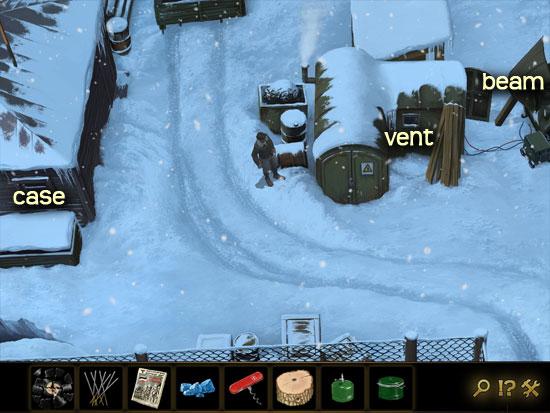

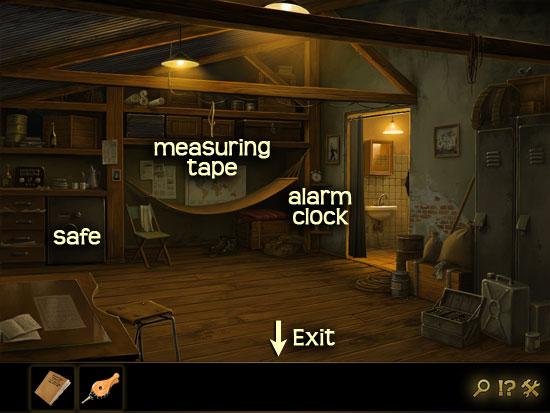
SHED
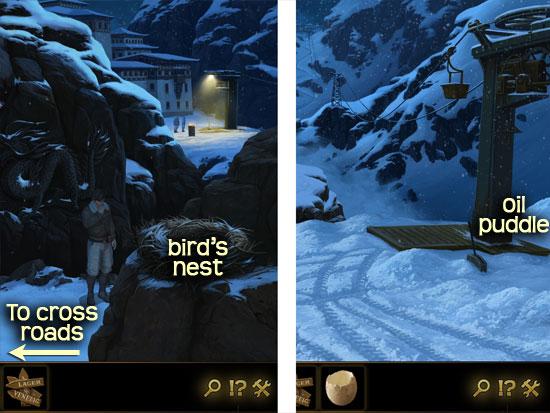
CROSSROADS
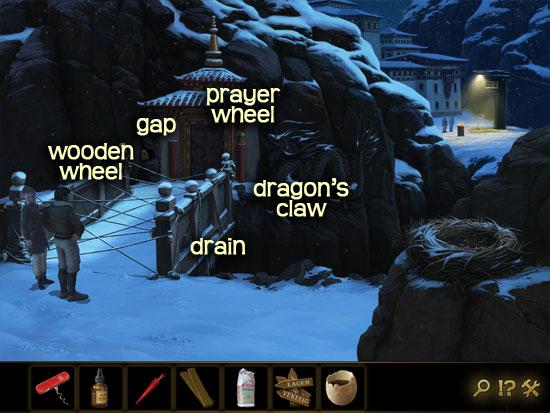
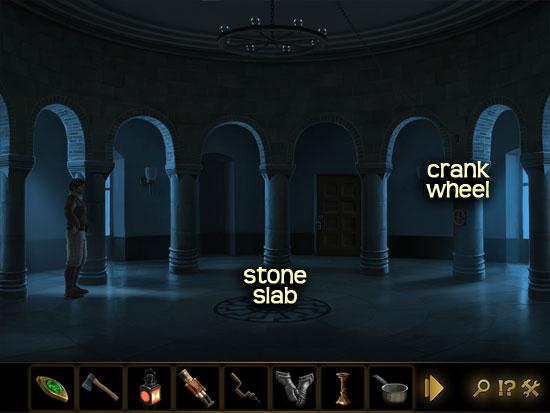
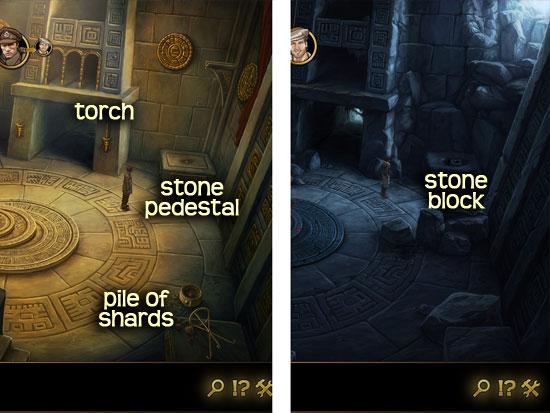
MONASTERY
COURTYARD

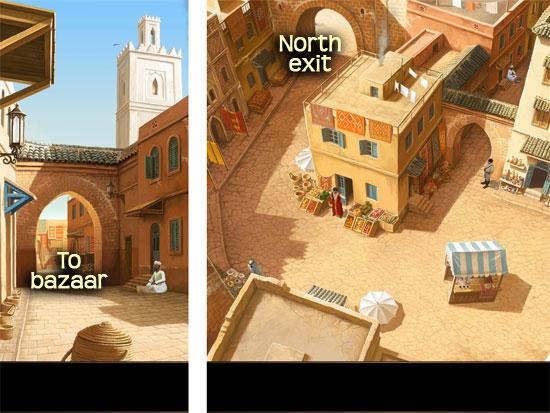
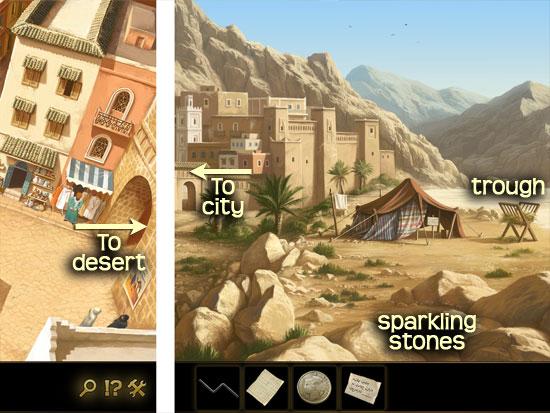
MOROCCO, MARRAKESH
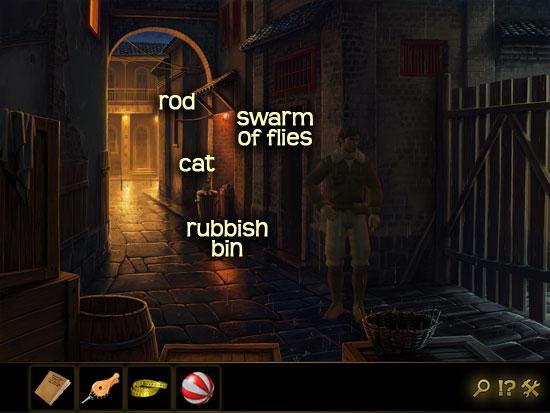
ALLEY
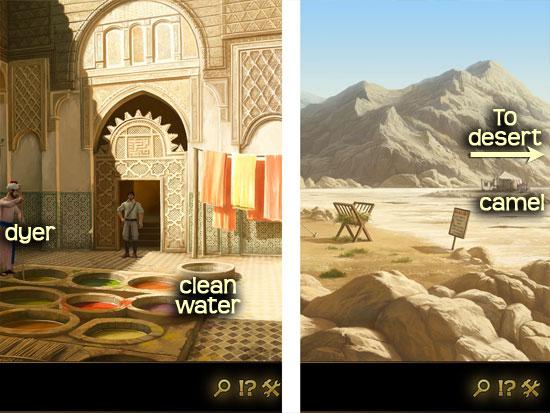
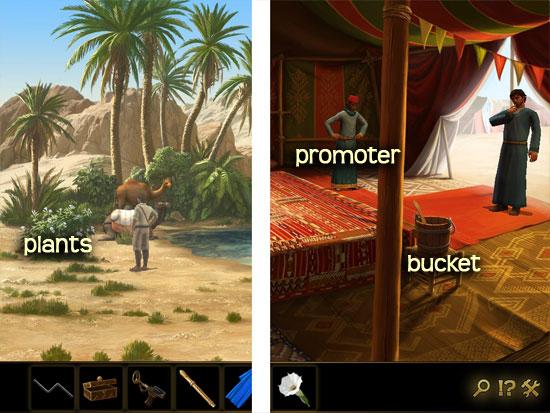
DESERT
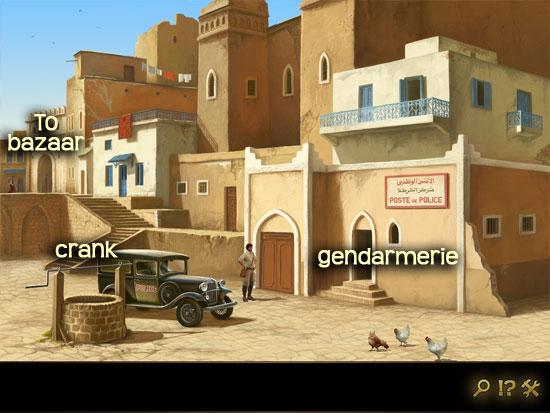
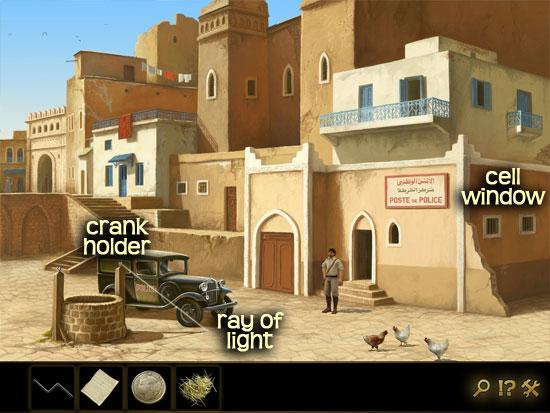
GENDARMERIE
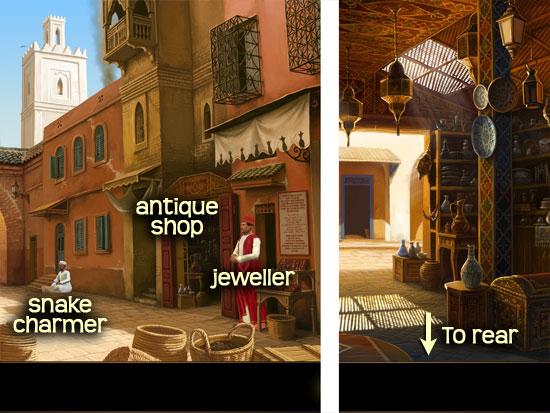
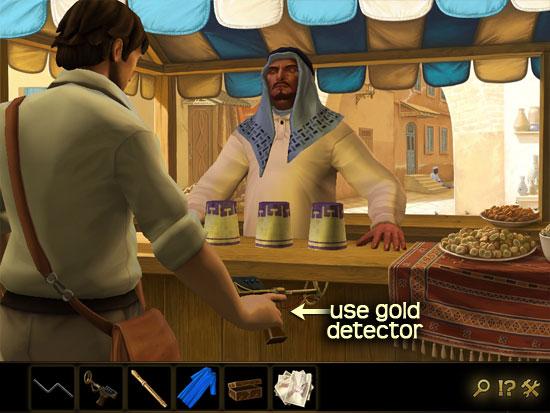
BAZAAR
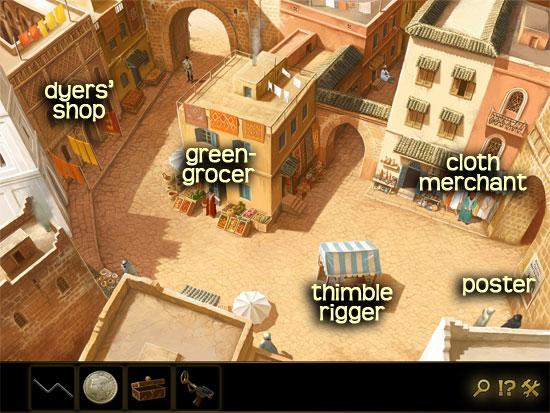
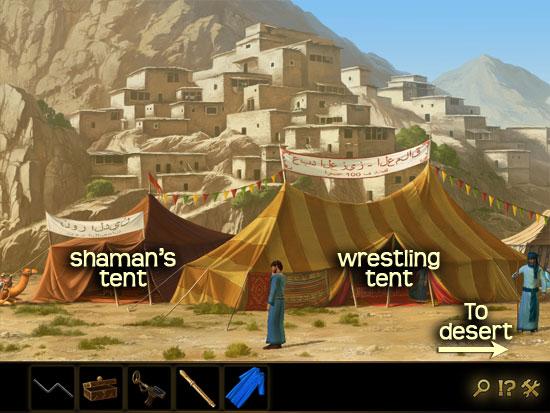
BERBER FESTIVAL
THIMBLERIGGER
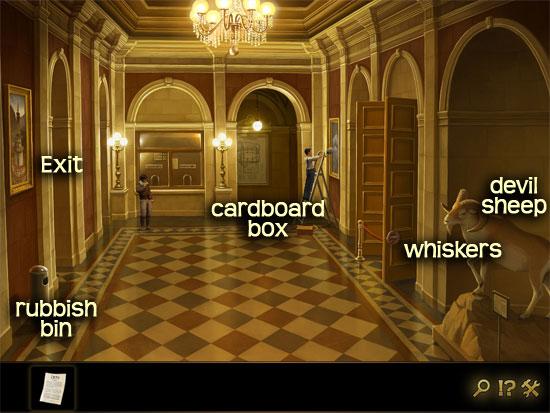
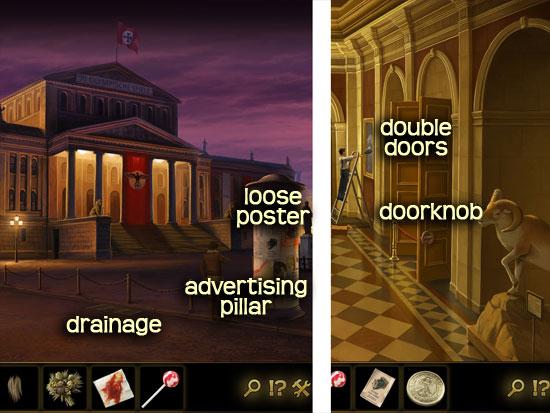
BERLIN, MUSEUM
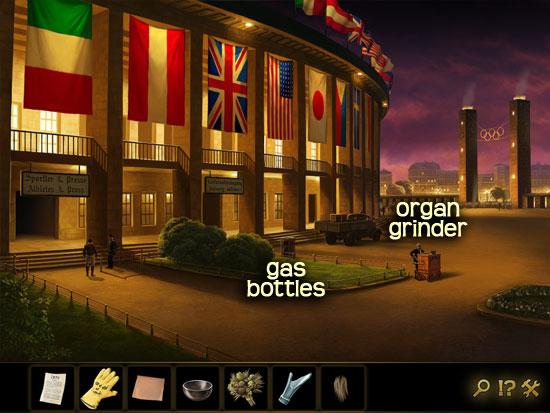
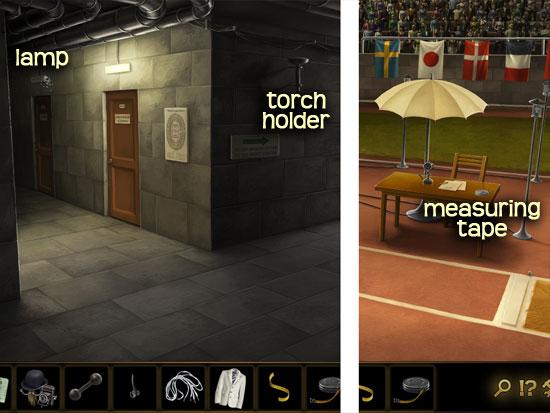
OLYMPIA STADIUM
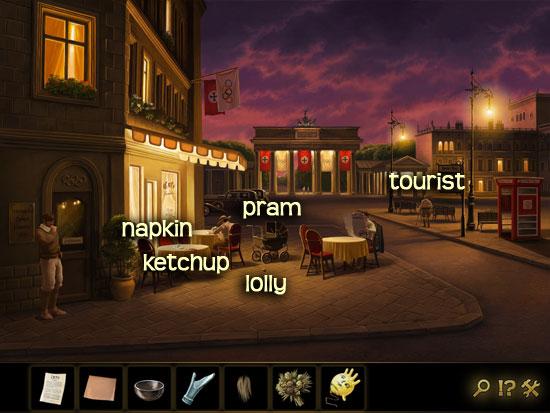
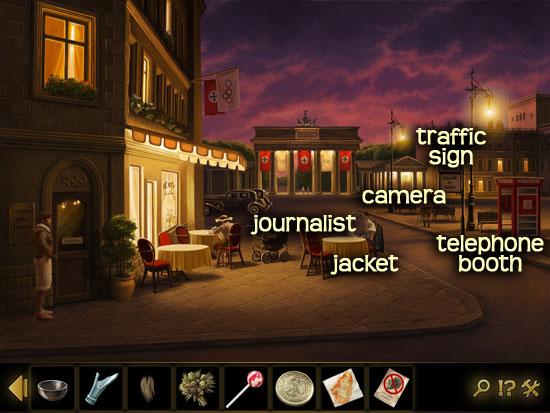
PARISER PLATZ
MUSEUM
PARISER PLATZ
OLYMPIA STADIUM
LOCKER ROOM
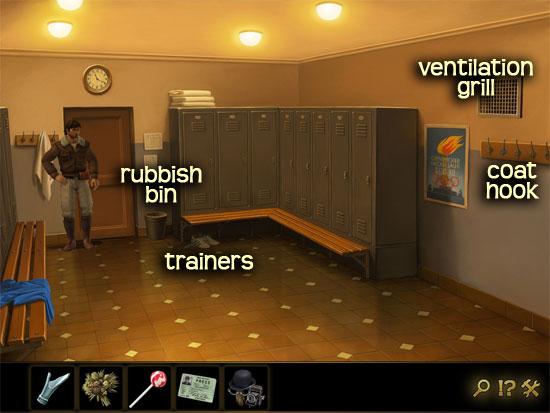
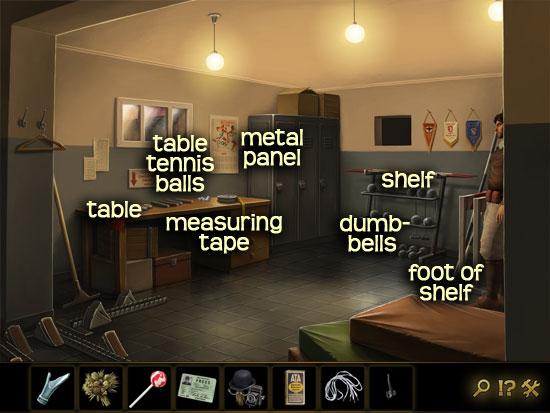
EQUIPMENT ROOM
LOCKER ROOM
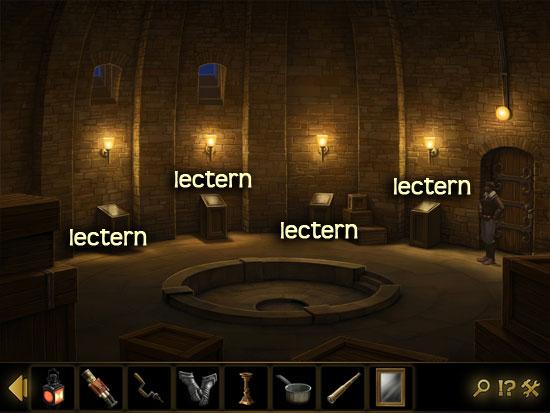
CATACOMBS & STADIUM
MUSEUM
LAB
MUSEUM
LAB
WEWELSBURG, TRAIN STATION

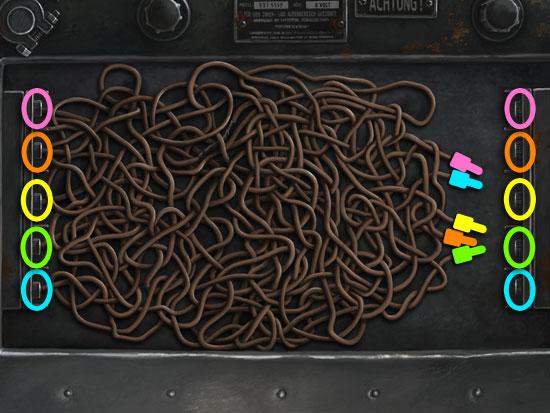
MINE MAZE
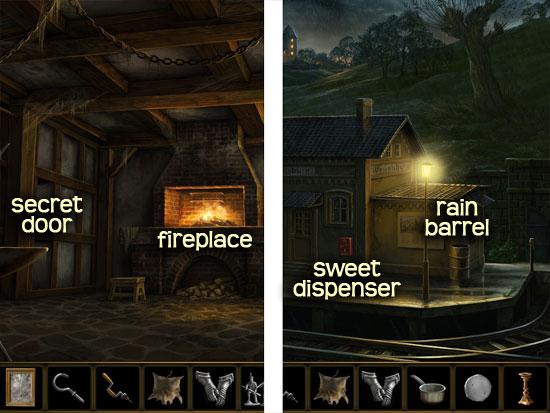
WORKSHOP
CORRIDOR
WORKSHOP
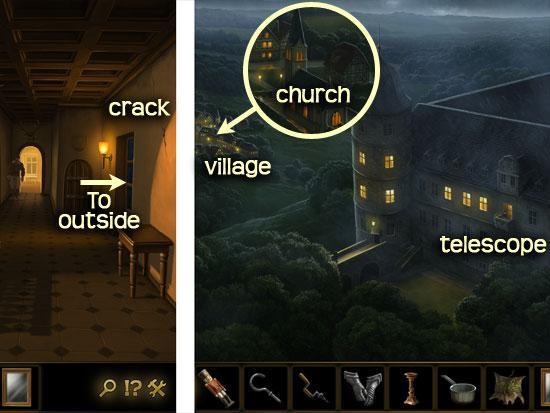
TRAIN STATION
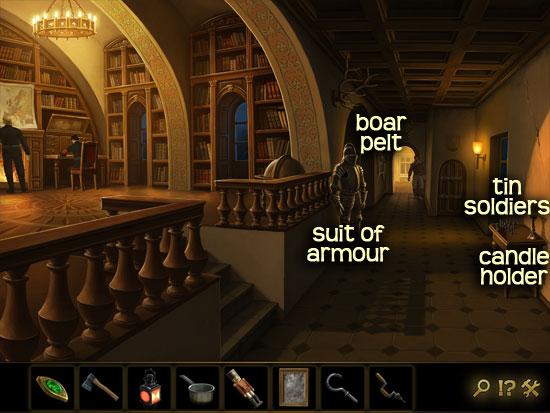
CORRIDOR & BALCONY
WORKSHOP & ROOF
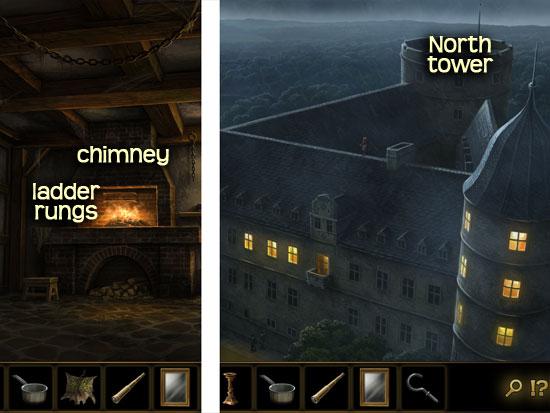
NORTH TOWER
CRYPT
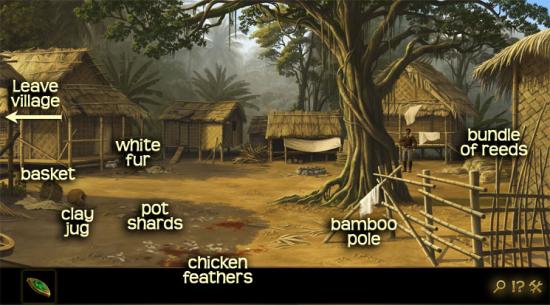
INDIA, VILLAGE
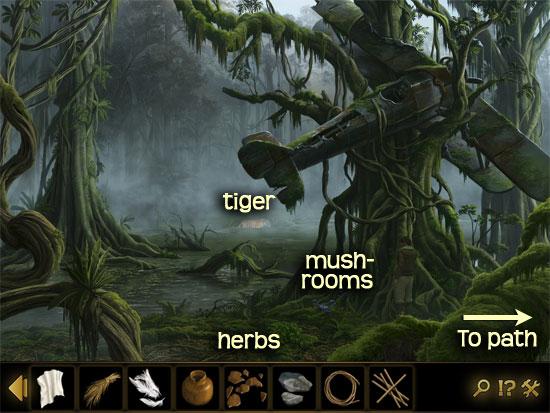
TIGER SWAMP
VILLAGE
SWAMP & VILLAGE
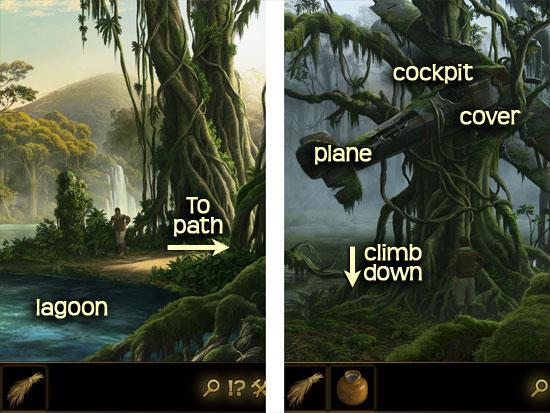
LAGOON
SWAMP
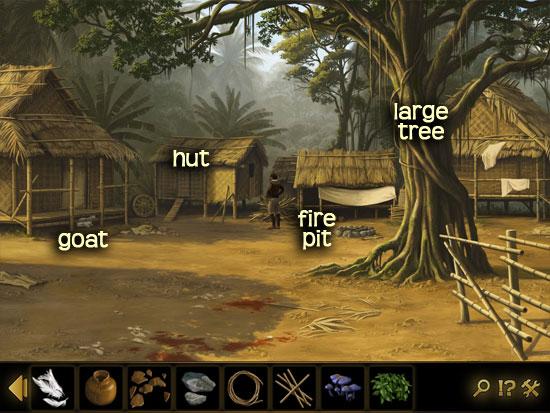
VILLAGE
LAGOON
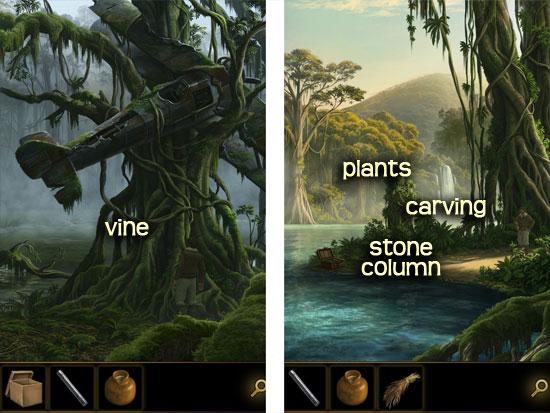
TEMPLE ENTRANCE
SWAMP
LAGOON
VILLAGE
TEMPLE ENTRANCE
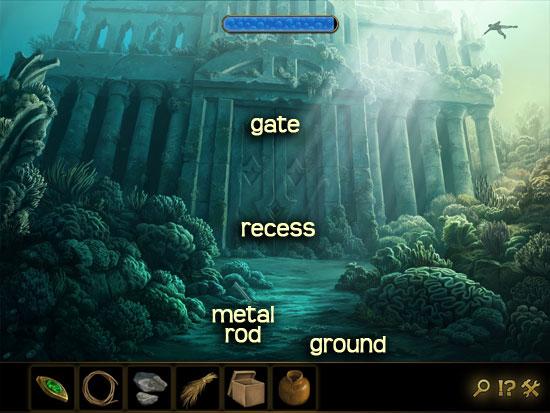
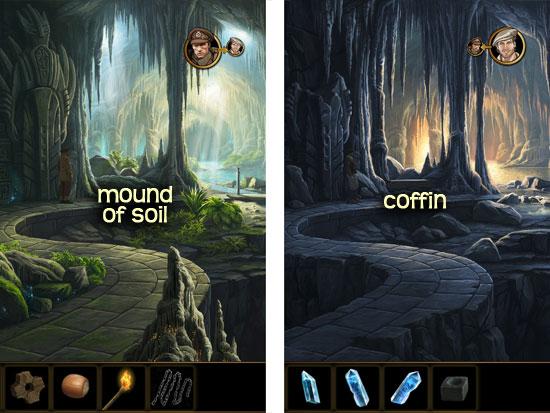
TEMPLE

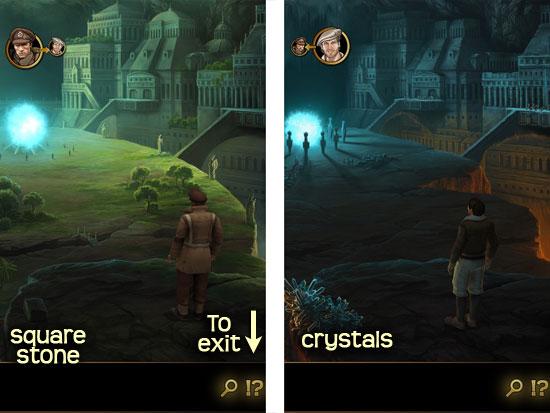
SHAMBALA
RIVER
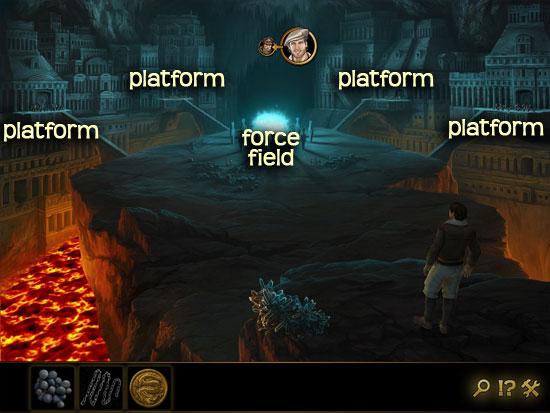
FORCEFIELD
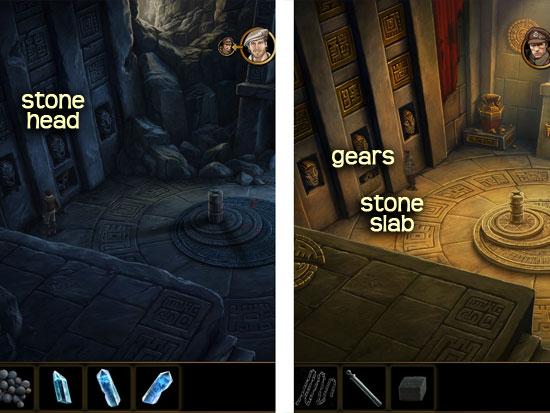
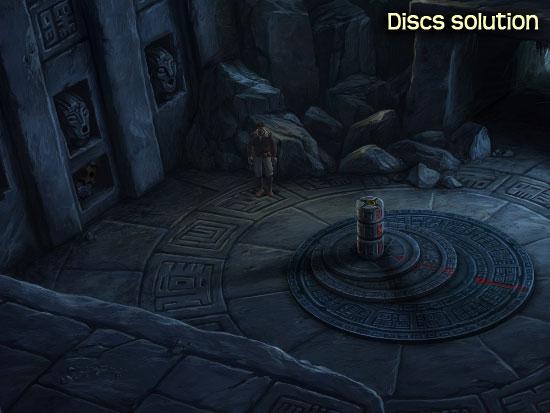
DISC ROOM
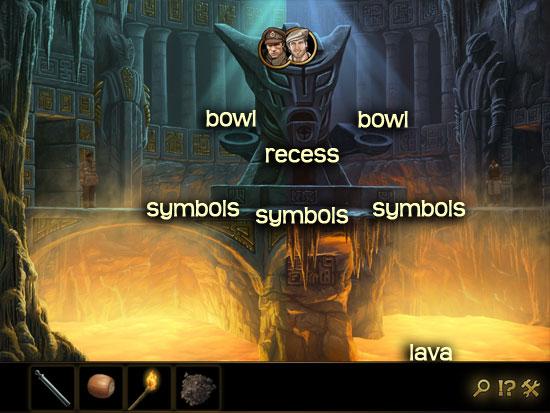
LAVA ROOM
STREAM
ICE ROOM
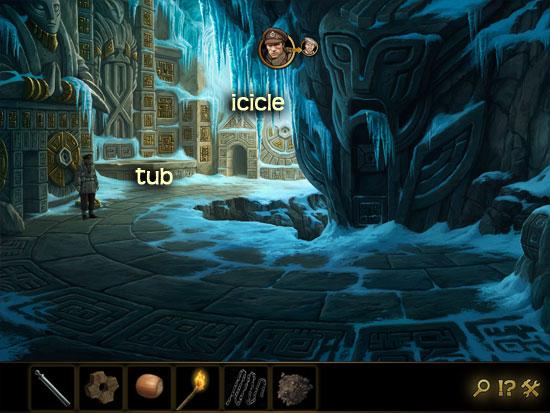
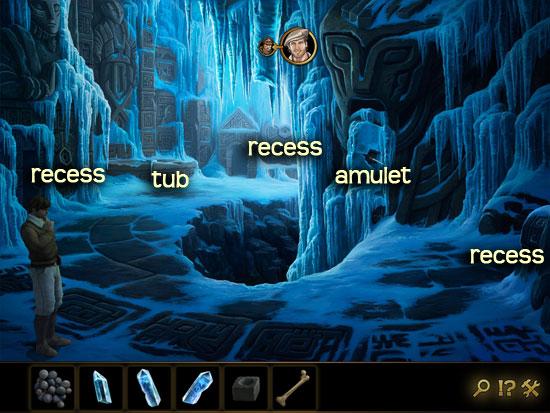
LAVA ROOM
DISC ROOM
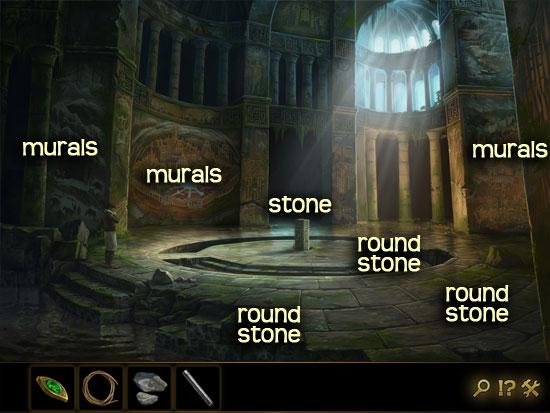
CENTRE OF SHAMBALA
THE END
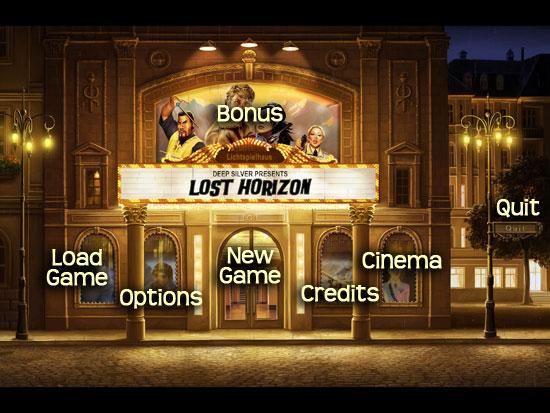
Congratulations! You have completed Lost Horizon. The Bonus features are now accessible from the main menu.
You’ll find the Bonus features area on the upper part of the building, above the theater doors and movie title. Here you’ll be able to:
Be sure to click on “set an alert” on the top of this page to be notified of any updates, reviews, posts, tips, and cheats for Lost Horizon.
Have tips of your own? Post them in the User Tips + Cheats section.
