- Wondering how to get Monopoly GO! free rolls? Well, you’ve come to the right place. In this guide, we provide you with a bunch of tips and tricks to get some free rolls for the hit new mobile game. We’ll …
Best Roblox Horror Games to Play Right Now – Updated Weekly
By Adele Wilson
Our Best Roblox Horror Games guide features the scariest and most creative experiences to play right now on the platform!The BEST Roblox Games of The Week – Games You Need To Play!
By Sho Roberts
Our feature shares our pick for the Best Roblox Games of the week! With our feature, we guarantee you'll find something new to play!All Grades in Type Soul – Each Race Explained
By Adele Wilson
Our All Grades in Type Soul guide lists every grade in the game for all races, including how to increase your grade quickly!
Little Shop – World Traveler Walkthrough
Welcome to Gamezebo's walkthrough for Little Shop: World Traveler. Little Shop: World Traveler is the latest installment in the Little Shop series. It's slightly different because it has now expanded to travel of the globe in search of hidden object treasures. You have been hired by a mysterious client and must complete your "Trips" to discover who the client is. GENERAL TIPS: There are a total of 16 Trips during which you will visit each of the 16 locations 5 time…
a:1:i:0;a:2:s:13:”section_title”;s:40:”Little Shop – World Traveler Walkthrough”;s:12:”section_body”;s:28119:”Welcome to Gamezebo’s walkthrough for Little Shop: World Traveler.
Little Shop: World Traveler is the latest installment in the Little Shop series. It’s slightly different because it has now expanded to travel of the globe in search of hidden object treasures. You have been hired by a mysterious client and must complete your "Trips" to discover who the client is.
GENERAL TIPS:
- There are a total of 16 Trips during which you will visit each of the 16 locations 5 times during your travels.
- This game should definitely satisfy any game player who says some games are too short because locations visited for each of the 16 trips range from 3 to 7 each making a total of 80 location scenes.
- Items to find are listed in 5 balloons at the bottom of the screen. When you find a particular item, its balloon will disappear and another balloon will pop up in its place if there are still more items to find.
- I won’t be showing the balloons or marking the items in my screen shots because the items to find are random each time you visit that location.
- Each location has an average of 75 possibilities for items to be shown but you are not required to find all of them.
- There are 15 objects available to be found in each scene but you only need to find 10 in order to move on, but the timer has to run out for that to happen. If you find all 15 objects, you earn a gold star which is a sort of a trophy.
- There is a timer in this game……each location counts down from 5 minutes. If you play in Window Mode, you can hold the top bar of the screen to give yourself extra time to look around before you grab an object or two.
- Also, if you play in Window Mode, you can "Pause" the game by clicking on the desktop.
- If your window isn’t large enough for you to see the game screen easily, you can always change your monitor resolution.
- If you quit in the middle of a location, you will have to start the location over and once again find all the objects.
- Obviously, I’m suggesting you might want to play in Window Mode for a number of reasons.
COLLECTIBLES:
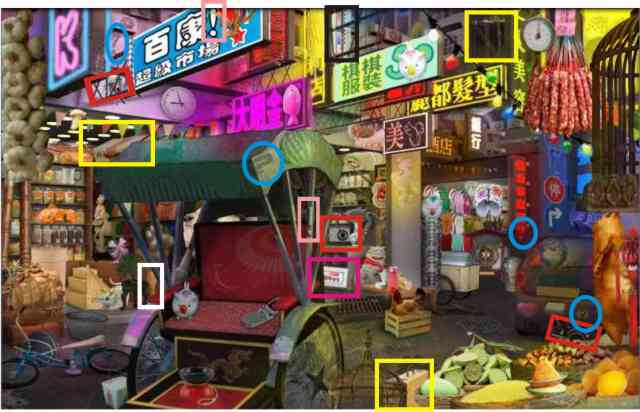
- Each location has 15 Collectibles to find: 2 Thermometers – 3 Cameras – 4 Picture Hints – 3 Suitcases – 1 Passport Stamp – 2 Location Hints.
- I tried to keep the color for each collectible pretty much the same but had to change a few because of the differences in coloring of the locations so check the colors listed at the locations.
- A word of caution: Use these help collectibles wisely because you will be returning to that location again and there will not be a new set for you to use. Once used, they are gone forever.
- Be sure to identify where they are so you don’t accidentally click on one without intending to do so.
- Keep in mind that these are temporary helps so you need to work quickly.
- If you find a "Thermometer" in a scene, the item balloons get flames as you get closer to the item or turn into icicles as you get farther away.
- In order to make optimum use of the Thermometers, I would suggest cruising around and seeing when all 5 items turn into some form of flame so that you can identify the area where the item is located after the help runs out.
- A "Camera" will get you a quick peek at the set of items you are currently looking for. If you play in Window Mode, you can hit the top bar of the game and freeze it long enough to memorize where the items are located so you can grab them quickly.
- You can earn more "Picture Hints" by finding the "Question Marks" hidden in each scene. These Hints only show you what the items look like…..not where they are located and again, the pictures do not last until you have found all of the items but you can hit the top screen bar in Window Mode to have a quick look around.
- Location-specific "Hints" are earned by finding the "Exclamation Marks" hidden in each location. If you find one, your cursor gets a cute location-specific helper which relates to your location. Again, you need to work as fast as possible because it doesn’t last forever. As you get close to an item, it will shake. I did find that after the helper left that sometimes the items were still quivering so considered that a kewl bonus.
- The stuffed suitcases don’t earn you extra points………you just get to have fun watching all the stuff fall out of them.
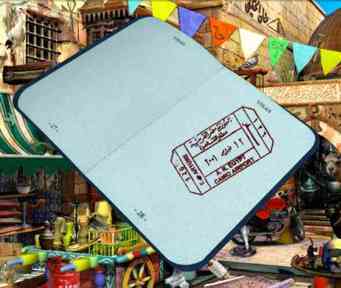
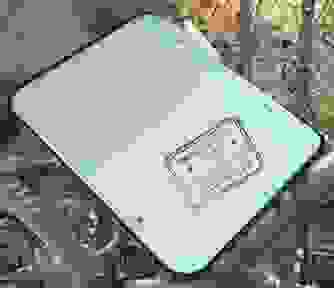
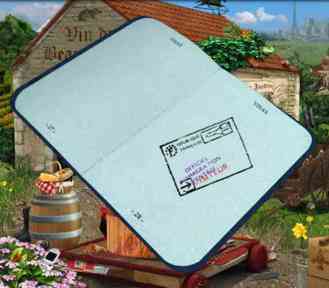
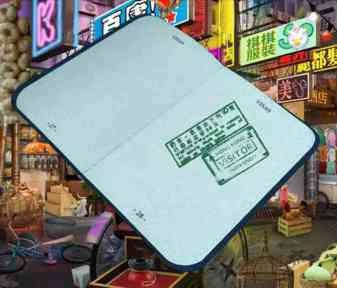
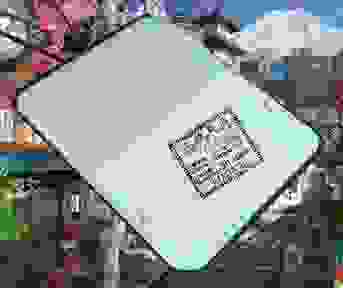
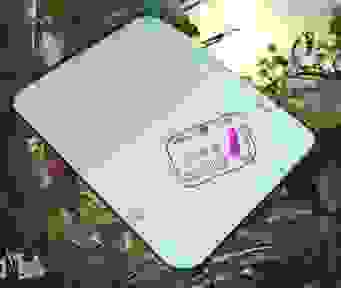
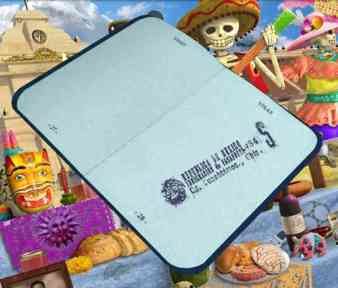
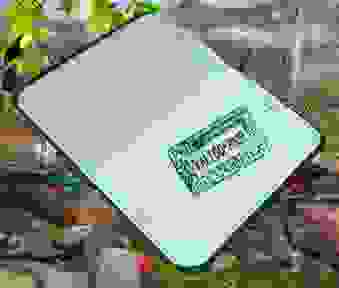
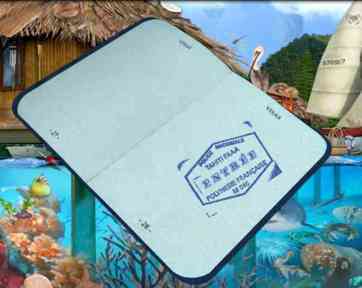
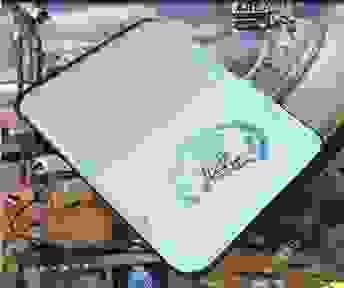
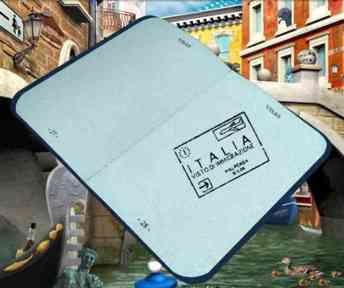
- The Passport Stamper allows you to see the passport stamp for that particular location. You can view them with their locations below.
TROPHIES:
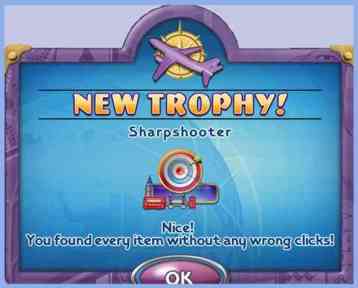
- Throughout the game you earn trophies for various things such as hoarding your hints and not using them or finding items within a short period of time.

SHAKE IT:
- At the end of each trip there is a "Shake It" round which you will need to play in order to move on to the next trip.
- There are 3 rounds within each Shake It round.
- Items to find are shown at the top of the screen and what you have found will be shown at the bottom of the screen.
- If you can’t find any more items, you can shake the container by clicking the "Shake Button" or you can hold your mouse at any edge of the container and move the container in any direction.
- The mouse method of shake is a lot more ballistic than clicking the button and sometimes gets better results.
- Some items have to be found in groups or added up to a specific value or in a certain order. I’ll let you know what is expected of you for a particular trip.
- The good news is that the "Shake It" round has no timer.
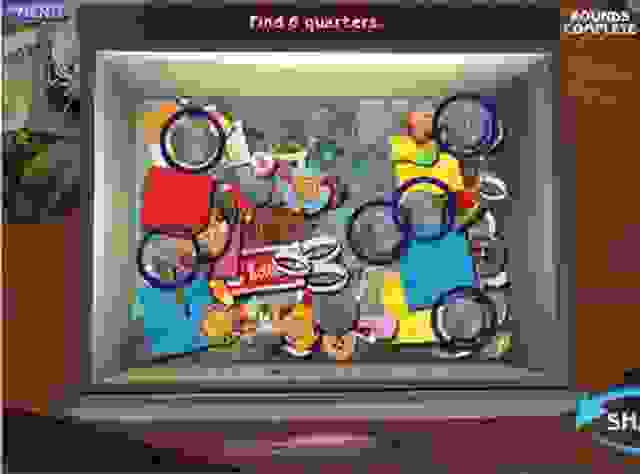
- Below is a sample which happens to show all of the items asked for in the "Shake It".
BLITZ MODE
- Blitz Mode is accessed from the Main Menu.
- When you finish a trip, you unlock a location in Blitz Mode.
- This is reversed timed to see how long it takes you to find all of the items.
- You can share your Blitz times online by selecting that option in "Settings" on the Main Menu.
- In Blitz Mode you get to find all the available items for that location so we are talking 73 to 79 items in the shortest amount of time.
- The good news is that if you chose to find all 15 items at each location during your Trips, you will have seen all of the objects for that location and will be ready to tackle Blitz Mode.
- The bad news is that I can’t give you a screen shot because there are so many items that the markings would overlap and you wouldn’t be able to see what you are looking for.
LOCATIONS:
I’ve listed the locations in alphabetical order to make them easier to find.
Antarctica
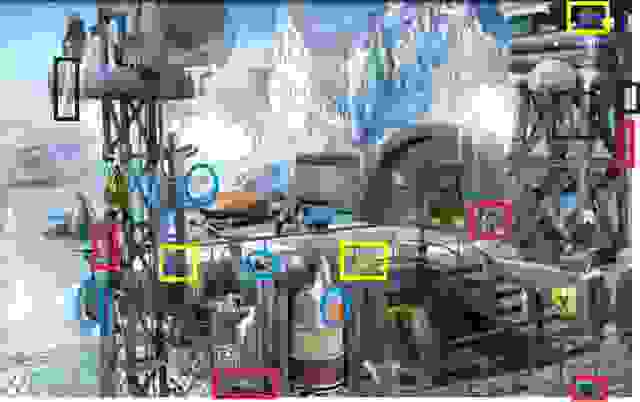
- Collectibles: 2 Thermometers – magenta; 3 Cameras – red; 4 Question Marks (Picture Hints) – turquoise circles; 3 Suitcases – yellow; 1 Passport Stamp – dark blue; 2 Exclamation Points (Proximity Location Hints) – black
- Tragedy or Comedy means either of the drama masks which can be found inside the right tower.
Passport Stamp
Australia
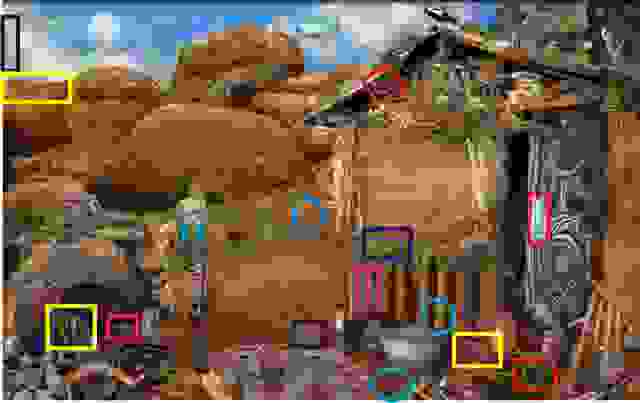
- Collectibles: 2 Thermometers – black; 3 Cameras – red; 4 Question Marks (Picture Hints) – turquoise circles; 3 Suitcases – yellow; 1 Passport Stamp – dark blue; 2 Exclamation Points (Proximity Location Hints) – magenta
- Trough refers to the round metal container near the lower edge of the scene between the two question marks.
- The Tasmanian Devil is not the little guy we know from cartoons……he is just behind the camera and suitcase in enclosure in the lower left of the screen.
- A Dingo is a wild dog mostly found in Australia……..you can find him on the rocks to the far left of the scene above the truck.
- Be sure to check the rocks for etched items if you can’t find something.
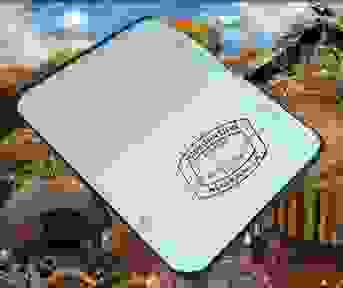
Passport Stamp
Brazil
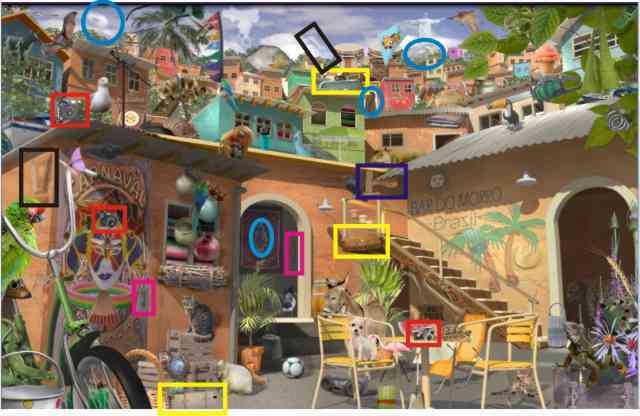
- Collectibles: 2 Thermometers – magenta; 3 Cameras – red; 4 Question Marks (Picture Hints) – turquoise circles; 3 Suitcases – yellow; 1 Passport Stamp – dark blue; 2 Exclamation Points (Proximity Location Hints) – black
- A Capybara is the large rodent at the bottom of the screen to the left of the soccer ball.
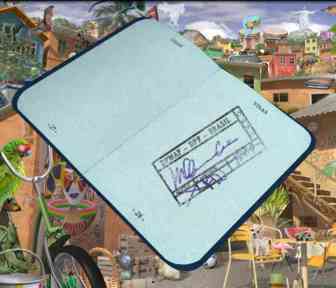
Passport Stamp
Egypt
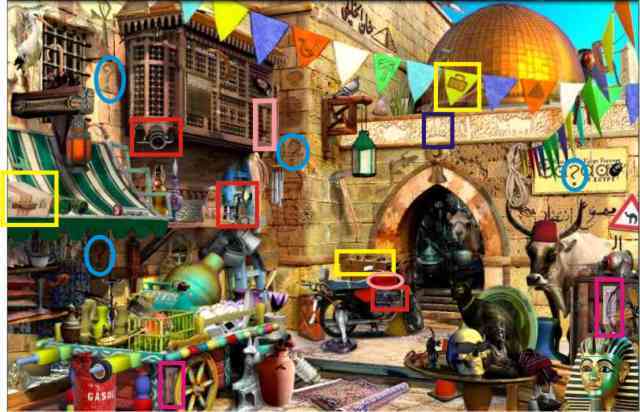
- Collectibles: 2 Thermometers – magenta; 3 Cameras – red; 4 Question Marks (Picture Hints) – turquoise circles; 3 Suitcases – yellow; 1 Passport Stamp – dark blue; 2 Exclamation Points (Proximity Location Hints) – pink
- Spade is the hand trowel located in the cart just to the left of the water lily.
Passport Stamp
England:
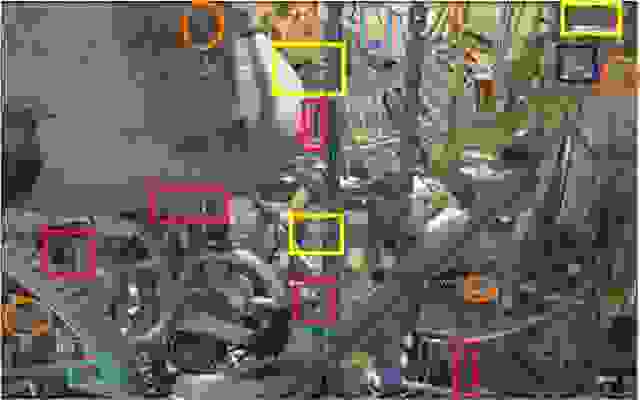
- Collectibles: 2 Thermometers – magenta; 3 Cameras – red; 4 Question Marks (Picture Hints) – orange circles; 3 Suitcases – yellow; 1 Passport Stamp – dark blue; 2 Exclamation Points (Proximity Location Hints) – light blue
- Look carefully at the bell for items.
Passport Stamp
France
- Collectibles: 2 Thermometers – black; 3 Cameras – red; 4 Question Marks (Picture Hints) – turquoise circles; 3 Suitcases – yellow; 1 Passport Stamp – dark blue; 2 Exclamation Points (Proximity Location Hints) – pink
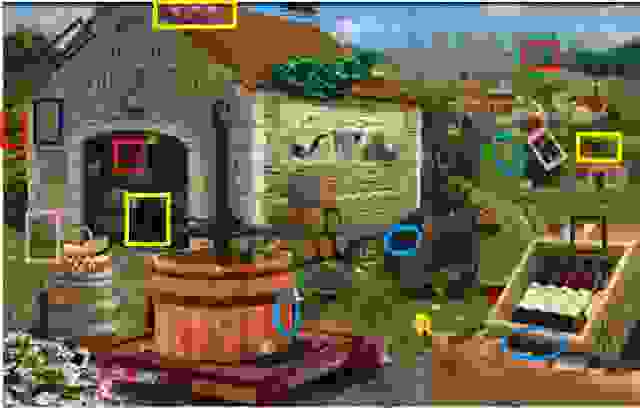
Passport Stamp
Hong Kong
- Collectibles: 2 Thermometers – magenta; 3 Cameras – red; 4 Question Marks (Picture Hints) – turquoise circles; 3 Suitcases – yellow; 1 Passport Stamp – white; 2 Exclamation Points (Proximity Location Hints) – pink
- Take-out refers to the Chinese take-out container to the left of the rickshaw.
- Nunchuk is a Chinese weapon consisting of two sticks and is at the far left middle of the scene below the garlic.
- A Chinese Finger Trap is a toy made out of bamboo that traps your fingers in it if you put one in each end and pull. It is located at the far left edge of the blue sign, just above a camera.
Passport Stamp
Japan
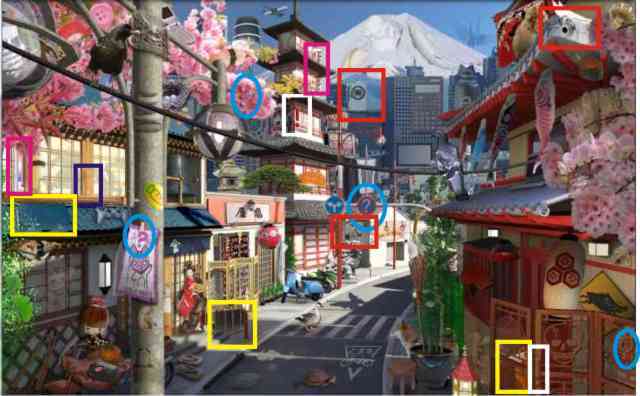
- Collectibles: 2 Thermometers – black; 3 Cameras – red; 4 Question Marks (Picture Hints) – turquoise circles; 3 Suitcases – yellow; 1 Passport Stamp – dark blue; 2 Exclamation Points (Proximity Location Hints) – white
- The Nunchuk as described at the Hong Kong location is at far left lower part of scene.
- A Katana is a sword and along the curb by the suitcase.
Passport Stamp
Madagascar
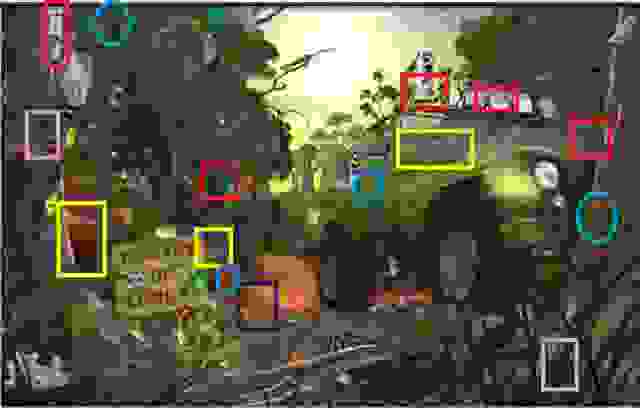
- Collectibles: 2 Thermometers – magenta; 3 Cameras – red; 4 Question Marks (Picture Hints) – turquoise circles; 3 Suitcases – yellow; 1 Passport Stamp – dark blue; 2 Exclamation Points (Proximity Location Hints) – pink
- A Carabiner is the metallic item on the jeep bumper.
- A Hissing Roach is apparently indigenous to Madagascar and grows to 2-3" in size. It’s up on the limb of the right tree.
Passport Stamp
Mexico
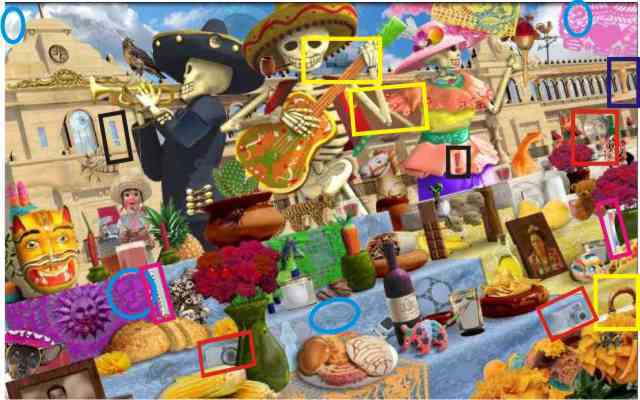
- Collectibles: 2 Thermometers – magenta ; 3 Cameras – red; 4 Question Marks (Picture Hints) – turquoise circles; 3 Suitcases – yellow; 1 Passport Stamp – dark blue; 2 Exclamation Points (Proximity Location Hints) – black
- Frida Kahlo was a Mexican painter and is the picture at the right above the camera by the candy skull.
- All of the peppers are skinny hot peppers.
Passport Stamp
Morocco
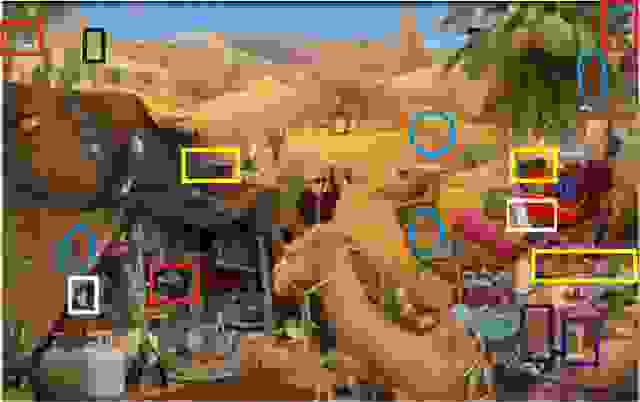
- Collectibles: 2 Thermometers – white; 3 Cameras – red; 4 Question Marks (Picture Hints) – turquoise circles; 3 Suitcases – yellow; 1 Passport Stamp – dark blue; 2 Exclamation Points (Proximity Location Hints) – black
- A Fennec Fox is a small nocturnal fox found in the Sahara Desert – you will find him here curled up between the two camels necks in the lower part of the scene.
Passport Stamp
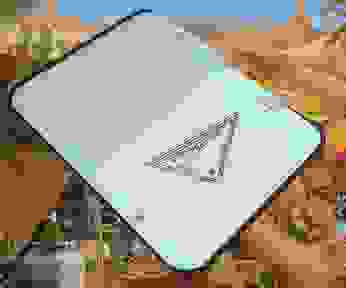
Peru
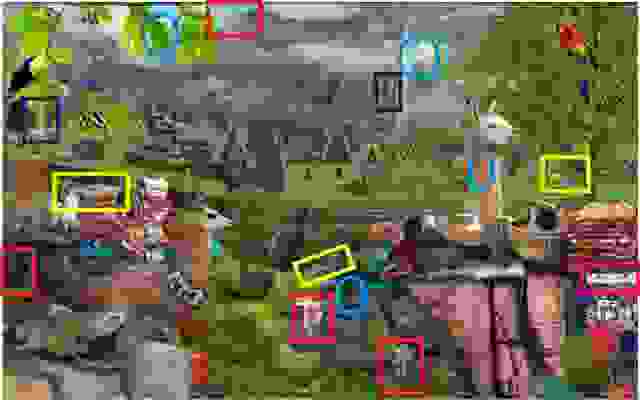
- Collectibles: 2 Thermometers – magenta; 3 Cameras – red; 4 Question Marks (Picture Hints) – turquoise circles; 3 Suitcases – yellow; 1 Passport Stamp – dark blue; 2 Exclamation Points (Proximity Location Hints) – black
- A Caiman is a species of Alligator found in South America – yours can be found wrapped around the mountain in the background.
Passport Stamp
Tahiti:
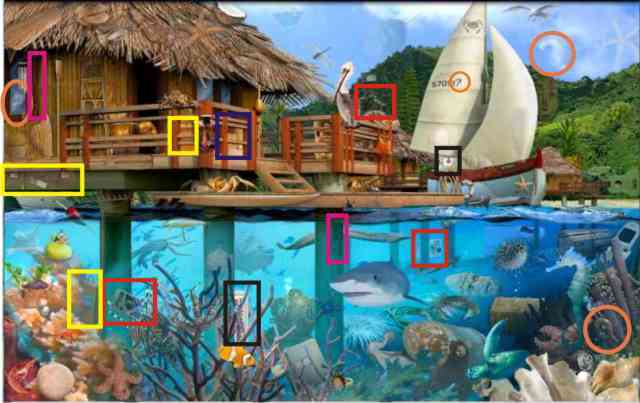
- Collectibles: 2 Thermometers – black; 3 Cameras – red; 4 Question Marks (Picture Hints) – orange circles; 3 Suitcases – yellow; 1 Passport Stamp – dark blue; 2 Exclamation Points (Proximity Location Hints) – magenta
Passport Stamp
Tibet
- Collectibles: 2 Thermometers – black; 3 Cameras – red; 4 Question Marks (Picture Hints) – turquoise circles; 3 Suitcases – yellow; 1 Passport Stamp – dark blue; 2 Exclamation Points (Proximity Location Hints) – magenta
Passport Stamp
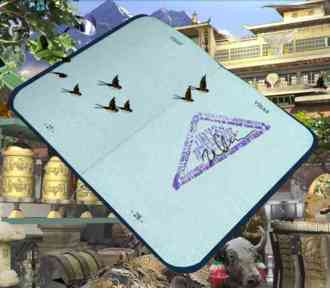
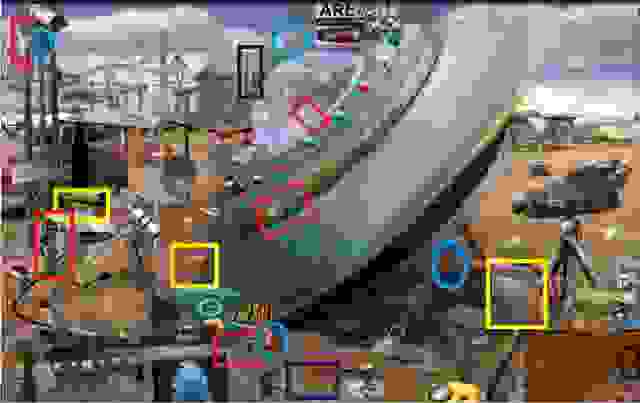
USA
- Collectibles: 2 Thermometers – magenta; 3 Cameras – red; 4 Question Marks (Picture Hints) – turquoise circles; 3 Suitcases – yellow; 1 Passport Stamp – dark blue; 2 Exclamation Points (Proximity Location Hints) – black
Passport Stamp
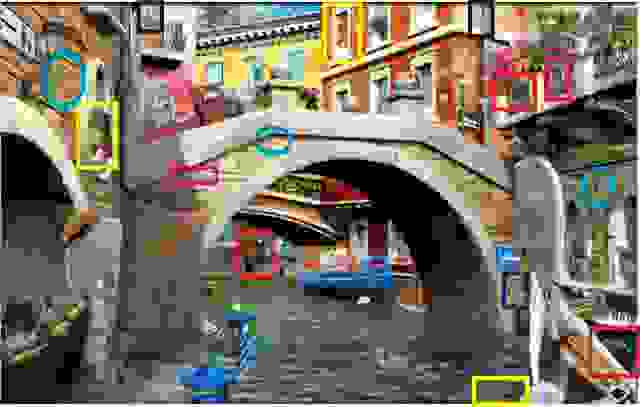
Venice
- Collectibles: 2 Thermometers – black; 3 Cameras – red; 4 Question Marks (Picture Hints) – turquoise circles; 3 Suitcases – yellow; 1 Passport Stamp – dark blue; 2 Exclamation Points (Proximity Location Hints) – magenta
- Ruler refers to a statue of someone who ruled such as Julius Caesar. Also, da Vinci is the statue to the far left on the bridge and not one of his paintings.
- There is a difference between a gold fish and a golden fish. The Gold Fish is on the wall of the orange building above the bridge. The Golden Fish is on the gondola on the left.
Passport Stamp
TRIPS:
The locations are listed below for each of the 16 trips you will take.
- You don’t have to play the locations in the order they are presented. You have the option of clicking on a different location to play them in whatever order you prefer.
- You can go back and play any trip again once you’ve completed it.
Trip 1: Tahiti – England – Madagascar
Shake It rounds ask for the following:
- 6 rings
- 7 pieces of candy
- 8 yellow buttons
Trip 2: Japan – England – Tahiti
Shake It rounds ask for the following:
- 4 pairs of items that add up to 10
- 4 items whose total value is less than 20
- 3 items whose total value is 21
- You can mix match the items such as playing cards, dice, stamps, etc.
Trip 3: Venice – Madagascar – Japan
Shake It rounds ask for the following:
- 6 dice consecutively from 1 to 6
- 5 coins from least valuable to most valuable
- 3 coupons starting with the largest discount down to the smallest
Trip 4: France – England – Tahiti – Venice
Shake It rounds ask for the following:
- 3 matching pairs of playing cards
- 6 fast food packets of the same type (ketchup, mustard, or relish)
- 5 candy hearts with the same message such as kiss, hug, 1?U
Trip 5: Madagascar – France – Brazil – USA
Shake It rounds give the following hints for different items to find:
- "Cork Screw" (a cork + a screw)
- "S’More" (chocolate + marshmallow + graham cracker)
- "Cherry Pick" (there is a bottle cap with cherries + a toothpick)
Trip 6: Mexico – Japan – Brazil – Venice
Shake It rounds ask for the following:
- 12 poker chips that aren’t blue
- 10 soda caps that aren’t red
- 9 coins that aren’t silver colored
Trip 7: Australia – USA – Hong Kong – Tahiti – France
Shake It rounds ask for the following:
- 5 batteries
- 6 dollar bills
- 4 dice that show a 3 on the top
Trip 8: England – Mexico – Madagascar – Egypt – Brazil
Shake It rounds ask for the following:
- 3 pairs of items that add up to 12 (playing cards, coins, poker chips, etc.)
- 2 groups of 3 items that add up to 25 (coins, cards, coupons, etc.)
- 5 coins that add up to 50 cents
Trip 9: Hong Kong – Venice – Morocco – Tahiti – Peru
Shake It rounds ask for the following:
- 4 buttons or keys with the fewest holes consecutively to the most holes
- 5 playing cards numbering from the highest to the lowest
- 8 poker chips from the lowest value consecutively to the highest value
Trip 10: Egypt – France – USA – Australia – Antarctica
Shake It rounds ask for the following:
- 3 matching pairs of poker chips
- 5 matching pairs of buttons
- 4 pairs of matching credit cards
Trip 11: Tibet – Brazil – England – Peru – Japan – Mexico
Shake It rounds give the following hints for different items to find:
- "Cotton Candy" (cotton ball + piece of candy)
- "Key Card" (a key + a card of some sort like a credit card)
- "Boat House" (a picture of a boat + a little wooden house)
Trip 12: Madagascar – Egypt – Morocco – Hong Kong – Tibet – Antarctica
Shake It rounds ask for the following:
- 14 fast food packets that aren’t relish (ketchup and mustard work)
- 16 buttons that don’t have 4 holes (that sort of leaves 2 holes)
- 21 pushpins that aren’t yellow
Trip 13: Australia – France – Peru – Morocco – USA – Venice
Shake It rounds ask for the following:
- 5 silver colored screws
- 6 diamond rings
- 6 quarters
Trip 14: Egypt – Tibet – Peru – Hong Kong – Japan – Mexico – Antarctica
Shake It rounds ask for the following:
- 3 pairs of matching stamps
- 4 pairs of matching coupons
- 5 pairs of matching keys
Trip 15: Egypt – Brazil – Morocco – USA – Australia – Antarctica – Tibet
Shake It rounds ask for the following:
- 21 candy hearts that don’t say "Kiss" – Don’t forget to include the larger red hearts.
- 14 playing cards that aren’t clubs
- 12 toothpicks that do not have blue cellophane on one end
Trip 16: Morocco – Hong Kong – Australia – Antarctica – Mexico – Tibet – Peru

- You have completed all your trips so you can now check out "Blitz" if you wish to continue the journey.
BLITZ MODE ROUNDS:
- Looks as if there will be 1,187 items to find for all of Blitz rounds.
- The number of items you will need to find for each location in Blitz is listed below.
- Good luck and remember that if you are really good at it, you can post your time online.
“;
More articles...
Monopoly GO! Free Rolls – Links For Free Dice
By Glen Fox
Wondering how to get Monopoly GO! free rolls? Well, you’ve come to the right place. In this guide, we provide you with a bunch of tips and tricks to get some free rolls for the hit new mobile game. We’ll …Best Roblox Horror Games to Play Right Now – Updated Weekly
By Adele Wilson
Our Best Roblox Horror Games guide features the scariest and most creative experiences to play right now on the platform!The BEST Roblox Games of The Week – Games You Need To Play!
By Sho Roberts
Our feature shares our pick for the Best Roblox Games of the week! With our feature, we guarantee you'll find something new to play!All Grades in Type Soul – Each Race Explained
By Adele Wilson
Our All Grades in Type Soul guide lists every grade in the game for all races, including how to increase your grade quickly!


