![Hololive Dreams Tier List [Best Cards]](/wp-content/uploads/2026/07/hololive-dreams-tier-list.jpg "Hololive Dreams Tier List [Best Cards]")
Hololive Dreams Tier List [Best Cards]
The best cards for the best performances.


![Iron Soul Dungeon Weapon Tier List [Best Weapons]](/wp-content/uploads/2026/07/iron-soul-dungeon-weapon-tier-list.jpg "Iron Soul Dungeon Weapon Tier List [Best Weapons]")

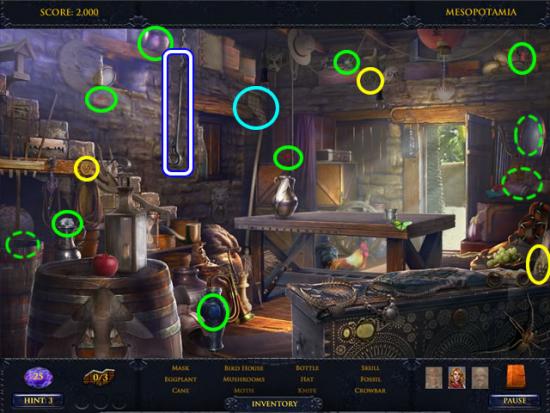
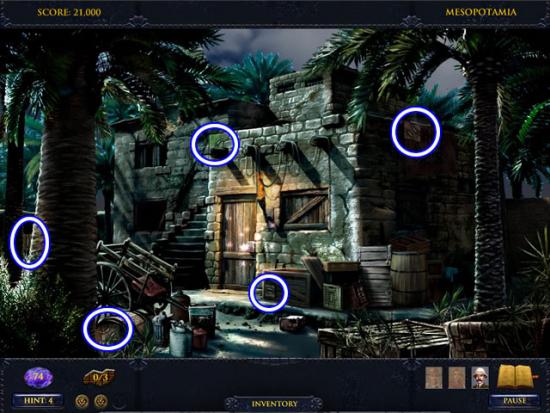
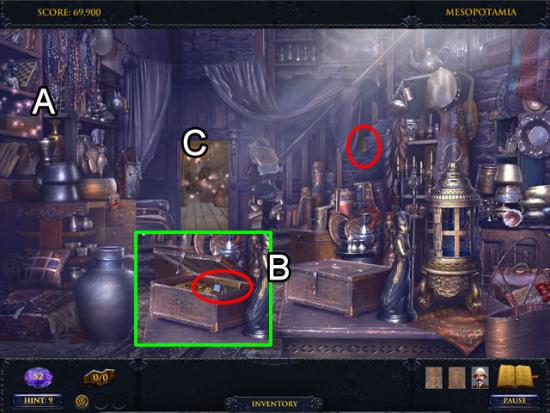
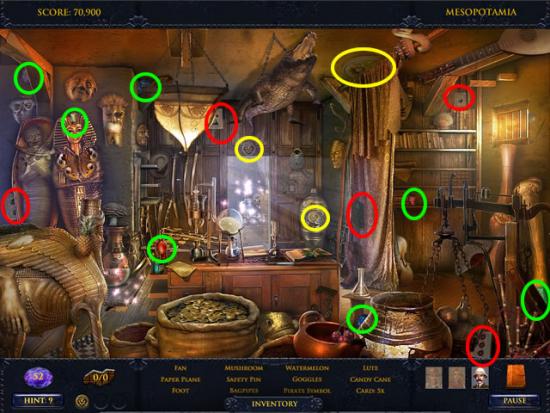
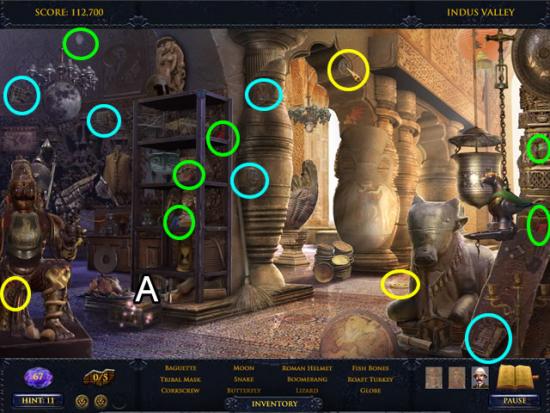
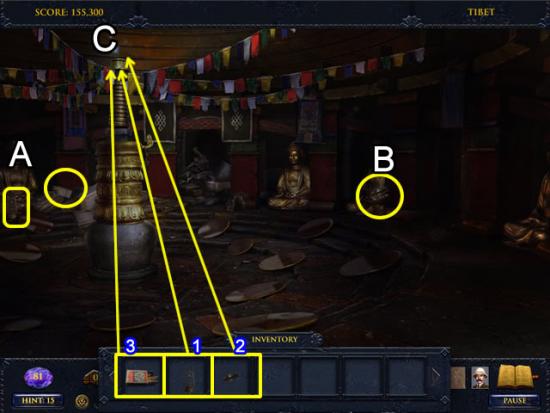
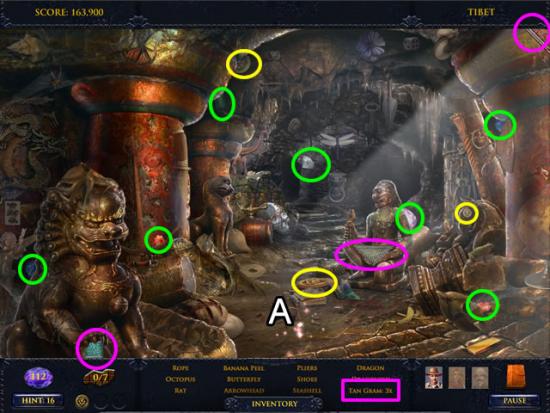
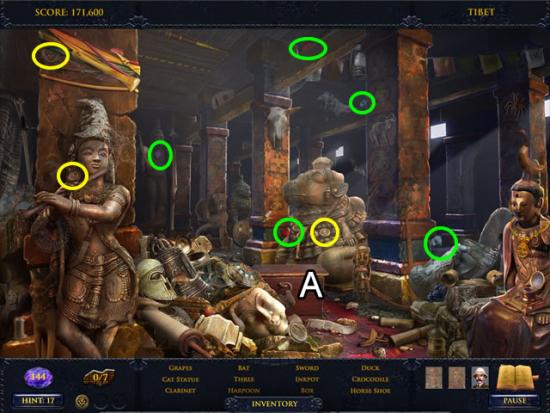
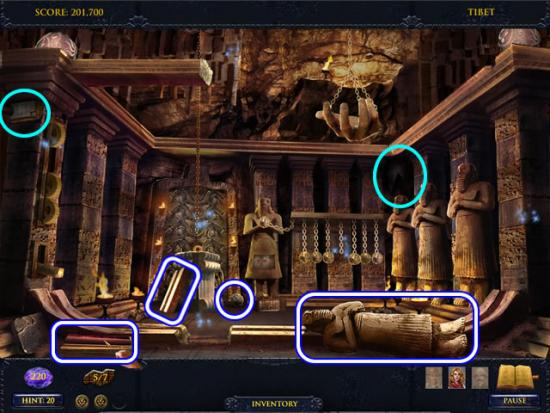
Welcome to the Jewel Quest Mysteries: The Oracle of Ur walkthrough on Gamezebo. Jewel Quest Mysteries: The Oracle of Ur is a Hidden Object/Match-3 game played on the PC created by iWin Games. This walkthrough includes tips and tricks, helpful hints and a strategy guide on how to complete Jewel Quest Mysteries: The Oracle of Ur.
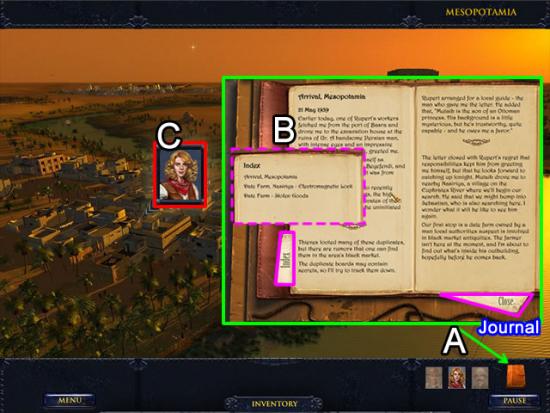
Welcome to the Jewel Quest Mysteries: The Oracle of Ur walkthrough on Gamezebo. Jewel Quest Mysteries: The Oracle of Ur is a Hidden Object/Match-3 game played on the PC created by iWin Games. This walkthrough includes tips and tricks, helpful hints and a strategy guide on how to complete Jewel Quest Mysteries: The Oracle of Ur.
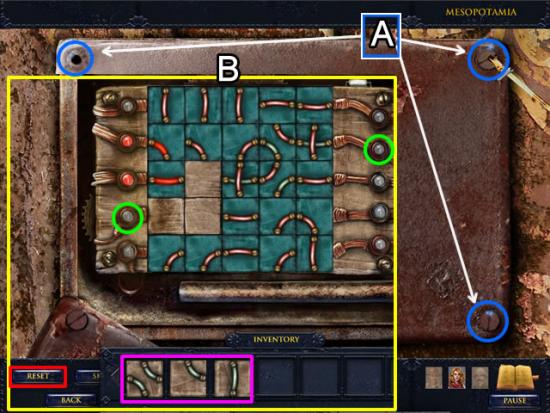
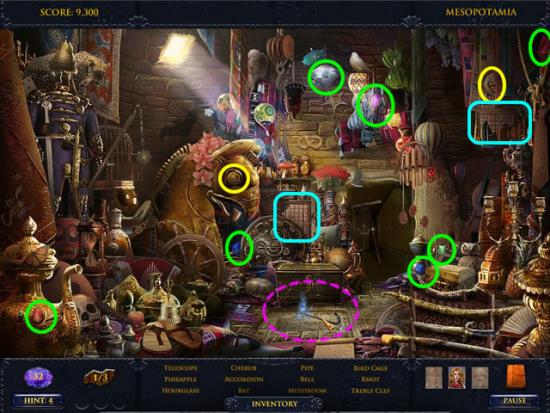
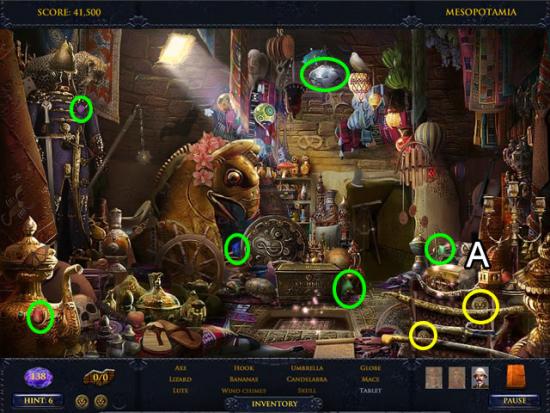
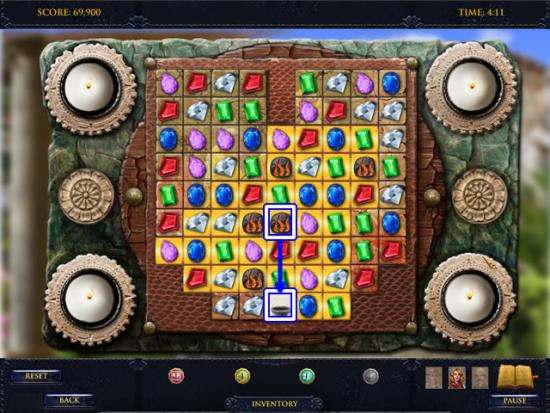
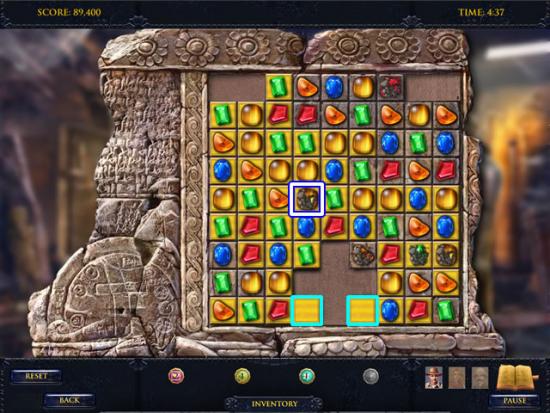
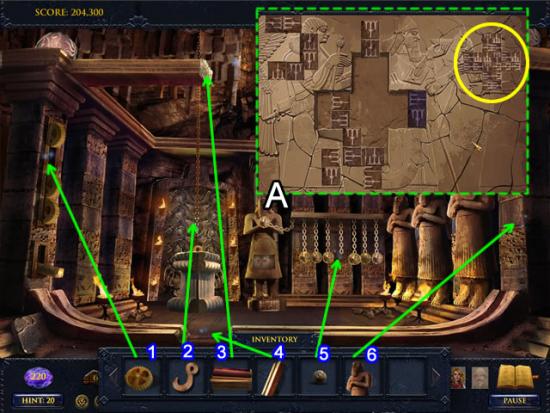
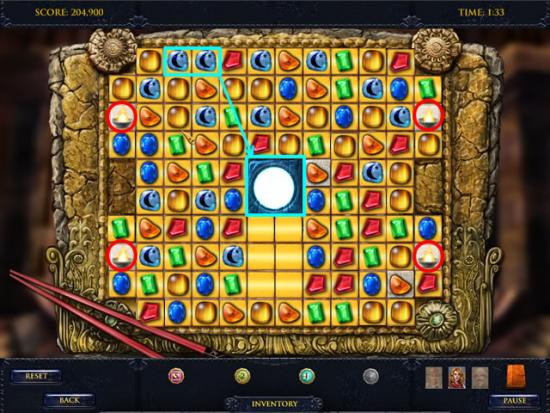
This game requires visiting several locations collecting different types of objects and completing a match-3 board to advance play.

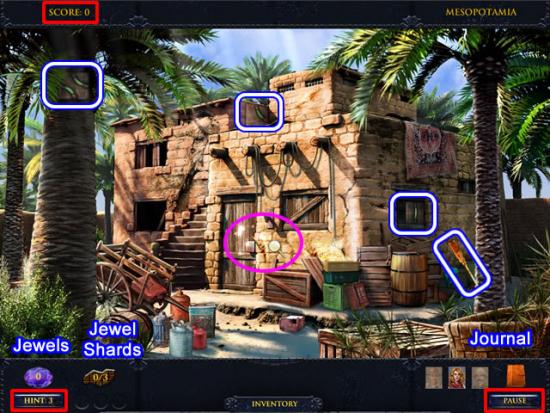
Date Farm
Outbuilding
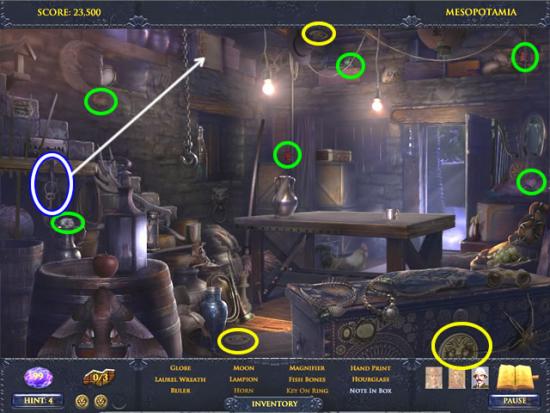
Mercantile Shop

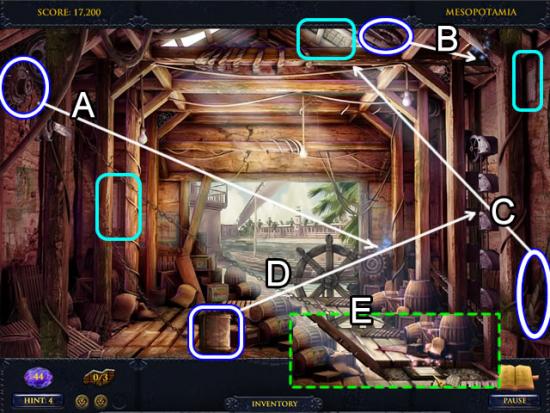
Warehouse
Date Farm
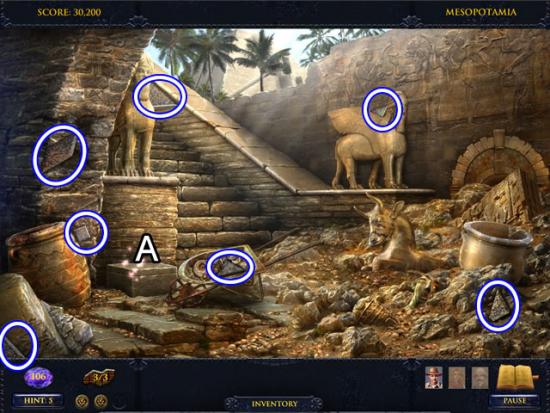
Ur Dig Site
National Museum – Lobby

National Museum – Backroom
Mercantile Shop
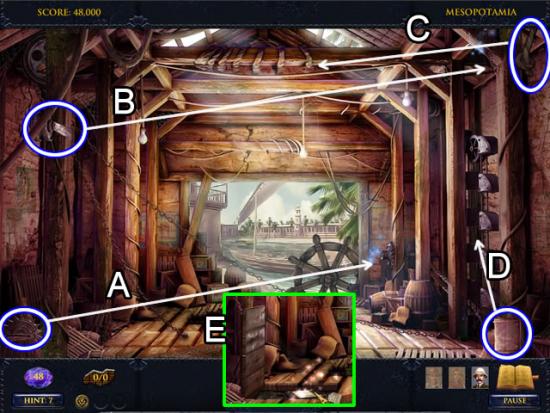
Warehouse
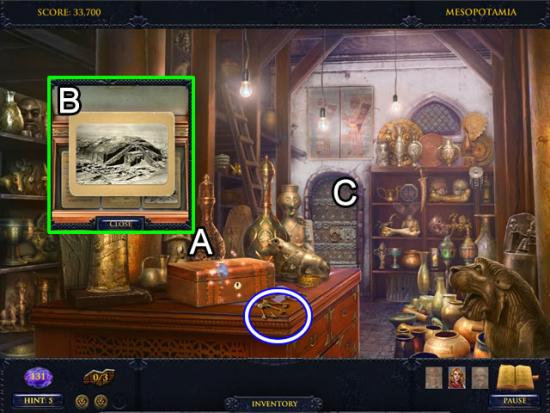
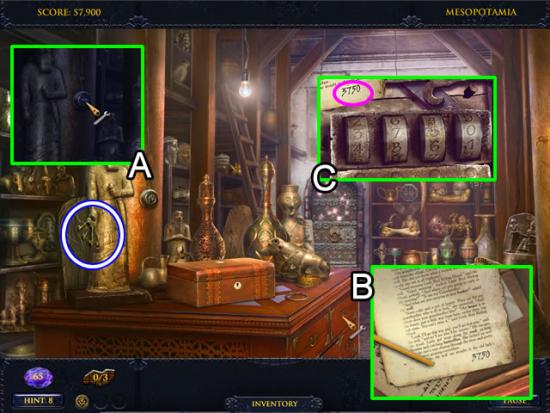
Curio Shop
Curio Shop – Hidden Room
National Museum Lobby
National Museum – Backroom
Ottoman Castle
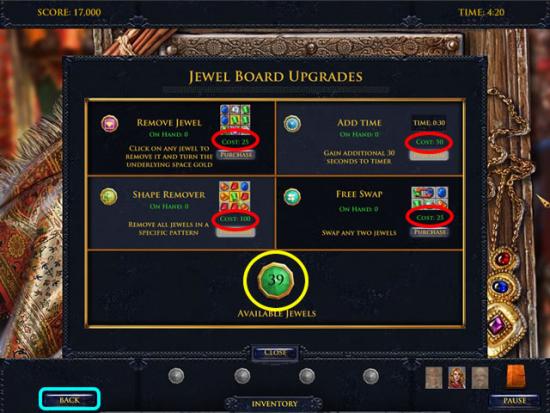
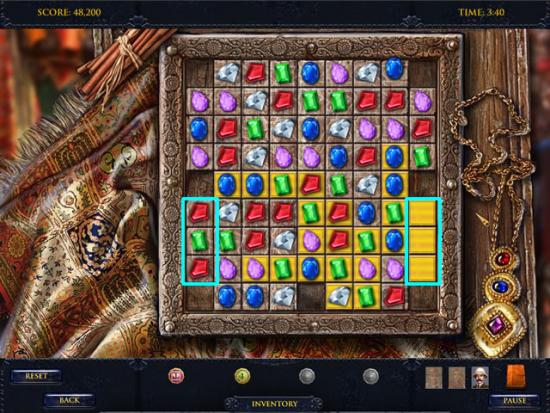
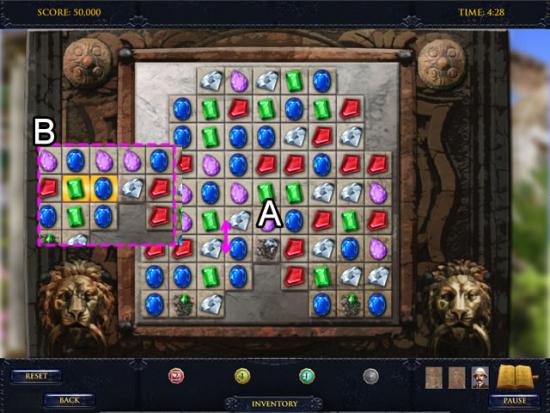
Fire Jewels
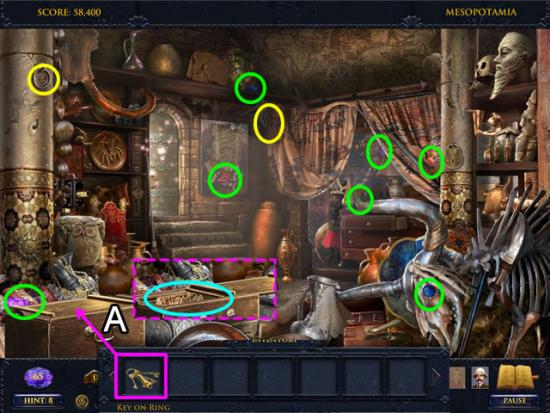
Curio Shop
Curio Shop – Hidden Room
Curio Shop
Ottoman Castle

Ur Dig Site
Underground Chamber
Sandstorm
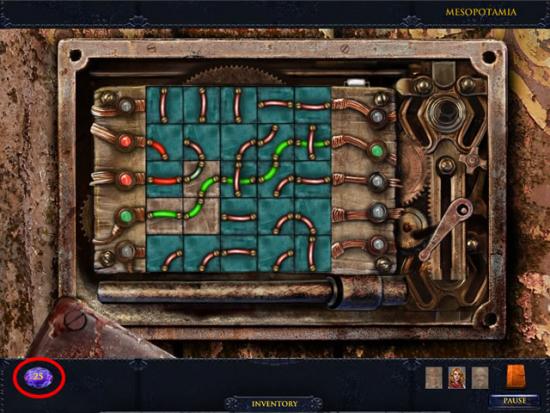
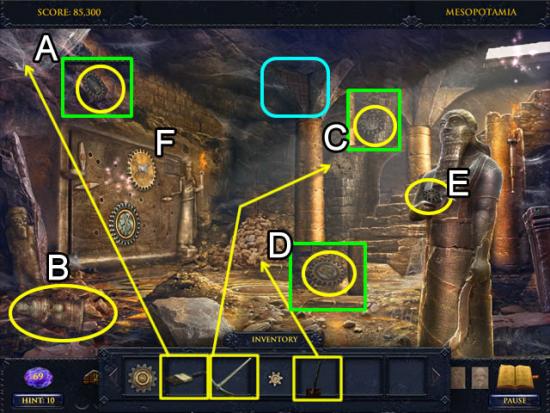
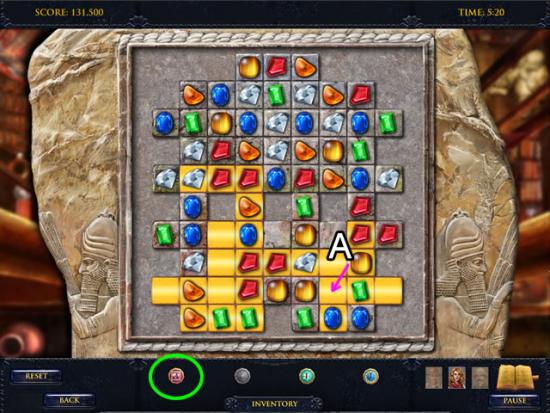
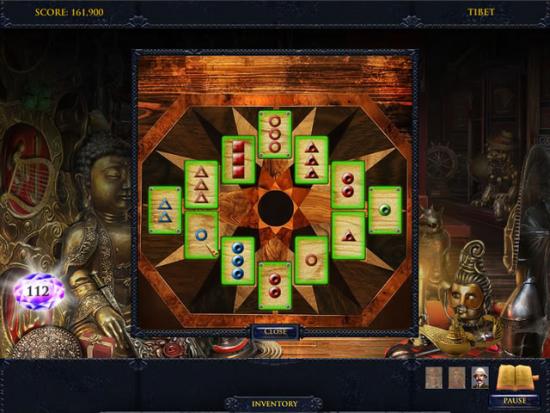
Completing the board brings up a summary of scoring for this chapter.
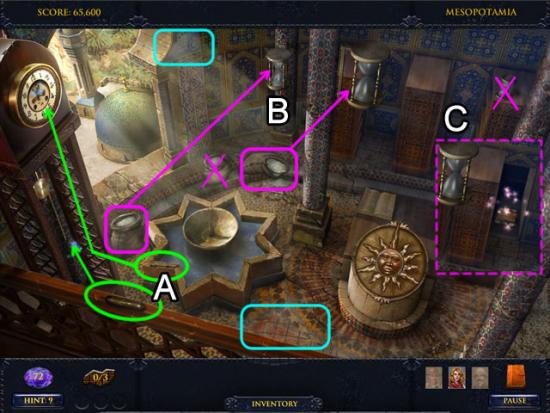
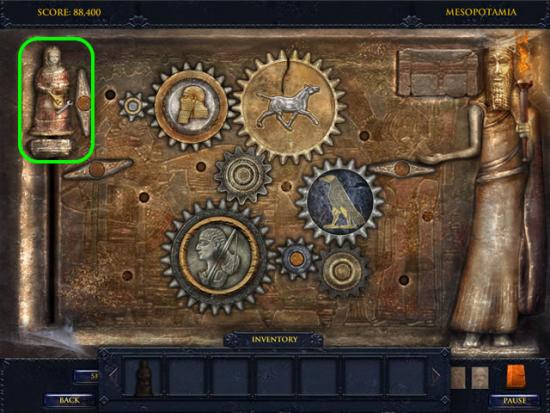
Palace
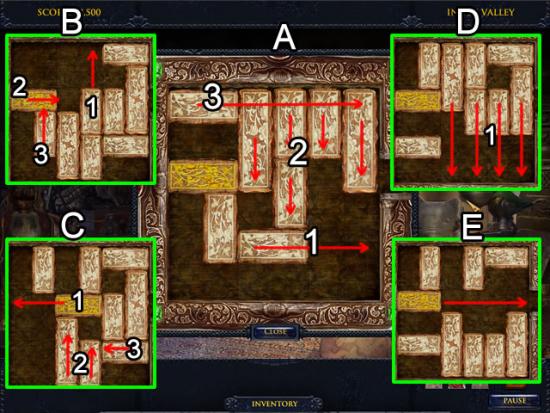
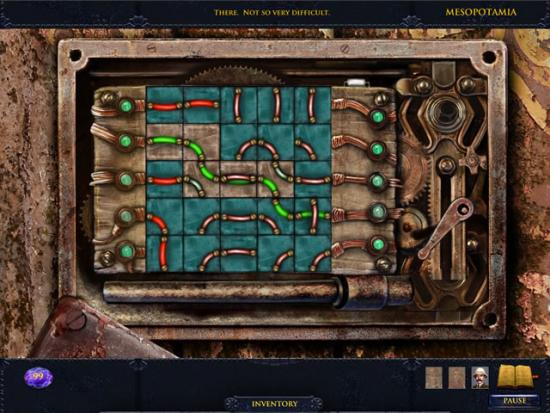
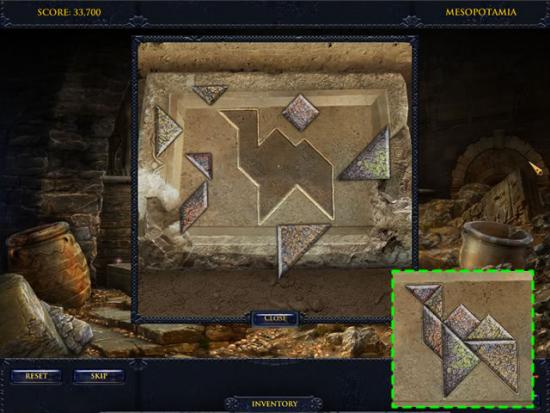
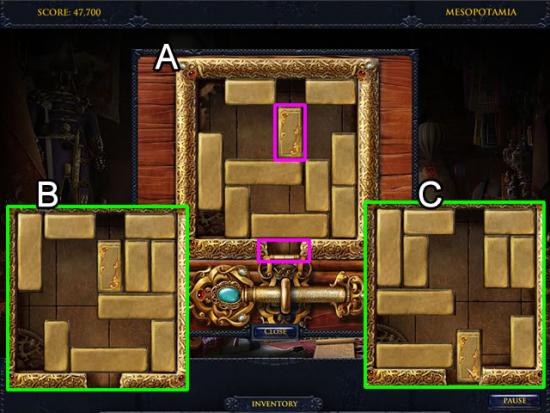
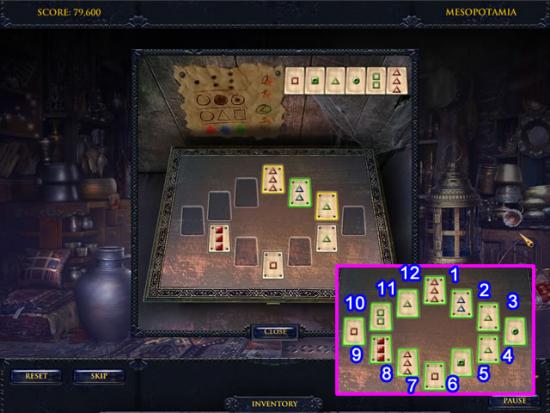
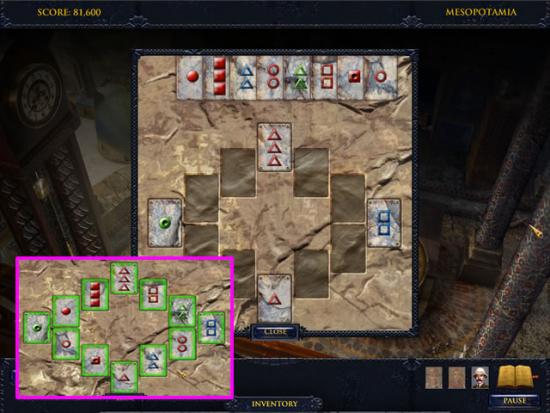
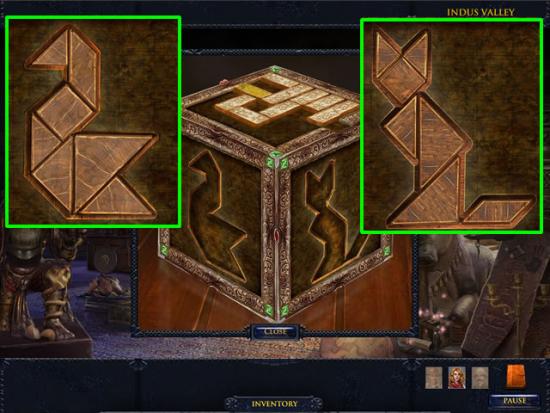
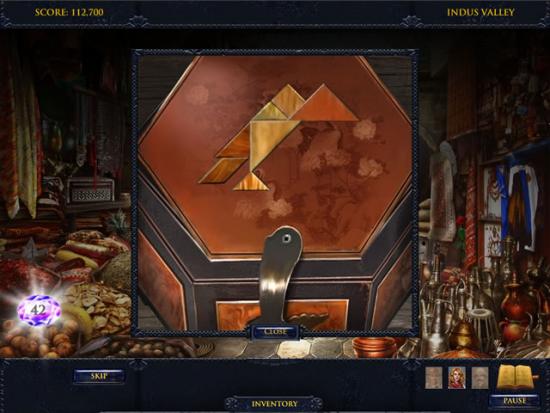
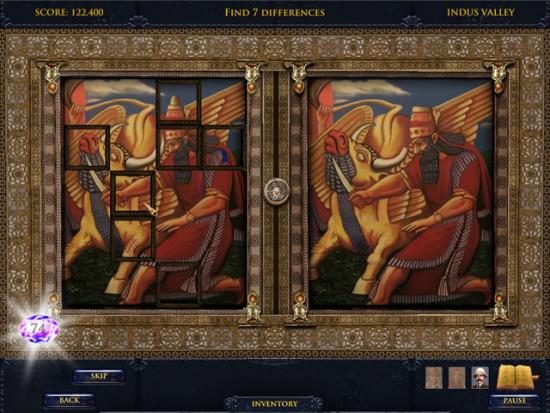
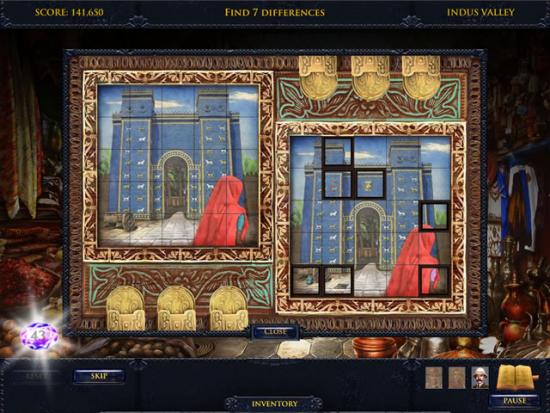
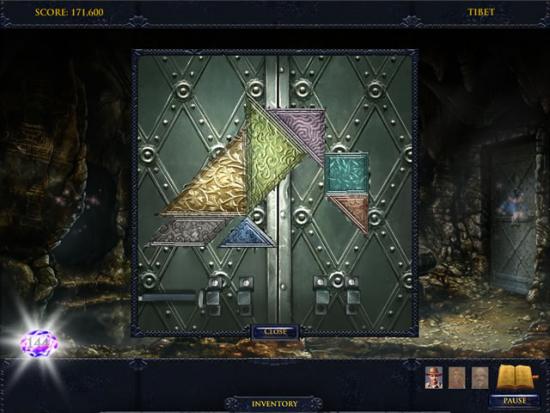
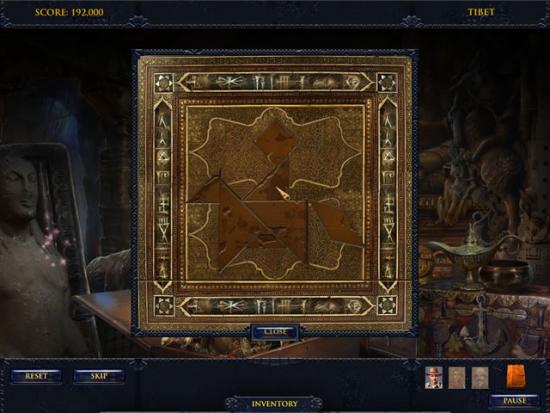
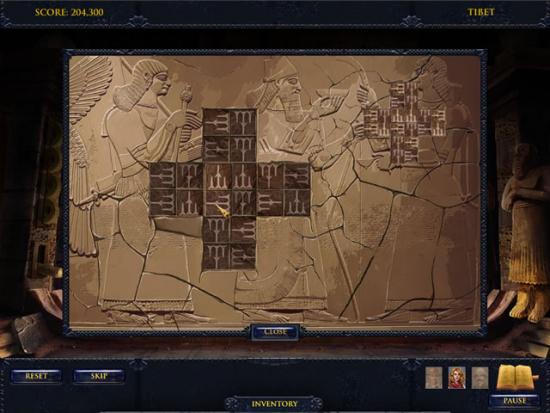
Shape puzzle
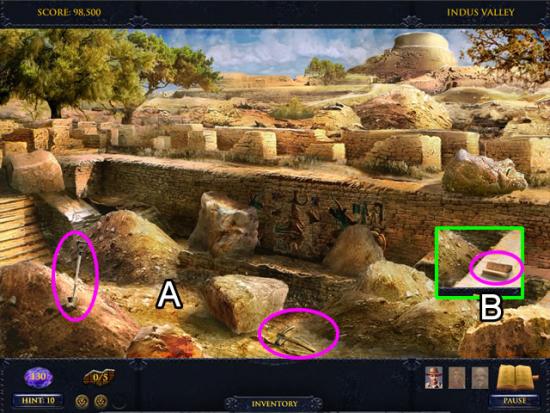
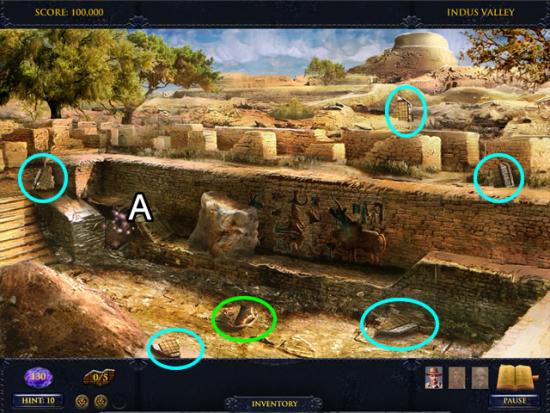
Dig Site – The Great Bath
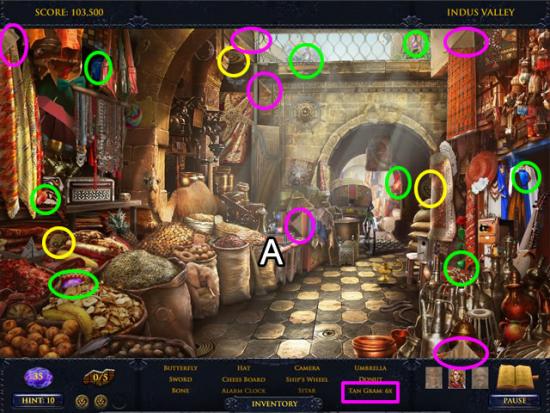
Covered Bazaar
Palace
Antiquities Shop
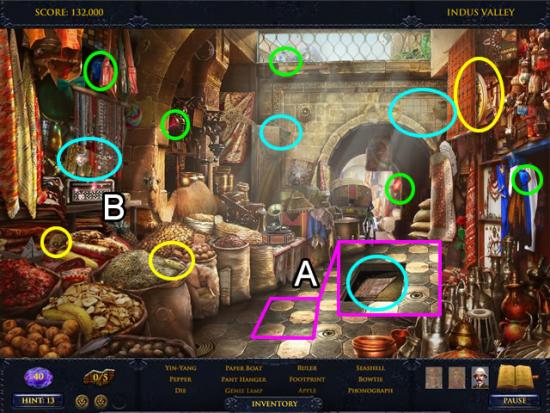
Covered Bazaar
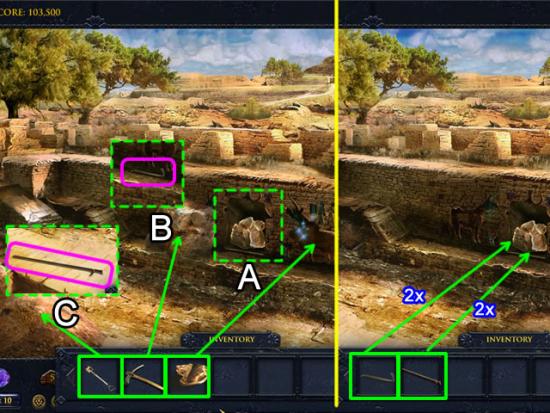
Dig Site – The Great Bath

Antiquities Shop
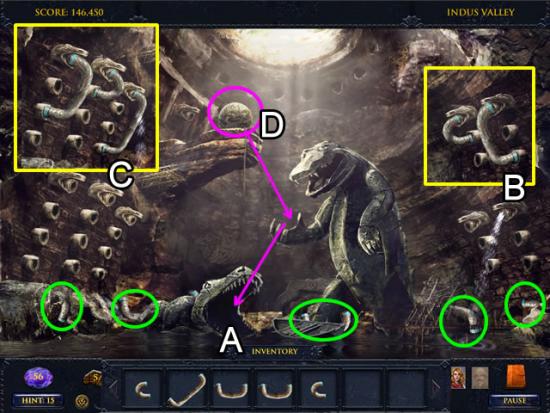
Dig Site – Viper Pit
Monastery Entrance
Right Chamber
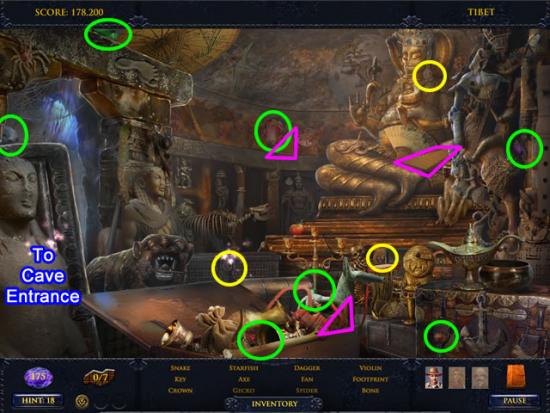
Donggar – Cave Entrance
Donggar – Left Cave
Monastery Entrance
Center Chamber
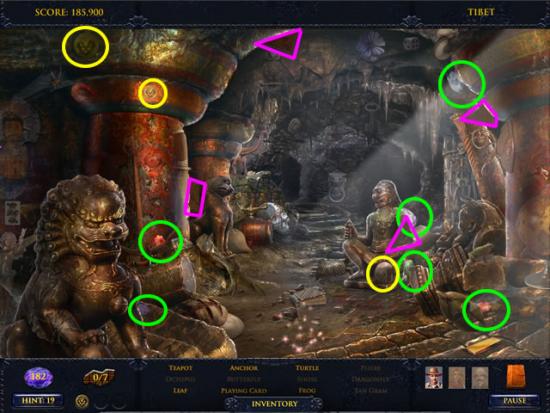
Donggar – Cave Entrance
Donggar – Right Cave
Donggar – Left Cave
Donggar – Right Cave
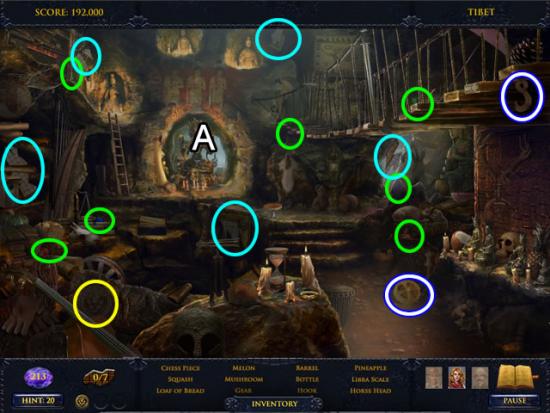
Lo Monthang – Cave Entrance
Lo Monthang – Storage Cave
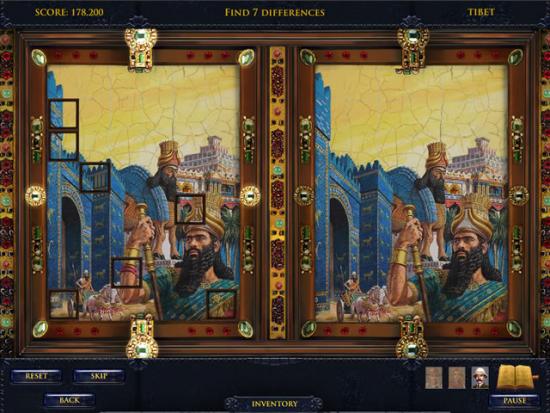
Congratulations! You have finished Jewel Quest Mysteries: The Oracle of Ur. If you are playing the collector’s edition, additional spot-the-difference and geometric insert puzzles and more jewel boards are now available under the Premium Content section of the main menu.