![Digimon UP Tier List [Supports, Buddies, and Partners]](/wp-content/uploads/2026/07/digimon-up-tier-list.jpg "Digimon UP Tier List [Supports, Buddies, and Partners]")
Digimon UP Tier List [Supports, Buddies, and Partners]
These Digimon will get you UP the leaderboard.

![Haze Seas Boss Drops [Chances, Locations, and How to Spawn]](/wp-content/uploads/2026/07/haze-seas-boss-drops.jpg "Haze Seas Boss Drops [Chances, Locations, and How to Spawn]")

Welcome to Gamezebo's walkthrough for Hostile Makeover.General Game Information Hidden Object game with 9 Chapters based on the "Crimes of Fashion" series by Ellen Byeruum. The game can be played in timed or casual mode and your final score is determined by your overall amount of money earned and money earned and time played in timed mode. The hidden object screens are played in one of 3 modes which rotate every chapter. The modes are "list mode", "snapshot/silhouet…
a:1:i:0;a:2:s:13:”section_title”;s:28:”Hostile Makeover Walkthrough”;s:12:”section_body”;s:44548:”
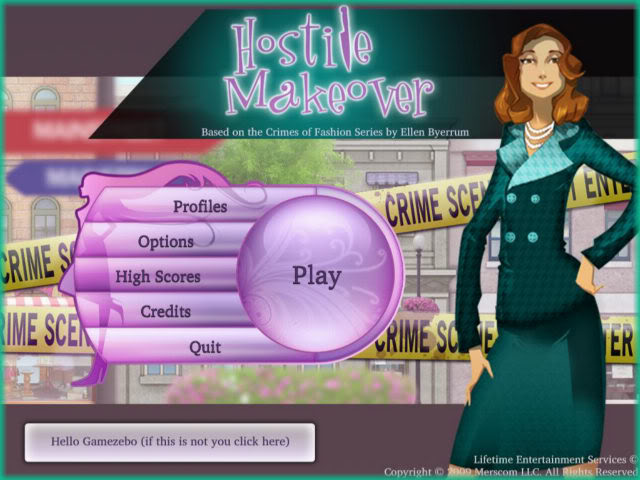
Welcome to Gamezebo’s walkthrough for Hostile Makeover.

General Game Information
Game Elements
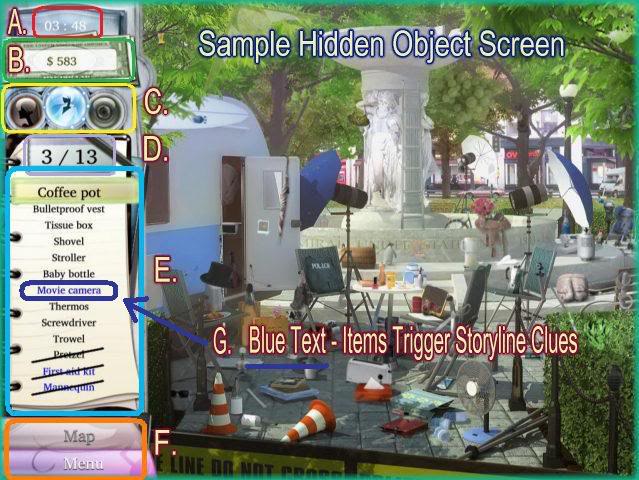
Hidden Object Screens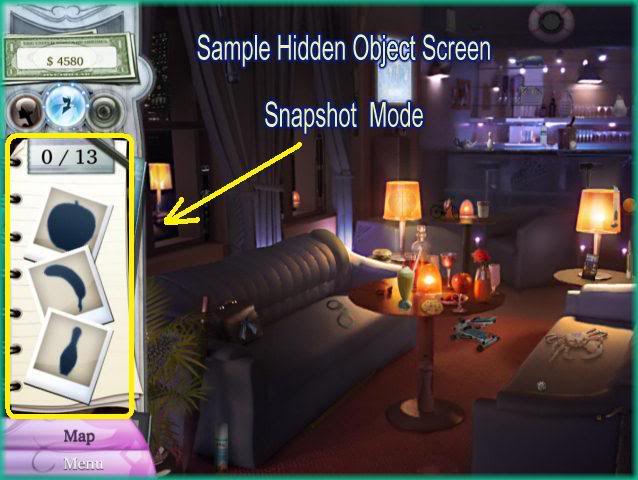
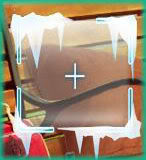
Find the Differences Screen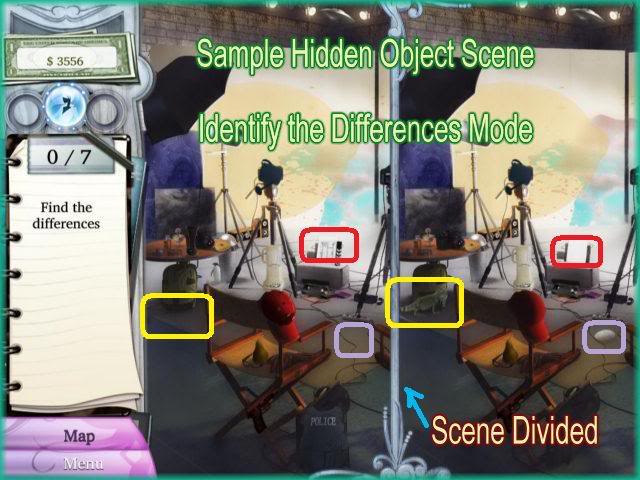
Hint – Fashion Savvy Sense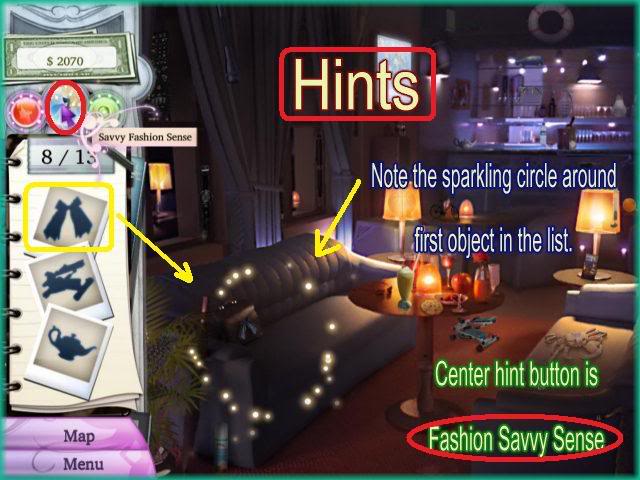
Hint – Female Intuition – Snapshot Mode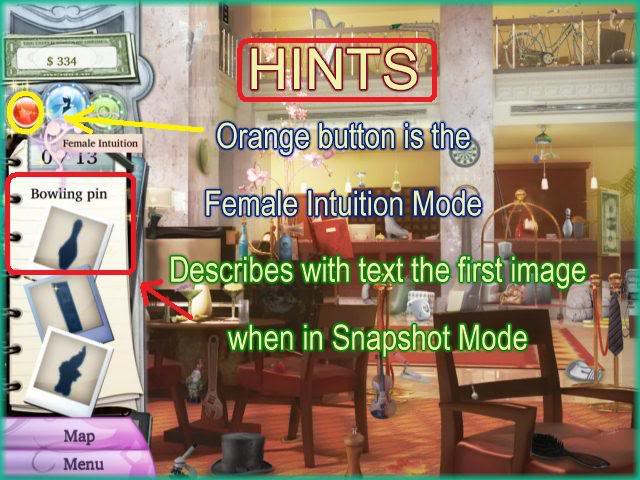
Hint – Female Intuition – List Mode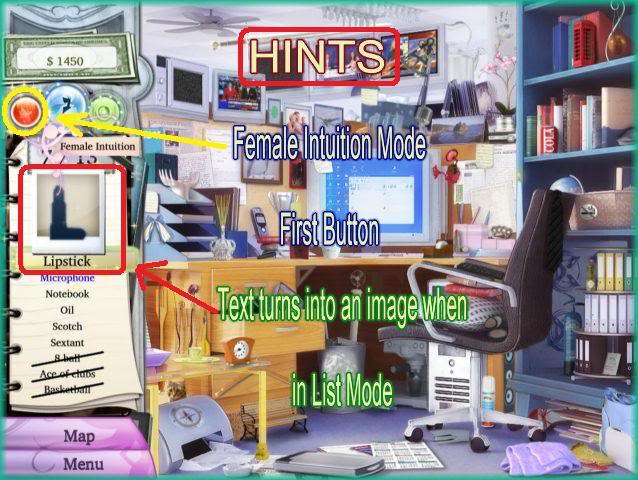
Hint – Night Vision Mode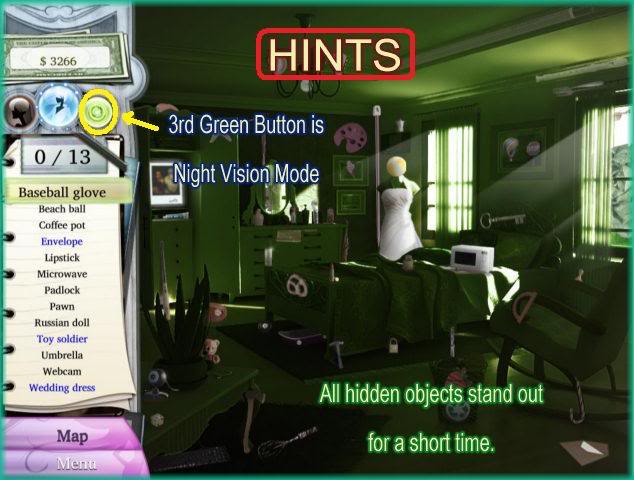
Cursors
Suspect City Maps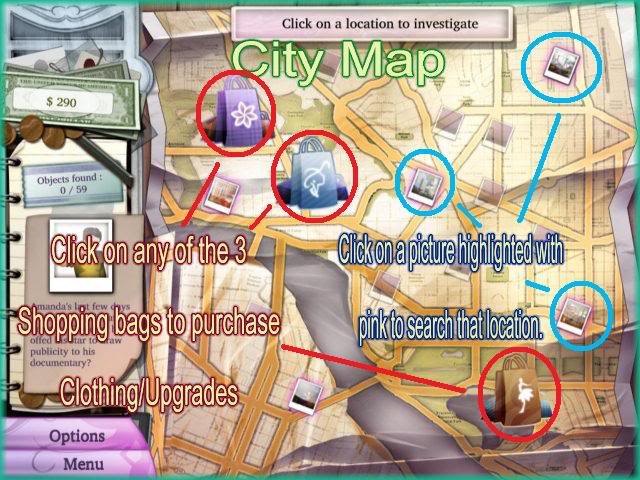
Shopping Bag – Blue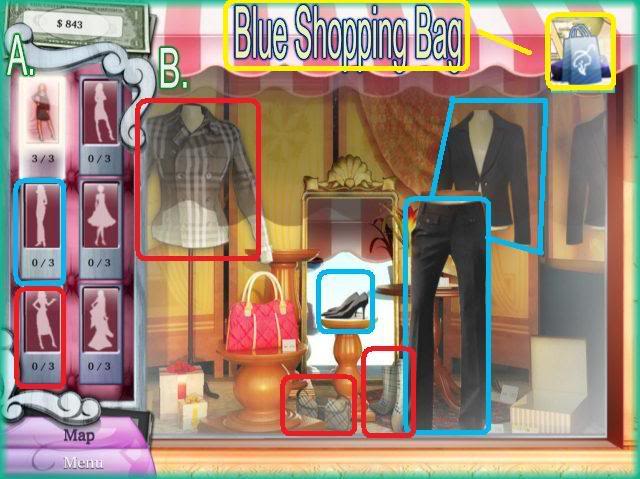
Shopping Bag – Purple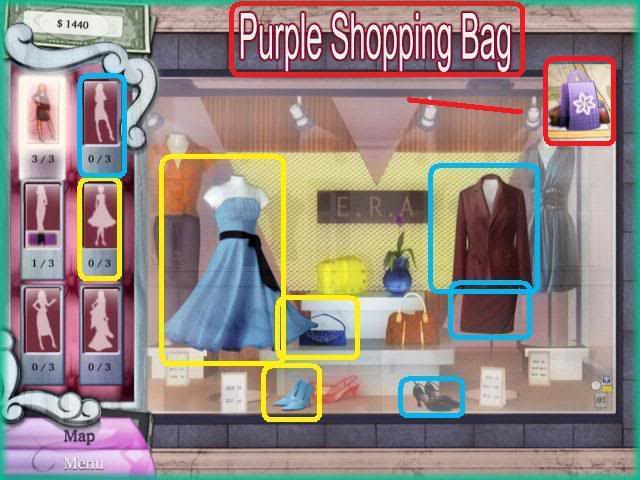
Shopping Bag – Brown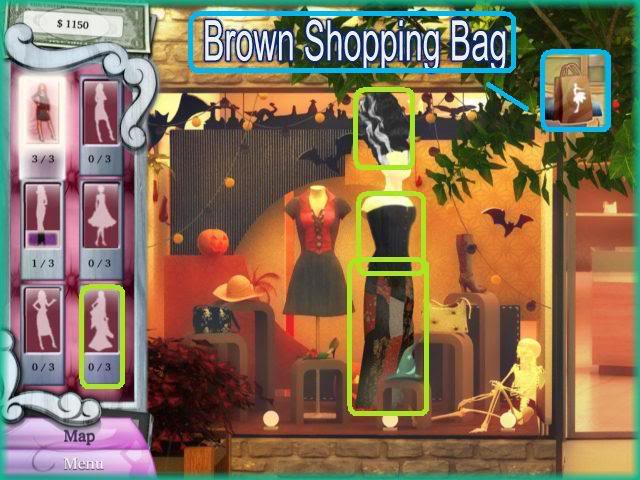
Changing Lacey’s Outfit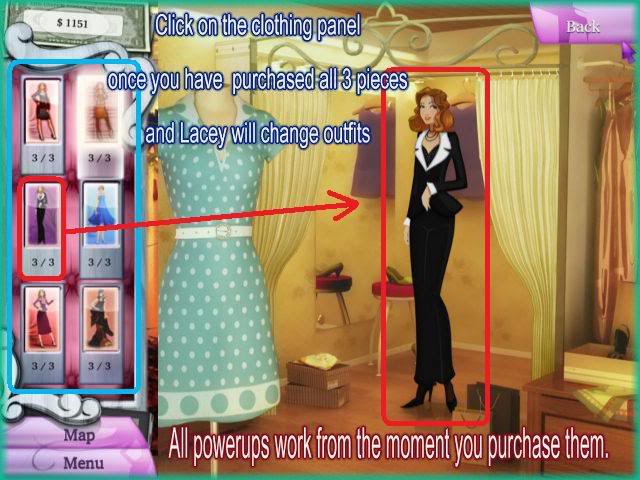
Location Mode Icons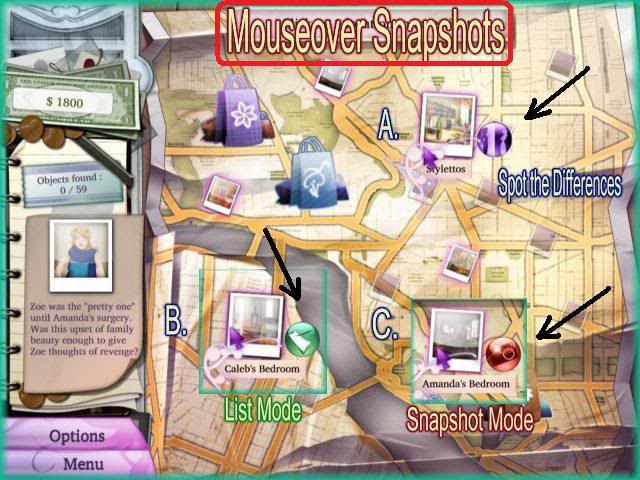
Walkthrough
Tutorial Screen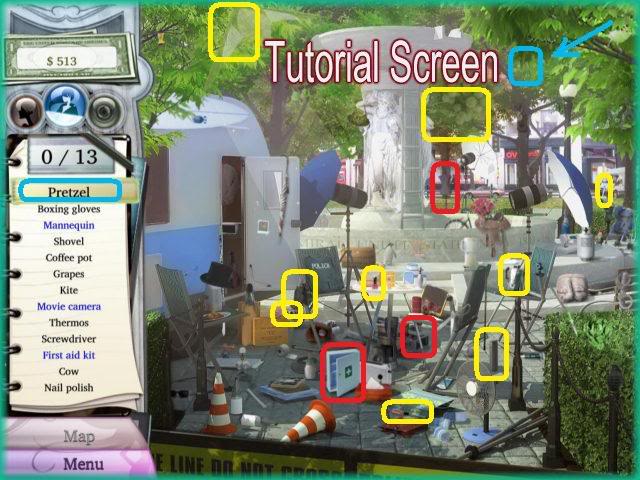
Suspect Board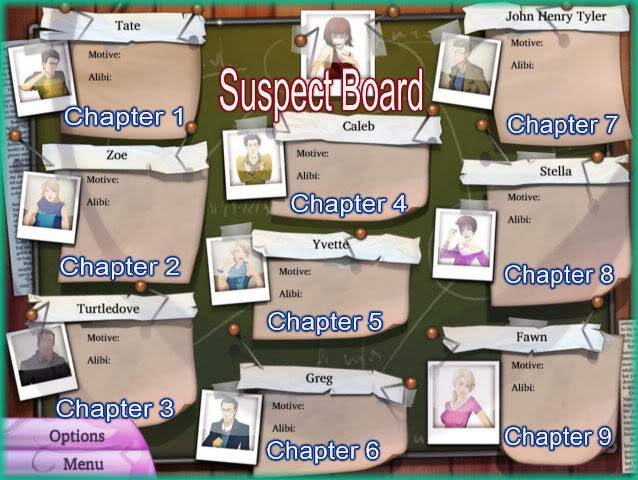
CHAPTER 1 – "Tate"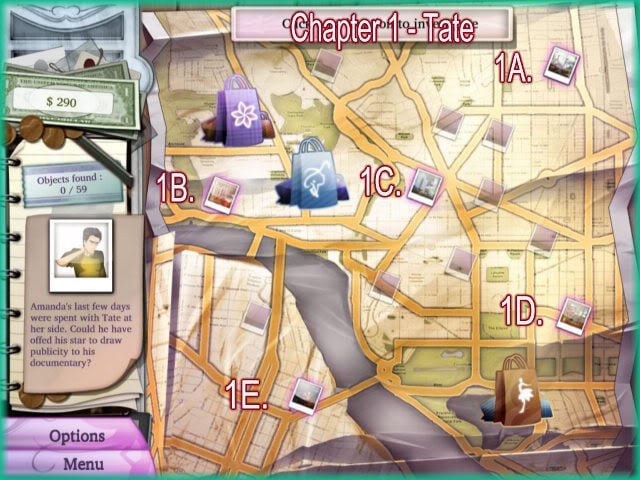
1A. Tate’s Photo Studio – Find the Differences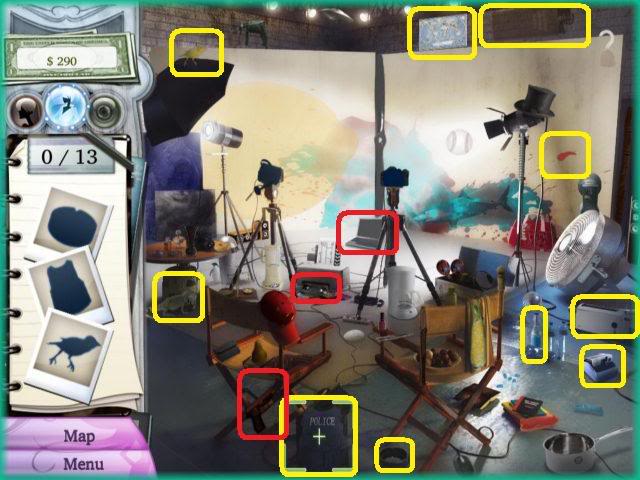
1B. Snazzy Jane’s – Find the Differences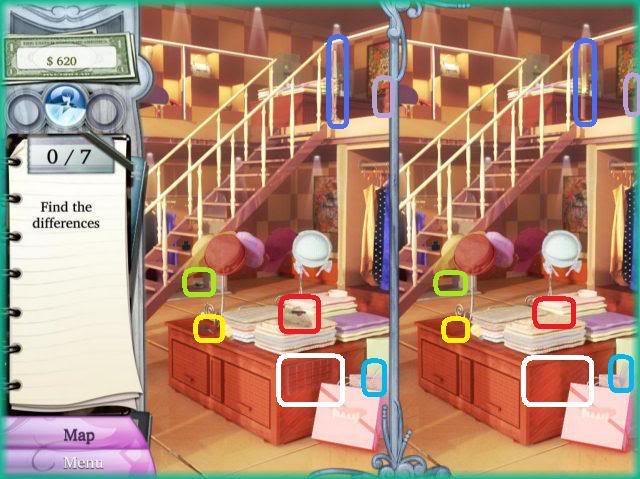
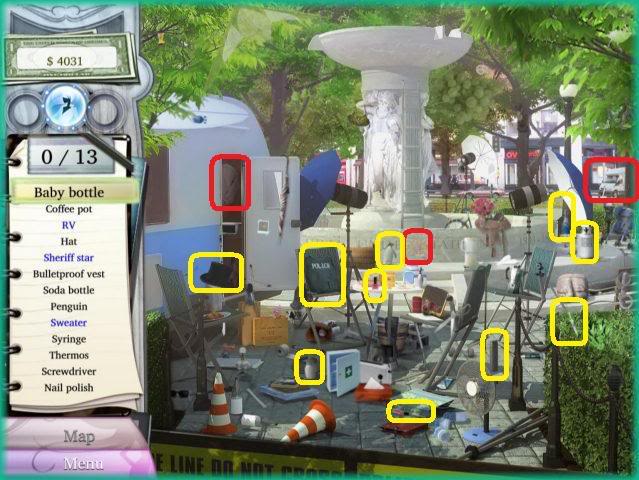
1C. Dupont Circle – Snapshot Mode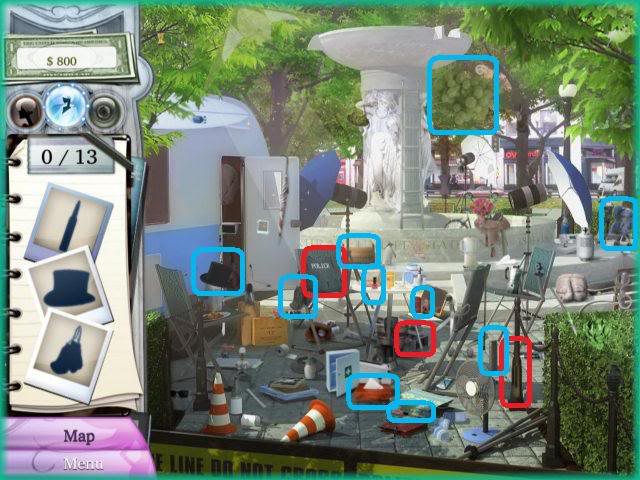
1D. Velvet’s Blues – List Mode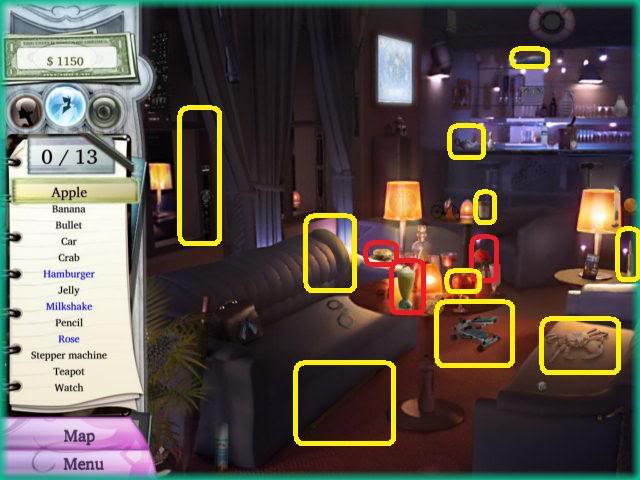
1E. National Air & Space Museum Gift Shop – List Mode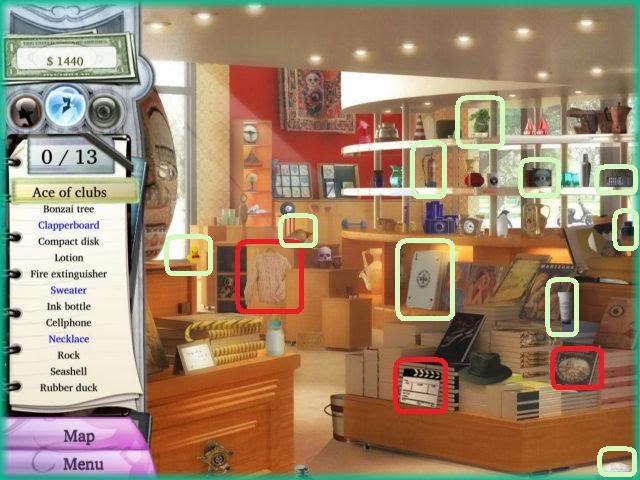
CHAPTER 2 – "Zoe"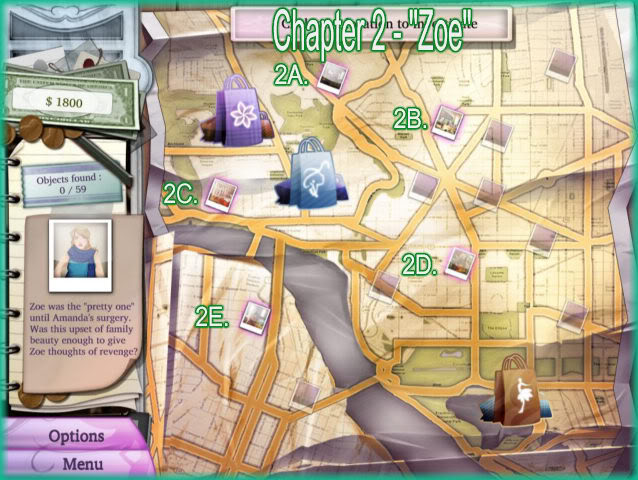
2A. Amanda’s Bedroom – Snapshot Mode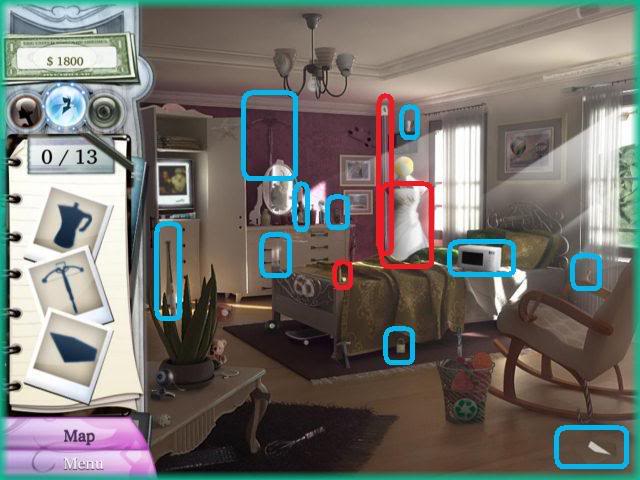
2B. Styletto’s – Find the Differences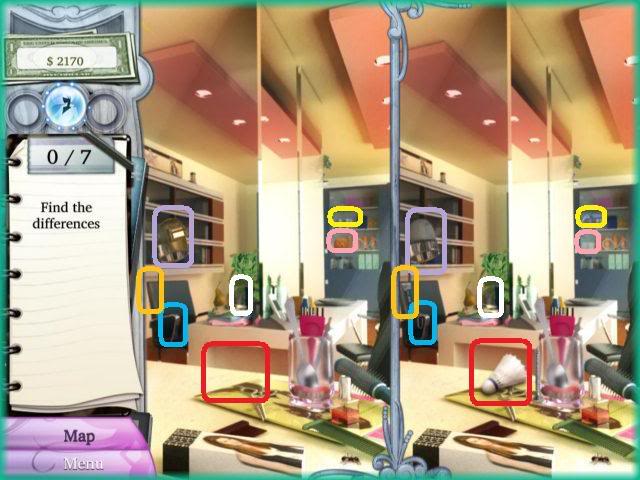
2C. Snazzy Jane’s – List Mode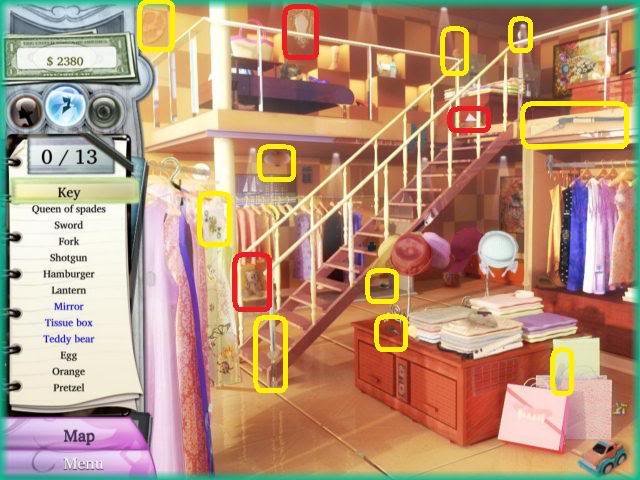
2D. Caleb’s Bedroom – List Mode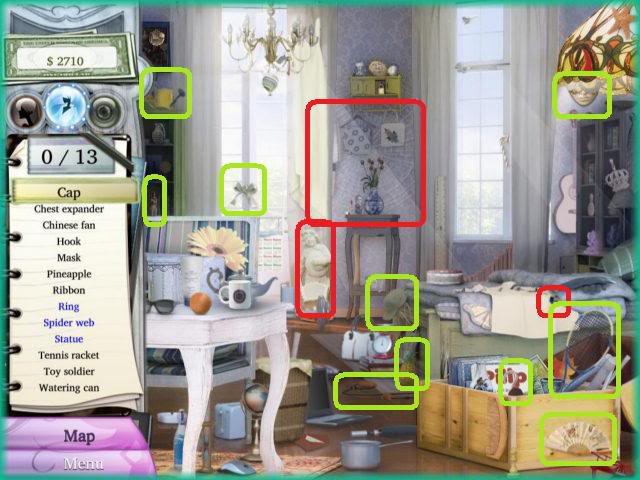
2E. Farragut Square – Snapshot Mode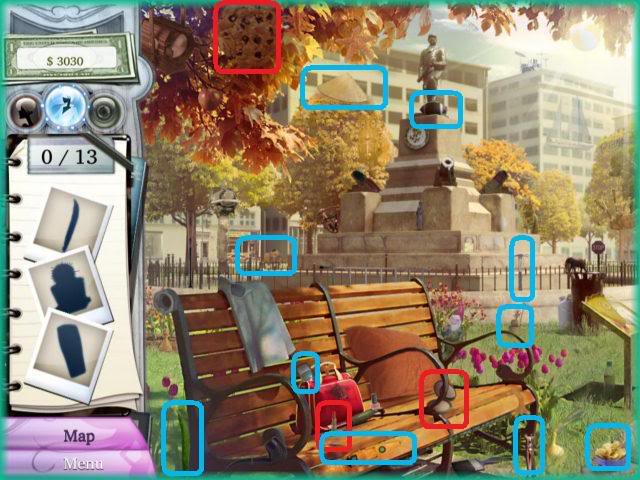
CHAPTER 3 – "Turtledove"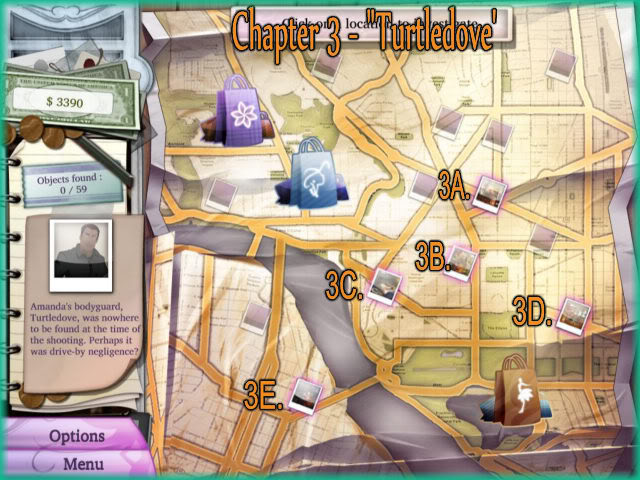
3A. Pilgrim Hotel – Find the Differences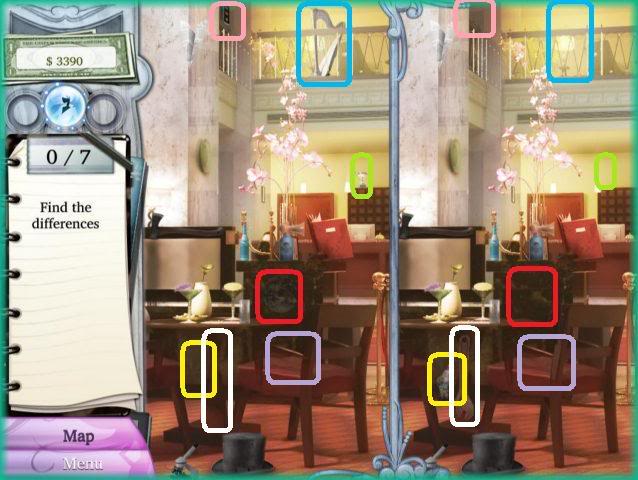
3B. Greg Spaulding’s Hospital Room – List Mode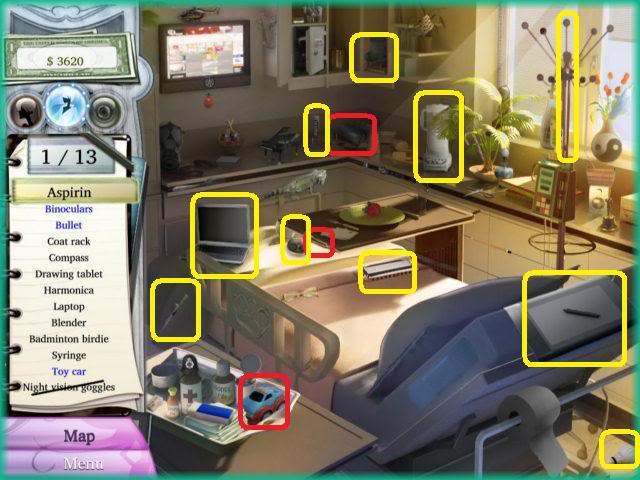
3C. Farragut Square – List Mode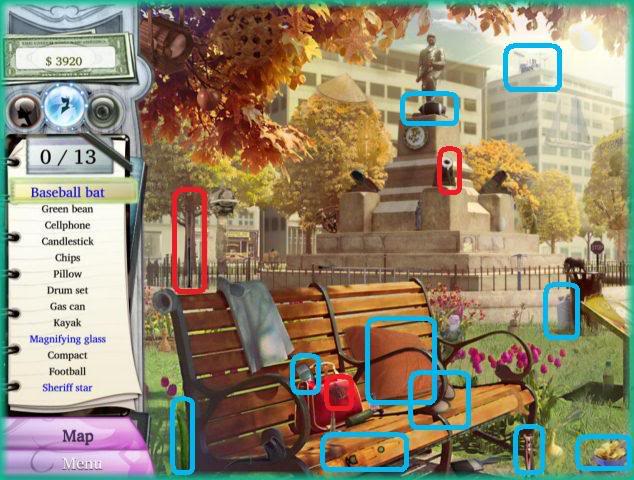
3D. National Air & Space Museum and gift shop – Snapshot Mode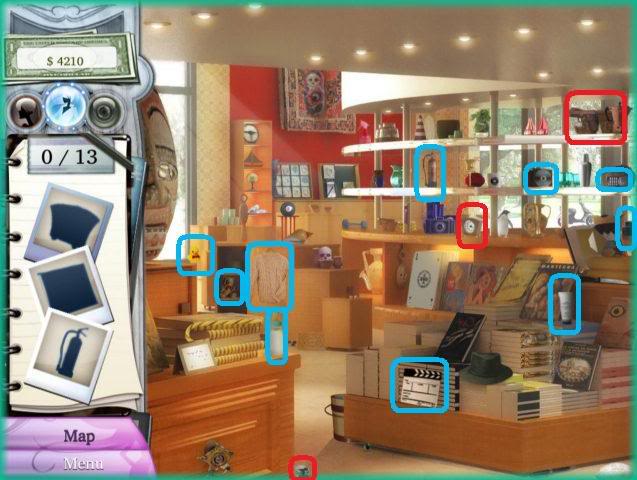
3E. Velvet’s Blues – Snapshot Mode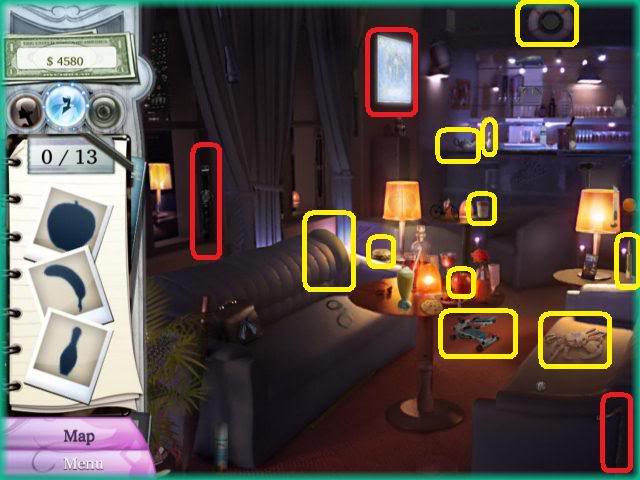
NOTE – Now you should purchase the 3 pieces to the "Black Casual outfit" which will activate the "Night Vision Goggles" hint feature.
CHAPTER 4 – "Caleb"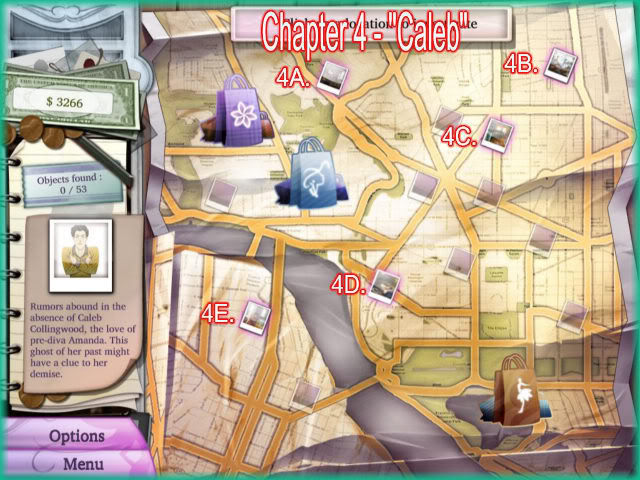
4A. Amanda’s Bedroom – List Mode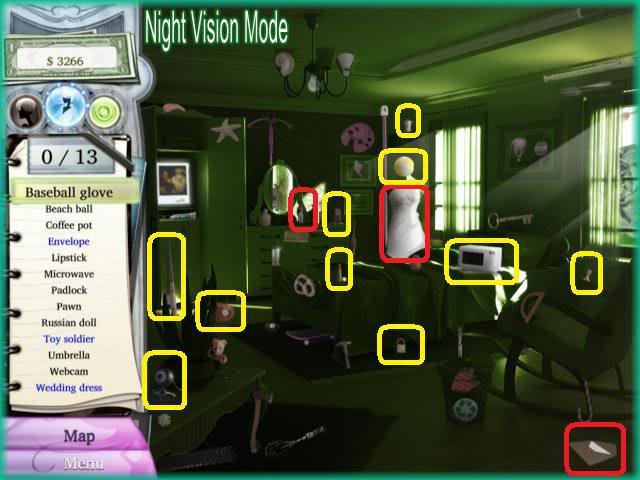
4B. Tate’s Photo Studio – List Mode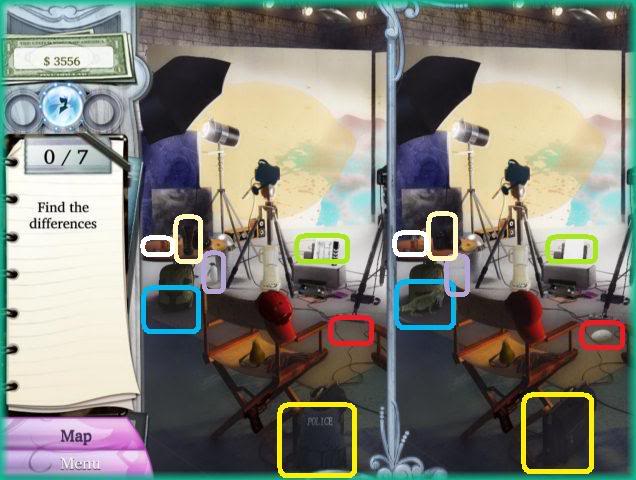
4C. Kramerword’s & Afterbooks Cafe – List Mode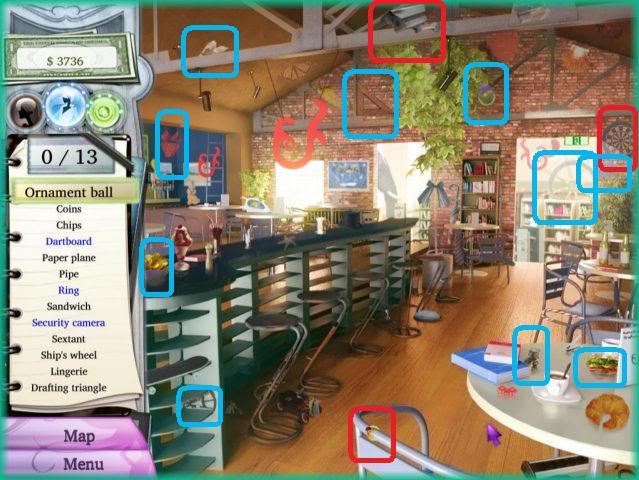
4D. Caleb’s Bedroom – Snapshot Mode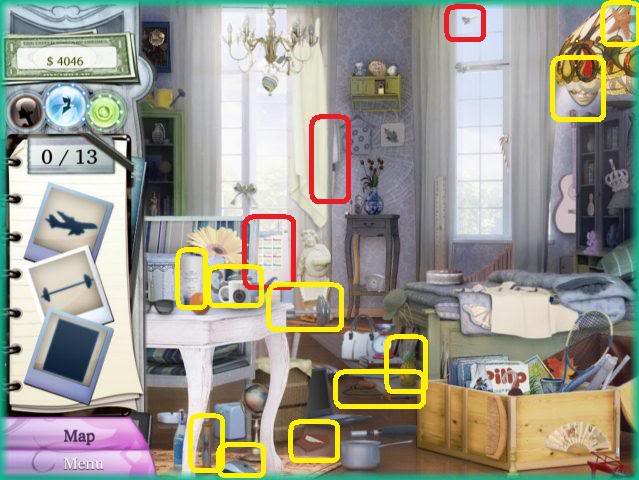
4E. Greg Spaulding’s Hospital Room – Find the Differences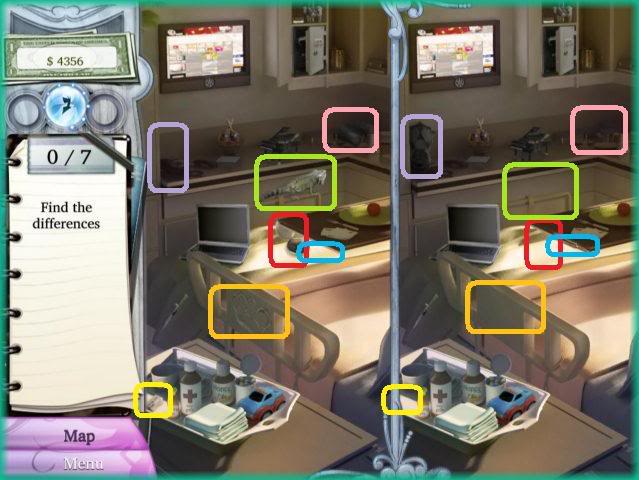
CHAPTER 5 – "Yvette"
5A. Amanda’s Bedroom – Find the Differences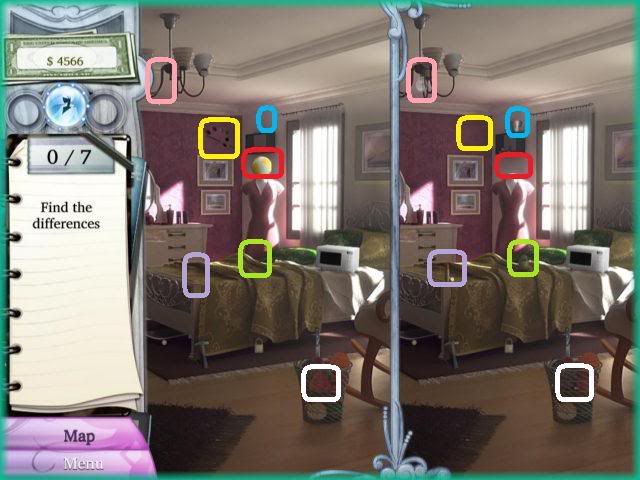
5B. Stylettos – List Mode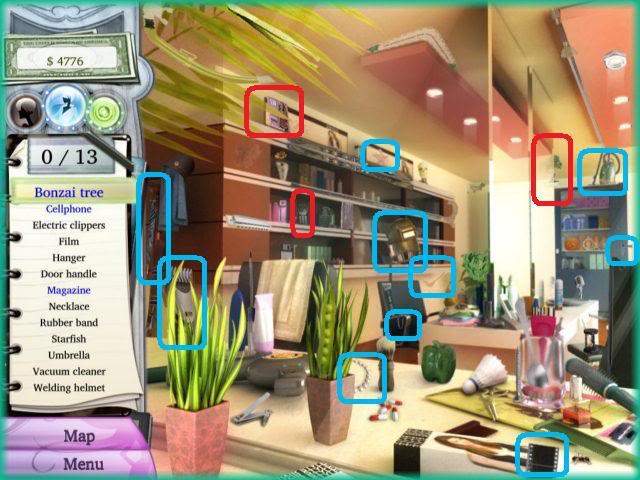
5C. Kramerwords & Afterbooks Cafe – Find the Differences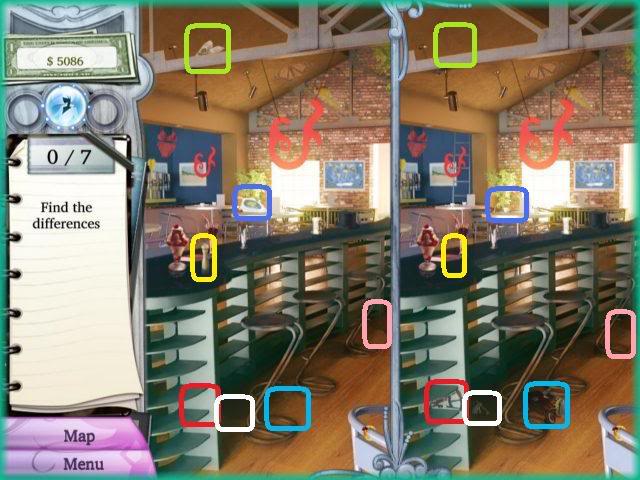
5D. Snazzy Jane’s – Snapshot Mode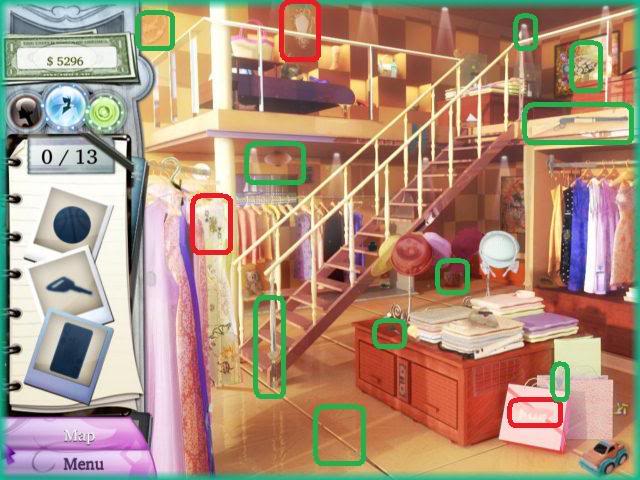
5E. Pilgrim Hotel – List Mode
NOTE – Now you should have enough money to purchase the "Female Intuition" upgrade which is the "Haymarket Checkered Suit" in the blue shopping bag store. This will initiate the "Female Intuition" hint button.
CHAPTER 6 – "Greg"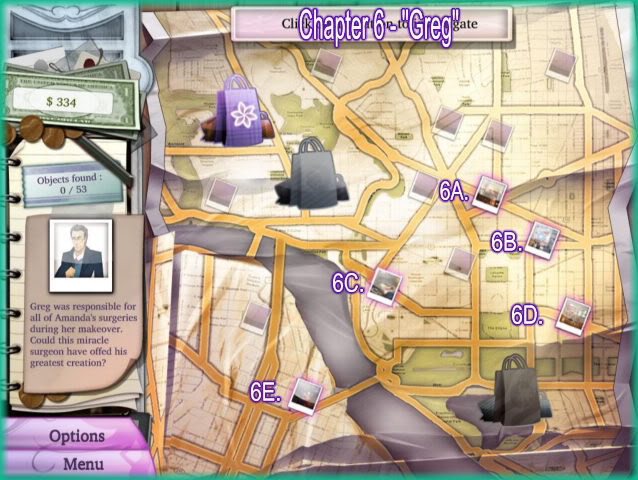
6A. Pilgrim Hotel – Snapshot Mode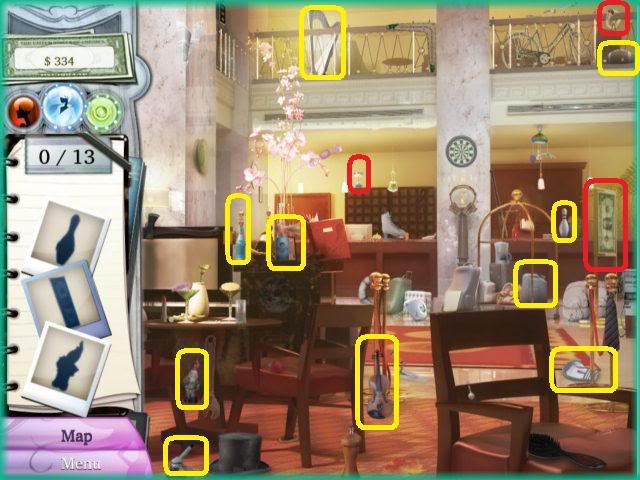
6B. Lacey’s Office – Find the Differences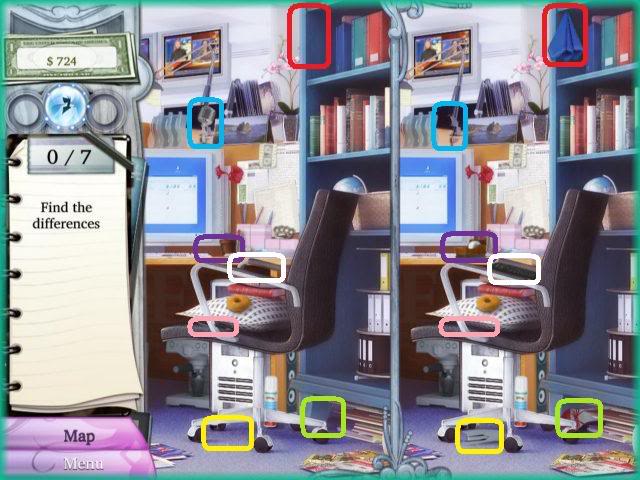
6C. Greg Spaulding’s Hospital Bed -Snapshot Mode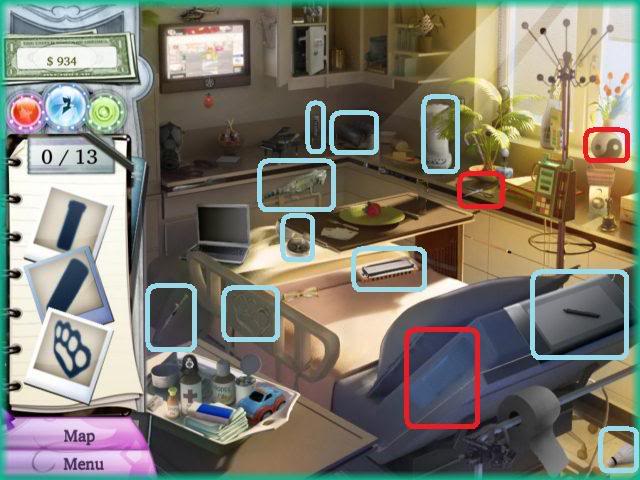
6D. National Air & Space Museum Gift Shop – List Mode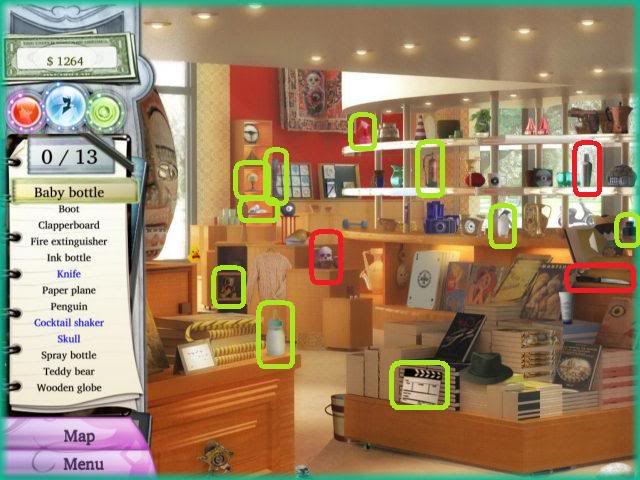
6E. Velvet Blues – Find the Differences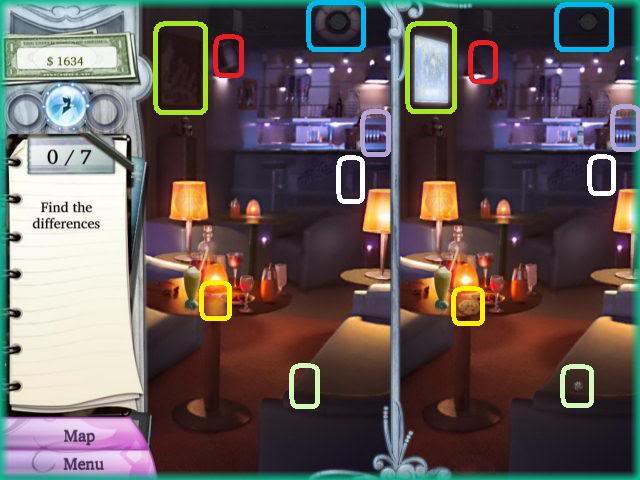
CHAPTER 7 – "John Henry Tyler"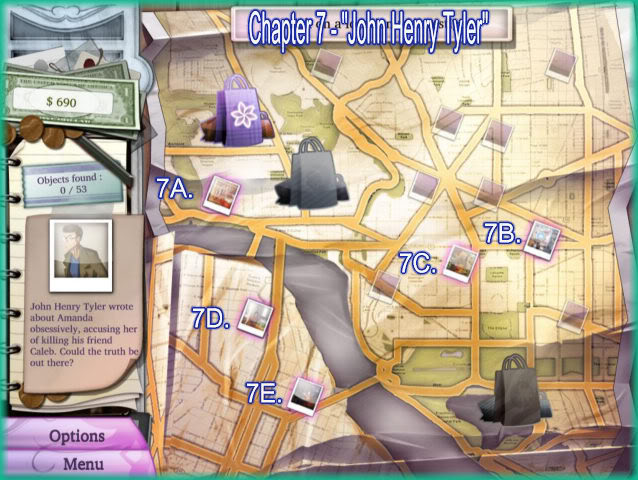
7A. Snazzy Jane’s – Snapshot Mode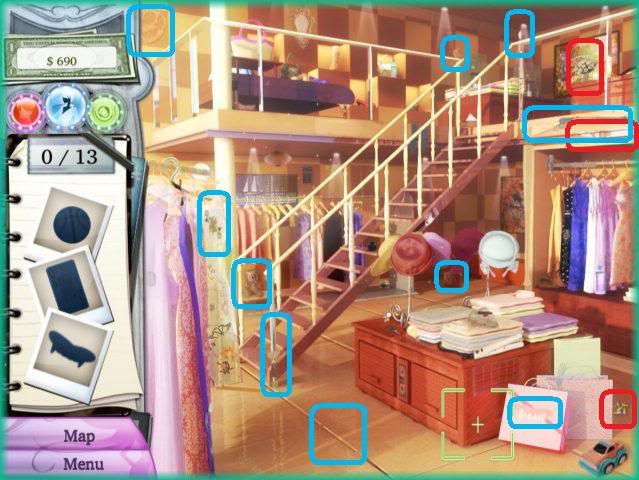
7B. Farragut Square – Find the Differences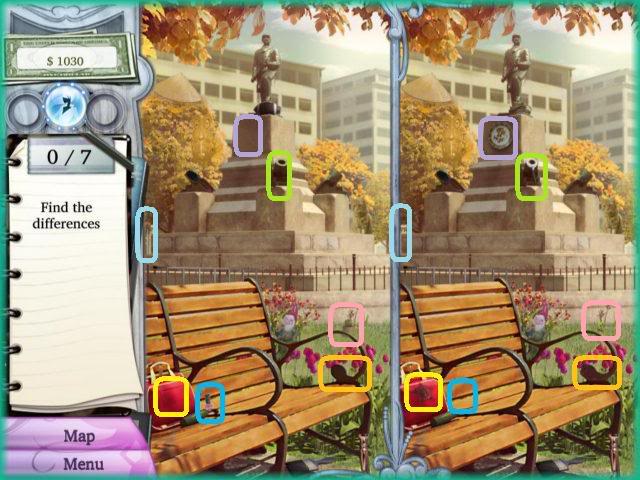
7C. Lacey’s Office – List Mode
7D. Caleb’s Bedroom – Find the Differences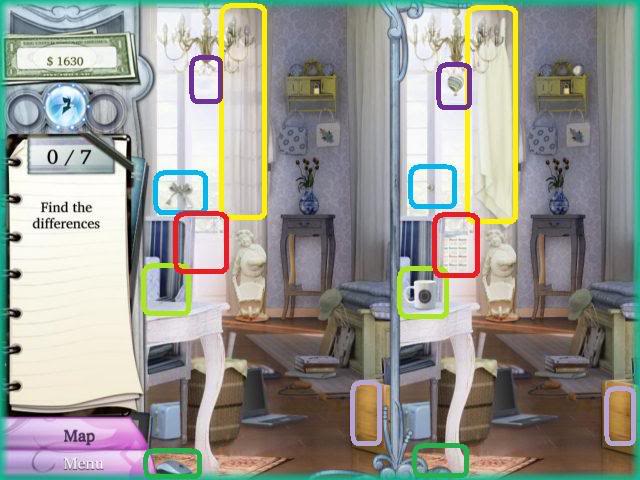
7E. Velvet’s Blues – Snapshot Mode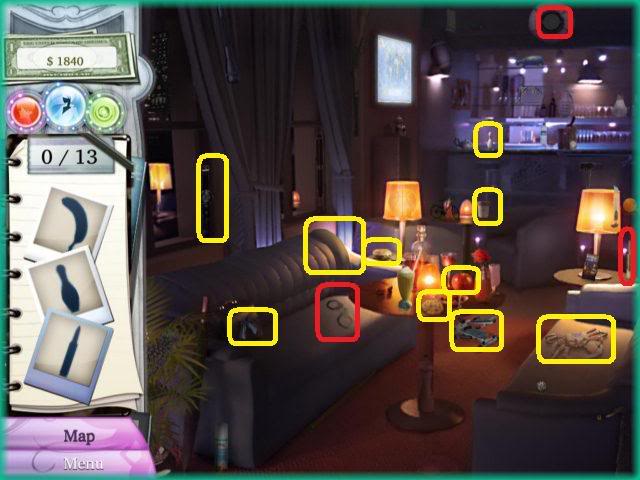
NOTE – You may now purchase all remaining outfits and feel free to change Lacey’s outfit if you wish. This is just for fun and has no impact on the outcome of the game.
CHAPTER 8 – "Stella"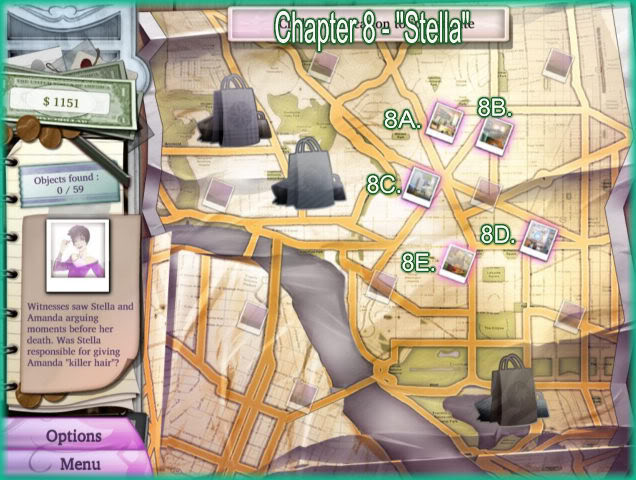
8A. Stylettos – List Mode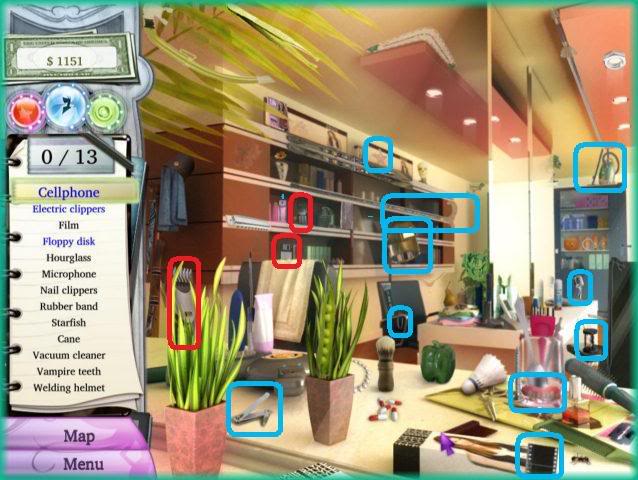
8B. Kramerwords & Afterbooks Cafe – List Mode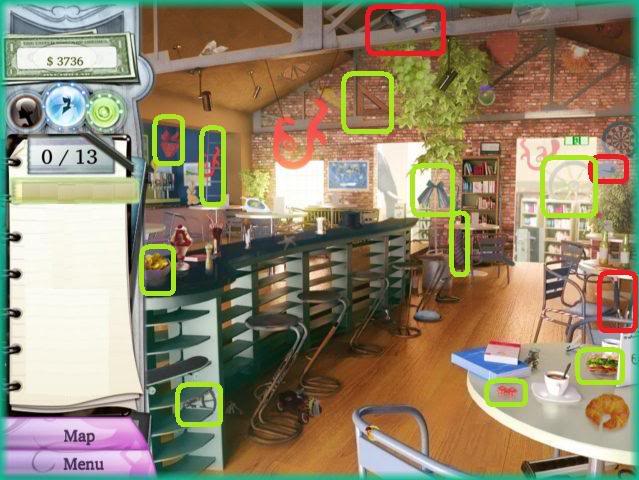
8C. Dupont Circle – Find the Differences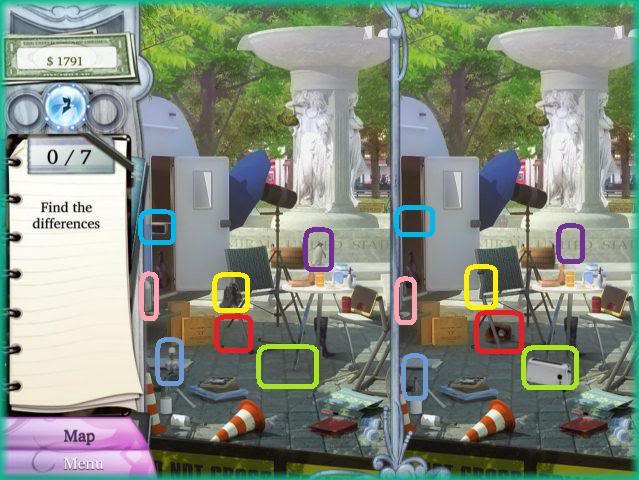
8D. Farragut Square – List Mode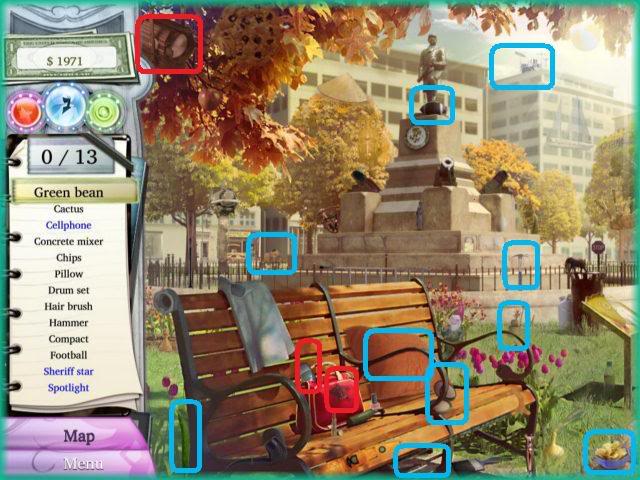
8E. Lacey’s Office – Snapshot Mode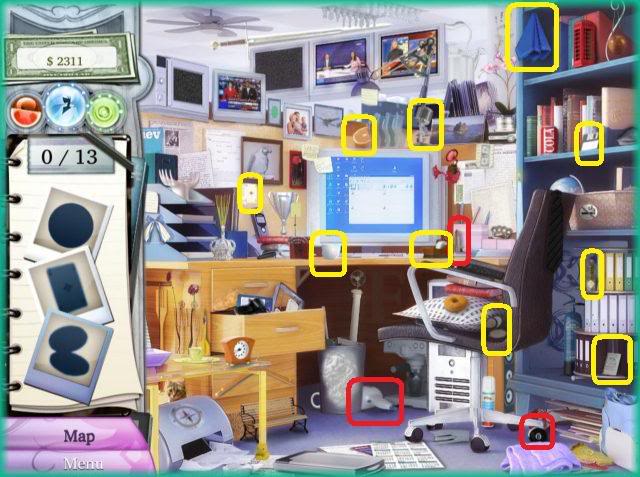
CHAPTER 9 – "Fawn"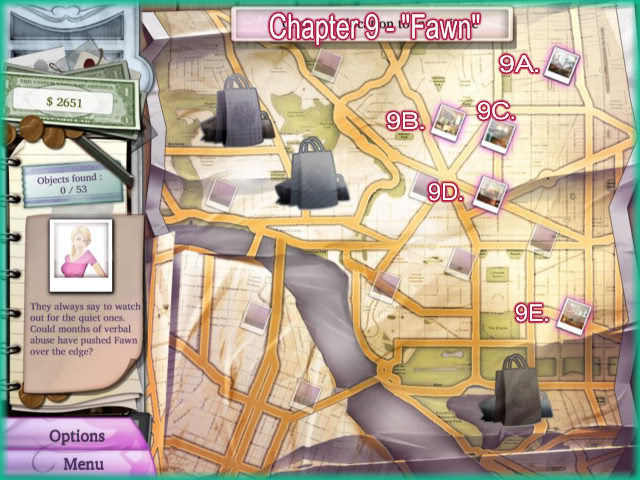
9A. Tate’s Photo Studio – List Mode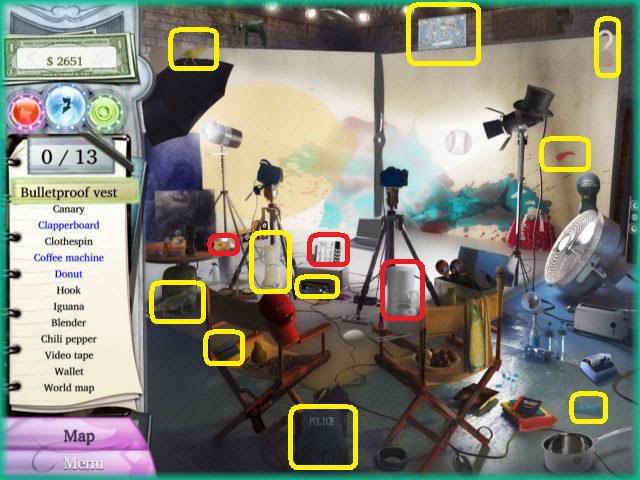
9B. Stylettos – Snapshot Mode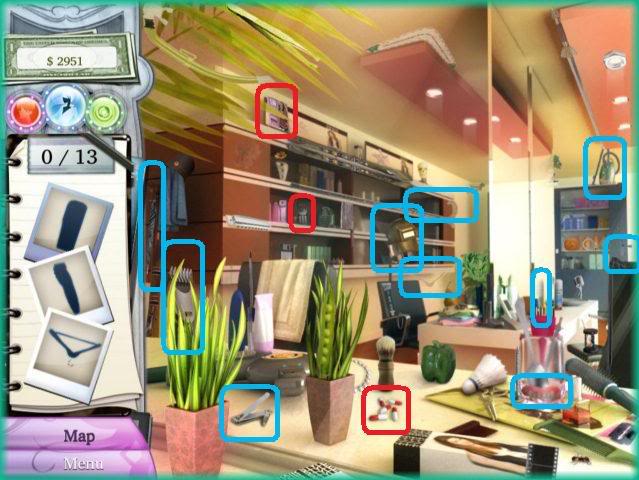
9C. Kramerwords & Afterbooks Cafe – List Mode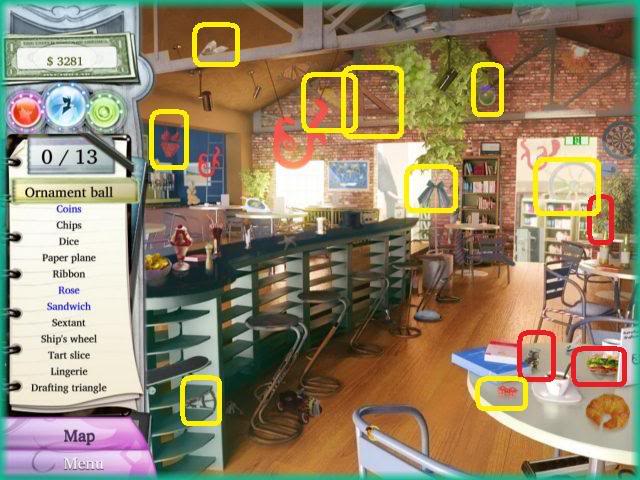
9D. Pilgrim Hotel – Find the Differences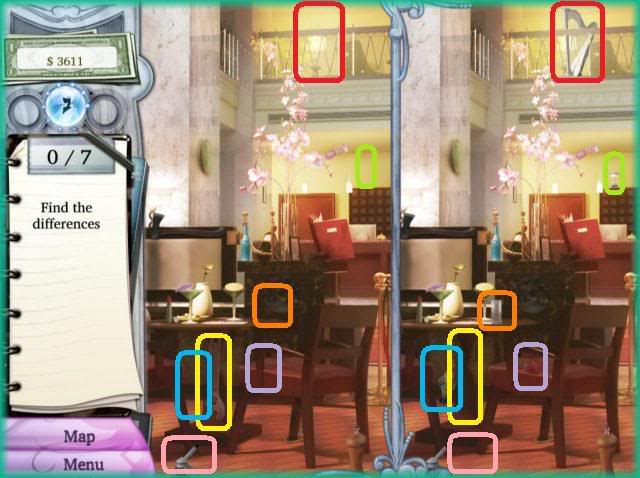
9E. National Air & Space Museum Gift Shop – Find the Differences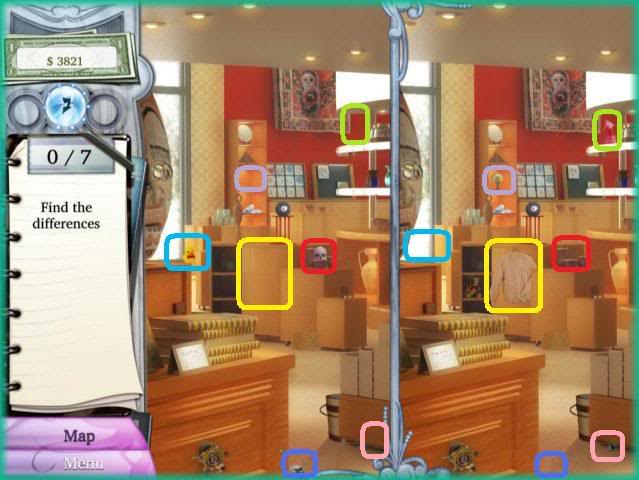
 “;
“;
