![All VV Ultimatum Titles [How to Get]](/wp-content/uploads/2026/06/vv-ultimatum-titles.jpg "All VV Ultimatum Titles [How to Get]")
All VV Ultimatum Titles [How to Get]
Do titles provide buffs?
By Adele Wilson

By Adele Wilson

By Sho Roberts

By Meriel Green
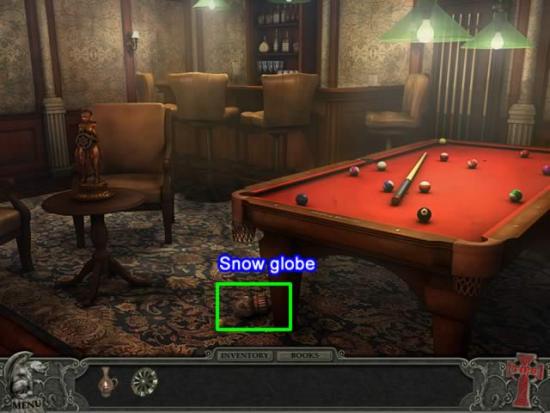
Welcome to the Hidden Mysteries: Vampire Secrets walkthrough on Gamezebo. Hidden Mysteries: Vampire Secrets is a Hidden Object Game played on the PC created by GameMill Entertainment and Gunnar Games. This walkthrough includes tips and tricks, helpful hints, and a strategy guide for how to complete Hidden Mysteries: Vampire Secrets.
Welcome to the Hidden Mysteries: Vampire Secrets walkthrough on Gamezebo. Hidden Mysteries: Vampire Secrets is a Hidden Object Game played on the PC created by GameMill Entertainment and Gunnar Games. This walkthrough includes tips and tricks, helpful hints, and a strategy guide for how to complete Hidden Mysteries: Vampire Secrets.
There is a short clip that sets up the story line. The first chapter contains an interactive tutorial that may be omitted by clicking Skip.

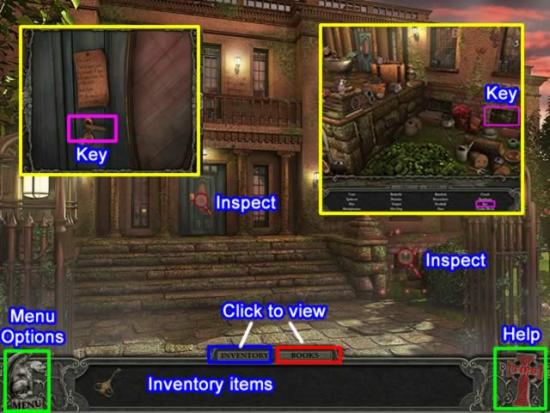
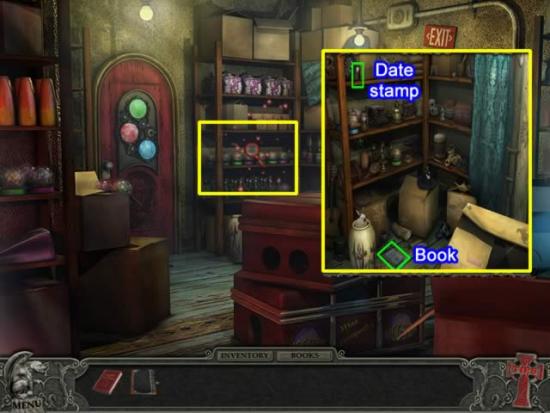
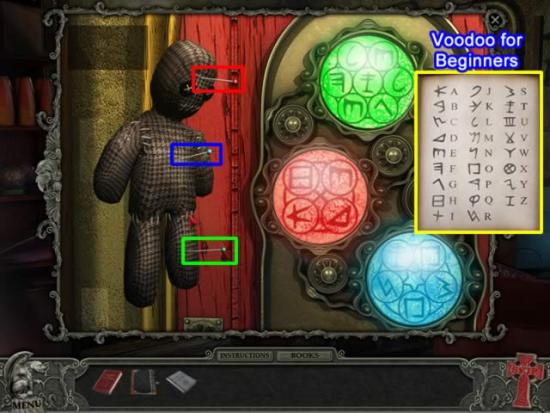
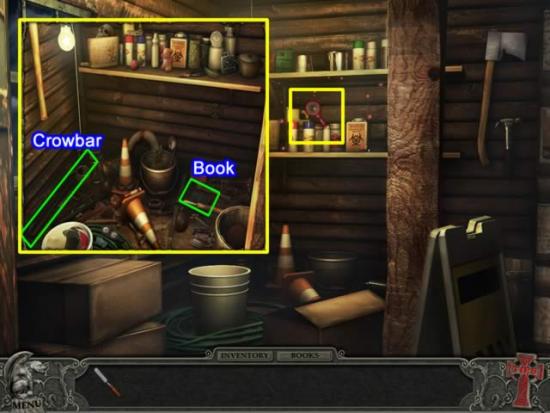
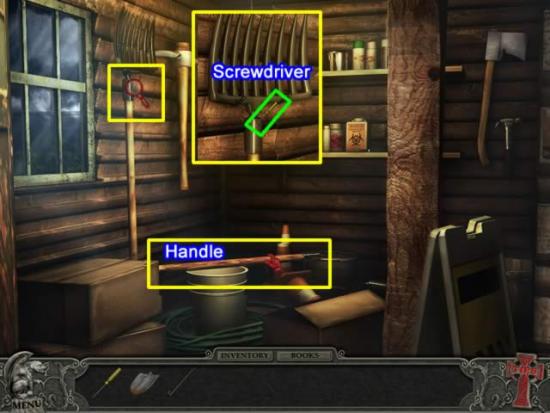
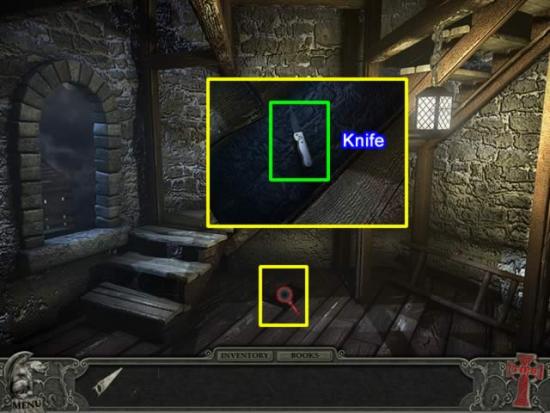
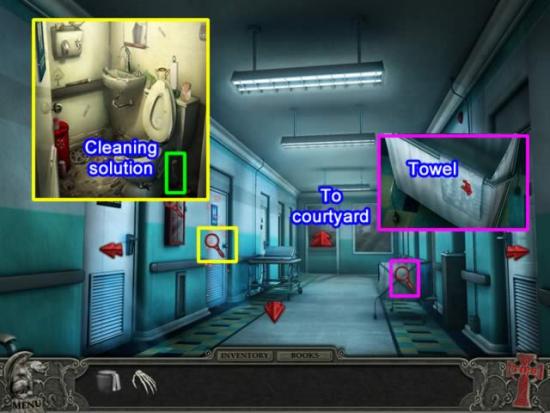
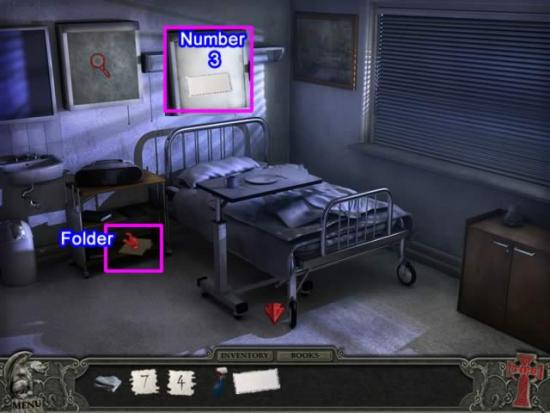
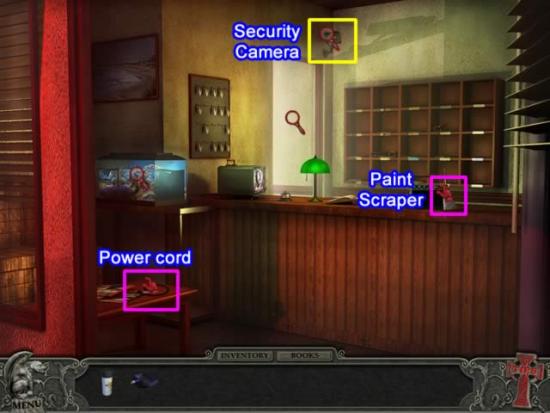
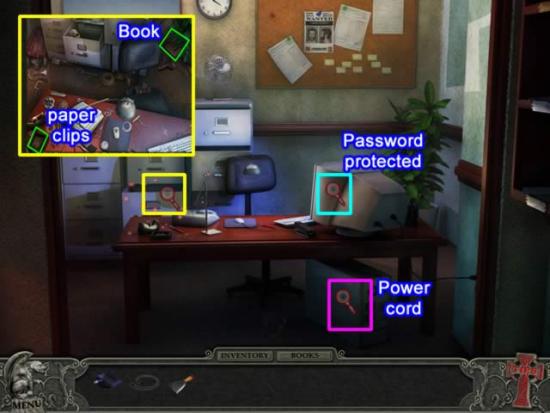
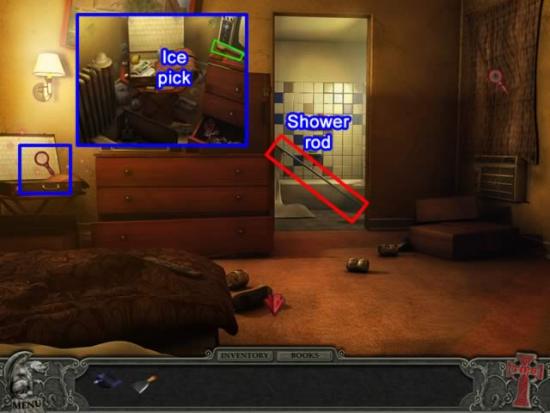
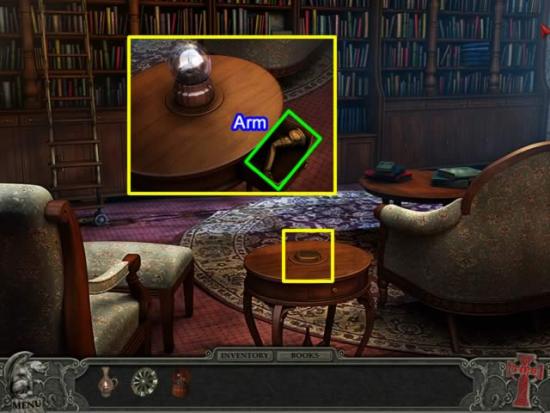
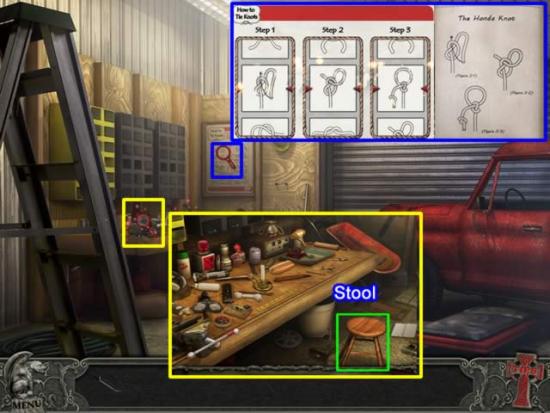
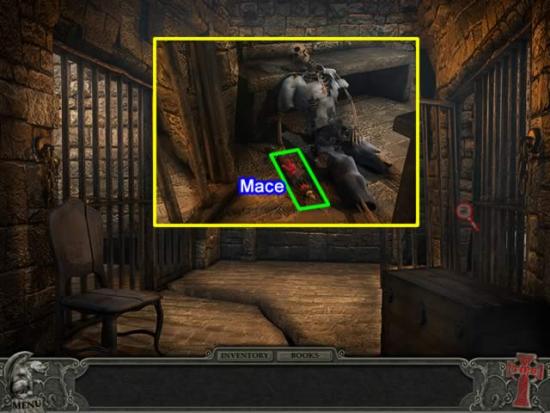
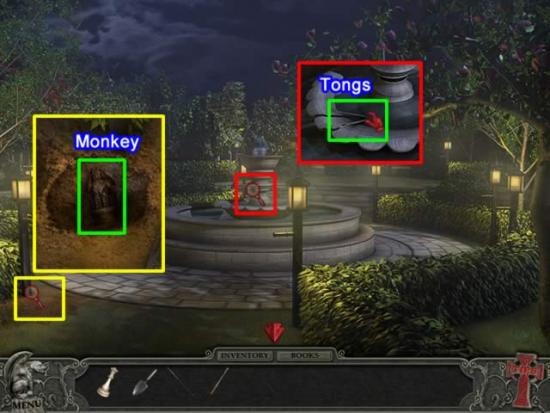
Move the cursor around the room to find areas that need exploring, or place the cursor on the Tips icon and click and hold to illuminate every area in the location.


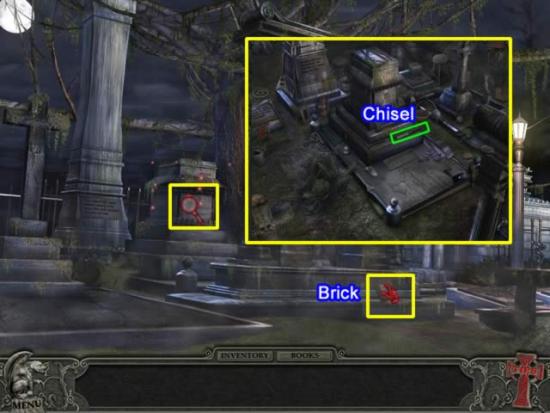
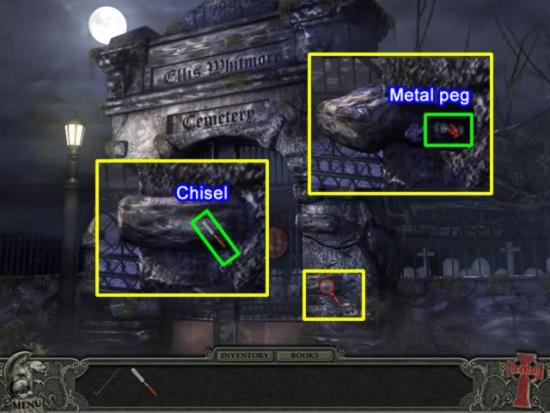
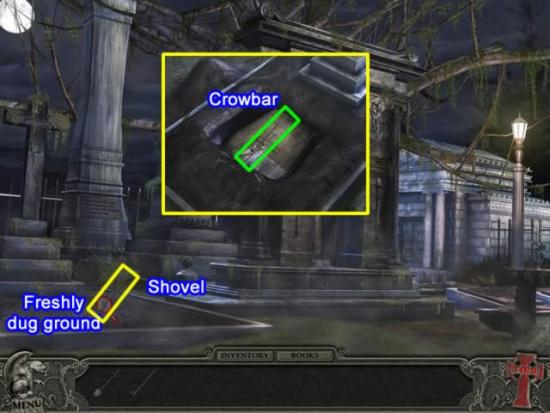
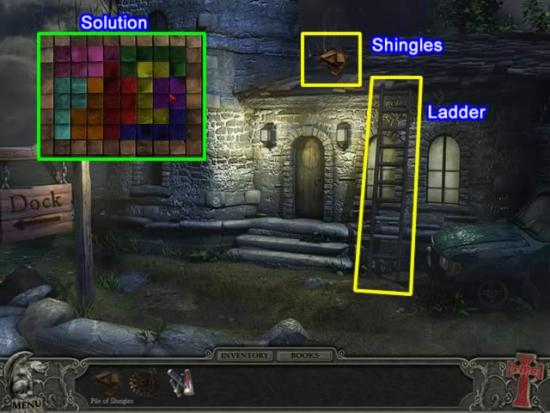
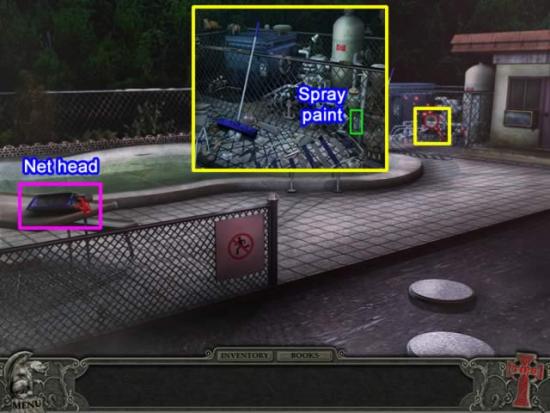
Welcome to the Ellis Whitmore Cemetery! To enter,
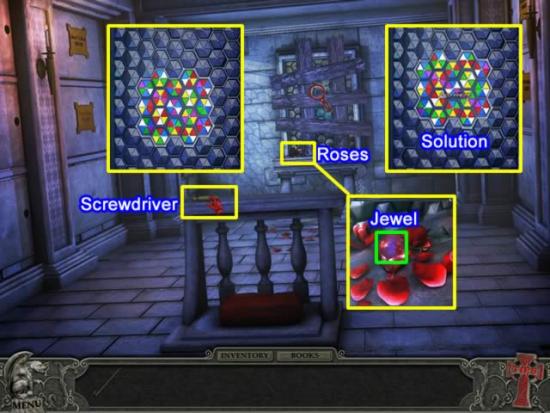
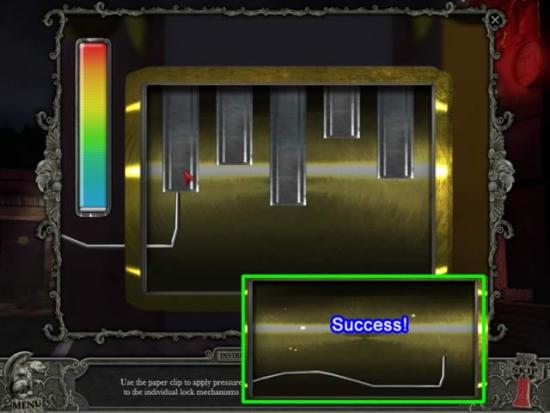

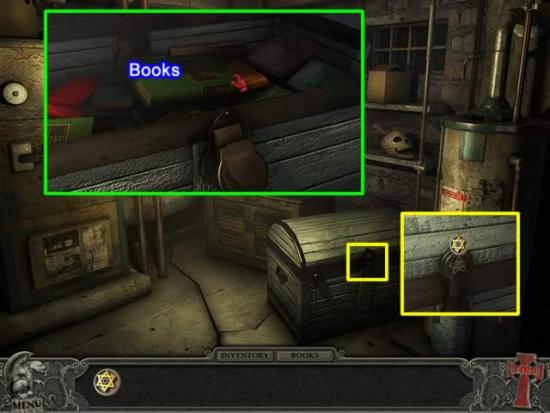
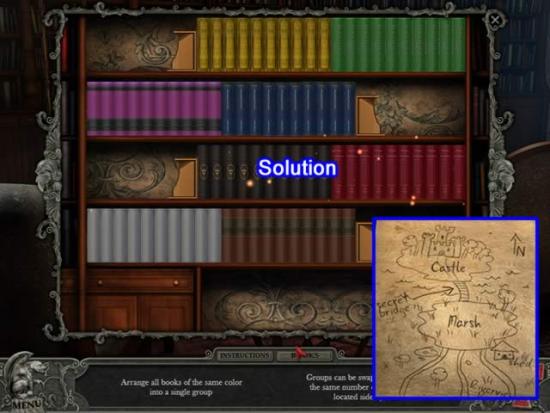
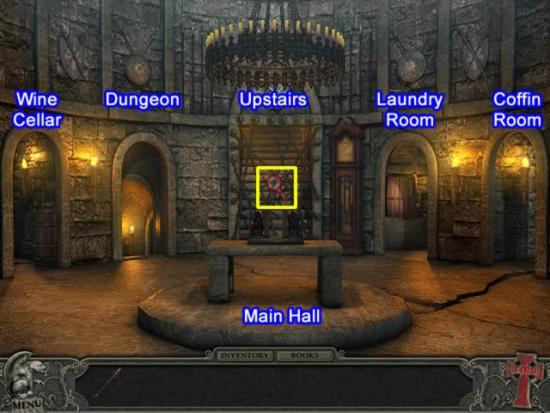
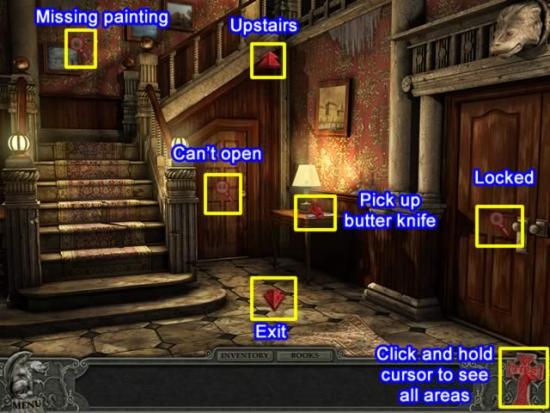
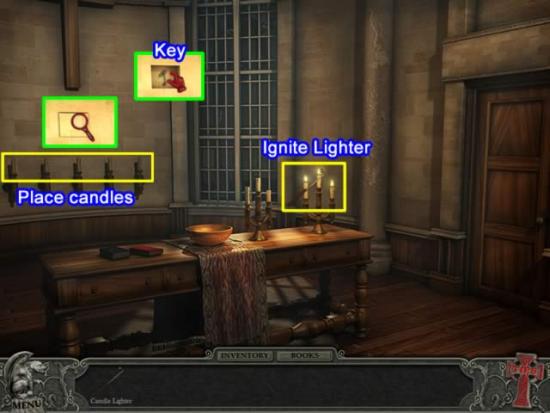
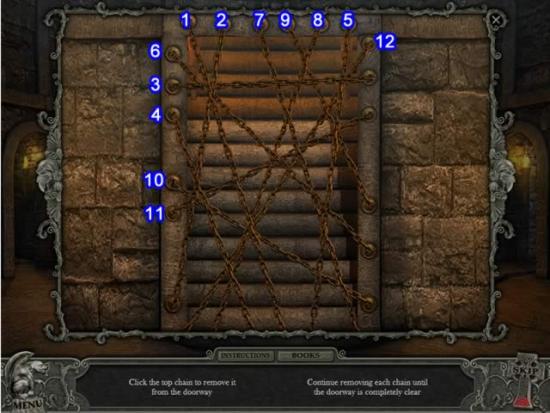
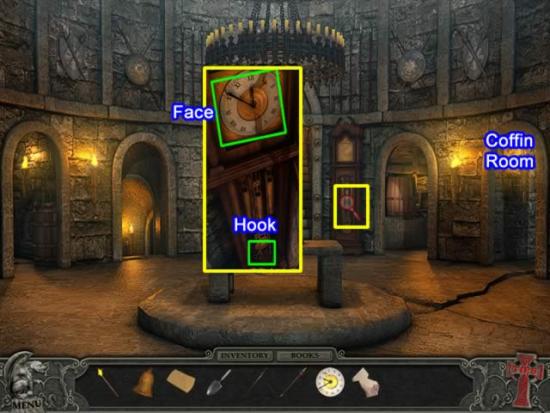
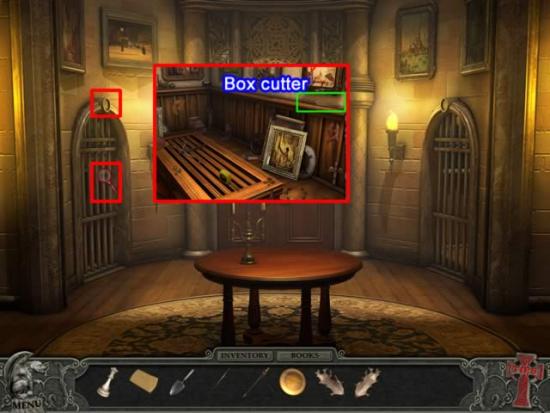
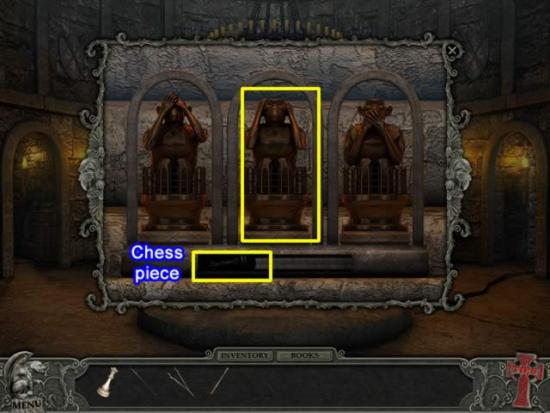
Orient yourself with the locations of the different areas off of this main hall of the castle. The first task is to go upstairs to the second floor. Click the chains across the entrance to activate a game.
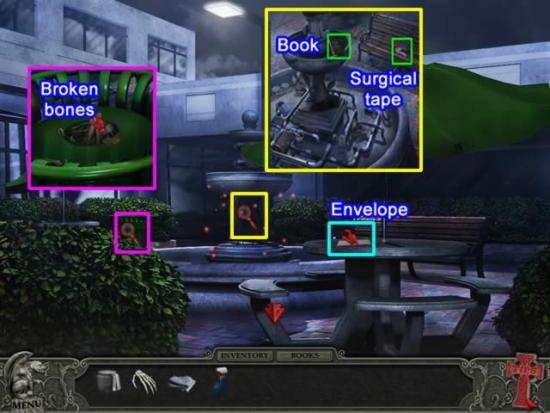
Tasks remaining to be completed in this area:
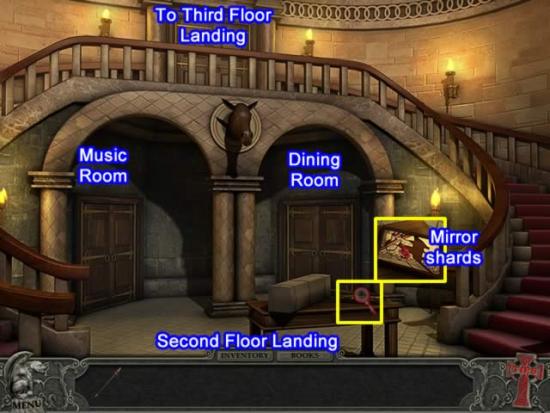
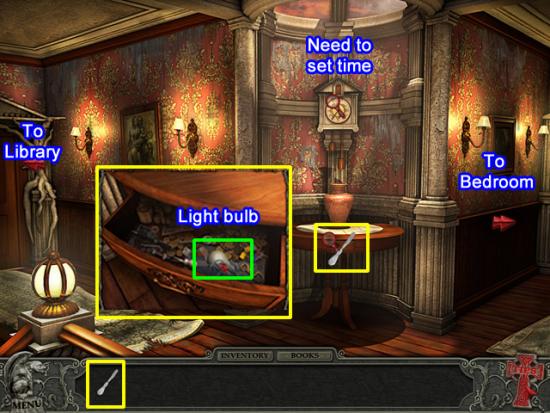
Orient yourself with locations off this second floor landing. Tasks to be done in this area:
Later tasks:
Go up to the third floor landing
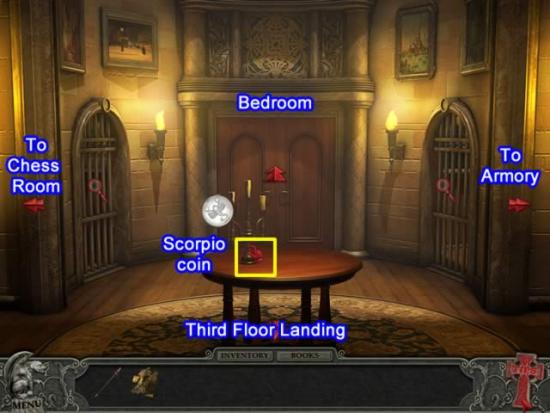
Orient yourself with locations off this third floor landing. Tasks to be done in this area:
Later tasks:
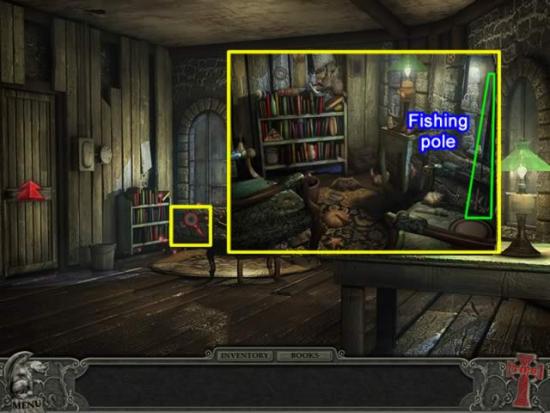
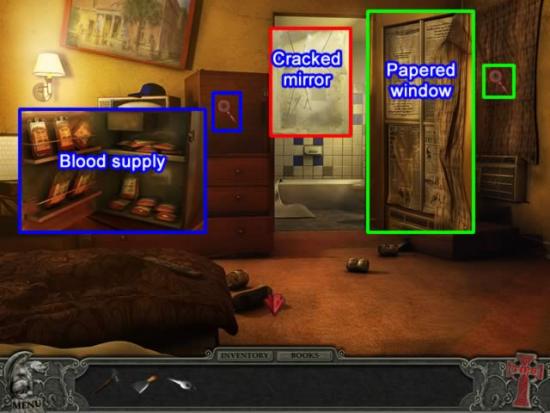
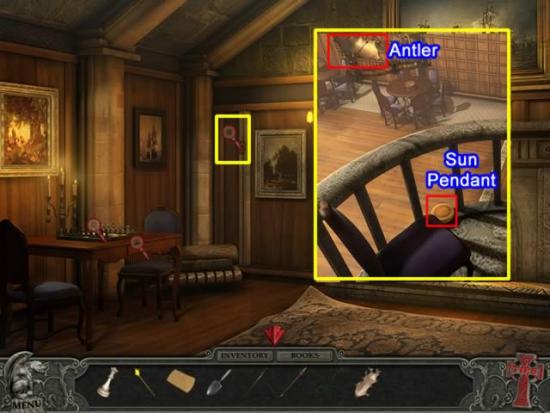
Enter the bedroom
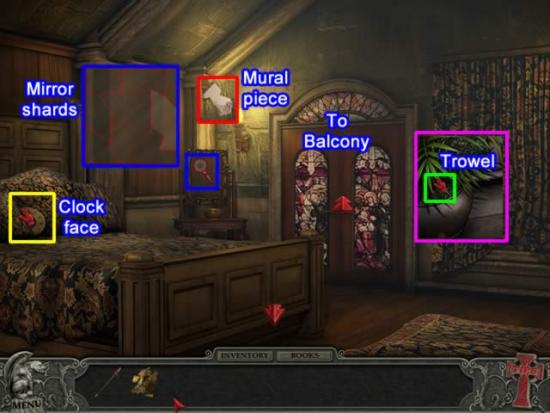
Tasks to do later:
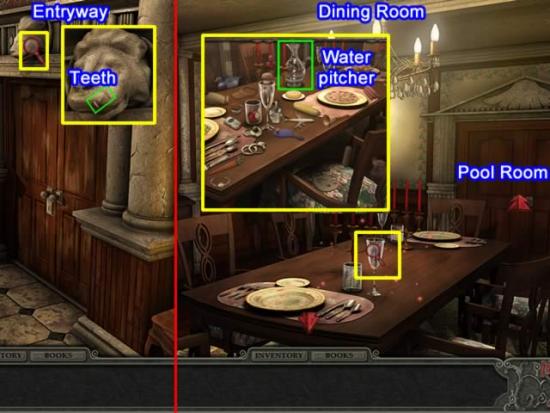
Exit the armory. Descend to the second floor landing and enter the door on the right, the dining room.
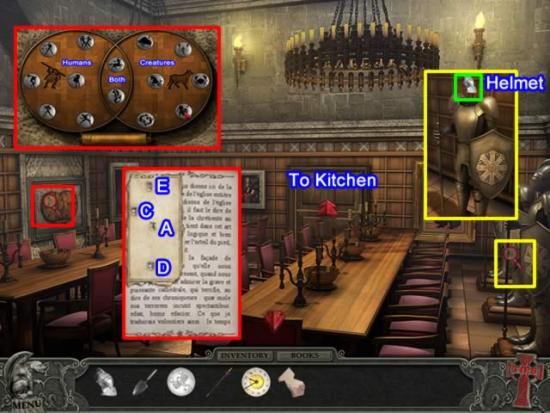


Tasks to be completed:
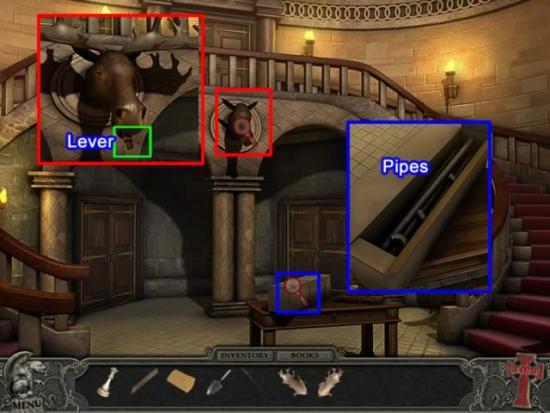
Exit the music room. Descend to the main hall.
Tasks to be completed:
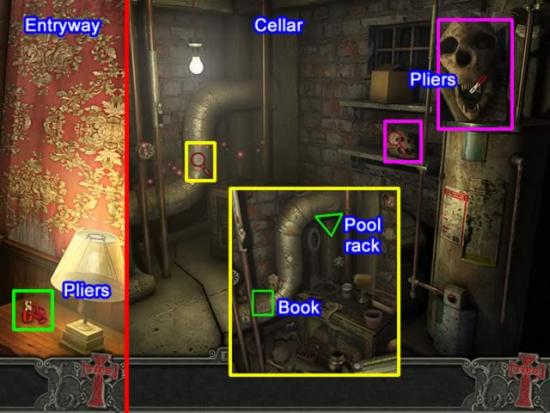
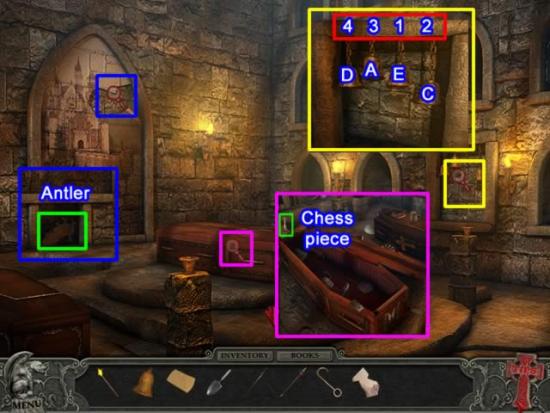
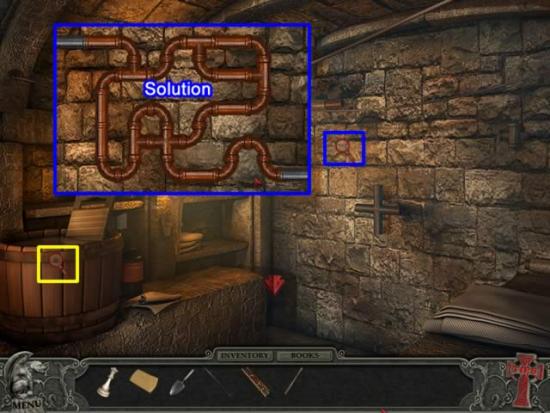
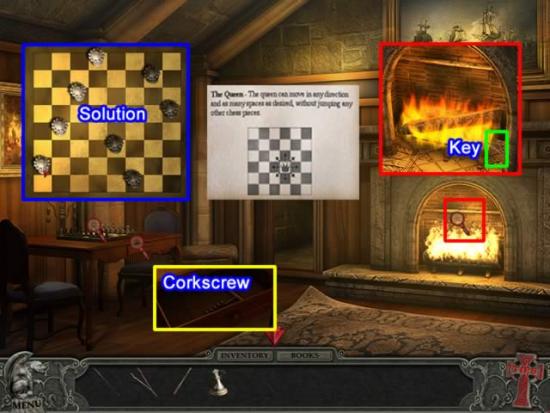
Exit the wine cellar. Return to the third floor landing. Turn left to enter the chess room.
Tasks to do later:
Exit the chess room to the second floor landing.
Tasks to do later:
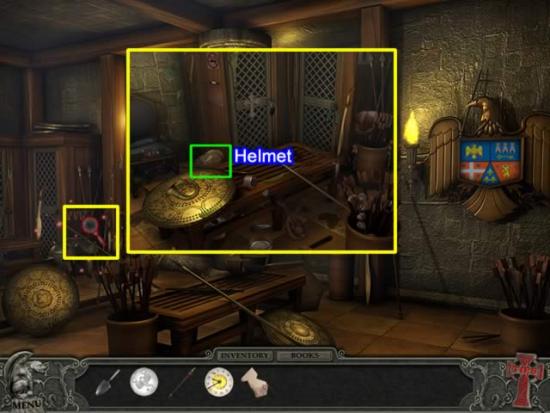
Continue down the hallway to the right to the armory.
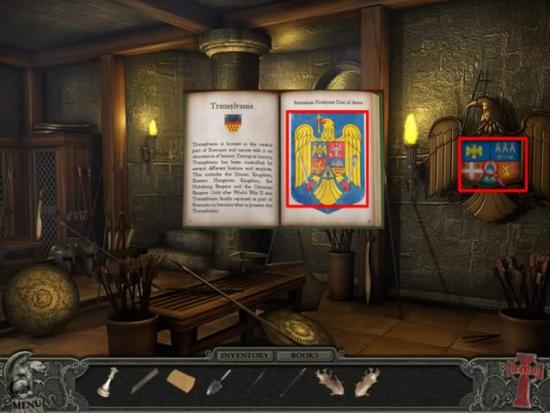
Tasks to do later:
Descend to the main hall and enter the laundry room.
Tasks to do later:
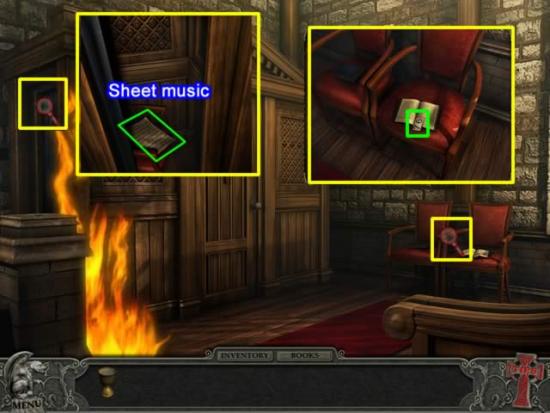
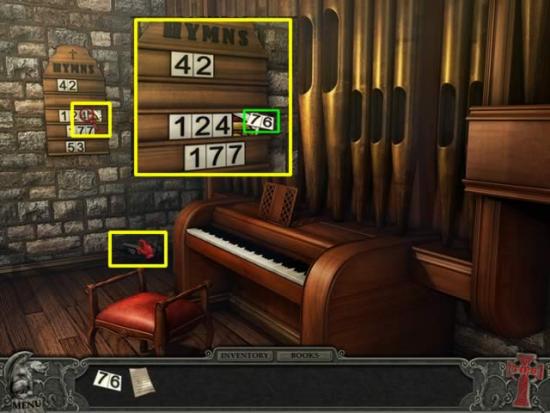
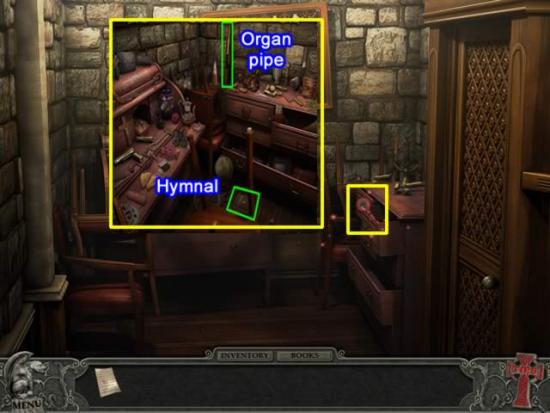
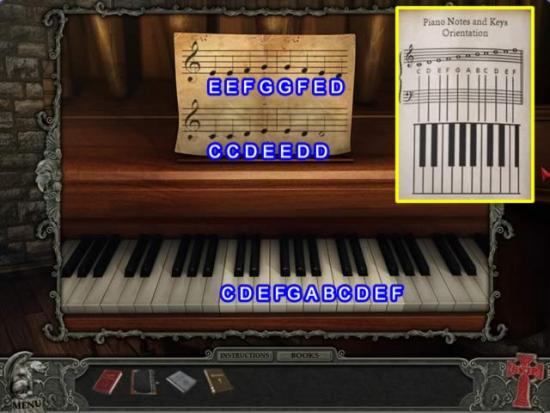
Return to the second floor landing. Enter the music room door on the left and proceed to the exit door at the back of the room.
Tasks to do later:
Return to the laundry room on the main floor
Congratulations! You have completed Hidden Mysteries: Vampire Secrets.
By Adele Wilson
By Adele Wilson
By Sho Roberts
By Meriel Green
